


Table of Contents |
|
Introduction ........................................................................... |
3 |
Manual 1 – The Game Guide |
|
Installation ............................................................................... |
6 |
How to get Help ...................................................................... |
7 |
Character Creation ................................................................... |
8 |
The Interface ......................................................................... |
13 |
Multiplayer Games ................................................................. |
29 |
Manual 2 – Volo’s Guide to Baldur’s Gate |
|
Part I: Background................................................................. |
37 |
Overview of the Realms..................................................... |
37 |
The Sword Coast............................................................ |
37 |
Candlekeep..................................................................... |
40 |
Baldur’s Gate .................................................................. |
42 |
Beregost ......................................................................... |
47 |
The Friendly Arm Inn...................................................... |
49 |
Power Groups .................................................................... |
51 |
Major Characters ................................................................ |
56 |
Monsters ............................................................................ |
61 |
Time .................................................................................. |
67 |
Part II: Rules .......................................................................... |
69 |
AD&D Rules ....................................................................... |
69 |
Character Actions ............................................................... |
71 |
Combat .............................................................................. |
75 |
Experience and Gaining Levels .......................................... |
82 |
Character Attributes............................................................ |
83 |
Magic and the Spell System ............................................... |
95 |
Spells ................................................................................. |
97 |
Mage............................................................................... |
98 |
Priest ............................................................................ |
114 |
Equipment ....................................................................... |
125 |
Weapons.......................................................................... |
127 |
Magical Items and Treasure ............................................. |
130 |
Tables ................................................................................. |
134 |
Credits.................................................................................... |
147 |
Index ...................................................................................... |
151 |
1
Introduction
Welcome to Baldur’s Gate!
Now that you’ve cracked open the box and are ready to slip that first CD into your computer, it seems like a good time to say welcome to Baldur’s Gate and the AD&D 2nd Edition electronic
game world.
Right now there’s probably two questions running through your mind – what’s this AD&D 2nd Edition thing and who’s the guy writing this anyway?
Baldur’s Gate is a huge and varied computer role-playing game – but the game didn’t happen out of thin air. Baldur’s Gate uses the AD&D 2nd Edition rules, the oldest and most popular role-playing game rules in the paper-and-pen world. This isn’t just any role-playing game, this is the granddaddy of them all.
So who am I? Well, somebody had to write the 2nd Edition rules back in ’89 and I and some other lucky souls were entrusted with that job. Back then, we were creating strictly for the paper-and-pencil, sit-around-the-table, face-to-face game. There was consideration to the needs of a computer game. Sure, it was something we had all thought about, but there was too much to do to spend time worrying about it – not that we knew how we would accomplish it anyway.
How times change. Now, almost ten years later, I’m sitting on the other side, making computer games – and I’m amazed at what Baldur’s Gate has done. Baldur's Gate brings the AD&D game alive on the computer like no other game before it – and that’s no small task! It is a testament to the depth and richness of the AD&D system that even today's computers are challenged to capture the entire range of flexibility allowed within the AD&D game, and it is a testament to Baldur’s Gate that it contains so much of that richness.
Still, face-to-face games don’t have a computer for a Dungeon Master. Computers can’t make judgement calls (and would you want one to?). That means there are some changes that couldn’t be avoided. Even in these changes though, Baldur’s Gate is true to the spirit of AD&D gaming. We wanted both experiences, paper and electronic, to be equally fun.
Really this introduction is to thank you for playing our game.You playing – and having fun – is what this is all about.
And I hope you do.
David "Zeb" Cook
2 |
3 |
What’s Included in the
Game Manuals
In the first manual, The Game Guide,
we delve into actually playing the game of Baldur’s Gate– creating a character, manipulating your characters in the gameworld, interpreting what you see, and playing with other players in multiplayer mode.
The second manual, Volo’s Guide to Baldur’s Gate, helps set the stage for the game story, and goes into detail on the rules that define what happens in the game world. Many of these things are not absolutely essential to know in order to play, but knowing them may help you to get more enjoyment out of the game.
Yes, ye shall find many useful tidbits within this morass of information that Volo has seen fit to call a book. I shall clarify as needed. ÐElminster
ÒAs neededÓ, but not Òas wantedÓ or Òas requestedÓ, eh wizard? So be it, scribble where ye must. Ð Volo
Unless specifically stated, everything that you read in either manual is applicable to both single player and multiplayer games. Baldur’s Gate multiplayer allows you to adventure with up to five friends through the same storyline as in singleplayer mode, with a group leader and the computer acting as the Dungeon Master.
4
The Game Guide
Manual I
5
How to Install and Start Playing
To install Baldur’s Gate, first insert the CD-ROM labeled Baldur’s Gate Disc 1 into your CD-ROM drive and follow the onscreen instructions. If your Autorun is not enabled, click
on the icon representing your CD-ROM Drive under ‘My Computer’. This will bring up a listing of the files on Baldur’s Gate Disc 1. Find AUTORUN.EXE and double click to launch in install application.
After installing the game, other options will be available on the launching menu:
View Readme The readme file contains last minute information and changes that could not be printed in this manual. Please take the time to view the readme file if you are having any problems with this product.
Register Please take the time to register Baldur’s Gate with Black Isle Studios. Your feedback is appreciated and will put you on the mailing list for special offers and game promotions.
Exit will close the launch window.
View Demos Demos of other Black Isle Studios products have been included with Baldur’s Gate. Please see the Readme file for descriptions and instructions on how to run them.
Configure The hotkeys used while playing Baldur’s Gate can be modified using this utility. Select the hotkey you would like to change and enter the new hotkey assignment.
Play After you have everything set, click on the Play button to begin playing. After viewing the logo and introduction movies, select “Single Player” and “New Game” to go directly into Character Creation and begin your adventure on the Sword Coast!
To start playing again later, select the Baldur’s Gate application from the Black Isle Studios program group in your start menu.
Uninstall When you’re ready, the Uninstall option will clean up everything except your saved games.
6
How to get help
Interplay Productions Technical Support now offers troubleshooting guides with complete installation and setup instructions as well as information that will help you overcome the most common difficulties. If you have access to the World Wide Web, you can find these at www.interplay.com/support/
Here you will find troubleshooting information on as well as information on regular system maintenance and performance.
DirectX www.interplay.com/support/directx/ Joysticks www.interplay.com/support/joystick/
Modems and Networks www.interplay.com/support/modem/
(For game-specific information and additional troubleshooting, visit our main page at www.interplay.com)
If you have questions about the program, our Technical Support Department can help. Our web site contains up-to-date information on the most common difficulties with our products, and this information is the same as that used by our product support technicians. We keep the product support pages updated on a regular basis, so please check here first for no-wait solutions: www.interplay.com/support/
If you are unable to find the information you need on our web site, please feel free to contact Technical Support via e-mail, phone, fax, or letter. Please be sure to include the following information in your e-mail message, fax, or letter:
Title of Game Computer manufacturer
Operating system (Windows 95, DOS 6.22, etc.) CPU type and speed in MHz
Amount of RAM
Sound card type and settings (address, IRQ, DMA) Video card
CD-ROM
Mouse driver and version Joystick and game card (if any)
A copy of the CONFIG.SYS and AUTOEXEC.BAT files from your hard drive A description of the problem you’re having
If you need to talk to someone immediately, call us at (949) 553-6678 Monday through Friday between 8:00AM-5: 45PM, Pacific Standard Time with 24 hours, 7 days a week support available through the use of our automated wizard. Please have the above information ready when you call.This will help us answer your question in the shortest possible time. When you call you will initially be connected with our automated wizard. For information pertaining to your specific title, press “1” on the main menu and listen carefully to all prompts. All titles are listed alphabetically. After you have selected your title, the most common difficulties will be listed. If the difficulty you are having is not listed or you need additional assistance, you may press “0” on your games main menu, and you will be transferred to a Technical Support Representative. No hints or codes are available from this line. You must call Interplay’s HINT Line for hints, tips, or codes at 1- 900-370-PLAY (1-900-451-6869 $1.25 in Canada only). You must be 18 years +, have a touch-tone phone, and the cost is $0.95 per minute.
Interplay Productions Support Fax: (949) 252-2820 Interplay Productions Technical Support
16815 Von Karman Avenue, Irvine, CA 92606 HOW TO REACH US ONLINE
INTERNET E-MAIL: support@interplay.com WORLD WIDE WEB: www.interplay.com
FTP: ftp.interplay.com
You can also visit the Baldur’s Gate website directly at “http://www.interplay.com/bgate”
7
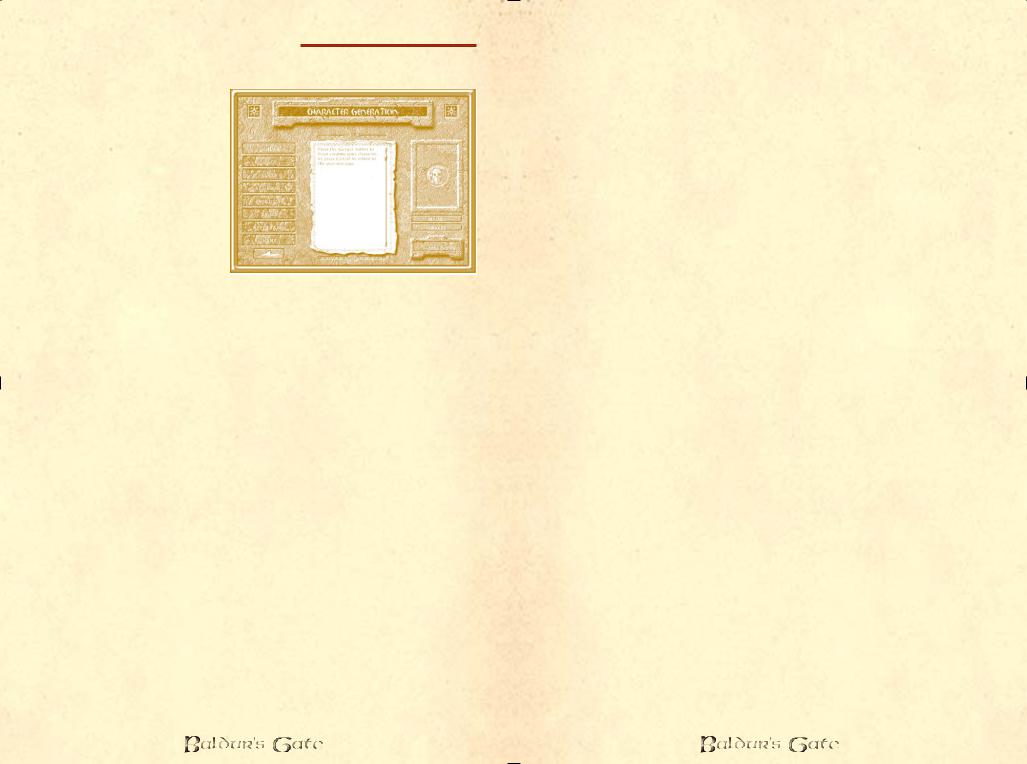
Character Generation in
Baldur’s Gate
When you are in the character creation section follow the
steps below; at any point in the process you may press “Cancel” and will be prompted if you wish to return to the main game screen. To go back during character creation press the up arrow at the bottom left of the screen.
GENDER
The gender of your character is decided first. You can select either male or female, and once selected press the “Done” button (as on every page).
*Females of the Realms can excel in any area they wish, and are easily the equals of their male counterparts in every skill or respect.
*Males of the Realms can excel in whatever profession they choose, whether wizardry, thievery, or the arts of war.
APPEARANCE: Portrait Selection
Select a portrait for your character.
To import a custom portrait, check the instructions in the Read Me file on the installation CD.
RACE
Select the race of your character. There are six available character races. Choose between human, dwarf, elf, gnome, halfing, or half-elf.
Descriptions of each race are given in the area beneath the selection boxes.
8
CLASS
The classes and class combinations that are available to the race you have chosen will be highlighted. Choose the class that you want from the list.
Descriptions of each class are noted in the area beneath the selection boxes.
Multiclassed characters are available to non-humans only and share the traits and restrictions of both classes. Human characters can choose to become dual class later in the game.
Dual class characters start their adventuring life as one class and then later switch to a different class. When the character chooses to switch class, the abilities of the former class are unavailable until the character surpasses the level of their former class with the level of their new class. At this time, the abilities of both classes are available at their current level. The character can never advance further in the former class. Only humans can be dual classed characters.
ABILITY SCORES
You’ll see a screen with the abilities the computer has randomly determined for your character (calculated as if you rolled three 6-sided dice for each ability, adjusted for character race). Any class minimums will be automatically selected for the character for abilities that were too low (i.e. if the character needs a 17 charisma to be a paladin, and the computer rolled a 12, then the character will receive 17). You can subtract points from an ability to add to another; however, you cannot take points away from an ability if it will lower the ability below racial or class minimums. Each ability will have a caption describing it. Reroll your abilities as many times as you like until you reach a combination you are happy with.
ALIGNMENTS
The player has a choice of alignments according to his class and race. Each alignment will have a caption describing it in detail. Your alignment determines how your character interacts with his environment. Read over each carefully before choosing. If you stray severely from your alignment during the course of the game, there will be consequences – you may even suffer loss of some of your abilities!
PROFICIENCIES
All characters receive weapon proficiencies. There will be a list of proficiencies available to the character, and each proficiency
9
will have a caption describing it. A character can often wield a weapon which they lack a proficiency for, but they will incur a -1 penalty on all rolls with that weapon. Fighters, paladins, and rangers can become even more skilled with weapons by adding a second dot to any proficiency. This will give them an added bonus to their attack rolls and to the damage they inflict. No starting character may have more than two dots allocated to any proficiency.
THIEF ABILITIES
If your character is a thief, or a multiclassed character with thief abilities, you will allocate ability points to thief abilities. The thief has 30 points to allocate at first level, and 20 points every level thereafter. Available skills are Thieving, Open Locks, Find Traps, and Stealth (Move Silently/ Hide in Shadows). Each ability has a caption describing it.
SPELLS
If your character is a wizard you will see a screen where you can choose 1st-level wizard spells. These are spells the character will start the game with. Each spell has a caption describing it.
RACIAL ENEMY
Rangers will choose a racial enemy. The ranger will receive bonuses when fighting creatures of this type. Choose between carrion crawler, ettercap, ghoul, gibberling, gnoll, hobgoblin, kobold, ogre, skeleton, and spider.
APPEARANCE
You will be shown a model of your character. You can modify the colors of your hair, skin, major clothing color, and minor clothing color. You will be able to modify your major and minor clothing colors in your inventory page after the adventure has begun. Click on the box showing the current color to bring up a selection box with other color choices for each category.
NAME
Last of all, you need to name your character. Click on the text box or start typing your name. When done, hit “Enter” or click on “Done”.
10
FINISHING YOUR CHARACTER
Once you have completed all of the above steps, click “Accept” in the lower right or click on the up arrow at the bottom left to erase and reenter the most recently entered data field.
Interface Overview – How to Play Baldur’s Gate
Baldur’s Gate is a fun game and there are many facets to its interface. These are designed to make playing the game easier once you have mastered the basic controls.
This section describes the different parts of the interface, including all windows and buttons, and discusses how each is controlled and its purpose. Most of the features are self-evident when you play, so you can either read this section after you have explored a bit in the game, or before you start.
Mouse Buttons and Control
L-click: Action
Selects a character or selects a portrait (if a character or group was selected before, this character or group is unselected
and the new character is selected instead).
If the SHIFT key is held down while L-clicking on various characters on the field or on the portraits, multiple characters
are selected.
If the CONTROL key is held down while L-clicking on unselected characters, the characters will be added to the
current character selection.
 Double click on a portrait centers the view on that character.
Pushes buttons – selects action for the character: guard, talk, attack (click on weapon),etc.
Casts spells and uses items once they have been selected.
On terrain, walks selected character(s) to targeted location (note: use R-click to move in formation mode).
 L-click and drag on terrain or portraits – selects multiple characters (creates draggable selection box).
 Picks up items with current selected character(s). If more than one character is selected, the top-most portrait (the “leader”)
walks over to and picks up the item.
11
L-click and drag on a portrait moves that portrait in the group order – inserts into space between characters you move portrait to.
 On the clock pauses and unpauses the game.
R-click: Information, Cancel Actions, and Formation Movement control
 On a portrait brings up that character’s Inventory Screen.
On an item or spell on main game area brings up the appropriate Item or Spell properties screen.
Cancels current actions – cancels attacks or spell casting.
On a monster or non-player character (NPC) or after clicking on a selected charcter plays selection sound for that character
or monster.
On terrain – selected character walks there in formation mode (R click and hold, and drag, rotates the formation if more than
one character is selected).
On Quick Weapons, Quick Spells, Quick Items, and Group Formations slots allows for the configuration of the slot type.
After R-clicking, the current options for that quick slot will appear. You can select one for the slot by L-clicking on it.
Mouse movement: Moves Viewport
The main game area will scroll up, down, left or right if you move the mouse to the edge of the screen, either in windowed or full screen mode. This also occurs if you use the number pad arrow keys.
12
The Main Interface: where the game is played
Main Game Area |
Help Wizard Tool Tip |
Dialogue Window |
LEFT MENU |
|
RIGHT MENU |
BUTTONS: |
|
BUTTONS: |
Game Screen |
|
Character |
Maps |
|
|
|
Portraits |
|
Journal |
|
|
Inventory |
|
|
Character |
|
|
Record |
|
|
Mage Spell |
|
|
Book |
|
|
Priest Spell |
|
|
Scroll |
|
AI On/Off |
Options |
|
Select All |
|
|
Clock 
 Bottom Menu Buttons
(9 group buttons shown hereÐ will display 12 character buttons if a single character is selected)
The Main Game Area
L-click selects characters; also, a L-click and Shift or L-click and Ctrl combination will select or select/deselect multiple characters; also, a click and drag on the main game area causes a box to be drawn and any character inside will be selected (this may be used with the Shift key add to the selected characters, or
Ctrl, to remove characters).
L-click does actions (see buttons, above), by the selected character(s).
R-click cancels an action and also does formation rotation and movement when a group is selected.
Note that the cursor changes when moved over objects or characters or NPC’s to indicate the default action. The default
action mode can be changed by L-clicking on the buttons at the bottom of the screen.
The action cursors include the following:
 Select: Indicates that you can select the character
 Move: Indicates that the action mode is movement
13

 Blocked Location: Indicates that no movement is possible
Travel: Indicates that if you move here you will leave the current map
Doors: Indicates that you will open/close the highlighted door
Enter: Indicates walking through an entry or hall-way, if a door is not highlighted
 Stairs: Allows you to go up/down staircases
 Pick up Item: Allows you to pick up an item
Attack: Indicates that the individual or group action mode is attack
Locked: Indicates a chest or door that is locked and which you can attempt to unlock, either by hitting it or picking the lock with a thief, depending on who is currently selected
Remove Trap: Indicates you can attempt to remove a trap with your thief
Pickpocket: Indicates you can attempt to steal from the selected character or creature
 Spell: Indicates that you are going to cast a spell
Note on cursors: If a given cursor is selected it may be changed by clicking on a different action button or by hitting “ESC” or by L-clicking an area where the cursor has no effect (e.g. a non-object or the interface border). Casting spells is cancelled by a R-click, or finished by a L-click on a creature or area (depending on the type of spell).
The fog of war: Characters see a certain distance away from them, using a direct line of sight. This means that they cannot see around a building until they move to the corner, and that they cannot see through walls.
Bottom Menu Buttons
Different sets of bottom buttons are displayed depending if you select a single character, or a group of characters.
14
There are 12 Character Bottom Buttons:
These change depending on which single character is selected.
2 Action Buttons (F1-F2 hotkeys)
The two left-most buttons
Guard/Protect: Protects either an area or another character. If this mode is selected, the desired ground area is L- clicked, and then the cursor is dragged, a circle will appear;
this represents the area that will be guarded. The character will move freely within this area but will not leave it. He will respond to attacks but will not leave the guard/protect area until moved somewhere else or if told to guard/protect another area. If a character is selected to be protected, the character will be followed and any creatures attacking the character will be attacked. If the Guard/Protect mode is chosen but the cursor is not L-clicked and dragged, the character will remain stationary and will not move, though he will respond to attacks.
Dialogue: This selects the dialogue cursor which will initiate dialogue if L-clicked on any creature.
5 Character Buttons (F3-F7)
Table of middle five buttons per class
Class |
|
|
|
Slot 1 (F3) |
|
|
|
Slot 2 (F4) |
|
|
|
|
Slot 3 (F5) |
|
|
|
Slot 4 (F6) |
|
|
Slot 5 (F7) |
||||
|
|
|
|
|
|
|
|
|
|
|
|
|
|
|
|
|
|
|
|
|
|
|
|
|
Fighter |
|
|
|
Quick Weapon 1 |
|
|
|
|
Quick Weapon 2 |
|
|
|
|
Quick Weapon 3 |
|
|
|
|
Quick Weapon 4 |
|
|
|
|
|
|
|
|
|
|
|
|
|
|
|
|
|
|
|
|
|
|
|
|
||||||
|
|
|
|
|
|
|
|
|
|
|
|
|
|
|
|
|
|
|
|
|
|
|
|
|
Paladin |
|
|
|
Quick Weapon 1 |
|
|
|
Quick weapon 2 |
|
|
|
|
Quick Weapon 3 |
|
|
|
Turn Undead |
|
|
|
Cast Spell |
|||
|
|
|
|
|
|
|
|
|
|
|
|
|
|
|
|
|
|
|
||||||
|
|
|
|
|
|
|
|
|
|
|
|
|
|
|
|
|
|
|
|
|
|
|||
|
|
|
|
|
|
|
|
|
|
|
|
|
|
|
|
|
|
|
|
|
|
|
|
|
Ranger |
|
|
|
Quick Weapon 1 |
|
|
|
|
Quick weapon 2 |
|
|
|
|
Quick weapon 3 |
|
|
|
|
Stealth |
|
|
|
|
Cast Spell |
|
|
|
|
|
|
|
|
|
|
|
|
|
|
|
|
|
|
|
|
|
|
|
|
|
|
|
|
|
|
|
|
|
|
|
|
|
|
|
|
|
|
|
|
|
|
|
|
|
|
Wizard |
|
|
|
Quick Weapon 1 |
|
|
|
|
Quick Spell |
|
|
|
|
Quick Spell |
|
|
|
|
Quick Spell |
|
|
|
|
Cast Spell |
|
|
|
|
|
|
|
|
|
|
|
|
|
|
|
|
|
|
|
||||||
|
|
|
|
|
|
|
|
|
|
|
|
|
|
|
|
|
|
|
|
|
|
|
|
|
|
|
|
|
|
|
|
|
|
|
|
|
|
|
|
|
|
|
|
|
|
|
|
|
|
Cleric |
|
|
|
Quick Weapon 1 |
|
|
|
|
Turn Undead |
|
|
|
|
Quick Spell |
|
|
|
|
Quick Spell |
|
|
|
|
Cast Spell |
|
|
|
|
|
|
|
|
|
|
|
|
|
|
|
|
|
|
|
||||||
|
|
|
|
|
|
|
|
|
|
|
|
|
|
|
|
|
|
|
|
|
|
|
|
|
|
|
|
|
|
|
|
|
|
|
|
|
|
|
|
|
|
|
|
|
|
|
|
|
|
Druid |
|
|
|
Quick Weapon 1 |
|
|
|
Quick Weapon 2 |
|
|
|
|
Quick Spell |
|
|
|
|
Quick Spell |
|
|
|
|
Cast Spell |
|
|
|
|||||||||||||||||||||||
|
|
|
|
|
|
|
|
|
||||||||||||||||
|
|
|
|
|
|
|
|
|
|
|
|
|
|
|
|
|
|
|
|
|
|
|
|
|
|
|
|
|
|
|
|
|
|
|
|
|
|
|
|
|
|
|
|
|
|
|
|
|
|
Bard |
|
|
|
Quick Weapon 1 |
|
|
|
Bard Song |
|
|
|
|
Thieving |
|
|
|
Quick Spell |
|
|
|
Cast Spell |
|||
|
|
|
|
|
||||||||||||||||||||
|
|
|
|
|
|
|
|
|
|
|
|
|
|
|
|
|
|
|
|
|
|
|
|
|
|
|
|
|
|
|
|
|
|
|
|
|
|
|
|
|
|
|
|
|
|
|
|
|
|
Thief |
|
|
|
Quick Weapon 1 |
|
|
|
Quick Weapon 2 |
|
|
|
|
Find Traps |
|
|
|
Thieving |
|
|
|
Stealth |
|||
|
|
|
|
|
||||||||||||||||||||
|
|
|
|
|
|
|
|
|
|
|
|
|
|
|
|
|
|
|
|
|
|
|
|
|
|
|
|
|
|
|
|
|
|
|
|
|
|
|
|
|
|
|
|
|
|
|
|
|
|
Fighter/Thief |
|
|
|
Quick Weapon 1 |
|
|
|
Quick Weapon 2 |
|
|
|
|
Find Traps |
|
|
|
Thieving |
|
|
|
Stealth |
|||
|
|
|
|
|
|
|
|
|
|
|
|
|
|
|
|
|
|
|
|
|
|
|
|
|
|
|
|
|
|
|
|
|
|
|
|
|
|
|
|
|
|
|
|
|
|
|
|
|
|
Fighter/Cleric |
|
|
|
Quick Weapon 1 |
|
|
|
|
Quick Weapon 2 |
|
|
|
|
Turn Undead |
|
|
|
|
Quick Spell |
|
|
|
|
Cast Spell |
|
|
|
|
|
|
|
|
|
|
|
|
|
|
|
|
|
|
|
|
|
|
|
|
|
|
|
|
|
|
|
|
|
|
|
|
|
|
|
|
|
|
|
|
|
|
|
|
|
|
15

|
Class |
|
|
Slot 1 (F3) |
|
|
|
|
Slot 2 (F4) |
|
|
|
Slot 3 (F5) |
|
|
|
Slot 4 (F6) |
Slot 5 (F7) |
|||
|
|
|
|
|
|
|
|
|
|
|
|
|
|
|
|
|
|
|
|
|
|
|
Fighter/Wizard |
|
|
Quick Weapon 1 |
|
|
|
|
Quick Weapon 2 |
|
|
|
Quick Spell |
|
|
|
Quick Spell |
|
|
|
Cast Spell |
|
|
|
|
|
|
|
|
|
|
|
|
|
|
|
|
|
|
|
|
|
|
|
|
|
|
|
|
|
|
|
|
|
|
|
|
|
|
|
|
|
|
|
|
|
Wizard/Thief |
|
|
Quick Weapon 1 |
|
|
|
|
Find Traps |
|
|
|
Thieving |
|
|
|
Stealth |
|
|
|
Cast Spell |
|
|
|
|
|
|
|
|
|
|
|
|
|
|
|
|
||||||
|
|
|
|
|
|
|
|
|
|
|
|
|
|
|
|
|
|
|
|
|
|
|
|
|
|
|
|
|
|
|
|
|
|
|
|
|
|
|
|
|
|
|
|
|
Cleric/Wizard |
|
|
Quick Weapon 1 |
|
|
|
|
Turn Undead |
|
|
|
Quick Spell |
|
|
|
Quick Spell |
|
|
|
Cast Spell |
|
|
|
|
|
|
|
|
|
|
|
|
|
|
|
|
||||||
|
|
|
|
|
|
|
|
|
|
|
|
|
|
|
|
|
|
|
|
|
|
|
|
|
|
|
|
|
|
|
|
|
|
|
|
|
|
|
|
|
|
|
|
|
Cleric/Thief |
|
|
Quick Weapon 1 |
|
|
|
|
Find Traps |
|
|
|
Thieving |
|
|
|
Stealth |
|
|
|
Cast Spell |
|
|
|
|
|
|
|
|
|
|
|
|
|
|
|
|
||||||
|
|
|
|
|
|
|
|
|
|
|
|
|
|
|
|
|
|
|
|
|
|
|
|
|
|
|
|
|
|
|
|
|
|
|
|
|
|
|
|
|
|
|
|
|
Fighter/Druid |
|
|
Quick Weapon 1 |
|
|
|
|
Quick Weapon 2 |
|
|
|
Quick Spell |
|
|
|
Quick Spell |
|
|
|
Cast Spell |
|
|
|
|
|
|
|
|
|
|
|
|
|
|
|
|
||||||
|
|
|
|
|
|
|
|
|
|
|
|
|
|
|
|
|
|
|
|
|
|
|
|
|
|
|
|
|
|
|
|
|
|
|
|
|
|
|
|
|
|
|
|
|
Cleric/Ranger |
|
|
Quick Weapon 1 |
|
|
|
|
Turn Undead |
|
|
|
Stealth |
|
|
|
Quick Spell |
|
|
|
Cast Spell |
|
|
|
|
|
|
|
|
|
|
|
|
|
|
|
|
||||||
|
|
|
|
|
|
|
|
|
|
|
|
|
|
|
|
|
|
|
|
|
|
|
|
|
|
|
|
|
|
|
|
|
|
|
|
|
|
|
|
|
|
|
|
|
Fighter/Wizard/ |
|
|
Quick Weapon 1 |
|
|
|
|
Quick Weapon 2 |
|
|
|
Turn Undead |
|
|
|
Quick Spell |
|
|
|
Cast Spell |
|
|
|
|
|
|
|
|
|
|
|
|
||||||||||
|
Cleric |
|
|
|
|
|
|
|
|
|
|
|
|
|
|
|
|
|
|
|
|
|
|
|
|
|
|
|
|
|
|
|
|
|
|
|
|
|
|
|
|
|
|
|
Fighter/Wizard/ |
|
|
Quick Weapon 1 |
|
|
|
|
Find Traps |
|
|
|
Thieving |
|
|
|
Stealth |
|
|
|
Cast Spell |
|
|
|
|
|
|||||||||||||||||
|
Thief |
|
|
|
|
|
|
|
|
|
|
|
|
|
|
|
|
|
|
|
|
|
|
|
|
|
|
|
|
|
|
|
|
|
|
|
|
|
|
|
|
||
Quick Weapon: These slots correspond to the quick weapon slots on the inventory page. Load a weapon into these slots (R-click to choose that weapon) and it will
appear in the relevant slots here.
Find Traps: This is a mode that thieves can choose. If an action other than movement is selected for that character, this mode ends.
Thieving: This includes pick pockets, open locks, and remove traps, depending on the target chosen.
Stealth: This is a blend of move silently and hide in shadows. Thieves can choose this mode, and if successful they become nigh-invisible. The next attack of the thief, if
successful, is a backstab, and this will cause either double, triple, or quadruple damage depending on the level of the thief. Moving into the light or launching an attack can cause the hide to fail.
Turn Undead: This is a mode that clerics can choose (the cleric persists in turning undead until an action other than movement is selected). Clerics in this mode will attempt to
turn undead creatures (if successful the undead run away for a time, or may be destroyed if the cleric is powerful enough). Evil clerics using this ability may actually be able to gain control over some undead creatures.
Cast Spells: This is possible by clerics and wizards. It pulls up the memorized spell list of the cleric or wizard and the cleric or wizard can cast a spell from this list.
Quick Spells: These are configured by R-clicking on the Quick Spell slot – this brings up a list of all currently
16
memorized spells. Once configured, the spell is ready for use at the push of the appropriate button or by L-clicking on that slot.
Bard song: This is possible by Bards – the bard character will begin playing a song, which continues until any action other than movement is selected for that bard. While the
song is playing, the party morale and luck is higher. (Luck decreases attack rolls and damage caused by enemies).
4 Item buttons (F8-11)
Use Item: If L-clicked, allows you to use any item you hold in your personal inventory quick item slots or items with usable properties that you are wearing.
Quick Item (x3): You may ready any item in the personal inventory for quick use by R-clicking on any of these three slots and selecting from all items held personally to
configure that slot (much as per Use Item). This is analogous to the usage of quick spells. If an item is used up or dropped or traded it must be removed from the quick item slot(s). If using an item causes a spell to be cast which must be used on a character or monster or terrain, the cursor will change accordingly and you must L-click on the target to use the item. R-clicking will cancel use.
Weapons with magical powers can have their magic powers configured in the quick items slots, but not the quick weapons slots (only weapons with physical attacks go into the quick weapon slots).
Special Abilities button (F12)
For any characters with special abilities (e.g. special abilities for certain character classes or any special abilities that are gained by your characters during the course of the
game), if you click on this button it brings up a page of special abilities for that character.
Lay Hands: This is possible by Paladins. They summon magical healing energies upon a target of their choice, and heal 2 hp per level once per day.
 Shapechange: This is possible by high-level druids (level 7).
Your characters may develop additional special abilities over the course of the game.
17
There are 9 Group Bottom Buttons:
These come up when you have more than one character selected:
Guard/Protect, Dialogue, and Attack are analogous to the buttons for a single selected character.
Stop: Halts all current party actions.
Handy for when you are blundering your way into a trap! ÐVolo
Quick Formation buttons:
Formations form in the same order as top down on the character portraits
bar (top character is #1 in formation, and down the list). If less than six characters are selected, they will form up to the number of characters selected, filling in the first, second, third, etc. formation slots until done. Formation movement is accomplished by R-clicking and holding (for rotation of the formation), or L- clicking, both only when a group is selected.
Quick formations work analogously to quick spells, quick weapons or quick items. They allow for real-time tactical combat: pull your mage into the middle of your party, or advance your fighters to the front quickly by using the formations. The quick formation slots are configured via a R-click which brings up all available formations; L-click selects one as the formation for that quick formation slot. L-click subsequently on that button selects the current party formation. Movement into formations is then achieved by L-clicking the terrain in the game, or by R-clicking and holding, to rotate the formation.
Right Menu Buttons
Select all: Selects or unselects all six characters
AI on/off: This turns the AI on/off for a given character or number of characters. This will mean that characters with AI turned off will not react to anything in the environment
unless manually controlled. They will not move or otherwise do anything unless dictated by their unmodifiable section of script (the portion that players are unable to change, representing the personality of that character).
Rest: From many of the interface screens, a Rest button will be available in place of the Select All and AI On/Off buttons. When you select Rest and confirm, time will
18
pass in the game, and your characters will heal and regain their spells.
DonÕt forget to decide which spells you want to memorize before resting. ÐVolo
Character portraits: The character portraits select that character if L-clicked upon; if R-clicked upon they bring up the inventory page for that character. Note that if you R- click on a portrait when the game is paused, it will
unpause the game! This is intentional, and is designed to show the effects of attempting to change equipment in the middle of a battle – your characters will likely be hit unless you change equipment when not in combat!
Note on Character Portraits: The colors of the character portraits indicate if they are being attacked or taking damage from poison (flashing red), or dead (darker gray). Damage to the character is represented on the character portrait as a red bar (i.e. the portion of the portrait that is the normal color is the portion of hit points still remaining to the character). If you move your cursor over the portrait of a character, the hit point total and the name of that character will appear. Character portraits will also display status icons (if your character is Charmed, Held, etc.) as well as the level-up icon if one of your characters can level-up.
Left Menu Buttons
The buttons down the left side of the interface give you direct access to the various interface screens in the game. The buttons are as follows:
Return to game |
Character record page |
Map |
Mage spell book |
Journal |
Priest spell scroll |
Inventory |
Options |
Each of these buttons will take you directly to the interface screen for the character selected. If the entire party is selected, the appropriate screen for the party leader will come up.
19
Help Wizard Tool Tips
These are the information windows that pop up whenever you leave your mouse cursor on any button for a period of time (determined in the options). Help Wizard Tool Tips will also pop up if you leave your cursor on certain items in the game (characters, buildings, signs, etc). To bring up the Tool Tips instantly, press the “Tab” button.
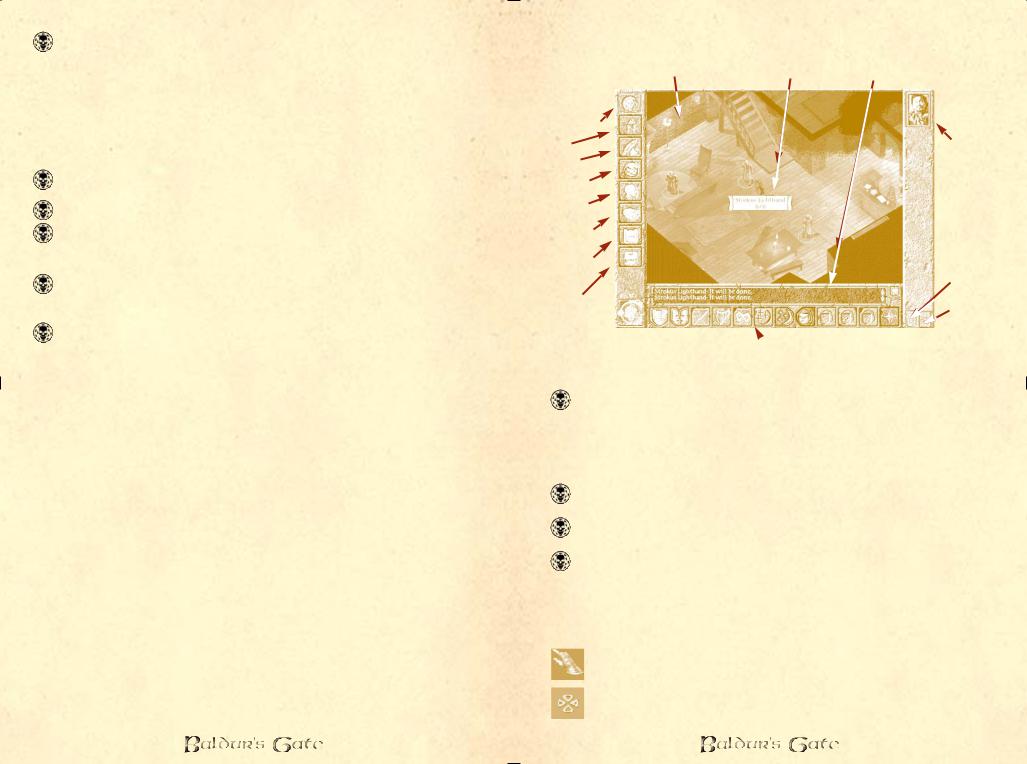
The Dialogue Window
Dialogue occurs with the selected character only; changing the character who is having the dialogue is not possible until dialogue is exited and restarted with a new character selected. If multiple characters are selected, the top-most selected character initiates the dialogue. Note: Regardless of who is having the dialogue, reaction adjustments will be based on the ‘leader’ of the group. The ‘leader’ is always the top-most character portrait of all the characters that are present in the area.
The more charismatic your leader, the better! ÐVolo
There are three available sizes to the dialogue window: a twoline size (small) which is the default in normal play, and which is used to display system messages and game conditions; and a 15 (medium) and 25 (large) line size which are used when dialogue is being displayed. The two line and 15 line sizes may be expanded to the 25 line size during game play by L-clicking the small “up” button at the right side of the dialogue window. There is a scroll bar at the right of the dialogue window that may be used to scroll up or down in the dialogue queue.
Dialogue uses a menu based system where you L-click on what you want to say from a list. What is available to be said varies according to the reaction adjustment and Charisma of the character who is speaking. When more text scrolls up in the window than can be read at once, or when dialogue is paused to give you a chance to read the text, you can L-click anywhere in the dialogue window to view more text. The text that has been already read can be reviewed with the scroll arrows on the right (up or down).
During dialogue the character who is talking has his portrait highlighted and will flash in the main game area. The NPC being spoken to will also flash.
Stores, Inns, Taverns, and Temples
Throughout the course of the game there are many non-player characters in the world who will offer goods or services. These NPC’s
20
all use a similar interface for the buying, selling, and trading of goods, information, and services. When these NPC’s are spoken to, a panel will replace the bottom portion of the screen with buttons for the various services offered.
Rent Rooms: Inns usually have four different types of rooms that the player can use to rest at night. The various accomodations vary from Peasant rooms to Deluxe lodgings.
The more expensive the room, the more comfortable your stay, and the more you will heal while you rest.
Buying and Selling: This screen is broken into a Buy window and a Sell window. Items that the store offers are shown in the Buy windows, items from the character’s inventory are shown
in the Sell window. To select items to purchase, L-click on them in the Buy window. The item icon will become highlighted, but will not be purchased until you L-click “Buy” at the bottom of the window. You may select multiple items and the current total for all items is shown next to the “Buy” button. The Sell window works in the same fashion, although the store owner may have no interest in buying the items in your inventory (in which case the item will be “dimmed”).
Items that are unusable by the character currently selected are shaded red. While these items are unusable, they can still be purchased for future use or for other party members.
Drinks and Rumors: Some locations will have a friendly bartender or innkeeper tending bar. The items offered at the bar vary from expensive liquors to cheap ales. Either way, upon
ordering a drink, the proprietor may decide to share rumors that he has heard lately. Be careful however, as your characters can become intoxicated if they drink too much.
Five drinks will usually do it... though it helps put me in a philosophic frame of mind. ÐVolo
No comment... ÐElminster
Steal: Thieves may have the option of attempting to steal items out of a shop’s inventory. The Steal screen works the same as Buying and Selling, except that no gold is exchanged. When an
item is selected to be stolen, the thief’s skills are checked – if successful, the item is added to the thief’s inventory; if unsuccessful, the guard will be called (or worse!).
Donate: You can donate money at a temple by selecting this option. When you donate, you may hear a rumor from the priest, and the party’s reputation may be increased depending
on the amount of gold donated. It is very helpful to donate gold if the party’s reputation is suffering.
The more your reputation has fallen, the more you must donate. Priests have very long memories... ÐVolo
21
Purchase Healing: Temples usually offer healing services for a price. A menu will appear showing the services offered and the price. Select the service you wish to receive and select the
character who is to receive the healing.
Identify: Shops and Temples can usually identify a much larger variety of items than your characters will be able to. The cost to have an item identified is 100 gold. If you cannot select the item
from the list, then the proprietor does not have the ability to identify the item.
Containers
Certain items and containers will be able to be picked up or opened in the game. When you move the cursor over them, they will become highlighted in blue. L-click to access the item or container. When you access the item or container, the Container panel will come up at the bottom of the screen. The left side of the panel shows the items that are on the ground or in the container and the right side is a small portion of the selected character’s inventory. Clicking on items on the left side of the panel moves the items from the ground or container into the character’s inventory.
If the character’s inventory is full, the item will not be transferred.
Note that this process can be reversed, and items can also be moved from a character’s inventory into a container or onto the ground by L-clicking on them in the right side of this panel.
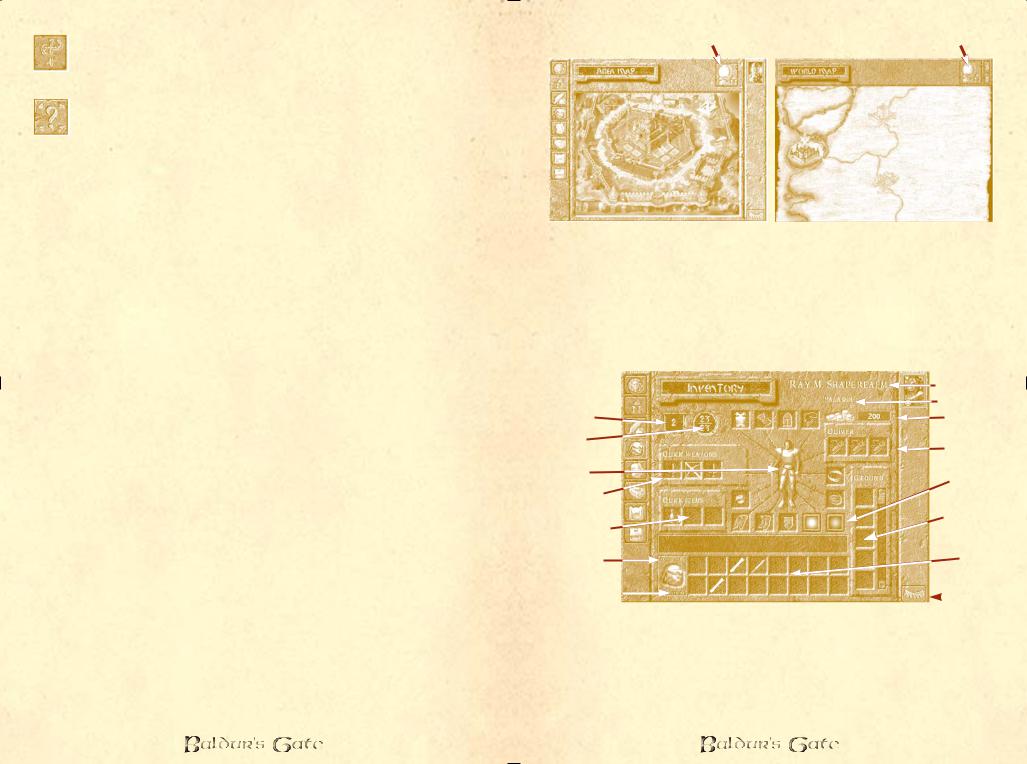
Maps
Area Map
L-clicking the map button will bring up the map that the selected character(s) are currently on. Areas that have been visited are lit up, areas that haven’t are dark. This map may be an interior or dungeon or an outdoor terrain.
The character(s) current position(s) are indicated on the map by dots.
World Map
When the World button on the Area Map is clicked the World Map comes up and the area that the character(s) are on will be marked by a shield standard. The areas visited thus far on the world map will be shown. Note that you cannot travel between areas unless you have traveled to the edge of the current area and brought up the world map with the “Travel” icon. To move to another area, highlight the area and click on it.
22
To World Map |
Back to Area Map |
Journal
Quests are entered in the journal as well as major occurrences in the game world.
Inventory
The inventory page can either be accessed by L-clicking the Inventory button on the left of the screen or by R-clicking a Character Portrait.
|
|
|
|
Character Name |
||
|
|
|
|
Character Class |
||
Armor Class |
|
|
|
Group Gold |
||
Hit Points |
|
|
|
Ammunition |
||
(current/maximum) |
|
|
|
|||
Paper Doll |
|
|
|
Character |
||
|
|
|
|
|
||
Quick Weapon |
|
|
|
Appearance |
||
|
|
|
|
|
||
Slots |
|
|
|
Ground Slots |
||
Quick Item Slots |
|
|
|
|||
|
|
|
|
|
||
Weight Carried |
|
|
|
Personal |
||
|
|
|
|
|
Inventory |
|
Max Weight |
|
|
|
|
|
Rest |
|
|
|
|
|
||
|
|
|
|
|
|
|
|
|
|
|
|
|
|
Most of the screen is taken up by the “Paper Doll” representation of the character. Along the bottom of the screen is the character’s personal inventory and the encumbrance of the character. Items can be dragged and dropped to be equipped on the Paper Doll, or dragged and dropped to other characters’ portraits to give the item to the other character.
Stackable items can be unstacked by double L-clicking on the
23
item. Unstacked items can be stacked by dragging and dropping them on top of each other.
Items placed in the “Ground” slots will be dropped at the character’s feet and can be picked up from the main game area.
The group pool of gold is shown on this page as well.
Encumbrance
Each character has a maximum weight they can carry. The weight currently carried by the character is shown next to the Personal Inventory. Maximum weight carried is determined by the Strength of a character. If this weight is exceeded, the character will slow or completely stop depending on how overloaded the character is.
The Paper Doll Inventory: Equipped Items
There are 16 distinct areas in the equipped items section: helm, armor/bracers, cloak, amulet, L ring, R ring, gauntlets, boots, up to 4 weapons (R hand, from which the quick attacks are chosen), the quiver (of up to 3 sets of ammunition), and the shield slot (L hand).
Quick Weapon Slots
The weapons put into the quick weapon slots determine the quick attacks that are available (these slots are like a bandolier of weapons available – for a mage, this could hold a dagger, for a fighter it could be a crushing weapon to use against undead, a bow for distant encounters and a sharp edged weapon for close combat). When a new weapon is put into the weapon slots on the inventory page, it generates a default quick attack in the quick attack button for this character at the bottom of the main interface screen.
Only one bow or crossbow may be equipped at a time. Both bolts and arrows may be in the quiver but only those usable by the current equipped weapon appear as quick attack choices on the main interface screen.
A shield may be equipped only if no 2-handed weapons are present in the weapon slots. If a 2-handed weapon is in one of these slots, the shield is not equipable and a message to this effect appears in the inventory message line: “Cannot equip (2-handed weapon in use).” A similar message is displayed if a shield is equipped and the player tries to move a 2-handed weapon into one of the 4 weapon slots: “Cannot equip (shield in use).”
Quick Item Slots
These are slots available to each player that represent miscellaneous items that are kept at the ready (potions, for
24
example). These items can be accessed easily during combat (similiar to “Quick Weapons” above).
Personal Inventory
Considered your “backpack”, you can only carry 16 different items or stacks of items, regardless of your encumbrance.
Items Property Page
If an item is R-clicked upon, the view changes to the Items Property page. This page contains the item’s icon, description and picture. Characters with high “Lore” abilities will automatically be able to Identify certain magical items. If the item is currently unidentified, there will be a button to allow you to try to magically Identify it. Potions may be drunk from this page. If the item is a scroll, wizards will have the opportunity to try to ‘Write Magic’ and add the scroll spell to their spell book. Certain magical items may even have special “Abilities” that can be accessed from this page
– including the ability to configure the item’s magical powers.
The benefits of study are not to be underestimated! ÐElminster
Character Appearance
Clicking on the colored boxes will allow you to pick from a palette of colors for your character to use for clothing colors.
Rest
L-click on this button to rest your characters. Some areas are better suited for resting than others, so select your campsite carefully.
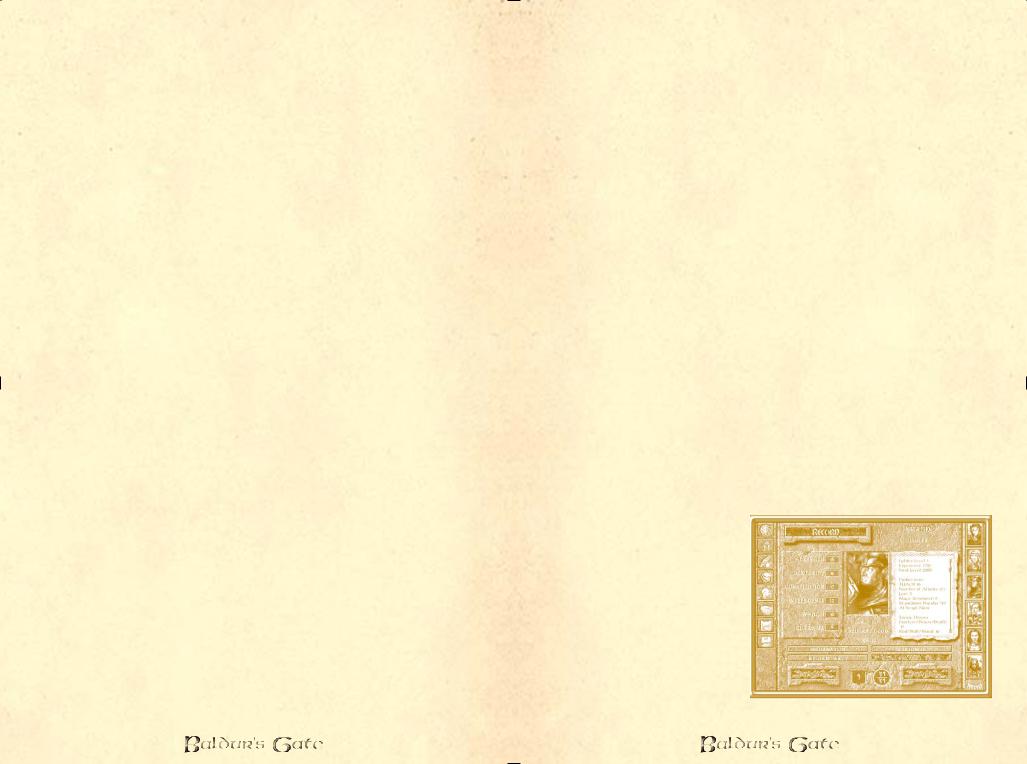
Character Record and Associated Screens
Character record
The character record page shows all of the vital statistics and abilities of the currently selected character.
25
Dual Class
This page is available to human characters only – after 2nd level you can convert a character to dual class.
When the player chooses dual class, a dual class interface screen will come up from which he will choose the new class for the selected character. Characters not allowed dual class status include paladins, and bards, the other classes may have restrictions. The character must meet the minimum requirements for the new class in all areas. The dual class page is very similar to the character generation page – and in fact, making a character dual classed can be seen as essentially starting a character over. As a new dual classed character, he starts with only the 1st-level abilities and restrictions of his new class, though he retains his hit point total from his prior class.
After a character becomes dual classed, he can only use the abilities of his new class until he surpasses the level of his original class, at which point he can freely use the abilities of either class. No further advancement is ever allowed in the first class, all further development is in the new class.
Level Up
This button is dimmed until the player gains enough experience points to gain a level.
When the player clicks the “Level-Up” button, a level up screen will be shown. All changes to the character sheet are highlighted. For a thief or bard, the player must distribute new thieving points. A new proficiency slot requires a player to choose a weapon proficiency.
Information
This page allows you to compare how the various characters in your party are playing. Various stats such as number of kills and favorite weapon are displayed.
Reform Party
This page allows you to remove characters from your party.
Customize
This page allows you to change a character’s appearance, change his voice, change his clothing colors, or change his scripts (the computer code that controls behaviors/reactions to situations). For more information on customized character portraits, character voices or scripts, refer to the information in the Readme file.
26
Export
This allows you to save a ‘snapshot’ of the character’s file to your computer for use in a multi-player game. The character’s current status will be saved, including hit points, experience points, level, class, inventory, etc.
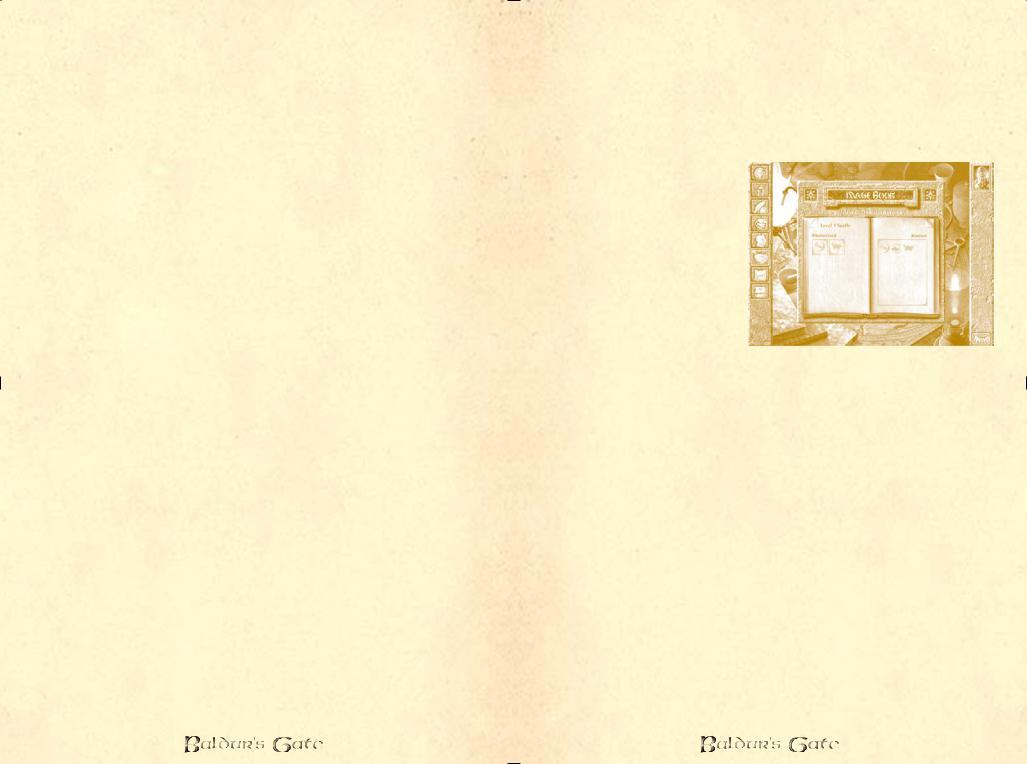
Mage and Priest Spell Screens:
The known spells of the wizard or priest are shown on the right. If you R-click on a spell icon, a display page will come up with a spell description. To memorize a spell, L-click on it. The spell appears on the left in the “memorized” area, but remains shaded (and unusable) until the character has a chance to rest. (See the Rest button on page 18).
The memorized spells of the wizard or priest are shown on the left. Every time the spell caster sleeps he will memorize the spells in this area.
If the memorized spell area is full and you want to memorize a different spell, L-click on the spell, and it will vanish.
Options
Save, Load, and Quit: These allow you to save games to your hard disk, discard your current game and load a previously saved game, and quit to the main menu.
Graphics:
Brightness/Contrast allows you to adjust the brightness and contrast of the display.
Color Depth allows you to toggle your display between 16 bit, 24 bit, or 32 bit color based on the capabilities of your system.
The other graphic options on this page should be used only if Baldur’s Gate is not displaying correctly on your system. Please refer to the Readme file for the latest information on how to correct any display errors.
27

Sound:
This menu allows you to adjust the volumes of various sounds in the game independently.
Select Sounds allows you to toggle on/off some specific sound effects and set the frequency with which your characters verbally respond to your orders.
Gameplay:
Tool Tip Delay adjusts how quickly the Windows Tool-Tip pop-up help appears. The left of the slider is the briefest period of time. Note: You can always make the tool tip appear instantly by hitting the “Tab” key.
Mouse Scroll Speed adjusts how quickly the screen scrolls across the game world when the mouse is at the edge of the screen.
Keyboard Scroll Speed adjusts how quickly the screen scrolls across the game world when the arrow keys are used.
Difficulty adjusts hidden factors within the game to make the game more or less difficult. Note: There is an experience point penalty for reducing the difficulty of the game below neutral. There is not a bonus for playing more difficult games.
Dither Always: Allows your characters to dither through obstacles that would normally obscure them.
Tutorial Messages: Toggle on/off here.
Gore: This toggles on/off the blood and ‘excessive’ damage and death animations in the game.
Feedback allows you to modify the frequency with which you see markers and locators in the game, as well as turning on and off the various messages that come up during the game.
Autopause allows you to set various conditions under which the game will automatically pause.
Miscellaneous Information
Fatigue: A character can continue to operate at peak efficiency for 24 hours game time (2 hours real time). After that the characters will start to complain, and the characters’ attributes begin to go down. For every 4 hours beyond this 24-hour mark the player will receive a -1 luck penalty (-1 to all of his rolls). As soon as the character rests all penalties will disappear.
Intoxication: A character becomes intoxicated after he drinks enough alcoholic beverages. The average character will be able to drink about 5 alcoholic beverages before becoming intoxicated
28
– but this amount may vary depending upon the character’s Constitution. Intoxicated characters gain a bonus to Morale, but a penalty to Luck. The greater the level of intoxication, the greater the bonus/penalty. The effects of intoxication diminish over time.
Infravision: Some characters and monsters have the power of infravision. Infravision allows you to see better in the dark by revealing the heat of objects. A character without innate infravision ability can obtain infravision through spells or magical items.
Effects of Wearing Armor on spells and abilities for dual or multiclassed characters
•Different buttons may be dimmed in the bottom panel depending on what your characters are wearing.
•Even if a multiclass or dual class wizard is wearing armor, he can still memorize spells, he just cannot cast wizard spells until the armor is removed.
Multiplayer Games of Baldur’s Gate
Multiplayer
The multiplayer game of Baldur's Gate is identical to the single player game – at least in terms of the game content. The main differences between the single and multiplayer games relate to who is playing in the game – in the single player game, you create one character and up to five other NPC's join you. After they join, they are essentially characters fully under your control. In a multiplayer game, between one and six players may adventure together, cooperatively controlling both created characters and NPC's that join the party.
A few definitions are in order. The leader is the player who has control over such things as who can join, what kinds of characters can be brought into the game, and what abilities the players who are in the game actually have (in terms of game play – see Permissions, below). The leader can control one or more characters in the game, and has the ability to assign characters to the other players. The server is the computer (usually, but not necessarily, the leader's) which coordinates the various game-states of the client machines of each player. A player is one of the people who controls one or more characters in the game. A character is an alter-ego, analogous to the characters of the single player game, which is controlled by one player in a multiplayer session.
29
Starting Out
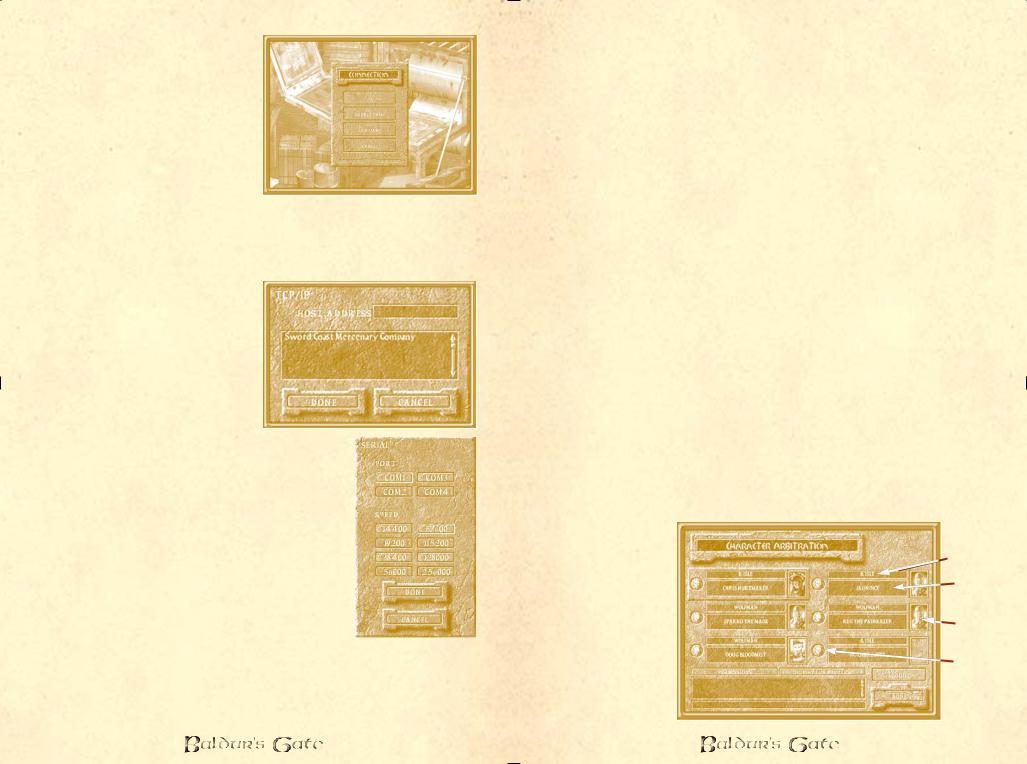
When you start a multiplayer game, (also known as a session) you will be presented with the Connection screen. Here you can choose the protocol that you will play your game with.
Protocol
There are four available
protocols that you can choose from on the protocol screen.
IPX
You will be presented with the all available IPX sessions. After choosing one, you will proceed to the game.
TCP/IP
A connection screen will come up in which you can enter the host address you wish to connect to. Once you do this, you will be connected to this session if it is available. On local area networks, TCP/IP has an auto-detect feature to automatically set up games.
Modem
If you choose a modem connection you will be presented with a popup menu where you can configure the COM port and speed of your modem. Once you have done this, you can enter the number that you want to dial; once you have dialed the number you will be connected with that game.
Serial (null modem)
If you choose serial connection, a popup menu will appear on which you can select the COM port of the null modem cable that you will be using as well as the port connection speed.
Joining a Game
Whichever protocol is choosen, if you are not creating the game but rather joining one, you will be prompted to choose a player name by which you can be identified by the leader and other players in the session. After this you will proceed to the Character Arbitration screen (see below).
30
Creating a Game
If you choose to create a game which other players can join, you will see a popup window appear, on which are spaces to fill in the session name, the player name, and buttons to create a new game or load a game. If you choose to create a new game, you must fill out the spaces for the session name and the player name.
After you have created your game or loaded in a game from the list of available saved games, you will proceed to the Character Arbitration screen.
When characters join your session (at any point in the steps outlined below, or for that matter in the actual game) the leader is notified. The leader has the ability to stop listening to requests to join (this is set in the Player Permissions window, described below).
Character Arbitration
The character arbitration screen is where players are assigned control of character slots and create the characters that they will roleplay in the game. From this screen, the leader also controls Permissions and other options for the game.
The player running the server is initially assigned as the leader of the party. As the leader, he or she has the ability to assign character slots to the players who are in the session. This is achieved by L-clicking on the player name slots, after which a panel will pop up with the names of all players currently in the session. Control of a slot may be assigned to any player.
On the character arbitration screen, characters may be loaded into a slot in by the player who controls that slot. This is done by clicking on the Create Character button.
The Protagonist
in the Multiplayer
Games Player Name
As in the
single player |
Character |
|
Name |
||
game, there is |
||
|
||
one character |
Character |
|
who is the |
||
Information |
||
protagonist of the |
|
|
story. If this |
Character |
|
character dies, |
ÒLockÓ |
the game is over and the game must be
31

reloaded, as in the single player game. The protagonist in the multiplayer session is identified by the stone highlight around the first character slot.
Characters in Multiplayer Sessions
The characters in multiplayer may be created from scratch or may be imported into the game using the “Import” button. The character is created on the exact same screens as in the single player game (see page 8), subject to the restrictions set out by the leader of the session in the Player Permissions submenu off this page (see below).
Once a character is created, it can be modified by clicking on the player name, which brings up a window allowing the player to create, import, export or delete (the active character must be deleted before the first two options are available, and the latter two options are available only when there is a character in the slot).
When the player is satisfied with the character that he has imported or created, he clicks on the small skull icon to the left of the character slot to “lock” the character and prevent changes. If a player wishes to change a character, that character must be "unlocked" by clicking on the skull icon before the character is editable.
Player Permissions
Although both the leader and the other players in the session can view permissions on the Permissions screen, only players who have been assigned leadership privileges are able to modify permissions.
The leader can assign these permissions to any players that he chooses.
The permissions represent what players are able to do in the game. The permissions provided are:
|
the abilitiy to |
|
the ability to initiate |
|
|
||
|
modify characters |
|
dialogue |
|
the ability to spend |
|
the ability to view |
|
|
||
|
|
||
|
party gold/purchase items |
|
other character's |
|
|
|
records |
|
|
|
32
the ability to initiate an |
the ability to pause |
area transition |
the game |
the ability to modify permissions/remove players from the game (leadership permission)
Import Options
On the Permissions page the leader is able to set the options for importing by clicking on the “Import Options” button. This brings up a window with three settings: Stats only, Stats and XP (i.e. experience points and levels), or Stats, XP, and Items. By choosing one of these settings the leader limits the types of characters that can be brought into the multiplayer session from the single player game or other multiplayer sessions.
Listen to Join Requests
Also on the Player Permissions page is a button, “Listen to Join Requests”, which allows the leader to listen to requests to join the session or to turn off requests if there are enough players in the game. For example, the leader might only want to have one or two people in the game, so having people requesting to join could get annoying.
One interesting facet of multiplayer is that the player creating the session can choose to play solo. The advantage of this is that all characters in the party can then be created from scratch. [Note: While we specifically included this option due to popular request, we actually recommend playing the game with NPC's turned characters in the party – they'll have more personality.]
Starting the Multiplayer Game
When all players have L-clicked on the skull icons to the left of their characters' slots, the “Done” button will become active on the leader's computer. The game launches when the leader clicks “Done.”
Changing Options and Permissions in the Game
Both the Character Arbitration screen and the Player Permissions screen are available on the left side menu in the multiplayer game. These screens are treated identically in
the actual game to what is described above.
Playing a Multiplayer Game
Chatting
Players can chat between themselves. There is a chat window – to enter a comment merely L-click on the entry area and enter a comment. To address the comment to a specific
33
person (and only that person) type that player's name followed by a colon (":") then the comment – only that player will see your comment.
Saving and Loading
The leader can Save games at any time during normal play, just as if playing the single player game. In order to Load a game, the leader must exit and reload the game.
General Notes Concerning Multiplayer
When you are playing a multiplayer session, keep in mind the following notes:
1.Asynchronous: Baldur's Gate is an asychronous game. If you happen to be playing with somebody whose system is very close by, you may see different things happen on each system. The point to remember is that while things happen somewhat differently, the result of the actions is always the same.
2.Explorable Area: When playing a multiplayer game of Baldur's Gate, you are limited to exploring one area in the game at a time. That is, the characters in the game can only spread out within the same above ground area. While they can enter structures and underground areas individually, they cannot travel to other above ground areas until all characters are at the edge of the area and ready to move on.
3.Loading Time: The loading time for any given level is slightly longer while playing multiplayer. This is because the interiors for each level must be loaded along with the exteriors for each area. The single player game does not need to do this, so loading is faster. Also, the multiplayer game is forced to wait for the system that loads the area the slowest.
4.Party Gold: Just as in the single player game, all gold is shared between the members of the party.
5.Shared Experience: Just as in the single player game, all characters in the party share in the awarding of experience points.
6.The Leader is in Charge: In case you haven't figured it out by now, the leader has control over everything that the player can do in the game, including kicking them out and reassigning their characters to other players. Make sure that the leader is playing the type of multiplayer game that you want to play. That is to say, if you want a hacked game, join that kind of game or start it up; if you want a clean game according to AD&D rules without interference from hacked or edited characters or players who don't want to play as a team, then you need to find those players.
34
Volo’s Guide to Baldur’s Gate
Manual II
35
Volo’s Personal Introduction
This guidebook is one of the very finest in my ongoing tour of the Realms Ð I can guarantee that youÕll find no more diligent guide than your humble servant, Volothamp Geddarm. IÕve spent
the past six months journeying around the fine port city of BaldurÕs Gate and subjecting myself to horrors beyond belief in my quest to bring this information to light. Poor food, small beds, drafty accommodations Ð no peril is too vast for your friend and compatriot, Volothamp Geddarm.
In thy service! Volothamp Geddarm
Volo? Aye (sigh). IÕve spoken to ye before about his ÒaccuracyÓ, but he is getting a little better.
Maybe that makes his writing more tolerable. Perhaps.
Elminster
36
Part I: BACKGROUND
Overview of the Realms:
the World of Baldur’s Gate
Welcome to the Forgotten Realms and the world of Faerûn! (Fay-ROON). A land of magic and adventure, Faerûn is a continent hugging a larger world, which in turn is the
third world of eight orbiting a central sun, which is encapsulated in a crystal sphere within a swirling chaos, which is only one in a myriad of alternate dimensions. But for the races of Toril – for the elves and dwarves and gnomes and halflings and humans – Faerûn is a very important place: it is home.
Abeir-toril (Ah-BEER Tor-RILL), more commonly called Toril, is the name of the orb that Faerûn and the Forgotten Realms are set upon, just as Earth is the orb that Eurasia is set upon. The name is archaic, meaning “cradle of life,” and is rarely used in everyday speech. Abeir-Toril is an Earth-sized planet dominated by a large continent in its northern hemisphere as well as a number of other large landmasses scattered about its surface. This northern continent is called Faerûn in the west, Kara-Tur in the east, and Zakhara in the south. It is the primary purpose of this tome to deal with the western portion of this huge landmass, in particular the region in Faerûn between the Sea of Swords and the Inner Sea, and more particularly the area around the city known as Baldur’s Gate.
The Sword Coast
For years, the lands between Waterdeep, a huge city far north of Baldur’s Gate; bustling Amn to the south; the Sea of Swords to the West; and the Wood of Sharp Teeth to the East have been thought of as the Empty Lands – a vast, stretch of wilderness folk venture into only to get from one place to another. Legends abound of grisly fates that befell unfortunate travelers at the hands of the orcs, trolls, hobgoblins (and worse!) said to infest the area in veritable armies. In recent times the caravans have begun to see a new menace – raiding parties of humanoids who plunder mainly the miners in the Cloud Peak mountains north of Amn. Thanks to both human and bestial predators, the trip has always been dangerous – hence the name Sword Coast. Down through the ages, many folk have dreamed of founding a kingdom in this verdant valley hidden in the moors. The area is littered with the ruins of failed dreams – abandoned villages, empty towers and dungeons – as well as the occasional town,
37
city, or keep, such as Baldur’s Gate, Beregost, Nashkel, the Friendly Arm Inn, and Candlekeep. This guidebook directs the traveler toward the sights and lodgings in the cities. Those not traveling with a caravan in the Sword Coast are warned to hire escorts of armed, trustworthy adventurers!
Zane* was not far wrong, but the Coast today is also home to one of the two largest and most powerful cities in the region, Baldur’s Gate (the other, far inland, is Iraebor). From its gates south to Amn, the Coast on either side of the Coast Way road is pleasant, verdant farmland. North of the river Chionthar as far as the Way Inn, the land is more sparsely inhabited and more dangerous, but it serves as a hunting range for those who must kill wild game to eat and as homestead for lonely pioneer farmers. Travelers are warned that lawlessness is swiftly dealt with by ready, veteran patrols in the lands held by the nobles around Baldur’s Gate. Throughout the rest of the Coast, the traveler’s best protection is a ready blade and friendly magic close at hand. Brigands, dopplegangers, and kobolds are an everpresent danger. Many brigands stay in roving encampments, living off stolen livestock. From such bases they raid travelers, warehouses, and weak settlements at will, particularly at night or in bad weather. On the other hand, game is plentiful for travelers throughout this region.
*Zane Hellar of Amn, the famous senior cartographer of the MerchantsÕ League, on describing the coast between Waterdeep and Amn: ÒLeagues upon leagues of lawless waste, home to pirates and outlaws who prey on those who must go north or south while depending on the Sea of Swords as their guide, keeping it in sight so as not to lose their way.Ó
Ð Volo
38
Map of the Sword Coast
39
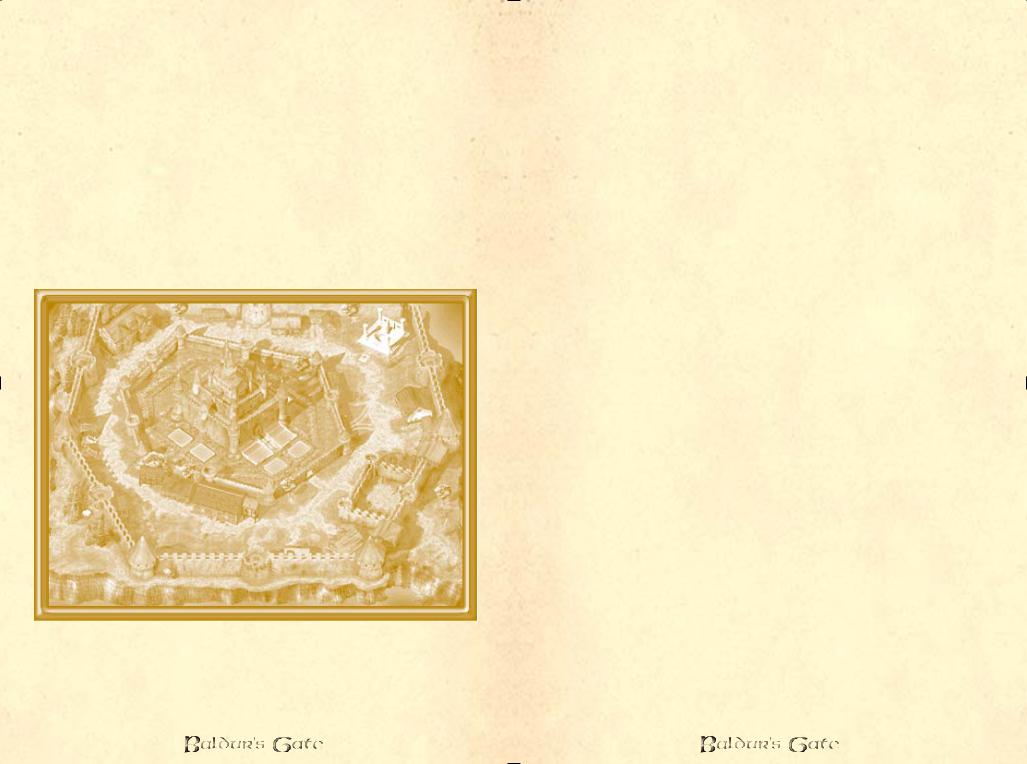
Candlekeep |
I understand your home is Candlekeep, so you |
probably remember more about it than I do, my |
|
|
friend. All apologies for any errors! -Volo! |
This citadel of learning stands on a volcanic crag, overlooking the sea. It is a many-towered fortress, once the home of the famous seer Alaundo, and it preserves his predictions along with all the written records and learning of the Realms that can be assembled. Candlekeep is certainly no tourist resort, but there is a store, a temple, and a fair inn here. The price for most travelers to enter the Keep proper is a book. Those wishing to examine any writing in the Keep’s library must gift Candlekeep with a new tome of no less than 10,000 gp value.
This applies to you as well, even though you called the keep home for many years. The monks make few exceptions, and only their true membership is exempt from the entrance fee. It was apparently GorionÕs influence alone that allowed you free access. Such strict enforcement of a rule is simply not to my tastes. ÐVolo
Candlekeepl
The monks of Candlekeep (who claim to be nondenominational, and call themselves the Avowed) also purchase certain books brought to them and even commission agents in great secrecy to procure writings they desire. Those who wish to browse in the library must normally be sponsored by a known mage of power, so many books given to Candlekeep in payment are minor spellbooks.
40
This community is ruled by the Keeper of the Tomes, assisted by the First Reader (the second in authority and traditionally the most learned sage of the monastery). There are up to eight Great Readers under these two offices, who are assisted by the Chanter, the Guide, and the Gatewarden. The Chanter leads the endless chant of Alaundo’s prophecies, spelled in this duty by three assistants, the Voices of the North, South and East. The Guide is in charge of teaching acolytes, and the Gatewarden deals with visitors, the security of and supplies for the community, and with the clergy. The central, highest fortress of the Keep is surrounded by a terraced rock garden of many trees. There are rumors of vast dungeons beneath the keep, dating from ancient times, when they were used as burial chambers for the wisest scribes.
Except in rare cases no visitor can remain in Candlekeep for more than 10 days at a time, or enter the monastery less than a month after leaving it. Order in the Keep is kept by the Gatewarden’s five underofficers: four Watchers and the Keeper of the Portal, all five of whom have a force of armed monks as assistants.
The Seekers are the lowest monks. They research and fetch and carry. Above them are the Scribes, who copy out works or compile books to sell from various sources in the library – the chief source of income for the community. Above the Scribes are the Chanter and the Readers. The current Keeper of the Tomes is Ulraunt, a proud and haughty minor mage. The current First Reader, Tethtoril, is often mistaken by visitors for the Keeper because of his intelligent, regal, and sensitive demeanor.
Candlekeep has but one absolute rule: “Those who destroy knowledge, with ink, fire, or sword, are themselves destroyed.” Here, books are more valuable than people.
41

Baldur’s Gate
This port city is shelter and lifeline for the folk of the Coast. It offers the discerning shopper a wide selection of goods – there are a total of six major inns, six main taverns, seven general stores, six primary temples, and a full-service magic store, along with hundreds of lesser buildings. Baldur’s Gate is a tolerant but well-policed city of merchants, and quiet trade and business are the general order of each day. The Flaming Fist Mercenary Company, over a thousand strong, is based in the city. Every tenth person or so is a member of the Fist or a watch agent (well, spy), skilled in battle and within a breath or two of numerous armed allies. The visitor can freely stroll and shop. The city has a system of magical lamps that provide light to its inhabitants in the evening and the night hours, which is one reason why the crime rate is so low (keeping the merchants and storekeepers happy!)
The city is named for the legendary sea faring explorer Balduran, who long ago sailed past the elven homeland Evermeet in search of the rich, fabled isles of Anchoromé (pronounced ”Ang-kor-OH-may”). Balduran returned with tales of strange, vast lands across the seas. He also brought back great wealth, and scattered it about his sparsely-settled home harbor, commanding that some of it be spent on a wall to protect against tribal orc and barbarian raids (still a problem in the area, in those long-ago days). Then he set sail again for the wondrous lands he had found. Balduran never returned.
Whatever Balduran’s true fate, his money was spent on a splendid city wall. Within its protection, building went on at a great pace, soon expanding beyond its confines. The wall was built by farmers who put it around their own holdings, excluding the actual harbor from its protection. This allowed them to tax all carts coming up from the docks to the protection of the walled city. The colleagues of Balduran, sea captains to whom the harbor was home, angrily insisted that the gate by which southern trade and the harbor traffic entered the city was ”Baldur’s Gate,” and they refused to pay for entering. The strife ended in the overthrow of the enriched farmers and the seizure of the city (which came to be called Baldur’s Gate) by the sea captains.
The four oldest captains, their days at sea drawing to a close, turned over their ships to younger sailors, who in turn supported their installation as rulers of the fledgling city. The four called themselves “dukes” as a joke, but the titles proved useful when dealing with other rulers, and they were later glorified by the appellation “grand.” Now called the Council of Four, elected by the populace for life (or until resignation), the present grand dukes
42
are Entar Silvershield (a high level fighter), Liia Jannath (a powerful wizard), the adventurer known only as Belt (a strong fighter), and Eltan (the commander of the Flaming Fist mercenary company).
Buildings in Baldur’s Gate tend to be tall and narrow, with slit windows located high and covered with shutters to block out winter winds and nesting seabirds. Tall among them rises the grandly-spired ducal palace of the four ruling grand dukes, known as the High Hall – a place for feasts, court hearings, and administrative business. Not far from the palace stands the High House of Wonders, consecrated to the deity Gond. It is the by far the largest of the Gate’s three temples. Its spreading eastern wings face the Hall of Wonders, also on Windspell Street, where the more successful of Gond’s inventions are displayed to the public. Not far from the Hall of Wonders, near the Black Dragon Gate, is the Wide. This huge open space is the Gate’s market. It bustles day and night, and is usually “open space” only in the sense that there are no buildings. Temporary stalls, bins, sale tables, and shoppers thronging to them usually crowd shoulder to shoulder. Outside the Wide, Baldur’s Gate lacks colorful landmarks. The ever-present damp discourages the use of banners, open shops, and the like.
Those wishing to overindulge in drink and in the company of the opposite sex are directed to the Undercellar, a little-known, damp, dark warren of linked cellars entered just off the Wide.
These are but a few of the many landmarks of this fine city. For the rest, I refer you to the excellent city map I have prepared for would-be adventurers within BaldurÕs Gate. IÕve tried to indicate most of the inns, taverns, stores, and temples there for you, my friends
Ð Volo
Hall of Wonders – Museum and Shop
This huge high-pillared stone hall displays the grandest glories of Gond to the faithful and the curious. Its cellars contain replicas of the wonders on display. Folk come from afar to see the marvels here. Many go away thoughtful, determined to create similar devices of their own and save themselves the awesome prices charged by the clergy of Gond. The Hall is dimly lit by enchanted glowing globes and is staffed by ever-watchful priests of Gond. It is crowded with gleaming mechanisms that represent the more successful inventions devised for the greater glory of Gond Wonderbringer, god of artifice, craft, and construction. The High House, its parent temple, faces it across Windspell Street. The Hall has held many marvels over the years. Currently on display are many small devices and a few large pieces. Many of the small devices seem to be locks or strongboxes so devised as
43
to look like something else, from goblets to statues to chairs. The larger items include a mechanical scribe, a steam dragon, a pump of Gond, an everlight, a fan chair, and a farseer. Unless one tries to damage, move, or tamper with a device, or states a clear and serious intent to purchase, the priests are usually far too busy fending off ever-present, awe-struck gnomes – who travel to
the Hall daily to gawk tirelessly at the wonders there – to speak to visitors. The devices on display in the main Hall are the work of priests, who duplicated original prototypes, and the originals aren’t for sale under any circumstances.
Elfsong Tavern
This tavern is the local watering hole, meeting place, and hiring spot for adventurers. A popular destination for pirates and outlaws on the loose in the Coastlands, it is a place the watch turns a blind eye toward, unless rowdiness and battle erupt. Those wishing to fence stolen goods, hire unusual folk for unrespectable tasks, and hear tall tales of daring adventure often come here early and stay late.
The tavern is named for an unusual haunting – a ghostly female elven voice heard from time to time all over the establishment. It isn’t loud, but can be heard clearly everywhere, and is both beautiful and mournful. No one is sure just who the singer is – although it’s clear she’s singing a lament for a lover lost at sea – or how the haunting came to be. No other music is permitted in the Elfsong.
The ground floor is devoted to a taproom that serves melted cheese sandwiches (spiced or unspiced, as you prefer), pickles, and fist-sized twists of dried herring – and drinks of all types, of course. Several dark, twisting stairs lead up to private meeting rooms that can be rented by the candle (the time it takes a short taper to burn down) or an evening. Those with enemies are warned that the dimness on the stairs has concealed many a seeking knife thrust or poisoned hand crossbow bolt.
The bartender has a prediliction to spread potentially useful gossip and rumors, but only when his palm is weighted and some drinks are quaffed. Patrons can – and are expected to – go armed when in the Elfsong, and the known rule is that all beings need to protect their own backs.
The Blade and Stars
This inn is named for its enchanted signboard, looted from a ruined village in Amn after a long-ago trade war. It’s a large black sign displaying a curved saber held by a delicate, long-fingered
44
female human hand. The sign is enchanted so that stars wink and slowly drift around the blade. The inn itself is less exciting, but still a good, safe, clean, pleasant place to stay.
The Blade is a long, tall building with attached stables and kitchens on one side and balconies opening out of upper rooms on the other. Its furnishings are clean and fairly new. There’s a small lounge off the front lobby for guests to meet citizens in. Vigilant stairwatchers on staff keep track of guests’ comings and goings, discouraging street thieves and even dopplegangers, who are a growing problem.
Rowdy or reckless guests are warned, once – and if something else happens, firmly asked to leave. On cold nights, the proprietor, Aundegul Shawn, is happy to talk, but only when his palm is liberally greased with gold.
The Blushing Mermaid
The Mermaid is known up and down the Coast lands as a meeting place in which to conduct illicit business for folk who are dangerous or criminal. It is a noisy, brawling establishment. I can recommend it only to those who go well armed, who know how to use their weapons, and who bring lots of loyal friends with similar skills.
The Mermaid is a long, low, ramshackle place with a confusing maze of wings, outbuildings, stockaded enclosures, and stables surrounding it on three sides – the better to give cover to those trying to approach or leave unseen, most Baldurians say. It has at least four levels of cellars – many more, some say – and rumors abound of secret passages, or even connections to an underground stream connecting with the harbor.
Maybe Volo means the sewers? Not a stream I would much fancy crossing Ð Elminster
Rooms at the Mermaid are low-ceilinged, dingy, and apt to be furnished with mismatched pieces that have seen better days. In general, they are loot-and-salvage pieces that have seen heavy use since their installation here. The visitor will find in the Mermaid an astonishing collection of smooth-tongued, old sea dogs nursing drinks at all hours. Each one is a contact person for this or that cabal, thieving brotherhood, smuggler, mercenary band, fence, panderer, or other shady professional interest. Negotiations with such contacts usually consist of a nasty grin and a case of temporary deafness until at least a few coins are given – whereupon they recall their voice, hearing, and manners, and inquire as to your own fortune. Once satisfied the coins you’ve dropped are of good quality, he’ll tell you what you want
45
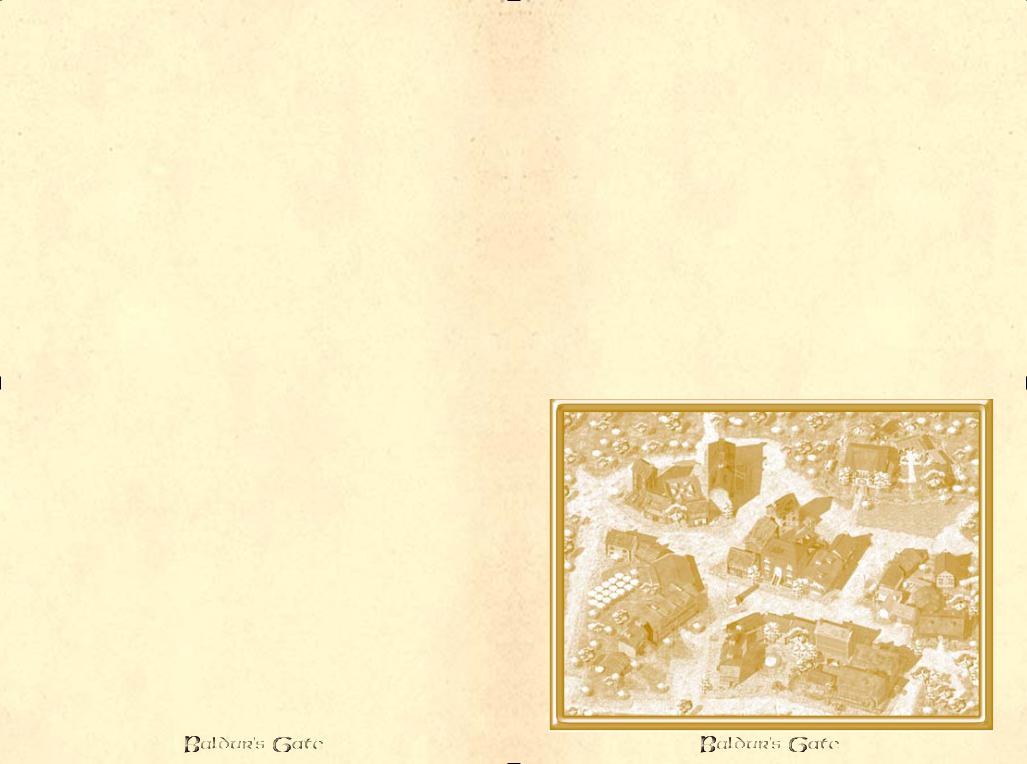
to know and arrange a meeting, or send you to a contact who can. I report all this secondhand, of course! A stay at the Mermaid is apt to be safe, so long as one avoids battle and does nothing overly insulting or stupid. Beer at the Mermaid is sea ale (thicker and more bitter than most tongues find enjoyable), stout, and a light, golden-hued lager from Mintarn. No wines are available, but one can get whisky strong and smoky enough to strip paint or tar from wood. It brings tears to the eyes of most who drink it, and probably worse things to their insides!
The Helm and Cloak
This grand inn, rooming, and feasting house is favored by those who’ve lots of coins to spare – both citizens of the Gate, who enjoy the dining room, and travelers. There’s even a floor of long-term rental rooms. Most of these are currently occupied by members of the Knights of the Unicorn, romantic adventurers described by a regular patron as elegant buffoons. The Helm is the fashionable place to dine and chat, much favored by those of power. Many an important business deal or alliance has been negotiated in its luxurious alcoves. The Helm avoids the haughty and gaudy, unerringly choosing the best of informal good taste, traditional furnishings, and thoughtful service. Warmed robe and slippers are brought to your room when you’re heard to rise in the morn. There’s also mead (very ordinary) and cinnamonspiced milk available (hot or cold, as you prefer), but no beer of any sort to be had.
ÒWeÕre not running a tavern, here mÕlord,Ó sniffed one of the senior servants to me, when I inquired why - Volo
Three Old Kegs
This cozy timber-and-stone inn has three old kegs hanging from a roof pole in place of a signboard. Those bold or whimsical enough to enter and stay will find one of the best inns in all Faerûn. Everything is comfortable and a little shabby, but the staff is quiet friendly. Where there aren’t paintings, there are bookshelves crammed with old diaries, travel books, collections of ballads and legends, and grand and overblown histories of heroes. Regular patrons snooze and read the days away, rousing themselves from time to time for a glass of wine, mug of broth, or a game of dice, cards, or shove-skittles. Both the wine and the broth are excellent, but they, along with iced water and dark and nutty malt bread, are the only fare to be had in the place. The thick beastskin rugs, paneling, books, and tapestries absorb most sound. The Kegs is a quiet place. Come here for a reasonable and comfortable rest, a haven against the bustle of business or adventure. Patrons are asked to keep their weapons in their
46
rooms, and excessive rowdiness is not permitted. Drunks often awaken in the morning to find themselves sleeping out back in the hay pile by the kitchen door. The innkeeper is a tall, quiet man with a mane of long, curly black hair and a sword scar that runs from his nose diagonally across one cheek. His name is Nantrin Bellowglyn, and he’s a Tethyrian noble’s retired guard who fled that land when civil strife erupted and his lord was slain.
Beregost
Tired travelers on the Coast Way between Baldur’s Gate and Amn often stop in Beregost. Beregost is located just off the road about a day’s travel south of where the Way of the Lion branches off from the Coast Way. This town, while much smaller than Baldur’s Gate, boasts three inns, two stores, a magic shop, a temple, and a decent tavern. It’s within reach of the northern borders of Amn. Merchants of that land often use it as a rendezvous for caravan assembly before attempting the perilous overland runs north to Waterdeep or east to the Sea of Fallen Stars. As a result, this small town gets very crowded at unpredictable intervals.
Begun as a farming village under the protection of a school of wizardry, Beregost is now dominated by the Song of the Morning, a major temple to Lathander.
Beregost
47
 Loading...