


Table of Contents
SYSTEM REQUIREMENTS |
|
INSTALLING THE GAME |
|
Install ......................................................................................... |
3 |
Minimum .......................................................................... |
|
Full ..................................................................................... |
|
DirectX ........................................................................... |
|
Uninstall ......................................................................... |
|
Readme .................................................................... |
|
THE LAUNCHER ................................................
MENUS AND INTERFACE SYSTEM
Interface Navigation ..................................
Main Menu .....................................................
Single Player ............................................
Multiplayer .............................................
Options ................................................
Profile ..................................................
Heads-up Display ...................................
Cross-hair System ..............................
WEAPONS, TOOLS, AND EQUIPMENT
Gaining Weapons, Tools, and Equipment
Human .................................... |
|
27 |
Predator .......................... |
27 |
|
Alien ......................................... |
|
27 |
Human ............................................. |
|
27 |
Weapons and Tools ................................. |
|
|
Equipment ................................................... |
|
|
Pickups .......................................................... |
|
|
Predator ........................................................... |
|
|
Weapons and Tools ......................................... |
|
|
Equipment ................................. |
|
33 |
Abilities ........................................... |
|
34 |
Alien Weapons and Abilities ............... |
34 |
|
Facehugger ...................................... |
|
34 |
Chestburster ............................ |
|
35 |
Mature Aliens ................................... |
|
35 |
Runner Special Abilities |
..................... |
|
Predalien Special Abilities .............. |
35 |
|
Praetorian Special Abilities ................... |
|
|
GAMEPLAY TIPS |
|
|
Alien .................................................... |
|
36 |
Marine ................................................... |
|
|
Predator ................................................... |
|
|
Environmental Hazards ................... |
|
36 |
Multiplayer Tactics ...............................
DEFAULT KEY CONFIGURATION CHARTS
CREDITS |
|
Fox Interactive |
......................................44 |
Monolith Productions .................................
Music ..............................................................
Voice and Motion Capture

 2
2


 Table
Table
 of
of
 Contents


System Requirements
MINIMUM SYSTEM REQUIREMENTS
Windows® 98/Me/2000 DirectX™ 8 or higher Pentium® III 450MHz
128 MB RAM (Win98) / 128 MB (Me/Win2K)
16MB 3D hardware accelerator card with Direct3D™ support 4x CD-ROM
Mouse Keyboard
56K modem or Local Area Network (LAN) for multiplayer 750MB free hard drive space
DirectX compatible 16-bit sound card
Recommended: Pentium® III 600MHz
256MB RAM (Win98) / 256MB (Me/Win2K)
32MB 3D hardware accelerator card with Direct3D™ support
Installing the Game
To begin, insert the Aliens Versus Predator 2 CD, Disc 1, into your CD-ROM drive. If AutoRun is enabled on your computer, the Launcher should appear within a few seconds.
NOTE: If nothing happens then AutoRun has been disabled. If this is the case you can start the Launcher by clicking on the START button on the Windows taskbar, then click RUN.... In the Run dialog box, type D:\AVP2 (where D: is the letter assigned to your CD-ROM drive) and then click the OK button.
Click INSTALL on the Launcher. Follow the on-screen prompts to navigate through the setup screens as follows:
In the Select Destination Directory screen, click Next to install to the default folder, or click Browse to install to a different folder on your hard drive.
In the Install Type screen, you may choose from two possible installation methods:
The Typical Installation (recommended) requires 1.3 gigabytes of free hard disk space and will copy both the game and all game data. For maximum performance, use this option.
The Compact installation option requires 750 megabytes of disk space and will copy only the game files to your hard drive and leaves all levels and other data on the CD. This option is recommended if you need to conserve hard drive space.


 Aliens
 vs
vs Predator
 2
2


 3
3
The default installation directory is C:\Program Files\Fox\Aliens vs. Predator 2.
In the Select Program Folder screen, simply click Next to add Fox Interactive/Aliens Versus Predator 2 to the default folder in your Start menu, or you can specify a different folder.
Once Setup is complete, click Next to exit the installer.
Install GameSpy Arcade: Once you have installed the game, you will be asked whether or not you want to install GameSpy Arcade.
Install DirectX 8.0: If you do not already have Microsoft’s DirectX version 8.0 or higher installed on your computer, you must upgrade your version of DirectX. We have included DirectX 8.0a for you.
Read Me: Provides useful information on installing and starting the game, as well as last minute information that didn’t make it into this manual. You may also read this file later by selecting its shortcut from the Aliens vs. Predator 2 folder on the START menu.
The Launcher
REACHING THE LAUNCHER
You can reach the Launcher by opening one of the Aliens Versus Predator 2 shortcuts created during install or by inserting the Aliens Versus Predator 2, Disc 1, into your CDROM drive when AutoRun is enabled.
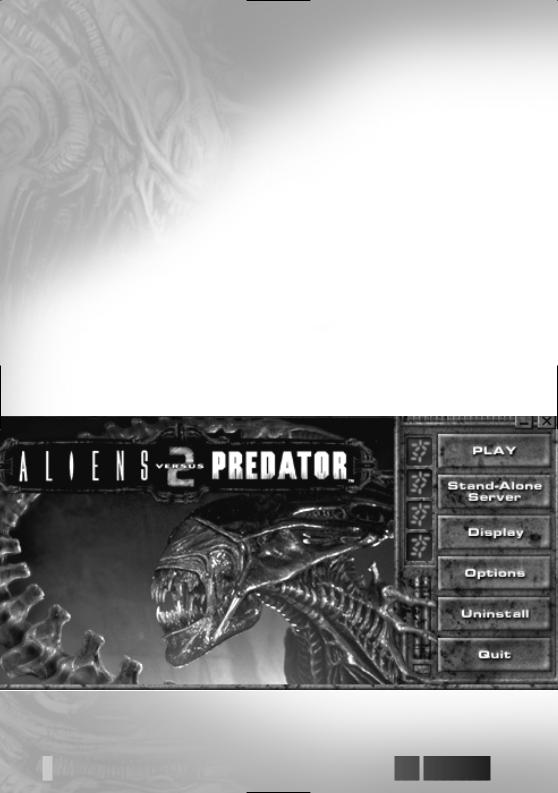
LAUNCHER OPTIONS
The following options are available from the game’s Launcher:

 4
4


 The
The Launcher


Play: Select this button if you wish to enter the Main Menu for Aliens Versus Predator 2.
Stand-alone Server: Select this button if you wish to launch a Stand-alone server using your last Hosted Multiplayer settings. If you have never hosted a Multiplayer Game, we provide a default setting for you.
Note: you may also launch a Stand-alone Server from the game’s Host Game screen.
Display: Select this button if you wish to change the game’s screen resolution, color depth, or driver settings before launching the game. When you first select the display option, the game will scan your system to determine the settings that your hardware supports.
To change your settings, highlight the desired setting with your mouse. Once you have highlighted all changes you desire, hit enter or click on the OK button. You may also move from panel to panel using your TAB key and move up and down each list using your UP/DOWN keys.
Options: Select this button if you wish to alter your advanced sound and graphics settings from outside of the game or to change your command-line parameters. These options are for Advanced Users only and are primarily used for troubleshooting, they can normally be ignored.
Uninstall: Once you have installed AVP2 to your system, this button will become active. Selecting this button will uninstall AVP2 from your system.
Menu and Interface System
INTERFACE NAVIGATION
The AVP2 menus are constructed for easy mouse navigation and for simple keyboard navigation.
Interface items: In the AVP2 menus, you find five basic types of interface items: Link Text, Tab Text, List Text, Toggle Text, and Arrow Bar Text. Your choice will be accepted upon exiting the relevant menu screen.
Mouse Navigation: To navigate with the mouse, point at any text. If the text becomes highlighted, you can interact with the text.
Keyboard Navigation: Use your UP and DOWN keys to move from one active item to the next.
•For Link Text and for Tab Text items - use the ENTER key to activate the item once you have selected it.
•For List Boxes - such as your list of Saved Games - use the RIGHT and LEFT arrows to cycle up and down the list.


 Menu
Menu and
and
 Interface
 System


 5
5

• For Arrow Text items - such as your Volume Settings - use the RIGHT and LEFT arrows to increase or decrease the slider value.
• For Option Text items - such as the Game Type selection for Multiplayer - use the RIGHT and LEFT arrows to cycle through the available options.
Tab Key Shortcuts: The active items on each screen are divided into groups - i.e. on the Main screen, Single Player, Continue Game,
Multi-player, Options, and Profiles form one group while the Quit text forms another. The TAB key acts as a shortcut to select the first item in the next group.
MAIN MENU
The following options are available from the game’s Main Menu:
Single Player: Access this menu if you wish to play through the single player missions in Aliens Versus Predator 2.
Continue Game: This option is only available once you have begun playing the single player missions. It will allow you to pick up where you left off in Single Player mode by automatically reloading your last saved game.
Multiplayer Internet: Access this menu to play a Multiplayer match against other players on the Internet. Note: to play over the Internet, you must have a valid CD key.
Multiplayer LAN: Access this menu to play a Multiplayer match against other players on a Local Area Network (LAN) or on the Internet.
Options: Here you can change Display and Sound Settings, Game difficulty, and Controls.
Profile: A profile tracks the preference and game progress of a user. This includes key configuration, saved games, and progress through the single player levels. Access the Profile Menu to create a new profile, rename an existing profile, load another profile or delete a profile.
Quit: Allows you to leave the game and return to Windows.

 6
6


 Main
Main
 Menu
Menu


SINGLE PLAYER MENUS
Load Game: This menu allows you to load previously saved games including your QuickSave game and your QuickSave Archive Game. Aliens Versus Predator 2 always stores your last two QuickSaves.
Marine: This menu displays all of the Marine missions that you can currently play.
Select Mission: At first, you can only choose one mission. Each time you complete a mission, a new one will become available until you have completed the Marine story. Completed missions remain in this menu for you to play again later. However, when you replay missions, you play with default weapons, tools, and equipment. To begin, just click on the name of the mission you want to play, then select a difficulty level, and then click on Launch.
Difficulty Levels: You can select from one of four difficulty levels for each mission. Once you begin a mission, you cannot change the difficulty level without returning to the Single Player Marine screen and restarting it.
•Easy - enemies are weaker and do less damage.
•Normal - the default setting.
•Hard - enemies are stronger and do more damage. Training Messages are turned off.
•Hardcore - enemies are the same as hard; saving games is not allowed, Mission Objectives are not displayed and Training Messages are disabled.
(Note: this mode is not for the impatient or the faint of heart. You will probably not survive the first time that you play through a mission; or the second; or the third; you get the idea.)
Launch: This button launches the currently selected mission.
Aliens: This menu displays all of the Alien missions. Otherwise, the Alien menu functions just as the Marine menu do.
Predator: This menu displays all of the Predator missions. Otherwise, the Predator menu functions just as the Marine menu do.
Custom Level: Although the tools necessary to create your own level are not available in the retail version of the game, they will be available for download via the Web in the future, please refer to this site first. The Custom Level option lets you load levels that you have created or downloaded. Only worlds stored in the AVP2/AVP2/Worlds directory will be available. Note that you will have to create this directory manually. Tools will be available at http://avp2.sierra-online.co.uk


 Single
 Player
 Menus
Menus


 7
7

MULTIPLAYER MENUS
The Multiplayer Menus let you play against other players on a Local Area Network (LAN) or on the Internet. The first time you enter the Multiplayer Internet menu, you will be asked to enter your CD Key, which can be found on the cover of your game CD case. The current CD Key will always be displayed on this screen and can be updated by selecting Update CD Key from the same menu. Both the Multiplayer Internet and Multiplayer LAN menus function in the same way, with the exception of the CD Key options, which is only found in the Multiplayer Internet menu. A CD Key is not necessary when hosting or joining a LAN game.
Host Internet/LAN Games: Allows you to Host your own Multiplayer game. On the Host screen, you can select from five different Host tabs: Game, Setup, Maps, Advanced, and Player.
Launch: Once you are satisfied with your settings, use this to start your game. You can access the Launch button from any tab in the host screen.
Game Tab: This tab allows you to name your game, review your choices, and make general decisions about type, password, and server settings.
Name: Type the name of your session here.
Type: You can select Deathmatch, Team Deathmatch, Hunt, Survivor, Overrun or Evac modes.
Password: Set your password. This entry is ignored unless you click the Lock Game Check Box.
Lock Game Check Box: Click this box to enable your password. Other players must know this password to join your game.
Dedicated: If you want to launch a Stand-alone Server, set Dedicated to “Yes”. Dedicated servers provide the best game performance, but you must then join the game from a second computer.
Configurations: Click here to save and load your favorite game configurations.
Game Settings: This box displays the settings that you selected on the Setup Tab.
Advanced Settings: This box displays the settings selected on the Advanced Tab (see below).
Setup Tab: This tab allows you to customize the game mode to match your favorite style of play. Since the rules in each game mode can vary drastically, the Setup tab varies from mode to mode. Also, for each mode, the Setup Tab remembers the changes that you make - such as your favorite maps - so you don’t have to worry that your favorite Deathmatch maps will load when you switch to playing Evac or some other mode.
Setup Deathmatch and Setup Team Deathmatch:
Max Players: The total number of players you will allow to enter your game

 8
8


 Multiplayer
 Menus
Menus


Max Marines: The total number of players of Marines that you will allow to enter your game.
Max Aliens: The total number of players of Aliens that you will allow to enter your game.
Max Predators: The total number of players of Predators that you will allow to enter your game.
Max Corporates: The total number of players of Corporates that you will allow to enter your game.
Frag Limit: The level ends when any player’s frag count reaches the Frag Limit. Set this to zero for no limit.
Score Limit: The level ends when any player’s score reaches the Score Limit. Set this to zero for no limit.
Time Limit: The level ends when the Time Limit expires. Set this to zero for no limit.
Alien Lifecycle: Use this to turn Alien Lifecycle On. When Lifecycle is on, Aliens spawn into the game as facehuggers and must implant hosts to become Alien drones or Predaliens.
Game Description: This text box describes the rules of the game. See Multiplayer Tactics on page 37 for a detailed description of these game types.
Setup Hunt:
Max Players: The total number of players you will allow to enter your game.


 Multiplayer
 Menus
Menus


 9
9

Frag Limit: The level ends when any player’s frag count reaches the Frag Limit. Set this to zero for no limit.
Time Limit: The level ends when the Time Limit expires. Set this to zero for no limit.
Hunter Race: Select the Hunter race. Only Hunters can score.
Prey Race: Select the Prey Race. If one of the Prey kills a Hunter, that Prey mutates into the Hunter Race when they respawn and vice versa.
Hunters vs. Prey: Use this to set the ratio of Hunters to Prey. If the teams become uneven, an appropriate player is chosen to mutate from one race to the other.
Game Description: This text box describes the rules of the game.
Setup Survivor:
Max Players: The total number of players you will allow to enter your game.
Round Limit: This defines how many rounds take place in a match. After these rounds are completed, the player with the highest score wins.
Score Limit: When any player’s score reaches the Score Limit, a new map loads. Set this to zero for no limit.
Round Time: This sets how long each round lasts. Set this to zero for no limit.
Survivor Race: All players begin as Survivors. Survivors become Mutants in one of three ways. One, a Survivor commits suicide. Two, a Mutant kills a Survivor. Three, the Survivor is the first player to die in a round (this is called “Cutthroat Mode”). While Survivors are active in the game, they gain one (1) point per second. (Survivors don’t score while invulnerable.)
Mutate Race: Mutants try to kill all of the Survivors. Each kill earns the Mutant ten (10) points.
Game Description: This text box describes the rules of the game.
Setup Overrun:
Max Players: The total number of players you will allow to enter your game.
Round Limit: This defines the number of rounds in a match. After this number of rounds, the team with the highest score wins.
Round Time: This sets how long each round lasts. Set this to zero for no limit.
Defender Race: The Defenders win the round if any of them are alive when the Round Time expires. If the Defenders win, they get one point per surviving Defender.
Defender Lives: This sets the number of lives allowed per Defender. Once a player uses up lives, he is dead for the remainder of the round. (Starting the game uses one life.)
Attacker Race: The Attackers win the round if they kill all of the Defenders before the Round Time expires. If the Attackers win, they get one point per dead Defender.
Attacker Lives: This sets the number of lives allowed per Attacker. Once a player uses his lives, he is dead for the remainder of the round. (Starting the game uses one life.)
Game Description: This text box describes the rules of the game.

 10
10


 Multiplayer
 Menus
Menus


Setup Evac:
Max Players: The total number of players you will allow to enter your game.
Round Limit: This defines the number of rounds in a match. After this number of rounds, the team with the highest score wins.
Evac Time: This sets how long the Evac Race has to evacuate. Set this to zero for no limit. To evacuate, one of the team members must reach the evacuation point and stay there for ten (10) seconds.
Evac Race: Select the Evac Race. The Evac Race wins the round if any of them reaches the evac point and remains there for ten (10) seconds before the Round Time expires. If they succeed, they gain one point.
Evac Lives: This sets the number of lives allowed per Evac member. Once a player uses his lives, he is dead for the remainder of the round. (Starting the game uses one life.)
Attacker Race: Select the Attacker Race. The Attacker Race win the round if the Evac Race fails to evacuate. If the Attackers win, they get one point.
Attacker Lives: This sets the number of lives allowed per Attacker. Once a player uses his lives, he is dead for the remainder of the round. (Starting the game uses one life.)
Game Description: This text box describes the rules of the game.
Maps Tab: Use this tab to determine levels that you wish to use and the order in which they will be used. The available maps are listed on the left, and your selected maps are listed on the right. Maps cycle in the order that they are displayed from top to bottom. In addition, if you choose to use custom multiplayer maps, they will be available here.
Add: Simply click on the map you want to add and then click on the Add option. A new map appears at the bottom of the selected maps list.
Remove: If you need to remove a specific level from the selected maps list, just click on the map, and then click on Remove.
Add All: Use the Add All option to add all of the available levels to the bottom of selected maps list. You will notice that these appear in the same order as the available map list.
Remove All: If you wish to remove all of the levels from the selected maps list, click on Remove All.
Advanced Tab: Use this tab to alter the advanced rules or to change the default scor-
ing. Rules are found on the Advanced Tab. Scoring settings are found on the Scoring Tab.
Advanced Sub-menu: Items listed here change the basic rules of AVP2.
Player Damage Rate: Modifies the normal damage inflicted by weapons. This value is a percent, with 100 as the default (i.e. 100% of normal)


 Multiplayer
 Menus
Menus


 11
11

Location-based damage: Specifies whether location-specific damage modifiers will be used (i.e. head shots inflict greater damage than limb shots).
Friendly Fire Damage: When turned On, you will be able to injure your teammates with your own weapon fire and vice versa.
Predator Mask Loss: When turned On, headshots can knock off a Predator’s mask.
Class Weapon Sets: When this is On, Marines and Predators begin with their special Default Weapons. When this is off, Marines begin with a pistol, a knife, and a pulse rifle, and Predators begin with Wristblades and a Plasmacaster.
Host Port ID: Specify a specific port to host a server.
Server Bandwidth: This adjusts the maximum bandwidth that the server is allowed to use to send information. Choose among the default settings or select Custom to set your own.
Custom Bandwidth: When the Server Bandwidth option is set to Custom you can use this to manually fine-tune the Server Band width setting. Please note that this option only be available when the Server Bandwidth option is set to Custom.
Scoring Sub-menu: Use this to set the score awarded to a player for killing each type of character.
Player Tab: Use this tab to pick your favorite Alien, Predator, Marine and Corporate characters.
Player Name: Set your player name. By default, this matches your Profile Name.
Race Arrow Text, Character Arrow Text: Use the Race and Character Arrow Text to tell the game which character of each race you prefer to play. The race arrows switch races while the character arrows switch between characters of the same race.
Preferred Team and Character: The displayed character represents your current preference when joining a Multiplayer Game. As long as the server allows you to play as that race, you will start the game as the displayed character. In Team Deathmatch modes, this will also select your team.
Class Description: This describes the abilities of the current character.
Note on classes: The server can select whether games are played with character classes. When this setting is On, Marines and Predators start with the default weapons listed in the Class Description. When this setting is Off, Marines begin with a pistol and a knife. Predators begin with Wristblades and a Plasmacaster.
Find Internet / LAN Games: These two screens are virtually identical. Both allow you to join a Multiplayer game already in progress. The screen includes three tabs that display the available servers, offer information on specific selected servers, and allow you to change your player settings. The Find Game screen also provides the following active buttons:
Join: Once you have clicked on the server you want to join, click on Join to connect.

 12
12


 Multiplayer
 Menus
Menus


Server List Tab: This tab displays all of the servers available and information about them. The tab includes the following controls:
Refresh Server List: Clicking this icon will command the game to update the list of available servers and all related information.
Server Name Header: Lists the name of each server in a column. Select this text to sort the list alphabetically based on Server Name. When you click on a server name under this header the IP address will be displayed to the right of the Status Text.
Ping Header: Lists the ping of each server in a column. Select this text to sort the list in ascending or descending order based on ping rate.
# Header: Lists the number (#) of players on each server in a column. Select this text to sort the list in ascending or descending order based on number.
Type: Lists the type of game on each server in a column. Select this text to sort the list alphabetically based on Type (DM/Team DM/Hunt/Survivor/Overrun/Evac).
Map: Lists the current map on each server in a column. Select this text to sort the list alphabetically based on Map Name.
Join Specific IP: Use this to connect to a game at a specific IP. The IP address will then be displayed to the right of the Status Text.
Status: The Status Text - found next to the Join Specific IP button text and above the Filters - displays the status of the server search.
Filters: The Filters line at the bottom of the screen provides four text toggles that can be used to filter for games that match specific criteria.
Version: #/Any: This will restrict the list to the version you have or to any versions.
Ping: This will restrict the list to the games of less than one hundred ping (<100), less than two hundred ping (<200), or less than four hundred ping (<400). Select Any to avoid filtering for ping.
Players: This will restrict the list based on how many people are currently playing.
Any: Game contains any number of players. 1+: Game contains more than one player.
<Max: Game is not full.
Some: Game contains more than one player and game is not full.
Game Type: This will restrict the mode of game (Any/DM/Team DM/Hunt/Survivor/ Overrun/Evac).
Server Type: This restricts the type of server displayed in the lists (Dedicated or Client Hosted).
Server Info Tab: This tab is only selectable after you select a server from the server list. The tab displays information about the selected game.
General Server Info: This displays the Server Name, IP, Version, Game Type, Current Level, Number of Players, and Player Names.
Game Settings: This displays the setup information for the game.


 Multiplayer
 Menus
Menus


 13
13
Advanced Settings: changes made to the
Player Tab: The player Join Game screen is the Player Tab found
Host Game screen Changes made to one will appear on the other and vice versa.

 14
14


 Multiplayer
 Menus
Menus


OPTIONS MENUS
The options menus gives you access to the Controls screen, the Game screen, the Sound screen, and the Display screen.
Controls: Lets you customize the keyboard movement and other configurable items to your tastes. The screen contains four tabs: Assignment, Mouse, Keyboard, and Joystick. Below is a list of the controls and what they mean:
Restore defaults: Reverts all controls for all species back to the original configuration.
Assignment Tab: This tab provides various controls that you can use to customize which key corresponds to a given control. To accommodate the three species, the Keyboard Tab is further divided into Shared, Marine, Predator, and Alien tabs. Controls on the Shared Tab apply to all three species. To change a control, select the control and then press ENTER or left mouse. You will see an “=” appear and the control setting will vanish. Now, press the new key that you wish to assign to the function.
• Warning Tones: If you hear a warning tone, you know that you have assigned a key that was already in use. The old assignment has been erased automatically.
Shared Tab: The Shared Tab covers basic movement, jumping, and attacking along with a few other commands. See Default Key Configuration Chart (on page 39) for more information.
Alien Tab: The Alien Tab covers Crouching, Wall-walking, Pounce Jumping, and the Wall-walk and Crouch Toggle keys.
Marine Tab: The Marine Tab covers Marine weapons and tools, the Activate/Use key, and Crouching.
Predator Tab: The Predator Tab covers Predator weapons and tools, the Activate/use key, Crouching and Leaping keys.
Mouse Tab: This option provides various controls that you can use to customize how your mouse interacts with the game.
Always Mouse Look: The user is always able to look around with the mouse (instead of pushing a button to look around with the mouse).
Invert y axis: Toggles vertical mouse movement.
Mouse sensitivity: Controls the speed at which your view swings around in response to mouse movement.
Mouse smoothing: Scales mouse input rate for smoother or more responsive movement.
Keyboard Tab: This tab provides various controls that you can use to customize how your keyboard interacts with the game.
Normal Turn Speed: If you turn with the keyboard, this determines how fast you will turn when you are walking.
Fast Turn Speed: If you turn with the keyboard, this determines how fast you will turn when you are running.


 Options
 Menu
Menu


 15
15
 Loading...