


USER MANUAL
®

TABLE OF CONTENTS |
|
Introduction ............................................................................... |
iii |
Credits ........................................................................................ |
v |
Boeing Sikorsky RAH-66 Comanche .......................................... |
vii |
Installation & Setup .................................................................... |
1 |
Quick Start .................................................................................. |
5 |
A. Easy Flight Model ................................................................ |
5 |
B. Advanced Flight Model ........................................................ |
6 |
C. Your Comanche Checkride TUTORIAL ................................. |
8 |
Roster Screens & Player Options ............................................... |
15 |
A. The Pilot Roster .................................................................. |
15 |
B. The Duty Roster ................................................................. |
16 |
C. Menu Bar .......................................................................... |
20 |
Flying the Comanche ................................................................ |
25 |
A. How Helicopters Work ....................................................... |
25 |
B. Example of Helicopter Flight .............................................. |
29 |
C. Keyboard Command Equivalents ....................................... |
34 |
Flight Avionics ........................................................................... |
41 |
A. The Helmet Mounted Display ............................................ |
41 |
B. Multi-Function Displays (MFDs) ......................................... |
47 |
C. Targeting Procedures ......................................................... |
51 |
D. Comanche Weapon Systems ............................................. |
61 |
Playing The Simulation.............................................................. |
61 |
A. Single Player Missions ........................................................ |
61 |
B. Multi-Player War Games ..................................................... |
67 |
Technical Specifications ............................................................. |
71 |
A. Friendly Aircraft ............................................................... |
71 |
B. Enemy Aircraft ................................................................. |
73 |
C. The Air Defense Threat .................................................... |
77 |
Index ........................................................................................ |
81 |
NovaLogic Technical Support .................................................... |
83 |

I N T R O D U C T I O N
“Only Comanche has the ability to conduct lethal deep, close, and rear operations and survive while providing critical data, protection, and flexibility to forward-deployed maneuver forces.”
The Honorable Togo West, Secretary of the Army
Thank you for purchasing Comanche® Gold, the latest helicopter simulation from NovaLogic, Inc. Those of you familiar with our other Comanche products will immediately notice some significant improvements in this simulation. Because of the greater RAM and processing horsepower of today’s computers, our design team was able to do things it couldn’t do in earlier versions. Consequently, Comanche Gold looks, sounds, and plays better than ever.
We could not have achieved this level of realism without the kind assistance of some very special people. First of all, our sincere thanks go out to the men and women of BoeingSikorsky’s “First Team,” who along with a number of contractors, designed and built the Army’s most sophisticated helicopter, the RAH-66 Comanche. We would also like to thank certain members of the U.S. Army who helped us get an accurate picture of helicopter weaponry and flight tactics. For security purposes they must remain unnamed but... you know who you are.
Since NovaLogic was designing a simulation based on Sikorsky’s “baby,” it’s perhaps only natural that their engineers would take an interest in what we were doing. Early on in the process, they extended a gracious offer to come visit their facilities. We quickly accepted and in no time at all our design team was on its way to Sikorsky headquarters in Connecticut. Once there, the team spent many hours getting “up close and personal” with their state-of-the-art Comanche simulator.
In addition to flying, our design team was able to corner the experts and grill them on every last little detail. As a result of this friendly interrogation, the team members came away with a new appreciation of everything the Comanche can do. They returned to NovaLogic determined to make sure those capabilities got into the game and passed on to you. Everyone here is very pleased with the end result.
Comanche Gold features our Voxel Space® 2 graphics engine. This revolutionary technology is able to move pixels with amazing speed. It allows you to view the battlefield in fine detail. Thanks to Voxel Space 2, the campaign “worlds” have been greatly expanded. Each mission covers more than 80 square miles of the most visually satisfying territory you’ll ever see in a flight simulation.

These expanded “worlds” give you plenty of room to maneuver. That’s a good thing too. Comanche Gold’s multi-player gaming option makes things a bit crowded up there. You can fly with up to nine other players and that’s enough to give any air traffic controller nightmares. The chat mode feature lets you send text messages back and forth. You can now strategize with friends or use this option to taunt your opponents.
In addition to looking good, Comanche Gold flies more like an actual helicopter than its predecessors. The flight equations and movement physics have been almost entirely re-engineered. Aircraft and helicopters move about the “world” according to the same laws of motion and inertia that affect their real life counterparts. This simulation is so close to the real thing that we had to add in an Easy Flight Model as a learning tool. People just weren’t ready to take on the “advanced” Flight Model right away.
Your weapon systems behave realistically, too. Laser-guided missiles, like the deadly AGM-114 Hellfire, don’t follow a straight path to the designated point of impact. They pop up after launch and plunge down on their target from above, just like the real missiles are programmed to do. The trajectory of each of your 20 mm shells is calculated separately; as is each piece of debris that comes flying off of exploding objects. Watch out. Those shards are not just cute visual effects. They’re deadly. They can damage or destroy anything they happen to strike.
Comanche Gold also sounds as good as it looks. From the low pitch whir of your rotors to the ripping sound of shells leaving your gun, the audio quality of this simulation puts you in the action. Call in an artillery strike then sit back and listen as the fire mission is executed. You’ll hear the characteristic whump-whump-whump of 155 mm shells as they begin to impact the target. Authentic cockpit chatter, recorded by actual helicopter pilots, accompanies you on every mission. You can even hear the splash effect when your rounds hit water instead of terra-firma. Cruise past a tree and you can almost hear birds chirping.
It is a difficult task, flying a helicopter, especially one as technologically advanced as the Comanche. That’s why this simulation comes with both an Easy and Advanced Flight Model. We recommend that novice pilots spend time flying the Easy model first. This manual contains a Quick Start tutorial that lets you jump right in. It also introduces you to some of the finer points of rotary wing flight.
When you’ve finished flying the training missions or you think you’re ready for a greater challenge, place your name on the Pilot Roster. From this moment on you’re a member of Griffon Squadron, the Army’s premier Comanche fighting force. This small but highly specialized unit can be deployed anywhere in the world on a moment’s notice. Its members are on call 24 hours a day, seven days a week. Once your name is added to the squadron’s duty roster, prepare yourself for some intense action.
|
C R E D I T S |
Programmed by |
Technical Consulting |
Kyle Freeman |
Simon Bradley |
|
Andy Johnson |
Game Design |
Major Allen Sakcriska, |
Kyle Freeman |
U.S. Army Retired |
Executive Producer |
Art Direction |
John Garcia |
Keith Rust |
Project Management |
Art |
David Seeholzer |
Daniel Cabuco |
|
Jhoneil Centeno |
Technical Management |
Lawrence Kevin |
John Butrovich |
Craig Marschke |
|
Mike Maza |
Programming Support |
Rod Parong |
John Bojorquez |
Jon Tando |
Randy Casey |
Darren Thorne |
Mark Davis |
Jason Tull |
David King |
|
Eric Milota |
Additional Art |
Jim Ratcliff |
Timothy Higgins |
Kent Simon |
Keith Rust |
Associate Producer |
Animation |
Wes Eckhart |
Dean Fowler |
Mission Design |
Digital Video Processing |
Keith Butler |
Daryl Kimoto |
Dan Chang |
|
Mat Jennings |
Audio Director |
David King |
Tom Hays |
Steve McNally |
|
David Merrick |
Sound Effects |
Todd Owens |
and Digital Editing |
Troy Sheets |
Richard Adrian |
Alicia Taylor |
Kyle Freeman |
|
Scott M. Gilman |
|
Tom Hays |
Music Composed by
James Donnellan
Scott Gilman
Tom Hays
Rik Schaffer
Voices
Valerie M. Arem
CWO Keith Bauer
Shawn Burke
Sgt. Oscar Galvin, USMC-R
Cpt. Denise D. Howard
Tim Knight
Tony Kotelenets
CWO Howard Lewis
Mike Maza
Capt. Christopher McCarthy, USMC
CW2 Jamie Tardif
1Lt. Miguel Torrente
CWO James T. Ybarra
Manual and Packaging Layout
Brett Wooldridge
Lilliam Dollenmayer
QA Management
Tim Knight
Lead Testing
Tony Kotelenets
Testing
David Arranaga
Fred Beers
Daniel Constant
John Graham
Tim Knight
Kevin White
Technical Support
T.J. Busko
Ron De Los Santos
Chris Lauw
Doug Rothman
Computer Maintenance
Glenn Kronick
Special Thanks
Jon Hausam
Kris Kraves
James Lamorticelli
Jackie Lay
John Loose at Dolby Laboratories
Lee Milligan
Lisa Nielsen
David Pollack
Matthew Ruhl
Tara Stivers
Rozita Tolouey
Karly Young
Boeing Sikorsky First Team
“Always Prepared”
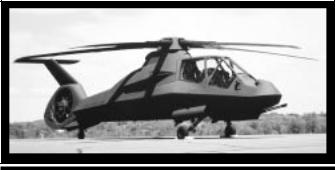
BOEING SIKORSKY RAH-66 COMANCHE
As a member of the Army’s elite Griffon Squadron, you’re expected to know your Comanche inside and out. The following overview should be considered “required reading” for new pilots.
The Boeing Sikorsky RAH-66 is the U.S. Army’s concept of what a 21st century reconnaissance/attack helicopter should be. It is fast, light-weight, and packs a powerful punch. The Comanche is also quiet, hard to spot visually, and nearly invisible to enemy radar. Even if detected, it can take repeated hits from triple-A fire that would blast lesser helicopters from the sky. It’s superbly designed to survive on the modern battlefield.
The Army has sought to equip it with the very latest high-tech electronic surveillance and targeting systems. Its avionics are designed so they share maximum commonality with the USAF’s F-22™ Raptor™. There’s something else the Comanche shares with the F-22: low observable stealth characteristics.
One axiom to arise out of late 20th century warfare is the idea that, “if you can be seen, you can be hit; and if you can be hit, you can be killed.” The military has taken this lesson to heart. It has learned that its weapon systems can no longer be protected by giving them thicker armor or faster engines. These days the only real way to safeguard anything is to make it difficult to detect. The enemy can hardly destroy something it doesn’t even know is around.
If there is such a thing as a stealth helicopter, the Comanche is it. Consider the ways a helicopter can be spotted. An enemy force can see it with the naked eye, hear it with the naked ear, or detect it using sophisticated means such as IR sensors, radar and radar detectors. The Comanche has been designed to be a true stealth helicopter. It has features which minimize or eliminate each of the enemy’s normal means of detection.
Because the Comanche pilot is equipped with a low visibility night piloting sensor system, he can operate the helicopter equally well in day or night conditions. By choosing to operate at night, the Comanche cuts down on the enemy’s ability to detect it visually. Even in daylight, the Comanche is nearly impossible to see from a distance. It is only 43 feet long (compared to the length of the Apache at 51 feet) and only 8 feet wide when viewed head-on. Its small fuselage can easily be overlooked.
The Comanche is also very hard to hear. The enclosed (shrouded) tail rotor significantly reduces noise by deflecting the air flow away from the main rotorwash. This eliminates a large portion of the slap-slap-slap noise created by most helicopters. In fact, Sikorsky engineers consider the Comanche to be two times quieter than the Apache or Kiowa.
Another principle means of detection is radar. The Comanche presents a very small radar cross-section because of its precisely shaped fuselage. Its radar return is estimated to be 600 times smaller than that of the Apache. Weapons are stored internally so that the Comanche presents a smooth external appearance. This allows the Comanche to deflect radar waves away from it rather than reflect them back to a radar receiver.
It is equally hard to detect through infrared means. The Comanche’s exhaust is cooled and diffused before being released into the surrounding atmosphere. The materials used to construct the fuselage absorb heat rather than reflect it. As a result, the Comanche’s IR signature is half that of the Apache.
Of course the best way to remain hidden from enemy view is to stay as far away from that enemy as possible. Because of its sophisticated long range targeting sensors, there’s less of a need for the Comanche to venture close to the enemy. In short, the Comanche survives in combat because of its ability to destroy the enemy before the enemy knows it's there.
Surviving in combat is one thing, being effective in battle is another. Not only is the Comanche hard to detect, it is able to dish out punishment like no other ordinary reconnaissance helicopter. By relying on a variety of weapons, the Comanche can take out both air and ground targets.
Its two side-mounted weapon storage bays each have three hardpoints. Each hardpoint can mount one AGM-114 Hellfire, or two AIM-92 Stingers, or a single rocket pod of four Hydra 70 FFARS. In addition, the Comanche carries a three-barrel 20 mm cannon with 500 rounds of ammunition. The cannon is located in a turret beneath the cockpit and is slaved to the pilot’s helmet.
When stealth becomes secondary to firepower, the Comanche is able to mount two wing-like EFAMS (External Fuel and Armament Management System). Each of these non-lifting “wings” has four hardpoints which, like the internal hardpoints, can mount one Hellfire or two Stingers per point. The EFAMS use the same fourrocket pods that are also used internally. Four of these four-rocket pods can be mounted on each EFAMS for a total of sixteen rockets.
The Comanche’s five-bladed main rotor is powered by two LHTEC T800-LHT-801 turboshafts each rated at 1,380 horsepower. These engines give the RAH-66 a maximum speed approaching 175 knots and a flight endurance of almost three hours of non-stop flight. The Comanche can self-deploy 1300 nautical miles to a combat area when fitted with external fuel tanks. In emergencies, up to eight Comanches can be carried inside a single C-5A Galaxy transport by simply removing the main rotor. These eight helicopters can be ready for battle within 30 minutes of touch-down.
According to the General Accounting Office, “the Comanche will be the most computerized, software intensive Army helicopter ever built. The Army estimates that about 1.4 million lines of code are required to perform and integrate mission critical functions... this compares to about 573,000 lines of code for the upgraded Apache attack helicopter with (Longbow) fire control radar.”
The Comanche will be replacing helicopters that will be thirty or more years old by the year 2000. When it finally enters service early in the next decade, the Comanche will be the most sophisticated weapon system the Army possesses. It will also be the only helicopter with stealth characteristics that allow it to go where it needs to go and survive where it needs to survive.
1 CHAPTER
INSTALLATION & SETUP
Welcome to Comanche Gold. This chapter will help you get the program installed on your computer, and will walk you through the configuration of your system. The last part of this chapter is a Quick Start section for those of you with significant flight sim experience, or for those who want to jump right in and learn by doing.
INSTALLING COMANCHE AND STARTING PLAY
In order to play Comanche Gold, you must first install the game files onto your computer’s hard drive. You should also calibrate your joystick before beginning play, and there are a series of game options offered by the program itself that you should consider.
GAME INSTALLATION
Your gateway to installing and running Comanche Gold is the AutoRun program. AutoRun will automatically load itself and run each time you insert the Comanche CD into your CD drive.
THE AUTORUN PROGRAM
Before you begin installing the game, close all programs that your computer may be currently running. The installation program requires all your computer’s resources. Then:
1)Place the game CD into your CD ROM drive and close the drive door. The AutoRun program will now take over. If you have turned off the Autorun feature or if Autorun fails to launch automatically, double-click on the "My Computer" icon on your desktop and then double-click on your computer's CD-ROM drive letter. This should launch Comanche Gold's Autorun.
2)Click the mouse on one of the menu choices, or type the letter corresponding to the underlined hot-key. The AutoRun menu gives you the following choices:
Start Comanche— Select this option to play the simulation. You will first have to install the program to your hard drive.
Install Comanche— Select this option to install the simulation onto your hard drive. You must install the game before you can play.
1


 CHAPTER 1
Start Mission Editor—Select this option to run Comanche Gold Mission Editor. You will first have to install the game on your hard drive.
Install Armored Fist 2 Demo— Click here to have a demo version of Armored Fist 2 installed on your hard drive.
Install F-22 Raptor Demo— Click here to have a demo version of F-22 Raptor installed on your hard drive.
Explore CD— This CD also contains additional data and program files not accessible through the Autorun screen. Use this option to install the Adobe Acrobat Reader or programmable joystick files.
View Readme— The Readme file contains the latest technical and gamerelated information about the program.
Install DirectX— Make this selection to install this version of DirectX. You must have DirectX 5.0 or greater installed on your machine to play Comanche Gold.
Exit— Exits the AutoRun program.
When you are ready, select Install Comanche.
INSTALLING Comanche Gold GAME FILES
Use your mouse to make appropriate selections, or press the letter of the underlined hot key.
1)At the beginning of the installation program you are given the opportunity to select a destination folder for the game. A default destination (C:\Program Files\Novalogic\Comanche Gold) is typed in the window for you. Press the Enter key to select the default destination. Otherwise, select your own folder name. If the folder you specify does not already exist on your hard drive, the Install program will create it for you. You will be prompted to choose which install size you want. The Large Install is a complete multiplayer station installation allowing multiplayer gameplay without multiple CD's. The Small Install is the minimum install for balanced hard drive and CD-ROM usage.
2)If there is enough free hard drive space at the destination site, the program will copy the files from your Comanche Gold CD ROM. An on-screen progress meter displays the completion percentage as the program transfers the files.
3)The install procedure automatically adds a NovaLogic folder to your Windows® 95 Start Menu under the Programs heading. A Comanche Gold sub-folder within the NovaLogic folder contains an application short-cut icon for the game. The install also places a Comanche Gold shortcut icon on your desktop. Additional shortcuts for the Readme file, Mission Editor and Mission Editor Readme file are also placed in the Start Menu in the Comanche Gold sub-folder.
4)If your system does not already have DirectX 5.0 or greater installed, you will need to install it now. Select Install DirectX 5.0 from the AutoRun program, then follow the on-screen instructions.
5)You will need to restart your computer to activate DirectX 5.0 before you can play Comanche Gold.
2
CALIBRATING THE JOYSTICK
You will need to calibrate your joystick in Windows® 95 for it to work properly in Comanche Gold. Follow these steps:
1.Click on the Start button at the far left of the Taskbar at the bottom of the screen.
2.Highlight Settings, then select Control Panel from the menu.
3.Double-click on the Game Controllers icon.
4.Select your joystick from the list of game controllers you have installed, then follow the on-screen instructions to calibrate your joystick.
STARTING THE GAME
1.If your computer is already turned on and the Comanche Gold CD is in the CD drive, double-click on the Comanche Gold shortcut icon, or go to the directory containing the simulation and double-click on the Comanche Gold program icon.
2.If your computer is on, but the program CD is not in the drive, insert the Comanche Gold CD into the drive and select Start from the AutoRun screen. If no screen appears when you insert the CD, double-click on the My Computer icon on your desktop, then double-click on the icon for your computer’s CD drive. You can then choose Start from the AutoRun screen. You may also use your computer’s Browse function to locate and launch the program.
3.Enjoy!
CONFIGURING THE GAME FOR PLAY
Comanche Gold offers the player a variety of configuration options for customizing control of the game and allowing you to take advantage of joysticks and other controllers. These configuration options are accessed in the menu bar. Chapter 3, section C discusses the menu bar in detail; however, here is a brief run-down on the options which are available.
The menu bar can be accessed from the main menu or while playing a mission by pressing “ESC”. Use the “left” or “right” keys to select between menus, use the “up” and “down” keys to highlight options from within each menu and press “ENTER” to select a highlighted option. When you are finished making changes, press “ESC” again to remove the menu bar.
Game Menu
The game menu has different options for mission playbacks, ending missions and exiting the game.
Control
The control menu provides options for using joysticks and other game control devices. You can enable the currently configured Windows joystick as well as throttle controller, foot pedals, etc. You can also customize some flight characteristics in this menu.


 1 CHAPTER
3


 CHAPTER 1
Options
The options menu allows you to choose between the Easy and Advanced Flight Models as well as enable or disable certain individual Comanche flight characteristics.
Detail
The detail menu contains options for controlling the graphical detail and volume settings in the game. Most of the options in this menu have variable settings. To change the settings for an option, highlight it using the “up” and “down” keys, then press the “+” or “-” keys to increase or decrease the setting level.
Video
The video menu lets you specify a video mode or window size, switch between full-screen and windowed mode and adjust the gamma of the display.
Comanche rearms and refuels in under 15 minutes.
4
QUICK START
For those players who want to jump right in and start flying, this portion of the manual is for you. It’s designed to get you into the game quickly yet alleviate your frustration when things start happening and you can’t figure out why.
Comanche Gold comes with two separate flight modes: an Easy Flight Model and an Advanced Flight Model (which is as close as most of us will ever come to flying the real thing). This chapter contains a detailed discussion of both.
Also included in this chapter is a checkride tutorial which takes you step by step through the first training mission: Fort Rucker. This tutorial is designed to get you off the ground in a hurry. It is not intended to explain everything to the nth degree. It may be necessary, even with the tutorial, to fly awhile... pause the game and read a bit... then resume flying again. In any case, the tutorial teaches one aspect or feature of the game at a time.
A. EASY FLIGHT MODEL
It will be stated and restated throughout this manual that learning to fly a helicopter is not an easy thing to do. Add to this the fact that sometimes bad people will be shooting at you and you can see you’re going to need all the help you can get, at least initially. The Easy Flight Model is set up to allow you to toggle its features On and Off. This way you can customize the Flight Model to suit your individual taste (not to mention skills).
The Easy Flight Model features are listed under the OPTIONS topic on the Menu Bar. You can either toggle the features On collectively or pick and choose among them. With practice you will come to depend less and less on the simplicity of the Easy Flight Model. When you find this happening you can simply begin toggling the Easy Flight Model features Off.
1. FANTAIL® MIXED WITH CYCLIC
The uniqueness of the tail rotor design is evident by the fact that it is a registered trademark of Sikorsky. This Easy Flight Model feature links your tail rotor (FANTAIL®) to your cyclic control so that your flight maneuvers are properly coordinated. Normally, a helicopter turns as a result of cyclic-induced bank. The tail rotor helps smooth the turn by yawing the nose of the helicopter in the proper direction. With this feature engaged, the tail rotor automatically adds the necessary yaw motion for you.
 2 CHAPTER
5


 CHAPTER 2
Using this feature makes it difficult, if not impossible, to fly laterally (sideways). Because it automatically links your tail rotor to your cyclic, this option will cause your helicopter to turn rather than maintain its heading and fly sideways. Weigh this negative carefully when deciding whether or not to use this option.
2. LIMIT CYCLIC RANGE (Ä) TOGGLE
Your Comanche is capable of some pretty radical maneuvers but as a new pilot you should probably refrain from performing them. It’s too easy to get yourself into trouble.
The Limited Cyclic Range feature acts as a governor on your cyclic stick. It prevents you from performing extreme pitch and bank maneuvers by limiting its gimbals. Most of the time you can fly with no problem using this feature. The movement of the cyclic, even when limited by this feature, gives you a healthy operating envelope.
Emergencies will arise from time to time that require you to operate outside of this normal flight envelope. The Limit Cyclic Range feature can be overridden for brief periods of time by using the Äkey. Simply hold down the Ä key while giving the helicopter cyclic input and this feature will be momentarily disengaged. Releasing the Äkey re-engages the Limit Cyclic Range feature.
B. ADVANCED FLIGHT MODEL
Once you’ve mastered the Easy Flight Model, the next step is to tackle the Advanced Flight Model. This model introduces you to some new control options and features that give you a much more realistic sensation of actual flight.
Like the previous Flight Model, the Advanced Flight Model is set up to allow you to toggle its various features On and Off. With practice you will come to depend less and less on these features. The following Advanced Flight Model features are listed under the OPTIONS topic on the Menu Bar. You can either toggle these features On collectively or pick and choose among them.
The Advanced Flight Model uses both of the Easy Flight Model options plus the following:
1. LIMIT COLLECTIVE TO AVOID OVER-TORQUE
Just as the Limit Cyclic Range feature kept you from performing extreme pitch and bank maneuvers, this feature prevents you from inadvertently damaging your engines by over-torquing them. Normal collective settings produce engine torque readings from 0 to 100. It is possible, even desirable in certain circumstances, to exceed this for short periods of time.
Allowing your engine torque to exceed 100 is known as over-torquing the engine. This technique is useful in emergencies but it places a great deal of stress on the engines. Over time the accumulated stress will permanently damage the engines. The Limit Collective option automatically steps in and keeps this from happening. Note that it does not prevent you from overtorquing the engine, it just keeps you from doing it long enough to cause damage.
6

2. HOVERHOLD (J)
Helicopters don’t fly as fast or as high as fixed wing aircraft. They can’t carry nearly the same amount of cargo and are expensive to maintain. So with all these negatives, why have them around in the first place? It’s because helicopters can do a number of things that other aircraft can’t do.
Helicopters are blessed with the ability to hover and fly vertically which has enormous battlefield practicality. This ability to hover, or maintain a stationary position, allows helicopters to perform tasks that require precise maneuvering. They can take-off and land within confined areas that would otherwise be prohibited to fixed-wing aircraft. It also comes in handy when masking themselves behind cover. Helicopters are able to pop-up and attack targets at just the right moment.
As useful as hovering is, it is one of the more difficult flight maneuvers to master. There is a vertical and a horizontal component you need to be concerned with. In order for a helicopter to remain in a hover, its thrust and lift must be in equal balance to its weight and drag. Maintaining this balance in the old days used to be a real chore and pilots got tired after just a few minutes. Fortunately, the Comanche, with its fly-by-wire flight controls, is a more sophisticated bird.
The Comanche is equipped with a HoverHold mode that automatically maintains a hover for you. To activate HoverHold, press the J key toggle. When activated, you’ll notice the appearance of four dots arranged in a diamond shape on the HMD. This indicates that HoverHold will be engaged anytime you meet the necessary criteria.
In order to engage HoverHold, your current speed (in any direction) must be below 10 knots. Look at the four HoverHold dots on the HMD. The acceleration cue on the tip of the velocity vector must be positioned inside the dots for HoverHold to engage. To maintain HoverHold, you must refrain from giving any cyclic input and your airspeed must remain below 10 knots.
While HoverHold is engaged, your helicopter will maintain its current position with regard to lateral drift. You can yaw the aircraft, using the tail rotor controls, without kicking out of HoverHold. HoverHold is just like cruise control when it comes to disengaging it. Simply move your cyclic in any direction and you seamlessly kick yourself out of HoverHold mode.
HoverHold does not maintain altitude for you but this is a good thing. It leaves you free to move up and down vertically while remaining in place. Besides taking-off and landing, HoverHold is particularly useful when it comes to popping up from behind cover, looking around for targets, then settling back down.
3. VERTICAL STABILIZER (V-STAB)
Maintaining a steady altitude will no doubt prove challenging to new pilots. To assist you, your helicopter has a Vertical Stabilizer (V-STAB) option that makes it easier and more intuitive to control your altitude.
V-STAB is automatically turned on if you are playing using the Easy Flight Model. If you are flying with the Advanced Flight Model, V-STAB can be turned
 2 CHAPTER
7


 CHAPTER 2
on or off from the Options menu. Keep in mind that the following description always applies in the Easy Flight Model, but only when V-STAB is enabled in the Advanced Flight Model.
Without V-STAB, you have direct control of the Comanche’s collective. Increasing collective increases lift, decreasing it decreases lift. Without V- STAB, in order to maintain a constant altitude, you must constantly adjust your collective to compensate for other factors which affect it such as pitch and ground effect.
When V-STAB is enabled the collective controls your helicopter somewhat differently. When your collective is “centered” (set to 50% by pressing the 5 key or putting the throttle controller into the center position), V-STAB attempts to maintain the current altitude, compensating for factors such as pitch and ground effect as well as possible. V-STAB then lowers the helicopter if you apply less than 50% collective, and raises it if you apply more than 50%.
C. YOUR COMANCHE CHECK RIDE TUTORIAL
All new pilots must prove their mastery of a particular aircraft before being allowed to fly it in combat. One way this is done is through the use of check rides. Check rides are just like the driving portion of the test you took when you first learned to drive the family car. Remember how nervous you were the first time you had to parallel park in front of the testing proctor? Well, this check ride won’t be that bad. Your instructor isn’t such a bad guy. At least he won’t chew your head off if you make a mistake. Just listen to what he has to say and follow along in the manual, you’ll do fine.
Your check ride, entitled Fort Rucker, happens to be the very first mission under the heading Training Flights. Here’s how you get there. You must first install the simulation on your machine. Assuming you followed the installation and set-up instructions in the previous chapter, you’re ready to go on your first flight. Helicopter veterans call this your “cherry hop”.
Ready- The first thing you see when entering the game is the Pilot Roster screen. There will be a list of default pilot names already on the roster. To use one of the default pilots, simply use the ¬ë keys to scroll the selection bar up and down the menu, then press the © key when you decide on one you like. To enter in a new name, press the ÿ key and type in a new name. Press the © key when you are done. This takes you to the pilot’s individual Duty Roster.
Set- Now that you have accessed your pilot’s Duty Roster, you’ll see a list of game options. This tutorial is the very first training mission so again, use the ¬ë arrow keys to scroll the selection bar to Training Flights. Press the © key.
Go- Find the mission entitled Fort Rucker. It should be the very first mission on the list. Press the © key and stand-by while the mission loads.
The Mission Briefing- Before every mission, you receive a quick mission briefing. These briefings are designed to explain the purpose and objective of the flight. You are given a description of your ordinance load-out as well as a mission map which outlines your flight path. Important points of interest are
8

also noted on your mission map as waypoints. Sometimes these waypoints will just be used as navigation aids, other times that will be used to mark the location of specific objects.
Before taking-off on a mission, it's helpful to take a moment and look at each of the waypoint map icons so that you know what to expect. When you’re satisified that you know what you need to know, go fly the mission.
TRAINING MISSION 1: FORT RUCKER
1)As this training mission begins, you are seated in the front seat of your Comanche RAH-66. Listen as the soothing voice of your flight instructor welcomes you to Fort Rucker. He’ll be seated in the CP/G’s (Co-Pilot/ Gunner) seat behind you throughout the flight. This mission is
not timed so there is no need to hurry. If necessary, freeze the simulation in place by pressing the ∏ key. Press the ∏ key again when you want to resume play.
∏Consider this your PANIC button. Feel free to halt the simulation at any time.
2)The view you are currently looking at is known as the Forward Cockpit View. You can access this view anytime by pressing the Á key. In front of you are two small cockpit monitors known as Multi-Function Displays
(MFDs). These monitors display various flight and weapons system information but they are not important at the moment. We’ll get to them a little later.
3)Right now, direct your attention to the white symbology that appears all over the screen. This symbology is actually being displayed on the visor of your helmet. This piece of Army hardware is known as the Helmet Mounted Display (HMD). No matter which direction you look, this information will always be positioned in front of your eyes. It lets you see outside the helicopter without taking your eyes off of crucial flight data.
4)Your engine will start spooling up (turning) your main rotor as the mission begins. They are not turning fast enough to cause you to lift off yet so don’t panic. Not enough engine torque is being produced to get you off the ground.
5)While you're getting settled in, take a moment to look around. Use the
(Left Cockpit View) £key to look left, now press the (Right Cockpit View)
¢key to look to your right. As you can see, the white HMD symbology
stays with you regardless of where you look. Now return to the Forward Cockpit View by pressing the Á key.
6)You are all set to take-off. To rise up off the ground you must first change the pitch of your rotor blades so that they give you more lift. You change the pitch of your blades by using what’s called the collective. Your collective is controlled by the row of numbered keys on your keyboard. (It can also be controlled by a throttle device if present.)
 2 CHAPTER
9
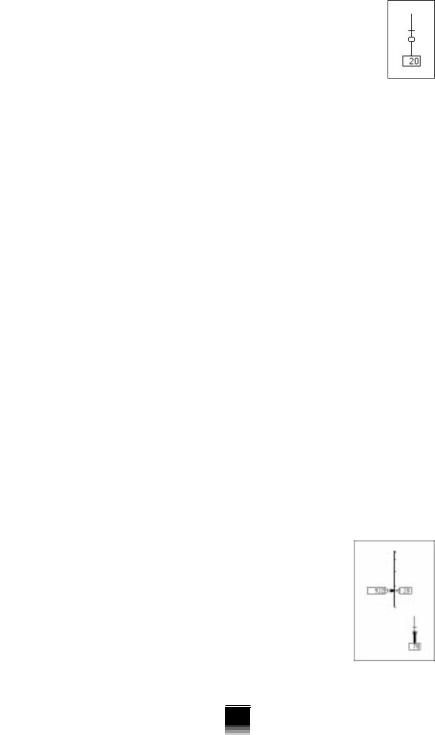
7) The collective is set to No collective at the beginning of the mission. No collective is set by pressing the ~ key. Direct
|
|
|
your attention to the engine torque indicator symbology in |
|
|
|
the lower left corner of your Helmet Mounted Display (HMD). |
|
|
|
You’ll see that even with a setting of No collective, the engine |
|
2 |
|
is producing a torque indication of 20. Keep an eye on this |
|
|
||
|
|
gauge. The relationship between collective and engine torque |
|
|
CHAPTER |
|
|
|
|
is important to your understanding of flying a helicopter. |
|
|
|
|
|
|
|
8) |
Increase your collective setting by pressing the 1 key. |
|
|
|
You’ll notice an increase in engine torque and a thick bar begins to rise |
|
|
|
up the stem of the torque indicator. You still aren’t producing enough lift |
|
|
|
to get off the ground, however. Go ahead and increase the collective a |
|
|
|
little more by pressing the 2 key. |
|
|
9) |
Still not enough, eh? Okay, go ahead and push the 4 key. Bingo. |
|
|
|
You’re flying. The helicopter should rise to an altitude of about 75 feet and |
then settle back a bit. Don’t be alarmed. The helicopter won’t crash. It’s being suspended on a cushion of air referred to as the In Ground Effect. Notice the power bar on the torque indicator has risen up the stem almost to the bottom of the tiny circle. This indicates that you almost have enough torque to maintain a hover outside of the In Ground Effect. More on that later.
10) You still don’t have enough altitude to safely clear all the nearby towers and buildings. Press the 6 key to add more collective. A collective setting of 6 gives you more than enough lift to begin climbing. You don’t want to climb too high, however.
11) Take a look at the Above Ground Level (AGL) altitude indicator. This digital indicator is calibrated in feet. When it reaches a reading of 80 (80 feet), press the (Lock Current Altitude) K key.
12) Becuase you locked in the altitude, your Comanche will seek to maintain this altitude above ground level for the rest of the mission. We may want to change this later but for the time being leave the V-STAB feature engaged.
13) Wow, after all that it’s finally time to transition from a hover into forward flight. Whereas your collective controls the vertical aspect of helicopter flight, your cyclic stick controls flight in the horizontal axis. Although cyclic control is usually input using a joystick, you can also use the four directional arrow keys on your keyboard or numbered keys on the keypad to perform the same function.
14) To begin moving forward, press the ¬ key. This will pitch the nose of your helicopter downward and cause you to begin moving forward. Because the V-STAB feature is engaged even though you dip the nose of the helicopter, and it looks like you should be entering a dive, you will remain at 80 feet. Notice the number increase inside the tiny rectangle on the right side of your HMD. This is your groundspeed indicator. It is calibrated in knots (nautical miles per hour) and tells you how fast you are traveling over the terrain outside.
10

15) Your instructor asks that you proceed to the mission start point. The start point for this mission is waypoint 1. Waypoint 1 is located approximately 2900 meters away, bearing 225º. (In the upper left corner of the HMD
you’ll see the waypoint indicator and distance to waypoint readout.) |
|
|
|
16) You are moving forward on a heading of 175º. In order to reach your first |
2 CHAPTER |
|
|
|
|||
waypoint, you’ll have to turn a little to the right. You can change your |
|
|
|
heading using the cyclic control by pressing the ä key or by using the |
|
|
|
tail rotor Sto yaw the nose of the helicopter. Notice your heading change |
|
|
|
occurring on the magnetic tape indicator. |
|
|
|
17) There is an inverted V symbol halfway between the 22 and 23 on the |
|
|
|
magnetic heading indicator. This inverted V is known as a waypoint caret. |
|
|
|
Its position on the heading tape indicates that you must fly a heading of |
|
|
|
225º. Turn or yaw so that the waypoint caret is positioned directly under |
|
|
|
your heading indicator. |
|
|
|
18) So far so good. You should now be en-route to your first waypoint, flying |
|
|
|
a heading of 225º at an altitude of 80 feet. Your HMD should now be |
|
|
|
displaying a symbol that looks something like a lollipop with the number |
|
|
|
1 inside. This symbol is known as a waypoint stake. The bottom of the |
|
|
|
waypoint stake points to the actual position of the waypoint on the |
|
|
|
ground. Continue flying toward it. |
|
|
|
19) Upon reaching the first waypoint, your instructor should congratulate |
|
|
|
you on your navigation skills. You’ll notice that the waypoint stake has |
|
|
|
disappeared and that the waypoint caret has moved to a different |
|
|
|
position on the magnetic heading tape. It is now indicating the position |
|
|
|
of waypoint 2. |
|
|
|
20) Straight ahead you’ll notice a little valley. Slow down to about 30 knots |
|
|
|
by flaring the helicopter (pitching the nose up). You can do this by |
|
|
|
pressing the |
key or pulling back on your joystick. |
|
|
21)Just ahead is waypoint 2. This waypoint notes the position of a tower and some oil pumps. Use this waypoint as a nav aid. Begin a gentle turn to the right once you reach the tower.
22)Now you should see a lollipop indicating the position of waypoint 3. This waypoint indicates the position of a group of fuel tanks. Your instructor will direct you to try a little target practice and rip ‘em up with your 20 mm cannon. Continue moving slowly forward until you have the tank farm in sight.
11


 CHAPTER 2
23)In order to hit the fuel tanks you must first target them using your Target Acquisition and Designation System
(TADS). To target an object, press the ©key. If there is a clear line-of-sight (LOS) between you and the target, a
Target Designator (TD) box symbol will be superimposed around the object (in this case a fuel tank).
24)Now that you have a TD box around one of the fuel
tanks, you can “open up” on it. To ready the cannon for firing, press the Z key. This is called placing the
weapon “in priority”. You’ll see the word CANNON appear in the lower left corner of the screen along with a box containing the number of cannon rounds
you have remaining. To fire the cannon, press the or 5key on the keypad. You’ll see tracer rounds leave your helicopter and hopefully impact the target. (When you initially begin a mission, the default weapon in priority will be the cannon.)
25)Once you have destroyed a fuel tank, press the © key or  key to target another one. Continue to press the © key or  key until you
have targeted and destroyed all the fuel tanks at waypoint 3. Good shooting!
26)Let’s test your nerves a bit. The next leg of the mission takes you through a narrow canyon pass. Are you ready? Good... let’s do it. With your altitude locked at 80 feet, you should be able to fly under the bridge. To fly over it, simply add additional collective.
27)These canyons are tricky to fly but ...you were the one who wanted to be a Comanche pilot! Comanche units only take the best. Prove you’re the best by making it through in one piece. Up ahead you'll see the waypoint stake indicating the position of waypoint 6.
28)Located at waypoint 6 is a Forward Area Rearming Point (FARP). The Army will have established FARPs in some of your missions as a means of rearming your Comanche close to the action. Landing on the tiny raised FARP platform takes a little skill, but it’s worth it if you’re running low on ammunition.
29)This training mission does not require you to land at this FARP unless you want to. You may choose to bypass the FARP altogether and continue on to waypoint 7. If you do decide to practice landing at this FARP, we recommend that you pause the simulation at this point and read the section on landing in Chapter 4: Flying the Comanche. Pay particular attention to the collective setting information and associated landing symbology presented in that section.
30)Waypoint 7 is an ammo dump. Advance on the ammo dump slowly and get set to blast it with 70 mm rockets.
12
31) Place your rockets “in priority” by pressing the X key. |
|
|
|
You’ll see a new I-beam symbol appear. This is the aiming |
|
|
|
pipper used with rockets. This symbol is actually known |
|
|
|
as the Rocket Steering Cue but we'll refer to it as the I- |
|
|
|
beam aiming pipper while you are in training. |
|
|
|
32) Since rockets are unguided, you must pitch and bank the helicopter so |
CHAPTER |
|
|
|
|||
that the I-beam aiming pipper is positioned over the target. To fire the |
|
||
rockets, press the ©key or Âkey. Continue to press the ©key or |
|
|
|
Âkey until you have targeted and destroyed all the targets within the |
2 |
|
|
ammo dump. |
|
||
|
|
||
33) Once you have destroyed some of the ammo dump targets, your first |
|
|
|
training mission is complete. Press the §key when prompted to end the |
|
|
|
mission and receive a debriefing. That wasn’t so bad , was it? Think you |
|
|
|
can do it again? Great. Get ready for the next training mission. |
|
|
|
|
|
|
|
|
|
|
|
|
|
|
|
|
|
|
|
Comanche is a formidable attack platform as well as an unequalled reconnaissance asset.
13

14

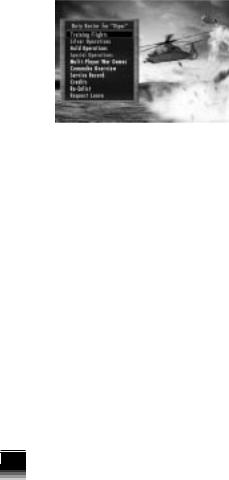
ROSTER SCREENS & PLAYER OPTIONS
A. THE PILOT ROSTER
The Pilot Roster is your launching point into the simulation. Think of it as Griffon Squadron’s “ready-room”. The Pilot Roster has space for up to ten (10) different pilots. They stay there undisturbed until you call upon them to perform a mission.
By separating your pilots in this manner, Comanche Gold allows you to have multiple careers going on at the same time. For example, pilot X can be occupying one slot on the roster (and undertaking training missions) while pilot Y may be off somewhere “on campaign” fighting for his or her country.
Aside from just being a starting point, the main purpose of the Pilot Roster is to give you a quick way of creating or removing pilots from the game.
As you might imagine, the Army frowns on letting unidentified people fly their aircraft; therefore, you are required to select a pilot from the Pilot Roster before proceeding any further.
1.SELECTING A PILOT FROM THE ROSTER
a)Use the ‘ keys to move the selection bar up and down the list of names on the Pilot Roster.
b)When you have positioned the selection bar underneath the name of the pilot you wish to use, press the © key. The Duty Roster of the pilot you
select now appears.
2.ADDING AND DELETING PILOTS
a)Adding a pilot to the Pilot Roster is easy. Position the selection bar on an available slot. It may be a blank slot or it may contain the name of a pilot you wish to remove from the Pilot Roster.
b)Press the ÿ key. At the cursor prompt, type the new pilot’s name as you wish it to appear on the roster. Press the © key. The new pilot’s name
now appears in the slot. This pilot is now ready for action.
 3 CHAPTER
15
Note that because the Pilot Roster only has slots for ten pilot names, it may be necessary for you to delete an existing pilot if there are no empty slots available.
 CHAPTER 3
B. THE DUTY ROSTER
1. SELECTING A DUTY ROSTER OPTION
A pilot’s Duty Roster is designed to help you manage that pilot’s career throughout the game. As soon as a pilot name is added to the Pilot Roster, that pilot is immediately issued his or her own personalized Duty Roster. This roster remains with the pilot until retirement (voluntary or otherwise).
Each Duty Roster contains a number of menu options. To select an option, use your ¬ë keys to move the selection bar up and down the Duty Roster menu. Once the selection bar is situated underneath the desired option, press the © key.
2. DUTY ROSTER OPTIONS
The Duty Roster is arranged to make it easy for you to jump right in and begin play. Your options are:
a) Training Flights
Training flights are designed to familiarize you with the Comanche and its systems in a relatively safe environment. This way you can
devote your full attention to flying. In the beginning, it will be hard enough just to keep from smacking into things.
Use these training hops to “get the feel” of the helicopter before you venture out to do battle. The training program consists of five missions that have you flying over a variety of terrain types. Take the time to fly each one. You know the old saying, “More sweat in training, less blood in battle.” Make your mistakes here, not in combat.
b)Silver Operations (Campaigns)
Campaigns consist of multiple missions which are referred to as “operations”. There are five separate operations: one training and four combat operations. Each one has its own unique terrain features and new set of challenges. Tactics that work well against enemy troops in one operation may not work as well in another. Your objective is to complete all the missions in an operation without getting hurt in the process.
16
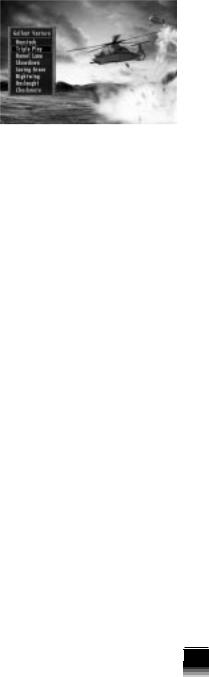
Operation: Gallant Venture
Griffon Squadron has been sent to the Black Sea port of Odessa as part of an American peace-keeping effort. This move has been made in response to Russian attempts to destabilize the Ukrainian Republic. The United Nations has asked that both sides put away their guns before somebody reaches for their nukes. It doesn’t look as if that’s going to happen, though. Columns of Russian tanks are reportedly heading for both Kiev and Odessa. Griffon Squadron is tasked with carrying out missions ranging from escorting friendly forces to destroying enemy armor and command centers. The gently rolling hills of the Ukrainian steppe are beautiful to look at but they conceal trouble. You and the Griffons have a lot of
work to do if a crisis is to be averted.
Operation: Frozen Friendship
Griffon Squadron has been sent to a lonely group of Forward Operating Bases (FOBs) deep inside Siberia. Rebel insurgents have seized a number of Russian military bases north of Vladivostock. Along with scores of armored vehicles and tons of supplies, these rebel forces have also captured several nuclear warheads. Griffon Squadron is to assist friendly forces belonging to the Russia Federation in putting down the rebellion and recapturing these bases. Although Siberia is known for its sub-zero temperatures and snowcovered landscape, with you and Griffon Squadron on the scene, things are about to heat up.
Operation: Firm Resolve
This operation takes place right in our neighborhood on the lovely island of Cuba. Communism collapsed in Cuba with the death of Fidel Castro in 2003. Bitter fighting has broken out on the island as various political groups seek to fill this vacuum of power. One of the more popular (and ruthless) groups to make a play for the island is the “Nuevo Dia” (New Day) party. It turns out, however, that this group is merely a front for the drug cartels of South America. With billions of dollars in financing, Nuevo Dia has bought itself an island and an army. You and the Griffons have been sent to Cuba as a show of America’s determination to see democracy prevail. It’s a good thing, too. This campaign begins with an all-out enemy assault on our base at Guantanamo.
Operation: Desert Endeavor
Iraqi forces have taken over Jordan and installed a puppet government in Amman. Saudi Arabia and the United States have once again formed a Coalition to oust the would-be conquerors. There will be no Desert Storm this time, however. Public opinion won’t permit us to send large numbers of troops back into the desert. America’s role in this new alliance is limited to a small, but highly sophisticated contingent of troops. The force includes the Army’s latest M1A2 Abrams tank, the F-22s of Storm Squadron, and of course, the Comanches of Griffon Squadron. You and the rest of the Griffons
 3 CHAPTER
17

 CHAPTER 3
have been sent to a remote base inside Saudi Arabia near the Jordanian border. Here you will immediately begin flying missions designed to evict Iraqi troops from the Hashemite Kingdom.
c) Gold Operations
Operation: Swift Justice
Cambodia’s democratic leadership has been ousted. A military junta seized power in a bloody coup promising to improve economic conditions throughout the country. The country quickly became a major drug haven acting as a warehousing and shipment center for the Golden Triangle. Enormous financial gain began flowing to the junta. Instead of improving conditions for the Cambodian people, the junta has used their financial resources in a massive militarization of the country. Now this force is threatening to destabilize the region as the junta attempts to expand their influence outside of Cambodia’s borders. No longer able to ignore the junta, the Association of Southeast Asian Nations (ASEAN) has appealed to the UN for help. Griffon Squadron has been assigned the preeminent U.S. role in a joint UN/ASEAN mission to restore democracy to Cambodia. In addition, the National Command Authority believes this is an excellent opportunity to cripple the flow of drugs from this region.
Operation: Providence
U. S. intelligence agencies have noticed an increase in illicit arms sales throughout Southeast Asia and Eastern Europe. The small nation of Kyrgyzstan appears to be the base of operations for the arms dealers. Its isolated territory, weak government, and close proximity to both Russian and Chinese arms sources have made it an ideal location for an organized group of these dangerous entrepreneurs, with ties to several radical groups throughout the region. Weapons used by the Cambodian junta were traced to this area as terrorist activities have increased across the globe. One way to deal with these organizations is to destroy their sources of weapons and ammunition. Griffon Squadron will participate in a covert operation to shut down these arms dealers.
Operation: Far Reach
Documents captured in Kyrgyzstan confirm the presence of a large terrorist training network operating in Mongolia. Its remote location and sparse population have made it an ideal hiding place… until now. Operating from mobile camps close to the Chinese border, terrorist units have begun to skirmish with Chinese forces. In addition to their extensive training and logistics camps inside Mongolia, it is rumored that they also have begun to construct facilities capable of manufacturing chemical and biological weapons. Eager to prove to the world that it is ready to be a partner in world peace efforts, China has asked to assist the U.S. in a covert operation to eliminate this threat to world stability.
Campaign: Kingpin
Ushering in a new era of cooperation, simultaneous Japanese and Russian commercial projects have completed bridge construction linking their countries with Sakhalin Island. In anticipation of commercial expansion,
18

they have established a jointly owned commercial space port on the island. Taking advantage of this era of rampant growth, terrorist elements have subverted part of the less populated southern region of Sakhalin. Within this area they have established some manufacturing facilities, which intelligence believes they are using to manufacture chemical and biological weapons. An analysis of financial records captured in Mongolia has revealed an extensive investment in aerospace technology, including the commercial spaceport. Captured documents indicate the terrorists will use the launch facilities to introduce biochemical weapons into the atmosphere. It is imperative that their operations are quickly neutralized. Russia and Japan have asked the United States to assist them in reaching this goal.
Operation: Southern Star
Over the past few years a radical separatist sect has seized control of an outlying island area of Indonesia. Since the death of their president in the late 1990s, Indonesia has been wracked with dissension and the government has been paralyzed with indecision. Using the wealth from the petroleum resources in the area, the separatist sect has positioned itself to take control of the entire country. They also pose a threat to the Philippine Islands. In addition the sect is holding a group of technical workers hostage. These workers are being forced to maintain the sect’s petroleum operations. Indonesia has requested U. S. aid in dealing with this threat. Buoyed by the recent success of their covert operations, Washington has concluded a secret agreement with Indonesia to intervene. Seeking to avoid imposition of the War Powers Act, the President has ordered that this operation must be completed within 90 days. Griffon Squadron is tasked to work with a joint Army/Marine task force dispatched to carry out the operation.
d) Special Operations
This set of operations is unique to Comanche Gold. It consists of one campaign of missions personally designed for Comanche by Major Allen Sakcriska, former Army Training and Doctrine Liaison to Boeing/Sikorsky Helicopter.
e) Load User Mission
Use this option to load and play a mission created using the Comanche Gold Mission Editor. The Mission Editor is automatically installed onto your hard disk when you install the game. To run the Mission Editor or view the documentation, select one of the shortcuts from the Start menu.
The User’s Manual for the Mission Editor exists on the Comanche Gold CD as an Adobe Acrobat file. If you do not already have an Acrobat Reader installed, you will find an installable version in the ACROBAT directory on the CD. Note: Acrobat always starts up showing the files which are in its own directory. To view the manual you will need to look in the root directory of the Comanche Gold CD for the file named EDITOR.PDF.
 3 CHAPTER
19

 CHAPTER 3
f) Multi-Player War Games
This multi-player aspect of Comanche Gold is covered in the B: MultiPlayer Missions section of Chapter 6: Playing the Simulation. Consult this chapter for complete information concerning the functionality of the multiplayer options.
g) Comanche Overview
Receive a technical specification and performance summary of your Comanche. Note that the facts and figures shown here reflect ideal operating conditions. Once in the field, the individual performance of your helicopter will vary according to local weather, maintenance, and a myriad of other factors.
h) Service Record
Access this pilot’s official Service Record.
i) Credits
View game credits.
j) Re-Enlist
Return to the Pilot Roster.
k) Request Leave
Exit the simulation.
C. MENU BAR
The Menu Bar gives you the ability to make changes to a variety of game options while the game is in progress. To access the Menu Bar, simply press the § key. It will appear along the top of your screen and pause the game.
There are five menu topics on the Menu bar: Game, Control, Options, Detail, and Video. Use the ñä keys to highlight the desired topic.
As you highlight each of the topics, a drop menu will appear underneath. It contains your topic options. Use the ‘keys to move the gray selection bar and highlight a desired option.
The © key and act as a select/de-select toggle. Once a menu option is selected, the green square pertaining to that option is filled in. (An open square will change to a solid green square.) You may de-select an option simply by pressing the © key or again.
20

1. GAME
The menu options under this topic give you a quick way of getting in and out of the simulation.
a) Exit Menu
Selecting this option removes the menu bar and is the same as pressing ESC.
b) Restart Mission
If you get the feeling that a mission just is not going your way, select this option to restart the mission over from scratch.
c) Mission Playback
The first few minutes of each Comanche mission are recorded for posterity. If you would like to see this replay, select this option. Mission Playback recordings are not saved however. Once you start a new mission, the old recording is erased.
You may change the view of the action at any time by pressing a view key as you would normally. View changes are saved to the Mission Playback so that the next time you watch the recording you’ll see it with the view changes you made previously.
Another neat feature of Mission Playback is the ability to stop the recording at any point and resume the action live. To do this, press the ŒTkeys. This lets you pick up the action and fly the mission as you would normally.
d) Takeover Playback
This option is only available while a mission playback is in progress. Select this during playback to take over control and play out the remainder of the mission. Note that although you have taken over control in the middle of a mission playback, you can still select Mission Playback again to play back the most recent version.
e) About Comanche
Select this option to view the Comanche Gold version information.
f) End Mission
This menu option ends the mission currently being played. You will immediately view the post-mission debriefing screen where your performance for that mission will be summarized. From there, press “1” to restart the mission, “2” to exit the mission or “3” to play back the mission.
g) Exit Game
Select this option to immediately exit from the game entirely.
 3 CHAPTER
21
 Loading...