


Table of Contents
Introduction . . . . . . . . . . . . . . . . . . . . . . . .8
Section One: Technical . . . . . . . . . . . . . . . .9
Setup and Installation . . . . . . . . . . . . . . . . . . . . .10 The ReadMe file . . . . . . . . . . . . . . . . . . . . . . . . .10
Section Two: The Getting Started Guide . . . .11
The Game Tutorial . . . . . . . . . . . . . . . . . . . . . . . . . . . . . .12
Overview . . . . . . . . . . . . . . . . . . . . . . . . . . . . . . . . . . . . . .12
Starting Off . . . . . . . . . . . . . . . . . . . . . . . . . . . . . . . . . . . .12
Game Controls . . . . . . . . . . . . . . . . . . . . . . . . . . . . . . . .20
Getting Around . . . . . . . . . . . . . . . . . . . . . . . . . . . . . . . .22
Warning Red Text . . . . . . . . . . . . . . . . . . . . . . . . . . . . . .23
Skip Time . . . . . . . . . . . . . . . . . . . . . . . . . . . . . . . . . . . .25
Accelerate Time . . . . . . . . . . . . . . . . . . . . . . . . . . . . . . . .25
Crew Management . . . . . . . . . . . . . . . . . . . . . . . . . . . . . . .26
Returning Home . . . . . . . . . . . . . . . . . . . . . . . . . . . . . . . . .28
Mission Debriefing . . . . . . . . . . . . . . . . . . . . . . . . . . . . . . .28
Saving the Game . . . . . . . . . . . . . . . . . . . . . . . . . . . . . . . .29
The Training Missions . . . . . . . . . . . . . . . . . . . . . .29
Taxi and Take Off . . . . . . . . . . . . . . . . . . . . . . . . . . . . . . . .30
Approach and Landing . . . . . . . . . . . . . . . . . . . . . . . . . . . .30
Feathering/Restarting an Engine . . . . . . . . . . . . . . . . . . . . . .31
Bombing – Good Conditions . . . . . . . . . . . . . . . . . . . . . . . . .31
Bombing – Poor Conditions . . . . . . . . . . . . . . . . . . . . . . . . .32
Gunnery . . . . . . . . . . . . . . . . . . . . . . . . . . . . . . . . . . . . . .34
The Quickstart Missions . . . . . . . . . . . . . . . . . . . |
. 34 |
Limping Home . . . . . . . . . . . . . . . . . . . . . . . . . . . . . . . . . |
.35 |
Attack of the Axis . . . . . . . . . . . . . . . . . . . . . . . . . . . . . . . |
.35 |
Where are the ‘Little Friends’? . . . . . . . . . . . . . . . . . . . . . . |
.35 |
Opportunity for the Axis . . . . . . . . . . . . . . . . . . . . . . . . . . . . |
35 |
Fighter sweep over France . . . . . . . . . . . . . . . . . . . . . . . . . . |
35 |
Defence of the Reich . . . . . . . . . . . . . . . . . . . . . . . . . . . . . |
36 |
Section Three: Reference . . . . . . . . . . . . . . |
37 |
The Main Menu Screen . . . . . . . . . . . . . . . . . . . .38

Player Options Menu . . . . . . . . . . . . . . . . . . . . . .39
Controls Menu . . . . . . . . . . . . . . . . . . . . . . . . . . . . . . . . . .39
Realism/Difficulty Menu . . . . . . . . . . . . . . . . . . . . . . . . . . .40
Graphics Menu . . . . . . . . . . . . . . . . . . . . . . . . . . . . . . . . . .42
Sound Menu . . . . . . . . . . . . . . . . . . . . . . . . . . . . . . . . . . .43
Load/Save Menu . . . . . . . . . . . . . . . . . . . . . . . . . . . . . . . . .43
The Game Options Screen . . . . . . . . . . . . . . . . . . |
44 |
The Campaign Game . . . . . . . . . . . . . . . . . . . . . . . . . . . . . . |
44 |
The Bomber Commander Campaign . . . . . . . . . . . . . . . . . . |
44 |
The Squadron Commander Campaign . . . . . . . . . . . . . . . . . |
44 |
The Single Mission Game . . . . . . . . . . . . . . . . . . . . . . . . . . |
45 |
The Quickstart Mission . . . . . . . . . . . . . . . . . . . . . . . . . . . |
45 |
The Training Mission . . . . . . . . . . . . . . . . . . . . . . . . . . . . |
45 |
Play a Historical Mission . . . . . . . . . . . . . . . . . . . . . . . . . |
45 |
Bombardment Division/Group Screen . . . . . . . . . . . . . . . . . . . |
45 |
Campaign Start . . . . . . . . . . . . . . . . . . . . . . . . . . . . . . . . |
47 |
Customise Bomber Screen . . . . . . . . . . . . . . . . . . . . . . . . . . |
47 |
New Bomber Name . . . . . . . . . . . . . . . . . . . . . . . . . . . . . |
47 |
Choose Nose Art . . . . . . . . . . . . . . . . . . . . . . . . . . . . . . . |
47 |
Bomber Crew Screen . . . . . . . . . . . . . . . . . . . . . . . . . . . . . . |
47 |
Squadron Bomber Names/Nose Art . . . . . . . . . . . . . . . . . . . . |
48 |
Squadron Crew Screen . . . . . . . . . . . . . . . . . . . . . . . . . . . . |
49 |
The HQ Corridor . . . . . . . . . . . . . . . . . . . . . . . . .49
The Operations Room . . . . . . . . . . . . . . . . . . . . . . . . . . . . .49 The Map – Planning the Mission . . . . . . . . . . . . . . . . . . . .50 Map Controls . . . . . . . . . . . . . . . . . . . . . . . . . . . . . . . .50 The Map Icons . . . . . . . . . . . . . . . . . . . . . . . . . . . . . . .50 The Map Symbols . . . . . . . . . . . . . . . . . . . . . . . . . . . . .51 Setting up a Reconnaissance Mission . . . . . . . . . . . . . . .51 Setting up a Bombing Mission . . . . . . . . . . . . . . . . . . . .52 Target Intelligence . . . . . . . . . . . . . . . . . . . . . . . . . . .52 The Primary Target . . . . . . . . . . . . . . . . . . . . . . . . . .52 The Secondary Target . . . . . . . . . . . . . . . . . . . . . . . . .52 Setting Waypoints . . . . . . . . . . . . . . . . . . . . . . . . . . .53 Intelligence File – Target Details . . . . . . . . . . . . . . . . . . . .53 The Blackboard . . . . . . . . . . . . . . . . . . . . . . . . . . . . . . . .54 Outside – Inspect the Bombers . . . . . . . . . . . . . . . . . . . . .54 Bomber Clipboard . . . . . . . . . . . . . . . . . . . . . . . . . . . .54 Mechanical File . . . . . . . . . . . . . . . . . . . . . . . . . . . . . .55 Crew Management File . . . . . . . . . . . . . . . . . . . . . . . . .55 Crew Replacement File . . . . . . . . . . . . . . . . . . . . . . . . .55 Next Bomber . . . . . . . . . . . . . . . . . . . . . . . . . . . . . . . .55

Clipboard – Choose Bombers for the Mission . . . . . . . . . . . .56 Ordnance – Select Munitions for the Mission . . . . . . . . . . . .56 Blackboard – View Mission Summary . . . . . . . . . . . . . . . . .57 The Squadron Commander’s Office . . . . . . . . . . . . . . . . . . . .57 In-tray ‘Read New Mail’ . . . . . . . . . . . . . . . . . . . . . . . . . .57 Out-tray ‘Read Old Mail’ . . . . . . . . . . . . . . . . . . . . . . . . . .57 Crew Information File . . . . . . . . . . . . . . . . . . . . . . . . . . . .57 Bomber Information File . . . . . . . . . . . . . . . . . . . . . . . . . .57 Medical File . . . . . . . . . . . . . . . . . . . . . . . . . . . . . . . . . .58 Squadron History Files (The Bookcase) . . . . . . . . . . . . . . . .58 Inspect the Bombers (Window) . . . . . . . . . . . . . . . . . . . . .58 The Bomber Commander’s Office . . . . . . . . . . . . . . . . . . . . .58 In-tray ‘Read New Mail’ . . . . . . . . . . . . . . . . . . . . . . . . . .58 Out-tray ‘Read Old Mail’ . . . . . . . . . . . . . . . . . . . . . . . . . .58 Crew Information File . . . . . . . . . . . . . . . . . . . . . . . . . . . .58 Inspect the B-17 . . . . . . . . . . . . . . . . . . . . . . . . . . . . . . .58 The Mission Briefing Room . . . . . . . . . . . . . . . . . . . . . . . . .59 View Route Map . . . . . . . . . . . . . . . . . . . . . . . . . . . . . . .59 View Reconnaissance Film . . . . . . . . . . . . . . . . . . . . . . . .59 Read Mission Briefing . . . . . . . . . . . . . . . . . . . . . . . . . . .60 Beginning the Mission . . . . . . . . . . . . . . . . . . . . . . . . . . .60
Inside the Aircraft . . . . . . . . . . . . . . . . . . . . . . . .60
Your Mission Responsibilities . . . . . . . . . . . . . . . . . . . . . . . .60 The Squadron Commander . . . . . . . . . . . . . . . . . . . . . . . .60 The Bomber Commander . . . . . . . . . . . . . . . . . . . . . . . . .60 Starting Off . . . . . . . . . . . . . . . . . . . . . . . . . . . . . . . . . .61 The Crew . . . . . . . . . . . . . . . . . . . . . . . . . . . . . . . . . . . . . .61 Crew Portrait Panel (pop up menu) . . . . . . . . . . . . . . . . . . .61 Crew Position Panel (pop-up menu) . . . . . . . . . . . . . . . . . .62 Crew Views Panel (pop-up menu) . . . . . . . . . . . . . . . . . . . .62 External View . . . . . . . . . . . . . . . . . . . . . . . . . . . . . . . .63 Compartment View . . . . . . . . . . . . . . . . . . . . . . . . . . . .63 Action View . . . . . . . . . . . . . . . . . . . . . . . . . . . . . . . . .63 Instrument View . . . . . . . . . . . . . . . . . . . . . . . . . . . . . .63 Window View . . . . . . . . . . . . . . . . . . . . . . . . . . . . . . . .63 The Pilot and Co-Pilot . . . . . . . . . . . . . . . . . . . . . . . . . . . . .63 The Navigator . . . . . . . . . . . . . . . . . . . . . . . . . . . . . . . . . .65 The Bombardier . . . . . . . . . . . . . . . . . . . . . . . . . . . . . . . . .67 The Engineer/Top Turret Gunner . . . . . . . . . . . . . . . . . . . . . .68 The Radio Operator . . . . . . . . . . . . . . . . . . . . . . . . . . . . . . .69 The Gunners (Ball Turret, Waist 1 and 2, Tail) . . . . . . . . . . . . .70 Compartment Selection (pop up menu) . . . . . . . . . . . . . . . . .71

Section Four: The Training Schools . . . . . . .73
An Introduction to the Basics of Flight . . . . . . . . . .74 Flying School (Pilot and Co-Pilot) . . . . . . . . . . . . . .78
Control Keys . . . . . . . . . . . . . . . . . . . . . . . . . . . . . . . . . . |
.78 |
Pilot’s and Co-Pilot’s Instrument Panel . . . . . . . . . . . . . . . . |
.82 |
The Take Off . . . . . . . . . . . . . . . . . . . . . . . . . . . . . . . . . . . |
83 |
Starting your Engines . . . . . . . . . . . . . . . . . . . . . . . . . . . . |
85 |
Taxiing . . . . . . . . . . . . . . . . . . . . . . . . . . . . . . . . . . . . . . |
86 |
The Pilot Helper . . . . . . . . . . . . . . . . . . . . . . . . . . . . . . . |
87 |
Getting into the Air . . . . . . . . . . . . . . . . . . . . . . . . . . . . . |
87 |
Climbing . . . . . . . . . . . . . . . . . . . . . . . . . . . . . . . . . . . . |
88 |
Levelling the B-17 . . . . . . . . . . . . . . . . . . . . . . . . . . . . . . |
89 |
Trimming and Cruising . . . . . . . . . . . . . . . . . . . . . . . . . . . |
89 |
Turns . . . . . . . . . . . . . . . . . . . . . . . . . . . . . . . . . . . . . . . |
90 |
Stalls and Spins . . . . . . . . . . . . . . . . . . . . . . . . . . . . . . . |
91 |
Forming Up . . . . . . . . . . . . . . . . . . . . . . . . . . . . . . . . . . . . |
91 |
Flying a Mission . . . . . . . . . . . . . . . . . . . . . . . . . . . . . . . . . |
91 |
The Waypoints . . . . . . . . . . . . . . . . . . . . . . . . . . . . . . . . |
91 |
The Initial Point . . . . . . . . . . . . . . . . . . . . . . . . . . . . . . . |
91 |
Flying Over the Target . . . . . . . . . . . . . . . . . . . . . . . . . . . |
91 |
The Rally Point . . . . . . . . . . . . . . . . . . . . . . . . . . . . . . . . |
92 |
The Return Home . . . . . . . . . . . . . . . . . . . . . . . . . . . . . . |
92 |
Getting Lost . . . . . . . . . . . . . . . . . . . . . . . . . . . . . . . . . . |
92 |
Feathering the Engine(s) . . . . . . . . . . . . . . . . . . . . . . . . . . |
92 |
Engine Fire Extinguishers . . . . . . . . . . . . . . . . . . . . . . . . . |
93 |
War Emergency Power . . . . . . . . . . . . . . . . . . . . . . . . . . . |
93 |
Lock Out AI Engine Control . . . . . . . . . . . . . . . . . . . . . . . . |
93 |
Landing the B-17 . . . . . . . . . . . . . . . . . . . . . . . . . . . . . . . . |
93 |
Pre-landing Checks . . . . . . . . . . . . . . . . . . . . . . . . . . . . . |
93 |
Pilot Checks . . . . . . . . . . . . . . . . . . . . . . . . . . . . . . . . . . |
93 |
The Traffic Pattern . . . . . . . . . . . . . . . . . . . . . . . . . . . . . . |
94 |
Pilot Helper . . . . . . . . . . . . . . . . . . . . . . . . . . . . . . . . . . |
94 |
The Final Approach . . . . . . . . . . . . . . . . . . . . . . . . . . . . . |
94 |
The Landing Roll . . . . . . . . . . . . . . . . . . . . . . . . . . . . . . . |
94 |
Taxi to Hardstand . . . . . . . . . . . . . . . . . . . . . . . . . . . . . . |
94 |
Bombardier School . . . . . . . . . . . . . . . . . . . . . . .95
Bombardier – General Principles . . . . . . . . . . . . . . . . . . . . . .95
Bombing Factors . . . . . . . . . . . . . . . . . . . . . . . . . . . . . . . .96
The Bomb Run . . . . . . . . . . . . . . . . . . . . . . . . . . . . . . . . . .97
Salvo Switch . . . . . . . . . . . . . . . . . . . . . . . . . . . . . . . . . .98
Intervalometer . . . . . . . . . . . . . . . . . . . . . . . . . . . . . . . . .98

Searching for the Target . . . . . . . . . . . . . . . . . . . . . . . . . .98 Bombing Results . . . . . . . . . . . . . . . . . . . . . . . . . . . . . . .99 The Chin Turret . . . . . . . . . . . . . . . . . . . . . . . . . . . . . . . .99
Navigator School . . . . . . . . . . . . . . . . . . . . . . . . .99
Pilotage . . . . . . . . . . . . . . . . . . . . . . . . . . . . . . . . . . . . . .99
Dead Reckoning . . . . . . . . . . . . . . . . . . . . . . . . . . . . . . . .100
The Navigator’s Map . . . . . . . . . . . . . . . . . . . . . . . . . . . . .100
Map Controls . . . . . . . . . . . . . . . . . . . . . . . . . . . . . . . . . .100
The Map Icons . . . . . . . . . . . . . . . . . . . . . . . . . . . . . . .101
The Map Symbols . . . . . . . . . . . . . . . . . . . . . . . . . . . . .101
Re-setting Waypoints . . . . . . . . . . . . . . . . . . . . . . . . . . .102
Navigation Realism . . . . . . . . . . . . . . . . . . . . . . . . . . . .102
The Drift Meter . . . . . . . . . . . . . . . . . . . . . . . . . . . . . . . .102
Engineer School . . . . . . . . . . . . . . . . . . . . . . . .103
Fuel Transfer . . . . . . . . . . . . . . . . . . . . . . . . . . . . . . . . . .103
Radio Operator School . . . . . . . . . . . . . . . . . . . .104
The Radio . . . . . . . . . . . . . . . . . . . . . . . . . . . . . . . . . . . .104
Messages Inward Log . . . . . . . . . . . . . . . . . . . . . . . . . . . .104
Messages Outward Log . . . . . . . . . . . . . . . . . . . . . . . . . . .104
Gunnery School . . . . . . . . . . . . . . . . . . . . . . . . .105
Gunner Skills . . . . . . . . . . . . . . . . . . . . . . . . . . . . . . . . . .106
Machine Guns . . . . . . . . . . . . . . . . . . . . . . . . . . . . . . . . .106
Gunsights . . . . . . . . . . . . . . . . . . . . . . . . . . . . . . . . . . . .106
The Clock System of Defence . . . . . . . . . . . . . . . . . . . . . . .106
The Zone Firing System . . . . . . . . . . . . . . . . . . . . . . . . . . .107
Sighting and Firing . . . . . . . . . . . . . . . . . . . . . . . . . . . . . .107
Red Text Warning . . . . . . . . . . . . . . . . . . . . . . . . . . . . . . .107
Unjamming Machine Guns . . . . . . . . . . . . . . . . . . . . . . . . .108
Ammo . . . . . . . . . . . . . . . . . . . . . . . . . . . . . . . . . . . . . . .108
Section Five: Crew/Bomber Management . . .109
Moving Crew to New Positions . . . . . . . . . . . . . . .110
Red Text Warning . . . . . . . . . . . . . . . . . . . . . . . . . . . . . . .111
Injured Crew . . . . . . . . . . . . . . . . . . . . . . . . . . .111
First Aid . . . . . . . . . . . . . . . . . . . . . . . . . . . . . . . . . . . . .111
Panic . . . . . . . . . . . . . . . . . . . . . . . . . . . . . . . . . . . . . . .111
Repairing items . . . . . . . . . . . . . . . . . . . . . . . . .111 Fighting Fires . . . . . . . . . . . . . . . . . . . . . . . . . .112 Baling Out . . . . . . . . . . . . . . . . . . . . . . . . . . . .112

Bomber Management . . . . . . . . . . . . . . . . . . . . .112
External Views . . . . . . . . . . . . . . . . . . . . . . . . . . . . . . . . .112 Flight . . . . . . . . . . . . . . . . . . . . . . . . . . . . . . . . . . . . . . .113 Formation . . . . . . . . . . . . . . . . . . . . . . . . . . . . . . . . . . . .113 Accelerate Time (Home) . . . . . . . . . . . . . . . . . . . . . . . . . . .113 Decelerate Time (End) . . . . . . . . . . . . . . . . . . . . . . . . . . . .113 Skip Time (Return/Enter) . . . . . . . . . . . . . . . . . . . . . . . . . .113
Mini-Time Skip . . . . . . . . . . . . . . . . . . . . . . . . . . . . . . .113 Pause Simulation (Pause/Break) . . . . . . . . . . . . . . . . . . . . .114 Jump to Other Bombers . . . . . . . . . . . . . . . . . . . . . . . . . . .114 Aircraft Select Pop-up Menu . . . . . . . . . . . . . . . . . . . . . . .114 Emergencies . . . . . . . . . . . . . . . . . . . . . . . . . . . . . . . . . .115
Red Text Warnings . . . . . . . . . . . . . . . . . . . . . . . . . . . . .115 Engine Fire Extinguisher . . . . . . . . . . . . . . . . . . . . . . . . .115
Mission Debriefing . . . . . . . . . . . . . . . . . . . . . . .115
Medals, Promotions and WIA . . . . . . . . . . . . . . . .116
Section Six: Fighter School . . . . . . . . . . . .117
Fighter Cockpit Instruments . . . . . . . . . . . . . . . .118
Single–engine Aircraft Controls . . . . . . . . . . . . . . . . . . . . . .118 Twin-engine/jet Aircraft Controls . . . . . . . . . . . . . . . . . . . . .119 Compass . . . . . . . . . . . . . . . . . . . . . . . . . . . . . . . . . . .120 Artificial Horizon . . . . . . . . . . . . . . . . . . . . . . . . . . . . . .120 Airspeed Indicator . . . . . . . . . . . . . . . . . . . . . . . . . . . . .120 Tachometer . . . . . . . . . . . . . . . . . . . . . . . . . . . . . . . . . .120 Altimeter . . . . . . . . . . . . . . . . . . . . . . . . . . . . . . . . . . .120 Oil Pressure Gauge . . . . . . . . . . . . . . . . . . . . . . . . . . . .121 Engine Temperature Gauge . . . . . . . . . . . . . . . . . . . . . . .121 Fuel Gauge . . . . . . . . . . . . . . . . . . . . . . . . . . . . . . . . . .121 Manifold Pressure Gauge . . . . . . . . . . . . . . . . . . . . . . . .121 Rate of Climb Indicator . . . . . . . . . . . . . . . . . . . . . . . . .121 Fighter Controls . . . . . . . . . . . . . . . . . . . . . . . . . . . . . . .121 Take Offs . . . . . . . . . . . . . . . . . . . . . . . . . . . . . . . . . . . . .122 Changing Fighters . . . . . . . . . . . . . . . . . . . . . . . . . . . . . . .123 Navigation to Target . . . . . . . . . . . . . . . . . . . . . . . . . . . . .123 Escort Fighters . . . . . . . . . . . . . . . . . . . . . . . . . . . . . . .123 Luftwaffe . . . . . . . . . . . . . . . . . . . . . . . . . . . . . . . . . . .123 Combat . . . . . . . . . . . . . . . . . . . . . . . . . . . . . . . . . . . . . .123 Landings . . . . . . . . . . . . . . . . . . . . . . . . . . . . . . . . . . . . .124
The Fighter Escort . . . . . . . . . . . . . . . . . . . . . . .124
P-38 Lightning . . . . . . . . . . . . . . . . . . . . . . . . . . . . . . . . .125
P-47 Thunderbolt . . . . . . . . . . . . . . . . . . . . . . . . . . . . . . .126
P-51 Mustang . . . . . . . . . . . . . . . . . . . . . . . . . . . . . . . . .127

The Luftwaffe . . . . . . . . . . . . . . . . . . . . . . . . . .128
Attacking the Bombers . . . . . . . . . . . . . . . . . . . . . . . . . . .128
FW 190 . . . . . . . . . . . . . . . . . . . . . . . . . . . . . . . . . . . . .129
Bf-109 (Me-109) . . . . . . . . . . . . . . . . . . . . . . . . . . . . . . .130
Me-262 . . . . . . . . . . . . . . . . . . . . . . . . . . . . . . . . . . . . . .131
Section Seven: Customer Information . . . . .141
Infogrames Customer Service Numbers . . . . . . . . . . . . . . . .142
Credits . . . . . . . . . . . . . . . . . . . . . . . . . . . . . . . . . . . . . .143

Introduction
They called it ‘The Mighty Eighth’, the US Army Air Force 8th Bomber Command. The force that flew daylight missions over occupied Europe, striking at specific military targets with pinpoint accuracy. The main drawback was that enemy fighters and flak concentrations could clearly see them in daylight. The solution was massive defensive bomber formations that had to fight their way there and fight their way back. B-17 Flying Fortress ‘The Mighty Eighth’ recreates that era, in a Second World War simulation that gives you total control of every aspect of the strategic air war (including the opposing fighters).
You’ll learn to fly the legendary B-17G ‘Flying Fortress’ and feel the power and grace of the massive four-engine bomber. You can also be one of the escort fighter pilots and fly the P-38 ‘Lightning’, the P-51 ‘Mustang’, or the P-47 ‘Thunderbolt’. In addition, you can take on the role of the Luftwaffe and jump into the cockpit of the German interceptors: the Bf-109, FW-190, and the jet powered Me-262!
This is the ultimate flight crew simulation, as you become an expert at all ten B-17 crew positions allowing you to take off and land the massive bomber, shoot from all turret positions, navigate across a realistically mapped Europe, send radio messages, carry out bomb runs, release the bombs and watch them hit the target!
B-17 Flying Fortress ‘The Mighty Eighth’. The complete WW2 strategic air war flight simulation
8

Section One: Technical

Specification
Make sure the specification shown on the B-17 Flying Fortress ‘The Mighty Eighth’ box matches that of your machine.
Installation
•Insert the B-17 Flying Fortress ‘The Mighty Eighth’ CD into your CD-ROM drive.
•If autorun is enabled, B-17 Flying Fortress ‘The Mighty Eighth’ will take you to the installation screen.
•Click on the ‘Install’ button and follow all on-screen directions.
•If autorun has not been enabled, you’ll have to double-click on the ‘My Computer’ icon on the Windows® Desktop, then on the CD-ROM icon, and then click on ‘Setup.exe’.
The simulation will now install.
•Follow all on-screen instructions.
Once B-17 Flying Fortress ‘The Mighty Eighth’ is installed it will appear in the Program Group on the START Menu.
Loading
• Select Start > Programs > MicroProse > B-17.
The game will now load.
The Read Me file
The B-17 Flying Fortress ‘The Mighty Eighth’ CD-ROM has a Read Me file where you can view trouble shooting and updated information about the product. To view this file, double-click on “Read Me” in the B-17 directory found on your hard drive. You may also view the Read Me file by first clicking on the START button on your Win95/98/Millennium taskbar, then on Programs > MicroProse > B-17 > Read Me file.
10
Section Two: The Getting
Started Guide
The Game Tutorial
Overview
Well, you’ve successfully installed and loaded the game and you’re itching to get into the air in that big bomber and see some WW2 action. This tutorial will get you up and running in a Bomber Commander campaign game, but it will not teach you the complete simulation (manual flying, bombing etc). For that you will need to try the specific Training and Quickstart Missions using the Training School sections later in this manual.
Starting Off
After the opening animation screens you will see the Main Menu screen.
New Game 
Game Options 
Before you do anything else you must check the status of the Navigation realism. Navigation is an important factor in the simulation and the aircraft can fly at three levels of Navigation Complexity: Historical, Easy or Flawless. For this guide we don’t want you to get lost so you will be flying with Flawless navigation.
•Click on the Game Option icon (bottom left) - a red light will switch on when selected.
•Click on the Continue button (bottom right).
You will be taken to the Game Difficulty/Realism menu screen.
•Select the second icon down on the left (marked 1, 2, 3) and click on the Continue switch (lower right).
•Scroll down the list to Navigation Complexity and make sure this is set at ‘Flawless’.
If it isn’t click on the line and click on Flawless in the lower panel.
•Click on the Continue switch (lower right).
•Click on the return to previous screen switch (lower left) to return to the Main Menu screen.
12

Now we want to play a New Game (the icon of the B-17 – lower left).
•Click on the icon (a red light will switch on when selected) and then click on the Continue button (bottom right).
You will be taken to the Game Type screen.
•Select to Play a Single Bomber Commander Campaign (the single aircraft icon – top left) and flip the Continue switch.
You will now be taken to the 8th Air Force Division screen. Here you can choose which Bombardment group and which Squadron in that Group you want to join. Different Bombing Groups are based at different airfields across England.
•Select the 401st Bombing Group from the left hand panel.
•Select the 612th Squadron from the right hand panel.
The lower graphic panels will show the insignia of the Bombing Group and the specific Squadron you have chosen.
At the bottom of the screen is a Campaign Start panel (covering the period December 1st 1943 to February 10th 1945). This is where you choose the campaign length.
•Click in the panel until it shows the date March 1st 1944.
•Flip the Continue switch (lower right).
You will now be taken to your bomber Name and Nose Art selection screen.
•Click on a ‘nose art’ name for your bomber (click and drag the scroll bar to view all options in the left panel).
The picture will be shown on the right hand panel.
•Now click on the Bomber Name panel (top), delete the default name with the Backspace key and type in your own choice of name for your bomber and press Return/Enter.
Try to match the name to the nose art you have chosen.
•Flip the Continue switch (lower right).
Your next stop is your Crew screen. This shows the current crew for your B-17. Remember that in a Bomber Commander campaign you are in overall charge of the ten-man crew and the one bomber.
13
•Click on the top left portrait (the Bombardier) and the bombardier’s name will appear in the central panel.
•Click inside the name panel and delete the name using the Backspace key.
•Type in a new name (it could be your own) in the two panels and press Return/Enter.
•Flip the Continue switch (lower right) and you will be taken to the HQ Corridor screen.
Bomber |
Squadron |
|
Inspection |
Commander’s |
|
|
Office |
|
Bomber |
|
|
Commander’s |
|
|
Office |
Operations Room |
|
Briefing Room |
||
|
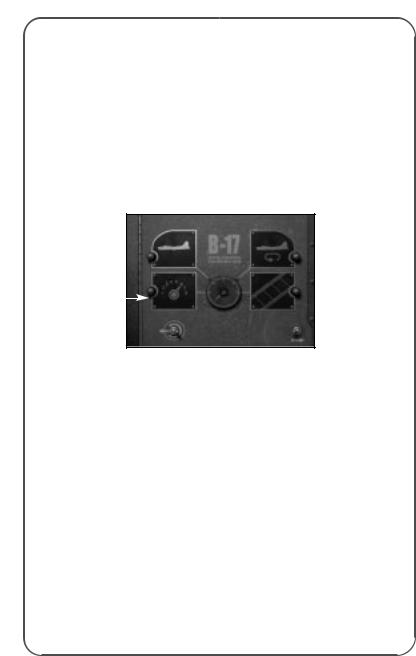
The HQ Corridor gives access to various mission planning and briefing screens. If you were playing the Squadron Commander game you would be able to plan all strategic operations in the Operations Room but as Bomber Commander you will NOT have access to mission planning. But you do have your own office.
•Click on the door on the far left of the HQ Corridor and you will enter your office (you must try to be a bit more tidy!).
Here you will find information about your crew and your bomber.
•Click on the book on the left of your desk and you will open the Crew Information File. The first page will open on the Bombardier details and will show the name you inserted in the Crew screen. Clicking on the tabs along the side of the book will show details for all ten crew (coded by position: TG – Tail Gunner, N – Navigator etc).
14

•Click away from the pages and the book will close.
•Click on the book on the right of the desk and the Bomber Information File will open
This shows the details of the bomber you renamed. This is a new campaign so there will not be details of any previous missions.
•Click anywhere away from the book to close the file.
•Click on the windows to go outside to Inspect Bomber and you will be taken to your Jeep.
A clipboard will show the name of your bomber.
•Click on the B-17’s name on the clipboard.
This will take you to the aircraft waiting at its dispersal point (in the 3D world). Inspection is particularly useful when you have returned from a mission and want to see the damage your bomber has sustained.
Full camera views are available:
Numeric Keypad |
|
|
Plus + and Minus - |
= |
Zoom in/Zoom out. |
Arrow keys |
= |
move the view left/right/up/down. |
PageUp/PageDown |
= |
tip view up/down. |
Ins/Delete |
= |
rotate view left and right. |
Mouse |
|
|
Alternately, you can use the mouse (with the right mouse button pressed in to zoom in/out and the left mouse button pressed in to rotate view).
•Press ESC to return to the jeep bonnet – this contains the Crew Management File.
•Click on the Crew Management File.
This shows a summary of the crew’s abilities. A cross ‘X’ shows the correct job of each crew member, a slash ‘/’ shows a competence in another job. It’s here that you can reassign your crew and manage their abilities as the campaign begins to take its toll and injuries or KIAs accumulate. To change a crewman’s job, click on the slash and it will become a cross. Note: Other crew positions will be automatically adjusted to fit in with your choices.
•Click on the right hand page to turn it over and you will see details of each crewman’s skills.
These will improve as each man gets more and more mission experience.
•Click away to close the book and click on the bunch of keys to return to the airbase. You will be returned to the HQ Corridor.
Now you have examined all aspects of your crew and bomber, you’d best get a briefing about your first mission.
15

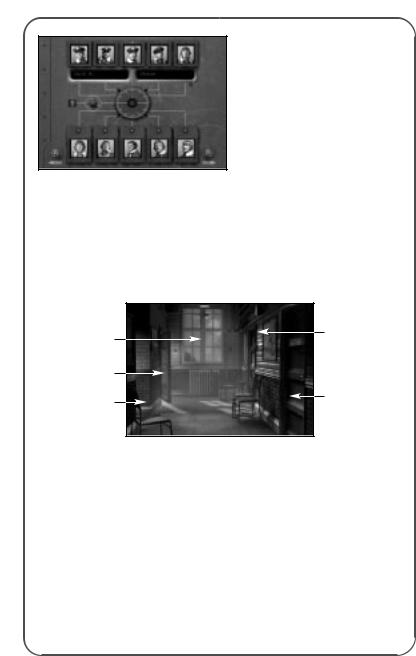
•Click on the doorway on the near left to enter the Briefing Room.
Film Screen |
Map |
|
Read Mission |
|
Briefing |
The Briefing Room gives you all the current information available about your target (or targets) and the routes there and back.
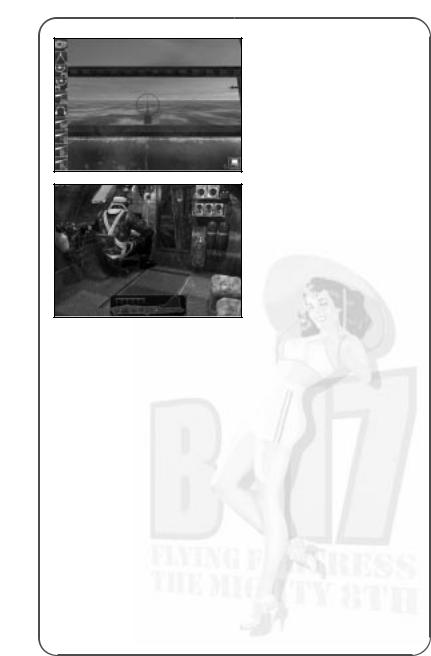
In the centre of the stage there are facilities to see a fly-over film of your target, as it will appear to the Bombardier.
•Click on the film screen and watch the film carefully.
In this tutorial guide you’ll be sitting in the Bombardier’s seat during the bomb run so it’ll help if you recognise the target.
When the film has finished or when you have pressed ESC, you will return to the Mission Briefing room.
•Click on the Map on the right of the stage to see bomber route, the target and the route back.
The Map can be controlled by using the numeric keypad keys:
Plus and Minus (+/-) |
= |
Zoom in/Zoom out. |
Arrow keys |
= |
move the map left/right/up/down. |
PageUp/PageDown |
= |
tip map up/down. |
Ins/Delete |
= |
rotate map left and right. |
Alternately, you can use the mouse (with the right mouse button pressed in) to move the map in all directions.
The map shows Waypoints, Initial Points, Primary, Secondary, Tertiary targets (if available) and Rally Points. The red arrows show the direction of travel along the route.
•Place your mouse cursor on a gold pyramid waypoint marker (you might have to tip the map view) and you will see the height the bomber formation should be flying at when it hits that particular waypoint (you might also have to zoom in with numeric keypad + key).
•Press ESC to leave the map and return to the Briefing Room.
You’ve now seen a reconnaissance film and the route to the target but you’ve still to read all the target details.
16
•Click on the green Mission Briefing file on the desk in front of you.
This opens on the Mission Summary page that includes details on the Primary and Secondary targets, type of bomb selected, distance to travel and fighter escort details.
•Click on the right hand page of the Mission Briefing file and it will turn the page to show the Primary Target details including Flak Strength, Fighter Strength and Target Intelligence.
•Click again on the right-hand page to view details of the Secondary Target.
•When you have read about the mission targets click on the right hand page again.
You will now have to sign that you have read and understood the target/ mission details.
•Click on the line (marked by an X) and a signature will appear.
•Click away from the book to close the Mission Briefing file and return to the Mission Briefing room.
Now let’s start the mission.
•Click on the door on the right of the Mission Briefing hut (Start Mission) to enter the 3D simulation.
Computer
 control icon
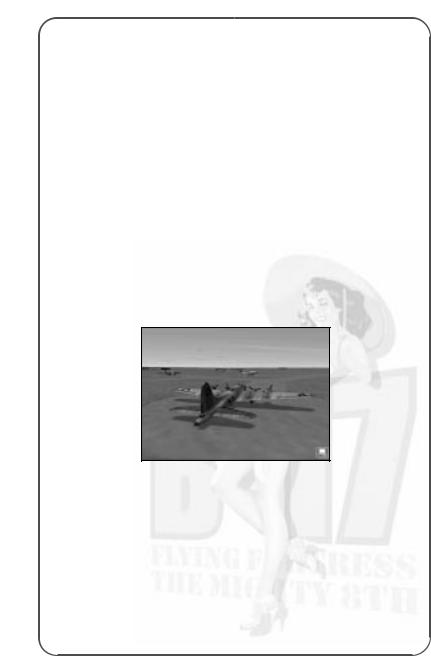
Now you’ve made it to the aircraft dispersal point. The B-17 has bombs loaded, fuel tanks are full and all the crew are ready for the off.
You will see an outside view of the aircraft and the game will be in computer-controlled mode (a small computer icon will be shown on the lower right of the screen). Note: The default is always computer control whenever a view or crew position is changed.
Use the numeric keypad controls +/- to zoom in and out on the B-17,
the arrow keys to move left/right/up/down. PageUp to tip up and PageDown to tip down the view. Ins and Del will rotate the view left/right. Or you can move the mouse, with the right mouse button pressed in for zooming in/out or the left mouse button pressed in to tip or rotate the view.
17
Before you can do anything you must give the orders to begin the mission.
•Press F1 to go inside the aircraft.
You will now be on the flight deck just behind the Pilot/Co-Pilot seats on the flight deck. To give the Begin Mission order you must go to the Radio Operator station.
•Press keyboard key 6 and you will jump to the Radio Operator’s Compartment view. You will now see the Radio Operator sitting at his station with a highlight around him. You now need to go to the Radio Operator’s Instrument View and can do this in one of two ways:
Either |
move your mouse cursor to the extreme right side of the |
|
screen (in the middle) to reveal a bank of five view icons. |
|
The current view is lit with a red light (the figure icon). |
|
Click on the fourth icon down (the dial icon). |
Or |
with the Radio Operator selected (highlighted) press key I. |
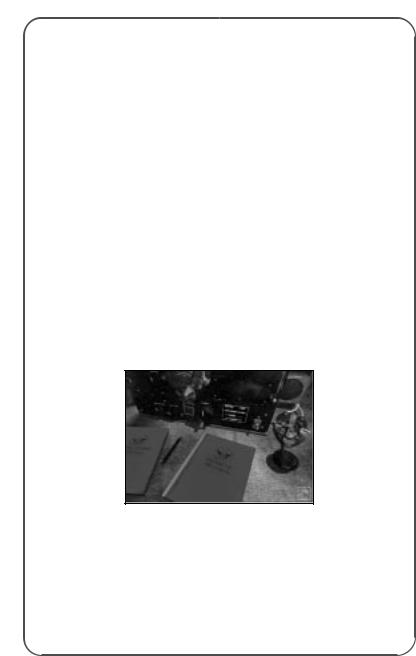
This will bring up the Radio Operator’s Instrument View (a radio set and two message books).
•Click on the ‘Outgoing Messages’ book (on the left) and it will open.
•Look for the Begin Mission order.
Before you can do anything you must take control away from the computer AI. This is a feature of B-17: everything will work on computer control but if you want to influence a position or character, you must take manual control.
 Manual control
•Press key M and the ‘computer controlled’ icon will disappear and be replaced by the manual control symbol (a ‘hand’ icon).
You are now in control of the Radio Operator.
•Find the Begin Mission order and click on it.
The order to start engines will be issued and Begin Mission will disappear from the messages list (you will not need to use it again on this mission).
18

•Click away from the book and you will return to the Radio Operator’s Instrument View.
You should hear the engines starting.
•Hover the mouse pointer to the extreme right of the screen (near the centre) to open the View Menu panel. This is available in all internal B-17 screens.
•Select the second icon down on the View Menu panel and you will return to the Compartment View (or press key C).
•Press keyboard key 3 to go to the Pilot’s Compartment view.
•Press F2 to go to an outside view to see the aircraft taxiing to its take off position.
Note: If you return to the Radio Operator’s position he will now be back in computer control – this applies to all crew management positions in the simulation.
The B-17 will now taxi to the main runway, followed by the rest of the squadron.
•Watch this from the outside view (using the mouse or numeric keypad controls).
Use the camera keys especially the zoom out feature to see the whole airfield.
The bomber will taxi to the main runway followed by the rest of the squadron and take up a position at the head of the take off runway.
The simulation also has a Pilot Helper key (H) that can guide you in various aspects of the simulation. In take off, if you press key H you will see a large green cone take up position in front of the aircraft. This leads you to the main take off runway. Press key H to switch off Pilot Helper.
Eventually when you get to the take off runway, the B-17 will stop briefly for the final checks to be carried out. It will then speed up and take off.
The landing gear will retract and the other aircraft in the squadron will follow the leader.
Your B-17 will circle until the other bombers in the squadron form up with it.
When taking off in manual mode the Pilot Helper key (H) also comes into play here. When you hear the command ‘Join Formation’ press H and you will see a white formation box appear (you might have to look for it with view keys). This box is where you should be for all the squadron to form up with you).
19

Game Controls
You can ‘pause’ the simulation at any time by pressing the Pause/ Break key (toggle).
The Home key will speed up the simulation 2, 4 or 8 times.
The End key will slow down the simulation (if things are happening too quickly) 2, 4, 8 times.
Once in the air and in formation, the B-17 will head for the target, perform the mission to the best of the crew’s current ability/initiative, defend itself against any attack, and try to return home and land.
If you want to skip large chunks of time when nothing important is happening, press the Return/Enter key to Time Skip. You cannot skip when there is an important game event happening (flak attack, fighter activity etc).
You need not do anything if you don’t want to. But the fun of this simulation is that you can jump into any position and take over manual control of that job! Similarly, you can jump into the escort and enemy fighter cockpits and dogfight with your enemy. Or, you can simply admire the views of the aircraft crossing a fully mapped Northern Europe!
In this tutorial guide we’ll jump into a variety of positions.
You should still be in external view, in the B-17 squadron formation.
•Skip time (press Return/Enter) as much as you can to speed up the ‘getting there’ procedure. If you are unable to skip time that means that a ‘game event’ is happening, such as escort fighters scrambling, flak firing or enemy fighters engaging you in combat.
Now let’s look at the Pilot and Co-Pilot controls.
•Return to the Pilots’ Compartment view by pressing F1.
You should be on the flight deck just behind the Pilot and Co-Pilot.
(If you are not press key 3 and select Compartment View from the right hand pop-up menu.)
•Select the Pilot (if he’s not already selected) by clicking on the figure on the left.
All members of the crew have their own set of specific views. The Pilot has an Action view (accessed by pressing key A) which drops you into his seat looking out of the front window (and left/right in the cockpit), and an Instrument view (press key I) showing the fully functioning cockpit dials and switches/levers. All these views can also be accessed via the View Menu panel by hovering the mouse cursor on the central right edge of the screen.
20
In addition, some crew positions have additional instrument views that relate to their jobs. The Pilot and Co-Pilot have specific zoomed-in instrument views (F5, F6, F7, F8 and F9).
•Press key A to access the Pilot’s Action view.
•Look left/right in the cockpit using the joystick ‘hat’ or Camera view keys.
•Press key I to access the Instrument view.
This is a fully functioning B-17 cockpit with dials, switches, levers etc all working. If you hover the mouse pointer on a switch or lever a tooltip will show what it does.
•Press F5 or F9 to see the Co-Pilot’s instruments.
•Press F6 to see the close-up engine dials.
•Press F7 or F8 to see the close-up Pilot’s dials/switches.
DO NOT OPERATE ANY OF THESE INSTRUMENTS UNTIL YOU UNDERSTAND MORE ABOUT THE B-17 SIMULATION CONTROLS (see the Training Schools later in this manual).
Now let’s have a tour of the different crew positions.
•Return to the Pilot’s Compartment view (key C or use the View Menu panel).
All crew positions in the simulation have a pre-set keyboard key:
`Bombardier
1Navigation
2Cheek Gun
3Pilot
4Co-Pilot
5Engineer/Top Turret Gun
6Radio
7Ball Turret Gun
8Left Waist Gun
9Right Waist Gun
0 Tail Gun
•Press keyboard key 1 and you will jump to the Nose Compartment.
This is where the Bombardier and the Navigator work. Note: Key 1 has also selected and highlighted the Navigator. If you press key ` (to the left of keyboard key 1) the Bombardier will be highlighted.
We’ve already seen the Pilots’ Compartment (see earlier) so let’s continue with the tour.
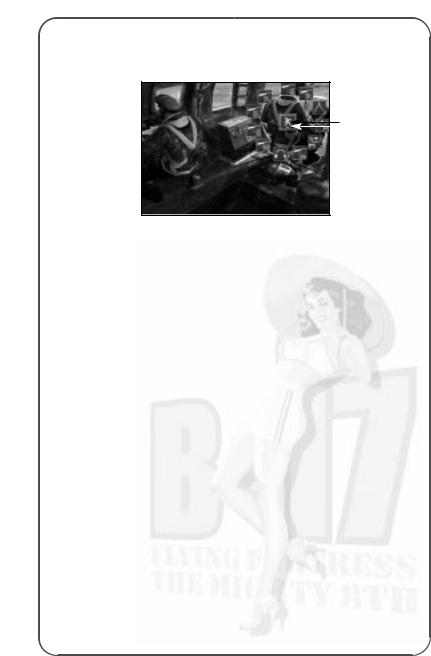
•Press key 5.
This will take you to the Engineer/Top Turret Gun compartment next to the bomb bay.
21

Note: Because of his position the Engineer/Top Turret gunner is obscured by the bombs and is not shown fully, but you can just see his legs highlighted.
•Press the Action view (key A) and you will see the Top Turret view.
•Press key M to take control of the top turret and rotate/fire the guns using your keyboard or joystick.
Notice the realistic tracer path but do not shoot at your own aircraft!
•You’ve already seen the Radio Operator’s Compartment (key 6) so try pressing key 7 and note that because you were in the Top Turret Gunner’s Action view, you have jumped immediately into the Ball Turret Gunner’s Action view.
•Press key C or click on the second icon down on the View Menu panel to see the Compartment view.
You will now see the two waist gunners with an almost obscured highlight of the Ball. Turret gunner’s position close to the feet of the Right Waist Gunner.
•Now select one of the Waist Gunners (click on one of them or press key 8 or 9), and go to his Action view (key A or View Menu panel third icon down).
You will be in position in front of the machine gun.
•Select manual control (key M) and fire the machine gun.
•Now return to the Compartment view by pressing key C.
The last compartment is where the Tail Gunner lives.
•Select keyboard key zero 0 and key A to view the Tail Gunner’s action view.
Press key M to take over control and try firing the machine guns.
Getting Around
There are various ways to navigate around the aircraft positions.
1. At the top of the screen is a Crew Portrait pop-up panel that allows you to jump to any member of the crew by clicking on his portrait.
22
2. To the left of the screen is a Crew Position pop-up panel that allows you to jump to any crew task (Navigation, Bomb Aiming/Dropping, Flying (as Pilot) etc.).
3. At the bottom of the screen is a panel that pops-up only in Compartment View that allows you to jump into the six B-17 compartments.
•Return to the Tail Gunner’s compartment view (key 0 and key C).
Warning Red Text
Throughout the mission you will hear speech from the crew calling out messages to each other, giving headings (Navigator to Pilot) etc.
This will be shown at the bottom of the screen in ordinary text.
You have merely to note what is being said. However there will be times when you will be prompted to perform a task (such as during an enemy fighter attack) to man the machine guns etc – in this case Red Text will appear when the message is heard.
If you click on the red text (or press SHIFT + H) you will jump immediately to the action station most associated with that message. For example, if you see red text message ‘Bandits at 6 o’clock, level’ and you click on the text, you will jump to the Tail Gunner’s station in Action view. Either watch the Tail Gunner fire his gun at the enemy fighters or press M to take control and fire the gun yourself.
Now let’s look at where the aircraft is headed and jump to the Navigator’s station.
•Open the top panel and click on the second portrait from the left – this is the Navigator. You are currently in Compartment view, so you will jump to the aircraft nose section (where the Bombardier also lives). The Navigator will be highlighted to show that he is the
selected crewman.
23
•Press key I to access the Navigator’s Instrument view. This will show his desk and instruments: the Radio Compass, the Drift Meter
(see later) and the Map.
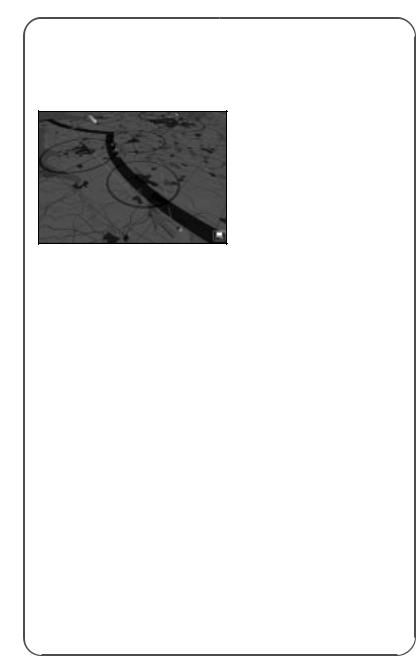
•Click on the Map (on the left of the screen), or press the Spacebar, and you will jump to the Map screen.
This map is very similar to the Mission Briefing map but it also has a track of the plane’s position (a green aircraft icon at the correct height and an aircraft shadow to show its position across the ground),
its projected course (a broken blue line) and its actual course across the map (a solid coloured line). The solid line is
coloured green when there is ample fuel left, amber if the fuel status is becoming critical and red if the fuel is calculated to run out.
All map controls are the same as for the map in the Briefing Room (see above). You are flying on Flawless Navigation level so the actual course flown by the aircraft will not differ from the mission briefing, but
if you were to fly Easy or Historical navigation complexity you would have to adjust position by constantly referring to the map and what you can see outside (see the Navigator School later in this manual for details).
•Exit the Map screen by pressing key C to go to the Compartment view.
•Select the Bombardier by clicking on him (the crewman sitting right in the nose of the Compartment) and he will be highlighted.
The Bombardier is also the Chin Turret operator when he is not busy with the bombsight. You may have to get him to change from Chin Turret to Bombsight. In this case right-click on him to open the Icon Rose.
Look at the topmost icon (at 12 o’clock), if this is a bombsight left click on it and he will change jobs. If it’s a Chin Turret, simply click away.
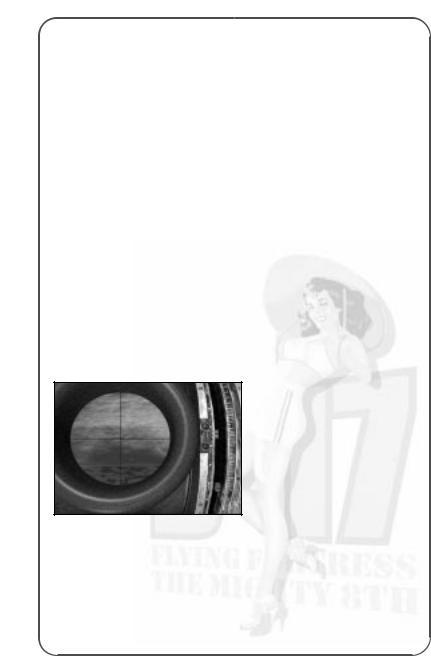
•Now press the Instrument key I to view the Norden bombsight.
This is a complex piece of equipment that Bombardiers use to locate and lock on to targets as long as the correct data is input properly.
For actual details of manual bombing see the Bombardier School later in this manual, but for now let’s look through the sight.
•Press the Action View key A.
You will be looking at the ground (or the sea) through the bombsight.
24
In this tutorial you will not drop bombs manually; you will leave the crew Bombardier to do this for you.
•Return to Compartment view by pressing key C.
Skip Time
The simulation allows you to skip large chunks of time by pressing the Return/Enter key but you might not be allowed to ‘skip’ if a game event is happening.
Accelerate Time
You can also accelerate time by pressing the Home key (3 levels of speed up) or slow down time by pressing the End key (3 levels of slow down).
Throughout the mission the Navigator will give the Pilot instructions about new turn headings and waypoints and the pilot will respond. You need do nothing in this guide but let them get on with it!
Eventually you will reach the last turn before the target (the Initial Point). Check this on the Navigator’s map. This is the straight line run to the target.
Now control of the aircraft is passed to the Bombardier. You may hear him call out “We’re on the bomb run” or “I have the plane”. Now make sure the Bombardier is selected and jump into the Bombardier’s Action view (key A).
You might have to be patient here depending on the length of the bomb run but watch carefully as the target is sought out by the AI controlled Bombardier, then acquired and locked into position.
You’ll notice two marker blocks on the right of the bombsight that are slowly approaching each other. When they meet, the red release light will come on and the bombs will be dropped. The view will then switch automatically to the bomb bay where you will see the bombs dropping.
•When this happens press F6 (to see the bombs in the air) and F6 again to view the bombs hitting the target.
•Use the mouse with left/right buttons pressed in to view the target from various angles or zoom.
•Press F1 to return to the Bomb Bay.
You’ve now looked at all the B-17 positions. Why don’t you take a flight in one of the many fighters available in the simulation?
25

•Press key F2 to get an exterior view of the B-17.
In Bomber Commander mode, only one bomber can be selected out of the six in the squadron. In the Squadron Commander game you can select all six bombers.
•Your B-17 will be centred in the middle of the screen.
•To access the fighters, hover your mouse pointer on the extreme right side of the mid-screen.
This area will show a pop-up menu with a white icon representing your B-17, your fighters (if there are any on your mission) and the enemy fighters types (if there are any around).
•If there are any friendly fighters around, click on the icon to jump to an outside view of the fighter.
•Press F1 to enter the cockpit of the fighter.
•Press key M to take control of the fighter and fly around (be careful and check the keyboard/joystick controls on the Reference Card).
Take a moment to examine the detailed cockpit and fully functioning dials, levers and joystick.
•Press the camera keys to view the virtual cockpit.
•Press key F2 to go to the outside view (you’ll still be in control!)
•Press key M to return to AI control.
•Return to your B-17 by accessing the B-17 icon in the pop-up panel.
•Press F1 to go back into your B-17.
Crew Management
You’ve now looked over the basic areas of the bomber simulation. Now let’s look at aspects of crew management that you’ll need to know when things get rough and you experience casualties or emergencies such as fires.
Depending on their level of initiative set up, crew can be told to takeover other crew positions, and made to perform certain actions in emergencies (apply first aid, unjam guns, take over in case someone panics etc.). If all else fails, they can be ordered to bail out!
Make sure you’re in the nose section in the Compartment view (you can see the figures of the Bombardier and the Navigator).
26
•Select the Bombardier by clicking on him and check that he is highlighted.
•Place your mouse cursor on the Bombardier and right click.
Icon Rose
This will open an ‘Icon Rose’. All the icons in the circle are instructions you can issue to individuals; all 10 crew in the B-17 can be given these types of orders (but they do vary depending on the job).
•Place your mouse cursor on a few of the icons and read the pop-up tooltips associated with these icons.
The central icon is the instruction you are issuing (such as ‘Move To’ a different position). If you click on the central icon the instruction will change (Give First Aid, Repair, Use, Bail Out etc).
If you select Give First Aid and you see a portrait (or portraits) with a red cross on – that means there is a crewman who requires first aid. Click on the injured crew portrait and the selected crewman will go to him and help.
If there is a fire additional icons with pop-up tooltips will show which fire extinguishers can be used in what compartments. Remember to put out fires as soon as you get a warning (or see smoke). Fire is your worst enemy aboard the B-17!
The Bombardier also has control of the Chin Turret that’s located just under his bombsight station. This is useful when he has completed the bomb run and can function as a defensive gunner on the dangerous journey back home.
Now, let’s change his ‘job’ to that of a chin turret gunner.
•Right click on the Bombardier and open the icon rose.
The central icon will be the Move To (walking man) order (if it isn’t then right click on it until it is).
•Move your mouse cursor to the top of the ‘rose’ and click on the Chin Turret icon (the pop-up tooltips will confirm this) and left click.
27

The Bombardier will now move the chin turret controls over the bombsight.
•Press key A to access the Chin Turret Action view and you will see the chin turret sight.
•Press key M to get manual control of the Chin Turret and fire off a few rounds.
•Now, with what you’ve already learnt, try to make the Bombardier return to his Bombsight. Note: The Norden Bombsight icon will have replaced the chin turret icon in the topmost position of the icon ‘rose’.
Returning Home
After releasing their bombs the aircraft will go to the Rally Point and then take the route marked on the mission map home (check this on the Navigator’s map view). Again, except in ‘flawless’ Navigation complexity, your Navigator will need to check the map to the actual geography. This is a dangerous time when all gunners have to be alert; you may be attacked by fighters or flak. This is a good opportunity to try out the Gunners’ stations and to get an understanding for the zones around the B-17 that each Gunner can defend.
Be careful not to shoot at your own aircraft in the formation and note that, if the guns jam, you can attempt to unjam them in the following way:
•Return to compartment view (key C).
•Right click on the gunner figure to open his ‘Icon Rose’.
•Right click on the icon in the middle until you see the ‘Repair’ spanner and click on the ‘Unjam’ guns icon that appears above it.
Gunners will call out bandits on the Clock System with 12 o’clock in front of the aircraft, six o’clock behind, and nine o’clock on the left etc. Level means level with the aircraft high and low are relative to the B-17’s level flight.
Unless something happens to the Pilot, the B-17 will be flown back to base and landed.
Mission Debriefing
At the end of the mission the aircraft will be landed. Here in manual mode you could also use the Pilot Helper key (key H). This will show a cone that you should fly towards to get to your base and to the landing runway. When the B-17 has landed the green cone will help you taxi back to the hardstanding dispersal point you will be taken to the Mission Debriefing hut.
•Double-click on the Mission Debriefing file to view details of your recent mission performance (click on the page to turn it).
Here you’ll find all details of the mission analysed and you may be informed of any medals and promotions.
28
Saving the Game
•To save the game at this point, press ESC. This will open the Options screen.
•Click on the Load/Save Menu (the floppy disc icon) and flip the continue switch (lower right).
•Select <New File> and type in a name for the file in the panel.
•Click on the right hand button (Save the Current Game).
•Return to the Options menu (flip switch lower left).
•Flip the switch (lower left) to resume the game.
The Training Missions
If you have completed the tutorial, you will have already been on a complete mission and had a quick taster of action. The more complex levels of the simulation however depends on your own skills and so, to improve these skills, the game provides a set of Training Missions
(use of bombsight etc.). Remember to have the Reference Card to hand when attempting these missions.
•Select New Game.
•Select Choose a Training Mission (the middle panel on the right) and you will go to the mission selection screen.
•Look at the panel at the top of the screen to access a training mission topic (you can scroll down the list by clicking on, holding down and dragging the right hand slider).
•Select the training topic you want to practice and the mission brief or set of tasks will be shown in the lower panel.
•Scroll this panel to read full details of what you have to do.
•Flip the Continue switch (lower right) to jump into a Training Mission.
You will be taken into the 3D world so that you can perform the training exercise without risk to life and limb.
29

Mission 1: Taxi and Take Off
Your aircraft is on a hardstand at an airfield with engines running, wheel brakes set and flaps fully lowered.
This is simply an exercise in taxiing the B-17 to the main runway and then carrying out a take off. It’s here that you will learn basic ground handling skills and take off procedures. The mission will end once you get to 1,000 feet pull in your gear and raise your flaps.
•Press key M to take control. The four engines will start automatically.
1.You will not be able to see much of the runway from the pilot’s position (just like the real thing) so you’re advised to stay in outside view when manoeuvring the B-17 to the runway.
2.Throttle slowly up (+).
3.Unlock your Tailwheel (Shift + T).
4.Use all camera views (especially the zoom in/out functions) to see where the main runway is.
5.Move very slowly and steer leftright using the Rudder controls (keyboard or joystick).
6.Stop at the top of the main runway (Wheel Brakes On - Insert key), lock your tail wheel (T).
7.Throttle up full using keyboard or joystick controls.
8.Wheel Brakes Off (Delete key) and as the aircraft speeds up over the runway, ease it gently into the air and perform a shallow climb.
9.Raise all landing gear (Up Arrow).
10.Raise flaps (key F).
Mission 2: Approach and Landing
You are on approach to the main runway of the airfield. All engines are running, gear and flaps are fully raised. You are in the Pilot’s seat behind the controls of the B-17 as it turns onto final approach.
You will need to follow the correct approach and ease the bomber onto the runway. The mission ends once you’ve landed and brought the aircraft to a complete halt.
•Press key M to take control.
1.Use the external camera views for maximum visibility.
2.Locate the main runway where you will land (it should be lined up in front of you).
3.Drop your landing gear (Shift + Up Arrow).
4.Ease up on the all engine throttles.
5.Lower flaps (Shift + F).
30
 Loading...