


132991680 copertina 28-10-2003 8:47 Pagina 1
W A S H I N G M AC H I N E
P R A L K A AU TO M AT Y C Z N A
AU TO M AT I C K Á P R A C K A
AU TO M AT I C K Á P R Á C K A
AU TO M ATA M O S Ó G É P
EWF 1045
EWF 1245
EWF 1445
132 991 680
G B
P L
C Z
S K
H

132991680 GB.qxd 28/10/2003 13:49 Pagina 2
Dear customer,
Please read these operating instructions carefully and pay particular attention to the safety notes indicated in the first pages. We recommend that you keep this instruction booklet for future reference and pass it on to any future owners.
Transport damages
When unpacking the appliance, check that it is not damaged. If in doubt, do not use it and contact the Service Centre.
The symbols you will see on some paragraphs of this booklet have the following meaning:
The warning triangle and/or the key words (Warning!, Caution!) emphasize information that is particularly important for your safety or correct functioning of the appliance.
The information marked with this symbol provides additional instructions and practical tips on the use of the appliance.
Tips and information about economical and ecological use of the machine are marked with this symbol.
Our contribution to the protection of the environment: we use environmentally friendly paper.
Contents
Warnings |
3-4 |
Washing hints |
14 |
|
Disposal |
4 |
Sorting the laundry |
14 |
|
Temperatures |
14 |
|||
Tips for environmental protection |
4 |
Before loading the laundry |
14 |
|
Maximum loads |
14 |
|||
|
|
|||
Technical specifications |
4 |
Laundry weights |
14 |
|
Removing stains |
14 |
|||
|
|
|||
Installation |
5 |
Detergents and additives |
15 |
|
Unpacking |
5 |
International wash code symbols |
16 |
|
Operating sequence |
17-19 |
|||
Positioning |
5 |
|||
Washing programmes |
20-21 |
|||
Water inlet |
5 |
|||
Maintenance |
22 |
|||
Water drainage |
6 |
|||
Door seal |
22 |
|||
Electrical connection |
6 |
|||
Bodywork |
22 |
|||
Your new washing machine |
7 |
|||
Detergent dispenser drawer |
22 |
|||
Description of the appliance |
7 |
Drain pump |
22 |
|
Water inlet filter |
23 |
|||
|
|
|||
Detergent dispenser drawer |
7 |
Emergency emptying out |
23 |
|
Frost precautions |
23 |
|||
|
|
|||
Use |
8 |
Something not working? |
24-25 |
|
Control panel |
8 |
|
|
|
Controls |
8-13 |
|
|
|
Programme information |
13 |
|
|
2
132991680 GB.qxd 28/10/2003 13:49 Pagina 3
 Warnings
The following warnings are provided in the interests of overall safety. You must read them carefully before installing or using the appliance.
Installation
•All internal packing must be removed before using the appliance. Serious damage may be caused to the machine or adjacent furniture if the protective transit devices are not removed or are not completely removed. Refer to the relevant paragraph in the instruction book.
•Any electrical work required to install this appliance must be carried out by a qualified electrician.
•Any plumbing work required to install this appliance must be carried out by a qualified plumber.
•After having installed the machine, check that it is not standing on its electrical supply cable.
•If the appliance is placed on a carpeted floor, ensure that air can circulate freely between the feet and the floor.
Use
•This appliance is designed for domestic use. It must not be used for purposes other than those for which it was designed.
•Only wash fabrics which are designed to be machine washed. Follow the instructions on each garment label.
•Do not overload the appliance. Follow the instructions in the instruction book.
•Make sure that all pockets are empty. Objects such as coins, safety pins, pins and screws can cause extensive damage.
•Do not machine wash garments saturated with petroleum, methylated spirits, trichlorethylene, etc. If such fluids have been used to remove stains prior to washing, wait until they have completely evaporated from the fabric before placing garments in the appliance.
•Place small items such as socks, belts, etc. in a cloth bag or pillowcase to prevent them getting trapped between the drum and the tub.
•Use only the recommended quantities of fabric softener. An excessive amount could damage the laundry.
•Leave the porthole door slightly ajar when the appliance is not in use. This preserves the door seal and prevents the formation of musty smells.
•Always check that water has emptied out before opening the door. If not, drain the water following the instructions in the instruction book.
•Always unplug the appliance and shut the water tap after use.
General safety
•Repairs to the machine must be carried out only by qualified personnel. Repairs carried out by inexperienced persons could cause serious danger. Contact your local Service Centre.
•Never pull the power supply cable to remove the plug from the socket; always take hold of the plug itself.
•During high temperature wash programmes the door glass may get hot. Do not touch it!
Child safety
•Children are often not aware of how dangerous electrical appliances can be. When the machine is working, children should be carefully supervised and not be allowed to play with the appliance.
•The packaging components (e.g. plastic film, polystyrene) can be dangerous to children - danger of suffocation! Keep them out of children’s reach.
•Keep all detergents in a safe place out of children’s reach.
•When the appliance is to be scrapped, cut off the electrical supply cable and destroy the plug with the remaining cable. Disable the door catch in order to prevent children from becoming trapped inside while playing.
ENGLISH
3

132991680 GB.qxd 28/10/2003 13:49 Pagina 4
 Disposal
Packaging materials
The materials marked with the symbol  are recyclable.
>PE<=polyethylene
>PS<=polystyrene
>PP<=polypropylene
This means that they can be recycled by disposing of them properly in appropriate collection containers.
Machine
Use authorised disposal sites for your old appliance. Help to keep your country tidy!
 Tips for environmental protection
To save water, energy and to help protect the environment, we recommend that you follow these tips:
•Normally soiled laundry may be washed without prewashing in order to save detergent, water and time (the environment is protected too!).
•The machine works more economically if it is fully loaded.
•With adequate pre-treatment, stains and limited soiling can be removed; the laundry can then be washed at a lower temperature.
•Measure out detergent according to the water hardness, the degree of soiling and the quantity of laundry being washed.
Technical specifications
|
|
EWF 1045 |
EWF 1245 |
EWF 1445 |
DIMENSIONS |
Height |
85 cm |
85 cm |
85 cm |
|
Width |
60 cm |
60 cm |
60 cm |
|
Depth |
59 cm |
59 cm |
59 cm |
|
|
|
|
|
MAXIMUM LOAD |
Cotton |
5 kg |
5 kg |
6 kg |
|
Synthetics |
2.5 kg |
2.5 kg |
3 kg |
|
Delicates |
2.5 kg |
2.5 kg |
3 kg |
|
Woollens |
2 kg |
2kg |
2 kg |
|
Hand wash |
2 kg |
2 kg |
2 kg |
|
Silk |
1 kg |
1 kg |
1 kg |
|
|
|
|
|
SPIN SPEED |
|
1000 rpm max. |
1200 rpm max. |
1400 rpm max |
|
|
|
|
|
POWER SUPPLY VOLTAGE/FREQUENCY |
220-230 V/50 Hz |
220-230 V/50 Hz |
220-230 V/50 Hz |
|
TOTAL POWER ABSORBED |
|
2200 W |
2200 W |
2200 W |
MINIMUM FUSE PROTECTION |
|
10 A |
10 A |
10 A |
|
|
|
|
|
WATER PRESSURE |
Minimum |
500 kPa |
500 kPa |
500 kPa |
|
Maximum |
800 kPa |
800 kPa |
800 kPa |
This appliance complies with the following EEC Directives: 73/23/EEC of 19/02/73 relating to low voltage
89/336/EEC of 03/05/89 relating to electromagnetic compatibility.
4

132991680 GB.qxd 28/10/2003 13:49 Pagina 5
Installation
Unpacking
All transit bolts and packing must be removed
before using the appliance.
You are advised to keep all transit devices so that they can be refitted if the machine ever has to be transported again.
Using a spanner unscrew and remove the two rear bottom screws. Slide out the two plastic pins.
Lay the machine gently on its back, making sure that the hoses are not squashed.
P1129 |
P0001 |
Remove the polystyrene block from the bottom of the machine and release the two plastic bags. Very carefully slide out the left polythene bag, removing it towards the right and then downwards.
1 |
2 |
3 |
P1124 |
P1126 |
Repeat the operation for the right polythene bag, removing it towards the left and then upwards.
P1127 |
Remove the polystyrene base.
Set the machine upright and unscrew the remaining rear screw. Slide out the relevant pin.
Fill all the holes with the plastic plugs supplied with the instruction booklet.
P1128 |
P0002 |
Positioning |
|
Install the machine on a flat hard floor.
Make sure that air circulation around the machine is not impeded by carpets, rugs etc. Check that the machine does not touch the wall or other kitchen units.
Carefully level by screwing the adjustable feet in or out. Never place cardboard, wood or similar materials under the machine to compensate for any unevenness in the floor.
P1051 |
Water inlet
Connect the water inlet hose to a tap with a 3/4" thread.
The other end of the inlet hose which connects to the machine can be turned in any direction. Simply loosen the fitting, rotate the hose and retighten the fitting, making sure there are no water leaks
P1088 |
P0021 |
ENGLISH
5

132991680 GB.qxd 28/10/2003 13:49 Pagina 6
The inlet hose must not be lengthened. If it is too short and you do not wish to move the tap, you will have to purchase a new, longer hose specially designed for this type of use.
Water drainage
The end of the drain hose can be positioned in three ways:
Hooked over the edge of a sink using the plastic hose guide supplied with the machine. In this case, make sure the end cannot come unhooked when the machine is emptying.
This could be done by tying it to the tap with a piece of string or attaching it to the wall.
P0022 |
In a sink drain pipe branch. This branch must be above the trap so that the bend is at least 60 cm above the ground.
Directly into a drain pipe at a height of not less than 60 cm and not more than 90 cm.
The end of the drain hose must always be ventilated, i.e. the inside diameter of the drain pipe must be larger than the outside diameter of the drain hose.
The drain hose must not be kinked. Run it along the floor; only the part near the drainage point must be raised.
P0023 |
Electrical connection
This machine is designed to operate on a 220-230 V, single-phase, 50 Hz supply.
Check that your domestic electrical installation can take the maximum load required (2.2 kW), also taking into account any other appliances in use.
Connect the machine to an earthed socket.
The manufacturer declines any responsibility for damage or injury through failure to comply with the above safety precaution.
Should the appliance power supply cable need to be replaced, this should be carried out by our Service Centre.
The power supply cable must be easily accessible after installing the machine.
6

132991680 GB.qxd 03/11/2003 16:11 Pagina 7
Your new washing machine
This new washing machine, which is fitted with the Jet system, patented Electrolux, meets all modern needs for effective treatment of laundry with low water, energy and detergent consumption.
Further savings are achieved by washing small loads of laundry, since water and electricity consumption is proportional to the quantity and type of laundry being washed.
•The programme progress display shows the programme steps selected and the programme phase which is running.
•The special wool programme with its new delicate wash system treats your woollens with extreme care.
•Automatic cooling of the wash water to 60°C before draining, with the 95°C programme. This reduces thermal shock to fabrics, helping to prevent creasing.
•The balance control device ensures the machine is stable during the spin.
•The programme selector dial combines the possibility of selecting between different fabrics, special cycles and memories, making it easier to set the programmes.
ENGLISH
Description of the appliance
1 Detergent dispenser drawer
2 Control panel
3 Door handle
4 Drain pump
5 Adjustable feet
12
Options |
Change |
Exit |
3
Detergent dispenser drawer
 Prewash
 Main wash
Fabric softener, starch
4
5
P1190 |
7

132991680 GB.qxd 28/10/2003 13:49 Pagina 8
Use
Control panel
|
|
|
M |
1 |
|
|
|
|
|
|
M |
2 |
|
E |
|
|
|
||
M |
3 |
|
|
|
|
|
|
|
Temp. Spin Options Change Exit
TIMELINE |
|
|
PROGRAM |
FUNCTION |
START/PAUSE EWF 1445 |
|
|
|
|
3 |
|
|
5 |
|
|
|
|
|
|
|
|
|
|
|
|
|
|
||
1 |
2 |
4 |
6 |
7 |
|||||||
1 Programme chart |
|
|
only a few control elements (1 programme selector |
||||||||
A programme chart in English is in the interior part |
|
|
dial and 6 buttons). This simple control method is |
||||||||
|
|
made easy thanks to the interactive display. |
|||||||||
of the detergent dispenser drawer. |
|
|
Interactive means that the washing machine display |
||||||||
A programme chart in other languages is provided |
|
|
changes to reflect each step you have entered. This |
||||||||
with the instruction booklet. |
|
|
ensures that only those settings that make sense are |
||||||||
2 Programme selector dial |
|
|
made. You are able to see the current settings at any |
||||||||
|
|
time in the information panel and in the option row. |
|||||||||
The selector dial is divided into 4 sections:
•Cotton, synthetics and delicates (blue section)
•Handwash, wool, silk and mini-programme (green section)
•Rinses, drain, spin and delicate spin (grey section)
•Memory 1, memory 2, memory 3 (green section)
|
|
M |
1 |
|
|
|
|
M |
2 |
|
E |
|
|
M |
3 |
|
The selector dial can be turned either clockwise or anticlockwise.
Position E corresponds to the ENERGY SAVING programme for cotton and position O to Reset programme/Switching OFF of the machine.
At the end of the programme the selector dial must be turned to position O, to switch the machine OFF.
Attention!
If you turn the programme selector dial to another programme when the machine is working, a warning message appears for 4 seconds on the display while the buzzer sounds for 3 times .
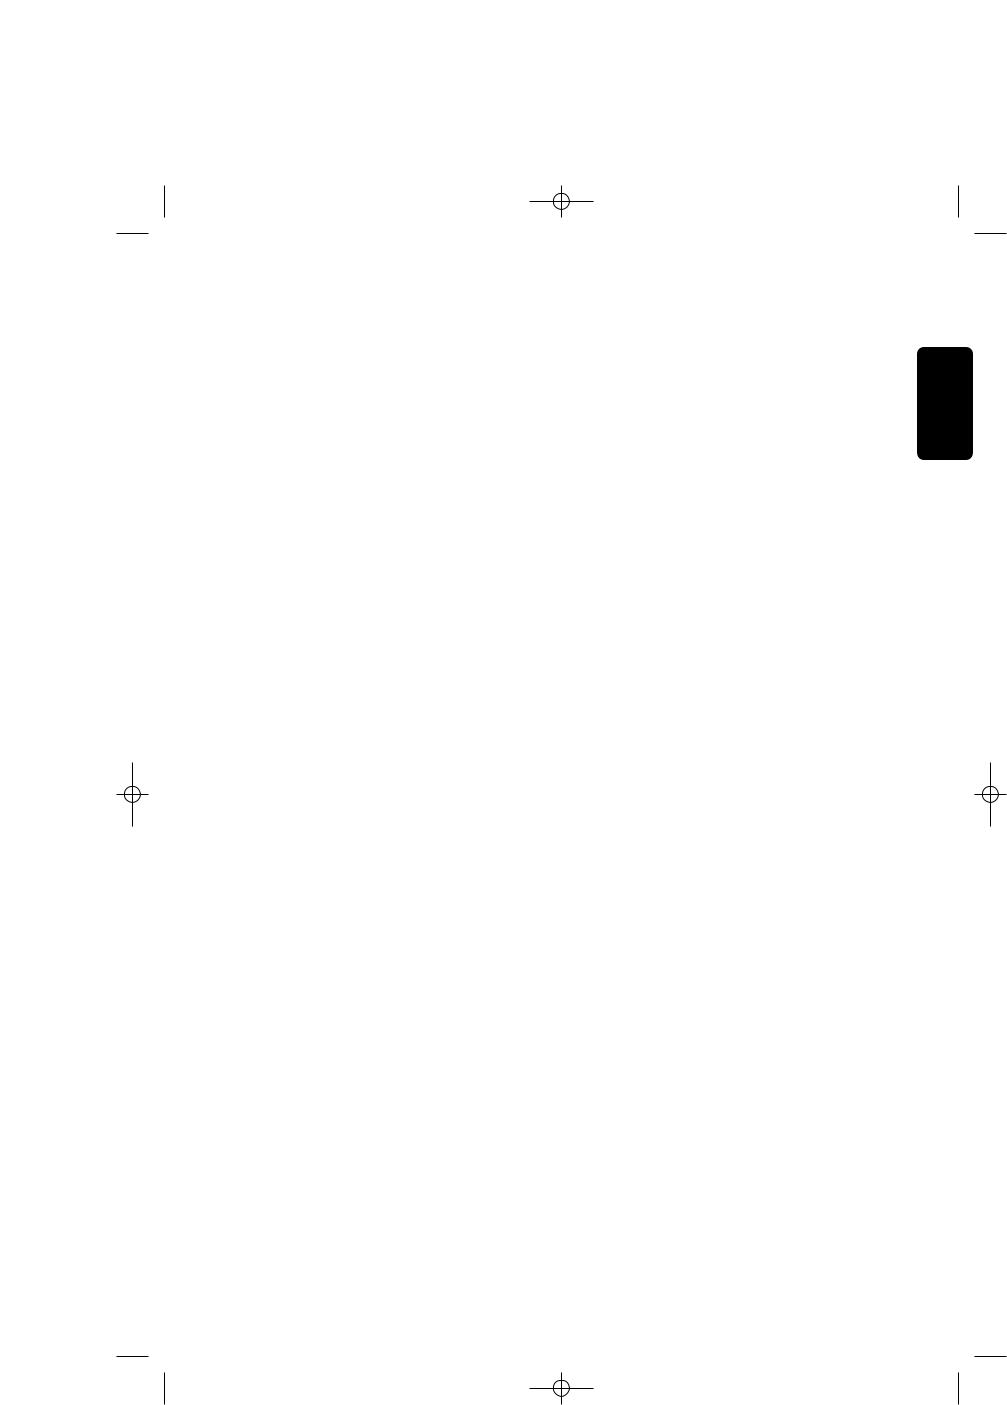
3 Display
The DISPLAY is used for setting a large number of functions and combine them with each other using
1 |
|
|
3 |
2 |
Cotton |
|
|
|
08.30 |
Cycle and at |
|
|
10.55 |
|
95°C |
1400 |
|
|
|
Temp. |
Spin |
Options |
Change |
Exit |
|
4 |
|
|
|
1.Information panel shows the current settings
2.Real time clock
3.End cycle time
4.Selection shows temperature, spin speed, options and extras.
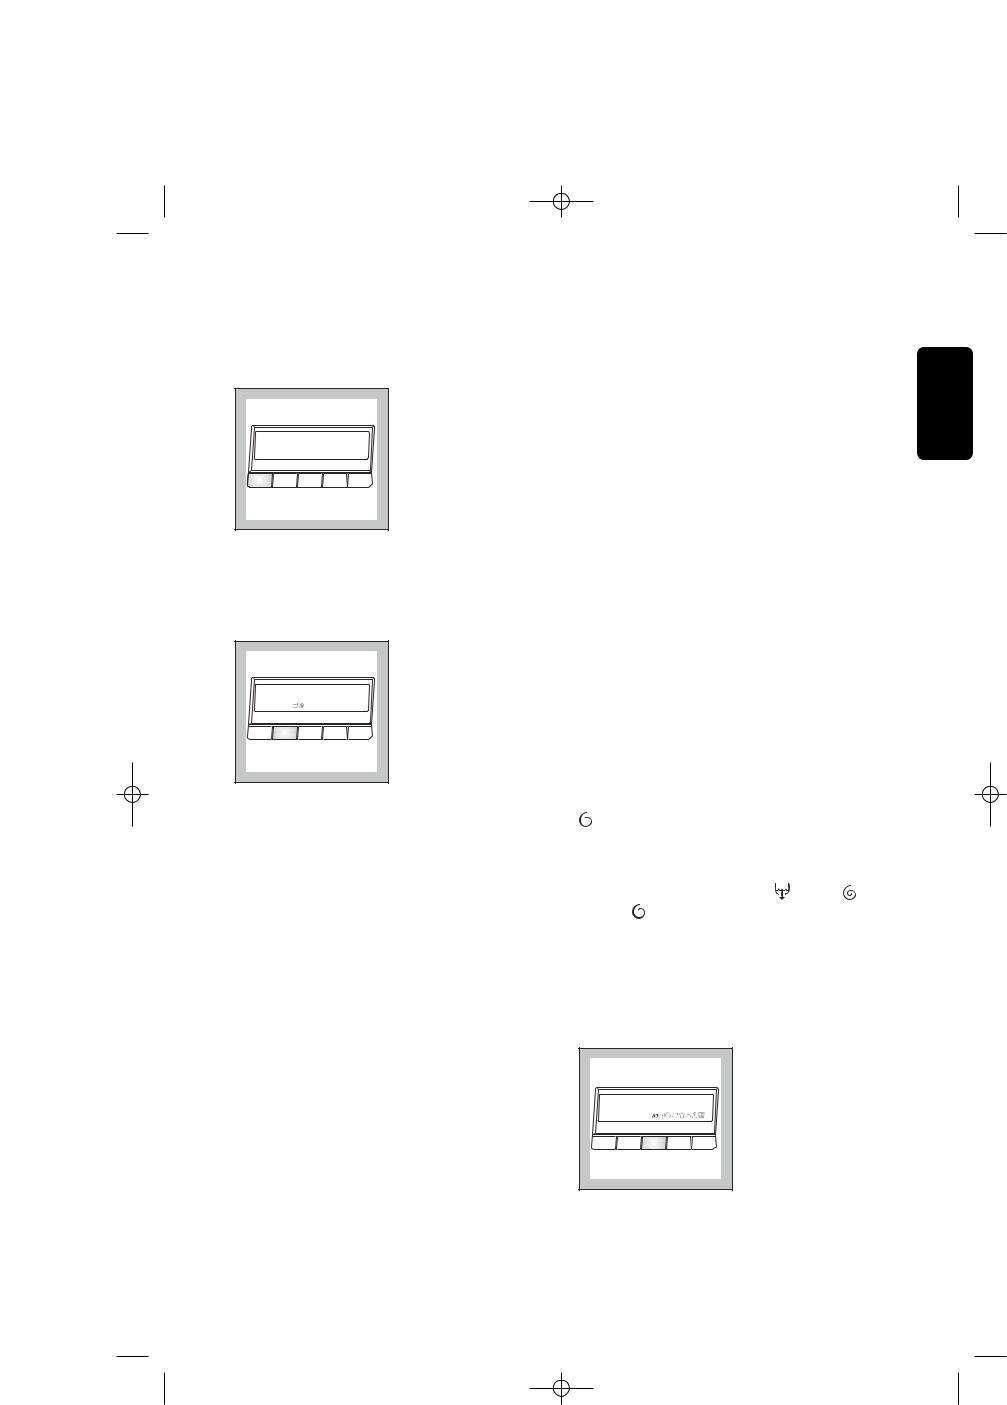
4 Temperature button “Temp.”
Press this button repeatedly to increase or decrease the temperature, if you want your laundry to be washed at a temperature different from the one proposed by the washing machine.
Maximum temperatures are 95°C for cotton, 60°C for synthetic fabrics, 40°C for delicate fabrics, wool and fabrics to be hand-washed, 30°C for silk and «Miniprogramme», while «0» corresponds to cold wash.
By depressing Temperature “Temp.” button, the relevant message will appear on the second row of the display (instead of «cycle end at»). In the corner of the third row appears the indication of the selected temperature.
8
132991680 GB.qxd 28/10/2003 13:49 Pagina 9
COTTON |
|
|
|
08.30 |
MAX 95°C |
|
|
|
10.55 |
60°C |
|
|
|
|
Temp. |
Spin |
Options |
Change |
Exit |
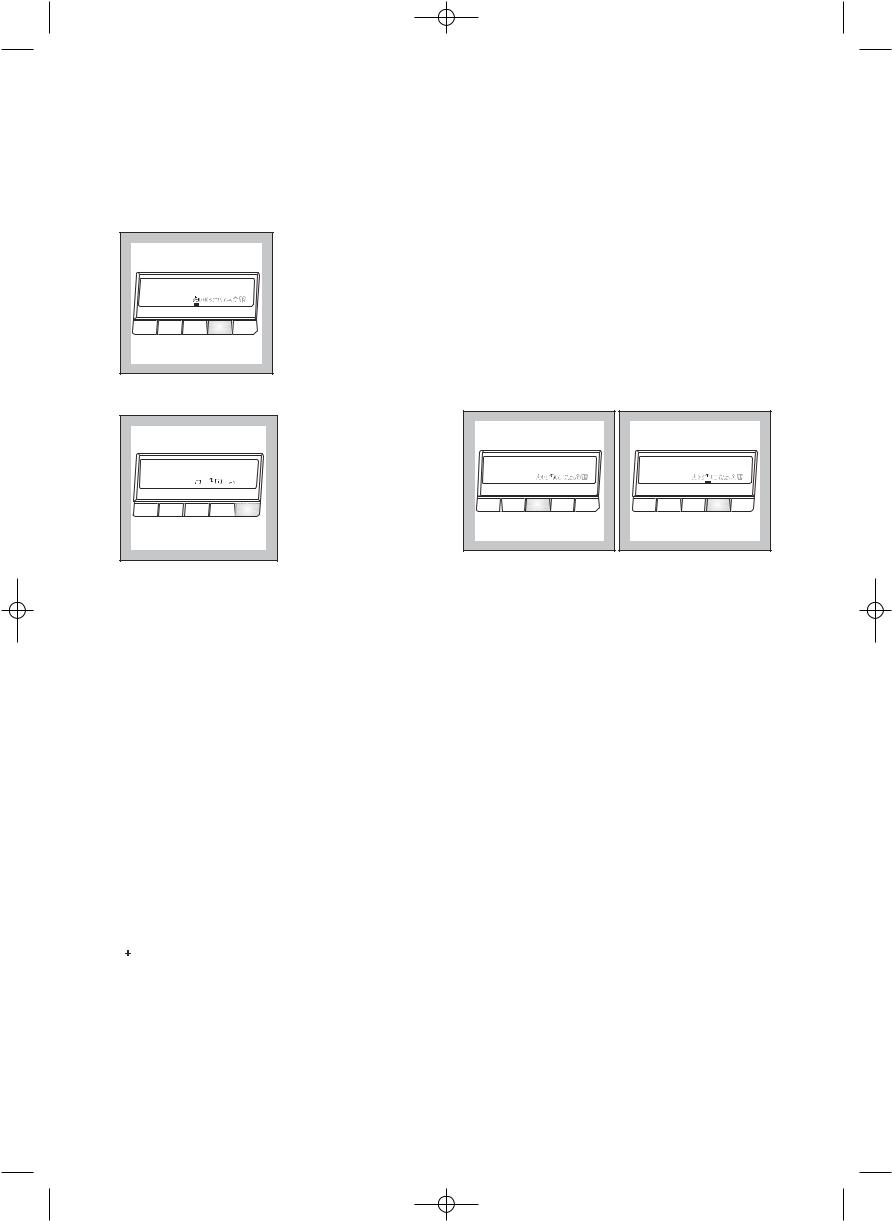
5 Spin Speed button “Spin”
Press this button repeatedly to change the spin speed, if you want your laundry to be spun at a speed different from the one proposed by the washing machine.
COTTON |
|
|
|
08.30 |
MAX 1400 |
|
|
10.55 |
|
|
1400 |
|
|
|
Temp. |
Spin |
Options |
Change |
Exit |
Maximum speeds are:
• for cotton: 1000 rpm for model EWF 1045; 1200 rpm for model EWF 1245; 1400 rpm for model EWF 1445;
• for synthetic, wool, and fabrics to be handwashed: 0900 rpm;
• for delicate, silk fabrics, miniprogramme:
0700 rpm;
By depressing the Spin speed button you can also choose No Spin option «0», Rinse Hold option  and Night cycle option
  .
.
No spin «0» option eliminates all the spin phases and increases the rinses number for cottons and synthetics.
Rinse hold position  : when you choose this option, the machine will not drain the water of the last rinse, so as not to wrinkle the laundry.
Night cycle position  : when you choose this option, the machine will not drain the water of the last rinse, so as not to wrinkle the laundry.
As all spinning phases are suppressed, this washing cycle is very noiseless and it can be selectionned at night or in times with a more economical power rate. On cotton and synthetic programmes the rinses will be performed with more water.
To complete the cycle, choose one of the following programmes:
 Drain
Drain
To drain the water select Drain  programme by means of the selector dial, then press the START button.
 Spin
Spin
To spin the laundry choose spin  or delicate spin
programme by means of the
selector dial; select spin speed by means of button “Spin” and then press the START/PAUSE button.
Important! |
|
|
Before choosing the programme |
(Drain), |
|
(Spin) or |
(Delicate Spin) the selector dial has to |
|
be positioned on «O» (OFF).
6«Options», «Change» and «Exit» buttons
Options button allows you to move through the option icons.
Extra Rinse |
|
|
|
|
No |
|
|
|
10.55 |
Temp. |
Spin |
Options |
Change |
Exit |
ENGLISH
9
132991680 GB.qxd 28/10/2003 13:49 Pagina 10
Change button allows you to select/change the status of the different icons.
Extra Rinse |
|
|
|
|
Yes |
|
|
|
10.55 |
Temp. |
Spin |
Options |
Change |
Exit |
Exit button allows you to return to the previous selection.
COTTON |
|
|
|
08.30 |
CYCLE END AT |
|
|
10.55 |
|
60°C |
1400 |
|
|
|
Temp. |
Spin |
Options |
Change |
Exit |
Depending on the program, different functions can be combined. These must be selected after choosing the desired program and before depressing the START/PAUSE button.
By depressing the "Options" button, all the symbol icons, allowed for the selected programme will appear in the display (allowed for the selected programme).
The first option  will start flashing. Its name and status will appear in the display.
If you want to change the option status, press "Change" button. There will appear a line below the selected icon, indicating that the option is set.
To select the other options press again the «Options» button and proceed as before.
Once you have completed the selection of the options, pressing the «Exit» button, the selected icons will remain fixed in the display.
Note: To modify the already chosen option selections, repeat the previous procedure.
Important! While selecting the option, if you press the temperature “Temp.”, “Spin” , or Start/Pause button, the relative function will be executed.
 EXTRA RINSE: this option can be selected with all programmes, except the wool/handwash programs and miniprogramme.The machine will add 2 rinses for cottons and 1 rinse for synthetics, delicates and silk.
This option is recommended for people who are allergic to detergents, and in areas where the water is very soft.
 TIME SAVING: this option can be used for lightly soiled cotton, synthetic or delicates items in order to obtain a good washing program in a short time. The washing time will be reduced according to the type of fabric and the selected temperature. Selecting this option «Short» or «Very Short» will be shown in the display.
 DELAY START: this option makes it possible to delay the starting of the washing program by 30 min - 60 min - 90 min, 2 hours and then by 1 hour till 20 hours. The delay you have selected is indicated in the display.
Delay Start |
|
|
|
|
No |
|
|
|
10.55 |
Temp. |
Spin |
Options |
Change |
Exit |
Delay Start |
|
|
|
|
Start in 30 min |
|
|
11.25 |
|
Temp. |
Spin |
Options |
Change |
Exit |
You must select this option after you have set the program and before you press the START/PAUSE button.
You can cancel the delay time at any moment, before you press the START/PAUSE button. If you have already pressed the START/PAUSE button and you wish to cancel the Delay time proceed as follows:
1.set the washing machine to PAUSE by pressing the START/PAUSE button;
2.deselect the Delay start option, changing the status;
3.press the START/PAUSE button to start the program.
Important!
The selected delay can be changed only after selecting the washing program again.
The door will locked throughout the delay time.
If you need to open the door, you must first set the washing machine to PAUSE by pressing the START/PAUSE button. After you have closed the door, press the START/PAUSE button again.
The Delay Start cannot be selected with SPIN and DRAIN programmes.
 PREWASH: select this option if you wish your laundry to be prewashed before the main wash (not available for wool and handwash cycle, miniprogram and silk).
The Prewash ends with a short spin at 650 rpm in programmes for cotton and synthetic fabrics, whereas in the program for delicate fabrics the water is only drained.
10
132991680 GB.qxd 28/10/2003 13:49 Pagina 11
 INTENSIVE: for heavy soiled laundry.
This option can be selected only for cottons and synthetics.
The washing time will be prolonged according to the cycle temperature and the fabric type.
 EASY IRON: selecting this button the laundry is gently washed and spun to avoid any creasing. In this way ironing is easier. Furthermore the machine will perform 6 rinses instead of 3 for cotton and 4 rinses instead of 3 for synthetics. This function can be used for cotton and synthetic fabrics. If this option is selected for cotton programmes, the spin speed automaticaly will reduce to 1000 rpm.
 ECONOMY: this option can be selected only for synthetics lightly or normally soiled with a temperature of 40°C or higher. The washing time will be prolonged. If you select 60°C-50°C-40°C, the washing temperature will be reduced to 42°C.
 MENU:
MENU:
Menu option is used for selecting various basic settings without affecting the particular wash programme. These basic settings will remain active until they are deselected/modified.
To move through the different Menu settings use the «Options» button.
To change/confirm the selected setting use the «Change» button.
MEMORY
Programme settings that are frequently used can be saved (e.g. cotton, 95°C, 1200 rpm, with time saving). There are 3 memory spaces available for this purpose. The saved programme can be selected in the same way as any other wash programme by means of the selector dial.
Example: Cotton , 95°C, 1200 rpm, with Time saving.
1. Select the cycle and programme settings.
Cotton |
|
|
|
08.30 |
Cycle end at |
|
|
10.55 |
|
60°C |
1400 |
|
|
|
Temp. |
Spin |
Options |
Change |
Exit |
2.Enter the Menu option and select one of the memory positions. A «Store programme?» message will appear in the display.
A |
|
|
|
|
Setup |
|
|
|
|
Temp. |
Spin |
Options |
Change |
Exit |
|
|
A |
|
|
B |
|
|
|
|
Memory 1 |
|
|
|
|
Store programme? |
|
|
|
|
Temp. |
Spin |
Options |
Change |
Exit |
|
|
|
B |
|
3.To memorise the selected programme press the «Change» button. «Stored» message will appear in the display.
Programme Stored |
|
|
|
|
Temp. |
Spin |
Options |
Change |
Exit |
To change the memorized programme setting repeat the procedure from the beginning.
SOUND
The sound setting permits you to modify the volume of the sound emitter. You can choose between different levels: low, no sound and normal.
Example:
1.Enter the Menu option and select the sound setting.
Sound |
|
|
|
|
Normal |
|
|
|
|
Temp. |
Spin |
Options |
Change |
Exit |
2.Use the «Change» button to select the desired level.
Sound |
|
|
|
|
Low or No Sound |
|
|
|
|
Temp. |
Spin |
Options |
Change |
Exit |
ENGLISH
11

132991680 GB.qxd 28/10/2003 13:49 Pagina 12
 RINSE +
The washing machine is set such that its water consumption is extremely economical. For people with allergies and in areas where the water is very soft, it can however be helpful to use more water when rinsing. When you select RINSE +, 2 additional rinses will be carried out for cottons and 1 additional rinse for synthetics, delicates and silk items. If RINSE + has been selected,  will appear in the option row.
Extra Rinse |
|
|
|
|
No |
|
|
|
10.55 |
Temp. |
Spin |
Options |
Change |
Exit |
Extra Rinse |
|
|
|
|
Yes |
|
|
|
10.55 |
Temp. |
Spin |
Options |
Change |
Exit |
LANGUAGE
You can change the language setting if you would like the indicators in the display to appear in a different language.
Example:
1.Enter the Menu option and select the Language setting.
Language |
|
|
|
|
ENGLISH |
|
|
|
|
Temp. |
Spin |
Options |
Change |
Exit |
2.Press the «Change» button to select the desired Language.
Sprache |
|
|
|
|
DEUTCH |
|
|
|
|
Temp. |
Spin |
Options |
Change |
Exit |
|
|
|
A |
|
Einstellungen |
|
|
|
|
Temp. |
Spin |
Options |
Change |
Exit |
|
|
|
|
B |
CLOCK
The clock setting permits you to modify/set up the current time. It is important to keep it updated as the current END Cycle Time depends on it.
Example:
1.Enter the Menu option and select the Clock setting.
2.With a short/single time pressure of the «Change» button, the time varies minute by minute. With a continue pressure of the «Change» button, the time varies 10 minutes by 10 minutes.
A |
|
|
|
|
Clock |
|
|
|
14.45 |
Set Time |
|
|
|
|
Temp. |
Spin |
Options |
Change |
Exit |
|
|
A |
|
|
|
|
|
|
B |
Clock |
|
|
|
14.46 |
Set Time |
|
|
|
|
Temp. |
Spin |
Options |
Change |
Exit |
|
|
|
B |
|
CONTRAST
The Contrast setting allows you to modify the optical characteristic of the display. Example:
1.Enter the Menu option and select the Contrast setting.
2.Use the «Change» button to set up the desired contrast level.
Contrast |
|
|
|
|
Temp. |
Spin |
Options |
Change |
Exit |
|
|
A |
|
|
Contrast |
|
|
|
|
Temp. |
Spin |
Options |
Change |
Exit |
|
|
|
B |
|
BRIGHTNESS
The Brightness setting allows you to modify the backlight intensity of the display.
Example:
1.Enter the Menu option and select the Brightness setting.
2.Use the "Change"button to set up the desired brightness level.
Brightness |
|
|
|
|
Temp. |
Spin |
Options |
Change |
Exit |
|
|
A |
|
|
Brightness |
|
|
|
|
Temp. |
Spin |
Options |
Change |
Exit |
|
|
|
B |
|
Note:
At the end of the programme if no button is pressed for approximately 10 minutes the backlight intensity goes off.
12

132991680 GB.qxd 28/10/2003 13:49 Pagina 13
7 START/PAUSE button
START/PAUSE
This button has 2 functions:
●Start: after you have selected the desired programme and options, press this button to start the washing machine. The light close to the button will stop flashing and remain lit.
If you have selected a delay time option, the countdown will begin and will be shown on the display.
●Pause: when you press this button again, the programme in progress is interrupted. The light close to the button will start flashing. To restart the programme, press the button again.
When you PAUSE the cycle, it becomes possible to open the door if:
●The washing machine is not in the heating phase;
●The level of the water is not high;
●The drum is not turning.
Important! You must set the washing machine to PAUSE before you make any change in the programme in progress.
Programme information
 Wool
Wool
Washing programme for machine washable wool as well as for hand washable woollens and delicate fabrics with the “hand washing” care symbol.
 Rinses
With this programme it is possible to rinse and spin garments which have been washed by hand.
The machine performs 3 rinses, followed by a final spin at maximum speed.
The spin speed can be reduced by depressing button Spin. The final spin is foreseen only for cotton items as in the spin programme.
 Drain
Drain
For emptying out the water of the last rinse in
programmes with the Rinse hold |
or Night cycle |
option . |
|
Turn first the programme selector dial to O, then select programme and depress the START/PAUSE button.
 Spin
Spin
Separate spin at max.700 rpm for hand washed garments. It has to be used for cotton items. You can reduce the speed by means of button Spin to adapt it to the fabrics to be spun.
 Delicate Spin
Separate spin at the maximum speed for hand washed garments. It has to be used for synthetic, delicate, wool/handwashed, silk items. You can reduce the speed by means of button Spin to adapt it to the fabrics to be spun.
 Mini programme
This is a complete programme that can be combined with the following options: spin speed reduction, no spin, rinse hold or night cycle, delayed start.
To be used for laundry which is lightly soiled or which needs freshening up.
Max load 3 kg (EWF 1445);
2.5 kg (EWF 1045, EWF 1245). Washing temperature 30°C Programme duration 30 minutes
Final spin speed 700 r.p.m.
O = Cancelling/OFF
To reset a programme and to switch off the machine turn the selector dial to O. Now can a new programme be selected.
ENGLISH
13

132991680 GB.qxd 28/10/2003 13:49 Pagina 14
 Washing hints
Sorting the laundry
Follow the wash code symbols on each garment label and the manufacturer’s washing instructions. Sort the laundry as follows:
whites, coloureds, synthetics, delicates, woollens.
Temperatures
95° for normally soiled white cottons and linen (e.g. tea cloths, towels, tablecloths, sheets...)
50°-60° for normally soiled, colour fast garments (e.g. shirts, night dresses, pyjamas....) in linen, cotton or synthetic fibres and for lightly soiled white cotton (e.g. underwear).
O (cold) for delicate items (e.g. net curtains), mixed 30°-40° laundry including synthetic fibres and
woollens.
Before loading the laundry
Never wash whites and coloureds together. Whites may lose their “whiteness” in the wash.
New coloured items may run in the first wash; they should therefore be washed separately the first time.
Make sure that no metal objects are left in the laundry (e.g. hair clips, safety pins, pins).
Button up pillowcases, close zip fasteners, hooks and poppers. Tie any belts or long tapes.
Remove persistent stains before washing. Rub particularly soiled areas with a special detergent or detergent paste.
Treat curtains with special care. Remove hooks or tie them up in a bag or net.
Maximum loads
Recommended loads are indicated in the programme charts.
General rules:
Cotton, linen: drum full but not too tightly packed;
Synthetics: drum no more than half full;
Delicate fabrics and woollens: drum no more than one third full.
Washing a maximum load makes the most efficient use of water and energy.
For heavily soiled laundry, reduce the load size.
Laundry weights
The following weights are indicative: |
|
bathrobe |
1200 g |
napkin |
100 g |
quilt cover |
700 g |
sheet |
500 g |
pillow case |
200 g |
tablecloth |
250 g |
towelling towel |
200 g |
tea cloth |
100 g |
night dress |
200 g |
ladies’ briefs |
100 g |
man’s work shirt |
600 g |
man’s shirt |
200 g |
man’s pyjamas |
500 g |
blouse |
100 g |
men’s underpants |
100 g |
Removing stains
Stubborn stains may not be removed by just water and detergent. It is therefore advisable to treat them prior to washing.
Blood: treat fresh stains with cold water. For dried stains, soak overnight in water with a special detergent then rub in the soap and water.
Oil based paint: moisten with benzine stain remover, lay the garment on a soft cloth and dab the stain; treat several times.
Dried grease stains: moisten with turpentine, lay the garment on a soft surface and dab the stain with the fingertips and a cotton cloth.
Rust: oxalic acid dissolved in hot water or a rust removing product used cold. Be careful with rust stains which are not recent since the cellulose structure will already have been damaged and the fabric tends to hole.
Mould stains: treat with bleach, rinse well (whites and fast coloureds only).
Grass: soap lightly and treat with bleach (whites and fast coloureds only).
Ball point pen and glue: moisten with acetone (*), lay the garment on a soft cloth and dab the stain.
Lipstick: moisten with acetone as above, then treat stains with methylated spirits. Remove any residual marks from white fabrics with bleach.
Red wine: soak in water and detergent, rinse and treat with acetic or citric acid, then rinse. Treat any residual marks with bleach.
14

132991680 GB.qxd 28/10/2003 13:49 Pagina 15
Ink: depending on the type of ink, moisten the fabric first with acetone (*), then with acetic acid; treat any residual marks on white fabrics with bleach and then rinse thoroughly.
Tar stains: first treat with stain remover, methylated spirits or benzine, then rub with detergent paste.
(*) do not use acetone on artificial silk.
Detergents and additives
Good washing results also depend on the choice of detergent and use of the correct quantities to avoid waste and protect the environment. Although biodegradable, detergents contain substances which, in large quantities, can upset the delicate balance of nature.
The choice of detergent will depend on the type of fabric (delicates, woollens, cottons, etc.), the colour, washing temperature and degree of soiling.
All commonly available washing machine detergents may be used in this appliance:
–powder detergents for all types of fabric,
–powder detergents for delicate fabrics (60°C max) and woollens,
–liquid detergents, preferably for low temperature wash programmes (60°C max) for all types of fabric, or special for woollens only.
The detergent and any additives must be placed in the appropriate compartments of the dispenser drawer before starting the wash programme.
If using concentrated powder or liquid detergents, a programme without prewash must be selected.
The washing machine incorporates a recirculation system which allows an optimal use of the concentrated detergent.
Pour liquid detergent into the dispenser drawer compartment marked  just before starting the programme.
Any fabric softener or starching additives must be poured into the compartment marked  before starting the wash programme.
Follow the product manufacturer’s recommendations on quantities to use and do not exceed the «MAX» mark in the detergent dispenser drawer.
Quantity of detergent to be used
The type and quantity of detergent will depend on the type of fabric, load size, degree of soiling and hardness of the water used.
Water hardness is classified in so-called “degrees” of hardness. Information on hardness of the water in your area can be obtained from the relevant water supply company, or from your local authority.
Follow the product manufacturers’ instructions on quantities to use.
Use less detergent if:
–you are washing a small load,
–the laundry is lightly soiled,
–large amounts of foam form during washing.
ENGLISH
15
132991680 GB.qxd 28/10/2003 13:50 Pagina 16
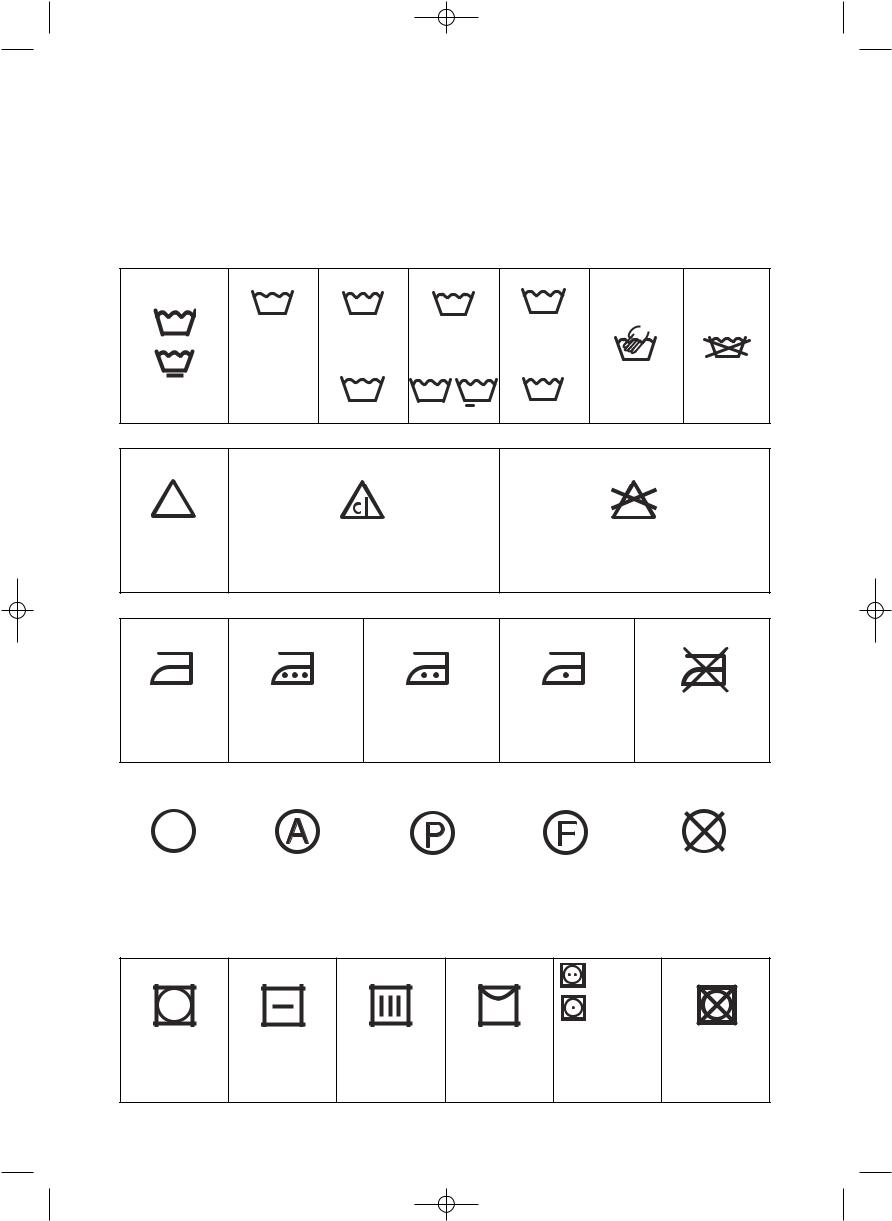
 International wash code symbols
These symbols appear on fabric labels, in order to help you choose the best way to treat your laundry.
Energetic wash |
|
|
|
30 |
|
|
95 |
60 |
|
40 |
|
|
|
Max. wash |
Max. wash |
Max. wash |
Max. wash |
|
|
|
temperature |
temperature |
temperature |
temperature |
|
|
|
95°C |
60°C |
|
40°C |
30°C |
|
|
|
60 |
40 |
40 |
30 |
Hand wash |
Do not |
Delicate wash |
|
wash |
||||
|
|
|
|
|
|
at all |
Bleaching |
Bleach in cold water |
Do not bleach |
Ironing |
Hot iron |
Warm iron |
Lukewarm iron |
Do not iron |
|
max 200°C |
max 150°C |
max 110°C |
|
Dry cleaning |
|
|
|
|
|
|
|
|
|
|
|
|
|
|
|
|
|
|
|
|
|
|
|
|
|
|
|
|
|
|
|
|
|
|
|
Dry cleaning |
Dry cleaning in |
Dry cleaning |
Do not |
|||||
|
in all solvents |
perchlorethylene, |
in petrol, |
dry clean |
||||
|
|
petrol, pure alcohol, |
pure alcohol |
|
||||
|
|
R 111 & R 113 |
and R 113 |
|
||||
|
|
|
|
|
|
|
|
|
|
|
|
|
high |
|
|
|
|
|
temperature |
|
|
|
|
|
low |
|
|
|
|
|
temperature |
|
Drying |
Flat |
On the line |
On clothes |
Tumble dry |
Do not |
|
|
|
hanger |
|
tumble dry |
16

132991680 GB.qxd 28/10/2003 13:50 Pagina 17
Operating sequence
Before washing your first load of laundry, we recommend that you run a cotton cycle at 60°C, with the machine empty, in order to remove any manufacturing residue from the drum and tub.
Pour half a measure of detergent into the main wash compartment and start up the machine.
1. Place the laundry in the drum
Open the door.
Place the laundry in the drum, one item at a time, shaking them out as much as possible.
Close the door.
P0004
2. Measure out the detergent
Pull out the dispenser drawer until it stops. Measure out the amount of detergent recommended by the manufacturer in a graduated cup and pour it into the main wash compartment  .
.
If you have selected the prewash  function, pour detergent into the appropriate compartment marked
 .
.
3. Measure out the additive
If required, pour fabric softener into the compartment marked  , without exceeding the «MAX» mark.
P1194 |
P1195 |
4. Switch the machine ON and OFF
Turn the selector dial to the desired programme to switch the appliance on.
To switch the appliance off turn it to «O».
|
|
|
M |
1 |
|
|
|
|
|
|
M |
2 |
|
E |
|
|
|
||
M |
3 |
|
|
|
|
|
|
|
Switching the appliance for the first time.
LANGUAGE
When switching on the appliance for the first time you must set the language in which you want the indicators in the display to appear.
Important!
If the display is not showing any language, the appliance has already been switched on once. In such case, go to the chapter «Change language» if you would like to change the language setting.
Example:
1.Press the «Change» button until the desired language appears in the display.
Language |
|
|
|
|
ENGLISH |
|
|
|
|
Temp. |
Spin |
Options |
Change |
Exit |
Sprache |
|
|
|
|
DEUTCH |
|
|
|
|
Temp. |
Spin |
Options |
Change |
Exit |
|
|
|
A |
|
2.Press the EXIT button to confirm the selection.
Einstellungen |
|
|
|
|
Temp. |
Spin |
Options |
Change |
Exit |
|
|
|
|
B |
All indicators in the display will appear in this language from now on.
When the appliance is switched on again all indicators in the display will appear in this language.
Note:
If the undesired language has been set, press contemporary SPIN + OPTIONS buttons for about 2 seconds in order to change the language.
Follow the instructions as before.
ENGLISH
17

132991680 GB.qxd 28/10/2003 13:50 Pagina 18
SETTING THE TIME
You should set the time prior to the first wash and when changing to and from daylight savings time. See «Clock setting», Menu.
5. Select the desired programme/fabric
Turn the selector dial, in order to select the desired programme/fabric. The relevant message will appear in the display.
The display will show the END CYCLE TIME of the selected programme, calculated on the basis of the maximum load for each type of fabric. The START/PAUSE button light will start flashing.
If the load of laundry to be washed is small, at the beginning of the cycle the display will still indicate the END CYCLE relevant to the maximum load. The duration value will be gradually adjusted during the execution of the cycle.
|
|
|
|
M |
1 |
|
|
|
|
|
|
|
|
|
|
|
|
|
|
|
|
M |
2 |
|
E |
|
|
|
|
M |
3 |
|
|
|
Cotton |
|
|
|
08.30 |
|
|
|
|
|
Cycle and at |
|
|
10.55 |
|
|
|
|
|
|
60°C |
1400 |
|
|
|
|
|
|
|
|
Temp. |
Spin |
Options |
Change |
Exit |
6. Select the temperature
Press the TEMPERATURE button if you wish to select a temperature value different from the one proposed by the washing machine.
The message of the maximum available temperature appears on the second row of the display (instead of «cycle end at»). In the corner of the third row appears the indication of the selected temperature.
COTTON |
|
|
|
08.30 |
MAX 95°C |
|
|
10.55 |
|
40°C |
1400 |
|
|
|
Temp. |
Spin |
Options |
Change |
Exit |
7.Select the Spin Speed “Spin”, the Rinse Hold  or Night cycle
  .
.
Press the SPIN SPEED button repeatedly, in order to select the desired spin speed or No Spin «O» or the Rinse Hold  or the Night Cycle
  options. The relevant message will appear on the second row of the display. The selected spin level will be shown on the third row next to the spin button.
If you select the Rinse Hold or Night Cycle options, the machine will stop at the end of the programme with the water still in the tub.
COTTON |
|
|
|
08.30 |
MAX 1400 |
|
|
10.55 |
|
40°C |
1200 |
|
|
|
Temp. |
Spin |
Options |
Change |
Exit |
8. Select the desired options
Depress the relevant buttons to select the required options.
Depending on the selected programme only certain options are available and shown during the selection phase.
Note: Not all the options are compatible between themselves. The uncompatible option icons will disappear.
9. Select the DELAY TIME
Before you start the programme, if you wish the starting to be delayed, choose the DELAY option. The selected delay time value (up to 20 hours) will appear on the display while selecting.
The end cycle will be updated and shown on the relative position of the display.
Delay Start |
|
|
|
|
No |
|
|
|
10.55 |
Temp. |
Spin |
Options |
Change |
Exit |
Delay Start |
|
|
|
|
Start in 30 min |
|
|
11.25 |
|
Temp. |
Spin |
Options |
Change |
Exit |
18

132991680 GB.qxd 28/10/2003 13:50 Pagina 19
10. Start the programme
Press the START/PAUSE button. The relevant light will stop flashing. The message relevant to the phase that is in progress will be shown in the display.
If you have chosen a delayed start, the washing machine will begin the countdown.
COTTON |
|
|
|
08.30 |
Washing |
|
|
12.00 |
|
40°C |
1200 |
|
|
|
Temp. |
Spin |
Options |
Change |
Exit |
START/PAUSE |
|
|
|
|
11.How to change a programme during its cycle
Before you make any change, you must pause the washing machine by pressing the START/PAUSE button.
It is possible to change any phase before the programme carries it out.
When the programme has started, you can only reset it by turning the programme selector dial to «O» and then you can select the new programme. The washing water remains in the tub.Start the new programme by depressing the START/PAUSE button.
Note: To drain the water before starting the new cycle you have to cancel the programme and select the DRAIN cycle.
12. Cancelling a programme
Turn the selector dial to «O» to cancel a programme which is running. Now you can select a new programme.
13.How to open the door during the cycle of a programme
You can open the door, after having set the washing machine to PAUSE, provided the following conditions exist:
●the washing machine is not in the heating phase beyond 55°C;
●the level of the water is not high;
●the drum is not turning.
If these requirements are met, when you pause the washing machine, the relevant message appears in the display and the door can be opened.
Should it not be possible to open the door, and should it be absolutely necessary to do so, switch the machine off by turning the selector dial on "O" position.
After approximately 3 minutes, you can open the door.
Pay attention to the level and temperature of the water in the washing machine!
14. End of programme
At the end of the programme, the washing machine stops automatically, gives an audible signal (if option no sound has not been selected), and displays the relevant message.
If you had selected the RINSE HOLD or NIGHT CYCLE option, the START/PAUSE button light is off. To drain or spin first turn the programme selector dial to «O» and then to drain programme  or spin/delicate spin programme
  /
/  .
.
Release of the lock is also indicated by the coming on of the message "Door openable" (cycle ended). Turn the programme selector dial to «O» to switch the machine off.
Remove the laundry from the washing machine. Check whether the drum is completely empty, by rotating it with your hand. The purpose of this is to prevent any items of laundry from remaining accidentally in the drum, where they might get damaged in a subsequent wash (e.g. by shrinking) or bleed colour into another load of laundry.
We advise you to close the water supply tap and disconnect the plug from the socket.
Leave the door ajar in order to air the washing machine.
ENGLISH
19

132991680 GB.qxd 28/10/2003 13:50 Pagina 20
Washing programmes
Washing Programmes
|
Type of laundry |
Max |
Programme/ |
Description of |
|
|
Consumption* |
|||||||
|
|
|
|
|
|
|
|
|
||||||
|
and symbols on |
Available options |
|
|
|
|
|
|
|
|||||
|
load |
temperature |
programme |
|
Energy |
|
Water |
|
Time |
|||||
|
labels |
|
|
|
|
|
|
kWh |
|
litres |
|
h/min. |
||
|
|
|
|
|
|
|
|
|
|
|
||||
|
|
|
|
|
|
|
|
|
|
|
|
|
||
|
White and |
5 kg |
Cottons |
Main wash at |
|
|
EWF1045-EWF1245 |
|
||||||
|
coloureds cotton: |
EWF1045 |
O(cold)-95°C |
|
|
|
|
|
|
|
|
|||
|
O(cold)-95°C |
|
1.9 |
|
47 |
|
2.20 |
|
||||||
|
e.g. sheets, |
|
|
|
|
|||||||||
|
EWF1245 |
|
3 rinses |
|
|
|
|
|
|
|
|
|||
|
tablecloths, |
6 kg |
|
Long spin |
|
|
|
EWF1445 |
|
|
||||
|
household linen |
|
|
|
|
|
|
|
|
|
|
|||
|
EWF1445 |
|
|
|
2.05 |
|
52 |
|
2.20 |
|
||||
|
|
|
|
|
|
|
|
|
||||||
|
|
|
|
|
|
|
|
|
|
|
|
|
|
|
|
White and |
|
|
Cottons E |
Main wash at |
|
|
|
|
|
|
|
|
|
|
coloured cotton |
5 kg |
60°-50°-40°C |
|
0.85 |
|
44 |
|
2.04 |
|
||||
|
60°-50°-40°C |
|
|
|
|
|||||||||
|
Economy**: e.g. |
|
|
2 rinses |
|
|
|
|
|
|
|
|
||
|
shirts, blouses, |
|
|
|
Long spin |
|
|
|
|
|
|
|
|
|
|
|
|
|
|
|
|
|
|
|
|
|
|||
|
underwear, towels, |
6 kg |
|
|
|
1.02 |
|
49 |
|
2.04 |
|
|||
|
house-hold linen |
|
|
|
|
|
|
|||||||
|
|
|
|
|
|
|
|
|
|
|
|
|
||
|
|
|
|
|
|
|
|
|
|
|
|
|
|
|
|
Synthetic fabrics: |
2.5 kg |
Synthetics |
Main wash at |
|
0.85 |
|
50 |
|
1.27 |
|
|||
|
e.g. shirts, blouses, |
O(cold)-60°C |
|
|
|
|
||||||||
|
|
|
|
|
|
|||||||||
|
underwear |
|
|
O(cold)-60°C |
3 rinses |
|
|
|
|
|
|
|
|
|
|
|
|
|
|
|
|
|
|
|
|
||||
|
|
|
3 kg |
|
Short spin |
|
1.05 |
|
55 |
|
1.27 |
|
||
|
|
|
|
|
|
|
|
|
||||||
|
|
|
|
|
|
|
|
|
|
|
||||
|
|
|
|
|
|
|
|
|
|
|
|
|
|
|
|
Delicate fabrics: |
2.5 kg |
Delicates |
Main wash at |
|
|
|
|
53 |
|
58 |
|
||
|
e.g. acrylic fabrics, |
O(cold)-40°C |
|
0.55 |
|
|
|
|||||||
|
|
|
|
|
|
|||||||||
|
|
|
|
|
|
|
|
|||||||
|
viscose, polyester, |
|
|
O(cold)-40°C |
3 rinses |
|
|
|
|
|
|
|
|
|
|
|
|
|
|
|
|
|
|
|
|
||||
|
synthetic blends |
3 kg |
|
Short spin |
|
0.6 |
|
57 |
|
58 |
|
|||
|
|
|
|
|
|
|
|
|
||||||
|
|
|
|
|
|
|
|
|
|
|
|
|
|
|
|
Handwash |
2 kg |
Hand wash |
Main wash at |
|
0.35 |
|
52 |
|
57 |
|
|||
|
O(cold)-40°C |
|
|
|
|
|||||||||
|
|
|
|
|
|
|
|
|
|
|
|
|
|
|
|
|
|
|
|
O(cold)-40°C |
3 rinses |
|
|
|
|
|
|
|
|
|
|
|
2 kg |
|
|
|
|
|
|
|
|
|||
|
|
|
Short spin |
|
0.4 |
|
55 |
|
57 |
|
||||
|
|
|
|
|
|
|
|
|
|
|
|
|
|
|
|
Wool |
2 kg |
Wool |
Main wash at |
|
0.35 |
|
52 |
|
57 |
|
|||
|
O(cold)-40°C |
|
|
|
|
|||||||||
|
|
|
|
|
|
|||||||||
|
|
|
|
|
O(cold)-40°C |
3 rinses |
|
|
|
|
|
|
|
|
|
|
|
2 kg |
|
|
|
|
|
|
|
|
|||
|
|
|
|
Short spin |
|
0.4 |
|
55 |
|
57 |
|
|||
|
|
|
|
|
|
|
|
|
|
|
|
|
|
|
|
Silk |
1 kg |
Silk |
Main wash at |
|
0.3 |
|
50 |
|
|
|
|||
|
30°C |
|
|
|
39 |
|
||||||||
|
|
|
|
|
30°C |
|
|
|
|
|||||
|
|
|
|
|
3 rinses |
|
|
|
|
|
|
|
|
|
|
|
|
1 kg |
|
|
|
|
|
|
|
|
|||
|
|
|
|
|
|
|
|
|
|
|
||||
|
|
|
|
Short spin |
|
0.3 |
|
52 |
|
39 |
|
|||
|
|
|
|
|
|
|
|
|
|
|
||||
|
|
|
|
|
|
|
|
|
|
|
|
|
|
|
|
Miniprogramme |
2.5 kg |
|
Main wash at |
|
0.3 |
|
40 |
|
30 |
|
|||
|
|
|
|
30°C |
|
|
|
|
||||||
|
|
|
|
|
30°C |
|
|
|
|
|||||
|
|
|
3 kg |
3 rinses |
|
|
|
|
|
|
|
|
||
|
|
|
|
|
|
|
|
|
|
|
||||
|
|
|
|
Short spin |
|
0.35 |
|
45 |
|
30 |
|
|||
|
|
|
|
|
|
|
|
|
|
|
|
|
|
|
*The consumption data shown on this chart is to be considered purely indicative, as it may vary depending on the quantity and type of laundry, on the inlet water temperature and on the ambient temperature. It refers to the highest temperature for each wash programme.
**In compliance with EC directive 92/75 the consumption figures indicated on the Energy label refer to this programme at E60°C.
The wool wash cycle of this machine has been approved by Woolmark for the washing of machine washable Woolmark products provided that the garments are washed according to the instructions on the garment label and those issued by the manufacturer of this machine. Licence No. M9605.
20
132991680 GB.qxd 28/10/2003 13:50 Pagina 21
Washing programmes
Special Programmes
|
Programme |
|
Programme |
|
Addictional |
|
Wash |
|
Consumption* |
|
|
|||||
|
|
|
|
|
|
|
||||||||||
|
|
|
|
|
|
|
|
|
|
|
|
|
||||
|
selector dial |
Programme |
|
|
load |
|
|
|
|
|
|
|
|
|
||
|
description |
|
functions |
|
Energy |
|
Water |
|
Time |
|
|
|||||
|
position |
|
|
|
max. |
|
|
|
|
|||||||
|
|
|
|
|
|
|
kWh |
|
litres |
|
h/min. |
|
|
|||
|
|
|
|
|
|
|
|
|
|
|
|
|
||||
|
|
|
|
|
|
|
|
|
|
|
|
|
|
|
||
|
|
|
3 rinses with |
|
|
|
5 kg |
|
EWF1045-EWF1245 |
|
|
|
||||
|
|
|
|
|
|
|
|
|
|
|
|
|
|
|
||
|
|
|
liquid additive, |
|
|
|
0.05 |
|
45 |
|
45 |
|
|
|
||
|
|
|
|
|
|
|
|
|
|
|
|
|||||
|
|
For rinsing items |
if required. |
|
|
|
|
|
|
|
|
|
|
|
|
|
|
|
|
|
|
|
|
|
EWF1445 |
|
|
|
|
||||
|
Rinses |
|
Long spin at |
|
|
|
6 kg |
|
|
|
|
|
|
|||
|
|
|
|
|
|
|
|
|
|
|
|
|
|
|||
|
|
max. speed |
|
|
|
0.06 |
|
48 |
|
45 |
|
|
|
|||
|
|
|
|
|
|
|
|
|
|
|
||||||
|
|
|
|
|
|
|
|
|
|
|
|
|||||
|
|
|
|
|
|
|
|
|
|
|
|
|
|
|
|
|
|
|
For empting out the |
|
|
|
|
/ |
- |
|
- |
|
2 |
|
|
|
|
|
|
water of the last |
|
|
|
|
|
|
|
|
|
|||||
|
|
|
|
|
|
|
|
|
|
|
|
|||||
|
|
rinses of program- |
Water draining |
|
|
|
|
|
|
|
|
|
|
|
|
|
|
Drain |
mes with option |
|
|
|
|
/ |
|
|
|
|
|
|
|
|
|
|
and Night Cycle |
|
|
|
|
- |
|
- |
|
2 |
|
|
|
|||
|
|
|
|
|
|
|
|
|
|
|
||||||
|
|
|
|
|
|
|
|
|
|
|
|
|
|
|
|
|
|
|
Separate spin for |
Drain and spin |
|
|
|
5 kg |
- |
|
- |
|
10 |
|
|
|
|
|
|
at the max. |
|
|
|
|
|
|
|
|
|
|
|
|
|
|
|
|
cottons |
|
|
|
|
|
|
|
|
|
|
|
|
|
|
|
Spin |
speed |
|
|
|
6 kg |
- |
|
|
|
10 |
|
|
|
||
|
|
|
|
|
|
- |
|
|
|
|
||||||
|
|
|
|
|
|
|
|
|
|
|
||||||
|
|
|
|
|
|
|
|
|
|
|
|
|
|
|
|
|
|
|
Separate spin for |
Drain and |
|
|
|
5 kg |
- |
|
- |
|
6 |
|
|
|
|
|
|
synthetics, delicates, |
|
|
|
|
|
|
|
|
|
|
|
|
|
|
|
Delicate Spin |
wool/hanwash and |
delicate spin |
|
|
|
6 kg |
|
|
|
|
|
|
|
|
|
|
silk |
|
|
|
|
- |
|
- |
|
6 |
|
|
|
|||
|
|
|
|
|
|
|
|
|
|
|
|
|
|
|
|
|
|
O |
For cancelling the |
|
|
|
|
|
|
|
|
|
|
|
|
|
|
|
programme which is |
|
|
|
|
/ |
|
|
|
|
|
|
|
|
|
|
|
|
|
|
|
|
- |
|
- |
|
- |
|
|
|
|||
|
|
running or to switch |
|
|
|
|
|
|
|
|
|
|||||
|
Reset/Off |
|
|
|
|
|
|
|
|
|
|
|||||
|
|
|
|
|
|
|
|
|
|
|
|
|
|
|
||
|
the machine off. |
|
|
|
|
|
|
|
|
|
|
|
|
|
|
|
|
|
|
|
|
|
|
|
|
|
|
|
|
|
|
|
|
|
|
|
|
|
|
|
|
|
|
|
|
|
|
|
|
|
|
|
|
|
|
|
|
|
|
|
|
|
|
|
|
|
|
ENGLISH
*The consumption data shown on this chart is to be considered purely indicative, as it may vary depending on the quantity and type of laundry, on the inlet water temperature and on the ambient temperature.
21

132991680 GB.qxd 28/10/2003 13:50 Pagina 22
Maintenance
1. Door seal
Check from time to time the door seal and eliminate eventual possible objects that could be trapped in the fold.
P1050
2. Bodywork
Clean the outside of the machine with warm water and a neutral, non-abrasive household detergent. Rinse with clean water and dry with a soft cloth.
Important: do not use methylated spirits, solvents or similar products to clean the bodywork.
3. Detergent dispenser drawer
After a while, detergents and fabric softeners leave deposits in the drawer.
Clean the drawer from time to time by rinsing it under a running tap. To remove the drawer from the machine, press the button in the rear left-hand corner.
To facilitate cleaning, the top part of the additive compartment can be removed.
P1191 |
C0068 |
P1192 |
P1086 |
Detergent can also accumulate inside the drawer recess: clean it with an old toothbrush. Refit the drawer after cleaning.
P0038 |
Drain pump
The pump should be inspected if
•the machine does not empty and/or spin
•the machine makes an unusual noise during draining due to objects such as safety pins, coins etc. blocking the pump.
Proceed as follows:
•Disconnect the appliance.
•If necessary wait until the water has cooled down.
•Open the pump door.
P1114 |
•Place a container close to the pump to collect any spillage.
•Release the emergency emptying hose, place it in the container and remove its cap.
•When no more water comes out, unscrew the pump and remove it. Always keep a rag nearby to dry up spillage of water when removing the pump.
P1115
22

132991680 GB.qxd 28/10/2003 13:50 Pagina 23
•Remove any objects from the pump impeller by rotating it.
•Put the cap back on the emergency emptying hose and place the latter back in its seat.
P1117 |
•Screw the pump fully in.
•Close the pump door.
Water inlet filter
If you notice that the machine is taking longer to fill, check that the filter in the water inlet hose is not blocked.
Turn off the water tap.
Unscrew the hose from the tap.
Clean the filter with a stiff brush.
Screw the hose back onto the tap.
P1090 |
Emergency emptying out
If the water is not discharged, proceed as follows to empty out the machine:
•pull out the plug from the power socket;
•close the water tap;
•if necessary, wait until the water has cooled down;
•open the the pump door;
•place a bowl on the floor and place the end of the emergency emptying hose into the bowl. Remove its cap. The water should drain by gravity into the bowl. Whe the bowl is full, put the cap back on the hose. Empty the bowl. Repeat the procedure until water stops flowing out;
•clean the pump if necessary as previously described;
•replace the emergency emptying hose in its seat after having plugged it;
•screw the pump again and close the door.
Frost precautions
If the machine is installed in a place where the temperature could drop below 0°C, proceed as follows:
•Remove the plug from the socket.
•Close the water tap and unscrew the water inlet hose from the tap.
•Place the end of the emergency emptying hose and that of the inlet hose in a bowl placed on the floor and let water drain out.
•Screw the water inlet hose back on and reposition the emergency emptying hose after having put the cap on again.
By doing this, any water remaining in the machine is removed, avoiding the formation of ice and, consequently, breakage of the affected parts.
When you use the machine again, make sure that the ambient temperature is above 0°C.
ENGLISH
23
132991680 GB.qxd 28/10/2003 13:50 Pagina 24
Something not working?
Problems which you can resolve yourself.
During machine operation it is possible that one of the following messages appears on the display:
Problem with the water supply |
......“No incoming water. Check tap & hose” |
Problem with water draining .......... |
“No drain. Check drain hose /filter” |
Door open ...................................... |
“Door not closed. Please check” |
Once the problem has been eliminated, press the START/PAUSE button  to restart the programme. If after all checks, the problem persists, contact your local Service Centre.
Problem |
Possible cause |
|
|
• The machine does not start up: |
• The door is not firmly closed.(Door not closed. |
||
Please check) |
|||
|
|||
|
• The machine is not plugged in or there is no power |
||
|
at the socket. |
||
|
• The main fuse has blown. |
||
|
• The START/PAUSE button has not been depressed. |
||
|
• The DELAY START option has been selected. |
||
|
|
||
• The machine does not fill: |
• The water tap is closed. (No incoming water. |
|
|
|
Check tap & hose) |
||
|
• The inlet hose is squashed or kinked. (No |
||
|
incoming water. Check tap & hose) |
||
|
• The filter in the inlet hose is blocked. (No incoming |
||
|
water. Check tap & hose) |
||
|
• The door is not properly closed. (Door not closed. |
||
• The machine fills then empties |
Please check) |
||
• The end of the drain hose is too low. Refer to |
|
||
immediately: |
relevant paragraph in “water drainage” section. |
||
|
|
||
• The machine does not empty |
• The drain hose is squashed or kinked. (No drain. |
|
|
and/or does not spin: |
Check drain hose /filter) |
||
• The RINSE HOLD option , NIGHT CYCLE or |
|||
|
|||
|
NO SPIN «O» has been selected. |
||
|
• The drain pump is clogged. (No drain. Check |
||
|
rain hose /filter) |
|
|
• There is water on the floor: |
• Too much detergent or unsuitable detergent |
||
|
(creates too much foam) has been used. |
||
|
• Check whether there are any leaks from one of the |
||
|
inlet hose fittings. It is not always easy to see this |
||
|
as the water runs down the hose; check to see if it |
||
|
is damp. |
||
|
• The drain hose is damaged. |
||
|
• The drain pump cover has not been screwed in |
||
|
after cleaning. |
||
|
• The emergency emptying hose has not been |
||
|
plugged after cleaning the pump. |
||
|
|
||
• Unsatisfactory washing results: |
• Too little detergent or unsuitable detergent has |
|
|
|
been used. |
||
|
• Stubborn stains have not been treated prior to |
||
|
washing. |
||
|
• The correct temperature was not selected. |
||
|
• Excessive laundry load. |
||
|
|
|
|
24

132991680 GB.qxd 28/10/2003 13:50 Pagina 25
Problem |
Possible cause |
|
|
|
|
• The machine vibrates or is noisy: |
• The transit bolts and packing have not been |
|
|
removed. |
|
|
• The support feet have not been adjusted. |
|
|
• The laundry is not evenly distributed in the drum. |
|
|
• Maybe there is very little laundry in the drum. |
|
|
|
|
• The door will not open: |
• The water level is above the bottom edge of the |
|
|
door. |
|
|
• The machine is heating the water. |
|
|
• The drum is turning. |
|
|
The door could be opened only when «Door |
|
|
openable» message appears in the display. |
|
|
|
|
• Spinning starts late or the |
• The electronic unbalance detection device has cut |
|
laundry is not spun enough: |
in because the laundry is not evenly distributed in |
|
the drum. The laundry is redistributed by reverse |
||
|
||
|
rotation of the drum. This may happen several |
|
|
times before the unbalance disappears and |
|
|
normal spinning can resume. If, after 5 minutes, |
|
|
the laundry is still not evenly distributed in the |
|
|
drum, the machine will spin at a lower speed. If at |
|
|
the end of the programme the laundry is not spun |
|
|
enough, redistribute the load manually and select |
|
|
the spin programme. |
|
|
|
|
• Water is not visible in the |
• The machine, which is the result of modern |
|
machine: |
technology, runs in a very economical way with |
|
low water consumption. Performance is |
||
|
||
|
nevertheless excellent. |
|
|
|
|
• The machine makes an unusual |
• The machine is fitted with a commutator motor |
|
noise: |
which improves machine performance. |
|
|
||
|
|
If you are unable to identify or solve the problem, contact our service centre. Before telephoning, make a note of the model, serial number and purchase date of your machine: the Service Centre will require this information.
|
Mod. .......... |
|
Prod. No. ........... |
P0042 BD |
Ser. No. ......... |
|
ENGLISH
25
132991680•PL 28-10-2003 9:59 Pagina 26
Spis treści
Ważne informacje |
26 |
Środki piorące i zmiękczające |
|
Utylizacja |
27 |
Dozowanie środków piorących |
|
Międzynarodowe symbole |
|||
|
|
||
Zalecenia w zakresie |
|
konserwacji odzieży |
|
27 |
|
||
ochrony środowiska |
Kolejność czynności |
||
Dane techniczne |
27 |
Tabela programów |
|
Konserwacja |
|||
Instalacja |
28 |
||
Obudowa |
|||
Rozpakowanie |
28 |
||
Drzwi |
|||
Ustawienie i poziomowanie |
28 |
||
Pojemnik na środki piorące |
|||
Podłączenie węża dopływowego wody |
29 |
||
Mały filtr węża dopływowego wody |
|||
Podłączenie węża odpływowego wody |
29 |
||
Pompa odplywowa wody |
|||
Podłączenie do zasilania elektrycznego |
29 |
||
Awaryjne odprowadzenie wody |
|||
|
|
||
Państwa nowa pralka automatyczna |
30 |
Wskazówki dotyczące przechowywania |
|
Opis urządzenia |
30 |
w niskich temperaturach |
|
Co zrobić, jeśli urządzenie nie |
|||
Pojemnik na środki piorące |
30 |
pracuje? |
|
Eksploatacja |
31 |
Punkty Serwisowe |
|
Panel sterowania |
31-34 |
|
|
Praktyczne wskazówki dotyczące prania |
35 |
|
|
Sortowanie odzieży |
35 |
|
|
Temperatury |
35 |
|
|
Przed włożeniem bielizny |
35 |
|
|
Maksymalne ilości bielizny |
35 |
|
|
Ciężar bielizny |
35 |
|
|
Usuwanie plam |
35-36 |
|
36
36
37
38-39
40-42
43 |
POLSKI |
43 |
|
43
43
43
43
44
44
45-46
46-47
Symbole pojawiające się w niniejszej instrukcji obsługi mają następujące znaczenie:
Trójkat ostrzegawczy i okreßlenia sygnalizacyjne (Uwaga! Ostrzeqenie! Upomnienie!) maja na celu zwrócenie szczególnej uwagi na wskazówki niezwykle waqne dla zapewnienia Panstwa bezpieczenstwa i niezawodnej pracy urzadzenia. Prosimy o ich przestrzeganie.
Informacje poprzedzone tym symbolem stanowia uzupelnienie instrukcji funkcjonowania i praktycznego uqywania urzadzenia.
Ten symbol oznacza zalecenia i wskazówki dotyczace oszczednego korzystania z urzadzenia w sposób przyjazny dla ßrodowiska.
Oto nasz wkład w ochronę środowiska: używamy papieru pochodzącego z recyklingu.
26

132991680•PL 28-10-2003 9:59 Pagina 27
POLSKI
Ważne informacje
Prosimy o uwaqne przeczytanie niniejszej instrukcji obslugi i zwrócenie szczególnej uwagi na podane na pierwszych stronach zasady bezpieczenstwa. Radzimy zachowa© instrukcje, aby móc korzysta© z niej w przyszloßci oraz przekaza© kolejnemu uqytkownikowi pralki, w razie jej odstapienia.
Przed przystąpieniem do podłączenia i eksploatacji pralki powinni Państwo dokładnie zapoznać się z instrukcją obsługi.
Instalacja
•Po rozpakowaniu nie jest ono wątpliwości prosimy
zakładem serwisowym
•Przed uruchomieniem urządzenia należy usunąć wszystkie elementy opakowania. Szczególnie należy zwrócić uwagę na blokady transportowe. Jeżeli nie zostaną usunięte może dojść do uszkodzenia pralki oraz znajdujących się w jej pobliżu przedmiotów i mebli. Prosimy o dokładne przeczytanie odpowiedniego rozdziału w niniejszej instrukcji obsługi.
•Wszelkie przeróbki instalacji elektrycznej / hydraulicznej muszą być wykonywane przez uprawnionego montera.
•Pralki nie należy stawiać na przewodzie zasilającym.
•Jeżeli pralka stoi na wykładzinie podłogowej należy wyregulować nóżki tak, aby zapewnić swobodną cyrkulację powietrza.
Eksploatacja
•Urządzenie jest przeznaczone do użytku w warunkach gospodarstwa domowego. Nie należy go używać niezgodnie z przeznaczeniem.
•Przed włożeniem bielizny sprawdzić, czy nadaje się ona do prania w pralce. Przestrzegać zaleceń producenta odzieży, umieszczonych na metkach.
•Nie przeładowywać pralki. Stosować się do zaleceń zawartych w niniejszej instrukcji obsługi.
•Przed włożeniem bielizny do pralki sprawdzić, czy w kieszeniach np. spodni nie zostawiono zapalniczek, monet, śrubek itp., gdyż mogą one spowodować zniszczenia.
•W pralce nie należy prać odzieży zabrudzonej olejem, benzyną, alkoholem lub innymi pochodnymi środkami. Jeżeli plamy są usuwane specjalnymi środkami odplamiającymi, należy odczekać z włożeniem bielizny do pralki do momentu całkowitego ulotnienia się tego środka.
•Wskazane jest pranie drobnych rzeczy (np. skarpetki, koronki, paski itp.) w małych woreczkach lub w poszewce, aby uniknąć przedostania się tych rzeczy pomiędzy bęben, a zbiornik.
•Używać tylko sprawdzonego środka do zmiękczania tkanin. Jego nadmierna ilość może uszkodzić tkaninę.
zakończeniu prania w bębnie pozostała woda, należy ją odpompować przed otwarciem drzwiczek (patrz odpowiedni rozdział instrukcji).
•Po zakończeniu pracy należy wyjąć przewód zasilający z gniazdka oraz zakręcić zawór wodny.
Bezpieczeństwo ogólne
•Naprawy urządzenia mogą być wykonywane tylko przez fachowy personel. Nieprawidłowe naprawy mogą spowodować poważne zagrożenie. Naprawy należy zlecać ośrodkom serwisowym ZANUSSI.
•Nigdy nie należy wyciągać wtyczki z gniazdka ciągnąc za przewód, lecz wyjąć wtyczkę.
•Podczas prania w wysokich temperaturach drzwiczki pralki nagrzewają się. Nie dotykać drzwiczek podczas pracy urządzenia.
Bezpieczeństwo dzieci
•Dzieci czesto nie zdaja sobie sprawy z niebezpieczenstwa zwiazanego z urzadzeniami elektrycznymi. Podczas pracy pralki dzieci nie powinny bawi© sie w pobliqu urzadzenia lub manipulowa© elementami sterujacymi – istnieje niebezpieczenstwo zamkniecia sie w nich dzieci.
•Elementy opakowania (np. folia, tworzywo) moga stanowi© zagroqenie dla dzieci. Niebezpieczenstwo uduszenia sie! Naleqy trzyma© poza zasiegiem dzieci.
•Detergenty naleqy trzyma© w miejscu niedostepnym dla dzieci.
•Naleqy upewni© sie, czy dzieci i zwierzeta domowe nie weszly do bebna pralki.
•W razie zlomowania urzadzenia naleqy wyja© wtyczke z gniazdka, odcia© przewód i wyrzuci© wtyczke z pozostalym odcinkiem przewodu. Naleqy teq unieruchomi© mechanizm blokujacy drzwi, aby bawiace sie dzieci nie mogly zamkna© sie w pralce.
POLSKI
27

132991680•PL 28-10-2003 9:59 Pagina 28
Utylizacja
Materialy opakowania
Materialy oznaczone symbolem  nadaja sie do ponownego wykorzystania.
>PE<= polietylen
>PS<= styropian
>PP<= polipropylen
Aby materialy te mogly zosta© ponownie wykorzystane, musza zosta© umieszczone w wyznaczonych miejscach (lub pojemnikach).
Pralka
W celu usuniecia Panstwa starego urzadzenia naleqy korzysta© z wyznaczonych skladowisk odpadów. Prosimy Panstwa o pomoc w utrzymaniu czystoßci Waszego miasta!
Zalecenia w zakresie ochrony ßrodowiska
W celu zaoszczedzenia wody i energii elektrycznej oraz przyczynienia sie do ochrony ßrodowiska, prosimy o przestrzeganie nastepujacych zalecen:
•Normalnie zabrudzona bielizna moqe by© prana bez cyklu prania wstepnego. W ten sposób oszczedzamy detergent, wode i czas (dbajac tym samym o ochrone ßrodowiska!).
•Urzadzenie pracuje w sposób oszczedny, gdy cieqar zaladowanej bielizny jest zgodny z podanym maksymalnym cieqarem wsadu. Nie przeladowywa© pralki.
•Stosujac odpowiednie zabiegi, moqna usuna© plamy i brud z niewielkich powierzchni, a nastepnie wykona© cykl prania z zastosowaniem niqszej temperatury.
•Ilość używanego detergentu powinna zależeć od poziomu twardości wody, stopnia zabrudzenia bielizny i jej ilości.
Dane techniczne
|
|
EWF 1045 |
EWF 1245 |
EWF 1445 |
||
WYMIARY |
Wysokość |
85 cm |
85 cm |
85 cm |
||
|
Szerokość |
60 cm |
60 cm |
60 cm |
||
|
Głębokość |
59 cm |
59 cm |
59 cm |
||
|
|
|
|
|
||
PARAMETRY ELEKTRYCZNE |
Napięcie |
220-230V/50Hz |
220-230V/50Hz |
220-230V/50Hz |
||
|
Maks. pobór mocy |
2200 W |
2200 W |
2200 W |
||
|
Minimalne zabezpieczenie 10 A |
10 A |
10 A |
|||
|
|
|
|
|
||
CIŚNIENIE WODY |
Minimalne |
050 kPa |
050 kPa |
050 kPa |
||
|
Maksymalne |
800 kPa |
800 kPa |
800 kPa |
||
|
|
|
|
|
|
|
WSAD ZNAMIONOWY |
Bawełna i len |
5 |
kg |
5 |
kg |
6 kg |
|
Syntetyki |
2,5 kg |
2,5 kg |
3 kg |
||
|
Tkaniny delikatne |
2,5 kg |
2,5 kg |
3 kg |
||
|
Wełna / pranie ręczne |
2 |
kg |
2 |
kg |
2 kg |
|
Jedwab |
1 |
kg |
1 |
kg |
1 kg |
|
|
|
|
|
||
PREDKOŚĆ WIROWANIA |
|
1000 obr./min. |
1200 obr./min. |
1400 obr./min. |
||
Urządzenie posiada znak CE i spełnia następujące normy EWG - 73/23/EWG z 19.02.1973 (niskie napięcia) wraz ze zmianami;
- 89/336/EWG z 03.05.1989 wraz ze zmianami.
POLSKI
28

132991680•PL 28-10-2003 9:59 Pagina 29
POLSKI
Instalacja
Rozpakowanie
Przed uruchomieniem urzadzenia naleqy usuna© blokady transportowe.
1.Za pomoca klucza odkreci© dwie dolne ßruby z tylu urzadzenia. Wyciagna© dwa plastikowe kolki. Poloqy© pralke na tylnej ßciance, upewniajac sie, qe urzadzenie nie przygniata gumowych weqy. Umießci© jeden z katowników opakowania miedzy urzadzeniem a podloga.
P0001
2.Wyja© styropianowy blok z dna urzadzenia, nastepnie wyciana© dwie celofanowe torebki
ochronne. |
3.Najpierw wyja© bardzo ostroqnie lewa torebke, ciagnac ja w prawo i w dól.
4.Wyja© nastepnie torebke prawa, ciagnac ja w lewo i do góry.
5.Postawi© urzadzenie, wykreci© ostatnia ßrube z tylu pralki. Wyja© plastikowy kolek.
6.Zakry© wszystkie puste otwory zaßlepkami znajdujacymi sie w plastikowej torebce z instrukcja obslugi.
P0002
Zaleca sie zachowa© wszystkie elementy transportowe, aby móc z nich skorzysta© w razie przeprowadzki.
Ustawienie i poziomowanie
Urzadzenie musi zosta© zainstalowane na stabilnej i idealnie poziomej powierzchni.
Upewni© sie, czy cyrkulacja powietrza dookola urzadzenia nie jest utrudniona przez dywany, wykladzine dywanowa itp.
Pralka nie moqe dotyka© ßcian, ani mebli kuchennych.
Wypoziomowa© dokladnie urzadzenie dokrecajac lub odkrecajac nóqki regulacyjne. Nigdy nie podklada© pod urzadzenie kartonu, drewna lub podobnych materialów w celu skasowania ewentualnych nierównoßci posadzki.
P1051 |
POLSKI
29

132991680•PL 28-10-2003 9:59 Pagina 30
Podłączenie węża dopływowego wody
Podlaczy© waq doplywowy do zaworu zimnej wody z gwintem 3/4”.
W celu podlaczenia do sieci wodnej naleqy wykorzysta© waq doplywowy bedacy na wyposaqeniu urzadzenia. Nie naleqy stosowa© starych, poprzednio uqywanych weqy.
Drugi koniec weqa doplywowego (od strony urzadzenia) moqe zosta© ukierunkowany dowolnie. Naleqy lekko odkreci© nakretke mocujaca, obróci© koncówke weqa i ponownie dokreci© nakretke sprawdzajac, czy nie ma wycieków wody.
P1088 |
P0021 |
Nie moqna przedluqy© weqa doplywowego. Jeßli jest on za krótki i nie moqna przenieß© zaworu doplywowego, naleqy kupi© nowy, dluqszy waq.
Waqne!
Jeqeli rury kanalyzacyine, do których podlaczana jest pralka sa nowe lub nie korzysta sie z nich od dluqszego czasu, zaleca sie otworzy© zawór wodny, odczeka© pewien czas, aq spora iloß© wody splynie z instalacji i dopiero wóczas przymocowa© waq doplywowy. W ten sposób usuniete zostana ewentualne osady piaskowe oraz tlenkowe powstale w rurach wodociagowych.
Podlaczenie węża odpływowego wody
Waq odplywowy moqna umießci© w trzech róqnych pozycjach:
Na krawedzi zlewozmywaka przez zastosowanie kolanka z tworzywa, dostarczonego wraz z urzadzeniem. Waqne jest, aby predkoß©, która woda uzyskuje podczas odplywu, nie spowodowala zeßlizgniecia sie kolanka z krawedzi zlewozmywaka. Naleqy wiec przymocowa© je sznurkiem do baterii lub haczyka na ßcianie, zaczepiajac go o specjalny otwór, biegnacy wzdlluq zagietej czeßci weqa.
P0022 |
Podlaczy© do rozgalezienia syfonu zlewozmywaka. Rozgalezienia to musi znajdowa© sie nad syfonem tak, aby zakrzywiona czeß© weqa znalazla sie na poziomie nie niqszym niq 60 cm od posadzki.
Podlaczy© do wezla sanitarnego na wysokoßci nie niqszej niq 60 cm i nie wyqszej niq 90 cm.
Koncówka weqa odplywowego zawsze musi mie© wentylacje, co oznacza, qe ßrednica wewnetrzna weqa odplywowego musi by© wieksza niq ßrednica zewnetrzna weqa odplywowego.
Waq odplywowy nie moqe mie© przeweqen.
Waq odplywowy moqe zosta© przedluqony, ale jego dlugoß© nie moqe przekracza© 400 cm.
W razie przedluqenia ßrednica wewnetrzna weqa stanowiacego przedluqenie musi by© równa ßrednicy wewnetrznej weqa oryginalnego. Do polaczenia obu weqy naleqy zastosowa© odpowiednia zlaczke.
P0023 |
Podlaczenie do zasilania elektrycznego
Pralka jest przystosowana do funkcjonowania pod napieciem 220-230 V pradu jednofazowego i 50 Hz.
Naleqy sprawdzi©, czy instalacja domowa jest w stanie znieß© maksymalne obciaqenie urzadzen (2,2 kW), biorac pod uwage równieq korzystanie z innych sprzetów gospodarstwa domowego.
Podlaczy© urzadzenie do gniazdka z uziemieniem.
Producent nie ponosi qadnej odpowiedzialnoßci za zniszczenia i uszko-dzenia spowodowane nieprzestrzeganiem przepisów bezpieczenstwa. Wymiany przewodu zasilajacego mozna dokona© jedynie w autoryzowanym punkcìe serwìsowym.
Waqne: po zainstalowaniu urzadzenia przewód zasilajacy musi by© latwo dostepny.
POLSKI
30
 Loading...