

D Link DP-311U Users Manual

D-Link
Wireless Print Server
Manual
DP-311UDP-311U
DP-311U
DP-311UDP-311U
Building Networks for People

Contents
Package Contents ................................................................................3
Introduction............................................................................................4
Wireless Basics ....................................................................................8
Setting up the DP-311U ...................................................................... 10
Getting Started ....................................................................................12
Using the Web Configuration ...............................................................13
TCP/IP Printing for Windows XP ........................................................21
TCP/IP Printing for Windows 2000.....................................................29
TCP/IP Printing for Windows 98SE/Me ..............................................38
Unix/Linux Printing (See PS Admin Manual on CD-ROM) .................. 49
Setting up AppleTalk or LPR Printing in MAC OSX ..............................50
Setting up AppleTalk Printing in MAC OS9 ..........................................55
Networking Basics .............................................................................. 58
Technical Specifications ......................................................................70
Contacting Technical Support .............................................................. 71
Warranty and Registration ................................................................... 72
Appendix: DP-311U Printer Compatibility List ....................................75
2
Package Contents
Contents of Package:
D-Link DP-311U
Fast Ethernet Print Server
Manual and Warranty on CD
Printed Quick Installation Guide
If any of the above items are missing, please contact your reseller.
A computer with an installed Ethernet adapter
Windows XP/2000/ME/98SE
Apple Mac OS with AppleTalk
Linux
Internet Explorer 6.0, or Netscape Navigator version 6.0 or
above, with JavaScript enabled
Printer must support required Operating System
System Requirements:
3

Introduction
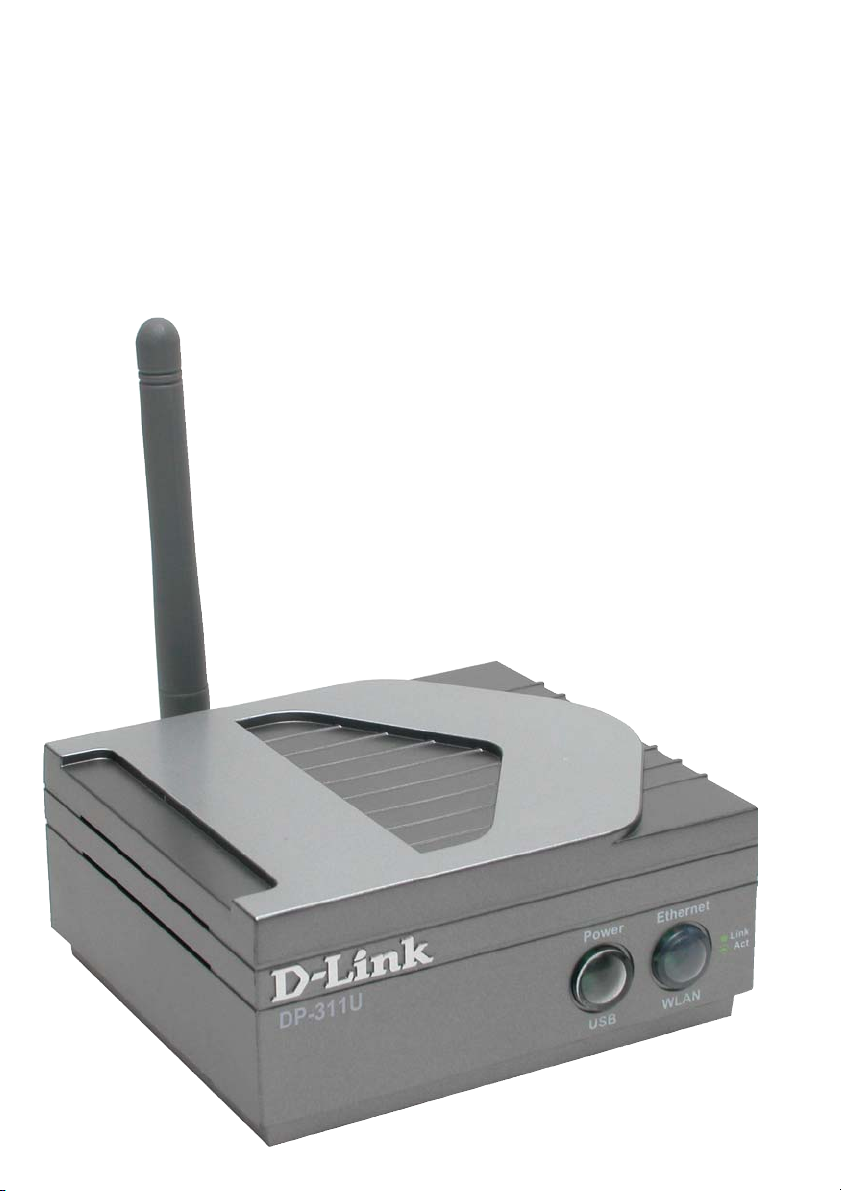
The D-Link DP-311U Print Server is an 802.11b wireless print server that also
connects to your Ethernet/Fast Ethernet network. Now you can locate USB
printer services virtually anywhere in your home or office. The DP-311U manages
the flow of print files from workstations or file servers to connected printers,
delivering print jobs to printers much faster than a file server on a PC acting as a
print server can. With one USB (v1.1) port, the DP-311U can connect to almost
any printer with a USB port.
The DP-311U includes easy-to-use software to install on most Windows-based
networks. Protocol support for TCP/IP, NetBEUI, and AppleTalk are provided to
ensure seamless connection to major networking Operating Systems.
The DP-311U has a built in Web-Based management feature that allows users to
easily configure and manage print queues through TCP/IP. The DP-311U also
supports Telnet as an alternative method to configure the unit.
The DP-311U improves network printing services in the following ways:
The DP-311U delegates print jobs to the connect USB printer. This
provides workload relief to your file servers and allows the file servers’ full
capacity to be used for file access or other direct services to network
users. On peer-to-peer networks, workstations can print directly to the
Print Server without increasing the load of another workstation or server.
The DP-311U’s USB port, version 1.1, can transmit to high-speed laser
printers much faster than a PC’s parallel printer port.
Because the DP-311U is very portable and inexpensive compared to a
PC-based print server, and the Print Server connects to your file servers
through the network, printers can be deployed to locations of maximum
convenience to users.
4

The DP-311U offers extraordinary flexibility, operating with all major network
operating systems and protocols:
Windows-based setup and administration software, PS Admin, is supplied with
the Print Server, making configuration and management quick and easy. The
Print Server also supports configuration and management via the Telnet protocol
for networks without Windows-compatible systems.
TCP/IP
UNIX lpr/lpd
Windows NT/2000, Windows 95/98SE/ME, Windows XP
NetWare 5.x NDPS LPR Remote Printing
NetBEUI
Windows 2000/XP, Windows 95/98SE/ME, Microsoft LAN
Manager, IBM LAN Server
AppleTalk
MacOS EtherTalk
External Features
Port Connectors
The DP-311U’s USB port is located on its rear panel. The USB can be configured
using the PS Admin program or the print server’s Telnet interface. (See the PS
Admin User’s Guide, available on the CD that came with the DP-311U, for
information about configuring the print server’s ports.) The Print Server also
supports web configuration permitting users to configure settings through the web
browser. The default IP Address is as follows:
Default IP Address – 192.168.0.10
Subnet Mask – 255.255.255.0
Note:
The PC’s IP Address must be in the same subnet as the Print Server’s IP Address for the
two devices to communicate. (For example, if your Print Server’s IP Address is
192.168.0.10, with a subnet mask of 255.255.255.0, then your computer’s IP Address
should be 192.168.0.x, where x is a value between 1-254, excluding 10.)
5
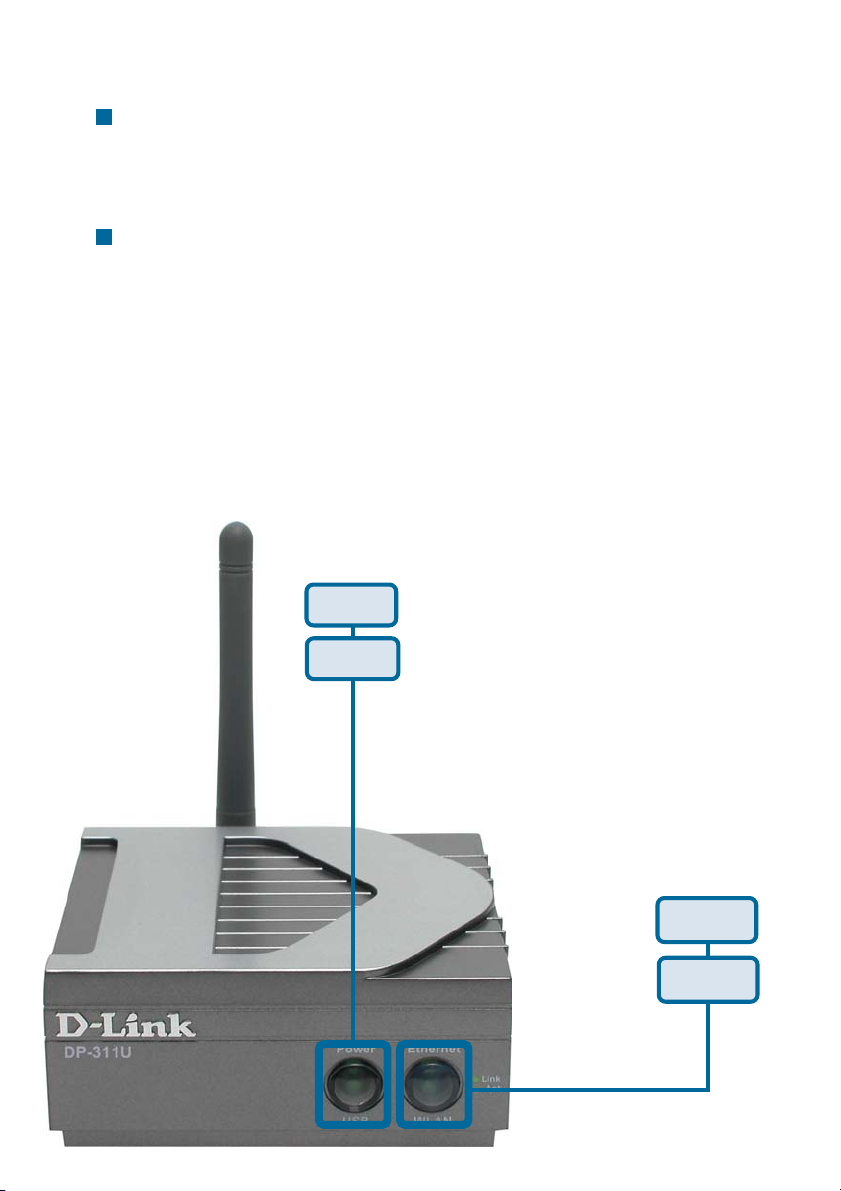
Front Panel LED Indicators
Power / USB
Steady or flashing green light confirms that the Print Server is
powered ON. The LED indicator lights up to show that the Print
Server is transferring print data through the USB port.
Ethernet/WLAN
Steady or flashing green light confirms that the Print Server has a good
connection to the Ethernet or Fast Ethernet network.
The indicator blinks off briefly to indicate that the Print Server is
receiving or transmitting from the network.
These four indicators are also used by the Print Server’s Power-ON Self Test
(POST) to indicate any hardware failures.
Power
USB
Ethernet
WLAN
6
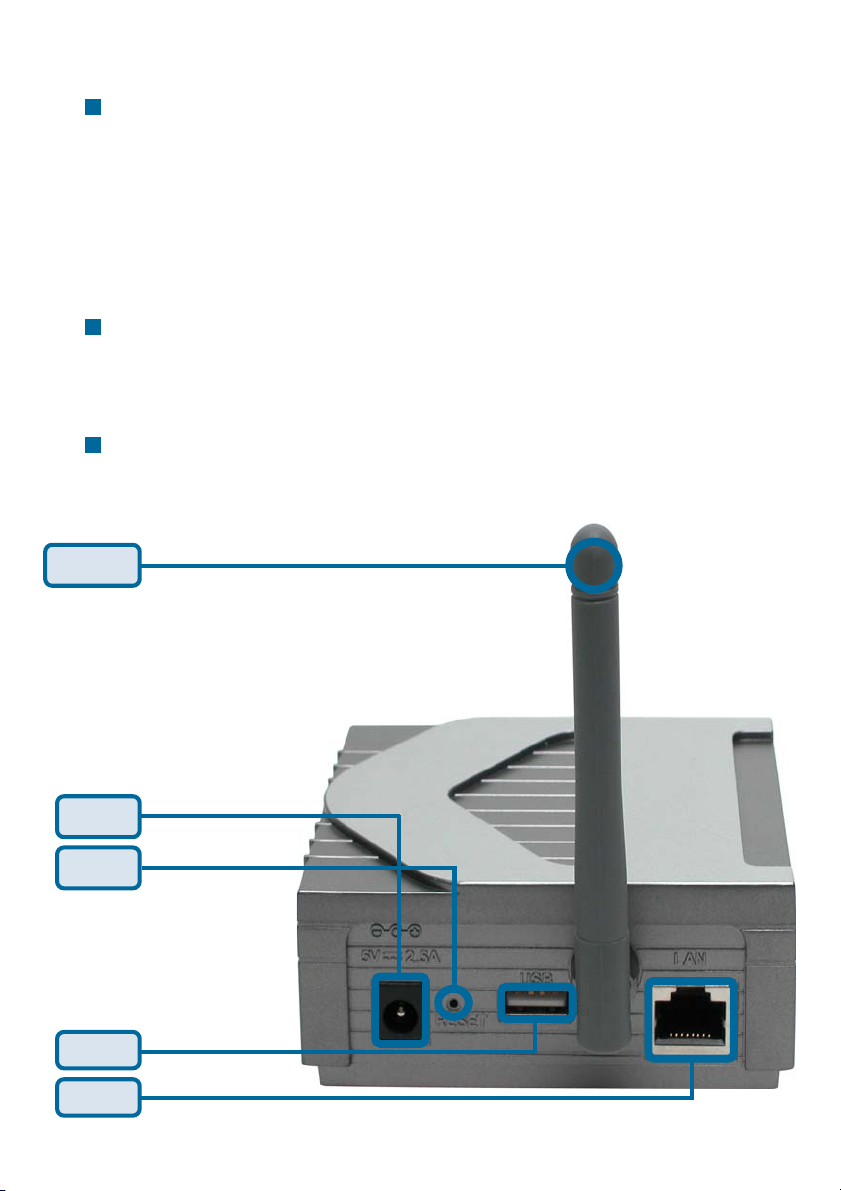
Rear Panel Connectors
Network Cable Connector
The Print Server’s rear panel features an RJ-45 connector for
connection to 10Base-T Ethernet cabling or 100Base-TX Fast
Ethernet cabling (which should be Category 5 twisted-pair cable).
The port supports the NWay protocol, allowing the Print Server to
automatically detect or negotiate the transmission speed of the
network.
DC Power Connector
The DC power input connector is located on the Print Server’s
rear panel and is labeled DC 5V.
LED Indicators
The front panel of the Print Server features five LED indicators:
Antenna
Power
Reset
USB
RJ-45
7

Wireless Basics
D-Link wireless products are based on industry standards to provide easy-to-use
and compatible high-speed wireless connectivity within your home, business or
public access wireless networks. D-Link wireless products will allow you access to
the data you want, when and where you want it. You will be able to enjoy the
freedom that wireless networking brings.
A WLAN is a cellular computer network that transmits and receives data with radio
signals instead of wires. WLANs are used increasingly in both home and office
environments, and public areas such as airports, coffee shops and universities.
Innovative ways to utilize WLAN technology are helping people to work and
communicate more efficiently. Increased mobility and the absence of cabling and
other fixed infrastructure have proven to be beneficial for many users.
Wireless users can use the same applications they use on a wired network.
Wireless adapter cards used on laptop and desktop systems support the same
protocols as Ethernet adapter cards.
People use wireless LAN technology for many different purposes:
Mobility - Productivity increases when people have access to data in any location
within the operating range of the WLAN. Management decisions based on realtime information can significantly improve worker efficiency.
Low Implementation Costs – WLANs are easy to set up, manage, change and
relocate. Networks that frequently change can benefit from WLANs ease of
implementation. WLANs can operate in locations where installation of wiring may
be impractical.
Installation and Network Expansion - Installing a WLAN system can be fast and
easy and can eliminate the need to pull cable through walls and ceilings. Wireless
technology allows the network to go where wires cannot go - even outside the
home or office.
Scalability – WLANs can be configured in a variety of topologies to meet the needs
of specific applications and installations. Configurations are easily changed and
range from peer-to-peer networks suitable for a small number of users to larger
infrastructure networks to accommodate hundreds or thousands of users,
depending on the number of wireless devices deployed.
Inexpensive Solution - Wireless network devices are as competitively priced as
conventional Ethernet network devices.
8

Wireless Basics (cont.)
Standards-Based Technology
Based on the IEEE 802.11b standard, the DP-311U is interoperable with existing
compatible 2.4GHz wireless technology with data transfer speeds of up to 11Mbps
when used with other D-Link AirPlus devices.
Installation Considerations
The D-Link AirPlus DP-311U lets you print through your network, using a wireless
connection, from virtually anywhere within its operating range. Keep in mind,
however, that the number, thickness and location of walls, ceilings, or other objects
that the wireless signals must pass through, may limit the range. Typical ranges
vary depending on the types of materials and background RF (radio frequency)
noise in your home or business. The key to maximizing wireless range is to follow
these basic guidelines:
Keep the antenna of the DP-311U in an upright position
1.
2.
Keep the number of walls and ceilings between the DP-311U and other
network devices to a minimum - each wall or ceiling can reduce your D-Link
wireless product’s range from 3-90 feet (1-30 meters.) Position your devices
so that the number of walls or ceilings is minimized.
3.
Be aware of the direct line between network devices. A wall that is 1.5 feet thick
(.5 meters), at a 45-degree angle appears to be almost 3 feet (1 meter) thick. At
a 2-degree angle it looks over 42 feet (14 meters) Keep your product away (at
least 3-6 feet or 1-2 meters) from electrical devices or appliances that
generate extreme RF noise.5.thick! Position devices so that the signal will
travel straight through a wall or ceiling (instead of at an angle) for better
reception.
4.
Building Materials can impede the wireless signal - a solid metal door or
aluminum studs may have a negative effect on range. Try to position wireless
devices and computers with wireless adapters so that the signal passes
through drywall or open doorways and not other materials.
Keep your product away (at least 3-6 feet or 1-2 meters) from electrical
5.
devices or appliances that generate extreme RF noise.
9

Setting up the DP-311U
Installing the Print Server
WARNING: Configuration problems may result if the Print Server is powered up without
first establishing its network connection. Follow this procedure to avoid complications at
the configuration stage.
1.
Confirm proper operation of the printer to be connected to the DP-311U,
When you have confirmed proper operation of the USB printer, switch it the
2.
power OFF.
Confirm that your network is operating normally.3.
Connect the DP-311U RJ-45 Connector to the network, using a straight
4.
through CAT5 cable..
While the printer is powered OFF, install the USB printer cable to connect the
5.
printer’s USB port to the USB port of the Print Server.
Switch on the connected printer.6.
7.
Plug the AC power adapter’s DC output plug into the DC 5V power socket on
the rear panel of the Print Server.
Plug the power adapter into a power outlet. This will supply power to the Print
8.
Server, as it has no external power switch. The green Power LED on the
Print Server’s front panel should illuminate steadily, and the Print Server’s
Self-Test will proceed.
10
Power ON Self-Test
Every DP-311U has been factory-tested to operate properly.
When the DP-311U is powered ON, it also automatically performs a Self-Test on
each of its major components. The final result of the Self-Test is signaled by the
state of the USB LED indicator following the Self-Test. Preliminary to the actual
component tests, the LED indicators are tested to confirm their steady and
flashing operation.
Immediately after power-up, all three of the green LEDs should illuminate steadily
for several seconds. Then the USB LED should flash ON three times.
Irregularity of the LED during this LED test may mean there is a problem with the
LED itself.
The actual component tests immediately follow the LED tests. A normal (no fault)
result is signaled by a flashing of the USB LED, followed by a darkened LED.
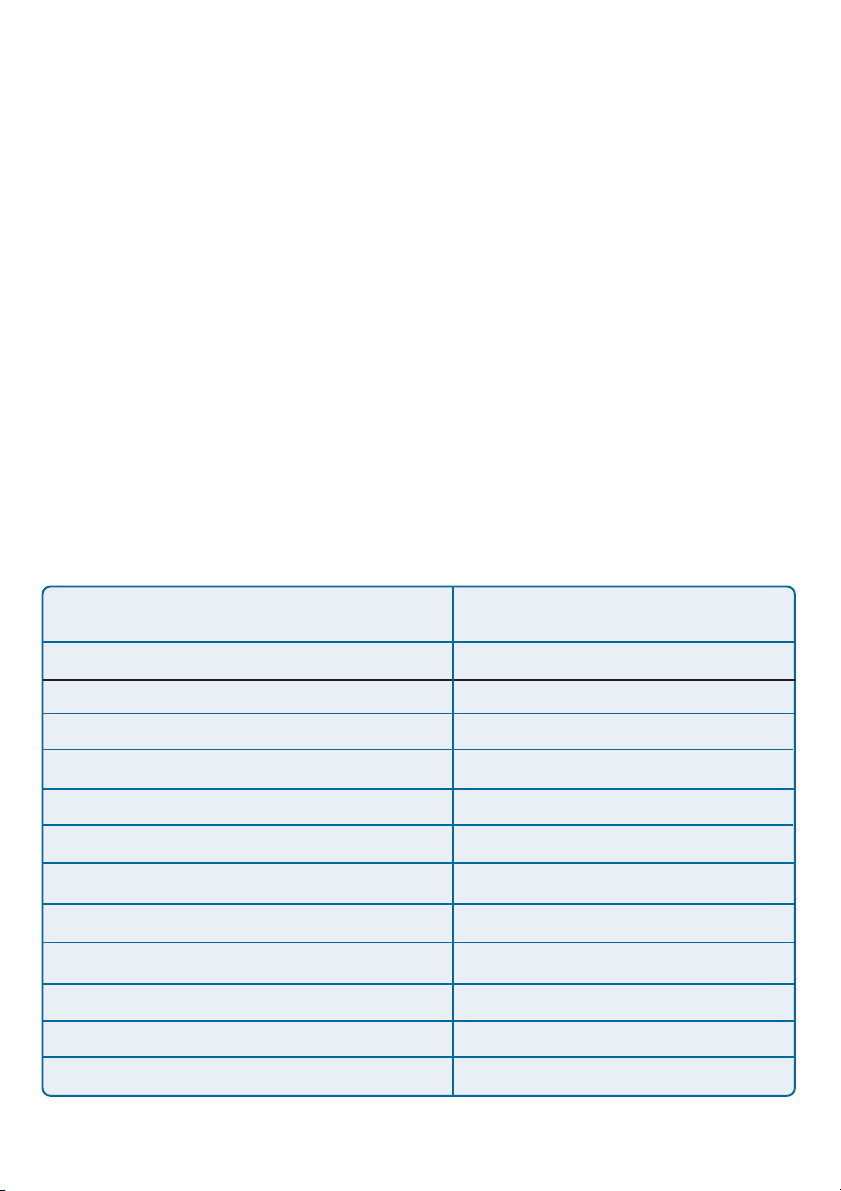
If the Self-Test routine detects any component error, then following the LED tests
the Self-Test will halt and the LEDs will continuously signal the error according to
the following table. In the event of any such error signal, contact your dealer for
correction of the faulty unit.
USB LED
low speed flashing
steady ON
1 long 2 short
1 long 3 short
1 long 5 short
1 long 6 short
1 long 7 short
1 long 11 short
1 long 15 short
1 long 16 short
1 long 17short
1 long 18 short
Faulty Component
Need to reload firmware
DRAM error
Timer INT error
Flash Protected
Flash Erase/Program error
LAN Controller error
LAN memory error
LAN I/O base error
Wireless LAN card detect error
Wireless LAN card CIS error
Wireless LAN card I/O error
USB error
11
Getting Started
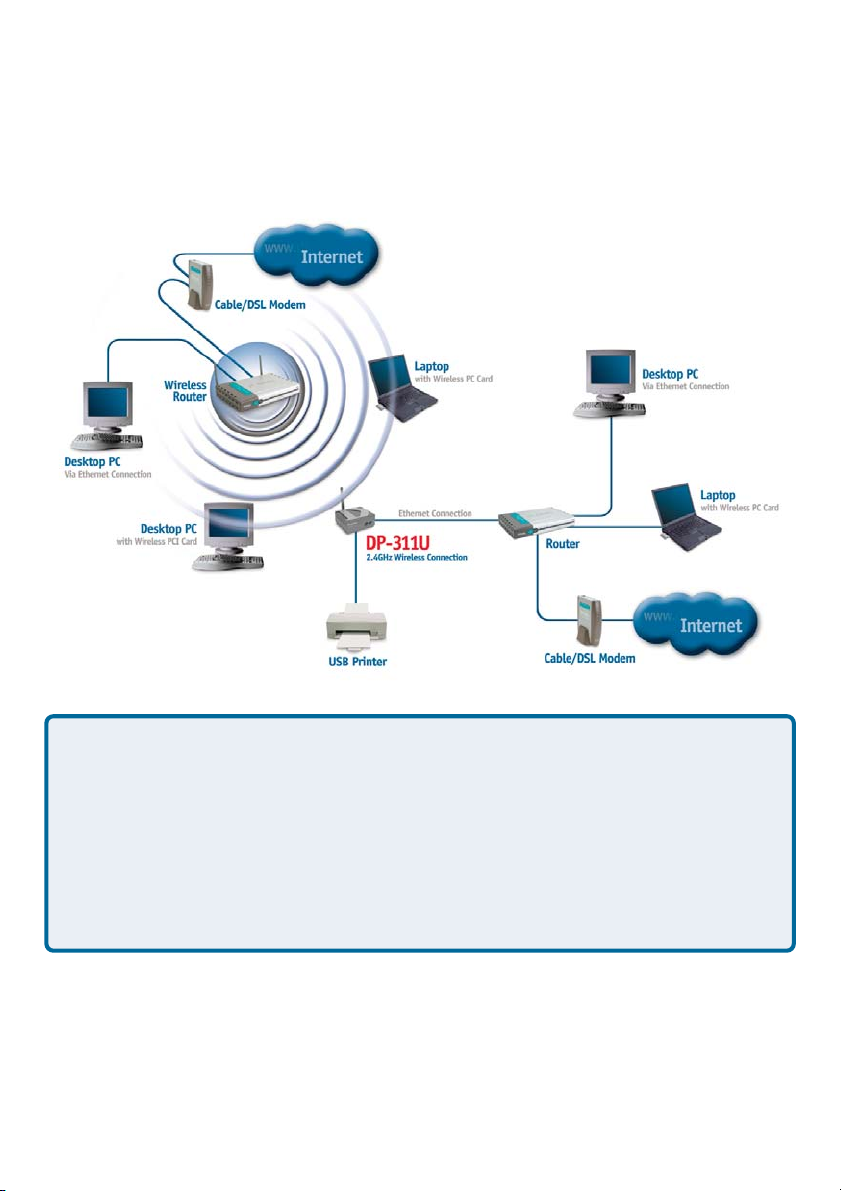
Below is a sample network using the DP-311U. The DP-311U has a built- in
Web-based management feature that allows users to easily configure and
manage their print queue through TCP/IP.
Warning!
Only a USB printer may be connected to the USB port of the DP-311U. Do not
connect any other USB devices to the USB port of the DP-301U; to do so, may
damage the unit and will void the warranty for this product.
For a list of printers that are compatible with the DP-311U, please see the
Appendix in this manual. The compatibility list is not comprehensive. Even if it
is not included in the list, your printer may be compatible with the DP-311U.
12
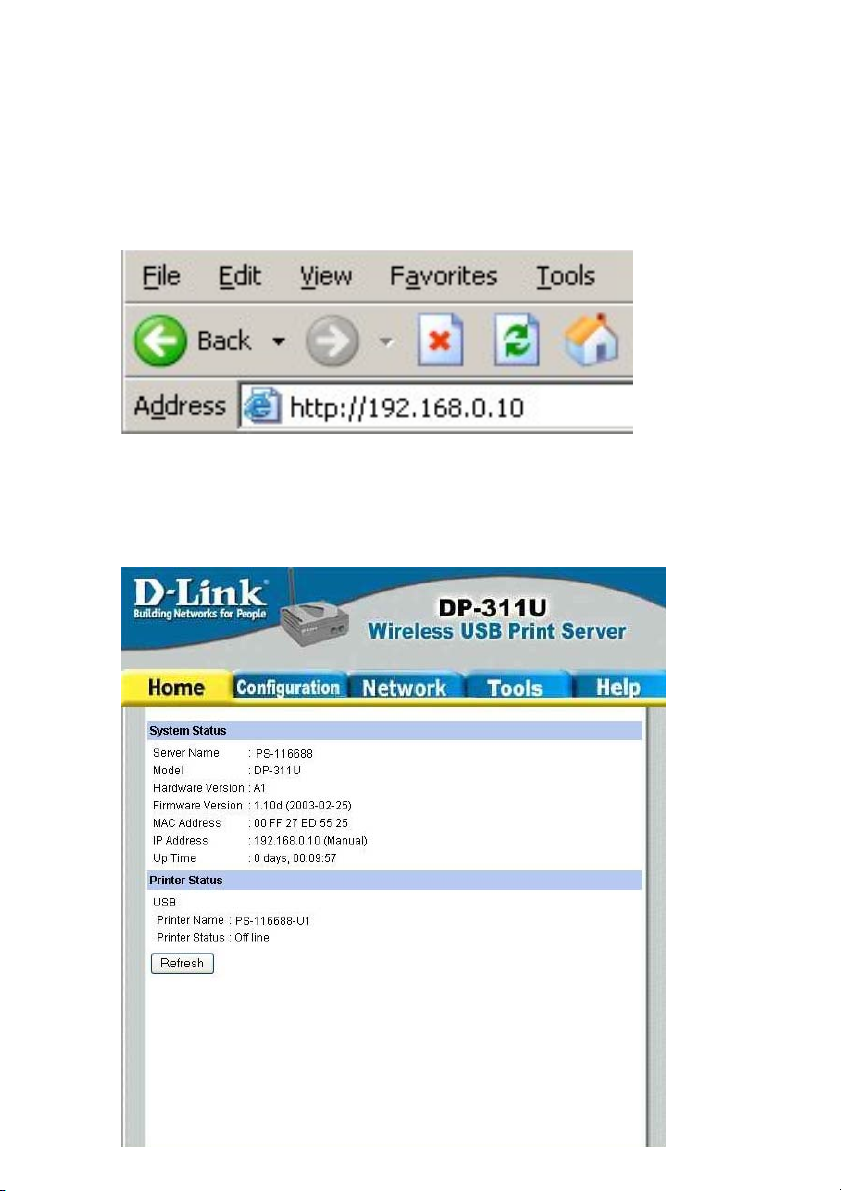
Using the Web Configuration
Open your web browser and type http://192.168.0.10 in the address box, and
press <Enter>. This set of numbers is the default IP Address of your Print Server.
Please note that the PC’s IP Address must correspond with the Print
Server’s IP Address in the same segment for the two devices to
communicate.
When you entered the default IP address, the main screen of the Print Server’s
configuration will appear (see below). In addition to the product information, you can
access and control the Print Server’s configuration through four links on the top of
this main screen: Home, Configuration, Network, Tools, and Help.
13
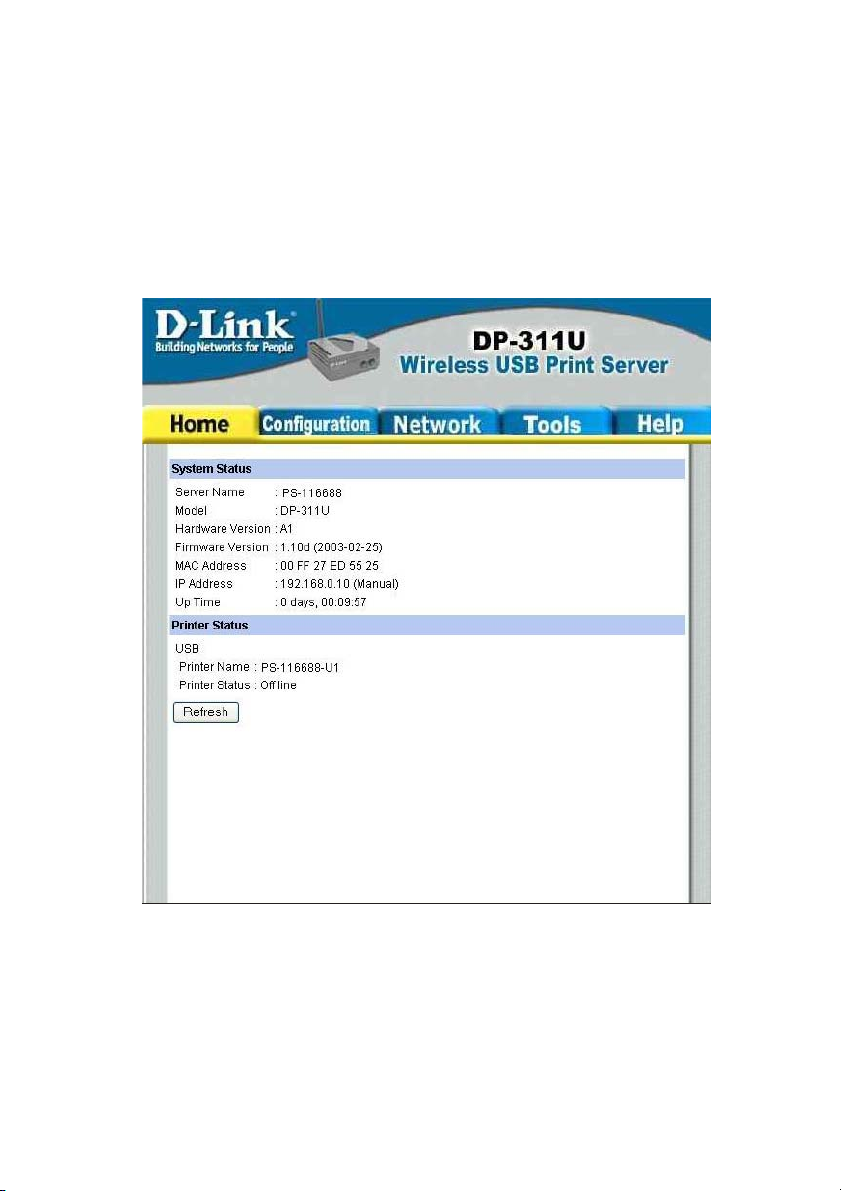
Home
Click on Home tab from the tools bar of the main screen to display information of
the DP-311U’s System Status and Printer Status.
System Status and Printer Status
When you choose and enter the Home tab, it will show you the system information
(see below), providing general information regarding the Print Server. Click on the
<Refresh> button to acquire the most updated information. Once a printer is
connected to the Print Server, the Printer Status will show [Online].
Server Name: The name assigned to the Print Server.
Model: The model of the Print Server.
Hardware Version: The version of the hardware on the Print Server.
Firmware Version: The version of the firmware and release date on the
Print Server.
MAC Address: The MAC address of the Ethernet port.
IP Address: The IP Address of the Print Server.
Up Time: The length of time the Print Server has been up.
14
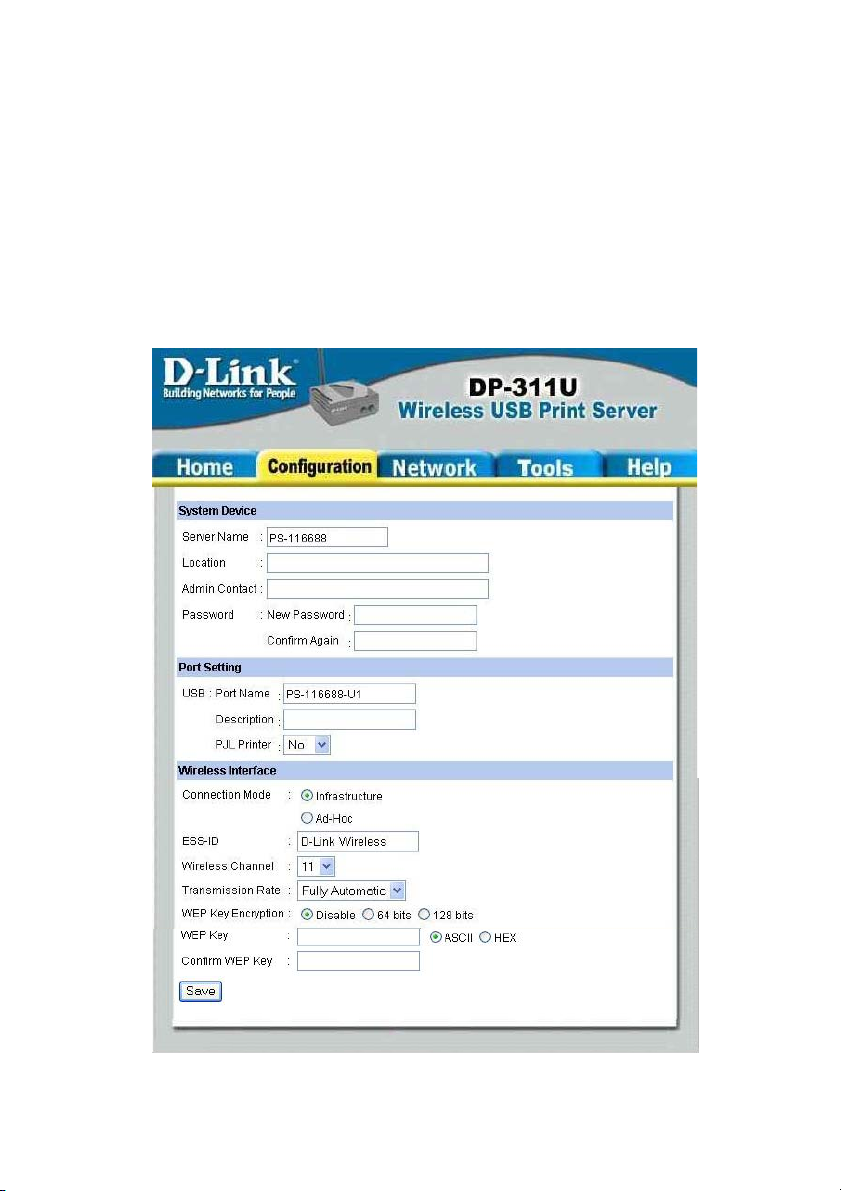
Configuration
Click on Configuration tab from the tools bar of the main screen to enter the Configuration Page; it provides the configuration options that include System Device
and Port Setting
System Device and Port Setting
This option will show you settings required to configure the DP-311U Print Server.
Consult your printers owner manual for the PJL(Printer Job Language) and print
speed supported on your printer. Click the <Save> button on the bottom of the
configuration page to ensure the settings are updated and saved.
15
 Loading...