

Delonghi En670b Owner's Manual
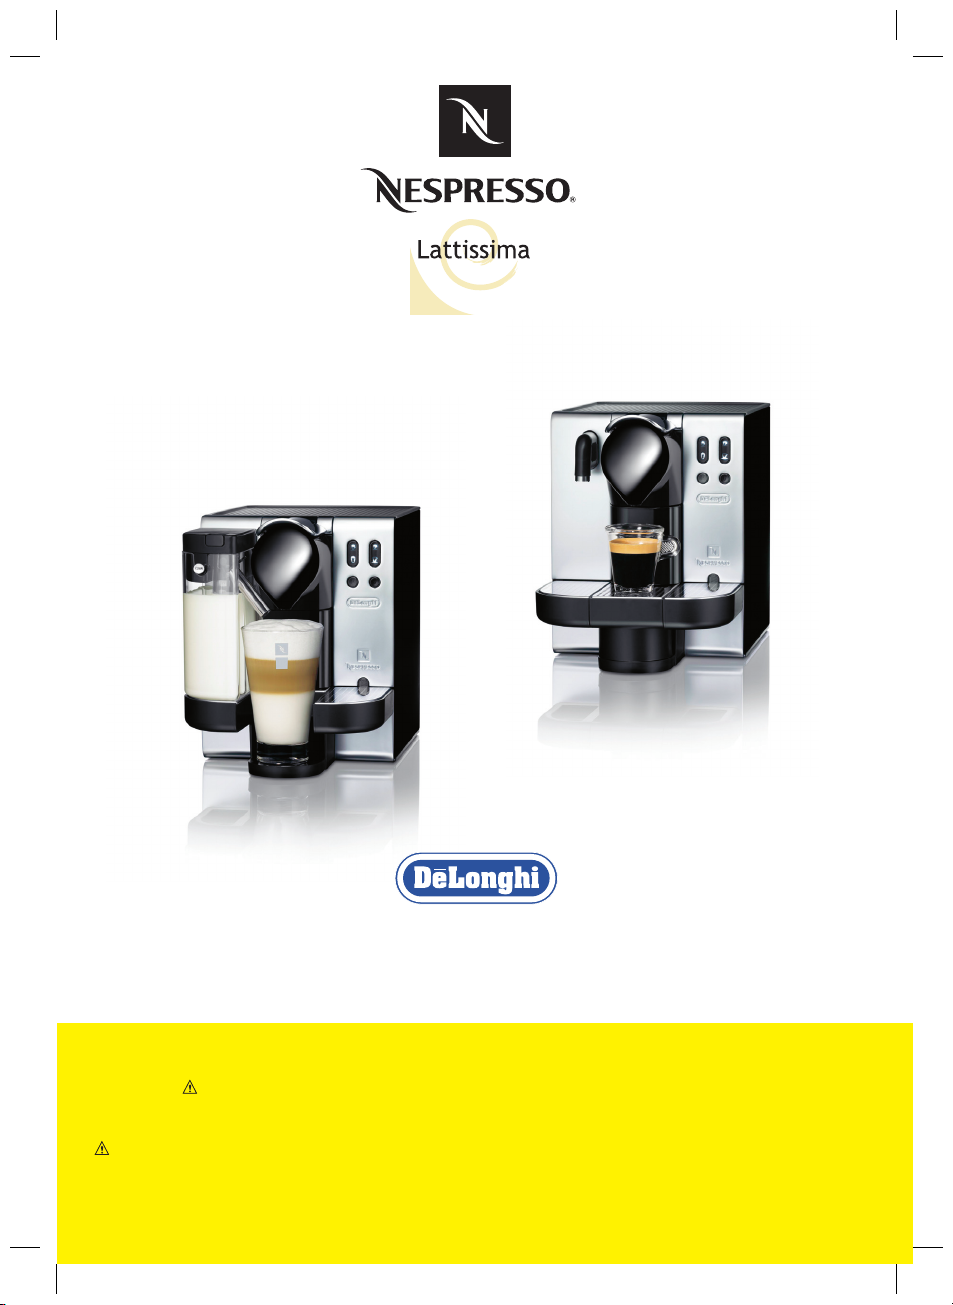
Instructions – Mode d‘emploi
07
DE’LONGHI America, Inc.
Park 80 West, Plaza One
Saddle Brook, NJ 07663
IMPORTANT INSTRUCTIONS! SAVE THESE INSTRUCTIONS!
Note all safety instructions contained in this operating manual!
MODE D’EMPLOI IMPORTANT! CONSERVEZ LES PRESENTES INSTRUCTIONS!
Ne mettez l‘appareil en marche qu‘après avoir pris connaissance
de ce mode d‘emploi et des consignes de sécurité!

Table of contents
IMPORTANT SAFEGUARDS ...............................2
Table des matières
PRECAUTIONS IMPORTANTES
..............................5
Short cord Instructions ...................................... 3
r-
Pay attention to instructions • Symbols ......3
Proper use ..............................................................4
Important instructions for
use and disposal ..................................................4
Your contact at Nespresso Club .....................4
Overview ................................................................ 8
First use or after a longer
1.
period of non-use ..................................... 10
Switch machine on ....................................10
2.
Instructions for all
3.
types of beverages ....................................12
Preparing Espresso and Lungo..............12
4.
Preparing Cappuccino and Latte
5.
Macchiato .....................................................14
Preparing hot water ..................................16
6.
Energy saving / Standby mode .............16
7.
8.
Adjusting quantity for hot water/
Espresso/Lungo ..........................................18
9.
Adjusting quantity for
Cappuccino/Latte Macchiato .................18
10.
Restoring quantity to factory
settings ..........................................................20
Instructions spéciales pour câble
d‘alimentation court ..................................................6
Attention aux instructions • Symboles ..........7
Utilisation conforme ..................................................7
Consignes importantes lors
de l’utilisation .................................................................7
Votre service au club Nespresso ........................7
Vue d’ensemble .............................................................8
Mise en service ou après une période
de non-utilisation prolongée ........................... 10
Allumer la machine .................................................. 10
Instructions pour toutes les préparations 12
Préparation d’un Espresso ou
d’un Lungo .................................................................... 12
Préparation d’un Cappuccino ou
d’un Latte Macchiato .............................................. 14
Préparation d’eau chaude ................................... 16
Modes économiseurs d’énergie ...................... 16
Programmation de la quantité d’eau
chaude/d’Espresso/de Lungo ........................... 18
Programmation de la quantité de
Cappuccino/de Latte Macchiato .................... 18
Revenir à la programmation initiale ............. 20
Rinsing after milk
11.
recipe preparation .....................................22
12.
Daily cleaning ..............................................24
13.
Descaling .......................................................24
14.
Emptying machine ....................................28
15.
Troubleshooting .........................................28
16.
Technical speci cations ...........................30
17.
Optional accessory ....................................30
Nettoyage après la préparation
d’une recette lait ........................................................ 22
Nettoyage au quotidien ....................................... 24
Détartrage ...................................................................... 24
Vider la machine ........................................................ 28
Pannes............................................................................... 28
Spéci cations techniques ................................... 30
Accessoire optionnel .............................................. 30
A
A
t
e
A
A
t
O
O
d
h
IMPORTANT SAFEGUARDS
4
a
Read and follow the instructions in full to avoid possible harm and damage.
Save these instructions and pass them on to any subsequent user.
1. Read all Instructions.
2. Do not touch hot surfaces. Use
handles or knobs.
3. Connect the appliance to outlets with
120V electrical voltage.
4. To protect against re, electric shock
and injury to persons do not immerse
cord, plugs or appliance in water or
other liquid. Never touch cord with
wet hands. Do not over ll water tank.
5. The appliance is not intended for use
by persons (including children) with
reduced physical, sensory or mental
capabilities, or lack of experience and
knowledge, unless they have been
given supervision or instruction concerning use of the appliance by a per-
son responsible for their safety. Keep
appliance/power cord/capsule holder
out of reach of children. Children shall
not use the appliance.
6. Unplug from outlet before cleaning.
Allow to cool before putting on or
taking o parts, and before cleaning
the appliance. Never clean wet or
immerse appliance in any uid. Never
clean the appliance with running
water. Never use detergents to clean
the appliance.
7. After use of the appliance always
remove the capsule and clean the
capsule holder. Empty and clean drip
tray and capsule bin daily.
Never put your hand inside the space
for the capsules. Risk of injury!
2
English | Français
8. Do not pull rinsing tool up during
descaling process. Rinse the water
tank and clean the machine to avoid
any residual descaling agent.
9. Any operation, cleaning and care
other than normal use must be undertaken by after-sales service centers
approved by Nespresso Club Hotline.
10. Do not operate any appliance with
a damaged cord or plug or after the
appliance malfunctions, or has been
damaged in any manner. Unplug cord
immediately. Return appliance to the
nearest authorized service facility approved by Nespresso Club Hotline for
examination, repair or adjustment.
11. Do not dismantle appliance and do
not put anything into openings.
12. The use of accessory attachments
not recommended by the appliance
manufacturer may result in re, electric shock or injury to persons.
13. Do not use outdoors.
14. Do not let cord hang over edge of
table or counter, or touch hot surfaces
or sharp edges. Do not allow cord to
dangle (risk of tripping up).
15. Do not place on or near a hot gas or
electric burner, or in a heated oven.
16. To disconnect, turn any control to
“o ”, then remove plug from wall
outlet. Do not unplug by pulling the
cord.
17. Do not use appliance for other
than intended use. Appliance is for
household use only (non-commercial
areas). Appliance must be used in
accordance with these instructions
and speci cations. Use only capsules
provided. Liability of manufacturer
will be voided due to wrong use for
not intended purposes.
S
2
W
W
si
d
C
C
si
m
N
N
in
w
pr
e.
o
f
r
id
-
nters
ine.
h
he
en
cord
the
ap-
for
t.
o
ce
ec-
aces
to
18. If the machine is out of use for a
longer period (holidays etc.) unplug it
from the mains.
19. Always close lever.
20. Scalding may occur if the lever
is lifted during the brewing cycles.
21. Do not put ngers under outlet
during beverage preparation.
22. Do not touch the milk nozzle immediately after use. It will still be very hot.
23. Always use the milk container with lid
and milk nozzle that are included for
milk recipes. Otherwise there is a risk
of scalding.
Save these instructions this product is for household only.
Short cord Instructions
24. a) A short power-supply cord or
detachable power-supply cord is to
be provided to reduce risks resulting
from becoming entangled in or tripping over a longer cord.
b) Longer detachable power-supply
cords or extension cords are available
and may be used if care is exercised in
their use.
c) If a long detachable power-supply
cord or extension cord is used:
1) The marked electrical rating of
the detachable power-supply cord
or extension cord should be at least
as great as the electrical rating of
the appliance;
2) If the appliance is of the grounded type, the extension cord should
be a grounding-type 3-wire cord;
and
3) The longer cord should be arranged so that it will not drape over
the counter top or table top where
it can be pulled on by children or
tripped over.
or
n.
he
r
rcial
s
les
r
or
Pay attention to instructions • Symbols
WARNING
WARNING indicates a potentially hazardous
situation which, if not avoided, could result in
death or serious injury.
CAUTION
CAUTION indicates a potentially hazardous
situation which, if not avoided, may result in
minor injuries.
NOTICE
NOTICE used without the safety alert symbol
indicates a potentially hazardous situation
which, if not avoided, may result in damage to
property.
This is the safety alert symbol. It is used
to alert you to potential personal injury
hazards. Observe all safety messages
that show this symbol to prevent possible injury or death.
Suitable for dishwashers.
Not suitable for dishwashers.
English | Français
3
Proper use
e
o
This machine is for preparing speciality co ee and for heating water for use in private households
in accordance with these instructions for use and using the supplied capsules. Only use capsules
authorized for the Nespresso system. Any other use is not in accordance with the instructions.
Any use that is not in accordance with the instructions may cause personal injury and leads to a
loss of any rights to claim under the guarantee. The manufacturer assumes no liablity for damages
from use that is not in accordance with the instructions.
Important instructions for use
and disposal
Always close the lever. Never open the
lever while the machine is running.
Only use the machine with the drip
tray and grid.
Packaging is made of recyclable
materials. Contact your local council/
authority for further information on
recycling.
Environment protection rst!
Your appliance contains valuable
materials which can be recovered or
recycled.
Leave it at a collection point.
Your contact at Nespresso Club
www.nespresso.com
V
d
le
4
English | Français
2
a
a
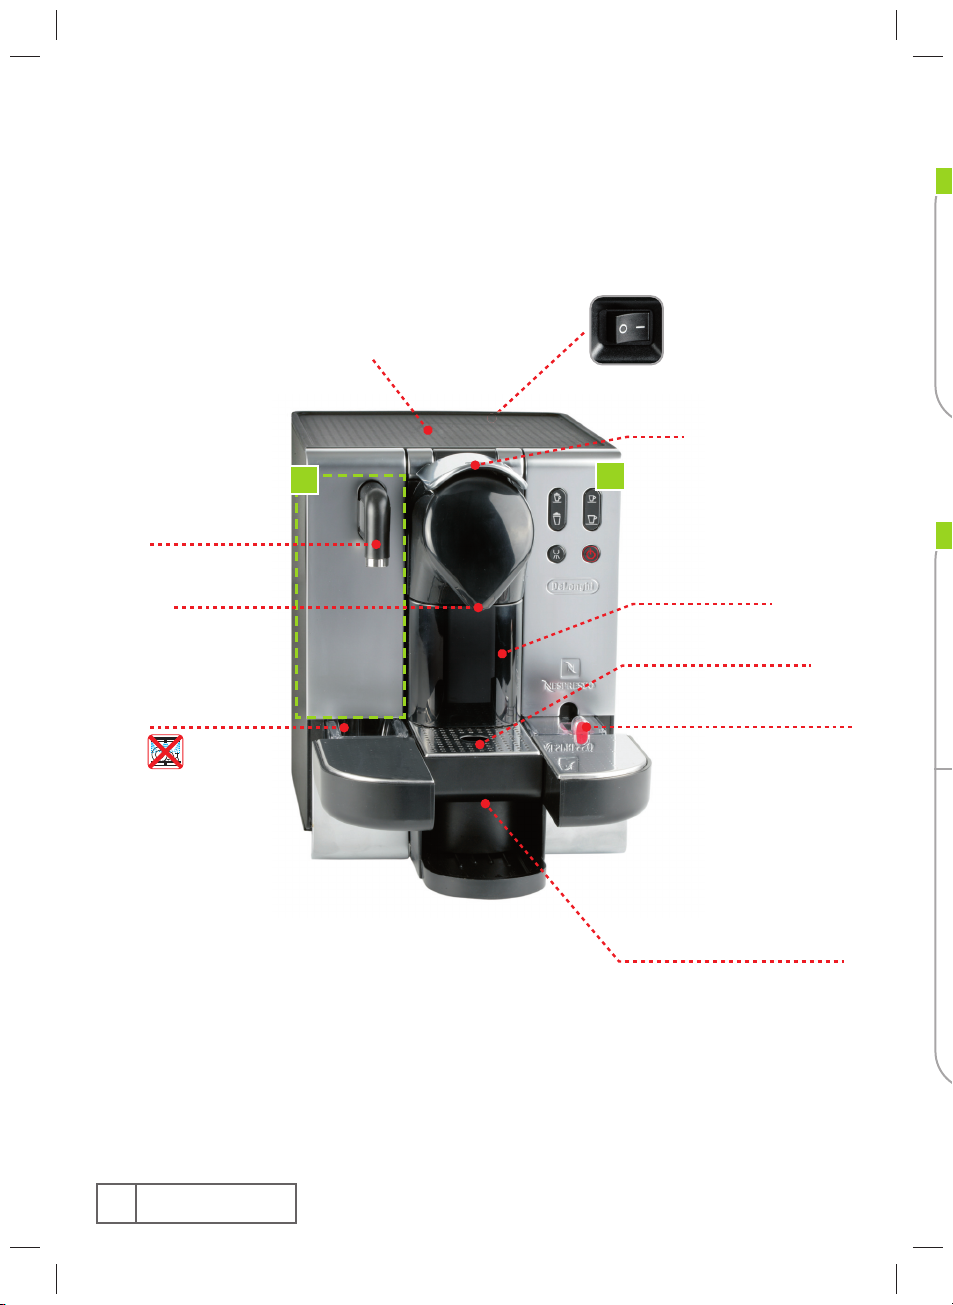
Overview
y
o
Vue d’ensemble
R
S
1
Hot water nozzle
Buse eau chaude
Co ee outlet
Sortie café
Water tank (41 oz.)
Réservoir à eau (1.2L)
Cup Plate
(Cup Warmer only for
Model EN680.M)
Plateau repose-tasses
(Chau e-tasses pour
modèle EN680.M)
1
Main Switch
Interrupteur principal
Lever
Poignée
2
Capsule container
Réservoir à capsules
Drip tray level indicator
Flotteur du bac récolte-gouttes
Water tank level indicator
Niveau d’eau du réservoir d’eau
B
C
Accessories: see on packaging
Accessoires: voir sur packaging
8
English | Français
Drip-Tray (push inside for Latte
Macchiato glass)
Bac récolte-gouttes (faire
coulisser à l’intérieur pour un
verre Latte Macchiato)
Rapid Cappuccino System
Système Rapid Cappuccino
1
Bouton de rinçage
Milk container (17 oz.)
(Must be placed in the refrigerator)
Réservoir à lait (0.5L)
(Peut être mis au réfrigérateur)
Froth regulatorRinsing button
Régulateur de mousse
No froth
Pas de mousse
Max. froth
Mousse maximale
Milk spout
Buse lait
Backlit buttons
Commandes
2
Cappuccino
Cappuccino
Latte Macchiato
Latte Macchiato
Hot water
u
Eau chaude
Espresso
Espresso
Lungo
Lungo
Standby button
Touche mise en marche / Veille
te
If milk container is inserted,
co ee and milk recipe
buttons are on.
Si le réservoir à lait est installé,
les boutons café et préparations lait sont allumés.
or
ou
If hot water nozzle is inserted,
co ee and hot water
buttons are on.
Si la buse eau chaude est
installée, les boutons café et
eau chaude sont allumés.
English | Français
9

1
p
o
f
t
r
o
a
u
P
a
e
First use or after a longer period of non-use
Mise en service ou après une période de non-utilisation prolongée
2
Remove plastic lm from the
drip tray grid and from the side
grids.
Retirer le lm plastique de la
grille du bac récolte-gouttes et
des grilles latérales.
After two minutes, system
is ready to rinse.
Après 2mn, la machine est
prête au rinçage.
Switch machine on
Allumer la machine
Fill water tank with fresh
water up to maximum level.
Remplir le réservoir d’eau
fraîche jusqu’au maximum.
3×
Rinsing: brew 3 preparations pressing the Lungo button
(without capsule inside). Then brew hot water 3 times by
pressing the hot water button.
Rinçage: préparez 3 lungo de suite en appuyant sur la
touche lungo (sans capsule) et 3 tasses d’eau chaude, en
appuyant sur la touche eau chaude.
Insert hot water nozzle.
Place a container under co ee
outlet and hot water nozzle.
Mettre la buse eau chaude.
Placer un récipient sous la sortie
café et la sortie eau chaude.
3×
Pl
Br
> I
se
>
«P
10
English | Français
Fill water tank with
fresh water up to
maximum level.
Remplir le réservoir d’eau
fraîche jusqu’au maximum.
Switch machine on.
Allumer la machine.
System is heating up
(blinking standby button).
Préchau age (bouton
veille clignotant).
Af
is
C
A
p
ca
ee
.
ortie
.
Plug machine into mains.
Brancher la machine.
> If no water ows:
see chapter «Troubleshooting».
> Pas d’eau: voir chapitre
«Pannes».
Switch machine on.
Allumer la machine.
System is heating up
(blinking standby button).
Préchau age (bouton
veille clignotant).
After one minute system
is ready to make co ee.
Co ee buttons are on.
Après 1mn: préparation
possible de café. Les boutons
café sont allumés.
After 2 minutes, system is ready to
make hot water, espresso or milk recipes
if milk container is inserted.
Après 2mn: préparation possible
d’eau chaude ou de recettes lait avec
le pot à lait.
English | Français
11
 Loading...