


User Guide
BT EQUINOX 1200

Section
Welcome…
to your BT Equinox digital cordless colour screen telephone
Assign pictures and ringtones to entries in the phonebook.
SMS text messaging. Send and receive texts .
Write text messages using predictive text or standard text.
Range of up to 300 metres outside and up to 50 metres indoors.
200 Name and number phonebook.
Use Caller Display to see who is calling and keep track of unanswered calls.
Easy settings for Call Diversion, Call Waiting and
Reminder Call.
Register up to 5 handsets to a base without the need for additional wiring.
Transfer phonebook entries between your mobile SIM card and BT Equinox handset.

This User Guide provides you with all the information you need to get the most from your phone.
You must first set up your machine before you can use it. This doesn’t take long and is easy to do. Just follow the simple instructions on the next few pages.
Need help?
If you have any problems setting up or using your BT Equinox 1200, contact the Helpline on
0870 605 8047.
Alternatively, you may find the answer in ‘Help’ at the back of this guide.
Hearing aid?
Please note that the BT Equinox works by sending radio signals between the base and handset. These signals may interfere with some hearing aids, causing a humming noise.
Got everything?
Section BT Equinox 1200 base
BT Equinox 1200 handset
2 x NiMH AAA rechargeable batteries
Battery compartment cover
Mains power adaptor
Belt clip
Telephone line cord
In addition
If you purchased the BT Equinox 1200 Twin:
BT Equinox 1200 handset
BT Equinox 1200 charger
2 x NiMH AAA rechargeable batteries
Battery compartment cover
Mains power adaptor
Belt clip

4In this guide
Getting started . . . . . . . . . . . . . . . . .7 Location . . . . . . . . . . . . . . . . . . . . . .7 Setting up . . . . . . . . . . . . . . . . . . . . .7 Battery performance . . . . . . . . . . . . .8 BT Equinox Twin . . . . . . . . . . . . . . . .10
Getting to know your phone . . . . . . .11 Handset buttons . . . . . . . . . . . . . . . .11 Base . . . . . . . . . . . . . . . . . . . . . . . . .12 Display icons . . . . . . . . . . . . . . . . . . .13 Navigating the menu . . . . . . . . . . . . .14 Menu map . . . . . . . . . . . . . . . . . . . . .15
Using the phone . . . . . . . . . . . . . . . .16 Switch handset on/off . . . . . . . . . . . . .16 Make a call . . . . . . . . . . . . . . . . . . . .16 Preparatory dialling . . . . . . . . . . . . . .16 Call timer . . . . . . . . . . . . . . . . . . . . .16 End a call . . . . . . . . . . . . . . . . . . . . . .16 Receiving calls . . . . . . . . . . . . . . . . . .17 Handsfree . . . . . . . . . . . . . . . . . . . . .17 Earpiece/handsfree volume . . . . . . . . .17 Redial . . . . . . . . . . . . . . . . . . . . . . . .18 Secrecy . . . . . . . . . . . . . . . . . . . . . . .19 Paging . . . . . . . . . . . . . . . . . . . . . . .19 Keypad lock . . . . . . . . . . . . . . . . . . . .20 Internal calls . . . . . . . . . . . . . . . . . . .20
Call another handset . . . . . . . . . . . . .20 3-Way call . . . . . . . . . . . . . . . . . . . . .20 Transfer a call . . . . . . . . . . . . . . . . . .21 Caller on hold . . . . . . . . . . . . . . . . . .21 Using a headset . . . . . . . . . . . . . . . . .22
Phonebook . . . . . . . . . . . . . . . . . . . .23 Writing tips . . . . . . . . . . . . . . . . . . . .23 Add entry . . . . . . . . . . . . . . . . . . . . .23 Dial . . . . . . . . . . . . . . . . . . . . . . . . . .23 Edit name and number . . . . . . . . . . . .24 View details . . . . . . . . . . . . . . . . . . . .24 Delete an entry . . . . . . . . . . . . . . . . .25 Select ringtone . . . . . . . . . . . . . . . . .25 Picture . . . . . . . . . . . . . . . . . . . . . . .25 Copy entry . . . . . . . . . . . . . . . . . . . . .26 Copy phonebook . . . . . . . . . . . . . . . .27 Copy from SIM . . . . . . . . . . . . . . . . . .27 Phonebook full . . . . . . . . . . . . . . . . . .28
SMS text messaging . . . . . . . . . . . . .29 To subscribe . . . . . . . . . . . . . . . . . . .29 Cost of the fixed line service . . . . . . . .30 Using SMS . . . . . . . . . . . . . . . . . . . . .30 Write an SMS text message . . . . . . . .30 FasTxT predictive text . . . . . . . . . . . . .31 Standard text . . . . . . . . . . . . . . . . . . .31

In this guide |
5 |
Writing tips . . . . . . . . . . . . . . . . . . . .32 Character map . . . . . . . . . . . . . . . . . .32 Using options . . . . . . . . . . . . . . . . . .33 Drafts folder . . . . . . . . . . . . . . . . . . .34 Save to drafts . . . . . . . . . . . . . . . . . .34 Send from drafts . . . . . . . . . . . . . . . .34 Outbox . . . . . . . . . . . . . . . . . . . . . . .34 Deleting . . . . . . . . . . . . . . . . . . . . . .35 Changing templates . . . . . . . . . . . . . .36 Delete template . . . . . . . . . . . . . . . . .36 Receiving and reading
text messages . . . . . . . . . . . . . . . . . .37 Open Inbox . . . . . . . . . . . . . . . . . . . .37 Open Inbox from
standby screen . . . . . . . . . . . . . . . . . .38 SMS settings . . . . . . . . . . . . . . . . . . .39 SMS Service Centre numbers . . . . . . .39 To change the SMS Service Centre
phone numbers . . . . . . . . . . . . . . . . .40 Set SMS text alert . . . . . . . . . . . . . . .40 User areas . . . . . . . . . . . . . . . . . . . . .41 Set personal user area . . . . . . . . . . . .41 Send text message from a user area . .42 Default user . . . . . . . . . . . . . . . . . . . .42 Delete user area . . . . . . . . . . . . . . . .43 Default SMS settings . . . . . . . . . . . . .44
BT Calling Features . . . . . . . . . . . . . .45 Caller Display . . . . . . . . . . . . . . . . . . .45 Calls lists . . . . . . . . . . . . . . . . . . . . . .46 Missed and calls received . . . . . . . . . .46 Redial . . . . . . . . . . . . . . . . . . . . . . . .47 All calls . . . . . . . . . . . . . . . . . . . . . . .47 Delete . . . . . . . . . . . . . . . . . . . . . . . .48 Call Diversion . . . . . . . . . . . . . . . . . .48 Call Waiting . . . . . . . . . . . . . . . . . . . .49 Reminder call . . . . . . . . . . . . . . . . . . .50
Personalise the handset . . . . . . . . . .51 Ring tone . . . . . . . . . . . . . . . . . . . . .51 Ringer volume . . . . . . . . . . . . . . . . . .52 Handset name . . . . . . . . . . . . . . . . . .52 Language . . . . . . . . . . . . . . . . . . . . .53 Picture . . . . . . . . . . . . . . . . . . . . . . .53 Menu colour . . . . . . . . . . . . . . . . . . .54 Auto talk . . . . . . . . . . . . . . . . . . . . . .54 Keybeep . . . . . . . . . . . . . . . . . . . . . .55 PABX access code . . . . . . . . . . . . . . .55 Call groups . . . . . . . . . . . . . . . . . . . .56 Handset default settings . . . . . . . . . . .57
Base settings . . . . . . . . . . . . . . . . . .58 Ringtone . . . . . . . . . . . . . . . . . . . . . .58 Ringer volume . . . . . . . . . . . . . . . . . .58

6In this guide
Handset priority . . . . . . . . . . . . . . . . .59 Dial mode . . . . . . . . . . . . . . . . . . . . .59 System PIN . . . . . . . . . . . . . . . . . . . .60 Default base settings . . . . . . . . . . . . .60
Time settings . . . . . . . . . . . . . . . . . |
.61 |
Set alarm . . . . . . . . . . . . . . . . . . . . . . |
61 |
Alarm tone . . . . . . . . . . . . . . . . . . . . |
62 |
Set time and date . . . . . . . . . . . . . . . |
62 |
Games
Rabbit runner . . . . . . . . . . . . . . . . . .63 Hector . . . . . . . . . . . . . . . . . . . . . . . .63 Bowling . . . . . . . . . . . . . . . . . . . . . . .64
Additional handsets and bases . . . . .65 Register a new BT Equinox handset . . .65 Register handset with an
additional base . . . . . . . . . . . . . . . . .66 Select base . . . . . . . . . . . . . . . . . . . .67 De-register a handset . . . . . . . . . . . . .67
Help . . . . . . . . . . . . . . . . . . . . . . . . .68 Replacing handset batteries . . . . . . . .68 Helpline . . . . . . . . . . . . . . . . . . . . . .73
General information . . . . . . . . . . . . .74 Safety . . . . . . . . . . . . . . . . . . . . . . . .74 Cleaning . . . . . . . . . . . . . . . . . . . . . .75 Environmental . . . . . . . . . . . . . . . . . .75 Guarantee . . . . . . . . . . . . . . . . . . . . .76 Returning your phone . . . . . . . . . . . . .77 How many telephones
can you have? . . . . . . . . . . . . . . . . . .78 Connecting to a switchboard . . . . . . . .78 Access code and entering a pause . . .79 Dialling mode . . . . . . . . . . . . . . . . . .79 Declaration of Conformance . . . . . . . .80 R&TTE . . . . . . . . . . . . . . . . . . . . . . .80 Accessories and spares . . . . . . . . . . . .80 For your records . . . . . . . . . . . . . . . . .80
Getting started |
7 |
Location
You need to place your BT Equinox 1200 within 2 metres of a mains power and telephone socket so that the cables will reach.
Make sure it is at least 1 metre away from other electrical appliances to avoid interference.
Your BT Equinox 1200 works by sending radio signals between the handset and base. The strength of the signal depends on where you site the base. Putting it as high as possible ensures the best signal.
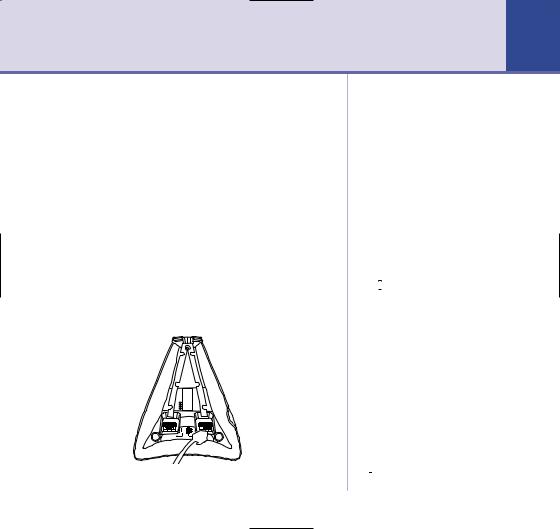
Setting up
1. Plug the mains power cable into the base.
WARNING
Do not place your BT Equinox 1200 in the bathroom or other humid areas.
Handset range
The BT Equinox 1200 has a range of 300 metres outdoors when there is a clear line of sight between the base and handset. When there is no clear line of sight between the base and handset, e.g. base indoors and handset either indoors or outdoors, the range could be reduced to 50 metres. Thick stone walls severely affect the range.
Signal strength
The  symbol on your handset screen indicates when you are in range. When you are out of range, it flashes.
IMPORTANT
Do not connect the telephone line until at least one of the handsets is fully charged.
The base must be plugged into the mains power at all times.
Which socket?
 Power socket
 Telephone line socket

8Getting started
The red Charging light stays on while the handset is on the base, even when the batteries are fully charged.
Talk/Standby time
Under ideal conditions, fully charged handset batteries should give up to 8 hours talktime or 80 hours standby on a single charge.
Battery low warning
The handset battery symbol is empty and flashing and you will hear a warning beep. Start recharging your handset right away.
When charging the battery, level bars are animated.
Replacing batteries
Use only rechargeable 750mAh or higher AAA NiMH batteries.
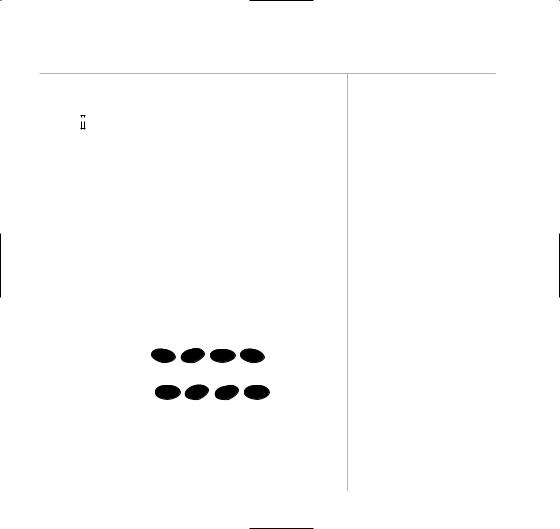
Battery performance
When batteries are fully charged the display shows red, orange and yellow level bars.
To keep your batteries in the best conditions, leave the handset off the base for a few hours at a time (after the initial 16 hour charge).
Please note however, that new NiMH batteries do not reach full capacity until they have been in normal use for several days.
2.Insert 2 x AAA NiMH batteries supplied into the handset. Slide the battery compartment covers into place.
3.Charge the handset for at least 16 hours by placing it on the base. The red Charging light comes on. The handset is pre-registered to the base as Handset 1. The screen shows the standby display.
08:16
Equinox 1
Menu Names
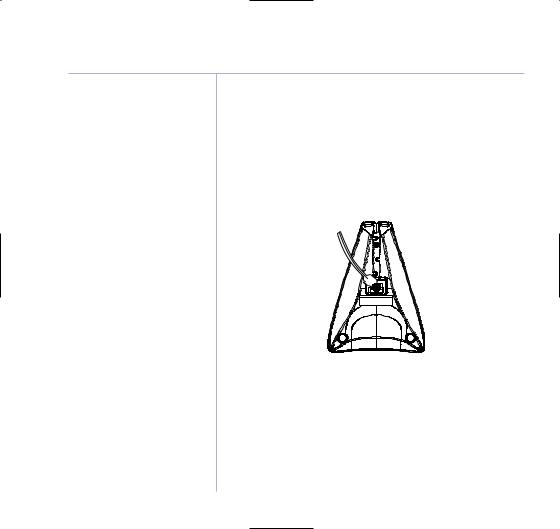
4.After 16 hours, plug the telephone line cord into the wall socket and your BT Equinox 1200 base.
Getting started |
9 |
Range indicator
The  symbol on your handset display indicates when you are in range of the base. If the symbol flashes and you hear a warning beep, you are out of range and will need to move closer to the base. The display shows Base and the number of the base last used.
Set date and time.
If you have subscribed to your network’s Caller Display service, the time and date will be set automatically when you receive your first call. You can also set the time manually.
1.On the handset, press MENU. Scroll  to Time Settings and press OK. Scroll
  to Set Date & Time and press OK.
2. |
Enter the date, e.g. |
1 |
MNO |
0 |
|
4 |
G |
for 16th April. |
6 |
|
HI |
||||||
|
|
|||||||
|
Press OK. |
|
|
|
|
|
|
|
3. |
Enter the time, e.g. |
0 |
WXYZ |
3 |
DEF |
0 |
for 9:30am. |
|
9 |
|
|||||||
Press OK. This overwrites the current setting. If you make a mistake press CLEAR to delete.
The time and date is saved.
4. Press and hold CLEAR to return to standby.
Running the batteries right down at least once a week will help them last as long as possible.
The charge capacity of rechargeable batteries will reduce with time as they wear out, so reducing the talk/standby time of the handset. Eventually they will need to be replaced. New batteries can be obtained from the BT Equinox Helpline 0870 605 8047.
Helpline
If you have any difficulties setting up your BT Equinox 1200, please call the BT Equinox Helpline on
0870 605 8047.
10 Getting started
Ensure the charger is connected to the mains at all times.
Your BT Equinox 1200 is now ready for use.
Additionally, if you have purchased the BT Equinox 1200 Twin
1.Connect the mains power adaptor to the charger and switch on.
2.Insert the batteries.
3.Charge the handset for at least 16 hours.
Your BT Equinox 1200 additional handset comes pre-registered to the base as Handset 2 and this is shown on the display.
Your BT Equinox 1200 Twin is now ready for use.

Getting to know your phone |
11 |
Handset buttons
Power on/off
Press and hold to switch handset on or off, page 16.
On-screen options
Open the menu and select the options you require, page 14.
SMS
Opens the text messaging menu, page 29.
Headset socket 
Use to make and receive calls without having to hold the handset, page 22.
Talk
Press to make calls, page 16.
During a call, press to enter handsfree mode, page 17.
R
1
4 |
G |
HI |
|
|
|
7 |
PQ |
RS |
R
Digital Clarity
S M S |
|
|
|
|
C |
3 |
DEF |
2 |
AB |
|
|
|
|
|
|
|
L |
MNO |
|
|
6 |
|
|
5 |
JK |
|
|
|
|
|
|
|
|
X |
|
8 |
|
W |
YZ |
TU |
9 |
|
|
|
V |
|
|
0 |
|
|
|
|
|
Int |
|
Volume/Scroll/Redial/Calls list
Adjust earpiece/handsfree volume page 17; handset and base volume, pages 52 and 58.
Open redial list, page 18. Open missed calls list, page 46.
Scroll through the directory, menu options, redial and calls list.
On-screen options
Open the phone book and select the options shown on the screen.
End
End a call, page 16.
Keypad lock
Press to lock the keypad, page 20.
Int
Lets you make calls between handsets registered to the base, page 20.
Also used to switch between upper and lower case characters.
For use with a switchboard, page 78 and BT Calling Features, page 45.
12Getting to know your phone
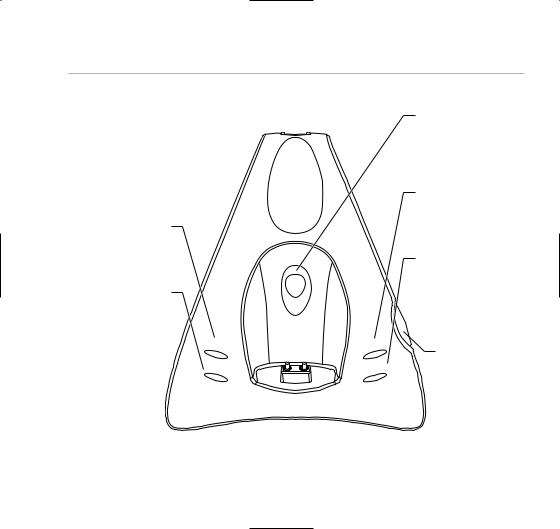
Base
Missed Calls
Lights up if you have new missed calls.
Page
New SMS
Lights up if you have new text messages.
Missed C all s
New SMS
|
|
|
g |
|
|
gin |
|
|
ar |
|
|
h |
|
|
|
C |
|
|
|
|
se |
|
e/In U |
w |
|
o |
|
P |
|
Page
Press to page handset(s) registered to the base, page 19.
Charging
ON = handset on base/charging.
Power / In use
ON = power on, line ready for use.
FLASHING = incoming call/ line in use.
 SIM Card reader
Remove and insert your SIM card for copying, see page 27.
Getting to know your phone |
13 |
Standby screen – These are where the handset icons will appear.
Handset display icons – The number of the handset is displayed at all times. You can change the name on the handsets, e.g. Michael, Kitchen, Office etc.
These are the main display icons you will see.
On hook |
In range indicator (flashes when out of range). |
Off hook |
Alarm |
Missed call alert. Check Calls list. |
Ringer off. |
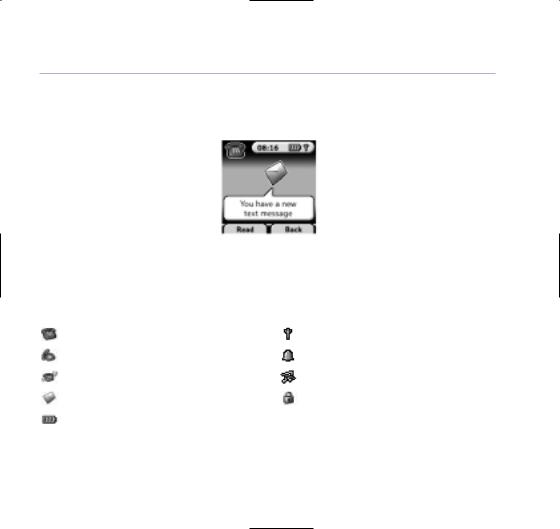
You have new SMS messages. |
Keypad locked. |
Battery status |
|

14 Getting to know your phone
Select the option displayed by pressing the button underneath it.
For example, select Names by pressing the option button below it.
Navigating the menu
Your BT Equinox 1200 has a menu system which is easy to use. Each menu leads to a list of options. The menu map is shown on the following page.
When the handset is switched on and in standby, press the option button under MENU to open the main menu. Press the  or
or  button to scroll to the menu option you want. Then press OK to select further options or confirm the setting displayed.
For example to change the handset ringer volume:
1.Press MENU then scroll  to Personalise and press OK.
2.Press OK to select Handset, scroll  to Ring Volume then press OK.
3.The current setting is displayed. Press  to increase or
  to decrease the volume, the ringtone is played at each level you select. Press OK to confirm.
Exit or go back one level in the menu
To the previous level in the menu, press BACK.
To cancel and return to standby at any time, press  .
.
If no button is pressed for 60 seconds, the handset returns to standby automatically.

Getting to know your phone |
15 |
Menu map
SMS
•Write message •Inbox •Drafts •Outbox
•Delete Messages •Templates •Settings
Calls Lists
•Received calls •Missed calls •Dialled calls
•Delete calls list
Personalise
•Handset •Call Groups
Base Settings
•Base Ringtone •Base Volume •Handset Priority
•Dial Mode •System PIN
Time Settings
•Alarm •Set Date & Time
Calling Features
•Call Diversion •Call Waiting •Reminder Call
Registration
•Register Handset •Select Base •De-register
Games
•Rabbit Runner •Hector •Bowling
Phonebook
(once an entry has been stored)
•Add entry
•Show details
•Delete entry
•Edit entry
•Ringtone
•Picture
•Copy from SIM
•Delete all phonebook
•Copy entry
•Copy all names

16 Using the phone
Simple and easy.
Switch handset on/off
1.Press and hold  to switch the handset off.
2.Press  again or place it in the base to switch the handset back on.
Make a call
1. Press  then dial the number you want.
Preparatory dialling
1.Enter the number first. If you make a mistake, press CLEAR to delete. Press  to dial.
Call timer
1.The display shows the duration of all external calls. After you hang up, the total call time is shown.
End a call
1. Press  or place the handset back on the base.

Using the phone |
17 |
Receiving calls
Providing you have subscribed to your network’s Caller Display service, the caller’s number (and name if stored in the phone book) is displayed.
1.Press  or if the handset is on the base, simply lift it up and speak.
Handsfree
Handsfree lets you talk to your caller without holding the handset. It also enables other people in the room listen to both sides of your conversation.
Make a handsfree call
1.Press  twice. The display shows
  . Dial the number. Your call can be heard over the handset’s loudspeaker.
2.To switch back to the handset at any time, press  again. Press
  to end the call.
You can switch any call to handsfree by pressing  during the call.
Adjust earpiece/handsfree volume
1.During a handsfree call, press  or
or  to select volume 1-5.

18 Using the phone
During a call you can open the phonebook by pressing Names and add, see details, delete or edit an entry in the phonebook.
This can be useful with handsfree calling.
To use the phonebook, see page 23.
Answer a call in handsfree
When the phone rings:
1.Press  twice. The call comes through the handset loudspeaker. Press
  again to transfer back the earpiece.
Redial
You can redial up to 20 of the last numbers called.
If you have stored a name in the phonebook to go with the number, the name will be displayed instead, see phonebook, page 23.
Redial a number from the list
1.Press  to enter the redial list. Scroll
  or
or  until the number you want is displayed.
2.Press  to dial the number.

Using the phone |
19 |
Secrecy
During a call, you can talk to someone nearby without your caller hearing you.
1.During the call, press SECRECY. Display shows Secrecy On. Your caller cannot hear you.
2.Press OFF to return to your caller.
Paging
You can use the Page button on the base to alert handset users that they are wanted or locate a missing handset.
1.Press Page on the base. The handset(s) ring. Display shows
Paging.
2.Press Page to stop the handsets ringing or press any button on the handset.
Paging calls cannot be answered by a handset.

20 |
Using the phone |
|
|
|
|
|
You cannot make any calls, |
Keypad lock |
|
including 999 and 112 emergency |
|
|
calls while the keypad is locked. |
You can lock the keypad to prevent accidental dialling |
|
Answer incoming calls by pressing |
|
|
as normal. |
while carrying the handset around. |
1.Press and hold  until the screen shows Keypad Locked and the padlock symbol appears.
2.Press Unlock then YES to use the keypad again.
Internal calls
If you have two or more handsets registered to your base, you can make internal calls. Two handsets can be holding an internal call while a third is making an external call.
Call another handset
1.Press Int then the handset number you want.
2.Press  to end the call.
3-Way call
You can put an external caller on hold, talk to another handset user, then hold a call between all three.
Using the phone |
21 |
1. During a call, press Int your caller is put on hold. Enter the handset number you want.
2.Press JOIN and then  . All three callers can talk. Press
  to end the internal call. Press
  to hang up the call.
Transfer a call
You can transfer an external call to another handset.
During the call:
1.Press Int . Your caller is put on hold. Enter the handset number you want.
2.Scroll  to the handset you want and press
  .
.
You can speak to the other handset user then press  to transfer the call.
Caller on hold
|
You can put an external caller on hold, talk to another |
|
handset user, then resume your external call. |
1. |
During a call, press Int your caller is put on hold. Enter |
|
the handset number you want. |
2. |
Press Int to end the internal call and return to your |
|
external caller. The other handset presses Talk Off to |
|
end the call. |

22 Using the phone
Using a headset (not supplied)
The headset lets you make and receive calls without having to hold the handset.
1.Plug the headset into the socket on the side of the handset. You can now make and receive calls as normal.

Phonebook |
23 |
Your own directory, stored in a handset.
Each Equinox handset can store up to 200 names and numbers. Names can be up to 16 characters long and numbers up to 20 digits.
Add entry
1.Press NAMES.
2.If the Phonebook is empty, Add Entry is highlighted.
Press OK.
Or
3.If names have been stored, they are listed.
Press OPTIONS. Add Entry is highlighted. Press OK.
4.Use the keypad to enter the name, then press SAVE.
5.Use the keypad to enter the number, then press SAVE. The screen shows the Names list.
6.Press and hold Back to return to standby.
Dial
1.Press NAMES.
2.Scroll  or
or  to the name you want or use the keypad
to enter the first letter of the name, e.g. press 7 |
PQ |
four |
|
RS |
|||
|
|||
times for names beginning with S. |
|
|
|
3. Press |
to dial. |
|
|
If you subscribe to your network’s Caller Display service, and want the names in your Phonebook displayed instead of the phone numbers, you must store the full telephone number including the national code.
Writing tips
Entering names
Use the keypad letters to enter names, e.g. to store TOM:
1.Press 8 TUV once to enter T.
2.Press 6MNO three times to enter O.
3.Press 6MNO once to enter M.
If you make a mistake, press CLEAR to delete the last character or digit.
Press Int to switch between upper and lower case letters.
The  icon will be displayed when you have selected upper case.

24 Phonebook
Edit name and number
1.Press NAMES then scroll  or
or  to the name you want, then press OPTIONS. Scroll
  to Edit Entry and press OK.
2.Edit Entry screen is displayed. Press CLEAR to delete or use  or
or  to position the cursor. Use the keypad to change the name. Press SAVE.
3.Edit the number and press SAVE. Display returns to the list of names.
4.Press and hold Back to return to standby.
View details
1.Press NAMES then scroll  or
or  to the name you want, the press OPTIONS.
2.Scroll  to Show Details and press OK.
3.Displays shows the name, number and any call group or ringtone you may have assigned to the entry.
4.Press and hold Back to return to standby.

Phonebook 25
Delete an entry
1.Press NAMES then scroll  or
or  to the name you want, then press OPTIONS.
2.Scroll  to Delete Entry and press OK.
3.Press YES to confirm or NO to cancel.
4.Press and hold Back to return to standby.
Select ringtone
You can choose which ringer melody is played when you receive a call from selected numbers in the phonebook.
1.Press NAMES then scroll  or
or  to the name you want, then press OPTIONS.
2.Scroll  to Ringtone and press OK. The Ringtone screen is displayed and the current setting is highlighted.
3.Scroll  or
or  to the ringtone you want. A sample is played. Press OK. The display shows Ringtone Saved then returns to the phonebook list.
4.Press and hold Back to return to standby.
Picture
You can select a picture to be displayed on screen when you receive a call from a number stored in the phonebook.
You can assign a specific ringtone to a caller, but in order for it to work you must subscribe to your network’s Caller Display Service.
You can assign a picture to a caller, but in order for it to work you must subscribe to your network’s Caller Display Service.
 Loading...