


 Loading...
User’s Guide
ADS-2400N
ADS-2800W
ADS-3000N
ADS-3600W
Version E
ENG

Brother Numbers
IMPORTANT
For technical help, you must call the country where you bought the machine. Calls must be made from within that country.
Register your product online at
www.brother.com/registration
By registering your product with Brother, you will be recorded as the original owner of the product. Your registration with Brother:
•may serve as confirmation of the purchase date of your product should you lose your receipt;
•may support an insurance claim by you in the event of product loss covered by insurance; and,
•will help us notify you of enhancements to your product and special offers.
Register your new product online at www.brother.com/html/registration
FAQs (Frequently Asked Questions)
The Brother Solutions Center is our one-stop resource for all your Brother machine needs. You can download the latest software and user documentation, read FAQs and troubleshooting tips, and learn how to get the most from your Brother product.
support.brother.com
NOTE
•You can check here for Brother driver updates.
•To keep your machine performance up to date, check here for the latest firmware upgrade. Otherwise, some of your machine’s functions may not be available.
i |

User’s Guides and Where Do I Find Them?
Which manual? |
What’s in it? |
Where is it? |
Quick Setup Guide |
Follow the instructions for setting up your machine |
Printed / In the box |
|
and installing the drivers and software for the |
|
|
operating system and connection type you are using. |
|
Product Safety Guide |
Read this Guide first before you set up your machine. |
Printed / In the box |
|
See this Guide for the operating system and |
|
|
connection type you are using. |
|
|
|
|
User’s Guide |
Learn the Scan operations and security features, |
PDF file / Brother |
|
learn how to perform routine maintenance, and see |
Solutions Center 1 |
|
troubleshooting tips. |
|
|
|
|
Network User’s Guide |
This Guide provides useful information about Ethernet |
PDF file / Brother |
|
network settings and security settings using the |
Solutions Center 1 |
|
Brother machine. You can also find supported |
|
|
protocol information for your machine and detailed |
|
|
troubleshooting tips. |
|
Web Connect Guide |
This Guide provides useful information about |
PDF file / Brother |
(ADS-2800W / ADS-3600W) |
accessing Internet services from the Brother |
Solutions Center 1 |
|
machine, as well as downloading images and |
|
|
uploading files directly from Internet services. |
|
|
|
|
Mobile Print/Scan Guide for |
This Guide shows how to use your Brother machine to |
PDF file / Brother |
Brother iPrint&Scan |
scan to, and print from, your mobile device connected |
Solutions Center 1 |
(ADS-2800W / ADS-3600W) |
to a Wi-Fi network. |
|
Brother Image Viewer Guide |
This Guide provides useful information about using |
PDF file / Brother |
for Android™ |
your Android™ mobile device to view and edit |
Solutions Center 1 |
|
documents that were scanned by a Brother machine. |
|
1 Visit Brother Solutions Center at support.brother.com
ii |

Getting Started
Features |
Applications |
What Can I Do? |
Where Should I Go for |
||
More Information? |
|||||
|
|
|
|
||
Scan to PC |
Scan to Image |
ControlCenter4 |
Scan your document directly |
For scanning from the Control |
|
|
|
(Windows®) |
into a graphics application for |
Panel of the machine: |
|
|
|
Brother iPrint & |
image editing. |
Home Mode: Save Scanned |
|
|
|
|
|||
|
|
Scan (Mac) |
|
Documents on Your Computer |
|
|
|
|
|
in Home Mode on page 130 |
|
|
|
|
|
Advanced Mode: Save |
|
|
|
|
|
Scanned Documents on Your |
|
|
|
|
|
Computer in Advanced Mode |
|
|
|
|
|
on page 133 |
|
|
|
|
|
For scanning from ControlCenter4 |
|
|
|
|
|
(Windows®): |
|
|
|
|
|
Home Mode: Basic Scan |
|
|
|
|
|
on page 78 |
|
|
|
|
|
Advanced Mode: Basic Scan |
|
|
|
|
|
on page 85 |
|
|
|
|
|
|
|
|
Scan to OCR |
|
Scan your document and |
For scanning from the Control |
|
|
|
|
convert it to text. This text can |
Panel of the machine: |
|
|
|
|
be edited using your favourite |
Home Mode: Save Scanned |
|
|
|
|
word processing software. |
Documents on Your Computer |
|
|
|
|
|
||
|
|
|
|
in Home Mode on page 130 |
|
|
|
|
|
Advanced Mode: Save |
|
|
|
|
|
Scanned Documents on Your |
|
|
|
|
|
Computer in Advanced Mode |
|
|
|
|
|
on page 133 |
|
|
|
|
|
For scanning from ControlCenter4 |
|
|
|
|
|
(Windows®): |
|
|
|
|
|
Home Mode: Basic Scan |
|
|
|
|
|
on page 78 |
|
|
|
|
|
Advanced Mode: Basic Scan |
|
|
|
|
|
on page 85 |
|
iii

|
|
|
|
|
|
|
|
|
|
|
|
|
|
|
Features |
Applications |
What Can I Do? |
Where Should I Go for |
|
|
|
More Information? |
|
||||
|
|
|
|
|
|
|
|
Scan to PC |
Scan to Email |
ControlCenter4 |
Scan your document to your |
For scanning from the Control |
|
|
(continued) |
|
(Windows®) |
default email application so |
Panel of the machine: |
|
|
|
Brother iPrint & |
you can send the scanned job |
Home Mode: Save Scanned |
|
|
|
|
|
|
|||
|
|
|
Scan (Mac) |
as an attachment. |
Documents on Your Computer |
|
|
|
|
|
|
||
|
|
|
(continued) |
|
in Home Mode on page 130 |
|
|
|
|
|
Advanced Mode: Save |
|
|
|
|
|
|
|
|
|
|
|
|
|
|
Scanned Documents on Your |
|
|
|
|
|
|
Computer in Advanced Mode |
|
|
|
|
|
|
on page 133 |
|
|
|
|
|
|
For scanning from ControlCenter4 |
|
|
|
|
|
|
(Windows®): |
|
|
|
|
|
|
Home Mode: Basic Scan |
|
|
|
|
|
|
on page 78 |
|
|
|
|
|
|
Advanced Mode: Basic Scan |
|
|
|
|
|
|
on page 85 |
|
|
|
|
|
|
|
|
|
|
Scan to File |
|
Scan your document and save |
For scanning from the Control |
|
|
|
|
|
it to a folder on your hard disk |
Panel of the machine: |
|
|
|
|
|
in one of the file types shown in |
Home Mode: Save Scanned |
|
|
|
|
|
the file type list (for example: |
Documents on Your Computer |
|
|
|
|
|
as a PDF file). |
|
|
|
|
|
|
in Home Mode on page 130 |
|
|
|
|
|
|
|
|
|
|
|
|
|
|
Advanced Mode: Save |
|
|
|
|
|
|
Scanned Documents on Your |
|
|
|
|
|
|
Computer in Advanced Mode |
|
|
|
|
|
|
on page 133 |
|
|
|
|
|
|
For scanning from ControlCenter4 |
|
|
|
|
|
|
(Windows®): |
|
|
|
|
|
|
Home Mode: Basic Scan |
|
|
|
|
|
|
on page 78 |
|
|
|
|
|
|
Advanced Mode: Basic Scan |
|
|
|
|
|
|
on page 85 |
|
iv

|
|
|
|
|
|
|
|
|
|
|
|
|
|
|
Features |
Applications |
What Can I Do? |
Where Should I Go for |
|
|
|
More Information? |
|
||||
|
|
|
|
|
|
|
|
Scan to PC |
Scan Using the |
Applications |
Use the Nuance™ |
For scanning using the |
|
|
(continued) |
TWAIN/WIA |
supporting the |
PaperPort™ 14SE application |
TWAIN/WIA driver: |
|
|
Driver for |
TWAIN/WIA |
included in the scanner driver, |
Scan Using Nuance™ |
|
|
|
|
|
||||
|
|
Windows® |
driver such as: |
or other applications |
PaperPort™ 14SE or Other |
|
|
|
Users |
|
supporting TWAIN or WIA |
|
|
|
|
Nuance™ |
Windows® Applications |
|
||
|
|
|
PaperPort™ |
specifications, for scanning. |
on page 105 |
|
|
|
|
|
|
||
|
|
|
14SE |
|
|
|
|
|
|
Windows® Fax |
|
|
|
|
|
|
and Scan |
|
|
|
|
|
|
Windows® |
|
|
|
|
|
|
Photo Gallery |
|
|
|
|
|
|
|
|
|
|
|
|
Scan Using the |
Applications |
Use the applications |
For scanning using the TWAIN |
|
|
|
TWAIN/ICA |
supporting the |
supporting TWAIN |
driver: |
|
|
|
Driver for |
ICA driver, such |
specifications for scanning. |
Scan Using TWAIN Applications |
|
|
|
Macintosh Users |
as: |
|
|
|
|
|
After installing the scanner |
(Macintosh) on page 122 |
|
||
|
|
|
|
|
||
|
|
|
ABBYY |
driver, you can also use the |
|
|
|
|
|
FineReader Pro |
Apple Image Capture |
For scanning using the ICA driver: |
|
|
|
|
Applications |
application for scanning. |
|
|
|
|
|
|
Scan Using Apple Image Capture |
|
|
|
|
|
supporting the |
|
|
|
|
|
|
TWAIN/ICA |
|
(ICA Driver) on page 126 |
|
|
|
|
driver, such as: |
|
|
|
|
|
|
Apple Image |
|
|
|
|
|
|
Capture |
|
|
|
|
|
WS Scan |
Windows® Fax |
Scan your document using |
For installing drivers: |
|
|
|
(Windows® |
and Scan |
the Web Services protocol. |
Install Drivers Used for |
|
|
|
users only) |
Windows® |
The Web Services protocol |
|
|
|
|
Scanning via Web Services |
|
|||
|
|
(ADS-2800W / |
Photo Gallery |
enables you to scan over a |
(Windows Vista®, Windows® 7, |
|
|
|
ADS-3600W) |
|
network using your machine |
Windows® 8, Windows® 8.1, |
|
|
|
|
|
and a computer running |
Windows® 10) in the Network |
|
|
|
|
|
Windows Vista®, Windows® 7, |
User’s Guide |
|
|
|
|
|
Windows® 8, Windows® 8.1 or |
|
|
|
|
|
|
Windows® 10. |
|
|
|
|
|
|
|
For scanning from the Control |
|
|
|
|
|
|
Panel of the machine: |
|
|
|
|
|
|
Scan Using Web Services |
|
|
|
|
|
|
(Windows Vista®, Windows® 7, |
|
|
|
|
|
|
Windows® 8, Windows® 8.1 and |
|
|
|
|
|
|
Windows® 10) on page 177 |
|
v |

|
|
|
|
|
|
|
|
|
|
|
|
|
|
|
Features |
Applications |
What Can I Do? |
Where Should I Go for |
|
|
|
More Information? |
|
||||
|
|
|
|
|
|
|
|
Scan from |
Scan to USB |
— |
Scan your document and save |
Save Scanned Documents on a |
|
|
the Control |
|
|
the scanned image on a USB |
USB Flash Drive on page 137 |
|
|
Panel of the |
|
|
flash drive. |
|
|
|
Machine |
|
|
(ADS-2800W / ADS-3600W) |
|
|
|
|
|
|
|
|
|
|
|
|
|
You can configure the settings |
|
|
|
|
|
|
on the machine’s control panel. |
|
|
|
|
Scan to FTP |
|
Scan your document directly |
Scan Documents to an FTP |
|
|
|
|
|
to an FTP server on your local |
Server on page 142 |
|
|
|
|
|
network, or on the Internet. |
|
|
|
|
|
|
|
|
|
|
|
Scan to SFTP |
|
Scan your document directly to |
Scan Documents to an SFTP |
|
|
|
|
|
an SFTP server on your local |
Server on page 151 |
|
|
|
|
|
network, or on the Internet. |
|
|
|
|
|
|
|
|
|
|
|
Scan to |
|
Scan your document directly |
Scan Documents to SharePoint |
|
|
|
SharePoint |
|
to a SharePoint server. |
on page 169 |
|
|
|
Scan to Apps |
|
Convert the scanned data to a |
Network User’s Guide |
|
|
|
(ADS-2800W / |
|
Microsoft Office compatible |
|
|
|
|
|
document. |
|
|
|
|
|
ADS-3600W) |
|
|
|
|
|
|
|
|
|
|
|
|
|
|
|
|
|
|
|
|
Scan to Network |
|
Scan your document directly |
Scan Documents to a Shared |
|
|
|
(Windows® |
|
to a shared folder on your local |
Folder / Network Location |
|
|
|
users only) |
|
network, or on the Internet. |
(Windows®) on page 160 |
|
|
|
Scan to Email |
— |
Scan your document and send |
Send Scanned Documents |
|
|
|
Server |
|
it directly to an email address |
Directly to an Email Address |
|
|
|
(ADS-2800W / |
|
from the machine. In addition, |
(ADS-2800W / ADS-3600W) |
|
|
|
|
because this feature can |
on page 179 |
|
|
|
|
ADS-3600W) |
|
|
||
|
|
|
assign an email address to |
|
|
|
|
|
|
|
|
|
|
|
|
|
|
the machine, you can use the |
|
|
|
|
|
|
machine to send documents |
|
|
|
|
|
|
over your local network or |
|
|
|
|
|
|
the Internet to computers. |
|
|
|
|
|
|
|
|
|
|
|
Scan to Web |
|
Scan your document and |
Web Connect Guide |
|
|
|
(ADS-2800W / |
|
upload it directly to Web |
|
|
|
|
|
Services, such as Evernote, |
|
|
|
|
|
ADS-3600W) |
|
|
|
|
|
|
|
Dropbox, Box and OneDrive, |
|
|
|
|
|
|
|
|
|
|
|
|
|
|
without using a computer. |
|
|
|
|
|
|
|
|
|
vi

|
|
|
|
|
|
|
|
|
|
|
|
|
|
|
|
|
|
Features |
Applications |
What Can I Do? |
Where Should I Go for |
|
|
|
|
More Information? |
|
||||
|
|
|
|
|
|
|
|
|
From |
|
Scan |
Brother |
Scan your document directly |
Mobile Print/Scan Guide |
|
|
Mobile |
|
Documents |
iPrint&Scan |
from your Android™ devices, |
for Brother iPrint&Scan |
|
|
Devices |
|
(Brother |
|
iOS devices, and Windows® |
|
|
|
|
|
iPrint&Scan) |
|
Phone without using a |
|
|
|
|
|
|
|
computer. |
|
|
|
|
|
|
|
You can download and install |
|
|
|
|
|
|
|
Brother iPrint&Scan from |
|
|
|
|
|
|
|
Google Play, the App Store, or |
|
|
|
|
|
|
|
the Windows® Phone Store. |
|
|
|
|
|
View or Edit |
Brother Image |
Use your Android™ mobile |
Brother Image Viewer Guide |
|
|
|
|
Scanned Data |
Viewer |
device to view and edit |
for Android™ |
|
|
|
|
(Android™) |
|
documents that were scanned |
|
|
|
|
|
(ADS-2800W / |
|
by a Brother machine. |
|
|
|
|
|
ADS-3600W) |
|
You can download and install |
|
|
|
|
|
|
|
|
|
|
|
|
|
|
|
Brother Image Viewer from |
|
|
|
|
|
|
|
Google Play. |
|
|
|
|
|
|
|
|
|
|
vii

You Can Use the Following Features
Manage the machine securely
Feature |
Description |
Where Should I Go for |
|
More Information? |
|||
|
|
||
Secure Function Lock 3.0 |
Allows users to choose which functions each user |
Secure Function Lock 3.0 |
|
(ADS-2800W / ADS-3600W) |
can use. |
(ADS-2800W / ADS-3600W) |
|
|
|
on page 39 |
|
|
|
|
|
Active Directory Authentication |
Restricts the use of the Brother machine unless |
Active Directory |
|
(ADS-2800W / ADS-3600W) |
users provide the user ID and password. |
Authentication (ADS-2800W / |
|
|
|
ADS-3600W) on page 48 |
|
|
|
|
|
Setting Lock |
Allows you to prevent users who do not know the |
Setting Lock (ADS-2800W / |
|
(ADS-2800W / ADS-3600W) |
password from changing the machine’s settings. |
ADS-3600W) on page 37 |
|
LDAP Authentication |
Restricts the use of the Brother machine unless |
LDAP Authentication |
|
|
users enter the user name and password. |
(ADS-2800W / ADS-3600W) |
|
|
|
on page 49 |
|
|
|
|
Streamlining Work
Feature |
Description |
Where Should I Go for |
|
More Information? |
|||
|
|
||
Scan Using Near Field |
Allows you to scan using the settings you saved |
Adding ID Card Shortcuts |
|
Communication (NFC) |
when you registered your NFC ID card to a |
(ADS-3600W only) |
|
(ADS-3600W) |
Shortcut. |
on page 14 |
|
BRAdmin Light (Windows® only) |
Allows you to manage Brother machines connected |
Launch the BRAdmin Utility |
|
BRAdmin Professional 3 |
to a network. Using a computer, you can search for |
on page 73 |
|
Brother machines on the network, display device |
|
||
(Windows® only) |
|
||
|
status information, and change network settings. |
|
|
One touch scan |
Allows you to scan documents in your favourite |
Shortcut Settings |
|
(ADS-2800W / ADS-3600W) |
settings with one button. To use this function, you |
(ADS-2800W / ADS-3600W) |
|
|
must create a one touch setting in your shortcut |
on page 10 |
|
|
and set the shortcut number on your Home screen. |
|
|
|
|
|
viii

Saving Space and Managing Your Data
Feature |
Description |
See |
Scan to FTP/SFTP |
Allows you to transmit scanned data directly to an |
Scan Documents to an |
|
FTP/SFTP server without using a computer. This |
FTP Server on page 142 |
|
feature makes it easy to share large data files that |
Scan Documents to an |
|
cannot be sent by email. |
|
|
SFTP Server on page 151 |
|
|
|
|
|
|
|
Scan to SharePoint |
Allows you to transmit scanned data directly to |
Scan Documents to |
|
SharePoint without using a computer. |
SharePoint on page 169 |
|
|
|
Scan to Email server |
Allows you to scan documents and send them |
Send Scanned Documents |
(ADS-2800W / ADS-3600W) |
directly to an email address from the machine. |
Directly to an Email |
|
|
Address (ADS-2800W / |
|
|
ADS-3600W) on page 179 |
|
|
|
Scan to Web |
Allows you to scan your documents and upload them |
Upload Scanned |
(ADS-2800W / ADS-3600W) |
directly to Web Services. |
Documents to the Web |
|
|
(ADS-2800W / |
|
|
ADS-3600W) on page 185 |
Scan to Network |
Allows you to scan your documents and upload them |
Scan Using Scan to |
|
directly to a Network. |
Network Profiles |
|
|
on page 167 |
|
|
|
ix
Table of Contents |
|
|
1 |
General Information |
1 |
|
Using the Guide......................................................................................................................................... |
1 |
|
Symbols and Conventions Used in the Guide ..................................................................................... |
1 |
|
About This Machine................................................................................................................................... |
2 |
|
Control Panel Overview (ADS-2400N / ADS-3000N) ................................................................................ |
3 |
|
Control Panel Overview (ADS-2800W / ADS-3600W)............................................................................... |
5 |
|
Touchscreen LCD................................................................................................................................ |
6 |
|
Basic Operations ................................................................................................................................. |
9 |
|
Shortcut Settings (ADS-2800W / ADS-3600W) ....................................................................................... |
10 |
|
Adding Scan Shortcuts ...................................................................................................................... |
10 |
|
Adding Web Connect Shortcuts ........................................................................................................ |
12 |
|
Adding Apps Shortcuts ..................................................................................................................... |
13 |
|
Adding ID Card Shortcuts (ADS-3600W only)................................................................................... |
14 |
|
Changing Shortcuts ........................................................................................................................... |
14 |
|
Editing Shortcut Names..................................................................................................................... |
15 |
|
Deleting Shortcuts ............................................................................................................................. |
15 |
|
Recalling Shortcuts............................................................................................................................ |
15 |
|
Accessing Brother Utilities (Windows®)................................................................................................... |
16 |
|
General Setup (ADS-2400N / ADS-3000N)............................................................................................. |
17 |
|
Set Date&Time .................................................................................................................................. |
17 |
|
Set Sleep Time .................................................................................................................................. |
21 |
|
Select Your Language ....................................................................................................................... |
25 |
|
Assign the Scan Feature to the Network Device Key 1-3.................................................................. |
29 |
|
General Setup (ADS-2800W / ADS-3600W) ........................................................................................... |
32 |
|
Set the Backlight Brightness.............................................................................................................. |
32 |
|
Set the Dim Timer for the Backlight................................................................................................... |
32 |
|
Set the Home Screen ........................................................................................................................ |
32 |
|
Select Your Language ...................................................................................................................... |
33 |
|
Memory Storage ................................................................................................................................ |
33 |
|
Beep Volume ..................................................................................................................................... |
33 |
|
Automatic Daylight Saving Time........................................................................................................ |
34 |
|
Sleep Time ........................................................................................................................................ |
34 |
|
Auto Power Off .................................................................................................................................. |
35 |
|
Multifeed Detection............................................................................................................................ |
36 |
|
Setting Lock (ADS-2800W / ADS-3600W)............................................................................................... |
37 |
|
Set the Password .............................................................................................................................. |
37 |
|
Change the Password ....................................................................................................................... |
38 |
|
Turn Setting Lock On/Off................................................................................................................... |
38 |
|
Secure Function Lock 3.0 (ADS-2800W / ADS-3600W).......................................................................... |
39 |
|
Before you Begin to Use Secure Function Lock 3.0.......................................................................... |
40 |
|
Turning Secure Function Lock On/Off ............................................................................................... |
41 |
|
Configure Secure Function Lock 3.0 Using Web Based Management ............................................. |
42 |
|
Setting Up the Card Authentication for Users (For ADS-3600W)...................................................... |
44 |
|
Setting Up and Changing the Public User Mode ............................................................................... |
44 |
|
Switching Users................................................................................................................................. |
46 |
|
Active Directory Authentication (ADS-2800W / ADS-3600W) ................................................................. |
48 |
|
Turning Active Directory Authentication Lock On/Off ........................................................................ |
48 |
|
LDAP Authentication (ADS-2800W / ADS-3600W) ................................................................................. |
49 |
|
Turning LDAP Authentication Lock On/Off ........................................................................................ |
49 |
x |

2 |
Document Specifications |
50 |
|
Acceptable Documents............................................................................................................................ |
50 |
|
Unacceptable Documents........................................................................................................................ |
52 |
|
Loading Capacity............................................................................................................................... |
53 |
|
Area Not to be Perforated.................................................................................................................. |
54 |
|
Conditions for Multifeed Detection..................................................................................................... |
55 |
|
Scanning a Mixed Batch.................................................................................................................... |
55 |
|
Carrier Sheet Recommendations ............................................................................................................ |
57 |
3 |
Scan Preparation |
58 |
|
Set Up Your Scanner............................................................................................................................... |
58 |
|
Load Documents...................................................................................................................................... |
59 |
|
Standard-size Documents ................................................................................................................. |
59 |
|
Business Cards ................................................................................................................................. |
61 |
|
Plastic Cards ..................................................................................................................................... |
63 |
|
Documents Longer than Standard-size ............................................................................................. |
64 |
|
Documents Not Printed on Standard-size Paper............................................................................... |
65 |
|
Documents with Facing Pages .......................................................................................................... |
66 |
|
Receipts, Clippings, Photos, and Other Documents ......................................................................... |
66 |
4 |
Prepare Your Network for Scanning with Your Computer |
68 |
|
Before Scanning ...................................................................................................................................... |
68 |
|
Before Network Scanning........................................................................................................................ |
68 |
|
Network Licence (Windows®)............................................................................................................ |
68 |
|
Configure Network Scanning for Windows®...................................................................................... |
68 |
|
Configure Network Scanning for Macintosh ...................................................................................... |
72 |
|
Launch the BRAdmin Utility............................................................................................................... |
73 |
5 |
Before scanning |
74 |
6 |
Scan Using Your Computer |
75 |
|
Change the ControlCenter4 User Interface (Windows®)......................................................................... |
75 |
|
Scan Using ControlCenter4 in Home Mode (Windows®) ........................................................................ |
78 |
|
Basic Scan......................................................................................................................................... |
78 |
|
Scan Documents Using the Carrier Sheet......................................................................................... |
79 |
|
Scan Plastic Cards ............................................................................................................................ |
81 |
|
Scan Documents to SharePoint ........................................................................................................ |
83 |
|
Scan Using ControlCenter4 in Advanced Mode (Windows®).................................................................. |
85 |
|
Basic Scan......................................................................................................................................... |
85 |
|
Scan to Image ................................................................................................................................... |
86 |
|
Scan to OCR ..................................................................................................................................... |
87 |
|
Scan to E-mail ................................................................................................................................... |
88 |
|
Scan to File........................................................................................................................................ |
89 |
|
Change a Scan Button’s Default Settings ......................................................................................... |
90 |
|
Scan Using the Carrier Sheet............................................................................................................ |
90 |
|
Scan Plastic Cards ............................................................................................................................ |
92 |
|
Scan Documents to SharePoint ........................................................................................................ |
94 |
xi

|
Create a Custom Tab (ControlCenter4 Advanced Mode) (Windows®) ................................................... |
96 |
|
Create a Custom Tab ........................................................................................................................ |
96 |
|
Create a Custom Button in a Custom Tab......................................................................................... |
97 |
|
Change Scan Settings (ControlCenter4) (Windows®)............................................................................. |
98 |
|
Scan Using Brother iPrint&Scan (Mac).................................................................................................. |
104 |
|
Change Scan Button Settings from Brother iPrint&Scan (Mac) ...................................................... |
104 |
|
Scan Using Nuance™ PaperPort™ 14SE or Other Windows® Applications ........................................ |
105 |
|
Scan Using Nuance™ PaperPort™ 14SE....................................................................................... |
105 |
|
Scan Using Windows® Photo Gallery or Windows® Fax and Scan................................................ |
120 |
|
Use ABBYY FineReader........................................................................................................................ |
121 |
|
Scan Using TWAIN Applications (Macintosh)........................................................................................ |
122 |
|
Scan Using TWAIN Applications (for example, Presto! PageManager) .......................................... |
122 |
|
TWAIN Driver Settings .................................................................................................................... |
123 |
|
Scan Using Apple Image Capture (ICA Driver) ..................................................................................... |
126 |
|
Scan Using Apple Image Capture ................................................................................................... |
126 |
|
ICA Driver Settings .......................................................................................................................... |
128 |
7 |
Scan Using the Control Panel |
130 |
|
Save Scanned Documents on Your Computer in Home Mode ............................................................. |
130 |
|
Save Scanned Documents on Your Computer in Advanced Mode ....................................................... |
133 |
|
Save Scanned Documents on a USB Flash Drive................................................................................. |
137 |
|
Scan Documents to an FTP Server....................................................................................................... |
142 |
|
Start Web Based Management ....................................................................................................... |
143 |
|
Configure the FTP Default Settings................................................................................................. |
145 |
|
Scan Using FTP Server Profiles...................................................................................................... |
149 |
|
Scan Documents to an SFTP Server..................................................................................................... |
151 |
|
Start Web Based Management ....................................................................................................... |
152 |
|
Configure the SFTP Default Settings .............................................................................................. |
154 |
|
Scan Using SFTP Server Profiles ................................................................................................... |
158 |
|
Scan Documents to a Shared Folder / Network Location (Windows®) ................................................. |
160 |
|
Start Web Based Management ....................................................................................................... |
161 |
|
Configure the Scan to Network Default Settings ............................................................................. |
163 |
|
Scan Using Scan to Network Profiles.............................................................................................. |
167 |
|
Scan Documents to SharePoint............................................................................................................. |
169 |
|
Start Web Based Management ....................................................................................................... |
170 |
|
Set up a Scan to SharePoint Profile ................................................................................................ |
172 |
|
Scan Using Web Services (Windows Vista®, Windows® 7, Windows® 8, Windows® 8.1 and |
|
|
Windows® 10) .................................................................................................................................... |
177 |
|
Configuring Settings for Scanning ................................................................................................... |
178 |
|
Send Scanned Documents Directly to an Email Address (ADS-2800W / ADS-3600W) ....................... |
179 |
|
Select an Email Address from the Address Book............................................................................ |
180 |
|
Enter an Email Address Manually ................................................................................................... |
180 |
|
Set Up the Address Book (ADS-2800W / ADS-3600W) ........................................................................ |
181 |
|
Register an Email Address .............................................................................................................. |
181 |
|
Change an Email Address............................................................................................................... |
181 |
|
Delete an Email Address ................................................................................................................. |
182 |
|
Set Up a Group................................................................................................................................ |
183 |
|
Change a Group ............................................................................................................................. |
183 |
|
Delete a Group ................................................................................................................................ |
184 |
|
Upload Scanned Documents to the Web (ADS-2800W / ADS-3600W) ................................................ |
185 |
|
Change Scan to PC Settings (Windows®) ............................................................................................ |
186 |
|
Scan Options Using the Touchscreen (ADS-2800W / ADS-3600W)..................................................... |
194 |
|
|
xii |

|
Skip Blank Page Function ............................................................................................................... |
194 |
|
Adjust the Scanning Position........................................................................................................... |
194 |
|
Split and Save a Scanned File ........................................................................................................ |
194 |
|
Scan Specify Area ........................................................................................................................... |
195 |
|
Automatically Detect Whether a Document Uses Colour ................................................................ |
195 |
|
Auto Colour Detect Adjust ............................................................................................................... |
195 |
8 |
Managing the Machine from Your Computer |
196 |
|
Monitor the Machine’s Status from Your Computer (Windows®) .......................................................... |
196 |
|
Status Monitor Indicators................................................................................................................. |
197 |
|
Set Up the Brother Machine from Your Computer................................................................................. |
199 |
9 |
Routine Maintenance |
203 |
|
Clean the Outside of the Machine ......................................................................................................... |
203 |
|
Clean the Scanner and Rollers.............................................................................................................. |
205 |
|
Replace Supplies................................................................................................................................... |
209 |
|
Part Names, Numbers, and Life Cycles .......................................................................................... |
209 |
|
Check Supplies Replacement Cycle (ADS-2400N / ADS-3000N)................................................... |
210 |
|
Check Supplies Replacement Cycle (ADS-2800W / ADS-3600W) ................................................. |
213 |
|
Replace the Pick-up Roller .............................................................................................................. |
213 |
|
Replace the Reverse Roller............................................................................................................. |
217 |
|
Reset the Usage Counters .............................................................................................................. |
219 |
|
Reset the Usage Counters (ADS-2800W / ADS-3600W)................................................................ |
222 |
|
Packing and Shipping the Machine ....................................................................................................... |
223 |
10 |
Troubleshooting |
225 |
|
Overview................................................................................................................................................ |
225 |
|
Identifying The Problem......................................................................................................................... |
225 |
|
Error and Maintenance Messages......................................................................................................... |
225 |
|
Document Jam ................................................................................................................................ |
229 |
|
Operational and Software Difficulties..................................................................................................... |
231 |
|
Machine Information .............................................................................................................................. |
237 |
|
Check the Serial Number (ADS-2400N / ADS-3000N).................................................................... |
237 |
|
Check the Serial Number (ADS-2800W / ADS-3600W) .................................................................. |
239 |
|
WLAN Enable/Disable (ADS-2800W / ADS-3600W)....................................................................... |
239 |
|
LAN Enable/Disable ........................................................................................................................ |
240 |
|
USB Enable/Disable ........................................................................................................................ |
240 |
|
Reset Functions............................................................................................................................... |
241 |
|
Reset the Machine (ADS-2400N / ADS-3000N).............................................................................. |
241 |
|
Reset the Machine (ADS-2800W / ADS-3600W) ............................................................................ |
242 |
A |
Specifications |
243 |
|
General.................................................................................................................................................. |
243 |
|
Scanner ................................................................................................................................................. |
245 |
|
Direct Scan Feature (Scan to USB)....................................................................................................... |
245 |
|
Interfaces............................................................................................................................................... |
246 |
|
Network.................................................................................................................................................. |
246 |
|
Computer Requirements........................................................................................................................ |
247 |
|
|
xiii |

B |
Appendix |
248 |
|
Entering Text (ADS-2800W / ADS-3600W) ........................................................................................... |
248 |
|
Inserting Spaces ............................................................................................................................. |
248 |
|
Making Corrections.......................................................................................................................... |
248 |
|
LED Indications (ADS-2400N / ADS-3000N)......................................................................................... |
249 |
|
Service Call Indications ................................................................................................................... |
260 |
|
Scan Settings .................................................................................................................................. |
261 |
C |
Index |
267 |
xiv

 1 General Information
1
Using the Guide
Thank you for buying a Brother machine! Reading the documentation will help you make the most of your machine.
Symbols and Conventions Used in the Guide
The following symbols and conventions are used throughout this guide.
CAUTION |
CAUTION indicates a potentially hazardous situation which, if not avoided, |
may result in minor or moderate injuries. |
|
|
|
IMPORTANT |
IMPORTANT indicates a potentially hazardous situation which, if not avoided, |
may result in damage to property or loss of product functionality. |
|
|
|
NOTE |
Notes tell you how you should respond to a situation that may arise or give tips about |
other scanning features. |
|
Bold |
Bold typeface identifies keys on the machine control panel or computer screen. |
|
|
Italics |
Italicised typeface emphasises an important point or refers you to a related topic. |
|
|
Courier New |
Text in Courier New font identifies messages on the machine’s Touchscreen. |
(ADS-2800W / ADS-3600W) |
|
NOTE
•Unless otherwise specified, screens and illustrations in this guide show the ADS-3600W.
•Unless otherwise specified, the screens in this manual are from Windows® 7 and OS X 10.10.x. Screens on your computer may vary depending on your operating system.
1 |

General Information
About This Machine
1
1
2
3
4
5
6
|
8 |
7 |
9 |
10 |
11
1Extendable Automatic Document Feeder (ADF)
2Paper Guides
3Control Panel
4Front Cover
5Extendable Output Tray
6Document Stopper
7USB 2.0 Port
8Ethernet Cable Port
9Hi-Speed USB 2.0 Port (ADS-2400N / ADS-2800W) USB 3.0 SuperSpeed Port (ADS-3000N / ADS-3600W)
10AC Adapter Connector
11Security Slot
2 |

General Information
Control Panel Overview (ADS-2400N / ADS-3000N)
1
6 |
5 |
4 |
3 |
2 |
1 |
1Error Indicator (with LED)
Blinks when the machine is in an error state. For more information, see LED Indications (ADS-2400N / ADS-3000N) on page 249.
2Power button (with LED)
You can turn the machine on and off.
Press  to turn the machine on.
Press and hold  to turn the machine off.
3Stop button
Press the Stop button to:
Stop document feed
Cancel a job
Wake the machine up
Recover from an error
Disconnect Remote Setup
4Scan to USB button (with LED)
Press the Scan to USB button to:
Scan to USB
Wake the machine up
5Scan to PC button (with LED)
Press the Scan to PC button (USB Connect) to:
Scan to PC
Wake the machine up
3 |

General Information
6
1
You can assign the Scan to FTP/SFTP, Scan to Network, Scan to Sharepoint, Scan to PC (Network Connect), or WS Scan functions to these buttons. After configuring the settings, press the button to select your assigned function.
These buttons are available only if the machine was set up using the wired network method with the installation disc and a USB cable (see the Quick Setup Guide).
For more information, see Scan Documents to an FTP Server on page 142, or Scan Using Web Services (Windows Vista®, Windows® 7, Windows® 8, Windows® 8.1 and Windows® 10) on page 177.
4 |

General Information
Control Panel Overview (ADS-2800W / ADS-3600W)
1
|
6 |
5 |
4 |
3 |
2 |
1 |
1 |
(Back Button) |
|
|
|
|
|
Press to go back to the previous screen or menu. The Back button lights up when it is available.
2  (Power On/Off)
Press  to turn the machine on. Press and hold
  to turn the machine off. The Touchscreen displays Shutting Down and stays on for a few seconds before going off.
3  (Home Button)
Press to return to the Home Screen and Ready Mode. The Home button lights up when it is available.
4  (Stop Button)
Press to stop or cancel your current action and return to Ready Mode. The Stop button lights up when it is available.
5Touchscreen LCD
Access the menus and options by pressing the Touchscreen.
6NFC (Near Field Communication) Reader
(ADS-3600W)
You can use card authentication by touching the IC card to the NFC Reader on the control panel.
If your Android™ device supports the NFC standard, you can scan to your device by touching it to the NFC logo. You must download and install Brother iPrint&Scan to your Android™ device to use this feature.
5 |
General Information
Touchscreen LCD
|
1 |
|
You can select one of four screens as the Home screen. When the Home screen is displayed, you can |
||
|
||
change the displayed screen by swiping left or right, or pressing d or c. |
|
The following screens display the machine’s status when the machine is idle:
1 2 Scan 1 screen
The Scan 1 screen provides access to scan features, such as Scan to Web, Scan to PC, Scan to Network.
3 |
4 |
5 |
6 |
Scan 2 screen
The Scan 2 screen provides access to scan features, such as
Scan to FTP/SFTP, Scan to E-mail Server, Scan to SharePoint.
7 |
8 |
9 |
Scan 3 screen
The Scan 3 screen provides access to scan features, such as WS Scan and Scan to USB, and additional features, such as Apps. The WS Scan screen appears if you have set up the WS Scan function.
10 |
11 |
12 |
NOTE
“Swiping” means sliding your finger across the Touchscreen to display the next page or item.
6 |
General Information
1 |
(WiFi Setup) |
1 |
|
A four-level indicator on the Ready Mode screen displays the current wireless signal strength when using |
a wireless connection.
0 |
Max |
2 (All Settings)
Press to access the main settings (for more information, see Settings screen on page 9).
3 |
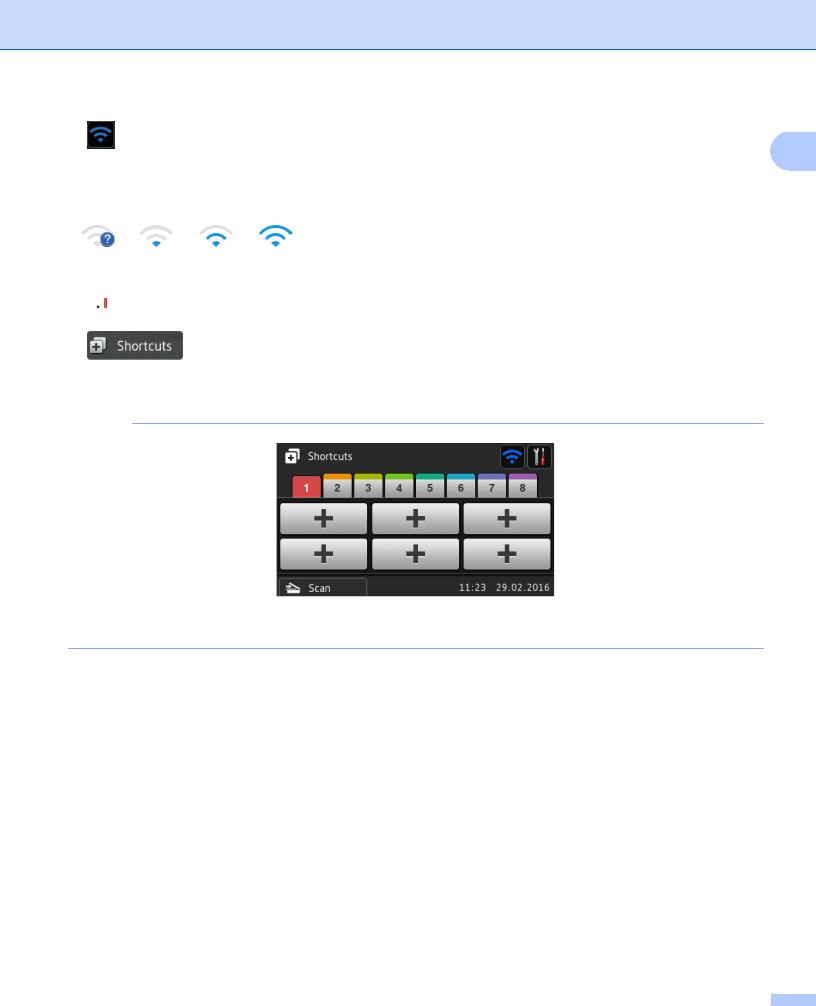
(Shortcuts) |
Press to set up Shortcuts.
You can quickly scan and connect to web services using the options set as Shortcuts.
NOTE
Eight Shortcut tabs are available. You can set up to six Shortcuts in each Shortcut tab. A total of 48 Shortcuts are available.
4to Web
Press to connect the Brother machine to an Internet service (for more information, see the Web Connect Guide).
5to PC
Press to access the Scan to PC function.
6to Network
Press to access the Scan to Network function.
7to FTP/SFTP
Press to access the Scan to FTP/SFTP function.
8to E-mail Server
Press to access the Scan to E-mail Server function.
9to SharePoint
Press to access the Scan to SharePoint function.
7 |

General Information
10 Apps |
|
Press to connect the Brother machine to the Brother Apps menu. (For more information, see the Web |
1 |
Connect Guide.) |
|
11 WS Scan
Press to access the WS Scan function.
This icon appears when you have selected WS scan. (For more information, see the Network User’s Guide.)
12 to USB
Press to access the Scan to USB function.
13 Warning icon 
The warning icon  appears when there is an error or maintenance message; press
  to return to Ready Mode.
For more information, see Error and Maintenance Messages on page 225.
NOTE
This product adopts the font of ARPHIC TECHNOLOGY CO., LTD.
Auto Start Scan
The Auto Start Scan feature allows you to start scanning automatically as soon as a document is placed in the ADF. To use Auto Start Scan, you must first create an Auto Start Scan Shortcut, and then enable the Auto Start Scan setting in General Setup:
1
2
3
4
5
6
Press Shortcuts.
Press the 9th Shortcut tab.
Press  to add the Auto Start Scan Shortcut.
Select the Shortcut function (for example, Scan to PC).
Press Save as Shortcut. When the LCD displays These settings will be saved as a shortcut., press OK.
Enter the Shortcut Name. When the LCD displays Make this a One Touch Shortcut?, press OK.
7 Press |
(All Settings) to access the Settings menu. Press General Setup > Auto Start Scan |
Mode and select On.
8 |

General Information
NOTE |
|
1 |
|
||
Only one Auto Start Scan profile can be saved at a time. |
||
|
|
|
Settings screen |
|
|
Press |
(All Settings) to check and access all the machine’s settings. |
|
General Setup
Press to access the full Settings menu.
Shortcut Settings
Press to set Shortcuts.
For more information, see Shortcut Settings (ADS-2800W / ADS-3600W) on page 10.
Network
Press to access Network settings.
Machine Info.
Press to check the machine’s information.
Initial Setup
Press to access the Date & Time, Scan offset correction, Reset and Local Language menus.
Basic Operations
Press your finger on the Touchscreen to operate it. To display and access all the screen menus or options, swipe left, right, up, down, or press d c or a b to scroll through them.
IMPORTANT
DO NOT press the Touchscreen with a sharp object, such as a pen or stylus. It may damage the machine.
The following example shows how to change a machine setting. In this example, the Document Size setting in Scan to USB is changed to Auto.
1
2
3
4
5
6
7
Swipe left or right, or press d or c to display Scan 3.
Press to USB.
Press Options.
Press a or b to display Document Size.
Press Document Size.
Press a or b to display Auto.
Press Auto.
NOTE
Press  to go back to the previous screen or menu.
9 |

General Information
Shortcut Settings (ADS-2800W / ADS-3600W)
1
You can add the scan and Web Connect settings you use most frequently as your Shortcuts. Later you can recall and apply these settings quickly. You can add up to 48 Shortcuts.
Adding Scan Shortcuts
The following settings can be included in a scan Shortcut:
Setting |
to PC |
to USB |
to E-mail |
to FTP / |
to Network |
to |
|
Server |
SFTP |
SharePoint |
|||||
|
|
|
|
||||
PC Name |
|
- |
- |
- |
- |
- |
|
Scan Settings |
|
- |
- |
- |
- |
- |
|
2-sided Scan |
|
|
|
- |
- |
- |
|
Scan Type |
|
|
|
- |
- |
- |
|
Resolution |
|
|
|
- |
- |
- |
|
File Type |
|
|
|
- |
- |
- |
|
Document Size |
|
|
|
- |
- |
- |
|
File Name |
- |
|
|
- |
- |
- |
|
File Name Style |
- |
|
|
- |
- |
- |
|
File Size |
- |
|
|
- |
- |
- |
|
Auto Deskew |
|
|
|
- |
- |
- |
|
Skip Blank Page |
|
|
|
- |
- |
- |
|
Brightness |
|
|
|
- |
- |
- |
|
Contrast |
|
|
|
- |
- |
- |
|
Colour |
- |
|
|
- |
- |
- |
|
Black and White/Grey |
- |
|
|
- |
- |
- |
|
Skip blank page |
|
|
|
- |
- |
- |
|
sensitivity |
|
|
|
|
|
|
|
Margin Settings |
- |
|
|
- |
- |
- |
|
Document Separation |
- |
|
|
|
|
|
|
Profile name *1 |
- |
- |
- |
|
|
|
*1 The Profile name setting contains many items. For more information, see the Network User’s Guide.
1
2
3
Press  .
.
Press a tab from 1 to 8.
Press  where you want to add a Shortcut.
10

General Information
4 Swipe up or down, or press a or b to display the type of scan you want, and then press it.
5 Do one of the following: |
1 |
If you pressed to USB, go to step 8.
If you pressed to E-mail Server, go to step 6.
If you pressed to OCR, to File, to Image or to E-mail, go to step 7.
If you pressed to FTP/SFTP, to Network or to SharePoint, swipe up or down, or press a or b to display the Profile Name, and then press it. Go to step B.
NOTE
To add a Shortcut for to FTP/SFTP, to Network or to SharePoint you create a Profile Name first.
6 Do one of the following:
To enter an email address manually, press Manual. Enter the email address you want using the keyboard on the machine’s Touchscreen. (For help with entering text using the Touchscreen, see Entering Text (ADS-2800W / ADS-3600W) on page 248.)
Press OK.
To enter an email address from the Address Book, press Address Book. Swipe up or down, or press a or b to display the email address you want, and then press it.
Press OK.
After you confirm the email address you have entered, press OK. Go to step 8.
NOTE
Press Detail to view the list of addresses you have entered.
7 Do one of the following:
8
9
0
When the machine is connected to a computer using a USB connection: Press USB to confirm that USB is selected as the PC Name. Go to step A.
When the machine is connected to a network:
Swipe up or down, or press a or b to display the PC Name, and then press it. Go to step 8.
Press Options.
Swipe up or down, or press a or b to display the available settings, and then press the setting you want.
Swipe up or down, or press a or b to display the available options for the setting, and then press the option you want.
Repeat steps 9 and 0 until you have selected all the settings for this Shortcut. Press OK.
A Review the settings you have selected:
To make more changes, return to step 8.
To finish, press Save as Shortcut.
11

General Information
B Review your settings on the Touchscreen, and then press OK.
C Enter a name for the Shortcut using the keyboard on the machine’s Touchscreen. (For help with entering 1 text using the Touchscreen see Entering Text (ADS-2800W / ADS-3600W) on page 248.)
Press OK.
D Press OK to save your Shortcut.
Adding Web Connect Shortcuts
The settings for these services can be included in a Web Connect Shortcut:
Box
Google Drive™
Evernote®
Evernote Business
Dropbox
OneDrive
OneNote
NOTE
•Web services may have been added or service names may have been changed by the provider since this document was published.
•To add a Web Connect Shortcut, you must have an account with the service you want to use (for more information, see the Web Connect Guide).
1 Press |
. |
2 Press a tab from 1 to 8. |
|
3 Press |
where you have not added a Shortcut. |
4 Press to Web.
5 If information about the Internet connection appears, read the information and confirm it by pressing OK.
6 Swipe left or right, or press d or c to display the available services, and then press the service you want.
7 Press your account.
If the account needs a PIN (Personal Identification Number), enter the PIN for the account using the keyboard on the machine’s Touchscreen.
Press OK.
8 Press the function you want.
NOTE
The functions that can be set may vary depending on the selected service.
12

General Information
9 Read and confirm the displayed list of functions you have selected, and then press OK.
0 Enter a name for the Shortcut using the keyboard on the machine’s Touchscreen. (For help with entering 1 text using the Touchscreen see Entering Text (ADS-2800W / ADS-3600W) on page 248.)
Press OK.
A Press OK to save your Shortcut.
Adding Apps Shortcuts
The settings for these services can be included in an Apps Shortcut:
NoteScan
Outline&Scan
NOTE
Web services may have been added or service names may have been changed by the provider since this document was published.
1 Press  .
.
2 Press a tab from 1 to 8.
3 Press  where you have not added a Shortcut.
4 Press Apps.
5 If information about the Internet connection appears, read the information and confirm it by pressing OK.
6 Swipe left or right, or press d or c to display the available apps, and then press the app you want.
NOTE
The available apps depend on the selected service.
7 Press your account.
If the account needs a PIN, enter the PIN for the account using the keyboard on the machine’s Touchscreen.
Press OK.
8
9
0
Read and confirm the displayed list of apps you have selected, and then press OK.
Enter a name for the Shortcut using the keyboard on the machine’s Touchscreen. (For help with entering text using the Touchscreen see Entering Text (ADS-2800W / ADS-3600W) on page 248.)
Press OK.
Press OK to save your Shortcut.
13

General Information
Adding ID Card Shortcuts (ADS-3600W only)
1
1 Press .
2 Press a tab from 1 to 8 to display the Shortcut you want.
3 Press and hold the Shortcut button.
4 Press Register NFC.
NOTE
•You cannot use the same ID card for different Shortcuts.
•To use the ID card for another Shortcut, unregister the card first, and then register it with the new Shortcut.
Changing Shortcuts
You can change the settings in a Shortcut.
NOTE
To change a Web Connect Shortcut, delete it first, and then add a new Shortcut.
(For more information, see Deleting Shortcuts on page 15 and Adding Web Connect Shortcuts on page 12.)
1
2
3
Press  .
.
Press a tab from 1 to 8 to display the Shortcut you want to change.
Press the Shortcut you want, and then press Options. The settings for the Shortcut that you have selected appear.
4 Change the settings for the Shortcut you have selected in step 3 (for more information, see Shortcut Settings (ADS-2800W / ADS-3600W) on page 10).
5
6
7
When finished, press OK, and then press Save as Shortcut.
Press OK to confirm.
Do one of the following:
To overwrite the Shortcut, press Yes.
To keep the existing Shortcut, press No to enter a new Shortcut name. Go to step 8.
8 To create a new Shortcut, press  and hold down
  to delete the current name, and then enter a new name using the keyboard on the machine’s Touchscreen. (For help with entering text using the Touchscreen, see Entering Text (ADS-2800W / ADS-3600W) on page 248.)
Press OK.
9 Press OK to confirm.
14

General Information
Editing Shortcut Names
|
1 |
|
You can edit a Shortcut name. |
||
|
1 Press  .
.
2 Press a tab from 1 to 8 to display the Shortcut you want.
3 Press and hold the Shortcut button.
4 Press Rename.
5 To edit the name, press and hold  to delete the current name, and then enter a new name using the keyboard on the machine’s Touchscreen. (For help with entering text using the Touchscreen, see Entering Text (ADS-2800W / ADS-3600W) on page 248.)
Press OK.
Deleting Shortcuts
You can delete a Shortcut.
1
2
3
4
5
Press  .
.
Press a tab from 1 to 8 to display the Shortcut you want.
Press and hold the Shortcut button.
Press Delete to delete the Shortcut that you have selected in step 3.
Press Yes to confirm.
Recalling Shortcuts
The Shortcut settings appear on the Shortcut screen. To recall a Shortcut, simply press the Shortcut name.
1
2
3
Press  .
.
Press a tab from 1 to 8 to display the Shortcut you want.
Press the Shortcut button.
15
Loading...