


Series 3
380
370
360
washable
start |
• |
stop |
|
||
|
|
Type 5736
Type 5738
Type 5739
www.braun.com/register
English |
4, |
6 |
Français |
7, |
9 |
Polski |
10, 12 |
|
âesk˘ |
13, 15 |
|
Slovensk˘ |
16, 18 |
|
Magyar |
19, 21 |
|
Hrvatski |
22, 24 |
|
Slovenski |
25, 27 |
|
Türkçe |
28 |
|
|
30, 32 |
|
|
34, 36 |
|
|
40, 37 |
|
Braun GmbH
Frankfurter Straße 145
61476 Kronberg/Germany
|
Braun Infolines |
GB |
0800 783 70 10 |
IRL |
1 800 509 448 |
F |
0 810 309 780 |
B |
0 800 14 592 |
PL |
0 801 127 286 |
|
0 801 1 BRAUN |
CZ |
221 804 335 |
TR |
0 212 473 75 85 |
RUS |
+7 495 258 62 70 |
UA |
+38 044 428 65 05 |
HK |
852-25249377 |
|
(Audio Supplies Company Ltd.) |
5-736-353/00/V-07/M GB/F/PL/CZ/SK/H/HR/SLO/TR/RUS/UA/Arab Printed in Germany
1 |
|
|
|
|
charge |
|
start |
• |
stop |
|
|
|
|
|
|
|
|
||
2 |
|
|
|
|
ce |
|
|
|
|
|
|
|
|
pla |
|
|
|
|
|
|
|
|
|
re |
|
|
|
|
|
|
|
|
|
|
res |
et |
|
|
|
|
|
|
|
6 |
|
|
|
|
|
|
|
|
|
360 |
|
|
|
||
|
|
|
3 |
|
|
|
|
||
5 |
|
|
|
|
|
|
|
|
|
|
|
|
|
|
|
|
|
|
|
washable |
|
|
|
|
|
|
|
|
|
|
|
stop |
|
|
charge |
|
|
|
|
|
• |
4 |
7 |
empty |
|
|
|
||
start |
|
re |
|
|
|
|
|||
|
|
|
|
place |
|
|
|
|
|
|
|
|
|
|
res |
et |
|
|
|
|
|
|
|
|
|
|
|
|
|
|
|
|
|
|
370 |
|
|
|
|
6 |
|
|
|
|
|
|
|
|
|
7 |
|
|
|
|
|
|
|
|
|
8 |
|
|
|
|
|
|
|
|
|
9 |
|
|
|
|
|
|
|
|
|
10 |
|
|
|
|
|
|
|
|
|
11 |
|
|
|
|
|
|
|
|
|
|
|
|
|
|
|
|
|
|
• |
|
|
|
|
|
|
|
|
|
off |
|
|
|
|
|
|
|
oil |
|
|

English
Our products are designed to meet the highest standards of quality, functionality and design. We hope you enjoy your new Braun Shaver.
Warning
Your shaver is provided with a special cord set with an integrated Safety Extra Low Voltage power supply. Do not exchange or manipulate any part of it. Otherwise there is risk of electric shock.
Charging lights
360 and 370 models: The green charging light blinks when the shaver is being charged. When the battery is fully charged, the charging light lights permanently.
380 model: The 3 segments of the green charging light indicate the charging level by thirds. When fully charged, all 3 segments of the charging light shine permanently.
Description
1 Shaver foil
2 Cutter block
3 Release button
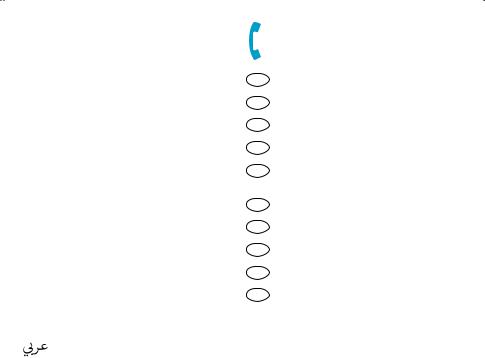
4 On/off switch («start/stop»)
5 Long hair trimmer
6 Charging lights (green)
7 Low-charge light (red) (380/370 models only)
8 Replacement light for shaving parts
9 Reset button
10 Special cord set
11 Model 380 only: charging stand
Charging
The best environmental temperature for charging is between 15°C and 35°C.
•Using the special cord set, connect the shaver/charging stand to an electrical outlet with the motor switched off.
•When charging for the first time, leave the shaver to charge continuously for 4 hours.
•Once the shaver is completely charged, discharge the shaver through normal use. Then recharge to full capacity. Subsequent charges will take about 1 hour.
•A full charge provides up to 50 minutes of cordless shaving time depending on your beard growth.
•Maximum battery capacity will only be reached after several charging/discharging cycles.
•If the rechargeable batteries are discharged, you may also shave by connecting the shaver to an electrical outlet via the special cord set.
Low-charge light
(380/370 models only)
The red low-charge light flashes when the battery capacity has dropped below 20%, provided the shaver is switched on. The remaining capacity will then be sufficient for 2 to 3 shaves.
Shaving
Turn on the shaver («start» ):
The pivoting cutting system automatically adjusts to every contour of your face.
Trimmer
When the long hair trimmer is activated, it allows the controlled trimming of moustache or sideburns.
Tips for the perfect shave
•We recommend that you shave before washing, as the skin tends to be slightly swollen after washing.
•Hold the shaver at right angles (90°) to the skin. Stretch the skin and shave against the direction of beard growth.
•To maintain 100% shaving performance, replace the shaver foil and cutter block, when the replacement light (8) comes on (after about 18 months), or when the shaving parts are worn.
4
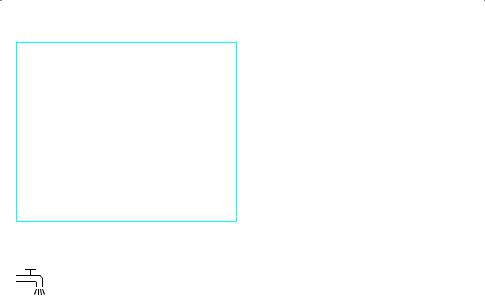
Cleaning
This appliance is suitable for cleaning under an open water tap.

 Warning: Detach the hand-held part from the power supply before cleaning it in water.
Regular cleaning ensures better shaving performance. Rinsing the shaving head after each shave under running water is an easy and fast way to keep it clean:
•Switch the shaver on (cordless) and rinse the shaving head under hot running water. A natural based soap may also be used provided it contains no particles or abrasive substances. Rinse off all foam and let the shaver run for a few more seconds.
•Next, switch off the shaver, remove the shaver foil and the cutter block. Then leave the disassembled shaving parts to dry.
•If you regularly clean the shaver under water, then once a week apply a drop of light machine oil onto the long hair trimmer and shaver foil.
Alternatively, you may clean the shaver using the brush provided:
•Switch off the shaver. Remove the shaver foil.
•Using the brush, clean the cutter block and the inner area of the shaver head. However, do not clean the shaver foil with the brush as this may damage the foil.
Keeping your shaver in top shape
About every four weeks, clean the cutter block with Braun cleaning agents.
Replacement light for shaving parts / Reset
To maintain 100% shaving performance, replace your foil and cutter block, when the replacement light for shaving parts (8) comes on (after about 18 months) or when worn.
Change both parts at the same time for a closer shave with less skin irritation.
(Shaver foil and cutter block: 31 B/S)
The replacement light will remind you during the next 7 shaves to replace the shaving parts. Then the shaver will automatically reset the display.
After you have replaced the shaving parts (foil and cutter block), use a ball-pen to push the reset button (9) for at least 3 seconds to reset the counter.
While doing so, the replacement light blinks and goes off when the reset is complete. The manual reset can be done at any time.
Preserving the batteries
In order to maintain the optimum capacity of the rechargeable batteries, the shaver has to be fully discharged (by shaving) every 6 months approximately. Then recharge the shaver to full capacity. Do not expose the shaver to temperatures higher than 50°C for extended periods of time.
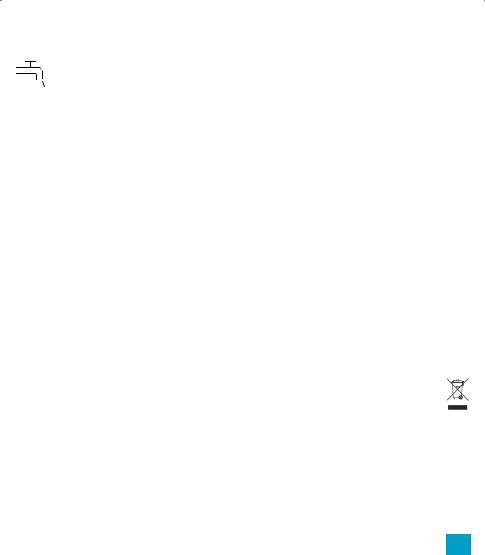
Environmental notice
This product contains rechargeable batteries. In the interest of protecting the environment, please do not dispose of the product in the household waste at the end of its useful life. Disposal can
take place at a Braun Service Centre or at appropriate collection points provided in your country.
Subject to change without notice.
This product conforms to the European Directives EMC 2004/108/EC and Low Voltage 2006/95/EC.
For electric specifications, see printing on the special cord set.
5

Guarantee
We grant 2 years guarantee on the product commencing on the date of purchase. Within the guarantee period we will eliminate, free of charge, any defects in the appliance resulting from faults in materials or workmanship, either by repairing or replacing the complete appliance as we may choose.
This guarantee extends to every country where this appliance is supplied by Braun or its appointed distributor.
This guarantee does not cover: damage due to improper use, normal wear and tear (e.g. shaver foil or cutter block) as well as defects that have a negligible effect on the value or operation of the appliance. The guarantee becomes void if repairs are undertaken by unauthorised persons and if original Braun parts are not used.
To obtain service within the guarantee period, hand in or send the complete appliance with your sales receipt to an authorised Braun Customer Service Centre.
For UK only:
This guarantee in no way affects your rights under statutory law.
6

Français
Nos produits sont conçus pour satisfaire aux plus hautes exigences en matière de qualité, fonctionnalité et design. Nous espérons que vous serez pleinement satisfait de votre nouveau rasoir Braun.
Attention
Votre rasoir est fourni avec un adaptateur basse tension muni d’une prise de sécurité très basse tension intégrée. Ne changez ou ne manipulez pas ces composants pour éviter tout risque de choc électrique.
Description
1Grille de rasage
2Bloc-couteaux
3Bouton d’ouverture de la tête de rasage
4Bouton «marche/arrêt» («start/stop»)
5Tondeuse retractable
6Témoin lumineux de charge (vert)
7Témoin de décharge (rouge) (modèle 380 et 370 seulement)
8Témoin de remplacement des pièces de rasage
9Bouton de réinitialisation
10Cordon d’alimentation spécial
11Modèle 380 seulement : en charge
Recharge
La température environnante idéale pour un programme de recharge est comprise entre 15 °C et 35 °C.
•En utilisant le cordon d’alimentation, reliez le rasoir et la station de chargement à une prise de courant lorsque le moteur est éteint.
•Lorsque vous chargez votre rasoir pour la première fois, laissez le rasoir se charger en continue pendant au moins 4 heures.
•Une fois que le rasoir est complètement chargé, déchargez-le à travers une utilisation normale. Puis rechargez-le jusqu’à atteindre une pleine capacité. Une pleine charge prendra environ 1 heure.
•Une pleine charge procurera environ 50 minutes de rasage sans fil, selon la nature de votre barbe.
•La capacité optimum de la batterie sera atteinte après plusieurs cycles de chargement et de déchargement.
•Si votre batterie est déchargée, vous pouvez aussi vous rasez en branchant votre rasoir sur une prise de courant grâce au cordon d’alimentation spécial.
Témoin de chargement
Modèle 360 et 370 : Le témoin de chargement vert clignote lorsque le rasoir est en cours de chargement. Lorsque la batterie est complètement pleine, le témoin de chargement s’allume de façon permanente.
Le modèle 380 : Les 3 niveaux du témoin de chargement vert indiquent les différents
niveaux de chargement par tiers. Lorsqu’elle est pleinement chargée, les 3 segments du témoin de chargement brillent de façon permanente.
Témoin lumineux de décharge
(Modèle 380/370 uniquement)
Le témoin lumineux de décharge rouge clignote lorsque la capacité de la batterie est descendue en dessous de 20% et que le rasoir est en marche. La capacité restante sera alors suffisante pour 2 ou 3 autres rasages.
Rasage
Allumez votre rasoir en appuyant sur «start» : Le système de coupe pivotant s’adapte parfaitement à tous les contours de votre visage.
Tondeuse
Quand la tondeuse rétractable est activée, elle permet d’ajuster la taille de la moustache et des pattes.
7
Conseils d’utilisation pour un rasage parfait
•Toujours se raser avant la toilette faciale car la peau a tendance à légèrement gonflée quand elle est humide.
•Tenir le rasoir perpendiculairement (90°) à la peau. Tendre la peau et se raser dans le sens contraire à la pousse du poil.
•Pour conserver 100% de la performance de votre rasoir, remplacez votre grille et votre bloc-couteaux lorsque le témoin lumineux de remplacement (8) s’allume (après environ 18 mois) ou lorsqu’elles sont usées.
Nettoyage
Cet appareil peut être nettoyé sous un filet d’eau courante.
Attention : retirez la partie détachable du cordon d’alimentation avant de le nettoyer sous l’eau.
Un nettoyage régulier assure une performance de rasage optimale. Rincer la tête de rasage après chaque utilisation est une façon simple et rapide de le garder propre :
•Allumez votre rasoir (sans le cordon d’alimentation) et rincez la tête de rasage sous l’eau chaude. Vous pouvez également utiliser un savon naturel dans la mesure où il ne contient ni particules ni substances corrosives. Rincez toute la mousse et laissez le rasoir fonctionner encore quelques secondes.
•Puis, éteignez le rasoir, retirez la grille de rasage et le bloc-couteaux. Laissez-les alors sécher.
•Si vous nettoyez régulièrement votre rasoir sous l'eau courante, appliquez une goutte d'huile sur la tondeuse et la grille du rasoir toutes les semaines.
Alternativement, vous pouvez nettoyer votre rasoir en utilisant la brosse fournie :
•Eteignez votre rasoir. Retirez la grille de rasage.
•Cependant, ne nettoyez pas la grille de rasage avec la brosse car cela pourrait l’endommager.
Pour conserver votre rasoir en parfait état
Toutes les 4 semaines environ, nettoyez le bloc-couteaux avec du liquide nettoyant Braun.
Témoin lumineux pour les pièces de rasage /Initialisation
Pour conserver 100% de la performance de votre rasoir, remplacez votre grille et votre bloc-couteaux lorsque le témoin de remplacement des pièces de rasage (8) s’allume (après environ 18 mois) ou lorsqu’elles sont usées. Pour un rasage plus précis et moins d’irritations, changez les deux pièces en même temps.
(Grille de rasoir (1) et bloc-couteaux (2) : 31 B/S)
Le témoin lumineux de remplacement des pièces de rasage clignotera pendant les
7 prochains rasages. Puis le rasoir réinitialisera automatiquement le témoin. Après avoir changer les pièces de rasage (grille et bloccouteaux), utilisez la mine d’un stylo pour appuyer sur le bouton reset (9) durant au moins 3 secondes pour réinitialiser le compteur. Pendant la manipulation, la lumière de remplacement clignote et s'éteint lorsque la réinitialisation est complète. La réinitialisation manuelle peut être faite à tout moment.
Maintenir la batterie en bon état
Afin d’optimiser la capacité maximum de la batterie, le rasoir doit être déchargé complètement (lors de l’utilisation courante) tous les 6 mois environ. Puis rechargez à nouveau le rasoir à pleine capacité. N’exposez pas le rasoir à des températures supérieures à 50 °C pendant de longue durée.
8

Respect de l’environnement
Ce produit contient des batteries rechargeables. Afin de protéger l’environnement, ne jetez jamais l’appareil dans les ordures ménagères
à la fin de sa durée de vie. Remettez-le à votre centre service agréé Braun ou déposez-le dans des sites de récupération appropriés conformément aux réglementations locales ou nationales en vigueur.
Sujet à modifications sans préavis.
Cet appareil est conforme aux normes Européennes fixées par les Directives 2004/108/EC et la directive Basse Tension 2006/95/EC.
Caractéristiques électriques : voir inscriptions sur le cordon d’alimentation.
Garantie
Nous accordons une garantie de 2 ans sur ce produit, à partir de la date d'achat.
Pendant la durée de la garantie, Braun prendra gratuitement à sa charge la réparation des vices de fabrication ou de matière en se réservant le droit de décider si certaines pièces doivent être réparées ou si l'appareil lui-même doit être échangé.
Cette garantie s'étend à tous les pays où cet appareil est commercialisé par Braun ou son distributeur exclusif.
Cette garantie ne couvre pas : les dommages occasionnés par une utilisation inadéquate, l’usure normale (par exemple, grille et bloccouteaux) ainsi que les défauts d’usures qui ont un effet négligeable sur la valeur ou l’utilisation de l’appareil. Cette garantie devient caduque si des réparations ont été effectuées par des personnes non agréées par Braun et si des pièces de rechange ne provenant pas de Braun ont été utilisées.
Pour toute réclamation intervenant pendant la période de garantie, retournez ou rapportez l'appareil ainsi que l'attestation de garantie à votre revendeur ou à un Centre Service Agréé Braun.
Appelez au 08.10.30.97.80 (ou se référez à http://www.braun.com/global/contact/ servicepartners/europe.country.html) pour connaitre le Centre Service Agrée Braun le plus proche de chez vous.
Clause spéciale pour la France
Outre la garantie contractuelle exposée cidessus, nos clients bénéficient de la garantie légale des vices cachés prévue aux articles 1641 et suivants du Code civil.
9

Polski
Nasze produkty zosta∏y zaprojektowane tak, aby spe∏nia∏y najwy˝sze standardy jakoÊci, funkcjonalnoÊci i wzornictwa. Mamy nadziej´, ˝e b´dà Paƒstwo w pe∏ni zadowoleni z nowej golarki Braun.
Ostrze˝enie
Golarka wyposa˝ona jest w specjalny przewód zasilajàcy przystosowany do bezpiecznego zasilania ze êróde∏ niskiego napi´cia. Nie próbuj wymieniaç ani manipulowaç przy jakiejkolwiek cz´Êci golarki. W przeciwnym razie nara˝asz si´ na ryzyko pora˝enia pràdem.
Opis
1 Folia golàca
2 Blok ostrzy tnàcych
3 Przycisk zwalniajàcy blokad´
4 W∏àcznik/wy∏àcznik («start/stop»)
5 Trymer do d∏u˝szego zarostu
6 Kontrolka ∏adowania (zielona)
7Kontrolka informujàca o niskim poziomie na∏adowania akumulatora (czerwona) (tylko modele 380/370)
8 Kontrolka informujàca o potrzebie wymiany cz´Êci golàcych
9 Przycisk do resetowania
10Specjalny przewód zasilajàcy
11Tylko model 380: przystawka do ∏adowania
¸adowanie
Golark´ najlepiej jest ∏adowaç przy temperaturze otoczenia mi´dzy 15°C a 35°C.
•Pod∏àcz golark´/przystawk´ do ∏adowania do gniazdka przy u˝yciu specjalnego przewodu zasilajàcego, ale nie w∏àczaj jej.
•Za pierwszym razem golark´ nale˝y ∏adowaç bez przerwy przez 4 godziny.
•Po ca∏kowitym na∏adowaniu golarki, roz∏aduj jà poprzez normalne u˝ywanie, a nast´pnie ponownie ca∏kowicie na∏aduj. Kolejne ∏adowania trwajà oko∏o godziny.
•Pe∏ne ∏adowanie zapewnia do 50 minut golenia bez zasilania w zale˝noÊci od tego,
jak szybko roÊnie Twoja broda i jak cz´sto si´ golisz.
•Maksymalna pojemnoÊç baterii osiàgana jest dopiero po kilkunastu cyklach pe∏nego na∏adowania i roz∏adowania.
•W przypadku roz∏adowania si´ akumulatorów mo˝esz goliç si´ po pod∏àczeniu golarki do gniazdka specjalnym przewodem zasilajàcym.
Kontrolki ∏adowania
Modele 360 i 370: Zielona kontrolka miga podczas ∏adowania golarki. Gdy golarka jest w pe∏ni na∏adowana, kontrolka jest stale zapalona.
Model 380: Trzy cz´Êci zielonej kontrolki ∏adowania wskazujà poziom na∏adowania golarki, a ka˝da z nich odpowiada jednej trzeciej pe∏nego poziomu na∏adowania. Gdy golarka jest w pe∏ni na∏adowana, wszystkie trzy cz´Êci sà stale zapalone.
Kontrolka niskiego poziomu na∏adowania akumulatora
(Tylko modele 380/370)
Czerwona kontrolka niskiego poziomu na∏adowania akumulatora miga, jeÊli stan na∏adowania akumulatora spadnie poni˝ej 20 proc., pod warunkiem, ˝e golarka b´dzie w∏àczona. Pozosta∏y poziom na∏adowania akumulatora wystarczy jeszcze na 2–3 golenia.
Golenie
W∏àcz golark´ («start»):
Ruchomy system golàcy automatycznie dopasowuje si´ do kszta∏tów Twojej twarzy.
Trymer
Po w∏àczeniu trymera do d∏u˝szego zarostu mo˝esz w kontrolowany sposób przystrzygaç wàsy i baki.
10
Wskazówki, jak goliç si´ dok∏adnie
•Zalecamy golenie przed umyciem twarzy, poniewa˝ skóra po umyciu jest zwykle nieco spuchni´ta.
•Trzymaj golark´ przy skórze pod w∏aÊciwym kàtem (90°). Naciàgnij skór´ i zacznij goliç, poruszajàc golarkà pod w∏os.
•Aby utrzymaç 100% skutecznoÊç golenia, wymieƒ foli´ i g∏owic´ golàcà, gdy zapali si´ kontrolka (8) informujàca o potrzebie wymiany cz´Êci golàcych (po oko∏o 18 miesiàcach) lub gdy cz´Êci zu˝yjà si´.
Czyszczenie
Urzàdzenie jest przystosowane do czyszczenia pod bie˝àcà wodà.
Uwaga: Przed umyciem golarki w wodzie nale˝y od∏àczyç jà od zasilania.
Regularne czyszczenie zapewnia lepsze efekty golenia. P∏ukanie g∏owicy golàcej pod bie˝àcà wodà po ka˝dym goleniu pozwala w ∏atwy i szybki sposób utrzymaç golark´ w czystoÊci:
•W∏àcz golark´ (przy wy∏àczonym zasilaniu z sieci) i op∏ucz g∏owic´ golàcà pod strumieniem goràcej wody. Mo˝esz tak˝e u˝yç myd∏a z naturalnymi sk∏adnikami pod warunkiem, ˝e nie zawiera ono ˝adnych drobnych czàstek sta∏ych ani Êrodków Êcierajàcych. Sp∏ucz resztki piany i odczekaj kilka sekund, zanim wy∏àczysz golark´.
•Nast´pnie, wy∏àcz golark´, zdejmij foli´ i blok ostrzy tnàcych, a potem poczekaj a˝ roz∏o˝one cz´Êci wyschnà.
•Je˝eli regularnie czyÊcisz urzàdzenie pod strumieniem wody, co tydzieƒ wpuÊç kropl´ oleju maszynowego mi´dzy przystrzygacz I foli´ golàcà.
Alternatywnie, mo˝esz wyczyÊciç golark´ za∏àczonà szczoteczkà:
•Wy∏àcz golark´. Zdejmij foli´ golàcà.
•U˝ywajàc szczoteczki, oczyÊç blok ostrzy tnàcych i jego wewn´trznà stron´. Nie
czyÊç szczoteczkà powierzchni folii, gdy˝ mo˝e jà to uszkodziç.
Utrzymanie golarki w doskona∏ym stanie
Co 4 tygodnie blok ostrzy nale˝y myç przy u˝yciu specjalnych Êrodków czyszczàcych firmy Braun.
Kontrolka informujàca o wymianie cz´Êci golàcych / Resetowanie
Aby utrzymaç 100% skutecznoÊç golenia, wymieƒ foli´ i blok ostrzy tnàcych, gdy zapali si´ kontrolka (8) informujàca o potrzebie wymiany cz´Êci golàcych (po oko∏o 18 miesiàcach) lub, gdy cz´Êci zu˝yjà si´.
Wymieƒ obie cz´Êci jednoczeÊnie, co zapewni dok∏adniejsze golenie i zmniejszy ryzyko podra˝nieƒ skóry.
(Folia golàca (1) i blok ostrzy tnàcych (2): 31 B/S)
Kontrolka przypomni Ci o wymianie cz´Êci golàcych jeszcze podczas 7 kolejnych cykli golenia. Nast´pnie golarka automatycznie zresetuje wyÊwietlacz.
Po wymianie cz´Êci golàcych (folii i bloku ostrzy tnàcych), przy pomocy d∏ugopisu naciÊnij przycisk do resetowania (9) i przytrzymaj go przez co najmniej 3 sekundy, aby r´cznie zresetowaç wyÊwietlacz.
W tym samym czasie kontrolka informujàca o wymianie cz´Êci b´dzie migaç i zgaÊnie dopiero, gdy resetowanie zostanie zakoƒczone.
WyÊwietlacz mo˝na zresetowaç r´cznie w dowolnym momencie.
PojemnoÊç akumulatorów
Aby utrzymaç optymalnà pojemnoÊç akumulatorów, golark´ nale˝y ca∏kowicie roz∏adowaç (poprzez normalne u˝ywanie) w przybli˝eniu raz na 6 miesi´cy. Nast´pnie, golark´ nale˝y ponownie ca∏kowicie na∏adowaç. Golarki nie wolno wystawiaç na d∏ugotrwa∏e dzia∏anie temperatur powy˝ej 50 °C.
11

Uwagi dotyczàce ochrony Êrodowiska
Urzàdzenie to wyposa˝one jest w baterie przystosowane do wielokrotnego ∏adowania. Aby zapobiec zanieczyszczaniu Êrodowiska,
pod koniec okresu eksploatacji produktu nie wyrzucaj go do kosza na Êmieci. Mo˝esz pozostawiç go w punkcie serwisowym marki Braun lub jednym ze specjalnych punktów zajmujàcych si´ zbiórkà zu˝ytych produktów w wybranych miejscach na terenie kraju.
Powy˝sze informacje mogà ulec zmianie bez uprzedniego powiadomienia.
Produkt ten spe∏nia wymogi dyrektywy EMC 2004/108/EC oraz dyrektywy 2006/95/EC dotyczàcej elektrycznych urzàdzeƒ niskonapi´ciowych.
Specyfikacje elektryczne zosta∏y wydrukowane na specjalnym przewodzie zasilajàcym.
Warunki gwarancji
1.Procter and Gamble DS Polska sp. z.o.o. gwarantuje sprawne dzia∏anie sprz´tu w okresie 24 miesi´cy od daty jego wydania Kupujàcemu. Ujawnione w tym okresie wady b´dà usuwane bezp∏atnie, przez wymieniony przez firm´ Procter and Gamble DS Polska sp. z.o.o. autoryzowany punkt serwisowy, w terminie 14 dni od daty dostarczenia sprz´tu do autoryzowanego punktu serwisowego.
2.Kupujàcy mo˝e wys∏aç sprz´t do naprawy do najbli˝ej znajdujàcego si´ autoryzowanego punktu serwisowego wymienionego przez firm´ Procter and Gamble DS Polska sp. z.o.o. lub skorzystaç z poÊrednictwa sklepu, w którym dokona∏ zakupu sprz´tu. W takim wypadku termin naprawy ulegnie wyd∏u˝eniu o czas niezb´dny do dostarczenia i odbioru sprz´tu.
3.Kupujàcy powinien dostarczyç sprz´t w oryginalnym opakowaniu fabrycznym dodatkowo zabezpieczonym przed uszkodzeniem. Uszkodzenia spowodowane
niedostatecznym zabezpieczeniem sprz´tu nie podlegajà naprawom gwarancyjnym.
4.Niniejsza gwarancja jest wa˝na z dokumentem zakupu i obowiàzuje na terytorium Rzeczypospolitej Polskiej.
5.Okres gwarancji przed∏u˝a si´ o czas od zg∏oszenia wady lub uszkodzenia do naprawy sprz´tu.
6.Naprawa gwarancyjna nie obejmuje czynnoÊci przewidzianych w instrukcji, do wykonania których Kupujàcy zobowiàzany jest we w∏asnym zakresie i na w∏asny koszt.
7.Ewentualne oczyszczenie sprz´tu dokonywane jest na koszt Kupujàcego wed∏ug cennika danego autoryzowanego punktu serwisowego i nie b´dzie traktowane jako naprawa gwarancyjna.
8.Gwarancjà nie sà obj´te:
a)mechaniczne uszkodzenia sprz´tu spowodowane w czasie jego u˝ytkowania lub w czasie dostarczania sprz´tu do naprawy;
b)uszkodzenia i wady wynik∏e na skutek:
–u˝ywania sprz´tu do celów innych ni˝ osobisty u˝ytek;
–niew∏aÊciwego lub niezgodnego z instrukcjà u˝ytkowania, konserwacji, przechowywania lub instalacji;
–u˝ywania niew∏aÊciwych materia∏ów eksploatacyjnych;
–napraw dokonywanych przez nieuprawnione osoby; stwierdzenie faktu takiej naprawy lub samowolnego otwarcia sprz´tu powoduje utrat´ gwarancji;
–przeróbek, zmian konstrukcyjnych lub u˝ywania do napraw nieoryginalnych cz´Êci zamiennych firmy Braun;
c)cz´Êci szklane, ˝arówki oÊwietlenia;
d)ostrza i folie do golarek oraz materia∏y eksploatacyjne.
9.Bez nazwy i modelu sprz´tu, daty jego zakupu potwierdzonej pieczàtkà i podpisem sprzedawcy karta gwarancyjna jest niewa˝na.
10.Niniejsza gwarancja na sprzedany towar konsumpcyjny nie wy∏àcza, nie ogranicza ani nie zawiesza uprawnieƒ Kupujàcego wynikajàcych z niezgodnoÊci towaru z umowà.
12
 Loading...