


BATTERY CHARGER
SMART CHARGER 170
SMART CHARGER 170
2010 016 123 576

1 8
9 16
17 24

2010 016 123 576
1

Before using the product, please read this manual carefully. The manual is to guide your usage of this product specially.
 INTRODUCTION
We congratulate your choice of a high quality product. The instruction manual for this product contains important information concerning safety, use and disposal. Before using the product, please familiarize yourself with all of the safety information and instructions for use. Only use the unit as described and for the speci ed applications. If you pass the product on to anyone else, please ensure that the instruction manual is included.
 Intended use
This model is a multistep battery charger (may be referred to as appliance) for charging and charge retention of 6V or 12V rechargeable lead acid batteries of the following types: Flooded Cell, Ca/Ca, VRLA, MF AGM or GEL with electrolyte solution.
This charger is not suitable for Lithium batteries!
The manufacturer is not liable for damage caused by improper use. The device is not intended for commercial use and to be used indoors only.
 Parts included
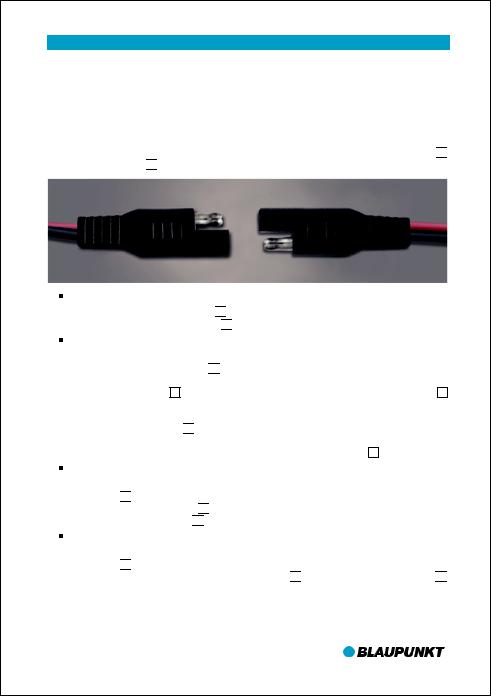
1 Charger; 2 types of detachable terminal lead sets [Clamp & Cigarette Lighter Plug]; 1 Instruction Booklet.
 Parts description
Refer to Figure A:
1 |
12V 0.8A - (Program 2) |
2 |
12V 3.8A - (Program 3) |
3 |
12V 3.8A - (Program 4) |
4 |
6V 0.8A - (Program 1) |
5 |
LED reverse connection |
6 |
LED stand-by |
7 |
Charge display |
8 |
Condition Bar display |
9 |
Voltage display |
10 Program selection button (MODE) |
|
11 Charger |
12 Fastening eyelets |
||
13 Input cable lead |
14 “+” pole clamp (red) |
||
15 “-” pole clamp (black) |
16 Cigarette lighter plug set |
||
17 Output cable lead |
18 SAE socket |
||
Technical Data |
|
|
|
Input voltage: |
220-240V~50/60Hz |
Rated power: |
60W |
Rated voltage outgoing: |
6V/12V |
Rated output current: |
0.8A/3.8A |
Ambient temperature: |
0°C to 40°C |
Housing protection type: IP 65 |
|
Protection class: |
II/ |
|
|
Charging battery types: 6V lead acid battery1.2Ah-14Ah 12V Lead acid battery1.2Ah-120Ah
2

Figure A: |
|
|
|
|
|
10 |
1 |
2 3 4 |
5 |
11 |
|
12 |
|
|
|
|
12 |
|
|
|
|
|
|
12 |
|
|
|
|
12 |
|
|
|
|
|
|
17 |
9 |
8 |
7 6 |
13 |
|
|
|
|
|
|
|
|
18 |
|
|
|
|
15 |
|
|
|
|
16 |
|
|
|
|
|
|
14 |
|
|
|
|
|
|
18 |
|
|
|
|
|
|
|
|
|
18 |
Figure B: |
|
|
|
|
|
|
|
|
|
|
3 |
 OPERATION
 Before use
Before connecting the charger, the operating instructions must be observed. Furthermore, the instructions of the vehicle manufacturer regarding a permanently connected battery charger must be observed. Secure the vehicle, switch o the ignition and locate the battery compartment.
Clean the battery poles and terminal leads. Wear eye protection and ensure su cient ventilation is available while charging.
 Connect the pole clamp lead set or cigarette lighter plug lead set to the output cable 17
 using the SAE sockets 18
 .
.
Connecting with Pole Clamp Set:
Connect the “+” pole clamp (red) 14
 to the “+” pole of the battery. Connect the “-” pole clamp (black) 15
 to the “-” pole of the battery.
Connecting with Cigarette Lighter Plug Set:
Charge or maintain your battery without lifting the hood.
Insert the cigarette lighter plug 16
 into the 12V accessory outlet. Route the power cord from the charger through the vehicle’s open window.
The battery voltage display 9 shows the current battery terminal voltage – display light 6 illuminates.
Make sure to place the charger on a dry, nonammable surface like metal or concrete. Then connect the mains cable 13
 of the charger to a mains power socket and switch on. Should the connection of the clamps or cigarette lighter plug be incorrectly connected [reversed polarity], the “LED reverse connection” indicator will illuminate 5 .
Disconnecting with Pole Clamps:
Disconnect the appliance from the mains supply by switching the power o and removing the mains cable 13
 .
.
Remove the “-” pole clamp (black) 15
 from the “-” pole of the battery. Remove the “+” pole clamp (red) 14
 from the “+” pole of the battery.
Disconnecting with Cigarette Lighter Plug Set:
Disconnect the appliance from the mains supply by switching the power o and removing the mains cable 13
 .
.
Disconnect the cigarette lighter plug lead set from the 17
 output cable using the inline 18
 SAE sockets.
If leaving the cigarette lighter plug lead set attached to the 12V accessory outlet for later use, then securely store the attached cigarette lighter plug lead set. Ensure the SAE socket will not make electrical contact with any metal or moving component/s.
4
 Battery charging
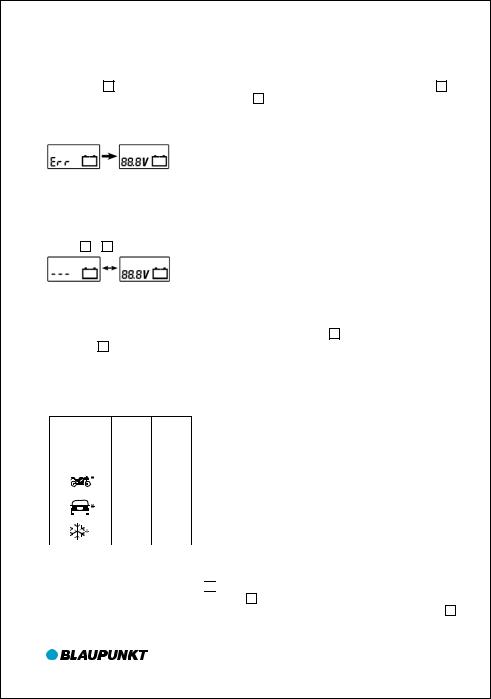
Connect the battery to the charger using Pole Clamp method [described above]. Connect the Battery Charger to the mains power outlet and switch on to enter the Standby mode – display light 6 illuminates. Only the battery voltage will be indicated in the LCD display 9 and the segments of the condition bar display 8 will be empty.
Note: If the voltage is below 3.8V [for 6 Volt series], 7.5V [12 Volt series] or above 15V, the battery charger will remain in the Standby mode. The display will brie y shows the error message “Err”.
 Commence battery charging
6V Batteries: If the voltage range of the battery is measured between 3.8V ~ 7.3V, only program1 can be selected.
12V Batteries: If the voltage range is between 7.5V ~ 10.5V, the charger will perform a controlled test for approximately 90 seconds to determine the battery condition. The LCD display 7 & 9 will ash alternately indicating the battery voltage during the controlled test.
If the battery is deemed defective, the charger will remain in the Standby mode.
If the battery tests OK, the battery charger will commence charging in Program 2 [14.4V with 0.8A]. Charging starts with a pulse charge step for revitalizing. Once 10.5V are reached, the appliance switches to the next charge steps. The charge display 7 ashes and the condition bar display 8 will indicate the charge state.
 Program selection
NOTES: Depending on the selected Program, the characteristic charge curve is monitored for voltage, time and temperature. Included are the diagnostics testing, bulk charge mode and maintenance mode [Refer to Figure C].
Program Max.(V) Max.(A)
1 |
6V |
7.3V |
0.8A |
|
|
|
|
2 |
|
14.4V |
0.8A |
|
|
|
|
3 |
|
14.4V |
3.8A |
|
|
|
|
4 |
|
14.7V |
3.8A |
|
|
|
|
 Program 1 : 6V (7.3V/0.8A)
For charging 6V batteries with a capacity of less than 14Ah.
Press the Mode selection button 10
 , to select program 1. The symbol “6V” is displayed on the LCD. During charging, the charge display 7 ashes and shows the progress of the charge procedure (1 ~ 4 bars). When the battery is fully charged, the condition bar display 8 shows 4 bars. When the ashing stops, the appliance will automatically switch to maintenance charge mode.
5
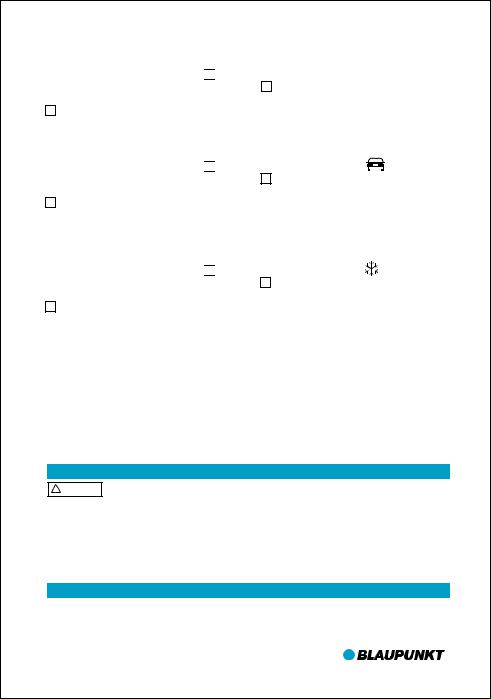
 Program 2
  : 12V (14.4V/0.8A)
For charging 12V batteries with a capacity of less than 14Ah.
Press the Mode selection button 10
 , to select program 2. The symbol
 is displayed on the LCD. During charging, the charge display 7 ashes and shows the progress of the charge procedure (1 ~ 4 bars). When the battery is fully charged, the condition bar display 8 shows 4 bars. When the ashing stops, the appliance will automatically switch to maintenance charge mode.
 Program 3
  : 12V (14.4V/3.8A)
For charging 12V batteries with a capacity of between 14Ah ~ 120Ah.
Press the Mode selection button 10
 , to select program 3. The symbol
  is displayed on the LCD. During charging, the charge display 7 ashes and shows the progress of the charge procedure (1 ~ 4 bars). When the battery is fully charged, the condition bar display 8 shows 4 bars. When the ashing stops, the appliance will automatically switch to maintenance charge mode.
 Program 4
 : 12V (14.7V/3.8A)
For charging 12V AGM Series batteries with a capacity of between 14Ah ~ 120Ah or under cold conditions.
Press the Mode selection button 10
 , to select program 4. The symbol
  is displayed on the LCD. During charging, the charge display 7 ashes and shows the progress of the charge procedure (1 ~ 4 bars). When the battery is fully charged, the condition bar display 8 shows 4 bars. When the ashing stops, the appliance will automatically switch to maintenance charge mode.
 Maintenance charge mode
Depending on the voltage drop of the battery, caused by continuous current drain from attached accessories or natural self-discharge, the charger will react accordingly to maintain the battery condition. The battery can remain connected to the charger for longer periods of time if it is disconnected from the vehicle.
 Appliance protection function
The charger will switch o if an abnormal situation occurs, such as short circuit, critical voltage drop during charging, broken circuit or reversed connection is detected.
Should the appliance become too hot during charging, the output current is automatically reduced. This protects the appliance from damage.
 MAINTENANCE AND CARE
! WARNING Before you carry out any work with the battery charger always pull the mains plug out of the mains socket.
The appliance is maintenance-free. Ensure that all of the battery charger components are in place and in good working condition. Do not under any circumstances use solvents or other aggressive cleaning agents. Clean the plastic surfaces of the device with a clean dry cloth. No internal servicing required, as there are no user-serviceable parts.
Store the battery charger the upright position in a cool, dry place. Failure to do so could result in personal injury or property damage.
 SAFETY INSTRUCTIONS
Children or persons who lack the knowledge or experience to use this type of device should not attempt to use it without supervision or instruction by a quali ed person responsible for their safety. This appliance is not a toy.
6

! WARNING Never use the charger for non-rechargeable lead acid batteries or alkaline batteries.
Only use the charger for 6V and 12V lead acid batteries. Do not attempt to charge frozen batteries.
During charging, ensure there is su cient ventilation available.
DANGER OF ELECTRIC SHOCK! Do not operate the appliance if the cables, the mains cable or mains plug are damaged. A damaged mains cable indicates a life-threatening danger due to electric shock.
Before connecting to the power, ensure that the power connection is earthed, is 230V~50Hz, and is 16A fused and equipped with an RCCB (Residual Current Circuit Breaker) switch in accordance with the current regulations.
Disconnect the charger from the grid, before you make or break connections to the battery.
First, connect the clamp that is not connected to the bodywork. Then connect the other clamp to the bodywork, away from battery and fuel pipe. Only after this, connect the charger to the grid.
After charging, disconnect the charger from the grid. Only after this remove the clamp from the bodywork. Following this, remove the clamp from the battery.
DANGER OF EXPLOSION AND FIRE HAZARD! Protect yourself from a highly explosive hydrogen-oxygen reaction.
Ensure that during charge and maintenance charge procedures, there are no naked lights ( ames, cinders or sparks).
Ensure that the positive cable does not come into contact with fuel lines (e.g. petrol pipe). Ensure that there is no possibility of ignition of explosive or ammable substances (e.g. petrol or solvents), while using the charger.
DANGER OF CHEMICAL BURNS! Wear protective glasses! Wear protective gloves. If eyes or skin has come into contact with battery acid, rinse the a ected body region o with a large amount of clean water and consult a doctor straight away.
Avoid causing a short circuit when connecting the charger to the battery. Connect the negative pole connector cable only to the negative (-) pole battery or to the body work. Connect the positive pole connector cable only to the positive (+) pole of the battery. Do not place the charger close to re, heat or to places with long-term exposure to temperatures over 50°C.
Ensure that no fuel lines, electric cables, hydraulic or coolant pipes are damaged when connecting the charger.
Do not cover the charger with any objects. Protect the electrical contact surfaces of the battery from short circuiting.
Competence Center Car Multimedia |
|
Evo-Sales GmbH |
|
Robert-Henseling-Straße 11 |
|
31789 Hameln/Deutschland |
|
www.blaupunkt.com |
After the manual, if any change, we will not notice! |
7
 Loading...