

Page 1

DTEK50
Version: 6.0
User Guide
Page 2

Published: 2016-07-19
SWD-20160719172300041
Page 3

Contents
Setup and basics........................................................................................................................................... 5
Your device at a glance...................................................................................................................................5
Insert the SIM card.........................................................................................................................................6
Insert a media card........................................................................................................................................ 7
Turn your device on or
Move between home screens......................................................................................................................... 8
Get around with navigation buttons................................................................................................................ 8
Touch screen gestures................................................................................................................................... 9
Apps, widgets, and shortcuts....................................................................................................................... 13
Personalizing your device.............................................................................................................................16
Phone and voice.......................................................................................................................................... 17
Phone icons.................................................................................................................................................17
Find your own phone number.......................................................................................................................17
Change your ringtone...................................................................................................................................17
Making calls.................................................................................................................................................18
Receiving calls.............................................................................................................................................19
Blocking calls.............................................................................................................................................. 21
Add a contact or number to your speed dial list.............................................................................................22
Call waiting and call forwarding.................................................................................................................... 23
Start a conference call................................................................................................................................. 23
LTE calling................................................................................................................................................... 24
Wi-Fi calling................................................................................................................................................. 26
Voicemail.....................................................................................................................................................27
o............................................................................................................................... 8
Applications and features.............................................................................................................................28
Find help for apps........................................................................................................................................ 28
Download an app on Google Play™............................................................................................................... 28
Organizing your home screen....................................................................................................................... 28
Messenger...................................................................................................................................................30
About the Google™ app and Now on Tap....................................................................................................... 32
Page 4

Clock........................................................................................................................................................... 32
BlackBerry Device Search............................................................................................................................35
Location services and Google Maps..............................................................................................................37
Google Chrome™ and Downloads................................................................................................................. 39
Printing........................................................................................................................................................40
Settings....................................................................................................................................................... 42
Change your device settings.........................................................................................................................42
Customize the quick settings menu.............................................................................................................. 42
Notifications................................................................................................................................................ 42
Storage space and media cards................................................................................................................... 48
Connections................................................................................................................................................ 52
Battery and power....................................................................................................................................... 70
Display........................................................................................................................................................ 74
Advanced interactions................................................................................................................................. 77
Convenience key..........................................................................................................................................77
Accounts..................................................................................................................................................... 78
Accessibility.................................................................................................................................................79
Users...........................................................................................................................................................81
Backup and reset.........................................................................................................................................83
Update your device software........................................................................................................................ 86
Security....................................................................................................................................................... 87
Locks, passwords, and protecting your data................................................................................................. 87
Finding and protecting a lost device............................................................................................................. 94
Security settings.......................................................................................................................................... 95
Legal notice .............................................................................................................................................. 100
Page 5

User Guide Setup and basics
Setup and basics
Your device at a glance
1. Headset jack
2. Notification LED and front flash
3. Front camera
4. Volume up/down key
5. Convenience key
6. Nano SIM card and media card (microSD card) tray
7. USB port
8. Power on/o key
5
Page 6

User Guide Setup and basics
Insert the SIM card
Your device uses a nano SIM card. If you don't have a SIM card or don't have the right type of SIM card, contact your
service provider.
CAUTION: Do not use a larger SIM card that was cut to a smaller size. Your device might not recognize the SIM card, or the
SIM card might get stuck because it is thicker than a nano SIM card.
Release the tray by pushing the tip of the tool (provided in the box) into the hole on the right side of your device. If
1.
you don't have the tool that came with your device, you can also use a paper clip.
2. Pull out the tray completely and set it on a flat surface.
3. Hold the SIM card so that the metal contacts are facing away from you. Align the notch on the SIM card with the
notch in the smaller section of the tray.
Put the SIM card in the tray.
4.
5. Push the tray back into the slot.
6
Page 7

User Guide Setup and basics
Insert a media card
If you want more storage for pictures, videos, music, and documents, you can insert a media card (microSD card).
Release the tray by pushing the tip of the tool (provided in the box) into the hole on the right side of your device. If
1.
you don't have the tool that came with your device, you can also use a paper clip.
2. Pull out the tray completely and set it on a flat surface.
3. Hold the media card so that the metal contacts are facing away from you. Align the notch on the media card with the
notch in the larger section of the tray.
Put the media card in the tray.
4.
5. Push the tray back into the slot.
7
Page 8

User Guide Setup and basics
Turn your device on or o
Press and hold the Power on/o key (on the left side of your device).
• To turn
• To turn your device o and then on again, tap Restart.
o your device, tap Power o.
Turn o the screen
Press the Power on/o key (on the left side of your device).
To turn the screen back on, press the Power on/o key, or tap the screen twice.
Move between home screens
You can move between your home screens with a gesture on the screen.
On the screen, swipe left or right.
Get around with navigation buttons
No matter what you're doing on your device, navigation buttons appear at the bottom of your screen.
Do any of the following:
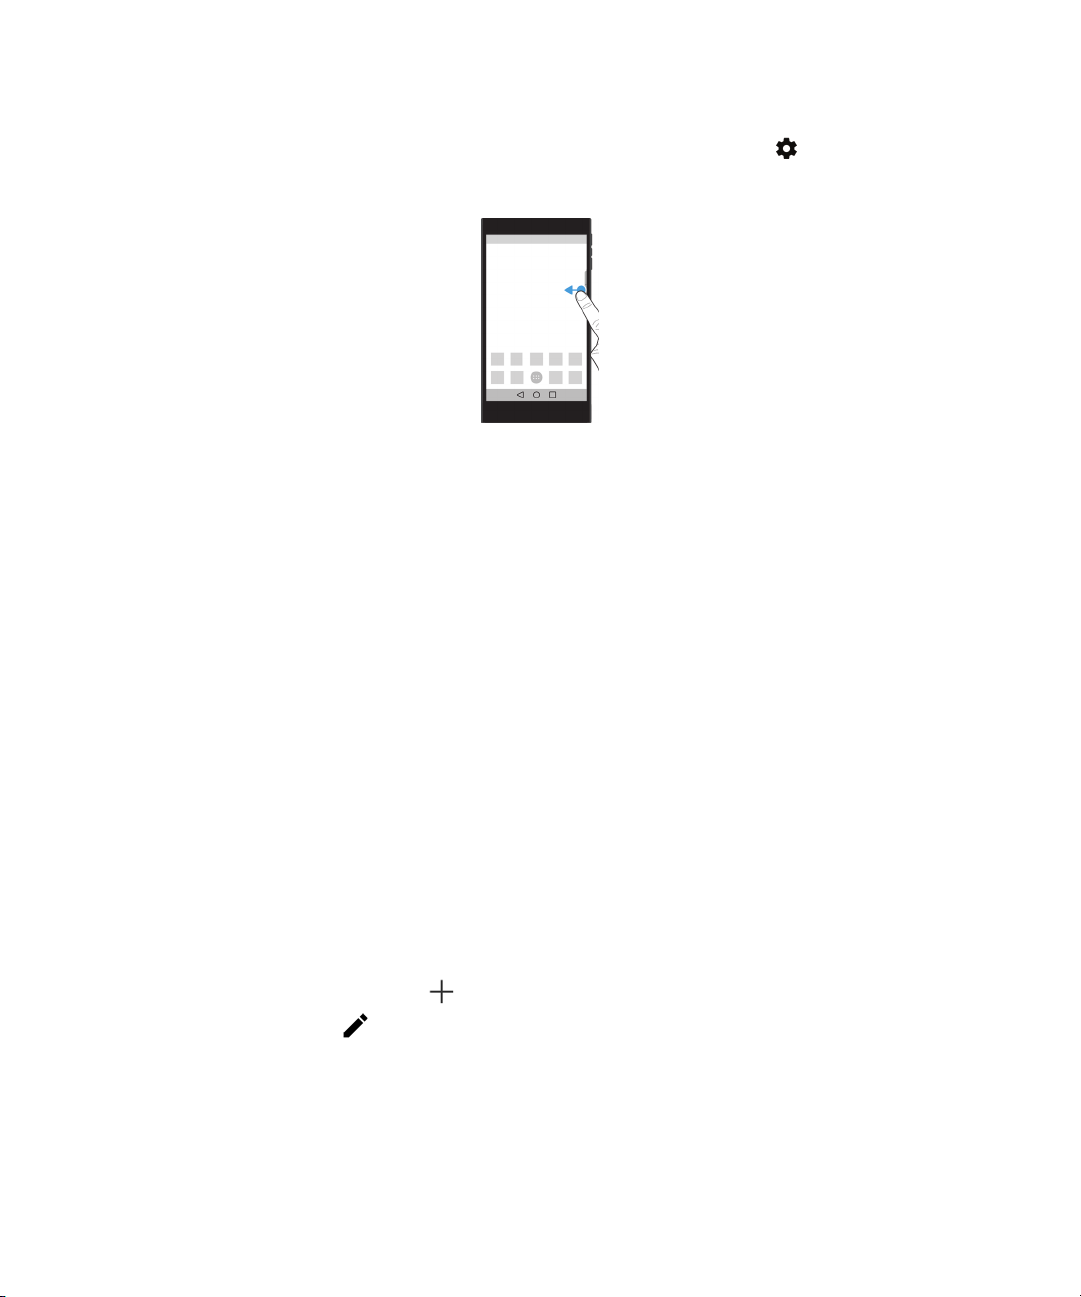
• To go back to the previous screen, tap
8
.
Page 9

User Guide Setup and basics
• To go to your home screen, tap .
• To see your recently opened apps and screens, tap .
Touch screen gestures
Take a moment to learn the common gestures that you can use on the touch screen.
Wake up your device
Tap the screen twice.
Select items
Do any of the following:
• To select an item, tap it. If the item can be opened, it opens.
• To select multiple items, such as photos that you want to share or email messages that you want to delete, touch and
hold one item. Tap more items. To clear an item, tap it again.
9
Page 10

User Guide Setup and basics
Scroll or move between items
Slide your
finger to scroll through a list or move between items, such as photos.
Check your notifications
You can check your latest notifications (for example, email messages and text messages) at any time.
10
Page 11

User Guide Setup and basics
Swipe down from the top of the screen. Tap a notification to open it or pull down to see more notifications.
Open Quick Settings
You can open Quick Settings to turn on or turn o common settings such as Wi-Fi and airplane mode.
Swipe down from the top of the screen once using two
fingers, or twice using one finger.
Open an app
You can open one of three default apps from anywhere on your device.
Slide your finger up from the bottom of the screen. Move your finger over the app that you want to open. Lift your finger.
11
Page 12

User Guide Setup and basics
Use a slider
If a slider appears on your screen, you can progress through a
screen brightness.
Drag the slider handle to the right or left.
file, such as a song or video, or adjust a setting, such as the
Zoom in to or zoom out from the screen
If you want to see something in more detail, such as a photo or part of a map, you can magnify the image.
To zoom in, slide two fingers apart.
12
Page 13

User Guide Setup and basics
To zoom out, slide two fingers together.
Tip: In some cases, you can tap twice to zoom in or zoom out.
Apps, widgets, and shortcuts
About apps, widgets, and shortcuts
When you tap
shortcuts.
• The Apps tab includes a complete list of the apps installed on your device, including apps that you download on Google
Play™.
• Widgets are like miniature apps that you can often interact with on the home screen. For example, the BBM widget
shows a small view of your current chats. The Bookmarks widget shows all of the websites that you have bookmarked so
that you can open them right from the home screen.
• Shortcuts help you perform the tasks that you do the most. For example, if you frequently write email, you can set up an
email shortcut. Tapping the shortcut opens an email composer.
on your home screen, a tray opens where you can access installed apps and widgets and set up
13
Page 14

User Guide Setup and basics
Search for installed apps, widgets, and shortcuts
1.
On the home screen, tap .
2. Enter a search term in the Search apps, widgets, and shortcuts field.
Add an app, a widget, or a shortcut to your home screen
1.
On the home screen, tap .
2. Tap Apps, Widgets, or Shortcuts.
3. Touch and hold an app, a widget, or a shortcut, and then release your
After you add a shortcut to your home screen, you might be prompted to set up the shortcut. For example, if you add the
Email Contact shortcut, you must tap the contact that you want to send an email to.
finger when the home screen appears.
Sort your apps
You can sort your apps in the Apps list in several dierent ways:
• Default: The ten apps that you use the most appear at the top, followed by an alphabetical list of your apps. If you're
using Android™ for Work on your device, your work apps appear at the bottom of the list.
• Alphabetical: Your apps are sorted alphabetically.
• Newest: The apps that you most recently installed appear at the top.
• Most Used: The apps that you use the most appear at the top.
To change how your apps are sorted, do the following:
1.
On the home screen, tap .
2. Tap the drop-down list that appears in the top-right corner. If you haven't changed how your apps are sorted, the word
Default appears beside the drop-down list.
3. Tap a sorting option.
About pop-up widgets
Pop-up widgets are associated with the apps that you add to the home screen. When you add an app that includes a popup widget, an indicator appears beneath the app icon ( ). Pop-up widgets are useful because they allow you to have
widgets that don't take up space on the home screen.
14
Page 15

User Guide Setup and basics
Turn on pop-up widgets
1.
On the home screen, touch and hold an empty area of the screen, and then tap .
2. Select the Pop-up widgets checkbox.
Open a pop-up widget for an app
With pop-up widgets, you can access a widget for an app without having that widget on the home screen. If a pop-up
widget is available for an app, an indicator ( ) appears beneath the app icon.
On the home screen, swipe up or down on an app that has a pop-up widget.
Change the pop-up widget for an app
If an app has more than one widget available, when you first swipe up or down on the app icon, you choose a widget to set
as the pop-up widget. You can change the pop-up widget at any time.
1. Swipe up or down on an app icon.
2.
In the upper-right corner of the widget, tap > Change widget.
3. In the list of available widgets, tap another widget.
Turn o pop-up widgets
On the home screen, do one of the following:
• To turn
• To turn
o a pop-up widget, on the app icon, swipe up or down. In the upper-right corner of the widget, tap > Turn
o pop-up widget.
o all pop-up widgets, touch and hold an empty area of the screen, and then tap > . Clear the Pop-up
widgets checkbox.
Swipe to access shortcuts
You can use a swipe gesture to access up to three shortcuts from anywhere on your device. You can swipe to open an app,
speed dial a number, send a message, and more. By default, you can swipe to open the BlackBerry Device Search app, the
Phone, and the BlackBerry Hub, but you can change the swipe shortcuts in the device settings.
1.
To access a shortcut, swipe up from .
2. Slide your finger to the shortcut, and then release your finger.
15
Page 16

User Guide Setup and basics
Change the shortcuts that you access with the swipe gesture
You can change the shortcuts that you access with the swipe gesture. For example, you can set up the gesture to start an
action, such as composing an email.
1. Swipe down from the top of the screen once using two fingers, or twice using one finger.
2.
Tap > Swipe Shortcuts.
3. Tap a circle.
• To set the gesture to open a
• To set the gesture to call a contact, tap Speed dial, and then tap a contact.
• To set the gesture to send an email or a text message to a contact, tap Send message. Tap Email contact or Text
contact, and then tap a contact.
• To set the gesture to start an action, tap All shortcuts.
Turn
If you set up a gesture to open an app or use a shortcut, to turn o the gesture, do the following:
1. Swipe down from the top of the screen once using two fingers, or twice using one finger.
2.
3. Tap a circle.
4. Tap Clear.
o a swipe gesture
Tap > Swipe shortcuts.
dierent app, tap Open app, and then tap an app.
Personalizing your device
Learn how to personalize your device and make it uniquely yours. For example, you can change your ringtone or set a
picture as your wallpaper.
• Change your device settings
• Change your ringtone
• Change your wallpaper
• Add a contact or number to your speed dial list
• Add an app, a widget, or a shortcut to your home screen
• Change your font size
• Change how you view your recent apps and screens
• Set up or change a screen lock
16
Page 17

User Guide Phone and voice
Phone and voice
Phone icons
During a call
Icon Description
Turn on the speakerphone
Mute your microphone
Tip: You can also press the Convenience key to mute your microphone.
Put a call on hold
Show the dial pad
Make another call
Merge calls to start a conference call
Split a conference call into multiple calls
Find your own phone number
1. Swipe down from the top of the screen once using two
2.
Tap > About phone > Status > SIM Status.
Your phone number appears at the bottom of the screen. If it doesn't appear, your service provider might not have added
your phone number to your SIM card. For more info, contact your service provider.
fingers, or twice using one finger.
Change your ringtone
1. Swipe down from the top of the screen once using two fingers, or twice using one finger.
2.
Tap > Sound & notification > Phone ringtone.
3. Tap a ringtone, and then tap OK.
17
Page 18

User Guide Phone and voice
Tip: To use a song or a custom sound as your ringtone, move the .mp3 file you want to use to the Ringtones folder on your
device. You might need to install a file manager app from the Google Play™ store first.
Making calls
Make a call
1.
In the Phone app, tap .
2. Enter the number.
3.
Tap .
Call a recent number
1.
In the Phone app, tap .
2.
Beside a name or number, tap .
Call a contact
1.
In the Phone app, tap .
2. Tap a contact.
3. Tap the number that you want to call.
To send a text message to a contact, beside the number, tap .
Tip:
Speed dial a contact
For more info about speed dial, see Add a contact or number to your speed dial list.
1.
In the Phone app, tap .
2. Tap a speed dial contact.
Show or hide your number on outgoing calls
Depending on your service provider, this feature might not be supported.
1.
In the Phone app, in the upper-right corner of the screen, tap .
18
Page 19

User Guide Phone and voice
2. Tap Settings > Call settings > Additional settings > Caller ID.
3. Tap Show number or Hide number.
View your call history
You can view past outgoing, incoming, and missed calls on the History screen.
1.
In the Phone app, in the upper-right corner of the screen, tap > Call History.
2. Do any of the following:
• To see the details of a specific call, tap a name or phone number, and then tap .
• To view missed calls, tap Missed.
• To clear your call history, tap
> Clear call log > OK.
Receiving calls
Answer or dismiss a call
1.
If your device is locked, touch and hold .
• To answer a call, slide your finger until it covers . Release your finger.
• To dismiss a call, slide your finger until it covers . Release your finger.
2.
If your device is unlocked, in the call notification, tap Answer or Dismiss.
Send a quick response to a caller
You can send a caller a brief text message instead of answering an incoming call. Depending on the recipient of the quick
response, additional text messaging charges might apply.
If a call is from an unknown caller, the option to send a quick response does not appear.
Note:
1.
When you receive an incoming call, touch and hold . Slide your finger until it covers and then release your
finger.
2. Do any of the following:
• To send a default message, tap a message.
• To compose a new message, tap Write your own.
19
Page 20

User Guide Phone and voice
When you dismiss a call to send a quick response, the caller is sent to voicemail. If you do not have voicemail, the caller
receives a busy signal instead.
Change your default quick response messages
You can create your own quick response messages to replace the available defaults.
1.
In the Phone app, in the upper-right corner of the screen, tap > Settings > Quick responses.
2. Tap the quick response you want to change.
3. Type a new message.
4. Tap OK.
To reset to the default quick responses, on the Edit quick responses screen, tap
> Reset default app.
Silence the ringtone when you receive a call
If you receive a call while your sound or vibration notifications are turned on, you can quickly silence your ringtone and stop
your device from vibrating. After you silence the ringtone, you can still answer or decline the call.
When you receive an incoming call, press the Volume key.
Move a call from your headset to your device
When you have a Bluetooth headset connected to your device, incoming calls are automatically received on your headset.
You can manually move the call back to the device.
1.
While on a call, tap .
2. Do one of the following:
• To move the call to your device, tap Handset earpiece.
• To move the call to your device speakerphone, tap Speaker.
Prevent calls from going to your Bluetooth headset
You can disconnect your Bluetooth headset from the Phone app so that calls are sent to your device instead.
1. Swipe down from the top of the screen once using two fingers, or twice using one finger.
2. Tap Bluetooth.
3.
Beside the paired headset you want to disconnect, tap .
4. Clear the Phone audio checkbox.
20
Page 21

User Guide Phone and voice
Put a call on hold
While on a call, tap .
To resume a call, tap again.
Blocking calls
Block all incoming or outgoing calls
When you block calls, you can stop all incoming or outgoing calls, and prevent all incoming or all outgoing calls when
roaming. Contact your service provider for more info on blocking
provider, this feature might not be supported.
1.
In the Phone app, in the upper-right corner of the screen, tap > Settings > Call settings > Call barring.
2. Do any of the following:
specific phone numbers. Depending on your service
• To block the types of calls that your device can make, tap Outgoing call barring. Tap an option.
• To block incoming calls, tap Incoming call barring. Tap an option.
The first time that you turn on call blocking, you are prompted to create a password to lock your call blocking settings. To
change your call blocking password, tap Change password.
Block a caller
Verify that the number you want to block is listed as a number for a contact in your Contacts app.
1. In the Contacts app, tap a contact.
2.
Tap > .
3. Select the All calls to voicemail checkbox.
Block callers who aren't contacts
You can use the priority only mode to ignore calls from callers who aren't contacts. Your phone doesn't ring when you
receive a call from someone who's not in your contact list, but your device still lets you know that you missed a call.
1. Swipe down from the top of the screen once using two fingers, or twice using one finger.
21
Page 22

User Guide Phone and voice
2.
Tap > Priority only.
3. Tap More Settings > Priority only allows > Calls > Contacts only.
Note: By default, priority only mode lasts for one hour. To change how long it lasts, swipe down from the top of the screen
once using two fingers, or twice using one finger. Tap > Priority only. To increase how long the mode stays on, tap ,
or tap Until you turn this o.
Limit the phone numbers that you can call
When you set up and use fixed dialing numbers, you can make calls and send text messages (SMS or MMS) only to the
phone numbers that you add to the
can limit the phone numbers that your child can call. To use fixed dialing numbers, your service provider must set up your
SIM card for this feature. Depending on your service provider, this feature might not be supported.
1.
In the Phone app, in the upper-right corner of the screen, tap .
2. Tap Settings > Call settings > Fixed Dialing Numbers.
3. Tap Enable FDN.
4. Enter the SIM security code provided to you by your service provider.
5. Tap OK.
6.
Tap FDN list > > Add contact.
7. Type a name and phone number.
8. Tap Save.
fixed dialing numbers list. For example, if you give your device to your child to use, you
Add a contact or number to your speed dial list
Contacts that you add to your speed dial list appear in the
1.
In the Phone app, tap .
2. Tap the picture or letter beside a contact's name.
3.
Tap .
Remove a contact or number from your speed dial list
1.
In the Phone app, tap .
2. Touch and hold the contact you want to remove.
22
tab in the Phone app.
Page 23

User Guide Phone and voice
3.
Drag the contact over Remove. Release your finger.
Call waiting and call forwarding
Turn call waiting on or
Depending on your service provider, this feature might not be supported.
1.
In the Phone app, in the upper-right corner of the screen, tap .
2. Tap Settings > Call settings > Additional settings.
3. Tap the Call waiting checkbox.
o
Set up call forwarding
Depending on your service provider, this feature might not be available.
1.
In the Phone app, in the upper-right corner of the screen, tap .
2. Tap Settings > Call settings > Call forwarding.
3. To change the number that your calls are forwarded to, tap a call forwarding option and type a number.
Start a conference call
1. While on a call, make or answer another call.
2.
To merge the calls, tap .
Answer a second call while already on a call
Verify that call waiting is turned on.
1.
While you are on a call and receive a second call, touch and hold . Slide your finger until it covers and then
release your finger.
2. Do one of the following:
• To put the first call on hold and answer the second call, tap Hold current call.
• To end the first call and answer the second call, tap End current call.
3.
If you put the first call on hold, to merge both calls and start a conference call, tap .
23
Page 24

User Guide Phone and voice
To add more people to the conference call, repeat steps 1 and 2.
Make another call while already on a call
When you make another call while you're already on a call, your first call is automatically put on hold.
1.
While on a call, tap .
2. Do any of the following:
• Use the dial pad to enter a number.
• Tap above the dial pad to go to the Phone screen. Tap a contact.
3.
To merge both calls and start a conference call, tap .
To add more people to the conference call, repeat steps 1 to 3.
Remove people from a conference call
1. While in a conference call, to view the conference call participants, tap Manage conference call.
2. Do one of the following:
• To remove a person from the conference call and hang up, tap .
• To remove a person from the conference call and keep them in a separate call, tap .
LTE calling
Turn on Voice over LTE and LTE video calling
Voice over LTE and LTE video calling provide
video calling, you must turn on Voice over LTE.
Depending on your service provider, this feature might not be supported. For more information, contact your service
provider.
1. Swipe down from the top of the screen once using two
2.
Tap .
3. Depending on the available options, do one of the following:
• Tap Advanced Calling.
• Tap More > Cellular networks > IMS Settings.
24
high-definition voice and video calling using 4G LTE connections. To use LTE
fingers, or twice using one finger.
Page 25

User Guide Phone and voice
4. Turn on the Advanced Calling, IMS settings, or Enhanced 4G LTE Services switch.
5. Turn on the HD Voice Only, Voice over LTE, or Enhanced 4G LTE Mode switch.
6. To turn on video calling, turn on the HD Video Calling or Video Call Over LTE switch.
Make an LTE video call
If your service provider supports LTE video calling, you can make a video call to contacts who have this feature.
1. In the Phone app, do one of the following:
• To dial a number, tap
• To call a contact, tap , and then tap a contact.
• To call a speed dial contact, tap , and then tap a contact.
2.
Tap .
Note: Depending on your service provider, you might not be able to make an LTE video call to a contact directly from or
. Instead, call the contact, and then after the call connects, tap > Video call.
, and then enter the number.
Switch to a voice-only call
During a video call, tap .
To switch back to a video call, tap again.
Switch between the front-facing and rear-facing camera
During a video call, do one of the following:
• Tap
• Tap
.
> Switch camera.
Put a video call on hold
During a video call, do one of the following:
• Tap
• Tap > Hold call.
.
25
Page 26

User Guide Phone and voice
Share video one way
During a voice call, you can share video with the contact you're talking to, if they also have the LTE video calling feature, but
the contact doesn't have to share video with you.
1.
During a voice call, tap .
2. Tap One Way Video or Transmit Video Share.
Answer an LTE video call
1.
When you receive a call, touch and hold .
2. Do one of the following:
• To answer the call as a video call, slide your finger until it covers .
• To answer the call as a voice call, slide your finger until it covers .
Wi-Fi calling
Turn on Wi-Fi calling
Your device might be able to make and receive calls over Wi-Fi networks, even if you have limited or no mobile network
coverage.
Depending on your service provider, this feature might not be supported. Contact your service provider for more
information.
1. Swipe down from the top of the screen once using two
2.
Tap > More > Wi-Fi calling.
3. Turn on the Wi-Fi Calling switch.
4. To see when your device will make Wi-Fi calls, turn on Wi-Fi Calling Status.
5. Tap Wi-Fi calling preferences > Connection preferences.
• To use a Wi-Fi network, even when you have a cellular signal, tap Wi-Fi preferred.
• To never use a cellular network and only use a Wi-Fi network, tap Wi-Fi only.
• To only use a Wi-Fi network for calls when you don't have a cellular signal, tap Cellular network preferred.
26
fingers, or twice using one finger.
Page 27

User Guide Phone and voice
Make a Wi-Fi call
Make sure that appears at the top of your screen.
1.
In the Phone app, tap .
2. Enter the number.
3.
Tap .
Voicemail
Set up your voicemail
Depending on your service provider, this feature might not be supported. Contact your service provider for more info.
1.
In the Phone app, in the upper-right corner of the screen, tap .
2. Tap Settings > Call settings > Voicemail.
3. Do any of the following:
• To set up voicemail, tap Setup. If the Voicemail number field is blank, tap Voicemail number, and then enter your
voicemail access number. If you don't have a voicemail access number, contact your service provider.
• To select a notification profile, tap Sound.
• To set the voicemail notification to vibrate, select the Vibrate checkbox.
To call your voicemail from the Phone app, touch and hold 1.
Visual Voicemail
Visual Voicemail is another way to access and manage your voicemail. In an app, you can see and scroll through your
messages on your device. Some Visual Voicemail services can also transcribe your voicemail messages into text and send
messages over email and SMS.
Your service provider might have a Visual Voicemail app preloaded on your device or available for you to download.
27
Page 28

User Guide Applications and features
Applications and features
Find help for apps
You can learn about apps, such as BlackBerry Hub, Calendar, BlackBerry Camera, DTEK by BlackBerry, and more, at
help.blackberry.com.
™
Download an app on Google Play
1. Open the Google Play™ store app.
2. If necessary, sign in with your Google™ account.
3. Browse or search for an app that you want to download.
4. Tap the app, and then tap Install.
Organizing your home screen
Move an app, a widget, or a shortcut around
1. Touch and hold an an app, a widget, or a shortcut, and then drag it to a new spot.
2. Release your
finger.
Move an app or a shortcut to the favorites tray
The favorites tray appears at the bottom of each home screen, giving you easy access to your favorite apps or shortcuts.
You can add up to four apps or shortcuts to the favorites tray.
1. If the favorites tray is full, touch and hold one of the apps or shortcuts in the tray. Drag it to a spot on the home screen.
2. Touch and hold the app or shortcut that you want to add, and then drag it to the favorites tray.
Add a home screen
You can add as many home screens as you want to organize your apps, widgets, and shortcuts.
1. On the home screen, touch and hold the item that you want to move, and then drag it to the right edge of the screen.
28
Page 29

User Guide Applications and features
2. Hold the item at the right edge of the screen until the next home screen appears. If necessary, continue to hold the
item until a blank home screen appears.
3. Release your finger.
Tip: To view dierent home screens quickly, tap the circles that appear above the favorites tray, and then slide your finger
left or right.
Change the default home screen
Change the home screen that is displayed when you turn on your device or when you tap .
Note: You might have to tap twice to open your default home screen.
1. On the home screen, touch and hold an empty area on the screen.
2.
Above the home screen that you want to set as your default, tap .
Delete a home screen
If you're not using one of your home screens, you can delete it. If you delete the default home screen, the home screen to
the right becomes the default home screen.
Note: After you delete a home screen, you can't restore it.
1. On the home screen, touch and hold an empty area of the screen.
2. Touch and hold the home screen that you want to remove, and then drag it to the Remove bar at the top of the
screen.
Organize apps and shortcuts into folders
1. On the home screen, touch and hold an app or a shortcut.
2. Drag the app or shortcut on top of another app or shortcut that you want to include in the same folder.
3. To name the folder, tap the folder. Tap New folder, and then enter a name.
Change how you view your recent apps and screens
When you tap , you see a tiled view, a masonry view, or a rolodex view of your recent apps and screens. You can change
the view to suit your preferences.
1. Swipe down from the top of the screen once using two
2.
Tap > Display > Recents.
fingers, or twice using one finger.
29
Page 30

User Guide Applications and features
3. Select a view.
4. Tap Done.
Uninstall an app or remove an app, a widget, or a shortcut from a home screen
If you uninstall an app, the app is no longer available on your device. You must reinstall the app if you want to use it. Some
built-in apps can't be uninstalled; instead, you can turn o these apps so that they no longer appear in and so that you
no longer receive notifications for them.
If you remove an app from the home screen, the app is still installed on your device, and you can open the app from
1. Touch and hold an app, a widget, or a shortcut.
2. Drag the app, widget, or shortcut toward the top of the screen.
• To uninstall an app, drag the app toward Uninstall.
• To turn
• To remove an app, a widget, or a shortcut from the home screen, drag the app toward Remove.
You can use the Google Play™ store to reinstall apps that you uninstall. In the Google Play™ store, tap > My apps > All.
You can turn on apps that you turned o in > Apps. At the top of the screen, swipe left on the categories until you see
the Disabled category. Tap an app, and then tap Enable.
o an app, drag the app toward Disable.
Messenger
Using Messenger
You can use the default Messenger app on your device to send, receive, and manage text messages, including SMS and
MMS messages.
.
Send a text message
1.
In the Messenger app, tap .
2. In the To field, enter a mobile phone number or start typing a contact's name.
3.
In the Send message field, type your message, and then tap .
Tip: You can add an emoticon by tapping in the message field. To return to the keyboard, tap .
30
Page 31

User Guide Applications and features
Send a multimedia message
1.
In the Messenger app, tap .
2. In the To field, enter a mobile phone number or start typing a contact's name.
3.
Tap and attach a media file:
• To attach a picture you take, tap . To expand the camera view to full screen, tap .
• To attach a picture from your library, tap
• To attach a sticker, tap . You can also download other stickers and attach them.
• To attach an audio message you record, tap , and then touch and hold to record the audio.
• To attach your location, tap .
4.
Tap .
Note: If you close the screen while composing a message, it is saved as a draft. You can tap on the conversation to resume
typing the message.
.
Delete a message
1. In the Messenger app, touch and hold the message.
2.
Tap > Delete.
Manage conversations
1. In the Messenger app, touch and hold a conversation until a toolbar appears along the top of the screen.
2. Do any of the following:
• To delete a conversation, tap .
• To add a contact, tap
• To turn notifications on or o, tap or .
• To block a number, tap .
• To archive a conversation, tap . To return the archived conversation to your message list, touch and hold the
conversation, and then tap .
.
Search for messages in the Messenger app
You can easily search the Messenger app for items, such as a contact, phone number, or message.
31
Page 32

User Guide Applications and features
1.
In the Messenger app, tap .
2. In the Search field, type your search term or terms.
About the Google™ app and Now on Tap
The Google™ app provides useful information when you need it through Google Now™ cards. Google Now™ cards contain
personalized info, such as weather updates for your location, or directions to the next event on your agenda.
Now on Tap extends the features of the Google™ app to show you relevant information based on the app that you're using.
For example, if you and a friend are using BBM to discuss meeting at a restaurant, Now on Tap can provide a card with
ratings for the restaurant or directions to the restaurant. After you set up Now cards in the Google™ app, you can touch and
hold to access Now on Tap.
For more information about the Google app and Now on Tap, see the Help for the Google app.
Clock
Setting the alarm clock
Set an alarm
1.
In the Clock app, tap .
• To set an existing alarm, tap the time shown on the alarm.
• To create a new alarm, tap
2. To adjust the alarm time, tap the hour or minute. Touch and hold the dial, and then slide the dial to your desired time.
3. Tap AM or PM.
4. Tap OK.
.
Create or delete an alarm
In the Clock app, do one of the following:
• To create an alarm, tap > .
• To delete an alarm, under the alarm that you want to delete, tap
You can add labels to your alarms to help you remember what each alarm is for.
Tip:
32
> .
Page 33

User Guide Applications and features
Change your alarm ringtone
1.
In the Clock app, tap .
2.
Under the alarm you want to change, tap > .
3. Select a ringtone.
4. Tap OK.
Set an alarm for multiple days
1.
In the Clock app, tap .
2.
Under an alarm, tap .
3. Select the Repeat checkbox.
Days that the alarm is set to go
4. To add or remove a day, tap its letter.
o are indicated by a letter inside a white circle.
Set the snooze length
By default, the alarm snoozes for ten minutes.
1.
In the Clock app, tap > Settings > Snooze length.
2. Slide your finger up or down over the numbers.
3. When the number you want appears between the lines, tap OK.
Set the silence time
By default, the alarm is silenced after ten minutes.
1.
In the Clock app, tap > Settings.
2. Tap Silence after.
3. Tap a time.
4. Tap OK.
Use the stopwatch
1.
In the Clock app, tap .
2. Tap the stopwatch.
33
Page 34

User Guide Applications and features
• To stop the stopwatch, tap the stopwatch again.
• To restart the stopwatch after it's been stopped, tap the stopwatch again.
• To add a lap, tap .
• To reset the stopwatch, tap .
Set the timer
1.
In the Clock app, tap .
2. Enter the time in hours, minutes, and seconds. For example, if you want to set an hour-long timer, type 1 00 00.
3.
To start the timer, tap .
You can do more than just set your timer:
•
To add an extra minute to your running timer, tap .
•
To set another timer, tap .
•
To reset a timer, tap
•
To delete a timer, tap .
, and then tap .
Set your home time zone
1.
In the Clock app, tap .
2. Tap Home time zone.
3. Tap a time zone.
If you would like the clock to update automatically to your current location's time zone when you're traveling, select
Tip:
the Automatic home clock checkbox.
View the time for other locations
You can view the time for multiple locations on the clock screen.
1.
In the Clock app, tap .
2.
Tap .
3. Tap the locations that you want to appear on your clock screen.
4.
Tap .
34
Page 35

User Guide Applications and features
Remove a location from the clock screen
1.
In the Clock app, tap .
2. Clear the checkbox next to the location that you want to remove.
3.
Tap .
Switch to night mode
You can dim your screen and keep the time displayed like a bedside clock by switching to night mode.
In the Clock app, do one of the following:
• Tap > Night mode.
• Touch and hold anywhere on the clock screen.
Change the clock style
To view the clock in either digital or analog format, in the Clock app, tap > Settings > Style > Analog or Digital.
BlackBerry Device Search
Search your device
With the BlackBerry Device Search app, you can search your device for
Instant Actions command in the search field to perform a task quickly.
In the BlackBerry Device Search app, type a search term or an Instant Actions command.
Change the search categories
To look for a specific type of file, you can specify categories to include in searches. For example, if you are looking for a
song, you can clear all of the categories except Music.
1.
In the BlackBerry Device Search app, tap > Settings > Search categories.
2. To choose which categories to include in searches, select or clear the checkboxes.
3. Tap OK.
files, apps, help, and more. You can also type an
35
Page 36

User Guide Applications and features
Tip: The Extended Search category searches Internet results, cloud apps (such as Google Drive™ and Google Play™), other
apps on your device, and more. To search only the data on your device, clear the Extended Search checkbox.
Do more with your search results
You can perform a variety of actions with items in your search results right in the search results screen. The actions
available to you depend on the type of item. For example, if one of the search results is an app, you can open the app
directly from the search results screen.
1. Tap a search result.
2. If necessary, tap an action.
Stop saving your search history
By default, your device keeps the last 20 search results that you visit for quick reference and reuse. If you don't want to
save your search results, you can turn o this feature.
1.
In the BlackBerry Device Search app, tap > Settings.
2. Turn o the Save search history switch.
Tip: To delete an individual search result, swipe left or right on the result. To clear all of your search history permanently,
tap > Settings > Clear search history.
Perform tasks quickly with Instant Actions
Instant Actions are shortcuts that allow you to perform tasks quickly.
Instant Actions use the input language that is set on your device.
Note:
1. In the search field, type a command.
2. From the results, tap the instant action.
Make a call
You can call a contact or dial a phone number right from the search field.
Type phone, dial, or call, and then enter a contact name or phone number.
Send an email
Type email or mail, and then enter a contact name.
36
Page 37

User Guide Applications and features
Send a text message
Type either sms, message, msg, or text, and then enter a contact name or phone number.
Play music
Type play, and then enter a song name, artist name, or album name.
Get directions
Type map, and then enter the name of a business or address.
Create a note
Type note or memo, and then enter a title for the note.
Create a task
Type task or todo, and then enter a title.
Troubleshooting: BlackBerry Device Search
I can't find an email using the BlackBerry Device Search app
The BlackBerry Device Search app only searches email that is in the BlackBerry Hub. To learn how to add email accounts
to the BlackBerry Hub, read the Help for the BlackBerry Hub.
Location services and Google Maps
About location services
You can turn on location services so that location-based applications and services, like Google Maps™, can find your
location. Location-based applications can use GPS technology and other positioning information to provide you with
information, such as driving directions.
37
Page 38

User Guide Applications and features
From the Location settings screen, you can also see the apps that are using location services. If you decide that you don't
want an app to know your location, you can turn o location permissions for that app. For more information about turning
app permissions on or o, see the help for Security.
Turn location services on or o
1. Swipe down from the top of the screen once using two fingers, or twice using one finger.
2.
Tap > Location.
3. At the top of the screen, turn the switch on or o.
Change location modes
With location modes, you can set how accurately your device detects your location. You can choose from the following
location modes:
• High accuracy: Uses GPS, Wi-Fi networks, mobile networks, and Google™ location services to
accurately.
• Battery saving: Uses Wi-Fi networks, mobile networks, and Google™ location services to find your location, while
conserving your battery life.
• Device only: Uses GPS only to find your location. This mode might use more battery life than battery saving mode, and
might not be as fast as high accuracy mode.
1. Swipe down from the top of the screen once using two fingers, or twice using one finger.
2.
Tap > Location > Mode.
3. Tap an option.
Turn Location History on or
Location History is a Google™ service that creates a private map of where you go with your device, and uses the map to give
you useful information, such as commute predictions and more relevant search results.
1. Swipe down from the top of the screen once using two
2.
Tap > Location > Google Location History.
3. If necessary, add your Google™ account.
4. At the top of the screen, turn the switch on or o.
o
fingers, or twice using one finger.
find your location
38
Page 39

User Guide Applications and features
About Google Maps
™
Google Maps™ helps you to find businesses, restaurants, and other places of interest, and can provide you with turn-byturn directions to your destination.
Find help for Google Maps
Do one of the following:
• In Google Maps™, tap > Help.
• Visit the Maps for mobile Help Center at support.google.com/gmm/android.
™
Google Chrome™ and Downloads
Find help for Google Chrome
Visit the Chrome for Android Help Center or, in Google Chrome™, tap
Downloads
™
> Help & feedback.
You can use the Downloads app to manage
Chrome™, and more. Streamed music and videos don't appear in the Downloads app.
files that you download from email, BBM messages, hangouts, Google
Downloads icons
Icon
Description
Delete a downloaded file
Share a downloaded file
View downloads as a list or as thumbnails
Sort files by name, date, or file size
39
Page 40

User Guide Applications and features
Printing
Print from your device
You can print webpages, photos, documents, and more from your device using compatible Wi-Fi or Bluetooth enabled
printers and printers connected to your computer. Not all applications support printing.
1.
In an app, tap > Print. Depending on the app, this option might appear in a dierent location, or might be called
something dierent, such as Share & export.
2. Tap the top of the screen, and then tap the printer that you want to use.
3.
Tap .
Note: You may have to install a printing service and add a printer before you can print.
Install a printing service
1. Swipe down from the top of the screen once using two fingers, or twice using one finger.
2.
Tap > Printing.
3. Tap Add service.
4. Tap the service that's compatible with your printer, and then tap Install. To
wireless printer's brand or consult its user guide.
5.
Tap twice.
6. Tap the printer service that you just installed. If the service isn't listed, swipe down from the top of your screen, and
then tap the
7. Turn on the switch for that service, and then tap OK. Wait for the service to
notification for your newly installed printer service.
find a compatible service, find your
find printers automatically.
Add a printer
In most cases, after you install a printer service, your device finds your printer automatically. If your device can't find your
printer, you might be able to add it manually.
1. Swipe down from the top of the screen once using two fingers, or twice using one finger.
2.
Tap > Printing.
3. Tap the printer service for the printer that you want to use. If the printer service is turned o, turn it on.
4. Tap Add printer.
5. Follow the instructions on the screen.
40
Page 41

User Guide Applications and features
Printing using Google Cloud Print
™
You can use Google Cloud Print™ to print from your device to a Cloud Ready printer or to any printer that's connected to a
computer.
To print to a printer that's not Cloud Ready, you must also do the following:
• Make sure that Google Chrome™ is installed on your computer, and then log in to the same Google™ account that you
use on your device.
• When you print, make sure that your computer is turned on.
To learn more about setting up and using Google Cloud Print™, see https://support.google.com/cloudprint/.
41
Page 42

User Guide Settings
Settings
Change your device settings
1. Swipe down from the top of the screen once using two fingers, or twice using one finger.
2.
Tap a setting or, to see more settings, tap .
Tip: To find a setting quickly, tap , and then type the setting that you're looking for.
Customize the quick settings menu
1. Swipe down from the top of the screen once using two fingers, or twice using one finger.
2.
Tap .
3. Do any of the following:
• To move a setting, drag the icon to another position, and then release your finger.
• To remove a setting, drag the icon over , and then release your finger.
• To add a setting, tap , and then tap a setting.
4. Tap Save.
To use the default quick settings, tap Reset.
Notifications
Manage your notifications
Notifications let you know about new messages, calendar events, app updates, and more. When you receive a notification,
an indicator appears in the upper-left corner of the screen.
Check and open your latest notifications
1. Swipe down from the top of the screen with one finger.
2. If necessary, pull down to see more notifications.
3. Tap a notification to open it.
42
Page 43

User Guide Settings
Block or prioritize a notification
1. Swipe down from the top of the screen with one finger.
2. Touch and hold a notification.
3.
Tap .
4. Turn on the Block all or Treat as priority switch.
Dismiss a notification
1. Swipe down from the top of the screen with one finger.
2. Swipe left or right on a notification.
Note: To dismiss all of your
notifications at once, tap or Clear All.
Change the volume of your notifications
You can quickly access the volume sliders for notifications, media, and alarms when you press the "Volume up/down key"
and then tap . You can also customize the volume from the device settings screen.
1. Swipe down from the top of the screen once using two fingers, or twice using one finger.
2.
Tap > Sound & notification.
3. Drag any of the sliders to the right or left.
Note: The
control these volumes separately, you can find apps for that in the Google Play™ store.
Ring volume slider adjusts the volume for both your ringtone and your notification sounds. If you want to
Change your notification sounds
To change notification sounds and vibration settings for a specific app, look in the Settings screen inside the app. For
Note:
example, if you want to turn o notification sounds for new emails, open BlackBerry Hub, open the Settings screen, and
change the notification settings for your email account.
Change the default notification sound
The default sound only applies to apps that are set to use the default.
1. Swipe down from the top of the screen once using two fingers, or twice using one finger.
2.
Tap > Sound & notification > Default notification ringtone.
43
Page 44

User Guide Settings
3. Tap a notification sound.
4. Tap OK.
To turn sounds on or o for features such as screen locking or the dial pad, tap Other sounds. Turn any of the switches on
or o.
Add a custom notification sound
Note: If your device uses Android for Work, you can't select custom notification sounds for apps inside your work space.
1. Save the .mp3 file you want to use to the Notifications folder in your device's internal storage.
2. When you set the notification sound in an app's settings or change the default notification sound, tap the file name of
your .mp3 file.
3. Tap OK.
Turn o all sounds and notifications
Do not disturb lets you quickly silence your device when you don't want to be interrupted, like in a movie theater or during
an important meeting. You can also choose to receive only certain notifications, like calls or alarms.
Turn on do not disturb
1. Swipe down from the top of the screen once using two fingers, or twice using one finger.
2.
Tap .
3. Tap Total silence, Alarms only, or Priority only.
4. To change how long do not disturb stays on, tap + or -, or tap Until you turn this o.
5. Tap Done.
You can quickly turn on alarms only mode by pressing the Volume down key until the volume is all the way down, then
Tip:
pressing the key once more.
Keep some sounds and notifications on
You can use priority only mode to receive the notifications that are most important to you while keeping everything else
silent.
1. Swipe down from the top of the screen once using two fingers, or twice using one finger.
2.
Tap > Priority only > More settings > Priority only allows.
3. Choose the types of notifications you want to keep on.
44
Page 45

User Guide Settings
Turn o all sounds and notifications except calls
1. Swipe down from the top of the screen once using two fingers, or twice using one finger.
2.
Tap > Priority only > More settings > Priority only allows.
3. Turn o the Reminders and Events switches.
4. Tap Messages > None.
5. Tap Calls > From anyone.
Automatically turn on do not disturb at certain times
You can automatically turn on do not disturb at regular times or during all events of a certain type in your calendar.
1. Swipe down from the top of the screen once using two fingers, or twice using one finger.
2.
Tap > Sound and notification > Do not disturb > Automatic rules.
3. Tap one of the existing rules or add a new one.
4. If necessary, change the rule's settings.
5. If necessary, tap the switch at the top of the screen to turn on the rule.
Customize
To change
example, if you want to turn o notification sounds for new emails, open BlackBerry Hub, open the Settings screen, and
change the notification settings for your email account.
To change system-level notification settings for individual apps, follow the steps below.
1. Swipe down from the top of the screen once using two fingers, or twice using one finger.
2.
3. Tap an app.
4. Do one of the following:
notification sounds and vibration settings for a specific app, look in the Settings screen inside the app. For
Tap > Sound & notification > App notifications.
• To stop receiving notifications from the app, turn on the Block all switch.
• To see notifications from the app at the top of your notifications list, and to receive priority notification
interruptions, turn on the Treat as priority switch.
• If available, to set a custom LED color for the app, turn on the Customize LED Color switch. Tap LED Color and
then tap a color.
• To stop seeing notifications slide onto the top of your screen, turn o the Allow peeking switch.
• To hide
screen lock option, such as a password, must be set and the option When device is locked on the Sound &
notification screen must be set to Show all notification content.
notifications for an app
notification contents on the lock screen, turn on the Hide sensitive content switch. To see this switch, a
45
Page 46

User Guide Settings
You can grant some apps access to your notifications. Typically, these will be apps that present notifications to you in
another context, like Android™ Auto or BlackBerry Hub. To see these apps, or to turn access on and o, tap > Sound &
notification > Notification access. Tap an app to turn access on or o.
Change how notifications are displayed on your lock
screen
You can customize your settings so that only the notifications that you want to see show up on the screen when your device
is locked.
Note: Settings that you choose for the lock screen override notifications settings for individual
apps.
For information about setting a screen lock, see Set up or change a screen lock.
1. Swipe down from the top of the screen once using two fingers, or twice using one finger.
2.
Tap > Sound & notification > When device is locked.
3. Do one of the following:
• To get all notifications on the lock screen, including the contents of incoming email messages and chats, tap
Show all notification content.
• To receive a
downloaded), tap Hide sensitive notification content. (To see this option, a screen lock option, such as a
password, must be set.)
• To prevent notifications from appearing on the lock screen, tap Don't show notifications at all.
notification, but keep the contents hidden (such as who sent an email or the title of the song you
Add owner info to your lock screen
You can add your name, a personal message, or any other information that displays on your device when the screen is
locked.
1. Swipe down from the top of the screen once using two fingers, or twice using one finger.
2.
Tap > Security > Lock screen message.
3. Type your name or the message you want to display on the lock screen and tap Save.
BlackBerry Productivity Tab
The BlackBerry Productivity Tab provides quick access to your upcoming events, new messages, tasks, and contacts. The
tab is available on all device screens.
46
Page 47
User Guide Settings
By default, the tab is turned on and and is centered on the right edge of the device screen. If you want to turn o the tab,
swipe down from the top of the screen once using two fingers, or twice using one finger. Tap > Display, and then turn
o the Productivity Tab switch.
View productivity information and open apps
1. Swipe on the tab toward the center of the screen.
2. Tap an app icon, such as Calendar or Contacts.
3. Do any of the following:
• To see more details about an item, tap the
• To open the app associated with the notification, tap More or Open. You can return to the BlackBerry Productivity
Tab screen from an app when you swipe on the tab again.
4. To close the tab, swipe toward the edge of the screen.
notification.
Create an item using the BlackBerry Productivity Tab
You can add new items, such as calendar events or email messages, right from the BlackBerry Productivity Tab without
opening your calendar or email apps.
1. Swipe on the tab toward the center of the screen.
2. Tap an app icon.
3. Do one of the following:
• To add an event, task, or contact, tap .
• To compose an email, tap
.
Customize the BlackBerry Productivity Tab settings
You can adjust the BlackBerry Productivity Tab to best suit your needs and find what works for you.
47
Page 48

User Guide Settings
1. Swipe in on the tab toward the center of the screen.
2.
Tap , and then do any of the following:
• To remove the tab from your screen, tap Remove. To turn on the tab, in Display settings, turn on the Productivity
Tab switch.
• To change the placement of the tab to another side of your device screen, tap Left edge or Right edge.
• To change the length of the tab, slide your finger left or right on the Height slider.
• To adjust the transparency of the tab, slide your finger left or right on the Transparency slider.
Tip: By default, the tab is centered on the side of your screen, but you can move the tab up or
down along the edge of the screen. Touch and hold the tab, and drag it to your preferred spot.
Release your finger to place the tab.
Storage space and media cards
Manage your
files and folders
Search for a file or folder
1. Swipe down from the top of the screen once using two
2.
Tap > Storage & USB.
3. If necessary, tap Internal storage.
4. Tap Explore.
5.
Tap .
6.
Enter a search term, and then, on the keyboard, tap .
Share, copy, or delete a file or folder
1. Swipe down from the top of the screen once using two
2.
Tap > Storage & USB.
3. If necessary, tap Internal storage.
4. Tap Explore.
5. Touch and hold a
6. Do any of the following actions:
file or folder.
fingers, or twice using one finger.
fingers, or twice using one finger.
48
Page 49

User Guide Settings
• To share a file, tap , and then select how you want to share the file.
• To copy a file or folder, tap > Copy to, and then select where you want to copy the file to. Tap Copy.
• To delete a file or folder, tap .
Tip: To select multiple files or folders, touch and hold a file or folder, and then tap each additional file or folder. To select all
of the files in a folder or all of the folders on a screen, touch and hold a file or folder, and then tap > Select all.
Sort your files or folders
1. Swipe down from the top of the screen once using two fingers, or twice using one finger.
2.
Tap > Storage & USB.
3. If necessary, tap Internal storage.
4. Tap Explore.
5.
Tap , and then tap By name, By date modified, or By size.
Tip: To change how your files and folders are displayed, tap , and then tap Grid view or List view.
Using a media card
Get more space to store your ringtones, videos, pictures, songs, and more when you insert a microSD card into your device.
By using a media card, you can expand your device's storage space by up to 2 TB. Using a media card can also help
increase the performance and power eciency of your device, and can allow you to transfer your data from your current
device to another device that supports media card transfers.
To use a media card with a capacity greater than 32 GB, you must download Microsoft exFAT Technology for BlackBerry to
install the driver. A notification appears when you insert the media card into your device. Make sure that you are connected
to the Internet, and then tap the notification to download the driver.
A Class 10 card or faster is required to record videos in Ultra HD (4K).
Learn how to insert a media card.
Delete the data from your media card
To help protect your privacy, you can format your media card to permanently delete all of the data. Depending on the
amount of data, this process might take some time.
CAUTION:
1. Make sure that your device isn’t connected to a computer.
2. Swipe down from the top of the screen once using two fingers, or twice using one finger.
3.
When you format your media card, you can't recover any of the deleted data.
Tap > Storage & USB.
49
Page 50

User Guide Settings
4. Tap your media card.
5.
Tap > Settings > Format.
Remove a media card
1. Do one of the following:
• Turn
• Swipe down from the top of the screen once using two
Release the tray by pushing the tip of the tool (provided in the box) into the hole on the right side of your device. If
2.
you don't have the tool that came with your device, you can also use a paper clip.
3. Pull out the tray completely and remove the media card.
4. Push the tray back into the slot.
o your device.
fingers, or twice using one finger. Tap > Storage &
USB. Tap your media card. Tap > Settings > Eject.
Check how much storage space is free
1. Swipe down from the top of the screen once using two fingers, or twice using one finger.
2.
Tap > Storage & USB.
3. If necessary, tap Internal storage.
4. To see more details about an item in the list, tap the item. For example, to see which apps are using the most storage
space, tap Apps.
Free up storage space
You may notice slower performance on your device if your device's internal storage space is full or almost full. You can try
removing unnecessary files and clearing cached data to free up space and improve your device's performance.
50
Page 51

User Guide Settings
1. Swipe down from the top of the screen once using two fingers, or twice using one finger.
2.
Tap > Storage & USB.
3. If necessary, tap Internal Storage.
4. Do any of the following:
• To disable or uninstall an app that you don't use, tap Apps, and then tap an app. Tap . Tap Disable or
Uninstall.
• To delete
any additional files that you want to delete. Tap .
• To delete temporary files from your device by clearing your cache, tap Cached data > OK.
files that you don't need, tap a category or tap Explore. Navigate to a file. Touch and hold the file. Tap
Transfer files between your computer and device using
a USB connection
1. Using a USB cable, connect your device to your computer.
2. On your device, swipe down from the top of the screen and tap the Connected in charging mode notification.
3. Tap Transfer files (MTP) or Transfer photos (PTP).
4. On your computer, if necessary, enter your device password. Your device and media card appear as drives on your
computer.
5. Go to the files or folders that you want to copy.
6. Drag and drop the
7. If necessary, before disconnecting your device, on your computer, right-click your device's drive. Click Eject.
files or folders into the desired folders.
Change how your device connects to your computer
Each time you connect your device to your computer, by default, your device connects in charging mode, and a notification
appears in the notification tray that tells you which mode is in use. To change the connection mode, your device must be
connected to your computer.
1. Swipe down from the top of the screen.
2. Tap the USB connection
3. Select an option.
notification.
51
Page 52

User Guide Settings
Connections
Wireless connection icons
The following icons might appear at the top of your screen to indicate the wireless coverage level that your device currently
has.
Icon Description
The amount of solid color indicates the strength of the
mobile signal. If the signal is weak, your device might use
more power to try to maintain the connection.
Your device is connected to the mobile network and can
access all of the features of your mobile network plan.
Your device is connected to the network type shown, but
the network functionality is limited. You might be able to
make a phone call, but you might not be able to access the
Internet or view email messages.
You have no mobile network coverage. You can only make
emergency calls.
Your device is roaming. Extra charges might apply.
The amount of solid color indicates the strength of the Wi-Fi
signal. If the signal is weak, your device might use more
power to maintain the connection.
Your device is connected to a Wi-Fi network but there is no
Internet connectivity. Your device uses the mobile network
instead.
Wi-Fi is turned o on your device.
Your device is connected to a VPN.
Your device is in airplane mode and all of your wireless
network connections are turned o. You can turn on Wi-Fi or
Bluetooth technology, but not your connection to the
mobile network.
There is no SIM card in your device.
The following icons appear at the top of your screen if your device is connected or trying to connect to another device using
mobile hotspot mode, Internet tethering, Bluetooth technology, a USB cable, or NFC.
52
Page 53

User Guide Settings
Icon Description
Mobile hotspot mode is turned on.
Bluetooth technology is turned on. If this icon is inside a
box, your device is connected to another device using
Bluetooth tethering.
Your device is connected to another device using a USB
cable. If this icon is inside a box, your device is connected
to another device using USB tethering.
NFC is turned on.
Turn on airplane mode
When you turn on airplane mode, all of the connections on your device turn o.
1. Swipe down from the top of the screen once using two fingers, or twice using one finger.
2.
Tap > More.
3. Turn on the Airplane mode switch.
After you turn on airplane mode, you can turn on certain connections, such as Wi-Fi or Bluetooth technology. This feature
allows you to connect to a Wi-Fi network on an airplane, for example.
Mobile network
A mobile network connection allows your device to make calls and, if you have a data plan, use data services such as
Internet browsing.
If your device is set up for roaming and you travel outside of your service provider's wireless coverage area, in most cases,
your device connects to another service provider's wireless network automatically. If you're not sure whether your device is
set up for roaming, or what roaming fees apply, check with your service provider before you travel.
Connect to the mobile network
To connect to the mobile network, airplane mode must be turned
Your device is designed to connect automatically to your service provider's mobile network after you insert your SIM card
into your device. If your device doesn’t connect automatically, you can manually select the mobile network.
1. Insert your SIM card into your device.
2. If necessary, swipe down from the top of the screen once using two
3.
Tap > More > Cellular networks > Network operators.
4. Tap a network.
o.
fingers, or twice using one finger.
53
Page 54

User Guide Settings
To turn o your mobile network connection, turn on airplane mode.
Set a preferred network type
1. Swipe down from the top of the screen once using two
2.
Tap > More > Cellular networks > Preferred network type.
3. Tap the type of network you prefer.
fingers, or twice using one finger.
Switch mobile networks manually
If you can't connect to a mobile network or if the network signal is weak, you can try switching networks manually.
1. Swipe down from the top of the screen once using two fingers, or twice using one finger.
2.
Tap > More > Cellular networks > Network operators.
3. Tap a network.
Turn o data services over the mobile network
o data services, you must have a SIM card in your device.
To turn
If you turn o data services, your device can't send or receive data over the mobile network and many features and apps
might not work correctly.
1. Swipe down from the top of the screen once using two
2.
Tap > Data usage.
3. If necessary, tap the Cellular tab.
4. Turn o the Cellular data switch.
fingers, or twice using one finger.
To turn on data services, turn on the Cellular data switch.
Turn o data services while roaming
Depending on your wireless service plan, you might be able to turn o data services (email messages, PIN messages, text
messages with attachments, and browser service) on your device so that only the phone and basic text messaging are
available. Turning o data services while roaming might prevent you from receiving additional roaming charges. For more
information, contact your service provider.
1. Swipe down from the top of the screen once using two fingers, or twice using one finger.
2.
Tap > More > Cellular networks.
3. Tap Data services while roaming.
4. Do one of the following:
54
Page 55

User Guide Settings
• To turn o data services, tap O.
• To receive a prompt before using data services while roaming, tap Prompt.
To turn on data services while roaming, tap On.
Change the APN settings for your default Internet connection
Your device uses Access Point Name (APN) settings to open a data connection with your service provider's wireless
network. You might need to change your APN settings if you change your wireless service plan or if the default settings
don't apply to your service provider. Depending on your service provider, you might not be able to change the APN settings.
1. Swipe down from the top of the screen once using two
2.
Tap > More > Cellular networks > Access Point Names.
3. Do one of the following:
• To create a new APN, tap .
• To change an existing APN, tap an APN.
4. Complete the fields. If you don't have the required information, contact your service provider.
5.
Tap > Save.
To reset the default APN settings, tap > Reset to default.
fingers, or twice using one finger.
Change your wireless service plan
To change your wireless service plan, you must have a SIM card in your device.
Depending on your service provider, you might not be able to change the details of your wireless service plan from your
device.
1. Swipe down from the top of the screen once using two fingers, or twice using one finger.
2.
Tap > More > Mobile plan.
3. Complete the instructions on the screen.
Troubleshooting: Mobile network
I can’t connect to the mobile network
Try the following:
• Check that airplane mode is turned
one finger. Tap > More. Check that the Airplane mode switch is turned o.
• Try switching to another mobile network. Learn how to switch mobile networks manually.
o. Swipe down from the top of the screen once using two fingers, or twice using
55
Page 56

User Guide Settings
• Check that the SIM card is inserted correctly in your device. Learn how to insert the SIM card.
Wi-Fi network
A Wi-Fi network connection allows your device to use data services, but unlike using the mobile network, using Wi-Fi
doesn't add charges to your data plan.
When you connect to a Wi-Fi network, your device saves the network information. The next time your device is within range
of the saved Wi-Fi network, and Wi-Fi is turned on, your device can connect to the network automatically.
Your device can be connected to the mobile network and a Wi-Fi network at the same time. For basic data functions, such
as using the Internet or downloading apps, your device is designed to try to use a saved Wi-Fi network before it tries to use
the mobile network. Keep in mind that if you leave Wi-Fi turned on, your battery might lose power more quickly.
Connect to a Wi-Fi network
1. Swipe down from the top of the screen once using two
2.
Tap > Wi-Fi.
3. If necessary, turn on the switch.
4. Tap a network.
5. If necessary, do one of the following:
• Enter the password for the Wi-Fi network, and then tap Connect.
• To connect to a Wi-Fi network at work, enter your username and password, and then tap Connect.
• To connect to a public network, tap the sign-in
necessary, tap > Use this network as is.
fingers, or twice using one finger.
notification and, if necessary, accept the license agreement. If
Add a Wi-Fi network manually
If your device doesn't connect automatically to a saved Wi-Fi network, you can set up a connection to a Wi-Fi network
manually. If you don't have the required information, ask your network administrator or the person who manages the Wi-Fi
network.
1. Swipe down from the top of the screen once using two fingers, or twice using one finger.
2.
Tap > Wi-Fi.
3. If necessary, turn on the switch.
4.
Tap > Add network.
5. In the Network field, type the SSID for the network.
6. In the Security drop-down list, tap the network's security type.
7. If necessary, tap Advanced options and specify additional information.
8. Tap Save.
56
Page 57

User Guide Settings
Connect to a Wi-Fi network using a proxy
You can connect to any Wi-Fi network using a proxy. You must be within range of the Wi-Fi network to change the proxy
settings.
1. Swipe down from the top of the screen once using two fingers, or twice using one finger.
2.
Tap > Wi-Fi.
3. If necessary, turn on the switch.
4. Touch and hold a network.
5. Tap Modify network.
6. Tap Advanced options. You might need to slide your
7. In the Proxy drop-down list, do one of the following:
• To set up a proxy, tap Manual, and then enter the proxy settings.
• To use a proxy already set up for the network, tap Proxy Auto-Config, and then confirm the proxy settings.
8. Tap Save.
finger up to see this option.
Delete a saved Wi-Fi network
If you don't want your device to connect to a Wi-Fi network automatically, you can delete the information used to connect to
the network.
1. Swipe down from the top of the screen once using two
2.
Tap > Wi-Fi.
3. If necessary, turn on the switch.
4. Tap a network, and then tap Forget.
fingers, or twice using one finger.
Set a static IP address for a Wi-Fi connection
You must be within range of your Wi-Fi network to change the IP settings.
By default, when you connect your device to a Wi-Fi network, your device assigns an IP address to the connection. You can
set a static IP address that doesn't change each time you connect to a Wi-Fi network.
1. Swipe down from the top of the screen once using two
2.
Tap > Wi-Fi.
3. If necessary, turn on the switch.
4. Touch and hold a network.
5. Tap Modify network.
6. Tap Advanced options. You might need to slide your
fingers, or twice using one finger.
finger up to see this option.
57
Page 58

User Guide Settings
7. In the IP settings drop-down list, tap Static.
8. Change the IP address fields.
9. Tap Save.
Change advanced settings for your Wi-Fi connections
You can change advanced settings for your Wi-Fi connections. For example, you can set whether your Wi-Fi connection
remains active when your device sleeps and you can change the Wi-Fi frequency band. You can also find the Media Access
Control (MAC) address and IP address for your device.
1. Swipe down from the top of the screen once using two fingers, or twice using one finger.
2.
Tap > Wi-Fi.
3. If necessary, turn on the switch.
4.
Tap > Advanced.
Advanced Wi-Fi connection settings
Setting Description
Network notification Turn on this switch to receive a notification when your device is within range of a
public Wi-Fi network.
Keep Wi-Fi on during sleep Tap this option to choose whether your device remains connected to the Wi-Fi
network when your device sleeps. If you turn o your Wi-Fi connection when
your device sleeps, you might increase the amount of mobile data you use.
Wi-Fi frequency band Tap to set the frequency band. When you set the band to 5 GHz, your device
connects to access points on the 5-GHz band only. When set to 2.4 GHz, your
device connects to access points on the 2.4-GHz band only. When set to
automatic, your device tries to connect to the band with the stronger signal
strength.
Install certificates Tap this option to install digital certificates that can identify your device when,
for example, your device connects to VPN or a Wi-Fi network.
Wi-Fi Direct Tap this option to connect with available Wi-Fi Direct compatible devices.
WPS Push Button Tap this option to turn on the Wi-Fi Protected Setup feature.
WPS PIN Entry Tap this option to enter the PIN for the Wi-Fi Protected Setup feature.
Troubleshooting: Wi-Fi connections
I can’t connect to a Wi-Fi network
Start by checking the following:
58
Page 59

User Guide Settings
• Verify that Wi-Fi is turned on. Swipe down from the top of the screen once using two fingers, or twice using one finger.
Tap > Wi-Fi. Check that the switch is turned on.
• Try turning airplane mode on and o. Learn how to turn on airplane mode.
• Check that your password for the Wi-Fi network is correct.
• Turn o your device, and then turn it on again.
• Delete the information used to connect to the Wi-Fi network, and then try to connect again. Learn how to delete a saved
Wi-Fi network.
• Verify that mobile hotspot mode is turned o. If mobile hotspot mode is on, your device can’t connect to a Wi-Fi
network. Swipe down from the top of the screen once using two fingers, or twice using one finger. Tap > More >
Tethering & Mobile Hotspot. Check that the Mobile Hotspot switch is turned
• Unplug your modem or router for 15 seconds, and then plug it in again.
• Try connecting your device to another Wi-Fi network at another location. If you can connect to another Wi-Fi network,
the problem might be specific to the Wi-Fi network at the original location.
Try more advanced troubleshooting options:
• Try choosing a dierent authentication type. Swipe down from the top of the screen once using two fingers, or twice
using one finger. Tap > Wi-Fi. Touch and hold the Wi-Fi network, and then tap Modify network. Tap EAP method,
and then tap a dierent authentication type.
• Check that the time on your device is correct and synchronized with the network time. If the times are dierent, it could
prevent your device from connecting (for example, connecting to a network might require that you have a
your device, and the certificate has an expiration date).
• If you use your device for work, your organization might prevent connections to certain wireless access points. For more
information, contact your administrator.
o.
certificate on
If you still can’t connect, contact your Internet service provider.
Bluetooth technology
Bluetooth wireless technology allows you to create a direct connection between your device and another Bluetooth
enabled device. For example, you can use a Bluetooth connection to play music through a separate speaker, make calls on
a headset, share files, or connect to Android Wear™ or a car kit.
Before you can connect to a Bluetooth enabled device, you must turn on Bluetooth technology on your device and then
pair the two devices. Some paired devices, for example, a car kit, usually connect to your device automatically.
Turn on Bluetooth technology
If you turn on Bluetooth technology, your device is discoverable and visible to other Bluetooth enabled devices nearby.
1. Swipe down from the top of the screen once using two
2.
Tap > Bluetooth.
3. Turn on the switch.
fingers, or twice using one finger.
59
Page 60

User Guide Settings
To turn o Bluetooth technology, turn o the switch.
Pair and connect your device with a Bluetooth enabled device
Make sure that you turn on Bluetooth technology on the device that you want to connect to.
1. Swipe down from the top of the screen once using two fingers, or twice using one finger.
2.
Tap > Bluetooth.
3. If necessary, turn on the switch.
4. To pair the devices, in the Available devices list, tap the device name, and complete the instructions on the screen. If
you're prompted to enter a pairing code, try entering 0000 or 1234, or check the documentation that came with the
device.
5. To connect the devices, in the Paired devices list, tap the device name.
Your devices are ready to communicate over the Bluetooth connection.
Change the name of your device for Bluetooth connections
If you turn on Bluetooth technology, the name of your device is visible to other Bluetooth enabled devices nearby.
1. Swipe down from the top of the screen once using two fingers, or twice using one finger.
2.
Tap > Bluetooth.
3. If necessary, turn on the switch.
4.
Tap > Rename this device.
5. Enter a new name for your device.
6. Tap Rename.
Change the settings for a paired Bluetooth enabled device
Some Bluetooth enabled devices support more than one Bluetooth feature. You can turn a feature on or o for a paired
Bluetooth enabled device. You can also change the name of a paired device as it appears on your device.
1. Swipe down from the top of the screen once using two
2.
Tap > Bluetooth.
3.
Tap beside the device you want to change.
4. Make your changes.
5. Tap OK.
60
fingers, or twice using one finger.
Page 61

User Guide Settings
Delete a paired Bluetooth enabled device
If you no longer want to connect to a Bluetooth enabled device, you can delete the device from the list of paired devices.
1. Swipe down from the top of the screen once using two fingers, or twice using one finger.
2.
Tap > Bluetooth.
3.
Tap beside the device you want to disconnect.
4. Tap Forget.
View a list of files you received over Bluetooth
1. Swipe down from the top of the screen once using two
2.
Tap > Bluetooth.
3. If necessary, turn on the switch.
4.
Tap > Show received files.
fingers, or twice using one finger.
Supported Bluetooth profiles
Your device is a Bluetooth Smart Ready device, and supports the following profiles.
Profile
Advanced Audio Distribution Profile
(A2DP)
Audio/Video Remote Control Profile
(AVRCP)
Device Identification Profile (DID) This profile allows Bluetooth enabled devices to access information about your
Hands-Free Profile (HFP) This profile allows you to connect your device to Bluetooth enabled headsets
Description
This profile allows your device to stream audio files to Bluetooth enabled
devices that support stereo audio, such as stereo headsets, speakers, and car
kits.
This profile allows you to use the buttons on a Bluetooth enabled device, such
as a headset, to perform actions such as adjusting the volume or playing the
next or previous media file on your device. This profile also displays information
about songs on a Bluetooth enabled device.
device model to support plug and play features, such as automatically
downloading the required drivers.
and car kits to make hands-free calls. This profile supports wideband audio.
Headset Profile (HSP) This profile allows you to connect your device to a Bluetooth enabled headset.
Human Interface Device Profile (HID) This profile allows you to connect your device to a Bluetooth enabled device,
such as a keyboard or mouse.
61
Page 62

User Guide Settings
Profile Description
Human Interface Device over Gatt
Profile (HOGP)
Message Access Profile (MAP) This profile allows a car kit to access text messages (SMS and MMS) on your
Object Push Profile (OPP) This profile allows your device to send files to and receive files from a Bluetooth
Personal Area Network Profile (PAN) This profile allows you to use your device to share your network connection
Phone Book Access Profile (PBAP) This profile allows a Bluetooth enabled car kit to access contact information
Serial Port Profile (SPP) This profile allows you to connect your device to other Bluetooth enabled
Remote SIM Access Profile (rSAP) This profile allows a Bluetooth enabled device, such as a car kit, to access the
This profile allows you to connect your device to a Bluetooth Smart device, such
as a keyboard or mouse.
device and lets you browse and read the text messages. If supported by the car
kit, you can also delete, compose, and send text messages from your car.
enabled device.
when connected to a Bluetooth enabled computer. This profile also lets you
connect your device to another device that is sharing its network connection.
and recent call history information on your device. This profile allows the car kit
to display the contact name for an incoming call.
devices that support the Serial Port Profile for data transfer.
SIM card on your device.
Troubleshooting: Bluetooth connections
I can't pair my device with a Bluetooth enabled device
• Check that your device and the device that you want to connect to have Bluetooth technology turned on.
•
To scan again for nearby Bluetooth enabled devices, on the Bluetooth screen, tap > Refresh.
• If your Bluetooth enabled device requires a passkey and you don't know what the passkey is, try 0000 or 1234, or
check the documentation that came with your Bluetooth enabled device.
• If the Bluetooth enabled device uses a battery, connect the device to a power source and then try again. If the battery
power level is too low, the device might be unable to pair with another device.
• Check that your device is compatible with the Bluetooth enabled device. For more information, see the documentation
that came with the Bluetooth enabled device.
• If mobile hotspot mode is turned on, verify that the device that you want to connect to uses the Hands-Free, Serial Port,
or Personal Area Network profile.
I keep losing the connection with my Bluetooth enabled car kit
• Check that your car kit is using the latest software version. For more information about your car kit's software version,
see the documentation that came with your car kit.
62
Page 63

User Guide Settings
• Move your device to another location in your vehicle or turn your device to face another direction. The location of your
device's antenna in relation to your car kit's Bluetooth antenna may aect the Bluetooth connection.
NFC
NFC is a short-range wireless technology that you can use to share content and information with another NFC-enabled
device or an NFC tag. Some NFC apps are designed to simulate a physical card, such as a credit card, a public transit pass,
or an access badge. With NFC, you don’t enter any information to create a connection, making NFC useful for on-the-go
actions.
If an app supports NFC, you might be able to:
• Share a picture with a friend.
• Unlock your device using the Smart Lock feature.
• Grab a coupon from a poster.
• Send a webpage to a friend.
• Exchange contact cards with a business acquaintance.
Share content using NFC
To share content with another device, make sure that both devices are unlocked and support NFC.
Not all apps support NFC.
1. On your device, open a screen that shows what you want to share, such as a webpage, YouTube video, or contact.
2. Tap the back of your device against the back of another NFC-enabled device or an NFC tag.
3. To send a
When the devices connect, you might hear a sound or your device might vibrate.
If you can't share content, try using the Android™ Beam feature. Open a screen that shows what you want to share. Tap
Tip:
> Share > Android Beam. Complete the instructions on the screen.
file, if necessary, touch your device screen.
Change the NFC settings
1. Swipe down from the top of the screen once using two
2.
Tap > More > NFC.
3. If necessary, turn on the NFC switch.
4. Do any of the following:
• To receive a prompt to accept file transfers, turn on the Prompt before receiving switch.
• To turn o the Android™ Beam feature, turn o the Android Beam switch.
To turn o NFC, turn o the NFC switch.
fingers, or twice using one finger.
63
Page 64

User Guide Settings
About tap and pay
When NFC is turned on, you can tap the back of your device to an NFC payment terminal to pay for your purchase.
If you have more than one payment app installed on your device, when you tap to pay for a purchase, you pay using the app
that is set as the default. You can change which app is used as the default. If you want to use another payment app for
some transactions, you can set the tap and pay feature to use the payment app that is open in the foreground instead.
Change the payment settings for tap and pay
Make sure that NFC is turned on.
1. Swipe down from the top of the screen once using two
2.
Tap > Tap & pay.
3. To change the default app, tap Payment default. Tap an app, and then tap OK.
4. To use other payment apps for some transactions, tap Use default > Except when another payment app is open.
fingers, or twice using one finger.
Tethering and mobile hotspot mode
Internet tethering
Internet tethering allows another device, such as a laptop or tablet, to share your device's connection to the mobile
network. You can connect the other device to your BlackBerry device using a USB cable or, if both devices are Bluetooth
enabled, you can use Bluetooth technology instead.
Additional charges might apply for using Internet tethering.
Mobile hotspot
When you use the mobile hotspot feature, your device becomes a wireless access point for other Wi-Fi enabled devices to
connect to and access the Internet. For the best performance, plug your device into a battery charger and connect it to a
power source.
Since the mobile hotspot feature uses the mobile network, you might incur additional data charges.
Use Internet tethering to share your mobile network connection
If your device has a data plan, you can share its Internet connection with another device, such as a laptop or tablet. You can
tether your devices using an appropriate cable or a Bluetooth connection.
1. Swipe down from the top of the screen once using two fingers, or twice using one finger.
64
Page 65

User Guide Settings
2.
Tap > More > Tethering & Mobile Hotspot.
3. Do one of the following:
• Connect your device to another device using an appropriate cable, and then turn on the USB tethering switch.
• Turn on the Bluetooth tethering switch, and then connect your device to another device using Bluetooth
technology.
To stop sharing your Internet connection, turn o the USB tethering or Bluetooth tethering switch.
Use mobile hotspot to share your Internet connection
Before you turn on mobile hotspot, confirm that your device is connected to the mobile network.
When you set up your mobile hotspot, record the name of your mobile hotspot and the password. You, or the user of
another device that wants to connect to your mobile hotspot, must know the name of your mobile hotspot and the
password to connect.
1. Swipe down from the top of the screen once using two
2.
Tap > More > Tethering & Mobile Hotspot.
3. Turn on the Mobile Hotspot switch.
4. To change your settings, tap Set up Mobile Hotspot. Make your changes, and then tap Save.
To stop sharing your Internet connection, turn
o the Mobile Hotspot switch.
fingers, or twice using one finger.
View a list of devices that are connected to your mobile hotspot
Make sure that mobile hotspot is turned on.
1. Swipe down from the top of the screen once using two fingers, or twice using one finger.
2.
Tap > More > Tethering & Mobile Hotspot > Connected devices.
Troubleshooting: Tethering and mobile hotspot
I can't use Internet tethering
• Check that your device is connected to the mobile network.
• Check that data services are turned on. Swipe down from the top of the screen once using two fingers, or twice using
one finger. Tap > Data usage. Confirm that the Cellular data switch is turned on.
• Check that your wireless service plan is set up to use Internet tethering.
• If your wireless service plan supports Internet tethering while roaming, check that data roaming is turned on. Swipe
down from the top of the screen once using two fingers, or twice using one finger. Tap > More > Cellular networks.
Confirm that the Data services while roaming setting is set to Prompt or On.
65
Page 66

User Guide Settings
• If you use your device for work, your organization might not allow Internet tethering. For more information, check with
your administrator.
I can't use my device as a mobile hotspot
• Check that you're connected to the mobile network.
• Check that your wireless service plan is set up to use the mobile hotspot feature. If not, you must change your wireless
service plan before mobile hotspot can work on your device.
• Your service provider might not allow the use of the mobile hotspot feature while roaming. For more information, check
your wireless service plan or contact your service provider.
• If you're using your device for work, your organization might not allow the use of the mobile hotspot feature. For more
information, check with your administrator.
I can't find the mobile hotspot password
If you set up a mobile hotspot, you must enter the mobile hotspot password on the device that is trying to connect to your
mobile hotspot.
To find your password, on your BlackBerry device, swipe down from the top of the screen once using two fingers, or twice
using one finger. Tap > More > Tethering & Mobile Hotspot, and then tap Set up Mobile Hotspot. Tap the Show
password checkbox.
VPN
A connection to a virtual private network (VPN) allows your device to use a wireless network connection to send data to and
receive data from a private network. For example, a VPN connection allows your device to connect securely to your
organization's network when you are working outside the oce. When you connect to a VPN, the security and data
management policies for the private network protect your data.
Before you can connect to a VPN, you must add a VPN profile. Only the device owner can add and manage VPN profiles on
your device. You might also need to install a VPN app on your device. For more information, contact your administrator or
download a VPN app from the Google Play™ store.
Add a VPN profile
Before you can add a VPN profile, you must set a screen lock for your device.
1. Swipe down from the top of the screen once using two fingers, or twice using one finger.
2.
Tap > More > VPN > .
3. Complete the fields on the screen. If you don't know the network information, contact your administrator.
4. Tap Save.
66
Page 67

User Guide Settings
Connect to a VPN
You must add a virtual private network (VPN) profile to your device before you can connect to a VPN.
1. Swipe down from the top of the screen once using two fingers, or twice using one finger.
2.
Tap > More > VPN.
3. Tap a VPN profile.
4. Enter your login information, and then tap the Save account information checkbox to connect automatically next
time.
5. Tap Connect.
To disconnect from a VPN, on the VPN screen, tap the VPN
profile you are connected to. Tap Disconnect.
Connect to a VPN automatically
To connect to a VPN automatically, the VPN must support always-on mode.
1. Swipe down from the top of the screen once using two
2.
Tap > More > VPN.
3.
Tap > Always-on VPN.
4. Complete the instructions on the screen.
To turn o always-on mode, on the VPN screen, tap > Always-on VPN > None > OK.
fingers, or twice using one finger.
Change or delete a VPN profile
1. Swipe down from the top of the screen once using two fingers, or twice using one finger.
2.
Tap > More > VPN.
3.
Tap beside the VPN profile you want to change or delete.
4. Do one of the following:
• Change the information, and then tap Save.
• Tap Forget.
Emergency broadcast messages
Depending on your region, service provider, and wireless network, you might receive text messages (SMS or MMS) about
possible threats to safety in your area. For example, you might receive messages with information about severe weather, a
missing child, or a national emergency. For more information, contact your service provider or administrator.
67
Page 68

User Guide Settings
Change the settings for emergency broadcast messages
Depending on your region, some settings might not be available.
1. Swipe down from the top of the screen once using two fingers, or twice using one finger.
2.
Tap > More > Emergency broadcasts.
3. Do any of the following:
• To receive a reminder for emergency broadcast messages, tap Alert reminder, and then tap how often you want
to receive a reminder.
• To stop your device from vibrating when you receive an emergency broadcast message, clear the Vibrate
checkbox.
• To turn o the text-to-speech feature, clear the Speak alert message checkbox.
• To stop receiving emergency broadcast messages, clear the Show extreme threats, Show severe threats, and
Show AMBER alerts checkboxes.
Data usage
Data usage refers to the amount of data that your device uploads and downloads when it is connected to the wireless
network. If you share your device with others, you can monitor the amount of data used by the device owner, guest, and any
user profiles on the device. Only the device owner can change the data usage settings.
If you exceed the data limit of your plan, your service provider might charge you additional fees. For more information about
your data limit, check your wireless service plan.
Monitor your wireless data usage
You can check how much data you use by wireless network type, time period, app, or in total.
1. Swipe down from the top of the screen once using two fingers, or twice using one finger.
2.
Tap > Data usage.
3.
To see your Wi-Fi usage, tap > Show Wi-Fi. Tap the Wi-Fi tab near the top of the screen.
4. Do any of the following:
• To check how much data you used during the current data usage cycle, view the value beside the time period.
• To check how much data an app used, view the value beside the app name.
• To check how much data each user
• To check how much data you used during a dierent time period, beside the current time period, tap >
Change cycle. Tap a date, and then tap Set.
You can close some apps to help reduce your data usage.
Tip:
68
profile set up on the device used, tap a user profile.
Page 69

User Guide Settings
Change when you get notified about data usage
Your wireless service plan must include data services.
1. Swipe down from the top of the screen once using two fingers, or twice using one finger.
2.
Tap > Data usage.
3. If necessary, tap the Cellular tab, and turn on the Cellular data switch.
4. At the top of the graph, drag the warning line up or down.
Set a limit for data usage
You can set a limit on the amount of data that your device can use when it's connected to the mobile network. If your device
reaches that limit, it can turn o data services and send you a notification. When data services are turned o, apps and
services on your device might not work correctly.
1. Swipe down from the top of the screen once using two fingers, or twice using one finger.
2.
Tap > Data usage.
3. If necessary, tap the Cellular tab, and turn on the Cellular data switch.
4. Turn on the Set cellular data limit switch, and then tap OK.
5. At the top of the graph, drag the red line up or down.
Stop sending background data over the mobile network
To reduce the amount of data that your device uses when connected to the mobile network, you can stop apps and services
from sending data when you aren't actively using the app or service. If you restrict background data, apps and services
might not work correctly unless your device connects to a Wi-Fi network.
1. Swipe down from the top of the screen once using two
2.
Tap > Data usage.
3. If necessary, tap the Cellular tab, and turn on the Cellular data switch.
4. Do one of the following:
• To turn o background data for all apps and services on your device, tap > Restrict background data, and then
tap OK.
• To turn o background data for an app or a service, tap the app or service. Turn on the Restrict app background
data switch, and then tap OK.
fingers, or twice using one finger.
69
Page 70

User Guide Settings
Stop sending data on some Wi-Fi networks
You can stop apps and services from sending data in the background, and prevent your device from downloading large files
when it's connected to certain Wi-Fi networks.
1. Swipe down from the top of the screen once using two fingers, or twice using one finger.
2.
Tap > Data usage > > Network restrictions.
3. Tap a network name.
Battery and power
Check your battery power level and usage info
You can see which apps and features are using the most battery power and how much battery power you have left.
1. Swipe down from the top of the screen once using two fingers, or twice using one finger.
2.
Tap > Battery.
Charge your device
CAUTION:
use with your device. Other chargers might not provide adequate power and might damage your device.
1. Hold the cable with the BlackBerry logo facing the front of the device, and insert the cable into the port on your
2. Plug the charger into a power outlet.
Keeping your battery charged
Your device uses a lithium-ion battery. To maximize your use of this type of battery, when possible, do the following:
• Avoid using your device while it's charging to help it charge faster.
• Do not leave your device plugged into a charger after it has reached a full charge.
• Avoid charging, using, or storing your device in extremely hot or cold places, such as on a vehicle dashboard.
• Avoid leaving your device turned o for an extended periods when the battery power level is low. If you plan to store
70
Use the charging accessory that came with your device, or a charger specifically approved by BlackBerry for
device.
your device for an extended period, partially charge the battery and put the device in a cool, dry place.
Page 71

User Guide Settings
Battery and charging icons
The battery power level icons appear at the top of the screen.
Icon Description
The battery is charging.
The battery is fully charged and still connected to a power source.
The battery is getting low on power.
Battery saver mode is turned on, or you can turn it on from your list of
notifications.
The battery is at 5% power or less. If the battery charge gets too low, your device
might turn o. Save any work in progress and charge your device.
There is a problem with the battery, and the battery might need to be replaced.
About the battery edge indicator
When turned on, the battery edge indicator appears as a strip of color on the right edge of the screen. The strip grows and
transitions from red to yellow to green as your device charges.
When your device is charging, the indicator displays the percentage of your current battery power and estimates how much
time is left until the device is fully charged.
To avoid disturbing you, the indicator automatically disappears when the room is dark or when your battery power level
reaches 100%. If your screen is turned on, the indicator automatically disappears after eight seconds.
Turn o the battery edge indicator
1. Swipe down from the top of the screen once using two fingers, or twice using one finger.
2.
Tap > Display.
3. Tap Show battery status on screen edge, and then select the O option.
How can I extend battery life?
To save battery power, your device automatically goes to sleep when you aren’t using it, and apps that you don’t use
regularly are put in standby mode.
71
Page 72

User Guide Settings
If your battery is still draining quicker than expected, you can change some device settings to extend battery life. Swipe
down from the top of the screen once using two fingers, or twice using one finger. Tap , and then change any of the
following settings.
Turn o network connections that you aren't using
When your device is outside a wireless coverage area, you can turn o your mobile network or Wi-Fi connections so that
your device doesn’t search for a wireless network signal continuously.
In the device settings, do any of the following:
• To turn o all connections, tap More. Turn on the Airplane mode switch.
• To turn
o Wi-Fi only, tap Wi-Fi. Turn o the switch.
Delete saved Wi-Fi networks
1. In the device settings, tap Wi-Fi.
2. Tap a Wi-Fi network, and then tap Forget.
Shorten the length of time before your device goes to sleep
1. In the device settings, tap Display.
2. Tap Sleep, and then tap 15 seconds or 30 seconds.
Dim the screen
1. In the device settings, tap Display > Brightness level.
2. On the slider, drag the slider handle to the left.
Turn down the volume
1. In the device settings, tap Sound &
2. On the Media volume, Alarm volume, or Ring volume sliders, drag the slider handle to the left.
Turn
1. In the device settings, tap Language & input > BlackBerry Keyboard Settings > Key press feedback.
2. Turn o the Vibrate switch and the Sound switch.
72
o key press feedback
notification.
Page 73

User Guide Settings
Turn on battery saver
If your device is low on battery power, you can turn on battery saver to limit features that use the most power, such as
vibration, location services, and data services. You can set battery saver to turn on automatically when your battery power
reaches a certain percentage.
Note: When battery saver is turned on, some applications and messaging services that rely on syncing might not update
unless you open them.
1.
In the device settings, tap Battery > > Battery saver.
2. Turn on the switch.
3. To turn on battery saver automatically when your device is low on battery power, tap Turn on automatically. Tap a
percentage.
Turn on battery optimization
By default, battery optimization is turned on for most apps and features. If you turned o battery optimization for an app,
you might want to turn it back on again, at least until you have a chance to charge your device.
1.
In the device settings, tap Battery > > Battery optimization.
2. Tap an app.
3. Select the Optimize option, and then tap Done.
Device and battery safety
You should use only the battery that BlackBerry
any other battery, you might invalidate any warranty provided with your device.
CAUTION: There is a risk of explosion if the battery is replaced with an incorrect battery type. Do not try to replace your
nonremovable battery. Only qualified service personnel should perform repairs or battery replacements in your device.
Device and battery disposal
Please recycle your device and battery in accordance with your local regulations. Do not dispose of either your device or
battery in a fire. Your device or battery should not be placed in household waste bins. For information about returning your
device to BlackBerry for recycling and safe disposal, from a browser on your computer visit http://www.blackberry.com/
recycling. The recycling program is available only in certain areas.
specifies for use with your particular BlackBerry device model. If you use
73
Page 74

User Guide Settings
View the safety, warranty, and privacy information for your device
Take a moment to review the license agreement, limited warranty, safety information, and privacy policies for your device.
These documents are available from your device settings screen. They contain important information about terms and
conditions of use, the battery, other important safety precautions, and warranty coverage.
To view BlackBerry's Privacy Policy, your device must be connected to the Internet.
1. Swipe down from the top of the screen once using two
2.
Tap > About phone > Legal information > BlackBerry.
fingers, or twice using one finger.
Display
Change your wallpaper
Add your favorite photo to the home screen of your device.
1. In the Photos app, tap a picture.
2.
Tap > Use as. If necessary, tap More.
3. Tap Wallpaper.
4. Slide your fingers apart or together to zoom in or zoom out.
5. Tap Set wallpaper.
To change your wallpaper, touch and hold a blank area on a home screen. Tap Wallpapers. Tap a wallpaper or a Live
Tip:
Wallpaper. To use a picture as your wallpaper, tap Select image and tap a picture.
Take a screenshot
Press and hold the Volume down key and the Power on/o key at the same time.
To find your screenshot, in the Photos app, tap > Device folders. Screenshots are saved in the Screenshots folder.
Change the screen brightness
1. Swipe down from the top of the screen once using two
2.
Drag to the left or right.
74
fingers, or twice using one finger.
Page 75

User Guide Settings
Change your font size
1. Swipe down from the top of the screen once using two fingers, or twice using one finger.
2.
Tap > Display > Font size.
3. Tap the text size that you want to use.
Change your display language
The language that you selected during the initial setup of your device is your display language. The home screen,
BlackBerry Hub, and supported applications display content in this language.
1. Swipe down from the top of the screen once using two fingers, or twice using one finger.
2.
Tap > Language & input > Language.
3. Tap a language.
Turn on or turn o screen rotation
Choose whether or not your screen rotates when you turn your device.
1. Swipe down from the top of the screen once using two fingers, or twice using one finger.
2.
Tap or .
Note: If you don't see the rotation icons, tap > Accessibility and turn on the Auto-rotate screen switch.
™
Set up Daydream
With Daydream™, you can display your photos, apps, and more as screensavers while your device is idle or charging. You
can customize what to display and when.
1. Swipe down from the top of the screen once using two
2.
Tap > Display > Daydream.
3. Turn on the switch.
Choose what to display in Daydream
After you turn on the Daydream™ feature, you can select which dreams you want to display, such as the clock or pictures,
when your device is sleeping.
fingers, or twice using one finger.
™
75
Page 76

User Guide Settings
1. On the Daydream™ screen, tap a dream.
2.
If necessary, tap beside a dream to see even more customization options.
Your dreams display the next time your device goes to sleep. To show dreams right away, tap > Start now.
To download or buy more dreams from the app store, tap
Set when to Daydream
When the Daydream™ feature is on, you can set when dreams display on your device.
1.
On the Daydream™ screen, tap > When to daydream.
2. Tap While docked, While charging, or Either.
™
> Install More Dreams.
Set the wait time for sleep mode
Set the length of time that your device remains inactive before entering sleep mode and before your Daydream starts.
1. Swipe down from the top of the screen once using two fingers, or twice using one finger.
2.
Tap > Display > Sleep.
3. Tap a time.
Cast your screen
Using Chromecast™ or a Wi-Fi CERTIFIED Miracast device, you can display your device's screen onto your TV. With
Chromecast™, you can also display content like TV shows, movies, photos, games, and websites from supported apps.
Learn more about Chromecast.
Learn more about Wi-Fi CERTIFIED Miracast.
1. Swipe down from the top of the screen once using two
2.
Tap > Display > Cast.
3.
If necessary, tap and select the Enable wireless display checkbox.
4. Tap the device that you want to share your screen on.
After you set up devices that you want to share your screen on, you can access them in the Quick Settings menu by
Tip:
tapping .
To stop casting your screen, swipe down from the top of the screen once with two fingers or twice with one finger. Tap ,
then tap the device you're casting to and tap Disconnect.
76
fingers, or twice using one finger.
Page 77

User Guide Settings
Use your device as a flashlight
1. Swipe down from the top of the screen once using two fingers, or twice using one finger.
2.
Tap .
To turn o the flashlight, tap .
Advanced interactions
To turn advanced interactions on or
finger. Tap > Advanced interactions.
o, swipe down from the top of the screen once using two fingers, or twice using one
Flip to mute
If this feature is turned on, when you receive a call and it isn’t a convenient time to respond, you can turn your device
facedown on a flat surface to silence the ringtone or vibration. You still receive a notification of the missed call.
To turn this feature on or o, tap the Flip to mute switch.
Double tap to wake
If this feature is turned on, you can tap the screen twice to wake up your device, or tap an empty area on the home screen
twice to turn o the screen.
To turn this feature on or o, tap the Double tap to wake switch.
Convenience key
Customize the Convenience key
Your device can perform a specific action when you press the Convenience key (the round key on the right side of your
device). For example, you can speed dial one of your favorite contacts, open an app, or turn on the flashlight.
1. Do one of the following:
• To assign an action to the key for the first time, press the Convenience key.
77
Page 78

User Guide Settings
• To change the action, swipe down from the top of the screen once using two fingers, or twice using one finger. Tap
> Convenience key. Tap Clear.
2. Follow the instructions on the screen.
Accounts
Manage your accounts
Add an account
You can add an account, such as a Microsoft Exchange or Yahoo! email account, to your device.
1. Swipe down from the top of the screen once using two fingers, or twice using one finger.
2.
Tap > Accounts > Add account.
3. Tap the type of account that you want to add.
4. Complete the instructions on the screen.
If you added an email account to your device, you can send and respond to messages using the BlackBerry Hub. To add an
email account to the BlackBerry Hub, in the BlackBerry Hub, tap > Add account. Complete the instructions on the
screen.
Change the settings for an account
1. Swipe down from the top of the screen once using two
2.
Tap > Accounts.
3. Tap the type of account, and if necessary, tap the account.
4. Make your changes.
To stop syncing information for all accounts (for example, to save battery life), on the Accounts screen, tap , and
Note:
then clear the Auto-sync checkbox.
fingers, or twice using one finger.
Delete an account
1. Swipe down from the top of the screen once using two fingers, or twice using one finger.
2.
Tap > Accounts.
3. Tap the type of account that you want to delete, and if necessary, tap the account.
78
Page 79

User Guide Settings
4.
Tap > Remove account.
Accessibility
About accessibility features on your device
Your device comes with several well-established accessibility aids for people with disabilities.
For more information on the following features, visit Android Accessibility Help.
•
Magnification settings allow you to zoom in or zoom out to increase or decrease the display magnification.
• Google™ TalkBack provides audible output based on the visual information displayed on your screen.
• Switch Access allows you to navigate screens on your device using external switches.
• Braille support is available using BrailleBack.
• Font customization allows you to choose small, medium, large, or huge sizes.
• Screen Reader technology lets you select the text-to-speech application that you prefer to use (if you have downloaded
an alternate text-to-speech engine on Google Play™).
• Google Now™ voice assistant answers questions, makes recommendations, and performs actions.
• Voice dictation allows you to dictate text instead of typing.
• Closed or open captioned multimedia content is available. Personalize your closed caption settings by adjusting
character size, color, opacity, or font.
• Display features, such as color inversion and color correction, are applied across all applications.
• The touch & hold delay feature lets you increase the length of time for touch responses on the screen.
• Third-party keyboards are supported.
• The ability to speak your passwords is included.
• An accessibility shortcut is available that you can use to quickly change your accessibility settings.
• Teletypewriter (TTY) support allows you to connect to a TTY device to make and receive calls from TTY devices.
For more information on the following features, visit BlackBerry Accessibility.
• Hearing aid compatibility is available for certain BlackBerry smartphone models. Compatibility ratings are available
online at BlackBerry Accessibility.
• The BlackBerry Keyboard lets you type more
personalized learning that gets to know the way you type.
• If your device has a physical keyboard, keyboard shortcuts and speed dial allow you to assign actions and phone
numbers to
• If you are using PRIV, you have the option of using the touch screen keyboard, or the slide-out keyboard with tactilely
discernible keys.
• Alerts and
• An integrated hands-free speakerphone is available, or you can connect your device to a hands-free headset or
Bluetooth enabled headset.
specific keys.
notifications can be customized using tone, vibration, onscreen alerts, or the LED indicator.
eciently with contextual autocorrection, next-word prediction, and
79
Page 80

User Guide Settings
Change accessibility settings
You can turn accessibility settings on or o, such as Google™ TalkBack, captions, touch & hold delay, and color inversion.
1. Swipe down from the top of the screen once using two fingers, or twice using one finger.
2.
Tap > Accessibility.
3. Set the accessibility options switches.
Turn on Hearing Aid mode
Hearing Aid mode is designed to improve the compatibility of your device with a hearing aid equipped with a telecoil. This
feature might not be supported depending on your BlackBerry device model. Hearing aid compatibility ratings are available
online at BlackBerry Accessibility.
1.
In the Phone app, in the upper-right corner of the screen, tap .
2. Tap Settings > Accessibility.
3. Select the Hearing aids checkbox or turn on the Hearing aids switch.
Turn on TTY support
TTY support is designed to allow your device to connect with an external TTY device that converts received calls to text.
The TTY device that you want to connect to your BlackBerry device must operate at 45.45 bps. If your TTY device is
designed for use with a 2.5-mm headset jack, you must use an adapter accessory to connect your TTY device to your
device. The adapter end that plugs into the TTY device must be a male three pole mono 2.5-mm headset jack, and the end
that plugs into your BlackBerry device must be a male four pole stereo 3.5-mm headset jack.
1. Connect a TTY device to your device according to the instructions that came with your TTY device.
2.
In the Phone app, in the upper-right corner of the screen, tap .
3. Tap Settings > Accessibility > TTY mode.
4. Select one of the following TTY modes:
• To turn
• To turn on all TTY settings, tap TTY Full.
• To turn on TTY Hearing Carry Over mode, tap TTY HCO.
• To turn on TTY Voice Carry Over mode, tap TTY VCO.
80
o all TTY settings, tap TTY O.
Page 81

User Guide Settings
Users
About users
The users feature lets you share your device with others while keeping your personal or work information private. For
example, users that you add to your device can't access your info, such as your email, contacts, pictures, apps, and more.
By default, your device is set up with a device owner and a guest. You can also add more user
To improve privacy between users, each user should set up a screen lock. A screen lock prevents another user from
accessing information in a dierent user profile.
All user profiles use the wireless connection information set up on the device. Any changes that a user makes to some
device settings, such as Wi-Fi network connections, are available or applied to all users on the device.
All users can install app updates for any user on the device.
You (device owner)
The person who sets up the device for the
the device owner and a guest, and set whether the guest or user can use the device to make calls or send text messages.
You control whether someone can add and access a user from the lock screen. You can also install app updates for all
users on the device, uninstall apps from a user profile, and delete a user from the device.
first time (you) is the device owner. You can add up to three users in addition to
profiles to your device.
Guest
You can use the guest profile to let someone borrow your device. When someone uses the guest profile, the device creates
a separate space where the guest can download apps, take pictures, and use other device features. Apps and data added
to your device by the guest are only available from the guest profile. When you or the guest delete the guest profile, the
apps and data in the guest profile are permanently deleted from the device.
You control whether the guest can make and receive phone calls.
User
While the guest profile allows you to let someone borrow your device occasionally, you can create a user profile for
someone that you share your device with frequently. A user profile creates a separate space on the device where another
person can use device features and customize the device to their liking. For example, you might want to create a "kids"
user profile that contains child-friendly apps. When a child wants to use your device, you can switch to the "kids" user
profile and not worry that your apps or data might accidentally be deleted or changed. Apps and data added to the device
by the user are only available from the user profile.
81
Page 82

User Guide Settings
You control whether the user can make and receive phone calls, and whether the user can send and receive text messages
(SMS).
Add a user
A user profile creates a separate space on your device for another person to use and customize. For example, the user can
add a Google™ account or download apps, wallpaper, and music without seeing the device owner or other users' account
info, apps, and data.
1. Swipe down from the top of the screen once using two
2.
Tap > Users > Add user.
3. Tap OK.
4. Tap Set up now.
5. If necessary, to wake up your device, swipe up from the bottom of the screen.
6. Complete the instructions on the screen.
fingers, or twice using one finger.
Switch users
1. Swipe down from the top of the screen once using two
2.
Tap > Users.
3. Do one of the following:
• Tap a user.
• Tap Guest.
fingers, or twice using one finger.
Allow access to guest and user profiles when your
device is locked
Guests and users can access their profiles from the lock screen if you set up your device to allow this feature. This feature
also lets you add a user from the lock screen without having to unlock the screen first.
1. Swipe down from the top of the screen once using two fingers, or twice using one finger.
2.
Tap > Users > .
3. Select the Add users when device is locked checkbox.
82
Page 83

User Guide Settings
Allow a user to make calls and send text messages
You can set whether a guest or user can make or receive calls when they use the guest profile or a user profile on your
device. You can also set whether a user can send or receive text messages (SMS).
1. Swipe down from the top of the screen once using two
2.
Tap > Users.
3. Do any of the following:
• Beside the guest
• Beside a user
profile, tap . Tap the Turn on phone calls switch.
profile, tap . Tap the Turn on phone calls & SMS switch.
fingers, or twice using one finger.
Delete a user or guest
When you delete a user from your device, you permanently delete the user's space and all of the apps and data in it. The
user is no longer available from the list of users. When you delete a guest, all of the apps and data in the guest space are
permanently deleted, but the guest profile remains on the device.
1. Swipe down from the top of the screen once using two fingers, or twice using one finger.
2.
Tap > Users.
3. Do one of the following:
• Beside the user you want to delete, tap
• Tap Guest. If necessary, tap Yes, continue. Swipe down from the top of the screen once using two
using one finger. Tap > Users > Remove guest > Remove.
A guest or a user can delete the apps and data from the guest space or user profile space on your device. A guest can tap
> Delete Guest from this device. A user can tap > Delete <username> from this device.
> Remove user > Delete.
fingers, or twice
Backup and reset
About backing up device data
Each method for backing up the data on your device backs up
these methods to back up your data.
dierent types of data. Consider using a combination of
83
Page 84

User Guide Settings
Backup method Description
Android™ Backup Service
Transfer files to your computer You can connect your device to your computer using a USB cable, view your device's
Use a third-party backup service The Google Play™ store includes many apps that provide backup services.
With Android™ Backup Service, you can back up your data to your Google™ account.
If you must replace your device unexpectedly (for example, if your device is
damaged, lost, or stolen), you can restore your data on a device running Android™.
The following types of data can be backed up to a Google™ account:
• Google Calendar™ settings
• Wi-Fi networks and passwords
• Home screen wallpapers
• Gmail™ settings
• Apps installed on Google Play
• Display settings
• Language and input settings
• Date and time settings
• Third-party app settings and data (depending on the app)
files in your computer's file manager, and copy the files (such as pictures and
documents) to your computer. This is a manual process. BlackBerry does not
provide desktop software for Android™ devices. For more information, see Transfer
files between your computer and device using a USB connection.
BlackBerry cannot guarantee the security or trustworthiness of these apps, so use
caution when considering a third-party backup service.
™
Back up and restore data using Android™ Backup Service
Turn on Android™ Backup Service
After you turn on Android™ Backup Service, your data is backed up automatically every 24 hours when your device is
plugged in, idle, and connected to a Wi-Fi network.
1. Swipe down from the top of the screen once using two fingers, or twice using one finger.
2.
Tap > Backup & reset.
3. Turn on the Back up my data switch.
After you turn on Android™ Backup Service, if you reset your device or switch to another Android™ device, your data is
restored when you add the Google™ account that you used to back up your data to your device.
84
Page 85

User Guide Settings
Change the Google™ account that you use to back up device data
If you have more than one Google™ account, or if you start using a new Google™ account, you can change the account that
you use to back up your data.
1. Swipe down from the top of the screen once using two fingers, or twice using one finger.
2.
Tap > Backup & reset > Backup account.
3. Tap an account. If you haven't added the account to your device yet, tap Add account, and then follow the prompts to
add the account.
Automatically restore app data
If you uninstall an app and then reinstall it later, your device can automatically restore the app data if the app has opted in
to use Android™ Backup Service. App data can be restored as long as you're using the same Google™ account on your
device.
1. Swipe down from the top of the screen once using two
2.
Tap > Backup & reset.
3. Turn on the Automatic restore switch.
fingers, or twice using one finger.
Check which apps are backed up
Not all apps opt in to use Android™ Backup Service to back up application data. You can check which apps are backed up
in Google Drive™.
In the Google Drive™ app, tap
> Settings > Manage backup.
Delete your device data with a factory reset
Before you switch to a new device or give away your current device, you should delete your data. A factory reset is designed
to delete all of the data on your device permanently so that it can't be recovered. The permanently deleted data includes
email accounts, downloaded apps, media files, documents, browser bookmarks, and settings.
Important:
when your device restarts, it will not work again until you enter your Google™ account credentials. After a factory reset, you
do not need to enter your Google™ account credentials.
1. Swipe down from the top of the screen once using two fingers, or twice using one finger.
2.
3. Tap Factory data reset > Reset phone.
4. If necessary, enter your screen lock.
If you delete your device data in any other way, for example, by entering the screen lock incorrectly ten times,
Tap > Backup & reset.
85
Page 86

User Guide Settings
5. When prompted, tap Erase everything.
I can't get out of safe mode
To get out of safe mode, press and hold the Power on/o key (on the left side of your device). Tap Restart.
Update your device software
Updating your device software to the latest version can help your device stay secure and run as expected.
Do one of the following:
• To update your device software when a
the system update notification, tap Install.
• To update your device software manually, swipe down from the top of the screen once using two
finger. Tap > About phone > System updates > Check for update. If an update is available, tap Restart &
one
install.
Note: Major updates can take time to download and install and require that you restart your device. To help prevent issues,
keep your device connected to a power source and a reliable Wi-Fi network while the update is in progress.
notification appears, swipe down from the top of the screen using one finger. On
fingers, or twice using
86
Page 87

User Guide Security
Security
Locks, passwords, and protecting your data
There are several types of locks, PINs, and security features that you can use to help protect the data on your device.
If you use your device for work, your organization might have security rules in place. The organization might require you to
enter a password to unlock your device or might prevent you from using the Smart Lock feature.
Screen lock
A screen lock helps prevent someone else from unlocking your device and accessing your data. When you set up a screen
lock, you set whether the screen lock must be entered to turn on the device.
Some security features, such as Smart Lock, require that you set up a screen lock before you can set up the feature.
There are several types of screen locks to choose from. Each type is designed to provide a
• Password: A secure password can contain letters, numbers, and symbols. A password is designed to be a strong screen
lock that is
• PIN: A PIN must contain a minimum of four numbers. The more numbers there are in your PIN, the more secure your
screen lock.
• Pattern: A pattern is a continuous line that connects four or more dots on a grid. You trace your pattern to unlock your
device.
• Swipe: A swipe gesture can unlock your device.
dicult for someone else to figure out.
dierent level of security.
Smart Lock
The Smart Lock feature lets you set up your device to remain unlocked when it's connected to a trusted Bluetooth enabled
device or NFC-enabled device, when it recognizes your face or voice, or when you are carrying it in your hand, pocket, or
bag. The Smart Lock feature also allows your device to remain unlocked when it's in a familiar location, such as your home
or workplace.
The Smart Lock feature is a convenient way to access the data on your device, but it doesn't
is the person using the device.
You must have a screen lock set before you can set up the Smart Lock feature.
confirm that the device owner
87
Page 88

User Guide Security
Data encryption
By default, data on your device, including your account information, apps, music, pictures, and other downloaded files, is
stored in a format that can be read only when your device decrypts the data. If you set up a screen lock and require that it
must be entered to turn on your device, your password, PIN, or pattern is used to generate a new encryption key to decrypt
your data.
SIM card PIN
You can set up a PIN for your SIM card, which you can use to help prevent unauthorized use of your SIM card in another
device. For example, if you lose your SIM card and someone tries to use it in another device, the SIM card can't be used
unless the PIN is entered correctly.
Network lock and unlock codes
To use a SIM card from another service provider, for example, if you’re traveling and want to use a local service provider’s
network, you can request unlock codes (MEP codes) from your current service provider. After you insert the new SIM card,
enter the unlock code.
If you exceed the number of allowed attempts to enter an unlock code, your SIM card allows emergency calls only. For
assistance, contact your service provider.
Google™ account and factory reset protection
The factory reset protection feature uses your Google™ account information to help protect the data on your device. If your
device is lost or stolen, the factory reset protection feature is designed to prevent someone else from being able to set up
your device for use, even if that person tries to reset your device to its factory settings. The device must be set up using the
same Google™ account information that was set up on the device before it was reset.
To use the factory reset protection feature, you must set up a screen lock and you must add your Google™ account to your
device.
Set up or change a screen lock
Locking your device can help prevent your device from sending accidental messages or pocket dialing. Before you can
unlock your device and access the data on your device, you must enter your password, PIN, or pattern, or swipe the screen.
If you use your device for work, depending on the rules set up by your administrator, you might not be able to use a pattern
or swipe gesture to unlock your device.
Using a swipe gesture to unlock your screen is not a secure way to prevent others from accessing the data and
Note:
features on your device.
88
Page 89

User Guide Security
1. Swipe down from the top of the screen once using two fingers, or twice using one finger.
2.
Tap > Security > Screen lock.
3. If necessary, enter your current password, PIN, or pattern.
4. Tap the type of screen lock that you want to use.
5. Complete the instructions on the screen.
Set your screen lock options
After you set up a screen lock for your device, you can set up your screen lock options. For example, you can set how long
your device can be inactive before it automatically locks and whether your device automatically deletes your device data if
you enter your password incorrectly ten times.
1. Swipe down from the top of the screen once using two
2.
Tap > Security.
3. Do any of the following:
• To lock your device automatically after a certain amount of inactive time, tap Automatically lock, and then tap an
interval.
• To lock your device when you press the Power on/o key, turn on the Power button instantly locks switch.
• To delete your device data automatically after ten unsuccessful attempts to unlock the device, turn on the
Automatically wipe switch.
• To display a message or owner information on the screen when the device is locked, tap Lock screen message.
Type the info to display, and then tap Save.
• To hide your password, PIN, or pattern so that it is not visible when you unlock your screen, turn
passwords visible switch.
fingers, or twice using one finger.
o the Make
Creating a strong password
A strong password helps prevent someone else from accessing your information. Weak passwords, such as 1234, might be
easy to remember but they're easier to guess as well.
To create a strong password, avoid using a password with the following characteristics (in order of importance):
Avoid Example
Common passwords password
Words from a dictionary quarter
Combining words from a dictionary SimpleGraph
Names or addresses Cecilia
Adding numbers at the end of a word password145
The key is to create a strong password that you can remember easily. Consider the following tips:
89
Page 90

User Guide Security
Do Example
Use as many characters as you can remember –
Combine words from dierent languages field of Kühe
Instead of: field of cows
Mix character sets größere3 stre4gth
Use the first letter from each word in a sentence Tqbfjotld
Instead of: The quick brown fox jumps over the lazy dog
Combine misspelled words SimzleGarph
Instead of: SimpleGraph
About Smart Lock
The Smart Lock feature makes it easy for you to unlock your device. You can set up your device to remain unlocked in the
following situations:
• When your device is connected to a trusted Bluetooth enabled device or NFC-enabled device
• When your device is in a familiar location, such as your home or workplace
• When your device recognizes your face or voice
• When you carry your device in your hand, pocket, or bag
The Smart Lock feature can't detect who is holding your device when the device is unlocked and connected to a trusted
device, in a trusted location, or passed between people while on-body detection is turned on. It might also be possible for
someone who looks like you to unlock your device when you turn on the trusted face option.
If you use your device for work, depending on the rules set by your administrator, the Smart Lock feature might not be
available.
Set up Smart Lock to unlock your device
Make sure that you have set a screen lock on your device. Depending on the type of Smart Lock you set up, you might need
to turn on or set up other features on your device, such as Bluetooth technology, NFC, Google Maps™, "Ok Google™" voice
detection, a trust agent, or a wireless network connection.
1. Swipe down from the top of the screen once using two
2.
Tap > Security > Smart Lock.
3. Enter your password, PIN, or pattern, and then tap Next.
4. Do any of the following:
• To keep your device unlocked when it is connected to a Bluetooth enabled device, when you tap an NFC tag, or
when you tap an NFC-enabled device, tap Trusted devices.
• To keep your device unlocked when it detects it is at home or at another trusted location, tap Trusted places.
90
fingers, or twice using one finger.
Page 91

User Guide Security
• To unlock your device when it recognizes your face, tap Trusted face.
• To unlock your device when you say "Ok Google™," tap Trusted voice. If necessary, turn on the From the Google
app switch. Turn on the From any screen switch. If necessary, set up the "Ok Google™" voice detection feature,
and then turn on the Trusted voice switch.
• To keep your device unlocked when you carry it on your body or in a bag, tap On-body detection, and then turn on
the switch.
5. Complete the instructions on the screen.
Turn o Smart Lock
1. Swipe down from the top of the screen once using two fingers, or twice using one finger.
2.
Tap > Security > Smart Lock.
3. Enter your password, pattern, or PIN, and then tap Next.
4. Do any of the following:
• Tap Trusted devices. Tap a device, and then tap Remove trusted device.
• Tap Trusted places. Tap a location, and then tap Turn
• Tap Trusted face. Tap Remove trusted face, and then tap Remove.
• Tap Trusted voice. Turn o the Trusted voice switch.
• Tap On-body detection. Turn
5. If you turn o all of your Smart Lock settings, you should also turn o the Smart Lock trust agent:
a. Go back to the Security screen and tap Trust agents.
b. Turn
o the Smart Lock (Google) switch.
o the switch.
o this location.
Protect your SIM card with a PIN
You can use a SIM card PIN to help prevent unauthorized use of your SIM card in another device. For example, if you lose
your SIM card and someone tries to use it in another device, the SIM card can't be used unless the PIN is entered correctly.
After you set up a PIN for your SIM card, you must enter the PIN from the lock screen to use your device.
1. Swipe down from the top of the screen once using two fingers, or twice using one finger.
2.
Tap > Security > Set up SIM card lock.
3. Turn on the Lock SIM card switch.
4. Type a PIN, and then tap OK.
To remove the PIN from your SIM card, turn
Change the PIN for your SIM card
1. Swipe down from the top of the screen once using two fingers, or twice using one finger.
o the Lock SIM card switch. Type the PIN for your SIM card, and then tap OK.
91
Page 92

User Guide Security
2.
Tap > Security > Set up SIM card lock.
3. Tap Change SIM PIN.
4. Follow the instructions on the screen.
About smart cards
Smart cards store certificates and private keys. You can import certificates from a smart card to your device by using an
external smart card reader or a microSD smart card. Private key operations such as signing and decryption use the smart
card. Public key operations such as
You can use smart card certificates with third-party apps that support smart card technology. And you can use smart card
certificates to send S/MIME-protected messages.
Store your smart card password on your device
You can set up your device to store your smart card password temporarily, so that you don't have to enter it as often. To
remove the password from your device cache, lock your device.
1. Swipe down from the top of the screen once using two fingers, or twice using one finger.
2.
Tap > Security > Smart Card.
3. Turn on the PIN Caching switch.
verification and encryption use the public certificates on your device.
Set or change the PIN for your smart card reader
1. Swipe down from the top of the screen once using two fingers, or twice using one finger.
2.
Tap > Security > Smart Card.
3. Tap a smart card reader.
4. Do one of the following:
• Tap Set PIN.
• Tap Change PIN.
5. Complete the instructions on the screen.
92
Page 93

User Guide Security
Troubleshooting: Locks, passwords, and protecting your data
I forgot my password, PIN, or pattern
For security reasons, the only way that you can reset your screen lock without knowing the password, PIN, or pattern is to
delete all of your device data and set up the device again.
You can typically do this by entering your password, PIN, or pattern incorrectly ten times. Or, if you have a remote device
management app installed on your device, such as the Android™ Device Manager, you can log in to the website and delete
your device data.
If you add your Google™ account to your device, the factory reset protection feature is turned on. To set up your device
again, you must add the same Google™ account. If you don't use the same Google™ account, you can't complete the setup
process.
Smart Lock doesn't unlock my device as expected
Try any of the following;
• If your device doesn't unlock when you scan your face, try to improve the image Smart Lock uses to recognize your
face. Tap
• Adjust the distance between your BlackBerry device and a trusted Bluetooth enabled device. The distance of a
Bluetooth connection can vary depending on your BlackBerry device model and the Bluetooth enabled device.
• If your device remains unlocked when it is close to a trusted location instead of when you are at the trusted location, try
improving the accuracy of the trusted location. Delete the trusted location. Tap > Location > Mode. Tap High
accuracy or Battery saving, and then add the trusted location again. Your device might detect a trusted location
outside of the physical walls of a building, such as your house. Smart Lock might keep your device unlocked when it is
within an 80-meter radius of a trusted location.
• You might need to unlock your device using your screen lock the first time you connect to a trusted device or arrive at a
trusted location.
> Security > Smart Lock > Trusted face > Improve face matching.
93
Page 94

User Guide Security
Finding and protecting a lost device
What to do if your device is lost or stolen
If you have a remote device management app, such as Android™ Device Manager, set up on your device, visit the remote
device management website and sign in. Depending on the remote device management app installed on your device, you
might be able to:
• Lock your device
• Make your device ring
• Add a phone number or message to the home screen of your device
• View the approximate location of your device on a map
• Delete all of the data on your device
If your device is not connected to the wireless network or if data services are turned o, you should still try to lock your
device and delete your device data. The next time your device connects to a wireless network, or data services are turned
on, your device is designed to lock and delete all the data.
If you don't have a remote device management app set up on your device, contact your service provider or your
administrator and report that your device is lost or stolen. Your service provider can lock your device remotely and delete
your data. If you use your device for work, your administrator might also be able to lock your device and delete your data.
If you suspect your device was stolen and you locate your device using a remote device management website, contact the
local law enforcement agency to retrieve your device. Don't try to retrieve your device on your own.
Set a device administrator
By default, the Android™ Device Manager is set up as the device administrator for your device. If you download a third-party
remote device management app to help you
administrator.
1. Swipe down from the top of the screen once using two
2.
Tap > Security > Device administrators.
3. Tap the app.
4. Tap Activate.
find your device or protect your device data, you must set the app as a device
fingers, or twice using one finger.
About Android™ Device Manager
Android™ Device Manager includes features designed to help you find your device and help protect the data on your device
if your device is lost or stolen.
94
Page 95

User Guide Security
On the Android Device Manager website, you can view the approximate location of your device on a map, make it ring, set a
password to lock your device and display a message on the lock screen, or delete all of the data from your device. If your
device is turned o, doesn't have a valid SIM card in it, or isn't connected to the wireless network, the Android™ Device
Manager will complete the request the next time your device is turned on and connected to the wireless network.
The Android™ Device Manager app is preloaded on your device. If someone you know loses an Android™ device, you can let
that person log in to the Android™ Device Manager app to try to
To learn more about how to set up and use Android Device Manager, visit support.google.com and search for Android
Device Manager.
find the lost device.
Change your Android™ Device Manager settings
1. Swipe down from the top of the screen once using two fingers, or twice using one finger.
2.
Tap > Google > Security.
3. Do any of the following:
• To be able to locate your device if it is lost or stolen, turn on the Remotely locate this device switch.
• To be able to lock your device and delete all of your device data if it is lost or stolen, turn on the Allow remote lock
and erase switch.
Security settings
About app permissions
When you download an app that is designed for Android™ 6.0 or later, you can install the app on your device without
accepting any app permissions. When you use the app, the app prompts you for permission to access certain data or
features on your device before it completes an action. For example, if the BlackBerry Hub wants to access your contacts,
you can allow or deny the permission request.
You can also turn a permission on or
cases, turning
you turn o microphone access for the BlackBerry Keyboard, the voice dictation feature doesn't work. If you turn o
camera access for the BlackBerry Camera, the app doesn't work at all.
When you download an app designed for an earlier version of the Android™ OS, you must accept all permissions before you
can successfully install the app. If you install the app, and then later don't want the app to have access to a permission,
turning o a permission stops the app from working correctly. If you don't want the app to have access to a permission, you
should uninstall the app from your device.
o a permission can prevent the app from working properly, or the app might not work at all. For example, if
o at any time, although some features of the app might not be available. In some
95
Page 96

User Guide Security
Turn a permission on or o for an app
You can turn a permission on or o to control what features or personal information an app or an Android™ OS system
service can access. When you turn o a permission, depending on the app, the app might continue working, but some
features of the app might not be available. The app might also stop working properly, or the app might not work at all.
If you use your device for work, your administrator might control which permissions you can change.
1. Swipe down from the top of the screen once using two
2.
Tap > Apps.
3. Do one of the following:
• To view the permissions for an app, tap the app.
• To view the permissions for an Android™ OS system app or service, tap > Show system, and then tap the app or
service.
4. Tap Permissions.
5. Turn on or
6. If necessary, tap Deny.
To see a list of apps and system services that access a
permissions, and then tap a permission.
o a permission switch.
fingers, or twice using one finger.
specific type of permission, from the Apps screen, tap > App
Download apps from sources other than Google Play
Google Play™ is the default trusted source for downloading Android™ apps onto your device.
You can set up your device to let you download apps onto your device from other websites and sources. If you want to
download apps from other sources, you should also set up your device to scan for malicious app activity.
1. Swipe down from the top of the screen once using two fingers, or twice using one finger.
2.
Tap > Security.
3. Turn on the Unknown sources switch.
4. Tap OK.
™
Scan device for malicious activity
You can set up your device to scan periodically for malicious activities. Your device warns you about potentially harmful app
activity.
1. Swipe down from the top of the screen once using two
2.
Tap > Google > Security.
96
fingers, or twice using one finger.
Page 97

User Guide Security
3. Turn on the Scan device for security threats switch.
About screen pinning
Screen pinning lets you pin one app into the foreground on your device. The feature disables the and buttons on
your device so that the only way to close a pinned app is to unpin the screen. You can set up screen pinning so that you
must enter your screen lock to unpin the screen.
Screen pinning allows you to let someone else use your device, for example, to play a game or view a video, without
worrying that the person might close the app and access your data.
Turn on screen pinning
1. Swipe down from the top of the screen once using two
2.
Tap > Security > Screen pinning.
3. Turn on the switch.
4. To unpin a screen without entering your screen lock, turn
switch.
To turn o the screen pinning feature, turn o the switch.
fingers, or twice using one finger.
o the Ask for Password/PIN/Pattern before unpinning
Pin a screen
Make sure that you have turned on the screen pinning feature.
1. Open an app or a screen that you want to pin to the foreground of your device.
2.
Tap .
3.
On the app or screen that you want to pin, tap .
To unpin a screen, touch and hold and at the same time. If necessary, enter your screen lock.
Install a certificate
Some Wi-Fi and VPN networks require your device to have a security certificate before the device can connect to the
network. You can install a certificate to help identify your device. Typically, when you install a client certificate, a
certification authority (CA) certificate is installed on your device at the same time.
1. Connect your device to your computer using a USB cable.
2. Copy the
Google Drive™ account.
3. Swipe down from the top of the screen once using two fingers, or twice using one finger.
certificate or keystore to the root of the internal storage space on your device, your media card, or your
97
Page 98

User Guide Security
4.
Tap > Security > Install from SD card.
Your device only displays certificates and keystores that are not already installed on your device.
5. Find and tap the certificate or keystore that you want to install.
6. If necessary, type the password for the certificate or keystore, and then tap OK.
After the certificate or keystore is installed, your device deletes the copy of the file on your device or media card.
7. Type a name to identify the certificate or keystore.
8. In the Credential use drop-down list, tap an option.
9. Tap OK.
Remove or turn o a certificate
When you remove a certificate that you installed, it is deleted from your device. If you require the certificate again, you
must reinstall it. When you turn o a system certificate, you can turn it on again.
1. Swipe down from the top of the screen once using two fingers, or twice using one finger.
2.
Tap > Security > Trusted credentials.
3. Do one of the following:
• To view a list of installed certificates, tap the User tab.
• To view a list of system certificates, tap the System tab.
4. Tap a
5. Do one of the following:
certificate.
• To remove an installed certificate, tap Remove.
• To turn o a system certificate, tap Disable.
To turn on a certificate that you turned o, on the System tab, tap the certificate. On the bottom of the certificate
information screen, tap Enable.
Turn
Some apps and services monitor the active apps on your device. If you turn o access to this info, some apps might not
work correctly.
1. Swipe down from the top of the screen once using two fingers, or twice using one finger.
2.
3. Tap an app and then turn o the Permit usage access switch.
98
o access to the usage info for apps
Tap > Security > Apps with usage access.
Page 99

User Guide Security
Improving your security settings using DTEK
The DTEK by BlackBerry app is designed to help you monitor and control the level of security on your BlackBerry device.
DTEK is preloaded on your device, and updates are available from the Google Play™ store.
Evaluating how security features are set up on your device
DTEK evaluates how or if you have set up security features on your device, including screen lock, factory reset protection,
and remote device management.
DTEK assigns an overall security rating to your device along with a rating for each of the security features that it monitors. If
a security feature receives a poor or fair rating, DTEK recommends how you can improve your security settings to achieve a
better rating.
Monitoring how apps access your data
DTEK lets you see and control which third-party apps use features on your device to access your info. DTEK doesn't
monitor preloaded apps or apps that your administrator might push to your device if you use your device for work.
DTEK monitors apps that:
• Take a picture or video using the camera
• Read, create, edit, or delete a contact
• Access the location of your device
• Send a text message (SMS or MMS) from your device
• Turn the microphone on or o
Get the latest info about DTEK at help.blackberry.com.
99
Page 100

User Guide Legal notice
Legal notice
©
2016 BlackBerry. Trademarks, including but not limited to BLACKBERRY, EMBLEM Design, BBM and BES are the
trademarks or registered trademarks of BlackBerry Limited, the exclusive rights to which are expressly reserved.
Android™, Google™, Google Play™ and other marks are trademarks of Google Inc. Bluetooth is a trademark of Bluetooth
SIG. HDMI is a trademark of HDMI Licensing, LLC. LTE is a trademark of European Telecommunications Standards Institute
(ETSI). Microsoft is either a registered trademark or trademark of Microsoft Corporation in the United States and/or other
countries. Qualcomm and IZat are trademarks of Qualcomm Incorporated. Wi-Fi, Wi-Fi CERTIFIED Miracast, Wi-Fi Direct,
and Wi-Fi Protected Setup are trademarks of the Wi-Fi Alliance. Yahoo! is a trademark of Yahoo! Inc. All other trademarks
are the property of their respective owners.
This documentation including all documentation incorporated by reference herein such as documentation provided or
made available on the BlackBerry website is provided or made accessible "AS IS" and "AS AVAILABLE" and without
condition, endorsement, guarantee, representation, or warranty of any kind by BlackBerry Limited and its
companies ("BlackBerry") and BlackBerry assumes no responsibility for any typographical, technical, or other
inaccuracies, errors, or omissions in this documentation. In order to protect BlackBerry proprietary and
information and/or trade secrets, this documentation may describe some aspects of BlackBerry technology in generalized
terms. BlackBerry reserves the right to periodically change information that is contained in this documentation; however,
BlackBerry makes no commitment to provide any such changes, updates, enhancements, or other additions to this
documentation to you in a timely manner or at all.
This documentation might contain references to third-party sources of information, hardware or software, products or
services including components and content such as content protected by copyright and/or third-party websites
(collectively the "Third Party Products and Services"). BlackBerry does not control, and is not responsible for, any Third
Party Products and Services including, without limitation the content, accuracy, copyright compliance, compatibility,
performance, trustworthiness, legality, decency, links, or any other aspect of Third Party Products and Services. The
inclusion of a reference to Third Party Products and Services in this documentation does not imply endorsement by
BlackBerry of the Third Party Products and Services or the third party in any way.
aliated
confidential
EXCEPT TO THE EXTENT SPECIFICALLY PROHIBITED BY APPLICABLE LAW IN YOUR JURISDICTION, ALL CONDITIONS,
ENDORSEMENTS, GUARANTEES, REPRESENTATIONS, OR WARRANTIES OF ANY KIND, EXPRESS OR IMPLIED,
INCLUDING WITHOUT LIMITATION, ANY CONDITIONS, ENDORSEMENTS, GUARANTEES, REPRESENTATIONS OR
WARRANTIES OF DURABILITY, FITNESS FOR A PARTICULAR PURPOSE OR USE, MERCHANTABILITY, MERCHANTABLE
QUALITY, NON-INFRINGEMENT, SATISFACTORY QUALITY, OR TITLE, OR ARISING FROM A STATUTE OR CUSTOM OR A
COURSE OF DEALING OR USAGE OF TRADE, OR RELATED TO THE DOCUMENTATION OR ITS USE, OR PERFORMANCE
OR NON-PERFORMANCE OF ANY SOFTWARE, HARDWARE, SERVICE, OR ANY THIRD PARTY PRODUCTS AND SERVICES
REFERENCED HEREIN, ARE HEREBY EXCLUDED. YOU MAY ALSO HAVE OTHER RIGHTS THAT VARY BY STATE OR
PROVINCE. SOME JURISDICTIONS MAY NOT ALLOW THE EXCLUSION OR LIMITATION OF IMPLIED WARRANTIES AND
CONDITIONS. TO THE EXTENT PERMITTED BY LAW, ANY IMPLIED WARRANTIES OR CONDITIONS RELATING TO THE
DOCUMENTATION TO THE EXTENT THEY CANNOT BE EXCLUDED AS SET OUT ABOVE, BUT CAN BE LIMITED, ARE
HEREBY LIMITED TO NINETY (90) DAYS FROM THE DATE YOU FIRST ACQUIRED THE DOCUMENTATION OR THE ITEM
THAT IS THE SUBJECT OF THE CLAIM.
TO THE MAXIMUM EXTENT PERMITTED BY APPLICABLE LAW IN YOUR JURISDICTION, IN NO EVENT SHALL
BLACKBERRY BE LIABLE FOR ANY TYPE OF DAMAGES RELATED TO THIS DOCUMENTATION OR ITS USE, OR
PERFORMANCE OR NON-PERFORMANCE OF ANY SOFTWARE, HARDWARE, SERVICE, OR ANY THIRD PARTY
100
 Loading...