


Washing Machine
User Manual
WTL72051S
Document Number : 1911861291_EN/ 10-04-20.(17:53)
Please read these instructions first before using your appliance
Dear Customer,
Thank you for choosing a Beko appliance. Please take some time to read this user manual before using your appliance, to ensure you know how to safely operate the controls
and functions. Carefully follow all unpacking and installation instructions to ensure the appliance is correctly connected and fitted prior to use. Please write your product model and serial number on the last page of this user manual, and store in a safe location close to the appliance for easy future reference. This user manual may also be applicable for several other models. Differences between models will be listed. If you have any questions or concerns, please call our contact centre or find help and information online at www. beko.co.uk
Explanation of symbols used throughout this User Manual
C Important information or useful hints about usage.
AWarning for hazardous situations with regard to life and property.
BWarning for electric shock.
Recyclable materials.
Do not dispose of the packaging materials together with the domestic or other wastes. Take them to the packaging material collection points designated by the local authorities.
This product was manufactured using the latest technology in environmentally friendly conditions.

TABLE OF CONTENTS |
|
1 General safety instructions |
5 |
1.1 Life and property safety---------------------------------------------------------------------------- |
5 |
1.2 Children's safety- ----------------------------------------------------------------------------------- |
6 |
1.3 Electrical safety------------------------------------------------------------------------------------- |
6 |
1.4 Hot surface safety---------------------------------------------------------------------------------- |
7 |
2 Important instructions for the environment |
8 |
2.1 Compliance with WEEE Directive------------------------------------------------------------------ |
8 |
2.2 Package information- ------------------------------------------------------------------------------ |
8 |
3 Intended use |
8 |
4 Your product |
9 |
4.1 Overview-------------------------------------------------------------------------------------------- |
9 |
4.2 Package Contents---------------------------------------------------------------------------------- |
10 |
4.3 Technical specifications--------------------------------------------------------------------------- |
11 |
4.4 Installation------------------------------------------------------------------------------------------ |
12 |
4.4.1 Appropriate installation location------------------------------------------------------------------------- |
12 |
4.4.2 Removing packaging reinforcement--------------------------------------------------------------------- |
12 |
4.4.3 Removing the transportation locks- --------------------------------------------------------------------- |
13 |
4.4.4 Connecting the water supply----------------------------------------------------------------------------- |
13 |
4.4.5 Connecting the drain hose to the drain------------------------------------------------------------------ |
14 |
4.4.6 Adjusting the feet----------------------------------------------------------------------------------------- |
14 |
4.4.7 Electrical connection-------------------------------------------------------------------------------------- |
15 |
4.4.8 Initial use- ------------------------------------------------------------------------------------------------- |
16 |
4.5 Preparation----------------------------------------------------------------------------------------- |
17 |
4.5.1 Sorting the laundry---------------------------------------------------------------------------------------- |
17 |
4.5.2 Preparing laundry for washing--------------------------------------------------------------------------- |
18 |
4.5.3 Tips for energy and water saving------------------------------------------------------------------------ |
18 |
4.5.4 Loading the laundry--------------------------------------------------------------------------------------- |
18 |
4.5.5 Correct load capacity-------------------------------------------------------------------------------------- |
19 |
4.5.6 Using detergent and softener---------------------------------------------------------------------------- |
19 |
4.5.7 Tips for efficient washing--------------------------------------------------------------------------------- |
22 |
4.6 Operating the product- ---------------------------------------------------------------------------- |
23 |
4.6.1 Control panel---------------------------------------------------------------------------------------------- |
23 |
4.6.2 Preparing the machine------------------------------------------------------------------------------------ |
23 |
4.6.3 Programme selection and tips for efficient washing---------------------------------------------------- |
23 |
4.6.4 Programme and consumption table--------------------------------------------------------------------- |
24 |
4.6.5 Main programmes ---------------------------------------------------------------------------------------- |
25 |
4.6.6 Additional programmes - --------------------------------------------------------------------------------- |
26 |
4.6.7 Special programmes-------------------------------------------------------------------------------------- |
27 |
4.6.8 Speed selection------------------------------------------------------------------------------------------- |
27 |
4.6.9 Delayed Start---------------------------------------------------------------------------------------------- |
27 |
4.6.10 Starting the programme--------------------------------------------------------------------------------- |
28 |
Washing Machine / User Manual |
3 / EN |

TABLE OF CONTENTS |
|
4.6.11 Child Lock------------------------------------------------------------------------------------------------- |
28 |
4.6.12 Progress of programme--------------------------------------------------------------------------------- |
29 |
4.6.13 Loading door lock- --------------------------------------------------------------------------------------- |
29 |
4.6.14 Changing the selections after programme has started------------------------------------------------ |
29 |
4.6.15 Cancelling the programme------------------------------------------------------------------------------ |
30 |
4.6.16 End of programme--------------------------------------------------------------------------------------- |
30 |
4.6.17 Your machine features "Pause Mode".------------------------------------------------------------------ |
30 |
4.7 Maintenance and cleaning------------------------------------------------------------------------- |
31 |
4.7.1 Cleaning the detergent drawer--------------------------------------------------------------------------- |
31 |
4.7.2 Cleaning the loading door and the drum----------------------------------------------------------------- |
31 |
4.7.3 Cleaning the body and control panel--------------------------------------------------------------------- |
31 |
4.7.4 Cleaning the water intake filters------------------------------------------------------------------------- |
32 |
4.7.5 Draining remaining water and cleaning the pump filter------------------------------------------------- |
32 |
5 Troubleshooting |
34 |
4 / EN |
Washing Machine / User Manual |

1 General safety instructions
This section includes security instructions which may help prevent the injuries and material damage risks. All kinds of warranties shall be invalid if these instructions are not observed.
1.1 Life and property safety
uNever place the product on a carpet-covered floor. Electrical parts will get overheated since air cannot circulate from under the device. This will cause problems with your product.
uUnplug the product if it is not in use.
uAlways have the repairing procedures carried out by an Authorised Service Agent. The manufacturer shall not be held liable for damages that may arise from procedures carried out by unauthorised persons.
uThe water supply and draining hoses must be securely fastened and remain undamaged. Otherwise a water leak may occur.
uWhile there is water inside the product, never open the loading door or remove the filter. Otherwise, risk of flooding and injury from hot water will occur.
uDo not force open the locked loading door. The door can be opened a few minutes after the washing cycle ends. In the case of forcing the loading door to open, the door and the lock mechanism may get damaged.
uUse detergents, softeners and supplements suitable for automatic washing machines only.
uFollow the instructions on the label of textiles and the detergent package.
uThe water supply pressure required to run the product is between 1 to 10 bars (0.1 – 1 MPa).
uDo not use old or used water inlet hoses on the new product. It may cause stains on your laundry.
Washing Machine / User Manual |
5 / EN |

1.2 Children's safety
uThis product can be used by children who are at the age of 8 and over and the people whose physical, sensory or mental skills are not fully developed or who do not have necessary required experience and knowledge as long as they are supervised or trained about the safe use of the product and its risks. Children should not play with the device. Cleaning and maintenance works should not be performed by children unless they are supervised by someone. Children of less than 3 years should be kept away unless continuously supervised.
uPackaging materials may be dangerous for children. Keep packaging materials in a safe place away from reach of children.
uElectrical products are dangerous for children. Keep children away from the product when it is in use. Do not allow them to play with the product. Use the child lock to prevent children from interfering with the product.
uDo not forget to close the loading door when leaving the room where the product is located.
uStore all detergents and additives in a safe place away from the reach of children and close the cover of the detergent container or seal the detergent package.
1.3Electrical safety
uIf the product has a failure, it should not be operated unless it is repaired by an Authorised Service Agent. Risk of electric shock!
uThis product is designed to resume operating in the event of powering on after a power interruption. If you wish to cancel the programme, see "Cancelling the programme" section.
uPlug the product into a grounded outlet protected by a 13 A fuse. Do not neglect to have the grounding installation made by a qualified electrician. Our company shall not be liable for any damages that will arise when the product is used without grounding in accordance with the local regulations.
uDo not wash the product by spraying or pouring water onto it! Risk of electric shock!
6 / EN |
Washing Machine / User Manual |
uNever touch the power cable plug with wet hands! Do not grab the power cord to unplug the machine, always unplug it by holding the socket with one hand, and pulling the plug with the other hand.
uProduct should be unplugged during installation, maintenance, cleaning and repair procedures.
uIf the power cable is damaged, it must be replaced by the manufacturer, after sales service or a similarly qualified person (preferably an electrician) or someone designated by the importer in order to avoid possible risks.
1.4Hot surface safety
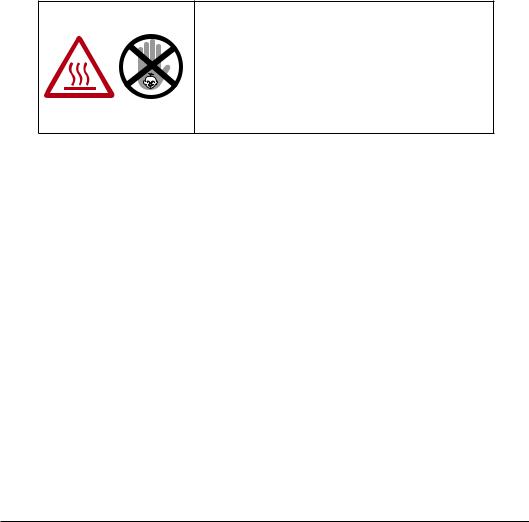
While washing the laundry at high temperatures, the loading door glass will get hot. Considering this fact, during the washing operation keep children away from the loading door of the product to prevent them touching it.
Washing Machine / User Manual |
7 / EN |

2 Important instructions for the environment
2.1 Compliance with WEEE Directive
This product complies with EU WEEE Directive (2012/19/EU). This product bears a classification symbol for waste electrical and electronic equipment (WEEE).
This product has been manufactured with high quality parts and materials which can be reused and are suitable for recycling. Do not dispose of the waste product with normal domestic and other wastes at the end of its service life. Take it to the collection center for the recycling of electrical and electronic
equipment. Please consult your local authorities to learn about these collection centres. Compliance with RoHS Directive:
The product you have purchased complies with EU RoHS Directive (2011/65/EU). It does not contain harmful and prohibited materials specified in the Directive.
2.2 Package information
Packaging materials of the product are manufactured from recyclable materials in accordance with our National Environment Regulations. Do not dispose of the packaging materials together with the domestic or other wastes. Take them to the packaging material collection points designated by the local authorities.
3Intended use
•This product has been designed for domestic use. It is not for commercial purposes or it should not be used other than its intended use.
•The product must only be used for washing and rinsing of laundry that are marked accordingly.
•The manufacturer waives any responsibility arising from incorrect usage or transportation.
•The service life of your product is 10 years. During this period, original spare parts will be available to operate the appliance properly.
•This appliance is intended to be used in household and similar applications such as:
–staff kitchen areas in shops, offices and other working environments;
–farm houses;
–by clients in hotels, motels and other residential type environments;
–bed and breakfast type environments;
–areas for communal use in blocks of flats or in launderettes.
8 / EN |
Washing Machine / User Manual |

4 Your product
4.1 Overview
1


 2 8
2 8 


 3
3 


 4
4
5
6
7
1- Power cable
2- Top panel
3- Control panel
4- Drain hose
5- Loading door
6- Filter cap
7- Adjustable feet
8- Detergent drawer
Washing Machine / User Manual |
9 / EN |

4.2 Package Contents
11 12
10
9
a |
b |
c |
14 16
15
13
9- Power cable
10Drain hose
11Transportation safety bolts*
12Mains water inlet hose (One of the following filter types is used for the mains hose connection.)
a- Electronic water shut-off b- Mechanical water shut-off c- Standard
13Liquid detergent container**
14User Manual
15Blind plug***
16Plastic plug group
* Number of transportation safety bolts may change depending on the model of your product. ** This may be supplied with the machine depending on the model of your product.
*** It will be supplied if your product has double water inlet.
CFigures in this manual are schematic and may not match the product exactly.
10 / EN |
Washing Machine / User Manual |
4.3 Technical specifications
Supplier name or trademark |
Beko |
|
|
|
|
Model name |
WTL72051S |
|
|
||
7000740007 |
||
|
||
|
|
|
Rated capacity (kg) |
7 |
|
|
|
|
Maximum spin speed (rpm) |
1200 |
|
|
|
|
Built-in |
No |
|
|
|
|
Height (cm) |
84 |
|
|
|
|
Width (cm) |
60 |
|
|
|
|
Depth (cm) |
49 |
|
|
|
|
Single Water inlet / Double Water inlet |
• / - |
|
|
||
• Available |
||
|
||
|
|
|
Electrical input (V/Hz) |
230 V / 50Hz |
|
|
|
|
Total current (A) |
10 |
|
|
|
|
Total power (W) |
2200 |
|
|
|
|
Main model code |
9217 |
|
|
|
C SUPPLIER’S NAME |
MODEL IDENTIFIER |
(*) |
A |
A |
|
The model information as stored in the product database can be reached by entering following website and searching for your model identifier (*) found on energy label.
https://eprel.ec.europa.eu/
Washing Machine / User Manual |
11 / EN |

4.4 Installation
•Preparation of the location and electrical, tap water and waste water installations at the place of installation is the customer's responsibility.
•Make sure that the water inlet and discharge hoses as well as the power cable are not folded, pinched or crushed while pushing the product into its place after installation or cleaning procedures.
•The manufacturer shall not be held liable for damages that may arise from procedures carried out by unauthorised persons.
•Prior to installation, visually check if the product has any defects on it. If so, do not have it installed. Damaged products cause risks for your safety.
4.4.1Appropriate installation location
•Place the product on a hard and level floor. Do not put it onto a carpet with high pile or other similar surfaces.
•If the washing machine and dryer are placed on top of each other, their total weight – when loaded– amounts to 180 kilograms. Place the products on a solid and flat floor that has sufficient load carrying capacity!
•Do not place the product on the power cable.
•Do not install the product in environments where the temperature falls below 0 ºC.
•Leaving a gap at the sides of the machine is suggested to reduce vibration and noise
•On a raised floor, do not place the product next to the edge or on a platform.
•Do not place heat sources such as Hobs, Irons, Ovens, etc. on the washing machine and do not use them on the product.
12 / EN |
Washing Machine / User Manual |

4.4.3 Removing the transportation locks
1Loose all bolts with an appropriate wrench until they turn freely.
2Remove the transport safety bolts by rocking them slightly.
3Insert the plastic covers from the bag containing the user manual into the openings on the rear panel.
ACAUTION: Remove the transportation safety bolts before operating the washing machine! Otherwise, the product will be damaged.
CKeep the transportation safety bolts in a safe place to reuse when the washing machine needs to be moved again in the future.
Install the transport safety bolts in the reverse order of the disassembly procedure. Never move the product without the transportation safety bolts properly fixed in place!
4.4.4 Connecting the water supply
CIt is necessary to have 10 – 80 litres of water flowing from the fully open tap in one minute to have your machine run smoothly. Attach a pressure reducing valve if the water pressure is higher.
ACAUTION: Models with a single water inlet should not be connected to the hot water tap. In such a case the laundry will get damaged or the product will switch to protection mode and will not operate.
1Tighten the nuts of the hose by hand. Never use a tool when tightening the nuts.
2When hose connection is completed, check whether there are no leak problems at the connection points by opening the taps fully. If any leaks occur, turn off the tap and remove the nut. Retighten the nut carefully after checking the seal. In order to prevent the water leaks and resultant damages, keep the taps closed when you do not use the product.
Washing Machine / User Manual |
13 / EN |

4.4.5Connecting the drain hose to the drain
•Attach the end of the drain hose directly to the waste water drain, lavatory or bathtub.
A CAUTION: Your drain house will be flooded if the hose comes out of its housing during water discharge. Moreover, there is risk of scalding due to high washing temperatures! In order to prevent such situations and make sure that the machine performs water intake and discharge processes without any problem, fix the drain hose securely.
• Connect the drain hose to a minimum height of 40 cm and a maximum height of 100 cm.
• In case the drain hose is elevated after laying it on the floor level or close to the ground (less than 40 cm above the ground), water discharge becomes more difficult and the laundry may come out excessively wet. Therefore, follow the heights described in the figure.
100 cm 40 cm
• To prevent the waste water siphoning back into the machine again and to ensure easy drainage, do not immerse the end of the hose into the waste water or do not insert it into the drain for more than 15 cm. If it is too long, cut it short.
• The end of the hose should not be bent, it should not be stepped on and the hose must not be pinched between the drain and the machine.
• If the length of the hose is too short, add an original extension hose. Length of the hose may not be longer than 3.2 m. To avoid water leak failures, the connection between the extension hose and the drain hose of the product must be fitted well with an appropriate clamp as not to come off and/or leak.
4.4.6 Adjusting the feet
A CAUTION: In order to ensure that the product operates more silently and vibration-free, it must stand level and balanced on its feet. Balance the machine by adjusting the feet. Otherwise, the product may move from its place and cause crushing and vibration problems.
CAUTION: Do not use any tools to loosen the lock nuts. Otherwise, they will get damaged.
1Loosen the lock nuts on the feet by hand.
2Adjust the feet until the product stands in a stable and balanced way.
3. Tighten all lock nuts by hand again.
14 / EN |
Washing Machine / User Manual |
 Loading...