


Hood |
CFB 9463 X |
|
User Manual |
||
CFB 6463 X |
||
EN ES PT |
||
|
||
|
|

ENGLISH
1 Recommendations and Suggestions. . . . . . .4 2 General Information - Safety Warnings . . . . 7 3 Installation . . . . . . . . . . . . . . . . . . . . . . . . . . . . . . . . . 9 4 Use - Maintenance . . . . . . . . . . . . . . . . . . . . . . . .10
ESPAÑOL
1 Recomendaciones y sugerencias . . . . . . . . . 13
2 Información general - Advertencias de seguridad. . . . . . . . . . . . . . . . . . . . . . . . . . . . . . . . . .16
3 Instalación. . . . . . . . . . . . . . . . . . . . . . . . . . . . . . . . .18 4 Uso - Mantenimiento. . . . . . . . . . . . . . . . . . . . . .19
PORTUGUÊS
1 Conselhos e Sugestões. . . . . . . . . . . . . . . . . . . .22
2 İnformações gerais - Precauções de segurança . . . . . . . . . . . . . . . . . . . . . . . . . . . . . . . . .25
3 Instalação . . . . . . . . . . . . . . . . . . . . . . . . . . . . . . . . .27 4 Utilização - Manutenção . . . . . . . . . . . . . . . . . 28
01M-8846143200-0615-01
01M-8846153200-0615-01
2 / 28 EN |
Hood / User Manual |
|
|
Please read this user manual first!
Dear Customer,
Thank you for prefering a Beko product. We hope that you get the best results from your product which has been manufactured with high quality and state-of-the-art technology. Therefore, please read this entire user manual and all other accompanying documents carefully before using the product and keep it as a reference for future use. If you handover the product to someone else, give the user manual as well. Follow all warnings and information in the user manual.
Rememberthatthisusermanualisalsoapplicableforseveralothermodels.Differences between models will be identified in the manual.
Explanation of symbols
Throughout this user manual the following symbols are used:
C Important information or useful hints about usage.
A Warning for hazardous situations with regard to life and property.
B Warning for electric shock.
Packaging materials of the product are manufactured from recyclable materials in accordance with our National Environment Regulations.
Do not dispose of the packaging materials together with the domestic or other wastes. Take them to the packaging material collection points designated by the local authorities.
This product was manufactured using the latest technology in environmentally friendly conditions.

1 Recommendations and Suggestions
The Instructions for Use apply to several versions of this appliance.
A Accordingly, you may find descriptions of individual features that do not apply to your specific appliance.
1.1 Installation
The manufacturer will not be held liable for any damages resulting from incorrect or improper installation.
•• The minimum safety distance between the cooker top and the extractor hood is 650 mm (some models can be installed at a lower height, please refer to the paragraphs on working dimensions and installation).
•• Check that the mains voltage corresponds to that indicated on the rating plate fixed to the inside of the hood.
•• For Class I appliances, check that the domestic power supply guarantees adequate earthing.
•• Connect the extractor to the exhaust flue through a pipe of minimum diameter 120 mm. The route of the flue must be as short as possible.
•• Do not connect the extractor hood to exhaust ducts carrying combustion fumes (boilers, fireplaces, etc.).
•• If the extractor is used in conjunction with non-electrical appliances (e.g. gas burning appliances), a sufficient degree of aeration must be guaranteed in the room in order to prevent the backflow of exhaust gas. The kitchen must have an opening communicating directly with the open air in order to guarantee the entry of clean air. When the cooker hood is used in conjunction with appliances supplied with energy other than electric, the negative pressure in the room must not exceed 0,04 mbar to prevent fumes being drawn back into the room by the cooker hood.
•• In the event of damage to the power cable, it must be replaced by the manufacturer or by the technical service department, in order to prevent any risks.
•• If the instructions for installation for the gas hob specify a greater distance specified above, this has to be taken into account. Regulations concerning the discharge of air have to be fulfilled.
4 / 28 EN |
|
Hood / User Manual |
|
|
|

1 Recommendations and Suggestions
1.2 Use
•• The extractor hood has been designed exclusively for domestic use to eliminate kitchen smells.
•• Never use the hood for purposes other than for which it has been designed.
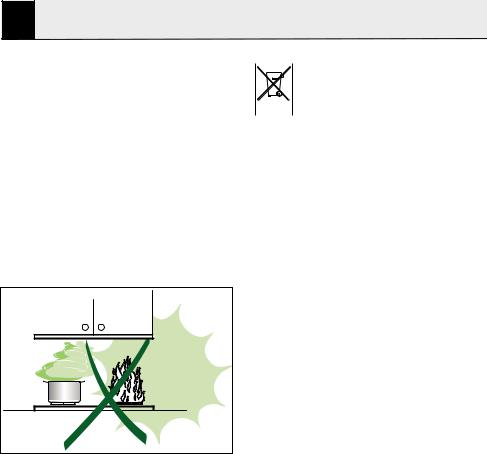
•• Never leave high naked flames under the hood when it is in operation.
•• Adjust the flame intensity to direct it onto the bottom of the pan only, making sure that it does not engulf the sides.
•• Deep fat fryers must be continuously monitored during use: overheated oil can burst into flames.
•• Do not flambè under the range hood; risk of fire
•• This appliance is not intended for use by persons (including children) with reduced physical, sensory or mental capabilities, or lack of experienceand knowledge,unless they have been given supervision or instruction concerning use of the appliance by a person responsible for their safety.
•• Children should be supervised to ensure that they do not play with the appliance.
•• “CAUTION: Accessible parts may become hot when used with cooking appliances.”.
Hood / User Manual |
5 / 28 EN |
|
|
1 Recommendations and Suggestions
1.3 Maintenance
•• Switch off or unplug the appliance from the mains supply before carrying out any maintenance work.
•• Clean and/or replace the Filters after the specified time period (Fire hazard).
•• Clean the hood using a damp cloth and a neutral liquid detergent
 The symbol onthe productoron itspack-
aging indicatesthat this productmay not
betreatedas household waste. Insteadit
 shalbe handed over totheapplicablecolectionpointfortherecyclingof electrical andelectronic equipment. By ensuring this product isdisposedof correctly, you wilhelp prevent potential negative consequences for theenvironmentandhumanhealth, whichcould otherwisebe caused by inappropriate waste handling of this product. For more detailed information about recycling of this product, please contact your local city office, yourhousehold waste disposal serviceor the shop where you purchased the product.
6 / 28 EN |
|
Hood / User Manual |
|
|
|

2 General Information - Safety Warnings
General Informatıon
This canopy hood is designed to be fixed to any rigid vertical surface, over a gas or electric hotplate and can be used either in the extraction mode (ducted to the outside) or in the recirculation mode (internal recycling). All cookers hood perform better when used in extraction mode. During winter time it may be convenient to use the hood in the recycling mode to avoid heat loss from the kitchen. Before starting the installation, consideration should be given to the difficulties that can be found during installation. The installation work must be undertaken by a qualified and competent person in conformity to the rules concerning the evacuation of contaminated air. The manufacturer disclaims all liability for any damage or injury caused as a result of not following the instructions for installation contained in the following text.
1. Safety Warnings
1.1When used in the extraction mode, the cooker hood ducting must not be connected to a flue which is used for exhausting fumes from appliances supplied with energy other than electric, such as a central heating flue or water heating flue.
1.2Before connecting to the mains supply ensure that the mains voltage corresponds with the voltage on the rating plate inside the hood.
1.3Connect the cooker hood to the mains via a double poled switch which has 3mm clearance between the contacts.
1.4For cooker hoods featuring an earth cable, make sure the electric plant of your house is correctly earthed.
1.5Appliance in class II are provided with a double insulation; therefore do not connect them through earthed plugs but through a double poled plugs.
1.6When installed, the hood must be positioned at least 65cm above the hotplate.
Hood / User Manual |
7 / 28 EN |
|
|

2 General Information - Safety Warnings
1.7Never do flambé cooking under this cooker hood.
1.8Never leave frying pans unattended during use as overheated fat and oil may catch fire.
1.9Before carrying out any kind of maintenance or cleaning, disconnect the hood from the mains supply.
1.10If the room where the cooker hood is to be used contains a fuel burning appliance such as a central heating boiler then this must be of the room sealed or balanced flue type. If other types of flue or appliance are fitted, ensure that there is an adequate supply of air into the room. When the cooker hood is used in conjunction with appliances supplied with energy other than electric, the negative pressure in the room must not exceed 0,04 mbar to prevent fumes being drawn back into the room by the cooker hood.
1.11The appliance must be positioned so that the plug is accessible.
1.12If the supply cord is damaged, it must be replaced by a special cord or assembly available from the manufacturer or its service agent.
1.13This appliance is not intended for use by persons (including children)withreducedphysical, sensory or mental capabilities, or lack of experience and knowledge, unless they have been given supervision or instruction concerning use of the appliance by a person responsible for their safety.
1.14Children should be supervised to ensure that they do not play with the appliance.
8 / 28 EN |
|
Hood / User Manual |
|
|
|

3Installation
3.1 Installatıon Instructıons
Some installation systems require the opening and removal of the metal grille panel.
3.1.1 Instructions for opening and removing the metal grille panel
To open the grille panel, press inwardly on the two slider catches at each side of the grille panel and the grille will pivot down.
To remove the metal grille, pull forward on the right hand side so that the hinge pin on the back of the grille will be released from the slot in the side of the casing.
3.1.2 Wall cabinet fixing
•• Predrilled wall cabinet: fix the hood onto the wall cabinet base panel using the four screws 4.2 x 45 mm (supplied with the fixing kit). It is not necessary to open the metal grille.
•• No predrilled wall cabinet:
-If the hood is provided with a paper fixing template, follow the instructions.
-If the hood is not provided with a paper fixing template, position the hood on the wall cabinet base panel and pilot drill the 3.5 x 16 mm screws (not supplied with the fixing kit) from the inside onto the wood.
3.1.3 Wall mounting
•• Drill two Ø 8 mm holes on the wall using the paper template, insert two rawl plugs and two 4.2 x 44,4 mm screws leaving 5 mm untightened. Open the metal grille panel, hook the hood on and fully tighten the screws.
•• If the hood is not provided with a paper fixing template, drill two Ø 8 mm holes (see draw.), insert the plugs and screws, proceeding as directed under paragraph a.
•• For wall mounting using wallbrackets (optional), follow the instructions of the fixing template.
•• Pay attention to the safety regulation of point 1.6.
3.1.4 Choice of operating mode
•• Evacuation mode
To check that the hood is set up for evacuation, open the grille panel and make sure that the conversion lever or the change-over knob on the centrifugal unit is in the DUCTING position. The charcoal filter is not required. For ducting to the outside, the hood is supplied with a rear and top outlet. A flange spigot of 100 mm diameter (120 mm in certain models) is usually fitted on the top outlet and a blanking plug on the rear outlet. If you choose to duct the hood from the rear of the casing, you should invert the position of the flange and of the blanking plug. Pay attention to the safety regulation 1.1.
•• Internal recirculation mode
To check that the hood is set up for recycling, open the grille panel and make sure that the conversion lever or the change-over knob on the centrifugal unit is in the RECYCLING position. The charcoal filter is to be fitted. To fit the charcoal filter, support the filter with one hand and turn the thumb screw through the centre of the charcoal filter. If the filter is of the interlocking type, turn the filter clockwise. The hood can remain connected to the outside.
3.1.5 Electrical connection and working test
•• The safety measures 1.2, 1.3, 1.4 and 1.5 of paragraph 1 are to be strictly observed.
•• Once the electrical connection has been completed, check that the worktop illumination, motor and speeds work properly.
Hood / User Manual |
9 / 28 EN |
|
|

4Use - Maintenance
4.1Operation
•• Controls are located on the right hand side of the front to operate worktop illumination and select the most suitable working speed for your cooking. To increase the area of extraction, the glass visor should be pulled open. The top speed should be used when frying or cooking foods with strong odours, while a lower speed can be used for normal cooking. To obtain the best performance from your hood, turn it on before you start cooking and leave it running for a few minutes after your cooking is over to clear the air.
•• Pay attention to safety regulations 1.7 and 1.8.
4.2 Maintenance and Cleaning
Regular maintenance and cleaning will ensure good performance and reliability, while extending the working-life of the hood. Special attention should be reserved to the grease filter and to the charcoal filter (recycling mode).
4.2.1 Grease filter
This retains the solid grease particles and can be supplied in different types. lt is fitted onto the reverse side of the metal grille panel. Maintenance of the grease filter varies according to the used type.
a. Whatever type of filters used, the filter is easily removed from the grille by pushing the metal wire clips to one side and removing.
b. Thin synthetic filter (1 mm thick). It should not be washed and should be replaced every two months. If the filter is provided with a saturation indicator, replace when:
b.1- The violet colour of the dots, which are visible through the metal grille, is spread over the whole surface of the filter.
b.2- The red colour of the stripes, which is not visible through the metal grille when the filter is clean, becomes visible from the outside of the metal grille.
c. Multi-layer metal filter. It should be washed once a month in hot water using mild detergent or liquid soap. It can be washed in a dishwasher. It should not be bent and should be left to drain dry.
WARNING: An excess of grease in the filter not only would affect the performance of the hood, but it is also a possible fire risk. We strongly recommend therefore to clean and replace filters in accordance with the manufacturer instructions.
4.2.2 Cleaning Metal selfsupporting Grease Filters
•• The filters are washable and must be cleaned at least every 2 months of operation, or more frequently for particularly heavy usage.
•• Remove the filters one at a time by pushing them towards the back of the group and pulling down at the same time.
•• Wash the filters, taking care not to bend them. Allow them to dry before refitting.
•• When refitting the filters, make sure that the handle is visible on the outside.
4.2.3 Charcoal filter
The charcoal filter is a chemical filter to be used only when the hood is in the recycling position. To replace the charcoal filter, open the grille and remove the thumb screw through the centre of the charcoal filter. If the filter is of the interlocking type, turn the filter anticlockwise. Replace by reversing the operation. For a good performance replace the charcoal filter on average every three months.
4.2.4 Worktop illumination
If a lamp fails to function at any time, open the metal grille panel and check that the lamp is fully screwed into the holder. When changing the lamp, an identical replacement must be fitted to ensure a safe working of the hood.
10 / 28 EN |
Hood / User Manual |
|
|
4 Use - Maintenance
4.4.5 Cleaning
The metal work should be cleaned regularly, at least once a month, using mild household cleaner and polish. Never use abrasives. For all operations from point 4.1 to point 4.4 and in particular for point 4.3, pay special attention to the safety regulation 1.9.
Hood / User Manual |
11 / 28 EN |
|
|
Lea el manual del usuario antes de utilizar el aparato
Estimado cliente:
Gracias por elegir un producto Beko. Esperamos que obtenga los mejores resultados de nuestro producto ya que ha sido fabricado con gran calidad y con tecnología de última generación. Por tanto, le aconsejamos que lea con atención este manual del usuario y todos los demás documentos adjuntos antes de utilizar el producto y que lo guarde para futuras consultas. Si va a entregar este producto a otra persona, proporciónele el manual del usuario también. Siga todas las advertencias e instrucciones incluidas en este manual.
Recuerde que este manual del usuario también es válido para otros modelos. Las diferencias entre los modelos se señalan dentro del manual.
Explicación de los símbolos
En este manual se utilizan los siguientes símbolos:
C Información importante o consejos útiles sobre el uso.
A Advertencia para situaciones de riesgo con respecto a la vida y la propiedad.
B Advertencia sobre posibles descargas eléctricas.
El embalaje del producto está fabricado a partir de material reciclable de acuerdo con las normativas nacionales sobre medio ambiente.
No se deshaga del material de embalaje ni de los desechos domésticos o de otro tipo. Llévelos a los puntos de recogida de material de embalaje designados por las autoridades locales.
Este producto se ha fabricado utilizando la última tecnología y en condiciones de fabricación respetuosas con el medio ambiente.
 Loading...