Page 1

Final Cut Pro X
User Guide
Page 2

K Apple Inc.
Copyright © 2013 Apple Inc. All rights reserved.
Your rights to the software are governed by the accompanying
software license agreement. The owner or authorized user
of a valid copy of Final Cut Pro software may reproduce this
publication for the purpose of learning to use such software.
No part of this publication may be reproduced or transmitted
for commercial purposes, such as selling copies of this
publication or for providing paid for support services.
The Apple logo is a trademark of Apple Inc., registered in
the U.S. and other countries. Use of the “keyboard” Apple
logo (Shift-Option-K) for commercial purposes without the
prior written consent of Apple may constitute trademark
infringement and unfair competition in violation of federal and
state laws.
Every eort has been made to ensure that the information in
this manual is accurate. Apple is not responsible for printing or
clerical errors.
Note: Because Apple frequently releases new versions and
updates to its system software, applications, and Internet sites,
images shown in this manual may be slightly dierent from
what you see on your screen.
Apple
1 Innite Loop
Cupertino, CA 95014
408-996-1010
www.apple.com
Apple, the Apple logo, Aperture, Apple TV, Final Cut,
Final Cut Pro, Finder, FireWire, GarageBand, iLife, iMovie, iPad,
iPhone, iPhoto, iPod, iSight, iTunes, iWork, Keynote, Logic, Mac,
Mac OS, OS X, QuickTime, and Xsan are trademarks of Apple
Inc., registered in the U.S. and other countries.
Multi-Touch is a trademark of Apple Inc.
Adobe and Photoshop are trademarks or registered
trademarks of Adobe Systems Incorporated in the U.S. and/or
other countries.
Intel, Intel Core, and Xeon are trademarks of Intel Corp. in the
U.S. and other countries.
IOS is a trademark or registered trademark of Cisco in the U.S.
and other countries and is used under license.
Thunderbolt and the Thunderbolt logo are trademarks of Intel
Corporation in the United States and other countries.
The YouTube logo is a trademark of Google Inc.
Production stills from the lm “Koee House Mayhem”
provided courtesy of Jean-Paul Bonjour. “Koee House
Mayhem” © 2004 Jean-Paul Bonjour. All rights reserved.
http://www.jeanpaulbonjour.com
Audi R8 production stills: Closed course with drivers wearing
safety equipment. Do not attempt on public roads; always
obey local trac laws. Audi trademarks are used with
permission of Audi of America, Inc.
Other company and product names mentioned herein
are trademarks of their respective companies. Mention of
third-party products is for informational purposes only and
constitutes neither an endorsement nor a recommendation.
Apple assumes no responsibility with regard to the
performance or use of these products.
019-2532
Page 3

Contents
10 Chapter 1: What’s new in Final Cut Pro?
10 What’s new in Final Cut Pro 10.0.6?
11 What’s new in Final Cut Pro 10.0.3?
12 What’s new in Final Cut Pro 10.0.1?
13 Chapter 2: Final Cut Pro basics
13 What is Final Cut Pro?
14 Final Cut Pro workow overview
15 Final Cut Pro interface overview
17 Media les and clips
18 Events and projects
19 Chapter 3: Import media
19 Importing overview
20 If it’s your rst import
20 Import from connected cameras
20 Import from le-based cameras
24 Import spanned clips
26 Import from iPhone, iPad, or iPod touch
28 Import from a digital still camera
29 Import from tape-based cameras
30 If your camera or device isn’t recognized
31 Import from other applications
31 Import from Motion
32 Import from iMovie
32 Import from iPhoto and Aperture
33 Import from iTunes
34 Import from devices
34 Import from a hard disk
36 Access media on an archive or disk image
37 Organize les while importing
39 Import while recording
40 About memory cards and cables
41 Supported media formats
43 Import and adjust REDCODE RAW video les
45 Chapter 4: Analyze media
45 Analyzing media overview
45 Video and still-image analysis options
46 Audio analysis options
47 Analyze your media
48 View analysis keywords on clips
3
Page 4

51 Chapter 5: Organize your media
51 Events and clips overview
52 Organize events
52 Create a new event
52 Rename an event
53 Merge or split events
53 Copy or move clips between events
54 Copy or move events
55 Sort events
56 Delete clips or events
57 Organize clips
57 View and sort clips
61 Rename clips
62 Rate clips as Favorite or Rejected
64 Add keywords to clips
67 Add or edit clip notes
68 Organize clips by roles
68 Find clips in the Event Browser
71 Save searches as Smart Collections
72 Organize Keyword and Smart Collections
73 Chapter 6: Play back and skim media
73 Playback and skimming overview
74 Play back media
76 Skim media
78 Play back and skim media in the Event Viewer
78 View playback on a second display
79 View playback on an external video monitor
80 About background rendering
81 Chapter 7: Create and manage projects
81 Create a new project
82 Preview and open a project
83 Modify a project’s name and properties
86 Organize projects in the Project Library
89 Save projects
90 Chapter 8: Edit your project
90 Editing overview
90 Select clips and ranges
90 About selections and lmstrips
91 Select one or more clips
93 Select a range
96 Manage multiple range selections in event clips
99 Add and remove clips
99 Adding clips overview
99 Drag clips to the Timeline
100 Append clips to your project
100 Insert clips in your project
103 Connect clips to add cutaway shots, titles, and synchronized sound eects
108 Overwrite parts of your project
Contents 4
Page 5

109 Replace a clip in your project with another clip
111 Add and edit still images
113 Create freeze frames
114 Add clips using video-only or audio-only mode
115 Remove clips from your project
116 Solo, disable, and enable clips
117 Find a Timeline clip’s source clip
117 Arrange clips in the Timeline
123 Cut and trim clips
123 Trimming overview
123 Cut clips with the Blade tool
126 Extend or shorten a clip
132 Make roll edits with the Trim tool
134 Make slip edits with the Trim tool
136 Make slide edits with the Trim tool
138 Show detailed trimming feedback
139 View and navigate
139 Zoom and scroll in the Timeline
141 Adjust Timeline settings
143 Navigate within your project
144 Navigate using timecode
145 Use the Timeline Index to view, navigate, and search your project
149 Work with markers
149 Markers overview
149 Add and remove markers
150 Edit, move, and navigate to markers
152 Manage chapter markers and their thumbnail images
154 Correct excessive shake and rolling shutter issues
157 Chapter 9: Edit audio
157 Audio overview
158 Audio editing basics
158 About audio waveforms
159 About audio channels and audio components
159 Ways to view audio clips
163 View audio waveforms at the audio sample level
164 View and correct audio levels
165 Solo and mute audio clips
166 Add audio
166 Add music and sound
166 Record audio
168 Edit audio clips or audio components
168 Audio editing overview
169 Congure audio channels
172 Adjust volume
174 Fade audio in or out
177 Pan audio
180 Multichannel audio editing examples
186 Use roles to organize clips and export audio les
187 Add and adjust audio eects
187 Add audio eects
Contents 5
Page 6

189 Adjust audio eects
192 Adjust audio eects using keyframes
199 Audio tools and techniques
199 Enhance audio
202 Sync audio and video automatically
203 Match audio equalization settings
203 Preserve pitch when retiming clips
204 Chapter 10: Add transitions, titles, eects, and generators
204 Transitions, titles, eects, and generators overview
205 Add and adjust transitions
205 Transitions overview
205 How transitions are created
206 Set transition defaults
207 Add transitions to your project
209 Delete transitions from your project
209 Adjust transitions in the Timeline
211 Adjust transitions in the Transition inspector and Viewer
212 Adjust transitions with multiple images
213 Create specialized versions of transitions in Motion
213 Add and adjust titles
213 Titles overview
213 Add titles to your project
215 Adjust titles
218 Remove titles from your project
218 Find and replace text in your project
219 Adjust built-in eects
219 Built-in eects overview
220 Resize, move, and rotate clips
221 Trim clips
222 Crop clips
224 Pan and zoom clips with the Ken Burns eect
225 Skew a clip’s perspective
226 Work with built-in eects
231 Add and adjust clip eects
231 Clip eects overview
231 Add eects to your project
232 Adjust eects in Final Cut Pro
234 Change clip eect order
235 Copy eects and attributes between clips
236 Turn o or remove an eect from a clip
237 Create specialized versions of the video eects in Motion
237 Add generators
237 Generators overview
238 Use a placeholder
239 Use a timecode counter
239 Use a shape
240 Use a background
241 Create specialized versions of the generators in Motion
241 About themes
242 Use onscreen controls
Contents 6
Page 7

242 Onscreen controls overview
242 Show or hide onscreen controls
243 Onscreen control examples
247 Use the Video Animation Editor
247 Video animation overview
247 Adjust video eects using keyframes
253 Adjust eect curves using fade handles or keyframe animation
257 Chapter 11: Advanced editing
257 Group clips with compound clips
257 Compound clips overview
259 Create and break apart compound clips
263 Manage compound clips
265 Add storylines
268 Fine-tune edits with the Precision Editor
271 Create split edits
275 Make three-point edits
275 Three-point editing overview
277 Three-point edit examples
281 Try out clips using auditions
281 Auditions overview
282 Create auditions to try out clips
283 Add and remove clips in auditions
284 Use auditions to try out clips in your project
287 Retime clips to create speed eects
287 Retiming clips overview
288 Change clip speed
292 Reverse or rewind clips
294 Create instant replays
294 Create a hold segment
295 Reset retimed clips to play at normal speeds
296 Conform frame sizes and frame rates
299 Use roles to manage clips
299 Roles overview
300 View and reassign roles
303 Create custom roles and subroles
305 View clips by role in the Timeline
307 Use roles to export media stems
307 Use XML to transfer projects and events
308 Edit with multicam clips
308 Multicam editing overview
309 Multicam editing workow
310 Import media for a multicam edit
311 Assign camera names and multicam angles
312 Create multicam clips in the Event Browser
316 Cut and switch angles in the Angle Viewer
324 Sync and adjust angles and clips in the Angle Editor
330 Edit multicam clips in the Timeline and the Inspector
332 Multicam editing tips and tricks
Contents 7
Page 8

334 Chapter 12: Keying and compositing
334 Keying
334 Keying overview
334 Use chroma keys
343 Use luma keys
348 Finalize the key
351 Compositing
351 Compositing overview
352 Use alpha channels
354 Use Compositing settings
355 Chapter 13: Color correction
355 Color correction overview
356 Analyze and balance color automatically
356 Color balance overview
356 Analyze a clip for color balance
357 Balance a clip’s colors
358 Match color between clips automatically
359 Adjust color manually
359 Manual color correction overview
359 Color correct the whole image
361 Target a specic color using a color mask
363 Target specic areas using shape masks
366 Add shape masks to a color mask
367 Apply multiple color corrections
368 Add a transition between color corrections
368 Save and apply color correction presets
369 Turn iMovie adjustments on or o
369 Turn ARRI Log C processing on or o
370 Measure video levels
370 Video scopes overview
370 Use the video scopes
371 Waveform Monitor display options
374 Vectorscope display options
375 Histogram display options
377 Chapter 14: Share your project
377 Sharing projects overview
378 Share projects, clips, and ranges
383 Modify share attributes
386 Export your project using Compressor
387 Status of shared projects
387 Shared project status overview
388 Visit, announce, and view the location of shared projects
389 Remove shared projects
Contents 8
Page 9

390 Chapter 15: Manage media les
390 Media management overview
390 Where your media and project les are located
392 Manage your media les
392 View a clip’s information
393 Relink clips to media les
397 Transcode media les
400 View background tasks
401 Delete render les to free up disk space
402 Manage your events and project les
402 Before you move or copy events and projects
402 Consolidate a project’s media les
403 Back up projects, your Project Library, and events
406 Edit your project on a dierent computer
410 Use SAN locations for events and projects
411 Create and manage camera archives
414 Solutions to common media management issues
414 Alert icons
416 Common media management issues
417 Chapter 16: Preferences and metadata
417 Preferences and metadata overview
417 Final Cut Pro preferences
417 Change preference settings
418 Editing preferences
419 Playback preferences
420 Import preferences
422 Destinations preferences
427 Work with destinations
432 Work with metadata
432 Display and change clip metadata
433 Modify metadata views
435 Batch rename clips
438 Chapter 17: Keyboard shortcuts and gestures
438 Keyboard shortcuts and Multi-Touch gestures overview
438 Keyboard shortcuts
452 Multi-Touch gestures
452 Customize keyboard shortcuts
452 View keyboard shortcuts in the Command Editor
455 Modify keyboard shortcuts in the Command Editor
456 Export and import command sets in the Command Editor
458 Glossary
Contents 9
Page 10

What’s new in Final Cut Pro?
1
What’s new in Final Cut Pro 10.0.6?
Final Cut Pro 10.0.6 includes numerous new features and enhancements, detailed below.
Advanced multichannel audio editing
Final Cut Pro automatically groups audio channels into audio components according to how the
channels are congured for the clip. You can now expand the audio portion of clips to view and
edit audio components down to the individual channel level. You can edit audio components in
a variety of ways, including any of the following:
•
Adjust volume or pan.
•
Disable or delete ranges within an audio component to quickly edit out unwanted sounds.
•
Apply and adjust audio eects.
•
Add or remove audio components in a multicam clip.
For more information, see Audio editing overview on page 168.
Streamlined sharing and export
Sharing your nished work is easier and more exible in Final Cut Pro 10.0.6. Destinations—sets
of precongured export settings—allow you to quickly publish a project or clip to a sharing
website, export it for viewing on iPad or iPhone, or burn it to a disc. Final Cut Pro comes with a
variety of destinations, and you can also modify destinations and create new destinations.
The simplied and streamlined sharing workow includes these enhancements:
•
Simplied and consolidated menus that you can easily populate with customized destinations
•
Reusable destination bundles that allow you to share to multiple output formats and locations
at once
•
Automatic sharing of project and clip metadata, with the ability to customize the metadata
that is shared
•
Support for multiple accounts at video-sharing websites such as YouTube
•
Faster sharing and export using the GPU and background processing
•
Sharing of a selected range in a project in the Timeline or in a clip in the Event Browser
For more information, see Sharing projects overview on page 377.
Unied import
Simplied and easier to use, the new unied Media Import window provides one place to go for
all your importing needs. Final Cut Pro 10.0.6 oers dedicated areas for connected cameras and
devices, both le-based and tape-based, as well as a new Favorites section, where you can add
frequently used folders for le import from your hard disk or an external drive. Other new import
features include list view to see multiple columns of metadata, multiple range selections within
individual clips from le-based cameras, and complete archive-management tools.
For more information, see Importing overview on page 19.
10
Page 11

Dual viewers
The Event Viewer is a separate video display that appears next to the main Viewer so you can
compare shots to match action and color. With the Event Viewer and the Viewer open, you can
display two clips at the same time: one from the Event Browser and one from the Timeline, each
with its own video scope display.
For more information, see Play back and skim media in the Event Viewer on page 78.
Native REDCODE RAW (R3D) support
Final Cut Pro 10.0.6 provides native support for REDCODE RAW (R3D) les. You can now import
RED les directly, make nondestructive RAW settings adjustments, and save those adjustments
as metadata, all within Final Cut Pro. This allows you to take advantage of the full latitude and
dynamic range contained in the REDCODE RAW source les.
For more information, see Import and adjust REDCODE RAW video les on page 43.
Improved range selections
Start and end points in clips in the Event Browser now stay in place when you click elsewhere.
You can also create multiple range selections in one or more clips.
For more information, see Select a range on page 93 and Manage multiple range selections in
event clips on page 96.
Other notable features
•
Chapter markers and chapter marker thumbnails allow you to prepare chapters and their
representative poster frame images directly within Final Cut Pro for output to DVD, Blu-ray
disc, iTunes, QuickTime Player, and Apple devices.
•
The new Paste Attributes window is a powerful way to transfer specic eects and other
settings between clips.
•
You can now add freeze frames quickly and easily with a single keyboard shortcut.
•
Titling is signicantly improved, including support for the new title markers feature in Motion.
•
Flexible connection points improve manual control over connected clips as you slip, slide, or
move clips in the primary storyline.
•
New compound clip architecture makes compound clips easier to reuse in multiple projects
and provides improved performance.
•
You can now import and export MXF les using third-party plug-ins. For a list of supported
media les, see Supported media formats on page 41.
•
Final Cut Pro 10.0.6 provides improved support for anamorphic media.
What’s new in Final Cut Pro 10.0.3?
Final Cut Pro 10.0.3 includes major new features and enhancements, detailed below.
Multicam editing
You can now use multicam clips to edit footage from multicamera shoots or other synchronized
footage in real time. Working with multicam clips in Final Cut Pro is a exible and uid process.
While the active angle plays in the Viewer, you can also view all angles playing simultaneously in
the Angle Viewer and easily cut and switch between them. You can create multicam clips from
diverse media sources and modify existing multicam clips during the editing process.
For more information, see Multicam editing overview on page 308.
Chapter 1 What’s new in Final Cut Pro? 11
Page 12

A/V output
You can now connect your computer to an external video monitor for audio and video (A/V)
output. In addition to showing you how video and audio look and sound on an NTSC/PAL or HD
broadcast monitor, this feature also allows you to test output with more sophisticated devices
such as vectorscopes and waveform monitors.
A/V output is available only with OS X Lion v10.7.2 or later and requires compatible third-
party video interface hardware and software. FireWire DV devices are not supported. For more
information, contact the device manufacturer or go to the Final Cut Pro X Resources webpage at
http://www.apple.com/nalcutpro/resources.
For more information, see View playback on an external video monitor on page 79.
Manual relinking of clips to media les
Now you can manually relink event clips and project clips to media les. Manual relinking gives
you more control over your post-production workow.
For more information, see Relink clips to media les on page 393.
Other notable features
•
Layered graphics les, such as Adobe Photoshop (PSD) les, can now be edited so that each
layer appears as a connected clip in the Timeline.
•
Advanced Keyer controls are now available.
•
Keyframing controls are improved in the Video and Audio Animation Editors.
What’s new in Final Cut Pro 10.0.1?
Final Cut Pro 10.0.1 includes a number of new features, enhancements, and changes. The most
signicant features are introduced below.
Roles
You can use the new roles metadata labels to organize clips in your events and projects, control
the appearance of the Timeline, and export separate video or audio les (also known as media
stems) for broadcast delivery, audio mixing, or post-production. For example, you can export
roles as media stems in a combined, multitrack QuickTime le, or as separate audio or video
les. During the export process you can assign mono, stereo, or surround output for your
audio channels.
For more information, see Roles overview on page 299 and Destinations preferences on
page 422.
Storage area network (SAN) locations
You can now add network volumes as storage locations for events and projects. When you
remove SAN locations in Final Cut Pro, other users on the network can work with the events
and projects stored on those locations.
For more information, see Use SAN locations for events and projects on page 410.
XML export and import
Final Cut Pro now supports XML import and export so that you can transfer your project and
event information to and from systems and third-party applications that don’t recognize
Final Cut Pro projects and events.
For more information, see Use XML to transfer projects and events on page 307.
Chapter 1 What’s new in Final Cut Pro? 12
Page 13
Final Cut Pro basics
What is Final Cut Pro?
2
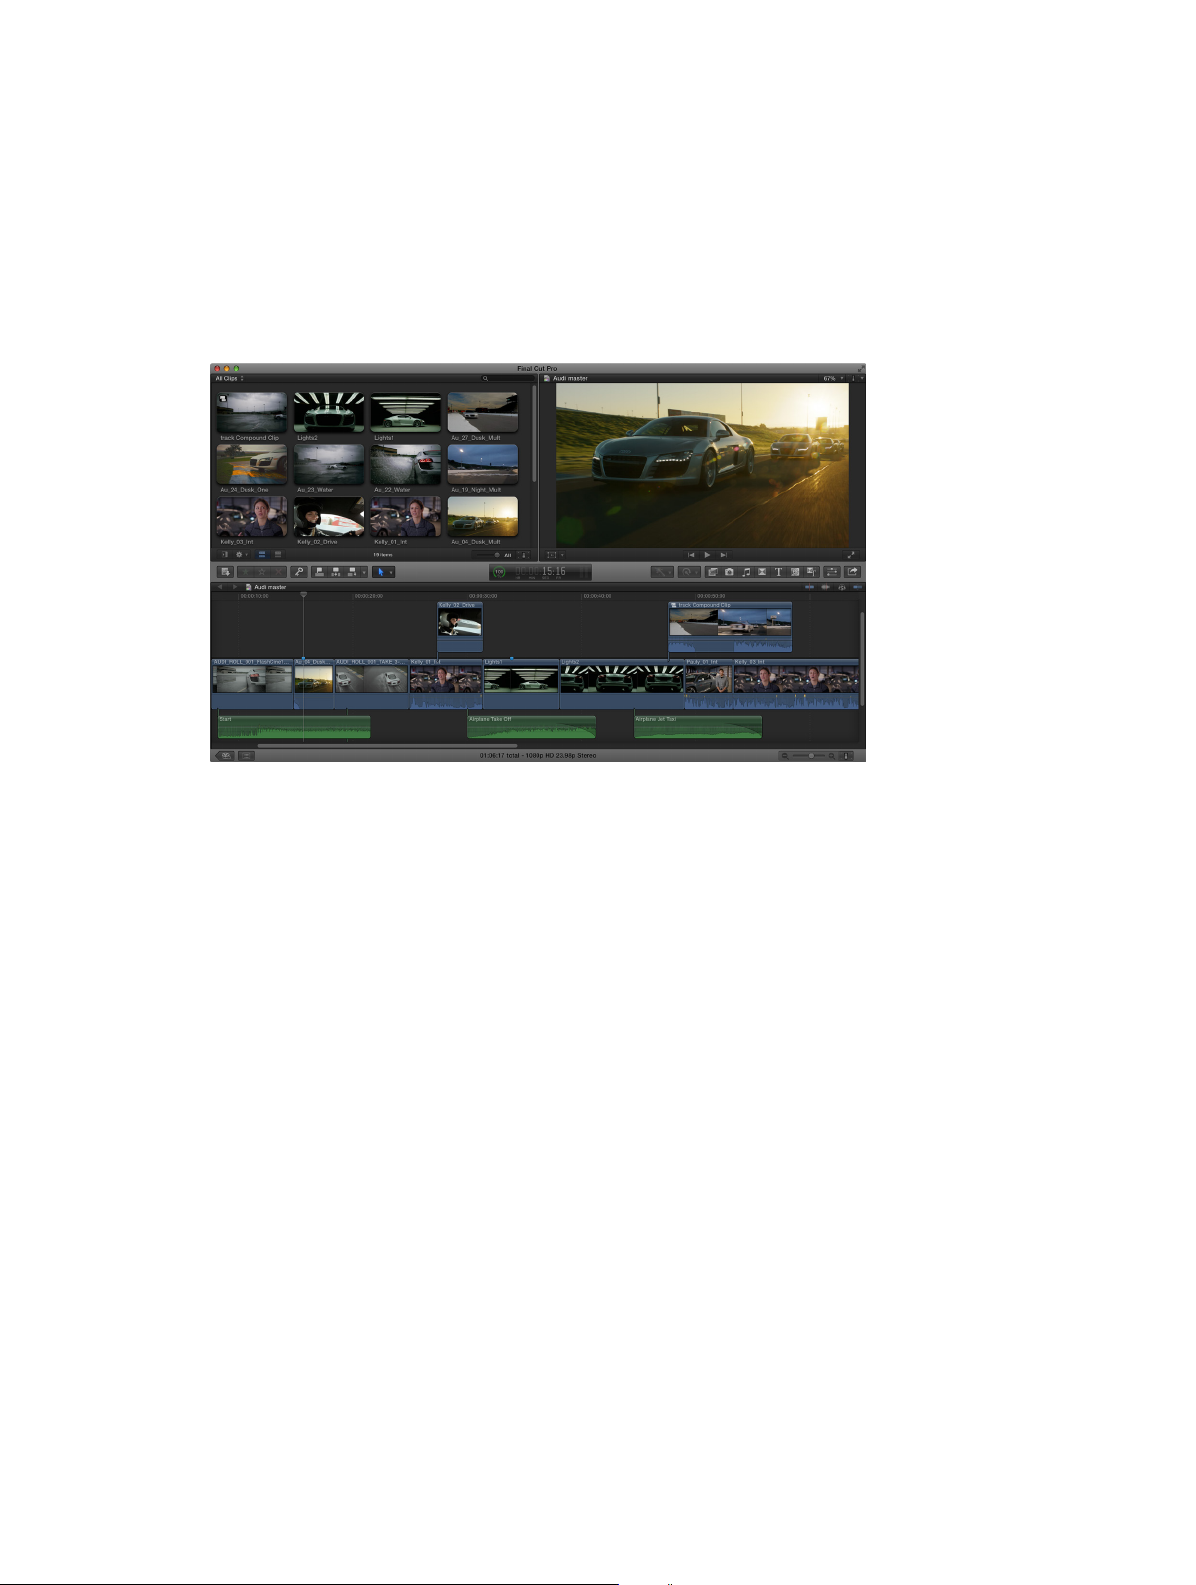
Final Cut Pro X is a revolutionary application for creating, editing, and producing the highest-
quality video. Final Cut Pro combines high-performance digital editing and native support
for virtually any video format with easy-to-use and time-saving features that let you focus
on storytelling.
In Final Cut Pro, you can:
•
Edit everything from uncompressed standard-denition video to HDV, DVCPRO HD, and
uncompressed high-denition video—as well as le-based formats such as AVC-Intra, AVCHD,
and XDCAM HD.
•
Play back and skim resolution-independent media up to 1920 x1080, 2K, 4K, and even 5K
resolution. You can also play your video full screen or on a second display.
•
Assemble clips with ease using the Magnetic Timeline, which uidly adjusts clips around the
clip you’re dragging to eliminate gaps, collisions, and sync problems.
•
Edit quickly with the complete set of professional editing and trimming tools. Fine-tune edits
with the inline Precision Editor.
•
Have Final Cut Pro analyze your video and nondestructively x common problems such as
camera shake, excess hum, or loudness. You can also have Final Cut Pro detect the presence of
people or the shot type, and automatically apply keywords such as One Person or Wide Shot.
•
Organize your media using Keyword Collections, which automatically group clips based on
keywords, and Smart Collections, which automatically group clips based on criteria you specify.
•
Try out clips in your project using auditions—sets of alternate takes, eects, or text
treatments—and then choose the best clip for the edit.
•
Create compound clips to group any combination of clips, and nest clips within other clips.
13
Page 14

•
Use connected clips and storylines to add cutaway shots, superimposed titles, and sound
eects to your project. Connected clips and storylines always stay in sync.
•
Add special eects to video, audio, and photos, and adjust them using keyframes and onscreen
controls. You can also change clip speed to create fast-motion or slow-motion eects.
•
Automatically balance and match color, or use the color correction tools to precisely control
the look of any clip in your project.
•
Publish your project directly to websites such as YouTube and Facebook, or send your project
to iTunes for syncing with Apple devices such as iPhone, iPad, and Apple TV.
FinalCutProworkowoverview
To give you an idea of the possibilities, the overall process for putting together a movie with
Final Cut Pro is described below. You don’t have to do every step, and you might do others that
aren’t listed. The workow isn’t necessarily linear. You could, for example, go all the way through
editing and adding eects, and then import more new media for your project.
Import your media into Final Cut Pro
To use Final Cut Pro, you need to transfer your media (video, audio, and still images) from your
recording device to your computer or an external disk. You can import media from many kinds
of cameras and other devices, or from other applications such as iMovie.
Organize your media
Final Cut Pro automatically organizes your imported media into events. An event is like a folder
that contains all the media recorded on a certain date. In Final Cut Pro, your media appears as
clips, which link to the media les stored on a disk. You can reorganize your clips by creating or
renaming events and moving clips between events. For example, you could create an event for
all the media shot for a specic client.
As you review your footage, you can easily rate clips as Favorite or Rejected. These ratings make
it easier to focus on your best footage. Final Cut Pro also oers other useful organizing tools, such
as Keyword Collections and Smart Collections.
Create a project and add clips to it
Your project is the movie you create using clips from your events and from the Final Cut Pro
media browsers. Start creating your movie by adding clips to the Timeline. You make all
your edits in the project; your original media les remain untouched (this is known as
nondestructive editing).
Arrange and edit your clips
Now your movie can really begin to take shape. To assemble a rough cut, rearrange and trim
clips in the Timeline. You can also try out dierent clips using auditions. Use connected clips
and storylines to add cutaway shots, titles, background music, and sound eects to your project.
Create compound clips to group any combination of clips and nest clips within other clips. You
can simplify a complicated project by creating a separate compound clip for each major section.
Add eects and transitions
Add special eects from the ample collection of video and audio eects in the Final Cut Pro
media browsers. Give your movie titles and credits, and apply video or audio transitions. Adjust
clip speed settings to create fast-motion or slow-motion eects.
To further polish your project, you can ne-tune cuts and transitions with the Precision Editor,
keyframe video and audio eects, correct color, and composite motion graphics.
Chapter 2 Final Cut Pro basics 14
Page 15
Share your movie
Viewer: Play back
Event Browser: Access all
Event Browser: View and sort
Event Library: Select an event
When your project is nished, you can publish your movie right from Final Cut Pro to the web, or
send it to iTunes, iPhone, iPad, iPod, or Apple TV. You can also burn a disc to give to others.
FinalCutProinterfaceoverview
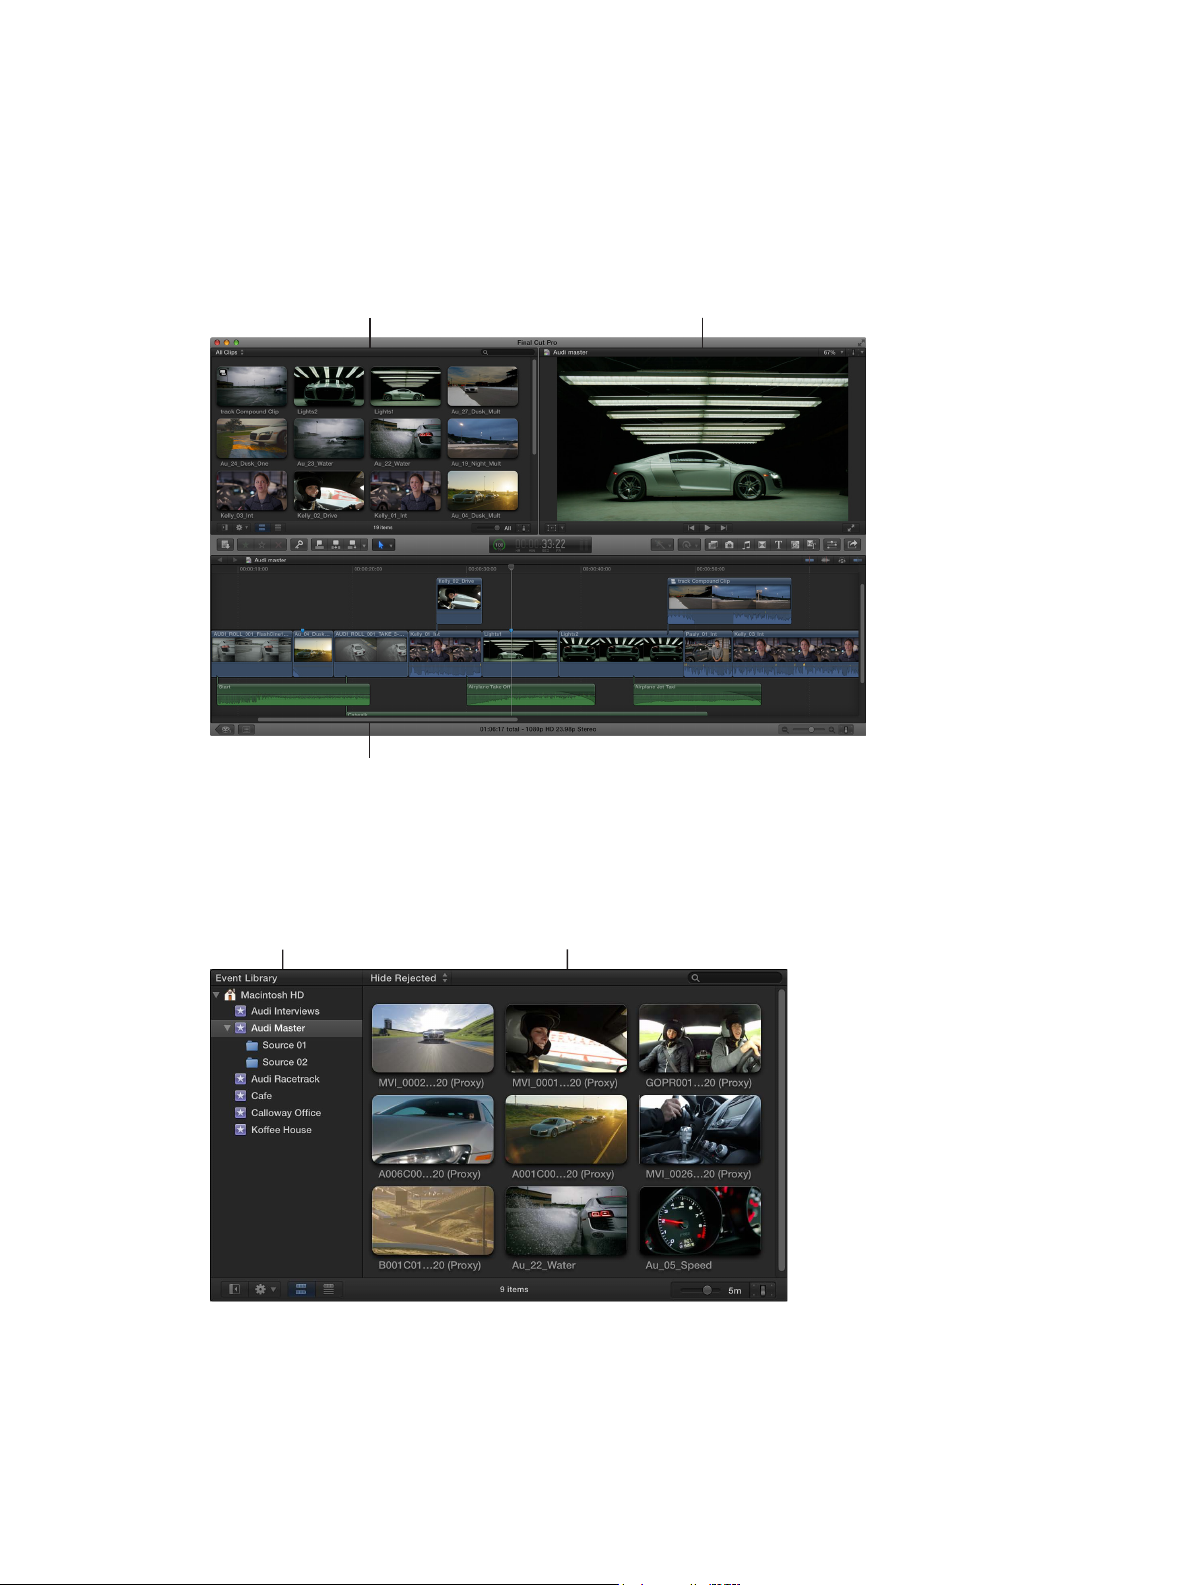
The Final Cut Pro window has three main areas:
the source media you import.
Magnetic Timeline: Edit your
movie in this area.
clips and projects.
Organize media in the Event Library and Event Browser
All your imported media is available in the Event Library. (An event is like a folder that contains clips.)
When you select an event in the Event Library, its clips appear in the Event Browser on the right.
to view its media on the right.
the clips in the selected event.
You can reorganize your media however you like at any time, and you can use the Event Library
and the Event Browser to manage, rate, sort, and add keywords to your imported media. For
more information, see Events and clips overview on page 51.
Chapter 2 Final Cut Pro basics 15
Page 16
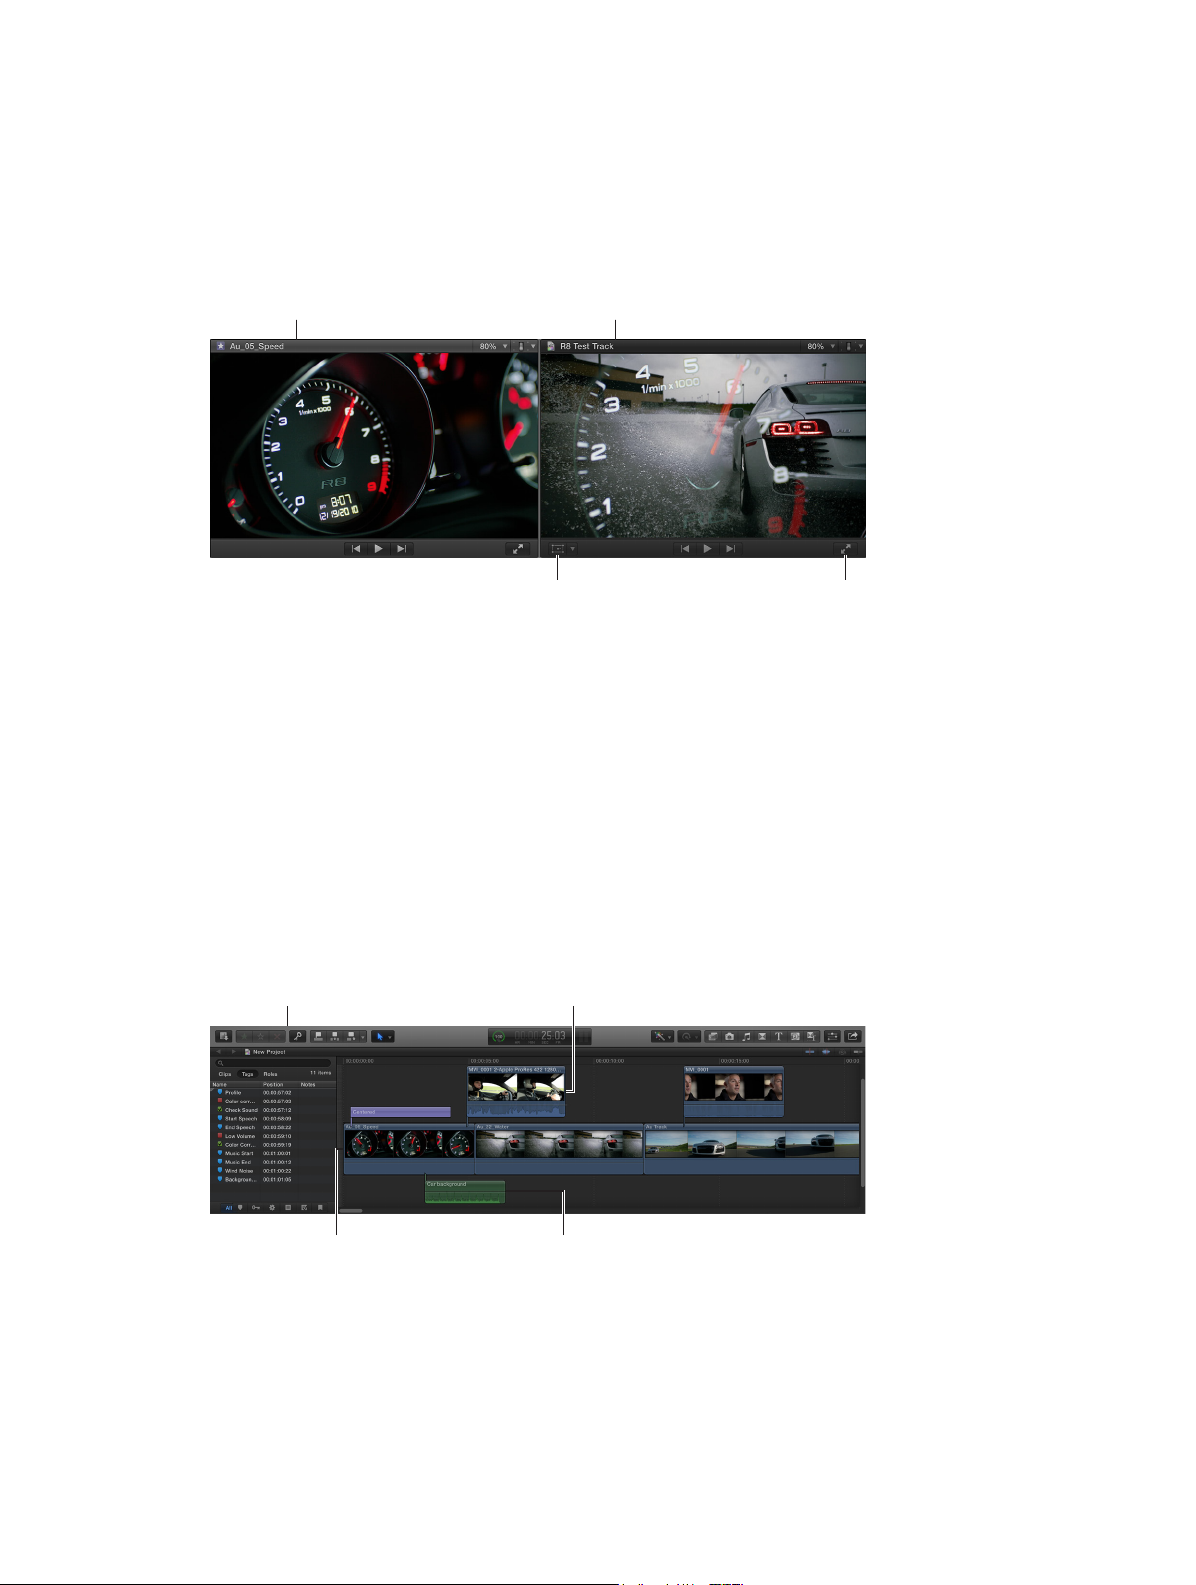
Play back clips and projects in the Viewer
Resolution-independent playback:
Dual viewers: Display event clips
Toolbar: Perform
Connected clips: Add titles and
The Viewer is where you play back your video, including clips and projects with up to 1920 x
1080, 2K, 4K, and even 5K resolution. You can play back events, projects, or individual clips in fullscreen view or on a second display. With the Event Viewer, a separate video display that can be
shown next to the main Viewer, you can display two clips at the same time: one from the Event
Browser and one from the Timeline. For information about ways to play media, see Play back
media on page 74.
and project clips side by side.
Onscreen controls:
Adjust effects such as
Transform, Crop, and Distort.
Play back video files up to 5K.
Full-screen playback:
Play your video full screen,
or on a second display.
You can also use onscreen controls, superimposed over the video in the Viewer, to adjust settings
for a wide array of eects and transitions.
Edit your project in the Magnetic Timeline
The bottom portion of the Final Cut Pro window contains the Timeline, where you create your
movie by adding and arranging clips and making all your edits. The Timeline in Final Cut Pro
“magnetically” adjusts clips to t around clips that you drag into place. If you drag clips out of
place, the surrounding clips close up to ll the space.
A Final Cut Pro project holds all of the information for your nal movie, including your editing
decisions and links to all the source clips and events. For more information about editing your
project, see Adding clips overview on page 99 and Arrange clips in the Timeline on page 117.
common tasks by
clicking a button.
Primary storyline: Add and
arrange clips to construct
your movie.
cutaway shots. In the Magnetic
Timeline, everything stays in sync.
Audio clips: Add music
and sound effects as
connected clips.
Chapter 2 Final Cut Pro basics 16
Page 17
Medialesandclips
After you import media into Final Cut Pro, clips representing the source media les appear in the
Event Browser. A large event may hold many clips.
Media les are the raw materials you use to create your project. A media le is a video, audio,
still-image, or graphics le on your hard disk that contains footage transferred from a camcorder
or recording device or originally created on your computer. Media les can contain multiple
video and audio components. Because media les—especially video les—tend to be quite
large, projects that use a lot of footage require one or more high-capacity hard disks.
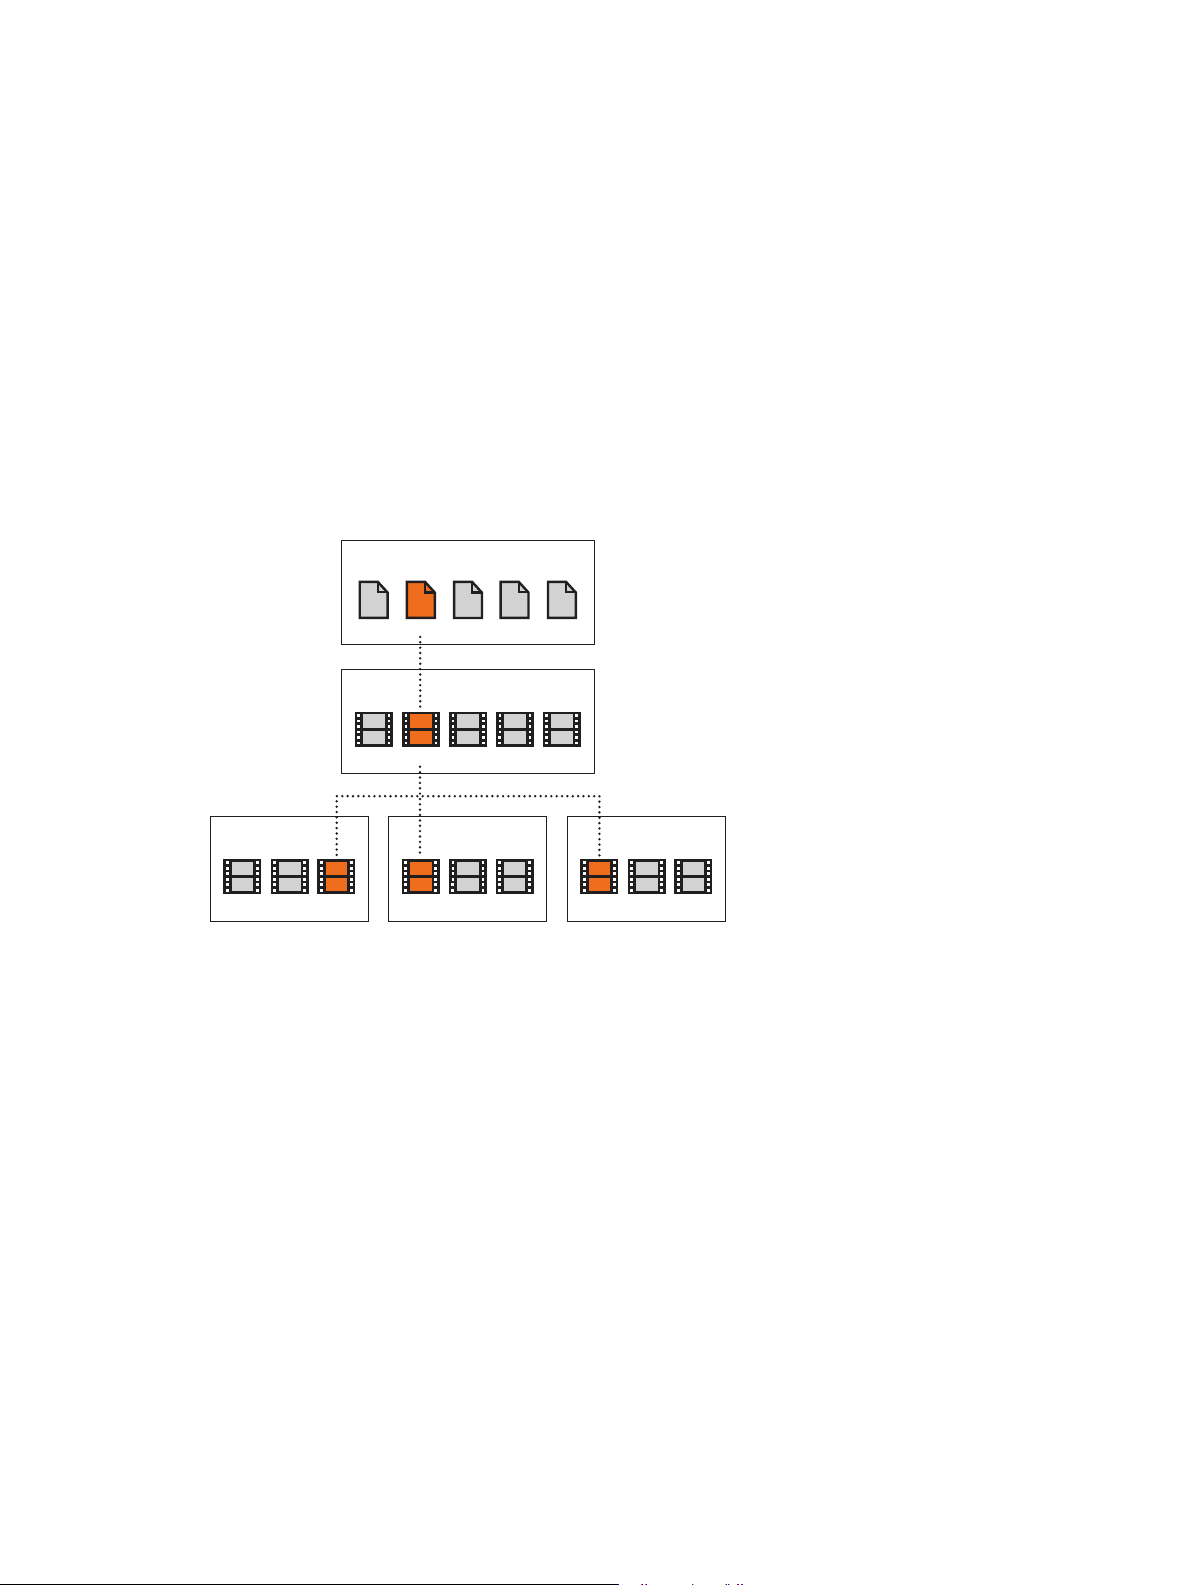
Clips represent your media, but they are not the media les themselves. The clips in a project
simply point to (link to) the source media les on your hard disk. When you modify a clip, you
are not modifying the media le, just the clip’s information in the project. This is known as
nondestructive editing, because all of the changes and eects you apply to clips in Final Cut Pro
never aect the media itself. Trimmed or deleted pieces of clips are removed from your project
only, not from the source clips in your Event Library or from the source media les on your
hard disk.
Media files on your hard disk
Toy1.mov
Event clips
Project 1
Toy1
Toy1
Toy1
Project 2
Project 3
Toy1
Chapter 2 Final Cut Pro basics 17
Page 18
Eventsandprojects
In Final Cut Pro X, you use events to collect and organize media. Events are like folders that
contain unedited media imported from a camera or some other source.
You use projects to edit and construct movies and share them with your audience. A project is
a record of the work you do in the Timeline and the editing decisions you make. When you add
a clip from an event to a particular project, you create a link between the source event clip and
the corresponding project clip (and, by extension, between the event and the project). However,
neither the event nor the source clip is contained within the project. You can use that event clip
in other projects, and your project can use clips from other events.
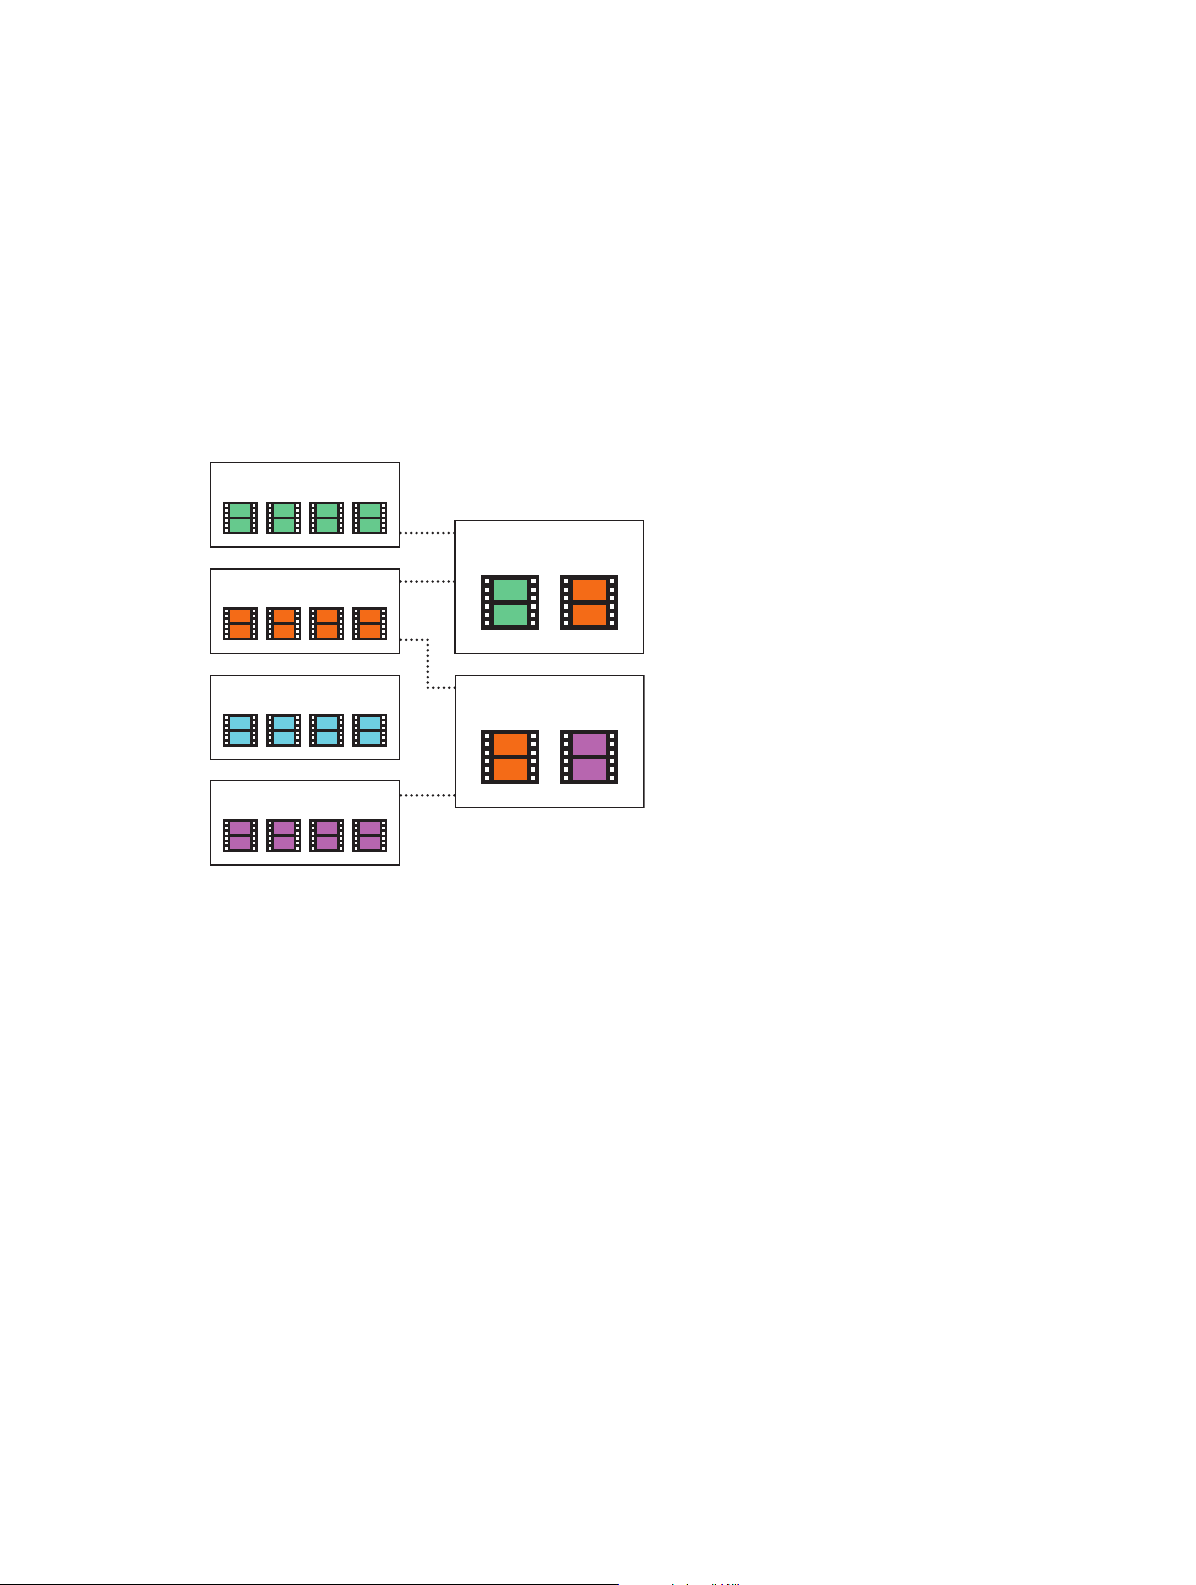
The illustration below shows the relationship between events and projects: Final Cut Pro X keeps
track of the links between project clips and their source event clips, but projects and events
remain independent.
Event
Project
Event
Event
Event
Project
Chapter 2 Final Cut Pro basics 18
Page 19

Import media
3
Importingoverview
Importing media into Final Cut Pro is the rst step toward making your movie. With Final Cut Pro,
you can:
•
Import from a le-based (tapeless) camera or device
•
Import from iPhone, iPad, or iPod touch
•
Import from a tape-based camcorder or device
•
Import from iMovie
•
Import from iPhoto and Aperture
•
Import from iTunes
•
Import from a hard disk
•
Import from a camera archive
During import, you assign your media to an event. You can also transcode your media and
analyze your media for a variety of issues, such as color balance, the presence of people and shot
type, and audio problems.
When you import clips (video, audio, or still images), Final Cut Pro assigns one of ve default roles
to the video and audio components of each clip: Video, Titles, Dialogue, Music, and Eects. For
more information, see View and reassign roles on page 300.
If you want to quickly back up your media (instead of taking the time to import it), you can
create an archive.
19
Page 20
Ifit’syourrstimport
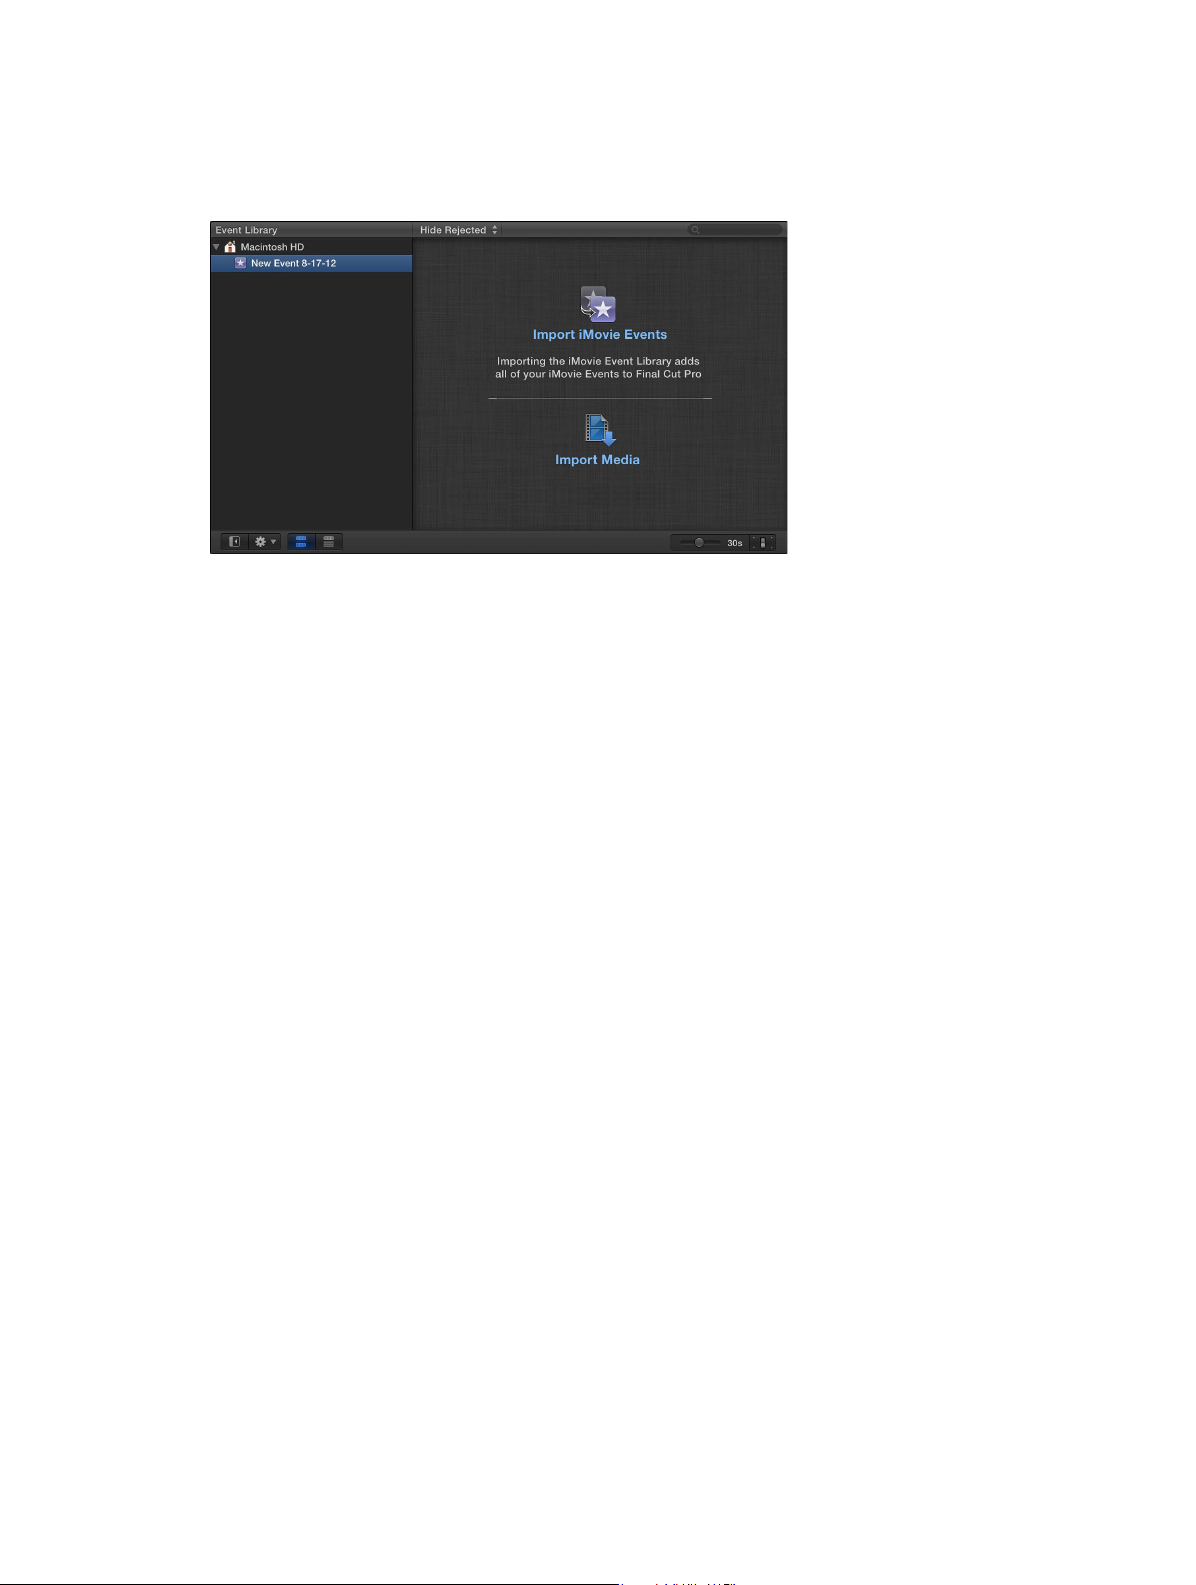
The rst time you open Final Cut Pro, it contains no media, no projects, and a single event. Buttons
appear in the Event Browser to help you quickly import events from iMovie, media from your
hard disk or a connected external storage device, or media directly from a connected camera.
Import media into an empty event
m To import events from iMovie: Click the Import iMovie Events button and follow the instructions
for importing iMovie events.
m To import les from a connected camera or from a hard disk: Click the Import Media button and
follow the instructions for importing les from a connected le-based camera, from a hard disk,
from a tape-based camera, or from a camera archive.
Importfromconnectedcameras
Import from le-based cameras
File-based camcorders and cameras can record video, audio, and still images. These kinds of
devices, which record to ash-based storage media, hard disk drives (HDD), and so on, usually
connect to your computer via a USB cable. Some devices have removable memory cards that you
can insert into your computer instead.
If your le-based device provides a clip-spanning feature, you can import all of the media as one
spanned clip.
To check whether your camera is compatible with Final Cut Pro, go to the Final Cut Pro X
Supported Cameras webpage at http://help.apple.com/nalcutpro/cameras.
Import from a le-based camcorder, camera, or device
1 Do one of the following:
•
Connect your camcorder, camera, or device to your computer, using the cable that came with
the device, and turn it on.
If you’re using a camcorder, set it to PC Connect mode. (The name of this transfer mode may
be dierent on your device.) Your camcorder may automatically go into “connect” mode if you
turn it on in playback mode while it’s connected to your computer. For more information, see
the documentation that came with your camcorder.
Note: Connecting a DVD camcorder to your Mac can cause the DVD Player application to
open. If that happens, simply close DVD Player.
Chapter 3 Importmedia 20
Page 21
•
Playback controls
Remove the memory card from your camcorder or device and insert it into the card slot on
your Mac (if it has one) or into an external card reader.
For more information about memory cards, see About memory cards and cables on page 40.
2 To open the Media Import window, do one of the following:
•
Choose File > Import > Media (or press Command-I).
•
Click the Import Media button on the left end of the toolbar.
3 If necessary, select your camcorder, camera, or device from the Cameras section on the left.
The Media Import window displays all the media on your device. In this window you can preview
the media by either playing it using the playback controls or skimming it by moving the pointer
forward or backward over a lmstrip.
The media on the
device appears here.
Change the way clips appear
using these controls.
Note: Most modern digital cameras can shoot still images and video interchangeably. In
many cases, the video clips and still images in those cameras appear side by side in the
Media Import window.
4 Do any of the following:
•
To change which device to import from: Click the device in the Cameras section.
•
To change the way the clips appear: Click the Clip Appearance button in the bottom-right
corner of the Media Import window.
•
To switch between lmstrip view and list view: Click the List View and Filmstrip View buttons
at the bottom of the Media Import window. (Connected le-based cameras and camera
archives only.)
Note: When you select a clip in list view, a lmstrip for the selected clip appears at the top
of the Event Browser. The lmstrip is fully interactive, allowing access to start and end points,
markers, and keywords.
Chapter 3 Importmedia 21
Page 22

•
To sort clips in list view by data such as duration, creation date, rating, keyword, and so on: Click
the column headings at the top of list view. For more information about list view, see Import
from a hard disk on page 34.
•
To add folders of frequently used media to the Favorites section: Drag them from list view.
To remove a folder from the Favorites section, Control-click the folder and choose Remove
from Sidebar in the shortcut menu.
•
To automatically close the Media Import window when the import begins: Select the “Close
window after starting import” checkbox.
•
To add a folder to the list view by dragging: Drag the folder from the Finder to the list view and
browse its contents in list view.
5 Do one of the following:
•
To import all clips: Click Import All.
•
To import only some of the clips: Select each clip you want to import by Command-clicking each
clip, and click Import Selected (the Import button changes its name).
Tip: To select several clips located together, you can drag around the clips to enclose them
with the selection rectangle.
•
To import portions of clips: Drag inside the lmstrip to select the range that you want, and click
Import Selected. You can also select multiple ranges in each clip. For more information, see
Select a range on page 93.
Tip: You can also select a clip, press the Space bar to play the clip, and press either I to set a
start point or O to set an end point.
6 In the window that appears, choose how you want to organize the imported media in the
Event Library:
•
To add the imported clips to an existing event: Select “Add to existing event,” and choose the
event from the pop-up menu.
•
To create a new event: Select “Create new Event” and type a name (for example, “Chris and Kim
Wedding”) in the text eld; then choose the disk where you want to store the event from the
“Save to” pop-up menu.
To learn more about events, see Events and clips overview on page 51.
7 If you want to organize your media, create optimized or proxy media, analyze the video, or
analyze the audio, select the relevant checkboxes.
If you don’t set Final Cut Pro to analyze your media during the import process, you can analyze it
later (if necessary) in the Event Browser.
8 Click Import.
By default, the Media Import window closes when you click Import. You can begin working with
your clips in the Event Browser. Final Cut Pro imports your media in the background.
If you selected any options in the previous step, Final Cut Pro transcodes and optimizes the
les after the import process is complete. You can view the progress of the import and other
background tasks in the Background Tasks window.
9 When background tasks are completed, disconnect the camcorder, camera, or device.
You can create an archive from your le-based or tape-based camera or device. For more
information, see Create and manage camera archives on page 411.
Chapter 3 Importmedia 22
Page 23

Reimport a clip
Two situations warrant reimporting a clip:
•
If the clip was not completely imported: If you cancel or quit Final Cut Pro before an import is
nished, a Camera icon appears on the bottom-left corner of the clip. This icon indicates that
Final Cut Pro is using the media on the camera for playback (instead of using the QuickTime
le that was created during import).
Camera icon
To play a clip with a Camera icon, Final Cut Pro locates the media on either a connected
camera or in a connected, available camera archive. (See Access media on an archive or disk
image on page 36 for more information.) If Final Cut Pro can’t locate the media in one of those
locations, the clip will go oine and display the Missing Camera alert icon.
•
If the clip’s source media le is not available: If a clip’s source media le is moved or deleted, or
the volume it is located on is disconnected from the computer, a Missing File icon is displayed
on the clip. To restore the clip, you can reimport it.
See Alert icons on page 414 for more information about alert icons.
When you reimport a clip, Final Cut Pro automatically connects to the necessary camera or
camera archive. There is no need to manually mount a camera archive before reimporting.
1 Do one of the following:
•
Connect the camera that contains the clip to your computer, and turn it on. This will bring the
clip online, but the clip will still display the Camera icon in the lower-left corner.
•
Insert the memory card that contains the clip in your computer or connected card reader.
See About memory cards and cables on page 40 for more information.
•
Make sure the camera archive that contains the clip is located in one of the Final Cut Pro
camera archives.
See Create and manage camera archives on page 411 for more information.
2 In Final Cut Pro, do one of the following:
•
To reimport one clip: Select the clip in the Event Browser.
•
To reimport all clips in an event: Select the event in the Event Library.
3 Choose File > Import > Reimport from Camera/Archive.
The clip or clips are reimported.
Chapter 3 Importmedia 23
Page 24
Import spanned clips
Some le-based camcorders or devices that have more than one memory card slot can record
one shot over multiple memory cards. The resulting shot is called a spanned clip.
A good way to import a spanned clip into Final Cut Pro is to attach your camera or card reader
to your local system and create a camera archive for each memory card. You can store the
camera archives on your local system or on an external storage device until you are ready to
import the spanned clip. (Even if you are importing the spanned clip immediately, it’s useful to
make the camera archive so you have a backup of the footage that makes up the spanned clip.)
Then, when you’re ready to import, you can mount all of the camera archives and import the
spanned clip.
Create a camera archive for each memory card
1 Connect your camcorder or camera to your computer and turn it on, or connect your card
reader and memory card to your computer. If you’ll be saving the camera archives to an external
storage device, connect that as well.
2 In Final Cut Pro, do one of the following:
•
Choose File > Import > Media (or press Command-I).
•
Click the Import Media button on the left end of the toolbar.
The Media Import window appears.
3 Select a memory card to archive from the list of cameras on the left.
4 Click the Create Archive button at the bottom-left corner of the window.
5 In the “Create Camera Archive as” eld, type a name for the archive.
6 Choose a location to save the archive from the Destination pop-up menu, and click OK.
Note: To protect your media, it is recommended that you save your archive to a disk or partition
dierent from the one where you store the media les used with Final Cut Pro.
7 Repeat steps 3 through 6 to create camera archives for each of the memory cards that contain a
portion of the spanned clip.
The camera archives appear in the Camera Archives list in the Media Import window.
See Create and manage camera archives on page 411 for more information about creating
camera archives.
Import a spanned clip
1 If your camera archives are stored on an external storage device, make sure that it is connected
to your local system.
2 Choose File > Import from Camera.
The Media Import window appears, showing all camera archives on your local system (and on
any connected external storage devices) in the Camera Archives section on the left.
Chapter 3 Importmedia 24
Page 25
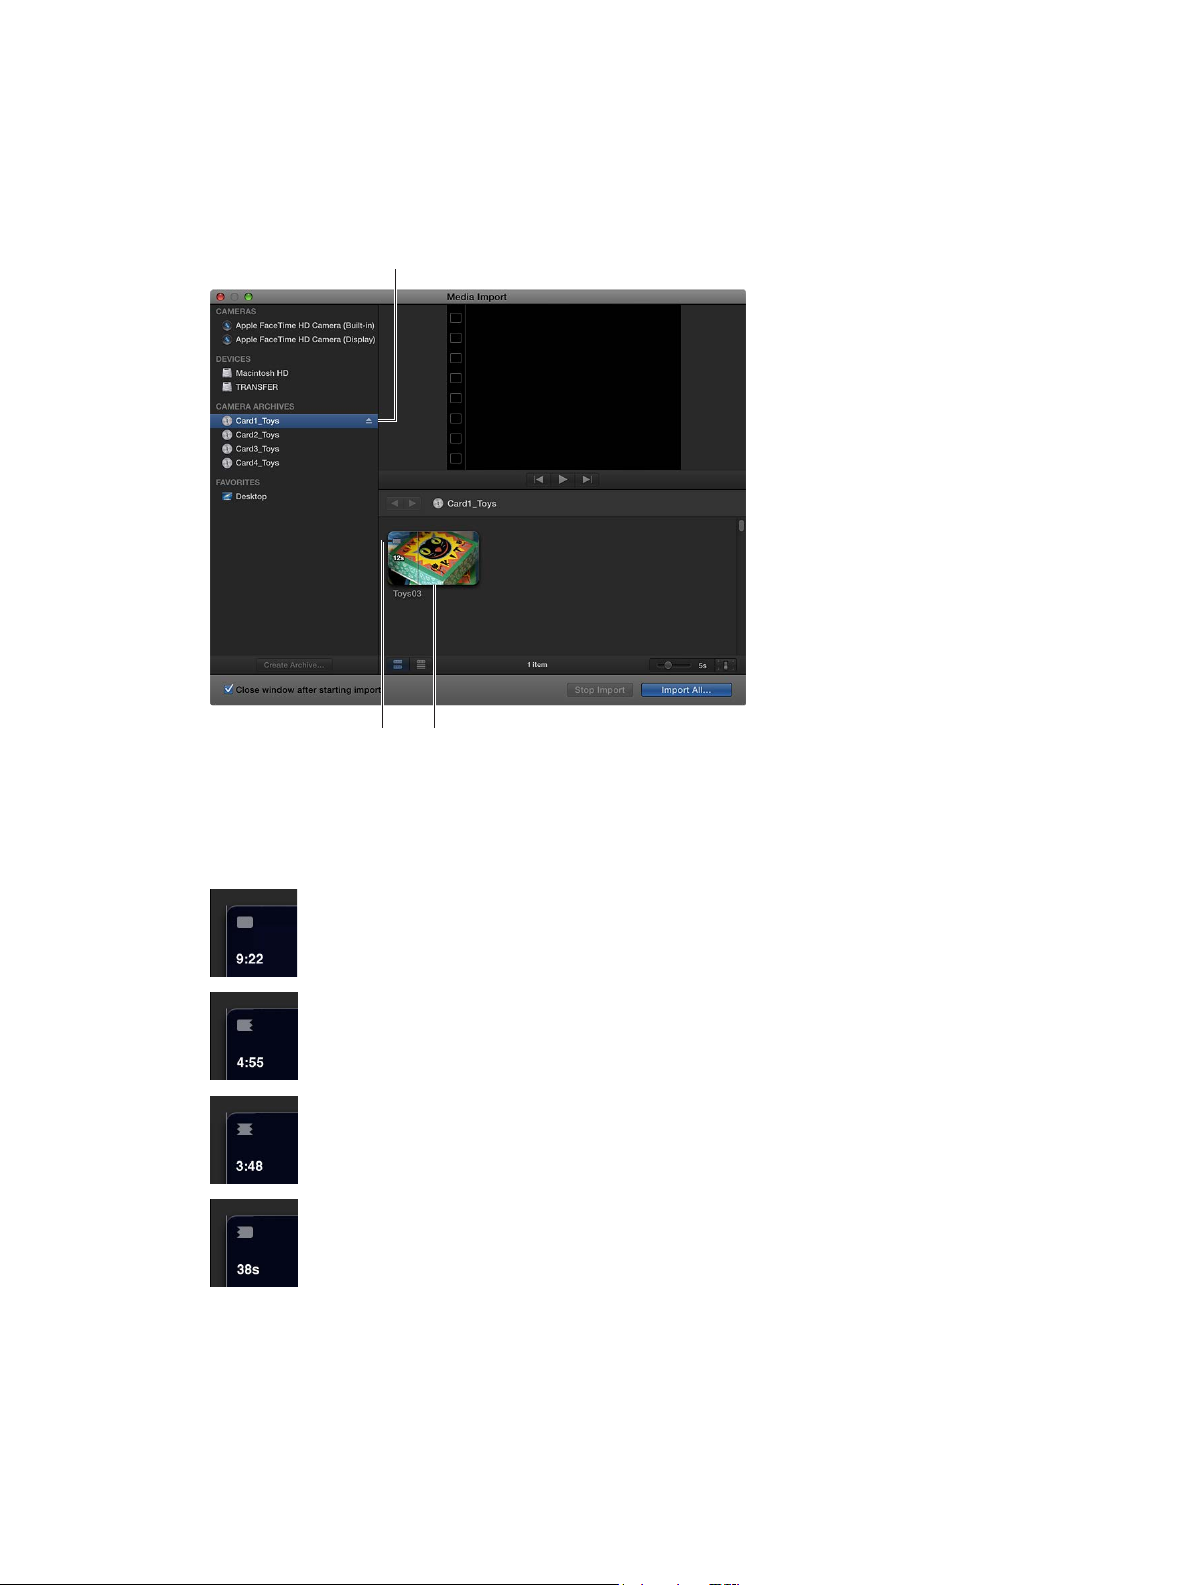
3 Select each camera archive that makes up the spanned clip.
These camera archives
Final Cut Pro mounts all of the camera archives. If all portions of the spanned clip are available,
all the mounted camera archives show a clip with the same duration. An icon indicating that the
spanned clip is complete appears on the spanned clip.
contain all portions
of the spanned clip.
This icon indicates that all
portions of the spanned
clip are available.
This clip represents the
complete spanned clip.
If one or more camera archives are missing, an icon appears on the spanned clip to indicate
which part of the spanned clip is available—the beginning, middle, or end. You can select each
camera archive to see the dierent icons.
Indicates that all
portions of the spanned
clip are available.
Indicates that the
beginning portion of the
spanned clip is available.
Indicates that the middle
portion of the spanned
clip is available.
Indicates that the end
portion of the spanned
clip is available.
4 Click Import All to import the spanned clip.
Important: If the camera archives that make up the spanned clip are not all available, you can
import each camera archive separately. Each portion of the spanned clip will be imported into
Final Cut Pro as a separate clip.
Chapter 3 Importmedia 25
Page 26
5 Choose how you want to organize the imported media in the Event Library:
•
To add the imported media to an existing event: Select “Add to existing event,” and choose the
event from the pop-up menu.
•
To create a new event: Select “Create new Event” and type a name (for example, “Chris and Kim
Wedding”) in the text eld; then choose the disk where you want to store the event from the
“Save to” pop-up menu.
To learn more about events, see Events and clips overview on page 51.
6 If you want to organize your media, transcode your media, analyze the video, or analyze the
audio, select the relevant checkboxes.
If you don’t set Final Cut Pro to analyze your media during the import process, you can analyze it
later (if necessary) in the Event Browser.
7 Click Import.
Final Cut Pro imports your media in the background. If you selected any options in the previous
step, Final Cut Pro transcodes and optimizes the les after the import process is complete. You
can view the progress of the background tasks in the Background Tasks window.
8 To begin working with your clips, close the Media Import window so you can access the
Event Browser.
Import from iPhone, iPad, or iPod touch
Importing media from iPhone, iPad, or iPod touch is the same as importing it from a le-based
camcorder, camera, or device.
Import from iPhone, iPad, or iPod touch
1 Connect your iPhone, iPad, or iPod touch to your computer using the Dock Connector to USB
cable that came with it. (If another application opens, close it.) Then turn on your device and
unlock it.
2 In Final Cut Pro, do one of the following:
•
Choose File > Import > Media (or press Command-I).
•
Click the Import Media button on the left end of the toolbar.
The Media Import window appears.
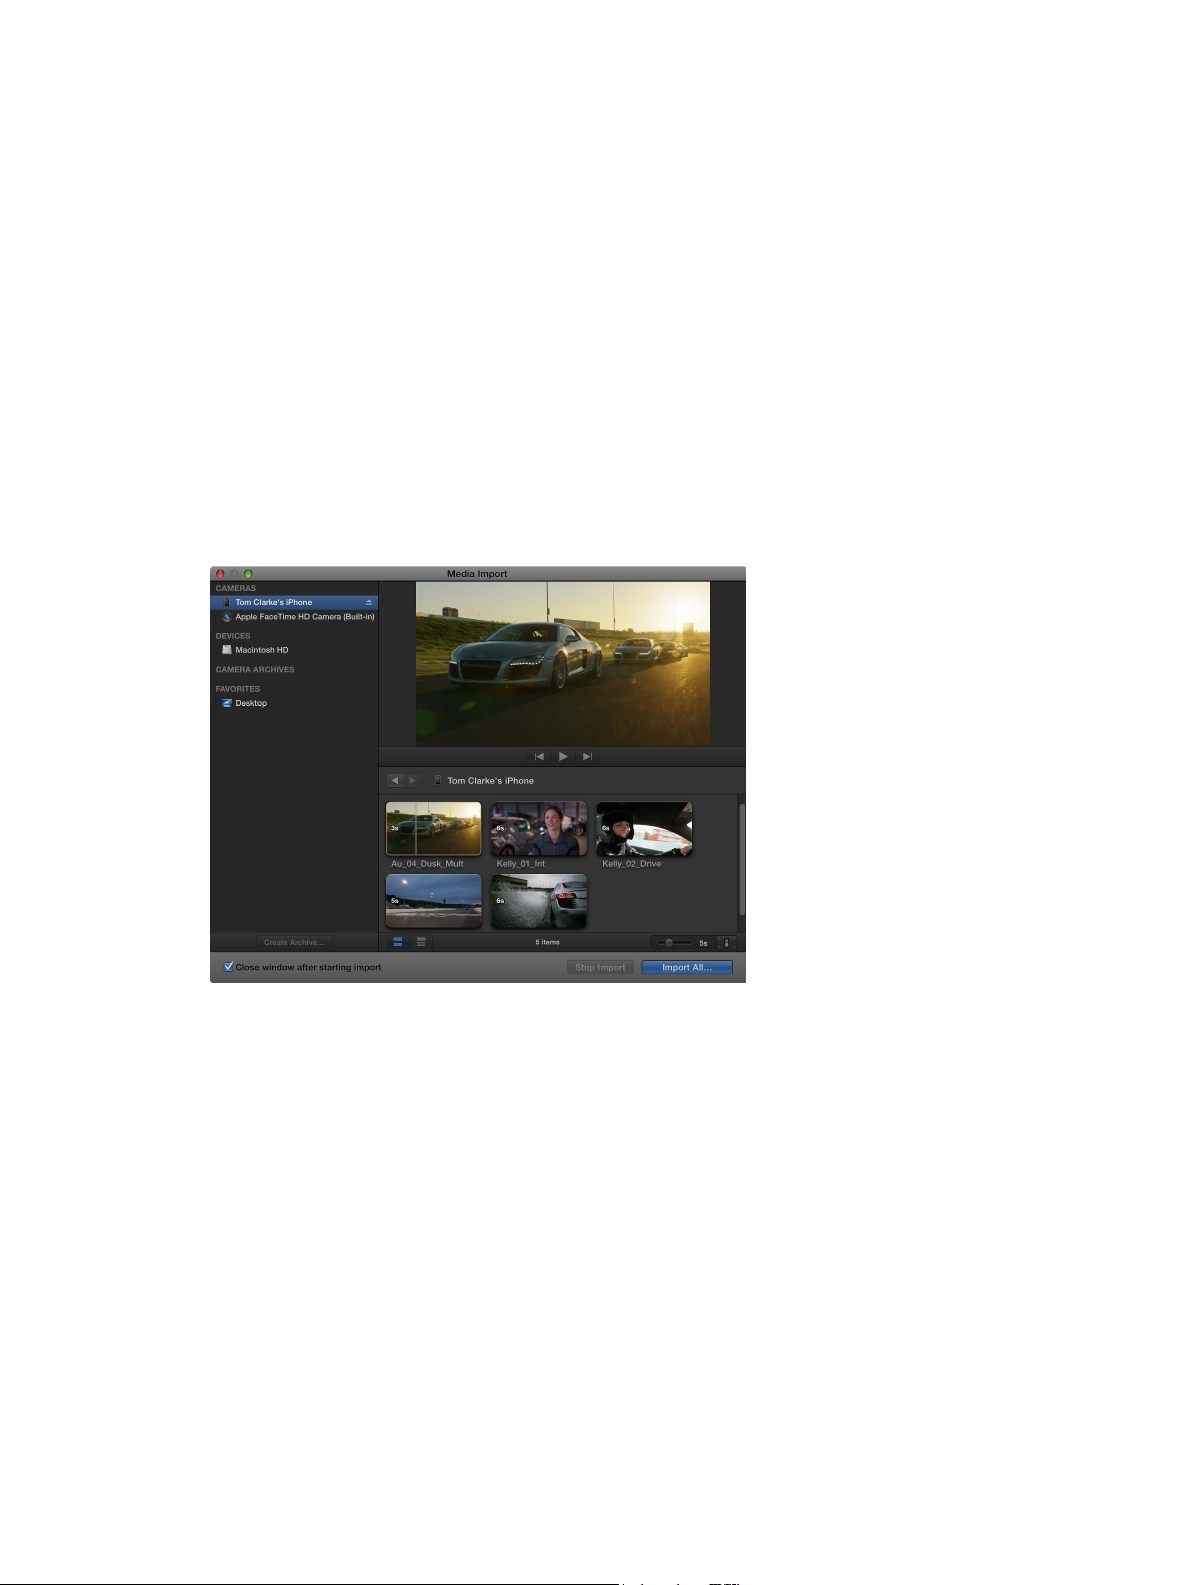
3 If necessary, select your iPhone, iPad, or iPod touch from the Cameras section on the left.
The Media Import window displays all the media on your device. In this window you can preview
the media by either playing it using the playback controls or skimming it by moving the pointer
forward or backward over a lmstrip.
You can also do any of the following:
•
To change which device to import from: Click the device in the Cameras section.
•
To change the way the clips appear: Click the Clip Appearance button in the bottom-right
corner of the Media Import window.
Chapter 3 Importmedia 26
Page 27
•
To switch between lmstrip view and list view: Click the List View and Filmstrip View buttons
at the bottom of the Media Import window. (Connected le-based cameras and camera
archives only.)
Note: When you select a clip in list view, a lmstrip for the selected clip appears at the top
of the Event Browser. The lmstrip is fully interactive, allowing access to start and end points,
markers, and keywords.
•
To sort clips in list view by data such as duration, creation date, rating, keyword, and so on: Click
the column headings at the top of list view. For more information about list view, see Import
from a hard disk on page 34.
•
To add folders of frequently used media to the Favorites section: Drag them from list view.
To remove a folder from the Favorites section, Control-click the folder and choose Remove
from Sidebar in the shortcut menu.
•
To automatically close the Media Import window when the import begins: Select the “Close
window after starting import” checkbox.
•
To add a folder to the list view by dragging: Drag the folder from the Finder to the list view
and browse its contents in list view.
4 Do one of the following:
•
To import all clips: Click Import All.
•
To import only some of the clips: Select each clip you want to import by Command-clicking each
clip, and click Import Selected (the Import button changes its name).
Tip: To select several clips located together, you can drag around the clips to enclose them
with the selection rectangle.
•
To import portions of clips: Drag inside the lmstrip to select the range that you want, and click
Import Selected. You can also select multiple ranges in each clip. For more information, see
Select a range on page 93.
Tip: You can also select a clip, press the Space bar to play the clip, and press either I to set a
start point or O to set an end point.
Chapter 3 Importmedia 27
Page 28

5 In the window that appears, choose how you want to organize the imported media in the
Event Library:
•
To add the imported clips to an existing event: Select “Add to existing event,” and choose the
event from the pop-up menu.
•
To create a new event: Select “Create new Event” and type a name (for example, “Chris and Kim
Wedding”) in the text eld; then choose the disk where you want to store the event from the
“Save to” pop-up menu.
To learn more about events, see Events and clips overview on page 51.
6 If you want to create optimized or proxy media, analyze the video, or analyze the audio, select
the relevant checkboxes.
If you don’t set Final Cut Pro to analyze your media during the import process, you can analyze it
later (if necessary) in the Event Browser.
7 Click Import.
By default, the Media Import window closes when you click Import. You can begin working with
your clips in the Event Browser. Final Cut Pro imports your media in the background.
If you selected any options in the previous step, Final Cut Pro transcodes and optimizes the
les after the import process is complete. You can view the progress of the import and other
background tasks in the Background Tasks window.
8 When background tasks are completed, disconnect the iPhone, iPad, or iPod touch.
Import from a digital still camera
You can import video and still images from digital still cameras. The steps below describe how
to import video and still images directly into Final Cut Pro. You can also import your photos into
Aperture or iPhoto and access them through the Photos Browser in Final Cut Pro.
To check whether your camera is compatible with Final Cut Pro, go to the Final Cut Pro X
Supported Cameras webpage at http://help.apple.com/nalcutpro/cameras.
Import still-image clips and video clips from a digital still camera
1 Connect your camera to your computer using the cable that came with the camera, and turn
it on.
If your camera doesn’t appear on the left side of the Media Import window (either in the
Cameras or Devices section), remove the camera’s memory card and insert it into the card slot on
your Mac (if it has one) or into an external card reader.
2 In the Finder, locate the DCIM folder inside the camera folder, and then locate the still-image or
video les. The les may be in the DCIM folder, or in a folder one or two levels down. Devices and
le structures vary by model and manufacturer.
3 In Final Cut Pro, do one of the following:
•
Choose File > Import > Media (or press Command-I) and follow the instructions in Import
from a hard disk on page 34.
•
Drag the les from the Finder into an event or Timeline in Final Cut Pro. The les will be
imported using the import settings you congured in Import preferences. See Import from a
hard disk on page 34.
After import, you may have separate audio les that you want to use to replace the video’s audio
track. To do this, you can automatically synchronize the video and audio clips.
Chapter 3 Importmedia 28
Page 29
Import from tape-based cameras
You can import media from a tape-based camcorder or tape-based device. To determine
which clips you want to import (rather than importing all of them), you can view them using
Final Cut Pro before you import them.
Final Cut Pro supports tape-based import of the following formats: DV (including DVCAM,
DVCPRO, and DVCPRO50), DVCPRO HD, and HDV.
To check whether your camera is compatible with Final Cut Pro, go to the Final Cut Pro X
Supported Cameras webpage at http://help.apple.com/nalcutpro/cameras.
Import media from a tape-based camcorder or device
1 Connect the camcorder to your computer using the cable that came with it, and congure your
device for remote control over FireWire, if necessary.
Note: For best results when importing from a tape-based camcorder, it is recommended that you
import the video using the same camcorder that you used to record it.
2 Turn on the camcorder and set it to VTR or VCR mode. (This mode may have a dierent name on
your camera. For more information, see the documentation that came with your camcorder.)
3 In Final Cut Pro, do one of the following:
•
Choose File > Import > Media (or press Command-I).
•
Click the Import Media button on the left end of the toolbar.
The Media Import window appears.
4 If you have multiple devices connected to your computer, choose the device you want to import
from in the list of cameras on the left.
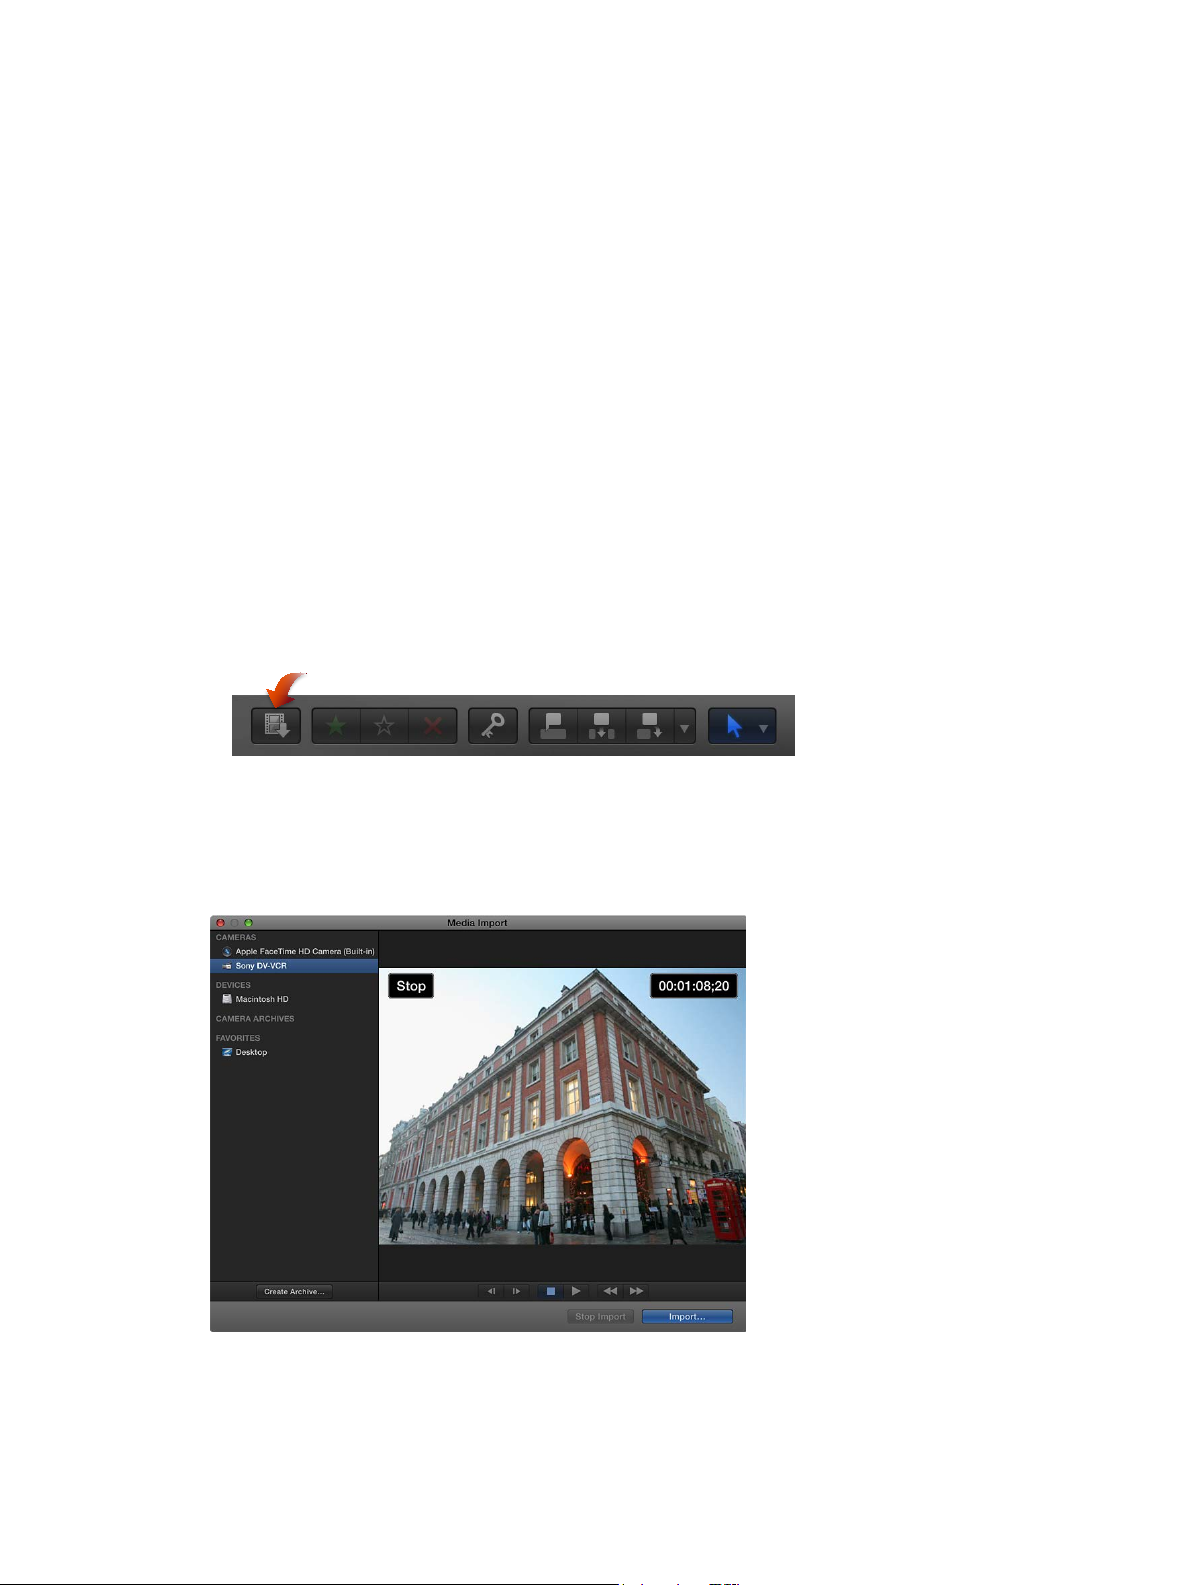
The Media Import window displays the image from the current position of the tape.
5 Use the playback controls (or use the J, K, and L keys) to set your tape to the point where you
want to begin importing, and click Import.
Chapter 3 Importmedia 29
Page 30

6 In the window that appears, choose how you want to organize the imported media in the
Event Library:
•
To add the imported clips to an existing event: Select “Add to existing event,” and choose the
event from the pop-up menu.
•
To create a new event: Select “Create new Event” and type a name (for example, “Chris and Kim
Wedding”) in the text eld; then choose the disk where you want to store the event from the
“Save to” pop-up menu.
To learn more about events, see Events and clips overview on page 51.
7 If you want to transcode your media, analyze the video, or analyze the audio, select the
relevant checkboxes.
If you don’t set Final Cut Pro to analyze your media during the import process, you can analyze it
later (if necessary) in the Event Browser.
8 Click Import.
Final Cut Pro begins importing immediately from the current location on the tape. It will
continue to import (and save the resulting media le to the event you specied) until one of the
following occurs:
•
It reaches the end of the tape.
•
The hard disk you are importing to is full.
•
You stop the import session by clicking Stop Import or Close (to close the Media
Import window).
The video plays as it’s being imported. It takes as long to import the video as it takes to watch it
at normal speed.
9 When the section of video you want to import has been imported, click Stop Import. Then use
the import controls to set your video to a point where you want to begin importing again,
and repeat steps 5 through 7. If you selected any options in step 6, Final Cut Pro transcodes
and optimizes the les after the import process is complete. You can view the progress of the
background tasks in the Background Tasks window.
10 When you’re done importing, click Close to close the Media Import window.
You can also create an archive from your tape-based device, recording everything on the tape
from beginning to end and saving the captured clips as an archive. For more information, see
Create and manage camera archives on page 411.
If your camera or device isn’t recognized
If you’ve connected your camera or device to your computer but the Media Import window
doesn’t open, or Final Cut Pro can’t control your device, there are several things you can do to try
to establish the connection.
Check your equipment and system
1 Make sure that you’re using the correct equipment conguration:
•
Your camcorder or camera must be compatible with Final Cut Pro. For a list of
compatible devices, go to the Final Cut Pro X Supported Cameras webpage at
http://help.apple.com/nalcutpro/cameras.
•
Your device must be connected properly to your computer.
Chapter 3 Importmedia 30
Page 31

•
Your camcorder must be set to the correct output mode. On some camcorders, this is
called VTR or VCR mode, but not all camcorders use the same terminology, so check the
documentation that came with your device. On some camcorders you must set the output
to DV mode or HDV mode, depending on whether the content is standard (DV) or high
denition (HDV).
•
If you’re connecting a tape-based camcorder to your computer, you should be using a FireWire
cable (also called IEEE 1394, or i.LINK), not a USB cable.
See About memory cards and cables on page 40 for more information.
•
If you’re importing video clips from a still camera or other ash memory device, make sure
the le format of your video is MPEG-2, MPEG-4, or AVCHD, all of which are compatible with
Final Cut Pro.
•
If your still camera is not supported by Final Cut Pro, try importing the media as les, using a
card slot on your Mac computer or an external card reader.
See Import from a hard disk on page 34 for more information.
•
If you’ve enabled Fast User Switching, make sure no one else is trying to use the camcorder
from a dierent account at the same time.
2 If you still can’t import media after checking the items above, try the following:
•
Turn the device o and on again.
•
Disconnect the cable from both the device and the computer, and then reconnect it.
•
Quit and then reopen Final Cut Pro.
•
Restart your computer.
•
Try using a dierent cable.
•
Try using a dierent computer with Final Cut Pro installed.
•
If you’re using a le-based camcorder, use the Finder to copy the mounted volume to a local
disk. Then open the les in Final Cut Pro in the same way that you open an archive.
Note: When you see red frames and a yellow alert triangle in a Timeline or event, Final Cut Pro is
alerting you that part of your project or event is missing. For more information, see Alert icons on
page 414.
Importfromotherapplications
Import from Motion
You can build and modify video eects, titles, transitions, and generators in Motion 5 for use in
Final Cut Pro. When you save a template in Motion, it is “published” and becomes available in its
respective media browser in Final Cut Pro.
See the information about Final Cut Pro X templates in Motion Help at
http://help.apple.com/motion.
For more information, see the following:
•
Create specialized versions of transitions in Motion on page 213
•
Create specialized versions of the video eects in Motion on page 237
•
Create specialized versions of the generators in Motion on page 241
Chapter 3 Importmedia 31
Page 32

Import from iMovie
You can import any of your existing iMovie projects and your iMovie Event Library into
Final Cut Pro.
Note: If you want to import an iMovie trailer project, you rst need to convert it to a standard
iMovie project. For more information, choose Help in iMovie ‘11 and search for “Convert a trailer
to a project.”
Important: iMovie projects and clips from the iMovie Event Library are not automatically
analyzed during import because they retain their original analysis results from iMovie. You
can override iMovie analysis by analyzing your clips in Final Cut Pro after import. For more
information, see Analyze your media on page 47.
Import an iMovie project
1 In Final Cut Pro, choose File > Import > iMovie Project and locate your existing iMovie project,
typically found in the Movies folder on your hard disk.
2 Click Import.
The project opens in the Timeline and any associated events appear in the Event Library.
Import your iMovie Event Library
1 In Final Cut Pro, choose File > Import > iMovie Event Library.
2 Read the message that appears and click OK.
The events in your iMovie Event Library appear in the Final Cut Pro Event Library.
Import from iPhoto and Aperture
When you import photos and video clips from iPhoto or Aperture into Final Cut Pro, the media is
imported using the import settings you dened in Import preferences. For more information, see
Import from a hard disk on page 34.
Import photos and video clips from iPhoto or Aperture
1 In Final Cut Pro, do one of the following:
•
Choose Window > Media Browser > Photos.
•
Click the Photos button in the toolbar.
Chapter 3 Importmedia 32
Page 33
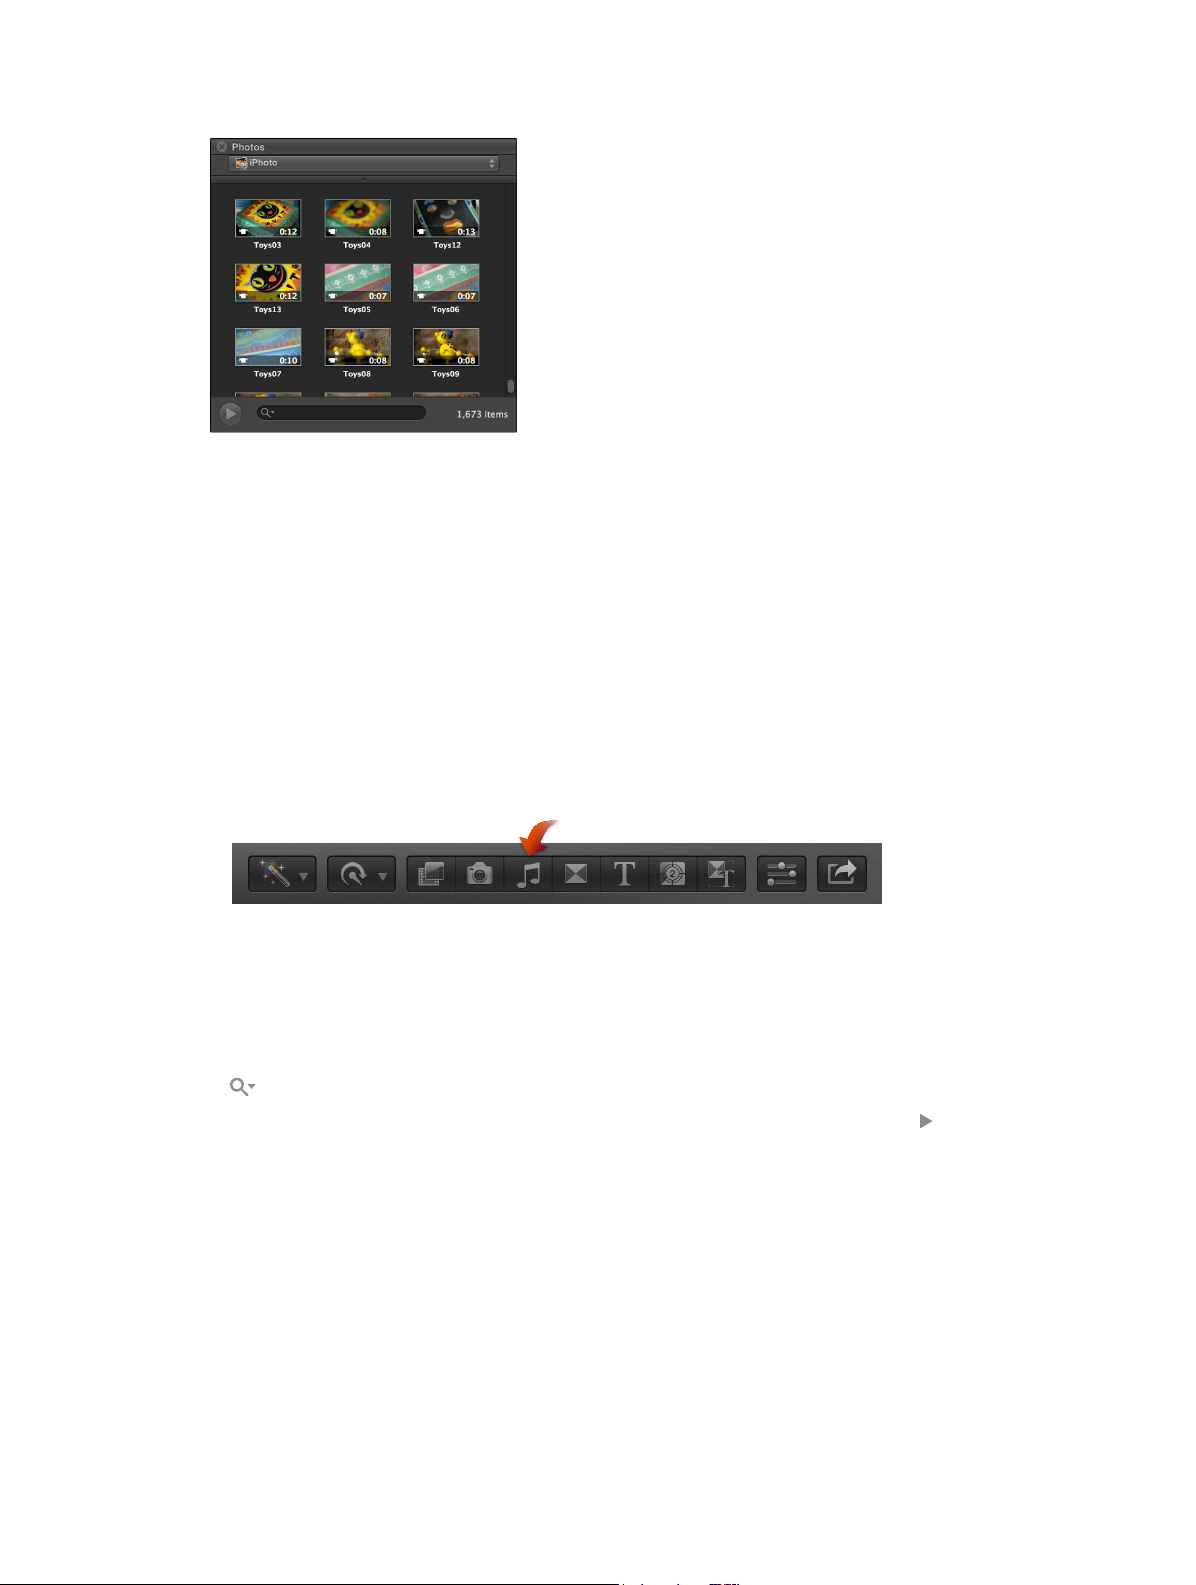
2 If necessary, navigate to the iPhoto or Aperture section of the Photos Browser.
3 To use one or more photos or video clips in your project, drag the items from the Photos Browser
to an event icon in the Event Library or a project in the Timeline. To select multiple clips, you can
Command-click them or drag a selection rectangle around them.
You can also drag photos and video clips from iPhoto or Aperture directly to an event in the
Event Library or a project in the Timeline, without using the Photos Browser.
Import from iTunes
You can import music and sound from your existing iTunes library into Final Cut Pro.
Import music and sound from iTunes
1 In Final Cut Pro, do one of the following:
•
Choose Window > Media Browser > Music and Sound.
•
Click the Music and Sound button in the toolbar.
2 In the Music and Sound Browser, choose iTunes from the pop-up menu at the top.
Tip: If the folder you’re looking for doesn’t appear, you can add it to the source list by dragging it
from the Finder or desktop to the Music and Sound Browser.
3 In the list that appears, nd the music or sound you want:
•
To search for an item: Type text in the search eld. To lter your search, click the Filter button
and choose a lter.
•
To preview an item: Double-click the item, or select the item and click the Play button .
•
To select more than one item: Command-click each item.
4 Drag the sound le or les to the Timeline.
Note: For better import and playback performance, Final Cut Pro automatically transcodes
all MP3 audio les to WAV audio les and retains the original MP3 les for future use. For
information about where to nd original and transcoded media les, see Where your media and
project les are located on page 390.
Chapter 3 Importmedia 33
Page 34
Importfromdevices
Import from a hard disk
You can import media—video, audio, still images, and graphics les—from your computer’s hard
disk, a connected external storage device, a memory card inserted in your computer’s card slot
or a card reader, or a network attached volume. You can import media using the Media Import
window or by dragging les from the Finder.
When you drag media from the Finder into Final Cut Pro, the media is imported using the
organize, transcode, and analysis settings you set in Final Cut Pro preferences. If you don’t want
to use the Media Import window to manage your import, and if you want to always use the
same organize, transcode, and analysis settings, importing by dragging les into Final Cut Pro is a
good option. See Import preferences on page 420 for information on the Import preferences.
Note: Some le-based devices allow you to copy the recorded media (with its original directory
structure) to a folder on your computer’s hard disk via the Finder. To import media copied in this
way, see Access media on an archive or disk image on page 36.
Import media from a hard disk using the Media Import window
1 If the media you want to import is on an external storage device or memory card, connect the
device to your computer and turn it on.
2 To open the Media Import window, do one of the following:
•
Choose File > Import > Media (or press Command-I).
•
Click the Import Media button on the left end of the toolbar.
3 In the Devices section on the left side of the Media Import window, select your computer’s
hard disk or the connected external storage device or memory card from which you want to
import media.
4 Use the list view at the bottom of the window to navigate to a le or folder and select it. (When
you import from a hard disk, lmstrips are visible for individual selected clips only.)
Chapter 3 Importmedia 34
Page 35
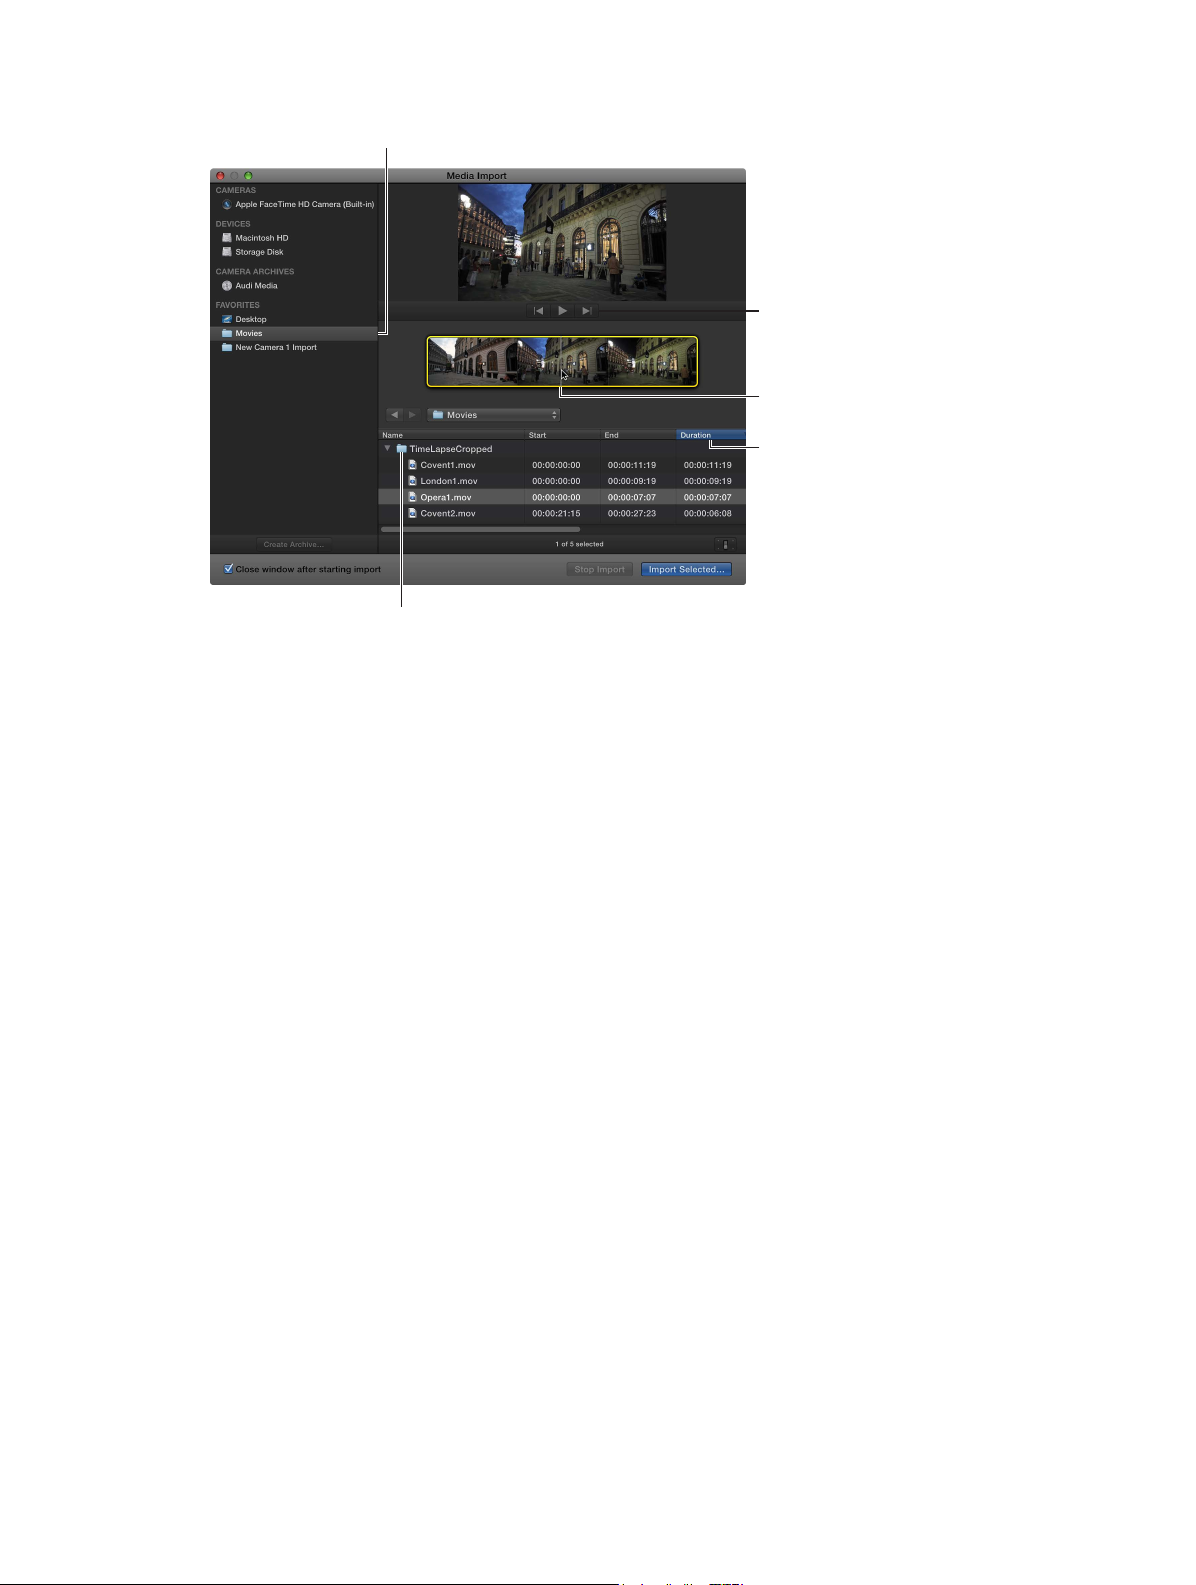
Tip: Command-click to select multiple les or folders to import.
Add favorite import folders.
Play back the
selected clip.
Skim the
selected clip.
Click a column
heading to sort
items by that
category.
Navigate to the files and folders.
5 Do any of the following:
•
To preview the selected clip: Play it using the playback controls or skim it by moving the pointer
forward or backward over the lmstrip.
•
To change which hard disk to import from: Select the hard disk in the Devices section or select
the location in the Favorites section.
•
To sort clips in list view by data such as duration, creation date, rating, keyword, and so on: Click
the column headings at the top of list view.
•
To add folders of frequently used media to the Favorites section: Drag a folder from the list on the
right to the Favorites section on the left.
To remove a folder from the Favorites section, Control-click the folder and choose Remove
from Sidebar in the shortcut menu.
•
To automatically close the Media Import window when the import begins: Select the “Close
window after starting import” checkbox.
•
To add a folder to the list view by dragging: Drag the folder from the Finder to the list view and
browse its contents in list view.
6 When you're ready to import, click Import Selected.
7 In the window that appears, choose how you want to organize the imported media in the
Event Library:
•
To add the imported clips to an existing event: Select “Add to existing event,” and choose the
event from the pop-up menu.
•
To create a new event: Select “Create new Event” and type a name (for example, “Chris and Kim
Wedding”) in the text eld; then choose the disk where you want to store the event from the
“Save to” pop-up menu.
To learn more about events, see Events and clips overview on page 51.
8 To have Final Cut Pro copy your media les and add them to the event folder that you specied,
select the checkbox.
Chapter 3 Importmedia 35
Page 36

9 If you want to organize your media, create optimized or proxy media, analyze the video, or
analyze the audio, select the relevant checkboxes.
If you don’t set Final Cut Pro to analyze your media during the import process, you can analyze it
later (if necessary) in the Event Browser.
10 Click Import.
By default, the Media Import window closes when you click Import. You can begin working with
your clips in the Event Browser. Final Cut Pro imports your media in the background.
If you selected any options in the previous step, Final Cut Pro starts to transcode and optimize
the les after the import process is complete. You can view the progress of the import and other
background tasks in the Background Tasks window.
If you imported media from an external device and you chose to have Final Cut Pro copy the
media les to the Final Cut Events folder (rather than just refer to them in their original location),
you can disconnect the device when the background tasks are completed.
Note: For information about restoring events and projects from backups, see Back up projects,
your Project Library, and events on page 403.
Import media by dragging from the Finder
Do one of the following:
m Select a le, Command-click to select multiple les, or select a folder of les, and drag the le or
les from the Finder to the event.
The clip or clips appear in the event.
m Select a le, Command-click to select multiple les, or select a folder of les and drag the le or
les from the Finder to a Keyword Collection.
The clip or clips appear in the event, and the keyword is automatically added to the clip or clips.
Important: If you have the “Import folders as Keyword collections” Import preference selected, a
Keyword Collection is created for each folder name, and the les inside the folder are assigned
that keyword.
m Select a le or Command-click to select multiple les and drag the le or les to a project in
the Timeline.
The clip or clips appear in the Timeline, and in the project’s default events folder.
The le or les are imported using your default import settings.
Access media on an archive or disk image
If you’ve created a camera archive, you can use the media in the archive in two ways:
•
You can connect to the camera archive, making the media available to Final Cut Pro. Although
all available camera archives are always listed in the Media Import window, you can’t use any
of the media in an archive until you connect to the camera archive.
•
You can import the media from the archive, or import media from disk images previously
archived with the Final Cut Pro Log and Transfer window in Final Cut Pro 7 or earlier. When you
do this, copies of the media are created on your local disk.
Note: Some le-based devices allow you to copy the recorded media (with its original directory
structure) to a folder on your computer’s hard disk via the Finder. To import media copied in this
way, follow the instructions below.
Chapter 3 Importmedia 36
Page 37
Import media from an archive or disk image
1 To open the Media Import window, do one of the following:
•
Choose File > Import > Media (or press Command-I).
•
Click the Import Media button on the left end of the toolbar.
2 Do one of the following:
•
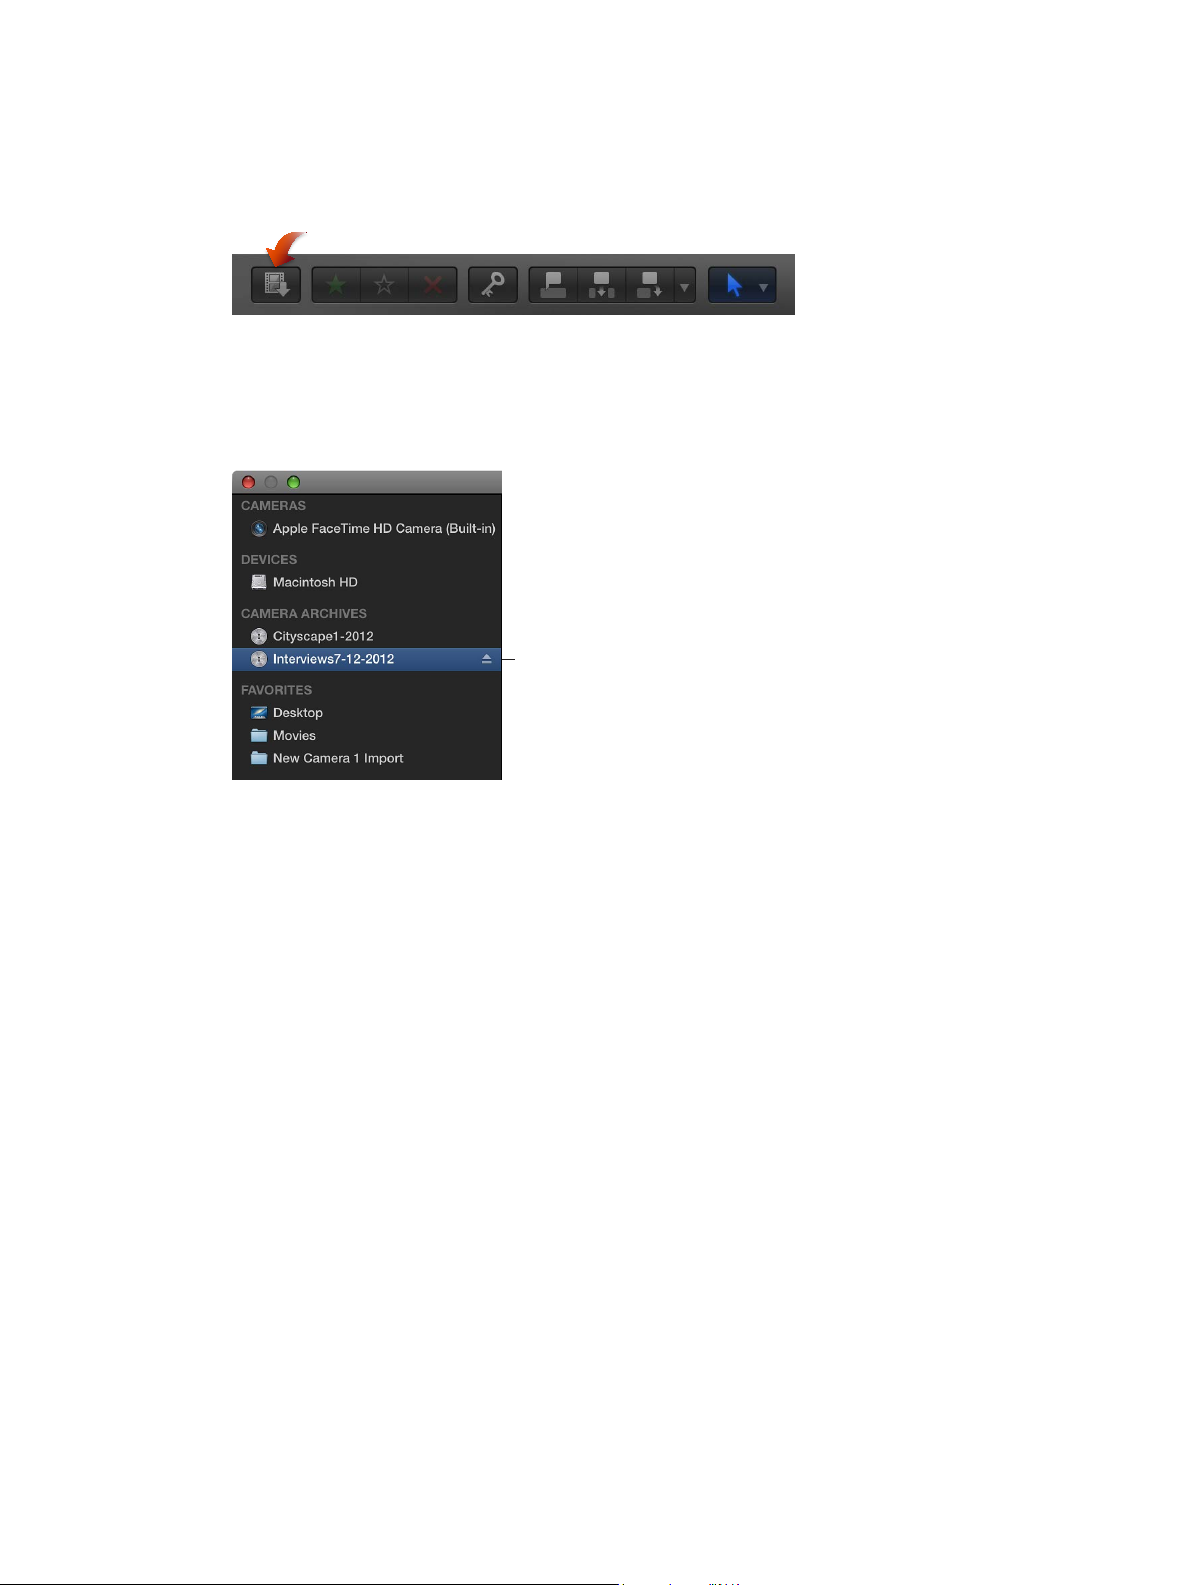
To mount a camera archive: In the Camera Archives section on the left side of the Media Import
window, select a camera archive to connect to it.
Note: To disconnect the camera archive, click the Eject button.
Camera archive
•
To mount a disk image: In the Devices section on the left side of the Media Import window,
select your computer’s hard disk or the connected external storage device or memory card
from which you want to import media. Then use the list at the bottom of the window to
navigate to the disk image and select it.
The archive (or disk image) is connected to Final Cut Pro and its media is displayed in the Media
Import window.
3 To import the media, see Import from le-based cameras on page 20.
Organize les while importing
You can choose how to organize your media when you import it into Final Cut Pro.
•
Copy les to Final Cut Events folder: This option duplicates the media les and places the copy
in the Final Cut Events folder on your computer. If you’re importing media from a dierent disk
or volume, or if you want to keep a copy of all the media les that have been imported into
Final Cut Pro in the same location (in the Final Cut Events folder), select this checkbox.
If you import les with this checkbox deselected, Final Cut Pro creates reference les (le
aliases) that simply point to the source media les without copying them. When you back
up events and projects that use these les, Final Cut Pro copies the reference les only (not
the source media les). If, after you back up your project or event, you want to replace the
reference les with the actual source media les, select the events and choose File > Organize
Event Files.
Chapter 3 Importmedia 37
Page 38

•
Import folders as Keyword Collections: If you have folders of les that have meaningful folder
names, selecting this option creates a keyword for each folder name and applies the keyword
to all the les in the folder during import. Additionally, a Keyword Collection is created for
each keyword.
After import, these clips
will have “B-roll” and
“Callaway” keywords.
After import, these clips
will have “Interviews” and
“Callaway” keywords.
Organize your les during import
1 To import a le, choose File > Import > Files and navigate to the le you want to import.
2 In the window that appears, choose how you want to organize the imported media in the
Event Library:
•
To add the imported media to an existing event: Select “Add to existing event,” and choose the
event from the pop-up menu.
•
To create a new event: Select “Create new Event” and type a name (for example, “Chris and Kim
Wedding”) in the text eld; then choose the disk where you want to store the event from the
“Save to” pop-up menu.
To learn more about events, see Events and clips overview on page 51.
3 Select one or both of the organize options (explained above).
4 If you want to transcode your media, analyze the video, or analyze the audio, select the
relevant checkboxes.
If you don’t set Final Cut Pro to analyze your media during the import process, you can analyze it
later (if necessary) in the Event Browser.
5 Click Import.
Final Cut Pro imports your media in the background. If you selected any options in the previous
step, Final Cut Pro transcodes and optimizes the les after the import process is complete. You
can view the progress of the background tasks in the Background Tasks window.
6 To begin working with your clips, close the Media Import window so that you can access the
Event Browser.
Copy all external media les used by an event to its event folder
1 Select the event in the Event Library.
2 Choose File > Organize Event Files.
3 In the window that appears, click Continue.
Final Cut Pro duplicates the media les and places the copy in the Final Cut Events folder on
your computer.
Chapter 3 Importmedia 38
Page 39

Importwhilerecording
You can record video directly into Final Cut Pro using your computer’s built-in camera or an
external iSight camera.
Record live video and audio into Final Cut Pro
1 Do one of the following:
•
To record using the built-in camera: Click the Import Media button in the toolbar.
•
To record using an external iSight camera: Connect the iSight camera to your computer with a
FireWire cable, and click the Import Media button in the toolbar.
2 In the Cameras list on the left side of the Media Import window, select the camera you want to
import from.
A live video image from the camera appears in the Media Import window.
3 Click Import.
The Event Settings window appears.
4 Choose how you want to organize the imported media in the Event Library:
•
To add the imported media to an existing event: Select “Add to existing event,” and choose the
event from the pop-up menu.
•
To create a new event: Select “Create new Event” and type a name (for example, “Chris and Kim
Wedding”) in the text eld; then choose the disk where you want to store the event from the
“Save to” pop-up menu.
To learn more about events, see Events and clips overview on page 51.
5 If you want to organize your media, create optimized or proxy media, analyze the video, or
analyze the audio, select the relevant checkboxes.
If you don’t set Final Cut Pro to analyze your media during the import process, you can analyze it
later (if necessary) in the Event Browser.
Chapter 3 Importmedia 39
Page 40

6 When you’re ready to begin recording, click Import.
The camera begins recording immediately.
7 When you want to stop recording, click Stop Import.
A new video clip is created. You can click Import to begin recording again. You can repeat this
process as many times as necessary.
Tip: It’s also possible to capture live video from some video camcorders over a FireWire cable
using QuickTime X. For more information, see QuickTime Player Help.
About memory cards and cables
To import media from your recording device to your computer, you need to remove the memory
card from your device and insert it into either your computer or a memory card reader. You can
also connect your device directly to your computer using the appropriate cable. Then you can
import the media on the memory card or device using the Media Import window. For more
information, see Import from a hard disk on page 34 and Import from le-based cameras on
page 20.
•
Memory cards: Many le-based camcorders and devices record media on a removable memory
card. You can connect a card reader to your computer and use that to transfer the contents of
your memory card onto your computer. Some Mac computers feature an SD (Secure Digital)
or SDXC (SD extended capacity) card slot that allows these computers to read and write data
to SD media inserted in the slot. If your Mac has a card slot, you can remove the card from the
camera, insert the card into your Mac, and then import the les.
For more information, go to http://support.apple.com/kb/ht3553.
You can also connect your device to the computer using a FireWire or USB cable. The kind of
cable you need depends on the kind of device you’re using:
•
USB device: You use a USB cable for le-based camcorders, digital still cameras that record
video, and iPhone, iPad, and iPod touch. The USB cable should have at least one connector
that plugs into your Mac (at the top in the illustration below). The other end of the USB
cable, which plugs into your recording device, might look dierent (on the bottom in the
illustration below).
Chapter 3 Importmedia 40
Page 41

•
FireWire device: For most camcorders that record to tape, you use a FireWire cable with a 6-pin
connector on one end that plugs into your Mac (at the top in the illustration below) and
a 4-pin connector on the other end that plugs into your camcorder (on the bottom in the
illustration below).
Or you might have a FireWire 800 cable, with a dierent end that plugs into your camcorder
or computer.
•
Thunderbolt device: Devices that use Thunderbolt I/O technology use a connector that plugs
into the mini display port on your Mac and looks like the connector below.
If your device didn’t come with a cable and you’re not sure what kind of device you have, you
can check the logo near the cable ports on your device to see if it matches the USB or FireWire
logo, both shown above. Otherwise, check the documentation that came with your device.
Note: Not all Mac computers include a FireWire port. Check your system conguration to conrm
that your Mac includes FireWire support before attempting to connect a standard (DV) or
HDV camcorder.
To check whether your camera is compatible with Final Cut Pro, go to the Final Cut Pro X
Supported Cameras webpage at http://help.apple.com/nalcutpro/cameras.
Supportedmediaformats
You can import and work with the following video, audio, and still-image formats in Final Cut Pro:
Video formats
•
Apple Animation codec
•
Apple Intermediate codec
•
Apple ProRes (all versions)
•
AVC-Intra
•
AVCHD (including AVCCAM, AVCHD Lite, and NXCAM)
•
DV (including DVCAM, DVCPRO, and DVCPRO50)
•
DVCPRO HD
•
H.264
•
HDV
•
iFrame
•
Motion JPEG (OpenDML only)
Chapter 3 Importmedia 41
Page 42

•
MPEG IMX (D-10)
•
REDCODE RAW (R3D)
•
Uncompressed 10-bit 4:2:2
•
Uncompressed 8-bit 4:2:2
•
XAVC
•
XDCAM HD/EX/HD422
•
QuickTime formats
Audio formats
•
AAC
•
AIFF
•
BWF
•
CAF
•
MP3
•
MP4
•
WAV
Still-image formats
•
BMP
•
GIF
•
JPEG
•
PNG
•
PSD (static and layered)
•
RAW
•
TGA
•
TIFF
Container formats
•
3GP
•
AVI
•
MP4
•
MXF
•
QuickTime
Chapter 3 Importmedia 42
Page 43

ImportandadjustREDCODERAWvideoles
You can import and work with REDCODE RAW (R3D) les in Final Cut Pro.
RAW format video les require some additional steps before and after import.
After the R3D RAW les are imported, you can make nondestructive color correction adjustments
directly within Final Cut Pro.
Import REDCODE RAW (R3D) les
1 Install the appropriate plug-in.
In order for Final Cut Pro to recognize the R3D RAW les, you must download and install the
corresponding plug-in. For more information, go to http://www.red.com.
2 Import the media.
Important: When you import the media, make sure to deselect the “Create optimized media”
and “Create proxy media” options, because any transcoding work done during import will be
discarded if you adjust the RAW settings in the next step.
For more information about importing media, see Import from le-based cameras on page 20
and Import from a hard disk on page 34. For more information about transcoding media, see
Transcode media les on page 397.
Note: If you are importing les from the RED ONE camera, it is recommended that you import
the R3D RAW les only. The RED ONE camera typically generates a set of up to four QuickTime
reference movie (.mov) les for each R3D RAW le. If you select both the R3D le and the
reference movies during the import process, Final Cut Pro imports the R3D le only. If you need
to import a reference movie, select only the reference movie, not the R3D le.
3 Adjust the RAW settings (with Final Cut Pro or with an external application such as
REDCINE–X PRO).
You can apply a nondestructive “one-light” color correction to the R3D RAW clips immediately
after import, to give your footage a more nished look for editing and review.
If you have a professional production with sophisticated color correction needs, you can revisit
these RAW settings during the nishing stage. For more information, see “Adjust RED RAW
settings,” below.
4 If you like, generate optimized or proxy media from the R3D RAW les.
For more information, see “Transcode clips after import” in Transcode media les on page 397.
Note: If you do generate optimized or proxy media, be sure to set Final Cut Pro preferences
accordingly. For more information, see Playback preferences on page 419.
5 Add the R3D RAW clips to your project and edit as you would any other clips.
Chapter 3 Importmedia 43
Page 44

Adjust RED RAW settings
You can adjust REDCODE RAW (R3D) les using the RED RAW Settings window.
Metadata about REDCODE RAW (R3D) les can be stored in two locations:
•
Internal (embedded) settings: This is metadata information recorded by the camera and
embedded in the R3D RAW le. It always remains with the le. These camera settings can be
superseded by settings in the external RMD le, but they are never overwritten. You can revert
to these camera settings by deleting any existing RMD le or by choosing Original Camera
Settings from the Revert To pop-up menu in the RED RAW Settings window.
•
External RMD le: This is an external metadata le with the le extension .RMD. This le is
created by Final Cut Pro, REDCINE-X PRO, or similar software applications. If you adjust RED
RAW settings in Final Cut Pro and an RMD le already exists, the existing le is overwritten
when the changes are saved. The embedded camera settings remain intact.
1 Install the appropriate plug-in.
In order for Final Cut Pro to recognize the R3D RAW les, you must download and install the
corresponding plug-in. For more information, go to http://www.red.com.
2 In the Event Browser or the Timeline, select the clip or clips you want to adjust.
Note: Compound clips cannot be adjusted.
3 Do one of the following:
•
Choose Window > Show Inspector (or press Command-4).
•
Click the Inspector button in the toolbar.
4 Click the Info button at the top of the pane that appears.
5 In the Info inspector, click the Modify RED RAW Settings button.
If the Modify RED RAW Settings button does not appear, choose Show File Status from the Action
pop-up menu at the bottom of the Info inspector.
6 In the RED RAW Settings window, adjust the settings.
Your changes are saved nondestructively to an external metadata le with the le extension
.RMD, overwriting any existing RMD metadata le. Unlike video eects that are applied to a clip,
these adjustments are associated with the le (via the RMD metadata le). Any changes you
make to these settings are applied to all copies of the selected clip or clips.
Note: Final Cut Pro supports the RED ROCKET card, a PCI card that provides a signicant boost
in performance.
For more information about REDCODE RAW (R3D) les and the RED ROCKET card, go to
http://www.red.com.
Chapter 3 Importmedia 44
Page 45

Analyze media
4
Analyzingmediaoverview
You can have Final Cut Pro analyze your media and automatically correct common problems
it may nd in your video, still images, and audio. For example, you can stabilize shaky video,
balance color, and remove excess hum or loudness.
You can also analyze clips to identify their contents. Analysis can detect the number of people in
a shot and identify if the shot is a close-up, medium, or wide shot. This is helpful if you need to
quickly nd a certain type of clip while viewing footage or editing a project. For complete lists of
the video and audio analysis options, see Video and still-image analysis options on page 45 and
Audio analysis options on page 46.
You can analyze media during the import process or after you import the media into
Final Cut Pro. You can also set Final Cut Pro to automatically analyze clips you drag directly to the
Final Cut Pro Timeline from the Finder.
After certain types of analysis, keywords are automatically added to clips or clip ranges to
describe the results of the analysis. For example, a clip range with shaky video is assigned the
Excessive Shake keyword. In the Event Browser, clips with analysis keywords have a purple line at
the top. (Clips with keywords you add manually have a blue line at the top. For more information,
see Add keywords to clips on page 64.)
Videoandstill-imageanalysisoptions
Final Cut Pro provides automatic video and still-image analysis options that can nd and
correct shaky video, automatically balance color in video, and detect people and shot angles in
video or still images. You can analyze video during import, or analyze video clips in the Event
Browser after import. Analysis keywords are added to clips or clip ranges based on the results of
the analysis.
Final Cut Pro provides these video and still-image analysis options:
•
Analyze for stabilization and rolling shutter: Analyzes video clips and adds the Excessive Shake
analysis keyword to clips or clip ranges with excessive shake, rolling shutter, or both. If a clip
has an Excessive Shake keyword, you can x the shaking after you add the clip to the Timeline
by turning on Stabilization and Rolling Shutter corrections. See Correct excessive shake and
rolling shutter issues on page 154. If a clip doesn’t have stabilization-related issues, the Steady
Shot analysis keyword is added.
Note: If you’re analyzing for stabilization problems, it’s recommended that you also select the
“Create Smart Collections after analysis” checkbox so that you can easily locate clips with the
Excessive Shake keyword.
Important: Analysis for stabilization and rolling shutter is available only after import. For more
information, see Analyze your media on page 47.
45
Page 46

•
Analyze for balance color: Analyzes video clips to detect color balance and contrast. Color is
automatically balanced when you add the clip to the Timeline. You can turn automatic color
adjustments on and o at any time.
•
Remove pulldown: Analyzes video clips and removes pulldown patterns.
Important: This option is available only when importing from a tape-based camera or device.
•
Find people: Analyzes video clips and still images for the number of people present and shot
types. After analysis, any of the following keywords are added to the clips or clip ranges: One
Person, Two Persons, Group, Close Up Shot, Medium Shot, and Wide Shot.
Note: If you’re analyzing to nd people, it’s recommended that you also select the “Create
Smart Collections after analysis” checkbox so that you can easily locate clips with “nd people”
analysis keywords.
•
Consolidate nd people results: Consolidates all of the “nd people” analysis keywords into one
shot type keyword and one people keyword for every 2-minute segment of video. The shot
type keyword chosen is the one for the widest shot type, and the people keyword chosen is
the one representing the most people. For example, if a video segment contains Medium Shot,
Wide Shot, One Person, and Group keywords, the segment's analysis keywords are reduced to
Wide Shot and Group during consolidation.
•
Create Smart Collections after analysis: Creates a Smart Collection for each keyword applied
when analyzing video clips for image stabilization problems or analyzing video clips and still
images for the presence of people. The Smart Collections are listed alphabetically in a People
folder inside the event in the Event Library.
When you drag a media le from the Finder to a Final Cut Pro event or the Timeline, the import
begins automatically, without displaying a window of import options. You can set automatic
import options in the Final Cut Pro Import preferences pane.
Audioanalysisoptions
Final Cut Pro provides automatic analysis options that can x common audio problems, analyze
and group audio channels, and remove silent channels. You can analyze audio during import, or
analyze video clips with audio issues in the Event Browser or in the Timeline.
Final Cut Pro provides these audio analysis options:
•
Analyze and x audio problems: Analyzes the audio for hum, noise, and loudness. Final Cut Pro
automatically xes problems that are considered severe (marked in red) and ags problems
that are considered moderate (marked in yellow). For more information, see Enhance audio on
page 199.
•
Separate mono and group stereo audio: Audio channels are analyzed and grouped as dual
mono or stereo, depending on the results of the analysis. Automatically corrected audio
channels are marked as Autoselected. For more information about audio channels, see
Congure audio channels on page 169.
•
Remove silent channels: Audio channels are analyzed, and silent channels are automatically
removed. Clips that have had channels removed are marked as Autoselected. For more
information about audio channels, see Congure audio channels on page 169.
When you drag a media le from the Finder to a Final Cut Pro event or the Timeline, the import
begins automatically, without displaying a window of import options. You can set automatic
import options in the Final Cut Pro Import preferences pane.
Chapter 4 Analyze media 46
Page 47

Analyze your media
You can analyze clips during the import process, analyze clips in the Event Browser after import,
or set Final Cut Pro to analyze clips automatically when they are dragged to a Final Cut Pro event
or the Timeline.
Note: Analysis for stabilization and rolling shutter is available only after import.
Analyze clips during import
1 Do one of the following:
•
To import a le from a compatible camcorder or camera, iPad, iPhone, iPod, or other device:
Connect the device to your computer, turn on the device, and choose File > Import > Media
(or press Command-I). In the window that appears, select the le you want to import, and click
the Import button.
•
To import a le from a tape-based camcorder: Connect the camcorder to your computer, turn
on the camcorder, and set it to VTR or VCR mode. Then choose File > Import > Media (or press
Command-I) and click the Import button.
•
To import a le from a memory card: Insert the memory card into the card slot on your Mac or
into a card reader that’s connected to your computer, and choose File > Import > Media (or
press Command-I). In the window that appears, select the le you want to import, and click
the Import button.
•
To import a le located on your hard disk or a connected external storage device: Choose File >
Import > Media (or press Command-I). In the window that appears, select the le you want to
import, and click the Import button.
•
To import from an archive: Choose File > Import > Media (or press Command-I). In the window
that appears, select a camera archive from the list on the left, click Open Archive, select the
les you want to import, and click the Import button.
2 In the window that appears, choose how you want to organize the imported media in the
Event Library:
•
To add the imported media to an existing event: Select “Add to existing Event,” and choose the
event from the pop-up menu.
•
To create a new event: Select “Create new Event” and type a name (for example, “Chris and Kim
Wedding”) in the text eld. Use the “Save to” pop-up menu to choose the disk where you want
to store the event.
To learn more about events, see Events and clips overview on page 51.
3 Select any of the video and audio analysis options that you want to apply.
For descriptions of the video and audio analysis options, see Video and still-image analysis
options on page 45 and Audio analysis options on page 46.
Final Cut Pro will analyze the les in the background, after the import process is complete.
4 Click Import.
The import may take a while, depending on the options you selected in step 3. You can see the
status of all the background processes currently running in the Background Tasks window.
Chapter 4 Analyze media 47
Page 48

Analyze clips after import
1 In the Event Browser, Control-click one or more clips and choose “Analyze and Fix” from the
shortcut menu.
Tip: To quickly nd a clip used in the Timeline, Control-click the clip and choose “Reveal in Event
Browser” from the shortcut menu.
2 In the window that appears, select any or all of the video analysis and audio analysis options that
you want to apply, and click OK.
The transcoding process may take a while, depending on the analysis options you selected.
You can see the status of all the background processes currently running in the Background
Tasks window.
Automatically analyze media les when they are dragged to an event or the Timeline
1 Choose Final Cut Pro > Preferences.
2 In the Preferences window, click Import and select each of the video and audio analysis options
that you want to apply.
When you’re nished, close the Preferences window.
3 To import one or more les, select a le (or Command-click multiple les) in the Finder and drag
the selection to an event or the Timeline.
Viewanalysiskeywordsonclips
If you analyzed media to nd shaky footage or people, analysis keywords such as Excessive
Shake, One Person, Close Up Shot, and so on are automatically added to clips or clip ranges.
Clips or ranges with analysis keywords are marked with a purple line in the Event Browser.
A clip with a purple
line has one or more
analysis keywords.
You can view a clip’s analysis keywords in several locations in Final Cut Pro.
Chapter 4 Analyze media 48
Page 49
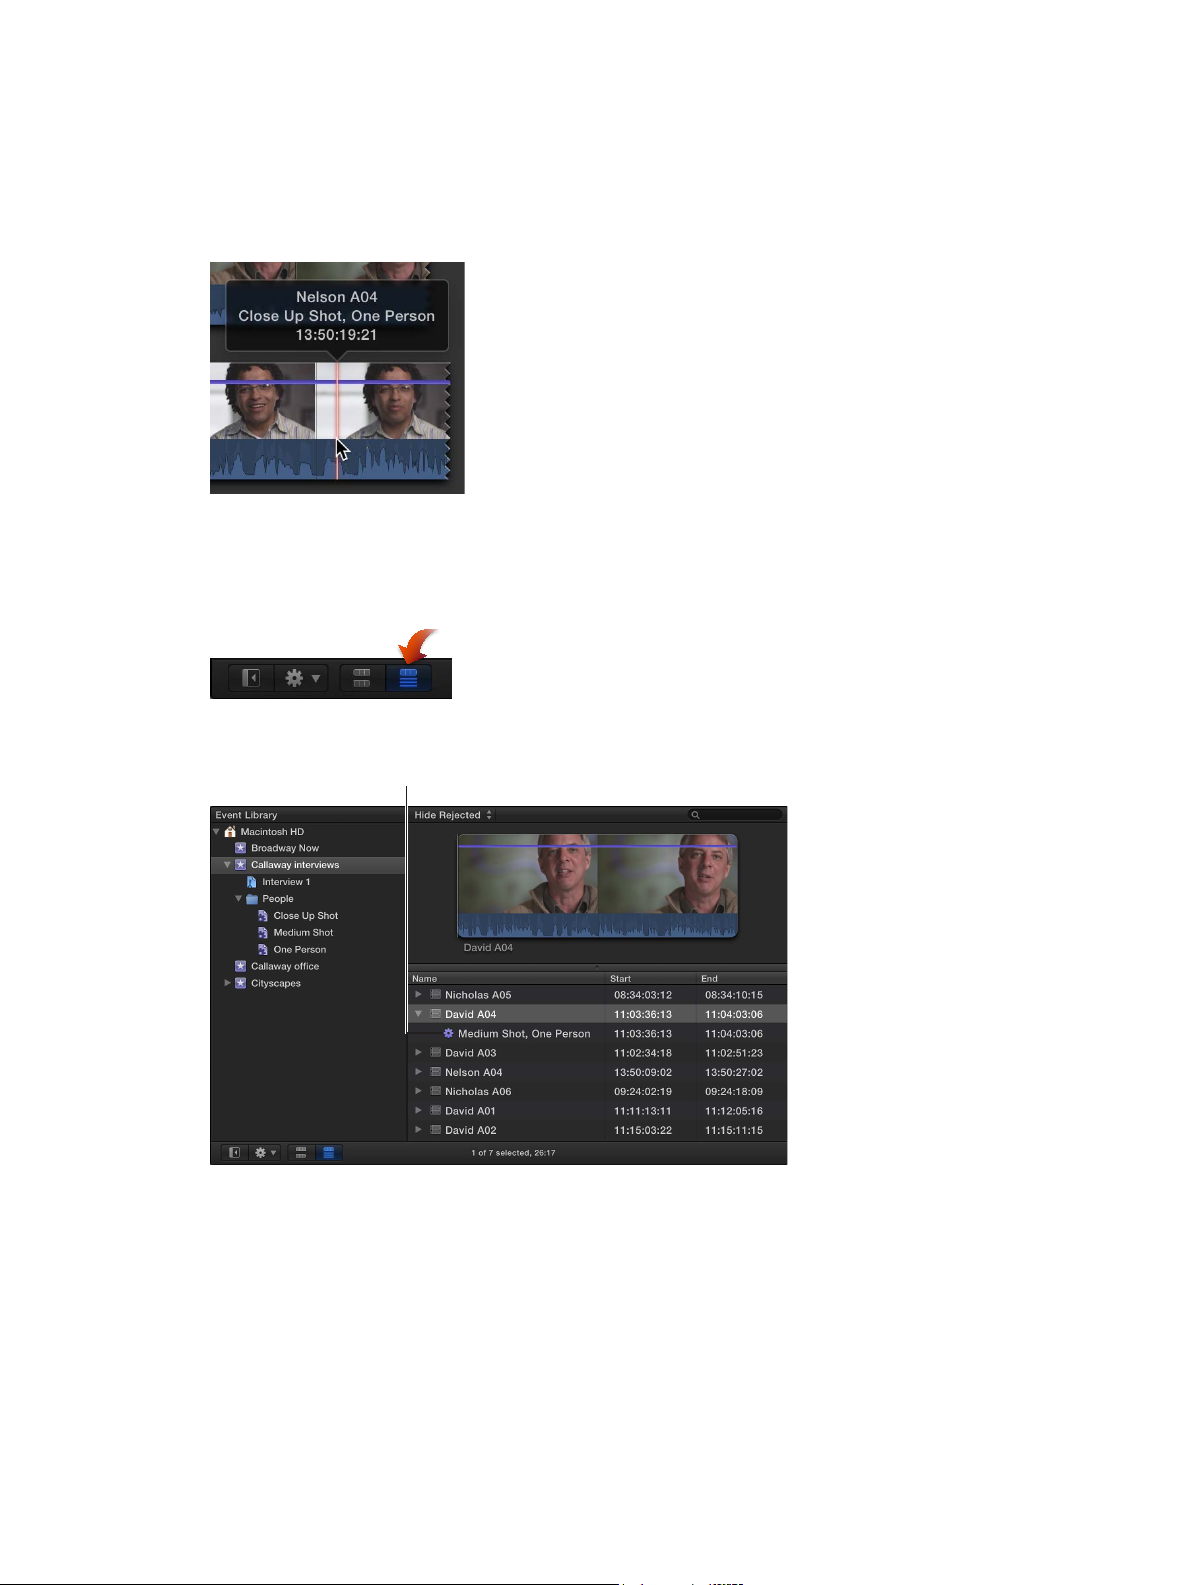
View keywords in the Skimmer Info window
The analysis keywords are
1 Choose View > Show Skimmer Info (or press Control-Y).
2 Skim the clip in the Event Browser.
Keywords, including analysis keywords, are displayed in the Skimmer Info window when you
hold the pointer over the clip.
To turn o Skimmer Info, choose View > Hide Skimmer Info (or press Control-Y).
View keywords in list view in the Event Browser
1 Click the List View button.
2 To see a clip’s keywords, click the disclosure triangle next to the clip.
listed next to the purple gear.
Chapter 4 Analyze media 49
Page 50

View the contents of a Smart Collection
Medium Shot Smart Collection
If you chose to create Smart Collections after analysis, clips that have analysis keywords are
automatically grouped in Smart Collections within the event in the Event Library. A Smart
Collection is created for each analysis keyword and placed in either a People folder or a
Stabilization folder, depending on the type of analysis.
m In the Event Library, select an analysis keyword Smart Collection inside a People folder or
Stabilization folder in an event.
The clips with that analysis keyword appear in the Event Browser. For example, if you select the
Medium Shot Smart Collection, all the clips in the event that have the Medium Shot keyword
appear in the Event Browser.
These clips contain the
Medium Shot analysis keyword.
Chapter 4 Analyze media 50
Page 51
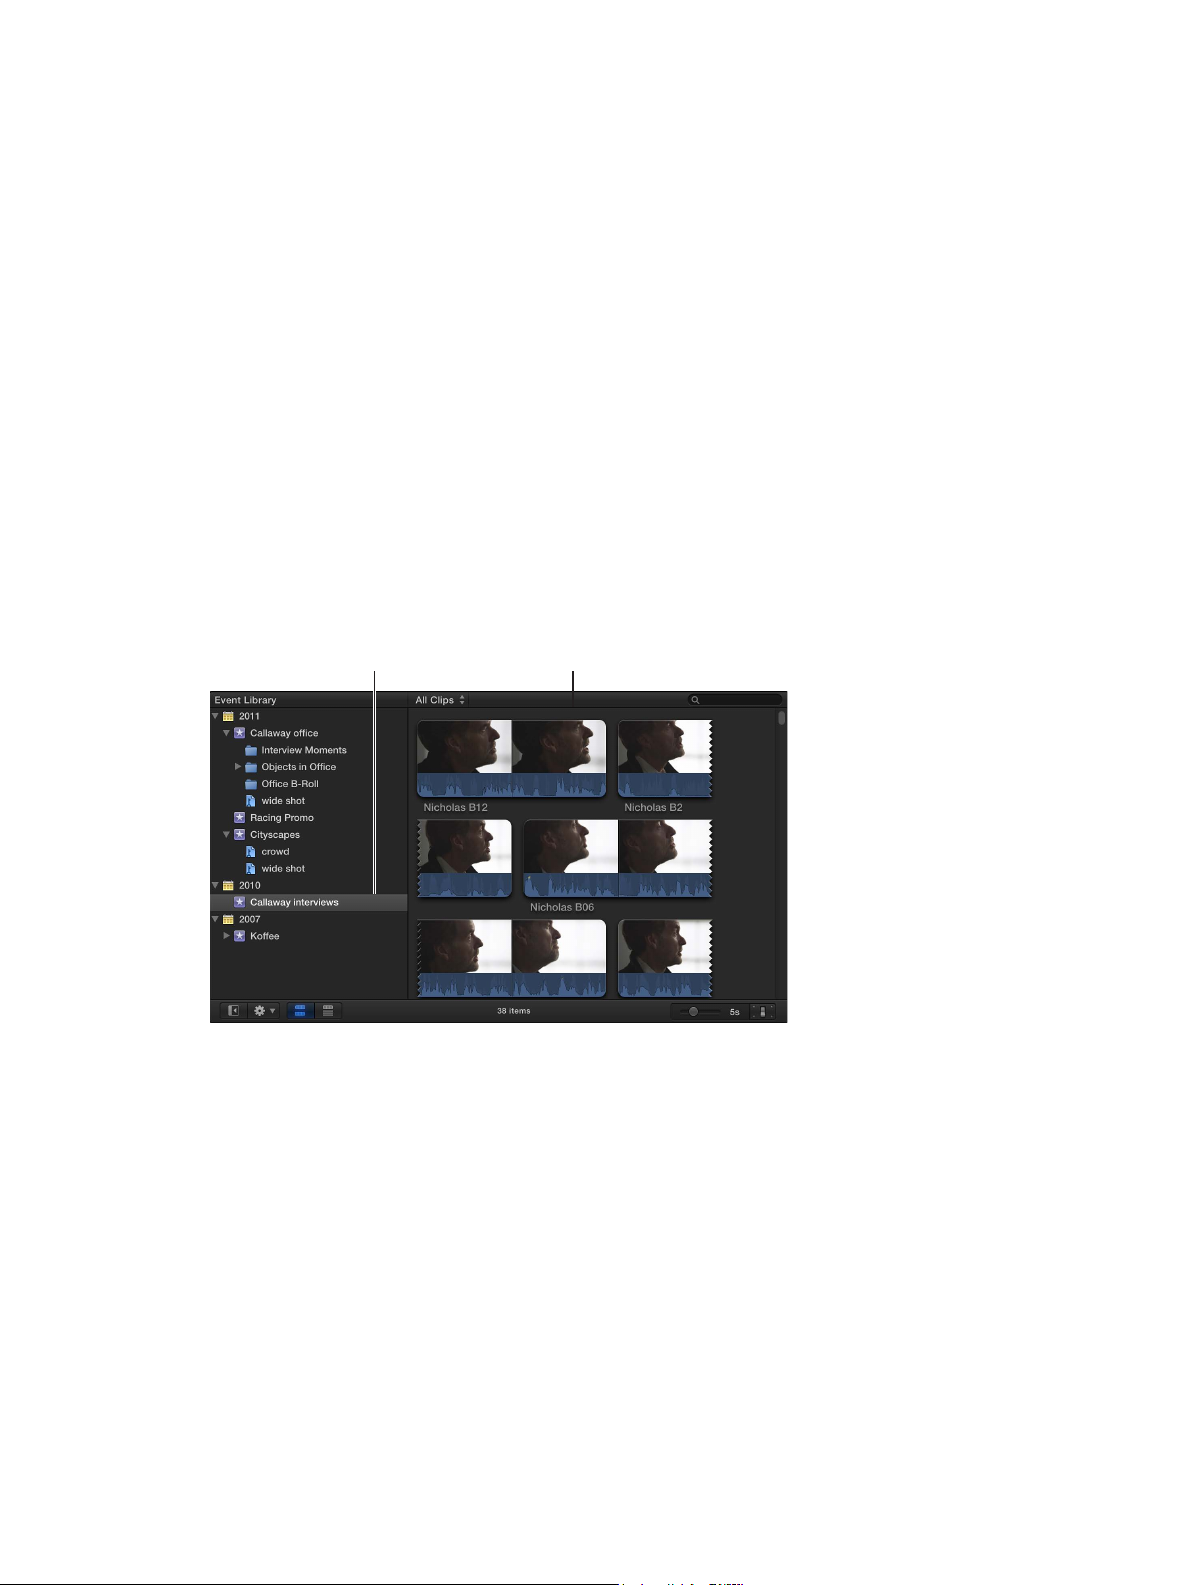
Select an event
The Event Browser displays
Organize your media
5
Eventsandclipsoverview
When you import video, audio, and still images, or record directly into Final Cut Pro, the source
media les (your raw footage) appear as clips in one or more events in the Event Library. An
event is similar to a folder that can hold dozens, hundreds, or even thousands of video clips,
audio clips, and still images. Each event in the Event Library refers to a folder on your hard
disk that contains the original source media les, any render les related to your media, and a
database le that keeps track of where everything is.
When you select an event in the Event Library, the media it contains appears as clips in the Event
Browser. You select clips or portions of clips in the Event Browser to work with them. You can sort
clips in the Event Browser by creation date, as well as by date imported, reel, scene, clip duration,
and le type.
in the Event Library.
When you import video into a new event, you name the event. By giving your events meaningful
names, such as “Smith Wedding 2011,” you can organize all of your media so that it’s readily
accessible. By default, Final Cut Pro lists the events in the Event Library by the date they were
recorded. You can organize the Event Library in other ways, and you can also hide the Event
Library to give yourself more room to work. The Event Library is also the home for Final Cut Pro
Keyword Collections and Smart Collections which provide a powerful way to organize your video
editing projects using keywords and persistent search lters.
the clips in the selected event.
51
Page 52
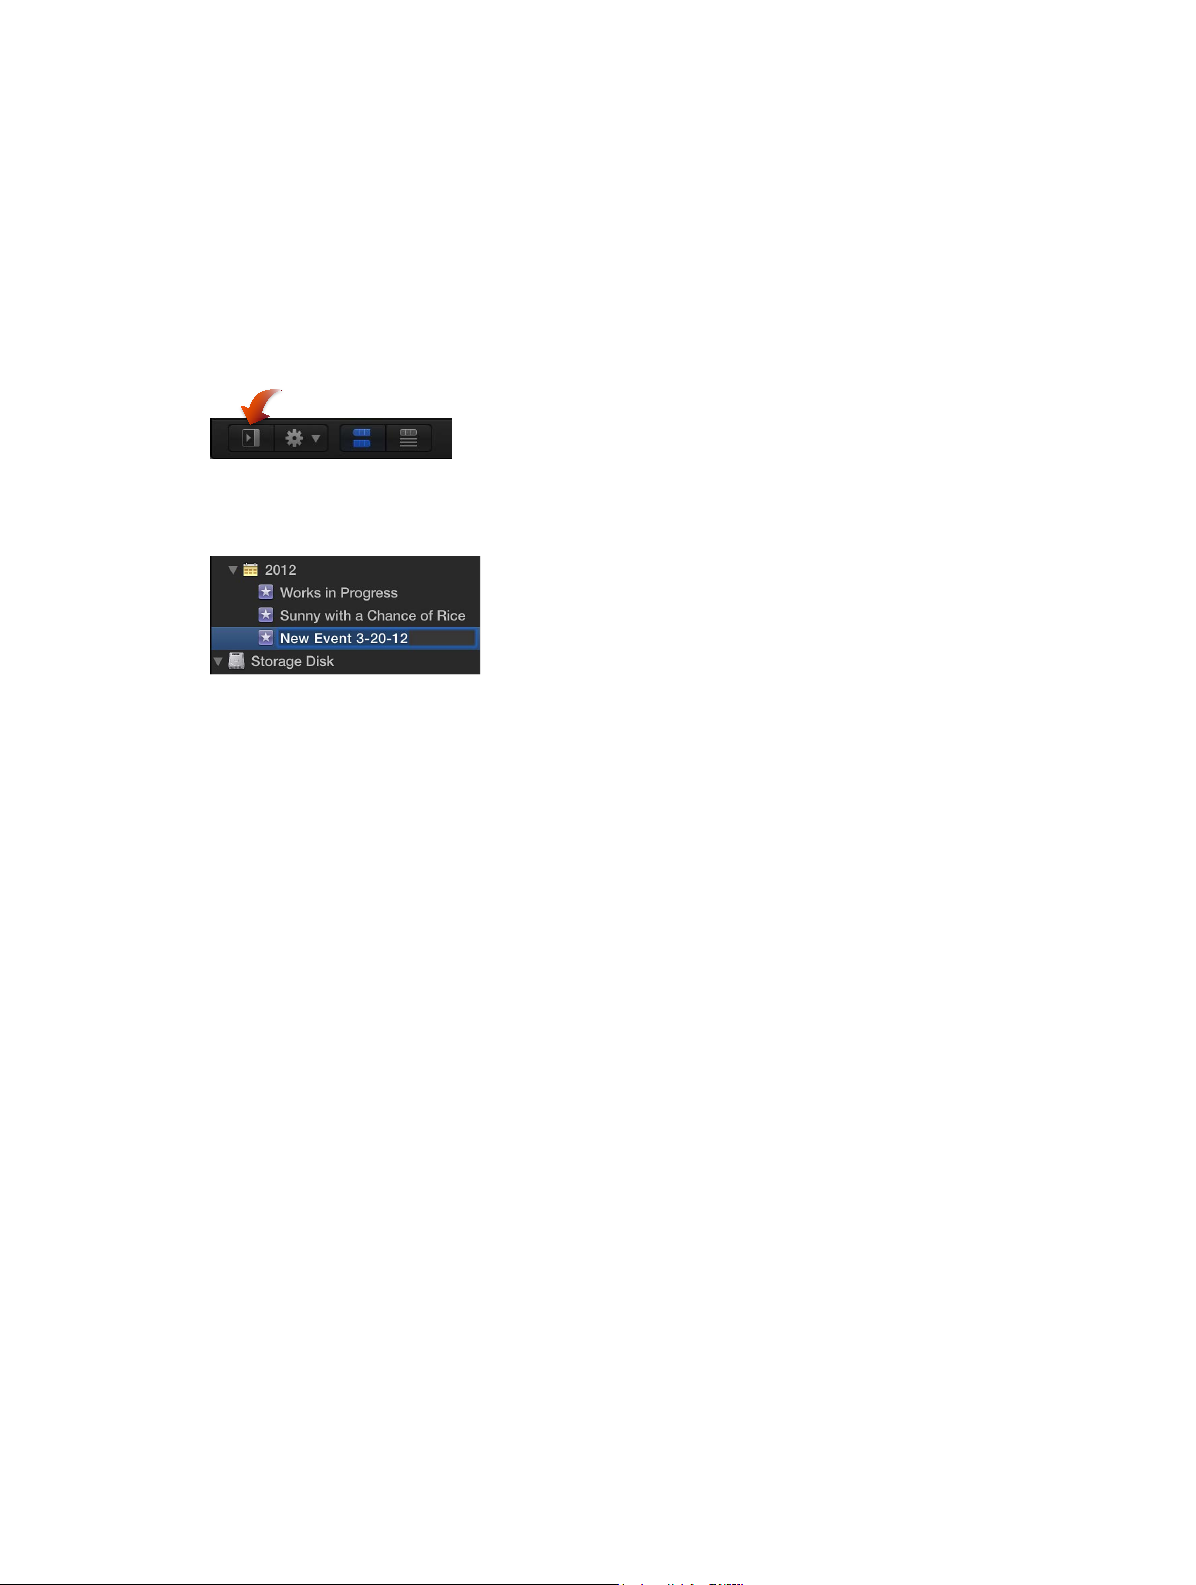
Organizeevents
Create a new event
After importing your source media les into Final Cut Pro, you may nd that you need to create
additional events to organize your media. For example, after importing media shot for a specic
client, you may decide to split the media into events dened by the location the media was shot
in; or split the media by the time of day it was shot, such as morning, afternoon, and evening.
Create a new event in the Event Library
1 If you don’t see the Event Library, click the Event Library button at the bottom-left corner of the
Event Browser.
2 Choose File > New Event (or press Option-N).
A new event appears in the Event Library.
3 Type a name for the event and press Return.
4 Move clips from other events into the new event, as necessary.
Rename an event
Change an event’s name
As your project evolves, you may nd that you want to rename an event so that it more
accurately reects the clips it contains.
1 In the Event Library, select the event whose name you want to change.
2 Do one of the following:
•
Click the event’s name and type a new name.
•
Press Return and type a new name.
Important: Renaming an event also renames the event’s folder on the hard disk where your
source media is located.
Chapter 5 Organizeyourmedia 52
Page 53

Merge or split events
You can merge (combine) two or more events in the Event Library (for example, if the media they
contain is very closely related). You can also split a single event into multiple events if you nd an
event is getting unmanageable.
Merge multiple events
1 In the Event Library, do one of the following:
•
Drag one or more events that you want to combine to a new event.
•
Select the events you want to combine, and choose File > Merge Events.
2 In the Merge Events window that appears, type a new name for the event.
3 Choose the disk where you want to store the event’s source media les from the Location
pop-up menu, and click OK.
Final Cut Pro merges the selected events into a single event in the Event Library. The source
media les for all the clips are moved into the merged event folder on the hard disk and stored
in the location you chose from the pop-up menu.
Split an event into multiple events
1 Create the new events you need.
2 Move the clips you want to separate out from the original event to the new events.
The source media les for all the clips are moved into the event folders on disk corresponding to
the newly created events in the Event Library.
Important: If you disconnect the disk where your merged or split events are stored, you will
not be able to access the events or their source media les from within Final Cut Pro until you
reconnect the disk.
Copy or move clips between events
You can copy and move clips from one event to another. When you copy a clip from one event
to another, the corresponding le is duplicated on disk. When you move a clip from one event to
another, the corresponding le is moved from one event folder to the other on disk.
Note: When you import media into Final Cut Pro, you have the option to select the “Copy les
to Final Cut Events folder” checkbox, which duplicates the source media les on your hard disk.
If you import les with this checkbox deselected, Final Cut Pro creates reference les (aliases)
that simply point to the source media les without copying them. When you copy or move
clips between events, Final Cut Pro copies or moves the reference les only (not the source
media les). If, after you have copied or moved the clips, you want to replace the corresponding
reference les with the actual source media les, select the events and choose File > Organize
Event Files. For more information about les and clips, see Media les and clips on page 17.
Chapter 5 Organizeyourmedia 53
Page 54
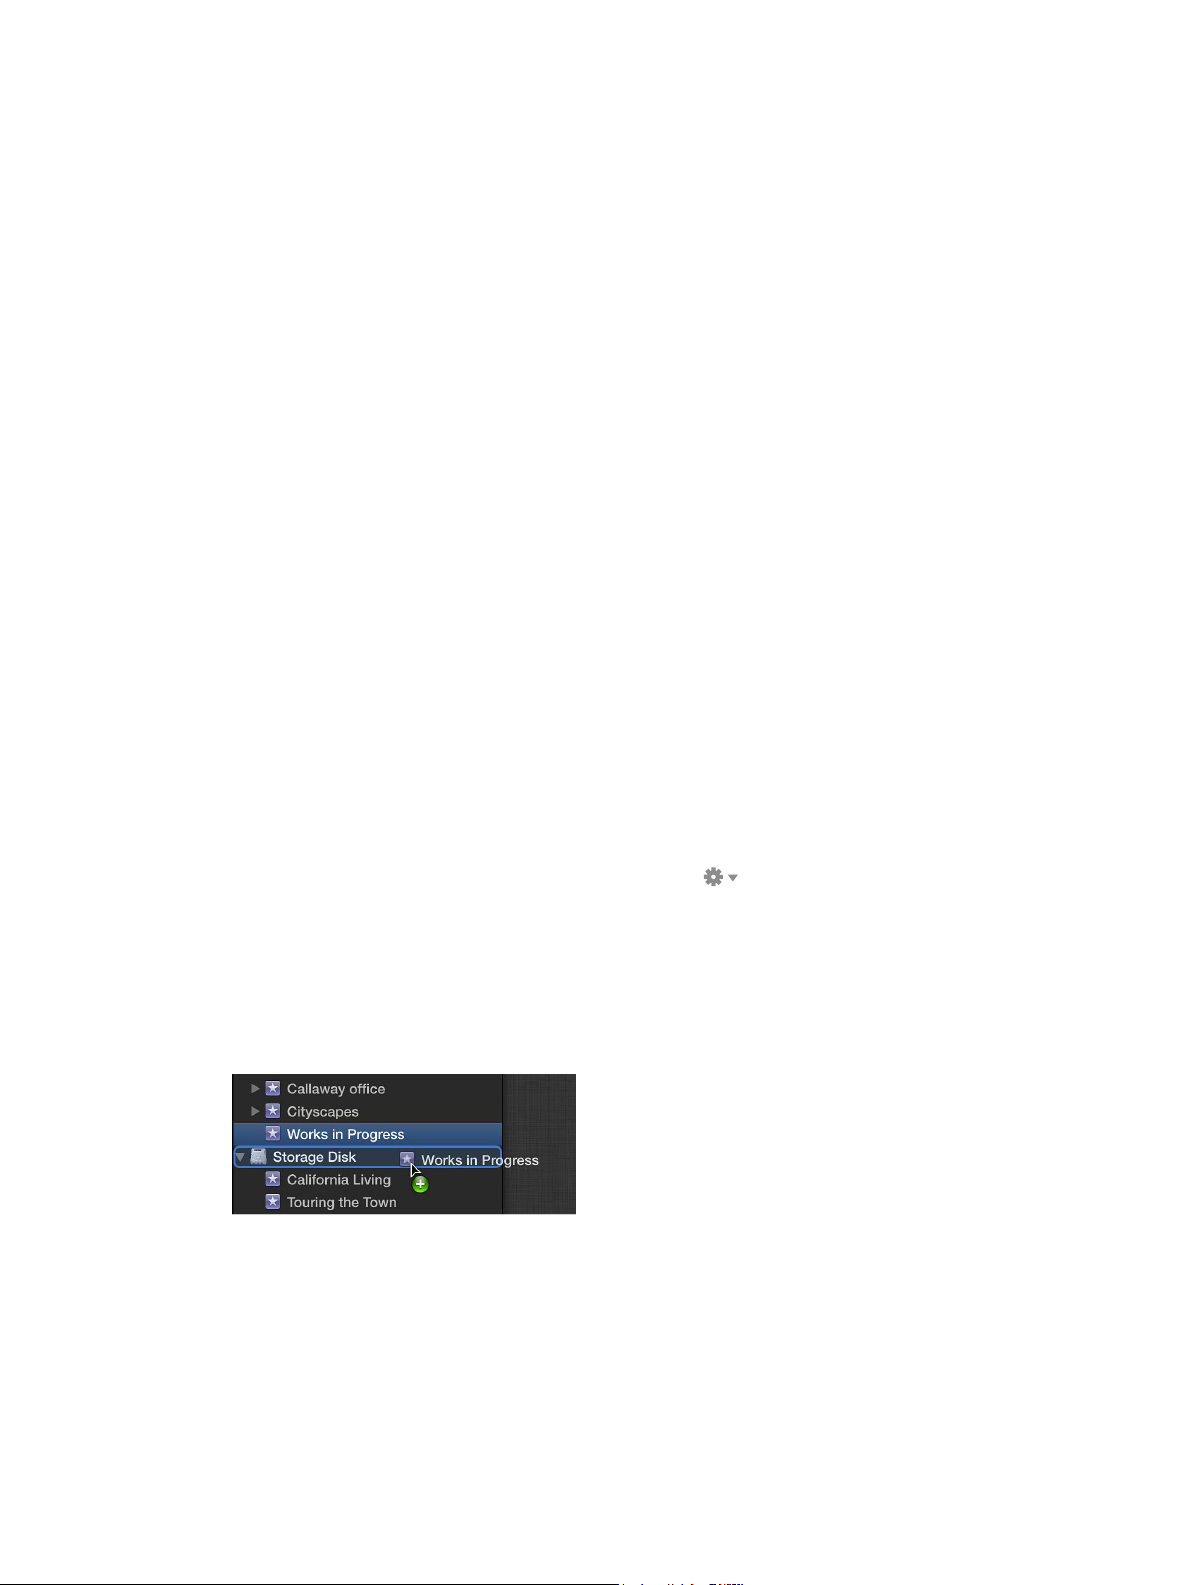
Copy clips from one event to another
1 In the Event Library, select the event that contains the clips you want to copy.
2 In the Event Browser, select the clip or clips you want to copy.
3 Do one of the following:
•
If both events are on the same hard disk: Option-drag the clips from one event to the other by
rst starting to drag and then holding down the Option key as you drag.
•
If the events are on separate hard disks: Drag the clips from one event to the other.
Move clips from one event to another
1 In the Event Library, select the event that contains the clips you want to move.
2 In the Event Browser, select the clip or clips you want to move.
3 Do one of the following:
•
If both events are on the same hard disk: Drag the clips from one event to the other.
•
If the events are on separate hard disks: Command-drag the clips from one event to the other.
The event to which you copy or move the clips may be re-sorted in the Event Library. It will be
listed below the year in which its most recent clip was recorded.
If you copy or move a large clip from an event stored on one hard disk to an event stored on
another, the move may take a few minutes as the source media les are copied or moved from
disk to disk.
Copy or move events
You can easily copy or move an event from your computer to a hard disk or from one hard disk
to another. This is useful if you want to work with your event on another computer that has
Final Cut Pro installed or free up space on your computer’s hard disk.
Copy an event
1 Make sure another hard disk is connected to your computer.
2 Choose Group Events by Disk from the Action pop-up menu below the Event Library.
The connected disk drive’s icon and name appear in the Event Library.
3 Select an event in the Event Library.
4 Do one of the following:
•
Choose File > Duplicate Event (or press Command-D).
•
Drag the event to the external drive’s icon.
5 In the Duplicate Event window, type a name for the new event.
6 To store your les in a second location, choose it from the Location pop-up menu.
7 Click OK.
Final Cut Pro makes a copy of the event at the location you chose. It also makes copies of the
source media les and places them in a new event folder. Keep in mind that copying an event
with large source media les can take several minutes.
Chapter 5 Organizeyourmedia 54
Page 55
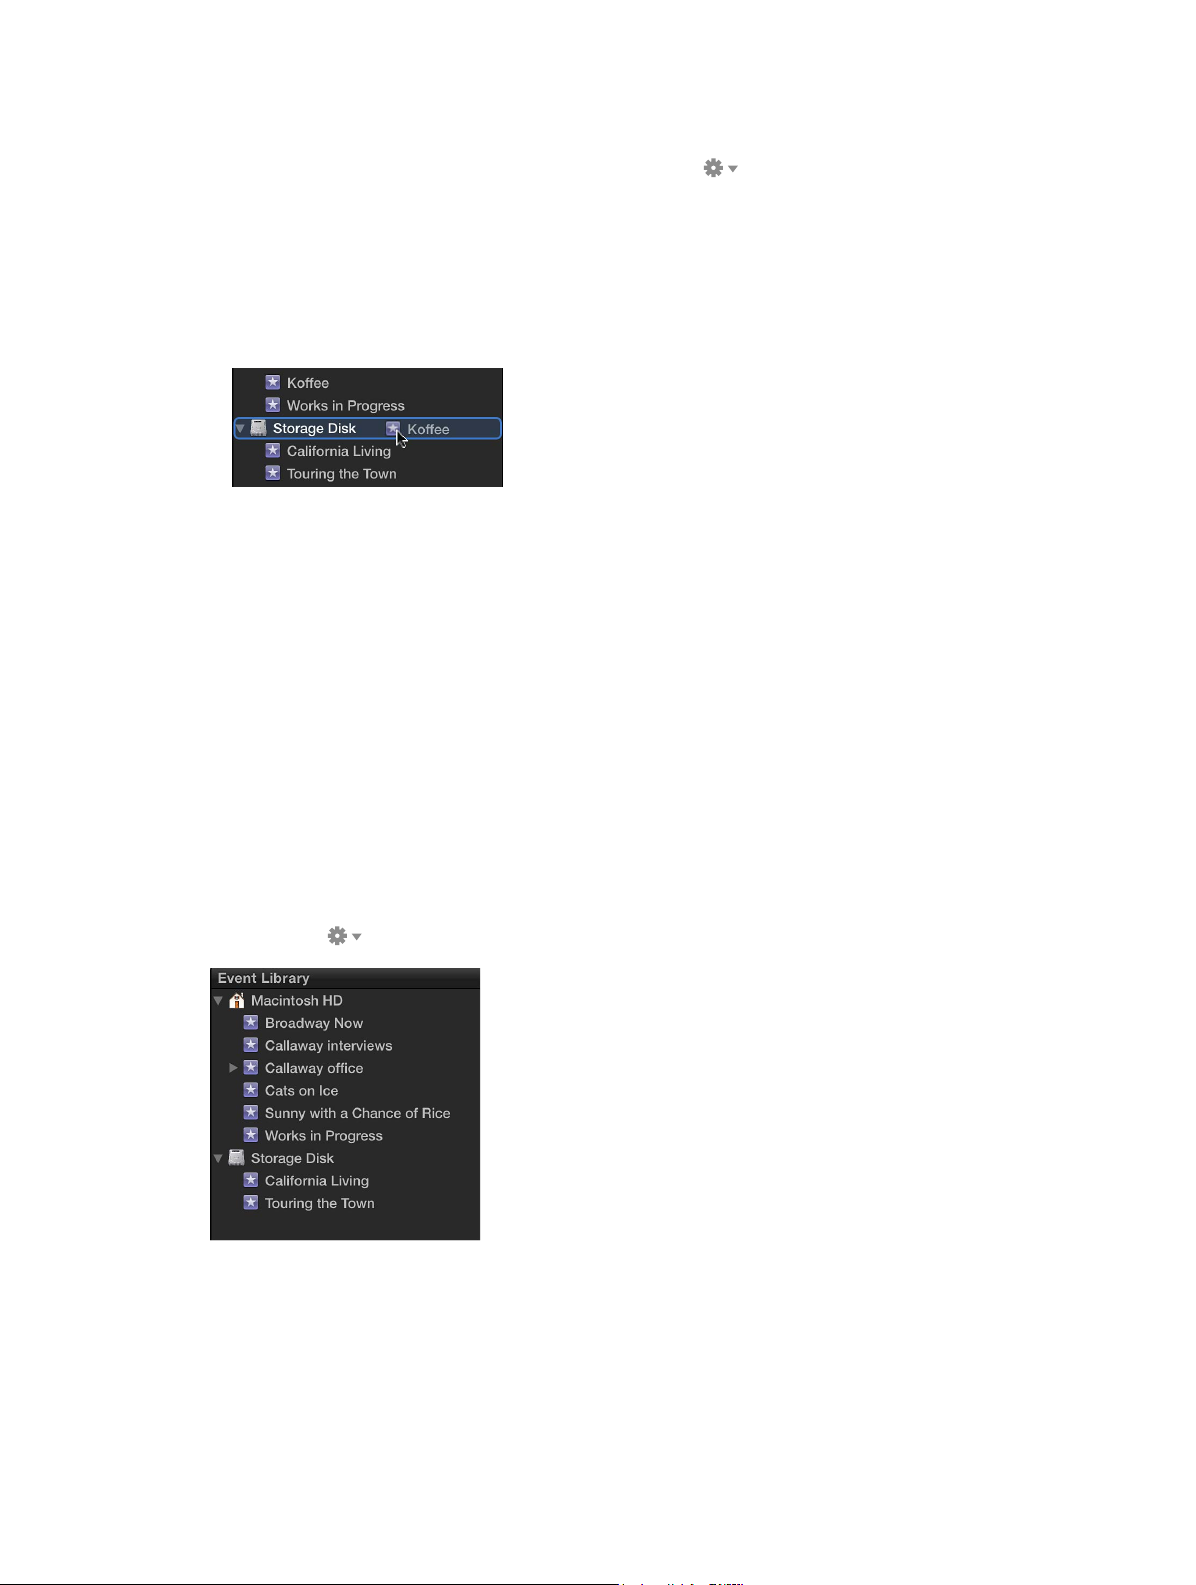
Move an event
1 Make sure another hard disk is connected to your computer.
2 Choose Group Events by Disk from the Action pop-up menu below the Event Library.
The connected disk drive’s icon and name appear in the Event Library.
3 Select an event in the Event Library.
4 Do one of the following:
•
Choose File > Move Event.
•
Command-drag the event to the drive’s icon.
5 To store your les in a second location, choose it from the Location pop-up menu.
6 Click OK.
Final Cut Pro moves the event to the location you chose. It also moves the event folder that
contains the source media les. Keep in mind that moving an event with large source media les
can take several minutes.
Important: If you disconnect the disk containing the event you moved, you will no longer
have access to the event or its source media les from within Final Cut Pro until you reconnect
the disk.
Sort events
In the Event Library, you can view your events in a number of ways, including by the disk they’re
stored on and the date when they were recorded.
Sort events by storage location or date
m To view events by the hard disk where they’re stored: Choose Group Events by Disk from the Action
pop-up menu below the Event Library.
Chapter 5 Organizeyourmedia 55
Page 56
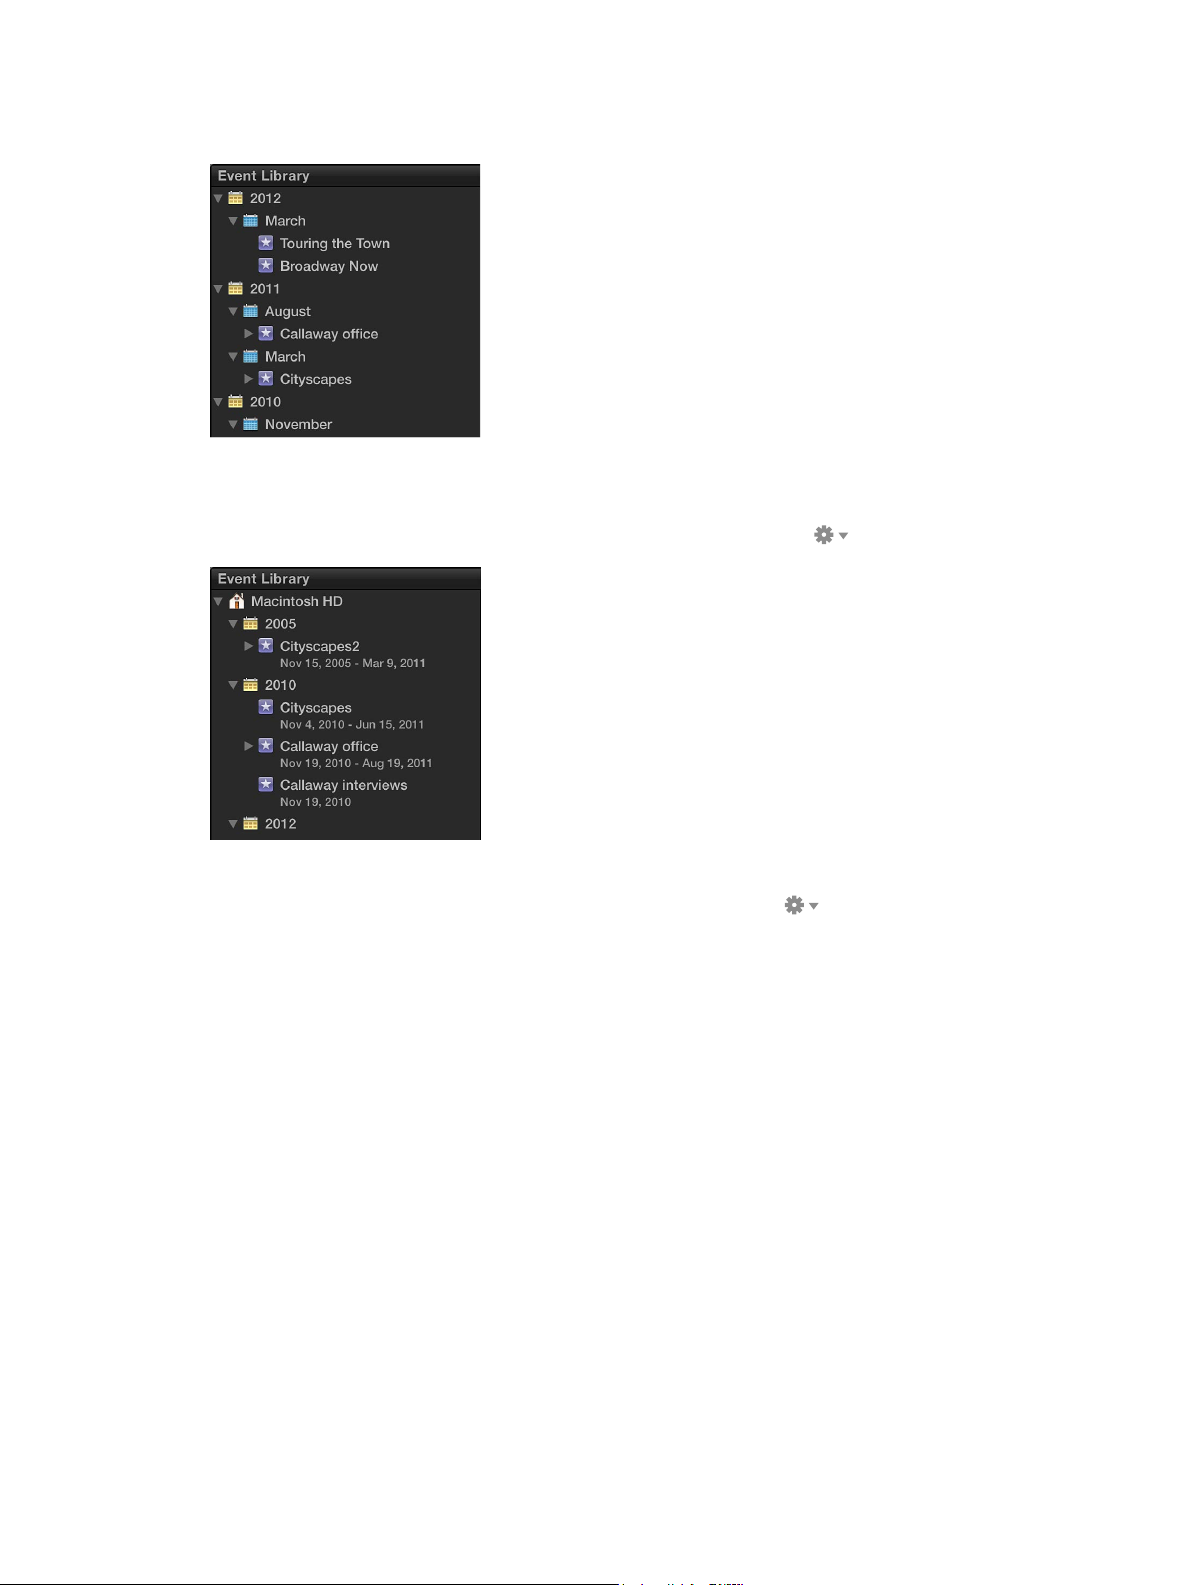
m To view events by the date they were recorded: Choose Group Events by Date from the Action
pop-up menu, and choose an option from the submenu.
Show event date ranges
Final Cut Pro can display the date ranges for the source media les within each event.
m Choose Show Date Ranges in Event Library from the Action pop-up menu .
Sort events by most recent
m Choose Arrange Events by Most Recent from the Action pop-up menu .
Delete clips or events
You can delete unwanted clips from an event, and you can delete an entire event in order
to free up space on your hard disk. When you delete a clip from an event or an entire event,
Final Cut Pro moves the source media to the Trash.
Note: The Event Library must contain at least one event.
Delete clips from an event or an entire event
1 In the Event Library, select the event you want to delete or delete clips from.
2 Do either of the following:
•
To delete clips from the event: Select the clips you want to remove, and choose File > Move to
Trash (or press Command-Delete).
•
To delete the entire event: Choose File > Move Event to Trash (or press Command-Delete).
Chapter 5 Organizeyourmedia 56
Page 57
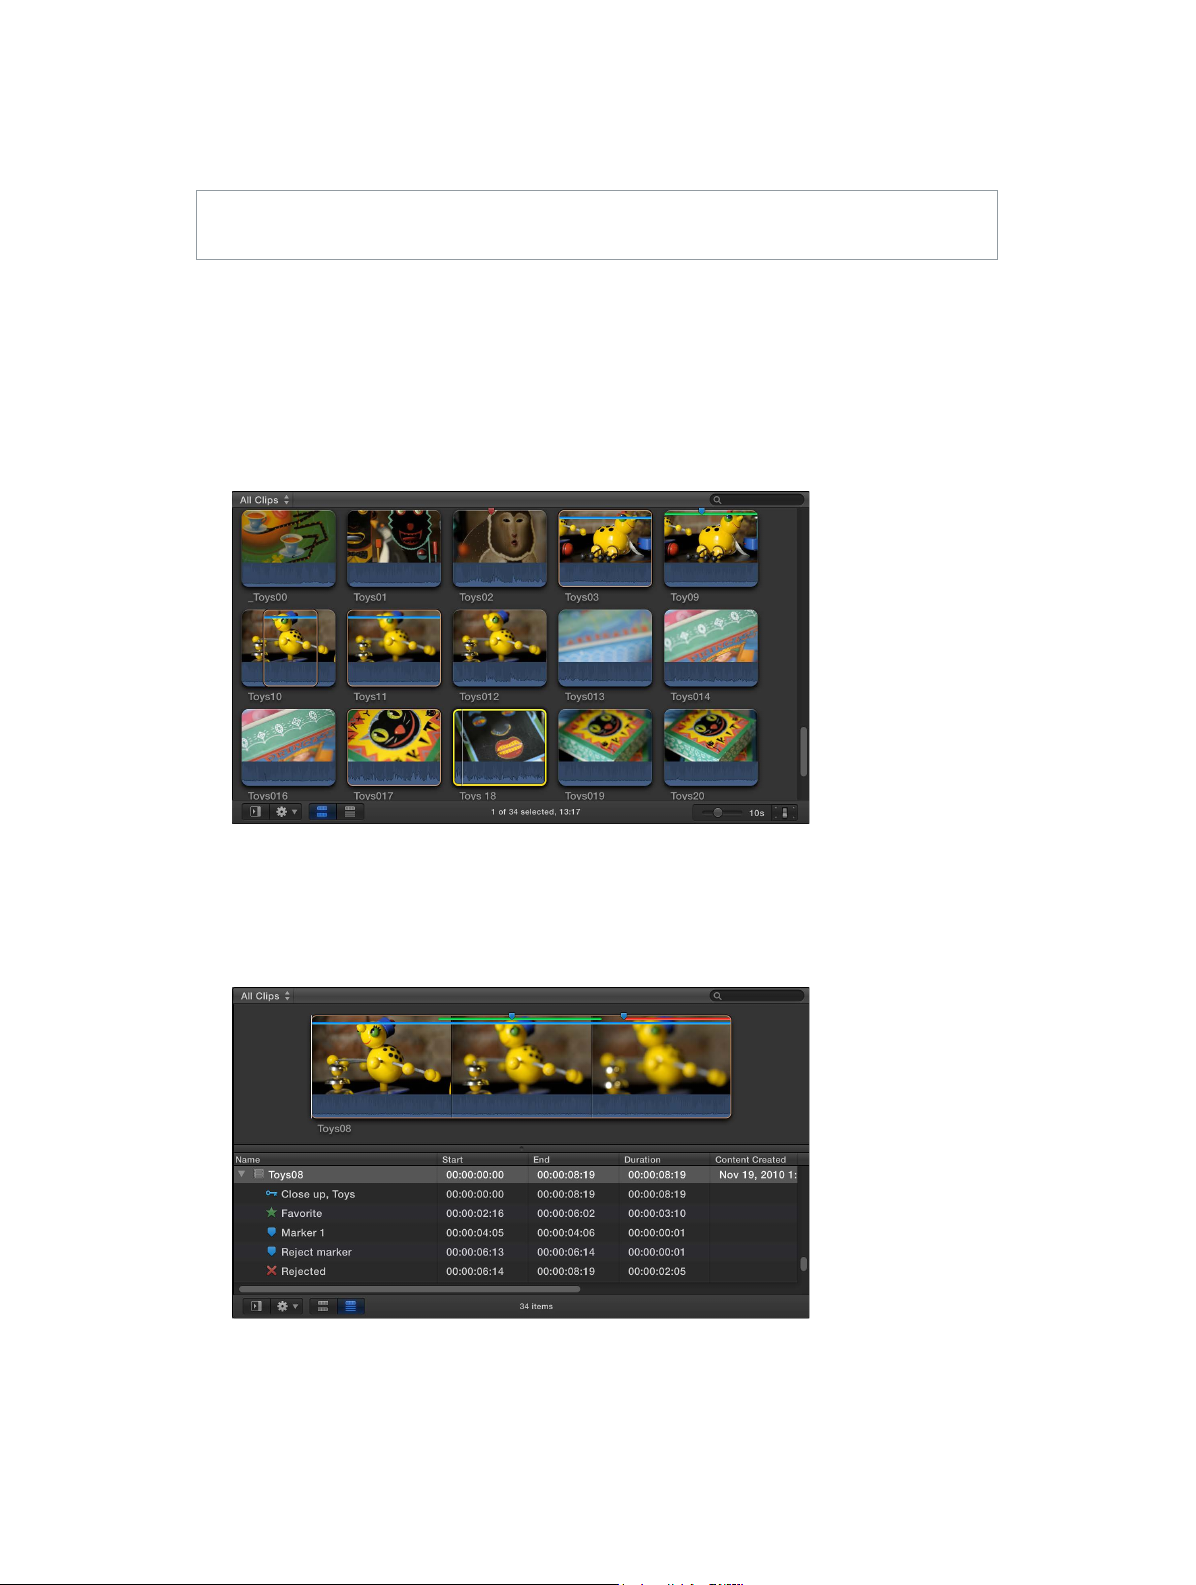
The selected clips’ source media les, or the event and all its associated source media les, are
moved to the Finder Trash. To permanently delete the source media les from your hard disk,
empty the Trash.
WARNING: After the Trash is emptied, the deleted clips or event and all their source media les
cannot be restored.
Organizeclips
View and sort clips
You can display your clips in the Event Browser in two views:
•
Filmstrip view: Displays the clips in the selected event as a connected series of thumbnail
images. Filmstrip view is useful when you want to visually locate your clips.
•
List view: Displays a list of your clips with associated le information. Use this view when you
want to view or sort clips by data such as duration, creation date, rating, keyword, and so on.
When you select a clip in list view, a lmstrip for the selected clip appears at the top of the
Event Browser. The lmstrip is fully interactive, allowing access to start and end points, markers,
and keywords.
Chapter 5 Organizeyourmedia 57
Page 58

Switch between lmstrip and list views
Do one of the following:
m Click the Filmstrip View button in the bottom-left corner of the Event Browser.
m Click the List View button in the bottom-left corner of the Event Browser.
Customize lmstrip view
m To adjust the time represented by each thumbnail in a clip’s lmstrip: At the bottom-right corner of
the Event Browser, drag the Duration slider.
Slider set to 5 seconds
Slider set to 30 seconds
Adjusting the Duration slider expands and contracts the amount of detail shown in each clip’s
lmstrip. The longer each thumbnail’s duration, the fewer thumbnails each clip displays, and the
more clips are displayed in the Event Browser.
Chapter 5 Organizeyourmedia 58
Page 59

m To adjust the lmstrip height: At the bottom-right corner of the Event Browser, click the Clip
Appearance button and drag the Clip Height slider.
m To turn audio waveforms on and o: At the bottom-right corner of the Event Browser, click the Clip
Appearance button and deselect the Show Waveforms checkbox in the window that appears.
When audio waveforms are on, they appear at the bottom of each clip’s lmstrip, increasing the
height of all clips in the Event Browser.
Chapter 5 Organizeyourmedia 59
Page 60

Customize list view
m To choose what type of information is displayed in list view columns as well as customize the columns
themselves: In the Event Browser, Control-click a column heading, and choose a category option
from the shortcut menu.
m To rearrange columns in list view: In the Event Browser, drag a column heading to move the
column to a new position.
m To sort clips in list view by a category: Click a column heading in the Event Browser to sort clips by
that category.
m To view a clip’s rating and keywords in list view: Click the disclosure triangle to the left of the
clip’s name.
Keyword
Rating
If a disclosure triangle appears to the left of a clip in list view, it means a rating, keyword, or both
have been applied to that clip.
Sort clips in the Event Browser
You can sort clips in the Event Browser into an order that makes it easier to visually locate them.
1 In the Event Library, select the event whose clips you want to sort.
2 Do one or both of the following:
•
To group clips by category: Choose Group Clips By from the Action pop-up menu below
the Event Library, and choose a category from the submenu. Choose to set the sort order as
Ascending or Descending from the same submenu.
•
To set the sort order of the clips in the event without grouping them: Choose Arrange Clips
By from the Action pop-up menu below the Event Library, and choose a category from
the submenu.
Note: You can both group clips and set their sort order (arrangement) independently.
Reset the sort order in the Event Browser to its default state
1 In the Event Library, select the event that contains the clips whose sort order you want to reset.
2 Choose Group Clips By > None and Group Clips By > Ascending from the Action pop-up menu
below the Event Library.
3 Choose Arrange Clips By > Content Created and Arrange Clips By > Ascending from the Action
pop-up menu.
Chapter 5 Organizeyourmedia 60
Page 61

Rename clips
Clips button
You can rename clips in the Event Browser, the Timeline Index, or the Info inspector at any time.
Renaming a clip aects only that instance of the clip. For example, if you add a clip from the
Event Browser to the Timeline, copy clips between events, or copy clips within the Timeline, each
of these clip instances (copies) is independent of the others and can have its own name.
Important: Renaming a clip in Final Cut Pro does not rename the clip’s source media le on disk.
Rename a clip in the Event Browser
m To rename a clip in lmstrip view: Select a clip’s name, and type a new name.
m To rename a clip in list view: Select a clip’s name, press Return, and type a new name.
Rename a clip in the Timeline Index
1 To open the Timeline Index, click the Timeline Index button in the lower-left corner of the
Final Cut Pro main window (or press Command-Shift-2).
2 Click the Clips button at the top of the Timeline Index.
3 Click the Name eld for a clip, and type a new name.
Rename a clip in the Info inspector
1 Select a clip in the Event Browser or the Timeline.
2 To open the Info inspector, click the Inspector button in the toolbar (shown below), and click the
Info button at the top of the pane that appears.
3 In the Name section of the Info inspector, click the Name eld and type a new name.
Chapter 5 Organizeyourmedia 61
Page 62

Rate clips as Favorite or Rejected
Favorite
Rejected
If your clips contain sections that you don’t like or that you might never want to use in a
project—because they’re blurry, for example—you can mark them as Rejected. You can easily
rate the clips you like and the clips you don’t like as you review them. When you’re ready to
make a project or play your clip for your client, you can focus on your best footage by choosing
to display only those clips you marked as Favorite. You can also delete your rejected clips’ source
media les to free up space on your hard disk.
Rate clips
1 In the Event Browser, select a range, a clip, or multiple clips you want to rate.
2 Do one of the following:
•
If you like the selection: Press the F key or click the Favorite button in the toolbar.
In the Event Browser, a green line appears at the top of frames you’ve marked as Favorite.
•
If you don’t like the selection: Press the Delete key or click the Reject button in the toolbar.
A red line appears at the top of frames you’ve marked as Rejected.
Note: If you chose Hide Rejected from the Filter pop-up menu at the top of the Event Browser,
clips marked as Rejected disappear from view.
Chapter 5 Organizeyourmedia 62
Page 63

Remove ratings from clips
Clips with all
1 Make sure the clips you want to work with appear in the Event Browser.
You might need to choose a new option, such as All Clips, from the Filter pop-up menu at the
top-left corner of the Event Browser so that all the clips you need to access are visible.
Choose All Clips to
show all the clips in
the event regardless
of rating.
2 In the Event Browser, select the clips whose rating you want to remove, and press the U key or
click the Clear Rating button in the toolbar.
The green or red line at the top of the clips disappears.
ratings removed
Chapter 5 Organizeyourmedia 63
Page 64
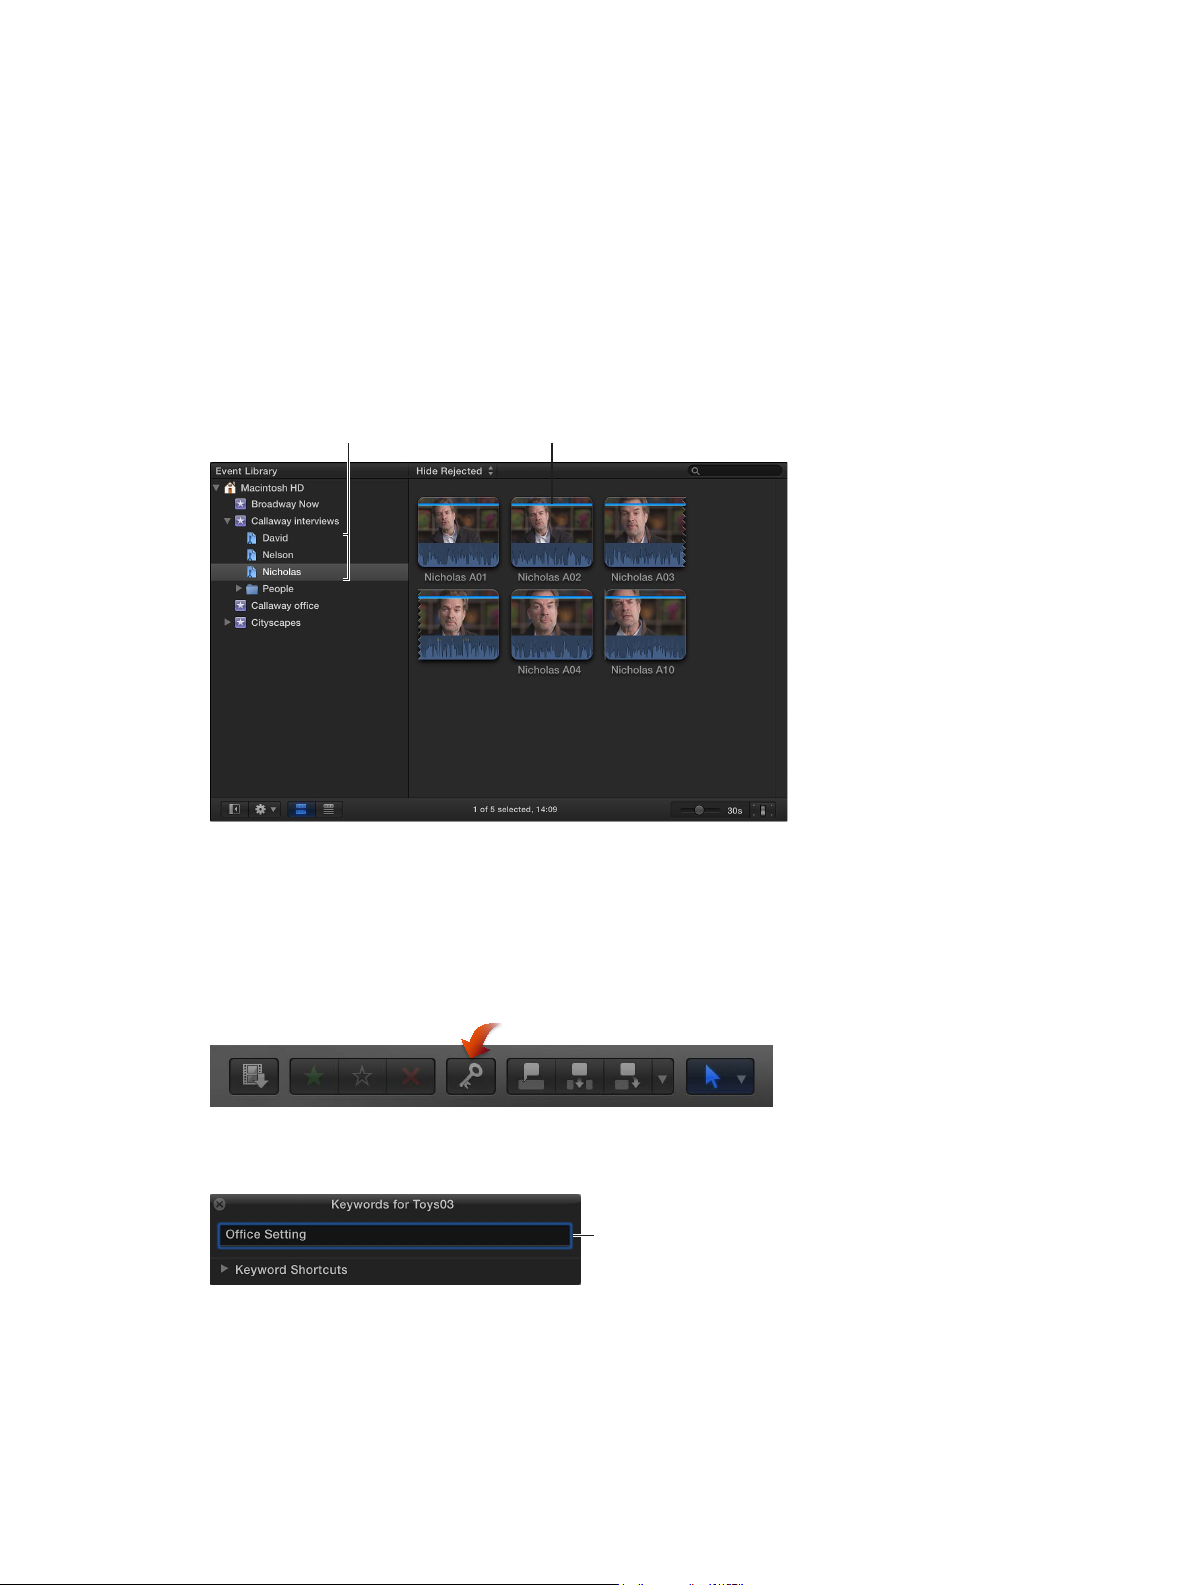
Add keywords to clips
Keyword
A blue line indicates that
You can apply keywords to your clips to help you quickly locate the clips you need to compose
your movie. After you apply a keyword to a clip or clip range, the clip or range is marked with
a blue line in the Event Browser. (Clips that have analysis keywords, which are automatically
applied after certain types of analysis, are marked with a purple line. For more information, see
Analyzing media overview on page 45.)
Additionally, when a keyword is applied to a clip or clip range, a Keyword Collection appears in
the Event Library. A Keyword Collection contains pointers (aliases) to clips tagged with a specic
keyword. For example, if you apply the keyword “Nicholas” to all clips containing Nicholas, you
can then select the Nicholas Keyword Collection in the Event Library to view all clips containing
the “Nicholas” keyword in the Event Browser.
Collections
a clip has keywords.
You can apply one or more keywords to a range within a clip, a whole clip, or a group of clips in
an event.
Apply keywords using the Keyword Editor
1 In the Event Browser, select a range or one or more clips to which you want to add keywords.
2 To open the Keyword Editor, click the Keywords button in the toolbar.
3 At the top of the Keyword Editor, type the keyword or keyword phrase you want to apply to the
selection, and press Return.
Chapter 5 Organizeyourmedia 64
Type a keyword
or keyword phrase,
and press Return.
Page 65
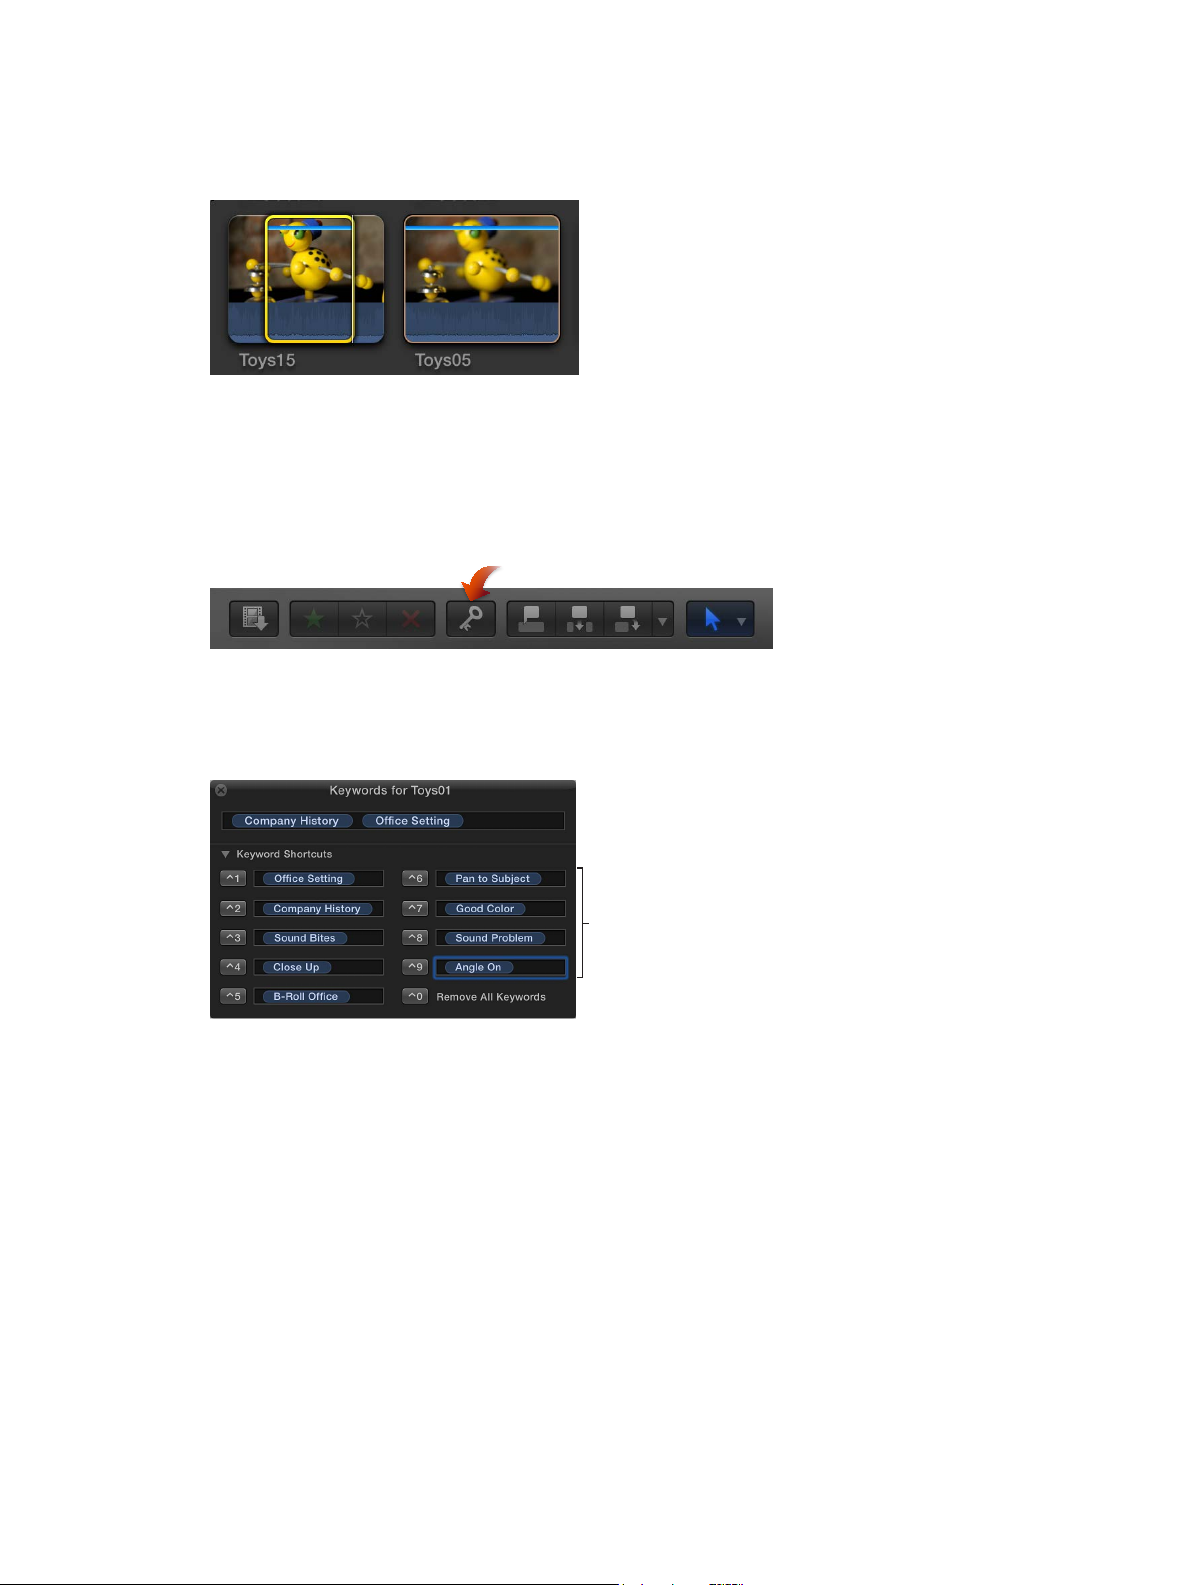
4 Repeat step 3 for each keyword or keyword phrase you want added to the selection.
A blue line appears at the top of the selection in the Event Browser, indicating that keywords
have been applied to it.
5 When you’re nished adding keywords, close the Keyword Editor.
Assign keywords using keyboard shortcuts
To add keyword phrases to your clips using keyboard shortcuts, you must rst assign keywords
and keyword phrases to the keyboard shortcuts.
1 If the Keyword Editor isn’t open, click the Keywords button in the toolbar.
2 In the Keyword Editor, click the disclosure triangle to the left of Keyword Shortcuts.
3 Type a keyword or phrase in each shortcut eld, and press Return.
To reassign a keyboard shortcut, select the shortcut text in the eld and type the new keyword.
Enter keywords
or a keyword phrase
here to assign them
to keyboard shortcuts.
4 To use a keyboard shortcut, select a range or one or more clips to which you want to add
keywords, and press Control and the corresponding number key (1 through 9).
Chapter 5 Organizeyourmedia 65
Page 66
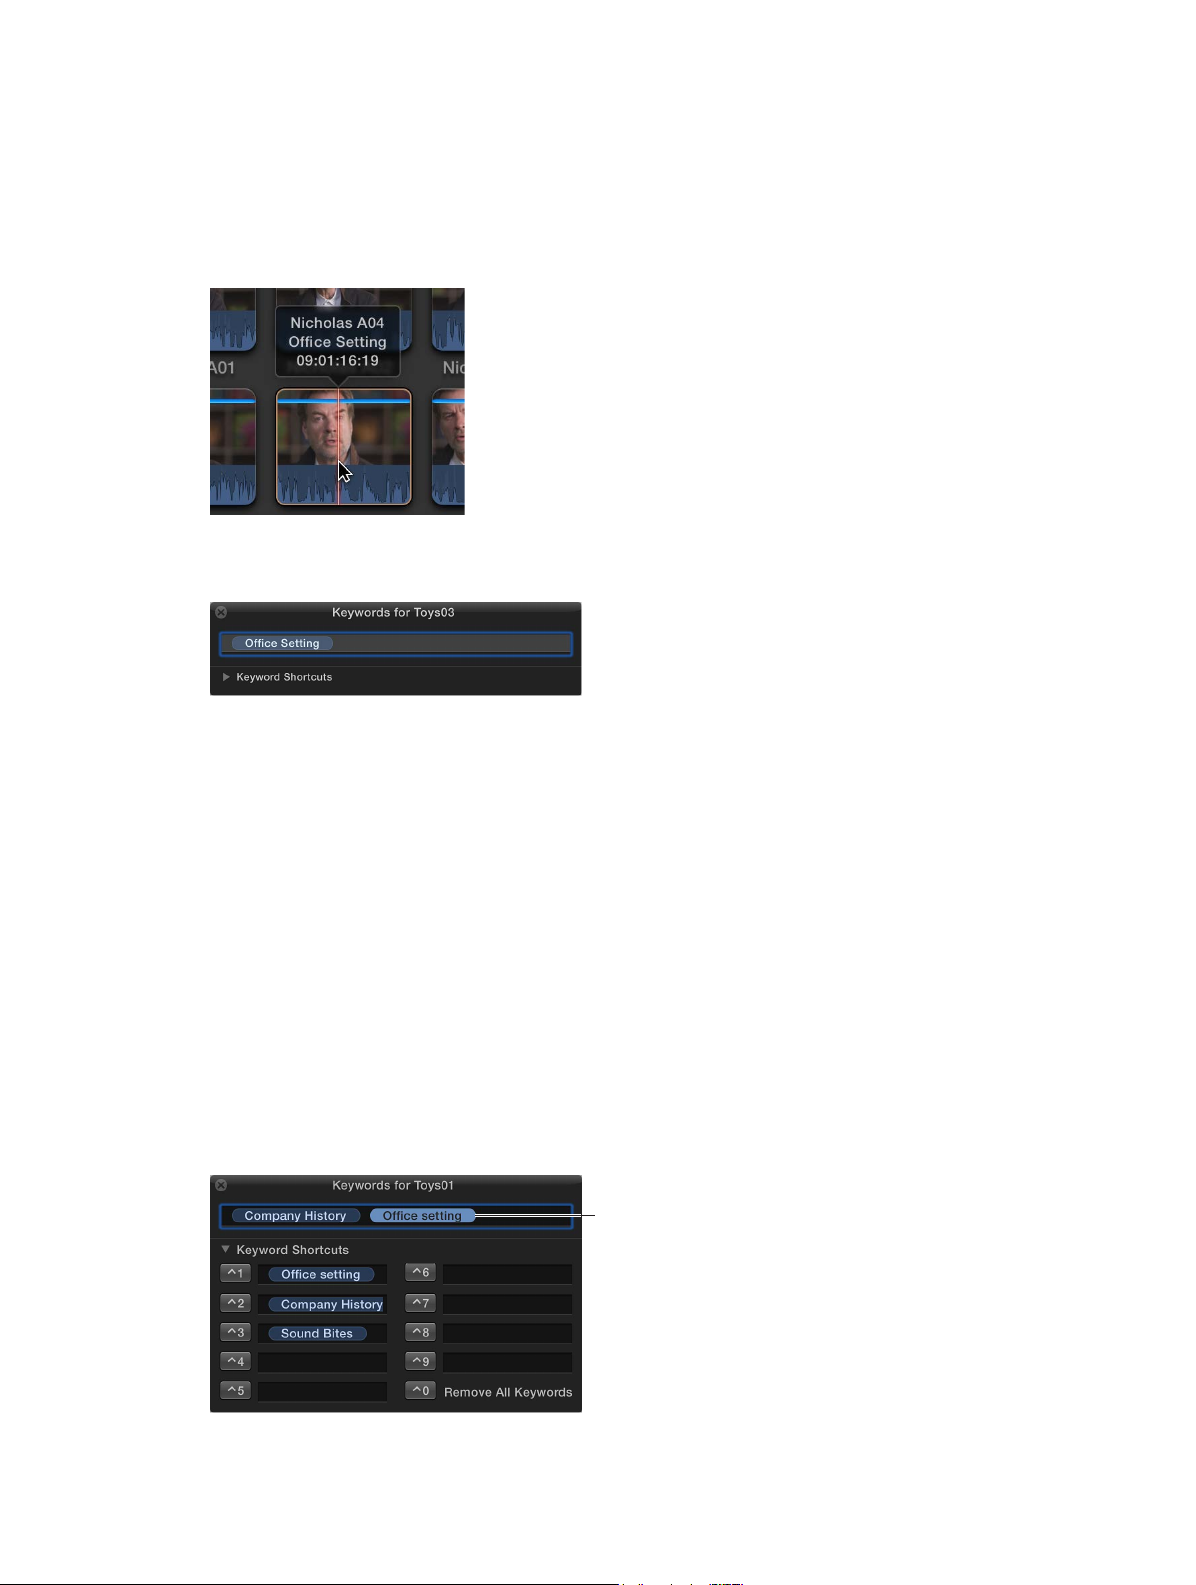
View keywords applied to clips
m To quickly identify clips that have keywords: Select an event in the Event Library.
Clips that have one or more keywords appear in the Event Browser marked with a blue line at
the top.
m To view all keywords applied to a clip: Choose View > Show Skimmer Info (or press Control-Y), and
skim the clip in the Event Browser.
You can also view a clip’s keywords by selecting the clip in the Event Browser and clicking the
Keywords button in the toolbar. The keywords applied to the clip are shown in the Keyword Editor.
m To view all the clips that have a specic keyword: Select a Keyword Collection in the Event Library.
The clips with that keyword appear in the Event Browser.
Remove all keywords from a selection
1 In the Event Browser, select a range or one or more clips from which you want to
remove keywords.
A blue line at the top of the clips indicates the portions of the clips that have keywords applied.
2 Choose Mark > Remove All Keywords (or press Control-0).
Remove a subset of keywords from a selection
1 In the Event Browser, select a range or one or more clips from which you want to remove
specic keywords.
A blue line at the top of the clips indicates the portions of the clips that have keywords applied.
Each keyword assigned to a clip is also shown in list view.
2 Click the Keywords button in the toolbar to open the Keyword Editor, select the keyword or
keywords you want to remove, and press Delete.
Select the keyword
or keywords that you
want to remove from
the selection, and
press Delete.
Chapter 5 Organizeyourmedia 66
Page 67

Add or edit clip notes
Clips button
As you review your clips, you can add and edit notes about them in the Event Browser or the
Timeline Index. You can quickly nd your clips by entering the note text in the search eld in
the Event Browser or the Timeline Index, or the Text eld in the Filter window.
Note: You can add notes to each instance of a clip. For example, if you add a clip from the Event
Browser to the Timeline, copy clips between events, or copy clips within the Timeline, each of
these clip instances (copies) is independent of the others.
Add or edit clip notes in the Event Browser
1 Click the List View button in the bottom-left corner of the Event Browser.
2 Select the clip for which you want to add or edit notes.
Note: Notes are applied to the whole clip, not to range selections.
3 Click the Notes eld for the clip, and type or edit the notes for that clip.
Add or edit clip notes in the Timeline Index
1 To open the Timeline Index, click the Timeline Index button in the lower-left corner of the
Final Cut Pro main window (or press Command-Shift-2).
2 To open the Clips pane, click the Clips button at the top of the Timeline Index.
Chapter 5 Organizeyourmedia 67
Page 68
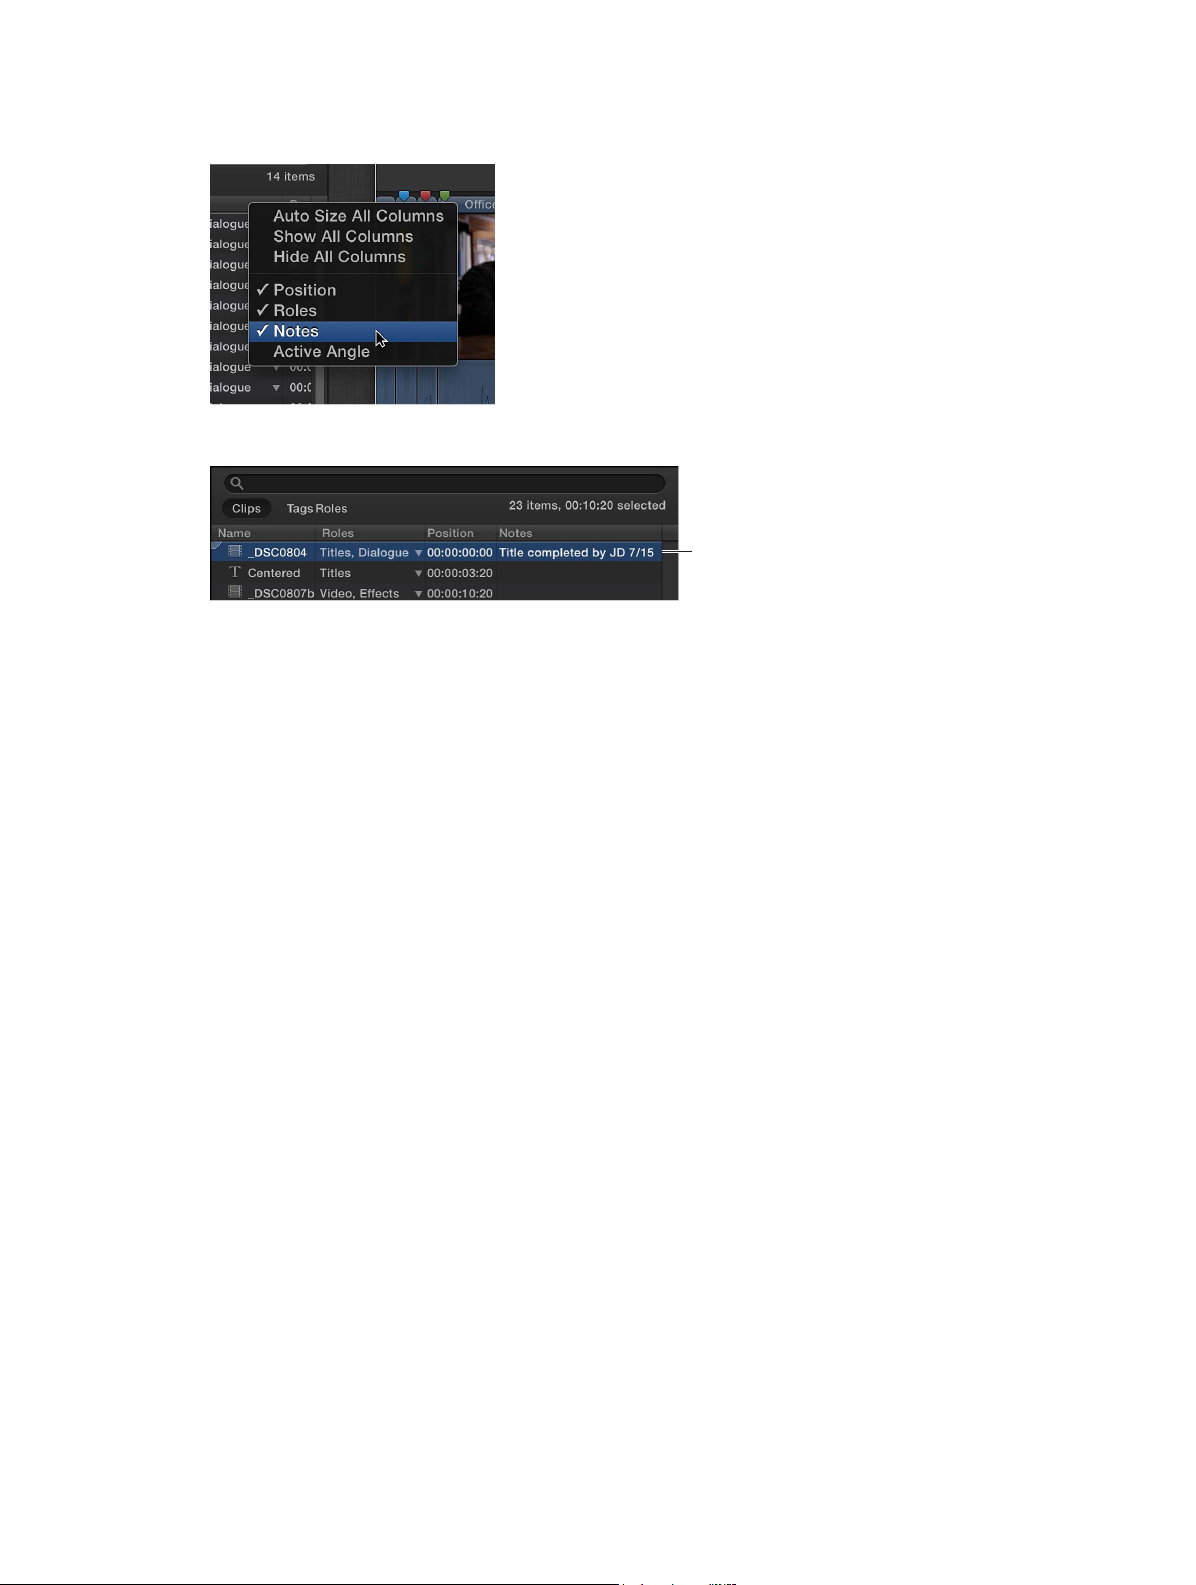
3 If the Notes column is not visible in the Clips pane, Control-click a column heading and choose
Notes from the shortcut menu.
4 Click the Notes eld for the clip, and type or edit the notes for that clip.
Enter notes
for a clip here.
Organize clips by roles
You can organize clips by roles, which are metadata text labels assigned to clips.
When you import clips (video, audio, or still images), Final Cut Pro automatically assigns one of
ve default roles to the video and audio components of each clip: Video, Titles, Dialogue, Music,
and Eects. You can also create custom roles and subroles and assign them to clips.
You can view and reassign roles in the Event Browser, the Timeline Index, or the Info inspector.
For example, you could easily identify all your dialogue clips and play them back in isolation from
other audio clips. See View and reassign roles on page 300.
Find clips in the Event Browser
In Final Cut Pro, you can search for media in two ways:
•
Quickly lter clips by marking: Use the Filter pop-up menu in the Event Browser to quickly
locate individual clips by rating, or the absence of ratings and keywords.
•
Search by a combination of criteria using the Filter window: Use the Filter window to perform
complex searches for clips, also known as a weighted search. You can use a wide variety of
criteria to search with, including clip name, rating, media type, excessive shake, keywords, the
presence of people, format information, and date.
Chapter 5 Organizeyourmedia 68
Page 69
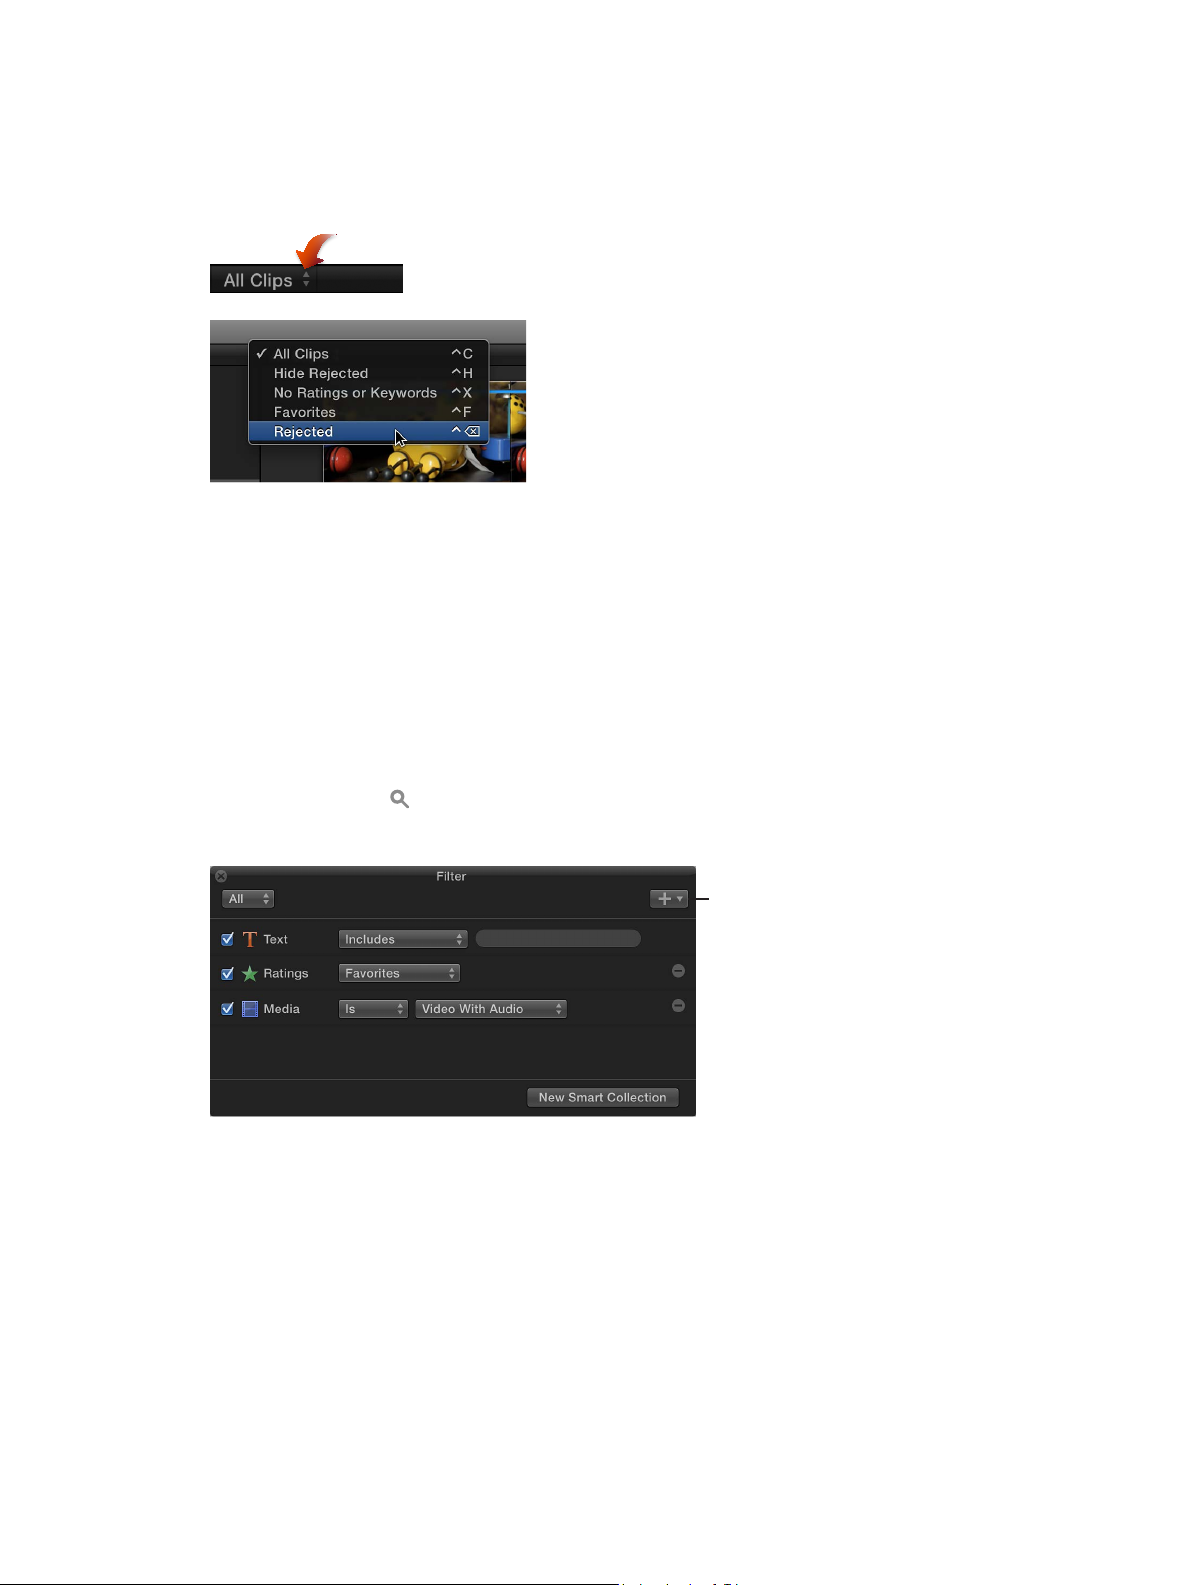
Filter clips quickly by rating
Use the Filter pop-up menu in the Event Browser to quickly nd clips by rating.
1 In the Event Library, select one or more events you want to search.
2 Choose an option from the Filter pop-up menu at the top of the Event Browser.
•
All Clips: Shows all clips in the event.
•
Hide Rejected: Shows all clips or range selections except those you’ve rated Reject.
•
No Ratings or Keywords: Shows only the clips or range selections without ratings or keywords.
•
Favorites: Shows only the clips or range selections you’ve rated Favorite.
•
Rejected: Shows only the clips or range selections you’ve rated Reject.
Search for clips by a combination of criteria
The Filter window allows you to combine multiple search criteria. For example, you can search for
video clips that contain the text “exterior” in their metadata.
1 In the Event Library, select the event or folder you want to search.
2 Click the Filter button at the top of the Event Browser.
3 In the Filter window, choose search criteria, or rules, from the Add Rule pop-up menu.
Add Rule pop-up menu
•
Text: Find clips by their name or any notes applied to them in list view using text. You can add
multiple Text rules to search by more than one word or phrase, as well as eliminate specic
words and phrases from the search.
•
Ratings: Find clips based on the rating (Favorite or Reject) assigned to them.
•
Media Type: Find clips whose source media les are of a specic type, such as video, audio,
or stills.
•
Stabilization: Find video clips that Final Cut Pro has identied as having excessive shake.
•
Keywords: Find clips by any of the keywords that you’ve assigned to them. You can select one
or more keywords to search for.
Chapter 5 Organizeyourmedia 69
Page 70
•
People: Find clips that Final Cut Pro has identied as having people in them.
•
Format Info: Find clips using format information, such as video frame rate or scene number.
•
Date: Find clips by either the date the clip’s media le was created or the date the media was
imported into Final Cut Pro.
•
Roles: Find clips by their assigned roles.
To remove a rule, click the Remove button to the right of the rule. To exclude a rule from your
search without removing it, deselect the checkbox to the left of the rule.
4 Further rene your search by choosing items from the pop-up menus for the rules you’ve added.
5 Do one of the following:
•
To specify that a clip must match at least one of the criteria or keywords: Choose Any from the
pop-up menu in the upper-left corner of the Filter window.
•
To specify that a clip must match all the criteria and keywords: Choose All from the pop-up menu.
The clips that match the search criteria are displayed in the Event Browser, and icons indicating
the search status appear to the right of the Filter button at the top of the Event Browser.
If you wish, you can save your search results as a Smart Collection, which gathers clips
automatically based on the search criteria.
Clear a weighted search
m Click the Reset button to the right of the search status icons in the upper-right corner of the
Event Browser.
Tip: If clips still appear to be missing from view, make sure to choose either All Clips or Hide
Rejected from the Filter pop-up menu in the upper-left corner of the Event Browser.
Search for clips by clip name and notes
You can use the search eld to quickly nd clips by name and any notes (applied in list view)
without having to open the Filter window.
1 In the Event Library, select one or more events you want to search.
2 In the search eld, enter the clip’s name or notes applied to the clip you’re looking for.
Conduct a lter and search workow
Performing a weighted search and then ltering the clips in the Event Browser by rating is a
powerful way to quickly nd clips. This is also the best method of nding specic clips that you
haven’t rated and comparing them against the clips you have rated.
1 In the Event Library, select the event or folder you want to search.
2 Search for clips using a combination of search criteria as described in the “Search for clips
by a combination of criteria” steps above. However, do not apply a ratings lter using the
Filter window.
Chapter 5 Organizeyourmedia 70
Page 71
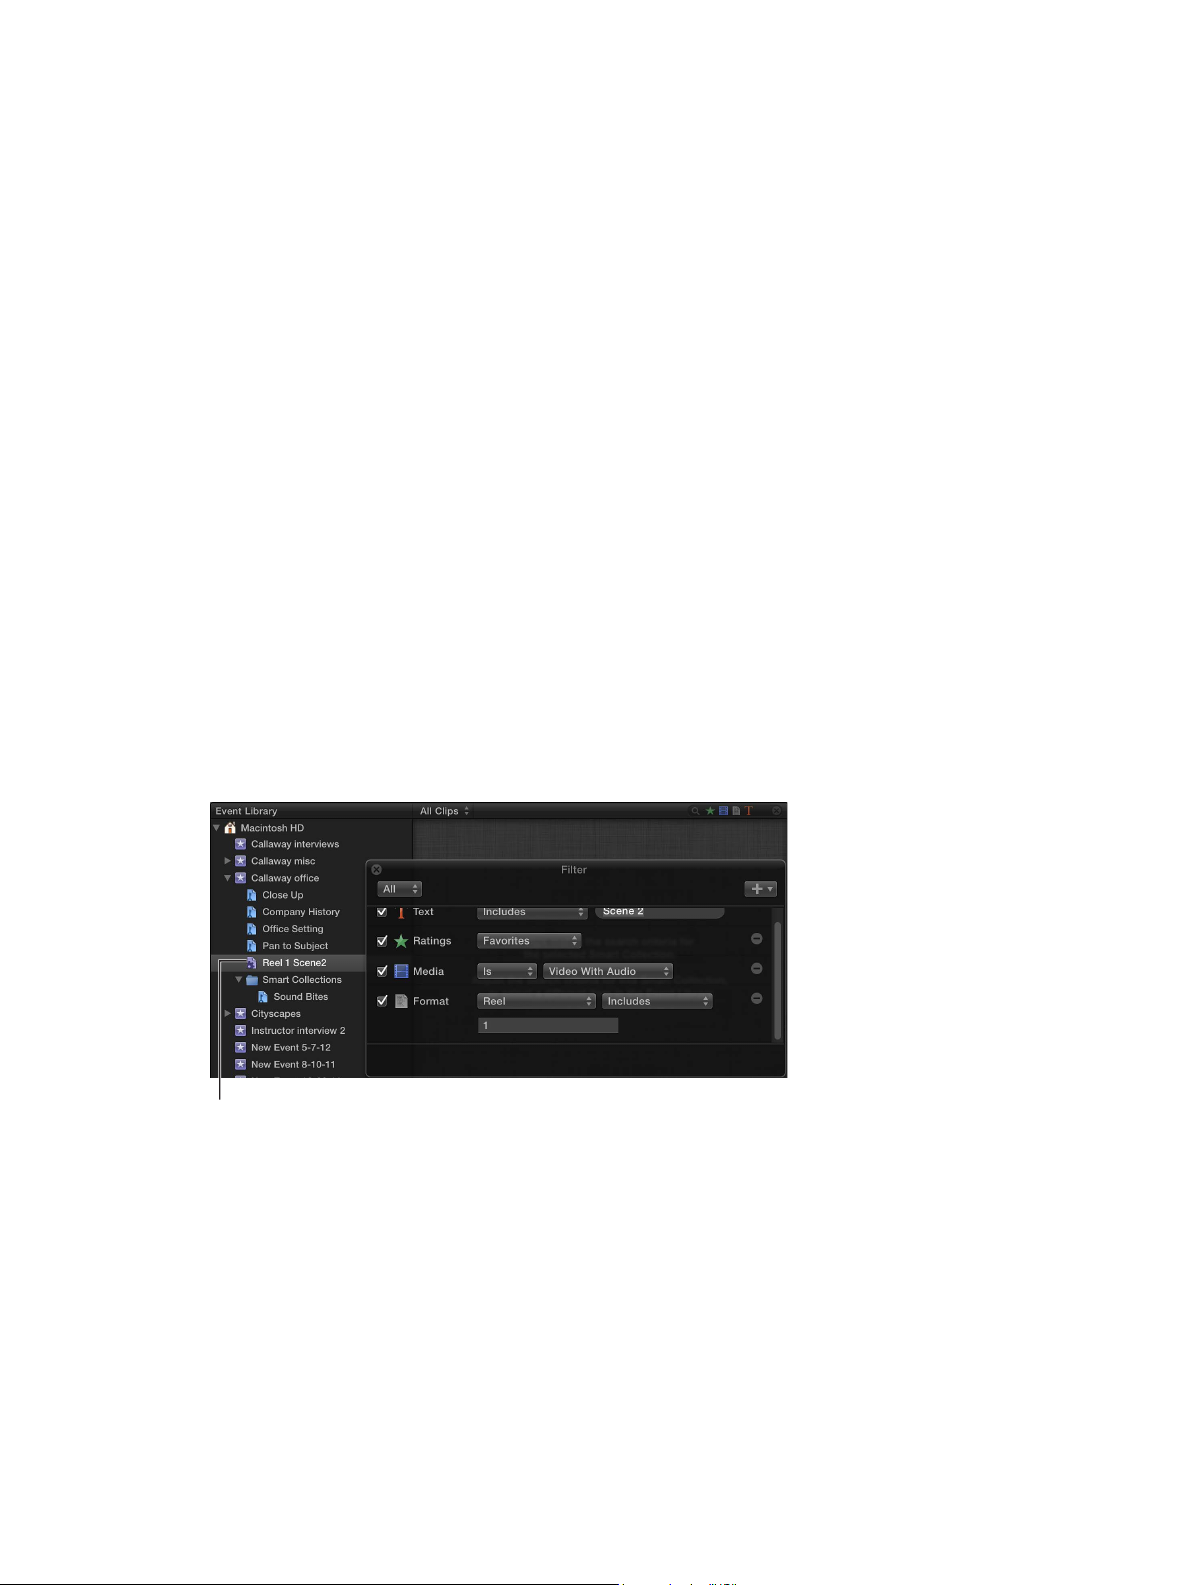
3 Use the Filter pop-up menu, as described in the “Filter clips quickly by rating” steps above, to
quickly lter the clips by rating.
4 Repeat step 3 until you nd the clips you’re looking for.
Save searches as Smart Collections
When you search for clips in an event using the Filter window, you can save your results by
creating a new Smart Collection that gathers clips matching the search criteria. Anytime a new
clip that matches the Smart Collection’s search criteria is brought into the event, the new clip is
automatically added to the Smart Collection.
Clips that appear in Smart Collections are not duplicates. Smart Collections lter clips in an event
to help you focus on the clips you need to use for a specic task.
Create a Smart Collection based on search criteria
1 In the Event Library, select an event.
2 Use the Filter window to search for clips based on specied criteria.
3 In the Filter window, click the New Smart Collection button.
A new, untitled Smart Collection appears in the Event Library.
4 Type a name for the Smart Collection, and press Return.
When you add clips to the event that match the Smart Collection’s search criteria, they’re
automatically added to the Smart Collection.
Change the contents of a Smart Collection
1 In the Event Library, double-click the Smart Collection whose contents you want to change.
The Filter window for the Smart Collection appears.
Smart Collection
2 Revise the search criteria in the Filter window.
3 When you’re nished specifying search criteria, close the Filter window.
Note: Modifying a clip’s ratings or keywords in such a way that it no longer matches a Smart
Collection’s search criteria results in the clip no longer appearing in the Smart Collection.
Chapter 5 Organizeyourmedia 71
Page 72
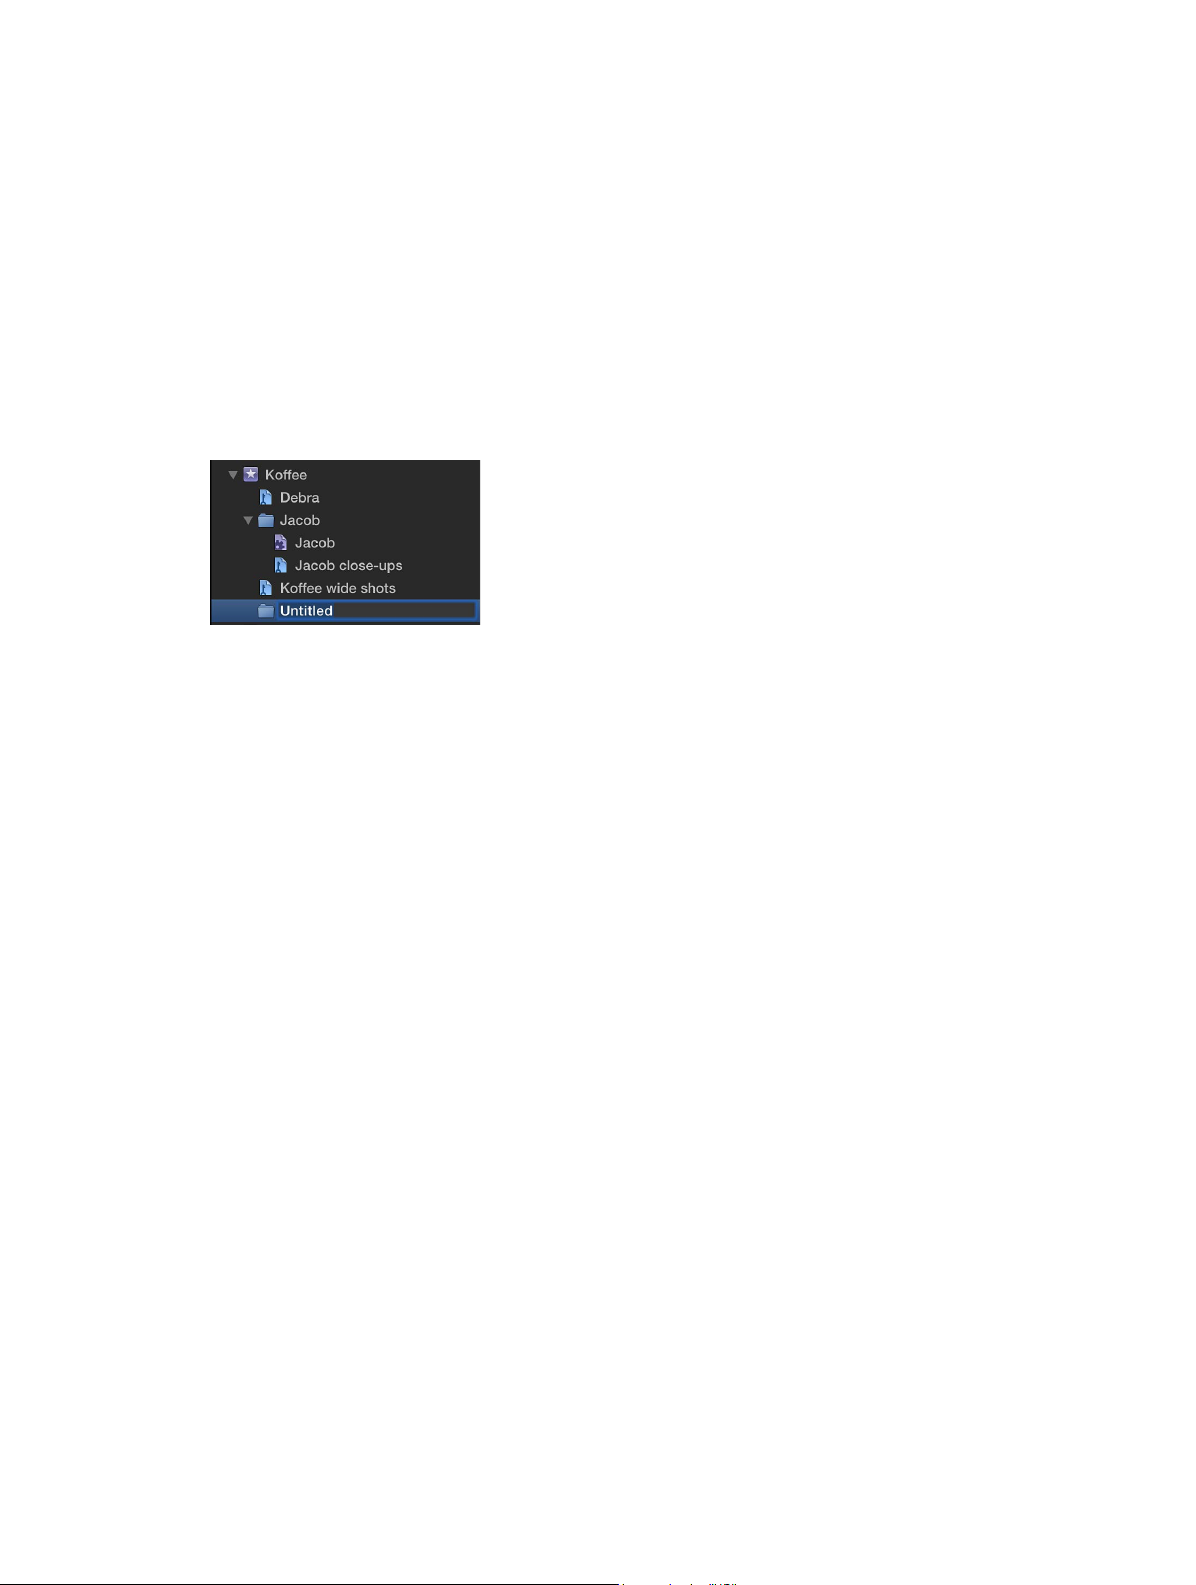
Delete a Smart Collection
m In the Event Library, select the Smart Collection you want to delete, and choose File > Delete
Smart Collection (or press Command-Delete).
The Smart Collection is removed from the Event Library, but its associated clips (the clips that
appeared in it) are unaected.
Organize Keyword and Smart Collections
You can organize Keyword Collections and Smart Collections in the Event Library with folders.
Organize collections with folders
1 In the Event Library, select the event containing the collections you want to organize, and choose
File > New Folder.
2 Type a name for the new folder that appears within the event.
3 Select the Smart Collections and Keyword Collections you want to organize, and drag them into
the new folder.
You can show and hide the contents of the folder by clicking the disclosure triangle to the left of
the folder’s name.
Chapter 5 Organizeyourmedia 72
Page 73
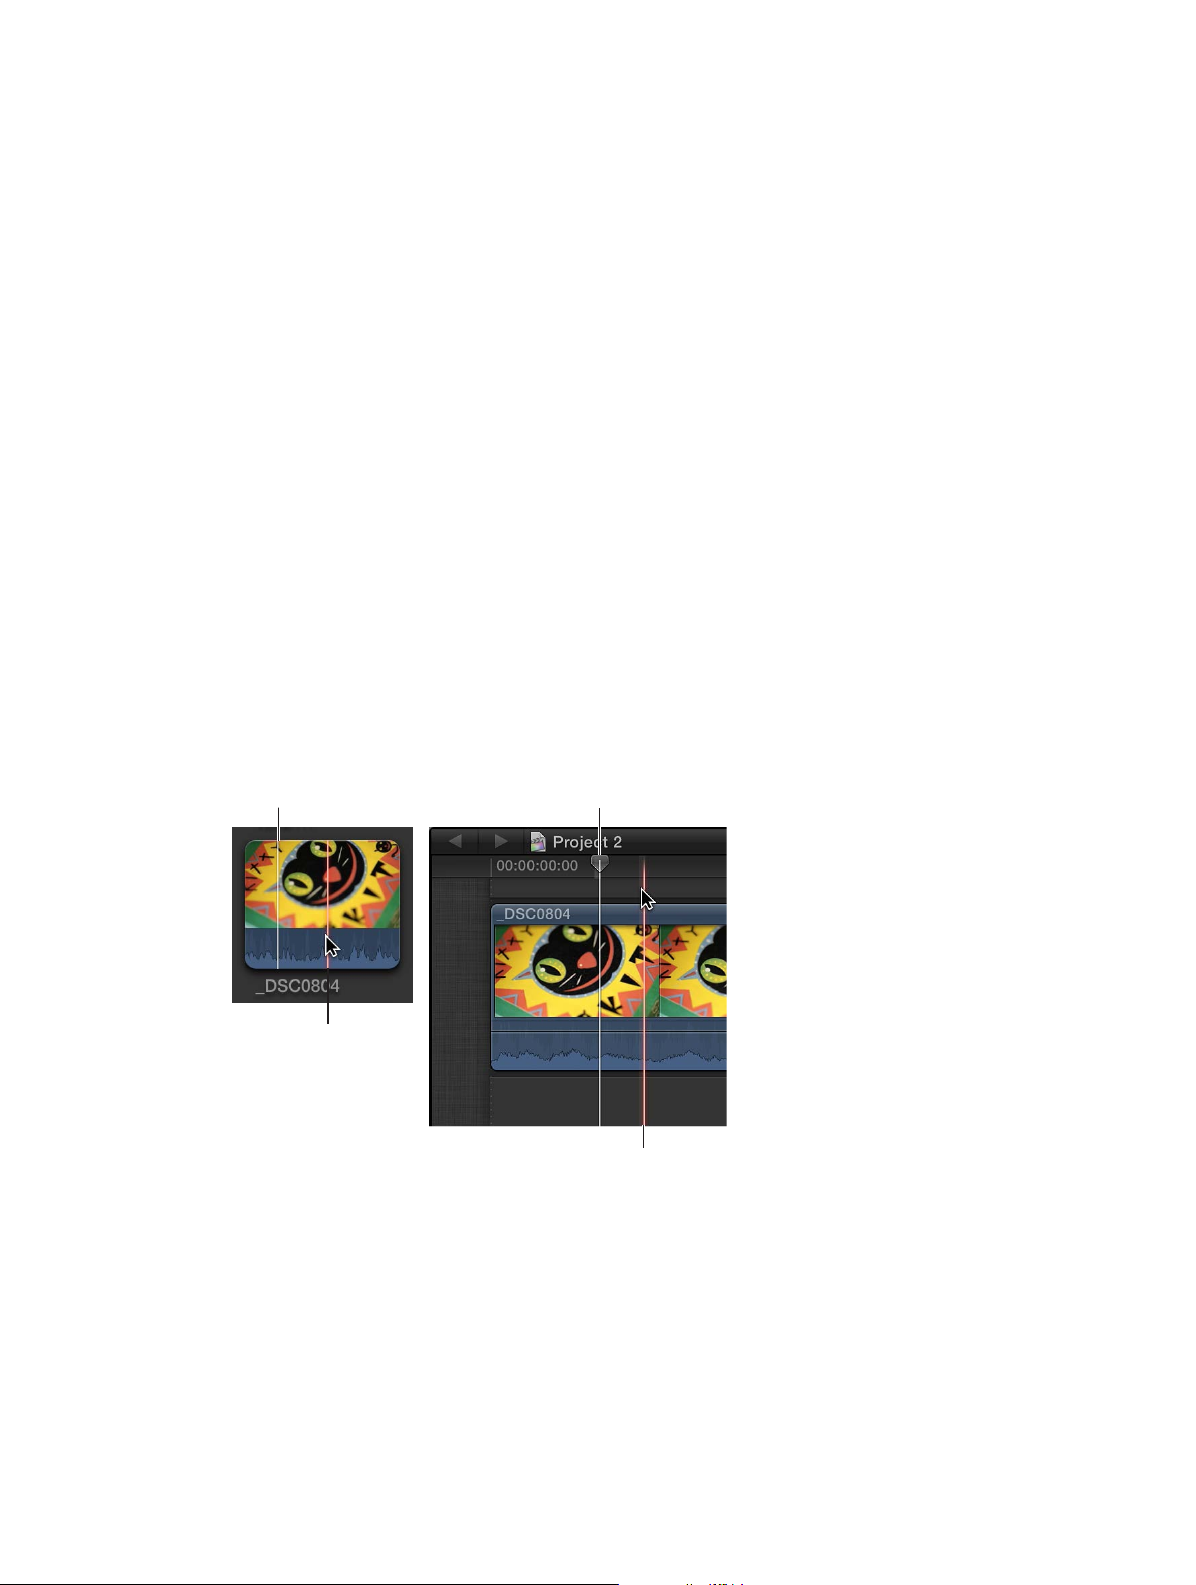
Playhead
Playhead
Play back and skim media
6
Playbackandskimmingoverview
Final Cut Pro makes it easy to view and listen to your media, whether it’s located in the Event
Browser, the Project Library, or the Timeline. Its dynamic previewing capabilities let you nd what
you need quickly without being distracted from the task at hand.
You use two tools to preview and play back media in Final Cut Pro:
•
The playhead marks the current position in the Timeline or the Event Browser. You can move
the playhead by dragging it or clicking another area of the Timeline or Event Browser. You use
the playhead to scrub, or play back from its current position.
The playhead appears as a gray vertical line that is xed in place unless you move it or
click elsewhere.
•
The skimmer lets you preview clips in the Timeline, Event Browser, or Project Library, without
aecting the playhead position. You use the skimmer to skim, or freely move over clips to play
back at the position and speed of the pointer.
The skimmer appears as a pink vertical line as you move the pointer over the area you’re
skimming. If you have snapping turned on, the skimmer turns orange when it snaps to
a position.
Skimmer
Skimmer
When skimming is turned on, you can skim to see what’s in other clips, but still keep your
73
playhead position in the Timeline. If both the playhead and skimmer are present in the same clip,
the skimmer becomes the default position for playback or editing.
When skimming is turned o or the skimmer is not present in a clip, the playhead assumes the
default position.
Page 74

Play back media
Yellow border
Skimmer
You can play back projects and clips in Final Cut Pro. Playback options include playing from the
beginning, playing from a certain point, looping playback, and playing at dierent speeds. You
can also play back video in full-screen view.
Whether Final Cut Pro uses proxy media or your original or optimized media during playback
is determined by the playback setting you select in the Final Cut Pro Editing preferences. See
Playback preferences on page 419 for more information.
Play back video and audio clips
m To play a project or clip from the beginning: Select the project or clip and choose
View > Playback > Play from Beginning (or press Shift-Control-I).
m To play a section of a project, selected clips, or a frame range from the beginning: Select the
project, clips, or all or part of a clip, and choose View > Playback > Play Selection, or press
the Slash (/) key.
When you select a clip or a portion of a clip or project, the selected area is marked with a
yellow border.
m To play a project or clip from a specic point: In the Event Browser or the Timeline, click a point in
a project or within a clip where you want to begin (or move the playhead to the point in the
Timeline), and either press the Space bar or click the Play button in the Viewer (or press L).
The clip or project begins
playing at the skimmer
or playhead position.
m To play around the playhead or skimmer: Choose View > Playback > Play Around, or press Shift-
Question Mark (?).
m To stop playback: Press the Space bar.
Chapter 6 Play back and skim media 74
Page 75

Use the J, K, and L keys for playback
forward speeds
reverse speeds
You can use the J, K, and L keys on your keyboard to play through a project or clip. Playback
begins at the location of the playhead (on a project) or the skimmer (on a clip). You can also use
the J, K, and L keys to control a video playback device.
Moves through
Pause
Moves through
You can use these keys to speed playback up to 32x normal speed.
m To begin forward playback at normal (1x) speed: Press L.
m To begin reverse playback at normal (1x) speed: Press J.
m To pause playback: Press K.
m To double the current playback speed: Press L or J twice.
m To immediately reverse the playback direction: Press J to play in reverse, or press L to play forward.
m To move the playhead one frame at a time: Hold down the K key, and press J or L.
m To move the playhead at 1/2x speed: Hold down the K key while holding down J or L.
When you use keyboard shortcuts to control a device (like a camcorder or camera), the speed of
forward (L) and reverse (J) playback may dier depending on your video equipment.
Play back media in a loop
You can turn on looping so that a project (or any portion of it) plays in a continuous loop.
1 To turn on looping, do one of the following:
•
Choose View > Playback > Loop Playback (or press Command-L).
•
Click the Loop Playback button.
2 Do one of the following:
•
To loop your entire project: Press the Space bar.
•
To loop a portion of your project: Select a range or a clip in the Timeline, and choose View >
Playback > Selection, or press the Slash (/) key.
Chapter 6 Play back and skim media 75
Page 76

Play video in full-screen view
Skimmer
1 Select or open a project in the Project Library or open a clip in the Event Browser, and position
the playhead where you want the video to begin.
2 Do one of the following:
•
Choose View > Playback > Play Full Screen (or press Command-Shift-F).
•
Click the Play Full Screen button below the Viewer.
The item plays in full-screen view starting at the playhead position.
3 To leave full-screen view, press the Esc (Escape) key.
When you play back clips, the frames under the playhead or skimmer play in the Viewer. If
you need to compare two clips at once, you can use the Event Viewer, a separate viewer for
playing back event clips only. The Event Viewer appears to the left of the main Viewer. For more
information, see Play back and skim media in the Event Viewer on page 78.
Skim media
You can quickly skim your video and audio to preview it, search for a particular shot, or make an
edit. When skimming is turned on and you move the pointer forward or backward over a clip in
the Event Browser or the Timeline, the content under the pointer plays in the Viewer.
You can also use the Blade, Trim, and Range Selection editing tools to skim clips in the Timeline
or in the Precision Editor.
As you’re editing in Final Cut Pro, you may nd skimming distracting when you move the pointer
from one location to another. You can disable all skimming (or just audio skimming).
Skim clips
m Move the pointer forward or backward over a clip in the Event Browser or the Timeline.
The skimmer (a vertical pink line) indicates exactly where the pointer is as you skim, and the
corresponding frames are displayed in the Viewer.
Tip: You can also press the Space bar at any time to play forward from the skimmer position.
Chapter 6 Play back and skim media 76
Page 77

Skim clips with editing tools
You can skim clips when you use the Blade, Trim, and Range Selection tools in the Timeline or in
the Precision Editor. The tools behave as skimmers as you move the pointer over a clip.
1 Select a clip in the Timeline or open the Precision Editor.
2 Select either the Blade, Trim, or Range Selection tool from the Tools pop-up menu in the toolbar.
3 Move the tool forward or backward over a clip.
When using an editing tool as a skimmer, you can skim and add markers to clips under
connected clips in the Timeline.
Turn skimming on and o
m To turn all skimming on or o: Click the Skimming button, choose View > Skimming, or press S.
m To turn audio skimming on or o: Click the Audio Skimming button, choose View > Audio
Skimming, or press Shift-S.
When skimming is turned on, the skimming buttons appear blue.
Audio skimming is turned off.
Skimming is turned on.
Note: When skimming is turned o, you can still skim with the Blade, Trim, and Range Selection
editing tools.
Skim audio for individual clips or audio components
You can turn on clip skimming to limit audio skimming to an individual clip. This is useful if you
have a connected clip in the Timeline and want to skim it without also hearing audio from the
clip in the primary storyline.
Important: Audio skimming must also be turned on in order to use this feature.
You can also use clip skimming to skim and listen to an individual audio component when
editing clips that show expanded audio components. If clip skimming is turned o, you hear
combined audio for all components in the clip as you skim.
Tip: To view expanded audio components, select the clip in the Timeline and choose
Clip > Expand Audio Components (or press Option-Control-S).
m To turn clip skimming on or o, choose View > Clip Skimming (or press Command-Option-S).
Chapter 6 Play back and skim media 77
Page 78

PlaybackandskimmediaintheEventViewer
Event Viewer Viewer
Sometimes, you may need two viewers so that you can play back and skim event clips separately
from Timeline clips. The Event Viewer is a separate video display that appears next to the main
Viewer. With the Event Viewer and the Viewer open, you can display two clips at the same time:
one in the Event Browser and one in the Timeline.
You use the Event Viewer to play clips in the Event Browser only. As with the main Viewer, you
can show video scopes, color channels, title and action safe zones, and multicam angles (with the
Event Viewer set to show angles). Playback and adjustment controls are identical in the Viewer
and the Event Viewer. Other viewer-related operations (including onscreen controls and built-in
eects) are done with the main Viewer.
The dual-viewer interface is derived from linear tape-based systems, which included both source
and record monitors. The source monitor was for previewing source clips and making selections
in them. The record monitor was for playing back the edited program.
Open the Event Viewer
m Choose Window > Show Event Viewer (or press Command-Control-3).
To close the Event Viewer, choose Window > Hide Event Viewer (or press Command-Control-3).
Note: If you’re using video scopes with the Event Viewer, you may nd it convenient to display
the scopes below the video image rather than on the left side (the default). To display scopes
below the video image, choose Vertical Layout from the Settings pop-up menu in the Event
Viewer. For more information, see Use the video scopes on page 370.
Viewplaybackonaseconddisplay
If you have a second display connected to your computer, you can show the Viewer on the
second display to play video, or the Event Browser on the second display to view clips in an
event, thereby expanding your workspace in the Final Cut Pro main window.
Show the Viewer on a second display
1 Connect a second display (a second computer monitor connected to the PCI video card), and
make sure it is connected to power and turned on.
2 In Final Cut Pro, choose Window > Show Viewers on Second Display.
The Viewer appears on the second display. All Viewer features (including onscreen controls) are
now available on the second display.
Chapter 6 Play back and skim media 78
Page 79

Note: If the Event Viewer is also visible, both viewers appear on the second display.
3 To return the Viewer to the Final Cut Pro main window, choose Window > Show Viewers in the
Main Window.
Show the Event Library and the Event Browser on a second display
1 Connect a second display (a second computer monitor connected to the PCI video card), and
make sure it is connected to power and turned on.
2 In Final Cut Pro, choose Window > Show Events on Second Display.
The Event Library and Event Browser appear on the second display. All event features (including
selection capabilities, markers, keywords, and so on) are now available on the second display.
To return the Event Library and Event Browser to the Final Cut Pro main window, choose
Window > Show Events in the Main Window.
Viewplaybackonanexternalvideomonitor
Final Cut Pro includes an A/V Output option to send video and audio from your computer to
an external video monitor. In addition to showing you how video and audio look and sound
on an NTSC/PAL or HD broadcast monitor, this feature also allows you to test output with more
sophisticated devices such as vectorscopes and waveform monitors.
A/V output is available only with OS X Lion v10.7.2 or later and requires compatible third-
party video interface hardware and software. FireWire DV devices are not supported. For more
information, contact the device manufacturer or go to the Final Cut Pro X Resources webpage at
http://www.apple.com/nalcutpro/resources.
Play video and audio on an external video monitor
1 Install the video interface hardware and software according to the manufacturer’s instructions.
2 Connect an external video monitor to the video interface and make sure it’s connected to power
and turned on.
3 To select an A/V output device, choose Final Cut Pro > Preferences (or press Command-Comma),
click Playback, and choose a device in the Playback preferences pane.
Chapter 6 Play back and skim media 79
Page 80
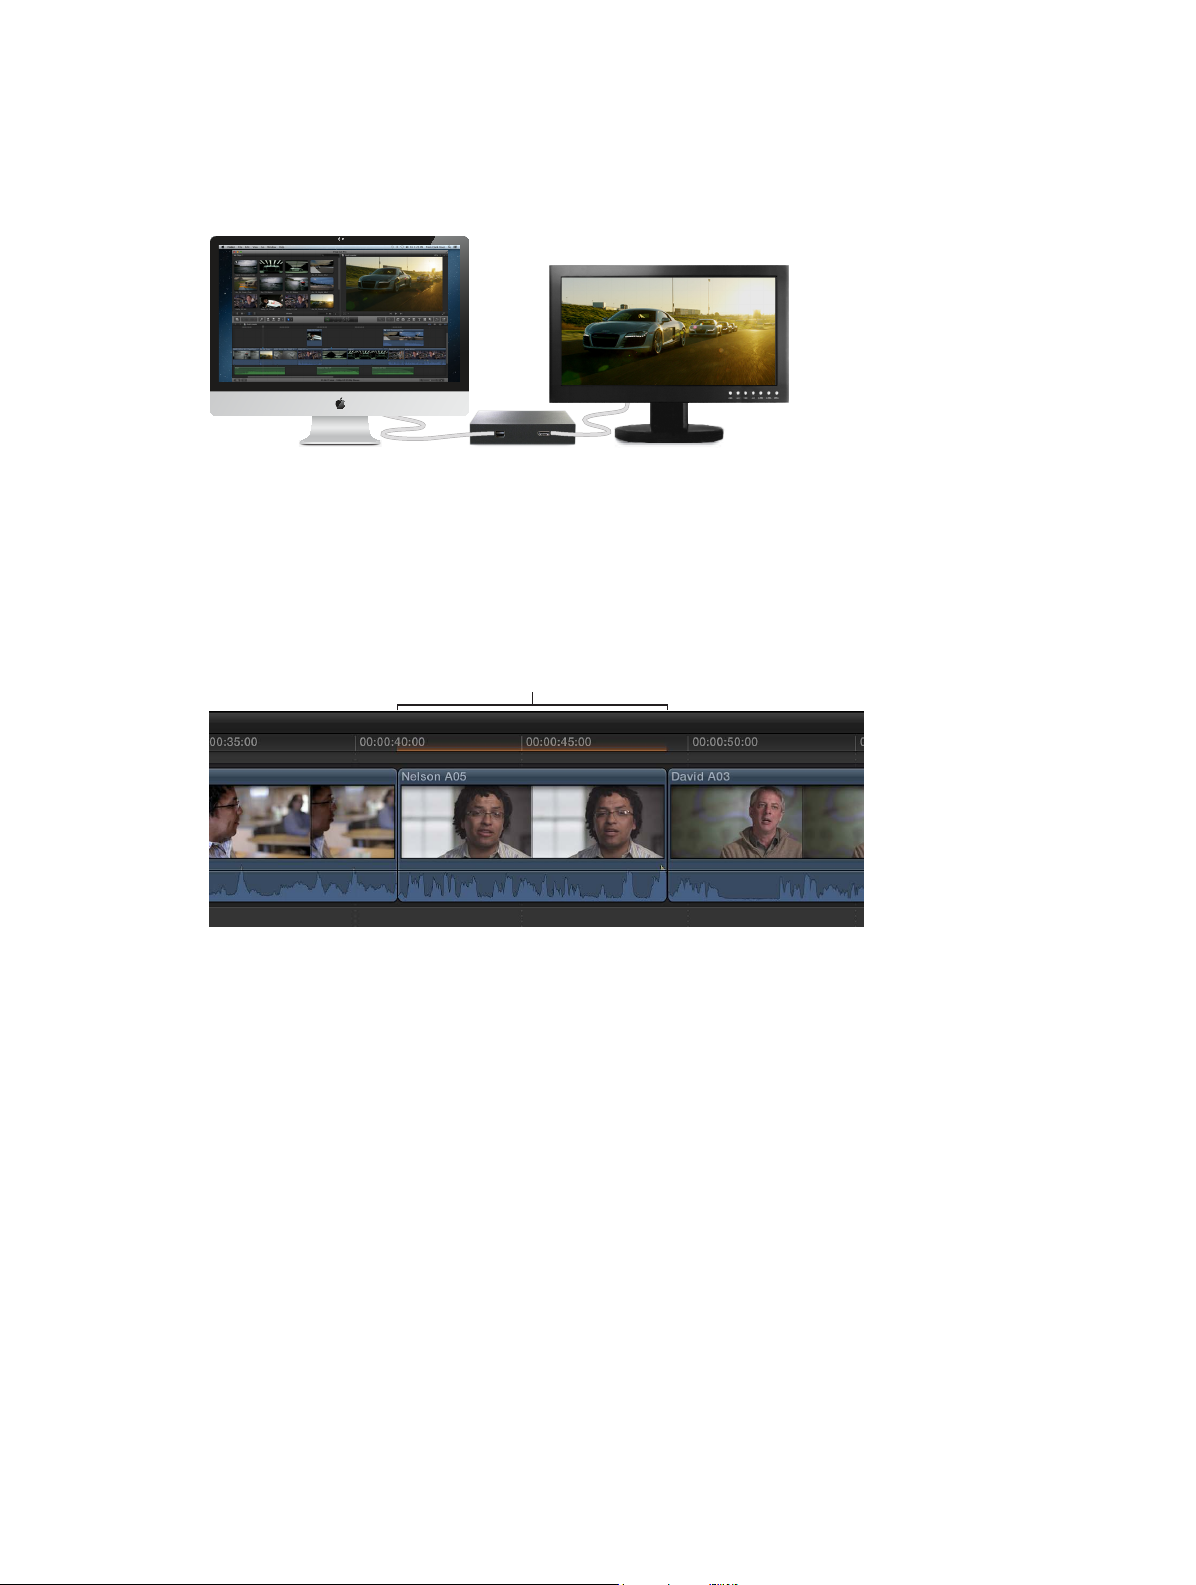
4 In Final Cut Pro, choose Window > A/V Output.
Background
The Viewer contents appear on the broadcast monitor. Viewer features (such as onscreen
controls and the title-safe and action-safe overlays) can be viewed only in Final Cut Pro.
Note: Video and audio are synced at the video frame (not audio sample) level.
To turn o A/V output, choose Window > A/V Output.
Aboutbackgroundrendering
When you add eects, transitions, generators, titles, and other items that require rendering
before playback, the background render indicator (an orange bar) appears below the timecode
in the Timeline.
render indicator
By default, background rendering begins 5 seconds after you stop working and moving
the pointer in Final Cut Pro. Background rendering continues while you work in a dierent
application. You can change this setting in the Final Cut Pro preferences.
Chapter 6 Play back and skim media 80
Page 81

Create and manage projects
Createanewproject
To create a movie in Final Cut Pro, you rst create a project, which provides a record of your
editing decisions and the media you use. Then you add clips to the project Timeline and
edit them.
When you create a new Final Cut Pro project, you do the following:
•
Name the project.
•
Specify a default event for the project.
The default event stores media that’s dragged to the project from the Finder or a Final Cut Pro
media browser. If you drag media from the Finder to the project’s Timeline, that media is
automatically located in the project’s default event.
Optionally, you can also set the starting timecode and dene the video, audio, and render
properties for the project.
After creating your project, you add clips to it from the Event Library.
Note: If you’re creating a project and you haven’t yet imported media into Final Cut Pro, you
should do so. See Importing overview on page 19 for information.
7
Start a project
1 Do one of the following:
•
In Final Cut Pro, choose File > New Project (or press Command-N).
•
Make sure the Project Library is open, and click the New Project button.
2 In the window that appears, type a name for the project in the Name eld.
3 Choose a default event for the project.
If you drag any media les from the Finder directly to the project’s Timeline, or add media to
the project from one of the media browsers, that media is automatically added to the project’s
default event.
4 If you want to further customize settings for your project, click Use Custom Settings.
Note: Final Cut Pro shows the Automatic Settings by default, but it will remember the settings
you used last, so this step may be unnecessary.
5 If you want your project’s timecode to start at a value other than 00:00:00:00, type a starting
timecode value in the Starting Timecode eld.
81
Page 82
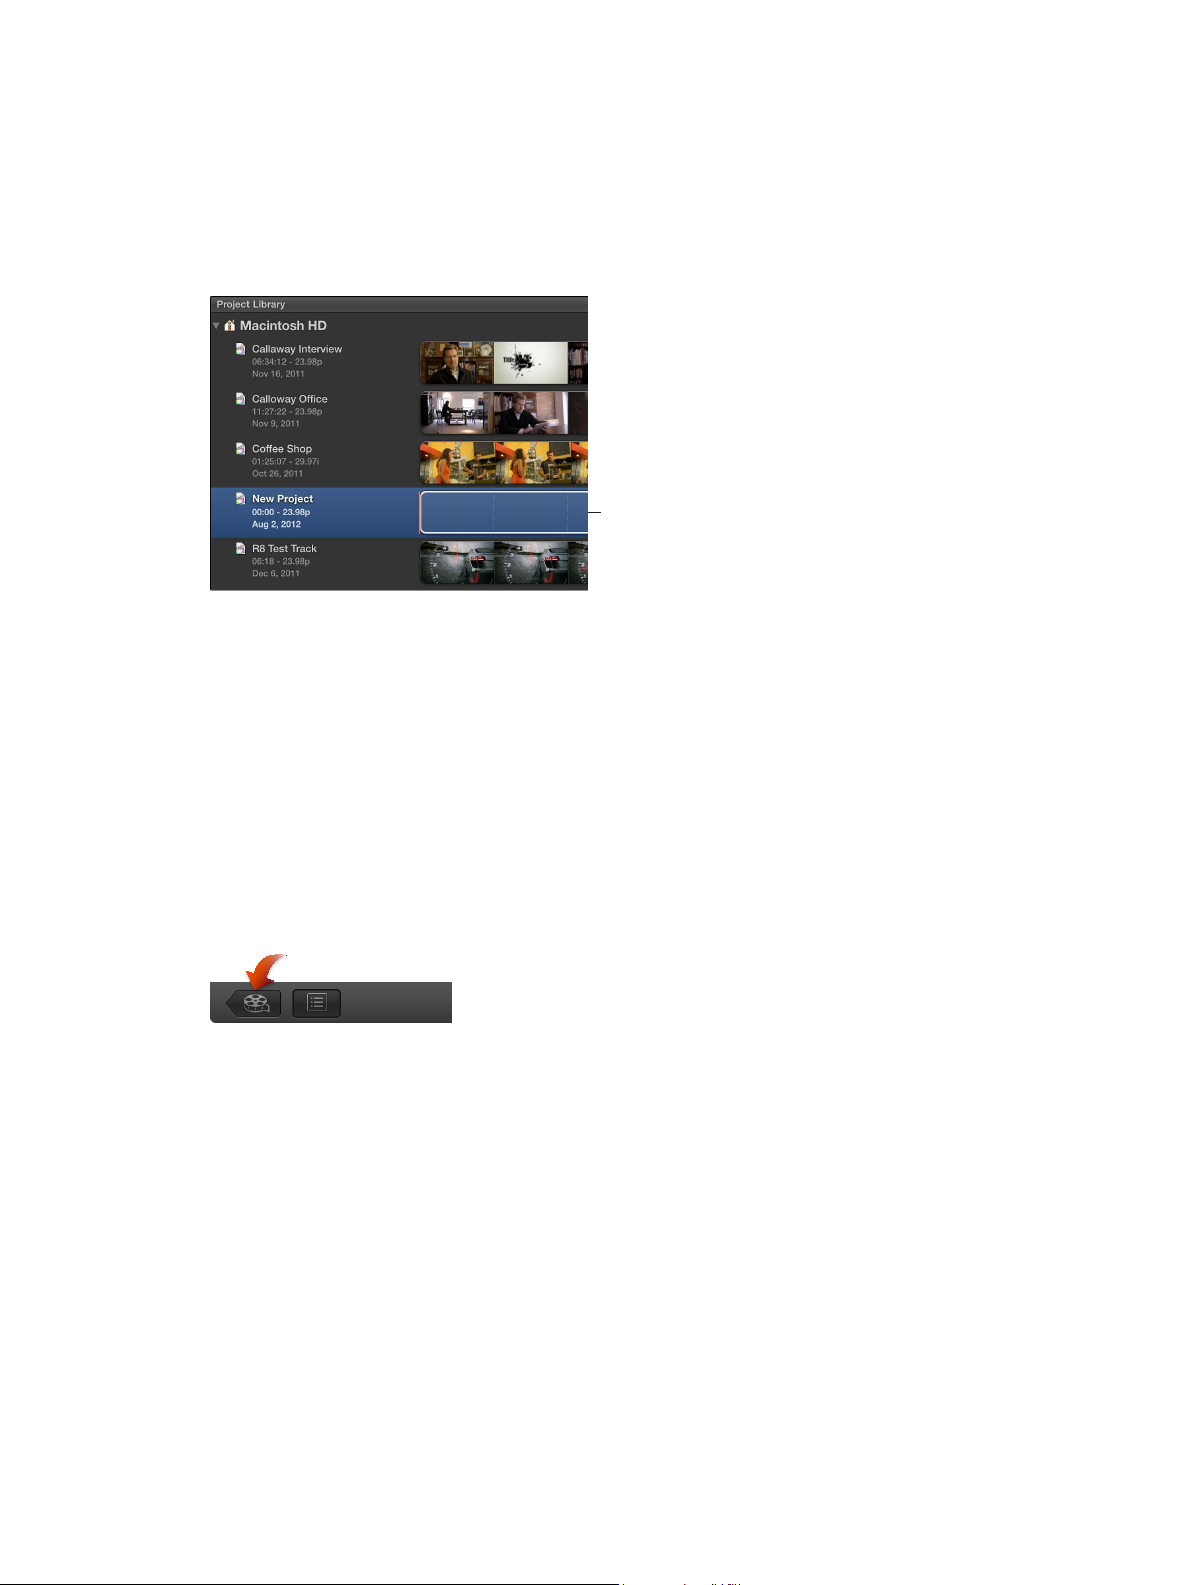
6 If you want to make any changes to the project’s video or audio properties, select Custom and
use the pop-up menus.
Unless you have a specic requirement for the project you’re creating, it’s best to leave “Set
automatically based on rst video clip” selected.
7 Click OK.
The new project appears in the Project Library with the name you gave it in step 2.
New project
You can now add clips from the Event Browser and begin to edit your project in other ways,
adding titles, special eects, background music, sound eects, and more.
You can change a project’s name, default event, and project properties at any time. See Modify a
project’s name and properties on page 83 for more information.
Previewandopenaproject
If you want to see the contents of a project, you can preview the project before opening it.
Preview a project
1 If the Project Library is not already open, click the Project Library button at the bottom-left
corner of the Final Cut Pro main window.
2 Select a project in the Project Library.
3 To preview a project in the Viewer, select it and do one of the following:
•
To skim the project: Move the pointer over the lmstrip (to the right of the project’s name).
•
To play the project from the skimmer (the pink vertical line): Press the Space bar; press it again to
stop playing the project.
Open a project
1 Open the Project Library.
2 Locate the project you want to open and double-click it.
Chapter 7 Createandmanageprojects 82
Page 83
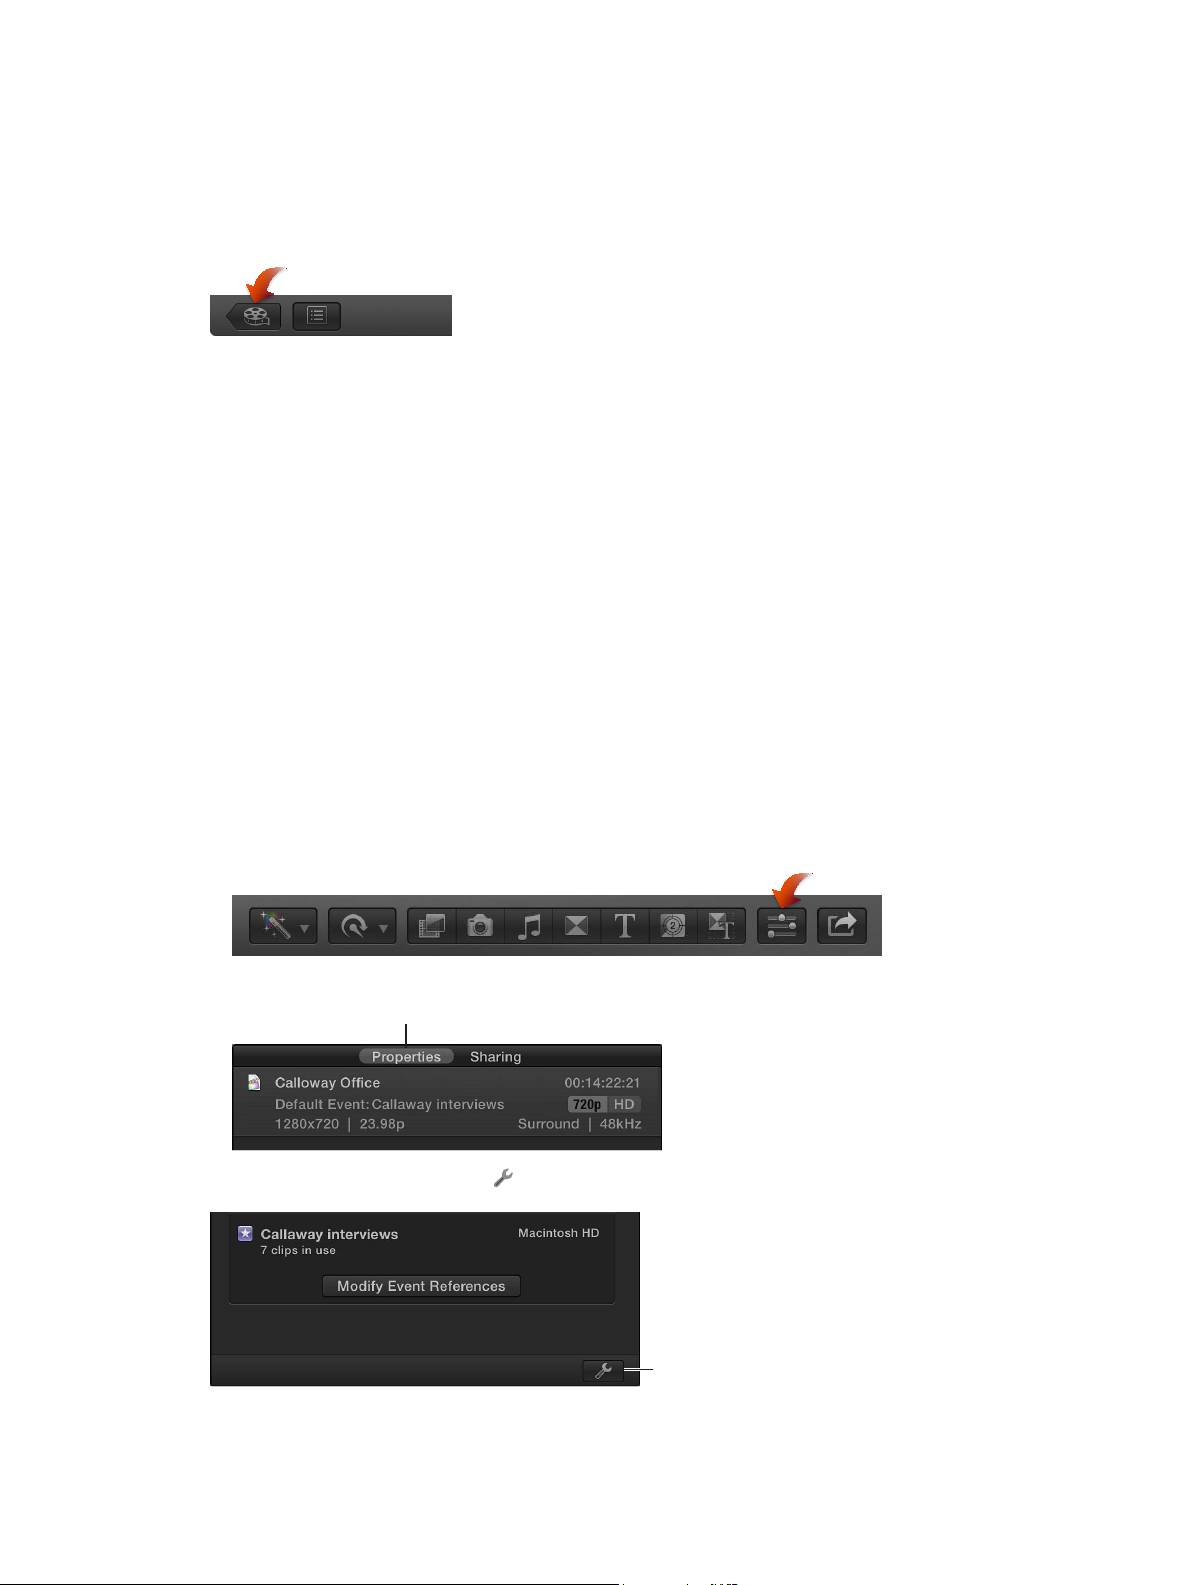
Modifyaproject’snameandproperties
Properties button
As your project evolves, you may decide you want to rename it or change its properties.
Rename a project
1 If the Project Library is not already open, click the Project Library button at the bottom-left
corner of the Final Cut Pro main window.
2 Select a project, and click the project’s name to highlight it.
3 Type a new name in the project Name eld, and press Return.
Depending on how you have the Project Library organized, the project’s position in the project
list may change after you rename it.
Change a project’s default event and properties
When you create a project, you set the project properties and assign the project a default event
to hold media that is dragged directly into the project’s Timeline from a Final Cut Pro media
browser or the Finder.
In most cases, Final Cut Pro manages project properties automatically based on the properties of
the rst clip you add to a project, but you can change almost all properties of an existing project.
If you must modify the project properties, choose video and audio project properties based on
how you intend to share your nal movie with your audience.
1 Open the Project Library and select a project.
2 Do one of the following:
•
Choose File > Project Properties (or press Command-J).
•
If the Inspector pane is hidden, click the Inspector button in the toolbar.
Then click the Properties button at the top of the pane.
3 Click the Project Properties button .
Project Properties
button
Chapter 7 Createandmanageprojects 83
Page 84

4 In the window that appears, change the settings as appropriate.
Name
•
Name: Type a name for the project.
Default Event
•
Default Event: Choose the default event for the project.
Starting Timecode
•
Starting Timecode: If you want your project’s timecode to start at a value other than
00:00:00:00, type a starting timecode value.
Drop Frame Timecode
•
Drop Frame: Select the checkbox to turn on drop frame timecode (this option appears only for
29.97 and 59.94 fps media).
In non-drop frame timecode, the timecode counter counts at a consistent rate without
dropping any numbers from the count. Non-drop frame timecode is available as a display
option for every frame rate.
In drop frame timecode, frames 0 and 1 are skipped the rst second of every minute, unless
the minute number is exactly divisible by 10.
Video Properties
•
Format: Choose the video format (a specic method of encoding the video).
•
Resolution: Choose the frame size of the video.
•
Rate: Choose the frames per second (fps).
Note: Unless the Timeline is completely empty, you cannot change the frame rate of an
existing project.
Choose a default Event
from the pop-up menu.
Change the project’s
video, audio, and
render properties.
Audio and Render Properties
•
Audio Channels: Choose whether to present the audio as multichannel surround sound or
as stereo.
•
Audio Sample Rate: Choose the audio sample rate for your project (the number of times a
signal is measured—or sampled—per second). A higher sample rate produces higher-quality
audio and larger le sizes, and a lower sample rate produces lower-quality audio and smaller
le sizes. Which sample rate you choose to work with depends on the source material you’re
working with, and the nal destination of your audio.
•
Render Format: Choose the codec to use for your project’s background rendering.
5 Click OK.
Chapter 7 Createandmanageprojects 84
Page 85
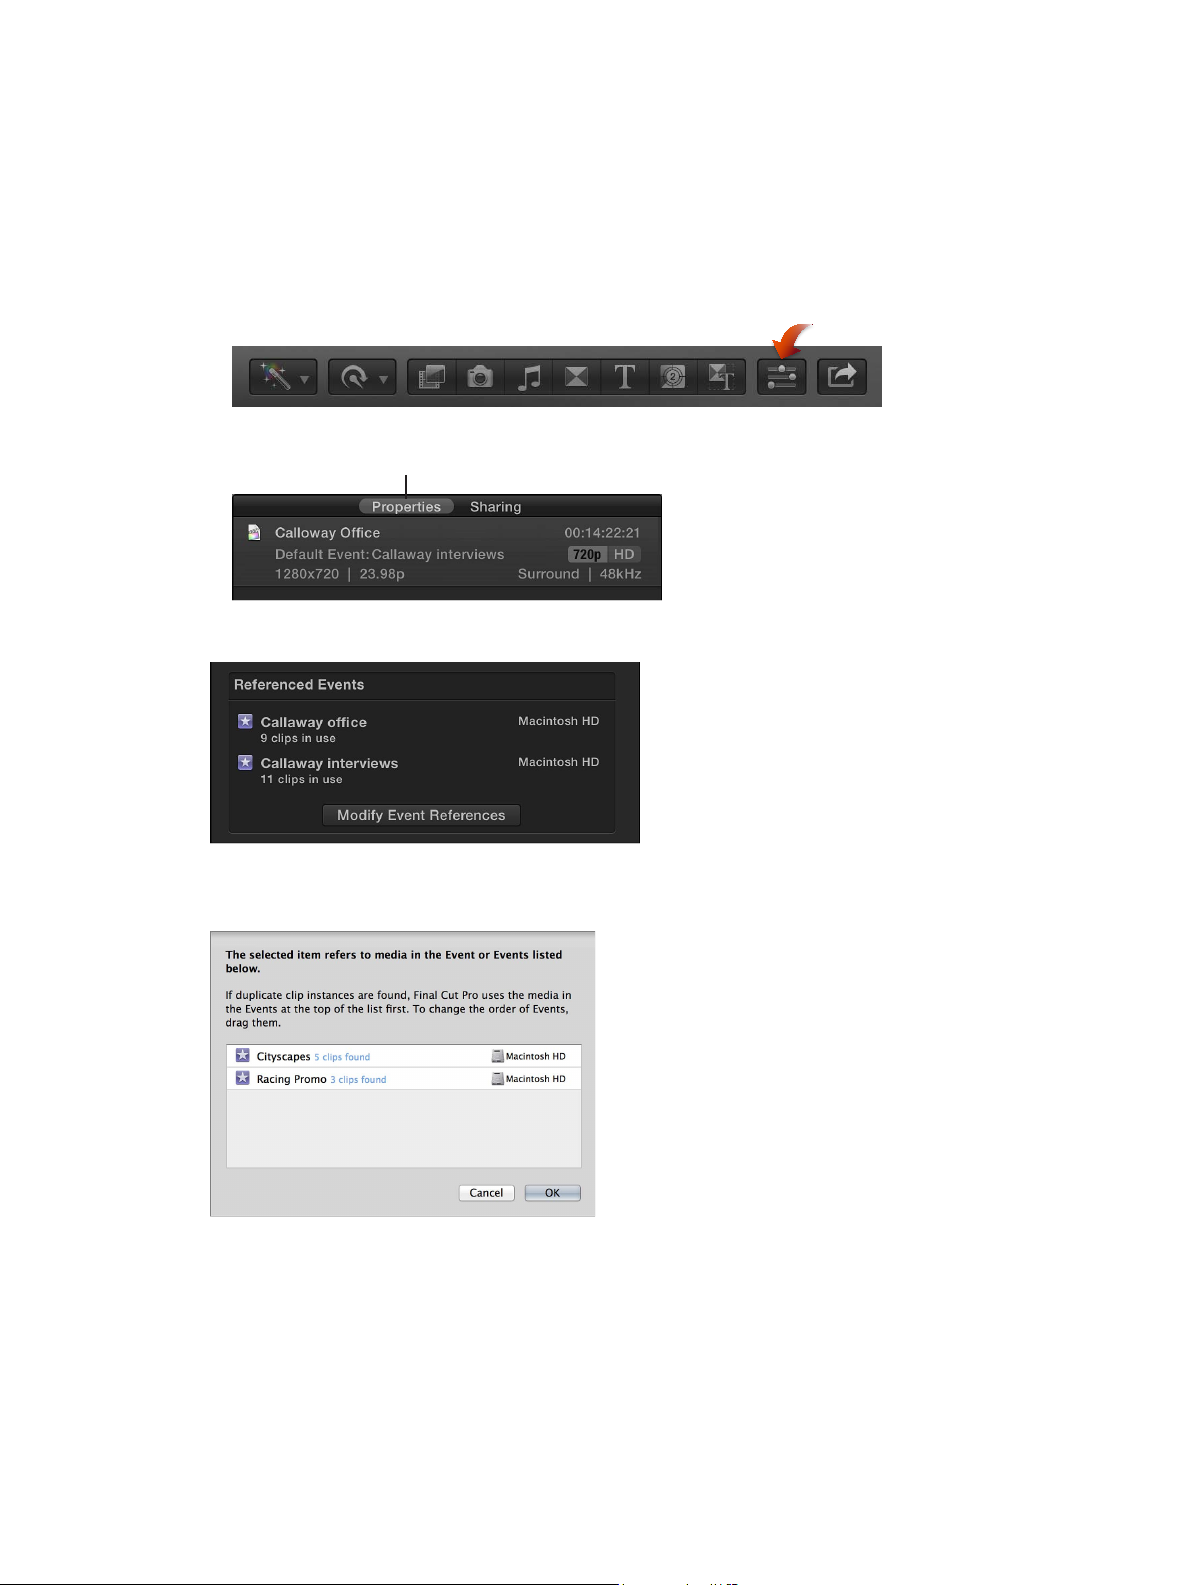
Dene the order in which events are referenced by a project
Properties button
If you have duplicate clips in dierent events, you can dene the order in which Final Cut Pro
looks for the clips.
1 Open the Project Library and select a project.
2 Do one of the following:
•
Choose File > Project Properties (or press Command-J).
•
If the Inspector pane is hidden, click the Inspector button in the toolbar.
Then click the Properties button at the top of the pane.
3 Click the Modify Event References button in the Referenced Events section.
4 In the window that appears, drag the events to set the order in which Final Cut Pro will look
for clips.
5 When you’ve set the order, click OK.
Chapter 7 Createandmanageprojects 85
Page 86
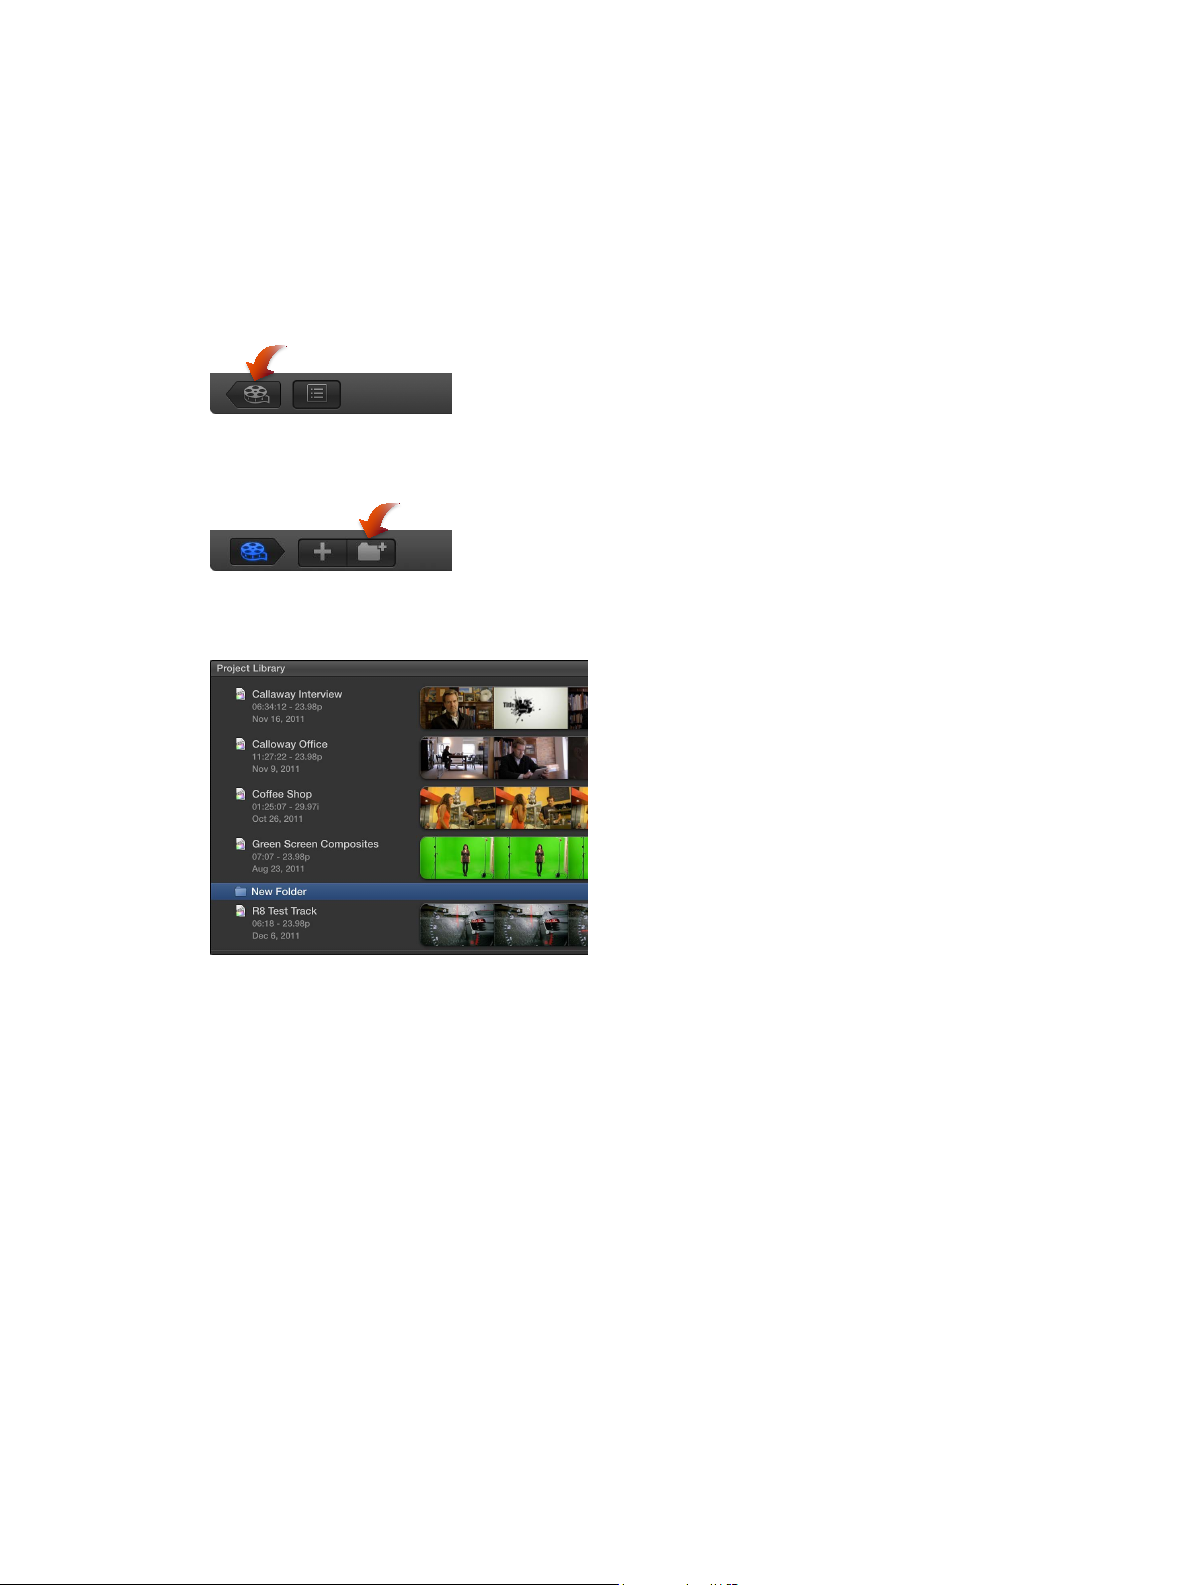
OrganizeprojectsintheProjectLibrary
All your Final Cut Pro video projects are listed in the Project Library. You can start organizing your
projects by connecting additional hard disks, creating folders to hold projects, and giving your
projects clear and specic names. As your Project Library grows, you can rename, copy, move,
and delete your projects as necessary.
Use folders to sort projects
1 If the Project Library is not already open, click the Project Library button at the bottom-left
corner of the Final Cut Pro main window.
2 Select a disk, folder, or project to which you want to add a folder, and click the New Folder
button at the bottom-left corner of the Final Cut Pro main window.
A new folder called New Folder appears inside the disk or folder you selected, or at the same
level as the project you selected.
3 Do any of the following:
•
To rename the folder: Select the folder, click the folder name, and type a new name.
•
To add a project to the folder: Drag the project to the folder.
•
To open or close the folder: Click the disclosure triangle to the left of the folder name.
Copy a project
Copying a project is useful if you want to work on a new version of a project or transfer a copy
to another computer.
1 Open the Project Library and select a project.
2 Choose File > Duplicate Project.
3 In the window that appears, choose a location for the duplicated le from the Location
pop-up menu.
Chapter 7 Createandmanageprojects 86
Page 87
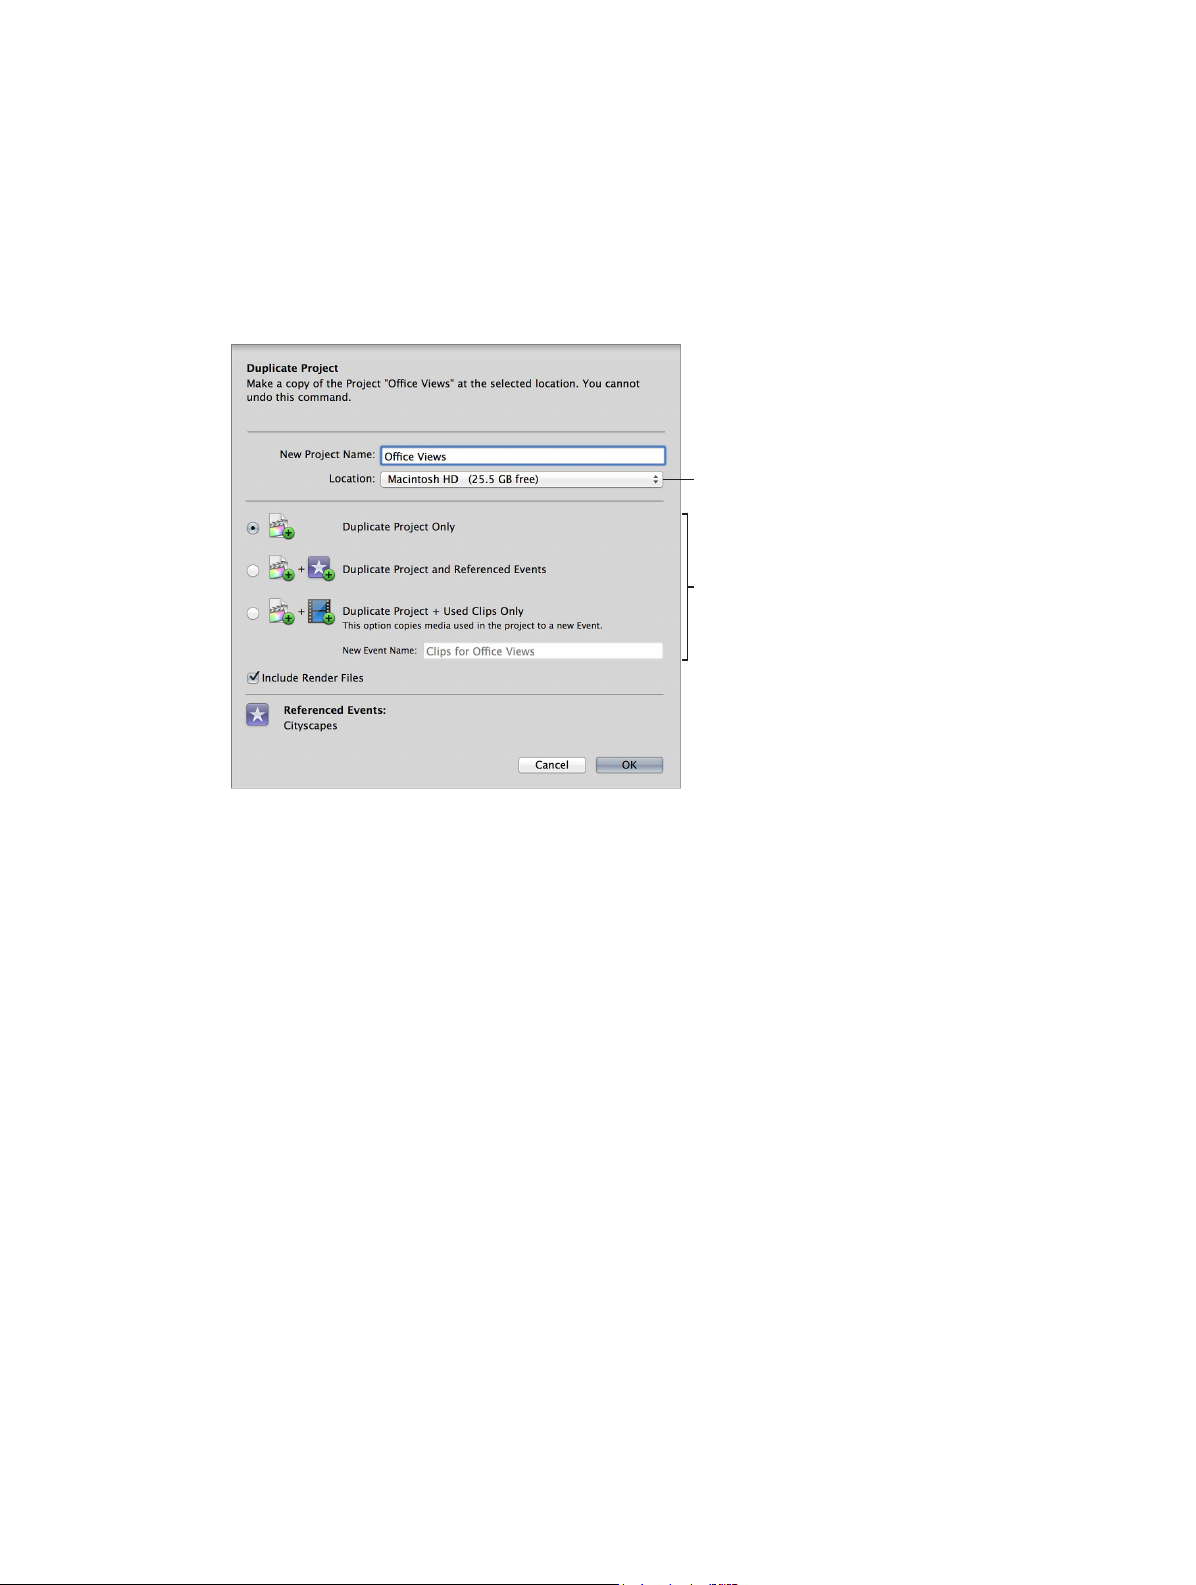
4 Select an option to specify what is duplicated:
•
Duplicate Project Only: Duplicates only the project le.
•
Duplicate Project and Referenced Events: Duplicates the project le, any events referred to by the
project le, and all of the media in the referenced events.
•
Duplicate Project + Used Clips Only: Duplicates the project le and the media les for any clips
used in the project.
•
Include Render Files: Select this checkbox to include render les for the clips and projects. If you
want to free up hard disk space, deselect this checkbox.
Choose a location to put
the copied project.
Select a duplicate option.
5 Click OK.
Final Cut Pro copies the project to the location you chose using the option you specied. The
project is given an appended name (for example, “Bill’s movie1”), and the project appears in the
Project Library.
Quickly copy a project to a connected external storage device
m Open the Project Library, select a project, and drag the project to another hard disk’s icon in the
Project Library.
Move a project
You can easily move a project to a connected hard disk or another computer. Moving a project
le is useful if you want to work on a project using another computer that has Final Cut Pro
installed, or if you want to free up space on your computer’s hard disk.
Important: You cannot undo a project move with the Undo command.
1 Open the Project Library and select a project.
2 Do one of the following:
•
Choose File > Move Project.
•
Hold down the Command key while you drag the project to another hard disk’s icon in the
Project Library.
3 In the window that appears, choose where you want to move the project (to a hard disk or
computer) from the Location pop-up menu.
Chapter 7 Createandmanageprojects 87
Page 88
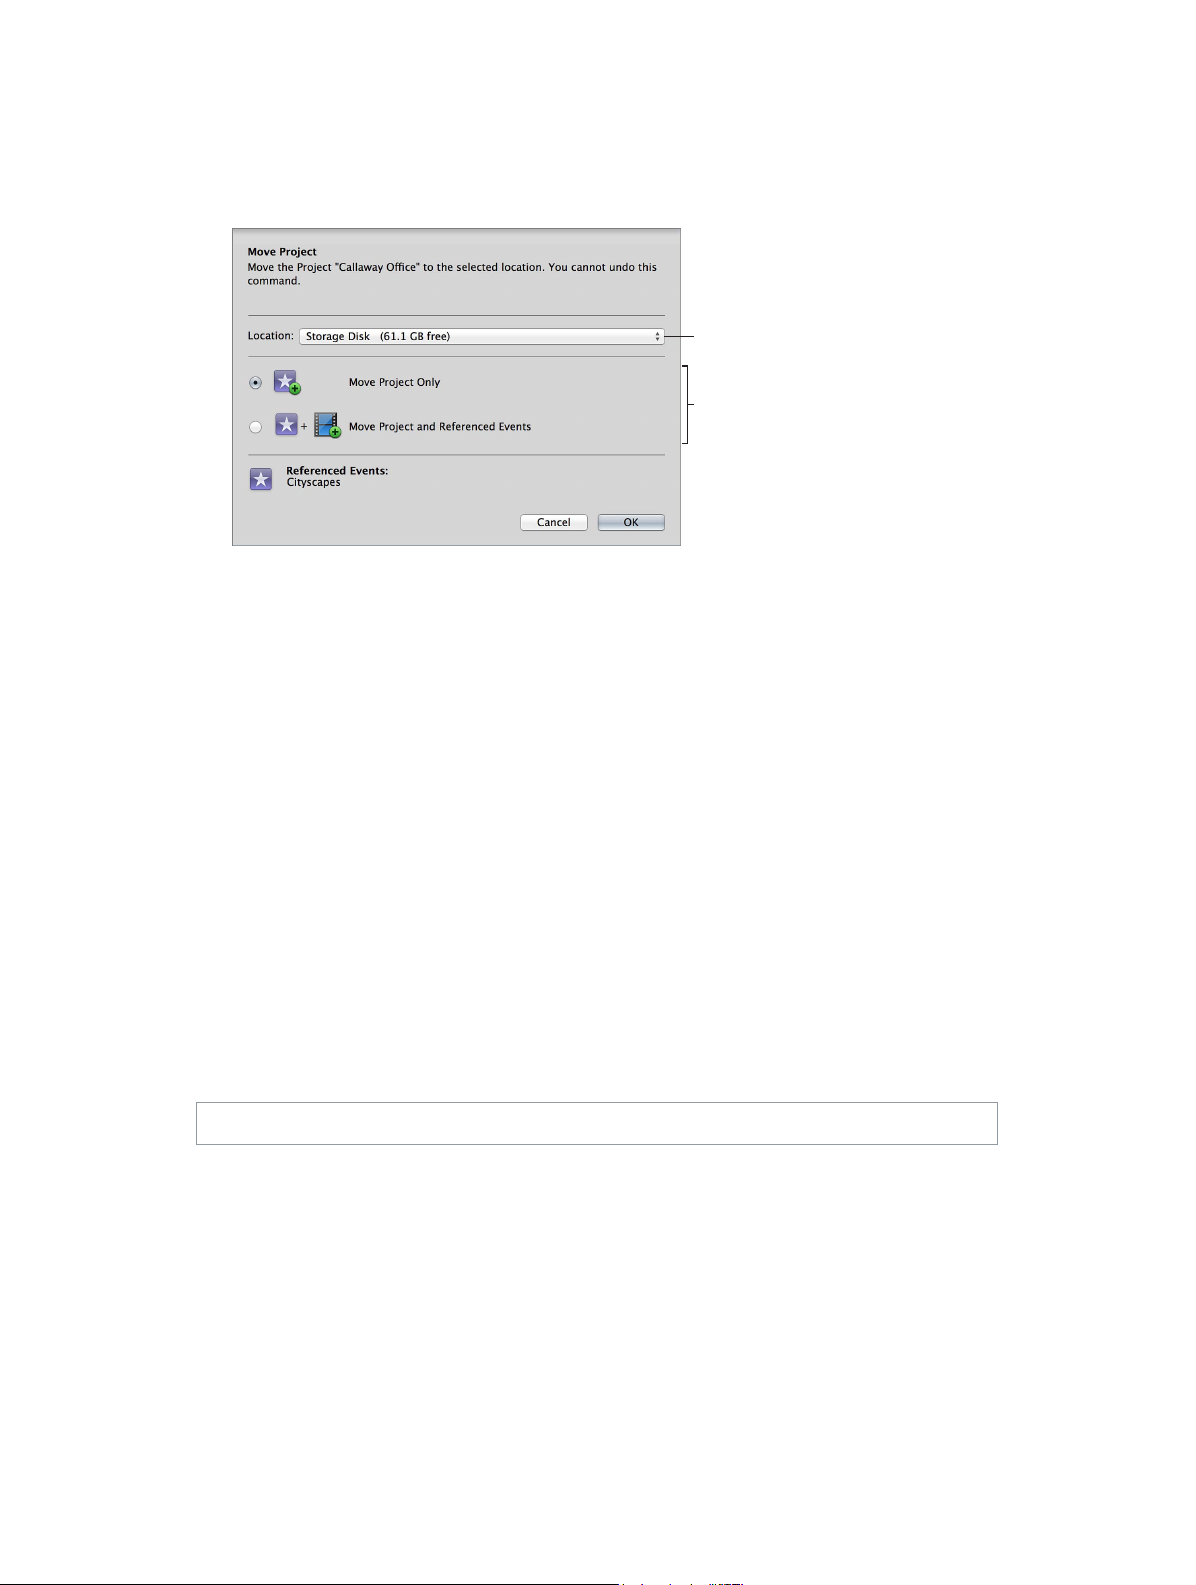
4 Select an option to specify what is moved:
•
Move Project Only: Moves only the project le.
•
Move Project and Referenced Events: Moves the project le, any events referred to by the project
le, and all of the media in the referenced events.
5 Click OK.
Final Cut Pro moves the project to the location you chose using the option you specied. See
Where your media and project les are located on page 390 for information about the default
location of Final Cut Pro projects and events.
Choose a location
to which you want
to move the project.
Select a move option.
Delete a project or project folder
Deleting a project folder deletes the folder and all of the projects it contains. Your media is not
deleted because media is stored in events.
1 Open the Project Library and select a project.
2 Do one of the following:
•
To delete a project: Select the project and choose File > Move Project to Trash (or press
Command-Delete).
•
To delete a folder and any projects the folder contains: Select the folder and choose File > Move
Folder to Trash (or press Command-Delete).
The project or project folder (and the projects the folder contains) is removed from the Project
Library and moved into the Finder Trash.
3 To permanently delete the project or project folder and its les and free up space on your hard
disk, empty the Finder Trash.
WARNING: After the Trash is emptied, the le or folder cannot be restored.
You can also delete a project’s render les. See View background tasks on page 400 for
more information.
Chapter 7 Createandmanageprojects 88
Page 89

Saveprojects
Final Cut Pro automatically saves all the changes you make as you work on a project, which
means you never have to save changes manually. Also, you can undo all of your changes up
to the last time you quit and reopened Final Cut Pro by choosing Edit > Undo (or pressing
Command-Z).
You can create multiple versions of a project by duplicating it. For more information about
duplicating projects, see Organize projects in the Project Library on page 86.
Changes you make to a clip in a project do not aect the clip’s source le. Thus, if you’ve made a
lot of changes to a clip but want to start fresh, you can easily restore the clip to its original state
by adding a new copy of the clip (located in the Event Library) to your project.
Chapter 7 Createandmanageprojects 89
Page 90

Edit your project
8
Editingoverview
The term video editing refers both to broader stages of a project workow and to very specic
manual tasks that you do with clips in a project Timeline.
•
Make selections and add clips to the Timeline: Adding and arranging clips in your project is the
fundamental step in creating a movie with Final Cut Pro. You move and reorder clips in the
Timeline. See Adding clips overview on page 99, Arrange clips in the Timeline on page 117,
and Audio overview on page 157.
•
Cut and trim clips: Final Cut Pro provides a wide variety of tools for adjusting the start and
end points of clips in the Timeline and for controlling pacing from one shot to the next. See
Trimming overview on page 123.
•
Further rene and adjust your project: Final Cut Pro provides many advanced editing tools to
nish a highly polished movie with ease. See topics in the advanced editing section.
•
Add eects and color correction: Finishing touches include visual eects and color correction.
See Transitions, titles, eects, and generators overview on page 204 and Color correction
overview on page 355.
Selectclipsandranges
About selections and lmstrips
A fundamental step in editing a video project is choosing what you want to include in your
nal movie. In Final Cut Pro you indicate what clips or portions of clips you want to act on by
making a selection. Final Cut Pro provides a variety of powerful tools for making selections with
both speed and precision, including lmstrips, which are connected series of thumbnail images.
Your video clips appear as lmstrips in the Timeline (where you build projects) and in the Event
Browser (where your source media is displayed). A single video lmstrip might represent several
seconds of video encompassing hundreds of video frames (individual images). Audio-only clips
appear as audio waveforms, showing the change in the audio volume over time.
When you add clips from the Event Browser to a project in the Timeline, you can add one
or more whole clips, or you can add a range within a clip. Then you can ne-tune the clips
individually in the Timeline, adding video eects to them, for example, or inserting transitions
between them.
90
Page 91

You can adjust the appearance of lmstrips in the Event Browser and the Timeline so that it’s
easier to make selections. For example, expanding the width of a lmstrip (by showing shorter
durations per thumbnail) helps you make more precise selections.
Filmstrip expanded
in the Event Browser
for precise selections
You can also adjust the lmstrip appearance in the Timeline to make it easier to view and select
audio waveforms.
Filmstrip appearance
changed for easy
viewing and selection
of audio waveforms
Select one or more clips
Clips represent your video, audio, and graphics les and allow you to work with your media in
Final Cut Pro without changing the les themselves. To add clips to your project, rearrange them,
or trim them, you rst need to select them. You can select a single clip or multiple clips at a time.
Selecting multiple clips allows you to move them as a group within your project, or from one
event to another. It’s also useful if you’ve made adjustments to a clip and you want to paste the
same adjustments onto several other clips.
Chapter 8 Edityourproject 91
Page 92

Select an entire clip
Do one of the following:
m Click the clip once.
m Move the skimmer (or the playhead) over a clip and press X.
Note: This results in a range selection that matches the boundaries of the clip.
m In the Event Browser, press Up Arrow or Down Arrow to move the selection to a neighboring clip.
m In the Event Browser, Option-drag from the start point to the end point of the clip.
m In the Timeline, move the skimmer (or the playhead if skimming is turned o) over the clip you
want to select and press C. This method selects the clip in the primary storyline.
Connected clips and storylines are attached to clips in the primary storyline, and they appear
above and below the primary storyline. To select a connected clip or storyline with this keyboard
shortcut method, position the pointer on the connected clip and press C. For more information,
see Connect clips to add cutaway shots, titles, and synchronized sound eects on page 103 and
Add storylines on page 265.
A yellow border appears around the clip, indicating that it is selected.
Note: A Timeline clip selection (shown above) is dierent from a Timeline range selection, which
has visibly distinct range handles for adjusting the selection start point and end point.
All selections in the Event Browser are actually range selections (with adjustable start and
end points).
Select multiple clips in the Event Browser or the Timeline
m To select a number of individual clips: Hold down the Command key as you click the clips you want
to select.
Note: Command-clicking an Event Browser clip with preexisting ranges selects the ranges rather
than the whole clip.
m To select all clips and ranges in the Event Browser or the Timeline: Click the Event Browser or
Timeline to make it active, and choose Edit > Select All (or press Command-A).
Chapter 8 Edityourproject 92
Page 93

m To select multiple clips by dragging: Drag a selection rectangle over the Timeline or event clips you
want to select.
Deselect clips in the Event Browser or the Timeline
m To deselect a single selected clip: Command-click the clip or click outside it (or select a
dierent clip).
m To deselect multiple selected clips: Hold down the Command key and click the clips you don’t
want selected.
m To deselect all clips and ranges: Choose Edit > Select > None (or press Command-Shift-A).
m To deselect all clips and clear all selected ranges in the Event Browser: Press Option-X.
Select a range
Instead of selecting whole clips, you can select a range within any clip in the Timeline or in the
Event Browser. In the Timeline, you can also select a range that spans multiple clips. You can trim
range selections, mark them with ratings and keywords, and modify them in other ways. You can
adjust the range selection start and end points by dragging either side of the selection. You can
also create multiple range selections in one or more clips in the Event Browser.
Range handles
Note: This illustration shows a Timeline range selection. Event Browser range selections have
straight range handles.
Chapter 8 Edityourproject 93
Page 94

Select a range
Do one of the following:
m In the Event Browser, drag across any clip (lmstrip).
A yellow border appears around the range you selected.
If the lmstrip wraps onto two lines, you can select a range extending over the break simply
by continuing to drag across the break. When you reach the edge, the pointer jumps to the
next line.
Tip: In the Event Browser, Option-drag across any clip (lmstrip) with existing ranges to replace
those ranges with a new range.
m In the Timeline, choose Range Selection from the Tools pop-up menu in the toolbar (or press R).
The pointer changes to the Range Selection tool .
Drag the Range Selection tool across one or more clips in the Timeline to select a range.
To adjust the range selection start and end points, drag the range handles on either side of
the range.
Tip: To temporarily turn on the Range Selection tool, hold down the R key. When you release the
R key, the tool reverts to the previously active tool.
Range handles
m Use the I and O keys to set the range selection start and end points. For more information, see
the instructions below.
m In the Event Browser or the Timeline, move the skimmer (or the playhead) over a clip and press X.
Final Cut Pro sets the range selection start and end points at the clip start and end points.
Tip: To use this X key method with connected clips or clips in a connected storyline, position the
pointer on the clip and press X.
Chapter 8 Edityourproject 94
Page 95

m Command-click a colored marker line at the top of a clip.
These marker lines can indicate any of the following: Favorite (green), Rejected (red), manually
applied keywords (blue), or analysis keywords (purple).
Set a range start point or end point
m To set the start point: Position the skimmer (or the playhead, if skimming is turned o) where you
want the selection to start, and choose Mark > Set Range Start (or press I).
To remove the range start point, press Option-I.
m To set the end point: Position the skimmer (or the playhead, if skimming is turned o) where you
want the range to end, and choose Mark > Set Range End (or press O).
To remove the range end point, press Option-O.
m To set the range start point or end point while a clip or your project is playing back: Press the Space
bar to start playback, and then press the I or O key when you want to set the start or end point.
Tip: In the Event Browser, you can press Command-Shift-I and Command-Shift-O to set multiple
ranges during playback.
If you’re using the Blade, Trim, and Range Selection tools in the Timeline or in the Precision Editor,
you can use the I and O keys to set selection start and end points in a connected clip or storyline,
as well as in clips underneath connected clips and storylines. Move the pointer directly over a clip
and press I to set a selection start point or O to set a selection end point.
Extend or shorten the range selection
m To adjust where the range starts or ends: Drag the left or right edge of the yellow selection border.
m To reset the start point or end point for a range within the same event clip or project: Move the
skimmer and press I or O.
Tip: You can also press the I or O key while a clip is playing back.
m To extend or shorten a range within an event clip: Move the skimmer to any frame that you want
the range to begin or end with, and then hold down the Shift key and click (or drag).
m To extend or shorten a range using timecode: Choose Modify > Change Duration (or press
Control-D), and enter a new duration. (This method works with single range selections only.)
The range selection is lengthened or shortened accordingly.
If you require the skimmer and it is not present, you can turn on skimming at any time.
Set multiple ranges in event clips during playback
You can set multiple ranges in clips in the Event Browser during playback.
1 Play back an event clip.
2 While the clip is playing, do either of the following:
•
To add a range start point: Press Command-Shift-I.
•
To add a range end point: Press Command-Shift-O.
Note: To set multiple ranges in the same clip, repeat these keyboard shortcuts while
continuing playback.
Chapter 8 Edityourproject 95
Page 96
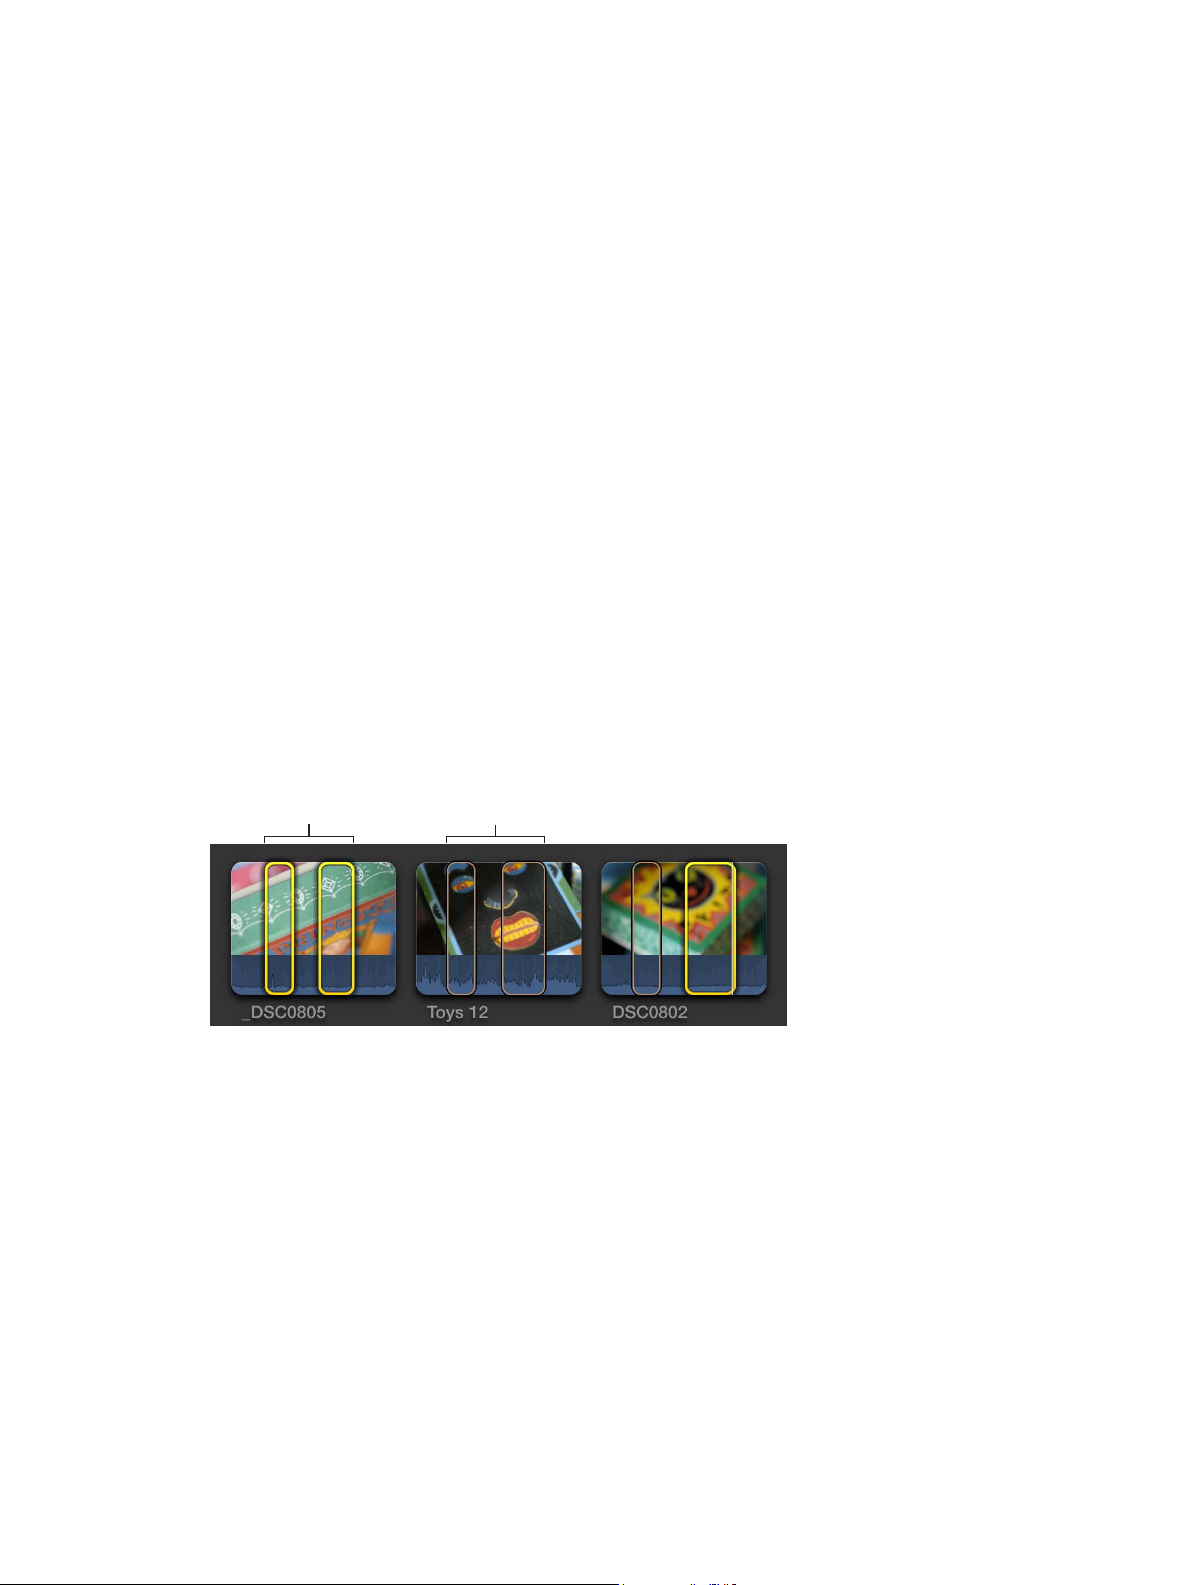
Set the range selection to match the boundaries of the clip
Selected ranges
Unselected ranges
m Move the skimmer (or the playhead) over a clip and press X.
Final Cut Pro sets a range selection from the start point to the end point of the clip. Any
preexisting ranges are removed.
Clear ranges
You can remove one or more ranges from the Event Browser or the Timeline.
Note: This operation does not aect the clip media in either the Event Browser or the Timeline.
m To remove an individual range in an event: Option-click the range.
m To remove a range in the Timeline: Click outside of the range or select a dierent range.
m To clear one or more ranges in the Event Browser or the Timeline: Select the range or ranges and
choose Mark > Clear Selected Ranges (or press Option-X).
Note: Selected ranges have a thick yellow border. Unselected ranges (available only in the Event
Browser) have a thin orange border.
m To remove all ranges in an event: Choose Edit > Select All (or press Command-A) to select all
ranges in the current event, and choose Mark > Clear Selected Ranges (or press Option-X).
Manage multiple range selections in event clips
In the Event Browser, you can set multiple ranges within one or more clips, and you can select
and deselect ranges after you set them. For example, you might set multiple ranges in a long
event clip, and then deselect some of the ranges before adding all of the selected ranges to the
Timeline at once.
Note: Selected ranges have a thick yellow border. Unselected ranges have a thin orange border.
Editing commands operate on yellow selections only.
Note: The commands described in this section require the Event Browser to be the active
portion of the Final Cut Pro interface. You can make the Event Browser active by moving the
pointer over it or clicking it. When the Event Browser is active, its background has a lighter
gray color.
Chapter 8 Edityourproject 96
Page 97
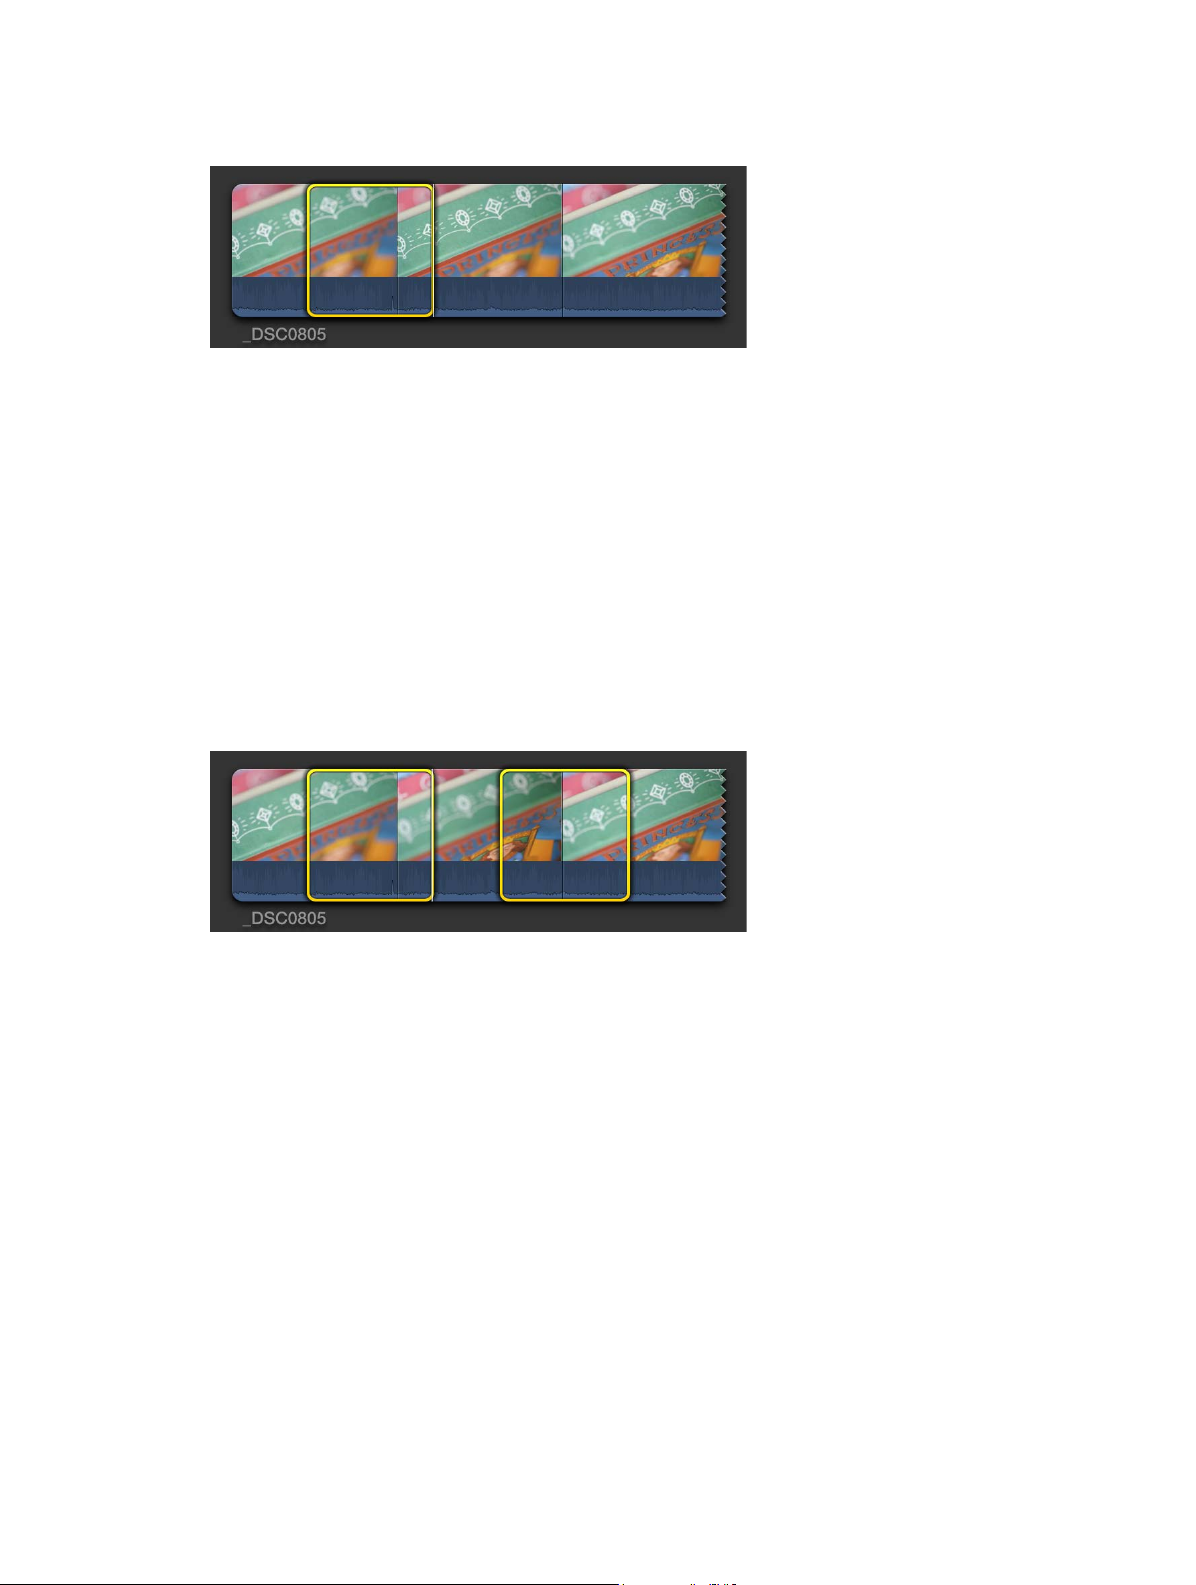
Set multiple ranges in an event clip
1 In the Event Browser, select a range within a clip.
2 To set an additional range, do one of the following:
•
Command-drag in a dierent section of the clip.
•
Move the skimmer (or the playhead) to the frame where you want the additional range to
start and press Command-Shift-I. Move the skimmer or playhead to the frame where you want
the additional range to end and press Command-Shift-O.
Note: These keyboard shortcuts also work during playback, so you can set additional ranges
on the y.
•
Option-drag over or within existing ranges to replace them with a new range.
•
Command-click a colored marker line at the top of a clip.
These marker lines can indicate any of the following: Favorite (green), Rejected (red), manually
applied keywords (blue), or analysis keywords (purple).
The additional range selection appears in the clip.
To remove a range selection, Option-click it.
Chapter 8 Edityourproject 97
Page 98
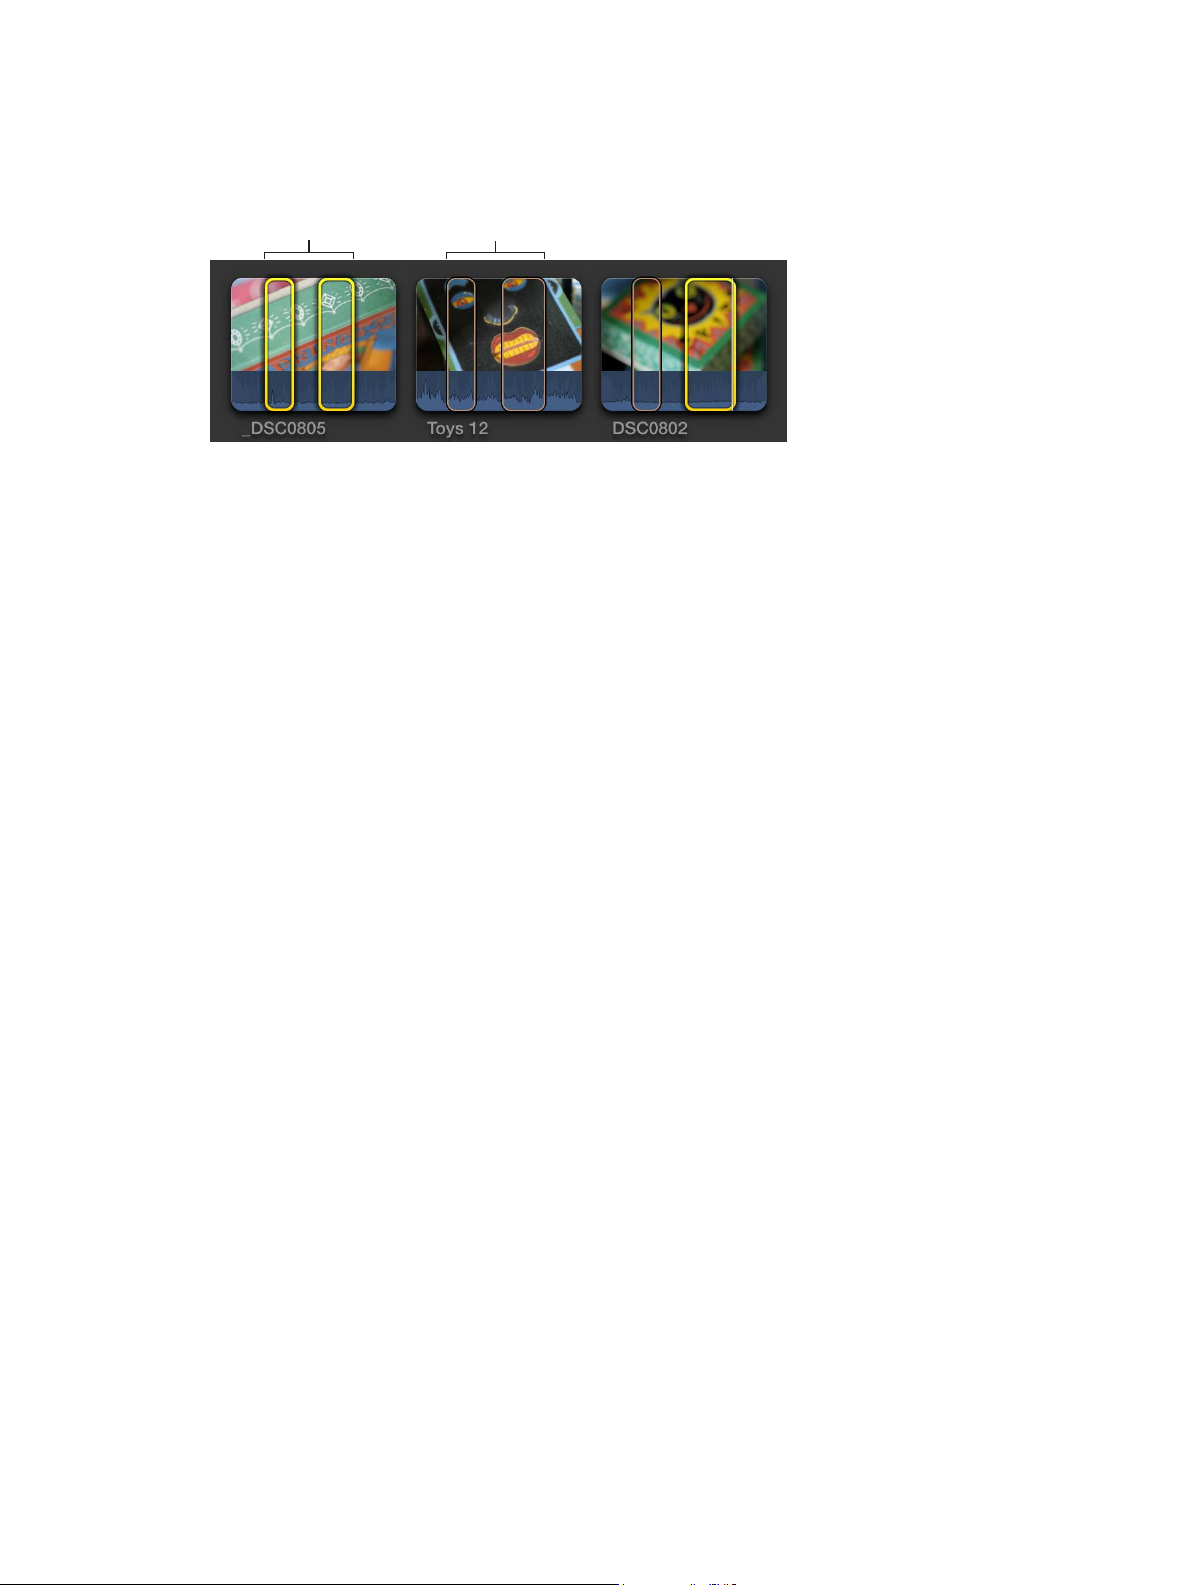
Select and deselect ranges and clips in an event
Selected ranges
Unselected ranges
You can set, select, or deselect multiple ranges within event clips or within events.
Important: Editing commands operate on yellow selections only. Editing commands ignore
orange (unselected) ranges.
m To select an individual range: Click the range.
m To select or deselect a range: Command-click the range.
m To select all ranges in a clip: Click an area of the clip that has no range.
m To select all ranges and clips in the current event: Choose Edit > Select All (or press Command-A).
The ranges (and all clips with no ranges) are selected with a yellow border.
m To deselect all ranges and clips in the current event: Choose Edit > Deselect All (or press
Command-Shift-A).
The ranges turn orange.
Remove ranges from clips in an event
You can remove individual ranges, multiple ranges, or all ranges from the current event.
m To remove an individual range in an event: Option-click the range.
m To remove selected ranges in an event: Select the ranges you want to remove, and choose Mark >
Clear Selected Ranges (or press Option-X).
m To remove all ranges in an event: Choose Edit > Select All (or press Command-A) to select all
ranges in the current event, and choose Mark > Clear Selected Ranges (or press Option-X).
Navigate between selections in an event
m To go to the start of the range selection: Choose Mark > Go to > Range Start (or press Shift-I).
Repeat this command to go to the start of the previous range selection, or to the start of the clip.
m To go to the end of the range selection: Choose Mark > Go to > Range End (or press Shift-O).
Repeat this command to go to the end of the next range selection, or to the end of the clip.
m To select the previous clip (or its ranges): Press Up Arrow.
To add to the selection, press Shift–Up Arrow.
m To select the next clip (or its ranges): Press Down Arrow.
To add to the selection, press Shift–Down Arrow.
Chapter 8 Edityourproject 98
Page 99
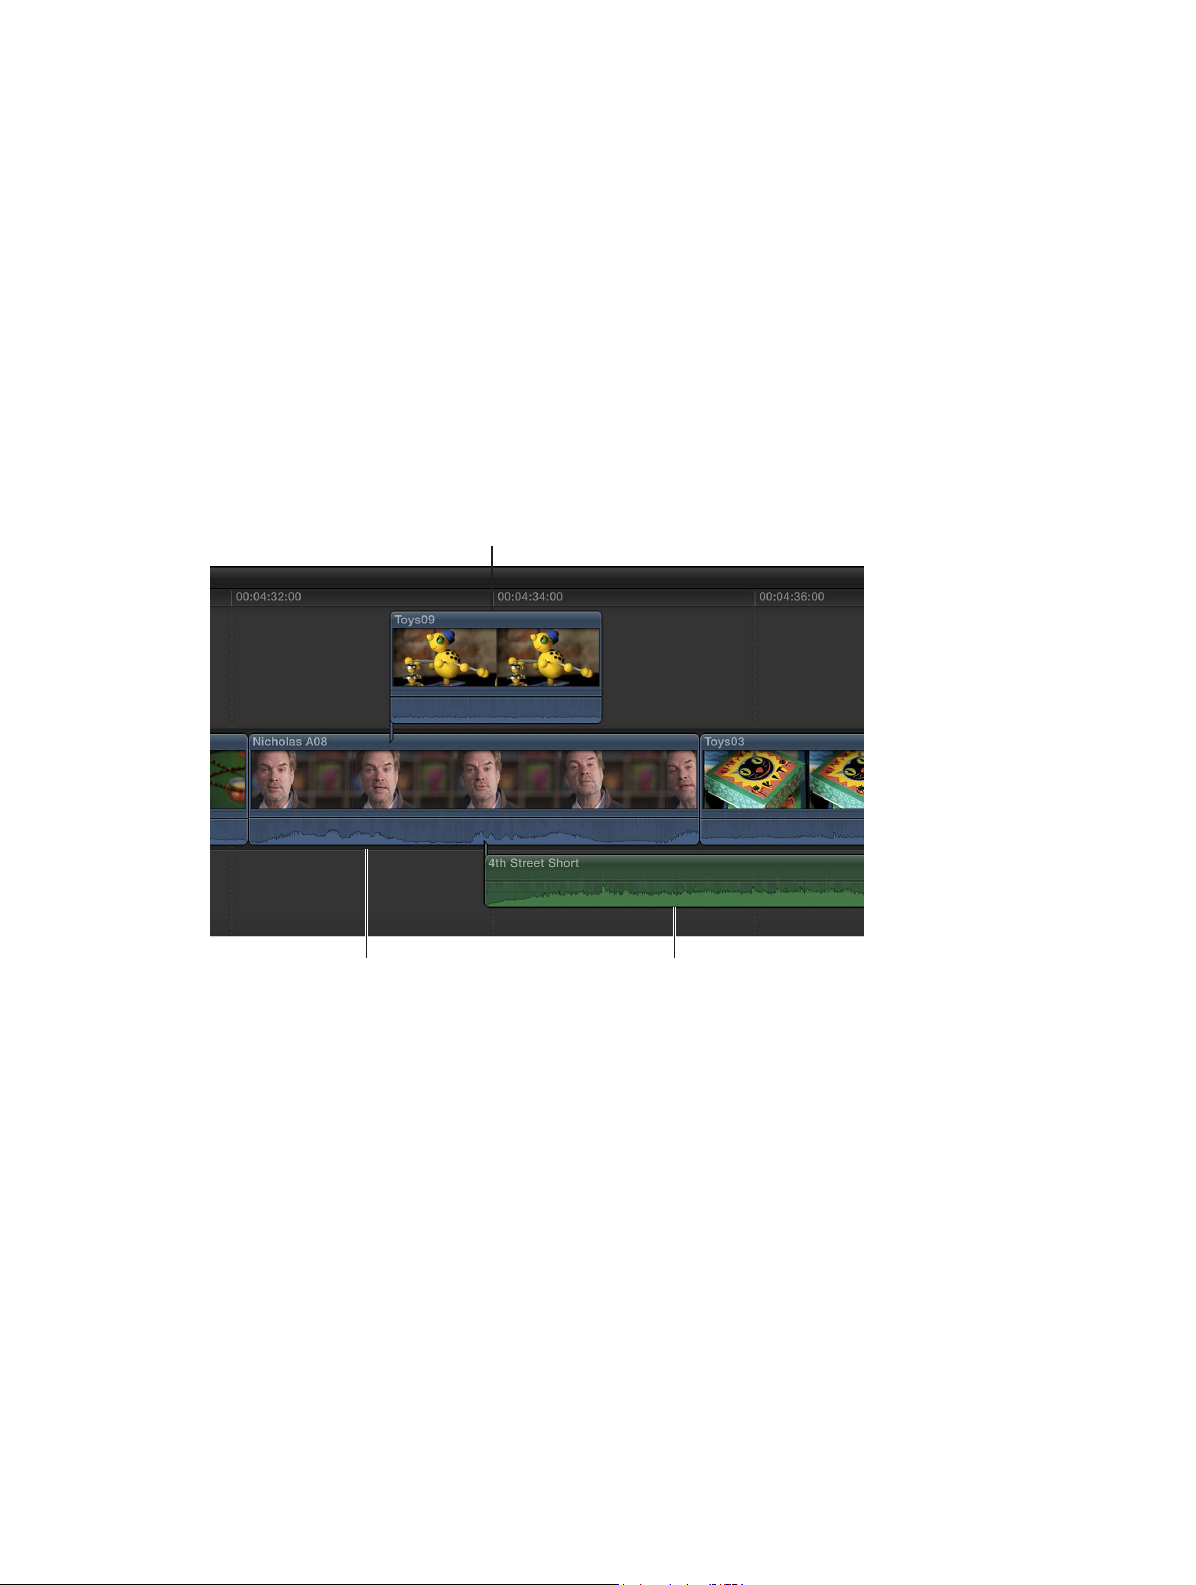
Addandremoveclips
Connected clip
Adding clips overview
You build a movie project by adding clips to the Timeline in a chronological arrangement. To suit
your particular editing style or need, you can choose from a wide variety of tools and techniques
for adding clips. You can change the arrangement of the clips in the Timeline at any time.
In Final Cut Pro, you can edit your projects without worrying about maintaining clip connection
or synchronization. For example, when you drag a clip into the Timeline, Final Cut Pro
automatically rearranges the Timeline to t each new clip without disturbing your existing work.
This is true for all kinds of clips: video, audio, titles, generators, still images, and so on.
You can use clips from multiple events in a single project. You can also add clips from the
Final Cut Pro media browsers and from the Finder. Deleting clips from the Timeline does not
aect clips or les in the Event Browser, the media browsers, or the Finder.
Connected clips and storylines remain attached to, and synchronized with, clips in the primary
storyline until you explicitly move or remove them.
Primary storyline
Connected
audio-only clip
Drag clips to the Timeline
You can add clips to the Timeline by dragging them from the Event Browser, from a Final Cut Pro
media browser (such as the Photos Browser or the Generators Browser), or from the Finder.
Drag clips from the Event Browser or a media browser
1 Do one of the following:
•
•
2 Drag one or more clips to the Timeline from the Event Browser or a media browser.
Depending on where you drag the clips in the Timeline, your actions may result in an append, an
insert, a connect, or a replace edit. Final Cut Pro automatically adjusts surrounding clips to t in
place around any clips you’ve dragged.
Tip: You can add one clip to your project at a time, or sometimes it’s easier to add a number of
clips to the project at once, and then rearrange them in the Timeline.
Chapter 8 Edityourproject 99
In the Event Library, select an event containing the clips you want to add to your project.
Open the media browser containing the media you want to add to your project.
Page 100

Drag les from the Finder
After edit
1 Arrange the windows onscreen so that you can see both the Final Cut Pro main window and the
les in the Finder.
2 Drag the les from the Finder to the Timeline.
Depending on where you drag the clips in the Timeline, your actions may result in an append, an
insert, a connect, or a replace edit.
Note: If you add clips to the Timeline from a Final Cut Pro media browser or the Finder, you are
eectively importing the media into the default event associated with the current project. You
can congure the default event in the project settings window. In this scenario, Final Cut Pro
applies the default optimization and analysis settings to the new clips. You can set default
optimization and analysis processes in Final Cut Pro preferences.
If you add still images to the Timeline, they will have a duration of 4 seconds by default. You can
change this default duration in Final Cut Pro preferences.
Append clips to your project
A simple way to add a clip to your project is an append edit, in which you add one or more clips
to the end of a project or storyline.
Append clips to your project in the Timeline
1 Select one or more clips in the Event Browser.
2 To add the clips to the Timeline, do one of the following:
•
Choose Edit > Append to End (or press E).
•
Click the Append button in the toolbar.
If there is no selection, the clip appears at the end of the primary storyline in the Timeline. If a
storyline is selected, the clip appears at the end of the selected storyline.
Insert clips in your project
An insert edit places the source clip so that all clips after the insertion point are moved forward
(or rippled) in the Timeline to make room for the clip being added. No clips are removed from
your project. An insert edit makes the project longer by the duration of the inserted clip.
A B CD
Before edit
A B CD
You might use insert edits when you want to add a new shot in the beginning or the middle of
your project. You can also use an insert edit to interrupt the action in an existing clip with the
action in the newly inserted clip. The action in the original clip then resumes after the inserted clip.
Note: You can use three-point editing to make insert edits. For more information, see Three-point
editing overview on page 275.
Chapter 8 Edityourproject 100
 Loading...