


VI49

User Guide
English ( 3 – 5 )
Guía del usuario
Español ( 6 – 8 )
Guide d'utilisation
Français ( 9 – 11 )
Guida per l'uso
Italiano ( 12 – 14 )
Benutzerhandbuch
Deutsch ( 15 – 17 )
Appendix
English ( 18 )

3
User Guide (English)
Introduction
Box Contents
VI49
VI Editor Software
(download)
Software Download Cards
USB Cable
User Guide
Safety & Warranty Manual
Support
For the latest information about this product (system requirements, compatibility information,
etc.) and product registration, visit alesis.com/vi49.
For additional product support, visit alesis.com/support.
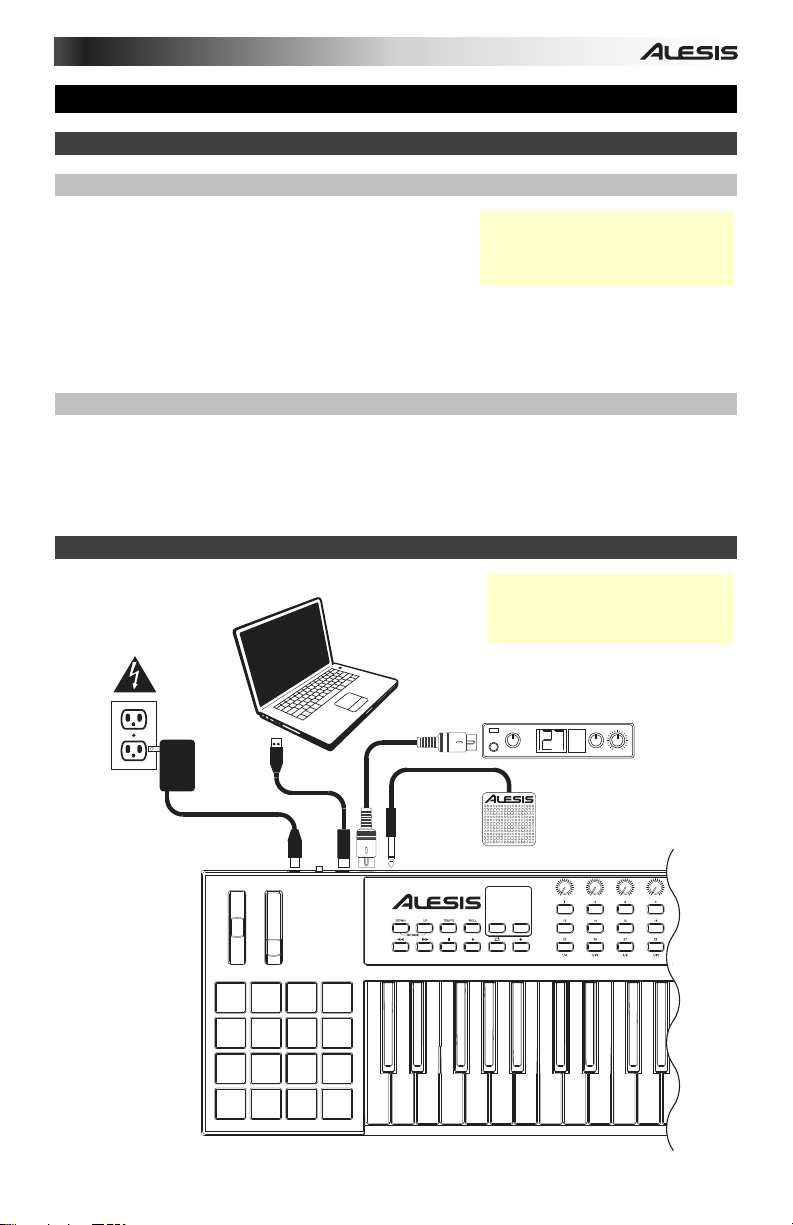
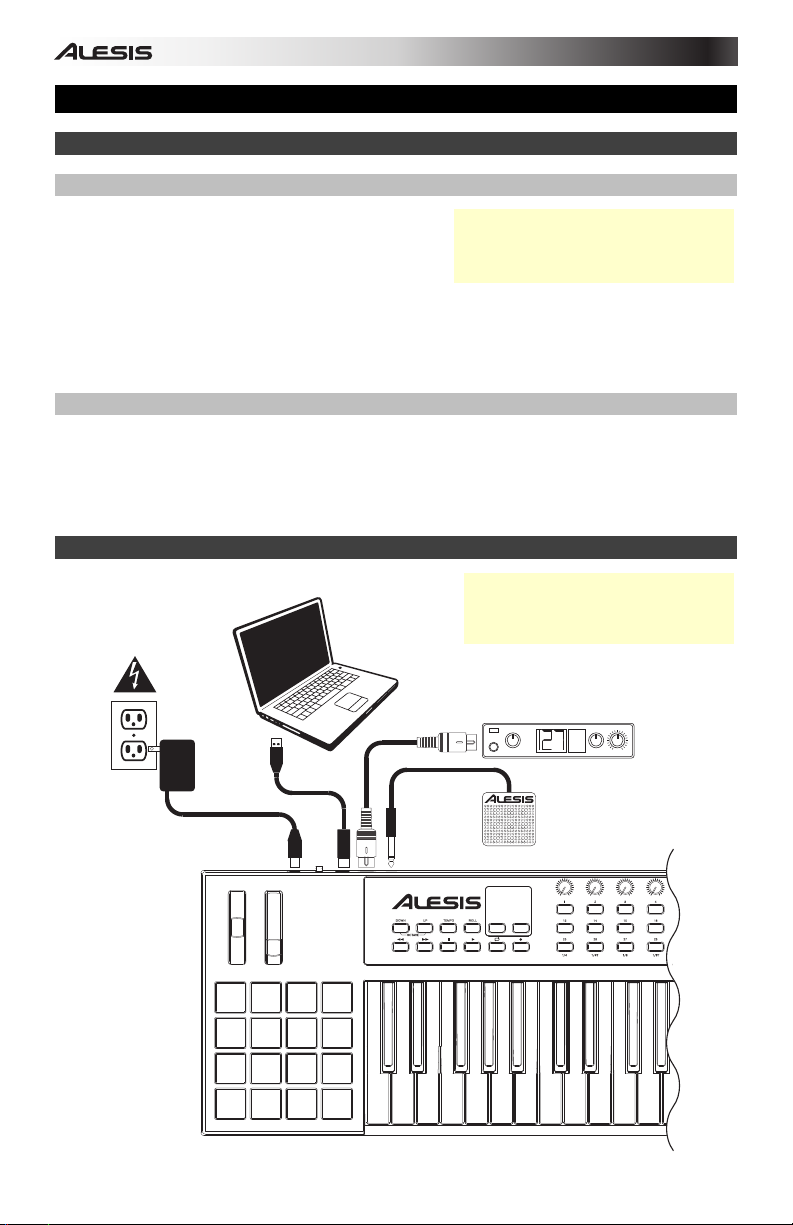
Quick Start / Connection Diagram
MIDI
PIANO
ORGAN
GUITAR/BASS
BRASS/ORCH
SYNTH/PAD
RHYTHM
SPECIAL FX
PATCH
PERFORM
RHYTHM
GM
Power
Computer
External MIDI
Sound Module
Sustain Pedal
Remember to select VI49 as the
controller in your digital audio
workstation (DAW).
Visit alesis.com/vi49 and click
Docs & Downloads to download
the VI Editor Software.

4
Features
Top Panel
1
2
3
7
6
5
4
89
10
11
12
1. Keyboard: This 49-note keyboard is velocity-sensitive with aftertouch and, in conjunction
with the Octave Down/Up buttons, can access the full range of 127 available MIDI notes.
2. Pitch-Bend Wheel: Moving this wheel sends MIDI Pitch Bend information.
3. Modulation Wheel: Moving this wheel sends continuous controller data—MIDI CC #01
(modulation), by default.
You can also use the VI Editor software to set this wheel to send a different MIDI CC
message to your software or external MIDI device. See the VI Editor's User Guide to learn
how to do this.
4. Octave Down/Up: Use these buttons to shift the keyboard's range up or down. The
display will indicate the current octave. Press both buttons simultaneously to reset the
octave shift to "zero."
5. Assignable Buttons: Use these buttons to send MIDI CC messages to your software or
external MIDI device. They can function as momentary or toggle (latching) buttons.
In Roll Mode, press one of Assignable Buttons 25–32 to select the current Time Division,
which determines the rate of the Roll feature: 1/4 note, 1/4 note triplet (1/4T), 1/8 note,
1/8 note triplet (1/8T), 1/16 note, 1/16 note triplet (1/16T), 1/32 note, or 1/32 note triplet
(1/32T).
You can also use the VI Editor software to set each button to send Program Change
messages to your software or external MIDI device. See the VI Editor's User Guide to
learn how to do this.
6. Assignable Knobs: Use these 270º knobs to send MIDI CC messages to your software
or external MIDI device.
In Roll Mode, turn Assignable Knob 1 to adjust the Gate, which determines the length of
the repeated note. Turn Assignable Knob 2 to adjust the Swing, which determines how
much swing (a "shuffle" feel) is applied to the repeated note.
You can also use the VI Editor software to set each knob to send aftertouch messages to
your software or external MIDI device. See the VI Editor's User Guide to learn how to do
this.
7. Pads: Use these pads to trigger drum hits or other samples in your software or external
MIDI sound module. The pads are velocity-sensitive, which makes them very responsive
and intuitive to play.
You can also use the VI Editor software to set each pad to send MIDI CC messages or
Program Change messages to your software or external MIDI device. See the VI Editor's
User Guide to learn how to do this.
5
8. Tempo: Tap this button at the desired rate to enter a new tempo.
Important: This feature does not work when the VI49 is set to External sync.
9. Roll: Press this button to activate or deactivate Roll Mode. In this mode, pressing and
holding a pad (that is set to send Note On messages) causes the pad to retrigger at a rate
based on the current Tempo and Time Division settings. This button can function as a
toggle (latching) or momentary button.
In Roll Mode, some controls have different functions:
• Press one of Assignable Buttons 25–32 to select the current Time Division, which
determines the rate of the Roll feature.
• Turn Assignable Knob 1 to adjust the Gate, which determines the length of the
repeated note.
• Turn Assignable Knob 2 to adjust the Swing, which determines how much swing (a
"shuffle" feel) is applied to the repeated note.
10. Transport Buttons: These six buttons are dedicated buttons for sending conventional
transport control commands: Rewind, Fast-Forward, Stop, Play, Loop, and Record.
You can also use the VI Editor software to set each button to send MIDI CC messages to
your software or external MIDI device. See the VI Editor's User Guide to learn how to do
this.
11. Display: Use this LCD screen to view parameter values relevant to VI49's current
operation.
12. Preset Down/Up (): Use these arrow buttons to change the current preset of VI49.
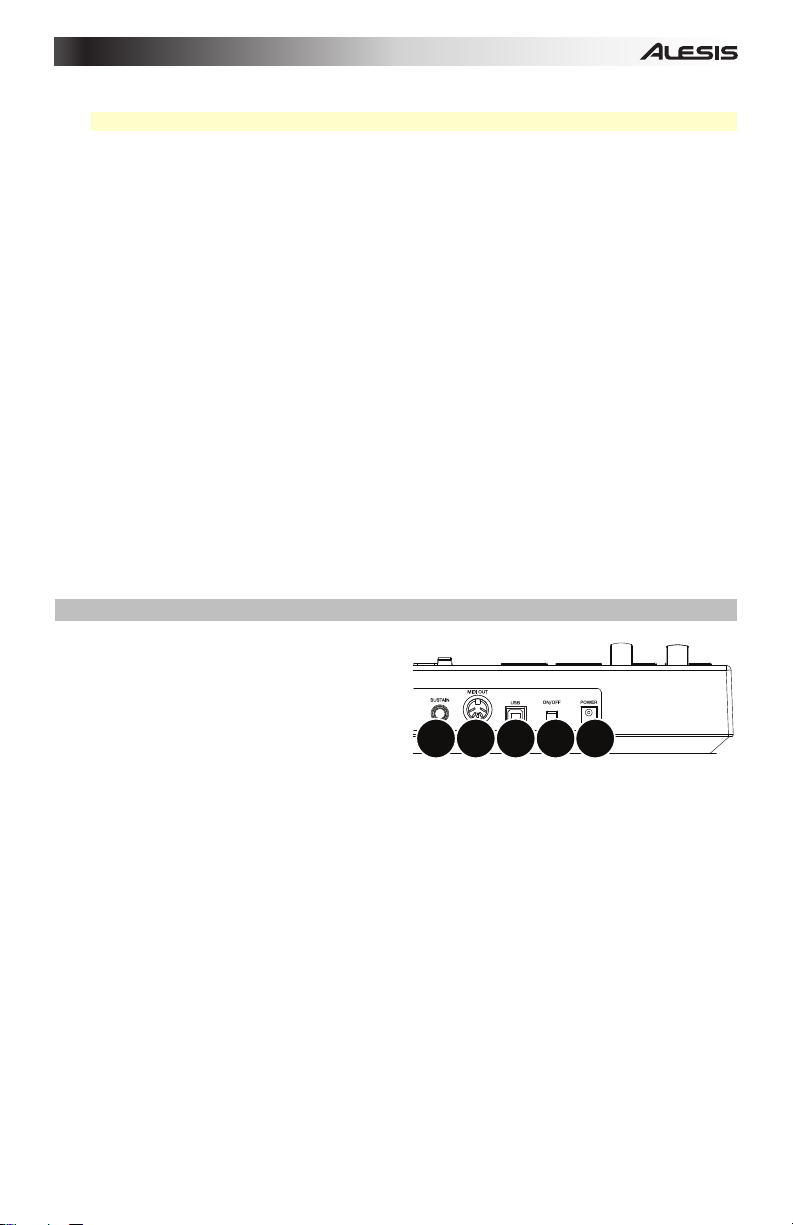
Rear Panel
1. Power Input: If you do not want to use a
computer in your setup (i.e., if you are
using VI49 to control an external MIDI
module), connect VI49's power input to a
power outlet using an optional power
adapter (9 V DC, 500 mA, center-positive,
sold separately). Alternatively, you can
connect VI49's USB Port to a power
outlet using a standard USB charger (sold
separately).
2. Power Switch: Press this button to power the VI49 on or off.
3. USB Port: Use a standard USB cable to connect this USB port to your computer. The
computer's USB port provides ample power to VI49. This connection is also used to send
and receive MIDI data to and from your computer.
If an external device is connected to the MIDI Out, your computer can send MIDI
messages via USB to the VI49, which will then send the message to the external device.
4. MIDI Out: Use a standard five-pin MIDI cable to connect this MIDI Out to the MIDI In of
an external MIDI device (e.g., a synthesizer, sequencer, drum machine, etc.).
5. Sustain Input: Connect an optional 1/4" TS sustain pedal to this input.
You can also use the VI Editor software to set the sustain pedal to send other MIDI CC
messages to your software or external MIDI device. See the VI Editor's User Guide to
learn how to do this.
1
2
345
6
Guía del usuario (Español)
Introducción
Contenido de la caja
VI49
VI Editor
(descargar)
Cable USB
Tarjetas de descarga de software
Guía del usuario
Manual sobre la seguridad y garantía
Soporte
Para obtener la información más completa acerca de este product (los requisitos del sistema,
compatibilidad, etc) y registro del producto, visite alesis.com/vi49.
Para soporte adicional del producto, visite alesis.com/support.
Diagrama de instalación y conexión rápida
MIDI
PIANO
ORGAN
GUITAR/BASS
BRASS/ORCH
SYNTH/PAD
RHYTHM
SPECIAL FX
PATCH
PERFORM
RHYTHM
GM
Visite alesis.com/vi49 y haga clic
Docs & Downloads para descargar
el software VI Editor.
Toma de
corriente
Ordenador
Modulo MIDI
externo
Pedal de
sostenido
Recuerde seleccionar VI49 como
controlador en su estación de
trabajo de audio digital (DAW).
 Loading...