


SR16

ALESIS
SR-16
Reference Manual

TABLE OF CONTENTS
CHAPTER 1: INTRODUCTION ........................................................1
1.1 WELCOME TO THE SR-16 DRUM MACHINE!................................................................1
1.1A If You Just Can't Wait…...................................................................................1
1.1B SR-16 Quick Description................................................................................1
1.1C About this Manual..........................................................................................1
1.1D Return Your Warranty Card Now!.....................................................................2
1.2 GROUND RULES.........................................................................................................2
1.2A The Pattern/Song Recording Method.............................................................2
1.2B The Four Different Types of Patterns...............................................................3
1.2C How "Looping" Simplifies Recording...............................................................4
1.2D What's a Voice?..............................................................................................4
1.2E About Defaults...............................................................................................4
1.2F Physical Layout..............................................................................................5
1.2G Display Layout...............................................................................................6
1.2H Text Protocols...............................................................................................6
1.3 IMPORTANT
HOW TO COMMUNICATE WITH THE SR-16.............................................................7
1.3A Entering Numbers..........................................................................................7
1.3B The Cursor....................................................................................................7
1.3C Leading Zeroes.............................................................................................7
1.3D Automatic Revert...........................................................................................7
1.3E The INC/DEC Buttons....................................................................................7
1.3F Buttons that Toggle........................................................................................8
1.4 10 STEPS TO INSTANT GRATIFICATION (SETUP AND CHECKOUT).............................8
CHAPTER 2: RECORD SETUP ......................................................10
2.1 PAGE 1: SELECT THE QUANTIZATION VALUE (QUANTIZE SELECT)...........................10
2.2 PAGE 2: SELECT THE SWING VALUE (SWING SELECT)..............................................11
2.3 PAGE 3: ENABLE CLICK (METRONOME) AND SET RHYTHM (CLICK SELECT).............12
2.4 PAGE 4: SET CLICK (METRONOME) VOLUME (CLICK VOL).........................................12
2.5 PAGE 5: ADJUST VELOCITY RESPONSE (VELOCITY)................................................13
2.6 PAGE 6: ADD/REMOVE BEATS FROM PATTERN END (LENGTH).................................14
2.7 PAGE 7: ADD/REMOVE BEATS FROM PATTERN BEGINNING (‘START)........................14
2.8 PAGE 8: OFFSET A PATTERN OR DRUM PART...........................................................15
2.9 PAGE 9: STEP MODE RECORDING (STEP MODE).......................................................15
2.9A Add a New Drum to a Step..............................................................................17
2.9B Erase a Drum Sound From a Step....................................................................17
2.9C Change a Drum Sound's Volume in a Given Step.............................................17
2.9D Exit Step Mode..............................................................................................17
2.10 PAGE 10: NAME THE PATTERN (NAME)....................................................................17
CHAPTER 3: PLAYING BACK/RECORDING PATTERNS.................18
3.1 PLAYBACK/RECORD BASICS.....................................................................................18
3.1A The Dual-Purpose Fill Button..........................................................................18
3.1B Perform/Compose Modes..............................................................................18
3.1C Set Pattern Tempo.........................................................................................19
3.1D Select Individual Patterns...............................................................................19
3.1E Stop/Restart a Pattern....................................................................................19
3.1F Using the Start/Stop Footswitch......................................................................20
3.1G Select New Patterns While in Perform (Playback) Mode....................................20
3.1H Select Fill Patterns in Perform (Playback) Mode................................................21
3.1I Record a Pattern..............................................................................................22

3.1J Select New Patterns and Fills While in Compose (Record) Mode........................22
3.1K Using Fill to Create Repetitive Drum Hits..........................................................23
3.2 ERASE FUNCTIONS....................................................................................................24
3.2A Erase Mistakes While Recording.....................................................................24
3.2B Erase an Entire Pattern...................................................................................24
3.2C Erase All Events Played by a Particular Drum Pad.........................................................24
3.3 COPY FUNCTIONS......................................................................................................25
3.3A Copy, Append, and Double Patterns...............................................................25
3.3B Copy (Merge) One Drum Pad's Part to Another Drum Pad (SoundStacking™)....25
3.3C Copy a Single Drum Pad's Part to a Drum Pad in a Different Pattern....................26
3.3D Copy a Pattern to Another SR-16 Via MIDI........................................................26
3.3E Copy a Single Drum Pad's Part to a Drum Pad in Another SR-16 Via MIDI............27
3.3F Copy a Drum Set to Another SR-16 Via MIDI.....................................................27
CHAPTER 4: CREATING DRUM SETS............................................28
4.1 PAGE 1: SELECT DRUM SET (DRUMSET SELECT)......................................................28
4.2 PAGE 2: ASSIGN SOUNDS TO PADS...........................................................................29
4.3 PAGE 3: SET PAD VOLUME (VOLUME).......................................................................29
4.4 PAGE 4: SET PAD STEREO POSITION (PANNING).......................................................30
4.5 PAGE 5: SET PAD TUNING (TUNING)............................................................................31
4.6 PAGE 6: SET TRIGGERING MODE (ASN MODE)............................................................31
4.7 PAGE 7: CHOOSE OUTPUT JACKS (OUTPUT).............................................................32
4.8 PAGE 8: SAVE DRUM SET (SAVE SET).......................................................................33
4.9 PAGE 9: MANUAL DRUM SET OVERRIDE (SET MODE)................................................34
CHAPTER 5: SONG MODE.............................................................35
5.1 SONG MODE BASICS..................................................................................................35
5.1A Select Songs and Enter/Exit Song Mode........................................................35
5.1B Set Song Tempo...........................................................................................35
5.1C Continue, Re-start, or Jump to Next Song Step................................................36
5.1D "Loop" a Pattern Indefinitely...........................................................................36
5.1E Start from the Middle of a Song.......................................................................36
5.1F Name a Song (NAME).....................................................................................36
5.1G Change Song Tempo as the SR-16 Plays........................................................37
5.2 REAL TIME SONG CREATION......................................................................................37
5.2A Real Time Song Editing..................................................................................37
5.3 MANUAL SONG CREATION.........................................................................................38
5.3A Enter a Pattern...............................................................................................38
5.3B Add a Fill........................................................................................................38
5.3C Remove a Fill.................................................................................................38
5.3D Insert a New Step Between Two Existing Song Steps......................................38
5.3E Delete a Step.................................................................................................38
5.3F Replace a Step...............................................................................................39
5.3G Erase an Entire Song.....................................................................................39
5.3H Copy a Song to Itself (Double Song Length)....................................................39
5.4I Copy a Song to Another Song
(or to the End of Another Song If That Song is Not Empty).........................................39
5.4J Copy a Song to Another SR-16 Via MIDI...........................................................40
CHAPTER 6: MIDI SETUP .............................................................41
6.1 PAGE 1: SELECT MIDI CHANNEL (MIDI CH)..................................................................41
6.2 PAGE 2: RECEIVE MIDI DRUM NOTES (DRUM IN).........................................................42
6.3 PAGE 3: TRANSMIT MIDI DRUM NOTES (DRUM OUT)...................................................42
6.4 PAGE 4: ASSIGN MIDI NOTE NUMBERS TO DRUM PADS (NOTE).................................43

6.5 PAGE 5: ACCEPT EXTERNAL CLOCK DATA (CLOCK IN)..............................................44
6.6 PAGE 6: SEND CLOCK DATA TO OTHER DEVICES (CLOCKOUT)................................44
6.7 PAGE 7: MERGE MIDI IN WITH MIDI OUT (MIDITHRU)......................................................45
6.8 PAGE 8: SELECT DRUM SETS VIA MIDI PROGRAM CHANGES (PRG CHNG).................46
6.9 PAGE 9: MAP DRUM NOTES (NOTE MAP)....................................................................46
CHAPTER 7: BACKUP....................................................................48
7.1 BACKUP BASICS........................................................................................................48
7.2 TAPE INTERFACE HOOKUP........................................................................................49
7.3 PAGE 1: SEND DATA AS MIDI TO A MIDI SYS EX STORAGE DEVICE
(SEND OUT MIDI?)..............................................................................................................49
7.4 RECEIVE DATA DIRECTLY FROM ANOTHER MIDI DEVICE...........................................50
7.5 PAGE 2: SAVE ALL MEMORY CONTENTS TO TAPE (STORE TO TAPE?).....................51
7.6 PAGE 3: VERIFY DATA RECORDED ON TAPE (VERIFY TAPE?)....................................51
7.7 PAGE 4: LOAD DATA FROM TAPE (LOAD IN TAPE?)....................................................52
7.8 PAGE 5: LOAD ONE PATTERN FROM TAPE (LOAD IN PATT).......................................53
7.9 PAGE 6: LOAD ONE SONG FROM TAPE (LOAD IN SONG)............................................53
7.10 PAGE 7: CHECK AVAILABLE MEMORY (FREE MEM).................................................54
7.11 CLEAR MEMORY/RE-INITIALIZE PARAMETERS........................................................55
7.12 CHECK SOFTWARE VERSION..................................................................................55
CHAPTER 8: APPLICATIONS.........................................................56
8.1 MIDI SYNC APPLICATIONS..........................................................................................56
8.1A SR-16 As MIDI Timing Master..........................................................................56
8.1B SR-16 as MIDI Timing Slave.............................................................................57
8.1C Synching to Synthesizer Sequencers.............................................................57
8.2 STRATEGIES FOR ASSEMBLING PATTERNS AND SONGS.........................................58
8.2A Create Fills Quickly with the Copy Function......................................................58
8.2B Assemble Short Patterns into Longer Patterns with the Copy Function.............58
8.2C Save Memory Through Song Steps................................................................58
8.2D Odd Time Signatures.....................................................................................58
8.3 SOUND STACKING......................................................................................................59
8.3A Basics...........................................................................................................59
8.3B Sound Stacking via MIDI.................................................................................59
8.3C Sound Stacking when Using the SR-16 as a Drum Machine..............................59
8.3D Editing Stacked Combinations........................................................................59
8.4 UNDERSTANDING RHYTHMIC NOTATION....................................................................60
CHAPTER 9: MIDI SUPPLEMENT...................................................61
9.1 MIDI BASICS................................................................................................................61
9.1A MIDI Hardware................................................................................................61
9.1B About Sequencing........................................................................................62
9.2 MIDI CHANNEL MESSAGES.........................................................................................62
9.2A Voice Messages............................................................................................62
9.2B Mode Messages............................................................................................63
9.3 SYSTEM COMMON MESSAGES..................................................................................63
9.4 BOOKS ON MIDI..........................................................................................................63
9.5 VIDEOS ON MIDI..........................................................................................................64
TROUBLESHOOTING CHART.........................................................66

CHAPTER 1: INTRODUCTION
1.1 WELCOME TO THE SR-16 DRUM MACHINE!
1.1A If You Just Can't Wait…
Turn to section 1.4, 10 Steps to Instant Gratification, and start making sounds. Some of the
terms in that section may not make sense, but just follow the instructions, and get ready to
hear some great grooves and have a good time. When you're ready to learn more, return to
the beginning to learn SR-16 basics.
The goal of the SR-16's design team has been to create a musical instrument, not a computer
that happens to make sounds. They thank you for your confidence in this product, and hope
that you find the SR-16 a rewarding tool for self-expression that stimulates your creativity (and
tickles your fancy).
1.1B SR-16 Quick Description
The SR-16 includes over 230 high-fidelity drum/percussion sounds, and is easy to operate.
As you tap the 12 drum pads (each of which can be assigned to any of the available sounds),
the SR-16's on-board computer records exactly when you triggered the drum sound and the
dynamics of your playing. You can play back the part, and edit it in various ways.
Data is retained in memory even if the power is turned off. If the memory fills up with drum
Patterns and Songs, this data can be saved permanently to standard cassettes, or to MIDI
System Exclusive storage devices.
The SR-16 also includes a library of preset rhythm Patterns prepared by professional
drummers for those who want to start creating Songs in the fastest and easiest way possible.
1.1C About this Manual
The manual takes you through every function of the SR-16 in the following order:
1. Introduction: Gives the basic ground rules and also covers how to play back drum parts.
2. Record Setup: Tells how to set up the SR-16 to record and edit drum parts.
3. Playing Back and Recording Drum Patterns: Put theory into practice and come up
with some drum parts. Includes material on copying and erasing.
4. Creating and Modifying Drum Sets: The SR-16 includes 50 Preset "drum sets" with
particular choices of sounds, tuning, panning, level, etc. However, you can also create and
modify your own. Each Pattern can have its own associated Drum Set .
5. Song mode: Now that you have a bunch of Patterns, string them together into Songs.
6. MIDI Setup: Here's how to use the SR-16 as part of a MIDI system.
7. Backup: Now that you've come up with some great Songs and rhythm Patterns, it's time
to save them to a cassette recorder or MIDI system exclusive storage device.
1

8. Applications: This additional information will help you get the most out of the SR-16.
9. MIDI Supplement: This brief, entry-level explanation of MIDI explains the basic theory
behind the MIDI protocol.
Feel free to cover topics in a different order. For example, if creating a whacked-out Drum Set
is important to you, read the Drum Set section before you start recording. If you come up with
a great tune, skip ahead to the Backup section so that you don't accidentally erase the tune or
otherwise lose it. If you only want to use the SR-16 as a MIDI expander module, then the MIDI
Setup section might be a priority.
Experts as well as beginners should read the following "ground rules" (definitions, concepts,
and how to communicate with the SR-16) very carefully. The SR-16 is easy to use, but only if
you read and understand these basic principles.
Certain subjects, such as quantization and output assignments, will be familiar to
experienced drum machine users but new concepts to others. As a result, some sections
contain background material tailored specifically for beginners. These sections are identified
as "background" and set in a smaller type size.
1.1D Return Your Warranty Card Now!
Your warranty will be in effect and you will receive product update information only if you
send in your warranty card. See the back page of the manual for full warranty information.
1.2 GROUND RULES
The SR-16 drum machine consists of two main elements:
• The drum sounds themselves, recorded using16-bit resolution (the same resolution as
CDs). For additional realism, many sounds use advanced "dynamic articulation" techniques
so that these sounds, when hit loudly, have a different timbre than when they're hit softly.
• An internal computer to control and trigger the sounds. This computer simulates an
advanced, easily editable tape recorder.
The SR-16 offers two main modes, Perform (for playback) and Compose (for recording). You
can switch between these while the SR-16 is playing, making it easy to test out different
sounds without recording them and then drop back into record mode.
1.2A The Pattern/Song Recording Method
When recording with a drum machine, it's often easier to divide a song into shorter individual
Patterns and work on these rather than record an entire song. A typical Pattern might be 8,16,
or 32 beats long, and correspond to a verse, chorus, bridge, instrumental, intro, etc. While
recording these Patterns, the SR-16 will be in Pattern mode. The SR-16 holds 50 Preset (i.e.,
can't be edited) Patterns and 50 user-programmable Patterns, each of which can be from 1 to
128 beats long.
2

After perfecting these Patterns, Song mode offers two ways to create a song:
• Program a list of Patterns, in the order in which they are to be played.
• Select Patterns in real time, and the SR-16 will remember your performance.
The SR-16 stores up to 100 User-programmable Songs.
Breaking a song into Patterns saves time since elements of a song often repeat. Example:
The second verse might have the same drum pattern as the first verse. Rather than record the
same Pattern twice, simply record one Pattern, then list it twice when assembling a Song.
This also saves memory (thus leaving room for more Patterns and Songs) since listing a
Song step takes up much less memory than recording a Pattern.
1.2B The Four Different Types of Patterns
The SR-16 introduces exciting new Song construction techniques. The SR-16 excels at live
performance—something usually not associated with drum machines. The key to using these
advanced features is understanding the different types of available Patterns.
• Preset Patterns provide a variety of rock, jazz, pop, and other rhythms programmed by
professional drummers.
• User Patterns are Patterns you can program, edit, and save. The Preset/User button selects
between these two master banks of Presets. The only way to modify a Preset Pattern is to
copy it to a User Pattern, where it can be edited.
There are 50 of each type of Pattern, numbered 00-49. However, each numbered Pattern
actually contains four different "sub-Patterns":
• A pair of independent Main Patterns (A and B, selected by their respective buttons).
• A pair of associated Fill Patterns (A Fill and B Fill, selected by pressing the FILL button when
either A or B is selected). The Fills primarily provide transitional Patterns between Main
Patterns, which makes for more realistic drum parts. The associated Fill Patterns share the
same length, Drum Set, and name as their Main Patterns (e.g., if A is 16 beats, A Fill is 16
beats). Otherwise, they are independent.
The reason for pairing the two different A and B Patterns together is simply so that you can
switch back and forth between them rapidly in live performance or while improvising.
However, A and B Patterns can be treated as completely independent Patterns if desired and
can have different lengths, Drum Sets, etc.
Always think of the Main Pattern and its associated Fill as a unit. For example, if you copy a
Main Pattern to another Main Pattern, its Fill will travel along with it.
Note that even though there are "only" 50 Patterns, the A and B variations double that to 100
Patterns, and the Fills double that again to 200 Patterns. Added to the Preset Patterns, 400
total Patterns are available.
3

1.2C How "Looping" Simplifies Recording
To simplify recording in Compose mode, a Pattern will "loop" over and over again. Example:
Suppose you want to record an 8-beat pattern. While recording, the pattern will record
through all 8 beats, then immediately jump back to the beginning and continue recording
through all 8 beats again. The SR-16 will remain in record mode, and continue to loop, until
you press STOP or switch over to Perform mode. You will hear any previously-played parts
as you record new parts.
You can also erase drum hits while the pattern is looping to correct for errors.
1.2D What's a Voice?
Each of the 12 large pads triggers a voice. A voice is a sound-generating element with
several variable parameters: Drum sound, tuning, volume, output assignment (the voice's
audio output can go to either one of two sets of stereo outputs, and furthermore, to anywhere
within the stereo field of the chosen set of outputs), and MIDI note number.
Each pad is velocity-sensitive: the harder you hit the pad, the louder the drum sound
assigned to the pad will play. Thanks to the dynamic articulation techniques mentioned
earlier, the timbre will often change as well, just like "real" drums.
There are eight levels of pad volume resolution, from soft to loud. However, when using the
SR-16 as a drum sound expander and triggering sounds via MIDI, they respond to all 127
MIDI volume levels.
1.2E About Defaults
A default is a setting that is automatically assumed until you purposely change it. Example:
When you turn on a VCR, it automatically defaults to Stop—you have to purposely tell the
machine to go into Record or Play. Stop is therefore the VCR's power-up default status.
The SR-16 includes a default setup that assigns particular drum sounds to particular voices
(pads), at certain level and pan settings. The default drum sound assignments are printed in
white on the pads. However, you can change these defaults and come up with any type of
"drum set" you'd like.
Defaults save time by giving you a setup that's instantly ready to go; sometimes you'll need to
change only a few parameters to customize the default setup to your liking.
Often the default is "whatever was selected last." Example: If the SR-16 was in Pattern mode
and Pattern 23 was selected when you turned off the SR-16, the next time the SR-16 powers
up it will be in Pattern mode with Pattern 23 selected.
4
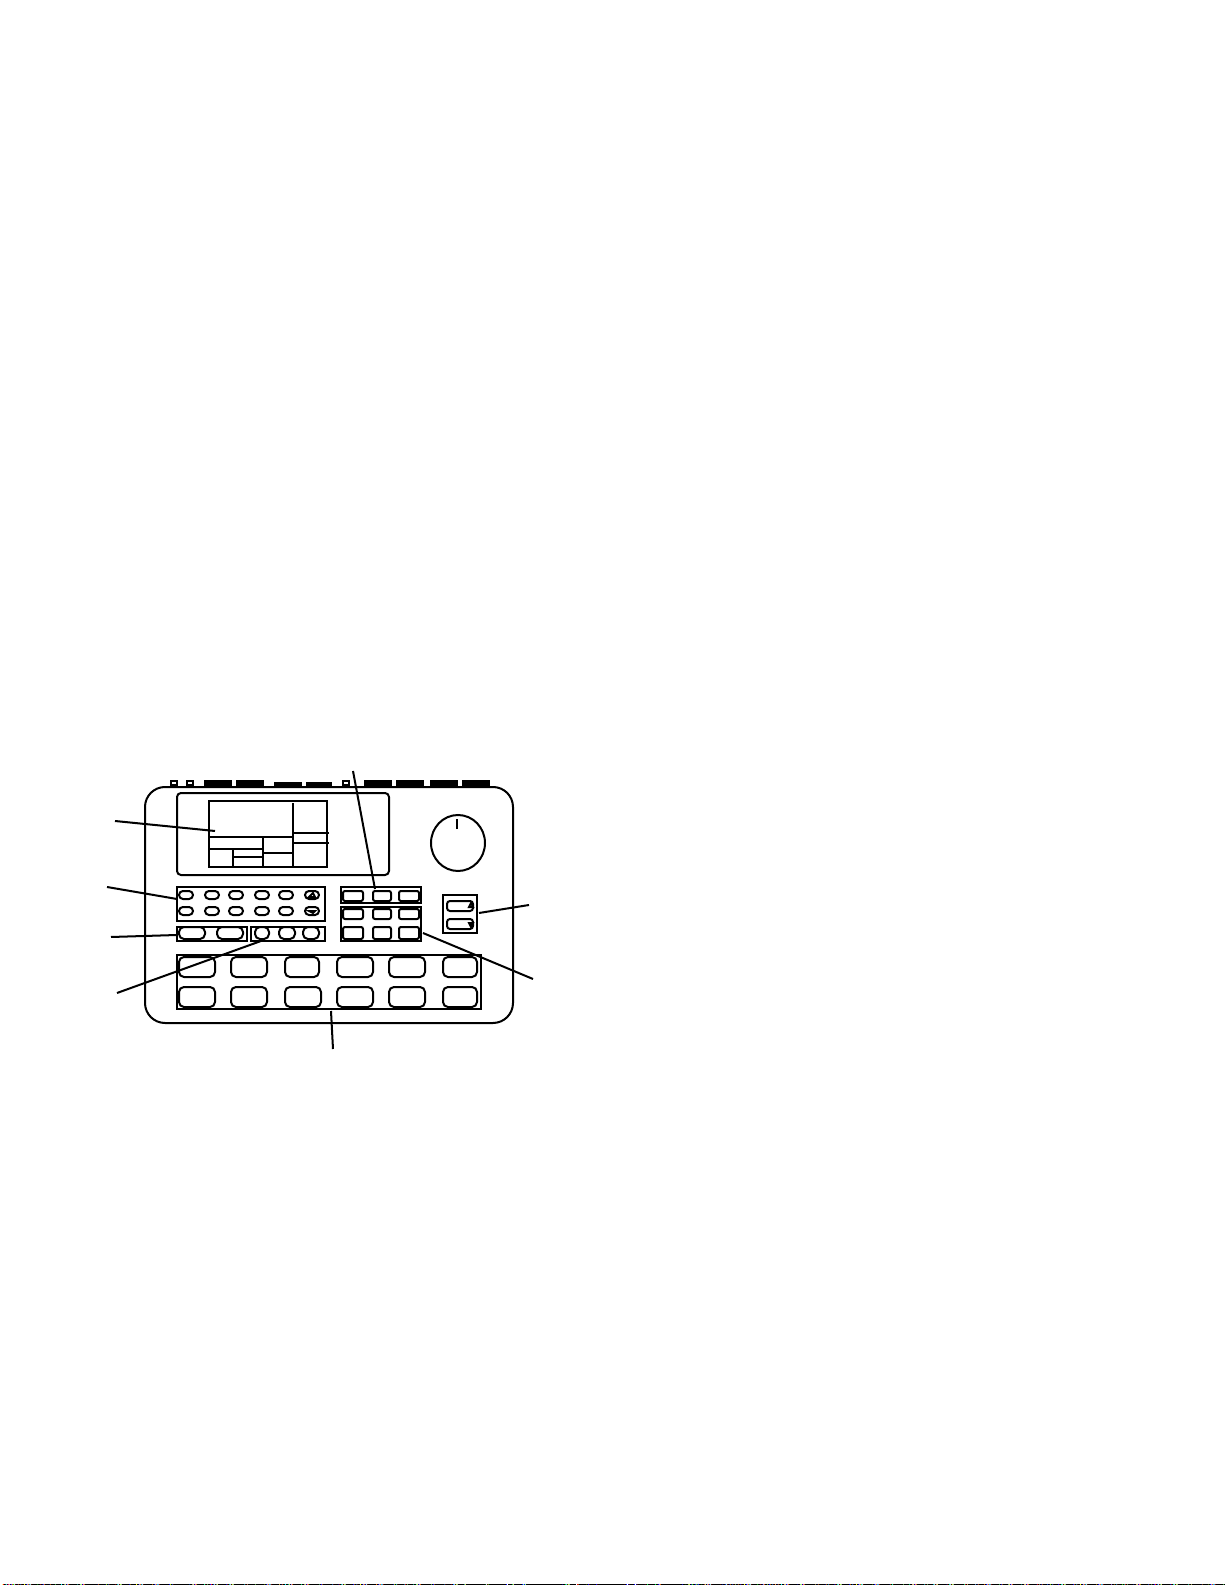
1.2F Physical Layout
VOLUME
RECORD
SETUP
Pads (play buttons)
Mode buttons
The SR-16 includes seven main types of controls, along with a group of connectors (located
on the back panel). The control groups (see diagram) are:
• Pads (play buttons). Tapping each button triggers an SR-16 voice.
• Function buttons. These six buttons select various functions, some of which include multiple
"pages" of options.
• Tempo/Page buttons. These alter the tempo and also select different "pages" present in the
Drum Set, Record Setup, MIDI Setup, and Backup functions.
• Pattern select buttons. These choose between the A, B, and Fill variations for a Pattern.
• Mode buttons. These choose between Pattern and Song modes, Perform (playback) and
Compose (record) modes, and the Preset and User patterns.
• "Tape recorder" buttons. These control playback and stop, and work similarly to a tape
recorder.
• Display and data entry buttons. The display informs you of the instrument's status, and also
prompts you for data from time to time. A detailed description of the display follows shortly.
The data entry buttons include number entry buttons (0-9) and up arrow (increment, or INC)
and down arrow (decrement, or DEC). The latter increase or decrease parameter values on
step at a time.
• Huge volume knob. If you're used to scratching a turntable, you'll love the feel of this knob. It
regulates the volume of the entire unit.
Display
Data
entry
buttons
"Tape
recorder"
buttons
Pattern
select
buttons
1 2 3 4 5
6 7 8 9 0
PLAY STOP
A B FILL
PATTERN /
PRESET /
SONG
USER
DRUM
SET
COPY ERASE BACKUP
PERFORM /
COMPOSE
TEMPO /
PAGE
MIDI
SETUP
TEMPO /
PAGE
Tempo/Page
buttons
Function
buttons
5
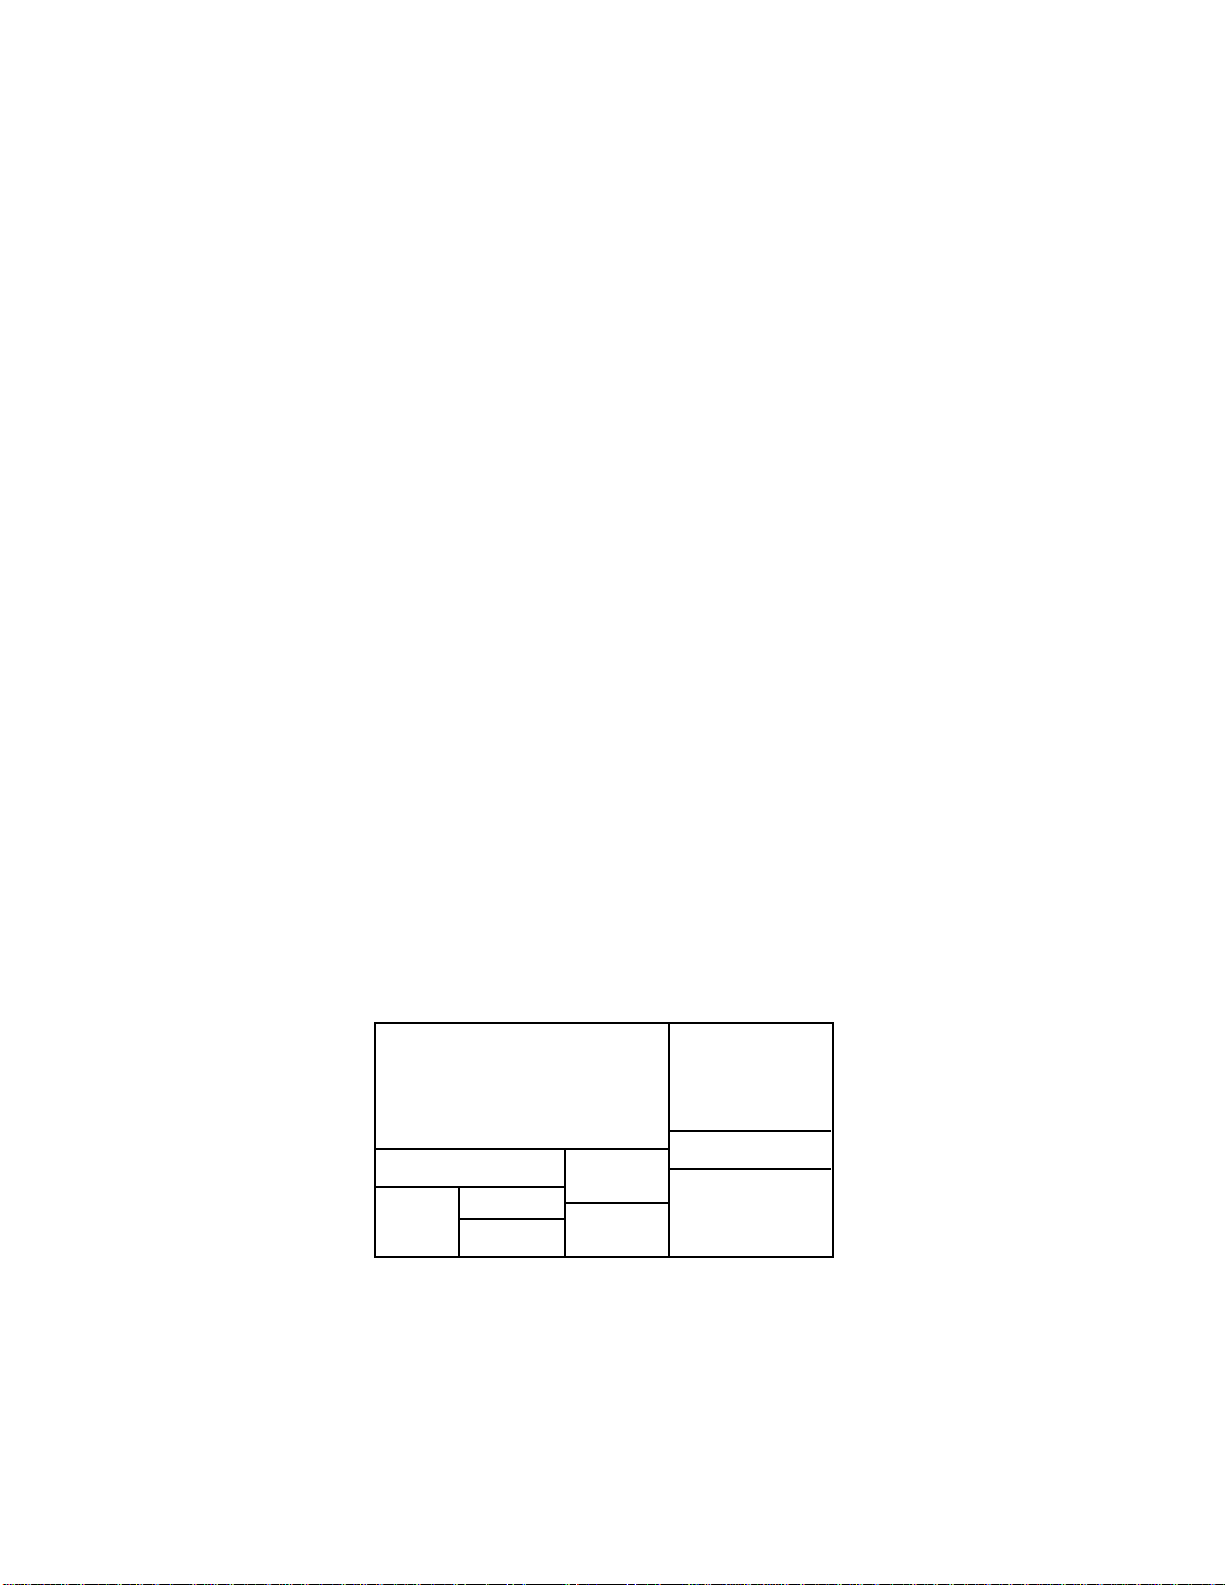
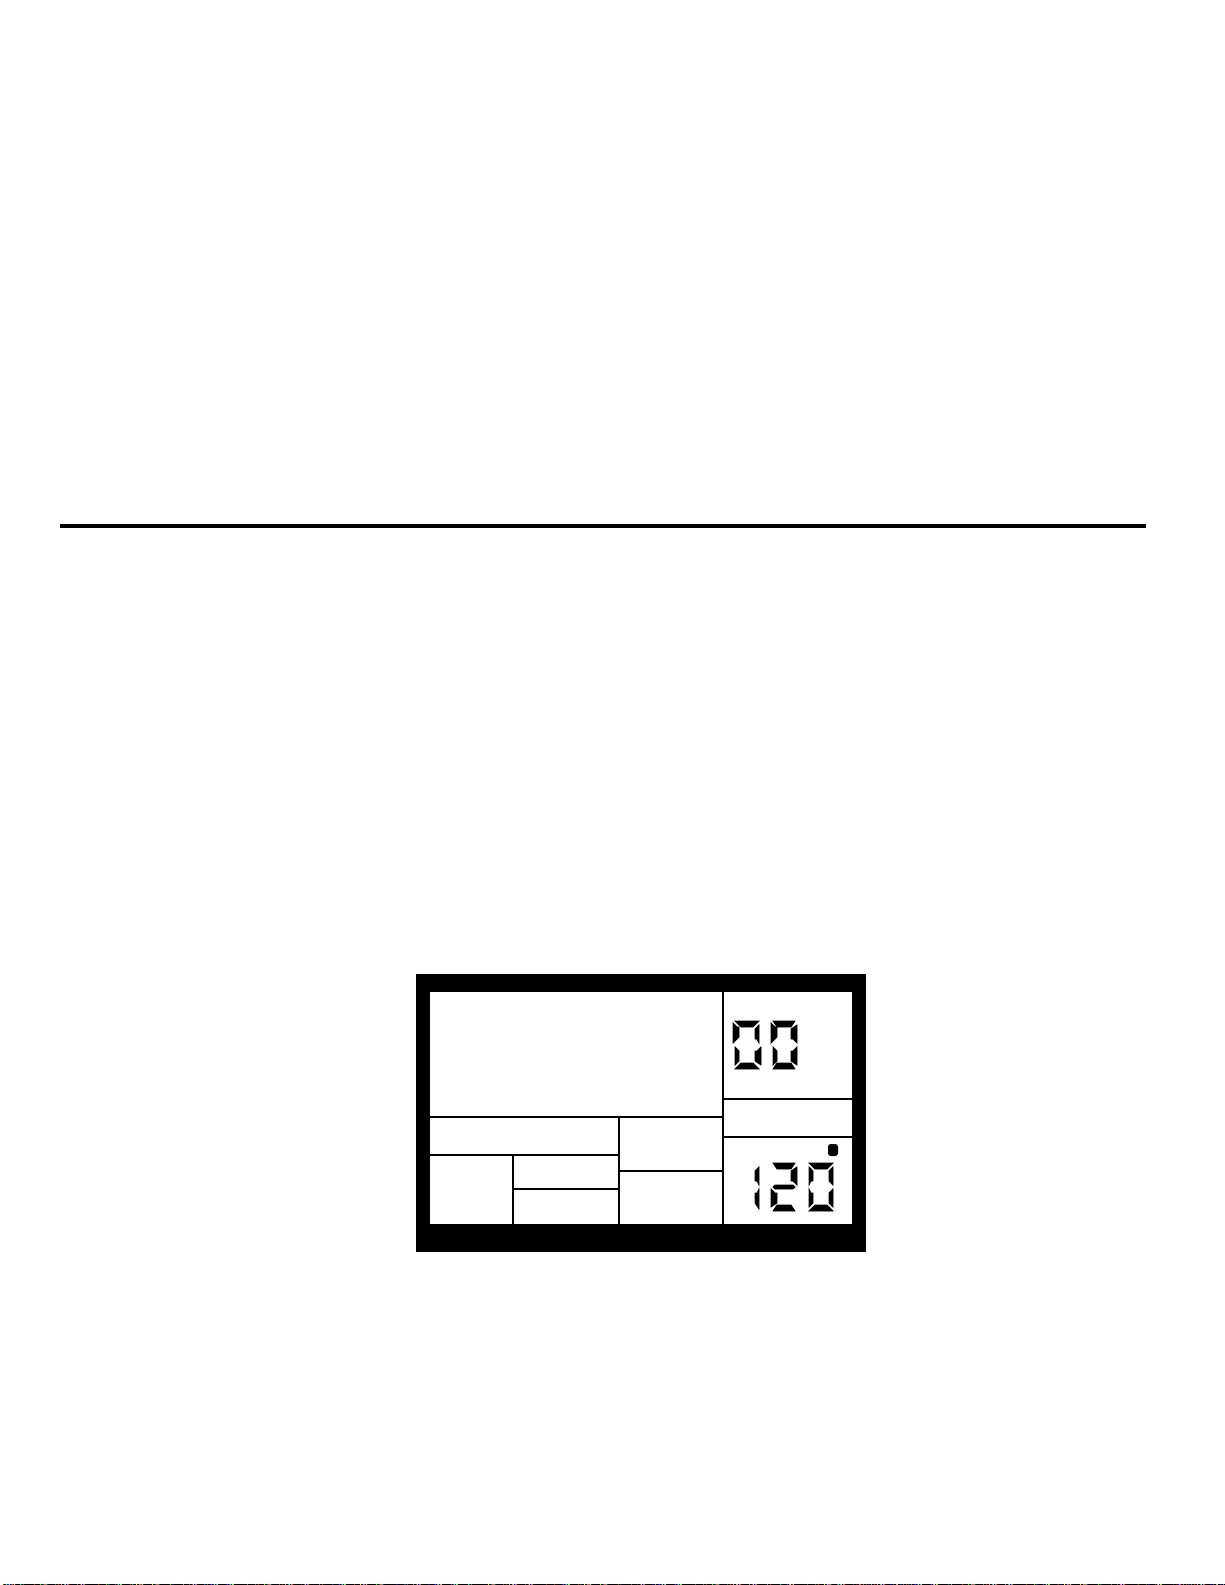
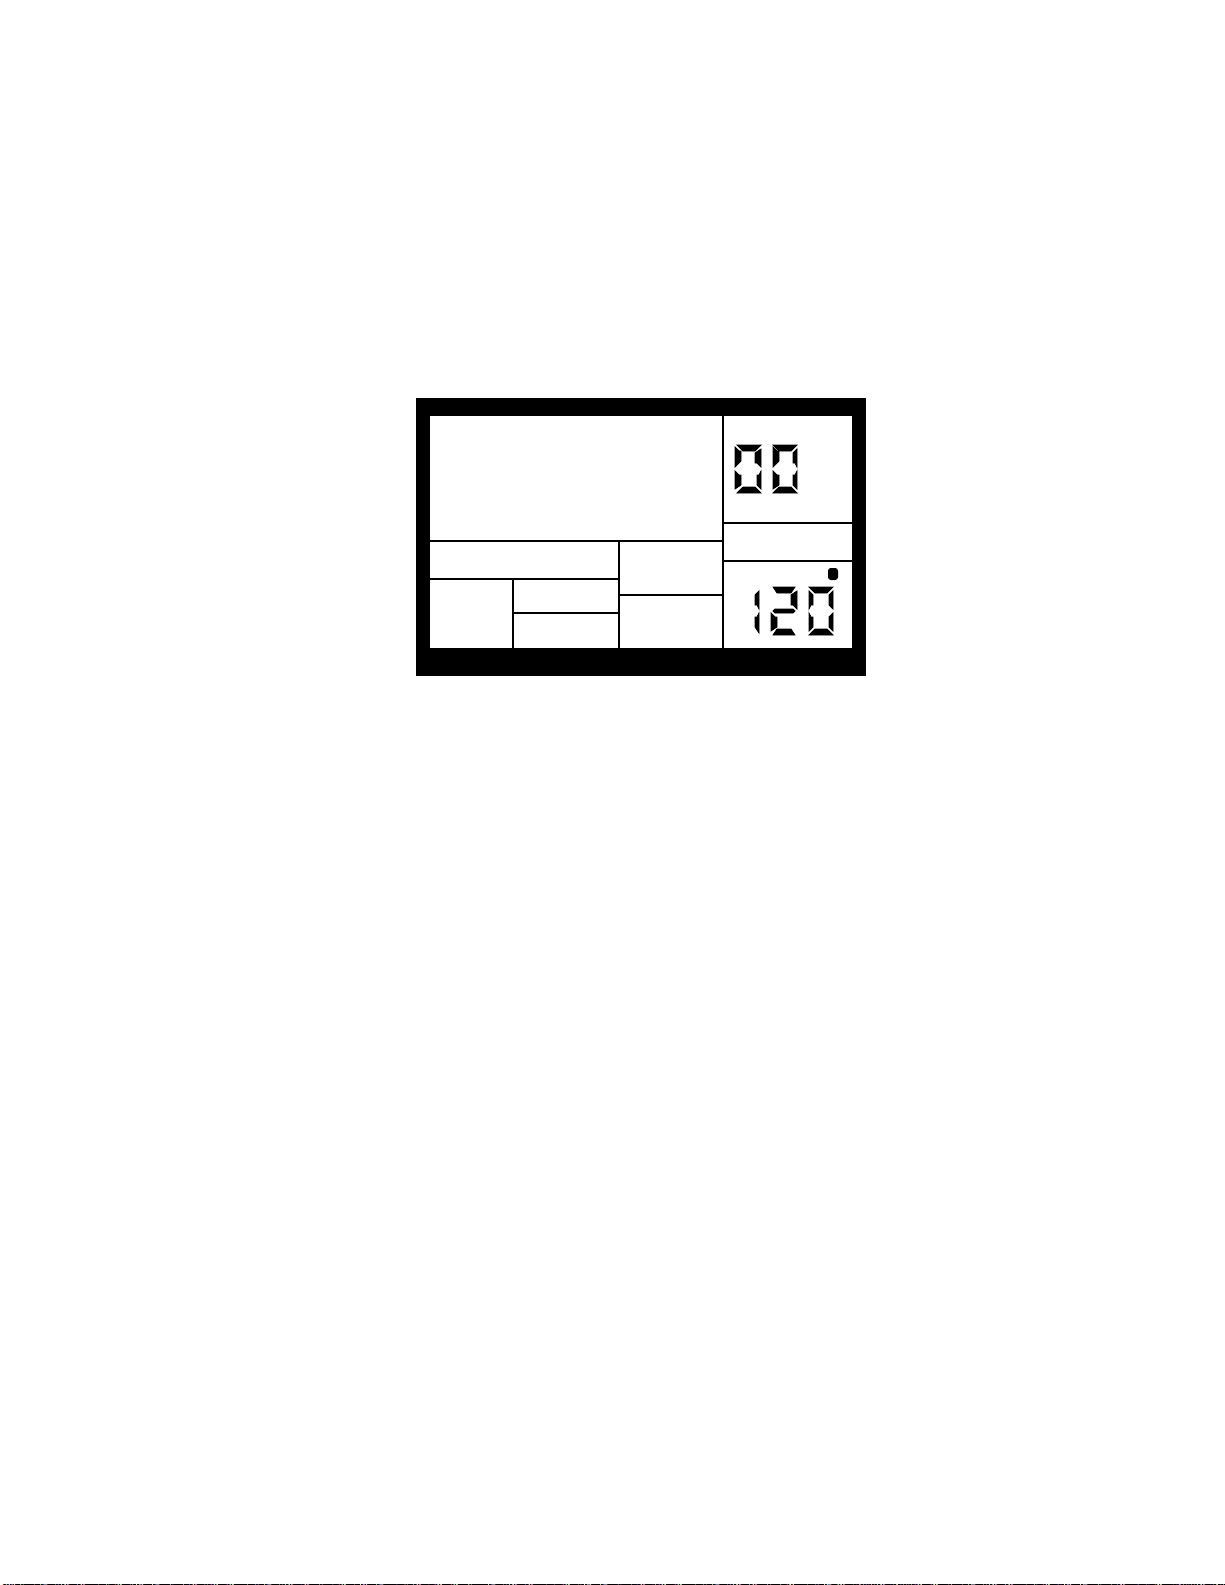
1.2G Display Layout
time Song/Pattern readout,
beat counter
Record
The LCD is divided into several "windows." Each window contains information that helps you
monitor the SR-16's status, and/or indicates what type of data should be entered.
• Name, "dialog" box, real time Song/Pattern readout, beat counter. This is the most
commonly-used area of the display. It shows Pattern and Song names, the beat counter if a
Pattern or Song is playing, and the Pattern (including A/B/Fill/Preset or User designators) that
is currently playing in Song mode. When acting as a "dialog box," it lists parameters and the
value to be edited (e.g., MIDI channel and the channel number).
• Pattern/Song readout (also Drum Set edit and drum pad readout). This shows the selected
Song or Pattern number; with Patterns, the A/B/Fill/Preset or User designators are also
shown. If you have edited a Drum Set to which a particular Pattern was assigned, the display
also shows DRUMSET EDITED. In operations that require selecting a drum pad, this
window displays the drum pad number.
• Press PLAY. For some operations, it is necessary to press the PLAY button to confirm a
particular operation, such as copy or erase. This portion of the display will say PRESS
PLAY if it is necessary to press PLAY to complete an operation.
• Page number and tempo display. When stopped or running, this shows the current tempo
and includes a visual metronome block that flashes on the beat. For functions that have
multiple "pages" of parameters (Drum Set, Record Setup, MIDI Setup, and Backup), this
portion of the display shows the currently selected page number.
• Compose/Perform. This indicates whether the SR-16 is in Compose or Perform mode.
• Click. In Compose mode, shows the current click rhythm in standard music notation (or OFF
if click is off).
• Quantize. In Compose mode, shows the current quantization rhythm in standard music
notation (or OFF if quantization is off).
• Selected function. This shows which function is currently selected: Drum Set, Record Setup,
MIDI Setup, Backup, or Step Edit.
• Swing. In Compose mode, shows the current swing rhythm, expressed as a percentage (or
OFF if swing is off).
• Play/Record. If the SR-16 is playing and in Compose mode, this will say RECORDING. If
the SR-16 is playing and in Perform mode, this will say PLAYING.
1.2H Text Protocols
Throughout the text, button names are shown in UPPER CASE and words that appear on the
display are shown in BOLD. When referring to a numbered step in a set of steps, the step
Name, "Dialog" box, Real
Selected Function
Quantize
Swing
Click
6
Play/
Compose
Perform
Pattern/Song
readout (also
drum set edit)
Press Play
Page number
and Tempo
display

number will be in parenthesis—for example, step (4)—to prevent confusion with Song steps
or step edit mode.
1.3 IMPORTANT: HOW TO COMMUNICATE WITH THE SR-16
1.3A Entering Numbers
The SR-16 identifies Patterns and Songs, as well as many other parameters, with numbers.
You need to type in (enter) these numbers in a specific way (as described below).
1.3B The Cursor
When the SR-16 wants you to enter a number in the "Dialog" box, the display will show the
previously-entered number (or the default number), and the first digit will have a small
underline called the cursor. If the cursor is not present, the number is there for reference only.
You are expected to enter something only if the cursor is present.
1.3C Leading Zeroes
If a value to be edited is a two-digit number, you must enter a two-digit number. If the number
is a three-digit number, you must enter a three-digit number. If necessary, enter a leading 0
(i.e., a zero at the beginning of the number) to fill out the required number of digits. Example:
The beat length is a three-digit number. To enter a beat length of 16, enter 016.
1.3D Automatic Revert
This feature may confuse you at first, but save you from potential problems as you become
more familiar with the machine. If all the required digits of a number aren't entered within two
seconds, the display will revert back to the previous number, with the cursor under the first
digit of the previous number. This is handy because if you start to enter a new number, but
then change your mind halfway through, you don't have to key in (or remember) the original
number again—just wait two seconds, and the display will revert to the original setting.
1.3E The INC/DEC Buttons
The two small buttons with the up arrow and down arrow symbols (next to the number keys)
are called the INC/DEC buttons respectively.
Pressing the INC button once increases the value of the entire number indicated by the
cursor (not just a single digit) by one. Pressing the DEC button once decreases the value of
the entire number indicated by the cursor (not just a single digit) by one. Example: If the
display shows 00 and you want to enter 01, tap the INC button once.
7
These buttons, and the TEMPO/PAGE buttons, also have a "scroll" feature. If you press and
PRESS PLAY
TEMPO
PERFORM
PATTERN
A
USER
hold a button, after a short pause the display will either increment or decrement at a rapid
rate.
1.3F Buttons that Toggle
The Mode buttons, FILL button, and several function buttons (DRUM SET, RECORD SETUP,
MIDI SETUP, and BACKUP) "toggle" between two states. Each button press sets the switch to
its alternate state. Example: Press the PATTERN/SONG button once to change from Pattern
to Song; press again to change from Song to Pattern. Example: Press RECORD SETUP to
call up the Record Setup menu; press RECORD SETUP again to get out of the Record Setup
menu.
1.4 10 STEPS TO INSTANT GRATIFICATION (SETUP AND CHECKOUT)
1. Connect the Main outputs (either left or right for a mono monitoring system, or both for
stereo) to a high-quality musical instrument amplifier or PA. The amp and SR-16 volume
controls should be all the way down (counter-clockwise).
2. Leave the MIDI jacks (rear panel) disconnected for now.
3. Plug the SR-16's AC adapter into the wall. The smaller plug inserts in the 9V AC Power
jack on the back.
4. Turn on the rear panel On/Off switch, then turn on the amplifier.
5. The LCD will show a sign-on message. The upper right of the display should say
PATTERN and not SONG; if it shows SONG, press the PATTERN/SONG button and the
display will show PATTERN.
EMPTY
PATT
6. Start tapping the pads. Adjust the volume control for a comfortable listening level, and
check out the sounds.
8
7. To hear the built-in demo, hold down the PATTERN/SONG button and press PLAY. To stop
PRESS PLAY
TEMPO
PERFORM
BEAT 001
PATTERN
A
USER
PLAYING
the demo, press STOP. If you want to play along with the demo, feel free to bash away on the
pads.
8. Press PLAY, and you'll hear a Preset Pattern. (In case the SR-16 has already been played
with, make sure that the display shows PERFORM and does not show USER before
continuing. To choose Perform mode, press the PERFORM/COMPOSE button until the
Perform/Compose section of the display shows PERFORM). To choose Preset rather than
User Patterns, press the PRESET/USER button until the display does not show USER. If
USER is not showing, then Preset Patterns are selected.
9. Try the following:
• Enter a two-digit number between 00-49 using the number keys, then press PLAY.
• Press the INC (up arrow) button to select the next higher-numbered Preset Pattern. It will
play at the end of the current Pattern.
• Press the DEC (down arrow) button to select the next lower-numbered Preset Pattern.
• Press the B button to select the B variation of the selected Pattern.
• Press the A button to select the A variation of the selected Pattern.
• Press FILL briefly while a Main (A or B) Pattern is playing. Note how the Main Pattern
switches from either A to B or B to A after the Fill has played.
• Press FILL and hold it down until after the Fill has played. If the FILL button is held down
past the next downbeat, the Fill's associated Main Pattern (A or B) continues to play rather
than switch from A to B or B to A.
• Press the TEMPO/PAGE buttons to change the tempo.
9
CHAPTER 2: RECORD SETUP
PAGE
QUANTIZE
SETUP
RECORD
QUANTIZE
KEYPAD
1
2
3
4
5
6
7
8
9, 0
NOTE VALUE
1/4
1/6
1/8
1/12
1/16
1/24
1/32
1/48
1/384
Several parameters are often adjusted prior to recording a Pattern, such as metronome,
Pattern length, etc. General instructions are:
1. Press the RECORD SETUP button.
2. Use the PAGE (up and down) buttons to select different "pages" of functions; the display's
lower right window shows the page number. These pages are described below.
3. Adjust values on pages, if necessary, as described for each page.
4. After making all needed changes, press RECORD SETUP again to exit, or choose another
page.
One of the pages, Step Mode, contains several sub-pages.
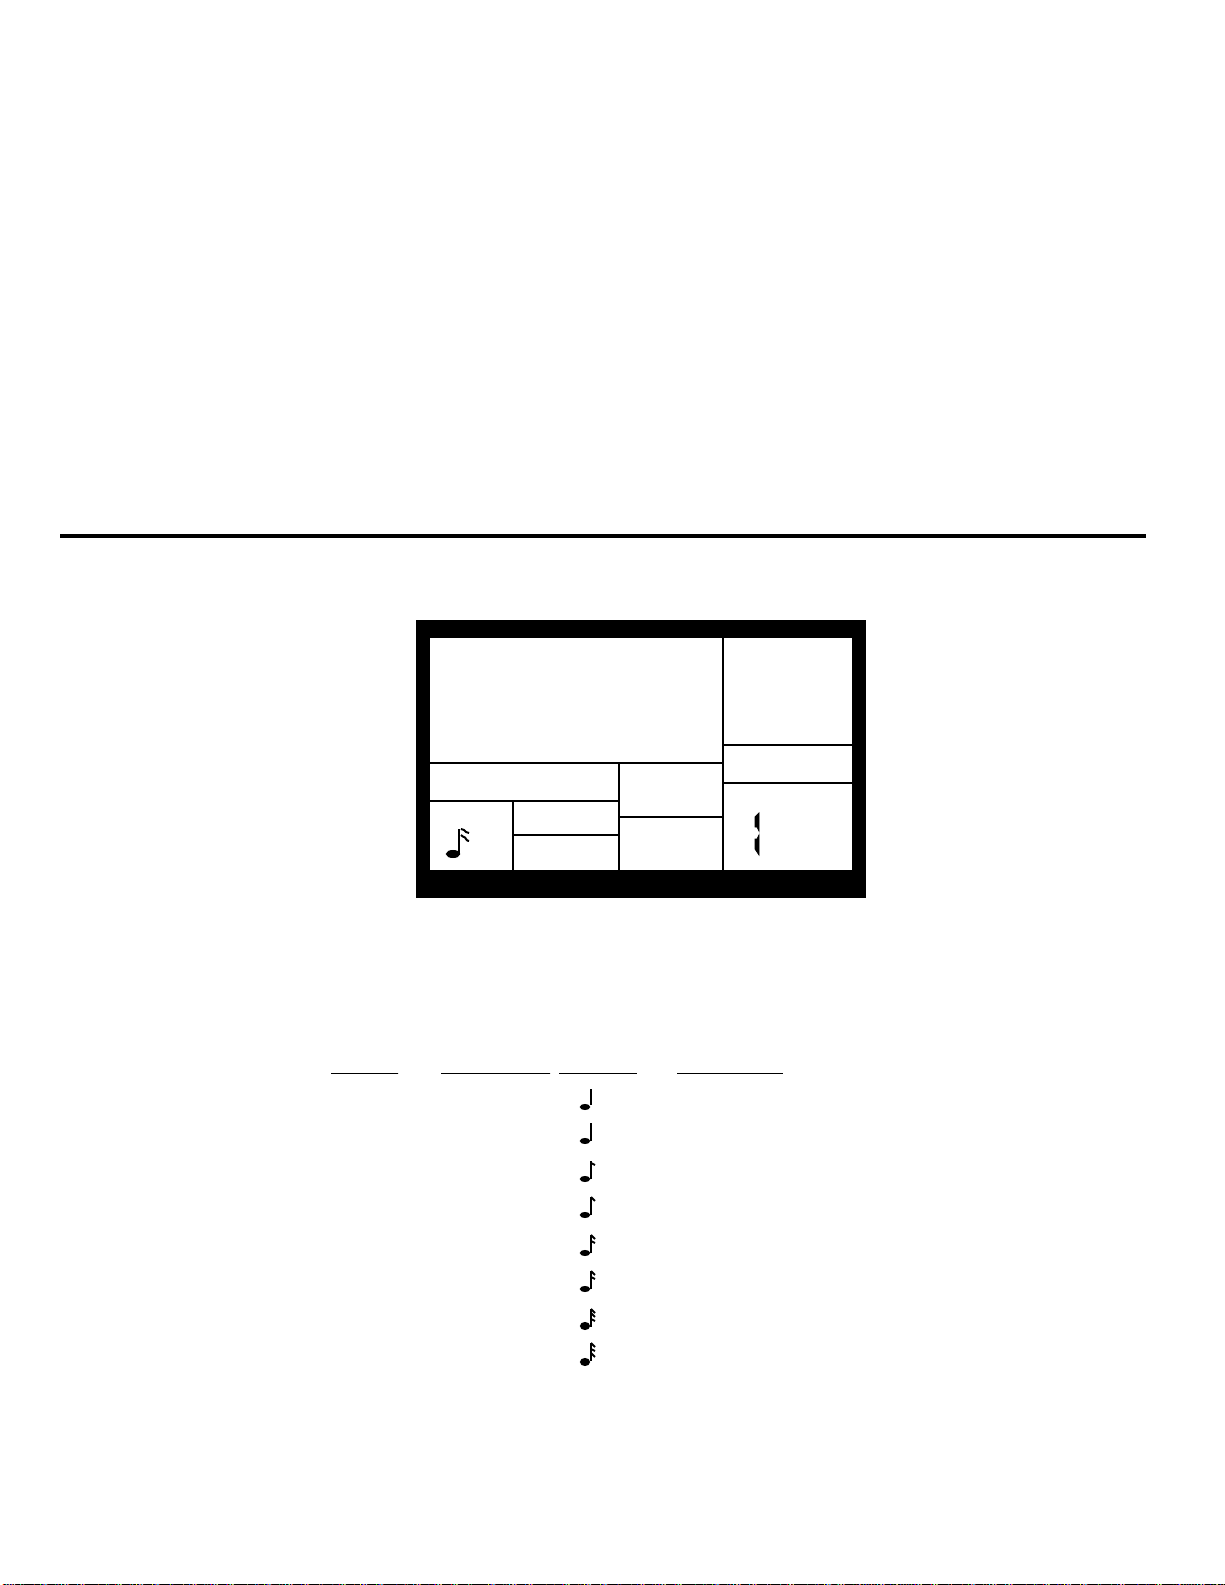
2.1 PAGE 1: SELECT THE QUANTIZATION VALUE (QUANTIZE SELECT)
The display shows QUANTIZE SELECT and a note icon in the lower left Quantize window.
SELECT
The note icon displays the quantization value in standard rhythmic notation. Enter the desired
quantization value with the INC/DEC or number buttons (1 = quarter note, 2 = quarter note
triplet, 3 = 8th note, 4 = 8th note triplet, 5 = 16th note, 6 = 16th note triplet, 7 = 32nd note, 8 =
32nd note triplet, 9 and 0 = Off, equivalent to 1/384th note resolution).
NOTE NAME
QUARTER NOTE
=
QUARTER NOTE TRIPLET
=
EIGHTH NOTE
=
EIGHTH NOTE TRIPLET
=
16th NOTE
=
16th NOTE TRIPLET
=
32nd NOTE
=
32nd NOTE TRIPLET
=
384th NOTE
=
=
=
=
=
=
=
=
=
=
=
=
=
=
=
=
=
=
=
10
DISPLAY
3
3
3
3
off
Quantization shifts your playing to the specified beat while you play, so choose the desired
PAGE
SETUP
RECORD
SWING
OFF
value before tapping out your rhythms. Remember that you can also change quantization
while recording if, for example, you want to record snare with eighth note quantization but
high-hats with 16th note quantization.
Note: The quantize value also sets the step length in Step Edit mode (section 2.9).
Background As you record a Pattern, quantization shifts all drum events to the nearest selected rhythmic value
to eliminate small timing errors. Example: With a quantize value of 1/16, all drum events you play will be shifted to
the nearest 16th note.
Quantization is most effective when used sparingly. If you're recording a drum part, quantize the kick and snare,
but try recording the hi-hat in real time (or quantize the hi-hat, and record the snare in real time). Another trick is to
combine both quantized and non-quantized parts. Example: hand claps often sound too mechanical when
quantized—when humans clap hands, you end up with a bunch of different sounds happening within a few
milliseconds of each other. A good way to simulate this effect (yet still have a rock-solid rhythm) is to record a
quantized hand claps part, then turn off quantization and try to double the part. Sometimes what you overdub will
be right on the beat, but sometimes it will be off by just enough to add that human touch.
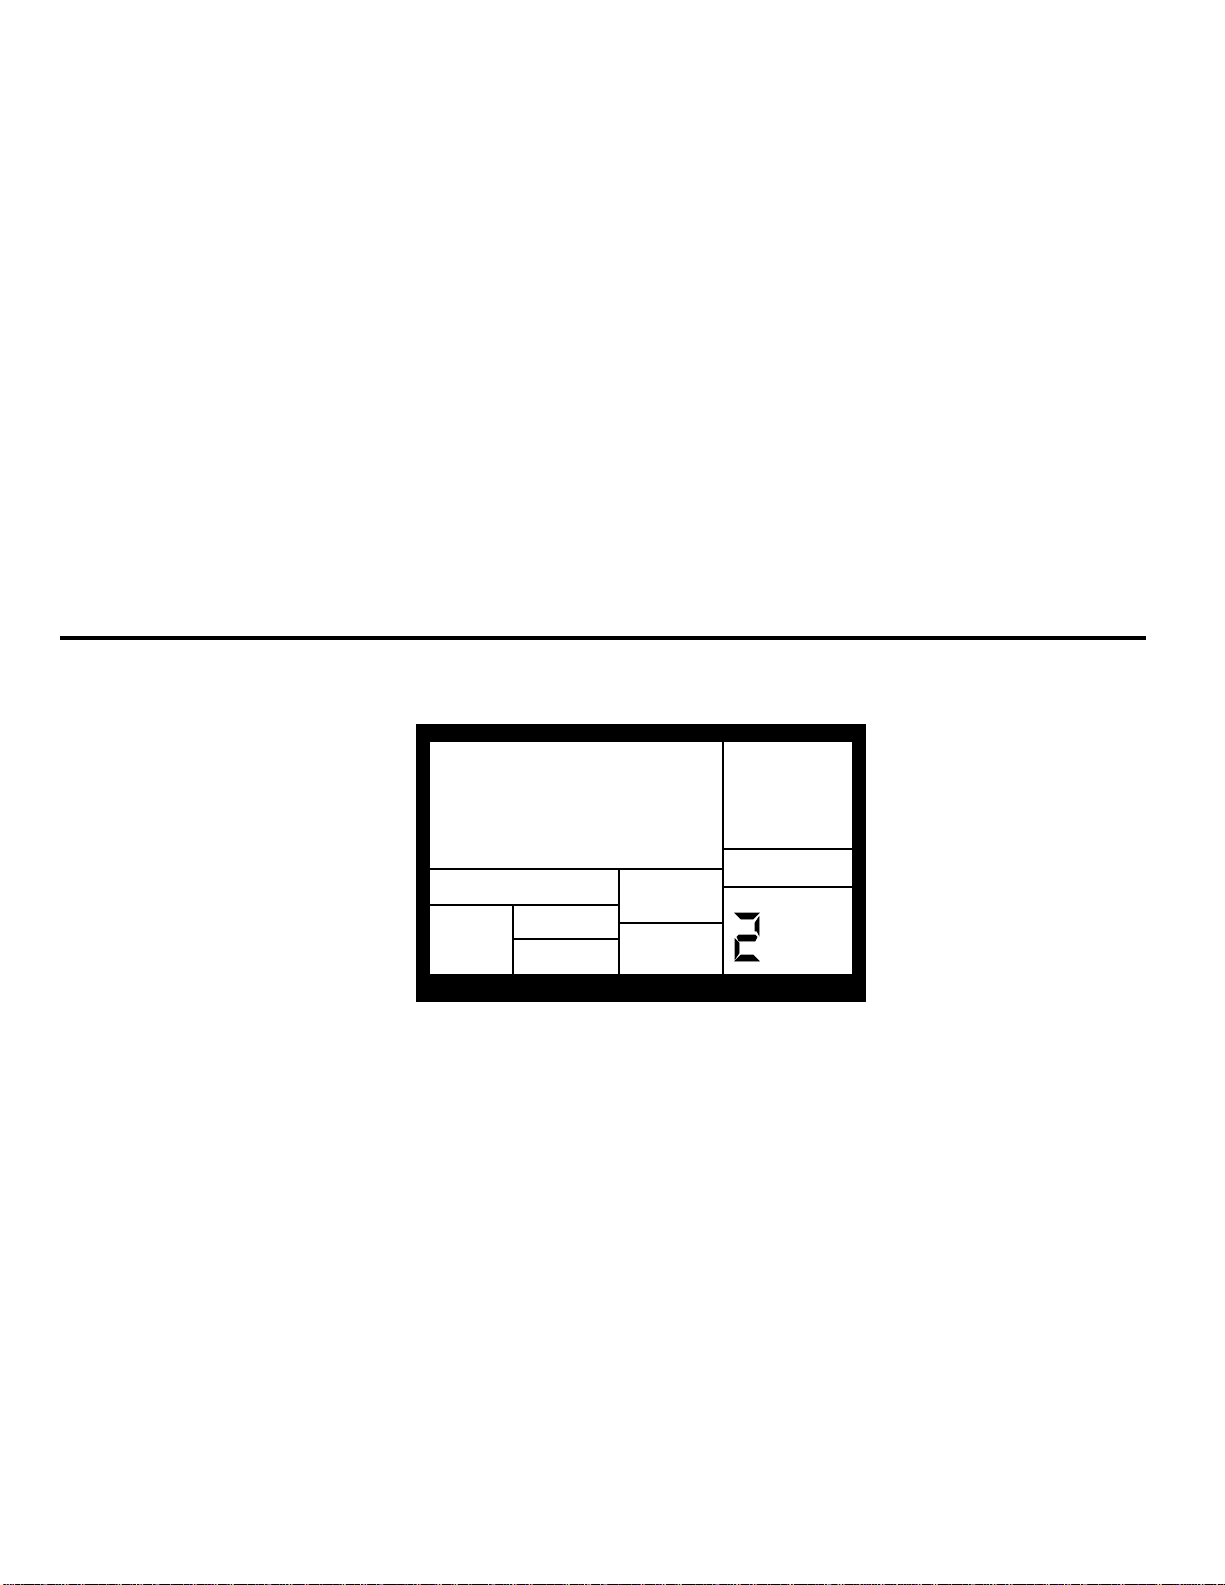
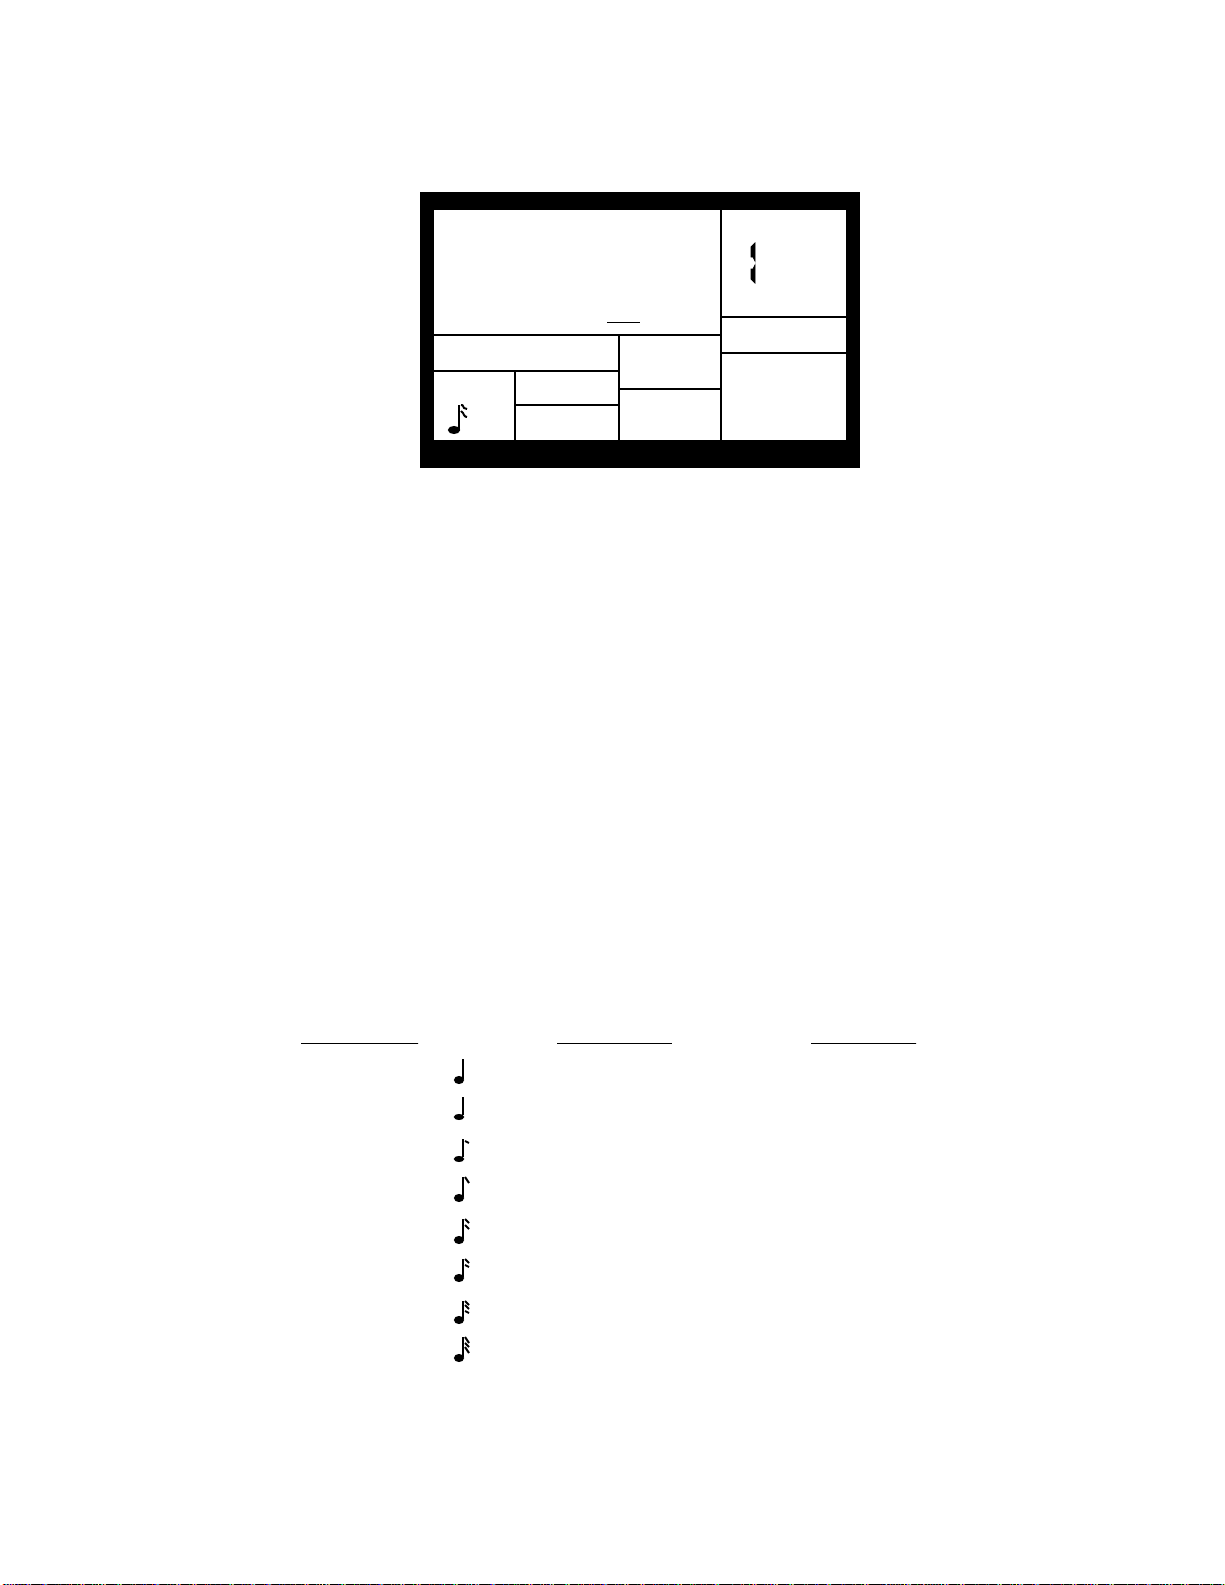
2.2 PAGE 2: SELECT THE SWING VALUE (SWING SELECT)
The display shows SWING SELECT; the Swing window shows the swing value.
SWING
SELECT
Enter the desired swing percentage with the INC/DEC or number buttons (1 = 54%, 2 = 58%,
3 = 62%, 4-0 = Swing Off).
Swing shifts notes as specified while you record, so choose the desired value before tapping
out your rhythms.
Background Swing affects the timing of pairs of equal-value notes. Each note normally defaults to taking up
50% of the total duration of both notes; adding swing lengthens the first note of the pair, and to keep the total
duration of both notes the same, shortens the second note of the pair. This imparts the kind of feel found in
shuffles and some jazz tunes. Example: With Swing set to 62%, the first note of the pair takes up 62% of the total
duration of the pair of notes, while the second note takes up 38% of the total duration.
11
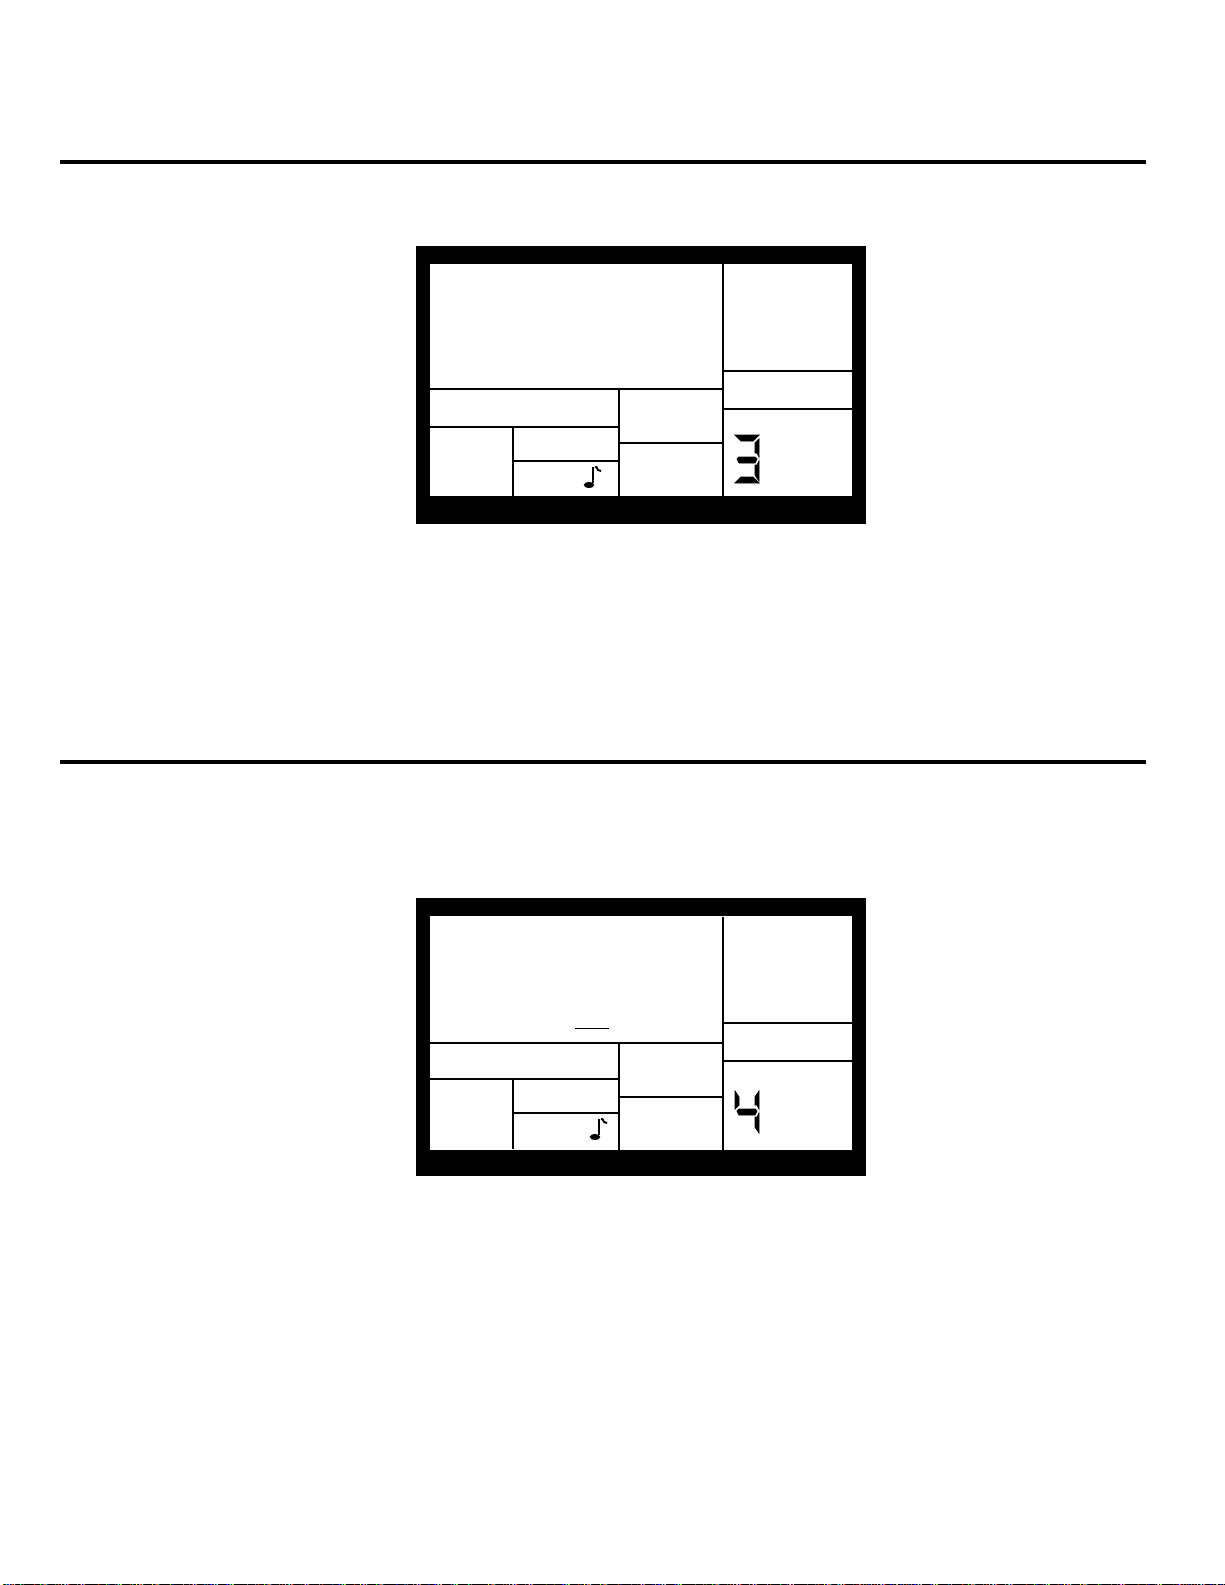
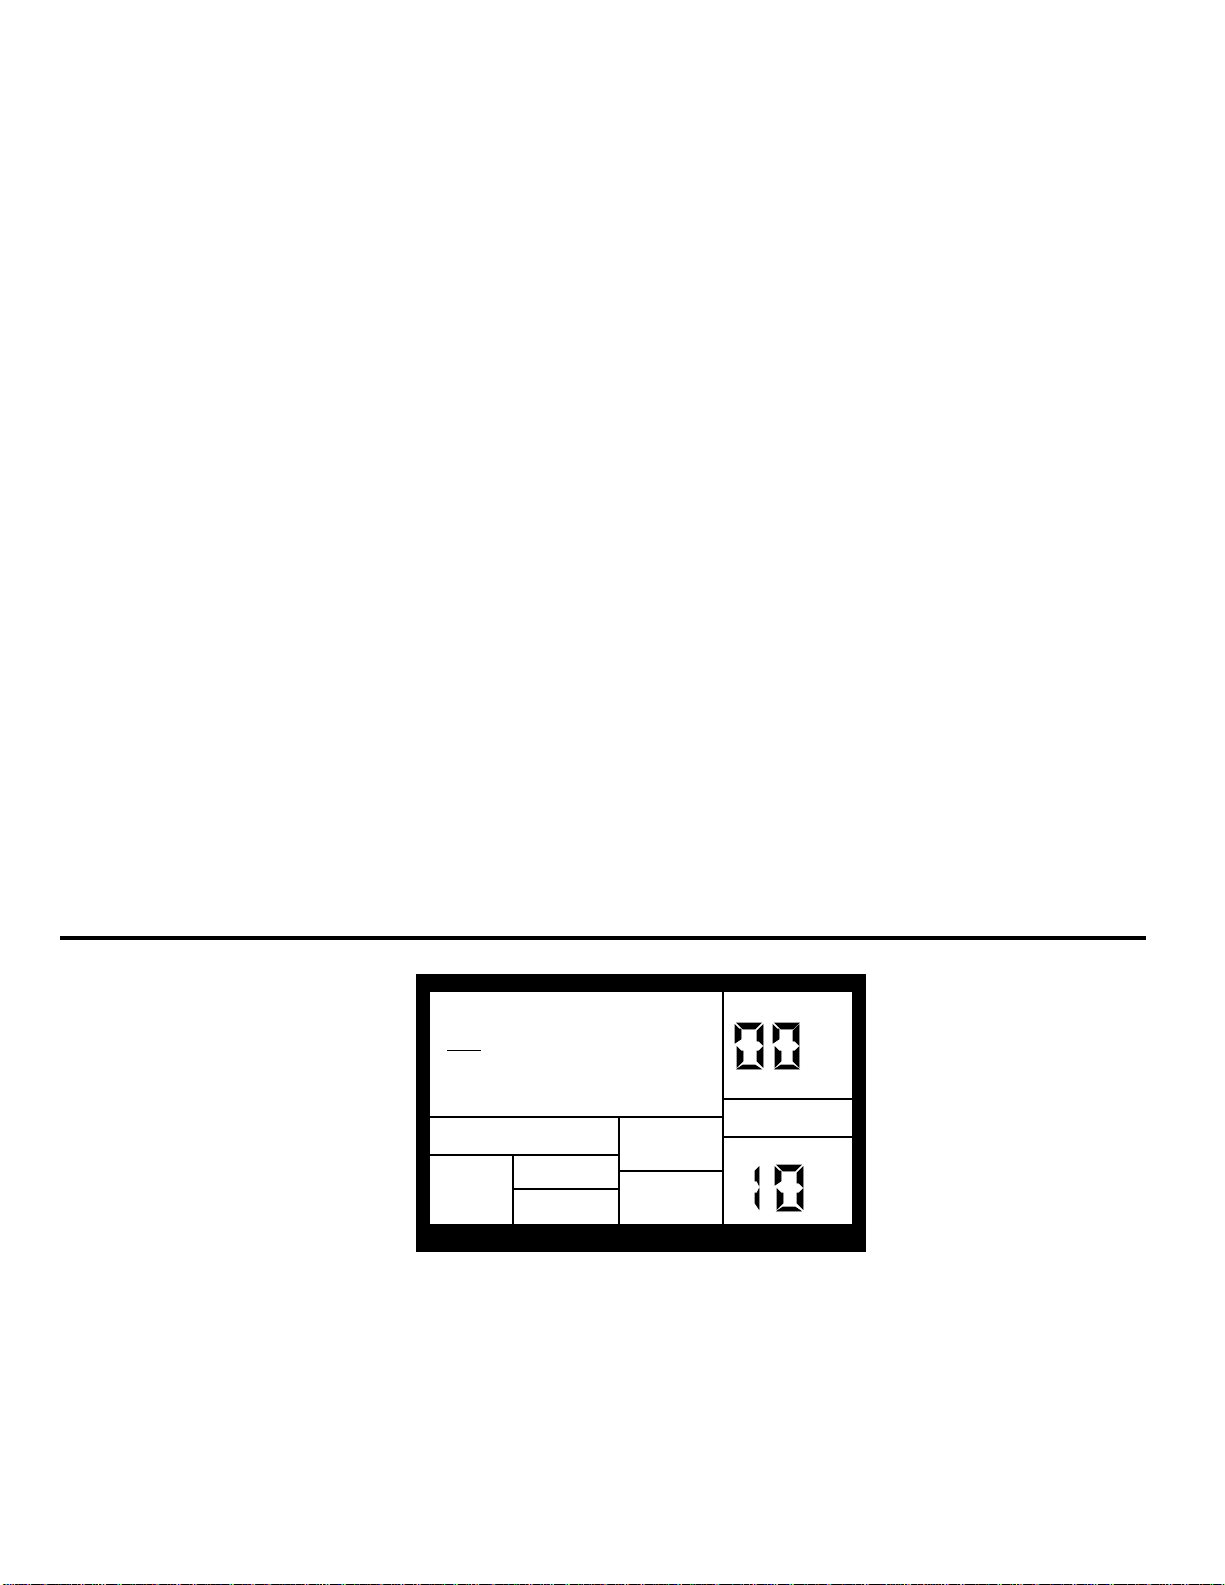
2.3 PAGE 3: ENABLE CLICK (METRONOME) AND SET RHYTHM (CLICK SELECT)
PAGE
SETUP
RECORD
CLICK
PAGE
SETUP
RECORD
CLICK
PERFORM
The display shows CLICK SELECT; the Click window shows the click's rhythmic value.
CLICK
SELECT
Enter the click value with the INC/DEC or number buttons (1 = quarter note, 2 = quarter note
triplet, 3 = 8th note, 4 = 8th note triplet, 5 = 16th note, 6 = 16th note triplet, 7-0 = Click Off).
The click is audible only in Compose mode.
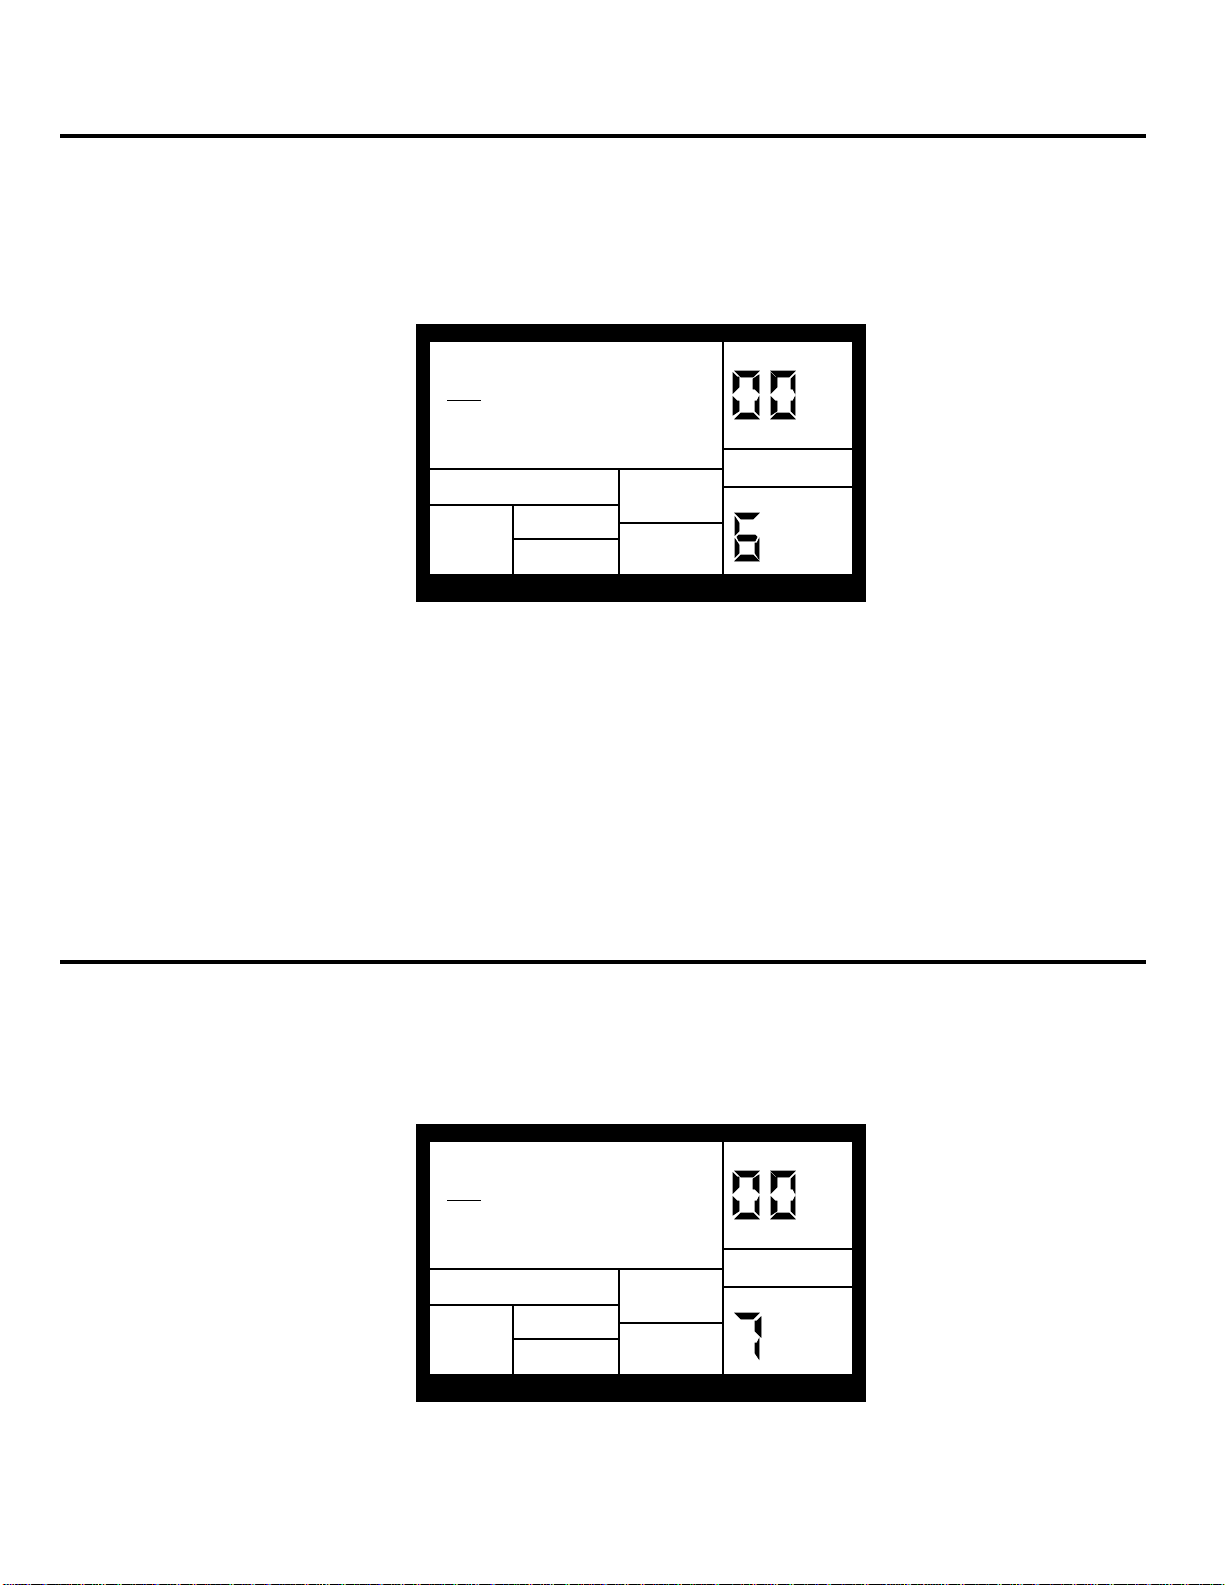
2.4 PAGE 4: SET CLICK (METRONOME) VOLUME (CLICK VOL)
The display shows CLICK VOL and a two-digit number representing click volume (00 =
inaudible, 99 = maximum volume). Enter the desired click level with the INC/DEC or number
buttons.
CLICK
VOL 70
12
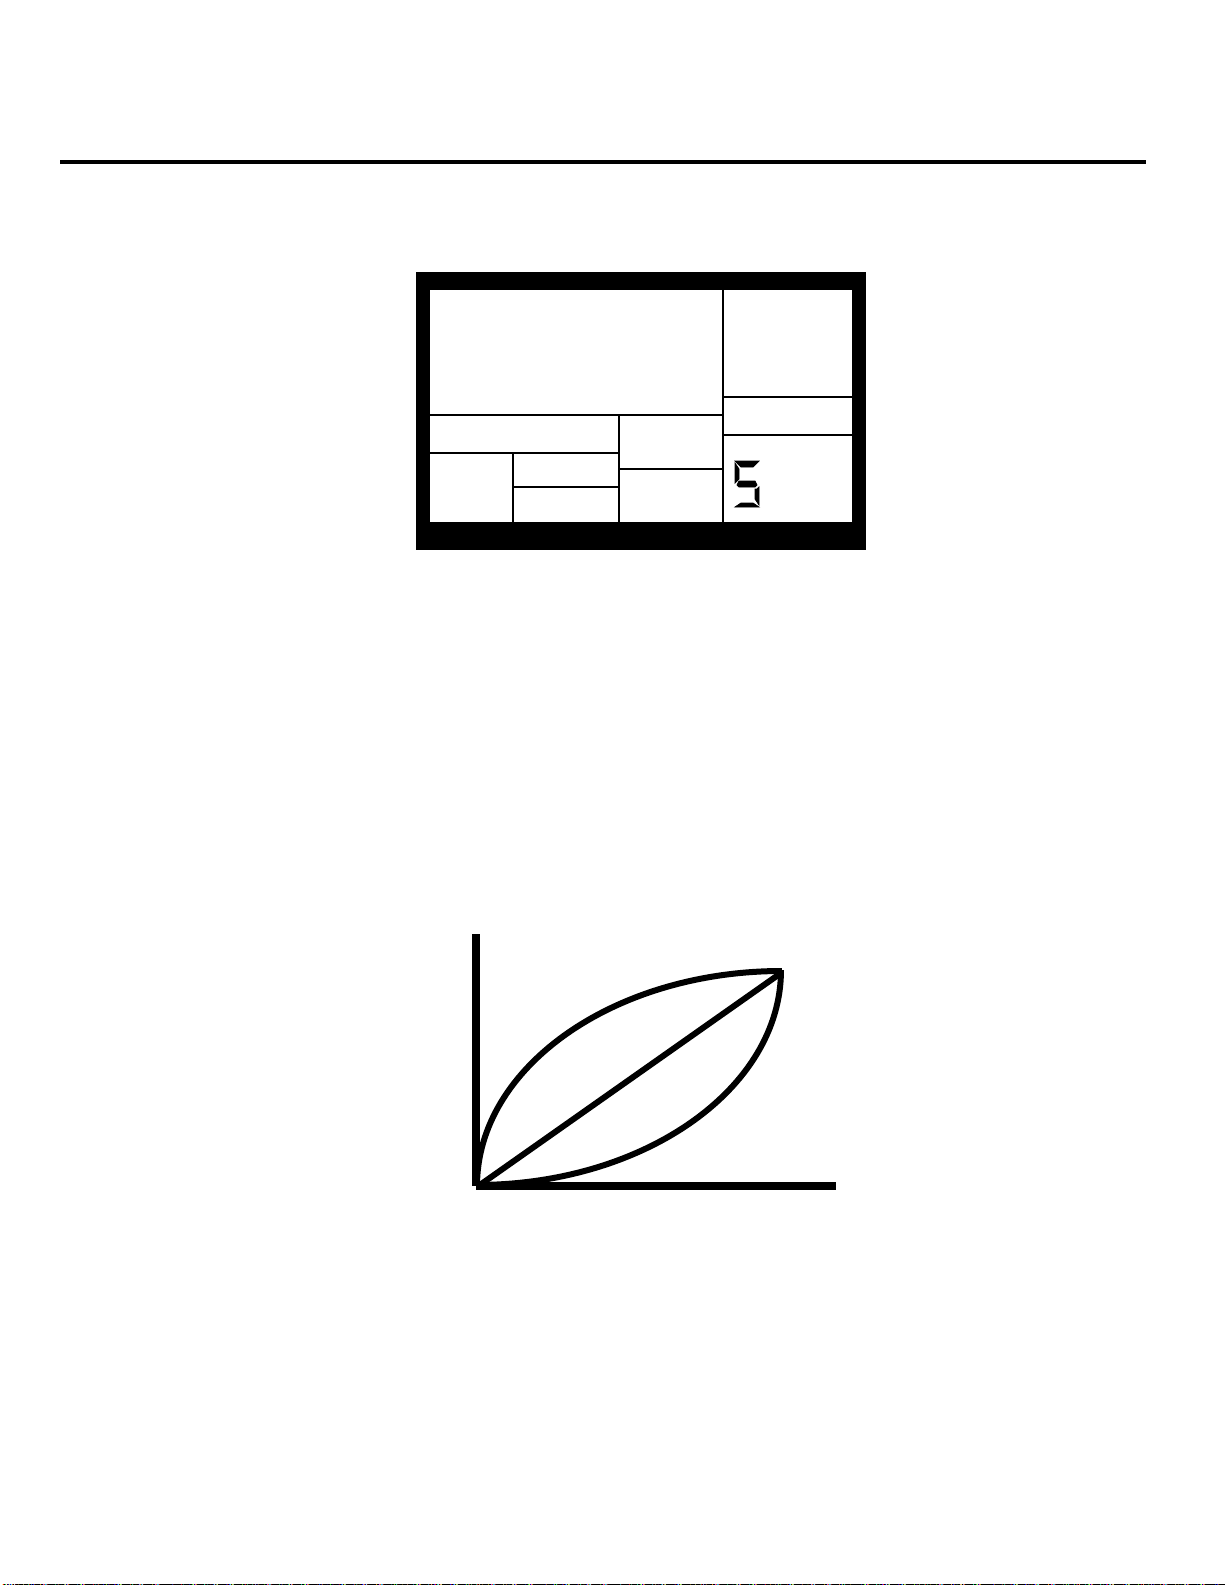
2.5 PAGE 5: ADJUST VELOCITY RESPONSE (VELOCITY)
PAGE
VELOCITY
SETUP
RECORD
PERFORM
➔
Soft Response
Loud Response
There are 11 ways in which a pad's output level can respond to the force with which you tap
it: soft, medium, loud, and eight fixed responses.
LOUD
The display says VELOCITY. To select the desired dynamic response, use the INC/DEC or
number buttons (1 = Fixed 1, 2 = Fixed 2, 3 = Fixed 3, 4 = Fixed 4, 5 = Fixed 5, 6 = Fixed 6, 7 =
Fixed 7, 8 = Fixed 8, 9 = Soft, and 0 = Loud). Medium can be selected only with the INC/DEC
buttons.
Background This feature accommodates players with a heavier or lighter touch. Referring to the diagram, soft
response weights the response toward softer sounds; with medium response, the level is directly proportional to
how hard you tap the pad; loud response weights the response toward louder sounds.
Fixed volume plays back the associated drum sound at one of eight possible volume levels. With Fixed Volume 1,
all drums assume the level of the softest possible tap, regardless of how hard you tap the pads. With Fixed Volume
8, all drums assume the level of the loudest possible tap, regardless of how hard you tap the pads. Fixed Volumes
2-7 provide the levels between the softest and loudest extremes, with lower numbers giving softer levels.
louder
➔
Volume
➔
Medium Response
softer
➔
softerTap Forceharder
13
2.6 PAGE 6: ADD/REMOVE BEATS FROM PATTERN END (LENGTH)
08 BEAT
PAGE
SETUP
RECORD
PATTERN
A
PERFORM
08 BEAT
PAGE
➝START
SETUP
RECORD
PATTERN
A
PERFORM
This option either adds beats to, or subtracts beats from, the end of the Pattern. The Pattern
length can be set prior to, or after, recording. Shortening a Pattern's end point erases any
drum events that fall outside the remaining part of the Pattern; lengthening a Pattern's end
point adds silence at the end of a Pattern. It is also important to note that changing a
Pattern's length also changes the length of the associated Fill Pattern.
0
LENGTH
The display says ### BEAT and LENGTH. This indicates a Pattern's length in beats
(quarter notes). Enter the desired length with the INC/DEC or number buttons (this must be a
three digit number; enter leading zeroes if necessary). To prevent accidental length
alteration, you must press PLAY before the SR-16 will store the new Pattern length. The
display shows CHANGED LENGTH for as long as PLAY is pressed.
Background Odd time signatures are not a problem since Patterns can be any number of beats (up to 128).
Example: For a measure of 13/4 followed by a measure of 5/4, program a 13-beat Pattern and a 5-beat Pattern.
2.7 PAGE 7: ADD/REMOVE BEATS FROM PATTERN BEGINNING (➔START)
This option either adds beats to, or subtracts beats from, the beginning of the Pattern. The
Pattern length can be set prior to, or after, recording. Shortening a Pattern's start point erases
any drum events that fall outside the remaining part of the Pattern; lengthening a Pattern's
start point adds silence at the beginning of a Pattern.
0
14

The display says ### BEAT and ➔START. This indicates a Pattern's length in beats
(quarter notes). Enter the desired length with the INC/DEC or number buttons (this must be a
three digit number; enter leading zeroes if necessary). A smaller value compared to the
original length will remove the difference, in beats, from the beginning of the Pattern. A larger
value will add the difference, in beats, to the beginning of the Pattern.
Background An example will help clarify how beats are added to or removed from the beginning. Assume an
original length of 008 beats. Changing ➔START to 007 will delete 1 beat from the Pattern beginning. Therefore,
what had been beats 002-008 will now be beats 001-007. Because a beat was removed, the Pattern will be 7
beats long.
Changing ➔START to 009 will add a beat to the beginning of the Pattern. What had been beats 001-008 will now
be beats 002-009. Because a beat was added to the beginning, the Pattern will be 9 beats long and the beat
added at the beginning will be silent.
2.8 PAGE 8: OFFSET A PATTERN OR DRUM PART
Offset shifts a Pattern or individual drum parts ahead of or behind the beat in 1/384th note
increments to allow for altering the "feel" of a piece. This only affects already-recorded parts.
1. The SR-16 should be in Pattern mode and stopped. The display says OFFSET, which will
be 00/384 (no offset).
2. Press the pad to be offset (as confirmed by the display). If you don't select a pad, offset
affects the entire Pattern.
3. Enter the two-digit offset value with the INC/DEC or number buttons. Positive numbers shift
events ahead of the beat (lead), negative numbers shift events behind the beat (lag).
The default is positive numbers; to enter a negative number with the number buttons, press
DEC first. Example: To offset a part 1/16th note later, enter -24 as the offset value since 24
sub-beats equals a 1/16th note.
Press PLAY to enter this number into the SR-16. To apply the same amount of offset to
additional pads, press the next pad then press PLAY.
Notes: The display counter resets after you exit the function. Therefore, it does not keep track
of the total amount of offset, but only changes in offset.
Drums offset to before the first beat "wrap around" to the end of the Pattern; drums offset past
the end of the last beat "wrap around" to the beginning of the Pattern.
2.9 PAGE 9: STEP MODE RECORDING (STEP MODE)
The display shows STEP MODE? This is your "gateway" to step editing, which provides
detailed Pattern editing and recording. To enter the step editor, press PLAY.
The display now shows the beat and sub-beat. If a drum event exists on this beat/sub-beat,
the display will also show the drum pad that played the event and the event volume. If more
15
than one drum event occurs on the same sub-beat, the PAGE UP/DOWN buttons step forward
DRUM
STEP
EDIT
QUANTIZE
SWING OFF
NOTE VALUE
1/4
1/6
1/8
1/12
1/16
1/24
1/32
1/48
SUB-BEATS
96
64
48
32
24
16
12
8
or backward respectively through each drum one at a time.
001/00
VOL 8
If no drum event exists on this beat/sub-beat, the display will show no pad number, and
EMPTY in place of volume data.
To navigate through the steps at the current quantization rate, use the PAGE UP button to
move forward or PAGE DOWN to move backward. If a drum exists between those beats that
fall on the current quantization value, the drum will sound as you go past it, but the display
will not stop on that drum.
If swing is on, step mode will step in "swinged" increments (see section 2.2).
Background Step mode provides detailed Pattern editing. (Note that "step" does not refer to Song steps, but
to the steps in a Pattern that hold drum events.) You can move through a Pattern one step at a time, stop at each
event as desired, and delete the event, add an event, or change an event's volume. While occasionally somewhat
tedious, Step Edit mode allows editing drum parts to your exact specifications.
Each step (also called a sub-beat) is 1/96th of a beat in duration, so at maximum resolution it takes 96 steps to
"move through" a quarter note. To save time, you can step through the Pattern at various note values, as set by
the quantization value (which is why it's preferable to select the quantization rate at which the Pattern was
recorded). Example: A 16th note consists of 24 sub-beats, so setting the quantization value to 1/16 lets you step
through the Pattern 24 sub-beats at a time. The following chart relates the number of sub-beats to
note/quantization values.
NOTE NAME
=
3
=
=
3
=
=
=
=
=
3
3
QUARTER NOTE
=
QUARTER NOTE TRIPLET
=
EIGHTH NOTE
=
EIGHTH NOTE TRIPLET
=
16th NOTE
=
16th NOTE TRIPLET
=
32nd NOTE
=
32nd NOTE TRIPLET
=
=
=
=
=
=
=
=
=
16

The following page summarizes the step edit options.
17
2.9A Add a New Drum to a Step
PAGE
SETUP
RECORD
PATTERN
A
PERFORM
Use the PAGE buttons to select the step where the drum is to be added. Press the pad that
corresponds to the sound you want to add. That drum, along with its volume (how hard the
pad was hit), will be recorded into the displayed step.
If you play a pad and there is already a drum event played by that pad on the displayed step,
you will edit the volume rather than add another event. This is true even if there are several
events on the displayed beat, and an event other than the one to be edited is showing.
2.9B Erase a Drum Sound From a Step
Use the PAGE buttons to locate the step containing the drum to be erased. While holding
down the ERASE button, press PLAY. The drum that was being displayed will be erased.
2.9C Change a Drum Sound's Volume in a Given Step
Use the PAGE buttons to select the step containing the drum whose volume needs to be
changed. Either press a number button from 1-8 (1=softest, 8=loudest), use the INC/DEC
buttons, or tap the displayed drum pad at the desired level. If you play a pad to change the
level and there are several events on the same step, the display need not show the specific
drum whose volume you want to edit.
2.9D Exit Step Mode
To exit step mode, press STOP, RECORD SETUP, or PLAY (the latter will begin playing the
Pattern from the beginning).
2.10 PAGE 10: NAME THE PATTERN (NAME)
NO NAME
NAME
The display shows NAME and the current name (or NO NAME if the Pattern has not yet
been named). To name, use the PAGE UP/DOWN buttons to select the character to be
changed; select the desired character with the INC/DEC buttons. Lower case and upper case
letters, numbers, punctuation, and various special-purpose characters are available. You can
also enter numbers with the number buttons.
18
 Loading...