


3-867-449-11 (1)
Color Monitor
P76
Operating Instructions |
|
|
GB |
|||
|
|
|
||||
Mode d’emploi |
|
FR |
||||
|
|
|
||||
Bedienungsanleitung |
|
DE |
||||
|
|
|
||||
Manual de instrucciones |
|
ES |
||||
|
|
|
||||
Istruzioni per l’uso |
|
|
IT |
|||

 DANGER
To avoid shock hazard:
•Do not remove the covers.
•Do not operate this product unless the stand is attached.
•Do not connect or disconnect this product during an electrical storm.
•The power cord plug must be connected to a properly wired and grounded power outlet.
•Any equipment to which this product will be attached must also be connected to properly wired and grounded power outlets.
•To isolate the monitor from the electrical supply, you must remove the plug from the power outlet. The power outlet should be easily accessible.
Handling:
• Your color monitor is heavy, so handle it with care. IBM recommends that this monitor is moved or lifted by two people.
DANGER
Pour éviter les risques d’électrocution :
•Ne retirez pas les capots du moniteur.
•N’utilisez pas ce produit si le socle n’est pas fixé.
•Ne connectez, ni ne déconnectez ce produit pendant un orage.
•Le câble d’alimentation doit être connecté à une prise électrique correctement mise à la terre et en bon état de marche.
•Tout équipement auquel ce produit est relié doit être également connecté à une prise correctement mise à la terre et en bon état de marche.
•Pour isoler le moniteur de la source d’alimentation électrique, vous devez le débrancher de la prise électrique. Cette prise doit être facile d’accès
Manutention :
•Votre moniteur couleurs est lourd et doit donc être manipulé avec soin. IBM vous conseille de le déplacer ou de le porter à deux.
GEFAHRENHINWEIS
Um die Gefahr eines elektrischen Schlags zu vermeiden, folgendes beachten:
•Unter keinen Umständen die Abdeckungen abnehmen.
•Das Produkt nicht in Betrieb nehmen, wenn der Sockel nicht montiert ist.
•Das Gerät nicht während eines Gewitters an eine Steckdose anschließen oder von ihr trennen.
•Das Netzkabel ist an eine ordnungsgemäß verdrahtete und geerdete Steckdose anzuschließen.
•Jedes Gerät, mit dem dieses Produkt verbunden wird, muß ebenfalls an eine ordnungsgemäß verdrahtete und geerdete Steckdose angeschlossen werden.
•Um den Monitor von der Stromversorgung zu trennen, muß der Stecker aus der Steckdose gezogen werden. Die Steckdose sollte leicht zugänglich sein.
Handhabungshinweis:
•Ihr Farbbildschirm ist schwer. Sie sollten daher beim Transport vorsichtig vorgehen. IBM empfiehlt Ihnen, den Bildschirm zu zweit anzuheben bzw. zu tragen.
GEVAAR
Ga als volgt te werk om het gevaar van een elektrische schok te voorkomen:
•Verwijder in geen enkel geval de kap.
•Stel dit produkt alleen in werking als de voet is bevestigd.
•Sluit dit apparaat niet aan op, of verbreek de aansluiting van dit apparaat niet van een contactdoos tijdens onweer.
•Het netsnoer moet worden aangesloten op een geaarde contactdoos met correcte bedrading.
•Ook alle apparatuur waarop dit produkt wordt aangesloten moet zijn aangesloten op een contactdoos met correcte bedrading.
•Om het beeldscherm te ontkoppelen van de netvoeding, dient u de stekker uit de contactdoos te trekken. De contactdoos dient goed toegankelijk te zijn.
Verplaatsing:
•Uw kleurenmonitor is zwaar, ga er dus voorzichtig mee om. IBM raadt aan dat het tillen of verplaatsen ervan door twee mensen gebeurt.
i

PELIGRO
Para evitar riesgos de descargas eléctricas:
•No retire bajo ningún concepto las cubiertas.
•No maneje el monitor sin antes acoplar el soporte.
•No conecte ni desconecte el equipo de una toma de alimentación durante una tormenta eléctrica.
•El cable de alimentación debe estar conectado a un enchufe debidamente cableado y con toma de tierra.
•Cualquier equipo al que se vaya a conectar este producto también debe estar conectado a tomas de alimentación cableadas y conectadas a tierra correctamente.
•Para aislar el monitor del suministro eléctrico, debe retirar el enchufe de la toma de alimentación. Esta toma deberá ser de fácil acceso.
Movimentazione del monitor:
•Il monitor a colori è pesante, si consiglia quindi di maneggiarlo con attenzione. IBM raccomanda che il monitor venga mosso o sollevato da due persone.
PERICOLO
Per evitare il rischio di scariche elettriche:
•Non rimuovere nessuna parte del telaio.
•Non accendere il prodotto se il piedistallo non è stato montato.
•Non collegare o scollegare il prodotto nel corso di un temporale.
•La spina del cavo di alimentazione deve essere collegata ad una presa di corrente con messa a terra, installata in maniera appropriata.
•Le apparecchiature a cui il prodotto viene attaccato devono essere collegate a prese di corrente con messa a terra, installate in maniera appropriata.
•Per isolare il monitor dalla corrente elettrica, staccare la spina dalla presa di alimentazione, che deve essere facilmente accessibile.
Manipulación:
•El monitor de color es pesado, por lo que debe manipularlo con cuidado. IBM recomienda moverlo con la ayuda de dos personas.
PERIGO
Para evitar o perigo de choques eléctricos:
•Não retire as coberturas.
•Não utilize este produto antes de montar a base.
•Não ligue nem desligue este produto durante uma tempestade eléctrica.
•O cabo de alimentação deve ser ligado a uma tomada eléctrica devidamente ligada à terra.
•Qualquer equipamento ligado a este produto deve estar ligado a tomadas eléctricas devidamente ligadas à terra.
•Para isolar o monitor da fonte de alimentação, retire a ficha do cabo de alimentação da tomada eléctrica. A tomada eléctrica deve ser de fácil acesso.
Manuseio:
•Seu monitor colorido é pesado, então manuseie-o com cuidado. A IBM recomenda que o monitor seja movido ou carregado por duas pessoas.
FARE
Sådan undgår du elektrisk stød:
•Kabinettet må under ingen omstændigheder fjernes.
•Undgå at anvende dette produkt, uden at vippe/drejefoden er monteret.
•Undgå at tilslutte eller frakoble dette produkt i tordenvejr.
•Netledningen skal være tilsluttet en korrekt jordet stikkontakt med korrekt ledningsføring.
•Alt udstyr, som tilsluttes dette produkt, skal også være tilsluttet korrekt jordede stikkontakter med korrekt ledningsføring.
•For at isolere skærmen fra strømforsyningen, skal stikket tages ud af stikkontakten. Stikkontakten bør være let tilgængelig.
Håndtering:
•Farveskærmen er tung, så den skal håndteres forsigtigt. IBM anbefaler, at skærmen flyttes eller løftes af to personer.
ii

FARE
Slik unngår du fare for elektrisk støt:
•Ikke ta av dekslene.
•Ikke bruk produktet dersom sokkelen ikke er montert.
•Ikke koble produktet til eller fra under tordenvær.
•Pluggen på strømledningen må kobles til korrekt montert og jordet strømuttak.
•Utstyr som dette produktet eventuelt blir koblet til, må også kobles til korrekt montert og jordet strømuttak.
•For å isolere skjermen fra strømkilden må du ta ut pluggen fra strømuttaket. Strømuttaket bør være lett tilgjengelig.
Käsittely:
•Värinäyttö on painava, joten käsittele sitä varoen. IBM suosittelee, että kaksi henkilöä siirtää tai nostaa sitä.
Varning - livsfara
För att undvika risk för elektriska stötar måste du tänka på följande:
•Ta inte bort några skyddskåpor.
•Använd inte den här produkten innan du har satt fast stativet.
•Anslut inte produkten till ett eluttag under åskväder. Koppla inte heller ur produkten från ett eluttag under åskväder.
•Strömkabeln måste anslutas till ett felfritt och jordat uttag.
•All utrustning som den här produkten kopplas till måste också anslutas till felfria och jordade uttag.
•För att bryta strömmen till bildskärmen måste du dra ut kontakten. Vägguttaget bör vara lätt att komma åt.
Hantering:
•Färgskärmen är tung och bör därför hanteras försiktigt. IBM rekommenderar att den flyttas eller lyfts av två personer.
VAARA
Sähköiskun vaaran välttämiseksi:
•Älä avaa laitteen kansia missään tilanteessa.
•Älä käytä laitetta, ellei jalustaa ole kiinnitetty.
•Älä kytke laitetta pistorasiaan tai irrota sitä pistorasiasta ukonilman aikana.
•Virtajohto on kytkettävä asianmukaisesti johdotettuun ja maadoitettuun pistorasiaan.
•Kaikki muutkin laitteet, joihin tämä tuote on liitetty, on kytkettävä asianmukaisesti johdotettuihin pistorasioihin.
•Kun haluat erottaa näyttimen sähköverkosta, sinun pitää irrottaa sen verkkojohto pistorasiasta. Pistorasian pitäisi olla
mahdollisimman lähellä näytintä ja vaivattomasti käsillä.
Håndtering:
•Värimonitorinne on painava, joten käsitelkää sitä varovasti. IBM suosittelee, että monitorin siirtämiseen tai kantamiseen käytetään kahta henkilöä.
º¹Á¢ËÁê
¡йб фио брпжщзЬ лйодаопщ имелфтпрмикЭбч:
•»ио бжбйтеЭфе фб лбманнбфб.
•»и хЫфефе фп ртпыЮо бщфЮ уе мейфпщтзЭб шцтЭч об еЭобй уфетецнЫои и вАуи фпщ.
•»и ущодЫефе Ь брпущодЫефе фп ртпыЮо бщфЮ лбфА фи дйАтлейб имелфтпхаеммбч.
•Жп жйч фпщ лбмцдЭпщ тещнбфпмЬрфи ртЫрей об ущодехеЭ уе нйб ртЭъб не уцуфЬ лбмцдЭцуи лбй зеЭцуи.
•ºАхе ущулещЬ уфио прпЭб ущодехеЭ бщфЮ фп ртпыЮо ртЫрей ерЭуич об ущодехеЭ уе ртЭъб не уцуфЬ лбмцдЭцуи лбй зеЭцуи.
•¡йб об брпнпосуефе фио пхЮои брЮ фио рбтпшЬ теанбфпч, ртЫрей об бжбйтЫуефе фп жйч брЮ фио ртЭъб. ¸ ртЭъб ртЫрей об еЭобй уе уинеЭп еалпмб ртпувАуйнп.
МейтйунЮч:
•¸ Ызштцни пхЮои убч еЭобй вбтйА, зйХбщфЮ шейтйуфеЭфе фио не ртпупшЬ. ¸ IBM ущойуфА и пхЮои об нефбжЫтефбй Ь об уилсоефбй брЮ дап Афпнб.
iii

TEHLÜKE
Elektrik •arpmasÝ tehlikesinden ka•Ýnmak i•in:
•KapaklarÝ •ÝkarmayÝnÝz.
•Bu cihazÝ kaidesine takÝlÝ durumda deÛilken •alÝßtÝrmayÝnÝz.
•Bu cihazÝ elektriksel fÝrtÝna sÝrasÝnda prize takmayÝnÝz veya prizden •ÝkarmayÝnÝz.
•Elektrik kablosunun fißi, elektrik ve toprak baÛlantÝlarÝ usulŸne uygun olarak yapÝlmÝß bir prize takÝlmalÝdÝr.
•Bu cihazÝn baÛlanacaÛÝ diÛer tŸm cihazlar da elektrik ve toprak baÛlantÝlarÝ usulŸne uygun olarak yapÝlmÝß prize takÝlmÝß olmalÝdÝr.
•MonitšrŸn elektrikle baÛlantÝsÝnÝ kesmek i•in fißini prizden •ekmeniz gereklidir. Priz, kolayca erißilebilecek bir yerde olmalÝdÝr.
KaldÝrma:
•Renkli monitšrŸnŸz aÛÝrdÝr; kaldÝrÝrken dikkatli olunuz. IBM, monitšrŸn iki kißi tarafÝndan taßÝnmasÝnÝ veya kaldÝrÝlmasÝnÝ tavsiye etmektedir.
iv

English
GB
F
ES
C
Edition 1
Thispublicationcouldcontaintechnicalinaccuraciesortypographicalerrors.Changesaremadeperiodicallytothe informationherein;thesechangeswillbemadeinlatereditions.IBMmaymakeimprovementsand/orchangesinthe product(s)and/orprogram(s)atanytime.
Itispossiblethatthispublicationmaycontainreferenceto,orinformationabout,IBMproducts(machinesandprograms), programming,orservicesthatarenotannouncedinyourcountry.
RequestsforcopiesofthispublicationandfortechnicalinformationaboutIBMproductsshouldbemadetoyourIBM
AuthorizedDealerorIBMRetailer.
No part of this publication may be reproduced or distributed in any form or by any means without prior permission in writing fromtheInternationalBusinessMachinesCorporation.
ReferencesinthispublicationtoIBMproducts,programs,orservicesdonotimplythatIBMintendstomaketheseavailablein allcountriesinwhichIBMoperates.AnyreferencetoanIBMproduct,programorserviceisnotintendedtostateorimplythat onlyIBM’sproduct,program,orservicemaybeused.Anyfunctionallyequivalentproduct,program,orservicethatdoesnot infringeanyofIBM’sintellectualpropertyrightsorotherlegallyprotectablerightsmaybeusedinsteadoftheIBMproduct,
program,orservice.Evaluationandverificationofoperationinconjunctionwith otherproducts,programs,orservices,except thoseexpresslydesignatedbyIBM,aretheuser’sresponsibility.
IBMmayhavepatentsorpendingpatentapplicationscoveringsubjectmatterinthisdocument.Thefurnishingofthis documentdoesnotgiveyouanylicensetothesepatents.
Trademarks
Thefollowingterms,usedinthispublication,aretrademarksorservicemarksoftheIBMCorporationintheUnitedStatesor othercountries:
IBM
© Copyright International Business Machines Corporation 1999. All rights reserved.
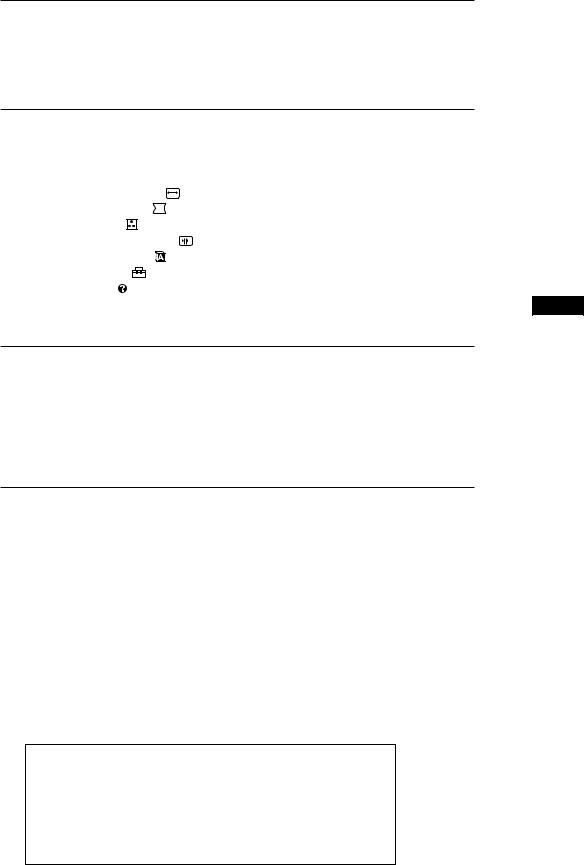
TABLE OF CONTENTS |
|
||
Getting started |
|
|
|
Precautions ...................................................................................................... |
|
|
2 |
Identifying Parts and Controls ..................................................................... |
3 |
||
Setup ................................................................................................................. |
|
|
4 |
Customizing Your Monitor |
|
||
Selecting the On-screen Display Language ................................................ |
5 |
||
Adjusting the Picture Brightness and Contrast .......................................... |
5 |
||
Introducing the On-screen Display System ................................................ |
5 |
||
Using the SIZE/CENTER |
On-screen Display ...................................... |
6 |
|
Using the GEOMETRY |
On-screen Display ........................................... |
7 |
|
Using the COLOR |
On-screen Display ..................................................... |
8 |
|
Using the CONVERGENCE On-screen Display .................................. |
9 |
||
Using the LANGUAGE |
On-screen Display ......................................... |
10 |
|
Using the OPTION |
On-screen Display ................................................ |
10 |
|
Using the HELP |
On-screen Display ..................................................... |
12 |
|
Resetting the Adjustments |
.......................................................................... |
13 |
|
Technical Features |
|
|
|
Power Saving Function ................................................................................ |
|
14 |
|
Damper Wires ............................................................................................... |
|
|
14 |
Plug & Play .................................................................................................... |
|
|
14 |
Preset Modes ................................................................................................. |
|
|
15 |
Displaying the Monitor’s Information ....................................................... |
15 |
||
Additional Information |
|
|
|
Warning Messages ........................................................................................ |
|
|
15 |
Troubleshooting ............................................................................................ |
|
|
16 |
Self-diagnosis Function ................................................................................ |
|
18 |
|
Specifications ................................................................................................. |
|
|
18 |
GB
F
ES
C
•ENERGY STAR is a U.S. registered mark.
•Trinitron® is a registered trademark of Sony Corporation.
•VGA is a registered trademark of IBM Corporation of the U.S.A.
•VESA is a trademark of Video Electronics Standard Association.
•All other product names mentioned herein may be the trademarks or registered trademarks of their respective companies.
•Furthermore, “™” and “®" are not mentioned in each case in this manual.
1

Getting startedS
Precautions
Installation
•Prevent internal heat build-up by allowing adequate air circulation. Do not place the monitor on surfaces (rugs, blankets, etc.) or near materials (curtains, draperies) that may block the ventilation holes.
•Do not install the monitor near heat sources such as radiators or air ducts, or in a place subject to direct sunlight, excessive dust, mechanical vibration or shock.
•Do not place the monitor near equipment which generates magnetism, such as a transformer or high voltage power lines.
Maintenance
•Clean the cabinet, panel and controls with a soft cloth lightly moistened with a mild detergent solution. Do not use any type of abrasive pad, scouring powder or solvent, such as alcohol or benzine.
•Do not rub, touch, or tap the surface of the screen with sharp or abrasive items such as a ballpoint pen or screwdriver. This type of contact may result in a scratched picture tube.
•Clean the screen with a soft cloth. If you use a glass cleaning liquid, do not use any type of cleaner containing an anti-static solution or similar additive as this may scratch the screen’s coating.
Use of the Tilt-Swivel
This monitor can be adjusted within the angles shown below. To find the center of the monitor’s turning radius, align the center of the monitor’s screen with the centering dots on the stand.
Hold the monitor at the bottom with both hands when you turn it horizontally or vertically. Be careful not to pinch your fingers at the back of the monitor when you tilt the monitor up vertically.
15°
90°
90° 
 5°
5°
Centering dots
Warning on power connection
•Use an appropriate power cord for your local power supply.
Examples of plug types:
Transportation
When you transport this monitor for repair or shipment, use the original carton and packing materials.
for 100 to 120 V AC for 200 to 240 V AC for 240 V AC only
•Before disconnecting the power cord, wait at least 30 seconds after turning off the power to allow the static electricity on the CRT display surface to discharge.
•After the power has been turned on, the CRT is demagnetized (degaussed) for about 5 seconds. This generates a strong magnetic field around the metal frame, which may affect the data stored on magnetic tapes and disks near the bezel. Place magnetic recording equipment, tapes and disks away from this monitor.
The equipment should be installed near an easily accessible electrical outlet.
2
Getting Started
Identifying Parts and Controls
See the pages in parentheses for further details.
Front
1? (reset) button (page 13)
Resets the adjustments to the factory settings.
2¬ (brightness) down and up (./>) buttons
(pages 5 – 13)
Adjust the picture brightness.
Function as the (./>) buttons when adjusting other items.
3 button (pages 5 – 13, 15)
Displays the MENU OSD.
4> (contrast) left and right (?//) buttons
(pages 5 – 13, 18)
Adjust the contrast.
Function as the (?//) buttons when adjusting other items.
5u (power) switch and indicator (pages 14,
18)
Turns the monitor on or off.
The power indicator lights up in green when the monitor is turned on, and either flashes in green and orange, or lights up in orange when the monitor is in power saving mode.
Rear
6AC IN connector (page 4)
Provides AC power to the monitor.
7Video input connector (HD15) (page 4)
Inputs RGB video signals (0.700 Vp-p, positive) and SYNC signals.
|
|
1 |
|
2 |
3 |
4 |
5 |
|
|
|
|
6 |
7 |
8 |
9 |
10 |
|
||
|
|
11 12 |
13 14 |
15 |
|
||||
|
|
|
|
|
|
|
|
||
|
Pin No. |
Signal |
|
|
|
Pin No. |
Signal |
||
|
1 |
Red |
|
|
|
8 |
|
|
Blue Ground |
|
2 |
Green |
|
|
|
9 |
|
|
— |
|
|
(Sync on Green) |
|
10 |
|
Ground |
|||
|
|
|
|
|
|
|
|||
|
3 |
Blue |
|
|
|
|
|
|
|
|
|
|
|
11 |
|
ID (Ground) |
|||
|
4 |
ID (Ground) |
|
|
|
|
|||
|
|
|
|
12 |
|
Bi-Directional |
|||
|
|
|
|
|
|
|
|||
|
5 |
DDC Ground* |
|
|
|
|
|
Data (SDA)* |
|
|
6 |
Red Ground |
|
|
|
13 |
|
H. Sync |
|
|
7 |
Green Ground |
|
|
14 |
|
V. Sync |
||
|
|
|
|
|
|
15 |
|
Data Clock(SCL)* |
|
|
|
|
|
|
|
|
|
|
|
*Display Data Channel (DDC) Standard of VESA
GB
F
ES
C
3
Getting Started
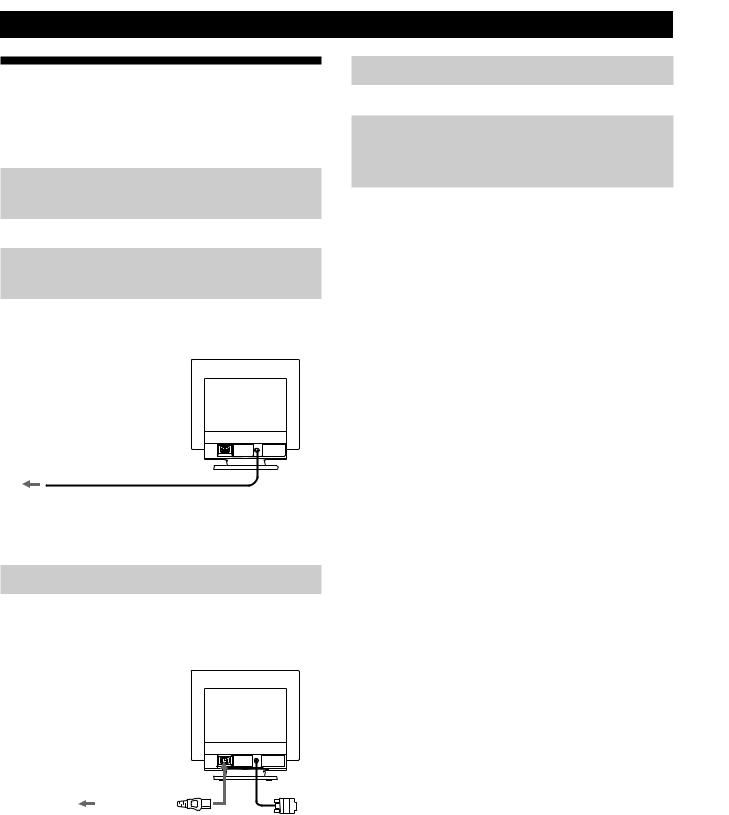
Setup
This monitor works with platforms running at horizontal frequencies between 30 and 96 kHz.
Step 1: Make sure the computer and
monitor are switched off
Step 2: Connect the monitor to the
computer
Connect the video signal cable to the video output of the computer.
To a computer with an HD15 video output
Note
Do not short the pins of the video signal cable.
Step 3: Connect the power cord
With the monitor switched off, connect one end of the proper power cord for your local supply to the monitor and the other end to a power outlet.
to a power outlet |
to AC IN |
||||
|
|
|
|
|
|
Power cord
Step 4: Turn on the monitor and computer
Step 5: Adjust the monitor’s controls according to your personal preference
The installation of your monitor is complete.
Note
If no picture appears on the screen and “MONITOR IS WORKING” or “MONITOR IS IN POWER SAVE MODE” appears on the screen, see “Warning Messages” on page 15.
4
 Loading...