

Page 1
■
■
■
Cubase LE 4 Installation Guide/
Control Surface Operation Guide
This document explains how to install the Cubase LE 4 software on a computer and how to use the HD8/HD16 as a control surface.
* Manufacturer names and product names mentioned in this document are trademarks or registered trademarks of their respective
owners.
Cubase LE 4 installation
and setup
Perform the following steps to install Cubase LE 4 on a
computer and set up the HD8/HD16 to function as a control
surface for Cubase LE 4.
NOTE
For the following procedure, you will need the "Cubase LE 4"
DVD-ROM supplied with this product.
1.
Use the supplied "Cubase LE 4" DVD-ROM
to install the Cubase LE 4 application on your
computer.
The procedure differs, depending on the operating system.
Windows Vista/XP
(1) Insert the supplied "Cubase LE 4" DVD-ROM
into the DVD drive of the computer.
(2) A message screen asking about what to do
with the inserted DVD-ROM appears. Select
"Open folder and show files".
Windows XP). Then double-click on the "Cubase LE 4"
DVD-ROM icon to display the contents of the DVD-ROM.
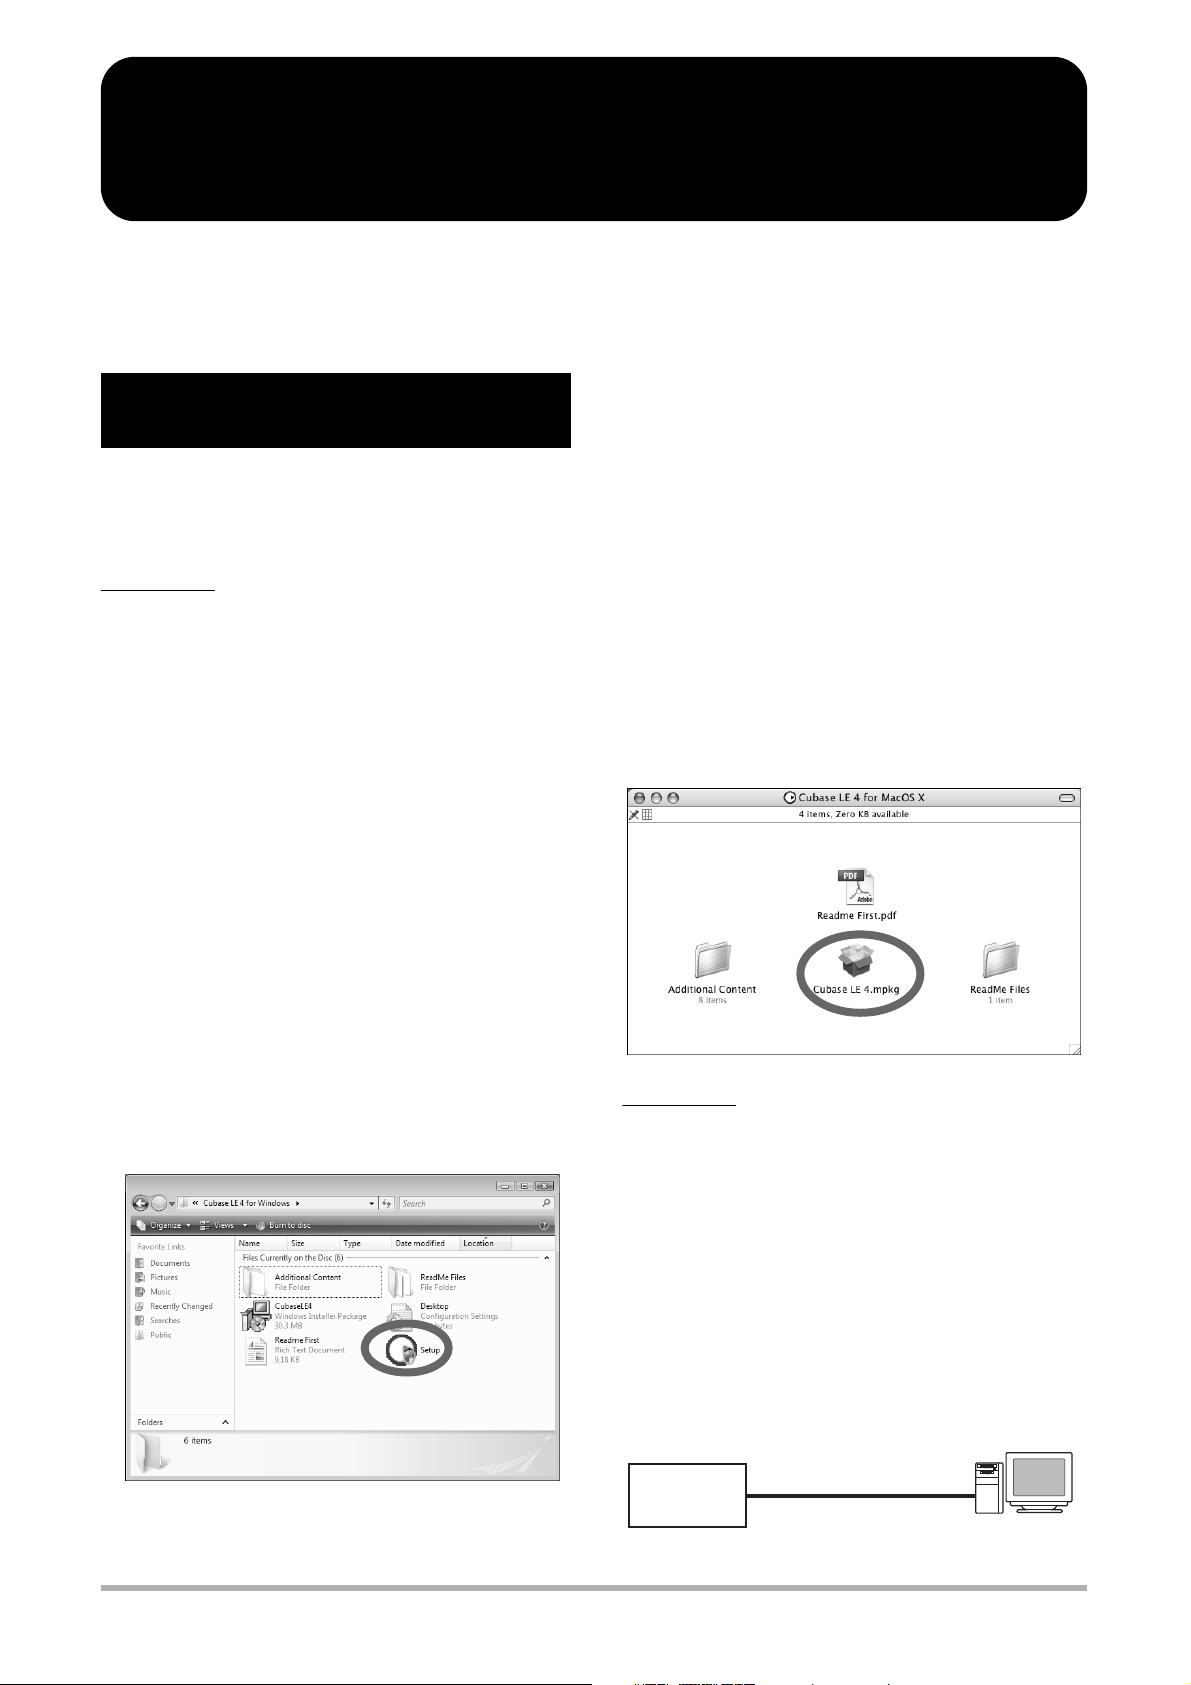
MacOS X
(1) Insert the supplied "Cubase LE 4" DVD-ROM
into the DVD drive of the Macintosh.
(2) The contents of the DVD-ROM appear
automatically. Open the "Cubase LE 4 for
MacOS X" folder and double-click on the
"Cubase LE 4.mpkg" file to start the installation
process.
If nothing happens when you insert the DVD-ROM, doubleclick on the "Cubase LE 4" icon shown on the desktop.
(3) When the contents of the DVD-ROM are shown,
open the "Cubase LE 4 for Windows" folder and
double-click on the "Setup.exe" file to start the
installation process.
If nothing happens when you insert the DVD-ROM, open the
Start menu and select "Computer" ("My Computer" in
Cubase LE 4 Installation Guide/Control Surface Operation Guide
NOTE
When the installation of Cubase LE 4 is complete, a screen
asking about installation of activation (software license
authentication) management software appears. Install this
software, because it is required for registering Cubase LE 4.
2.
Connect the HD8/HD16 to the computer.
You can connect the HD8/HD16 either via USB or via the
MIDI IN/OUT connectors. (If you use MIDI, the computer
must be equipped with a MIDI interface.)
Using USB
HD8/HD16
USB port
USB port
USB cable
Computer
1
Page 2
REC UTILITY 4/10
>SYSTEM
SYSTEM 1/7
>FOOT SWITCH
Control Surface
USB
Stat:Mute Bank:1
PAN
CTRLR SETUP 1/1
>MODE SELECT
Mode Select
Generic Remote
■
Cubase LE 4 Installation Guide/ Control Surface Operation Guide
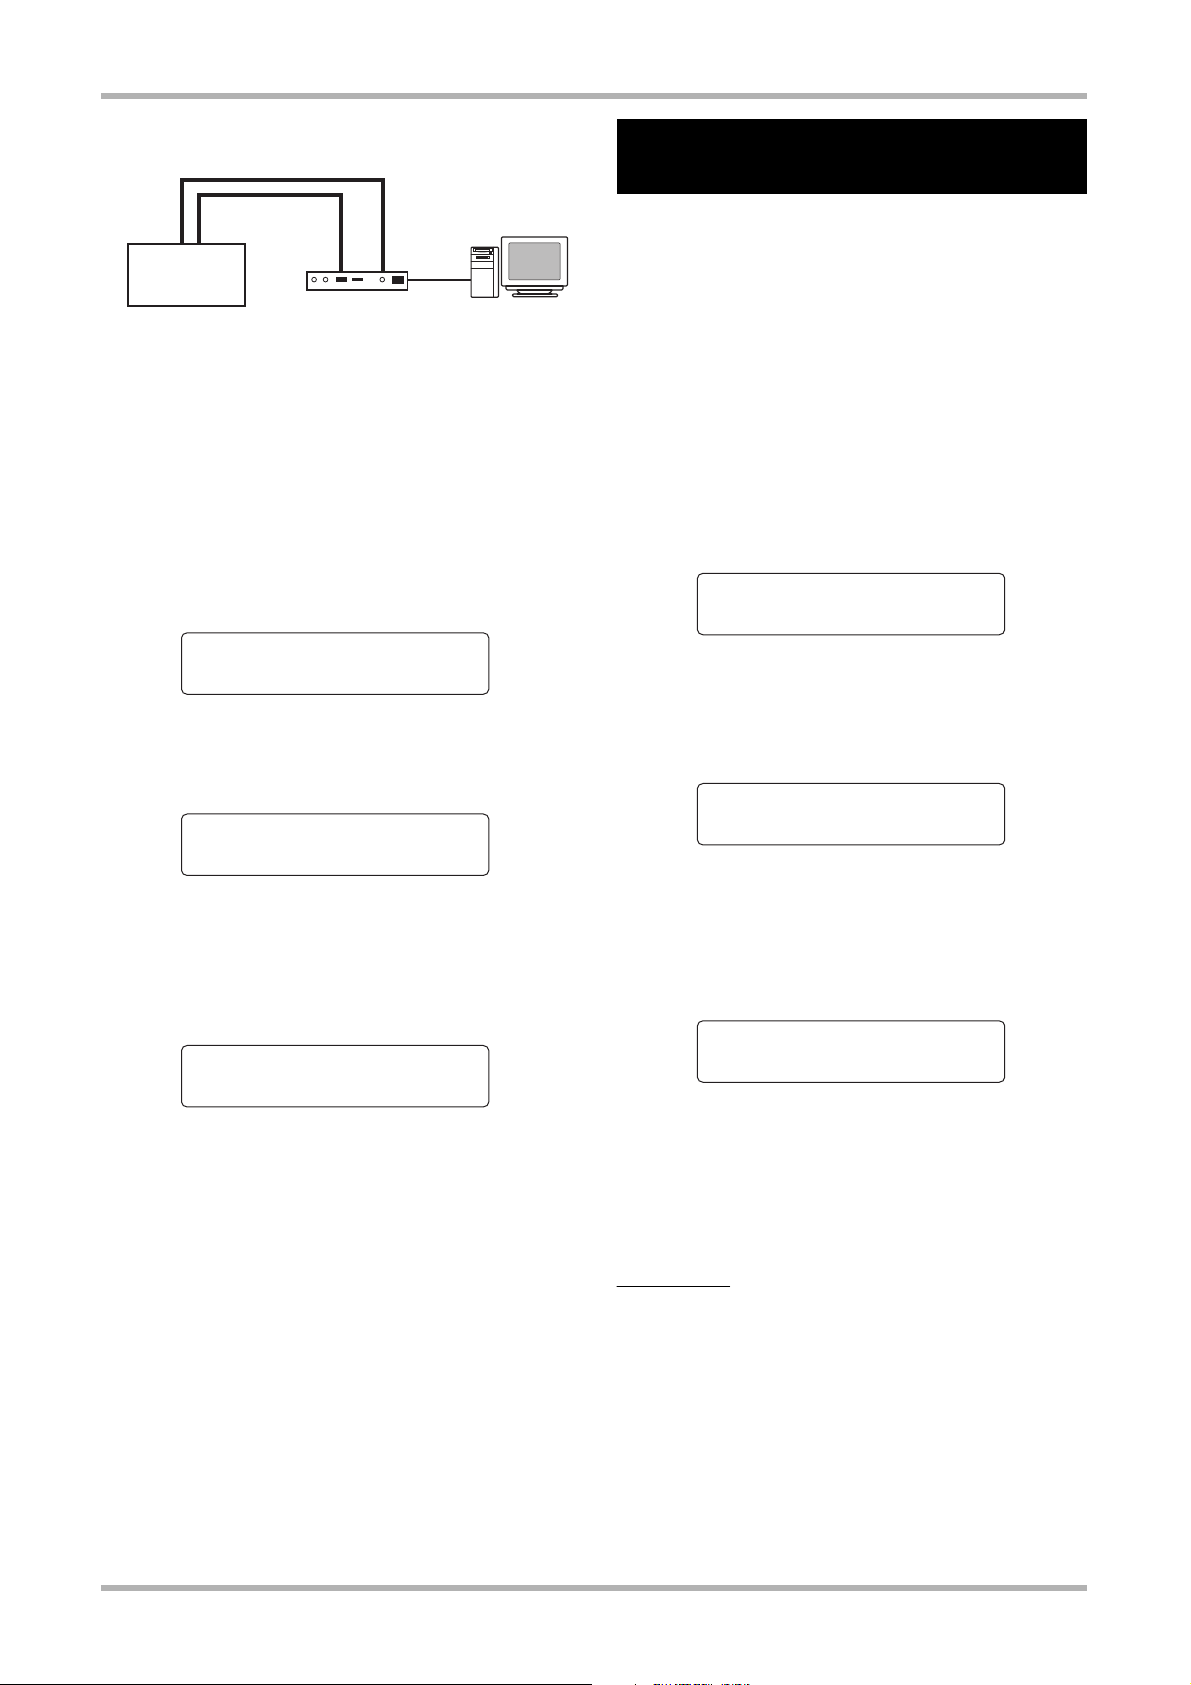
Using MIDI IN/OUT connectors
MIDI IN
connector
3.
4.
(1) From the main screen, press the [PROJECT/
UTILITY] key and then use the cursor left/right
keys to bring up the indication "SYSTEM" on the
second line of the display.
MIDI OUT
connector
HD8/HD16
Turn power to the HD8/HD16 on.
Perform the following steps at the HD8/HD16
to select the connection type.
MIDI IN
connector
MIDI interface
MIDI OUT
connector
Computer
REC UTILITY 4/10
>SYSTEM
(2) Press the [ENTER] key.
The display indication changes as follows.
Switching the HD8/HD16 to
control surface mode
To switch the HD8/HD16 to control surface mode, proceed as
follows. Within control surface mode, select "Mackie Control"
as operation mode.
1.
At the main screen of the HD8/HD16, hold
down the [SHIFT] key and press pad 2
(CONTROL SURFACE).
An indication for confirming the switch to control surface
mode appears.
2.
Press the [ENTER] key.
The HD8/HD16 switches to control surface mode.
Stat:Mute Bank:1
PAN
3.
Press the [FUNCTION] key.
The CTRLR SETUP screen for making control surface mode
settings appears.
SYSTEM 1/7
>FOOT SWITCH
(3) Use the cursor left/right keys to bring up the
indication "CONTROL SURFACE" on the
second line of the display, and press the
[ENTER] key.
Control Surface
USB
This indication shows the currently selected connection type.
(4) Turn the dial to select "USB" (connection via
USB port) or "MIDI I/O" (connection via MIDI IN/
OUT connectors). The remote operation signals
will be sent via the interface selected here.
(5) Press the [EXIT] key repeatedly to return to the
main screen.
CTRLR SETUP 1/1
>MODE SELECT
4.
Verify that the indication "MODE SELECT" is
shown on the second line of the display, and
press the [ENTER] key.
The control surface mode selection screen appears.
Mode Select
Generic Remote
This screen allows selection of two operation modes.
• Generic Remote
This setting serves for controlling Cubase LE in Generic
Remote mode.
NOTE
It is not possible to operate Cubase LE 4 in Generic Remote
mode. Be sure to select Mackie Control mode.
• Mackie Control
With this setting, the HD8/HD16 emulates the operation of a
Mackie Control.
5.
Turn the dial to select "Mackie Control" and
press the [ENTER] key.
2
Cubase LE 4 Installation Guide/Control Surface Operation Guide
Page 3
CUBASE
:Rec
CTRLR SETUP 1/2
>MODE SELECT
File Select
CUBASE.BDF
■
■
Cubase LE 4 Installation Guide/ Control Surface Operation Guide
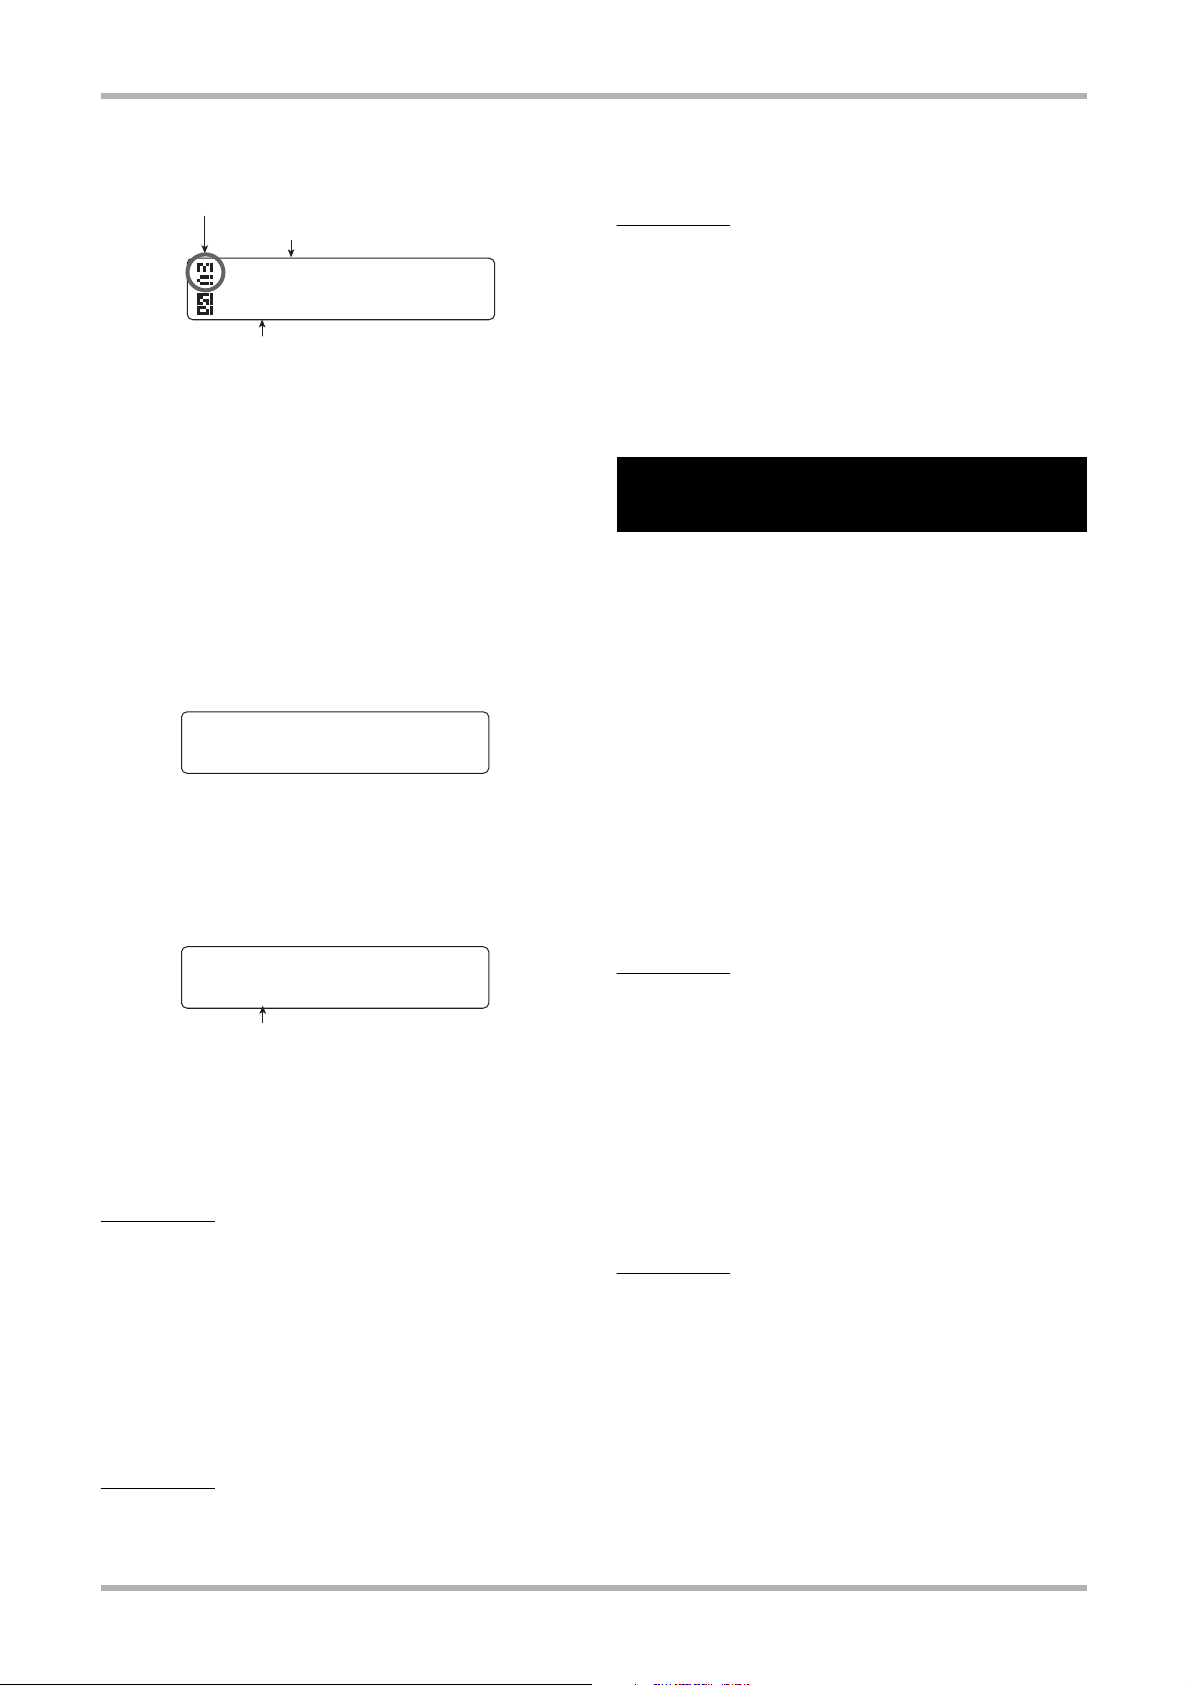
The HD8/HD16 is now set to Mackie Control mode, and the
display changes as follows.
Icon indicating Mackie Control mode
Currently loaded key mapping file
CUBASE
:Rec
Function assigned to status key
The first line of the display shows the Mackie Control mode
icon and the currently loaded key mapping file (a setup file that
assigns the control keys of the HD8/HD16 to DAW software
functions). The second line shows the function currently
assigned to the status key.
6.
Next, load a key mapping file for Cubase LE
4, as follows.
(1) Press the [FUNCTION] key to bring up the
control surface setup screen.
CTRLR SETUP 1/2
>MODE SELECT
(2) Use the cursor left/right keys to bring up the
indication "FILE SELECT" on the display, and
press the [ENTER] key.
The key mapping file selection screen appears.
File Select
CUBASE.BDF
Key mapping file name
built in. Regarding files for other DAW software applications,
please visit the web site of ZOOM Corporation (http://
www.zoom.co.jp).
NOTE
• It is not possible to operate Cubase LE 4 in Generic Remote
mode. Be sure to select Mackie Control mode.
• If the above screen appears when selecting control surface
mode in step 2, Mackie Control mode is already selected. In this
case, steps 3 - 5 are not required.
Starting Cubase LE 4 and
making settings
Start Cubase LE 4 as described below and select Mackie
Control as control surface type.
1.
Start Cubase LE 4.
The startup procedure differs, depending on the platform and
operating system.
Windows Vista/XP
Double-click on the Cubase LE 4 icon that was placed on the
desktop during installation.
MacOS X
Double-click on the Cubase LE 4 icon that was placed in the
"Applications" folder during installation.
NOTE
Be sure to start Cubase LE 4 only after setting the HD8/HD16
to control surface mode.
(3) Turn the dial to select the Cubase LE 4 key
mapping file "CUBASE.BDF", and press the
[ENTER] key.
The key mapping file is loaded.
NOTE
• When Mackie Control mode and USB mass storage mode are
being used simultaneously, a key mapping file cannot be loaded.
• If you want to use Mackie Control mode and USB mass storage
mode simultaneously, load the key mapping file first and then
activate the USB mass storage mode.
• For details on simultaneous use of the USB mass storage mode,
see the section "Using Mass Storage Mode and Control Surface
Mode Simultaneously" in the operation manual of the HD8/HD16.
HINT
The HD8/HD16 comes with a key mapping file for Cubase LE 4
Cubase LE 4 Installation Guide/Control Surface Operation Guide
To continue using Cubase LE 4, a process called activation
(license authentication and product registration) is necessary.
When you start Cubase LE 4, a screen offering to register the
product will appear. Select "Register Now". A web site for
registration will open in your Internet browser. Follow the
instructions on that page to register and activate the product.
HINT
The subsequent steps are the same for Windows Vista/XP and
MacOS X. The screen examples shown here are from Windows
Vista.
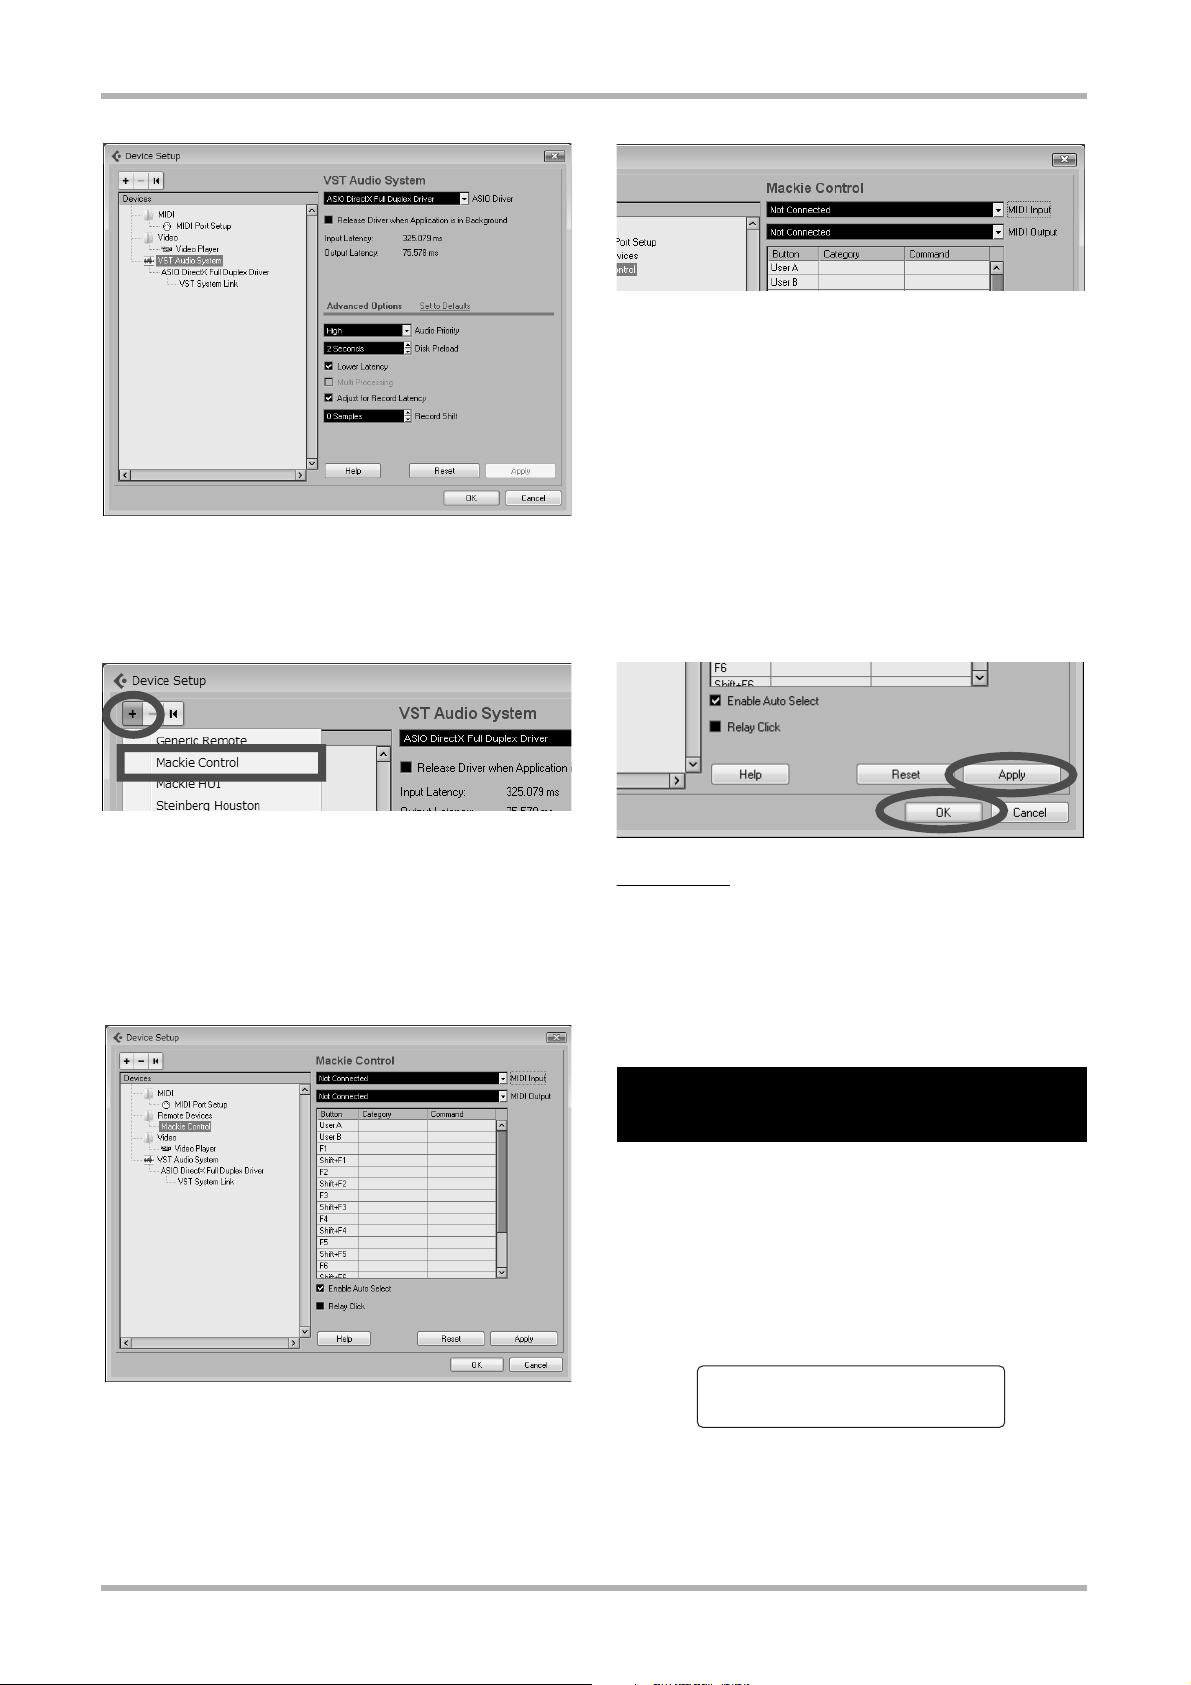
2.
After starting Cubase LE 4, select "Device
Setup..." from the "Devices" menu.
The device setup window for selecting the remote device type
appears.
3
Page 4
Cubase LE 4 Installation Guide/ Control Surface Operation Guide
Control Surface
Terminate?
3.
Click the "+" button at the top left of the
device setup window and select "Mackie
Control" from the menu that appears.
■
■
When connected via USB
Select "HD8" or "HD16" (or "USB Audio Device" in Windows
XP) in the MIDI Input and MIDI Output pull-down menus.
When connected via MIDI
Select the corresponding MIDI port of the MIDI interface or
similar.
6.
Click the "Apply" button and then click the
"OK" button.
The device setup window closes. The HD8/HD16 can now be
used to remotely control the Cubase LE 4 application.
This will add the "Mackie Control" entry to the remote device
list on the left side of the device setup window.
4.
Select "Mackie Control" in the list on the left
side of the device setup window.
The display changes as follows.
5.
Use the MIDI Input port and MIDI Output port
pull-down menus at the right side of the
device setup window to select the MIDI port
to which the HD8/HD16 is connected.
HINT
The settings are automatically saved by Cubase LE 4. When
you start Cubase LE 4 the next time, the setup procedure is no
longer necessary.
Terminating the control
surface mode
To terminate the control surface mode and return the HD8/
HD16 to normal operation, proceed as follows.
1.
From the main screen, hold down the [SHIFT]
key and press pad 2 (CONTROL SURFACE).
The display indication changes as follows.
Control Surface
Terminate?
2.
Press the [ENTER] key.
The main screen appears again and the HD8/HD16 resumes
normal recorder operation.
4
Cubase LE 4 Installation Guide/Control Surface Operation Guide
Page 5
CUBASE
:Rec
Cubase LE 4 Installation Guide/ Control Surface Operation Guide
●
●
●
Using the control surface
mode
This section describes use of the HD8/HD16 when the unit is
switched to control surface mode.
About the control surface mode
When the HD8/HD16 is switched to control surface mode and
Mackie Control has been selected as operation mode, the keys
and faders of the HD8/HD16 can be used to remotely control
the transport and mixing functions of Cubase LE 4.
When you switch the HD8/HD16 to control surface mode and
select Mackie Control as operation mode, the display
indication changes as follows.
CUBASE
:Rec
In control surface mode, the HD8/HD16 recorder functions are
not available, and the knobs and keys on the panel have special
functions for Cubase LE 4. The level meters of the HD8/HD16
show the fader positions for the Cubase LE 4 tracks.
For a list of functions assigned to the keys and knobs of the
HD8/HD16 in Mackie Control mode, see the table "Control
surface mode functions at a glance" on page 8 of this
document.
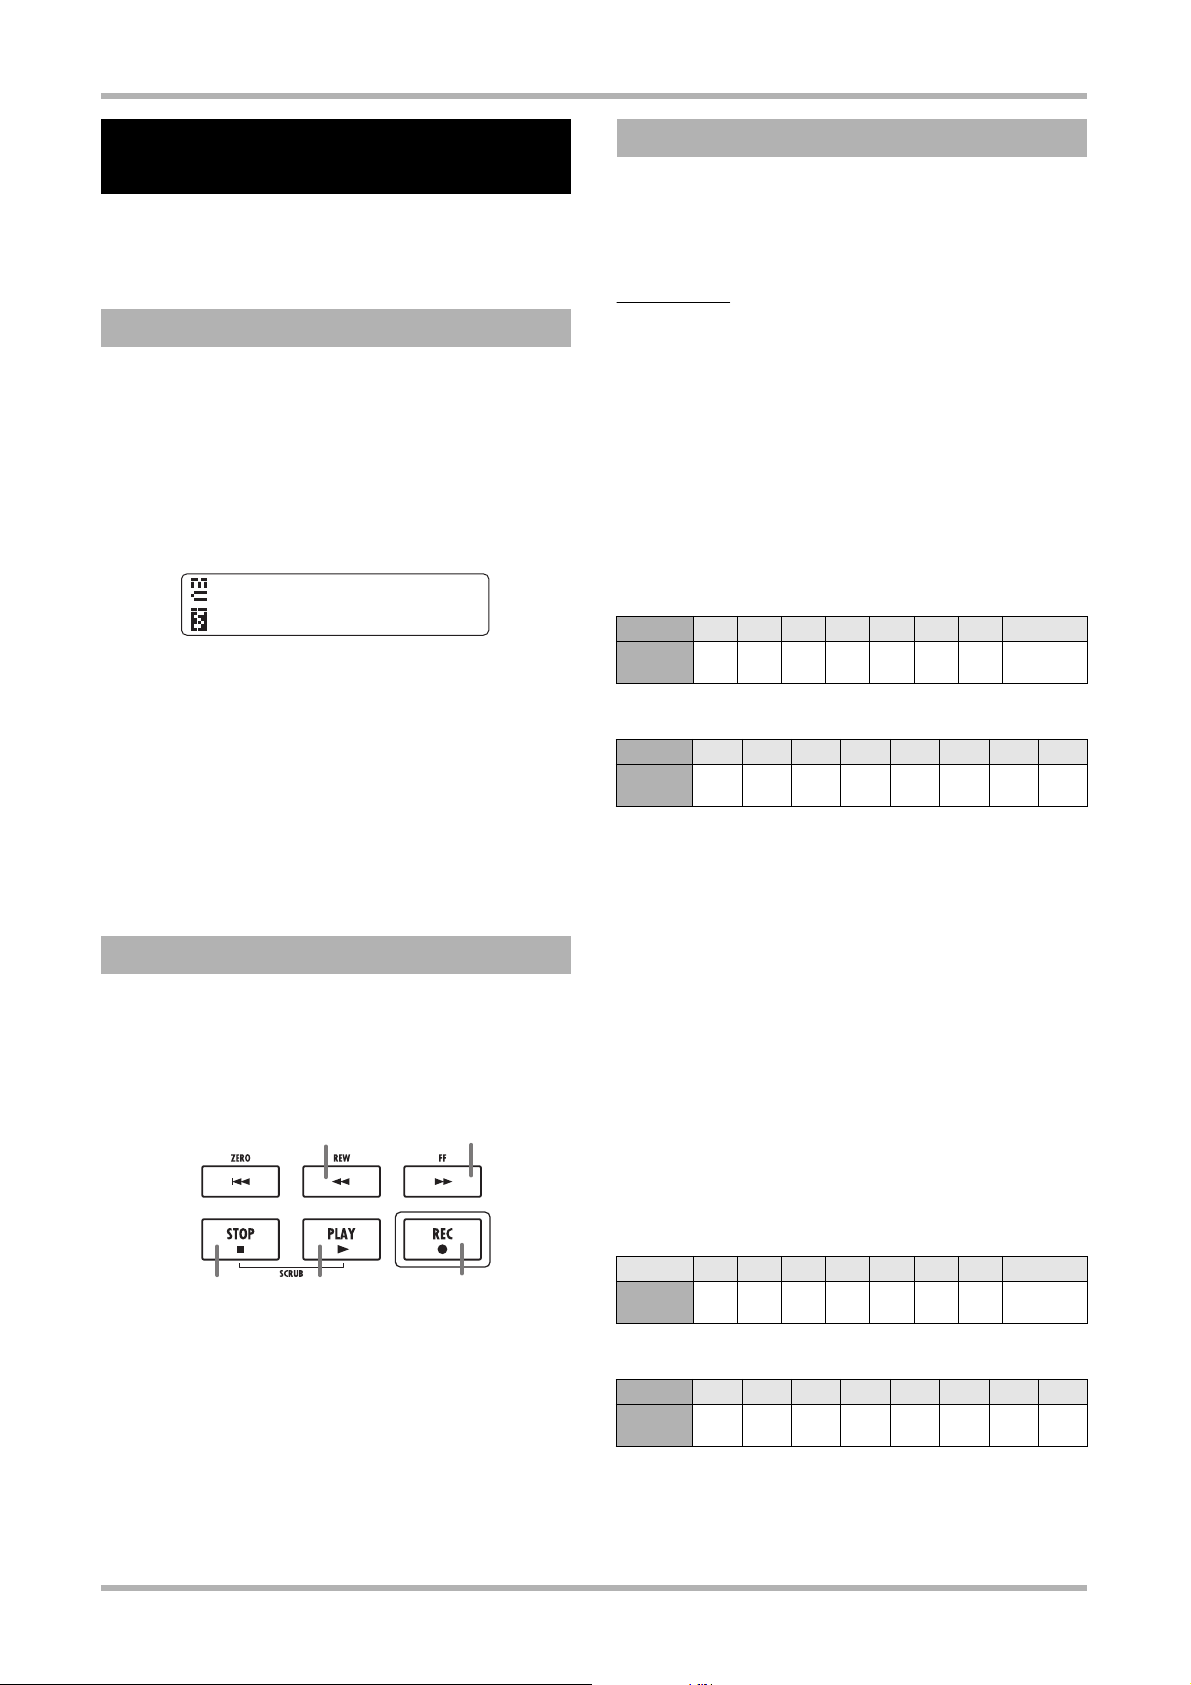
Operating the transport
When the HD8/HD16 is in control surface mode (operation
mode: Mackie Control), the keys of the transport section
control the following Cubase LE 4 functions.
REW [T] key
Rewind
STOP [P] key
Stop
Regarding the Cubase LE 4 functions of other keys in the
function/transport section, see the table "Control surface mode
functions at a glance" on page 8 of this document.
PLAY [R] key
Play
FF [Y] key
Fast forward
REC [O] key
Record
About banks
When the HD8/HD16 is in control surface mode (operation
mode: Mackie Control), the fader section controls (faders,
status keys, parameter knobs) can be used to adjust major
parameters of Cubase LE 4.
NOTE
With the HD8, the [RHYTHM] fader, [RHYTHM] status key, and
[RHYTHM] parameter knob can also be used, but with the
HD16, these controls are "not assigned".
A group of tracks operated by the fader section controls
(faders, status keys, parameter knobs) is called a "bank".
In Mackie Control mode, one bank can comprise up to 8 tracks.
For example, if fader 1 is assigned to track 1 of Cubase LE 4,
tracks 1 to 8 will be assigned as listed in the tables below.
HD8
Fader
Controlled
track
HD16
Fader
Controlled
track
The following keys can be used to change the track (channel)
assignment of the fader section controls.
[AUTO PUNCH IN/OUT] key (<CHANNEL)
Shifts the track (channel) assignment of the fader section
controls one position back.
● [A-B REPEAT] key (CHANNEL>)
Shifts the track (channel) assignment of the fader section
controls one position forward.
For example, if tracks 1 to 8 are currently assigned as shown
in the tables above, pressing the [A-B REPEAT] key
(CHANNEL>) once will change the assignment as listed in the
tables below, so that tracks 2 - 9 are now assigned.
● HD8
Fader
Controlled
track
● HD16
Fader
Controlled
track
● [TRACK PARAMETER] key (<BANK)
Shifts the track (channel) assignment of the fader section
controls back by 8 tracks.
1 2 3 4 5 6 7/8 [RHYTHM]
Tr. 1 Tr. 2 Tr. 3 Tr. 4 Tr. 5 Tr. 6 Tr. 7 Tr. 8
1 2 3 4 5 6 7 8
Tr. 1 Tr. 2 Tr. 3 Tr. 4 Tr. 5 Tr. 6 Tr. 7 Tr. 8
1 2 3 4 5 6 7/8
Tr. 2 Tr. 3 Tr. 4 Tr. 5 Tr. 6 Tr. 7 Tr. 8 Tr.9
1 2 3 4 5 6 7 8
Tr. 2 Tr. 3 Tr. 4 Tr. 5Tr. 6Tr. 7Tr. 8Tr.9
[RHYTHM]
Cubase LE 4 Installation Guide/Control Surface Operation Guide
5
Page 6

Cubase LE 4 Installation Guide/ Control Surface Operation Guide
● [INPUT SOURCE] key (BANK>)
Shifts the track (channel) assignment of the fader section
controls forward by 8 tracks.
For example, if tracks 2 to 9 are currently assigned as shown
in the tables on the preceding page, pressing the [INPUT
SOURCE] key (BANK>) once will change the assignment as
listed in the tables below.
● HD8
Fader
Controlled
track
● HD16
Fader
Controlled
track
1 2 3 4 5 6 7/8 [RHYTHM]
Tr. 10 Tr. 11 Tr. 12 Tr. 13 Tr. 14 Tr. 15 Tr. 16 Tr. 17
1 2 3 4 5 6 7 8
Tr. 10 Tr. 11 Tr. 12 Tr. 13 Tr. 14 Tr. 15 Tr. 16 Tr. 17
Operating the fader section
The faders, parameter knobs, and status keys of the fader
section can be used as follows to adjust track levels and
panning, and to switch mute/record standby/solo on and off.
1. Assign the Cubase LE 4 track (channel) to
operate to the fader section of the HD8/
HD16.
For information about assigning tracks, see the section "About
banks" on page 5.
2. Use the fader and parameter knob to adjust
the track level and panning.
The fader and parameter knob control the level and panning
value of the assigned track. The [MASTER] fader can be used
to adjust the master volume.
NOTE
With the HD16, the [RHYTHM] fader and [RHYTHM] parameter
knob are not assigned (not used).
3. The function assigned to the status key can
be selected by pressing the [SELECT] key
repeatedly.
Available functions to be controlled are Mute, Rec (recording
standby), and Solo. Each push of the [SELECT] key cycles the
function in the sequence Mute → Rec → Solo. Once the
selection is made, the status key then switches the respective
function on and off.
4. Press the status key for the respective track
to switch the selected function on and off.
Importing audio data into
Cubase LE 4
When the HD8/HD16 is connected to the computer via a USB
cable and the HD8/HD16 is set to mass storage mode, audio
data of the HD8/HD16 can be imported into Cubase LE 4
audio tracks as WAV files.
This section explains how to import audio data of the HD8/
HD16 into Cubase LE 4.
There are two ways to do this:
* Importing by drag & drop
* Using the "Import" command
Importing by drag & drop
1. Connect the computer and the HD8/HD16
with a USB cable.
2. Switch the HD8/HD16 to mass storage mode.
For information on how to do this, see page 161 of the
operation manual.
3. Start Cubase LE 4 and open the project into
which to import the audio data.
4. In the window on the computer screen
showing the hard disk of the HD8/HD16, open
the "TAKE" folder of the project that contains
the desired audio data.
For information on how to do this, see page 162 of the
operation manual.
5. Select the file or files in the "TAKE" folder and
drag & drop them onto the Cubase LE 4
project window.
HINT
The function currently assigned to the status key is shown on
the second line of the display.
6
Cubase LE 4 Installation Guide/Control Surface Operation Guide
Page 7

When you drag & drop files, a window for selecting how to sort
these files in Cubase LE 4 appears.
6. Click on "Different tracks" or "One track" to
select the desired import method.
Normally, you should select "Different tracks". This will cause
tracks to be automatically created as needed according to the
number of imported files. The files are lined up vertically.
When you select "One track", files are lined up horizontally on
a single track.
Cubase LE 4 Installation Guide/ Control Surface Operation Guide
Using the "Import" command
1. Perform steps 1 - 3 of "Importing by drag &
drop" to open the Cubase LE 4 project.
2. From the Cubase LE 4 menus, select "File" →
"Import" → "Audio File".
The "Import Audio" window appears.
3. Select the file or files in the "TAKE" folder of
the desired project and click the "Open"
button.
When you select a file or files, the "Import Options" window
appears.
4. Select the "Copy File to Working Directory"
check box, and click the OK button.
When you have selected the import method, the "Import
Options" window appears.
7. In the "Import Options" window, select the
"Copy Files to Working Directory" check box,
and click the OK button.
The audio data are loaded into Cubase LE 4 tracks.
Cubase LE 4 Installation Guide/Control Surface Operation Guide
A window for selecting how to sort the imported files in
Cubase LE 4 appears.
5. Click on "Different tracks" or "One track" to
select the desired import method.
The audio data are loaded into Cubase LE 4 tracks.
Normally, you should select "Different tracks". This will cause
tracks to be automatically created as needed according to the
number of imported files. The files are lined up vertically.
When you select "One track", files are lined up horizontally on
a single track.
7
Page 8

Cubase LE 4 Installation Guide/ Control Surface Operation Guide
Control surface mode
functions at a glance
HD8/HD16 control
Parameter knob
Parameter knob [RHYTHM]
Status key
Fader section
Function/
transport section
Control section
Status key [RHYTHM]
Fader
Fader [RHYTHM]
Fader [MASTER]
[SELECT] key
[FUNCTION] key
Cursor left/right/up/down keys
Dial
[REW] key
[REW] key + [USB] key
[FF] key
[FF] key + [USB] key
[STOP] key
[PLAY] key
[REC] key
[NEW PROJECT] key
[PROJECT/UTILITY] key
[TRACK PARAMETER] key
[INPUT SOURCE] key
[BOUNCE] key
[SCENE] key
[AUTO PUNCH IN/OUT] key
[A-B REPEAT] key
[CLEAR] key
[CLEAR] key + [USB] key
[MARKER U] key
[MARKER I] key
[MARK] key
[CD-R/RW] key
[CD-R/RW] key + [USB] key
[CONTROL SURFACE] key
[CONTROL SURFACE] key + [USB] key
[CONTROL SURFACE] key + [SHIFT] key
[USB] key
[USB] key + [SHIFT] key
[INSERT EFFECT] key
[INSERT EFFECT] key + [USB] key
[CHORUS/DELAY] key
[REVERB] key
[REVERB] key + [USB] key
[PATTERN] key
[PATTERN] key + [USB] key
[SONG] key
[SONG] key + [USB] key
[KIT/PROG] key
The table below lists the functions that are assigned to the
various controls when the HD8/HD16 is in control surface
mode (operation mode: Mackie Control).
Supplied template sample entry
Adjusts panning for respective track
HD8: Adjusts panning for respective track
HD16: Not assigned
Switch Mute, Rec, Solo on/off for respective
track
HD8: Switch Mute, Rec, Solo on/off for
respective track
HD16: Not assigned
Adjust volume of respective track
HD8: Adjust volume of respective track
HD16: Not assigned
Adjust master volume
Switch status key target
Open CTRLR SETUP menu
Same as cursor keys on computer
Move project cursor position
Rewind
Move cursor to beginning of project (zero locate)
Fast forward
Move cursor to end of project
Stop
Play
Record
CYCLE
PUNCH
< BANK
BANK >
MIXER
PROJECT
< CHANNEL
CHANNEL >
SAVE
PREVIOUS
NEXT
ADD
LEFT
RIGHT
MC SHIFT
UNDO
REDO
SOLO DEFEAT
READ
WRITE
FLIP
Switch cycle mode on/off
Switch punch-in on/off
Switch to previous bank
Switch to next bank
Open/close mixer window
Make project window active
Switch to previous channel
Switch to next channel
Save project
Save as new project
Go to previous marker
Go to next marker
Add marker
Move project cursor to punch-in point
Set left-side locator (punch-in point)
Move project cursor to punch-out point
Set right-side locator (punch-out point)
Terminate control surface mode
MC (Mackie Control) shift key
Enable/disable mass storage mode
Undo
Open "Edit History" dialog
Redo
Cancel Solo for all channels
Cancel Mute for all channels
Switch automation read on/off
Switch automation read for all channels on/off
Switch automation write on/off
Switch automation write for all channels on/off
Flip fader and parameter knob functions
Assigned function
8
Cubase LE 4 Installation Guide/Control Surface Operation Guide
rev1.0
Page 9

REC UTILITY 4/10
>SYSTEM
SYSTEM 1/7
>FOOT SWITCH
Control Surface
USB
■
■
■
■
Cubase LE Installation Guide/
Control Surface Operation Guide
This document explains how to install the Cubase LE software on a computer and how to use the control surface mode of the HD8/
HD16.
Cubase LE installation and
setup
Perform the following steps to install Cubase LE on a
computer and set up the HD8/HD16 to function as a control
surface for Cubase LE.
NOTE
For the following procedure, you will need the "Cubase LE" CD
and the "Factory Recover CD" supplied with the HD8/HD16.
1.
Use the supplied "Cubase LE" CD to install
the Cubase LE application on your
computer.
The procedure differs, depending on the operating system.
Windows XP
When you insert the supplied "Cubase LE" CD into the
CD-ROM drive of the computer, the Installer starts up
automatically. Follow the on-screen instructions to install
Cubase LE.
MacOS X
When you insert the supplied "Cubase LE" CD into the
CD-ROM drive of the Macintosh, a "Cubase LE" icon
appears on the desktop. Double-click on the icon to open it
and then use the Installer to install the software.
Using USB
HD8/HD16
Using MIDI IN/OUT connectors
MIDI IN
connector
HD8/HD16
3.
Turn power to the HD8/HD16 on.
4.
Perform the following steps at the HD8/
HD16 to select the connection type.
(1) From the main screen, press the [PROJECT/
UTILITY] key and then use the cursor left/right
keys to bring up the indication "SYSTEM" on the
second line of the display.
USB port
MIDI OUT
connector
USB cable
MIDI IN
connector
MIDI interface
USB port
MIDI OUT
connector
Computer
Computer
REC UTILITY 4/10
>SYSTEM
2.
Connect the HD8/HD16 to the computer.
You can connect the HD8/HD16 either via USB or via the
MIDI IN/OUT connectors. (If you use MIDI, the computer
must be equipped with a MIDI interface.)
Cubase LE Installation Guide/Control Surface Operation Guide
(2) Press the [ENTER] key.
The display indication changes as follows.
SYSTEM 1/7
>FOOT SWITCH
(3) Use the cursor left/right keys to bring up the
indication "Control Surface" on the second line
of the display, and press the [ENTER] key.
The currently selected connection type is shown.
Control Surface
USB
1
Page 10

Stat:Mute Bank:1
PAN
"Import" button
■
■
Cubase LE Installation Guide/ Control Surface Operation Guide
(4) Turn the dial to select "USB" (connection via
USB port) or "MIDI I/O" (connection via MIDI IN/
OUT connectors). The remote operation signals
will be sent via the interface selected here.
(5) Press the [EXIT] key repeatedly to return to the
main screen.
5.
Perform the following steps at the HD8/HD16
to activate the control surface mode.
(1) From the main screen, hold down the [SHIFT]
key and press pad 2 (CONTROL SURFACE).
A confirmation screen for switching to control surface
mode appears.
(2) Press the [ENTER] key.
The HD8/HD16 switches to control surface mode, and the
display indication changes as follows.
Stat:Mute Bank:1
PAN
6.
Start Cubase LE.
The startup procedure differs, depending on the operating
system.
Windows XP
Double-click on the Cubase LE icon that was placed on the
desktop during installation. A window appears, asking
whether to test the audio I/O ports. Select "Yes" to perform
the test.
In the right side of the device setup window, select "Generic
Remote" and click the "Add" button. This will add the
"Generic Remote" entry to the list on the left side of the device
setup window.
8.
Select "Generic Remote" in the list on the left
side of the device setup window, and click
the "Setup" tab.
The display indication changes as follows.
MacOS X
Double-click on the Cubase LE icon that was placed in the
"Applications" folder during installation.
NOTE
Be sure to start Cubase LE only after activating the control
surface mode at the HD8/HD16.
The following steps are the same for Windows XP and MacOS
X. The screen examples shown here are from Windows XP.
7.
After starting Cubase LE, select "Device
Setup..." from the "Devices" menu, and click
the "Add/Remove" tab.
The device setup window gives access to the settings required
for using the connected HD8/HD16 as control surface.
9.
Click the "Import"button.
The "Import Generic Remote" window appears.
10
.
Remove the "Cubase LE" CD from the CDROM drive of the computer and insert the
"Factory Recover CD".
2
Cubase LE Installation Guide/Control Surface Operation Guide
Page 11

11
Control Surface
Terminate?
.
Use drag & drop to copy the folder
"CTRL_SF" from the "Factory Recover CD" to
the hard disk of the computer.
12
.
In the "Import Generic Remote"window,
select the setup file located in the "CTRL_SF"
folder copied to the hard disk of the
computer. Then click the "Open" button.
The name of the setup file is as follows.
HD8 setup file: . . . . . CBLE_8.xml
HD16 setup file: . . . . CBLE_16.xml
■
■
Cubase LE Installation Guide/ Control Surface Operation Guide
When using MIDI
Select the corresponding MIDI port of the interface.
14
.
Click the "Apply" button and then click the
"OK" button.
The device setup window closes. The HD8/HD16 can now be
used to remotely control the Cubase LE application.
Click the "Open" button to load the Generic Remote setup file.
The contents of the file are reflected in the setup window.
13
.
Use the MIDI input port and MIDI output port
pull-down menus of Cubase LE to select the
MIDI port to which the HD8/HD16 is
connected.
HINT
The settings are automatically saved by Cubase LE. When you
start Cubase LE the next time, the setup procedure is no longer
necessary.
Terminating the control surface mode
To terminate the control surface mode and return the HD8/
HD16 to normal operation, proceed as follows.
1.
From the main screen, hold down the [SHIFT]
key and press pad 2 (CONTROL SURFACE).
The display indication changes as follows.
Control Surface
Terminate?
When using USB
Select MIDI input and output port from the following.
●
Windows
XP . . . . . . . " USB "
VISTA . . . . "
Macintosh
●
Mac OS X 10.2 and later. . . . " MIDI "
Cubase LE Installation Guide/Control Surface Operation Guide
MIDI "
2.
Press the [ENTER] key.
The main screen appears again and the HD8/HD16 resumes
normal recorder operation.
3
Page 12

Cubase LE Installation Guide/ Control Surface Operation Guide
Quick Guide: Importing
audio data into Cubase LE
This section explains how to import audio data of the HD8/HD16
into Cubase LE as WAV files. There are two ways to do this:
* Importing by drag & drop
* Using the "Import" command
Importing by drag & drop
1.
Connect the computer and the HD8/HD16
with a USB cable.
2.
Switch the HD8/HD16 to mass storage mode.
For information on how to do this, see page 161 of the
operation manual.
3.
Start Cubase LE and open the project into
which to import the audio data.
4.
In the window on the computer screen showing
the hard disk of the HD8/HD16, open the
"TAKE" folder of the project that contains the
desired audio data. For information on how to
do this, see page 162 of the operation manual.
The audio data are loaded into Cubase LE tracks.
1.
2.
The "Import Audio" window appears.
3.
Using the "Import" command
Perform steps 1 - 3 of "Importing by drag &
drop" to open the Cubase LE project.
From the Cubase LE menus, select "File"
"Import"
Select the file or files in the "TAKE" folder of the
desired project and click the "Open" button.
→
"Audio File".
→
5.
Select the file or files in the "TAKE" folder and
drag & drop them onto the Cubase LE project
window.
The "Import Options" window appears.
6.
In the "Import Options" window, select the
"Copy Files to Working Directory" check box,
and click the OK button.
The "Import Options" window appears.
4.
Select the "Copy File to Working Directory"
check box, and click the OK button.
The audio data are loaded into Cubase LE tracks.
4
Cubase LE Installation Guide/Control Surface Operation Guide
Page 13

Stat:Mute Bank:1
PAN
Cubase LE Installation Guide/ Control Surface Operation Guide
Using the control surface
mode
This section describes use of the HD8/HD16 in control surface
mode.
NOTE
The control surface functions described here are available only
when the setup file provided by ZOOM has been loaded into
Cubase LE.
About the control surface mode
When you switch the HD8/HD16 to control surface mode, the
keys and faders of the HD8/HD16 can be used to remotely
control the transport and mixing functions of Cubase LE.
When you switch the HD8/HD16 to control surface mode, the
display indication changes as follows.
Stat:Mute Bank:1
PAN
NOTE
While the HD8/HD16 is in control surface mode, the recorder
does not operate.
Operating the transport
When the HD8/HD16 is in control surface mode, the keys of
the transport section control the following Cubase LE
functions.
ZERO [U] key
Move cursor to
beginning of project
STOP [P] key
Stop
Regarding the functions of other keys in the function/transport
section, see the table "Control surface mode functions at a
glance" on page 8 of this document.
REW [T] key
Rewind
PLAY [R] key
Play
FF [Y] key
Fast forward
REC [O] key
Record
Operating the fader section
When the HD8/HD16 is in control surface mode, the controls
of the fader section (faders, status keys, parameter knobs) can
be used to adjust major parameters of Cubase LE. Regarding
the functions of the controls, see the table "Control surface
mode functions at a glance" on page 8 of this document.
In control surface mode, the HD8/HD16 recorder functions are
not available, and the knobs and keys on the panel have special
functions for Cubase LE. The level meter of the HD8/HD16
shows the fader positions for the Cubase LE tracks.
For a list of functions assigned to the keys and knobs of the
HD8/HD16 in control surface mode, see the table "Control
surface mode functions at a glance" on page 8 of this
document.
NOTE
With the HD8, the [RHYTHM] fader, status key, and parameter
knob are also used. With the HD16, all of these are "not
assigned".
Switching banks operated by the fader
section
A group of tracks operated by the controls (faders, status keys,
parameter knobs) of the fader section is called a "bank". By
switching the bank, you can control more tracks of Cubase LE.
With the HD8, there are four banks (1 - 4), and with the HD16
there are three banks (1 - 3). The table on the next page shows
the Cubase LE track numbers that are assigned to the controls
for each bank.
Cubase LE Installation Guide/Control Surface Operation Guide
5
Page 14

Cubase LE Installation Guide/ Control Surface Operation Guide
Stat:Mute Bank:3
EQ1:Freq
r
Stat:Mute Bank:3
EQ1:Freq
Stat:Mute Bank:1
EQ1:Freq
Banks available with HD8
Controls
Bank 1
Bank 2
Bank 3
Bank 4
Banks available with HD16
Controls
Bank 1
Bank 2
Bank 3
Controls
Bank 1
Bank 2
Bank 3
For example, when bank 1 is selected with the HD8, tracks 1 8 of Cubase LE can be controlled. Switching to bank 2 gives
access to tracks 9 - 16.
●
How banks are organized (HD8)
1 2 3 4 5 6 7/8
Tr. 1 Tr. 2Tr. 3Tr. 4 Tr. 5 Tr. 6 Tr. 7 Tr. 8
Tr. 9 Tr. 10 Tr. 11 Tr. 12 Tr. 13 Tr. 14 Tr. 15 Tr. 16
Tr. 17 Tr. 18 Tr. 19 Tr. 20 Tr. 21 Tr. 22 Tr. 23 Tr. 24
Tr. 25 Tr. 26 Tr. 27 Tr. 28 Tr. 29 Tr. 30 Tr. 31 Tr. 32
1 2 3 4 5 6
Tr. 1 Tr. 2Tr. 3Tr. 4Tr. 5Tr. 6
Tr. 13 Tr. 14 Tr. 15 Tr. 16 Tr. 17 Tr. 18
Tr. 25 Tr. 26 Tr. 27 Tr. 28 Tr. 29 Tr. 30
7 8 9/10 11/12 13/14 15/16
Tr. 7 Tr. 8 Tr. 9 Tr. 10 Tr. 11 Tr. 12
Tr. 19 Tr. 20 Tr. 21 Tr. 22 Tr. 23 Tr. 24
Tr. 31 Tr. 32 Tr. 33 Tr. 34 Tr. 35 Tr. 36
[RHYTHM]
Selecting a function to control with the
status keys
By using the status keys of the HD8/HD16, Mute, Rec
(recording standby), and Solo on/off for the respective track in
Cubase LE can be controlled. To select which of these
functions is controlled by the status key, proceed as follows.
1. Use the cursor left/right keys to select the
bank that includes the track to control.
The function currently assigned to the status key (Mute, Rec,
Solo) is shown on the left side of the first line of the display.
On/off function assigned to status key
Stat:Mute Bank:3
EQ1:Freq
2. Use the [SELECT] key to select the desired
function.
Each push of the key cycles the status key through the Mute →
Rec → Solo function in turn.
Bank 1
(Tracks 1 – 8)
Bank 2
(Tracks 9 – 16)
Bank 3
(Tracks 17 – 24)
Bank 4
(Tracks 25 – 32)
Use the cursor left/right keys to switch between banks. The
currently selected bank is indicated on the first line of the
display.
Current bank numbe
Stat:Mute Bank:3
EQ1:Freq
3. Press the status key for the target track to
switch the selected function on or off.
Selecting a function to control with the
parameter knob
By using the parameter knobs of the HD8/HD16, panning, EQ,
and effect send level can be adjusted for each track of Cubase
LE. To select which of these functions is controlled by the
knob, proceed as follows.
1. Use the cursor left/right keys to select the
bank that includes the track to control.
The function currently assigned to the parameter knob is
shown on the second line of the display.
Stat:Mute Bank:1
EQ1:Freq
Function assigned to parameter knob
2. Press the key corresponding to the
parameter to adjust.
The table on the next page shows the adjustable Cubase LE
parameters and the corresponding HD8/HD16 keys. Except for
the PAN parameter, you select one of several parameters by
pressing the same key repeatedly.
6
Cubase LE Installation Guide/Control Surface Operation Guide
Page 15

Cubase LE Installation Guide/ Control Surface Operation Guide
Pad Bank
Pad Sense
Normal
MIDI Pad Channel
10ch
HD8/HD16 key Display indication Cubase LE parameter
[TRACK PARAMETER] key
[INPUT SOURCE] key
[BOUNCE] key
[SCENE] key
[AUTO PUNCH IN/OUT] key
[A-B REPEAT] key
For example, pressing the [TRACK PARAMETER] key
repeatedly cycles through the following parameters for
control: SEND1: OnOff → SEND1: Level → SEND2: OnOff
→ SEND2: Level.
SEND1 – SEND4
PAN
EQ1
EQ2
EQ3
EQ4
SEND1 – SEND4 SEND1 – 4 On/Off status and level are shown in turn.
PA N - -
EQ:LOW EQ1 OnOff status, Gain, Freq and Q are shown in turn
EQ:LO MID EQ1 OnOff status, Gain, Freq and Q are shown in turn
EQ:HI MID EQ1 OnOff status, Gain, Freq, and Q are shown in turn
EQ:HI EQ1 OnOff status, Gain, Freq, and Q are shown in turn
3. Turn the parameter knob for the target track
to adjust the parameter.
Using the pads
Also while the HD8/HD16 is in control surface mode, the pad
playing information is output as MIDI messages. In control
surface mode of the HD8/HD16, the following pad settings are
possible.
Switching the pad bank
Parameters accessible through repeated
keypresses
Changing the pad sensitivity
You can adjust the volume that is produced according to the
force with which you hit the pads (pad sensitivity).
1. Hold down the [SHIFT] key and press pad 1
(CD-R/RW).
The display indication changes as follows.
Pad Sense
Normal
Pad sensitivity setting
For information on available settings, see page 125 of the
Operation Manual.
When you switch the pad bank in control surface mode, the set
of note numbers assigned to each bank changes. (For
information on MIDI note numbers for each pad, see page 205
of the Operation Manual.)
1. Hold down the [SHIFT] key and press pad 5
(CHORUS/DELAY).
The display indication changes as follows.
Pad Bank
1
Pad bank number
2. Turn the dial to select the pad bank (1 - 3).
When the setting is complete, press the [EXIT] key.
2. Turn the dial to select the pad sensitivity
settings.
When the setting is complete, press the [EXIT] key to return to
the previous screen.
Setting the MIDI channel
To set the channel for sending MIDI messages, proceed as
follows.
1. Hold down the [SHIFT] key and press pad 6
(REVERB).
The display indication changes as follows.
MIDI Pad Channel
10ch
MIDI channel
2. Turn the dial to select the MIDI channel
(1 - 16).
When the setting is complete, press the [EXIT] key to return to
the previous screen.
Cubase LE Installation Guide/Control Surface Operation Guide
7
Page 16

Cubase LE Installation Guide/ Control Surface Operation Guide
Control surface mode functions
at a glance
NOTE
The control surface functions listed here are available only
when the setup file provided by ZOOM has been loaded into
Cubase LE.
Control Description
Parameter knob
Parameter knob [RHYTHM]
Status key
Fader section
Function/transport section
Control section
Pad section
Status key [RHYTHM]
Status key [MASTER]
Fader
Fader [RHYTHM]
Fader [MASTER]
[SELECT] key
[SOLO] key
Cursor left/right keys
Cursor up key
Cursor down key
[ENTER] key
Dial
ZERO [U] key
REW [T] key
FF [Y] key
STOP [P] key
PLAY [R] key
REC [O] key
[NEW PROJECT] key
[PROJECT/UTILITY] key
[TRACK PARAMETER] key
[INPUT SOURCE] key
[BOUNCE] key
[SCENE] key
[AUTO PUNCH IN/OUT] key
[A-B REPEAT] key
[CLEAR] key
MARKER [U] / [I] keys
[MARK] key
Pads 1 – 9
[CD-R/RW] key
[CONTROL SURFACE] key
[USB] key
[CHORUS/DELAY] key
[REVERB] key
+ [SHIFT] key
Adjusts panning, EQ, and effect send level for
respective track
HD8: Adjusts panning, EQ, and effect send level for
respective track
HD16: Not assigned
Switch Mute, Rec, Solo on/off for respective track
HD8: Switch Mute, Rec, Solo on/off for respective
track
HD16: Not assigned
Not assigned
Adjust volume of respective track
HD8: Adjust volume of respective track
HD16: Not assigned
Adjust master volume
Switch status key target
Open/close mixer
Switch fader section banks
(HD8: 4 banks, HD16: 3 banks)
Navigate up
Navigate down
Move project window to foreground
Move the project cursor position
Return to zero the project cursor position
Rewind
Fast forward
Stop
Play
Record
Switch cycle mode on/off
Switch monitoring on/off
Select SEND as parameter knob target
Select PAN as parameter knob target
Select EQ1 as parameter knob target
Select EQ2 as parameter knob target
Select EQ3 as parameter knob target
Select EQ4 as parameter knob target
Open VST channel settings window
Move cursor to marked position, PI/PO point, or
project start
Mark current cursor position.
Send playing information as MIDI messages
Show HD8/HD16 pad sensitivity adjustment screen
Terminate control surface mode
Enable/disable mass storage mode
Show HD8/HD16 pad bank switching screen
Show HD8/HD16 MIDI channel selection screen
8
Cubase LE Installation Guide/Control Surface Operation Guide
 Loading...