

Page 1
Page 2
SPECIAL MESSAGE SECTION
This product utilizes batteries or an external power supply (adapter).
DO NOT connect this product to any power supply or adapter other
than one described in the manual, on the name plate, or specifically
recommended by Yamaha.
This product should be used only with the components supplied or; a
cart, rack, or stand that is recommended by Yamaha. If a cart, etc., is
used, please observe all safety markings and instructions that accompany the accessory product.
SPECIFICATIONS SUBJECT TO CHANGE:
The information contained in this manual is believed to be correct at the
time of printing. However, Yamaha reserves the right to change or
modify any of the specifications without notice or obligation to update
existing units.
This product, either alone or in combination with an amplifier and headphones or speaker/s, may be capable of producing sound levels that
could cause permanent hearing loss. DO NOT operate for long periods
of time at a high volume level or at a level that is uncomfortable. If you
experience any hearing loss or ringing in the ears, you should consult
an audiologist.
IMPORTANT: The louder the sound, the shorter the time period before
damage occurs.
NOTICE:
Service charges incurred due to a lack of knowledge relating to how a
function or effect works (when the unit is operating as designed) are not
covered by the manufacturer’s warranty, and are therefore the owners
responsibility. Please study this manual carefully and consult your
dealer before requesting service.
ENVIRONMENTAL ISSUES:
Yamaha strives to produce products that are both user safe and environmentally friendly. We sincerely believe that our products and the
production methods used to produce them, meet these goals. In keeping with both the letter and the spirit of the law, we want you to be
aware of the following:
Battery Notice:
This product MAY contain a small non-rechargeable battery which (if
applicable) is soldered in place. The average life span of this type of
battery is approximately five years. When replacement becomes
necessary, contact a qualified service representative to perform the
replacement.
This product may also use “household” type batteries. Some of these
may be rechargeable. Make sure that the battery being charged is a
rechargeable type and that the charger is intended for the battery
being charged.
When installing batteries, do not mix batteries with new, or with batteries of a different type. Batteries MUST be installed correctly. Mismatches or incorrect installation may result in overheating and battery
case rupture.
Warning:
Do not attempt to disassemble, or incinerate any battery. Keep all
batteries away from children. Dispose of used batteries promptly and
as regulated by the laws in your area. Note: Check with any retailer of
household type batteries in your area for battery disposal information.
Disposal Notice:
Should this product become damaged beyond repair, or for some
reason its useful life is considered to be at an end, please observe all
local, state, and federal regulations that relate to the disposal of products that contain lead, batteries, plastics, etc. If your dealer is unable
to assist you, please contact Yamaha directly.
NAME PLATE LOCA TION:
The name plate is located on the bottom of the product. The model
number, serial number, power requirements, etc., are located on this
plate. You should record the model number, serial number, and the
date of purchase in the spaces provided below and retain this manual
as a permanent record of your purchase.
Model
Serial No.
Purchase Date
92-BP
PLEASE KEEP THIS MANUAL
FCC INFORMATION (U.S.A.)
IMPORTANT NOTICE: DO NOT MODIFY THIS UNIT!
This product, when installed as indicated in the instructions contained in
this manual, meets FCC requirements. Modifications not expressly approved by Yamaha may void your authority, granted by the FCC, to use
the product.
IMPORTANT:
When connecting this product to accessories and/or another product use
only high quality shielded cables. Cable/s supplied with this product
MUST be used. Follow all installation instructions. Failure to follow instructions could void your FCC authorization to use this product in the
USA.
NOTE:
This product has been tested and found to comply with the requirements
listed in FCC Regulations, Part 15 for Class “B” digital devices. Compliance with these requirements provides a reasonable level of assurance
that your use of this product in a residential environment will not result in
harmful interference with other electronic devices. This equipment generates/uses radio frequencies and, if not installed and used according to
• This applies only to products distributed by Yamaha Corporation of America.
the instructions found in the users manual, may cause interference
harmful to the operation of other electronic devices. Compliance with
FCC regulations does not guarantee that interference will not occur in
all installations. If this product is found to be the source of interference,
which can be determined by turning the unit “OFF” and “ON”, please try
to eliminate the problem by using one of the following measures:
• Relocate either this product or the device that is being affected by the
interference.
• Utilize power outlets that are on different branch (circuit breaker or
fuse) circuits or install AC line filter/s.
• In the case of radio or TV interference, relocate/reorient the antenna.
If the antenna lead-in is 300 ohm ribbon lead, change the lead-in to
co-axial type cable.
If these corrective measures do not produce satisfactory results, please
contact the local retailer authorized to distribute this type of product. If
you can not locate the appropriate retailer, please contact Yamaha
Corporation of America, Electronic Service Division, 6600
Orangethorpe Ave, Buena Park, CA90620
Page 3
Congratulations!
○○○○○○○○○○○○○○○○○○○○○○○○○○○○○○○○○
You are the proud owner of a fine electronic keyboard. The Yamaha PSR-620 PortaTone
combines the most advanced AWM tone generation technology with state-of-the-ar t digital
electronics and features to give you stunning sound quality with maximum musical enjoyment.
A new large graphic display and easy-to-use interface also greatly enhance the operability of
this advanced instrument.
In order to make the most of your PortaTone’s features and extensive performance
potential, we urge you to read the manual thoroughly while trying out the various features
described. Keep the manual in a safe place for later reference.
Important Features
● 141 outstanding voices with eight percussion kits.
● A Voice Set function automatically selects appropriate voice parameters whene ver a voice
is selected.
● 100 accompaniment styles, each with independent intro, main A and B , 4 fill-ins, and ending
sections.
● Advanced auto-accompaniment technology gives you fully-orchestrated accompaniment
to back up what you play on the keyboard.
● Large multi-function LCD display panel makes it easy to select and edit parameters.
● One Touch Setting feature instantly provides you with f our types of registration settings, all
of which match to the selected accompaniment style.
● Digital Effects — Re verb , Chorus and DSP, let you freely create a variety of different sonic
environments.
● Minus One, and Repeat functions are ideal for learning new songs and polishing your
keyboard technique.
● Song recording feature lets you record two melody tracks with an accompaniment track.
○○○○○○○○○○○○○○○○○○○○○○○○○○○○○○
● With the Multi Pads, you can play and record a number of short rhythmic and melodic
sequences, to add a spice to your performance.
● Registration Memory saves 128 your favorite panel settings for instant recall when needed.
● Optional Yamaha Music Car tridges can be plugged in for enjoyable automated perform-
ance, keyboard practice, and extra accompaniment styles.
● Internal 3.5” floppy disk drive pro vides extended memory capacity and quick play capability .
● MIDI compatibility and a range of MIDI functions make the PSR-620 useful in a range of
advanced MIDI music systems.
● Built-in amplifier and speaker system delivers top-quality sound without the need for
external equipment.
○○○○○○○○○○○○○○○○○○○○○○○○○○○○○○○○○○○○○○○○○○○○○○○○○○○○○○○○○○○○○○○○○
1
Page 4
○○○○○○○○○○○○○○○○○○○○○○○○
Contents
○○○○○○○○○○○○○○○○○○○○○○○○○○
Taking Care of Your PortaTone ................................................. 3
Panel Controls 4
The Music Stand ......................................................................... 5
Setting Up 6
Power Supply .............................................................................. 6
■
Using An Optional AC Power Adaptor ..................................6
■
Using Batteries ..................................................................... 6
Connections ................................................................................ 7
■
The PHONES Jack ...............................................................7
■
SUSTAIN Jack...................................................................... 7
■
AUX OUT R and L+R/L Jack ................................................ 7
■
MIDI IN and OUT Connectors .............................................. 7
The Demonstration 8
Basic Display Operation 10
Playing the PSR-620 12
Selecting & Playing Voices ...................................................... 12
■
Keyboard Percussion ......................................................... 14
The Split Mode .......................................................................... 15
Changing the Split Voice & Related Parameters ................... 15
Touch Response ....................................................................... 17
Dual Voice.................................................................................. 17
Changing the Dual Voice & Related Parameters................... 18
Harmony/Echo........................................................................... 20
Selecting a Harmony/Echo Type ........................................... 20
Sustain ....................................................................................... 22
Transposition ............................................................................ 23
Pitch Bend ................................................................................. 23
Digital Effects 24
Using the Digital Effects........................................................... 24
Changing the Reverb Effect..................................................... 24
Selecting the Reverb Effect Type .......................................... 24
Setting the Reverb Return Level............................................ 25
Changing the Chorus Effect .................................................... 26
Selecting the Chorus Effect Type .......................................... 26
Setting the Chorus Return Level............................................ 27
Changing the DSP Effect.......................................................... 28
Selecting the DSP Effect Type .............................................. 28
Setting the DSP Return Level ................................................ 29
Using Auto Accompaniment 30
■
The Stop Accompaniment Function ................................... 37
Accompaniment Track Control................................................ 38
■
Large/Small Accompaniment.............................................. 39
■
Muting Individual Tracks ..................................................... 39
■
Changing Accompaniment Track Voices............................ 40
■
Adjusting Accompaniment Track Volume ........................... 40
Changing the Accompaniment Split Point ............................. 41
One Touch Setting .................................................................... 42
Registration Memory 43
Registering the Panel Settings ................................................ 43
Recall the Registered Panel Settings...................................... 45
The Accomp Freeze Function .................................................. 45
Song Recording 46
Recording a Melody Track ....................................................... 46
Recording Accompaniment With or Without a Melody
Accompaniment and Melody Playback................................... 52
Play from a Specified Measure .............................................. 53
■
Voice & Volume Rewrite ..................................................... 54
■
Clearing the SONG TRACKS ............................................. 54
.............. 49
The Multi Pads 55
Playing the MULTI PADS .......................................................... 55
Recording the MULTI PADS..................................................... 57
Using Music Cartridges 60
■
Inserting a Music Cartridge................................................. 60
■
Music Cartridge Handling Precautions ............................... 60
Cartridge Accompaniment Styles ........................................... 61
Selecting Cartridge Styles ..................................................... 61
Cartridge Songs ........................................................................ 62
Cartridge Song Playback ....................................................... 62
Cartridge Registration Presets ................................................ 63
Selecting Cartridge Registration ............................................ 63
Using Floppy Disks 64
■
Floppy Disk Handling Precautions...................................... 64
Formatting a New Floppy Disk ................................................ 65
Saving, Loading, & Deleting Disk Files................................... 66
Saving to Disk ........................................................................ 66
Loading From Disk................................................................. 68
The Referred File ................................................................... 70
■
User Style Files Referred to by a Song File ....................... 70
■
User Style or Pad Files Referred to by a Registration File . 71
■
Registration File Referred to by a User Style File .............. 71
Deleting a Disk File ................................................................ 72
Quick Play: Disk Orchestra Collection & Standard MIDI File Disks..
73
Practice Features 74
The Minus One Mode ................................................................ 74
■
Specifying the Parts To Be Turned On or Off ..................... 74
Repeat Play................................................................................ 75
Overall Functions 76
General Functions .................................................................... 77
■
Keyboard Volume ............................................................... 77
■
Octave ................................................................................ 77
■
Reverb Level ...................................................................... 78
■
Chorus Level ...................................................................... 78
■
DSP Level........................................................................... 78
■
Pan ..................................................................................... 78
■
Voice Set ............................................................................ 79
■
Accompaniment Volume..................................................... 79
■
Touch Sensitivity ................................................................ 79
■
Minus-one Right/Left-hand Channel ................................... 80
■
Pitch Bend Range............................................................... 80
■
Metronome ......................................................................... 80
■
Tuning................................................................................. 80
MIDI Functions .......................................................................... 81
■
Remote Channel................................................................. 83
■
Keyboard Out ..................................................................... 83
■
Song Out ............................................................................ 83
■
Accompaniment Out ........................................................... 84
■
Local Control ...................................................................... 84
■
External Clock .................................................................... 85
■
Initial Data Send ................................................................. 85
Appendix
PSR-620 Function Tree ......................................................... 86
About Digital Effect ................................................................ 88
Troubleshooting ..................................................................... 90
Data Backup & Initialization ................................................... 91
■
Data Initialization ................................................................ 91
Index........................................................................................... 92
Specifications......................................................................... 93
Voice List ............................................................................... 94
Percussion Kit List ................................................................. 98
MIDI Implementation Chart .................................................. 100
MIDI Data Format ................................................................ 103
■
GM System Level 1 .......................................................... 107
○○○○○○○○○○○○○○○○○○○○○○○○○○○○○○○○○○○○○○○○○○○○○○○○○○○○○○○○○○○○○○○○○
2
Page 5
○○○○○○○○○○○○ ○○○○○○○○○○○
Taking Care of Your PortaTone
Your PortaTone will give you years of playing pleasure if you follow the simple rules given below:
■ Location
Do not expose the instrument to the following conditions to avoid deformation, discoloration, or more
serious damage.
● Direct sunlight (e.g. near a window).
● High temperatures (e.g. near a heat source, outside,
or in a car during the daytime).
● Excessive humidity.
● Excessive dust.
● Strong vibration.
■ Power Supply
● Turn the power switch OFF when the instrument is
not in use.
● An AC adaptor, if used (the PSR-620 runs from
either batteries or an optional AC adaptor), should
be unplugged from the AC outlet if the instrument
is not to be used for an extended period of time.
● Unplug the AC adaptor during electric storms.
● Avoid plugging the AC adaptor into the same AC
outlet as appliances with high power consumption,
such as electric heaters or ovens. Also avoid using
multi-plug adaptors since these can result in re-
duced sound quality, operation errors, and possibly
damage.
■ Turn Power OFF When Making
Connections
● To avoid damage to the instrument and other de-
vices to which it is connected, turn the power
switches of all related devices OFF prior to con-
necting or disconnecting MIDI cables.
■ Cleaning
● Clean the cabinet and panel with a dry soft cloth.
● A slightly damp cloth may be used to remove stub-
born grime and dirt.
● Never use cleaners such as alcohol or thinner.
● Avoid placing vinyl objects on top of the instru-
ment (vinyl can stick to and discolor the surface).
■ Electrical Interference
● This instrument contains digital circuitry and may
cause interference if placed too close to radio or
television receivers. If this occurs, move the instrument further away from the affected equipment.
■ Data Backup
● Internal data (e.g. Registration Memory data) is
retained in memory even if the power switch is
turned OFF as long as backup batteries are installed or the AC plug is connected. The internal
memory can, however, be corrupted by incorrect
operation. Be sure to save important data to floppy
disk frequently so you have a backup to revert to if
the data in memory is accidentally damaged. Also
note that magnetic fields can damage data on
floppy disks, so it is advisable to make a second
backup copy of disks that contain particularly important data. Always keep backup disks in a safe
place away from stray magnetic fields (e.g. those
produced by speakers, appliances containing motors, etc.). More important precautions for floppy
disk use are given in the “Floppy Disk” section
begining on page 64.
■ Handling and Transport
● Never apply excessive force to the controls, con-
nectors or other parts of the instrument.
● Always unplug cables by gripping the plug firmly,
not by pulling on the cable.
● Disconnect all cables before moving the instru-
ment.
● Physical shocks caused by dropping, bumping, or
placing heavy objects on the instrument can result
in scratches and more serious damage.
YAMAHA is not responsible for damage caused by improper handling or operation.
○○○○○○○○○○○○○○○○○○○○○○○○○○○○○○○○○○○○○○○○○○○○○○○○○○○○○○○○○○○○○○○○○
■ Service and Modification
● The PSR-620 contains no user serviceable parts.
Opening it or tampering with it in anyway can lead
to irreparable damage and possibly electric shock.
Refer all servicing to qualified YAMAHA personnel.
3
Page 6
Panel Controls
■ Top Panel Controls .................................................................
1 POWER Switch ............................................. page 8
2 MASTER VOLUME Control........................... page 8
3 DEMO Button ................................................ page 9
4 DIGITAL EFFECT Section
• REVERB Button....................................... page 24
• CHORUS Button....................................... page 24
• DSP Button............................................... page 24
• DSP VARIA TION Button........................... page 24
5 LCD Panel ................................................... page 10
6 Data Dial.................................................. page 9, 14
7 Number [0]~[9] and
[+/YES], [–/NO] Buttons .......................... page 9, 13
8 SONG Section
• REC Button......................................... page 47, 50
• PLAY/STOP Button ......................page 48, 51, 52
• REPEAT PLAY Button .............................. page 75
• MINUS ONE Button ................................. page 74
9 AUTO ACCOMPANIMENT Section
• SYNC-START/STOP Button .................... page 35
• START/STOP Button..........................page 35, 37
• INTRO Button ........................................... page 35
• MAIN A/B Button................................ page 35, 37
• ENDING Button........................................ page 37
• ACCOMP LARGE/SMALL Button............ page 39
• TRACK ON/OFF Button ........................... page 39
0 CURSOR s, t, <, > Buttons ................... page 10
! TEMPO s, t Buttons................................. page 34
@ FUNCTION s, t Buttons........................... page 10
# REGISTRATION MEMORY Section
• MEMORIZE Button .................................. page 44
• 1~4 Buttons........................................page 44, 45
• ACCOMP FREEZE Button....................... page 45
$ MODE ▼ Button .......................................... page 11
% DISK Section
• JOB SELECT Button................................ page 67
• EXECUTE Button..................................... page 65
• QUIT Button.............................................. page 68
^ STYLE Button.............................................. page 33
& VOICE Button.............................................. page 12
* ONE TOUCH SETTING Button................... page 42
( Music CARTRIDGE Slot ............................. page 60
) KEYBOARD Section
• TOUCH RESPONSE Button .................... page 17
• DU AL VOICE Button ................................ page 17
• HARMONY/ECHO Button........................ page 20
• SUSTAIN Button....................................... page 22
q MULTI PADS Section
• MULTI PADS 1 ~ 4 ............................... page 56, 58
• REC/END, TERMINATE Button ......... page 56, 58
○○○○○○○○○○○○○○○○○○○○○○○○○○○○○○○○○○○○○○○○○○○○○○○○○○○○○○○○○○○○○○○○○
4
Page 7
Panel Controls
MIDI
OUT IN
SUSTAIN
AUX OUT
R L+R/L
DC IN 10-12V
t y u i
PITCH BEND Wheel................................... page 23
w
e PHONES Ja ck ............................................... page 7
r Disk Drive .................................................... page 64
■ Rear Panel Controls...............................................................
t
MIDI OUT and IN Connectors ....................
y SUSTAI N Ja ck ............................................... page 7
u
AUX OUT R, L+R/L Jacks.................................
i DC IN 10-12V Jack ........................................ page 6
page 7, 81
page 7
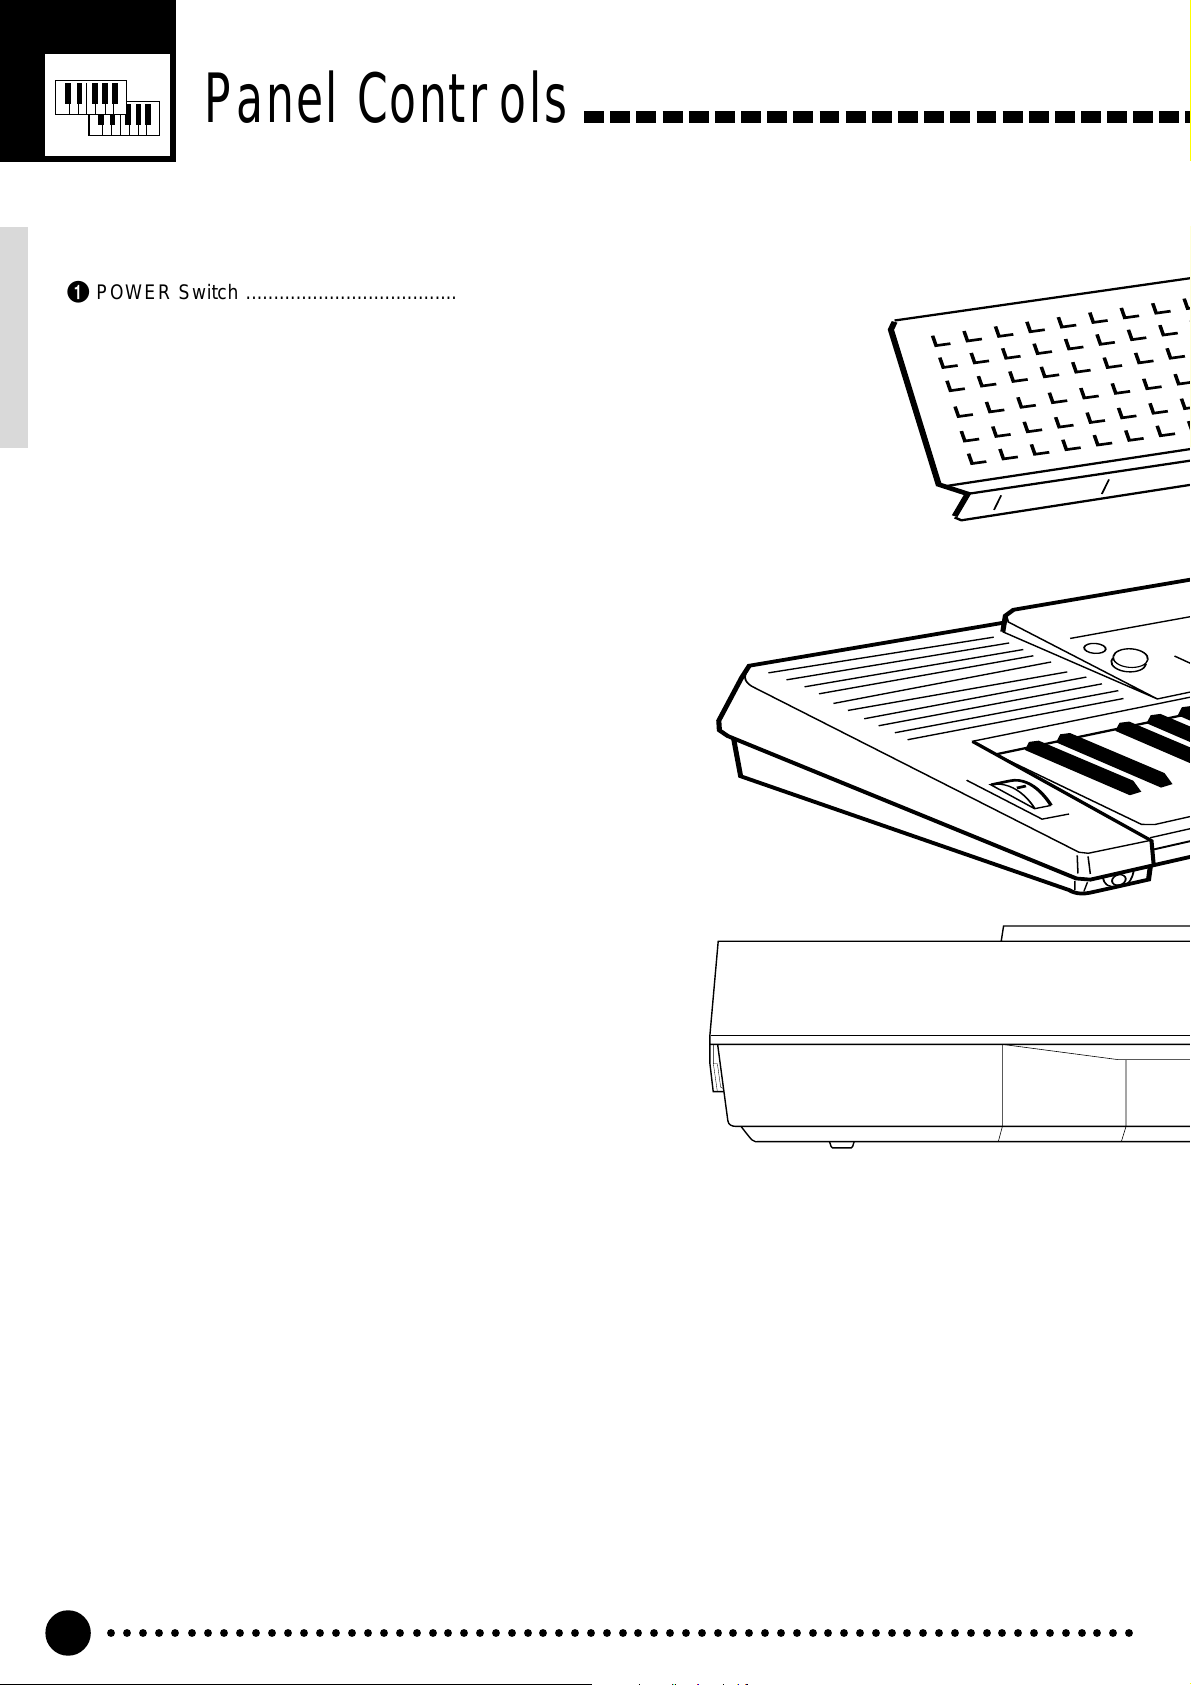
The Music Stand
The PSR-620 is supplied with a music stand
that can be attached to the instrument by inserting
it into the slot at the rear of the control panel.
○○○○○○○○○○○○○○○○○○○○○○○○○○○○○○○○○○○○○○○○○○○○○○○○○○○○○○○○○○○○○○○○○
5
Page 8
Setting Up
This section contains information about setting up your PSR-620
and preparing to play. Be sure to go through this section carefully
before using your PSR-620.
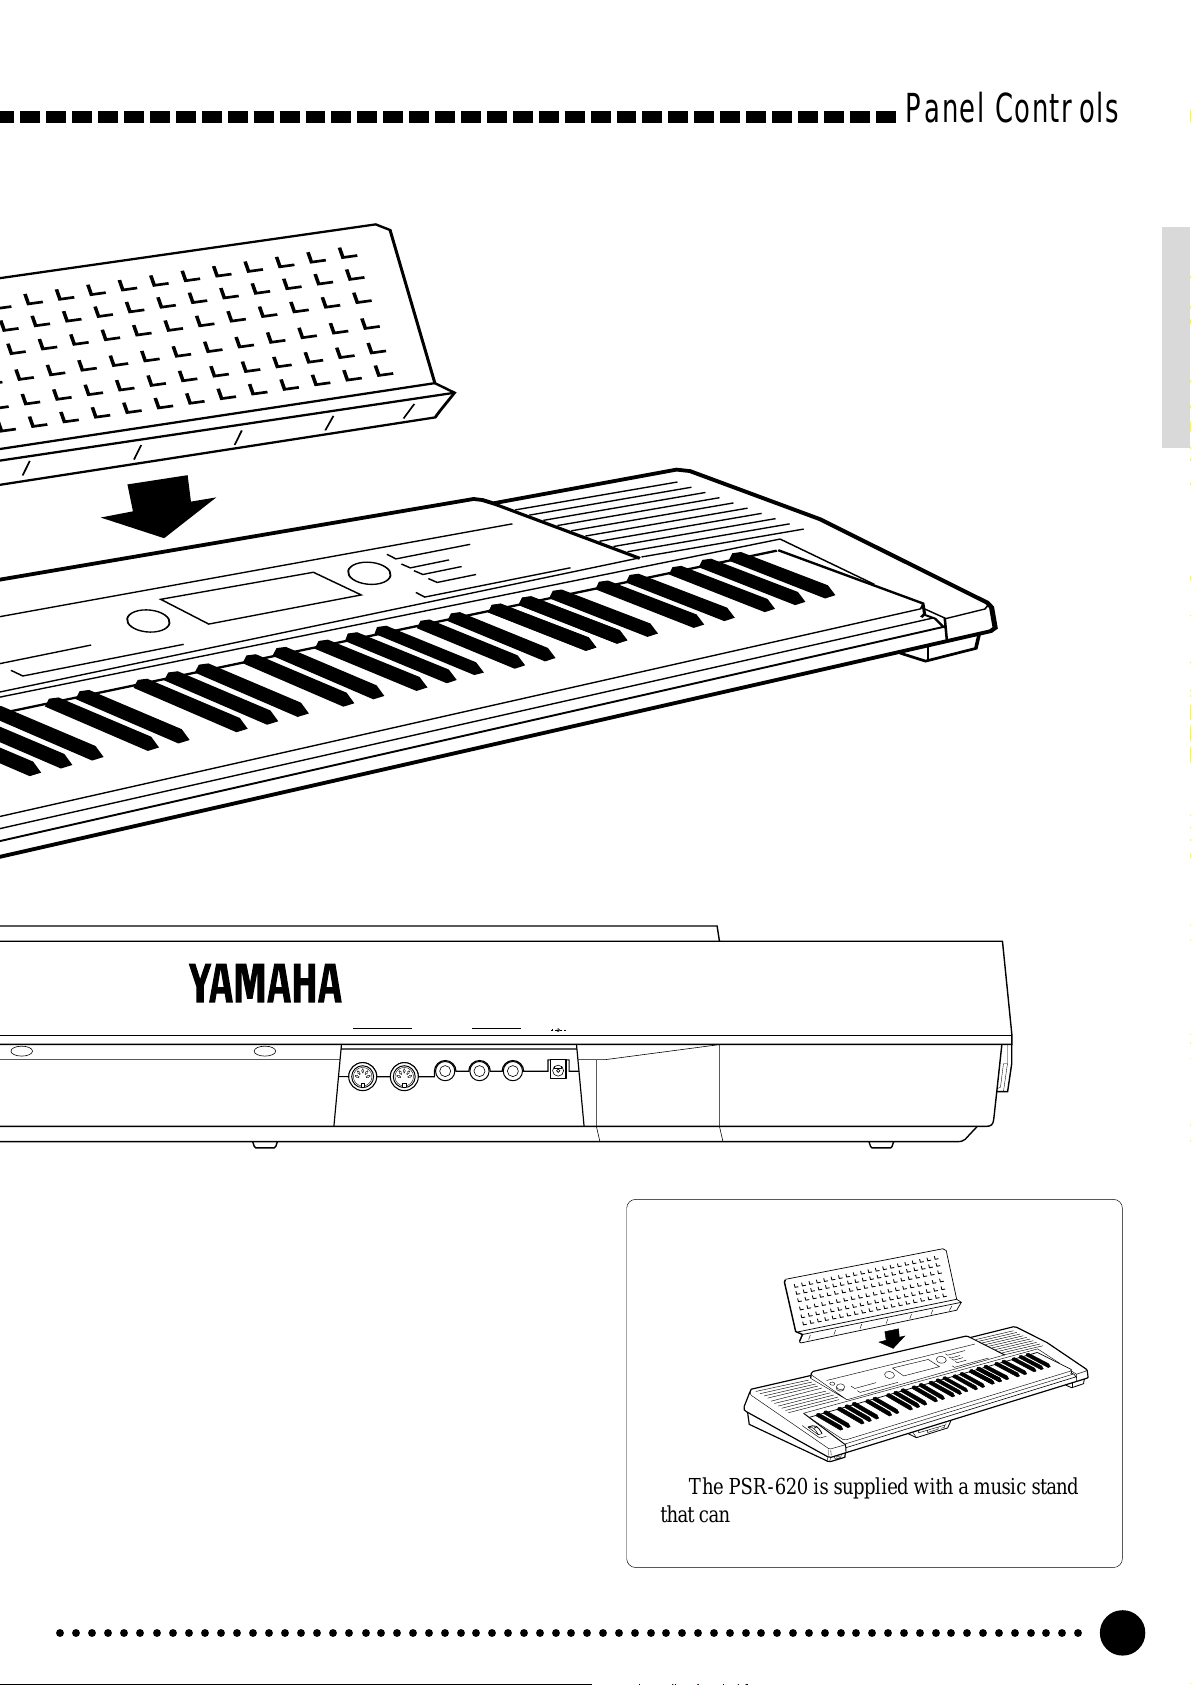
Power Supply
Your PSR-620 will run either from batteries or an optional power adaptor.
Follow the instructions below according to the power source you intend to use.
■ Using An Optional AC Power Adaptor.............................................................
Plug the DC output cable from an optional Yamaha PA-5, PA-5B, or P A-
5C AC Power Adaptor into the DC IN jack on the rear panel of the PSR-
620, then plug the Power Adaptor (or the AC cable of the Power Adaptor)
into a convenient wall AC power socket. The internal batteries are automatically disconnected when an AC Power Adaptor is used.
DC IN 10-12V
PA-5,
PA-5B,
or
PA-5C
AC power socket
• Never interrupt the power
supply (e.g. remove the batteries or unplug the AC adaptor)
during any PSR-620 record
operation! Doing so can result
in a loss of data.
• Use ONLY a Yamaha PA-5, PA-
5B, or PA-5C AC Power Adaptor to power your instrument
from the AC mains. The use of
other adaptors may result in
irreparable damage to both the
adaptor and the PSR-620.
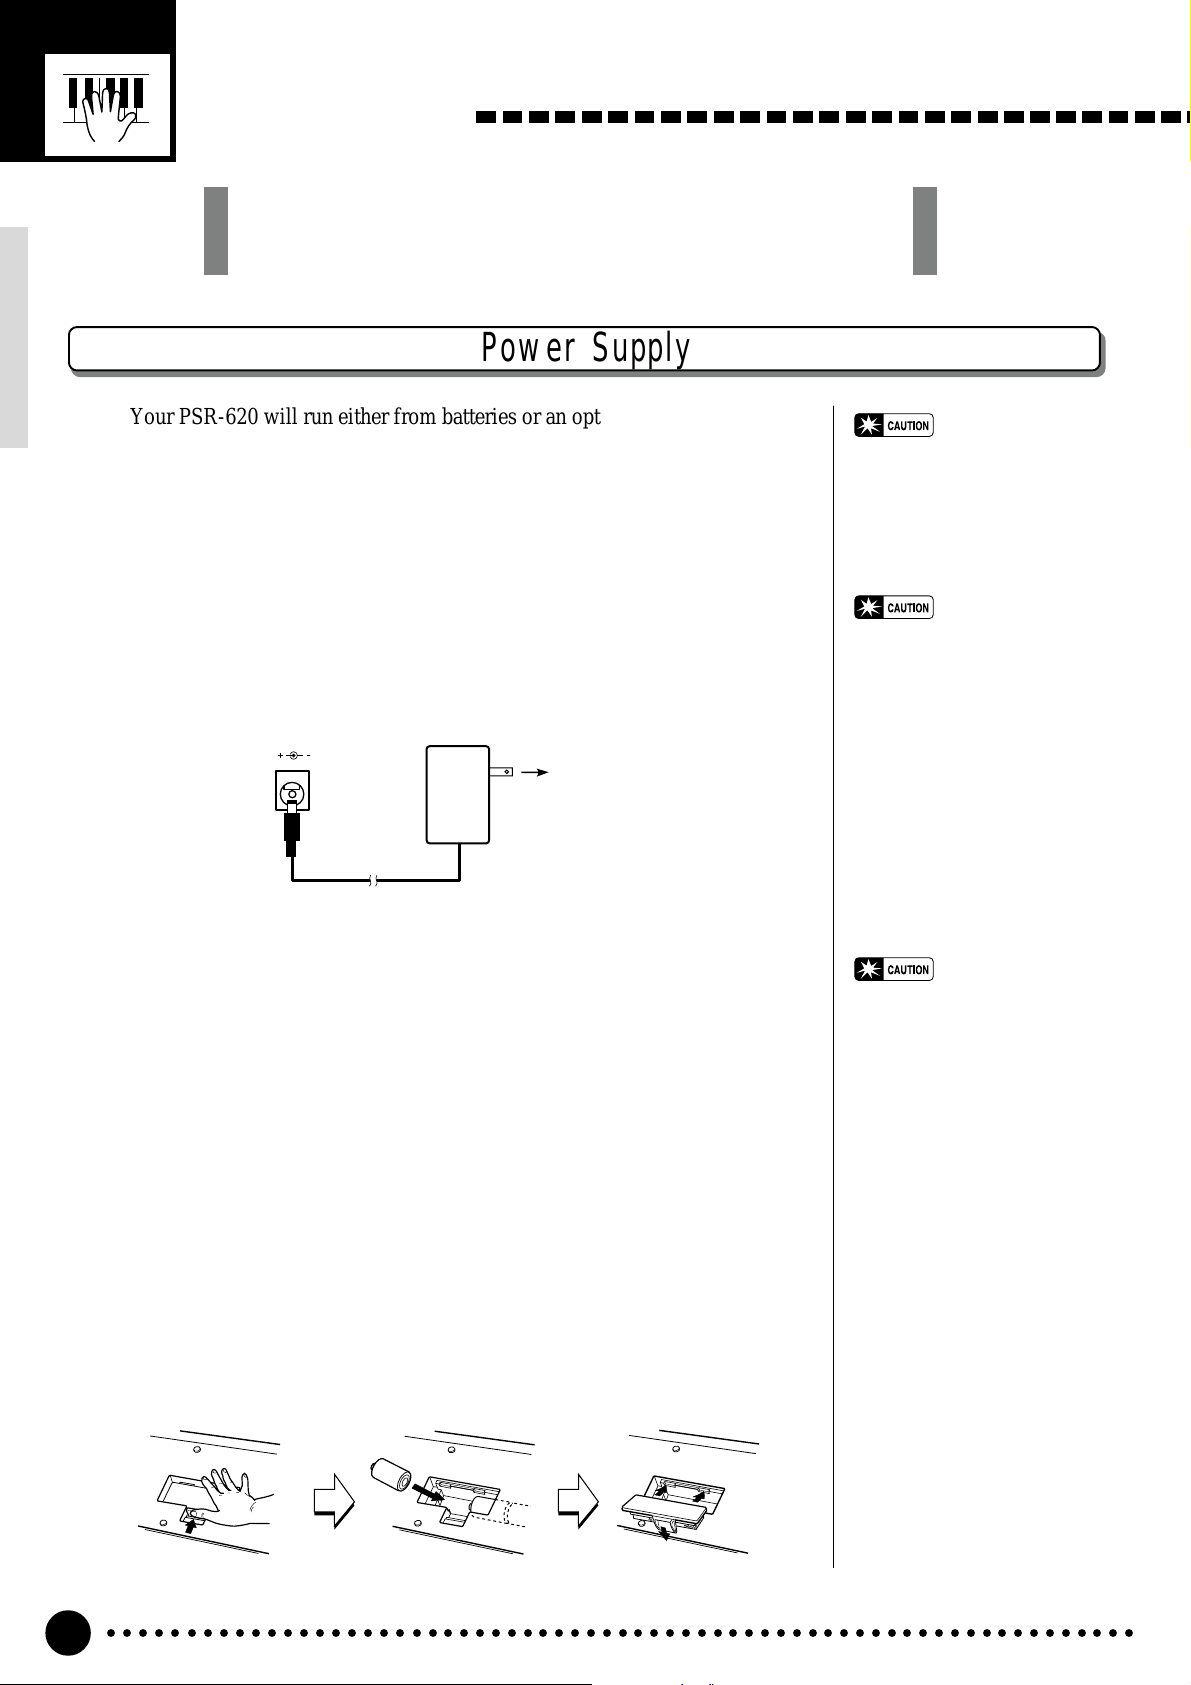
■ Using Batteries...............................................................................................................................................
For battery operation the PSR-620 requires six 1.5V SUM-1, “D” size,
R-20 or equivalent batteries.
When the batteries need to be replaced “Btry Low” will appear on the
display. Also the volume may be reduced, the sound may be distorted, and
other problems may occur . When this happens, turn the power OFF and either replace the batteries or connect an AC adaptor.
Replace the batteries as follows:
ZOpen the battery compartment cover located on the instrument’s bottom
panel.
XInsert the six new batteries, being careful to follow the polarity markings
on the inside of the compartment.
CReplace the compartment cover, making sure that it locks firmly in place.
• When the batteries run down,
replace them with a complete
set of six new batteries.
NEVER mix old and new batteries.
• Do not use different kinds of
batteries (e.g. alkaline and
manganese) at the same time.
• To prevent possible damage
due to battery leakage, remove
the batteries from the instrument if it is not to be used for
an extended period of time.
○○○○○○○○○○○○○○○○○○○○○○○○○○○○○○○○○○○○○○○○○○○○○○○○○○○○○○○○○○○○○○○○○
6
Page 9
Connections
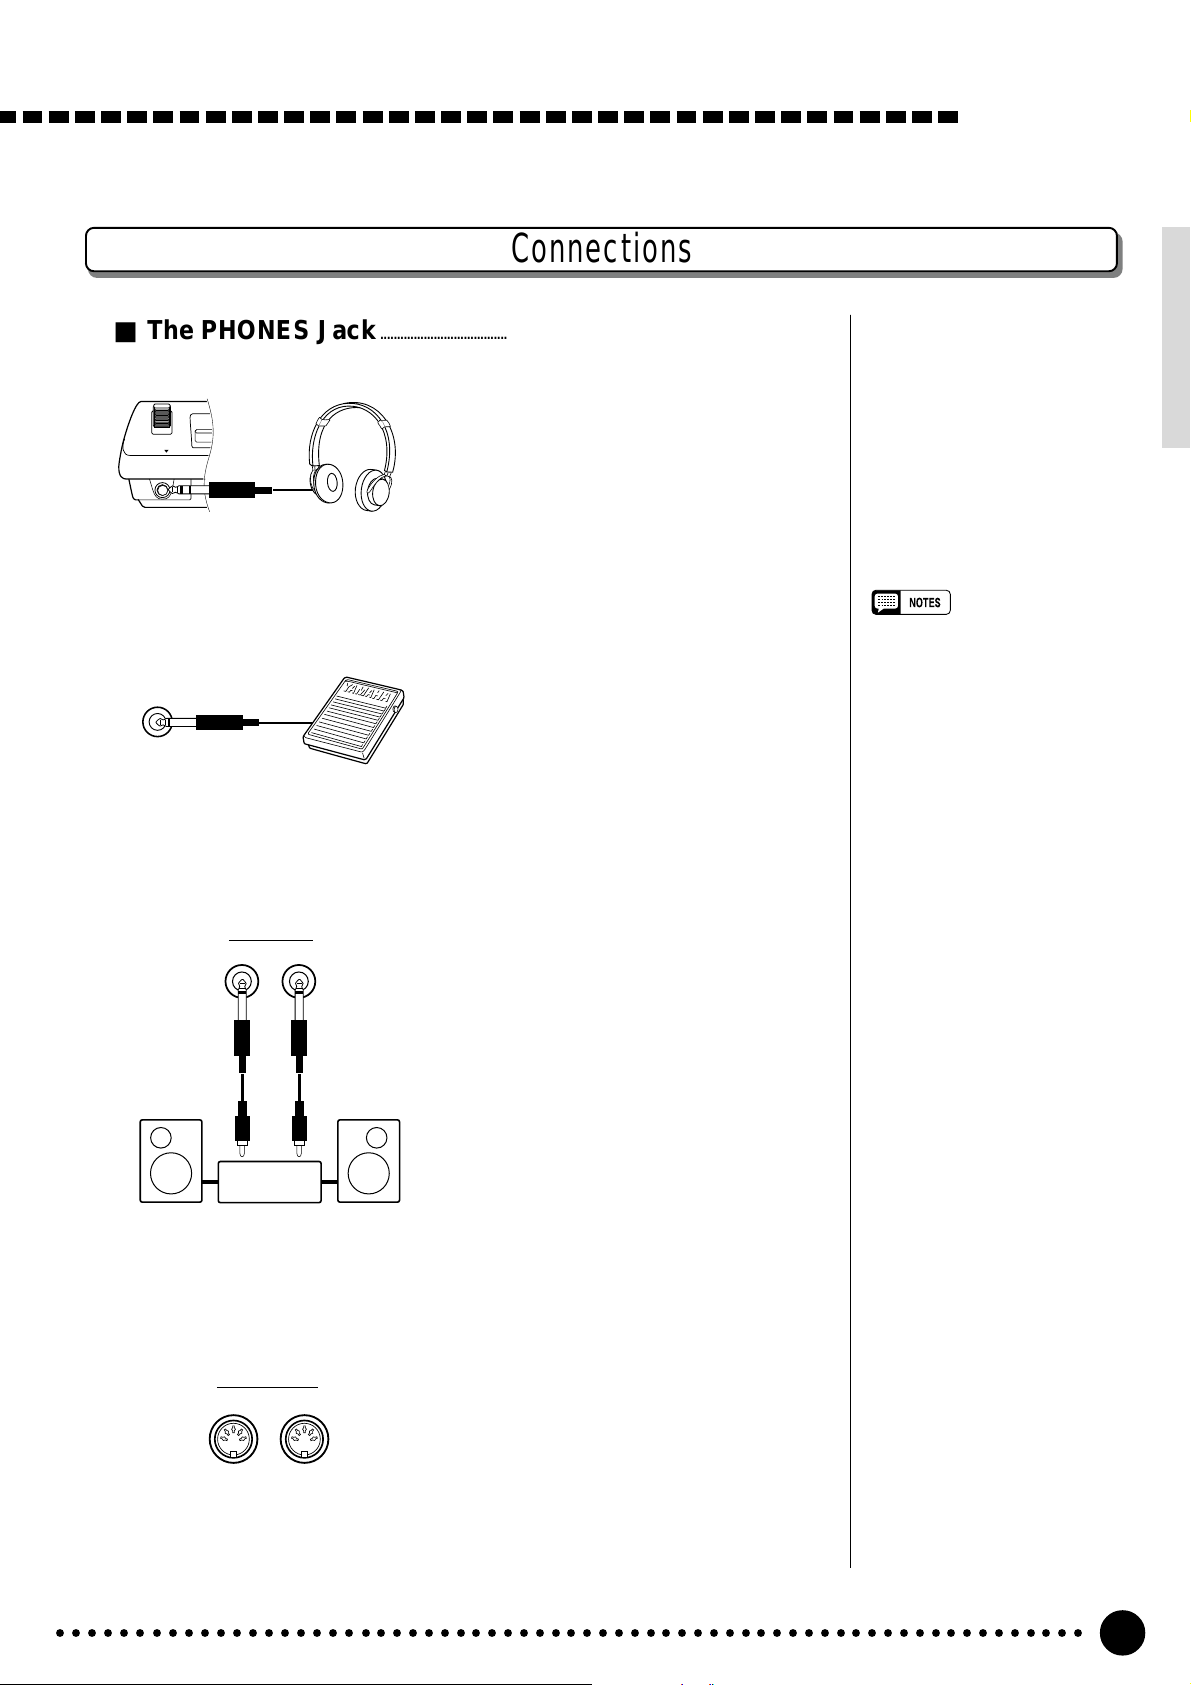
■ The PHONES Jack...................................................................................................................................
A standard pair of stereo headphones
can be plugged in here for private prac-
PHONES
■ SUSTAIN Jack ...................................................................................................................................................
tice or late-night playing. The internal
stereo speaker system is automatically
shut off when a pair of headphones is
plugged into the PHONES jack.
Setting Up
An optional Yamaha FC4 or FC5
footswitch can be plugged into the rear-
SUSTAIN
panel SUSTAIN jack for sustain control.
The footswitch functions like the damper
pedal on a piano — press for sustain,
release for normal sound.
■ AUX OUT R and L+R/L Jack..................................................................................................
The AUX OUT R and L+R/L jacks
AUX OUT
R L+R/L
Stereo
System
deliver the output of the PSR-620 for
connection to an external amplifier, mixing console, PA system, or recording
equipment. If you will be connecting the
PSR-620 to a monophonic sound system, use only the L+R/L jack. When a
plug is inserted into the L+R/L jack
only, the left- and right-channel signals
are combined and delivered via the
L+R/L jack so you don’t lose any of the
instrument’s sound.
• Be sure that you do not press the
pedal while turning the power
ON. If you do, the ON/OFF status
of the footswitch will be reversed.
■ MIDI IN and OUT Connectors.............................................................................................
The MIDI IN connector receives
MIDI data from an external MIDI device
MIDI
OUT IN
○○○○○○○○○○○○○○○○○○○○○○○○○○○○○○○○○○○○○○○○○○○○○○○○○○○○○○○○○○○○○○○○○
(such as a MIDI sequencer) which can
be used to control the PSR-620. The
MIDI OUT connector transmits MIDI
data generated by the PSR-620 (e.g. note
and velocity data produced by playing
the keyboard). More details on MIDI are
provided on page 81.
7
Page 10

The Demonstration
Once you’ve set up your PSR-620, try listening to the pre-programmed
demonstration songs — they’ll give you a good idea of what the PSR-620
can do! A total of 25 demo songs are provided — songs 01 through 17
have been created to demonstrate several of the instrument’s voices,
while songs 18 through 25 demonstrate a range of accompaniment
styles.
VOICE
STYLE
SONG
REGIST MEMORY
MULTI PAD
DUAL VOICE
SPLIT VOICE
/
ECHO
HARM
OVERALL
DIGIT AL EFFECT
Switch ON.................................................................................................................................................................
1
801
REGIST
RHYTHM BASS CHORD PAD PHRASE ACCOMP MELODY
111
ON /
OFF
VOICE
VOL
SSax
172 10 a01
TEMPO TRANSPOSE MEASURE REPEAT CHORD
134126152105 1991011
ACCOMP TRACK SONG TRACK
MELODY
REC REC REC
1
OTS
2
REVERB DUAL
CHORUS HARMONY
DSP SUSTAIN
BEAT
TOUCHMINUS ONE
Turn the power ON by pressing the [POWER] switch.
POWER
ON / OFF
NORMAL
SPLIT
SINGLE
FINGERED
LOAD
SAVE
DELETE
FORMAT
Set an Initial Volume Level.......................................................................................................
2
Turn the [MASTER VOLUME] control up (clockwise) about a quarterturn from its minimum position. You can re-adjust the [MASTER VOL-
UME] control for the most comfortable overall volume level after playback
begins.
MASTER
VOLUME
MIN MAX
○○○○○○○○○○○○○○○○○○○○○○○○○○○○○○○○○○○○○○○○○○○○○○○○○○○○○○○○○○○○○○○○○
8
Page 11
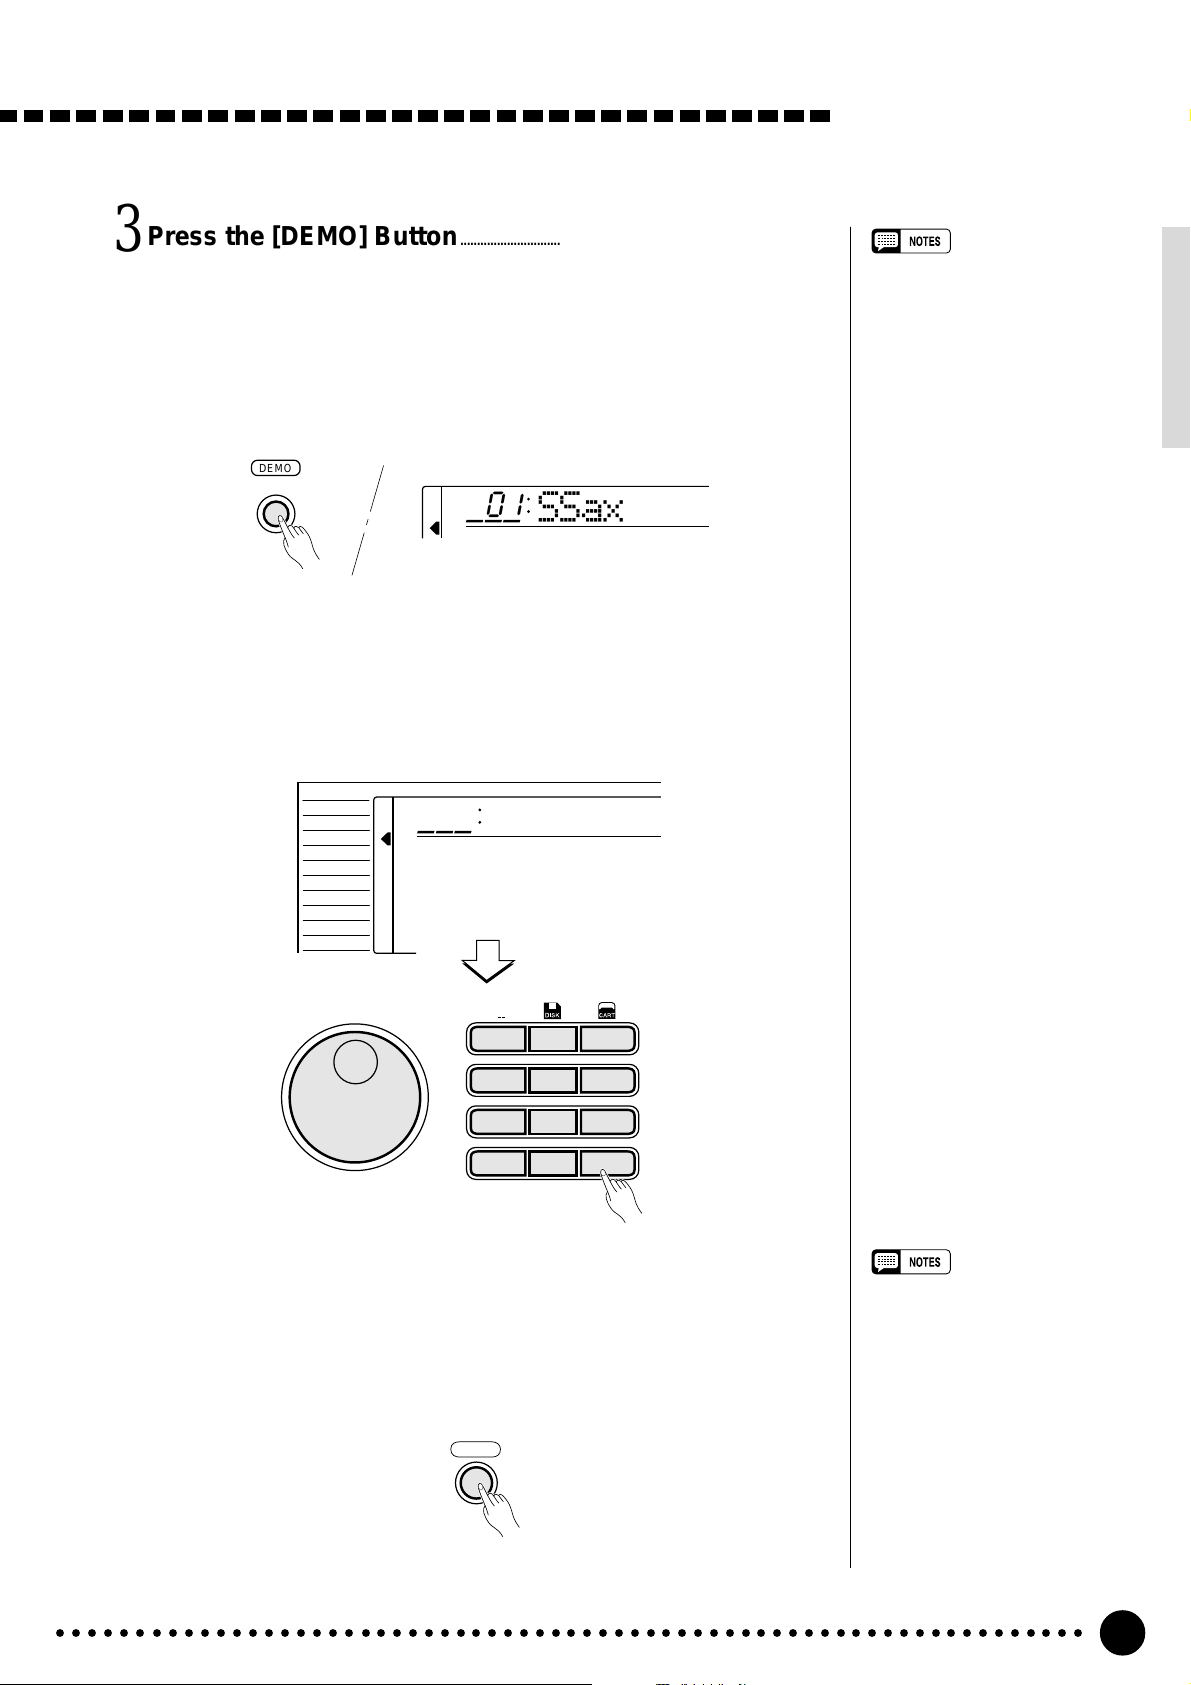
Press the [DEMO] Button...........................................................................................................
3
Press the [DEMO] button to start demo playback. The PSR-620 SONG
function will automatically be selected and the number and name of the first
demo song will appear on the top line of the display and the SONG [PLAY/
STOP] indicator will light. The demo will begin playing automatically. The
demo songs will play in sequence, and the sequence will repeat until
stopped.
DEMO
801
Skip to the Beginning Of a Different Demo Song.......................
4
SSax
While the demonstration is playing you can select any of the 25 demo
songs by using the [–/NO] and [+/YES] buttons, the number buttons or the
data dial. Playback will skip to the beginning of the selected song.
The Demonstration
• You can play along on the PSR620 keyboard while the demonstration is playing.
• The volume bars of the song
tracks at the bottom of the display will move in response to the
data in each track while the
demo plays.
• When playing demo songs which
use the PSR-620 internal accompaniment styles:
* Chord names will appear on
the display and the volume
bars of the accomp. tracks will
move in response to the data
in each track while the demo
plays.
* The harmony effect (see page
20) can be applied when playing along with the chord progression of the song.
VOICE
STYLE
SONG
REGIST MEMORY
MULTI PAD
DUAL VOICE
SPLIT VOICE
HARM
/
ECHO
OVERALL
DIGITAL EFFECT
Exit When Done.............................................................................................................................................
5
801
SSax
*
1
123
789
0
**
654
–
+
/YES
/NO
Press the [DEMO] button, the SONG [PLAY/STOP] button, or the
AUTO ACCOMP ANIMENT [START/STOP] button to stop demo play-
back, then press the [VOICE] button to exit from the SONG function and
return to the normal play-mode display when you’ve finished playing the
demo songs.
DEMO
• When you stop demo song sequence playback and start again
by pressing the [PLAY/STOP]
button, only the current song will
play, then playback will stop
automatically.
○○○○○○○○○○○○○○○○○○○○○○○○○○○○○○○○○○○○○○○○○○○○○○○○○○○○○○○○○○○○○○○○○
9
Page 12
A
U
E
R
S
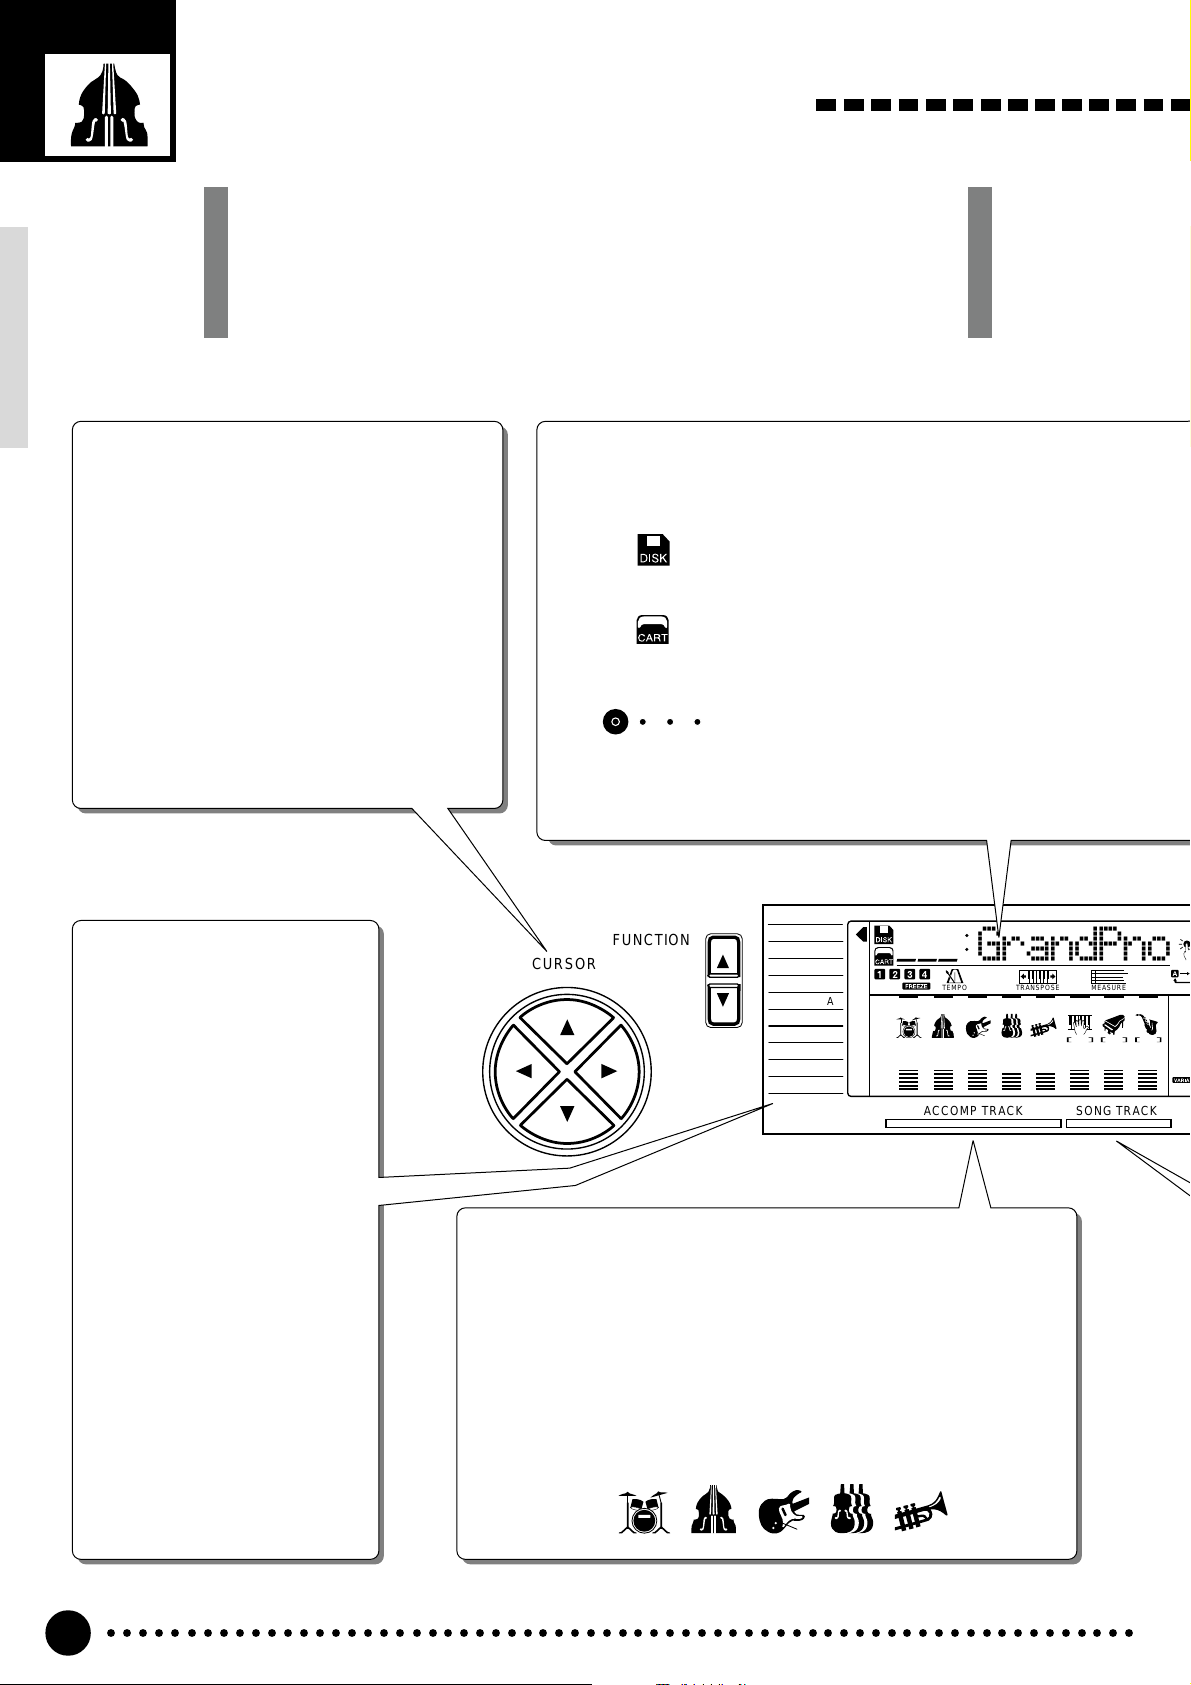
Basic Display Operation
The PSR-620 LCD panel is a large multi-function type that simultaneously
displays and provides access to a number of important parameters. Basic
operation of the display as well as the CURSOR, FUNCTION, MODE,
JOB SELECT and NUMBER buttons, and the meaning of the icons which
appear in the display, are summar ized briefly below.
The Cursor Buttons
The CURSOR buttons are used to select the
various parameters which appear in the display. Depending on the selected parameter,
the “cursor” may appear as an underline, or
the selected icon or value may simply flash.
Each CURSOR button moves the cursor in the
corresponding direction. The [▲] and [▼]
CURSOR buttons are also used to select functions within the function groups selected by the
FUNCTION buttons in some cases.
The Functions
The PSR-620 has a range of
functions selected via the
FUNCTION [▲] and [▼]
buttons — e.g. voice selection, style selection, song
number selection, etc. The
currently selected function is
indicated by an arrow in the
display next to the function
list printed immediately to the
left of the display. All of the
listed functions can be selected by pressing either the
FUNCTION [▲] or [▼] button
as many times as necessary
until the arrow in the display
appears next to the name of
the desired function.
Parameter Icons
DISK (Disk)
Appears when a Disk song, style, multi pad or
registration is selected (page 64).
CART (Cartridge)
Appears when a Music Cartridge song, style, or
registration memory is selected (page 60).
BEAT
Flashes at the current tempo and indicates the
BEAT
current beat during accompaniment and song
playback. (page 36)
FUNCTION
CURSOR
VOICE
STYLE
SONG
REGIST MEMORY
MULTI PAD
DUAL VOICE
SPLIT VOICE
HARM
/
ECHO
OVERALL
DIGITAL EFFECT
801
REGIST
RHYTHM BASS CHORD PAD PHRASE ACCOMP MELODY
111
ON /
OFF
VOICE
VOL
GrandPno
118 10 a01
TEMPO TRANSPOSE MEASURE REPE
135102117130 1011011
ACCOMP TRACK SONG TRACK
Accompaniment Track Parameters & Icons
The PSR-620 has 8 accompaniment tracks (RHYTHM1/2, BASS,
CHORD1/2, PAD, and PHRASE1/2), each with ON/OFF, voice number,
and volume parameters that can be set as required (page 38). The
icons, drums for RHYTHM1 and 2, an acoustic applied bass for BASS,
an electric guitar for CHORD1 and 2, violins for PAD, a trumpet for
PHRASE 1 and 2, will appear when the respective track is ON.
RHYTHM BASS CHORD PAD PHRASE
111
MELODY
1
REC REC REC
OT
2
MIN
REV
CHO
DSP
○○○○○○○○○○○○○○○○○○○○○○○○○○○○○○○○○○○○○○○○○○○○○○○○○○○○○○○○○○○○○○○○○
10
Page 13
A
S
OTS
REGIST
TEMPO
TRANSPOSE
MEASURE
REPEAT
m
CHORD
BEAT
m
T CHORD
TOUCH
S ONE
RB DUAL
US HARMONY
SUSTAIN
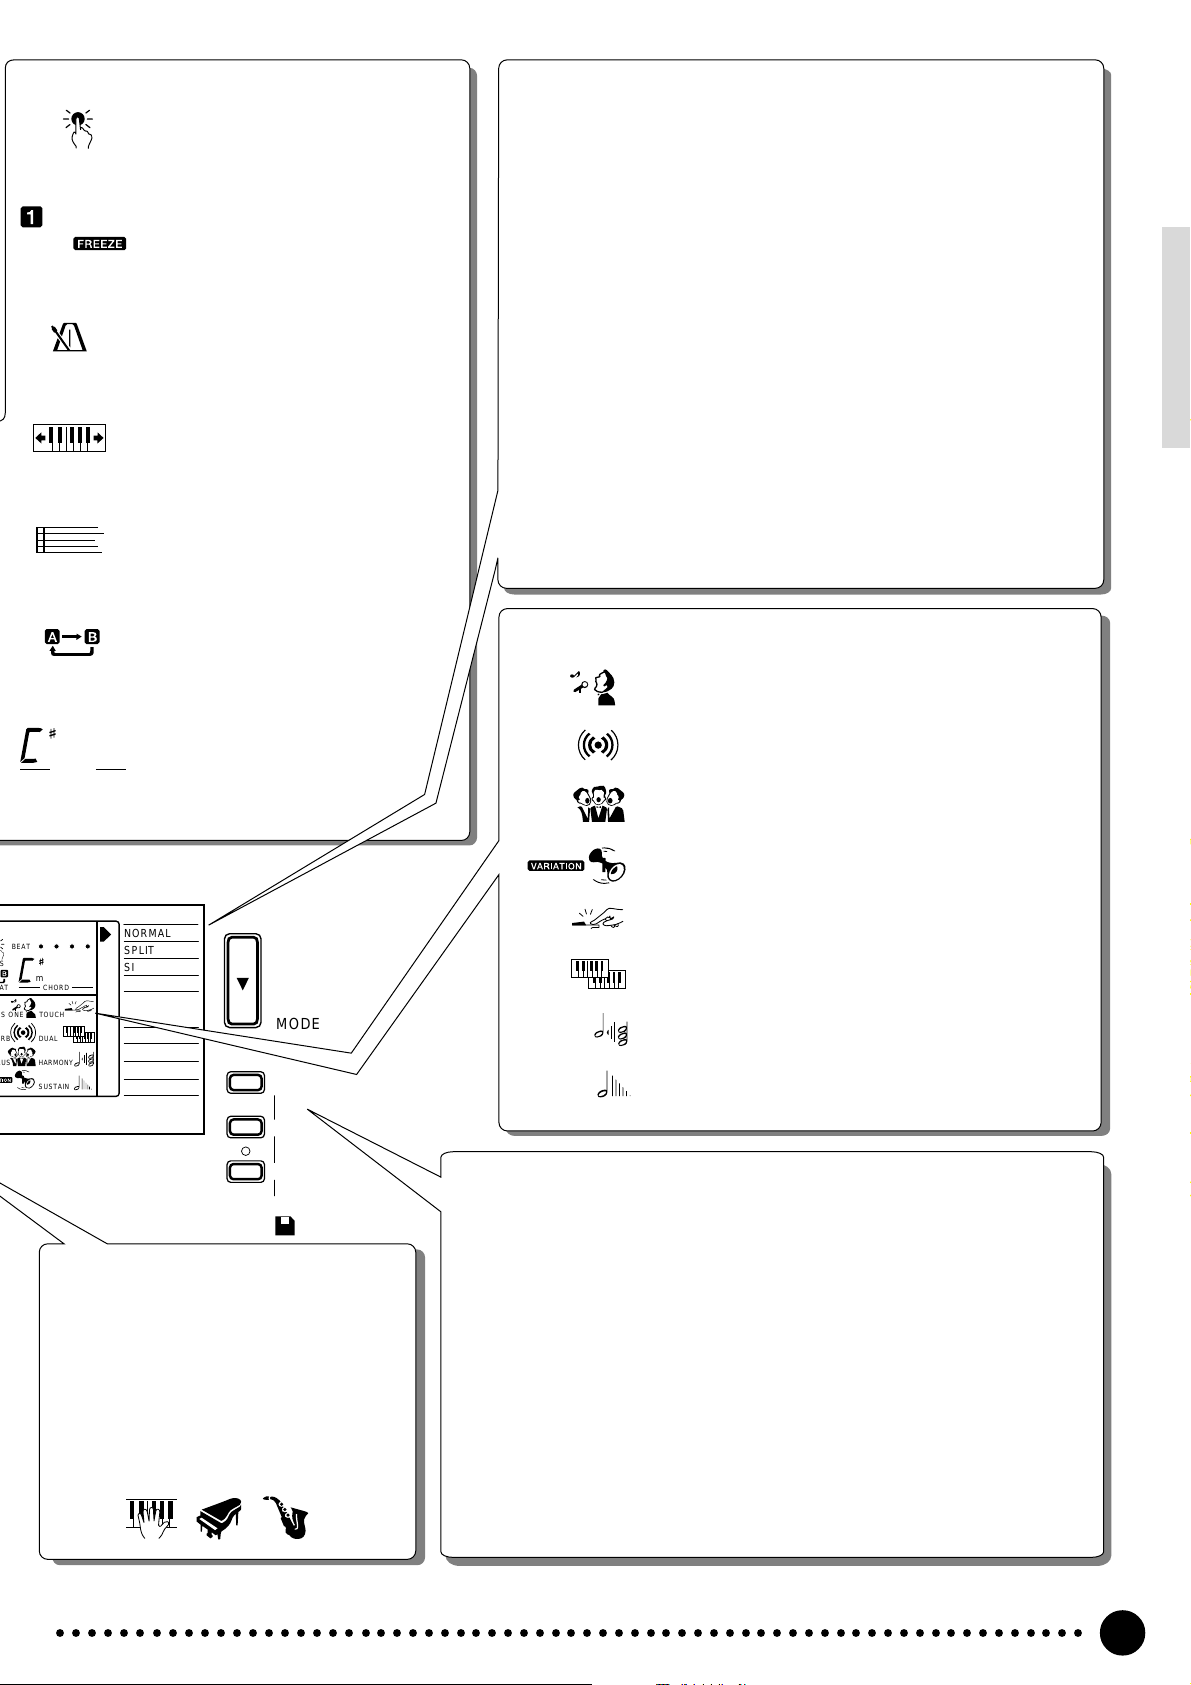
OTS (One Touch Setting)
Appears when the ONE TOUCH
SETTING feature is engaged
(page 42).
REGIST (Registration Memory)
Indicates the currently selected
REGISTRATION MEMORY
number (page 45).
TEMPO
Shows the current tempo of accompaniment/song playback (page
34).
TRANSPOSE
The current transpose value (page
23).
MEASURE
Indicates the current measure
number during song recording and
playback (page 53).
REPEAT
Indicates the “A” and “B” repeat
points when programming a repeat
section. (page 75)
CHORD
Indicates the current chord name
during accompaniment/ song playback (page36)
NORMAL
SPLIT
SINGLE
FINGERED
LOAD
SAVE
DELETE
FORMAT
MODE
JOB
SELECT
EXECUTE
The Modes
The MODE button to the right of the display selects one of the PSR520’s four operational modes: NORMAL, SPLIT, SINGLE, and FINGERED. The currently selected mode is indicated by an arrow in the
display next to the mode list printed immediately to the right of the
display. All of the listed modes can be selected by pressing the
MODE button as many times as necessary until the arrow in the
display appears next to the name of the desired mode.
NORMAL: The normal play mode (page 12).
SPLIT: The split-keyboard mode in which different voices can
be played by the left and right hands (page 15).
SINGLE: The single-finger accompaniment mode which allows
fully-orchestrated accompaniment to be produced by
specifying chords using only one, two or three fingers
(page 31).
FINGERED: The fingered accompaniment mode in which fully-or-
chestrated accompaniment is produced according to
chords you play on the keyboard (page 31).
Feature On/Off Icons
MINUS ONE
REVERB
CHORUS
DSP
TOUCH
DUAL
HARMONY
SUSTAIN
MINUS ONE
Appears when the MINUS ONE feature is ON (page 74).
REVERB
Appears when the REVERB EFFECT is ON (page 24).
CHORUS
Appears when the CHORUS EFFECT is ON (page 24).
DSP
Appears when the DSP EFFECT is ON (page 24).
TOUCH (Touch Response)
Appears when the TOUCH RESPONSE is ON (page 17).
DUAL (Dual Voice)
Appears when the DUAL VOICE feature is ON (page 17).
HARMONY
Appears when the HARMONY/ECHO is ON (page 20).
SUSTAIN
Appears when the SUSTAIN is ON (page 22).
QUIT
DISK
The Disk Functions
The [JOB SELECT] button to the right of the display selects one of the PSR620’s four disk jobs: LOAD, SAVE, DELETE and FORMAT. The currently se-
Song Track Parameters & Icons
Like the accompaniment tracks, each of
the 3 song tracks has ON/OFF, voice
lected job is indicated by an arrow in the display next to the disk job list printed
immediately to the right of the display. All of the listed jobs can be selected by
pressing the [JOB SELECT] button as many times as necessary until the arrow
in the display appears next to the name of the desired job.
number (MELODY tracks), and volume
parameters that can be set as required
(page 46). Each track has its own icon
which appears when the track is ON.
LOAD: Loads data from floppy disk (page 68).
SAVE: Saves the specified data to floppy disk (page 66).
DELETE: Deletes a specified data file from the floppy disk (page 72).
ACCOMP MELODY1MELODY
○○○○○○○○○○○○○○○○○○○○○○○○○○○○○○○○○○○○○○○○○○○○○○○○○○○○○○○○○○○○○○○○○
2
FORMAT: Formats a disk for use with the PSR-620 (page 65).
11
Page 14
Playing the PSR-620
VOICE
STYLE
SONG
REGIST MEMORY
MULTI PAD
DUAL VOICE
SPLIT VOICE
HARM
/
ECHO
OVERALL
DIGIT AL EFFECT
801
REGIST
RHYTHM BASS CHORD PAD PHRASE ACCOMP MELODY
111
ON /
OFF
VOICE
VOL
GrandPno
118 10 a01
TEMPO TRANSPOSE MEASURE REPEAT CHORD
135102117130 1011011
ACCOMP TRACK SONG TRACK
MELODY
REC REC REC
1
OTS
2
REVERB DUAL
CHORUS HARMONY
DSP SUSTAIN
BEAT
TOUCHMINUS ONE
NORMAL
SPLIT
SINGLE
FINGERED
LOAD
SAVE
DELETE
FORMAT
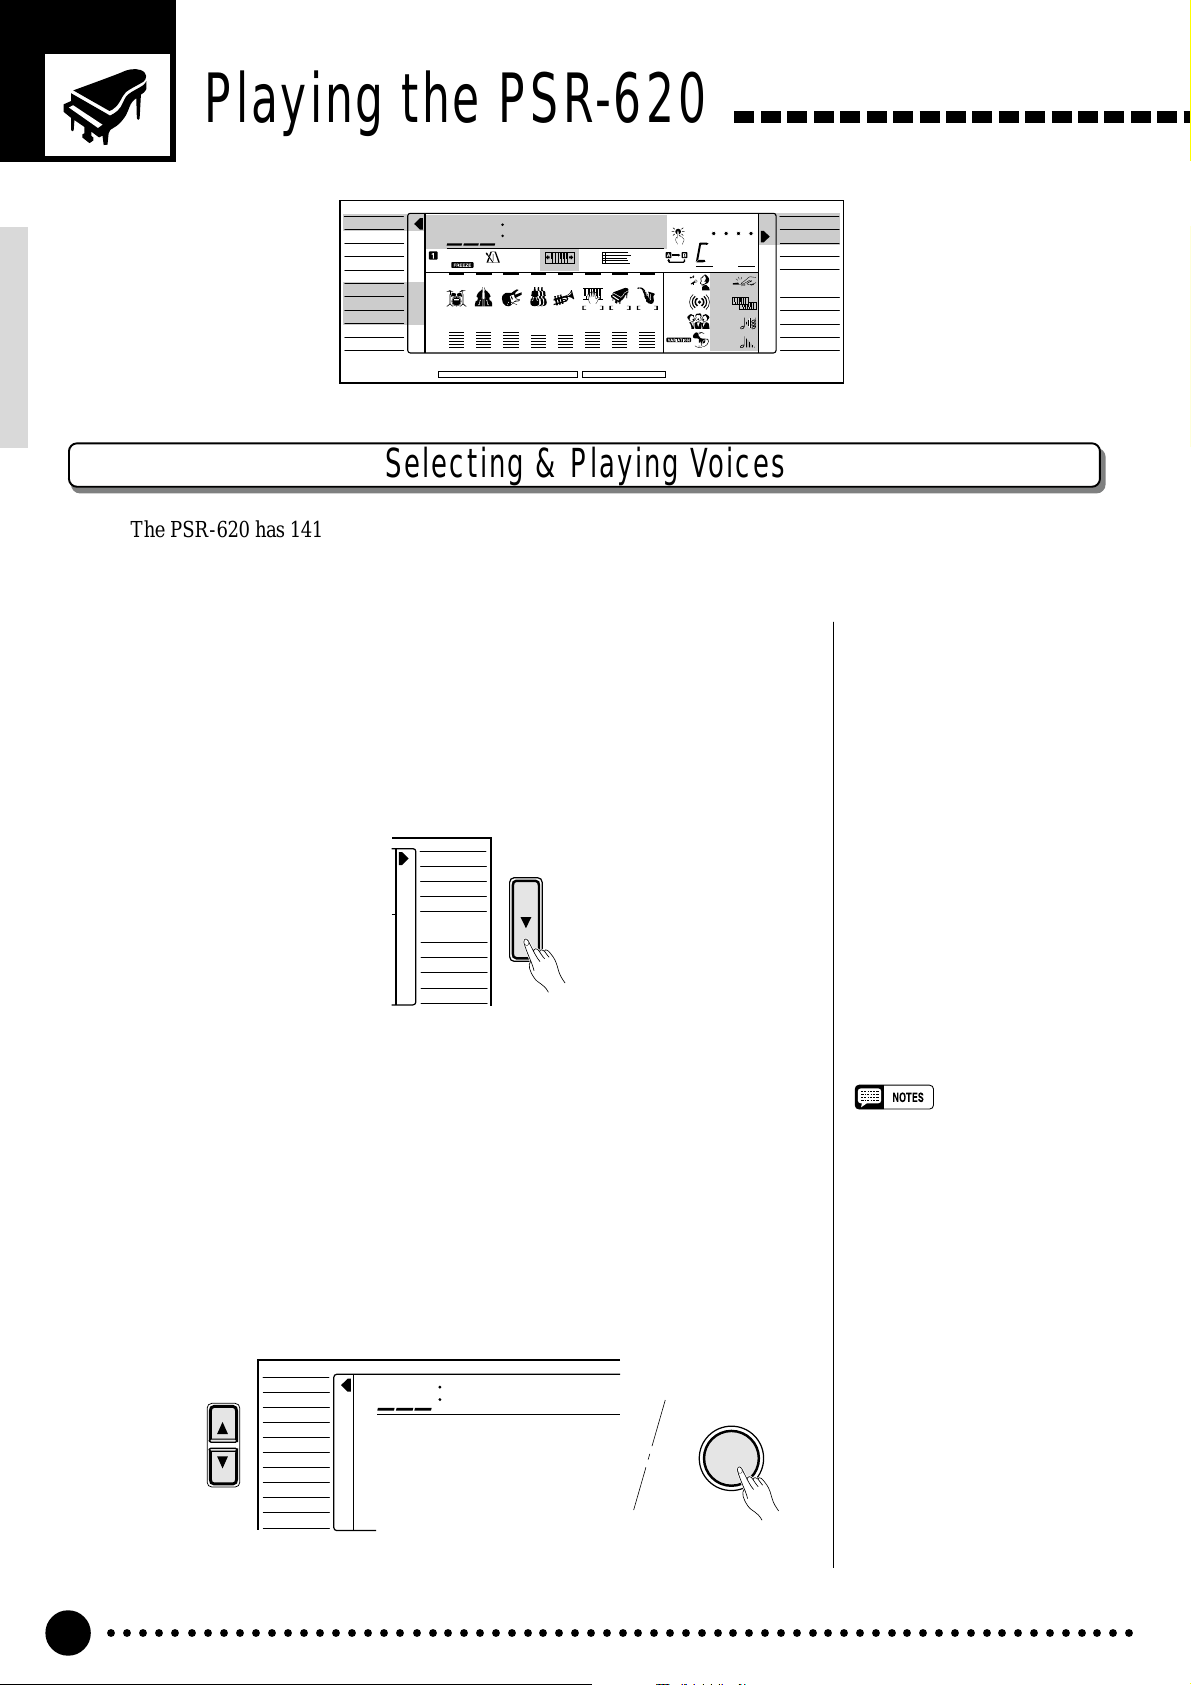
Selecting & Playing Voices
The PSR-620 has 141 outstanding “pitched” voices (voice numbers 01 through 141) and 8 percussion kits
(numbers 142 through 149) that you can select and play on the keyboard.
Select the NORMAL Mode........................................................................................................
1
If you want to play a single voice over the entire range of the PSR-620
keyboard, you’ll need to select the NORMAL mode. To do this, press the
[MODE] button to the right of the display as many times as necessary until
the arrow in the display appears next to “NORMAL” in the mode list to the
right of the display. The other modes will be described later in this manual.
NORMAL
SPLIT
SINGLE
FINGERED
LOAD
SAVE
DELETE
FORMAT
Select the VOICE Function......................................................................................................
2
Before you select a voice to play, the PSR-620 voice function must be
selected. The simplest way to do this is to press the [VOICE] button. This
immediately selects the VOICE function no matter what function was previously selected.
An alternative method is to press the [FUNCTION] button to the left of
the display as many times as necessary until the arrowhead in the display
appears next to “VOICE” in the function list to the left of the display.
VOICE
FUNCTION
STYLE
SONG
REGIST MEMORY
MULTI PAD
DUAL VOICE
SPLIT VOICE
HARM
/
ECHO
OVERALL
DIGITAL EFFECT
801
GrandPno
VOICE
•“Kybd Vol” function (see page
77) in the OVERALL function
group can be quickly selected by
pressing and holding the [VOICE]
button.
○○○○○○○○○○○○○○○○○○○○○○○○○○○○○○○○○○○○○○○○○○○○○○○○○○○○○○○○○○○○○○○○○
12
Page 15
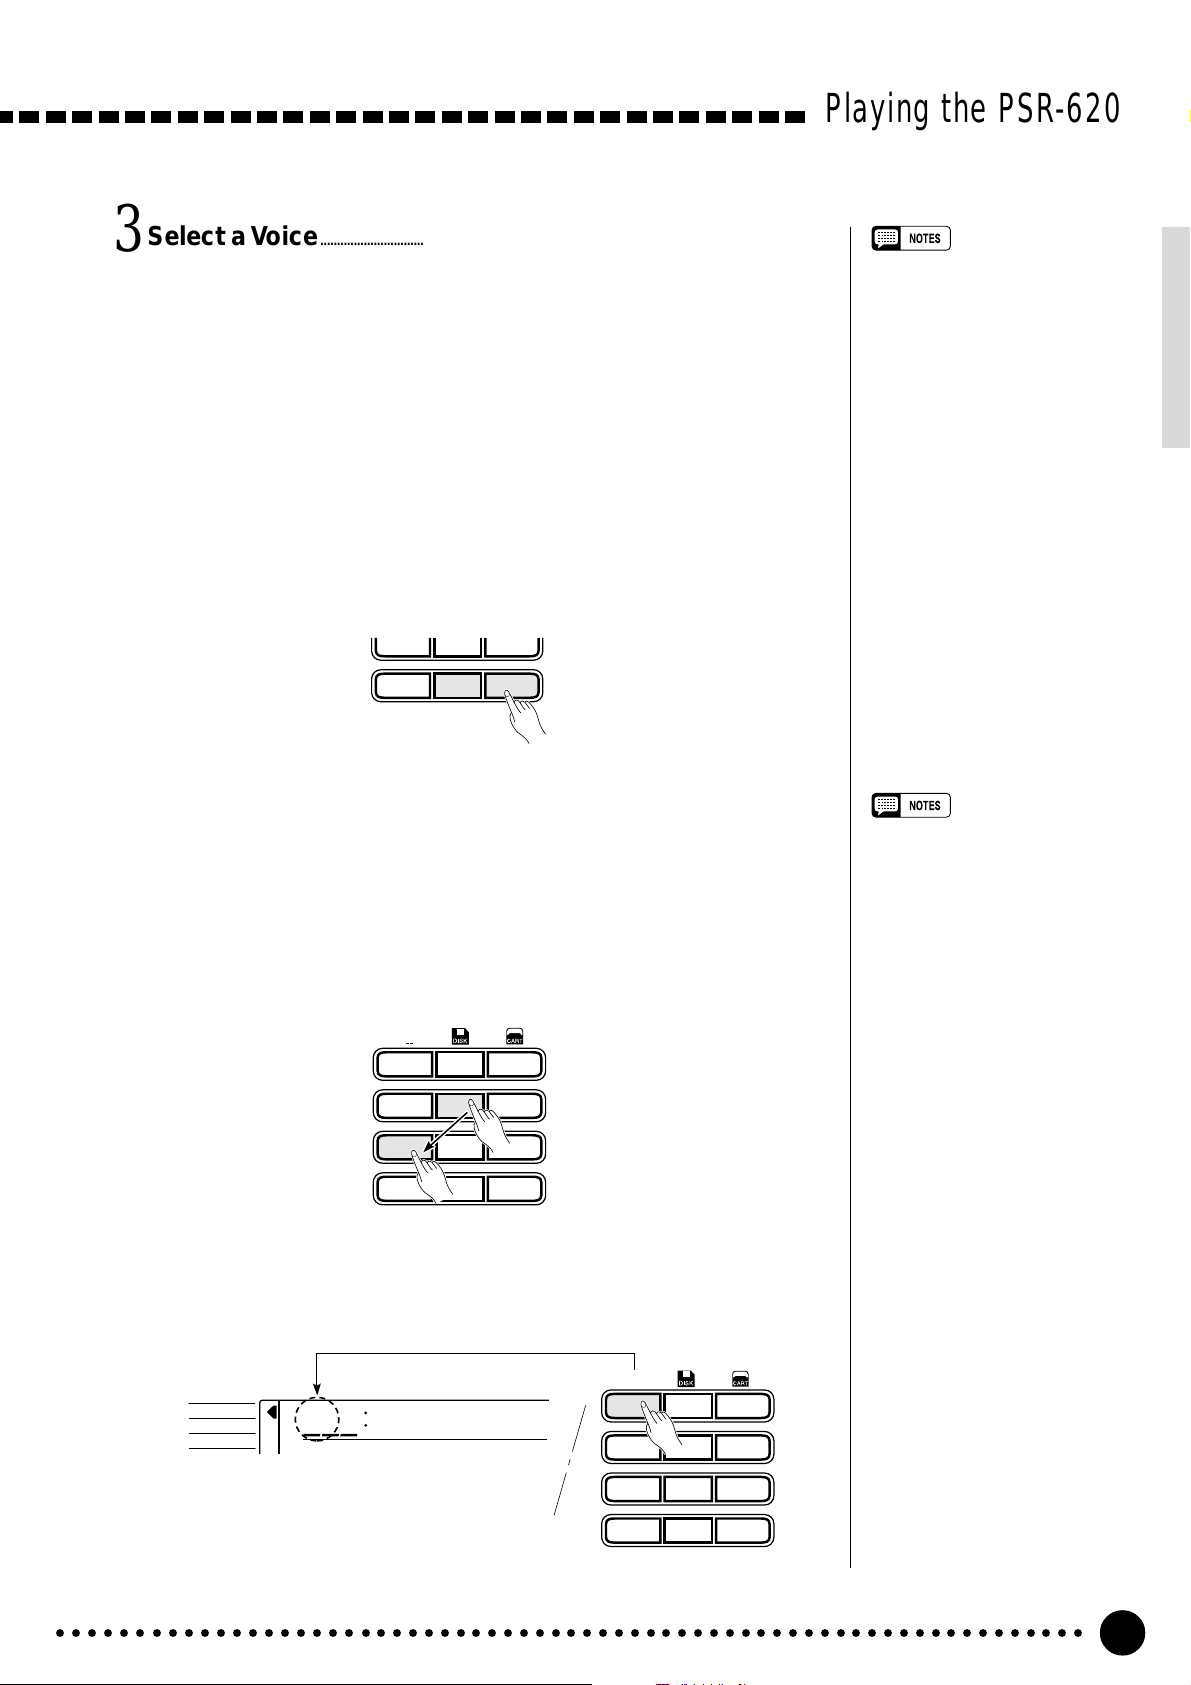
Select a Voice.....................................................................................................................................................
3
The PSR-620 has 149 voices that can be selected by using either the [–/
NO] and [+/YES] buttons, the number buttons or the data dial. The voices
are listed in the VOICE list printed at the top of the instrument’s control
panel. The number and name of the currently selected voice appears on the
top line of the display panel while the VOICE function is selected.
● The [–/NO] and [+/YES] Buttons
When the VOICE function is selected these buttons step up or down
through the PSR-520’s voices. Press either button briefly to step to the
next voice in the corresponding direction, or hold the button to scroll
rapidly through the voices in the corresponding direction.
789
–
+
/NO
/YES
0
Playing the PSR-620
• Voice numbers 150 ~ 151 exclusively can be used as the dual
voice — see page 19.
● The Number Buttons
The number buttons can be used to directly enter the number of the desired voice, thereby immediately selecting that voice without having to
step through a number of other voices.
Two-digit voice numbers (i.e. “01” through “99”) are selected simply by
entering the two digits in sequence — e.g. to select voice number “57”,
briefly press the [5] buttons and then the [7] button.
*
1
123
789
0
**
654
–
+
/YES
/NO
Three-digit voice numbers (i.e. “100” through “149”) are entered by first
pressing and holding the [1] button until “1” appears in the hundreds
position on the display, then press the remaining two digits in sequence.
**
*
1
– –
VOICE
STYLE
SONG
102
GrandPno
123
654
• Whenever you select a new
voice, the appropriate voicerelated parameters for that voice
will be set automatically. This is
the PSR-620 Voice Set function.
The Voice Set function can be
turned OFF if not required —
page 79.
• The stereo pan position of the
voice can be set via the “Pan”
function in the OVERALL function group — see page 78.
789
–
+
/NO
/YES
0
○○○○○○○○○○○○○○○○○○○○○○○○○○○○○○○○○○○○○○○○○○○○○○○○○○○○○○○○○○○○○○○○○
13
Page 16
Playing the PSR-620
● The Data Dial
This is undoubtedly the easiest way to select a voice. Simply rotate the
dial clockwise to increment or counter-clockwise to decrement.
Play & Adjust Volume.........................................................................................................................
4
You can now play the selected voice on the PSR-620 keyboard. Use the
[MASTER VOLUME] control to adjust the overall volume level.
• The optimum octave settings
(OVERALL function: octave=0)
are set for each voice (except for
the keyboard percussion voices).
• The keyboard volume can be
adjusted independently from the
accompaniment volume via the
“Kybd Vol” function in the OVERALL function group — see page
77. “Kybd Vol” function can be
quickly selected by pressing and
holding the [VOICE] button.
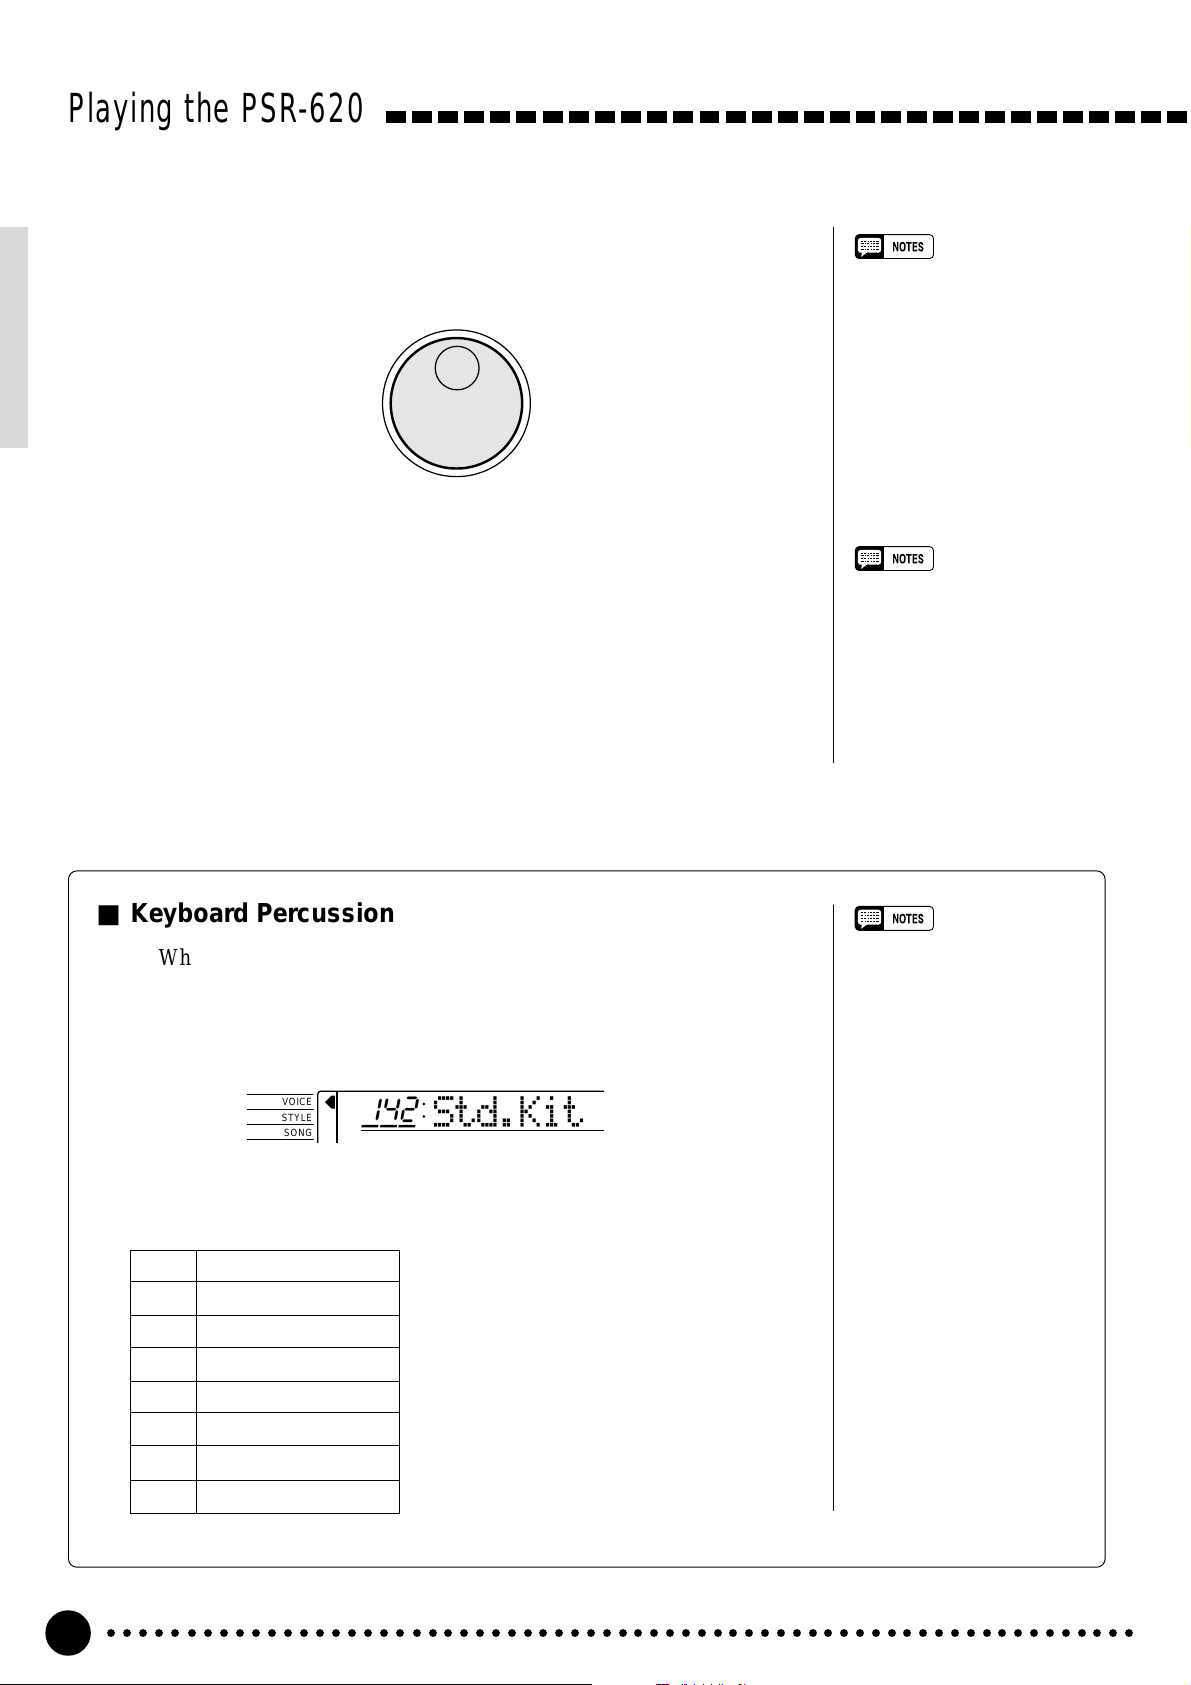
■ Keyboard Percussion
When one of the eight PERCUSSION KIT voices are selected — voice
numbers 142 through 149 — you can play drums and percussion instruments on the keyboard. The drums and percussion instruments played by the
various keys are marked by symbols below the keys.
VOICE
STYLE
SONG
● The Percussion Kits
142 Standard Kit
143 Room Kit
144 Rock Kit
145 Electronic Kit
146 Analog Kit
147 Jazz Kit
148 Brush Kit
149 Classic Kit
142
Std.Kit
• The Harmony/Echo and Dual
functions (pages 20 and 17)
cannot be turned ON while a
keyboard percussion voice is
selected, and will automatically
be turned OFF if a keyboard
percussion voice is selected
while they are ON.
• The TRANSPOSE parameter
(page 23) has no effect on the
keyboard percussion voices.
• See page 98 for a complete
listing of the keyboard percussion drum instrument assignments.
○○○○○○○○○○○○○○○○○○○○○○○○○○○○○○○○○○○○○○○○○○○○○○○○○○○○○○○○○○○○○○○○○
14
Page 17

The Split Mode
The SPLIT mode lets you play different voices with the left and right hands.
You could, for example, play bass with the left hand while playing piano with
the right. The right-hand voice is the keyboard voice you select in the normal
way (page 12), and the left hand voice is selected via the SPLIT VOICE function, described below. The “split point” is initially set at B2 (note number 59),
but it can be set at any key on the keyboard.
The SPLIT mode is engaged by pressing the [MODE] button so that the
arrow in the display appears next to “SPLIT” in the mode list to the right of the
display.
Playing the PSR-620
• The SPLIT mode and DUAL
VOICE features (page 17) can be
used at the same time. In this
case the dual voice plays simultaneously with the right-hand
voice only.
Split Point
Split Voice
Voice selected via
the VOICE function
NORMAL
SPLIT
SINGLE
FINGERED
LOAD
SAVE
DELETE
FORMAT
Changing the Split Voice & Related Parameters
Select the SPLIT VOICE Function..............................................................................
1
Press the [FUNCTION] button to the left of the display as many times
as necessary until the arrowhead in the display appears next to “SPLIT
VOICE” in the function list to the left of the display.
VOICE
FUNCTION
STYLE
SONG
REGIST MEMORY
MULTI PAD
DUAL VOICE
SPLIT VOICE
HARM
/
ECHO
OVERALL
DIGITAL EFFECT
855
Aco.Bass
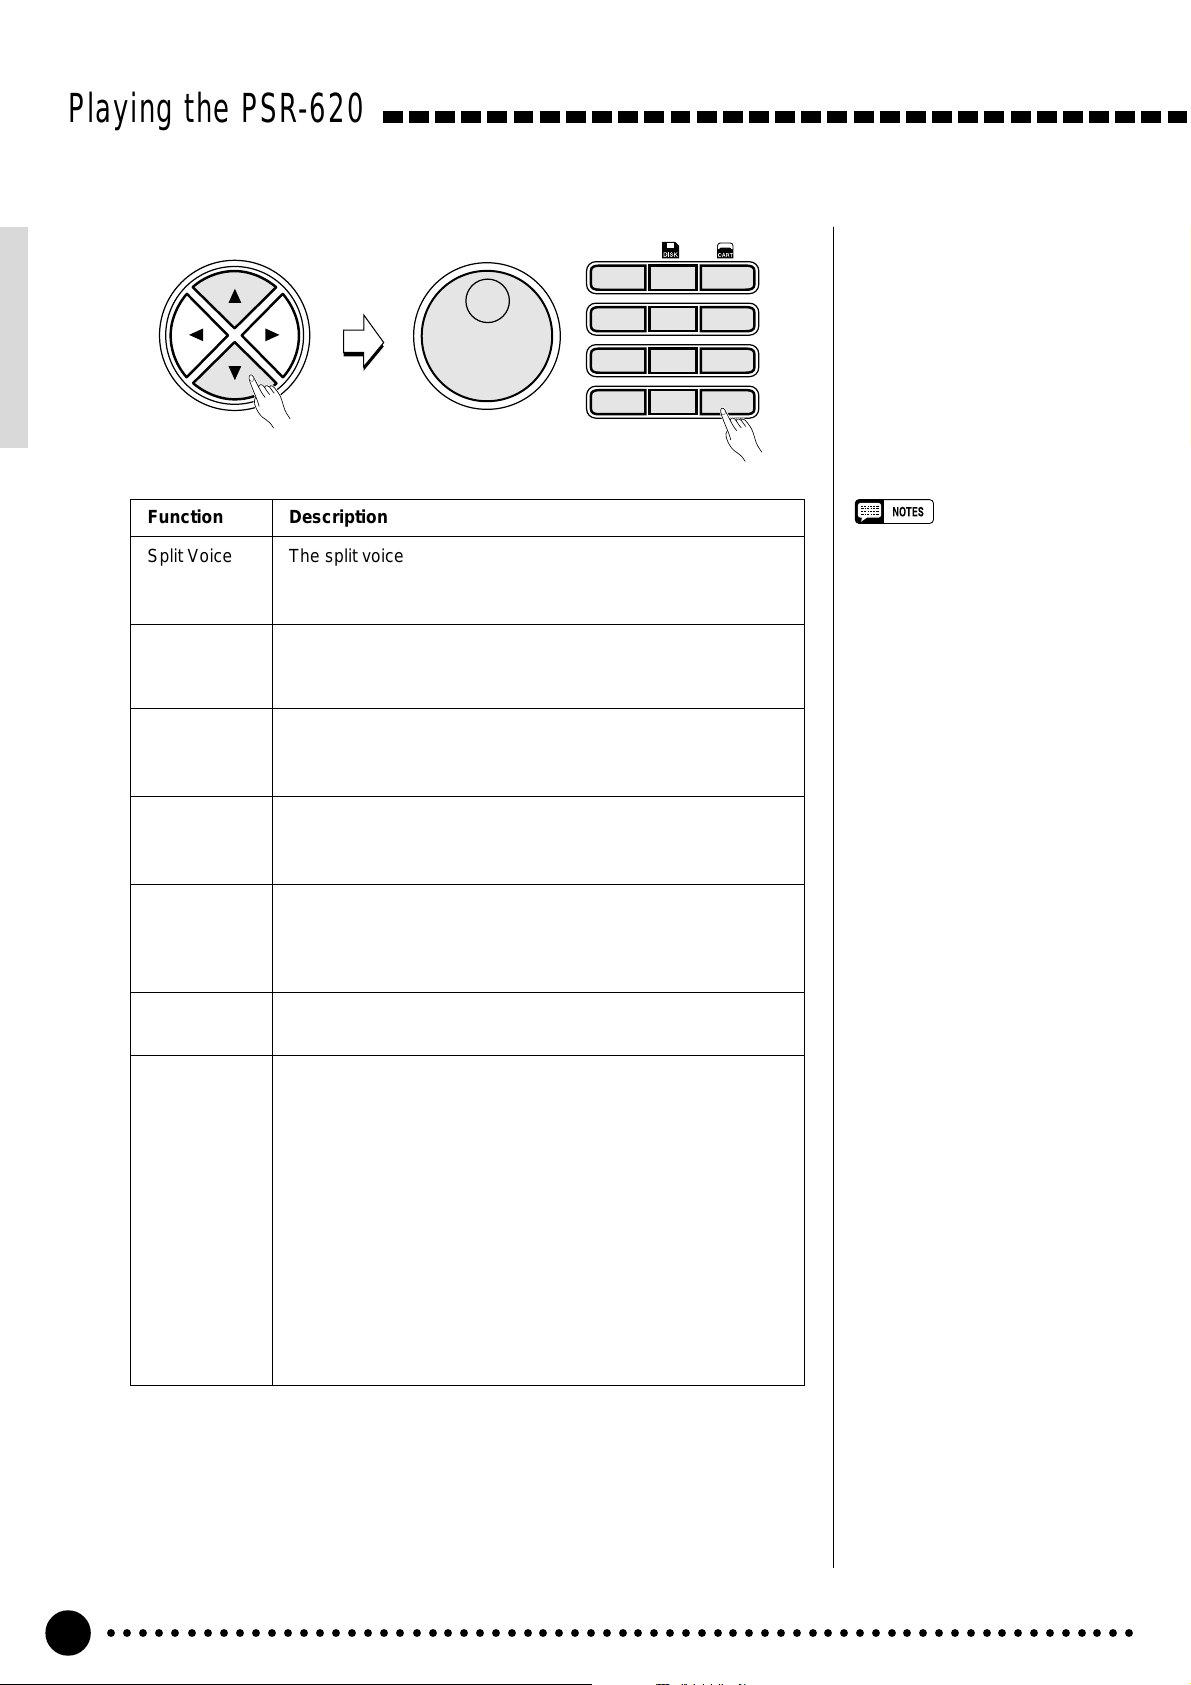
Select the Function and Set As Required.................................................
2
Use the cursor [▲] and [▼] buttons to select the desired function, and
then the [–/NO] and [+/YES] buttons, the number buttons or the data dial to
set as required (the name of the selected function and its current setting appear on the top line of the display).
○○○○○○○○○○○○○○○○○○○○○○○○○○○○○○○○○○○○○○○○○○○○○○○○○○○○○○○○○○○○○○○○○
15
Page 18
Playing the PSR-620
CURSOR
Function Description
Split Voice The split voice can be changed as required while the number
and name of the current split voice appear on the top line of
the display.
**
*
1
– –
123
654
789
–
+
/NO
/YES
0
S.Volume Sets the volume of the split voice so you can create the opti-
mum blend with the right-hand voice. The volume range is
from “00” (no sound) to “127” (maximum split voice volume).
S.Octave Shifts the pitch of the split voice up or down one or two oc-
taves. “–1” is down one octave, “–2” is down two octaves; “+1”
and “+2” are up one and two octaves, respectively.
S.RevLvl Sets the reverb send level for the split voice. The reverb send
level determines the amount of signal sent to the reverb effect.
The range is from “00”(no effect) to “127” (maximum effect).
S.ChoLvl Sets the chorus send level for the split voice. The chorus send
level determines the amount of signal sent to the chorus effect. The range is from “00” (no effect) to “127” (maximum
effect).
• If the Voice Set function is ON
(page 79), the Split Voice parameters will change automatically
whenever a different keyboard
voice is selected.
• The selected Split Voice parameter can be reset to its default
value by simultaneously pressing
the [–/NO] and [+/YES] buttons.
• Negative ”S.Octave” and “S.Pan”
parameters can be entered by
pressing the number buttons
while holding the [-NO] button.
• Reverb and chorus return levels
can be changed via “RevRtnLv”
and “ChoRtnLv” in the DIGITAL
EFFECT function - see pages 25
and 27.
S.Pan Positions the split voice in the stereo sound field. The pan
range is from “–7” to “+7”. “–7” is full left and “+7” is full right.
S.Split Sets the keyboard split point — i.e. the key that separates the
left- and right-hand voices (the split-point key is included in the
left-hand section of the keyboard). Simply press the key you
want to assign as the split point. The key number of the key
you press will appear to the left of “S.Split” on the top line of
the display. You can also use the [–/NO] and [+/YES] buttons,
the number buttons or the data dial to enter the split point key
number. The lowest key on the keyboard (C1) is key number
“36”, middle C (C3) is “60”, and the highest key (C6) is “96”.
The split point can be set at any key number from 00 through
127, allowing the split point to be set outside the range of the
PSR-620 keyboard for MIDI applications. The default split
point is 59 (B2).
Exit.........................................................................................................................................................................................
3
Press the [VOICE] button or select a different function to exit from the
SPLIT VOICE function.
○○○○○○○○○○○○○○○○○○○○○○○○○○○○○○○○○○○○○○○○○○○○○○○○○○○○○○○○○○○○○○○○○
16
Page 19
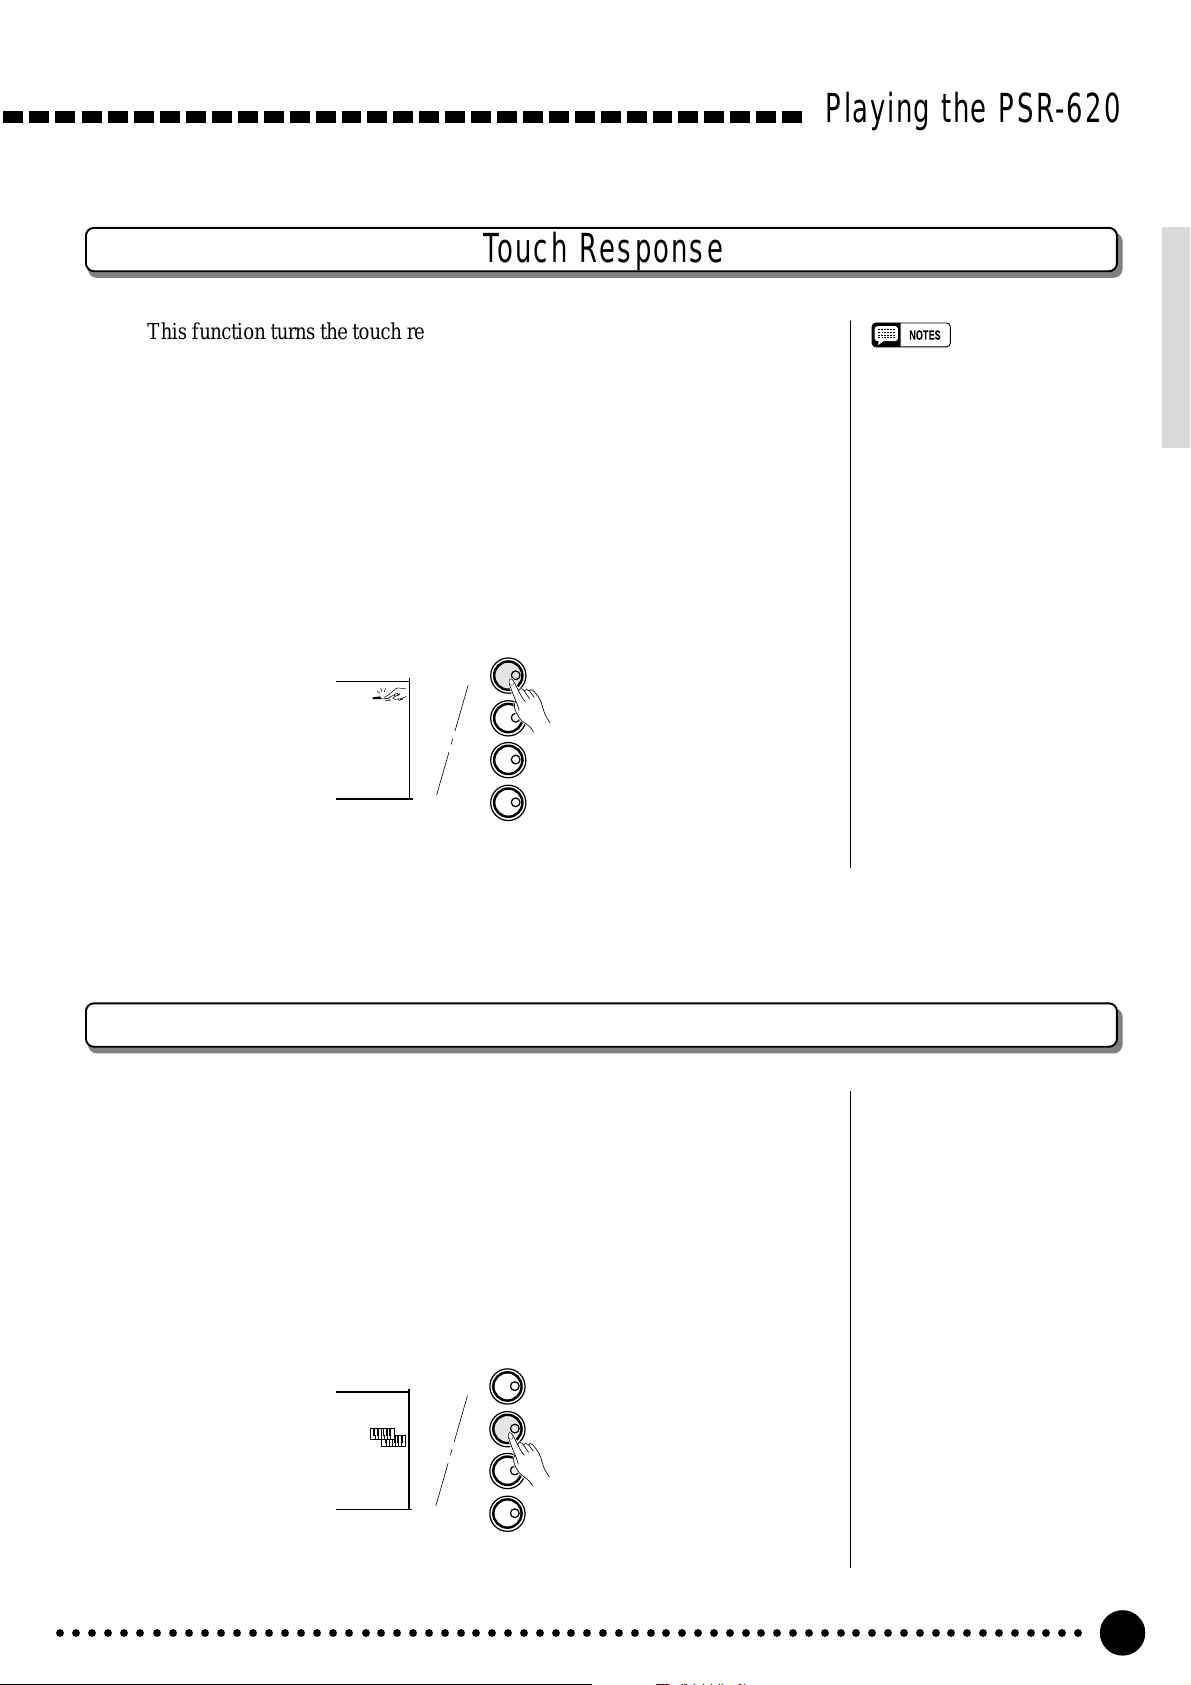
Touch Response
This function turns the touch response of the keyboard ON or OFF. Use the
KEYBOARD [TOUCH RESPONSE] button to turn TOUCH RESPONSE ON
or OFF as required. The touch-response icon will appear next to “TOUCH” in
the display when TOUCH RESPONSE is turned ON. The actual touch response sensitivity of the keyboard can be adjusted via the “TouchSns” function
in the OVERALL function group (page 79). When OFF (i.e. when the touchresponse icon is not showing) the same volume is produced no matter how hard
you play on the keyboard. Touch response can be turned OFF to produce a
more realistic effect with voices that normally do not have touch response: e.g.
organ and harpsichord.
KEYBOARD
TOUCH RESPONSE
TOUCH
DUAL
HARMONY
SUSTAIN
DUAL VOICE
HARMONY/ECHO
SUSTAIN
Playing the PSR-620
• Touch Response is turned ON
whenever the power switch is
turned ON.
• The “TouchSns” function in the
OVERALL function group can be
quickly selected by pressing and
holding the [TOUCH RESPONSE] button.
Dual Voice
When the DUAL VOICE feature is engaged you can play two voices simultaneously across the entire keyboard — the keyboard voice you select in the
normal way (page 12), and a “dual” voice selected via the DUAL VOICE function.
The DUAL VOICE feature is turned ON and OFF by pressing the [DUAL
VOICE] button. The dual-voice icon (overlapping keyboards) will appear next
to “DUAL” in the display when DUAL VOICE is turned ON.
KEYBOARD
TOUCH RESPONSE
TOUCH
DUAL
HARMONY
SUSTAIN
DUAL VOICE
HARMONY/ECHO
SUSTAIN
○○○○○○○○○○○○○○○○○○○○○○○○○○○○○○○○○○○○○○○○○○○○○○○○○○○○○○○○○○○○○○○○○
17
Page 20
Playing the PSR-620
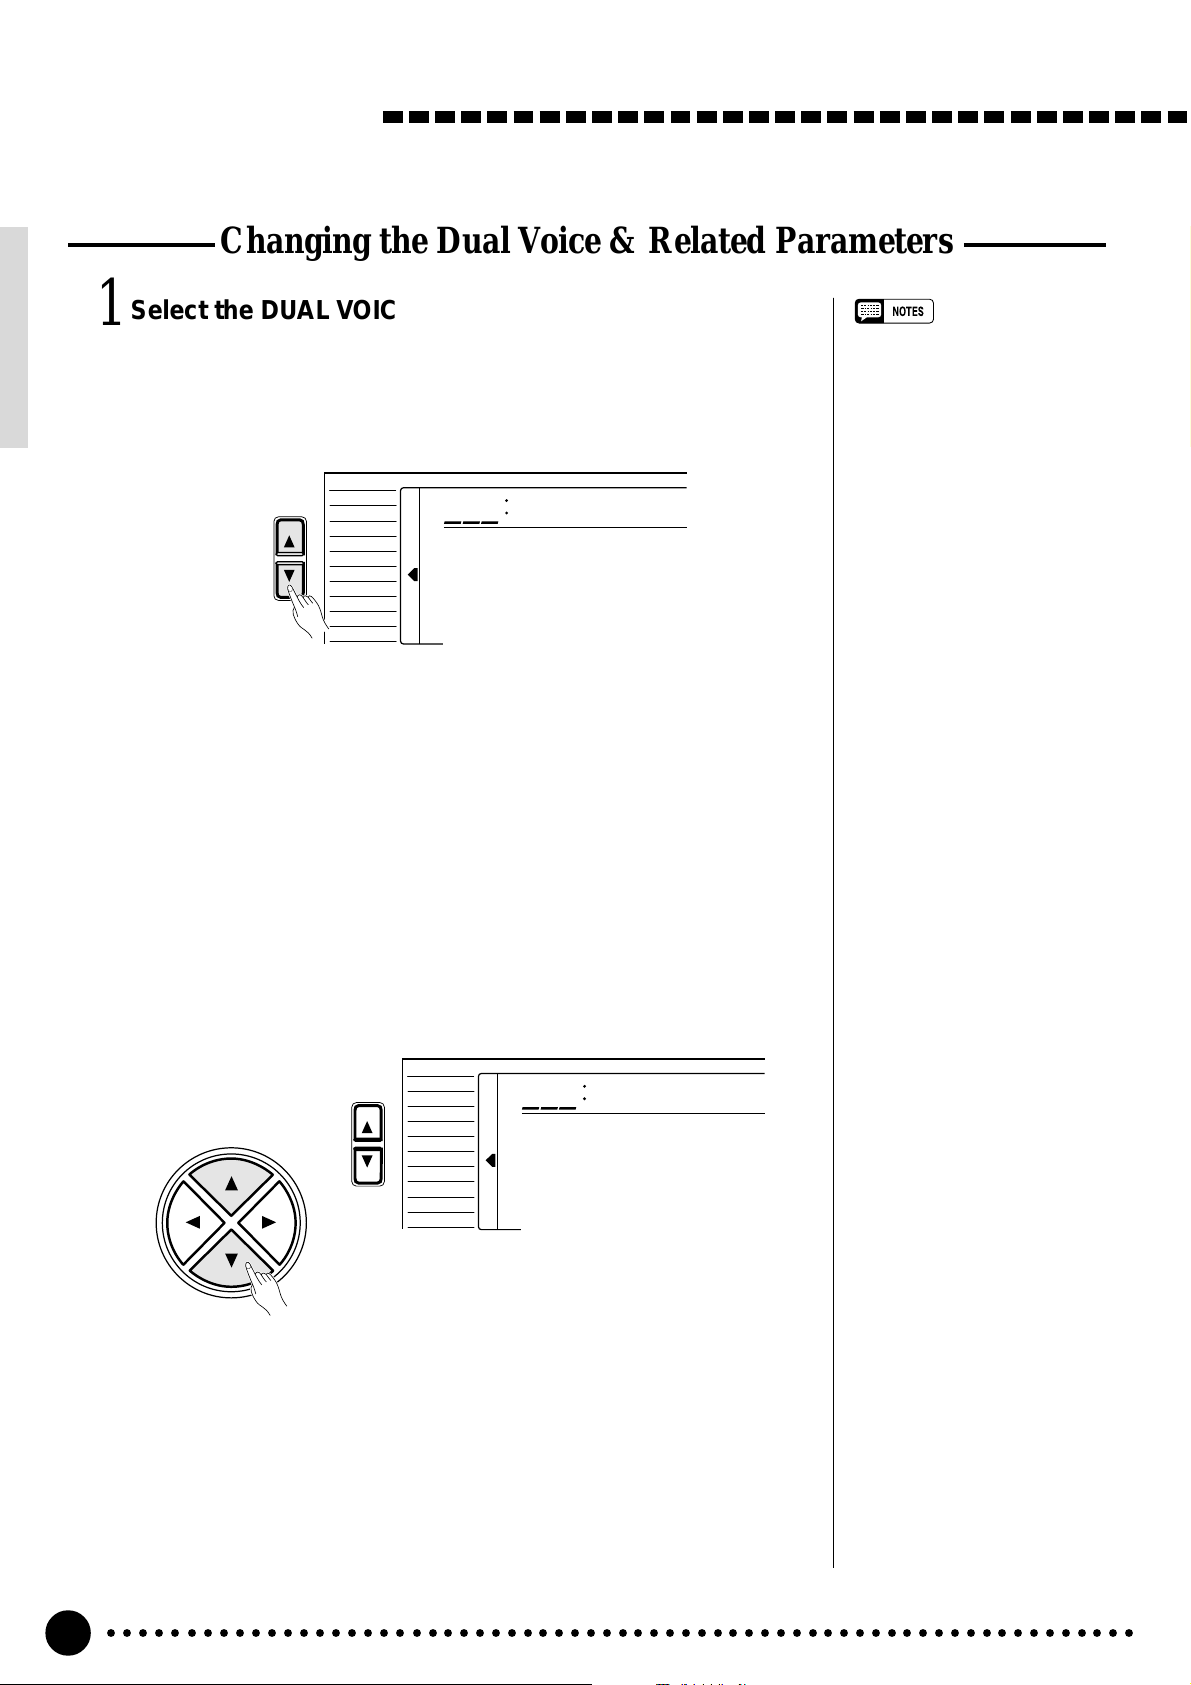
Changing the Dual Voice & Related Parameters
Select the DUAL VOICE Function...............................................................................
1
Press the [FUNCTION] button to the left of the display as many times
as necessary until the arrowhead in the display appears next to “DUAL
VOICE” in the function list to the left of the display.
FUNCTION
REGIST MEMORY
MULTI PAD
DUAL VOICE
SPLIT VOICE
HARM
DIGITAL EFFECT
VOICE
STYLE
SONG
/
ECHO
OVERALL
873
•“DUAL VOICE” function can be
quickly selected by pressing and
holding the [DUAL VOICE] button.
Strings2
Select the Function and Set As Required.................................................
2
Use the cursor [▲] and [▼] buttons to select the desired function, and
then the [–/NO] and [+/YES] buttons, the number buttons or the data dial to
set as required (the name of the selected function and its current setting appear on the top line of the display).
VOICE
CURSOR
FUNCTION
STYLE
SONG
REGIST MEMORY
MULTI PAD
DUAL VOICE
SPLIT VOICE
HARM
/
ECHO
OVERALL
DIGITAL EFFECT
150
D.Volume
○○○○○○○○○○○○○○○○○○○○○○○○○○○○○○○○○○○○○○○○○○○○○○○○○○○○○○○○○○○○○○○○○
18
Page 21
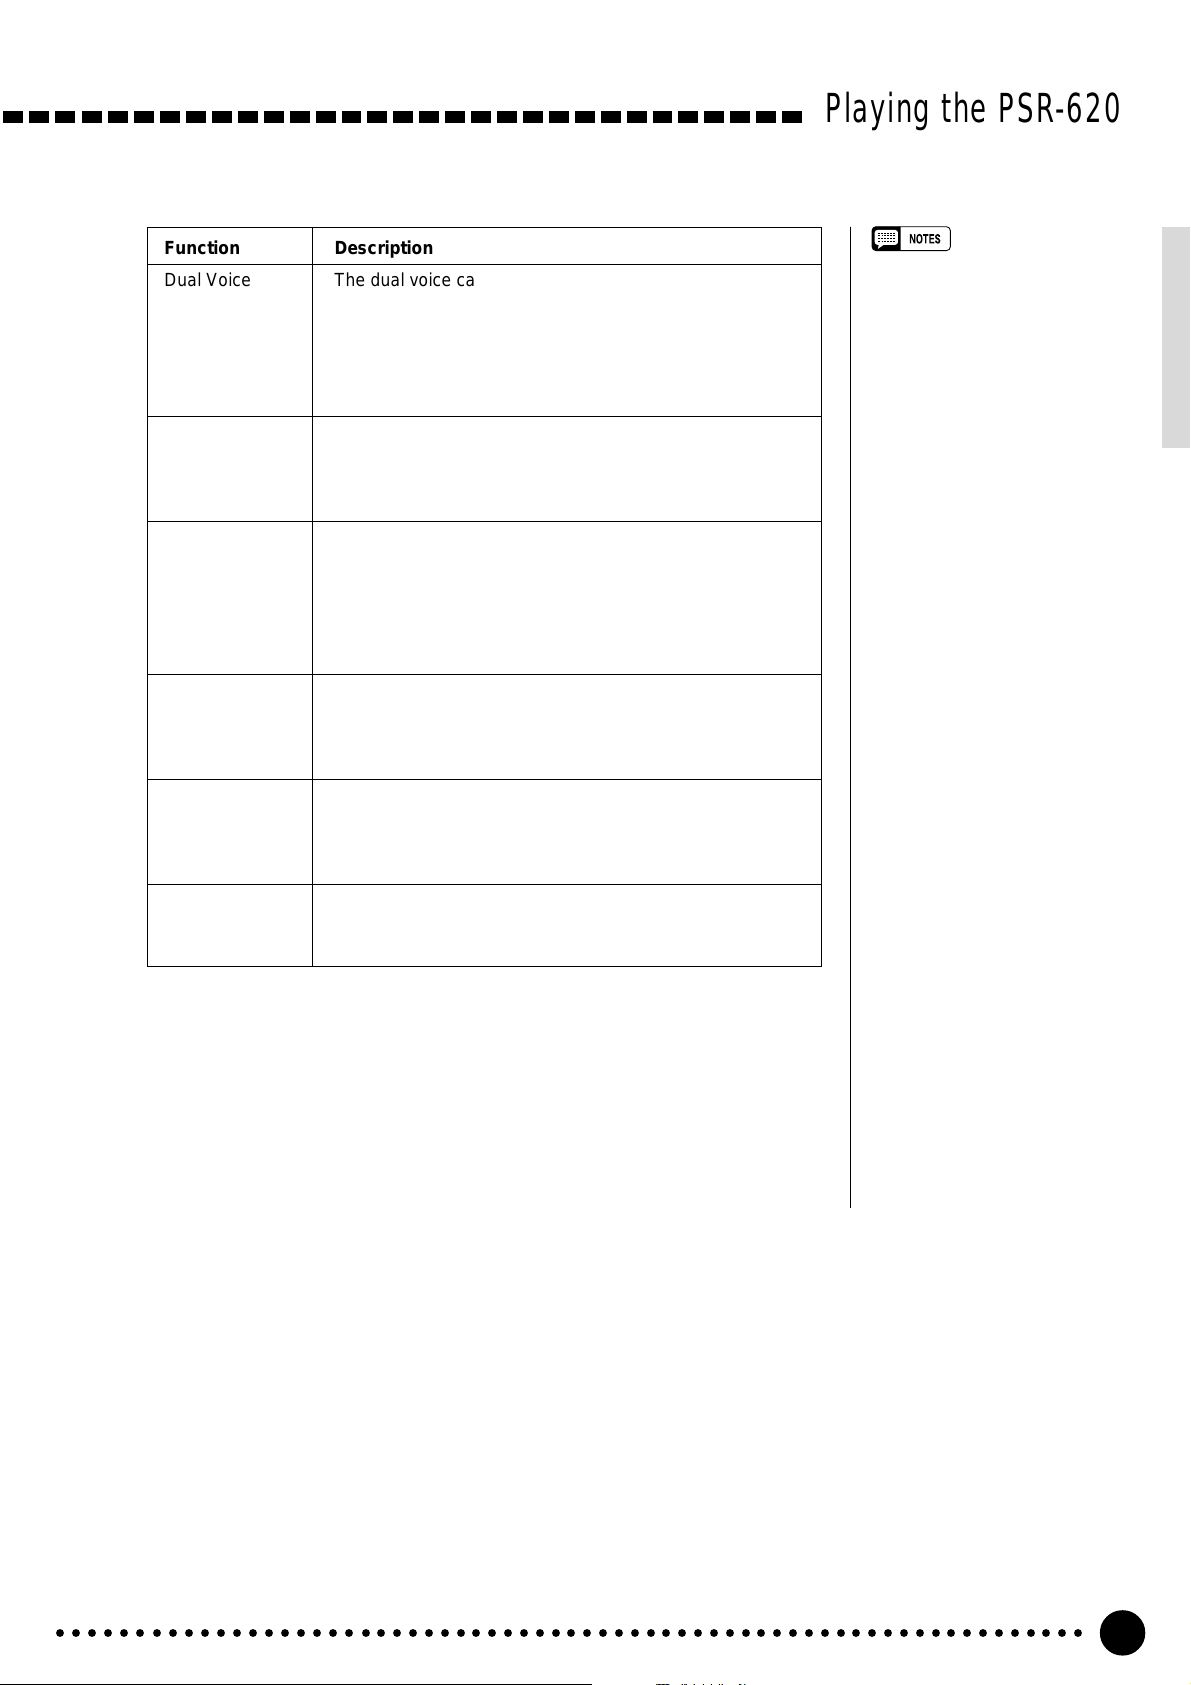
Function Description
Dual Voice The dual voice can be changed as required while the
number and name of the current dual voice appear on the
top line of the display.
The PSR-620 has 143 dual voices (voice numbers
01…141 and 150…151). Voice numbers 150…151 exclusively can be used as the dual voice.
D.Volume Sets the volume of the dual voice so you can create the
optimum blend with the main keyboard voice. The volume
range is from “00” (no sound) to “127” (maximum dual
voice volume).
D.Octave Shifts the pitch of the dual voice up or down one or two
octaves. “–1” is down one octave, “–2” is down two octaves; “+1” and “+2” are up one and two octaves, respectively. The original octave of the dual voice is determined
by the “Octave” function in the OVERALL function group
— page 77.
D.RevLvl Sets the reverb send level for the dual voice. The reverb
send level detrmines the amount of signal sent to the
reverb effect. The range is “00”(no effect) to “127”(maxi-
mum effect).
D.ChoLvl Sets the chorus send level for the dual voice. The chorus
send level determines the amount of signal sent to the
chorus effect. The range is “00”(no effect) to “127”(maxi-
mum effect).
Playing the PSR-620
• If the Voice Set function is ON
(page 79), the Dual Voice parameters will change automatically
whenever a different voice is
selected via the VOICE function.
• Keyboard percussion voices
cannot be used as the dual
voice.
• The selected Dual Voice param-
eter can be reset to its default
value by simultaneously pressing
the [–/NO] and [+/YES] buttons.
• The octave of the main and dual
voices can be changed via the
“Octave” function in the OVERALL function group — page 77.
• Negative “D.Octave” and “D.Pan”
parameters can be entered by
pressing the number buttons
while holding the [–/NO] button.
• Reverb and chorus return levels
can be changed via “RevRtnLv”
and “ChoRtnLv”, respectively, in
the DIGITAL EFFECT functionsee pages 25 and 27.
D.Pan Positions the dual voice in the stereo sound field. The pan
range is from “–7” to “+7”. “–7” is full left and “+7” is full
right.
Exit.........................................................................................................................................................................................
3
Press the [VOICE] button or select a different function to exit from the
DUAL VOICE function.
○○○○○○○○○○○○○○○○○○○○○○○○○○○○○○○○○○○○○○○○○○○○○○○○○○○○○○○○○○○○○○○○○
19
Page 22
Playing the PSR-620
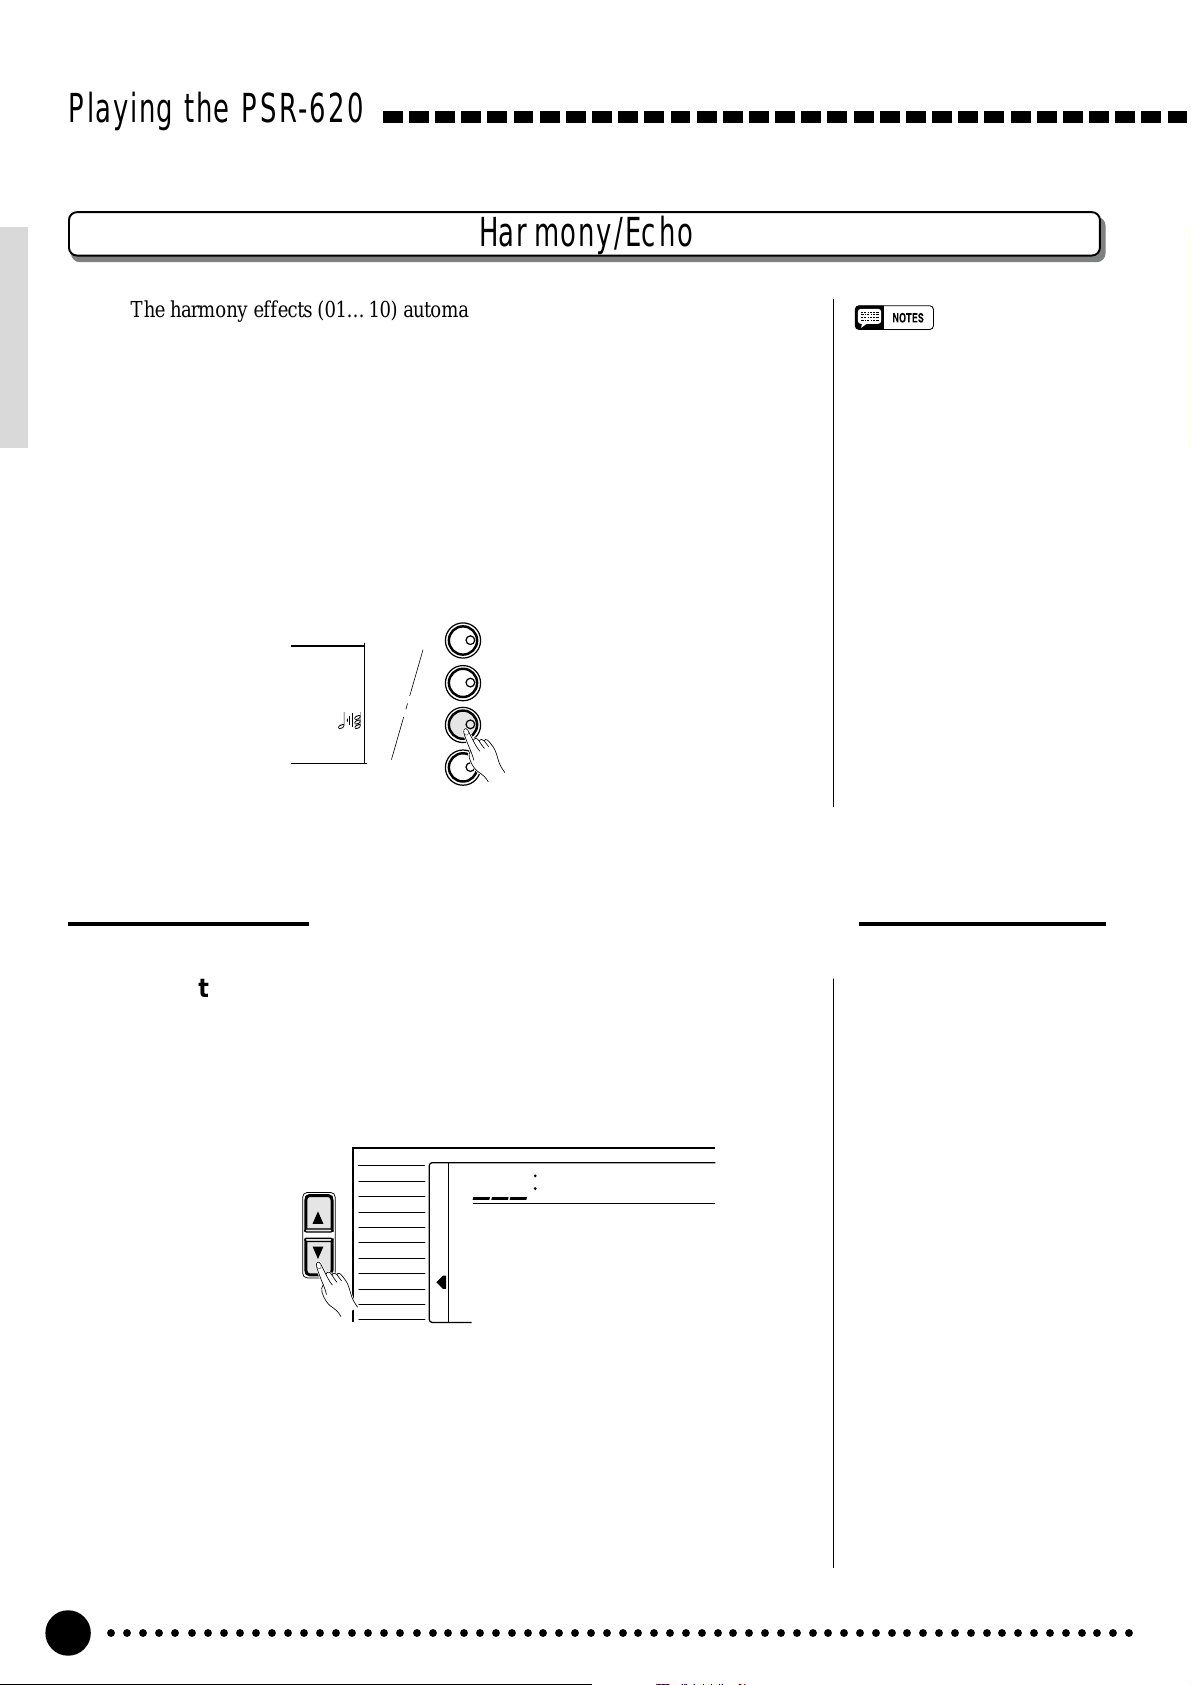
Harmony/Echo
The harmony effects (01…10) automatically add appropriate harmony notes
to the melody line you play on the keyboard. The harmony is derived from the
chords you play on the left hand parts.
The echo effects (11…22) add delay-based effects to the right hand melody
parts.
Press the [HARMONY/ECHO] button to turn the HARMONY/ECHO
effect ON or OFF. When HARMONY/ECHO is turned ON, the harmony icon
will appear next to “HARMONY” in the display.
KEYBOARD
TOUCH RESPONSE
TOUCH
DUAL
HARMONY
SUSTAIN
DUAL VOICE
HARMONY/ECHO
SUSTAIN
• Harmony/Echo effect can not be
turned ON when a keyboard
percussion kit is selected for the
Voice.
• Harmony can not be used when
the Auto Accompaniment Chord
Cancel function (page 32) is in
use.
• Harmony does not apply in the
NORMAL mode.
• Harmony can be used in the
SPLIT mode as well as in the
SINGLE and FINGERED modes.
• The Harmony/Echo effect can
not be turned ON when the FINGERED FULL mode (page 33) is
in use and will automatically be
turned OFF when the FINGERED
FULL mode is selected.
Selecting a Harmony/Echo Type
Select the Harmony/Echo Function.......................................................................
1
Press the [FUNCTION] button to the left of the display as many times
as necessary until the arrowhead in the display appears next to “HARM/
ECHO” in the function list to the left of the display.
VOICE
FUNCTION
STYLE
SONG
REGIST MEMORY
MULTI PAD
DUAL VOICE
SPLIT VOICE
HARM
/
ECHO
OVERALL
DIGITAL EFFECT
You can also select the HARM/ECHO function by pressing and holding
the [HARMONY/ECHO] button until the arrow jumps to the “HARM/
ECHO” position and the current harmony/echo name appears in the display.
805
Block
○○○○○○○○○○○○○○○○○○○○○○○○○○○○○○○○○○○○○○○○○○○○○○○○○○○○○○○○○○○○○○○○○
20
Page 23
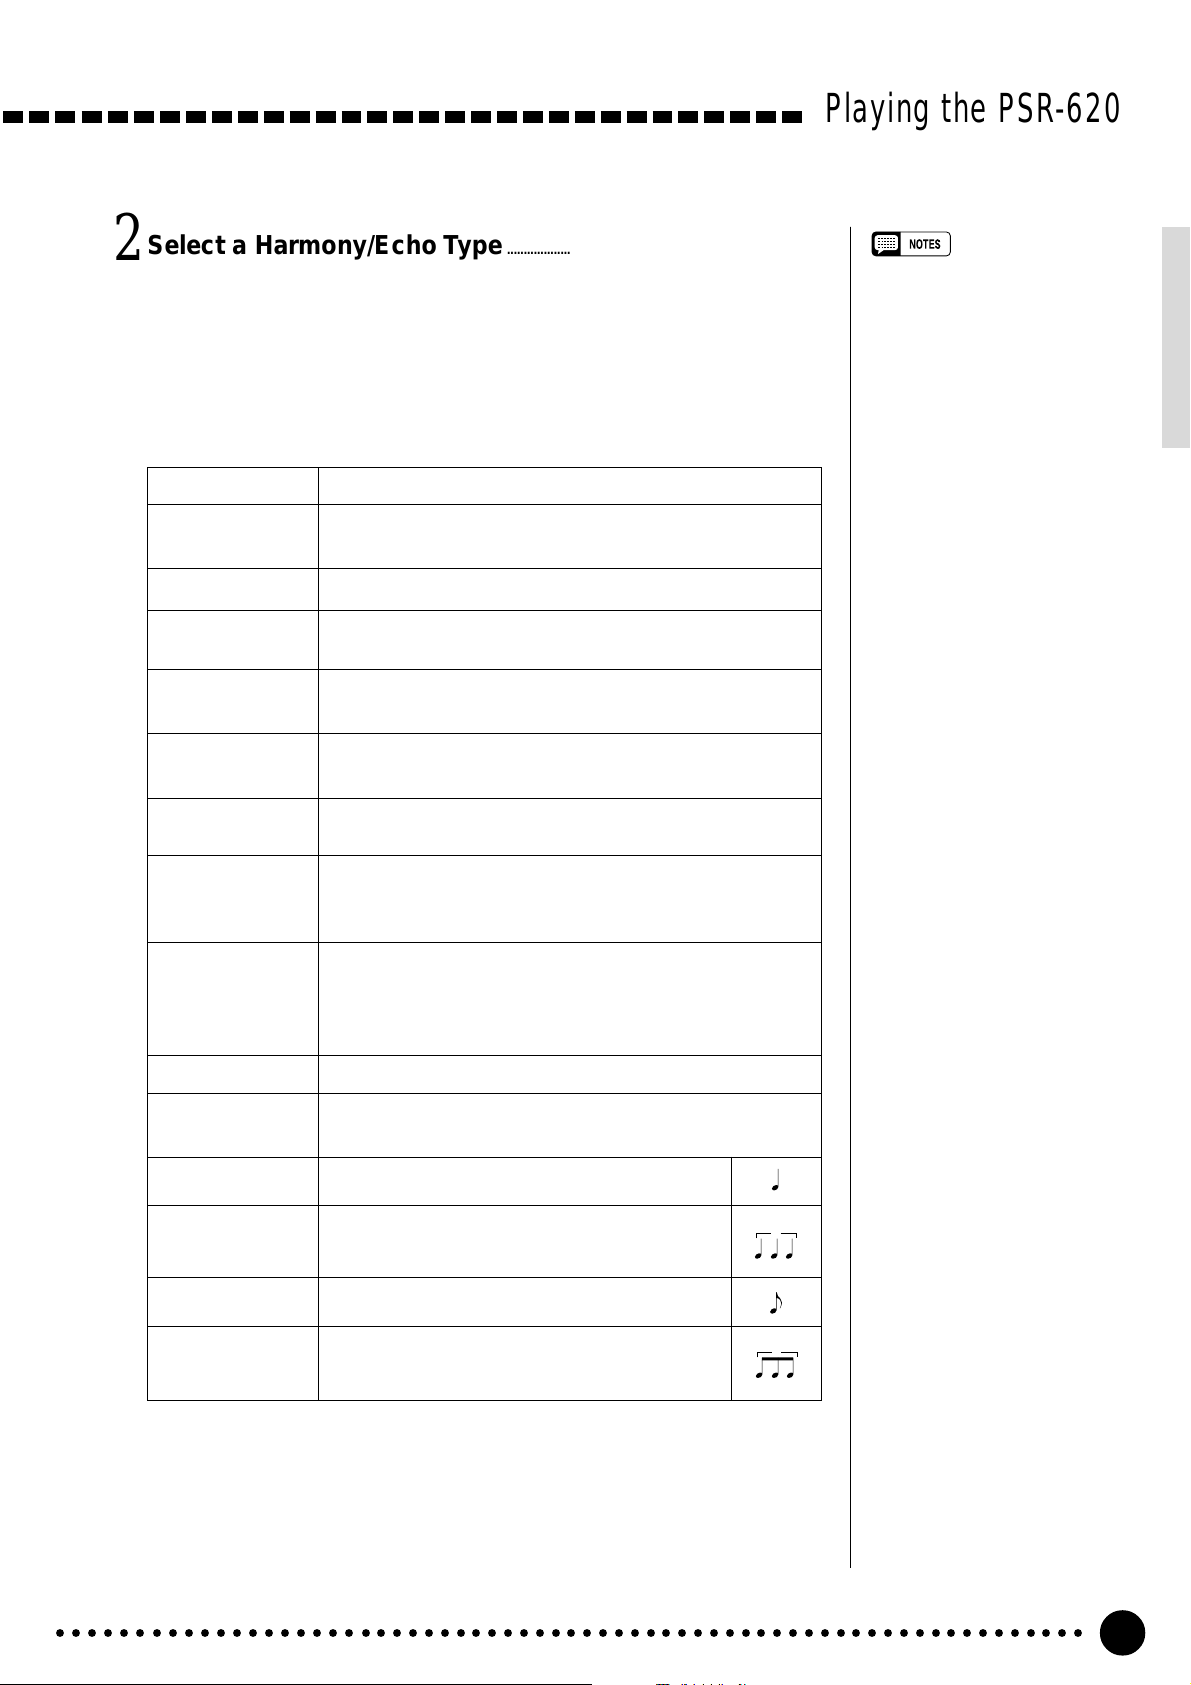
Select a Harmony/Echo Type.............................................................................................
2
Use the [–/NO] and [+/YES] buttons, the number buttons or the data dial
to select one of the available harmony/echo types (listed below).
● The Harmony(01…10) & Echo(11…22) Types
Type Description
01: Duet This harmony type produces a duophonic melody with the
second voice below the melody line.
02: 1+5 A parallel voice is produced a fifth above the melody voice.
03: Country Similar to Duet, but the second voice is above the melody
line.
04: Trio This harmony type generates two voices in addition to the
melody voice.
Playing the PSR-620
• If the VOICE SET function is ON
(page 79), the harmony/echo
type will change automatically
whenever a different voice is
selected via the VOICE function.
• The harmony/echo type can be
reset to its default by simultaneously pressing the [–/NO] and [+/
YES] buttons.
05: Block Three or four notes are added to the melody to produce
four or five-note chords.
06: 4WayClose1 Three harmony notes are generated to produce a four-note
chord.
07: 4WayClose2 Similar to the preceding type, but depending on the chords
played this type will sometimes produce a more colorful
sound.
08: 4WayOpen Four-note chords with open voice (large intervals between
the notes). The result is a very “open” sound. Since the
harmony notes can be as much as two octaves below the
melody, avoid playing in the lower registers.
09: Octave One note is added an octave below the melody.
10: Strum The notes and assignments are the same as in the Block
type, but the notes are arpeggiated.
11: Echo1/4 This type creates quarter-note delayed repeats.
12: Echo1/6 This type creates quarter-note triplet delayed
repeats.
13: Echo1/8 This type creates 8th-note delayed repeats.
3
14: Echo1/12 This type creates 8th-note triplet delayed
repeats.
○○○○○○○○○○○○○○○○○○○○○○○○○○○○○○○○○○○○○○○○○○○○○○○○○○○○○○○○○○○○○○○○○
3
21
Page 24
Playing the PSR-620
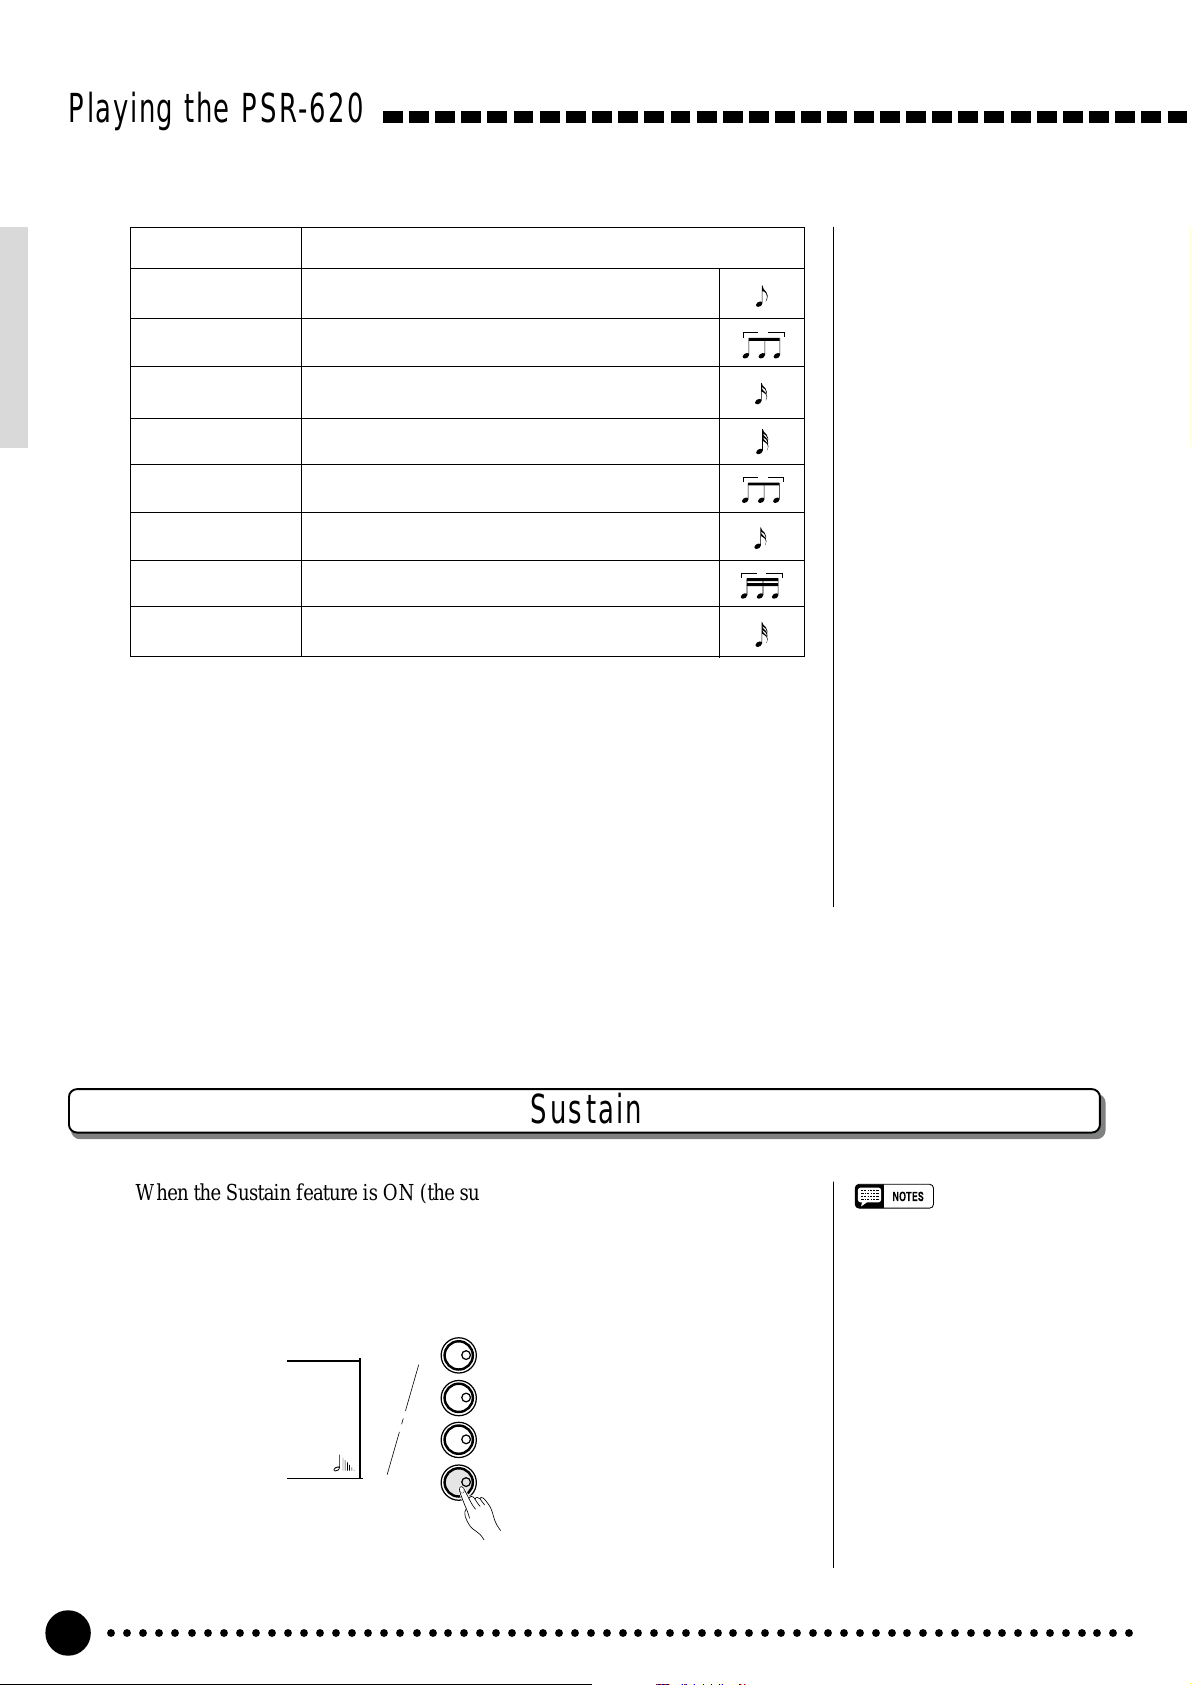
Type Description
15: Tremolo1/8 This type creates 8th-note tremolos.
16: Tremolo1/12 This type creates 8th-note triplet tremolos.
17: Tremolo1/16 This type creates 16th-note tremolos.
18: Tremolo1/32 This type creates 32nd-note tremolos.
19: Trill1/12 This type creates 8th-note triplet trilled repeats.
20: Trill1/16 This type creates 16th-note trilled repeats.
21: Trill1/24 This type creates 16th-note triplet trilled repeats.
22: Trill1/32 This type creates 32nd-note trilled repeats.
Exit.........................................................................................................................................................................................
3
Press the [VOICE] button or select a different function to exit from the
HARM/ECHO function.
3
3
3
Sustain
When the Sustain feature is ON (the sustain icon will appear next to “SUS-
TAIN” in the display), all notes played on the keyboard have a longer sustain.
Press the [SUSTAIN] button to turn the SUSTAIN effect ON or OFF.
KEYBOARD
TOUCH RESPONSE
TOUCH
DUAL
HARMONY
SUSTAIN
○○○○○○○○○○○○○○○○○○○○○○○○○○○○○○○○○○○○○○○○○○○○○○○○○○○○○○○○○○○○○○○○○
22
DUAL VOICE
HARMONY/ECHO
SUSTAIN
• Sustain does not apply to some
voices.
Page 25
Playing the PSR-620
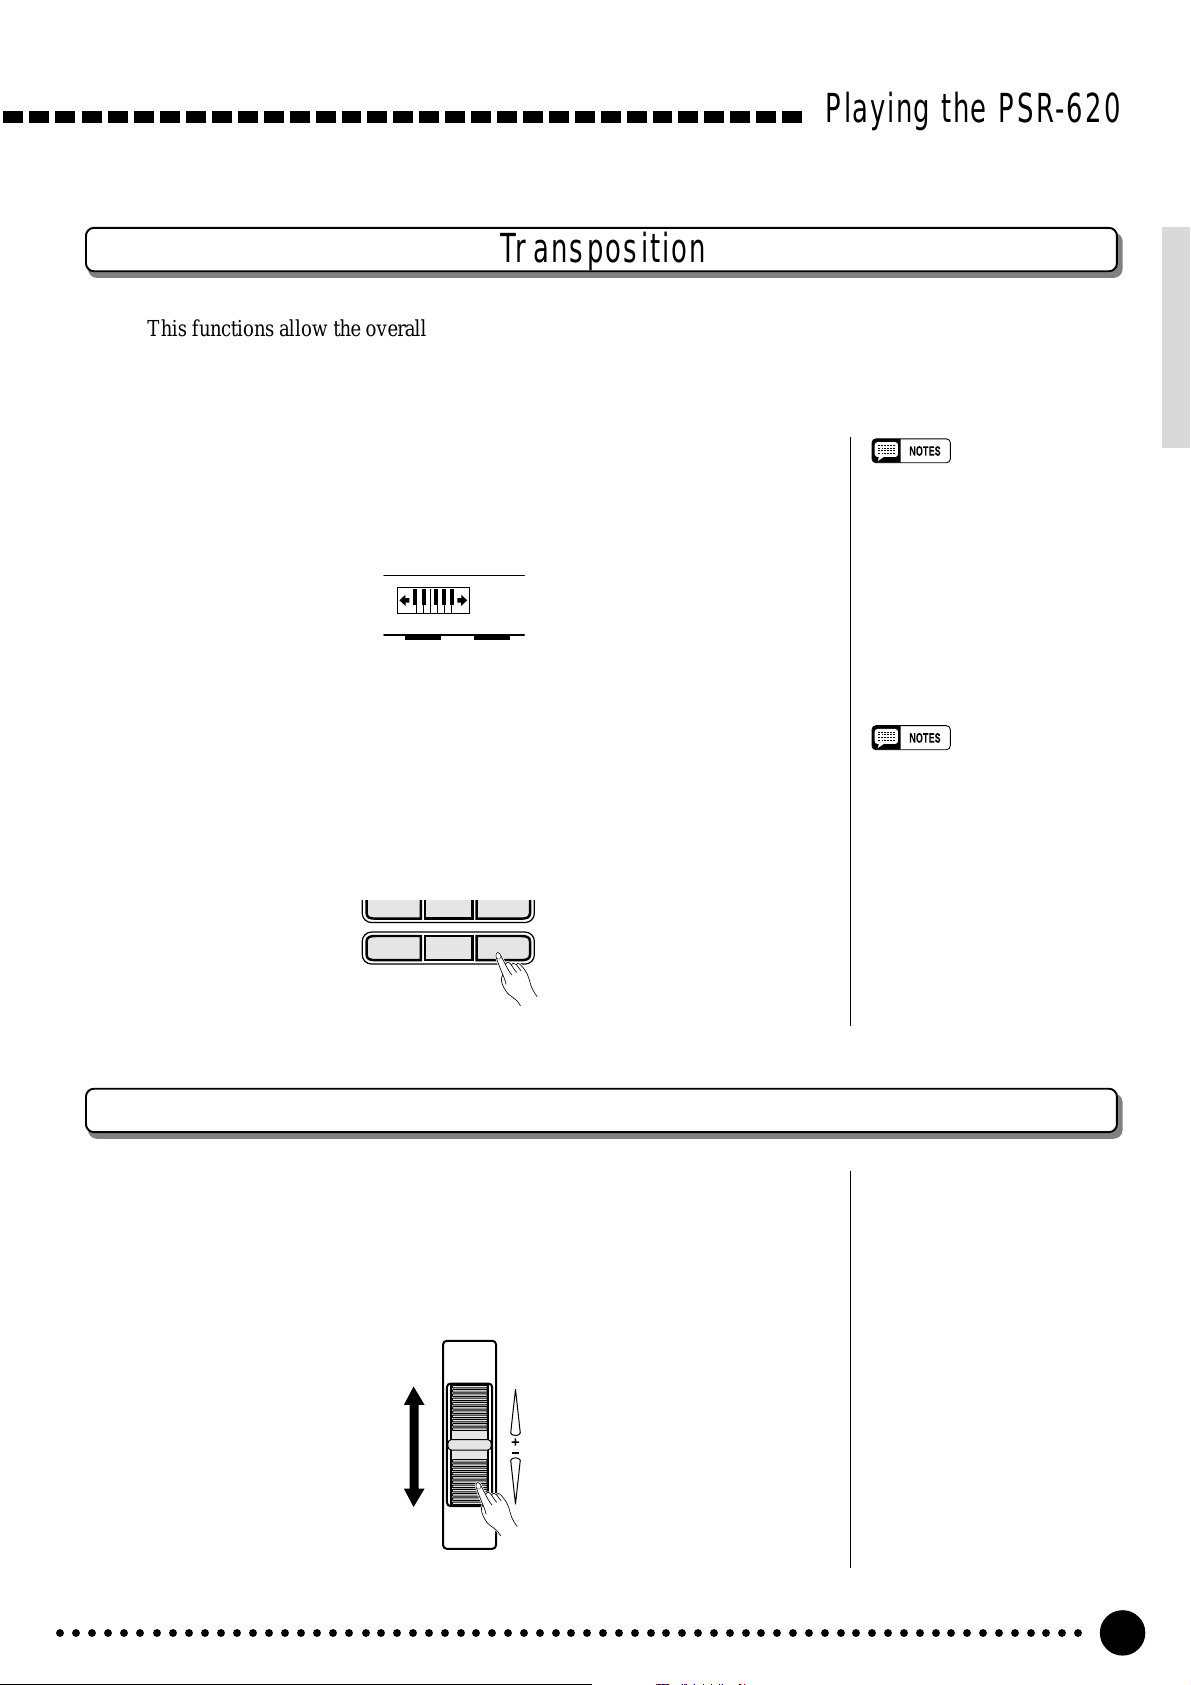
Transposition
This functions allow the overall pitch of the PSR-620 to be transposed up or down by a maximum of one
octave in semitone increments.
Move the Cursor to the Transpose Value...................................................
1
Use the CURSOR buttons to select the number to the right of the key-
board icon labelled “TRANSPOSE” on the display (the number will flash
when selected).
TRANSPOSE
0
• Press the [–/NO] and [+/YES]
buttons simultaneously to instantly reset the transpose value
to “0”.
• The new transpose value will
apply from the next note played.
Set the Transposition As Required .........................................................................
2
Use the [–/NO] and [+/YES] buttons, the number buttons or the data dial
to set the desired degree of transposition. The transpose range is from –12 to
+12, allowing a maximum upward or downward transposition of 1-octave.
A setting of “0” produces the normal pitch.
789
–
/NO
+/YES
0
Pitch Bend
The PITCH BEND wheel to the left of the keyboard allows the pitch of
notes played on the keyboard to be bend up or down - roll the wheel away from
you to bend up, and toward you to bend down.
The actual pitch bend range can be adjusted via the “PBRange” function in
the OVERALL function group (page 80).
• Negative values can be entered
by pressing the number buttons
while holding the [–/NO] button.
PITCH BEND
○○○○○○○○○○○○○○○○○○○○○○○○○○○○○○○○○○○○○○○○○○○○○○○○○○○○○○○○○○○○○○○○○
23
Page 26
Digital Effects
The PSR-620 provides a variety of Digital Effects — 12 Reverb Effects,
9 Chorus Effects and 45 DSP Effects — which can add tremendous
variety to your sound.
VOICE
STYLE
SONG
REGIST MEMORY
MULTI PAD
DUAL VOICE
SPLIT VOICE
HARM
/
ECHO
OVERALL
DIGIT AL EFFECT
801
REGIST
RHYTHM BASS CHORD PAD PHRASE ACCOMP MELODY
111
ON /
OFF
VOICE
VOL
≤Hall1
118 10 a01
TEMPO TRANSPOSE MEASURE REPEAT CHORD
135102117130 1011011
ACCOMP TRACK SONG TRACK
MELODY
REC REC REC
1
OTS
2
REVERB DUAL
CHORUS HARMONY
DSP SUSTAIN
BEAT
TOUCHMINUS ONE
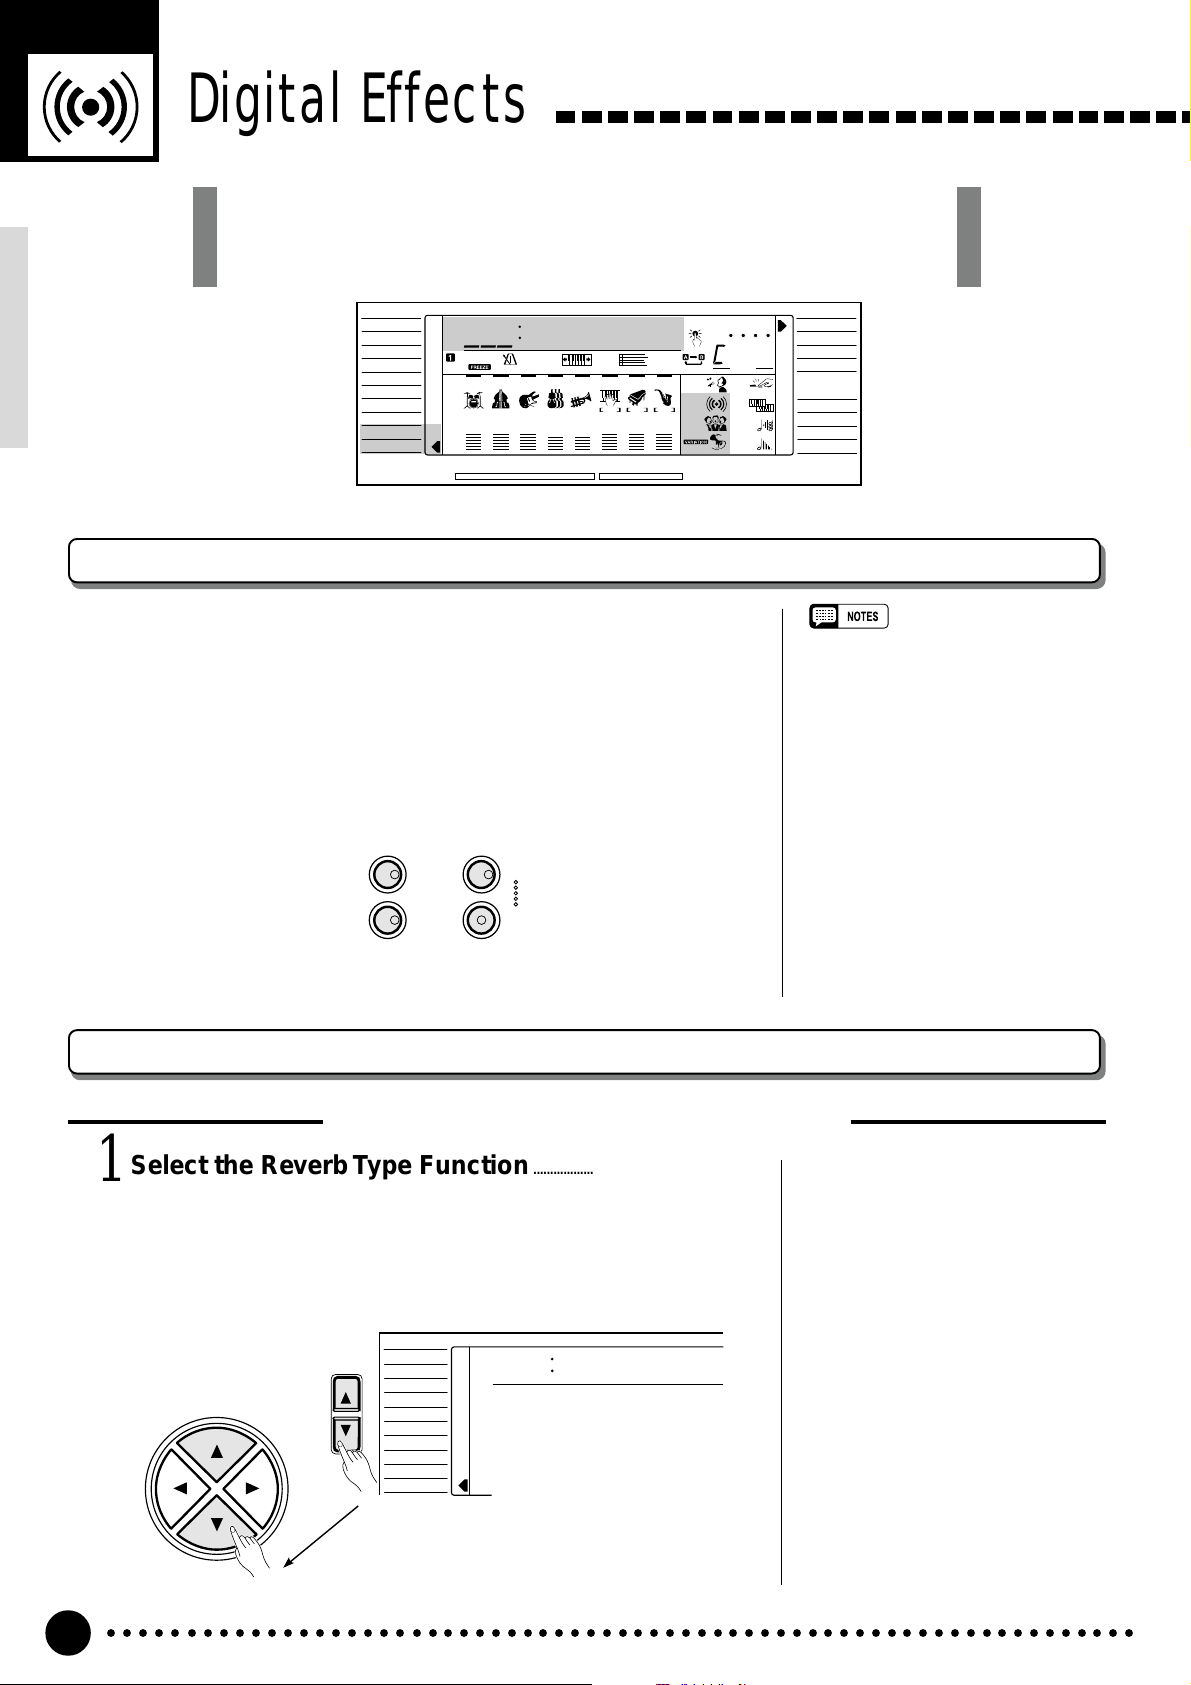
Using the Digital Effects
The digital effects can be turned ON or OFF by pressing the [RE-
VERB] button, [CHORUS] button and [DSP] button respectively .
Each DSP effect has a variation which can be accessed by using the
[DSP VARIA TION] button. The appropriate icon(s) will appear in the
display when the effects are turned ON.
DIGITAL EFFECT
REVERB
DSP
NORMAL
SPLIT
SINGLE
FINGERED
LOAD
SAVE
DELETE
FORMAT
• The [REVERB], [CHORUS] and [DSP]
buttons turn the effects applied to the
VOICE function voice ON or OFF.
• If the Voice Set function (page 79) is
ON, the REVERB, CHORUS, and DSP
VARIATION ON/OFF status will be set
automatically. DSP will be turned ON
whenever a different voice is selected
via the VOICE function.
CHORUS
DSP
VARIATION
Changing the Reverb Effect
Selecting the Reverb Effect Type
Select the Reverb Type Function...................................................................
1
Press the [FUNCTION] button to the left of the display as many
times as necessary until the arrowhead in the display appears next to
“DIGITAL EFFECT” in the function list to the left of the display, and
use the cursor [▲] and [▼] buttons to select the Reverb Type function,
“Reverb m”.
VOICE
CURSOR
FUNCTION
STYLE
SONG
REGIST MEMORY
MULTI PAD
DUAL VOICE
SPLIT VOICE
/
ECHO
HARM
OVERALL
DIGIT AL EFFECT
Reverb ≥
○○○○○○○○○○○○○○○○○○○○○○○○○○○○○○○○○○○○○○○○○○○○○○○○○○○○○○○○○○○○○○○○○
24
Page 27

Select the Reverb Type...................................................................................................................
2
Use the cursor [>] button to enter the Reverb Type function and then
select one of the 13 reverb types using the [–/NO] and [+/YES] buttons, the
number buttons or the data dial. The name of the selected reverb type appears on the top line of the display.
VOICE
CURSOR
FUNCTION
STYLE
SONG
REGIST MEMORY
MULTI PAD
DUAL VOICE
SPLIT VOICE
HARM
/
ECHO
OVERALL
DIGIT AL EFFECT
101
≤Hall1
You can also enter the Reverb Type function by pressing and holding the
[REVERB] button until the arrow jumps to the “DIGITAL EFFECT” position and the current reverb type name appears in the display.
Exit.........................................................................................................................................................................................
3
Press the [VOICE] button or select a different function to exit from the
DIGITAL EFFECT function.
Digital Effects
• See page 89 for a complete
listing of the reverb types.
• The default reverb type can be
recalled simultaneously pressing
the [–/NO] and [+/YES] buttons.
• You can return to the previous
display, “Reverbm”, by pressing
the cursor [<] button, and
choose the CHORUS or DSP
effect.
• The Reverb type will change
automatically whenever a different style is selected.
• If you want to disable the reverb
effect for all except the VOICE
function voice, select OFF in the
Type selection.
The Reverb Types
01~04 Hall 1~4
05~08 Room 1~4
09, 10 Stage 1, 2
11, 12 Plate 1, 2
13 OFF
Setting the Reverb Return Level
The reverb return level determines the amount of “wet” (effect) signal output to the amplifier.
Select the Reverb Return Level Function..................................................
1
Press the [FUNCTION] button to the left of the display as many times
as necessary until the arrowhead in the display appears next to “DIGITAL
EFFECT” in the function list to the left of the display, and use the cursor
[▲] and [▼] buttons to select the Reverb Return Level function.
164
Set the Reverb Return Level................................................................................................
2
RevRtnLv
Use the [–/NO] and [+/YES] buttons, the number buttons or the data dial
to set the desired reverb return level. The range is from “00” to “127”.
Exit.........................................................................................................................................................................................
3
Press the [VOICE] button or select a different function to exit from the
DIGITAL EFFECT function.
• See page 88 for more details on
the Digital Effects.
• The reverb return level specified
here affects the entire setting.
The reverb send level, however,
can be independently applied to
the voice selected via the VOICE
function, the split voice and the
dual voice via “RevLevel” in the
OVERALL function group,
“S.RevLvl” in the SPLIT VOICE
function, and “D.RevLvl” in the
DUAL VOICE function (see
pages 88, 16 and 19).
• The default reverb return level
=64 can be recalled instantly by
pressing both the [–/NO] and [+/
YES] buttons simultaneously.
○○○○○○○○○○○○○○○○○○○○○○○○○○○○○○○○○○○○○○○○○○○○○○○○○○○○○○○○○○○○○○○○○
25
Page 28
Digital Effects
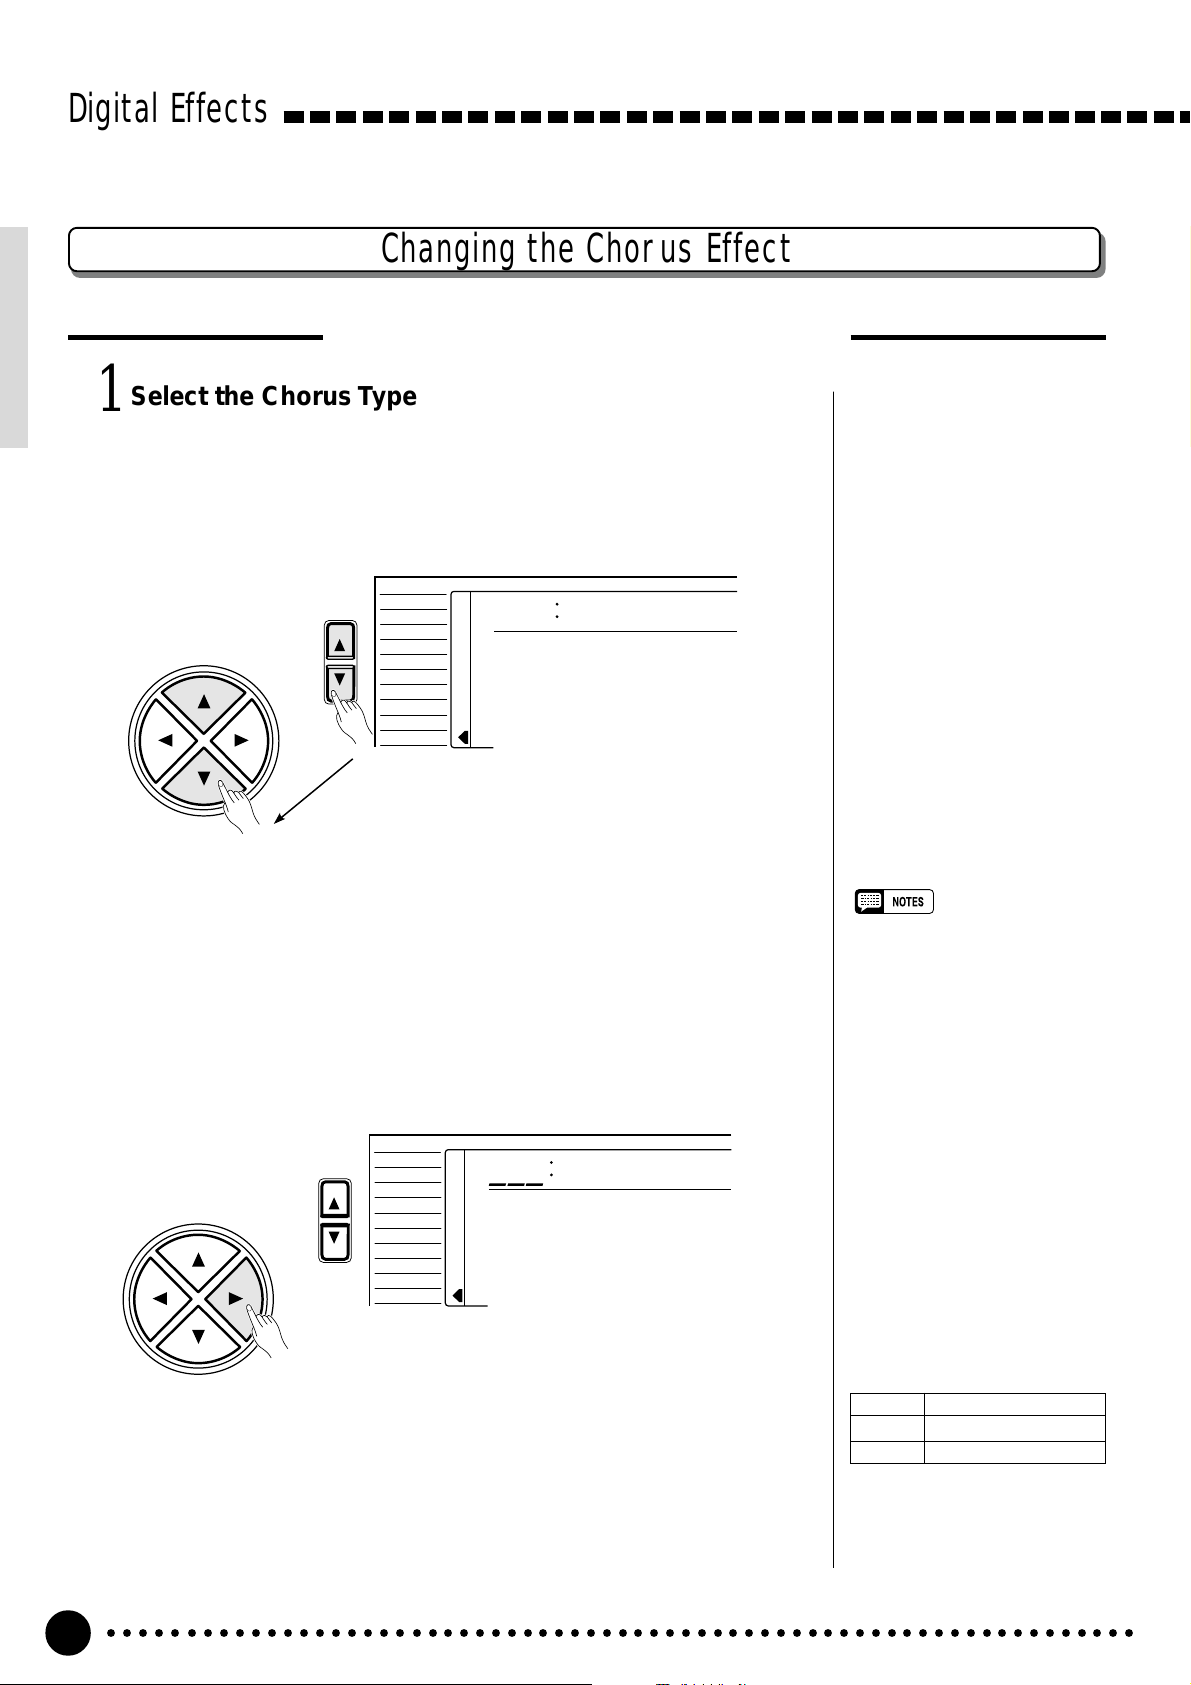
Select the Chorus Type Function ...............................................................................
1
Press the [FUNCTION] button to the left of the display as many times
as necessary until the arrowhead in the display appears next to “DIGITAL
EFFECT” in the function list to the left of the display, and use the cursor
[▲] and [▼] buttons to select the Chorus Type function, “Chorus m”.
CURSOR
FUNCTION
Changing the Chorus Effect
Selecting the Chorus Effect Type
VOICE
STYLE
SONG
REGIST MEMORY
MULTI PAD
DUAL VOICE
SPLIT VOICE
HARM
/
ECHO
OVERALL
DIGITAL EFFECT
Chorus ≥
Select the Chorus Type..................................................................................................................
2
Use the cursor [>] button to enter the Chorus Type function and then
select one of the 10 chorus types using the [–/NO] and [+/YES] buttons, the
number buttons or the data dial. The name of the selected chorus type appears on the top line of the display.
VOICE
CURSOR
FUNCTION
STYLE
SONG
REGIST MEMORY
MULTI PAD
DUAL VOICE
SPLIT VOICE
/
ECHO
HARM
OVERALL
DIGITAL EFFECT
101
≤Chorus1
You can also enter the Chorus Type function by pressing and holding the
[CHORUS] button until the arrow jumps to the “DIGITAL EFFECT” position and the current chorus type name appears in the display.
• See page 89 for a complete
listing of the chorus types.
• The chorus type will change
automatically whenever a different style is selected.
• You can return to the previous
display, “Chorusm”, by pressing
the cursor [<] button, and
choose the REVERB or DSP
effect.
• The default chorus type can be
recalled by simultaneously pressing the [–/NO] and [+/YES] buttons.
• If you want to disable the chorus
effect for all except the VOICE
function voice, select OFF in the
Type selection.
The Chorus Types
01~05 Chorus 1~5
06~09 Flanger 1~4
10 OFF
○○○○○○○○○○○○○○○○○○○○○○○○○○○○○○○○○○○○○○○○○○○○○○○○○○○○○○○○○○○○○○○○○
26
Page 29
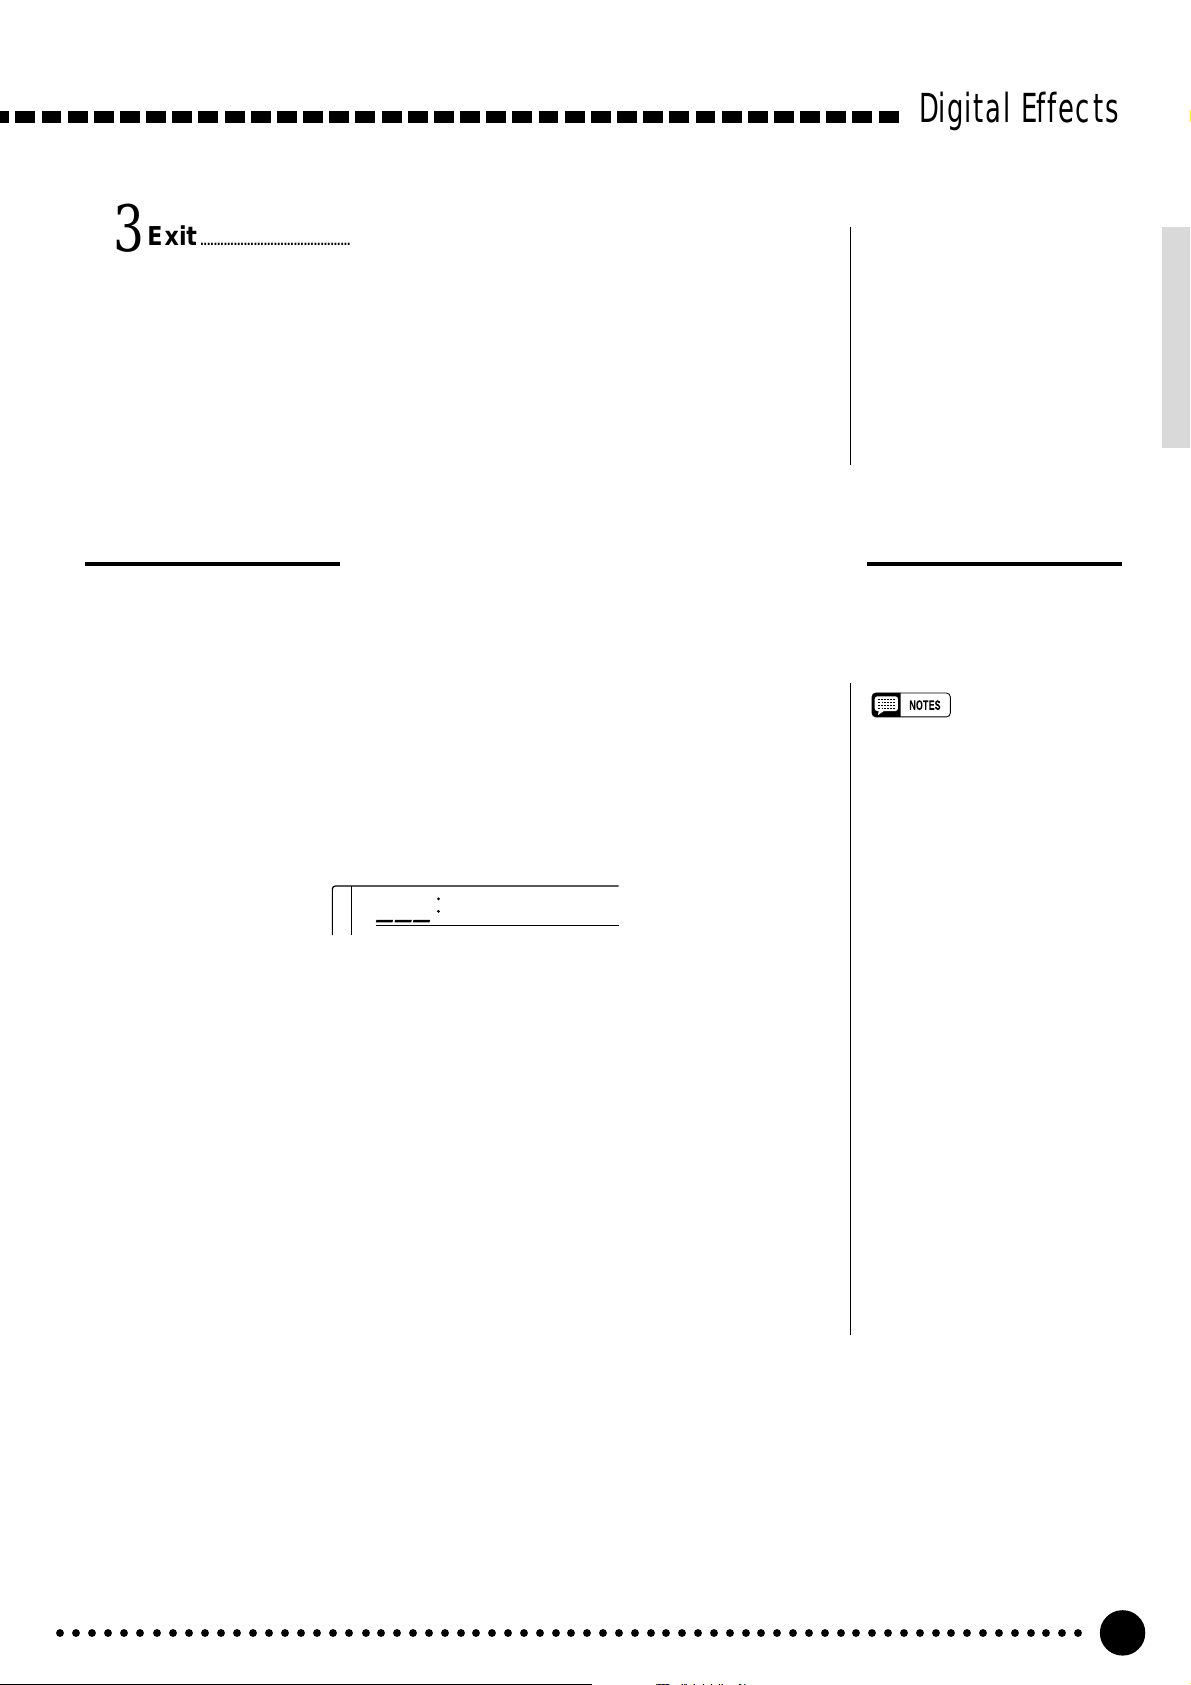
Exit.........................................................................................................................................................................................
3
Press the [VOICE] button or select a different function to exit from the
DIGITAL EFFECT function.
Setting the Chorus Return Level
The chorus return level determines the amount of “wet” (effect) signal output to the amplifier.
Select the Chorus Return Level Function.................................................
1
Digital Effects
Press the [FUNCTION] button to the left of the display as many times
as necessary until the arrowhead in the display appears next to “DIGITAL
EFFECT” in the function list to the left of the display, and use the cursor
[▲] and [▼] buttons to select the Chorus Return Level function.
164
Set the Chorus Return Level...............................................................................................
2
Use the [–/NO] and [+/YES] buttons, the number buttons or the data dial
to set the desired chorus return level. The range is from “00” to “127”.
Exit.........................................................................................................................................................................................
3
Press the [VOICE] button or select a different function to exit from the
DIGITAL EFFECT function.
ChoRtnLv
• See page 88 for more details on
the Digital Effects.
• The chorus return level specified
here affects the entire setting.
The chorus send level, however,
can be independntly applied to
the voice selected via the VOICE
function, the split voice and the
dual voice via “ChoLevel” in the
OVERALL function group,
“S.ChoLvl” in the SPLIT VOICE
function and “D.ChoLvl” in the
DUAL VOICE function (see
pages 88, 16 and 19).
• The default chorus return level =
64 can be recalled instantly by
pressing both the [–/NO] and [+/
YES] buttons simultaneously.
○○○○○○○○○○○○○○○○○○○○○○○○○○○○○○○○○○○○○○○○○○○○○○○○○○○○○○○○○○○○○○○○○
27
Page 30
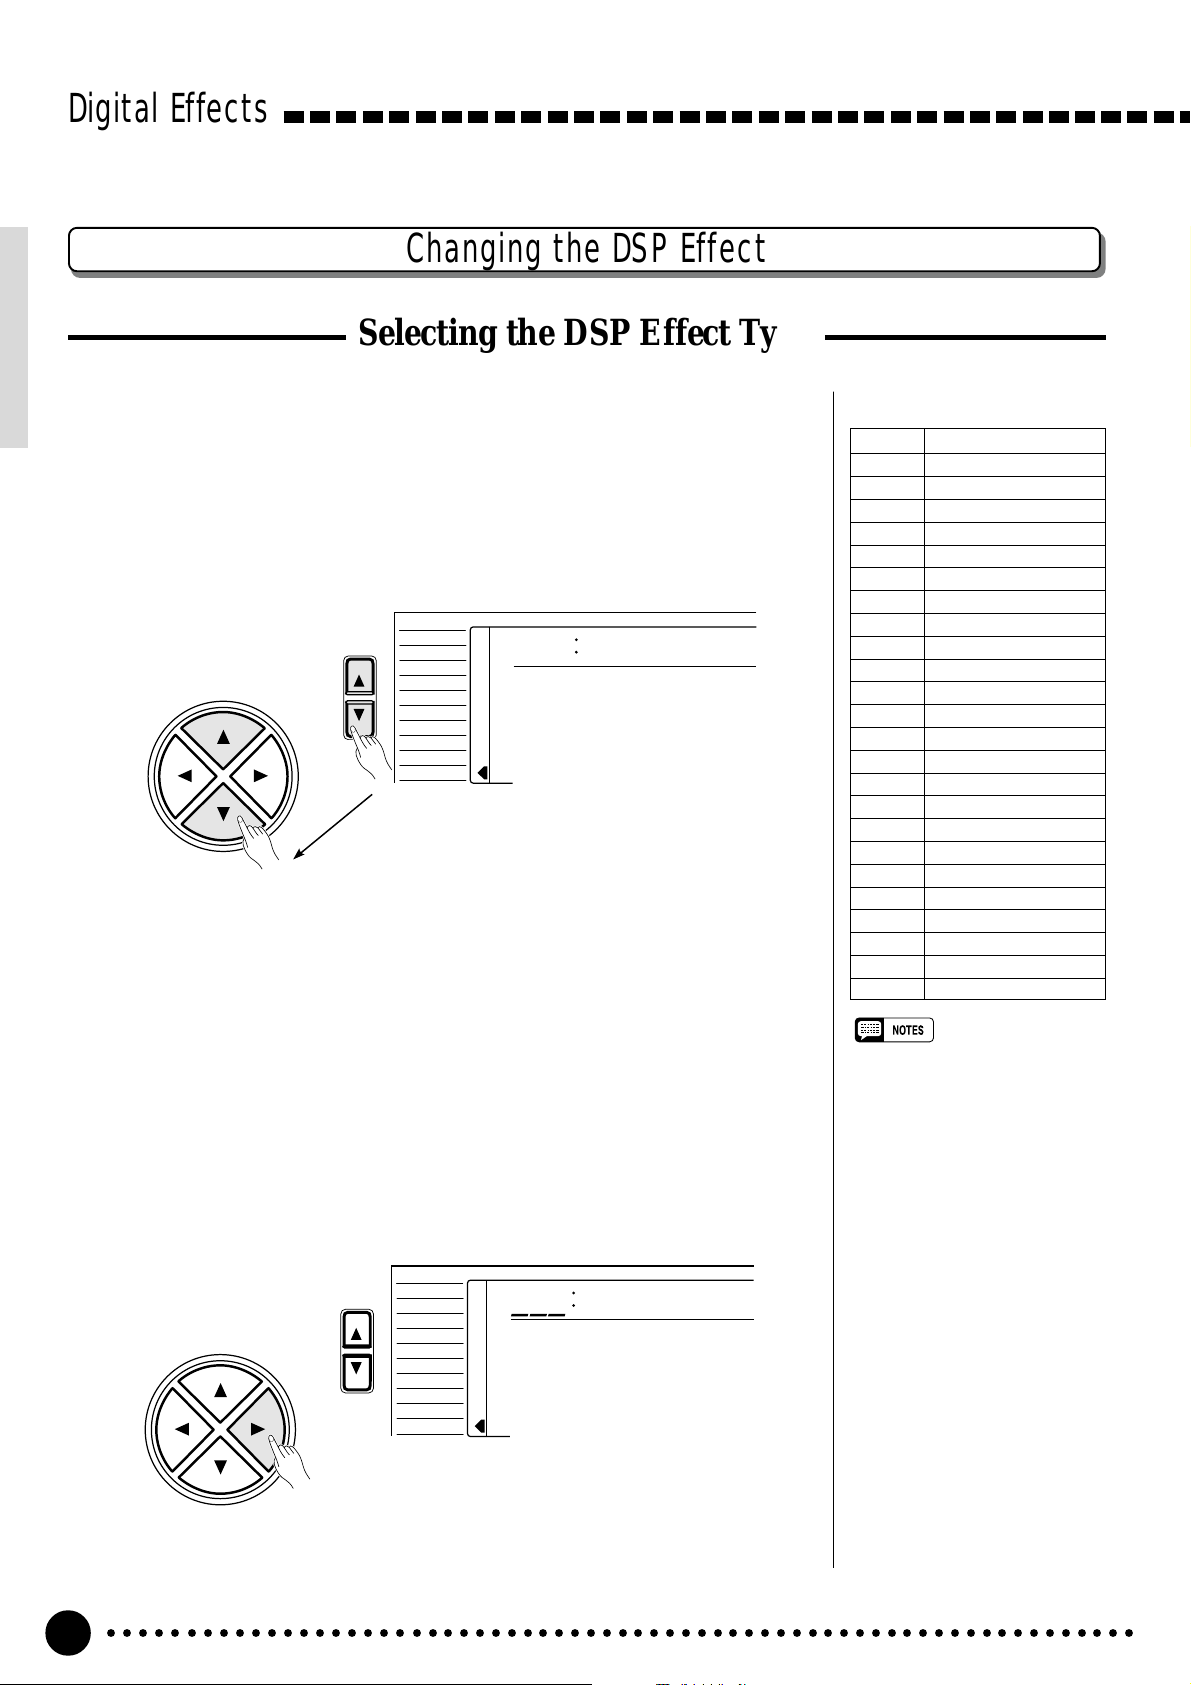
Digital Effects
Changing the DSP Effect
Selecting the DSP Effect Type
Select the DSP Type Function..........................................................................................
1
Press the [FUNCTION] button to the left of the display as many times
as necessary until the arrowhead in the display appears next to “DIGITAL
EFFECT” in the function list to the left of the display, and use the cursor
[▲] and [▼] buttons to select the DSP Type function, “Dsp m”.
VOICE
CURSOR
FUNCTION
STYLE
SONG
REGIST MEMORY
MULTI PAD
DUAL VOICE
SPLIT VOICE
HARM
/
ECHO
OVERALL
DIGITAL EFFECT
Dsp ≥
The DSP Types
01~04 Hall 1~4
05~08 Room 1~4
09, 10 Stage 1, 2
11, 12 Plate 1, 2
13, 14 Early Reflection 1, 2
15 Gate Reverb
16 Reverse Gate
17~21 Chorus 1~5
22~25 Flanger 1~4
26 Symphonic
27 Phaser
28~32 Rotary Speaker 1~5
33, 34 Tremolo 1, 2
35 Guitar Tremolo
36 Auto Pan
37 Auto Wah
38 Delay L, C, R
39 Delay L, R
40 Echo
41 Cross Delay
42 Distortion Hard
43 Distortion Soft
44 EQ Disco
45 EQ Telephone
46 OFF
• See page 89 for a complete
Select the DSP Type..............................................................................................................................
2
Use the cursor [>] button to enter the DSP Type function and then se-
lect one of the 46 DSP types using the [–/NO] and [+/YES] buttons, the
number buttons or the data dial. The name of the selected DSP type appears
on the top line of the display.
VOICE
CURSOR
○○○○○○○○○○○○○○○○○○○○○○○○○○○○○○○○○○○○○○○○○○○○○○○○○○○○○○○○○○○○○○○○○
28
FUNCTION
STYLE
SONG
REGIST MEMORY
MULTI PAD
DUAL VOICE
SPLIT VOICE
/
ECHO
HARM
OVERALL
DIGITAL EFFECT
110
≤Stage2
listing of the DSP types.
• The default DSP type can be
recalled by simultaneously pressing the [–/NO] and [+/YES] buttons.
• If the Voice Set function is ON
(page 79) the DSP type will
change automatically whenever a
different voice is selected via the
VOICE function.
• When Rotary Speaker 1…5 is
selected, the [DSP VARIATION]
button will switch the speed of
the rotating speaker between fast
(ON) and slow (OFF).
• You can return to the previous
display, “Dspm”, by pressing the
cursor [<] button, and choose
the REVERB or CHORUS effect.
• If you want to disable the DSP
effect for all except the VOICE
function voice, select OFF in the
Type selection.
Page 31

Each DSP effect has its own variation. Turn the [DSP VARIA TION]
button ON to activate each variation.
You can also select the DSP Type function by pressing and holding the
[DSP] button until the arrow jumps to the “DIGITAL EFFECT” position
and the current DSP type name appears in the display.
Exit.........................................................................................................................................................................................
3
Press the [VOICE] button or select a different function to exit from the
DIGITAL EFFECT function.
Digital Effects
Setting the DSP Return Level
The DSP return level determines the amount of “wet” (effect) signal output to the amplifier.
Select the DSP Return Level Function............................................................
1
Press the [FUNCTION] button to the left of the display as many times
as necessary until the arrowhead in the display appears next to “DIGITAL
EFFECT” in the function list to the left of the display, and use the cursor
[▲] and [▼] buttons to select the DSP Return Level function.
164
Set the DSP Return Level..........................................................................................................
2
Use the [–/NO] and [+/YES] buttons, the number buttons or the data dial
to set the desired DSP return level. The range is from “00” to “127”. The
DSP send level can be adjusted via the “DspLevel” function in the OVERALL function group-see page 78.
DspRtnLv
• See page 88 for more details on
• The DSP return level can not be
• The default DSP return level =64
the Digital Effects.
changed for the insertion DSP
types (see page 88). In this case,
“- - -” will appear on the display.
can be recalled instantly by
pressing both the [–/NO] and [+/
YES] buttons simultaneously.
Exit.........................................................................................................................................................................................
3
Press the [VOICE] button or select a different function to exit from the
DIGITAL EFFECT function.
○○○○○○○○○○○○○○○○○○○○○○○○○○○○○○○○○○○○○○○○○○○○○○○○○○○○○○○○○○○○○○○○○
29
Page 32

Using Auto Accompaniment
The PSR-620 has 100 different accompaniment “styles” that can be used
to provide fully-orchestrated accompaniment. The PSR-620’s sophisti-
cated Auto Accompaniment system can provide automated bass and
chord backing that is perfectly matched to the selected accompaniment
style.
• The maximum number of notes that can be played simultaneously on the PSR-620 keyboard is
reduced when the Accompaniment is used.
About the PSR-620 Styles and the Yamaha Style File Format
The Style File Format is Yamaha’s original auto-accompaniment format which has
evolved through years of development and refinement. Style File Format allows you
to use exceptionally high quality accompaniments with a variety of chord types
through its unique conversion system. Style File Format styles, based on GM system level 1, can be played with the GM compatible tone generator. In addition to the
internal styles, the optional style disks and music cartridges let you use different
shophisticated styles created with the Style File Format.
The internal PSR-620 styles conform to the Style File Format. The built-in floppy
disk drive also provides full Style File Format compatibility by allowing playback of
Style File Format Disk Styles.
VOICE
STYLE
SONG
REGIST MEMORY
MULTI PAD
DUAL VOICE
SPLIT VOICE
HARM
OVERALL
DIGIT AL EFFECT
Select the SINGLE or FINGERED
1
Accompaniment Mode
REGIST
RHYTHM BASS CHORD PAD PHRASE ACCOMP MELODY
111
ON /
OFF
/
ECHO
VOICE
VOL
.....................................................................................................................
801
8BeatPop
118 10 a01
TEMPO TRANSPOSE MEASURE REPEAT CHORD
MELODY
1
REC REC REC
134126152105 1011011
ACCOMP TRACK SONG TRACK
OTS
2
REVERB DUAL
CHORUS HARMONY
DSP SUSTAIN
BEAT
TOUCHMINUS ONE
Press the [MODE] button to the right of the display as many times as
necessary until the arrow in the display appears next to “SINGLE” or “FINGERED” in the mode list to the right of the display. If you select the “SINGLE” mode, accompaniment chords are played as follows:
NORMAL
SPLIT
SINGLE
FINGERED
NORMAL
SPLIT
SINGLE
FINGERED
LOAD
SAVE
DELETE
FORMAT
LOAD
SAVE
DELETE
FORMAT
○○○○○○○○○○○○○○○○○○○○○○○○○○○○○○○○○○○○○○○○○○○○○○○○○○○○○○○○○○○○○○○○○
30
MODE
Page 33

Using Auto Accompaniment
● SINGLE FINGER ACCOMPANIMENT
Single-finger accompaniment makes it simple to produce beautifully
orchestrated accompaniment using major, seventh, minor and minorseventh chords by pressing a minimum number of keys on the left-hand
section of the keyboard. The abbreviated chord fingerings described below are used:
C
■ For a major chord, press the root key only.
Cm
and a black key to its left.
■ For a seventh chord, simultaneously press the root
■ For a minor chord, simultaneously press the root key
C
7
key and a white key to its left.
■ For a minor-seventh chord, simultaneously press the
Cm
7
If the FINGERED Mode is Selected, Select the
2
root key and both a white and black key to its left.
Desired Fingering Mode...............................................................................................................
The PSR-620 has three fingering modes for fingered accompaniment —
Normal, Bass and Full. The NORMAL mode is automatically selected
whenever the power is initially turned ON. To select a different fingering
mode first select the OVERALL functions by pressing the [FUNCTION]
button to the left of the display as many times as necessary until the arrowhead in the display appears next to “OVERALL” in the function list to the
left of the display. “FngrngMd” should appear on the top line of the display
(if a different OVERALL function is selected, press the cursor [▲] or [▼]
button as many times as necessary until “FngrngMd” appears). Then use the
[–/NO] and [+/YES] buttons and the data dial to select the desired fingering
mode (the mode abbreviation appears to the left of “FngrngMd” on the display).
VOICE
CURSOR
FUNCTION
STYLE
SONG
REGIST MEMORY
MULTI PAD
DUAL VOICE
SPLIT VOICE
HARM
/
ECHO
OVERALL
DIGITAL EFFECT
nor
FngrngMd
The Normal (“nor”), Bass (“bAS”) and Full (“Full”) fingering modes
function as follows:
○○○○○○○○○○○○○○○○○○○○○○○○○○○○○○○○○○○○○○○○○○○○○○○○○○○○○○○○○○○○○○○○○
31
Page 34

Using Auto Accompaniment
● NORMAL
This is the default FINGERED accompaniment mode. The NORMAL
mode lets you finger your own chords on the left-hand section of the
keyboard (i.e. all keys to the left of and including the split-point key —
normally 54) while the PSR-620 supplies appropriately orchestrated
rhythm, bass, and chord accompaniment in the selected style.
The FINGERED mode will accept the chord types listed below (notes in
parentheses may be omitted).
Example for “C” chords
#11
C
Cm
C
6
b5
7
9
7
Cmadd
#11
C
7
( )
CMC
7
( )
Cm
9
( )
9
13
C
7
CM
7
( )
( )
Cm
11
( )
( )
b9
C
7
( )
CMadd
9
( )
CmM
7
( )
( )
b13
C
7
( )
Chord Name/[Abbreviation] Normal Voicing
Major [M] 1-3-5
Major sixth [6] 1-(3)-5-6
Major seventh [M7] 1-3-(5)-7
Major seventh sharp eleventh [M7#11] 1-(2)-3-#4-(5)-7
Major add ninth [Madd9] 1-2-3-5
Major ninth [M9] 1-2-3-(5)-7
Major sixth add ninth [6 9] 1-2-3-(5)-6
Augmented [aug] 1-3-#5
Minor [m] 1-b3-5
Minor sixth [m6] 1-b3-5-6
Minor seventh [m7] 1-b3-(5)-b7
Minor seventh flatted fifth [m7b5] 1-b3-b5-b7
Minor add ninth [madd9] 1-2-b3-5
Minor ninth [m9] 1-2-b3-(5)-b7
Minor eleventh [m11] 1-(2)-b3-4-5-(b7)
Minor major seventh [mM7] 1-b3-(5)-7
Minor major ninth [mM9] 1-2-b3-(5)-7
Diminished [dim] 1-b3-b5
Diminished seventh [dim7] 1-b3-b5-6
Seventh [7] 1-3-(5)-b7
Seventh suspended fourth [7sus4] 1-4-5-b7
Seventh flatted fifth [7b5] 1-3-b5-b7
Seventh ninth [7 9] 1-2-3-(5)-b7
Seventh sharp eleventh [7#11] 1-2-3-#4-(5)-b7 or
1-(2)-3-#4-5-b7
Seventh thirteenth [7 13] 1-3-(5)-6-b7 or
2-3-5-6-b7
Seventh flatted ninth [7b9] 1-b2-3-(5)-b7
Seventh flatted thirteenth [7b13] 1-3-5-b6-b7
Seventh sharp ninth [7#9] (1)-#2-3-(5)-b7
Major seventh augmented [M7aug] 1-3-#5-7
Seventh augmented [7aug] (1)-3-#5-b7
Suspended fourth [sus4] 1-4-5
One plus two plus five [1+2+5] 1-2-5
CM
CmM
C
7
( )
9
9
#9
9
C
6
( )
Cdim
( )
CM aug7C aug
( )
( )
Chord (C) Display
CC
C6 C6
CM7 CM7
CM7#11 CM7(#11)
CMadd9 CM(9)
CM9 CM7(9)
C6 9 C6(9)
Caug Caug
Cm Cm
Cm6 Cm6
Cm7 Cm7
Cm7b5 Cm7b5
Cmadd9 Cm(9)
Cm9 Cm7(9)
Cm11 Cm7(11)
CmM7 CmM7
CmM9 CmM7(9)
Cdim Cdim
Cdim7 Cdim7
C7 C7
C7sus4 C7sus4
C7b5C7b5
C7 9 C7(9)
C7#11 C7(#11)
C7 13 C7(13)
C7b9 C7(b9)
C7b13 C7(b13)
C7#9 C7(#9)
CM7aug CM7aug
C7aug C7aug
Csus4 Csus4
C1+2+5 C
Caug
Cdim
7
( )
Cm
C
7
7
Csus
Cm
6
C sus
7
( )
C
4
1+2+5
Cm
7
( )
b5
C
4
7
• If you play any three adjacent
keys (including black keys), the
chord sound will be cancelled
and only the rhythm instruments
will continue playing (CHORD
CANCEL function).
• An octave (1+8) produces accompaniment based only on the
root.
• A perfect fifth (1+5) produces
accompaniment based only on
the root and fifth which can be
used with many major and minor
chords.
• The chord fingerings listed are all
in “root” position, but other inversions can be used — with the
following exceptions:
* 6 chords are only recognized
in root position. All other inversions are interpreted as m7.
* 6 9 chords are only recognized
in root position. All other inversions are interpreted as m11.
* m6 chords are only recognized
in root position. All other inversions are interpreted as m7b5.
* 1+2+5 chords are only recog-
nized in root position. All other
inversions are interpreted as
sus4.
* With aug and dim7 chords the
lowest note played is assumed
to be the root.
* With 7#11 and 7b5 chords the
lowest note played is assumed
to be the root or b7.
○○○○○○○○○○○○○○○○○○○○○○○○○○○○○○○○○○○○○○○○○○○○○○○○○○○○○○○○○○○○○○○○○
32
Page 35

● BASS
This is essentially the same as the NORMAL mode, above, except that
the lowest note played in the auto accompaniment section of the keyboard will be played by the bass part rather than the chord root.
Using Auto Accompaniment
C
C on E
C on G
● FULL
In this mode the PSR-620 automatically differentiates between left-hand
chords and right-hand melody, no matter where they are played on the
keyboard. Right-hand chords with a left-hand bass line — single or octave — are also recognized. In the former case left-hand chords are recognized and accompaniment is produced in the same way as in the NORMAL mode, in the latter case the right-hand chords are recognized in the
same way but the accompaniment bass line will be based on the left-hand
bass line you play. This means you can play in just about any style anywhere on the keyboard, and the PSR-620 will automatically produce
appropriate accompaniment.
• A single note one octave lower
than the lowest note of the chord
is recognized as a bass note,
and a single note eleven notes
higher is recognized as a melody
note.
• The Harmony/Echo feature (page
20) has no effect in the FULL
mode.
Select the Style Function...........................................................................................................
3
Press the [STYLE] button to directly select the STYLE function.
Another way to do this is to press the [FUNCTION] button to the left of
the display as many times as necessary until the arrowhead in the display
• The “AcompVol” function in the
OVERALL function group can be
quickly selected by pressing and
holding the [STYLE] button.
appears next to “STYLE” in the function list to the left of the display.
VOICE
FUNCTION
○○○○○○○○○○○○○○○○○○○○○○○○○○○○○○○○○○○○○○○○○○○○○○○○○○○○○○○○○○○○○○○○○
STYLE
SONG
REGIST MEMORY
MULTI PAD
DUAL VOICE
SPLIT VOICE
HARM
/
ECHO
OVERALL
DIGITAL EFFECT
801
8BeatPop
STYLE
33
Page 36

Using Auto Accompaniment
Select a Style.....................................................................................................................................................
4
The PSR-620 has 100 styles that can be selected by using either the [–/
NO] and [+/YES] buttons, the number buttons or the data dial (these con-
trols function in the same way as for voice selection — see page 12). The
styles are listed in the STYLE list printed at the top of the instrument’s control panel. The number and name of the currently selected style appears on
the top line of the display while the STYLE function is selected.
Set the Tempo...................................................................................................................................................
5
When you select a different style while the accompaniment is not playing, the “default” tempo for that style is also selected, and the tempo is displayed to the right of the metronome icon “TEMPO” in quarter-note beats
per minute. If the accompaniment is playing and the One Touch Setting
function is OFF (page 42), the same tempo is maintained even if you select
a different style.
You can change the tempo to any value between 32 and 280 beats per
minute, however, by using TEMPO [▲] and [▼] buttons. Press either button
briefly to decrement or increment the tempo value by one, or hold the button
for continuous decrementing or incrementing. The default tempo for the
selected style can be recalled at any time by pressing both the TEMPO [▲]
and [▼] buttons simultaneously.
• See page 61 for details on selecting cartridge styles.
• One Style File Format disk style
can be loaded into the PSR620’s user style memory location
(style number 101) and used in
the same way as the preset
internal styles. See page 68 for
instructions on loading styles
from disk. You can also enter a
new name for the user style as
well as registration bank, user
song and user pad kit (see page
44, 51 and 59).
TEMPO
TEMPO
RESET
118
You can also use the CURSOR buttons to select the tempo value in the
display, and then use the [–/NO] and [+/YES] buttons, the number buttons
or the data dial to set the tempo value as required. In this case the [–/NO]
and [+/YES] buttons can be pressed simultaneously to recall the default
tempo. This can be done either before the accompaniment is started or while
it is playing.
CURSOR
789
TEMPO
118
–
+
/NO
/YES
0
• In this case, three-digit numbers
(i.e. “100” through “280”) are
entered by first pressing and
holding the [1] or [2] button until
“1” or “2” appears in the hundreds position on the display,
then pressing the remaining two
digits in sequence.
○○○○○○○○○○○○○○○○○○○○○○○○○○○○○○○○○○○○○○○○○○○○○○○○○○○○○○○○○○○○○○○○○
34
Page 37

Using Auto Accompaniment
Start the Accompaniment.........................................................................................................
6
There are several ways to start the accompaniment:
● Straight start:
Press the [START/STOP] button. The rhythm will begin playing imme-
diately without bass and chord accompaniment. The currently selected
MAIN [A] or [B] section will play.
• It is possible to select the MAIN
A or B section prior to a straight
start — refer to “8. Select the
MAIN A and B Sections as Required,” below.
SYNC-
START/STOP
START/STOP
INTRO
AUTO FILL
AB
ENDINGMAIN
● Start with an introduction followed by the MAIN A section:
Press the [INTRO] button so that its indicator lights, press the MAIN
[A] button (not necessary if its indicator is already flashing), then press
[START/STOP] button.
SYNC-
START/STOP
START/STOP
INTRO
AUTO FILL
AB
ENDINGMAIN
● Start with an introduction followed by the MAIN B section:
Press the [INTRO] button so that its indicator lights, press the MAIN
[B] button (not necessary if its indicator is already flashing), then press
[START/STOP] button.
SYNC-
START/STOP
START/STOP
INTRO
AUTO FILL
AB
ENDINGMAIN
• The [INTRO] button can be used
to select the INTRO section even
while the accompaniment is
playing.
● Synchronized start:
Any of the above start types can be synchronized to the first note or
chord played on the left-hand section of the keyboard (i.e. keys to the left
of and including the split-point key — normally 54) by first pressing the
[SYNC-START/STOP] button.
SYNC-
START/STOP
○○○○○○○○○○○○○○○○○○○○○○○○○○○○○○○○○○○○○○○○○○○○○○○○○○○○○○○○○○○○○○○○○
START/STOP
INTRO
AUTO FILL
AB
ENDINGMAIN
• If you press the [SYNC-START/
STOP] button while the accompaniment is playing, the accompaniment will stop and the
synchro start mode will be engaged.
• The accompaniment split point
can be changed via the
“AccSpPnt” function in the
OVERALL function group — see
page 41.
35
Page 38

Using Auto Accompaniment
Pressing the [SYNC-START/STOP] button alone causes a straight start
to occur when the first note or chord is played. Press the [SYNC-
START/STOP] button and then the appropriate [INTRO] and [MAIN]
buttons for a synchronized introduction start. The BEAT display will
flash at the current tempo when a synchronized start mode has been selected.
The synchro start mode can be disengaged prior to actually starting the
accompaniment by pressing the [SYNC-START/STOP] button a second
time.
Play On the Auto-accompaniment Section
7
Of the Keyboard
As soon as you play any fingering that the PSR-620 can “recognize” on
the left-hand section of the keyboard (or anywhere on the keyboard if the
FULL fingering mode is selected), the PSR-620 will automatically begin to
play the appropriate bass line and chord parts along with the selected style.
The accompaniment will continue playing even if you release the keys.
...........................................................................................................................................
• If you press and hold the [SYNCSTART/STOP] button the
“InitSnd?” function will be selected — see page 85.
The chord name recognized will be shown above “CHORD” in the dis-
play.
m
7
CHORD
● The Beat Indicator
The four dots of the BEAT display provide a visual indication of the selected tempo and beat as shown below.
4/4 time 3/4 time
1st beat
2nd beat
3rd beat
4th beat
BEAT
BEAT
○○○○○○○○○○○○○○○○○○○○○○○○○○○○○○○○○○○○○○○○○○○○○○○○○○○○○○○○○○○○○○○○○
36
Page 39

Using Auto Accompaniment
Select the MAIN A and B Sections as Required............................
8
The MAIN A and MAIN B sections can be selected at any time during
playback by pressing the corresponding button. Whenever you press the
MAIN [A] or [B] button during playback, the PSR-620 will generate an
appropriate “fill-in” (one of four types) which will smoothly connect the
current section to the selected section — even if it is the same section. For
example, if you press the MAIN [A] button while the MAIN A section is
playing, a fill-in will be produced, then the MAIN A section will continue
playing. When you select a different section, the fill-in will begin immediately and the new section will actually begin playing from the top of the
next measure unless the MAIN [A] or [B] button is pressed during the last
beat of the measure, in which case the fill-in will begin from the first beat of
the next measure.
SYNC-
START/STOP
START/STOP
INTRO
AUTO FILL
AB
ENDINGMAIN
Stop the Accompaniment..........................................................................................................
9
The accompaniment can be stopped at any time by pressing the [START/
STOP] button. Press the [ENDING] button if you want to go to the ending
section and then stop. The ending section will begin from the top of the next
measure.
SYNC-
START/STOP
SYNC-
START/STOP
START/STOP
START/STOP
INTRO
INTRO
AUTO FILL
AB
AUTO FILL
AB
ENDINGMAIN
ENDINGMAIN
• Some INTRO and ENDING
sections have their own chord
progressions which play in the
current accompaniment key.
• If the MAIN [A] or [B] button is
pressed while the ENDING section is playing, an appropriate fillin will be played, followed by a
return to the MAIN A or B section.
• The accompaniment volume can
be adjusted independently of the
main keyboard volume via the
“AcompVol” function in the
OVERALL function group — see
page 79.
■ Styles with Different Numbers of Sections
Some cartridge and disk styles (see page 61 and 34), for example, have A and B intro and ending sec-
tions as well as A and B main sections. In such a case, if the [INTRO] and MAIN [A] buttons are pressed
in order to start the accompaniment with an introduction and then go to the main A section, the intro A
section will play. If the [INTRO] and MAIN [B] buttons are pressed, the intro B section will play. A similar situation applies to endings: if the main A or B section is playing and the [ENDING] button is pressed,
the ending A or B section will play accordingly.
■ The Stop Accompaniment Function
While the SINGLE or FINGERED mode is selected chords played in the Auto Accompaniment section
of the keyboard are also detected and played by the PSR-620 Auto Accompaniment system when the accompaniment is stopped (except when the FULL FINGERED mode is engaged). In this case the bass note
and chord voices are selected automatically.
○○○○○○○○○○○○○○○○○○○○○○○○○○○○○○○○○○○○○○○○○○○○○○○○○○○○○○○○○○○○○○○○○
37
Page 40

Using Auto Accompaniment
Accompaniment Track Control
The PSR-620 has eight accompaniment tracks — RHYTHM 1/2, BASS,
CHORD 1/2, PAD, and PHRASE 1/2 — that you can control to modify the
“orchestration” and therefore the overall sound of the accompaniment. When
the power switch is turned ON or an accompaniment style is selected,
RHYTHM 1, CHORD 1 and PHRASE 1 tracks appear on the display.
RHYTHM 2, CHORD 2 and PHRASE 2 tracks can be selected by moving the
cursor [
<<
<] or [
<<
of the track icons. If the RHYTHM 1 track is selected and the cursor is moved
once to the right, for example, the cursor will not actually move but
“RHYTHM 2” will appear in place of “RHYTHM 1” and the parameters for
the RHYTHM 2 track can be changed as required. The same applies to the
CHORD 1 and 2, and PHRASE 1 and 2 tracks.
● What’s in the Tracks
>>
>] button from track to track when the cursor is located at one
>>
• The icons for all tracks that contain data in any section will appear whenever an accompaniment style is selected.
RHYTHM BASS CHORD PAD PHRASE
111
ON /
OFF
VOICE
VOL
RHYTHM 1&2 Both these tracks provide the drum and/or percussion sounds.
BASS The BASS track always plays a bass line, but the voice will
change to fit the selected style … acoustic bass, synth bass,
tuba, etc.
CHORD 1&2 Both these tracks provide the rhythmic chordal accompaniment
required by each style. You’ll find guitar, piano, and other
chordal instruments here.
PAD This track plays long chords where necessary, using sustained
instruments such as strings, organ, choir.
PHRASE 1&2 This is where the musical embellishments reside. The
PHRASE tracks are used for punchy brass stabs, arpeggiated
chords, and other extras that make the accompaniment more
interesting.
1351021171301
ACCOMP TRACK
○○○○○○○○○○○○○○○○○○○○○○○○○○○○○○○○○○○○○○○○○○○○○○○○○○○○○○○○○○○○○○○○○
38
Page 41

Using Auto Accompaniment
■ Large/Small Accompaniment.............................................................................................
The simplest form of accompaniment track control is provided by the
[ACCOMP LARGE/SMALL] button. This button alternately turns the
appropriate track (s) ON and OFF, thereby changing the number of parts in
the accompaniment. When the LARGE accompaniment is selected and accompaniment tracks are ON, their respective icons will appear in the appropriate positions in the display. When the SMALL accompaniment is selected, some tracks for that style will be turned OFF and their respective
icons will disappear.
RHYTHM BASS CHORD PAD PHRASE
111
ON /
ACCOMP LARGE/SMALL
OFF
■ Muting Individual Tracks..............................................................................................................
The PSR-620 Auto Accompaniment system includes five Track buttons
which allow you to control the accompaniment arrangement in real time.
The accompaniment tracks can be turned OFF (muted) or ON by pressing
the corresponding TRACK buttons. The track icon will disappear when a
track is muted.
For example, PHRASE 1 and 2 tracks are turned ON or OFF at the same
time by pressing the PHRASE track button. The same applies to the
RHYTHM 1 and 2, and CHORD 1 and 2 tracks.
• The LARGE accompaniment is
always selected whenever a new
style is selected.
• Please note that the tracks used
depend on the selected style and
all the tracks are not always
active even when the LARGE
accompaniment is selected.
RHYTHM BASS CHORD PAD PHRASE
111
ON /
OFF
VOICE
1351021171301
VOL
ACCOMP TRACK
TRACK ON/OFF
Individual accompaniment tracks can also be turned OFF (muted) or ON
by using the cursor buttons to select the icon of the target track (the icon and
track name will flash), and then using the [–/NO] and [+/YES] buttons or
the data dial to turn the track OFF or ON, respectively. In this way,
RHYTHM 1 and RHYTHM 2 tracks can be independently turned OFF or
ON. The same applies to the CHORD 1 and 2, and PHRASE 1 and 2 tracks.
○○○○○○○○○○○○○○○○○○○○○○○○○○○○○○○○○○○○○○○○○○○○○○○○○○○○○○○○○○○○○○○○○
39
Page 42

Using Auto Accompaniment
■ Changing Accompaniment Track Voices......................................................
You can change the voice used for each track by moving the cursor but-
tons to select the voice number of the target track (the voice number will
flash), and then using the [–/NO] and [+/YES] buttons, the number buttons
or the data dial to select the desired voice number. Please note that the GM
voices are used for the accompaniment instead of the panel voices. Therefore, voice numbers of the accompaniment tracks are different from the ones
for the PSR-620 panel voices. Refer to the GM Voice List (see page 97) for
the GM voice numbers and names. Only the numbers from 1 through 8 can
be selected for the RHYTHM tracks. In this case, the numbers from 1
through 8 correspond to the PERCUSSION KIT numbers 129 through 136.
Voice numbers 01 through 136 can be selected for all other tracks.
PAD
ON /
OFF
VOICE
VOL
17
Voice Number
■ Adjusting Accompaniment Track Volume...................................................
The volume of each accompaniment track can be adjusted to produce the
ideal “mix” between tracks. Use the cursor buttons to select the volume bar
of the target track (the volume bar will flash), and then use the [–/NO] and
[+/YES] buttons and the data dial to set the maximum volume of the track
as required. The shorter the bar, the lower the volume. During playback the
top segment of each volume bar will remain at the maximum volume level,
while the lower bars will move according to the amount of activity in each
track.
PAD
ON /
OFF
VOICE
VOL
17
Volume
• When a different style number is
selected, all accompaniment
track parameters will be reset to
their initial values. Use the REGISTRATION MEMORY — page
43 — if you want to store a particular set of settings for instant
recall when needed.
• After changing the voice or volume, the [–/NO] and [+/YES]
buttons can be pressed simultaneously to reset the initial values.
• The track data changed applies
to all sections.
• Muting individual tracks, changing accompaniment track voices
and adjusting accompaniment
track volume cannot be executed
during song recording.
○○○○○○○○○○○○○○○○○○○○○○○○○○○○○○○○○○○○○○○○○○○○○○○○○○○○○○○○○○○○○○○○○
40
Page 43

Using Auto Accompaniment
Changing the Accompaniment Split Point
Select the Accompaniment Split Point Function.........................
1
Press the [FUNCTION] button to the left of the display as many times
as necessary until the arrowhead in the display appears next to “OVERALL” in the function list to the left of the display. Then use the cursor [▲]
and [▼] buttons to select the “AccSpPnt” function from within the OVERALL function list.
VOICE
CURSOR
FUNCTION
STYLE
SONG
REGIST MEMORY
MULTI PAD
DUAL VOICE
SPLIT VOICE
HARM
/
ECHO
OVERALL
DIGITAL EFFECT
054
AccSpPnt
Set As Required...........................................................................................................................................
2
Simply press the key you want to assign as the split point. The key
number of the key you press will appear to the left of “AccSpPnt” on the top
line of the display. You can also use the [–/NO] and [+/YES] buttons, the
number buttons or the data dial to enter the split point key number. The lowest key on the keyboard (C1) is key number “36”, middle C (C3) is “60”,
and the highest key (C6) is “96”. The split point can be set at any key
number from 00 through 127, allowing the split point to be set outside the
range of the PSR-620 keyboard for MIDI applications.
**
*
1
– –
123
654
789
–
+
/NO
/YES
0
Exit.........................................................................................................................................................................................
3
• The split point key becomes the
highest key in the Auto Accompaniment section of the keyboard.
• The default split point (54) can be
instantly recalled by pressing the
[–/NO] and [+/YES] buttons at the
same time.
Press the [VOICE] button or select a different function to exit from the
OVERALL functions.
○○○○○○○○○○○○○○○○○○○○○○○○○○○○○○○○○○○○○○○○○○○○○○○○○○○○○○○○○○○○○○○○○
41
Page 44

Using Auto Accompaniment
One Touch Setting
One Touch Setting lets you instantly select the appropriate panel settings
suitable for the current style. Each style (100 styles) contains four variations.
This means that you can freely use 400 different panel settings. The One Touch
Setting feature automatically sets the following parameters:
One Touch Setting Parameter List
• Voice number
• Octave
• Pan
• Dual Voice (Voice number, volume,
octave, reverb level, chorus level,
pan)
• Dual ON/OFF
• Split Voice (Voice number, volume,
octave, reverb level, chorus level,
pan, split point=59)
• Keyboard volume
• Reverb level
• Chorus level
• DSP level
• Harmony/Echo ON/OFF, type
• DSP type
• Sustain (Panel) ON/OFF
• Reverb ON/OFF
• Chorus ON/OFF
• DSP ON/OFF
• DSP variation ON/OFF
• Multi Pad Kit number
• Style parameters=default
• Synchro start=ON
• Accomp volume=100
• Accomp split point=54
• Accomp large/small=large
• Tempo=Default (for the currently
selected style)
• Main A/B section
Turn On the One Touch Setting......................................................................................
1
Press the [ONE TOUCH SETTING] button so that the “OTS” icon appears
next to the BEAT display and number “1 “ (type1) appears above “REGIST” on
the display . Panel settings suitable for the currently selected style are automatically set up for you to play.
The BEAT indicator dots flash at the current tempo and the synchro start
mode is engaged.
BEAT
REGIST
Select another Type...............................................................................................................................
2
OTS
REPEAT CHORD
ONE TOUCH
SETTING
Press one of the REGISTRATION MEMORY buttons [2]~[4] to select another type. The corresponding One Touch Setting number appears above
“REGIST” in the display, and the display changes to the one for the selected
type.
MEMORIZE 1 2 3 4
REGIST
ACCOMP
FREEZE
• If the One Touch Setting is
turned ON when the NORMAL or
SPLIT mode is selected, the
FINGERED mode is automatically selected.
• You can create original setting by
editing the One Touch Setting
data and storing it to the Registration Memory — see page 43.
•“No OTS” will appear on the
display if the optional cartridge or
disk styles have no one touch
setting data.
One Touch Setting can be turned OFF by pressing the [ONE TOUCH SET -
TING] button a second time so that the “OTS” icon disappears from the dis-
play.
○○○○○○○○○○○○○○○○○○○○○○○○○○○○○○○○○○○○○○○○○○○○○○○○○○○○○○○○○○○○○○○○○
42
Page 45

Registration Memory
The PSR-620 Registration Memory feature can be used to memorize 128
complete control-panel setups (32 banks, 4 setups each) that you can
recall whenever needed.
VOICE
STYLE
SONG
REGIST MEMORY
MULTI PAD
DUAL VOICE
SPLIT VOICE
/
ECHO
HARM
OVERALL
DIGIT AL EFFECT
801
REGIST
RHYTHM BASS CHORD PAD PHRASE ACCOMP MELODY
111
ON /
OFF
VOICE
VOL
Bank1
118 10 a01
TEMPO TRANSPOSE MEASURE REPEAT CHORD
135102117130 1011011
ACCOMP TRACK SONG TRACK
MELODY
REC REC REC
1
OTS
2
REVERB DUAL
CHORUS HARMONY
DSP SUSTAIN
Registering the Panel Settings
Set Up the Controls as Required................................................................................
1
Make the desired control settings. The following settings are memorized
by the Registration Memory function:
● Data Stored By the Registration Memory
VOICE PARAMETERS
• Voice number
• Keyboard volume
• Octave
• Pan
• Split voice (Voice number,
volume, octave, reverb level,
chorus level, pan, split point)
• Dual voice (Voice number,
volume, octave, reverb level,
chorus level, pan)
• Dual voice ON/OFF
• Touch response ON/OFF,
sensitivity
• Harmony/Echo ON/OFF,
type
• DSP ON/OFF, DSP
(type, return level)
• DSP variation ON/OFF
• Reverb ON/OFF
• Chorus ON/OFF
• Sustain (Panel) ON/OFF
• Reverb Level
• Chorus Level
• DSP Level
• Pitch Bend Range
ACCOMPANIMENT PARAMETERS
• Mode (NORMAL/SPLIT/SINGLE/FINGERED)
• Style number
• Tempo
• Split point (Accomp)
• Fingering mode
• Accompaniment volume
• Track data (Track ON/OFF, voice, volume)
• Main A/B section
• Transpose
• Multi Pad Kit number
• Reverb (type, return level)
• Chorus (type, return level)
BEAT
TOUCHMINUS ONE
NORMAL
SPLIT
SINGLE
FINGERED
LOAD
SAVE
DELETE
FORMAT
Select a Registration Bank (if necessary).................................................
2
Any of the 32 Registration Memory banks can be selected via the
REGIST MEMORY function. Use the [FUNCTION] buttons to move the
arrowhead next to “REGIST MEMORY” in the function list to the left of
• The REGIST MEMORY function
can be quickly selected by pressing and holding the [MEMORIZE]
button.
the display, then use the [–/NO] and [+/YES] buttons, the number buttons or
the data dial to select the desired Registration Memory bank (01 through
32).
VOICE
FUNCTION
○○○○○○○○○○○○○○○○○○○○○○○○○○○○○○○○○○○○○○○○○○○○○○○○○○○○○○○○○○○○○○○○○
STYLE
SONG
REGIST MEMORY
MULTI PAD
DUAL VOICE
SPLIT VOICE
HARM
/
ECHO
OVERALL
DIGITAL EFFECT
101
Bank1
43
Page 46

Registration Memory
Register the Settings..........................................................................................................................
3
While holding the [MEMORIZE] button, press one of the REGISTRA-
TION MEMORY buttons. Any data that was previously in the selected location is erased and replaced by the new settings. The corresponding Registration Memory number will appear above “REGIST” in the display.
• Please note that anytime you
store to a REGISTRATION
MEMORY button, all settings
previously stored in that button
will be erased and replaced by
the new settings.
ACCOMP
REGISTRATION
MEMORY
MEMORIZE 1 2 3 4
● Enter a New Name for the Registration Bank
If you want to enter a descriptive name for easier identification, enter
your original Registration Bank name, this is recommended.
Use the cursor [>] button to move the cursor to the first (left most)
character of the Registration Bank name in the display. A Registration
Bank name can consist of up to 8 characters. The position of the character you want to enter or change can be selected by moving the cursor.
Using the [–/NO] and [+/YES] buttons or the data dial, enter the de-
sired character listed below. The number buttons can also be used to enter the number. If you want to insert an underline character at the cursor
position, press the cursor [▲] button. If you want to delete a character at
the cursor position, press the cursor [▼] button. When you’ve finished
entering the Registration Bank name, move the cursor to the position
other than the Registration Bank name so that the newly entered Registration Bank name will be memorized.
FREEZE
• The Registration Memory data,
including the registration name,
is retained in memory even when
the power switch is turned OFF
as long as the batteries are
installed or the AC adaptor is
connected. It is nevertheless a
good idea to save important
registration data to floppy disk so
you have a backup in case of
accidental erasure (see page
66).
Character List
ABCDEFGHIJKLMNOPQRSTUVWXYZ
abcdefghijklmnopqrstuvwxyz
0123456789–
101
○○○○○○○○○○○○○○○○○○○○○○○○○○○○○○○○○○○○○○○○○○○○○○○○○○○○○○○○○○○○○○○○○
44
Yamaha
Page 47

Recall the Registered Panel Settings
Simply select the appropriate bank as described above, then press the desired REGISTRATION MEMORY button at any time to recall the memorized
settings. The corresponding Registration Memory number will appear above
“REGIST” in the display, and the appropriate setting changes will appear in the
display.
The indicator of the selected REGISTRATION MEMORY will flash as
soon as any change is made to the panel settings. In other words, if the REGISTRATION MEMORY indicator is flashing, the current panel settings are different from those stored in the memory.
No REGISTRATION MEMORY indicator will be showing when the PSR620 is turned ON or a bank is selected.
VOICE
FUNCTION
STYLE
SONG
REGIST MEMORY
MULTI PAD
DUAL VOICE
SPLIT VOICE
HARM
/
ECHO
OVERALL
DIGITAL EFFECT
101
Bank1
Registration Memory
• Cartridge and disk registration
settings can be recalled as described on pages 63 and 68.
• If the Accomp Freeze function is
ON when a REGISTRATION
MEMORY is recalled, the registration number will flash.
• Registration bank 01 can be
instantly recalled by simultaneously pressing the [–/NO] and [+/
YES] buttons.
• When the One Touch Setting is
ON, registration memory data
can not be recalled.
MEMORIZE 1 2 3 4
REGIST
ACCOMP
FREEZE
The Accomp Freeze Function
When the ACCOMP FREEZE function is engaged, the accompaniment parameters listed above will
is recalled. This allows you to recall different REGISTRATION MEMORY
settings while using Auto Accompaniment, without suddenly disturbing the
flow of the accompaniment. The ACCOMP FREEZE function is turned ON
and OFF by pressing the [ACCOMP FREEZE] button. The “FREEZE” indicator appears in the “REGIST” area in the display when it is turned ON.
MEMORIZE 1 2 3 4
REGIST
not be changed when a REGISTRATION MEMORY
ACCOMP
FREEZE
• Accomp Freeze remains ON
even if a different registration
bank is selected.
• When you recall the REGISTRATION MEMORY settings while
song recording or playback, only
the voice parameter settings can
be recalled even if the ACCOMP
FREEZE function is turned OFF.
○○○○○○○○○○○○○○○○○○○○○○○○○○○○○○○○○○○○○○○○○○○○○○○○○○○○○○○○○○○○○○○○○
45
Page 48

Song Recording
The PSR-620 SONG TRACKS allows you to record and play back a
complete song including chord sequences created using the Auto Accompaniment feature and a melody line you play on the keyboard. The
SONG TRACKS include one ACCOMP track and two MELODY tracks.
Song number 26 is available for recording your own songs (the “user”
song). Only one song can be retained in the PSR-620 memory at a time,
but your songs can be sav ed to floppy disk - up to 100 songs per disk (the
actual number depends on the volume of the song data) - and then
reloaded later whenever you want to play them (see pgae 66).
• Material recorded on the SONG TRACKs is retained in memory even when the POWER switch is
turned OFF if batteries are present or an AC adaptor is connected. It is neverthless a good idea to
save important song data to floppy disk so you have a backup in case of accidental erasure.
• The recorded data will be lost if the power is turned OFF, the AC adaptor is unplugged, or the
batteries fail during recording.
• Up to approximately 1500 notes can be recorded to the MELODY tracks, or approximately 750
chords can be recorded to the ACCOMP track.
VOICE
STYLE
SONG
REGIST MEMORY
MULTI PAD
DUAL VOICE
SPLIT VOICE
/
ECHO
HARM
OVERALL
DIGIT AL EFFECT
826
UserSong
118 10 a01
TEMPO TRANSPOSE MEASURE REPEAT CHORD
REGIST
RHYTHM BASS CHORD PAD PHRASE ACCOMP MELODY
111
ON /
OFF
VOICE
135102117130 1011011
VOL
ACCOMP TRACK SONG TRACK
MELODY
REC REC REC
1
OTS
2
REVERB DUAL
CHORUS HARMONY
DSP SUSTAIN
BEAT
TOUCHMINUS ONE
Recording a Melody Track
The SONG MELODY tracks record the following operations and data:
• Note ON/OFF
• Velocity
• Voice number
• Octave
• Pan
• Dual voice ON/OFF
• Dual Voice (voice
number, volume, octave,
reverb level, chorus
level, pan)
• Keyboard volume*
• Pitch Bend
• Pitch Bend Range*
• Reverb Level
• Chorus Level
• DSP Level (MELODY 1 track only)
• Harmony/Echo ON/OFF, type
• Reverb ON/OFF
• Chorus ON/OFF
• DSP ON/OFF, DSP type (MELODY 1 track only)
• DSP variation ON/OFF (MELODY 1 track only)
• Sustain (Panel) ON/OFF (Sustain pedal ON/OFF)
• (Tempo signature common to melody & accomp
tracks)*
* Recorded only at the beginning of a song; changes can-
not be made during recording.
NORMAL
SPLIT
SINGLE
FINGERED
LOAD
SAVE
DELETE
FORMAT
○○○○○○○○○○○○○○○○○○○○○○○○○○○○○○○○○○○○○○○○○○○○○○○○○○○○○○○○○○○○○○○○○
46
Page 49

Select the User Song Number..........................................................................................
1
If necessary, use the [FUNCTION] buttons to select the SONG function,
and then the [–/NO] and [+/YES] buttons, the number buttons or the data
dial to select SONG number “26” (the user song number).
VOICE
FUNCTION
Select a Voice and Set the Voice Parameters......................................
2
STYLE
SONG
REGIST MEMORY
MULTI PAD
DUAL VOICE
SPLIT VOICE
HARM
/
ECHO
OVERALL
DIGITAL EFFECT
826
UserSong
Select the voice you want to record with, and set the digital effects and
other parameters as required.
Song Recording
• You cannot record in the SPLIT
mode — the NORMAL mode will
automatically be selected when
the SONG record ready mode is
engaged.
Engage the MELODY Track Record Ready Mode........................
3
Press the SONG [REC] button. The [REC] indicator will flash, and
“REC” will appear in the MELODY 1 track position on the display indicating that the PSR-620 is ready to record. Flashing square brackets in both the
MELODY 1 and MELODY 2 track positions indicate that either track can
be selected for recording at this point — use the [–/NO] and [+/YES] buttons or the data dial to select the MELODY track to be recorded (“REC”
appears in the selected track position).
SONG
REC PLAY/STOP
/
ACCOMP MELODY
MELODY
REC
2
1
789
–
0
/NO
The BEAT indicator dots flash at the current tempo. If the “Metronom”
function in the OVERALL function group is turned ON, the metronome
will also begin to sound at the currently selected tempo (page 80).
+
/YES
• If a previously-recorded SONG
ACCOMP track is ON (the SONG
ACCOMP track icon is showing),
it can be monitored while recording a MELODY track. If you don’t
want to hear the ACCOMP track
while recording, move the cursor
to the ACCOMP track icon and
press the [–/NO] button to turn it
OFF.
• If a non-user song number is
selected when the record ready
mode is engaged, user song
number 26 will automatically be
selected.
• The melody track volume is the
current Keyboard Volume setting
— see page 77.
• Only one melody track can be
recorded at a time.
• The record-ready mode of the
MELODY track can be disengaged by pressing the [REC]
button.
• When the record-ready mode is
engaged, the measure number
resets to 01. (Recording cannot
start from the specified measure.)
○○○○○○○○○○○○○○○○○○○○○○○○○○○○○○○○○○○○○○○○○○○○○○○○○○○○○○○○○○○○○○○○○
47
Page 50

Song Recording
Record.............................................................................................................................................................................
4
Recording will begin as soon as you play a note on the keyboard or
press the SONG [PLAY/STOP] button, and the BEAT indicator dots will
begin to indicate the current beat as in the Auto Accompaniment mode. The
MEASURE parameter will also show the current measure number. The
[REC] indicator lights continuously once recording has started.
Stop Recording..............................................................................................................................................
5
Stop recording by pressing the SONG [PLAY/STOP] button. The
[REC] indicator will go out and the MEASURE number on the display will
return to “01”.
SONG
REC PLAY/STOP
/
REPEAT
PLAY
SONG
REC PLAY/STOP
/
MINUS
ONE
REPEAT
PLAY
MINUS
ONE
• Whenever you record using the
SONG MEMORY, any previously
recorded material in the same
track will be erased.
• If you start recording by pressing
the [PLAY/STOP] button, nothing
will be recorded until you begin
playing on the keyboard.
• Melody Track data can be
cleared by pressing the [PLAY/
STOP] button to start recording
and stop it without playing the
keyboard (Melody Track Data
Clear).
• Recording is carried out in 1measure increments. If you stop
recording in the middle of a
measure, rests will automatically
be recorded until the end of that
measure.
• If the SONG MEMORY becomes
full while recording, “Full” will
appear on the display and recording will stop.
• If you want to re-record the
Melody track which “Full” was
shown on the display during
recording, execute “Melody Track
Data Clear” operation (see
above) before recording.
• Only VOICE function voice numbers are shown in the melody
track displays (dual voice numbers are not shown).
The melody track voice number and volume settings will appear on the
display.
○○○○○○○○○○○○○○○○○○○○○○○○○○○○○○○○○○○○○○○○○○○○○○○○○○○○○○○○○○○○○○○○○
48
Page 51

Recording Accompaniment With or Without a Melody
The SONG ACCOMP track records the following operations and data:
• Section changes
• Style number*
• Accompaniment track changes* (track ON/OFF, voice number, volume)
• Accompaniment volume*
• Chord changes, timing
• Reverb type
• Chorus type
* Recorded only at the beginning of a song; changes cannot be made during recording.
Select the User Song Number..........................................................................................
1
If necessary, use the FUNCTION buttons to select the SONG function,
and then the [–/NO] and [+/YES] buttons, the number buttons or the data
dial to select SONG number “26” (the user song number).
Song Recording
VOICE
FUNCTION
Select the SINGLE or FINGERED Mode and a Style.............
2
STYLE
SONG
REGIST MEMORY
MULTI PAD
DUAL VOICE
SPLIT VOICE
HARM
/
ECHO
OVERALL
DIGITAL EFFECT
826
UserSong
Select the SINGLE or FINGERED mode (page 30) and an accompaniment style that is appropriate for the type of music you want to record. Also
select the FINGERED fingering mode you want to use, if necessary .
NORMAL
SPLIT
SINGLE
FINGERED
MODE
○○○○○○○○○○○○○○○○○○○○○○○○○○○○○○○○○○○○○○○○○○○○○○○○○○○○○○○○○○○○○○○○○
49
Page 52

Song Recording
Engage the ACCOMP/MELODY Track
3
Record Ready Mode
Press the SONG [REC] button. The [REC] indicator will flash, and
“REC” will appear in the ACCOMP and MELODY 1 track positions on the
display indicating that the PSR-620 is ready to record. Flashing square
brackets in both the MELODY 1 and MELODY 2 track positions indicate
that either track can be selected for recording at this point — use the [–/NO]
and [+/YES] buttons or the data dial to select the MELODY track to be recorded, or none if you only want to record the ACCOMP track (“REC” appears in the selected track position).
The BEAT indicator dots flash at the current tempo. If the “Metronom”
function in the OVERALL function group is turned ON, the metronome will
also begin to sound at the currently selected tempo (page 80).
SONG
REC PLAY/STOP
/
.............................................................................................................................
ACCOMP MELODY
MELODY
REC REC
2
1
789
–
/NO
+/YES
0
• If a previously-recorded
MELODY track is turned ON (its
icon is showing), it can be monitored while recording. If you don’t
want to hear the previous track
while recording, move the cursor
to the corresponding track icon
and press the [–/NO] button to
turn it OFF.
• The accompaniment track volume is the current Accompaniment Volume setting — see page
79.
• When the record-ready mode is
engaged, the measure number
resets to 01. (Recording can not
start from the specified measure.)
Record.............................................................................................................................................................................
4
Recording will begin as soon as you play a chord on the Auto Accompaniment section of the keyboard. If you’ve selected the MELODY track to
record with the ACCOMP track, a right-hand note will also start the recording process. The [REC] indicator lights continuously once recording has
started.
SONG
REC PLAY/STOP
/
REPEAT
PLAY
Recording can also be started by pressing the ACCOMPANIMENT
CONTROL [START/STOP] button. In this case only the rhythm will begin
without bass and chord accompaniment until you play the first chord on the
Auto Accompaniment section of the keyboard.
SYNC-
START/STOP
START/STOP
INTRO
AUTO FILL
AB
ENDINGMAIN
MINUS
ONE
• Whenever you record using the
SONG MEMORY, any previously
recorded material in the same
track will be erased.
• If the SONG MEMORY becomes
full while recording, “Full” will
appear on the display and recording will stop.
• Recording is carried out in 1measure increments. If you stop
recording in the middle of a
measure, rests will automatically
be recorded until the end of that
measure.
• If you start the ACCOMP track
recording by pressing the [PLAY/
STOP] button, no chord data will
be recorded until you begin
playing on the keyboard.
○○○○○○○○○○○○○○○○○○○○○○○○○○○○○○○○○○○○○○○○○○○○○○○○○○○○○○○○○○○○○○○○○
50
Page 53

Play the required chords in the Auto Accompaniment section of the keyboard. If you’ve also selected the MELODY track to be recorded, play the
melody on the right-hand section of the keyboard. The MEASURE number
on the display will increment as recording progresses.
a02
MEASURE
Stop Recording..............................................................................................................................................
5
Stop recording by pressing the SONG [PLAY/STOP] button, the AUT O
ACCOMPANIMENT [START/STOP] button, or stop with an ending by
pressing the AUT O ACCOMPANIMENT [ENDING] button. The [REC]
button indicator will go out and the MEASURE number on the display will
return to “01”.
The ACCOMP track volume setting will appear on the display.
Song Recording
● Enter a New Name for the Song
If you want to enter a descriptive name for the user song (song number
“26”), enter your original song name, this is recommended.
Use the cursor [>] button to move the cursor to the first (left most) character of the song name in the display. A song name can consist of up to 8
characters. The position of the character you want to enter or change can be
selected by moving the cursor.
Using the [–/NO] and [+/YES] buttons or the data dial, enter the desired
character listed below. The number buttons can also be used to enter the
number. If you want to insert an underline character at the cursor position,
press the cursor [▲] button. If you want to delete a character at the cursor
position, press the cursor [▼] button. When you’ve finished entering the
song name, move the cursor to the position other than the song name so that
the newly entered song name will be memorized.
Character List
ABCDEFGHIJKLMNOPQRSTUVWXYZ
abcdefghijklmnopqrstuvwxyz
0123456789–
• The Song data including it’s
name is retained in memory even
when the power switch is turned
OFF, as long as the batteries are
installed or the AC adaptor is
connected.
126
Save Your Completed Song to Floppy Disk............................................
6
When you’ve finished recording your song - or have recorded as much
as you want to in the current session - save your song to floppy disk as described on page 66. Making this step a habit will prevent accidental loss of
data.
○○○○○○○○○○○○○○○○○○○○○○○○○○○○○○○○○○○○○○○○○○○○○○○○○○○○○○○○○○○○○○○○○
TOOFUNKY
51
Page 54

Song Recording
Select the User Song Number..........................................................................................
1
If necessary, use the FUNCTION buttons to select the SONG function,
and then the [–/NO] and [+/YES] buttons, the number buttons or the data
dial to select SONG number “26” (the user song number) containing the
song you have recorded.
FUNCTION
Accompaniment and Melody Playback
VOICE
STYLE
SONG
REGIST MEMORY
MULTI PAD
DUAL VOICE
SPLIT VOICE
HARM
/
ECHO
OVERALL
DIGITAL EFFECT
826
UserSong
Start Playback..................................................................................................................................................
2
Playback will begin as soon as the SONG [PLAY/STOP] button is
pressed. You can turn the ACCOMP and MELODY tracks ON and OFF
during playback as required.
SONG
REC PLAY/STOP
Play Along If You Like........................................................................................................................
3
REPEAT
MINUS
PLAY
ONE
/
Play along on the keyboard if you like. You can also change the tempo
during playback.
Stop Playback...................................................................................................................................................
4
Accompaniment and melody playback will stop automatically when all
recorded data has been played back. You can also stop playback at any time
by pressing the SONG [PLAY/STOP] button.
• You can also start playback from
any specified measure (see page
53).
• Individual tracks can be turned
OFF (muted) or ON by using the
cursor buttons to select the icon
of the target track (the icon and
track name will flash), and then
using the [–/NO] and [+/YES]
buttons or the data dial to turn
the track OFF or ON, respectively. The track icon will disappear when a track is muted.
• The NORMAL mode is automatically selected when SONG playback is started.
• Voice and volume data can be
rewritten during playback — see
“Voice & Volume Rewrite”, below.
• When the song playback is
stopped, the DSP type will compulsorily be changed according
to the currently selected voice
and the reverb and chorus types
will be changed according to the
currently selected style.
• User Song data can be loaded
into the PSR-620’s user song
memory location (Song number
26) and played. See page 68 for
instructions on loading song data
from disk.
○○○○○○○○○○○○○○○○○○○○○○○○○○○○○○○○○○○○○○○○○○○○○○○○○○○○○○○○○○○○○○○○○
52
Page 55

Play from a Specified Measure
You can start SONG playback from any specified measure, as long as the
specified measure is within the range of measures that has already been recorded:
Select the MEASURE Parameter..................................................................................
1
While no recording or playback is in progress, use the CURSOR buttons
to select the MEASURE parameter in the display.
CURSOR
Song Recording
MEASURE
Enter the Desired Measure Number......................................................................
2
Use the [–/NO] and [+/YES] buttons, the number buttons or the data dial
to enter the desired measure number.
*
1
123
789
–
0
/NO
Start Playback..................................................................................................................................................
3
a01
**
654
+
/YES
• Three-digit numbers are entered
by first pressing and holding the
[1] or [2] button until “1” or “2”
appears in the hundreds position
on the display, then pressing the
remaining two digits in sequence.
You can now start playback from the specified measure number.
○○○○○○○○○○○○○○○○○○○○○○○○○○○○○○○○○○○○○○○○○○○○○○○○○○○○○○○○○○○○○○○○○
53
Page 56

Song Recording
■ Voice & Volume Rewrite
You can rewrite the last recorded voice change in any individual track
during playback by using the cursor buttons to select the voice number of
the target track (the voice number will flash), and then using the number
buttons, the [–/NO] and [+/YES] buttons or the data dial to select the desired voice number . The data will actually be rewritten when the [PLAY/
STOP] button is pressed or the end of the song is reached or the next voice
change is encountered in the recorded data. The original voice number can
be recalled before it is actually rewritten by simultaneously pressing the
[–/NO] and [+/YES] buttons. Any other voice changes included in the recorded track data will take effect at the appropriate times.
The volume of each track can be rewritten during playback in the same
way. Use the cursor buttons to select the volume bar of the target track (the
volume bar will flash), and then use the [–/NO] and [+/YES] buttons or the
data dial to set the maximum volume of the track as required. The shorter
the bar, the lower the volume. The data will actually be rewritten when the
[PLAY/STOP] button is pressed or the end of the song is reached. The
original volume can be recalled before it is actually rewritten by simultaneously pressing the [–/NO] and [+/YES] buttons. The new volume data is
written only at the beginning of the track and affects the entire track.
• The dual voice will change
automatically when a melody
track voice is changed.
• Voice and volume data can
only be rewritten in songs you
have recorded yourself.
CURSOR
ACCOMP MELODY
MELODY
REC REC REC
2
1
101103
*
1
123
789
–
0
/NO
■ Clearing the SONG TRACKS
All data in the ACCOMP, MELODY 1 and MELODY 2 tracks of the
user song (number 26) can be completely erased by first pressing the [MI-
NUS ONE] button while holding the [REC] button, and then pressing the
[+/YES] button in response to the “Clear?” confirmation prompt on the dis-
play (press [–/NO] if you decide not to erase the data).
SONG
REC PLAY/STOP
REPEAT
MINUS
PLAY
ONE
/
126
Clear ?
**
+
654
/YES
• Only songs you have recorded
yourself can be cleared.
• If a non-user song number is
selected when the song-clear
mode is engaged, user song
number 26 will automatically
be selected.
○○○○○○○○○○○○○○○○○○○○○○○○○○○○○○○○○○○○○○○○○○○○○○○○○○○○○○○○○○○○○○○○○
54
Page 57

The Multi Pads
The PSR-620 MULTI PADS can be used to play 84 shor t pre-recorded
rhythmic and melodic sequences, that can be used to add impact and
variety to your ke yboard perf ormances. Some of the pad phrases simply
play back as programmed, while others are “chord match” types which are
automatically transposed to match chords played using the PSR-620
Auto Accompaniment feature.
The PSR-620 MULTI PADS can also be used to record short rhythmic or
melodic sequences, percussion fill-ins, or single percussion sounds that
can be played at any time simply by pressing the appropriate pad. Multi
pad kit number 22 is availab le f or recording y our own data (the user pad
kit). Only one set of MULTI PAD data can be retained in the PSR-620
memory at a time, but any number of MULTI PAD sets can be saved to
floppy disk and then reloaded later when needed (see page 66).
VOICE
STYLE
SONG
REGIST MEMORY
MULTI PAD
DUAL VOICE
SPLIT VOICE
/
ECHO
HARM
OVERALL
DIGIT AL EFFECT
801
REGIST
RHYTHM BASS CHORD PAD PHRASE ACCOMP MELODY
111
ON /
OFF
VOICE
VOL
Arpeggio
118 10 a01
TEMPO TRANSPOSE MEASURE REPEAT CHORD
135102117130 1011011
ACCOMP TRACK SONG TRACK
MELODY
REC REC REC
1
OTS
2
REVERB DUAL
CHORUS HARMONY
DSP SUSTAIN
BEAT
TOUCHMINUS ONE
NORMAL
SPLIT
SINGLE
FINGERED
LOAD
SAVE
DELETE
FORMAT
Playing the MULTI PADS
The PSR-620 has 21 multi pad kits, each containing a complete set of 4 MULTI PAD phrases — 84
phrases in all. Before using the MULTI PADS, select the MULTI PAD kit containing the phrases you want to
use as follows:
Select the MULTI PAD Function.....................................................................................
1
To select a multi pad kit, first select the MULTI PAD function by press-
ing one of the [FUNCTION] buttons until the arrowhead in the display ap-
pears next to “MULTI PAD” in the function list to the left of the display.
• See page 56 for a complete
listing of the Multi Pad
assingnments.
• The MULTI PAD function can be
quickly selected by pressing and
holding the [REC/END] button.
VOICE
FUNCTION
○○○○○○○○○○○○○○○○○○○○○○○○○○○○○○○○○○○○○○○○○○○○○○○○○○○○○○○○○○○○○○○○○
STYLE
SONG
REGIST MEMORY
MULTI PAD
DUAL VOICE
SPLIT VOICE
HARM
/
ECHO
OVERALL
DIGITAL EFFECT
101
Arpeggio
55
Page 58

The Multi Pads
Select a Multi Pad Kit Number.........................................................................................
2
Use the [–/NO] and [+/YES] buttons, the number buttons or the data dial
to select one of the 21 available multi pad kits.
789
–
/NO
+/YES
0
Play the Multi Pad.....................................................................................................................................
3
• One set of MULTI PAD data can
be loaded into the PSR-620’s
user pad kit memory location
(Multi Pad kit number 22) and
used in the same way as the 21
preset internal multi pad kits. See
page 68 for instructions on loading multi pad data from disk.
Simply tap any of the MULTI PADS at any time to play back the corresponding phrase. MULTI PAD playback begins as soon as the button is pressed.
You can even play two, three, or four MULTI PADS at the same time. Also, you
can create “retriggered sample” effects by repeatedly pressing a pad before its
contents are completely played back.
The MULTI PAD voices are independent from the voices you have currently
selected for keyboard performance. You could, for example, play piano on the
keyboard while a MULTI PAD plays a brass chord stab.
When a “chord match” type MULTI PAD phrase is played, the phrase will
be automatically transposed to match chords played using the PSR-620 Autoaccompaniment feature.
MULTI PAD playback can be terminated by pressing the MULTI PADS
[TERMINATE] button.
REC/END
MULTI PADS
TERMINATE
1234
• MULTI PAD playback speed is
determined by the current
TEMPO setting.
● The Multi Pad Kits
Chord Match
Kit Pad 1 Pad 2 Pad 3 Pad 4
01 Arpeggio OOOO
02 Brass Hit OOOO
03 Synth Arpeggio OOOO
04 Pianist OOOO
05 Fanfare –––O
06 Synth SFX OOOO
07 Wet Synth OOOO
08 Synth Sound OOOO
09 Human Vox OOOO
10 Twinkle OOOO
11 Open Air ––––
○○○○○○○○○○○○○○○○○○○○○○○○○○○○○○○○○○○○○○○○○○○○○○○○○○○○○○○○○○○○○○○○○
56
Kit Pad 1 Pad 2 Pad 3 Pad 4
12 Guitar Play OOOO
13 Drum Flam1 ––––
14 Drum Flam2 ––––
15 Drum Kit ––––
Conga & Vibraslap
16
17 Timbales ––––
18
Latin Percussion1
19 Rock Drum ––––
20
Latin Percussion2
21 Drum Fill ––––
Chord Match
––––
––––
––––
Page 59

Recording the MULTI PADS
The MULTI PADS record the following data:
• Note ON/OFF
• Velocity
• Voice number
• Octave
• Pan
• Dual voice ON/OFF, Dual voice (voice number, volume, octave, reverb level,
chorus level, pan)
• Keyboard volume*
• Reverb Level
• Chorus Level
• Harmony/Echo ON/OFF, type
• Reverb ON/OFF
• Chorus ON/OFF
• Pitch Bend
• Pitch Bend Range*
• Sustain (Panel) ON/OFF (Sustain pedal ON/OFF)
The Multi Pads
• Material recorded on the MULTI
PADS (user pad data) is retained
in memory even when the
POWER switch is turned OFF if
batteries are present or an AC
adaptor is connected.
• The recorded data will be lost if
the power is turned OFF, the AC
adaptor is unplugged, or the
batteries fail during recording.
• Up to approximately 200 notes
(for User Pad Kit) can be recorded in the PSR-620.
* Recorded only at the beginning of a phrase; changes cannot be made during recording.
Select the MULTI PAD Function.....................................................................................
1
To select a multi pad kit, first select the MULTI PAD function by pressing one of the FUNCTION buttons until the arrowhead in the display appears next to “MULTI PAD” in the function list to the left of the display.
VOICE
FUNCTION
Select the User Multi Pad Kit..............................................................................................
2
STYLE
SONG
REGIST MEMORY
MULTI PAD
DUAL VOICE
SPLIT VOICE
HARM
/
ECHO
OVERALL
DIGITAL EFFECT
101
Arpeggio
• The MULTI PAD function can be
quickly selected by pressing and
holding the [REC/END] button.
Use the [–/NO] and [+/YES] buttons, the number buttons or the data dial
to select multi pad kit number “22” (the user pad kit).
122
○○○○○○○○○○○○○○○○○○○○○○○○○○○○○○○○○○○○○○○○○○○○○○○○○○○○○○○○○○○○○○○○○
UserPad
789
–
/NO
+/YES
0
57
Page 60

The Multi Pads
Select a Voice and Other Parameters .................................................................
3
Select a voice and related parameters you want to record on the MULTI
PADS. You might also want to set a tempo that will be easy to record at.
If you select a pitched voice to record, the data will automatically be
transposed to match the chords played by the Auto Accompaniment feature
(“chord match”).
Engage the MULTI PAD Record Ready Mode......................................
4
Press one of the MULTI PAD buttons - [1] through [4] - while holding
the [REC/END] button. The [REC/END] indicator will flash to indicate
that the record ready mode is engaged.
The four dots of the BEAT display flash at the current tempo. If the
“Metronom” function in the OVERALL function group is turned ON, the
metronome will begin to sound at the currently selected tempo.
MULTI PADS
TERMINATE
REC/END
1234
• You cannot record in the SPLIT/
SINGLE/FINGERED mode - the
NORMAL mode will automatically
be selected when the MULTI
PAD record ready mode is engaged.
• If a non-user multi pad kit number
is selected when the record
ready mode is engaged, user
multi pad kit number 22 will
automatically be selected.
• The recorded multi pad volume
depends on the current Keyboard
Volume setting — see page 77.
• [DSP] button is disabled when
the MULTI PAD is in record
ready mode and record mode.
Also, DSP will automatically be
turned OFF when the MULTI
PAD record ready mode is engaged.
Record.............................................................................................................................................................................
5
Play a short sequence. The [REC/END] indicator will light during re-
cording, and the BEAT indicator dots will indicate the current beat.
If you want to play back the recorded data as the “chord match” type,
record all the phrases on CM7. The sound will be properly transposed when
used with the Auto Accompaniment feature.
Stop Recording..............................................................................................................................................
6
Stop recording by pressing the [REC/END] button. The [REC/END]
button indicator will go out.
REC/END
MULTI PADS
TERMINATE
1234
• Whenever you record to a MULTI
PAD, all previous data in the
same pad will be completely
erased and replaced by the new
material.
• If the MULTI PAD memory becomes full while recording, “Full”
will appear on the display and
recording will stop.
○○○○○○○○○○○○○○○○○○○○○○○○○○○○○○○○○○○○○○○○○○○○○○○○○○○○○○○○○○○○○○○○○
58
Page 61

Play the Multi Pads.................................................................................................................................
7
Tap any of the MULTI PADS. Your recorded data will be played in ex-
actly the same way as the preset data.
● Enter a New Name for the Multi Pad Kit
The Multi Pads
If you want to enter a descriptive name for the user pad kit (multi pad kit
number “22”), enter your original multi pad kit name, this is recommended.
Use the cursor [>] button to move the cursor to the first (left most) char-
acter of the multi pad kit name in the display. A multi pad kit name can consist of up to 8 characters. The position of the character you want to enter or
change can be selected by moving the cursor.
Using the [–/NO] and [+/YES] buttons or the data dial, enter the desired
character listed below. The number buttons can also be used to enter the
number. If you want to insert an underline character at the cursor position,
press the cursor [▲] button. If you want to delete a character at the cursor
position, press the cursor [▼] button. When you’ve finished entering the
multi pad kit name, move the cursor to the position other than the multi pad
kit name so that the newly entered multi pad kit name will be memorized.
Character List
ABCDEFGHIJKLMNOPQRSTUVWXYZ
abcdefghijklmnopqrstuvwxyz
0123456789–
122
Yamaha
• The user pad kit data including
it’s name is retained in memory
even when the power switch is
turned OFF, as long as the batteries are installed or the AC
adaptor is connected..
Save Your MULTI PAD Data to Floppy Disk .............................................
8
When you’ve finished recording your MULTI PAD data save it to
floppy disk as described on page 66. Making this step a habit will prevent
accidental loss of data.
○○○○○○○○○○○○○○○○○○○○○○○○○○○○○○○○○○○○○○○○○○○○○○○○○○○○○○○○○○○○○○○○○
59
Page 62

Using Music Cartridges
The PSR-620 features a cartridge slot which accepts pre-programmed
Yamaha Music Cartridges containing style, song and/or registration
data. One sample Music Cartridge is supplied with the PSR-620. Others
are available from your Yamaha dealer.
VOICE
STYLE
SONG
REGIST MEMORY
MULTI PAD
DUAL VOICE
SPLIT VOICE
HARM
OVERALL
DIGIT AL EFFECT
/
ECHO
REGIST
RHYTHM BASS CHORD PAD PHRASE ACCOMP MELODY
ON /
OFF
VOICE
VOL
■ Inserting a Music Cartridge
With the power OFF, insert the Music Cartridge into the cartridge slot as
shown, and press down firmly until the
Cartridge is seated properly (as shown
in the illustration). The Cartridge is
shaped so that it will only fit in the slot
one way - don’t try to force it in the
wrong way. Turn the power back ON
again after inserting.
The triangular mark on the front of
the Cartridge should be completely
below the panel edge when the
Cartridge is properly seated.
For Cartridges without the mark,
the bottom of the serrated edges
of the Cartridge should be even
with the panel edge (not above it).
801
111
YESTERDY
118 10 a01
TEMPO TRANSPOSE MEASURE REPEAT CHORD
135102117130 1011011
ACCOMP TRACK SONG TRACK
MELODY
1
REC REC REC
2
■ Music Cartridge Handling Precautions
• Do not leave Music Cartridges in locations which are
subject to excessive heat or humidity.
• Do not drop Music Cartridges or subject them to
strong shock.
• Do not disassemble Music Cartridges.
• Do not directly touch the Music Cartridge’s electrical
contacts. Persistently touching it may cause to break
electrical contacts or generate static electricity. Static
electric charges can cause loss of data and unreliable
operation.
• Do not insert objects or cartridges other than Yamaha
Music Cartridges in the PortaTone cartridge slot.
Doing so can result in serious damage to the instrument.
• Never attempt to insert or remove a cartridge when
the power switch is ON. Doing so can result in loss
of the PSR-620 memory data or complete lack of
control.
• The Music Cartridge data may not be selected or
played back correctly, if the electrical contacts on the
Music Cartridge are affected with dust. If this happens, insert and remove the Music Cartridge several
times. This may solve the problem. If the problem
still happens, wipe and clean the electrical contacts
on the Music Cartridge with a dry soft cloth.
BEAT
OTS
TOUCHMINUS ONE
REVERB DUAL
CHORUS HARMONY
DSP SUSTAIN
NORMAL
SPLIT
SINGLE
FINGERED
LOAD
SAVE
DELETE
FORMAT
• Be sure to insert the applicable Music Cartridge when you recall
the registration settings based on the cartridge data or playback
the song based on the cartridge data. Otherwise, “No Cart (Cartridge)” or “WrongCrt (Cartridge)” will appear on the display.
○○○○○○○○○○○○○○○○○○○○○○○○○○○○○○○○○○○○○○○○○○○○○○○○○○○○○○○○○○○○○○○○○
60
Page 63

Using Music Cartridges
Cartridge Accompaniment Styles
The Music Cartridge supplied with the PSR-620 provides an extra 8 accompaniment styles that can be used
in the same way as the internal accompaniment styles.
Selecting Cartridge Styles
Select the Style Function...........................................................................................................
1
Press the [STYLE] button to directly select the STYLE function, or
press the [FUNCTION] button to the left of the display as many times as
necessary until the arrowhead in the display appears next to “STYLE” in the
function list to the left of the display.
Select and Use a Cartridge Style................................................................................
2
To select a cartridge style, first press and hold the number [3] button (be-
low the cartridge icon on the panel) until the cartridge icon appears to the
left of the style name in the display, then enter the number of the cartridge
style you want to select via the number buttons in the normal way (2 digits).
The cartridge styles can also be selected by using the [–/NO] and [+/YES]
buttons or the data dial to go beyond the highest internal style numbers or
the lowest disk style numbers — e.g. pressing the [+/YES] button while
internal style number 00 (or user style number 101) is selected will select
cartridge style number 01 (the cartridge icon will appear).
The cartridge styles are used in exactly the same way as the internal ac-
companiment styles (page 34).
•“No OTS” will appear on the
display if the optional cartridge
styles have no one touch setting
data.
**
*
1
– –
VOICE
STYLE
SONG
REGIST MEMORY
○○○○○○○○○○○○○○○○○○○○○○○○○○○○○○○○○○○○○○○○○○○○○○○○○○○○○○○○○○○○○○○○○
801
ORGRKBLD
123
654
789
–
/NO
+/YES
0
61
Page 64

Using Music Cartridges
Cartridge Songs
Using Yamaha Music Cartridges (the one supplied with the PSR-620 includes 8 songs, others are available
from your Yamaha dealer), the PSR-620 will let you enjoy listening to automated performances, or function
as your “private music tutor,” allowing you to practice various parts of a piece while the others are played
automatically.
Cartridge Song Playback
Select the SONG Function.......................................................................................................
1
Use the FUNCTION [▲] and [▼] buttons to select the SONG function.
Select a Cartridge Song Number................................................................................
2
To select a cartridge song, first press and hold the number [3] button (be-
low the cartridge icon on the panel) until the cartridge icon appears to the
left of the song name in the display, then enter the number of the cartridge
song you want to select via the number buttons in the normal way. The car-
tridge songs can also be selected by using the [–/NO] and [+/YES] buttons
or the data dial to go beyond the highest internal song numbers or the lowest
disk song numbers — e.g. pressing the [+/YES] button while internal song
number 26 is selected will select cartridge song number 01 (the cartridge
icon will appear).
**
*
1
– –
VOICE
STYLE
SONG
REGIST MEMORY
Start Playback..................................................................................................................................................
3
802
AåTRAIN
123
654
789
–
+
/NO
/YES
0
Playback will begin as soon as the SONG [PLAY/STOP] button is
pressed.
Playback can be stopped at any time by pressing the SONG [PLAY/
STOP] button.
• Playback can be started from any
measure — page 53.
• The volume bars of the song
tracks at the bottom of the display will move in response to the
data in each track while the
cartridge song plays.
• When playing cartridge songs
which use the cartridge accompaniment styles:
* Chord names will appear on
the display and the volume
bars of the accomp. tracks will
move in response to the data
in each track, while the cartridge song plays.
* The harmony effect(see page
20) can be applied when playing along with the chord progression of the song.
• The playback tempo can be
changed freely as required.
• Cartridge song track voice and
volume data cannot be rewritten.
○○○○○○○○○○○○○○○○○○○○○○○○○○○○○○○○○○○○○○○○○○○○○○○○○○○○○○○○○○○○○○○○○
62
Page 65

Using Music Cartridges
Cartridge Registration Presets
The Music Cartridge supplied with the PSR-620 provides 8 banks of preset registration settings (8 banks
x 4 registration memories = 32 total) that provide a number of useful registration setups (refer to page 43 for
details on the registration memory).
Selecting Cartridge Registration
Select the Regist Memory Function......................................................................
1
Press either of the [FUNCTION] buttons to the left of the display as
many times as necessary until the arrowhead in the display appears next to
“REGIST MEMORY” in the function list to the left of the display.
Select and Use a Cartridge Registration.....................................................
2
To select a cartridge registration memory, first press and hold the number
[3] button (below the cartridge icon on the panel) until the cartridge icon
appears to the left of the registration bank number in the display, then enter
the number of the bank you want to select via the number buttons in the
normal way (page 43). The cartridge registration memories can also be selected by using the [–/NO] and [+/YES] buttons or the data dial to go beyond the highest internal bank numbers or the lowest disk bank numbers —
e.g. pressing the [+/YES] button while internal bank number 32 is selected
will select cartridge registration bank number 01 (the cartridge icon will
appear).
The individual cartridge registration memories are recalled via the REGISTRATION MEMOR Y buttons and used in exactly the same way as the
internal registration memories (page 45).
**
*
1
– –
VOICE
STYLE
SONG
REGIST MEMORY
801
ORGRKBLD
123
654
789
• Original data cannot be stored in
the cartridge registration
memory.
• The voices recalled by a cartridge registration are not the
PSR-620 panel voices but the
GM voices. When you select a
cartridge registration, GM voices
will be used. As a result, the
voice number “- - -” and GM
voice name will appear on the
display.
The GM voices can also be
played on the keyboard and can
be recorded to the SONG
MEMORY or the MULTI PADS.
–
+
/NO
/YES
0
○○○○○○○○○○○○○○○○○○○○○○○○○○○○○○○○○○○○○○○○○○○○○○○○○○○○○○○○○○○○○○○○○
63
Page 66

Using Floppy Disks
The PSR-620 features a floppy disk drive that allows virtually unlimited
storage of User Songs, User P ad kits (that you hav e recorded yourself),
User Styles (loaded from Style File Format Style Disks) and Registration
Memory data. PSR-620 disk data can be selected in the same wa y as the
internal data via the appropriate function display.
The disk drive also allows the PSR-620 to play standard MIDI music files
(format 0) and Yamaha Disk Orchestra Collection disks.
VOICE
STYLE
SONG
REGIST MEMORY
MULTI PAD
DUAL VOICE
SPLIT VOICE
/
ECHO
HARM
OVERALL
DIGIT AL EFFECT
801
REGIST
RHYTHM BASS CHORD PAD PHRASE ACCOMP MELODY
111
ON /
OFF
VOICE
VOL
Yamaha
118 10 a01
TEMPO TRANSPOSE MEASURE REPEAT CHORD
135102117130 1011011
ACCOMP TRACK SONG TRACK
■ Floppy Disk Handling Precautions
Floppy disks are an inexpensive, convenient, and reliable way
to store your music data. They are not indestructable, however,
and should be handled with care. Observe the following points to
ensure the long-term safety of your disks and data.
Type of Disk
• Use only double-sided double density (2DD) 3.5-inch floppy
disks with the PSR-620.
Taking Care of Your Floppy Disks
• Never attempt to eject a disk during a read or write operation
(i.e. while the disk drive is operating). Doing so can damage
both the disk and the drive.
• Never turn the power ON or OFF while a disk is in the drive.
Always eject the disk before turning the power OFF.
• To eject a floppy disk from the disk drive press the eject button
slowly as far as it will go. Then when the disk is fully ejected,
remove it by hand. The disk may not be ejected properly if the
eject button is pressed too quickly or if it is not pressed in far
enough (the eject button may become stuck halfway with the
disk extending from the slot by only a few millimeters). If this is
the case, do not attempt to pull out the partially ejected disk.
Doing so may damage the disk drive mechanism and/or the
floppy disk. To remove a partially ejected disk, try pressing the
eject button once again or push the disk back into the slot,
then repeat the eject procedure carefully.
NORMAL
SPLIT
SINGLE
FINGERED
LOAD
SAVE
DELETE
FORMAT
MELODY
1
REC REC REC
OTS
2
REVERB DUAL
CHORUS HARMONY
DSP SUSTAIN
BEAT
TOUCHMINUS ONE
• Do not store disks in places exposed to direct sunlight or other
sources of heat. The acceptable storage temperature range is
approximately 4° to 53° C (39° to 127° F).
• Do not store disks in areas subject to extreme dryness or humidity. The acceptable relative humidity range is approximately
8 to 90%.
• Do not store disks in areas contaminated with dust, sand,
smoke, etc.
• Do not place heavy objects such as books on top of a disk.
• Avoid getting floppy disks wet, particularly with oily or sticky
fluids. A disk that has been wet with water should be allowed to
dry naturally before use. Disks contaminated by other fluids can
cause damage to the disk drive and should be discarded.
• Be sure to apply the disk label at the proper position. When
changing the label never cover the old label with a new label;
always remove the old label first.
Head Cleaning
• With extended use the read/write head of the disk drive will pick
up dust and other particles that will eventually cause data errors. If this occurs, clean the head with a 3.5 inch head cleaning disk available from most computer supply stores.
Data Backup
• For maximum data security we strongly recommended that you
keep two copies of important data on separate floppy disks.
These disks should ideally be stored in separate locations. This
gives you a backup if one disk is lost or damaged.
Protecting Your Data (Write Protect Tab)
• To prevent accidental erasure of important data, slide the disk’s
write-protect tab to the “protect” position (tab open). If you
attempt to modify the disk when the write-protect tab is set to
• Do not insert anything but floppy disks into the disk drive.
Other objects can damage the disk drive or floppy disk.
ON position, “Protcted” will appear on the display indicating that
the operation is not possible.
• Never open the disk shutter by hand or touch the internal
surface of the disk. Dirt, dust, or grease on the disk’s magnetic
surface can cause data errors.
• Never leave disks near a speaker, TV, or other device that
emits a strong magnetic field. Strong magnetic fields can
partially erase the data on the disk.
Write protect tab ON
(locked-write protected)
○○○○○○○○○○○○○○○○○○○○○○○○○○○○○○○○○○○○○○○○○○○○○○○○○○○○○○○○○○○○○○○○○
64
Write protect tab OFF
(unlocked- write enabled)
Page 67

Using Floppy Disks
Formatting a New Floppy Disk
The PSR-620 uses only 3.5” 2DD floppy disks. Before you can use a new disk for saving data, the disk
must be “formatted” as described below.
Insert the Disk to Be Formatted....................................................................................
1
Make sure that the disk’s write protect tab is set to the “write” position
(tab closed), and insert the new disk into the disk drive unit with the sliding
shutter facing the drive slot and the label side of the disk facing upward. The
disk should click securely into place.
When an unformatted disk is properly loaded, the FORMAT job is automatically selected. “Unformat” will appear on the display and the [EX-
ECUTE] indicator will flash.
170
Unformat
LOAD
SAVE
DELETE
FORMAT
Press the [EXECUTE] button. “Sure?” will appear on the display
JOB
170
Format.............................................................................................................................................................................
2
Sure ?
SELECT
EXECUTE
QUIT
DISK
Press the [+/YES] button to execute the format operation (or eject the
disk to cancel). “Formatng” will appear on the display during formatting.
When the disk has been formatted, the [EXECUTE] indicator will go out.
789
–
/NO
+/YES
0
• Be careful not to format a disk
that already contains data you
want to keep. The format operation erases all data on the floppy
disk!
• Never remove the disk or turn the
power OFF while the “Formatng”
display is showing.
• The “Unformat” display will also
appear if you insert a disk the
PSR-620 cannot read.
• When an unformatted writeprotected disk is loaded,
“Unformat” will be displayed. If
you press the [EXECUTE] button, “Protcted” will appear on the
display. Make sure the disk’s
write-protect tab is set to the OFF
position before formatting.
• When you want to re-format a
formatted disk, press the [JOB
SELECT] button to the right of
the display as many times as
necessary until the arrowhead in
the display appears next to
“FORMAT” in the disk job list to
the right of the display. The
[EXECUTE] indicator will flash
and “Format?” will appear on the
display. To execute the format
operation, press the [EXECUTE]
button. “Sure?” will appear on
the display and the format is
executed by pressing the [+/YES]
button.
○○○○○○○○○○○○○○○○○○○○○○○○○○○○○○○○○○○○○○○○○○○○○○○○○○○○○○○○○○○○○○○○○
65
Page 68

Using Floppy Disks
Saving, Loading, & Deleting Disk Files
Saving to Disk
A single floppy disk can hold up to 100 separate files (depending on the file size). Each file on a disk has a
unique file number (01 through 00) and file name. You can specify both the file number and file name you
want to save to.
When saving data to disk you must also specify a file type according to the type of data you want to save.
The file types are listed below .
Type File Extension Data Saved
Song .SGD User song data
Style .STY User style data
Multi Pad .MPD User multi pad data : pads [1] through [4]
Registration .SRD The currently selected registration bank data:
Memory registration memory settings [1] through [4]
.RAL All registration bank data
* The “file extension” is a period and three-character suffix attached to the end of each file name to identify
the file type.
Insert a Formatted Disk ..............................................................................................................
1
If an appropriate disk is not already in the drive, insert the disk you want
to save the data to. If necessary format the disk as described in the previous
section before proceeding.
• The user style data is loaded
from disk to the style memory
area of the PSR-620 (style
number 101).
• Each file type corresponds to a
PSR-620 function.
○○○○○○○○○○○○○○○○○○○○○○○○○○○○○○○○○○○○○○○○○○○○○○○○○○○○○○○○○○○○○○○○○
66
Page 69

Select the SAVE Job...................................................................................................................................
2
Press the [JOB SELECT] button to the right of the display as many times
as necessary until the arrowhead in the display appears next to “SAVE” in the
disk job list in the right of the display.
The STYLE function will automatically be selected and the user style
number “101” (even if the user style number “101” has no data) will appear on
the display.
LOAD
SAVE
DELETE
FORMAT
JOB
SELECT
EXECUTE
QUIT
DISK
If the selected data number contains data, the [EXECUTE] indicator will
flash.
Select a Data Type (if necessary).......................................................................................
3
Any of the four data types — style, song, registration memory and multi pad
— can be selected.
If you select the data type other than style, press the [FUNCTION] button
to the left of the display as many times as necessary until the arrowhead in the
display appears next to “SONG”, “REGIST MEMORY” or “MULTI PAD” in
the function list to the left of the display.
Using Floppy Disks
• No disk job can be selected
even if you press the [JOB
SELECT] button if no disk is
inserted in the PSR-620 disk
drive.
• If the user style number “101”
contains no data, “********”
will appear to the right of the
data number in the display.
• When one of the disk jobs is
selected by pressing the
[JOB SELECT] button, operations other than the disk
related ones can not be
performed.
• The [JOB SELECT] button
cannot be used under the
following conditions: while
playing Song, Style or Multi
Pad; while recording Song or
Multi Pad; while the recordready mode is engaged.
VOICE
FUNCTION
Select a Data Number (if necessary)..........................................................................
4
STYLE
SONG
REGIST MEMORY
MULTI PAD
DUAL VOICE
SPLIT VOICE
HARM
/
ECHO
OVERALL
DIGITAL EFFECT
826
UserSong
When you select the STYLE, SONG or MULTI PAD function, user style
number “101”, user song number “26” or user pad kit number “22” automatically be selected.
When you save the registration memory data, select the desired Registration
Memory Bank (01 through 32) by using the [–/NO] and [+/YES] buttons, the
number buttons or the data dial. If you want to save all PSR-620 registration
memory data at once, select “33: AllBank” in the REGIST MEMORY function.
*
1
123
789
**
654
• The PSR-620 automatically
creates a file name which is
the same as the name of the
data you save. If you name
the file (this is recommended), enter your original
data name (see pages 44, 51
and 59) before executing the
save operation.
–
+
/NO
/YES
0
○○○○○○○○○○○○○○○○○○○○○○○○○○○○○○○○○○○○○○○○○○○○○○○○○○○○○○○○○○○○○○○○○
67
Page 70

Using Floppy Disks
Press the [EXECUTE] Button................................................................................
5
Press the [EXECUTE] button. The “SELECT DESTINATION”
indicator appears above the beat indicator in the display.
VOICE
STYLE
SONG
REGIST MEMORY
MULTI PAD
DUAL VOICE
SPLIT VOICE
HARM
/
ECHO
OVERALL
DIGITAL EFFECT
Select a Destination File in the Disk.......................................................
6
Select the file number you want to save the data to via the [–/NO]
and [+/YES] button, the number buttons or the data dial.
Execute the Save Operation....................................................................................
7
Press the [EXECUTE] button again to execute the save operation.
“Saving” will appear on the display while the data is being saved and
the [EXECUTE] indicator will light. When the data has been saved,
the [EXECUTE] indicator will go out.
The save operation can be canceled by pressing the [QUIT] button
while the [EXECUTE] indicator is flashing.
101
Saving
801
Yamaha
JOB
SELECT
EXECUTE
QUIT
DISK
• Never remove the disk or turn the
power OFF while the “Saving” display is
showing.
• When a file is selected “********” will
appear to the right of the file number in
the display if the file contains no data.
• If you select a file number that already
contains data and execute the save
operation, the PSR-620 will ask
“Overwr ?” for confirmation. If you’re
sure to overwrite press the [+/YES]
button. The original data will be erased
and replaced by the new data!
• If the disk becomes full when you try to
save ,“DiskFull” will appear on the
display and the save operation cannot
be done. Either delete unwanted data
from the disk to make more room, or
use a different disk.
• Duplicate file names of the same file
type are not allowed. “SameName” will
be briefly displayed and the file which
name as same file type already exists
on the disk will automatically be selected as the destination file. If you
execute the save operation for the file,
press the [EXECUTE] button (Press the
[QUIT] button if you want to cancel).
The PSR-620 will ask “Overwr ?” for
confirmation. If you’re sure you want to
write of the existing data, press the [+/
YES] button.
• If an error occurs while saving data to
the disk, “WriteErr” will appear on the
display. Try the operation again. If the
error persists there could be something
wrong with the floppy disk. Try a different disk.
Loading From Disk
Select a Data Type.......................................................................................................................
1
Any of the four data types — style, song, registration memory and
multi pad — can be selected.
Press the [FUNCTION] button to the left of the display as many
times as necessary until the arrowhead in the display appears next to
“STYLE”, “SONG”, “REGIST MEMORY” or “MULTI PAD” in the
function list to the left of the display.
VOICE
FUNCTION
○○○○○○○○○○○○○○○○○○○○○○○○○○○○○○○○○○○○○○○○○○○○○○○○○○○○○○○○○○○○○○○○○
68
STYLE
SONG
REGIST MEMORY
MULTI PAD
DUAL VOICE
SPLIT VOICE
HARM
/
ECHO
OVERALL
DIGITAL EFFECT
801
SSax
Page 71

Select a File.......................................................................................................................................................................
2
To select the file number you want to load, first press and hold the number [2]
button (below the disk icon on the panel) until the disk icon appears to the left of
the style, song, registration bank or multi pad kit name in the display, then enter
the number of the disk file you want to select via the number buttons in the normal way (2 digits). Disk files can also be selected by using the [–/NO] and [+/
YES] buttons or the data dial to go beyond the highest cartridge data numbers or
the lowest internal data numbers. If the selected file is loadable, the LOAD job is
automatically selected and the [EXECUTE] indicator will flash.
VOICE
STYLE
SONG
REGIST MEMORY
MULTI PAD
801
Yamaha
*
1
123
789
**
654
Using Floppy Disks
• If the selected song can be
played via Quick Play feature, the LOAD job will not
automatically be selected
and the [EXECUTE] indicator will not flash.
• Selecting a file on the disk
may not be possible, immediately after the floppy disk
is inserted and while the
PSR-620 is reading the disk
data.
• If the PSR-620 RAM
memory becomes full or
there is something wrong
with the floppy disk or the
data on the disk is corrupted when you try to load,
“Load Err” will appear on
the display.
Execute the Load Operation............................................................................................................
3
When the desired file has been specified, press the [EXECUTE] button.
If you have selected a STYLE, SONG or MULTI PAD data file, the file data
will automatically be loaded into the user style number “101”, user song number
“26” or user multi pad kit number “22“.
If you have selected a REGISTRATION data file, the “SELECT DESTINATION” indicator will appear above the beat indicator in the display. Select a destination registration memory bank (01 through 32) via the [–/NO] and [+/YES]
buttons, the number buttons or the data dial. When the destination registration
memory bank has been specified, press the [EXECUTE] button again.
VOICE
STYLE
SONG
REGIST MEMORY
MULTI PAD
801
Bank1
BEAT
OTS
JOB
SELECT
EXECUTE
QUIT
DISK
“Loading” will appear on the display while the data is being loaded. When
the data has been loaded the [EXECUTE] indicator will go out.
VOICE
STYLE
SONG
REGIST MEMORY
MULTI PAD
803
Loading
JOB
SELECT
EXECUTE
QUIT
DISK
The load operation can be canceled by pressing the [QUIT] button while the
[EXECUTE] indicator is flashing.
• Never remove the disk or
turn the power OFF while
the “Loading” display is
showing.
• Please note that when you
load data from disk the
loaded data will replace any
current data of the same
type in the PSR-620
memory.
• You can also select the
LOAD job by pressing the
[JOB SELECT] button
before selecting the file you
want to load.
When you select the LOAD
job by pressing the [JOB
SELECT] button, the file
number “01” will appear on
the display. Select the file
you want to load by using
the [–/NO] and [+/YES]
buttons, the number buttons
or the data dial.
• If you select the file containing all the registration data
from 1 through 32 and
execute the load operation,
“AllBank?” will appear on
the display. If you’re sure to
load all the data, press the
[+/YES] button. All current
PSR-620 registration data
will be erased and replaced
by the new data.
○○○○○○○○○○○○○○○○○○○○○○○○○○○○○○○○○○○○○○○○○○○○○○○○○○○○○○○○○○○○○○○○○
69
Page 72

Using Floppy Disks
The Referred File
Some song and registration files have “referred” file(s).
If, for example, a loaded song file was recorded with a user style, the song file will not play correctly if the user
style file has not also been loaded. Also, if a registration setup includes a user style and/or user pad data, the user
style and/or user pad file must also be loaded if the registration setup is to function properly.
When you record a song with a user style data or you memorize a registration with a user style and/or a user
pad data, the user style and/or user pad data is registered as the “referred” file(s) for the song or registration. If
you save the song or registration data with the referred file(s) to disk, be sure to save the referred file(s) (the user
style and/or the user pad data) to the same disk without changing the data name that was registered as the referred file(s).
■ User Style Files Referred to by a Song File.................................................................................................................................
→ When you load the song file, the referred user style file will automatically be loaded if both files exist on
the same disk.
Example:
SONG
“DISCOSNG”
LOAD
USER SONG
NUMBER
“26:DISCOSNG”
STYLE
“DISCO”
USER STYLE
NUMBER
“101:DISCO”
Song File: “DISCOSNG” with User Style “DISCO”.
Style File: “DISCO”
When you load the song file “DISCOSNG”, the referred
style file “DISCO” will automatically be loaded.
→ When the [PLAY/STOP] button is pressed to play the song, or the [REC] button is pressed to re-record
the song, “RefLoad?” will appear on the display and the [EXECUTE] indicator will flash if the inserted
disk includes the style file referred to by the song file and the style file has not been loaded . Press the
[EXECUTE] button to load the referred file. When the referred style file has been loaded, song playback
will start automatically or the record ready mode will be engaged.
→ When the [PLAY/STOP] button is pressed to play a song or the [REC] button is pressed to re-record the
song, “WrongDsk” or “No Disk” will appear on the display if the inserted disk does not include the user
style file or the applicable disk is not inserted in the disk drive. Insert the applicable disk and execute the
load operation for the user style file.
○○○○○○○○○○○○○○○○○○○○○○○○○○○○○○○○○○○○○○○○○○○○○○○○○○○○○○○○○○○○○○○○○
70
Page 73

Using Floppy Disks
■ User Style or User Pad Files Referred to by a Registration File ................................................
→ When recalling a registration setup with referred user style and/or user pad file(s), the [EXECUTE]
indicator will flash and “RefLoad?” will appear on the display if the inserted disk includes the user
style and/or user pad file(s) and the file(s) have not been loaded. Press the [EXECUTE] button to
load them.
Example:
Registration File: “DISCO_1” with User Style “DISCO”.
Style File: “DISCO”
REGIST
“DISCO_1”
LOAD
REGIST BANK
“01:DISCO_1”
STYLE
“DISCO”
REGISTRATION
MEMORY
MEMORIZE 1 2
When you recall the registration setup “DISCO_1”,
“RefLoad?” will appear on the display if the referred style file “DISCO” exists on the inserted disk
and has not been loaded.
REGIST
“DISCO_1”
REGIST BANK
“01:DISCO_1”
STYLE
“DISCO”
RefLoad?
USER STYLE
NUMBER
“101:DISCO”
→ When the REGISTRATION MEMORY [1]~[4] button is pressed to recall a registraion setup,
“WrongDsk” or “No Disk” will appear on the display if the inserted disk does not include the user
style and/or user pad file(s) or the applicable disk is not inserted in the disk drive. Insert the applicable
disk and execute the load operation for the user style and/or user pad file(s).
■ Registration File Referred to by a User Style File..................................................................................................
If a registration file has the same name as a user style file, the registration file is treated as the One Touch
Setting data for the user style file.
→ When you load the user style file, the referred registration file (One Touch Setting data) will automati-
cally be loaded if both files exist on the same disk.
○○○○○○○○○○○○○○○○○○○○○○○○○○○○○○○○○○○○○○○○○○○○○○○○○○○○○○○○○○○○○○○○○
71
Page 74

Using Floppy Disks
Select the DELETE Job..................................................................................................................
1
Press the [JOB SELECT] button to the right of the display as many
times as necessary until the arrowhead in the display appears next to “DELETE” in the disk job list to the right of the display.
LOAD
SAVE
DELETE
FORMAT
Deleting a Disk File
JOB
SELECT
EXECUTE
QUIT
DISK
Select the File to Be Deleted...............................................................................................
2
Select a file number to be deleted by using the [–/NO] and [+/YES] but-
tons, the number buttons or the data dial. If the selected file can be deleted,
the [EXECUTE] indicator will flash.
Execute the Delete Operation...........................................................................................
3
Press the [EXECUTE] button. “Sure?” will appear on the display . Press
the [+/YES] button to delete the selected file or [–/NO] button to cancel the
delete operation.
“Deleting” will appear on the display for a few seconds while the data is
being deleted. When the data has been deleted, the [EXECUTE] indicator
will go out.
170
Sure ?
JOB
SELECT
EXECUTE
789
–
0
/NO
+
• The delete operation can be
canceled by pressing the [QUIT]
button while the [EXECUTE]
indicator is flashing.
• Never remove the disk or turn the
power OFF while the “Deleting”
display is showing.
/YES
QUIT
DISK
○○○○○○○○○○○○○○○○○○○○○○○○○○○○○○○○○○○○○○○○○○○○○○○○○○○○○○○○○○○○○○○○○
72
Page 75

Using Floppy Disks
Quick Play: Disk Orchestra Collection &
Standard MIDI File Disks
In addition to playing files recorded on the PSR-620, the PSR-620 can play back pre-recorded Yamaha
Disk Orchestra Collection music disks, Yamaha Disklavier PianoSoft, ESEQ files and Standard MIDI File
(file format 0) disks recorded on other equipment.
Insert the Disk..................................................................................................................................................
1
Insert the Disk Orchestra Collection, PianoSoft, or Standard MIDI File
disk.
Select a Song Number.....................................................................................................................
2
Use the FUNCTION [▲] and [▼] buttons to select the SONG function.
T o select a disk song, first press and hold the number [2] button (below the
disk icon on the panel) until the disk icon appears to the left of the song
number in the display, then enter the number of the disk song you want to
select via the number buttons in the normal way. The disk songs can also be
selected by using the [–/NO] and [+/YES] buttons or the data dial to go
beyond the highest cartridge song numbers or lowest internal song numbers.
If the selected song can be played via the Quick Play feature, the LOAD
job will not automatically be selected (if the selected song can be loaded,
the LOAD job will automatically be selected).
VOICE
STYLE
SONG
REGIST MEMORY
MULTI PAD
DUAL VOICE
SPLIT VOICE
HARM
/
ECHO
OVERALL
DIGITAL EFFECT
Start Playback..................................................................................................................................................
3
801
FRAGILE
Playback will begin as soon as the SONG [PLAY/STOP] button is
pressed.
Playback can be stopped at any time by pressing the SONG [PLAY/
STOP] button.
SONG
REC PLAY/STOP
REPEAT
MINUS
PLAY
ONE
/
• Selecting a song on the disk may
not be possible, immediately
after the floppy disk is inserted
and while the PSR-620 is reading
the disk data.
• During Quick Play you can adjust
the tempo of playback. (see page
34)
• In the case of Disk Orchestra
Collection or Disklavier PianoSoft
disks, the minus-one left and
right hand parts will be set automatically. (see page 80)
○○○○○○○○○○○○○○○○○○○○○○○○○○○○○○○○○○○○○○○○○○○○○○○○○○○○○○○○○○○○○○○○○
73
Page 76

Practice Features
The PSR-620 includes two features that can be a great aid in learning to
play and practicing on the keyboard.
VOICE
STYLE
SONG
REGIST MEMORY
MULTI PAD
DUAL VOICE
SPLIT VOICE
HARM
/
ECHO
OVERALL
DIGIT AL EFFECT
__r
REGIST
RHYTHM BASS CHORD PAD PHRASE ACCOMP MELODY
111
ON /
OFF
VOICE
VOL
MinusMod
118 10 a01
TEMPO TRANSPOSE MEASURE REPEAT CHORD
135102117130 1011011
ACCOMP TRACK SONG TRACK
MELODY
1
REC REC REC
OTS
2
REVERB DUAL
CHORUS HARMONY
DSP SUSTAIN
BEAT
TOUCHMINUS ONE
The Minus One Mode
When the Minus One mode is engaged, the left-hand, right-hand, or both
keyboard parts of a song —internal demo, Music Cartridge or Disk — are
turned OFF so you can practice them on the PSR-620 keyboard. The
“MinusMod” function in the OVERALL function group determines which part
or parts are turned OFF when the Minus One mode is engaged.
To turn the Minus One function ON, thus cancelling the specified parts,
press the [MINUS ONE] button. The MINUS ONE icon will appear in the
display when the Minus One function is engaged.
NORMAL
SPLIT
SINGLE
FINGERED
LOAD
SAVE
DELETE
FORMAT
SONG
REC PLAY/STOP
REPEAT
MINUS
PLAY
ONE
/
MINUS ONE
• See page 80 for information on
■ Specifying the Part (s) to Be Turned On or Off ................................
To specify the right-hand, left-hand, or both parts to be turned OFF when
the Minus One mode is engaged, first select the OVERALL functions by
pressing either of the [FUNCTION] buttons to the left of the display as
many times as necessary until the arrowhead in the display appears next to
“OVERALL” in the function list to the left of the display. Then use the cur-
sor [▲] and [▼] buttons to locate the “MinusMod” function. Finally use the
[–/NO] and [+/YES] buttons or the data dial to select the desired Minus One
mode.
using the Minus One mode with
the specified channel.
• With songs you record yourself,
the MELODY 1 track corresponds to the right-hand part and
the MELODY 2 track is the lefthand part.
• The “MinusMod” function in the
OVERALL function group can be
quickly selected by pressing and
holding the [MINUS ONE] button.
•“_ _ r” (Right hand) is selected
whenever the power switch is
turned ON.
○○○○○○○○○○○○○○○○○○○○○○○○○○○○○○○○○○○○○○○○○○○○○○○○○○○○○○○○○○○○○○○○○
74
Page 77

CURSOR
FUNCTION
Mode Part Turned Off
__r Right hand.
L__ Left hand.
L_r Left and right hands.
VOICE
STYLE
SONG
REGIST MEMORY
MULTI PAD
DUAL VOICE
SPLIT VOICE
HARM
/
ECHO
OVERALL
DIGITAL EFFECT
__r
MinusMod
789
–
+
/NO
/YES
0
Practice Features
Repeat Play
This function allows you to specify any section of a song — cartridge, disk
or internal — for continuous repeat playback.
While the song is playing, press the [REPEAT PLAY] button once at the
beginning of the section to be repeated (the “A” repeat icon will appear on the
display) and again at the end of the section to be repeated (the “B” repeat icon
will appear). Repeat playback will begin automatically from the A point as
soon as the B point has been specified, and will continue until either the
[REPEAT PLAY] button is pressed again to cancel the repeat function, or until
song playback is stopped.
SONG
REC PLAY/STOP
It is also possible to specify the repeat section while playback is stopped.
First use the MEASURE parameter to specify the A point, then press the
[REPEAT PLAY] button. Next specify the B measure number and press
[REPEAT PLAY] again. The specified A-B section will play repeatedly when
the [PLAY/STOP] button is pressed.
REPEAT
MINUS
PLAY
ONE
/
REPEAT REPEAT
• When only the A point is specified, playback will repeat from the
A point to the end of the song.
• If you specify, for example,
measure number 8 for A point
and measure number 2 for B
point, playback will repeat from
measure number 2 to 8.
• The end point B tempo or your
manually adjusted tempo will be
used during repeat playback.
○○○○○○○○○○○○○○○○○○○○○○○○○○○○○○○○○○○○○○○○○○○○○○○○○○○○○○○○○○○○○○○○○
75
Page 78

Overall Functions
Some of the functions in the OVERALL function gro up have already been
described in appropriate sections of this manual. Others will be introduced for the first time in this section. Refer to the chart below for the
page numbers on which each function is described. The chart also lists
the full name of each function, the abbreviated name which appears on
the display, and the available settings or range of settings. Ranges are
indicated by two or more values separated by ellipses (…).
VOICE
STYLE
SONG
REGIST MEMORY
MULTI PAD
DUAL VOICE
SPLIT VOICE
/
ECHO
HARM
OVERALL
DIGIT AL EFFECT
8on
REGIST
RHYTHM BASS CHORD PAD PHRASE ACCOMP MELODY
111
ON /
OFF
VOICE
VOL
VoiceSet
118 10 a01
TEMPO TRANSPOSE MEASURE REPEAT CHORD
135102117130 1011011
ACCOMP TRACK SONG TRACK
MELODY
1
REC REC REC
OTS
2
REVERB DUAL
CHORUS HARMONY
DSP SUSTAIN
BEAT
TOUCHMINUS ONE
NORMAL
SPLIT
SINGLE
FINGERED
LOAD
SAVE
DELETE
FORMAT
Function Display Settings Page
Keyboard Volume
Octave
Reverb Level
Chorus Level
DSP Level
Pan
Voice Set
Fingering
Accompaniment Volume
Accompaniment Split Point
Touch Sensitivity
Minus-one Mode
Minus-one Right-hand Channel
Minus-one Left-hand Channel
Pitch Bend Range
Metronome
Tuning
Remote Channel
Keyboard Out
Song Out
Accompaniment Out
Local Control
External Clock
Initial Data Send
Kybd Vol 00 … 127 77
Octave –2 … 0 … 277
RevLevel 00 … 127 78
ChoLevel 00 … 127 78
DspLevel 00 … 127 78
Pan –7 … 0 … 778
VoiceSet oFF, on 79
FngrngMd nor, bAS, Full 31
AcompVol 00 … 127 79
AccSpPnt 00 … 127 41
TouchSns 00 … 127 79
MinusMod
_ _
r, L
_ _
, L
_
r74
MinusChR 01 … 16 80
MinusChL 01 … 16 80
PBRange 01 … 12 80
Metronom oFF, on 80
Tuning –100 … 100 80
RemoteCh oFF, 01 … 16 83
KybdOut oFF, on 83
SongOut oFF, on 83
AcompOut oFF, on 84
Local oFF, on 84
ExtClock oFF, on 85
InitSnd? None 85
○○○○○○○○○○○○○○○○○○○○○○○○○○○○○○○○○○○○○○○○○○○○○○○○○○○○○○○○○○○○○○○○○
76
Page 79

Overall Functions
To access an OVERALL function press either of the [FUNCTION] buttons to the left of the display as
many times as necessary until the arrowhead in the display appears next to “OVERALL” in the function
list to the left of the display. Then use the cursor [▲] and [▼] buttons to select the desired function from
within the OVERALL function list. Once the function has been selected, use the [–/NO] and [+/YES] buttons or the data dial (or number buttons, where applicable) to set the function as required.
VOICE
CURSOR
FUNCTION
STYLE
SONG
REGIST MEMORY
MULTI PAD
DUAL VOICE
SPLIT VOICE
HARM
/
ECHO
OVERALL
DIGITAL EFFECT
100
Kybd Vol
**
1
– –
123
789
*
654
0
General Functions
■ Keyboard Volume.......................................................................................................................................
Sets the volume of the keyboard sound (including dual and split voices)
in relation to the accompaniment and song playback sound. The range is
from “00” to “127”. A setting of “00” produces no sound. “127” produces
maximum volume.
100
■ Octave..............................................................................................................................................................................
Shifts the right-hand keyboard voice (including the dual voice) up or
down by one or two octaves. “–1” is down one octave, “–2” is down two
octaves; “+1” and “+2” are up one and two octaves, respectively.
KybdbVol
–
+
/YES
/NO
• The “Kybd Vol” function can be
quickly selected by pressing and
holding the [VOICE] button.
• The default setting =100 can be
recalled by pressing the [–/NO]
and [+/YES] buttons simultaneously.
• Negative values can be entered
by pressing the number buttons
while holding the [–/NO] button.
• The default setting =0 can be
recalled by pressing the [–/NO]
and [+/YES] buttons simultaneously.
100
○○○○○○○○○○○○○○○○○○○○○○○○○○○○○○○○○○○○○○○○○○○○○○○○○○○○○○○○○○○○○○○○○
Octave
77
Page 80

Overall Functions
■ Reverb Level.......................................................................................................................................................
Sets the reverb send level for the voice selected via the VOICE function.
The reverb send level determines the amount of signal sent to the reverb
effect. The range is from “00” to “127”. The reverb return level can be adjusted via the “RevRtnLv” function in the DIGITAL EFFECT function
group — see page 25.
128
■ Chorus Level......................................................................................................................................................
Sets the chorus send level for the voice selected via the VOICE function.
The chorus send level determines the amount of signal sent to the chorus
effect. The range is from “00” to “127”. The chorus return level can be adjusted via the “ChoRtnLv” function in the DIGITAL EFFECT function
group — see page 27.
170
RevLevel
ChoLevel
• See page 88 for more details on
the Digital Effects.
• The default setting can be recalled by pressing the [–/NO] and
[+/YES] buttons simultaneously.
• If the Voice Set function is ON
(page 79), the Reverb Level will
change automatically whenever a
different voice is selected via the
VOICE function.
• See page 88 for more details on
the Digital Effects.
• The default setting can be recalled by pressing the [–/NO] and
[+/YES] buttons simultaneously.
• If the Voice Set function is ON
(page 79), the Chorus Level will
change automatically whenever a
different voice is selected via the
VOICE function.
■ DSP Level..................................................................................................................................................................
Sets the DSP send level for the voice selected via the VOICE function.
The DSP send level determines the amount of signal sent to the DSP effect.
The range is from “00” to “127”. The DSP return level can be adjusted via
the “DspRtnLv” function in the DIGITAL EFFECT function group — see
page 29.
126
DspLevel
■ Pan..........................................................................................................................................................................................
Sets the stereo pan position of the right-hand keyboard voice (selected in
the VOICE function). The pan range is from “–7” (full left) to “+7” (full
right).
100
Pan
• See page 88 for more details on
the Digital Effects.
• The defalut setting can be recalled by pressing the [–/NO] and
[+/YES] buttons simultaneously.
• If the Voice Set function is ON
(page 79), the DSP Level will
change automatically whenever a
different voice is selected via the
VOICE function.
• The DSP send level cannot be
changed for the insertion DSP
types (see page 88). In this case,
“- - -” will appear on the display.
• If the Voice Set function is ON,
the pan setting = 0 will be selected automatically whenever a
different voice is selected via the
VOICE function.
• The defalut setting can be recalled by pressing the [–/NO] and
[+/YES] buttons simultaneously.
• Negative values can be entered
by pressing the number buttons
while holding the [–/NO] button.
○○○○○○○○○○○○○○○○○○○○○○○○○○○○○○○○○○○○○○○○○○○○○○○○○○○○○○○○○○○○○○○○○
78
Page 81

■ Voice Set.....................................................................................................................................................................
The VOICE SET feature brings out the best in each individual voice by
automatically setting a range of important voice-related parameters whenever a voice is selected. The parameters that may be set by the VOICE SET
feature are listed below . This function lets you turn VOICE SET ON or OFF,
as required. The Voice Set function is turned ON whenever the power switch
is turned ON.
• Pan=0
• Reverb Level
• Chorus Level
• DSP Level
• Dual voice (voice number, volume, octave, reverb level, chorus level, pan=0)
• Split voice (voice number, volume, octave, reverb level, chorus level, pan)
• Harmony/Echo type
• DSP type
• Reverb ON/OFF
• Chorus ON/OFF
• DSP=ON
• DSP variation ON/OFF
Overall Functions
oon
VoiceSet
■ Accompaniment V olume..............................................................................................................
Sets the volume of the accompaniment sound in relation to the keyboard
and song melody track sound. The range is from “00” to “127”. A setting of
“00” produces no sound. “127” produces maximum volume.
100
AcompVol
■ Touch Sensitivity........................................................................................................................................
This function sets the keyboard touch sensitivity when the TOUCH RESPONSE function (page 17) is ON. The range is from “00” to “127”. The
higher the value the higher the sensitivity .
100
TouchSns
• The “AccompVol” function can be
quickly selected by pressing and
holding the [STYLE] button.
• The default setting=100 can be
recalled by pressing the [–/NO]
and [+/YES] buttons simultaneously.
• The default setting=100 can be
recalled by pressing the [–/NO]
and [+/YES] button simultaneously.
• The “TouchSns” function can be
quickly selected by pressing and
holding the [TOUCH RESPONSE] button.
○○○○○○○○○○○○○○○○○○○○○○○○○○○○○○○○○○○○○○○○○○○○○○○○○○○○○○○○○○○○○○○○○
79
Page 82

Overall Functions
■ Minus-one Right/Left-hand Channel....................................................................
You can practice the specified part (in the Minus One mode) by selecting
the internal demo, cartridge or disk song you want to practice and by assigning the appropriate channel to the desired part.
Any channel —1 through 16 — can be selected. The default setting “01”
for the right-hand channel, “02” for the left-hand channel recalled by pressing the [–/NO] and [+/YES] buttons simultaneously.
801
802
MinusChR
MinusChL
■ Pitch Bend Range.....................................................................................................................................
Sets the pitch bend range. The pitch bend range value is displayed in
semitone ( “01” through “12” i.e. one octave).
• The channel for the specified part
will automatically be selected if
the selected song contains the
Minus-one (Right-/Left-hand)
channel settings. In this case,
“- - -” will appear on the display
and you can not change it.
• Regardless of the Minus-one
channel settings, with songs you
record yourself, the MELODY 1
track corresponds to the righthand part and the MELODY 2
track is the left-hand part. While
playing songs you record yourself, “- - -” will appear on the
display and you cannot change
the Minus-One channel settings.
• The default pitch bend range=02
can be instantly recalled by
pressing the [–/NO] and [+/YES]
buttons simultaneously.
102
PBRange
■ Metronome..............................................................................................................................................................
Turns the metronome function ON or OFF. The metronome will sound
during accompaniment/song playback and song/multi pad recording when
turned ON.
oFF
Metronom
■ Tuning..............................................................................................................................................................................
Sets the pitch of the PSR-620 to match other instruments. Tuning can be
accomplished over a ±100 cent range (that’s 200 cents total, or a tone). The
tuning range is from “–100” to “+100”. “00” is the “normal” tuning value.
• The metronome function is
turned OFF whenever the power
switch is turned ON.
• While playing demo songs in
sequence, the metronome function cannot be used.
• The normal tuning value=00 can
be recalled instantly by pressing
both the [–/NO] and [+/YES]
buttons simultaneously.
100
○○○○○○○○○○○○○○○○○○○○○○○○○○○○○○○○○○○○○○○○○○○○○○○○○○○○○○○○○○○○○○○○○
80
Tuning
Page 83

Overall Functions
MIDI Functions
MIDI, the Musical Instrument Digital Interface, is a world-standard communication interface that allows
MIDI-compatible musical instruments and equipment to share musical information and control one another.
This makes it possible to create “systems” of MIDI instruments and equipment that offer far greater versatility and control than is available with isolated instruments.
● The MIDI Connectors
The MIDI IN connector receives MIDI data from an external MIDI device which can be used to control the PSR-620. The MIDI OUT connector transmits MIDI data generated by the PSR-620 (e.g. note and velocity
data produced by playing the keyboard).
MIDI
OUT IN
● Simple MIDI Control
Most MIDI keyboards (including the PSR-620, of course) transmit note
and velocity (touch response) information via the MIDI OUT connector
whenever a note is played on the keyboard. If the MIDI OUT connector
is connected to the MIDI IN connector of a second keyboard (synthesizer, etc.) or a tone generator (essentially a synthesizer with no keyboard), the second keyboard or tone generator will respond precisely to
notes played on the original transmitting keyboard. The result is that you
can effectively play two instruments at once, providing thick multi-instrument sounds. The PSR-620 also transmits “program change” data
when one of its voices is selected. Depending on how the receiving device is set up, the corresponding voice will be automatically selected on
the receiving keyboard or tone generator whenever a voice is selected on
the PSR-620.
PSR-620
MIDI INMIDI OUT
Tone Generator
○○○○○○○○○○○○○○○○○○○○○○○○○○○○○○○○○○○○○○○○○○○○○○○○○○○○○○○○○○○○○○○○○
81
Page 84

Overall Functions
The PSR-620 is capable of receiving the same MIDI data, so a second
MIDI keyboard connected to the PSR-620 MIDI IN connector can be
used to remotely play the PSR-620 and select voices as required.
PSR-620
MIDI OUTMIDI IN
MIDI Keyboard
● MIDI Sequence Recording
Although the PSR-620 features a built-in “sequencer” (the SONG recorder is a type of sequencer), the same type of musical information
transfer described above can be used for more sophisticated MIDI sequence recording using an external sequencer or music computer. A
MIDI sequence recorder or music computer can be used to “record”
MIDI data received from a PSR-620, for example. When the recorded
data is played back, the PSR-620 automatically “plays” the recorded
performance in precise detail.
• Never use MIDI cables longer
than about 15 meters. Cables
longer than this can pick up noise
which can cause data errors.
PSR-620
MIDI INMIDI OUT
MIDI OUTMIDI IN
Music
Computer
○○○○○○○○○○○○○○○○○○○○○○○○○○○○○○○○○○○○○○○○○○○○○○○○○○○○○○○○○○○○○○○○○
82
Page 85

■ Remote Channel..........................................................................................................................................
Overall Functions
Sets the MIDI channel on which data from a remote keyboard will be
received. Any of the standard MIDI channels — 1 through 16 — can be
specified. The remote keyboard must be set up to transmit on the specified
remote channel, and the keyboard’s MIDI OUT connector must be connected to the PSR-620 MIDI IN connector via a standard MIDI cable. Refer
to the “MIDI Implementation Chart” section (page 100) for technical details. When set to OFF data is received on all 16 MIDI channels. The default
setting — OFF — can be recalled by pressing the [–/NO] and [+/YES]
buttons simultaneously .
oFF
RemoteCh
■ Keyboard Out.....................................................................................................................................................
Determines whether keyboard data will or will not be transmitted via the
MIDI OUT connector. Keyboard data is transmitted when this function is
turned ON (default). When set to ON the keyboard data is transmitted on the
following MIDI channels:
• Remote Channel is automatically
turned OFF when a MIDI “GM
ON” message is received.
• The Remote channel setting is
retained in memory even when
the power switch is turned OFF,
as long as batteries are installed
or an AC adaptor is connected.
• Keyboard Out setting is retained
in memory even when the power
switch is turned OFF, as long as
batteries are installed or an AC
adaptor is connected.
Voice Channel
Right-hand main voice 1
Dual voice 11
Left-hand voice (Split voice)
2
oon
KybdOut
■ Song Out.....................................................................................................................................................................
Determines whether song data (Melody track/s only) will or will not be
transmitted via the MIDI OUT connector. Song data is transmitted when
this function is turned ON. The default setting is OFF. When set to ON the
song data is transmitted on the following MIDI channels:
Track/voice Channel
Melody 1/main voice 13
Melody 1/dual voice 14
Melody 2/main voice 15
Melody 2/dual voice 16
oFF
SongOut
• Song Out setting is retained in
memory even when the power
switch is turned OFF, as long as
batteries are installed or an AC
adaptor is connected.
• Only the user song you recorded
can be transmitted.
• If you want to transmit all the
song data (including Accomp
track), set “Song Out” and “Ac-
companiment Out” to ON.
○○○○○○○○○○○○○○○○○○○○○○○○○○○○○○○○○○○○○○○○○○○○○○○○○○○○○○○○○○○○○○○○○
83
Page 86

Overall Functions
■ Accompaniment Out...........................................................................................................................
Determines whether auto-accompaniment data will or will not be trans-
mitted via the MIDI OUT connector. Accompaniment data is transmitted
when this function is turned ON. The default setting is OFF. When set to
ON the accompaniment data is transmitted on the following MIDI channels:
Track Channel
Rhythm 1 9
Rhythm 2 10
Bass 3
Chord 1 4
Chord 2 5
Pad 6
Phrase 1 7
Phrase 2 8
oFF
AcompOut
• Accompaniment Out setting is
retained in memory even when
the power switch is turned OFF,
as long as batteries are installed
or an AC adaptor is connected.
■ Local Control......................................................................................................................................................
“Local Control” refers to the fact that, normally , the PSR-620 keyboard
controls the internal tone generator, allowing the internal voices to be
played directly from the keyboard. This situation is “Local Control ON”
since the internal tone generator is controlled locally by its own keyboard.
Local control can be turned OFF, however, so that the keyboard does not
play the internal voices, but the appropriate MIDI information is still transmitted via the MIDI OUT connector when notes are played on the keyboard. At the same time, the internal tone generator can respond to MIDI
information received via the MIDI IN connector. This means that while an
external MIDI sequencer, for example, plays the PSR-620 internal voices,
an external tone generator can be played from the PSR-620 keyboard. The
default Local Control setting is ON.
oon
Local
○○○○○○○○○○○○○○○○○○○○○○○○○○○○○○○○○○○○○○○○○○○○○○○○○○○○○○○○○○○○○○○○○
84
Page 87

■ External Clock..................................................................................................................................................
Overall Functions
Reception of an external MIDI clock signal can be enabled or disabled as
required. When disabled (OFF), all of the time-based functions (Auto Accompaniment, SONG recording and playback, etc.) are controlled by its
own internal clock. When MIDI clock reception is enabled (ON), however,
all timing is controlled by an external MIDI clock signal received via the
MIDI IN terminal. The default setting is OFF.
oFF
ExtClock
■ Initial Data Send...........................................................................................................................................
Transmits all current panel settings to a MIDI data storage device before
actually recording your performance. With the “InitSnd?” function selected,
press the [+/YES] button to start transmission. When the data has been
transmitted, “End” will appear momentarily on the display and return to the
“InitSnd?”.
YES
InitSnd?
• If the External Clock function is
turned ON but the external clock
signal is interrupted for more than
400 milliseconds, the internal
clock is re-selected automatically.
• External Clock setting is retained
in memory even when the power
switch is turned OFF, as long as
batteries are installed or an AC
adaptor is connected.
• When the External Clock is
turned ON, the song recording/
playback will be controlled by the
external device.
• The song data will not be played
back correctly, if the panel settings for the song has not been
recorded in advance. To record
the panel settings to an external
device, engage the external
device in the record mode and
execute the Initial Data Send
operation.
• The “InitSnd?” function can be
quickly selected by pressing and
holding the [SYNC-START/
STOP] button.
○○○○○○○○○○○○○○○○○○○○○○○○○○○○○○○○○○○○○○○○○○○○○○○○○○○○○○○○○○○○○○○○○
85
Page 88

Appendix: PSR-620 Function Tree
FUNCTION
REGIST MEMORY Bank1 Selecting Registration Banks ....................................................page 43
Display Description
VOICE GrandPno Selecting Voices .......................................................................page 12
(Voice Name)
STYLE 8BeatPop Selecting Accompaniment Styles .............................................page 33
(Style Name)
SONG SSax Selecting Songs........................................................................page 47
(Song Name)
MULTI PAD Arpeggio Selecting Multi Pad Kits ............................................................page 55
(Multi Pad Kit Name)
DUAL V OICE Strings2 Selecting Dual Voices ...............................................................page 18
(Dual Voice Name)
D.Volume Changing Dual Voice Volume...................................................page 18
D.Octave Changing Dual Voice Octave....................................................page 18
D.RevLvl Changing Dual Voice Reverb Send Level ................................page 18
D.ChoLvl Changing Dual Voice Chorus Send Level ................................page 18
D.Pan Changing Dual Voice Panning..................................................page 18
SPLIT VOICE Aco.Bass Selecting Split Voices ............................................................... page 15
(Split Voice Name)
S.Volume Changing Split Voice Volume ................................................... page 15
S.Octave Changing Split Voice Octave ....................................................page 15
S.RevLvl Changing Split Voice Reverb Send Level.................................page 15
S.ChoLvl Changing Split Voice Chorus Send Level.................................page 15
S.Pan Changing Split Voice Panning ..................................................page 15
S.Split Changing Split Point (Split mode)............................................. page 15
HARMONY/ECHO Block Selecting Harmony/Echo types.................................................page 20
OVERALL
(Harmony/Echo Type Name)
DIGITAL EFFECT
○○○○○○○○○○○○○○○○○○○○○○○○○○○○○○○○○○○○○○○○○○○○○○○○○○○○○○○○○○○○○○○○○
86
Page 89

Appendix: PSR-620 Function Tree
Kybd Vol Changing Keyboard volume ................................................................... page 77
Octave Changing Octave (VOICE function voice and dual voice) ...................... page 77
RevLevel Changing Reverb Send Level (VOICE function voice) ........................... page 78
ChoLevel Changing Chorus Send Level (VOICE function voice) ........................... page 78
DspLevel Changing DSP Send Level (VOICE function voice) .............................. page 78
Pan Stereo Panning (VOICE function voice) ................................................. page 78
VoiceSet Turning Voice Set ON/OFF..................................................................... page 79
FngrngMd Selecting Fingering mode (Fingered mode) ........................................... page 31
AcompVol Setting Accompaniment Volume............................................................. page 79
AccSpPnt Changing Accompaniment Split Point (Accomp mode) .......................... page 41
TouchSns Setting Touch Sensitivity ........................................................................ page 79
MinusMod Selecting Minus One Mode..................................................................... page 74
MinusChR Selecting Minus One Right-hand Channel.............................................. page 80
MinusChL Selecting Minus One Left-hand Channel ................................................ page 80
PBRange Setting Pitch Bend Range....................................................................... page 80
Metronom Metronome ON/OFF ............................................................................... page 80
Tuning Fine Tuning............................................................................................. page 80
RemoteCh Setting Remote Keyboard Channel ........................................................ page 83
KybdOut Transmitting Keyboard Data ................................................................... page 83
SongOut Transmitting Song data (Melody track/s) ................................................ page 83
AcompOut Transmitting Auto-accompaniment data ................................................. page 84
Local Local Control ON/OFF............................................................................ page 84
ExtClock External Clock ON/OFF .......................................................................... page 85
InitSnd? Sending Initial Data................................................................................. page 85
Reverb Hall1 Selecting Reverb Types ............ page 24
(Reverb Type Name)
RevRtnLv Setting Reverb Return Level................................................................... page 25
Chorus Chorus1 Selecting Chorus Types ............ page 26
(Chorus Type Name)
ChoRtnLv Setting Chorus Return Level................................................................... page 27
Dsp Stage2 Selecting DSP Types................. page 28
(DSP Type Name)
DspRtnLv Setting DSP Return Level....................................................................... page 29
○○○○○○○○○○○○○○○○○○○○○○○○○○○○○○○○○○○○○○○○○○○○○○○○○○○○○○○○○○○○○○○○○
87
Page 90

Appendix: About Digital Effect
■ Digital Effect Configuration
The PSR-620 features three types of digital effectors: Reverb, Chorus and DSP. Reverb
and Chorus effectors are exclusively used for enhancing and varying their respective effect
types. On the contrary the DSP effector can be used to select a variety of effect types such as
Distortion, Equalizer, Reverb and Chorus.
All the digital effects are connected or routed in one of two ways: System or Insertion. All
types of Reverb and Chorus effects classified as System effects. DSP, on the other hand, can
be configured as either System or Insertion effects. DSP configuration varies depending on
the type selected: System or Insertion illustrated below.
Each digital effect can be applied to the performance and incoming performance data
through MIDI IN, accompaniment and song playback. Each effect send level can independently be set for each voice (Reverb and Chorus for the VOICE function voice, Dual voice and
Split voice. DSP for the VOICE function voice only), while each ef fect return level affects
entire system.
Sound
Module
DSP
(Insertion)
Normal Dry
Reverb Send Level
Dual
Split
Reverb Send Level
Reverb Send Level
Chorus Send Level
Chorus Send Level
Chorus Send Level
Reverb Return Level
REVERB
(System)
Chorus Return Level
DSP Return Level
CHORUS
(System)
DSP Send Level
DSP
(System)
○○○○○○○○○○○○○○○○○○○○○○○○○○○○○○○○○○○○○○○○○○○○○○○○○○○○○○○○○○○○○○○○○
88
Page 91

Appendix: About Digital Effect
The Digital Effect List
No. Effect Type Features
REVERB
01~04 Hall1~4 System Concert hall reverb.
05~08 Room1~4 System Small room reverb.
09, 10 Stage1, 2 System Reverb for solo instruments.
11, 12 Plate1, 2 System Simulated steel plate reverb.
13 OFF — No effect.
CHORUS
01~05 Chorus1~5 System Conventional chorus program with rich, warm chorusing.
06~09 Flanger1~4 System Pronounced three-phase modulation with a slight metallic sound.
10 OFF — No effect.
DSP
01~04 Hall1~4 System Concert hall reverb.
05~08 Room1~4 System Small room reverb.
09, 10 Stage1, 2 System Reverb for solo instruments.
11, 12 Plate1, 2 System Simulated steel plate reverb.
13, 14 Early Reflection1, 2 System Early reflections only.
15 Gate Reverb System Gated reverb effect, in which the reverberation is quickly cut off for special ef-
fects.
16 Reverse Gate System Similar to Gate Reverb, but with a reverse increase in reverb.
17~21 Chorus1~5 System Conventional chorus program with rich, warm chorusing.
22~25 Flanger1~4 System Pronounced three-phase modulation with slight metallic sound.
26 Symphonic System Exceptionally rich & deep chorusing.
27 Phaser System Pronounced, metallic modulation with periodic phase change.
28~32 Rotary Speaker 1~5 Insertion Rotary speaker simulation.
33, 34 Tremolo 1, 2 Insertion Rich Tremolo effect with both volume and pitch modulation.
35 Guitar Tremolo Insertion Simulated electric guitar tremolo.
36 Auto Pan Insertion Several panning effects that automatically shift the sound position (left, right,
front, back).
37 Auto Wah Insertion Repeating filter sweep “wah” effect.
38 Delay L, C, R System Three independent delays, for the left, right and center stereo positions.
39 Delay L, R System Initial delay for each stereo channel, and two separate feedback delays.
40 Echo System Stereo delay, with independent Feedback Level controls for each channel.
41 Cross Delay System Complex effect that sends the delayed repeats “bouncing” between the left and
right channels.
42 Distortion Hard Insertion Hard-edge distortion.
43 Distortion Soft Insertion This type is not so hard compared with Distortion Hard.
44 EQ Disco Insertion Discotype equalizer program to boost high and low frequencies.
45 EQ Telephone Insertion Equalizer program which eliminates higher and lower frequencies to simulate
the sounds through telephone.
46 OFF — No effect.
○○○○○○○○○○○○○○○○○○○○○○○○○○○○○○○○○○○○○○○○○○○○○○○○○○○○○○○○○○○○○○○○○
89
Page 92

Appendix: T roubleshooting
Something not working as it should? In many cases what appears to be a malfunction can be traced to a simple error that can be remedied immediately. Before assuming that your PSR-620 is faulty, please check the following points.
POSSIBLE CAUSE/SOLUTIONPROBLEM
The speakers produce a “pop” sound
whenever the power is turned ON or
OFF.
No sound when the keyboard is played.
Not all simultaneously-played notes
sound.
This is normal and is no cause for alarm.
Turn the power OFF and turn the power ON again. The default setting “Local ON”
is automatically selected.
The Local Control function could be turned OFF. Make sure Local Control is
turned ON (page 84).
You are probably exceeding the maximum polyphony of the PSR-620. The PSR620 can play up to 32 notes at the same time — including split, dual, auto-accompaniment, song memory, and multi pad notes. Notes exceeding this limit will not
sound.
Auto accompaniment won’t function
properly. No lower keyboard sound.
The selected voice does not sound
when the keyboard is played.
Operation of the sustain pedal is reversed.
The desired parameter cannot be edited.
Accompaniment does not play properly.
Auto accompaniment won’t sound right if you’re using SINGLE FINGER type
fingering when the SINGLE FINGER mode is not selected (page 31).
Are you sure you’re playing in the Auto-Accompaniment section of the keyboard?
Are you playing chords that the PSR-620 can recognize (see chord types on page
32)?
Make sure that the Keyboard Volume, Split Voice Volume, and/or Dual Voice Vol-
ume parameters are set at an appropriate level (pages 77, 15, and 18).
Turn the power OFF and turn the power ON again. The appropriate default vol-
ume setting for the voice is automatically selected.
Some sections of some styles do not use the accompaniment rhythm track.Rhythm doesn’t sound when started.
Sustain pedal operation will be reversed if you turn ON the power or plug in the
pedal while pressing the pedal. For normal operation turn OFF the power then
turn it back ON while the pedal is
The cursor is not located at the parameter to be edited. Make sure that the cursor
is located at the parameter to be edited (the parameter should be flashing).
Make sure that the accompaniment tracks you want to hear are not muted (page
39), and that the Accomp Volume parameter is turned up to a reasonable level
(page 79).
Turn the power OFF and turn the power ON again. The appropriate default track
setting for the style and the default accompaniment volume is automatically selected.
not pressed.
Neither of these functions can be turned ON if a percussion kit voice is selected.
The Harmony/Echo and/or Dual Voice
function will not turn ON.
○○○○○○○○○○○○○○○○○○○○○○○○○○○○○○○○○○○○○○○○○○○○○○○○○○○○○○○○○○○○○○○○○
90
Make sure a voice between number 01 and 141 is selected.
The Harmony/Echo effect cannot be turned ON when the FINGERED FULL mode
is in use. Select another fingering mode (page 31).
Page 93

Appendix: Troubleshooting / Data Backup & Initialization
POSSIBLE CAUSE/SOLUTIONPROBLEM
The reverb and chorus types can not
be changed by changing the registration memory number.
Cartridge data cannot be selected or
cannot be played bac k correctly.
ACCOMP FREEZE function is turned ON. The reverb and chorus types are
memoried as accompaniment parameter. Press the [ACCOMP FREEZE] button
to turn OFF it.
Make sure that an appropriate Yamaha Music Cartridge is properly plugged into
the cartridge slot (page 60)
The electrical contacts on the Music Cartridge are affected with dust. Insert and
remove the Music Cartridge several times. This may solve the problem. If the
problem still happens, wipe and clear the electrical contacts on the Music Cartridge with a dry soft cloth.
Appendix: Data Backup & Initialization
Except for the data listed below, all PSR-620 panel settings are reset to their
initial settings whenever the power is turned ON. The data listed below are
backed up — i.e. retained in memory — as long as an AC adaptor is connected
or a set of batteries is installed.
• Registration Memory data
• User Song data
• User Style data
• User Pad Kit data
• Remote Channel
• Keyboard Out
• Song Out
• Accomp Out
• External Clock
■ Data Initialization........................................................................................................................................
All data can be initialized and restored to the factory preset condition by
turning ON the power while holding the [–/NO] and [+/YES] buttons. “CLr:
Backup” will appear briefly on the display.
POWER
ON / OFF
CLr
Backup
789
–
+
/NO
/YES
0
• All registration, song, style and
multi pad memory data, plus
the other settings listed above,
will be erased and/or changed
when the data initialization
procedure is carried out.
• If the PSR-620 has been
“locked up” due to static electricity or other causes, turn the
PSR-620 OFF and execute the
initialize operation.
○○○○○○○○○○○○○○○○○○○○○○○○○○○○○○○○○○○○○○○○○○○○○○○○○○○○○○○○○○○○○○○○○
91
Page 94

Voice List
The PSR-620 is provided with the Panel Voices (voice numbers 01~151)
and GM Voices (voice numbers 01~136). GM Voices are used for the accompaniment. Refer to the GM Voice List on page 95 for the accompaniment track voice editing.
Polyphony
The PSR-620 can play up to 32 individual notes at the same time (i.e. it
has a maximum “polyphony” of 32). This number includes all voices used:
dual, split, auto accompaniment, song, and multi pads. If the maximum polyphony of the PSR-620 is exceeded, the excess notes will be truncated
(they will not sound).
Another feature affecting polyphony is the fact that some PSR-620
voices actually use two voices at once, as shown in the voice list below . The
effective maximum polyphony of the PSR-620 is correspondingly reduced
when these voices are used.
• The voice list includes the MIDI program numbers and MIDI bank select
numbers (Panel Voice List only) that
control each voice when the PSR-620
is played from an external MIDI device.
• Panel voice number 113/GM voice
number 110 (Bagpipe) uses only one
voice above A#2.
○○○○○○○○○○○○○○○○○○○○○○○○○○○○○○○○○○○○○○○○○○○○○○○○○○○○○○○○○○○○○○○○○
92
Page 95

Panel Voice List
Voice List
Voice
Number
Bank Select
MSB LSB Number Used
MIDI Number
Program Voice Name of Notes
Piano
01 0 0 0 Grand Piano 1
02 0 0 1 Bright Piano 1
03 0 0 2 Honky-tonk Piano 2
04 0 0 3 Funky Electric Piano 2
05 0 0 4 DX Electric Piano 2
06 0 0 5 Midi Grand Piano 2
07 0 0 6 Hyper Electric Piano 2
08 0 0 7 Dream Electric Piano 2
09 0 0 8 Bell Electric Piano 2
10 0 0 9 Ice Electric Piano 2
11 0 0 10 Tremolo Electric Piano 2
12 0 0 11 Harpsichord 1
13 0 0 12 Harpsichord Coupled 2
14 0 0 13 Clavi 2
15 0 0 14 Wah Clavi 2
16 0 0 15 Celesta 2
Mallets
17 0 0 16 Vibraphone 2
18 0 0 17 Marimba 2
19 0 0 18 Glockenspiel 1
20 0 0 19 Xylophone 1
21 0 0 20 Tubular Bells 1
22 0 0 21 Timpani 1
23 0 0 22 Steel Drums 2
24 0 0 23 Dulcimer 2
25 0 0 24 Music Box 2
26 0 0 25 Kalimba 1
Organ
27 0 0 26 Jazz Organ 1 2
28 0 0 27 Jazz Organ 2 2
29 0 0 28 Drawbar Organ 2
30 0 0 29 Full Organ 2
31 0 0 30 Click Organ 2
32 0 0 31 Rock Organ 1 2
33 0 0 32 Rock Organ 2 2
34 0 0 33 16'+2' Organ 2
35 0 0 34 16'+4' Organ 2
36 0 0 35 Church Organ 2
37 0 0 36 Reed Organ 2
38 0 0 37 Musette Accordion 2
39 0 0 38 Traditional Accordion 2
40 0 0 39 Soft Accordion 2
41 0 0 40 Tango Accordion 2
42 0 0 41 Bandoneon 2
Voice
Number
Bank Select
MSB LSB Number Used
MIDI Number
Program Voice Name of Notes
Guitar
43 0 0 42 Classical Guitar 1
44 0 0 43 Folk Guitar 2
45 0 0 44 12Strings Guitar 2
46 0 0 45 Jazz Guitar 2
47 0 0 46 Octave Guitar 2
48 0 0 47 Hawaiian Guitar 2
49 0 0 48 Clean Guitar 2
50 0 0 49 Tremolo Guitar 2
51 0 0 50 Muted Guitar 2
52 0 0 51 Guitar Harmonics 1
53 0 0 52 Overdriven Guitar 2
54 0 0 53 Distortion Guitar 2
Bass
55 0 0 54 Acoustic Bass 1
56 0 0 55 Finger Bass 1
57 0 0 56 Pick Bass 1
58 0 0 57 Fretless Bass 2
59 0 0 58 Slap Bass 2
60 0 0 59 Synth Bass 1 2
61 0 0 60 Synth Bass 2 2
62 0 0 61 Techno Bass 2
Strings
63 0 0 62 Violin 1
64 0 0 63 Viola 1
65 0 0 64 Cello 1
66 0 0 65 Contrabass 1
67 0 0 66 Banjo 1
68 0 0 67 Shamisen 1
69 0 0 68 Koto 1
70 0 0 69 Harp 2
71 0 0 70 Sitar 2
Ensemble
72 0 0 71 Strings 1 2
73 0 0 72 Strings 2 2
74 0 0 73 Chamber Strings 2
75 0 0 74 Synth Strings 2
76 0 0 75 Slow Strings 2
77 0 0 76 Tremolo Strings 2
78 0 0 77 Violin w/Strings 2
79 0 0 78 Pizzicato Strings 2
80 0 0 79 Choir 2
81 0 0 80 Choir Aahs 2
82 0 0 81 Choir Oohs 2
83 0 0 82 Synth Choir 2
84 0 0 83 Voyager 2
85 0 0 84 Orchestra Hit 1
○○○○○○○○○○○○○○○○○○○○○○○○○○○○○○○○○○○○○○○○○○○○○○○○○○○○○○○○○○○○○○○○○
93
Page 96

Voice List
Voice
Number
Bank Select
MSB LSB Number Used
MIDI Number
Program Voice Name of Notes
Brass
86 0 0 85 Trumpet 2
87 0 0 86 Flugel Horn 2
88 0 0 87 Muted Trumpet 2
89 0 0 88 Trombone 2
90 0 0 89 Trombone Section 2
91 0 0 90 French Horn 1
92 0 0 91 Tuba 1
93 0 0 92 Brass Section 2
94 0 0 93 Brass+Sax 2
95 0 0 94 Brass+Trombone 2
96 0 0 95 Brass+Trumpet 2
97 0 0 96 Synth Brass 1 2
98 0 0 97 Synth Brass 2 2
Reed
99 0 0 98 Soprano Sax 2
100 0 0 99 Alto Sax 1
101 0 0 100 Breathy Alto Sax 2
102 0 0 101 Tenor Sax 1
103 0 0 102 Breathy Tenor Sax 2
104 0 0 103 Baritone Sax 2
105 0 0 104 Sax + Clarinet 2
106 0 0 105 Sax+Trombone 2
107 0 0 106 Oboe 1
108 0 0 107 English Horn 1
109 0 0 108 Bassoon 1
110 0 0 109 Clarinet 1
111 0 0 110 Harmonica 1
112 0 0 111 Shanai 1
113 0 0 112 Bagpipe 2
Pipe
114 0 0 113 Piccolo 2
115 0 0 114 Flute 2
116 0 0 115 Pan Flute 2
117 0 0 116 Recorder 1
118 0 0 117 Blown Bottle 2
119 0 0 118 Shakuhachi 1
120 0 0 119 Whistle 1
121 0 0 120 Ocarina 1
Voice
Number
Bank Select
MSB LSB Number Used
MIDI Number
Program Voice Name of Notes
Synth Lead
122 0 0 121 Square Lead 2
123 0 0 122 Sawtooth Lead 2
124 0 0 123 Voice Lead 2
125 0 0 124 Crystal 2
126 0 0 125 Brightness 2
127 0 0 126 Sub Aqua 2
128 0 0 127 Analog Lead 2
129 0 1 0 Rain Hold 2
130 0 1 1 70’s Lead 2
131 0 1 2 Synth Clavi 2
Synth Pad
132 0 1 3 Fantasia 2
133 0 1 4 Bell Pad 2
134 0 1 5 Xenon Pad 2
135 0 1 6 Angels 2
136 0 1 7 Transform 2
137 0 1 8 Atmosphere 2
138 0 1 9 Shining 2
139 0 1 10 Dark Moon 2
140 0 1 11 Cyber Pad 2
141 0 1 12 Sci-Fi 2
Drum Kits
142 127 0 0 Standard Kit 1
143 127 0 8 Room Kit 1
144 127 0 16 Rock Kit 1
145 127 0 24 Electronic Kit 1
146 127 0 25 Analog Kit 1
147 127 0 32 Jazz Kit 1
148 127 0 40 Brush Kit 1
149 127 0 48 Classic Kit 1
Dual Only
150 0 1 13 Organ Harmonics 51/3 1
151 0 1 14
Organ Harmonics 51/3+ 22/3
2
○○○○○○○○○○○○○○○○○○○○○○○○○○○○○○○○○○○○○○○○○○○○○○○○○○○○○○○○○○○○○○○○○
94
Page 97

GM Voice List
MIDI Number
Voice
Program Voice Name of Notes
Number
Number Used
Piano
01 0 Acoustic Grand Piano 1
02 1 Bright Acoustic Piano 1
03 2 Electric Grand Piano 2
04 3 Honky-tonk Piano 2
05 4 Electric Piano 1 2
06 5 Electric Piano 2 2
07 6 Harpsichord 1
08 7 Clavi 1
Chromatic Percussion
09 8 Celesta 1
10 9 Glockenspiel 1
11 10 Music Box 2
12 11 Vibraphone 1
13 12 Marimba 1
14 13 Xylophone 1
15 14 Tubular Bells 1
16 15 Dulcimer 2
Organ
17 16 Drawbar Organ 1
18 17 Percussive Organ 1
19 18 Rock Organ 2
20 19 Church Organ 2
21 20 Reed Organ 1
22 21 Accordion 2
23 22 Harmonica 1
24 23 Bandoneon 2
Guitar
25 24 Acoustic Guitar (nylon) 1
26 25 Acoustic Guitar (steel) 1
27 26 Electric Guitar (jazz) 1
28 27 Electric Guitar (clean) 2
29 28 Electric Guitar (muted) 1
30 29 Overdriven Guitar 1
31 30 Distortion Guitar 1
32 31 Guitar Harmonics 1
Bass
33 32 Acoustic Bass 1
34 33 Electric Bass (finger) 1
35 34 Electric Bass (pick) 1
36 35 Fretless Bass 1
37 36 Slap Bass 1 1
38 37 Slap Bass 2 1
39 38 Synth Bass 1 1
40 39 Synth Bass 2 1
Strings
41 40 Violin 1
42 41 Viola 1
43 42 Cello 1
44 43 Contrabass 1
MIDI Number
Voice
Program Voice Name of Notes
Number
Number Used
45 44 Tremolo Strings 2
46 45 Pizzicato Strings 2
47 46 Orchestral Harp 1
48 47 Timpani 1
Ensemble
49 48 Strings Ensemble 1 1
50 49 Strings Ensemble 2 1
51 50 Synth Strings 1 2
52 51 Synth Strings 2 2
53 52 Choir Aahs 2
54 53 Voice Oohs 1
55 54 Synth Voice 1
56 55 Orchestra Hit 1
Brass
57 56 Trumpet 1
58 57 Trombone 1
59 58 Tuba 1
60 59 Muted Trumpet 1
61 60 French Horn 1
62 61 Brass Section 1
63 62 Synth Brass 1 2
64 63 Synth Brass 2 2
Reed
65 64 Soprano Sax 1
66 65 Alto Sax 1
67 66 Tenor Sax 1
68 67 Baritone Sax 1
69 68 Oboe 1
70 69 English Horn 1
71 70 Bassoon 1
72 71 Clarinet 1
Pipe
73 72 Piccolo 1
74 73 Flute 1
75 74 Recorder 1
76 75 Pan Flute 1
77 76 Blown Bottle 2
78 77 Shakuhachi 1
79 78 Whistle 1
80 79 Ocarina 1
Synth Lead
81 80 Lead 1 (square) 2
82 81 Lead 2 (sawtooth) 2
83 82 Lead 3 (calliope) 2
84 83 Lead 4 (chiff) 2
85 84 Lead 5 (charang) 2
86 85 Lead 6 (voice) 2
87 86 Lead 7 (fifth) 2
88 87 Lead 8 (bass+Lead ) 2
Synth Pad
89 88 Pad 1 (new age) 2
90 89 Pad 2 (warm) 2
Voice List
MIDI Number
Voice
Program Voice Name of Notes
Number
Number Used
91 90 Pad 3 (polysynth) 2
92 91 Pad 4 (choir) 2
93 92 Pad 5 (bowed) 2
94 93 Pad 6 (metallic) 2
95 94 Pad 7 (halo) 2
96 95 Pad 8 (sweep) 2
Synth Effects
97 96 FX 1 (rain) 2
98 97 FX 2 (soundtrack) 2
99 98 FX 3 (crystal) 2
100 99 FX 4 (atmosphere) 2
101 100 FX 5 (brightness) 2
102 101 FX 6 (goblins) 2
103 102 FX 7 (echoes) 2
104 103 FX 8 (sci-fi) 2
Ethnic
105 104 Sitar 1
106 105 Banjo 1
107 106 Shamisen 1
108 107 Koto 1
109 108 Kalimba 1
110 109 Bagpipe 2
111 110 Fiddle 1
112 111 Shanai 1
Percussive
113 112 Tinkle Bell 2
114 113 Agogo 1
115 114 Steel Drums 2
116 115 Woodblock 1
117 116 Taiko Drum 1
118 117 Melodic Tom 1
119 118 Synth Drum 1
120 119 Reverse Cymbal 1
Sound Effects
121 120 Guitar Fret Noise 1
122 121 Breath Noise 1
123 122 Seashore 2
124 123 Bird Tweet 2
125 124 Telephone Ring 1
126 125 Helicopter 2
127 126 Applause 2
128 127 Gunshot 1
Drum Kits
129 0 Standard Kit 1
130 8 Room Kit 1
131 16 Rock Kit 1
132 24 Electronic Kit 1
133 25 Analog Kit 1
134 32 Jazz Kit 1
135 40 Brush Kit 1
136 48 Classic Kit 1
○○○○○○○○○○○○○○○○○○○○○○○○○○○○○○○○○○○○○○○○○○○○○○○○○○○○○○○○○○○○○○○○○
95
Page 98

P ercussion Kit List
*“<——” indicates the content is the same as that of Standard Kit.
*The number in parentheses ( ) after the percussion kit name is the MIDI program number.
*The corresponding MIDI note numbers for the notes listed in the chart below are actually one octave
lower. For example, the MIDI note number for note #36 (C1) in the chart is note #24 (C0).
*Each drum/percussion voice uses one note.
*The drum and percussion voices in same alternate group *1–6 can not be played at the same time.
*GM voice numbers 129 through 136 correspond to the panel voice numbers 142 through 149 re-
spectively.
Note# Note 142: Standard Kit (0) 143: Room Kit (8) 144: Rock Kit (16) 145: Electronic Kit (24)
25 C#0 Surdo Mute <—— <—— <——
26 D0 Surdo Open <—— <—— <——
27 D#0 Hi Q <—— <—— <——
28 E0 Whip Slap <—— <—— <——
29 F0 Scratch H <—— <—— <——
30 F#0 Scratch L <—— <—— <——
31 G0 FingerSnap <—— <—— <——
32 G#0 Click Noise <—— <—— <——
33 A0 Metronome Click <—— <—— <——
34 A#0 Metronome Bell <—— <—— <——
35 B0 Click L (Square wave) <—— <—— <——
36 C1 Click H (Square wave) <—— <—— <——
37 C#1 Brush Tap <—— <—— <——
38 D1 Brush Swirl <—— <—— <——
39 D#1 Brush Slap <—— <—— <——
40 E1 Brush Swirl W/Attack <—— <—— Reverse Cymbal
41 F1 Snare Roll <—— <—— <——
42 F#1 Castanet <—— <—— Hi-Q
43 G1 Snare H Soft Snare Room L Snare Rock L Snare Gate L
44 G#1 Sticks <—— <—— <——
45 A1 Bass Drum H Soft Bass Drum Room L Bass Drum Rock L Bass Drum Gate L
46 A#1 Open Rim Shot Open Rim Room <—— <——
47 B1 Bass Drum L Bass Drum Room M Bass Drum Rock M Bass Drum Gate M
48 C2 Bass Drum H Hard Bass Drum Room H Bass Drum Rock H Bass Drum Gate H
49 C#2 Closed Rim Shot Closed Rim Room <—— <——
50 D2 Snare L Snare Room M Snare Rock M Snare Gate M
51 D#2 Hand Clap <—— <—— <——
52 E2 Snare H Hard Snare Room H Snare Rock H Snare Gate H
53 F2 Floor Tom L Room Tom 1 Rock Tom 1 Electronic Tom 1
54 F#2 Hi-Hat Closed *1 <—— <—— <——
55 G2 Floor Tom H Room Tom 2 Rock Tom 2 Electronic Tom 2
56 G#2 Hi-Hat Pedal *1 <—— <—— <——
57 A2 Low Tom Room Tom 3 Rock Tom 3 Electronic Tom 3
58 A#2 Hi-Hat Open *1 <—— <—— <——
59 B2 Mid Tom L Room Tom 4 Rock Tom 4 Electronic Tom 4
60 C3 Mid Tom H Room Tom 5 Rock Tom 5 Electronic Tom 5
61 C#3 Crash Cymbal 1 <—— <—— <——
62 D3 High Tom Room Tom 6 Rock Tom 6 Electronic Tom 6
63 D#3 Ride Cymbal 1 <—— <—— <——
64 E3 Chinese Cymbal <—— <—— <——
65 F3 Ride Cymbal Cup <—— <—— <——
66 F#3 Tambourine <—— <—— <——
67 G3 Splash Cymbal <—— <—— <——
68 G#3 Cowbell <—— <—— <——
69 A3 Crash Cymbal 2 <—— <—— <——
70 A#3 Vibraslap <—— <—— <——
71 B3 Ride Cymbal 2 <—— <—— <——
72 C4 Bongo H <—— <—— <——
73 C#4 Bongo L <—— <—— <——
74 D4 Conga H Mute <—— <—— <——
75 D#4 Conga H Open <—— <—— <——
76 E4 Conga L <—— <—— <——
77 F4 Timbale H <—— <—— <——
78 F#4 Timbale L <—— <—— <——
79 G4 Agogo H <—— <—— <——
80 G#4 Agogo L <—— <—— <——
81 A4 Cabasa <—— <—— <——
82 A#4 Maracas <—— <—— <——
83 B4 Samba Whistle H <—— <—— <——
84 C5 Samba Whistle L <—— <—— <——
85 C#5 Guiro Short <—— <—— <——
86 D5 Guiro Long <—— <—— <——
87 D#5 Claves <—— <—— <——
88 E5 Wood Block H <—— <—— <——
89 F5 Wood Block L <—— <—— <——
90 F#5 Cuica Mute <—— <—— Scratch H
91 G5 Cuica Open <—— <—— Scratch L
92 G#5 Triangle Mute *2 <—— <—— <——
93 A5 Triangle Open *2 <—— <—— <——
94 A#5 Shaker <—— <—— <——
95 B5 Jingle Bell <—— <—— <——
96 C6 Bell Tree <—— <—— <——
○○○○○○○○○○○○○○○○○○○○○○○○○○○○○○○○○○○○○○○○○○○○○○○○○○○○○○○○○○○○○○○○○
96
Page 99

Percussion Kit List
Note# Note 146: Analog Kit (25) 147: Jazz Kit (32) 148: Brush Kit (40) 149: Classic Kit (48)
25 C#0<—— <—— <—— <——
26 D0 <—— <—— <—— <——
27 D#0<—— <—— <—— <——
28 E0 <—— <—— <—— <——
29 F0 <—— <—— <—— <——
30 F#0<—— <—— <—— <——
31 G0 <—— <—— <—— <——
32 G#0<—— <—— <—— <——
33 A0 <—— <—— <—— <——
34 A#0<—— <—— <—— <——
35 B0 <—— <—— <—— <——
36 C1 <—— <—— <—— <——
37 C#1<—— <—— <—— <——
38 D1 <—— <—— <—— <——
39 D#1<—— <—— <—— <——
40 E1 Reverse Cymbal <—— <—— <——
41 F1 <—— <—— <—— <——
42 F#1 Hi-Q <—— <—— <——
43 G1 Snare Analog L Jazz Snare L Brush Slap L Snare Classic L
44 G#1<—— <—— <—— <——
45 A1 Bass Drum Analog L <—— <—— Gran Casa L
46 A#1<—— <—— <—— <——
47 B1 Bass Drum Analog M <—— <—— Gran Casa M
48 C2 Bass Drum Analog H <—— <—— Gran Casa H
49 C#2 Closed Rim Shot Analog <—— <—— <——
50 D2 Snare Analog M <—— Brush Slap H Snare Classic M
51 D#2<—— <—— <—— <——
52 E2 Snare Analog H <—— Brush Tap Snare Classic H
53 F2 Analog Tom 1 Natural Tom 1 Brush Tom 1 Natural Tom 1
54 F#2 Analog Hi-hat Closed 1 *3 Dark Hi-Hat Closed *4 Dark Hi-Hat Closed *5 Dark Hi-Hat Closed *6
55 G2 Analog Tom 2 Natural Tom 2 Brush Tom 2 Natural Tom 2
56 G#2 Analog Hi-hat Closed 2 *3 Dark Hi-Hat Pedal *4 Dark Hi-Hat Pedal *5 Dark Hi-Hat Pedal *6
57 A2 Analog Tom 3 Natural Tom 3 Brush Tom 3 Natural Tom 3
58 A#2 Analog Hi-hat Open *3 Dark Hit Hat Open *4 Dark Hit Hat Open *5 Dark Hit Hat Open *6
59 B2 Analog Tom 4 Natural Tom 4 Brush Tom 4 Natural Tom 4
60 C3 Analog Tom 5 Natural Tom 5 Brush Tom 5 Natural Tom 5
61 C#3 Analog Cymbal <—— <—— Hand Cymbal Long L
62 D3 Analog Tom 6 Natural Tom 6 Brush Tom 6 Natural Tom 6
63 D#3<—— <—— <—— Hand Cymbal Short L
64 E3 <—— <—— <—— <——
65 F3 <—— <—— <—— <——
66 F#3<—— <—— <—— <——
67 G3 <—— <—— <—— <——
68 G#3 Analog Cowbell <—— <—— <——
69 A3 <—— <—— <—— Hand Cymbal Long H
70 A#3<—— <—— <—— <——
71 B3 <—— <—— <—— Hand Cymbal Short H
72 C4 <—— <—— <—— <——
73 C#4<—— <—— <—— <——
74 D4 Analog Conga H <—— <—— <——
75 D#4 Analog Conga M <—— <—— <——
76 E4 Analog Conga L <—— <—— <——
77 F4 <—— <—— <—— <——
78 F#4<—— <—— <—— <——
79 G4 <—— <—— <—— <——
80 G#4<—— <—— <—— <——
81 A4 <—— <—— <—— <——
82 A#4<—— <—— <—— <——
83 B4 <—— <—— <—— <——
84 C5 <—— <—— <—— <——
85 C#5<—— <—— <—— <——
86 D5 <—— <—— <—— <——
87 D#5<—— <—— <—— <——
88 E5 <—— <—— <—— <——
89 F5 <—— <—— <—— <——
90 F#5 Scratch H <—— <—— <——
91 G5 Scratch L <—— <—— <——
92 G#5<—— <—— <—— <——
93 A5 <—— <—— <—— <——
94 A#5<—— <—— <—— <——
95 B5 <—— <—— <—— <——
96 C6 <—— <—— <—— <——
○○○○○○○○○○○○○○○○○○○○○○○○○○○○○○○○○○○○○○○○○○○○○○○○○○○○○○○○○○○○○○○○○
97
Page 100

MIDI Implementation Chart
[Portable Keyboard] Date: 1995. 5. 18
Model: PSR-620 MIDI Implementation Chart Version: 1.00
Function Transmitted Recognized Remarks
Basic Default 1~16 CH 1~16 CH (*1)
Channel Changed 1~16 CH 1~16 CH (*1)
Default Mode 3 (*1)
Mode Messages XX
Altered ***************** X
Note 0~127 0~127
Number : True voice ***************** 0~127
Velocity Note on O 9nH, v=1~127 O 9nH, v=1~127
Note off X 9nH, v=0 X 9nH, v=0 or 8nH
After key’s XX
Touch Ch’s XX
Pitch Bender OO
Control Change
0, 32 OOBank select MSB, LSB (*2)
1 X (*3) O Modulation
6, 38 OOData entry MSB, LSB
7 OOVolume
10 OOPan
11 X (*3) O Expression
64 OOSustain
66 X (*3) O Sostenuto
67 X (*3) O Soft pedal
71 X (*3) O Harmonic content
72 X (*3) O Release time
73 X (*3) O Attack time
74 X (*3) O Brightness
84 X (*3) O Portamento control
91 OOReverb send level
93 OOChorus send level
94 OODSP send level
96, 97 X (*3) O Data increment, decrement
98, 99 X (*3) O NRPN LSB, MSB (*4)
100, 101 OORPN LSB, MSB (*5)
120 O (*6) O All sound off
121 XOReset all controllers (*7)
Program O 0~127 O 0~127
Change : True # ***************** 0~127 (*8)
System Exclusive OO (*10)
System : Song Position XX
: Song Select XX
Common : Tune XX
System : Clock OO (*9)
Real Time: Commands OO (*9) Start, stop
Aux : Local ON/OFF XX
: All Notes Off XO
Messages: Active Sense OO
: Reset XX
Mode 1: OMNI ON, POLY Mode 2: OMNI ON, MONO O: Yes
Mode 3: OMNI OFF, POLY Mode 4: OMNI OFF, MONO X: No
○○○○○○○○○○○○○○○○○○○○○○○○○○○○○○○○○○○○○○○○○○○○○○○○○○○○○○○○○○○○○○○○○
98
 Loading...