


WHAW050BW
Whirlpool WHAW050BW, WHAW101BW, WHAW121BW, WHAW061BW, WHAW081BW Use And Care Manual
...
Room Air Conditioner
Use and Care Guide
Table of Contents
AIR CONDITIONER SAFETY .......................................... 2
INSTALLATION REQUIREMENTS ................................. 3
INSTALLATION INSTRUCTIONS—
6,000-12,000 BTU MODELS ............................................ 7
WINDOW INSTALLATION INSTRUCTIONS—
15,000-24,000 BTU MODELS ........................................ 10
WALL INSTALLATION INSTRUCTIONS—
15,000-24,000 BTU MODELS ........................................ 14
Climatiseur
Guide d’utilisation et d’entretien
Table des matières
For questions about features, operation/performance,
parts, or service, call: 1-800-207-1156.
In Canada, for assistance, installation, or service,
call: 1-800-207-1156.
USING YOUR AIR CONDITIONER ............................... 16
AIR CONDITIONER CARE ............................................ 19
TROUBLESHOOTING ................................................... 20
ASSISTANCE OR SERVICE ..........................................21
XLS PRODUCTS WARRANTY FOR
WHIRLPOOL® AIR CONDITIONERS ............................22
Au Canada, pour assistance, installation ou service,
composez le : 1-800-207-1156.
SÉCURITÉ DU CLIMATISEUR ..................................... 23
EXIGENCES D’INSTALLATION .................................... 24
INSTRUCTIONS D’INSTALLATION—
MODÈLES À 6 000 À 12 000 BTU ................................. 28
INSTALLATION DANS UNE FENÊTRE—
MODÈLES À 15 000 À 24 000 BTU ............................... 31
INSTRUCTIONS D’INSTALLATION AU MUR—
MODÈLES À 15,000 À 24,000 BTU ............................... 35
Acondicionador de aire para
habitación
Manual de uso y cuidado
Índice
SEGURIDAD DEL ACONDICIONADOR DE AIRE ....... 44
REQUISITOS DE INSTALACIÓN ..................................45
INSTRUCCIONES DE INSTALACIÓN—
MODELOS DE 6,000-12,000 BTU ................................. 49
INSTRUCCIONES DE INSTALACIÓN PARA LA
VENTANA— MODELOS DE 15,000-24,000 BTU ......... 52
INSTRUCCIONES DE INSTALACIÓN PARA LA
PARED— MODELOS DE 15,000-24,000 BTU ............. 57
Models/Modèles/Modelos:
WHAW050BW
WHAW061BW
WHAW081BW
WHAW101BW
WHAW121BW
®/™ ©2017 Whirlpool. All rights reserved. Manufactured under license by XLS Products, Pennsylvania.
®/™ ©2017 Whirlpool. Tous droits réservés. Fabriqué sous licence par XLS Products, Pennsylvanie.
®/™ ©2017 Whirlpool. Todos los derechos reservados. Fabricado bajo licencia por XLS Products, Pennsylvania.
95114
UTILISATION DE VOTRE CLIMATISEUR ...................37
ENTRETIEN DU CLIMATISEUR ................................... 40
DÉPANNAGE .................................................................41
ASSISTANCE OU SERVICE ..........................................42
GARANTIE DE XLS PRODUCTS
POUR LES CLIMATISEURS WHIRLPOOL® ................ 43
Si tiene preguntas respect o a las características,
funcionamiento, rendimiento, partes o servicio técnico,
llame al: 1-800-207-1156.
USO DE SU ACONDICIONADOR DE AIRE ................. 59
CUIDADO DEL ACONDICIONADOR DE AIRE ...........63
SOLUCIÓN DE PROBLEMAS .......................................64
AYUDA O SERVICIO TÉCNICO....................................65
GARANTÍA DE XLS PRODUCTS PARA
ACONDICIONADORES DE AIRE WHIRLPOOL® ........ 66
WHAW151BW
WHAW182BW
WHAW222BW
WHAW242BW
AIR CONDITIONER SAFETY
Your safety and the safety of others are very important.
We have provided many important safety messages in this manual and on your appliance. Always read and obey all
safety messages.
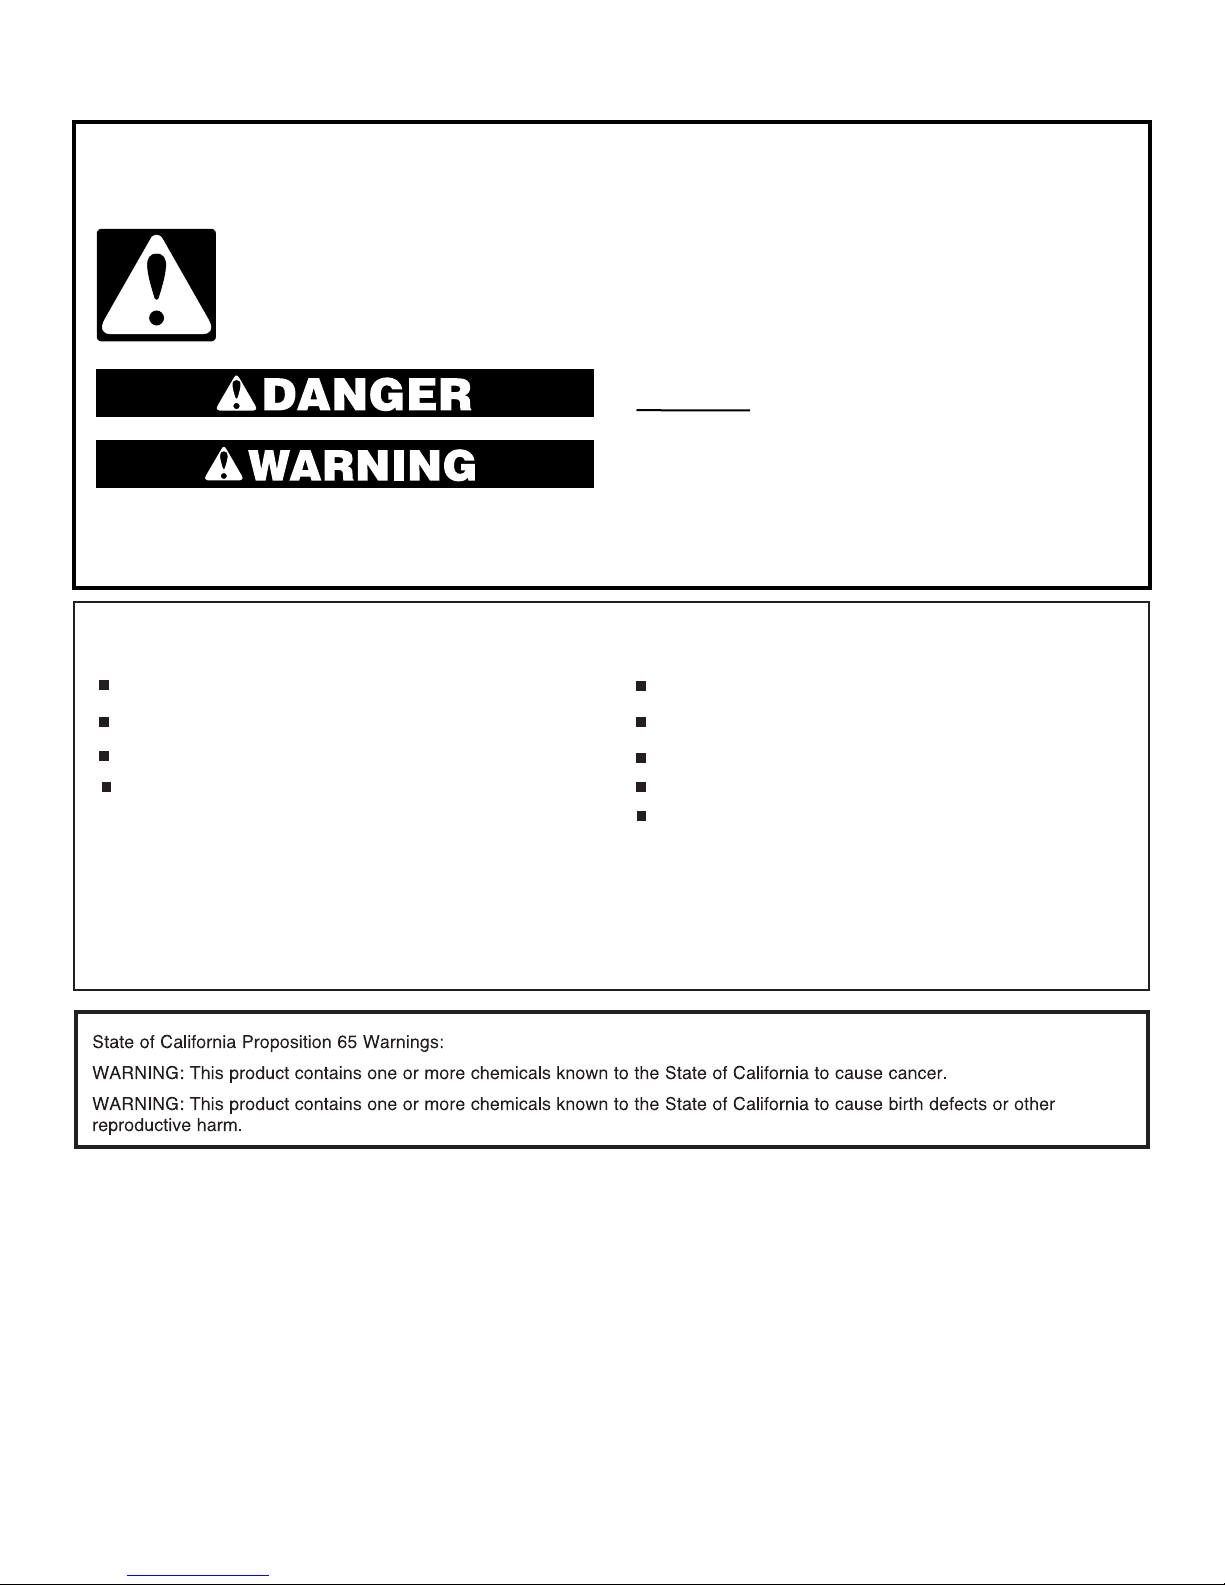
This is the safety alert symbol.
This symbol alerts you to potential hazards that can kill or hurt you and others.
All safety messages will follow the safety alert symbol and either the word “DANGER” or
“WARNING.” These words mean:
You can be killed or seriously injured if you don't
immediately follow instructions.
You can be killed or seriously injured if you don't
follow instructions.
All safety messages will tell you what the potential hazard is, tell you how to reduce the chance of injury, and tell you
what can
WARNING:
happen if the instructions are not followed.
IMPORTANT SAFETY INSTRUCTIONS
To reduce the risk of fire, electrical shock or injury when using your air conditioner, follow these basic precautions:
Plug into a grounded 3 prong outlet.
Do not use an extension cord.
Do not remove ground prong.
Do not use an adapter.
This appliance is not intended for use by persons
(including children) with reduced physical, sensory,
or mental capabilities, or lack experience and knowledge,
unless they have been given supervision or instruction
concerning the use of appliance by a person responsible
for their safety.
SAVE THESE INSTRUCTIONS
Unplug air conditioner before servicing.
Use two or more people to move and install air conditioner.
Do not drink water collected in the water bucket.
Children should be supervised to ensure that they do not
play with the appliance.
2
INSTALLATION REQUIREMENTS
Electrical Requirements—All Models
WARNING
Electrical Shock Hazard
Plug into a grounded 3 prong outlet.
Do not remove ground prong.
Do not use an adapter.
Do not use an extension cord.
Failure to follow these instructions can result in death,
fire, or electrical shock.
The electrical ratings for your air conditioner are listed on the
model and serial number label. The model and serial number
label is located on the right-hand side of the air conditioner
cabinet.
Specic electrical requirements are listed in the “Electrical
Requirements” sections. Follow the requirements for the type
of plug shown in these sections.
Electrical Requirements—
115 V Models
Model BTUs − 6,000; 8,000; 10,000; 12,000; 15,000
All models −
■ 115 volts − (103.5 min. - 126.5 max.)
■ If there is a “Single Circuit Only” label on the unit, use on a
dedicated single-outlet circuit only. If a dedicated single-outlet
circuit is not available,
then it is the customer’s responsibility to have a single-outlet
circuit installed by a qualied electrician.
■ If there is no “Single Circuit Only” label on the
unit, the unit may be used on any branch circuit
of correct voltage and adequate current
protection rating.
6,000-8,000 BTU models −
■ 0-8 amps
■ 10-amp time-delay fuse or circuit breaker
10,000-15,000 BTU models −
■ 0-12 amps
■ 15-amp time-delay fuse or circuit breaker
Electrical Requirements—
230 V Models
Model BTUs − 18,000; 22,000; 24,000
■ 230 volts (208 min. - 240 max.)
■ 6.6-11 amps
■ 15-amp time-delay fuse or circuit breaker
■ If there is a “Single Circuit Only” label on the unit, use on a
dedicated single-outlet circuit only.
■ If a dedicated single-outlet circuit is not available, then it is
the customer’s responsibility to have a single-outlet circuit
installed by a qualied electrician.
■ If there is no “Single Circuit Only” label on the unit, the unit
may be used on any branch circuit of correct voltage and
adequate current protection rating.
Recommended Grounding Method
This air conditioner must be grounded. This air conditioner is
equipped with a power supply cord having a grounded 3 prong
plug. To minimize possible shock hazard, the cord must be
plugged into a mating, grounded 3 prong outlet, grounded in
accordance with all local codes and ordinances. If a mating
outlet is not available, it is the customer’s responsibility to have
a properly grounded 3 prong outlet installed by a qualied
electrical installer. It is the customer’s responsibility:
■ To contact a qualied electrical installer.
■ To assure that the electrical installation is adequate and in
conformance with National Electrical Code, ANSI/NFPA 70—
latest edition, and all local codes and ordinances.
Copies of the standards listed may be obtained from:
National Fire Protection Association
1 Batterymarch Park
Quincy, MA 02269
3
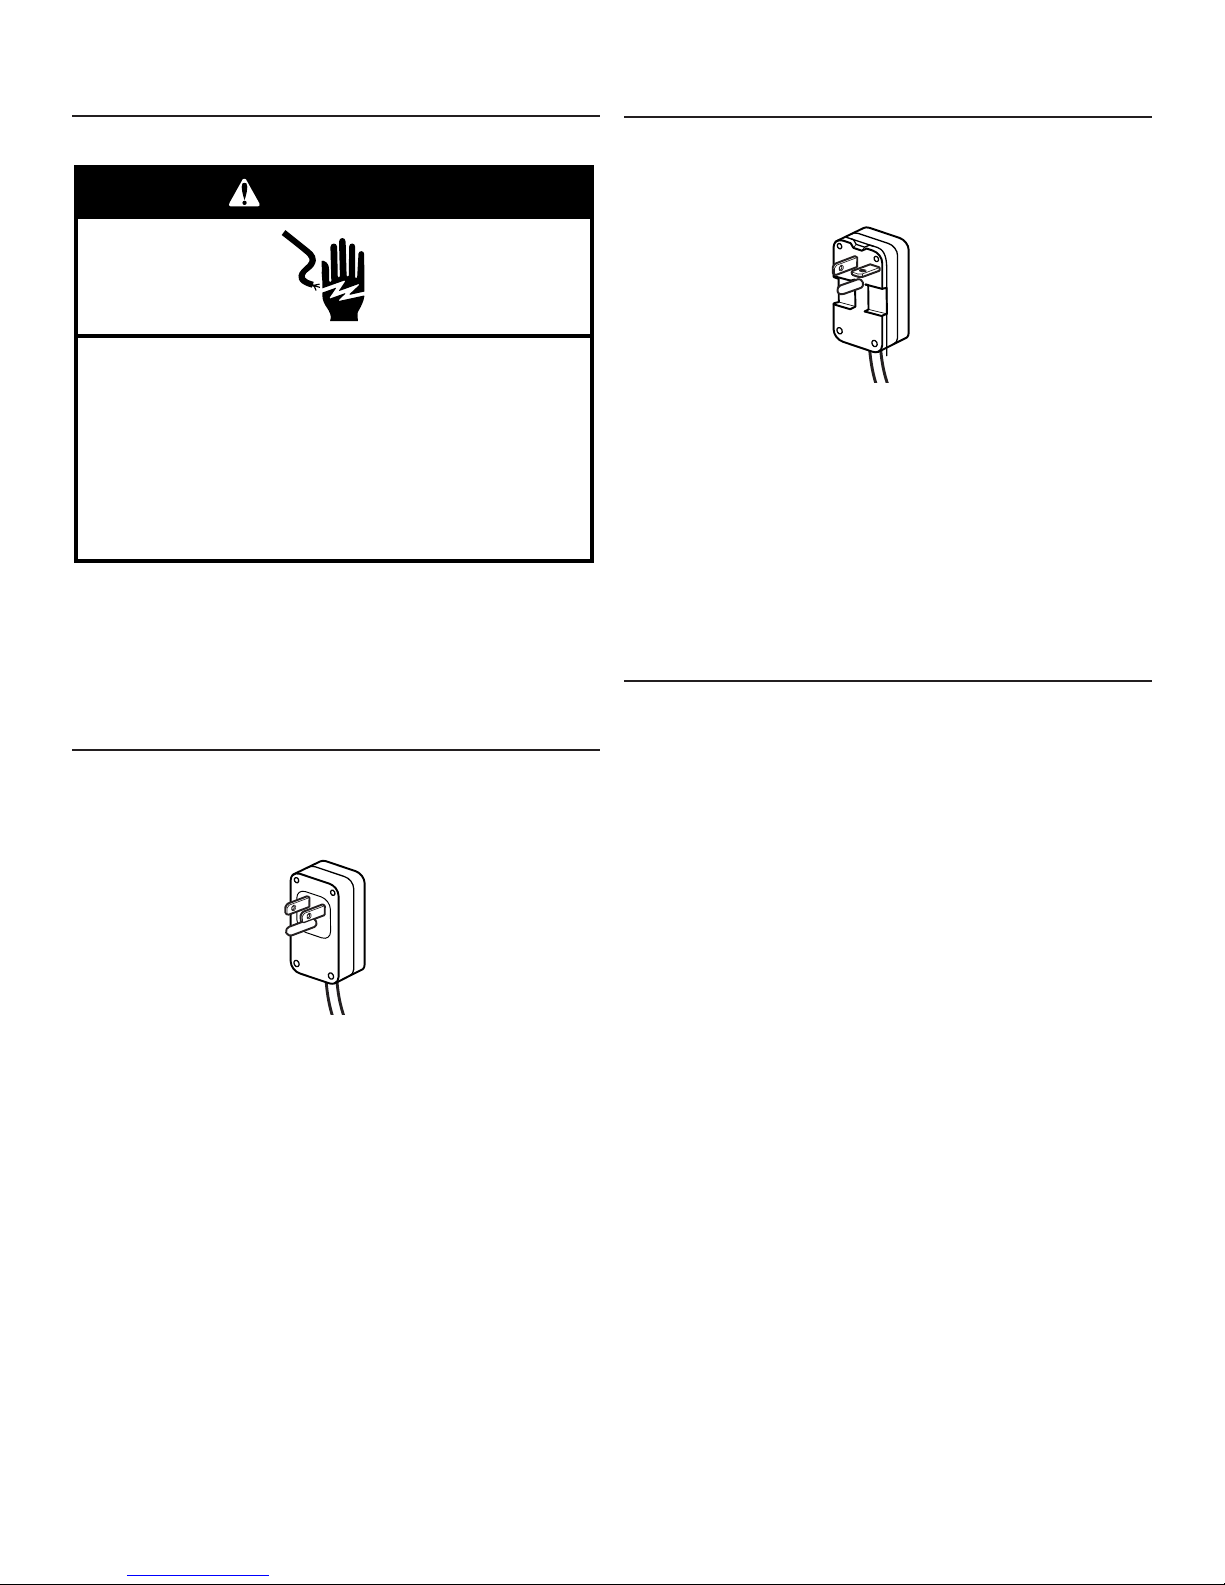
Power Supply Cord—All Models
WARNING
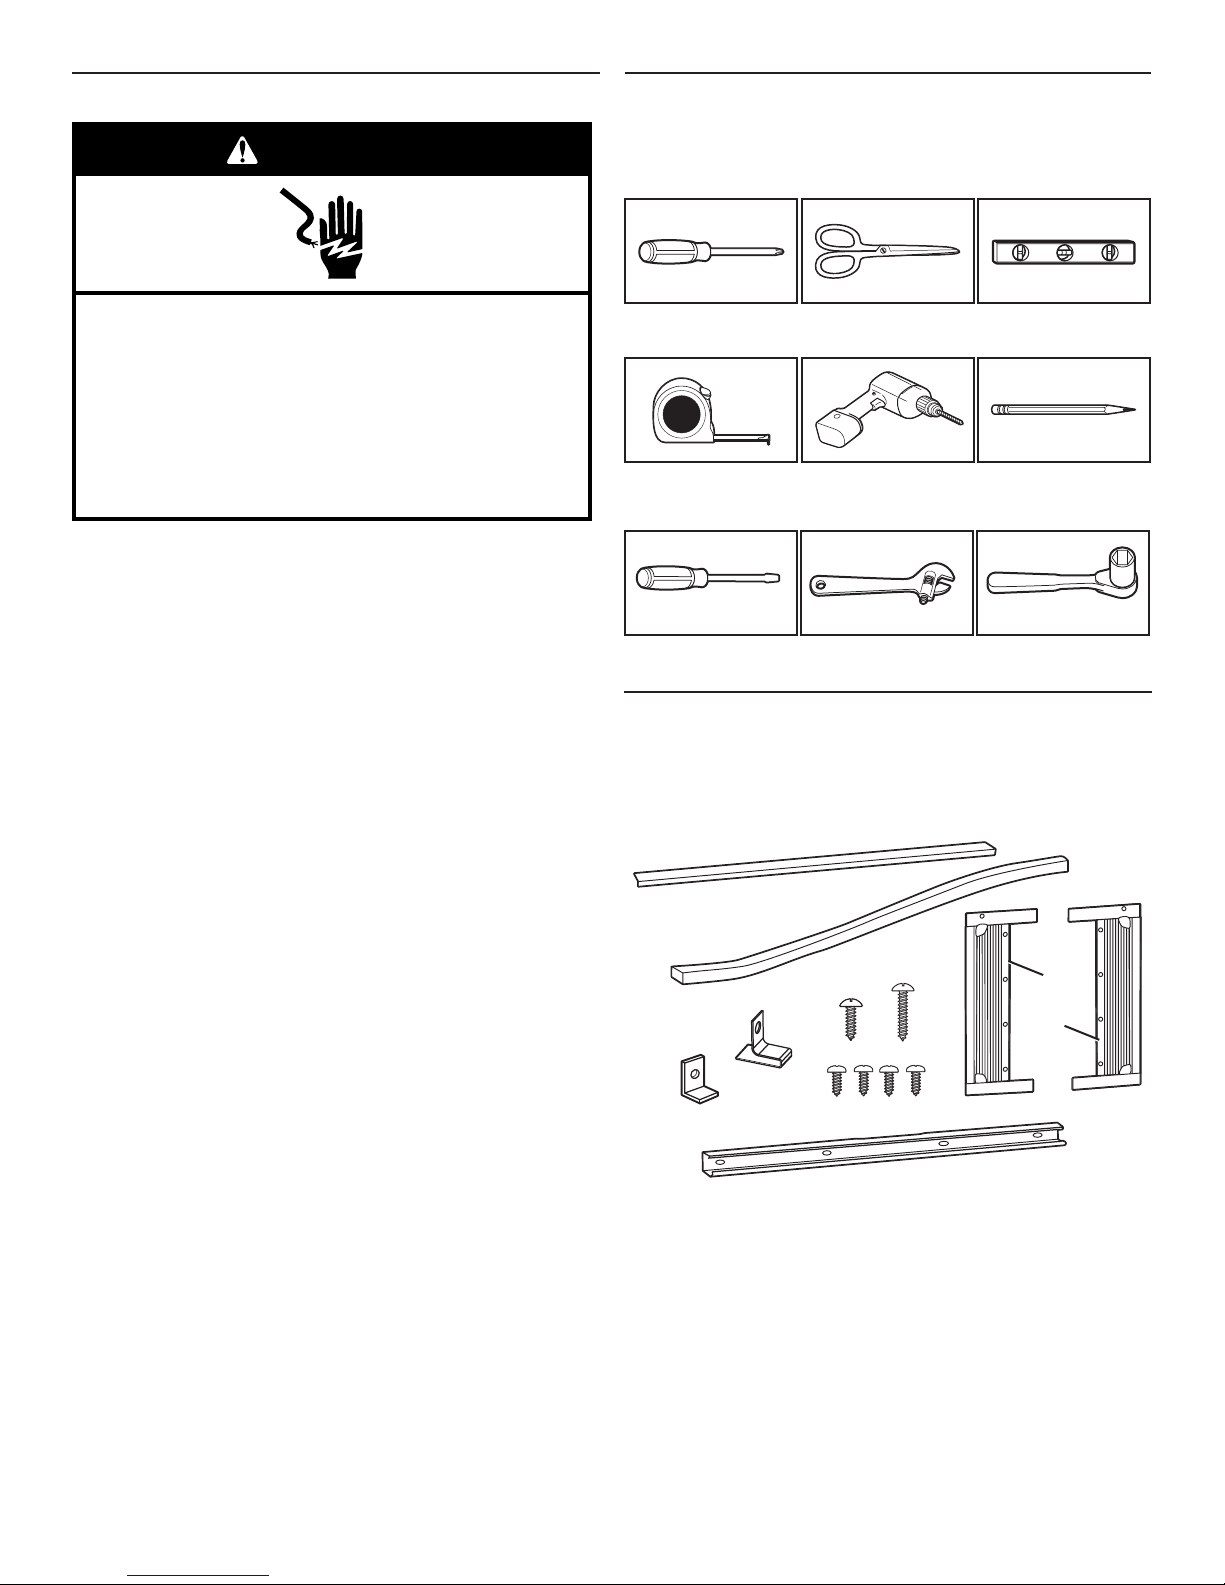
Tools Required—All Models
Gather the required tools and parts before starting installation.
Read and follow the instructions provided with any tools listed
here.
Electrical Shock Hazard
Plug into a grounded 3 prong outlet.
Do not remove ground prong.
Do not use an adapter.
Do not use an extension cord.
Failure to follow these instructions can result in death,
fire, or electrical shock.
NOTE: Your air conditioner’s power supply cord may differ from
those shown.
This air conditioner is equipped with a power supply cord
required by UL. This power supply cord contains state-of-the-art
electronics that sense leakage current. If the cord is crushed,
the electronics detect leakage current and power will be
disconnected in a fraction of a second.
To test your power supply cord:
1. Plug power supply cord into a grounded 3 prong outlet.
2. Press RESET (on some models, a green light will turn on).
3. Press TEST (listen for click; Reset button will trip, and on
some devices, a green light will turn off).
4. Press and release RESET (listen for click; Reset button will
latch, and on some devices, a green light will turn on).
The power supply cord is ready for operation.
NOTES:
■ The Reset button must be pushed in for proper operation.
■ The power supply cord must be replaced if it fails to trip when
the test button is pressed or fails to reset.
■ Do not use the power supply cord as an off/on switch. The
power supply cord is designed as a protective device.
■ A damaged power supply cord must be replaced with a new
power supply cord obtained from the product manufacturer
and must not be repaired.
■ The power supply cord contains no user-serviceable parts.
Opening the tamper-resistant case voids all warranty and
performance claims.
Phillips screwdriver
Tape measure
Flathead screwdriver Adjustable wrench
Scissors
Cordless drill and
1/8" bit
or pliers
Level
Pencil
Socket wrenches
Parts Supplied:
6,000-12,000 BTU models
Check that all parts are included in parts package.
NOTE: Not all parts are included with all models.
A
G
B
D
C
I
F
E
H
Left
Right
4
A. Foam seal with
adhesive strip
B. Foam seal without
adhesive strip
C. Sash lock x1
D. Lock frame x2
E. 1/2" screws x3
F. 3/4" screws x4
G. Side curtains x2
H. 3/8" screws x4
I. Top channel (appearance
may vary)
Other: AAA batteries x2
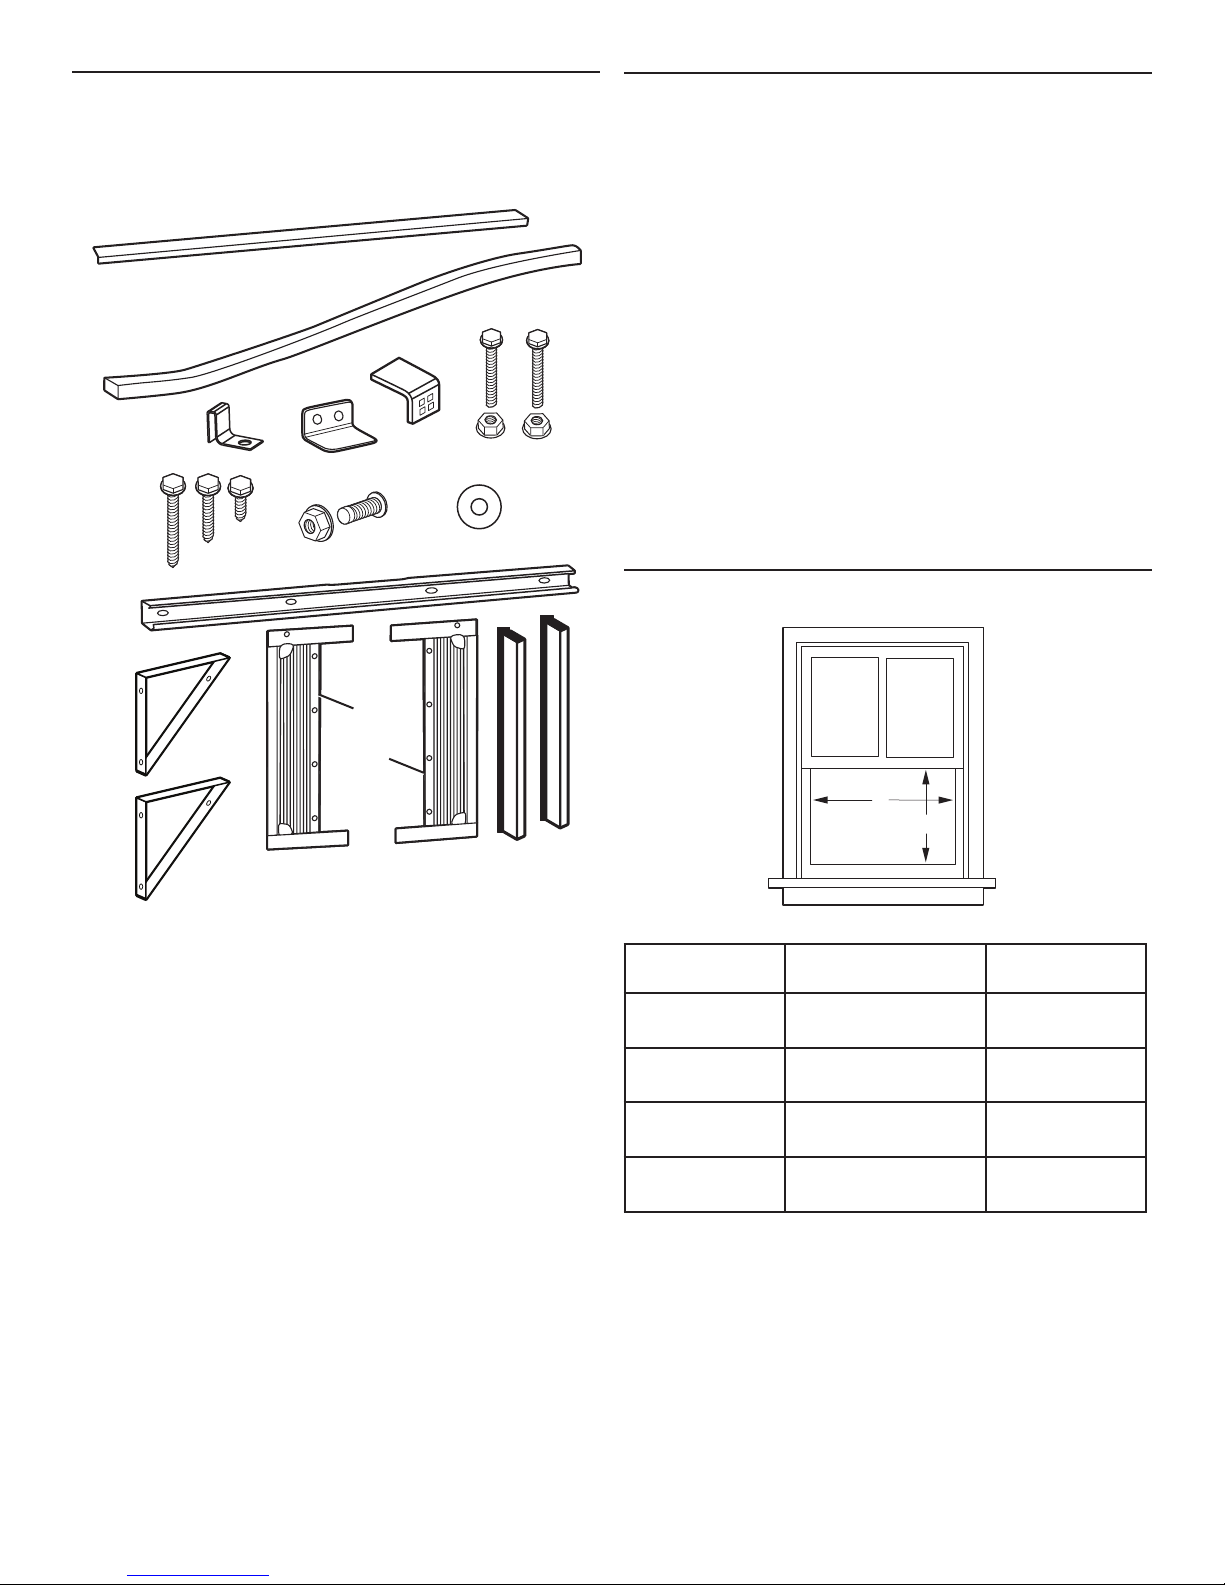
Parts Supplied—
15,000-24,000 BTU Models
Location Requirements—
Window Installation
Check that all parts are included in parts package.
NOTE: Not all parts are included with all models.
A
B
C
G
F
L
D E
H
I
Left
K
IMPORTANT: Observe all governing codes and ordinances.
Check the location where the air conditioner will be installed.
Make sure you have everything necessary for correct installation.
The location should provide:
■ Grounded electrical outlet within 6 ft (183 cm) of where
the power cord exits the air conditioner. Do not use an
extension cord.
■ Free movement of air in room to be cooled.
■ A large enough opening for the air conditioner. Installation
parts are supplied for double-hung windows.
NOTE: The air conditioner can be installed without the side
J
panels to t in a narrow window opening.
■ Adequate wall support for weight of air conditioner.
■ Firm wood, masonry, or metal to secure to supporting parts.
NOTE: Cabinet louvers must not be obstructed. Air must be able
to pass freely through the cabinet louvers.
Window Opening Measurements
M
N
A. Foam seal with
adhesive strip
B. Foam seal without
adhesive strip
C. Side curtain bracket x2
D. Safety lock
E. Sill angle bracket x2
F. 1/2" hex-head screw x2
G. 5/8" hex-head screw x4
H. 5/16" hex-head screw x10
I. 5/8" athead bolt with
locknut x2
Right
O
J. 1/2" athead bolt with
locknut x4
K. Gasket x2
L. Top channel (appearance
may vary)
M. Window support
bracket x2
N. Side curtains x2
O. Side retainers x2
Other: AAA batteries x2
A
B
Model BTUs Width (A) Minimum
Opening (B)
6,000-8,000 23"−36"
(58.4 cm−91.4 cm)
10,000-12,000 26"−36"
(66 cm−91.4 cm)
15,000-18,000 28"−41"
(71.1 cm−104.2 cm)
22,000-24,000 30"−41"
(76.2 cm−104.2 cm)
141⁄2"
(36.8 cm)
16"
(40.6 cm)
19"
(48.3 cm)
191⁄2"
(49.5 cm)
5
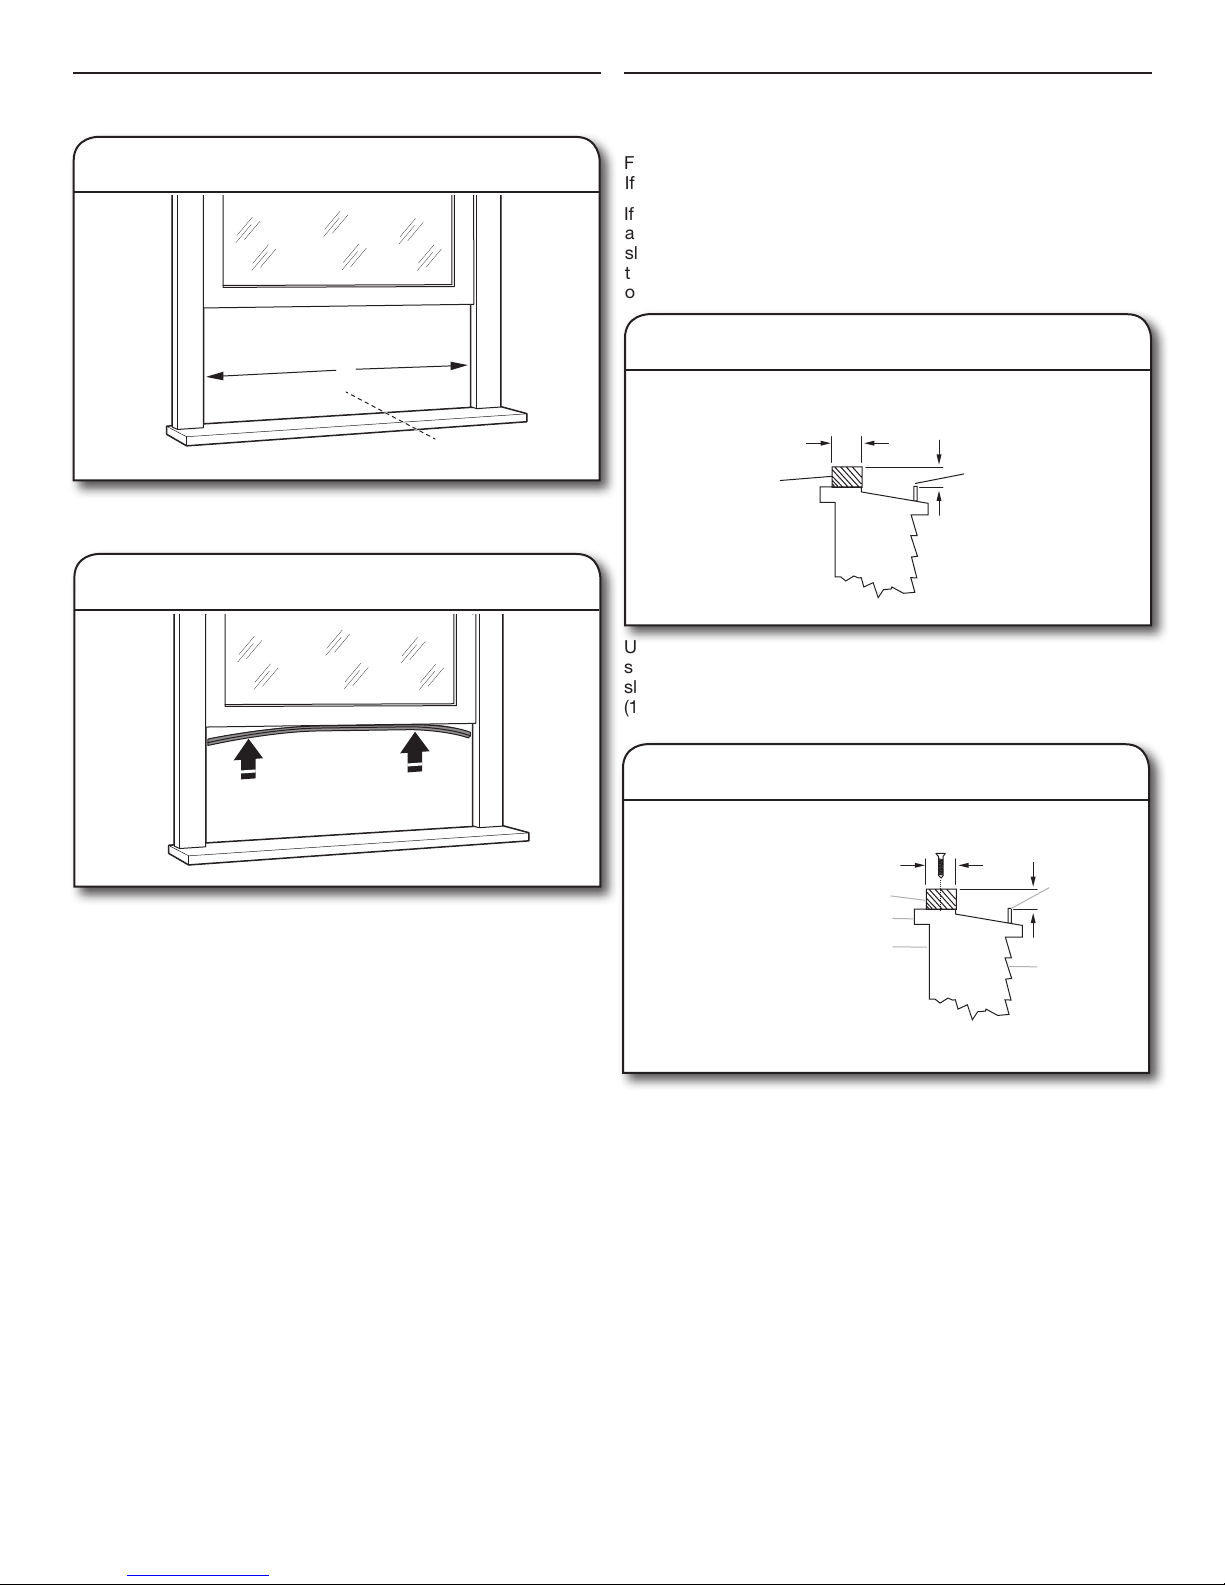
Prepare Window Opening
B
Preparing Window with Storm Window
or Other Obstruction
1. Measure and mark center line
Width of window opening
A
Center line
Measure the width of the window opening (A). Mark the center
line (B) of the window on the inside windowsill.
2. Attach upper foam seal
Follow the steps in “Prepare Window Opening”.
If possible, remove the storm window frame or other obstruction.
If the storm window frame or obstruction CANNOT be removed,
a wood spacer will be required to ensure that the air conditioner
slopes to the outside. This will allow condensation and rainwater
to drain away. Make sure that drain holes or slots are not caulked
or painted shut.
1. Measure size of spacer needed
1
(1.27 cm)
1
(3.8 cm)
/2"
1
Min.
Spacer
Using a level and measuring tape, determine thickness of wood
spacer needed to allow the air conditioner to slope downward
slightly to the outdoors. The block should provide at least 1/2"
(1.27 cm) of height above the obstruction.
/2"
Min.
Obstruction
Foam seal
Attach the foam seal with adhesive strip to the bottom of the
window sash.
2. Place block on windowsill
1
(1.27 cm)
1
/2"
(3.8 cm)
1
A. Piece of wood
B. Windowsill
C Indoors
D. Outdoors
E. Storm window frame
or other obstruction
Place wood spacer on windowsill. Spacer should be at least the
full width of the air conditioner cabinet.
Min.
A
B
C
/2"
Min.
E
D
6
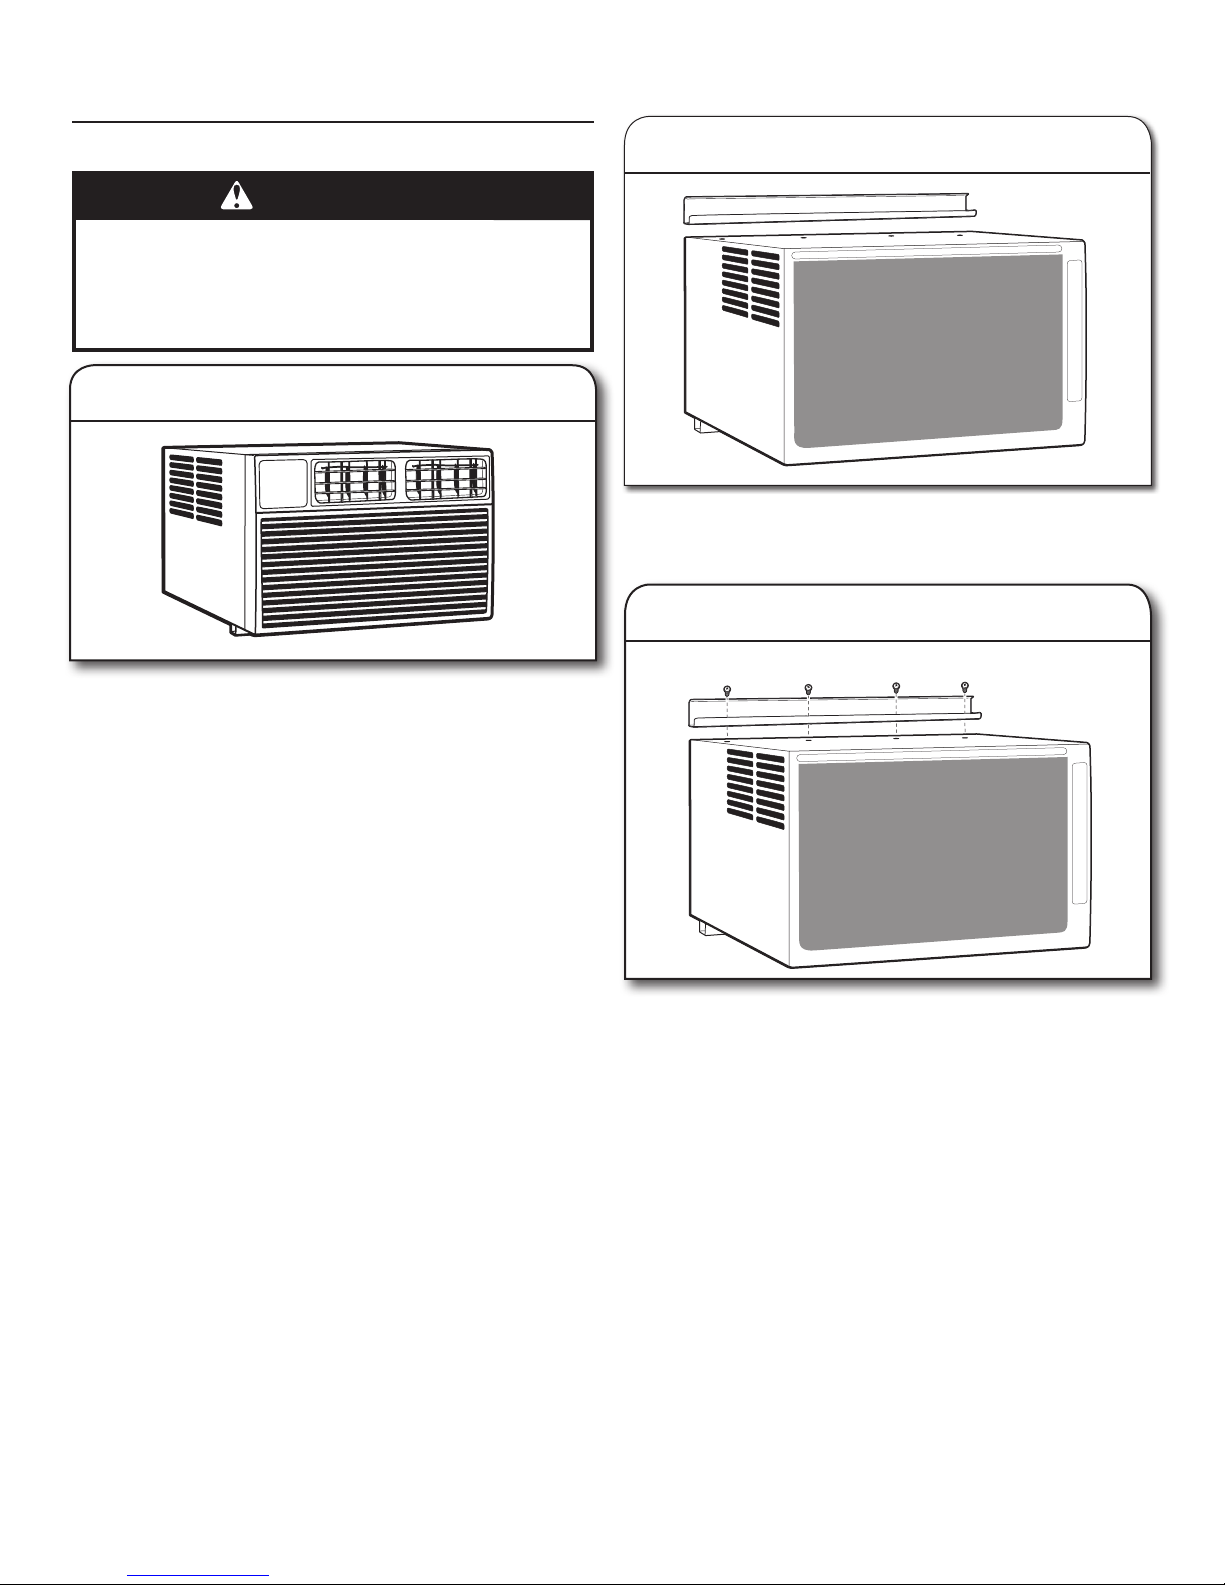
INSTALLATION INSTRUCTIONS—6,00012,000 BTU MODELS
Prepare Air Conditioner for Installation
WARNING
Excessive Weight Hazard
Use two or more people to move and install
air conditioner.
Failure to do so can result in back or other injury.
1. Unpack the Air Conditioner
Remove Packaging Materials:
■ Handle the air conditioner gently while unpacking the unit.
■ Place the air conditioner on a hard, at surface.
■ Remove tape and glue residue from surfaces before turning
on the air conditioner. Rub a small amount of liquid dish soap
over the adhesive with your ngers. Wipe with a damp cloth
and dry.
■ Do not use sharp instruments, rubbing alcohol, ammable
uids, or abrasive cleaners to remove tape or glue. These
products can damage the surface of your air conditioner.
■ Remove any packaging materials inserted into the side
louvers.
■ Dispose of/recycle packaging materials in an appropriate way.
2. Install top channel
Place the top channel on the top of the air conditioner, lining up
the holes in the top channel with the holes in the top of the air
conditioner.
3. Attach screws
Using four 3/8" screws, attach the top channel to the air
conditioner.
7
 Loading...