

Page 1

DUO ICE CREAM MAKER SEMD 12 A1
DUO ICE CREAM MAKER
Operating instructions
DUO-APARAT
ZA PRIPRAVO SLADOLEDA
Navodila za uporabo
PRÍSTROJ NA PRÍPRAVU ZMRZLINY
Návod na obsluhu
IAN 111458
URZĄDZENIE DO
PRZYRZĄDZANIA LODÓW DUO
Instrukcja obsługi
DUO ZMRZLINOVAČ
Návod k obsluze
DUO-EISCREMEMASCHINE
Bedienungsanleitung
Page 2
Before reading, unfold the page containing the illustrations and familiarise yourself with all functions of
the device.
Przed przeczytaniem proszę rozłożyć stronę z ilustracjami, a następnie proszę zapoznać się z wszystkimi
funkcjami urządzenia.
Pred branjem odprite stran s slikami in se nato seznanite z vsemi funkcijami naprave.
Před čtením si otevřete stranu s obrázky a potom se seznamte se všemi funkcemi přístroje.
Pred čítaním si odklopte stranu s obrázkami a potom sa oboznámte so všetkými funkciami prístroja.
Klappen Sie vor dem Lesen die Seite mit den Abbildungen aus und machen Sie sich anschließend mit allen
Funktionen des Gerätes vertraut.
GB Operating instructions Page 1
PL Instrukcja obsługi Strona 11
SI Navodila za uporabo Stran 21
CZ Návod k obsluze Strana 31
SK Návod na obsluhu Strana 41
DE / AT / CH Bedienungsanleitung Seite 51
Page 3
Page 4

Contents
Introduction . . . . . . . . . . . . . . . . . . . . . . . . . . . . . . . . . . . . . . . . . . . . . . . . . . . . . . 2
Intended use . . . . . . . . . . . . . . . . . . . . . . . . . . . . . . . . . . . . . . . . . . . . . . . . . . . . . 2
Package contents . . . . . . . . . . . . . . . . . . . . . . . . . . . . . . . . . . . . . . . . . . . . . . . . . 2
Description of the appliance . . . . . . . . . . . . . . . . . . . . . . . . . . . . . . . . . . . . . . . . 2
Technical data . . . . . . . . . . . . . . . . . . . . . . . . . . . . . . . . . . . . . . . . . . . . . . . . . . . . 2
Safety guidelines . . . . . . . . . . . . . . . . . . . . . . . . . . . . . . . . . . . . . . . . . . . . . . . . . 3
Assembly . . . . . . . . . . . . . . . . . . . . . . . . . . . . . . . . . . . . . . . . . . . . . . . . . . . . . . . . 5
Preparation . . . . . . . . . . . . . . . . . . . . . . . . . . . . . . . . . . . . . . . . . . . . . . . . . . . . . . 5
Making ice cream . . . . . . . . . . . . . . . . . . . . . . . . . . . . . . . . . . . . . . . . . . . . . . . . . 6
Cleaning and care . . . . . . . . . . . . . . . . . . . . . . . . . . . . . . . . . . . . . . . . . . . . . . . . . 7
Storage . . . . . . . . . . . . . . . . . . . . . . . . . . . . . . . . . . . . . . . . . . . . . . . . . . . . . . . . . 7
Warranty and service . . . . . . . . . . . . . . . . . . . . . . . . . . . . . . . . . . . . . . . . . . . . . 8
Disposal . . . . . . . . . . . . . . . . . . . . . . . . . . . . . . . . . . . . . . . . . . . . . . . . . . . . . . . . . 8
Importer . . . . . . . . . . . . . . . . . . . . . . . . . . . . . . . . . . . . . . . . . . . . . . . . . . . . . . . . 8
GB
Recipes . . . . . . . . . . . . . . . . . . . . . . . . . . . . . . . . . . . . . . . . . . . . . . . . . . . . . . . . . . 9
Vanilla ice cream . . . . . . . . . . . . . . . . . . . . . . . . . . . . . . . . . . . . . . . . . . . . . . . . . . . . . . . . . . . . . 9
Strawberry ice cream . . . . . . . . . . . . . . . . . . . . . . . . . . . . . . . . . . . . . . . . . . . . . . . . . . . . . . . . . 9
Banana ice cream . . . . . . . . . . . . . . . . . . . . . . . . . . . . . . . . . . . . . . . . . . . . . . . . . . . . . . . . . . . . 9
Mango ice cream . . . . . . . . . . . . . . . . . . . . . . . . . . . . . . . . . . . . . . . . . . . . . . . . . . . . . . . . . . . 10
Nut ice cream . . . . . . . . . . . . . . . . . . . . . . . . . . . . . . . . . . . . . . . . . . . . . . . . . . . . . . . . . . . . . . 10
SEMD 12 A1
1
Page 5

Introduction
GB
Congratulations on the purchase of your new
appliance.
You have selected a high quality product.
The operating instructions are part of this product.
They contain important information on safety, usage
and disposal. Before using the product, familiarise
yourself with all handling and safety instructions. Use
the product only as described and for the range
of applications specifi ed. Please also pass these
operating instructions on to any future owner(s).
Intended use
This appliance is intended exclusively for making
ice cream. This appliance is intended solely for use
in private households. Do not use it for commercial
purposes.
Package contents
DUO Ice Cream Maker
Operating instructions
Description of the appliance
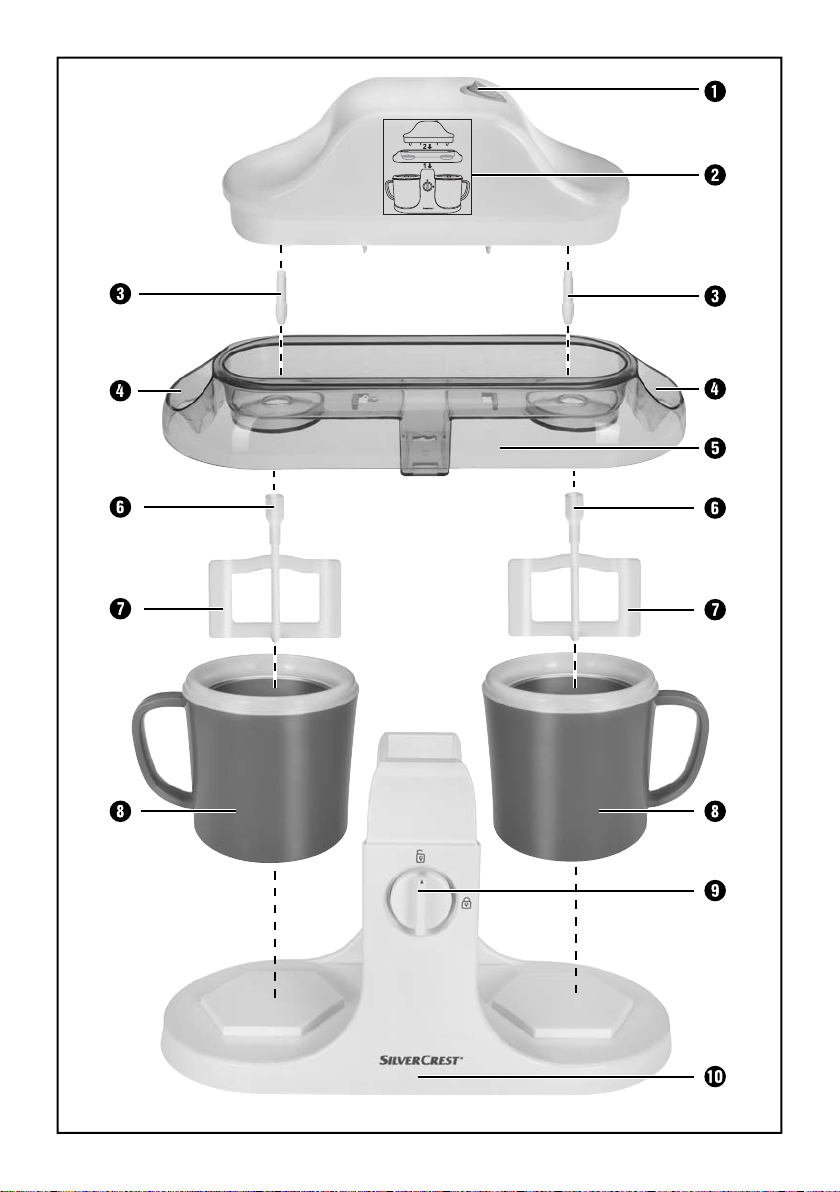
1 On/Off switch
2 Motor unit
3 Drive shafts
4 Filling openings
5 Lid
6 Drive shaft socket
7 Ice scraper
8 Beaker
9 Rotary switch
0 Base
Technical data
Rated voltage: 220 - 240V ~, 50Hz
Rated input: 12 W
Protection class: II
2
SEMD 12 A1
Page 6

Safety guidelines
RISK OF ELECTRIC SHOCK
► Connect the appliance only to mains power sockets supplying a mains
power voltage of 220 - 240 V ~, 50 Hz.
► To prevent accidents, have defective plugs and/or power cables replaced
immediately by an authorised specialist technician or our Customer Service
department.
► In event of operating malfunctions and before cleaning the appliance,
remove the power plug from the mains power socket.
► Always remove the power cable from the socket by pulling on the plug, not
on the power cable itself.
► Do not kink or crush the power cable, and route the cable so that it cannot
be stepped on or tripped over.
► Do not expose the appliance to humidity and do not use it outdoors.
If liquid gets into the housing, disconnect the appliance from the mains
power socket immediately and have it repaired by a qualifi ed technician.
► Never handle the power cable or the power plug with wet hands.
► Do not open the appliance motor unit. Doing so can lead to risks and also
invalidates the warranty.
GB
► Disconnect the appliance from the mains power source immediately after
use. The appliance is completely free of electrical power ONLY when
unplugged.
► The appliance is for indoor use only.
Never immerse the motor unit of the appliance in liquid and do not allow
any liquids to enter the housing of the motor unit.
SEMD 12 A1
3
Page 7

GB
WARNING! RISK OF INJURY!
► This appliance may be used by children aged 8years or over if they are
supervised or have been told how to use the appliance safely and are
aware of the potential risks.
► Cleaning and user maintenance tasks must not be carried out by children
unless they are aged 8 years or more and are supervised.
► The appliance and its connecting cable must be kept away from children
younger than 8 years old.
► This appliance may be used by persons with limited physical, sensory or
mental capabilities or lack of experience and knowledge, provided that
they are under supervision or have been told how to use the appliance
safely and are aware of the potential risks.
► Children must not use the appliance as a plaything.
► The appliance should always be disconnected from the mains when un-
attended and before assembly, disassembly or cleaning.
► Before changing accessories or additional parts that are in motion during
operation, the appliance must be switched off and disconnected from mains
power.
4
SEMD 12 A1
Page 8

Assembly
Use the diagrams on the fold-out page as a guide
for assembly!
1) Remove all packaging materials and any stickers
from the appliance.
2) Clean the appliance as described in the section
“Cleaning and Care”.
3) Place the base 0 on a fl at surface.
NOTE
Always put the appliance together in the or-
►
der described in this section. Otherwise some
parts may not fi t together correctly.
4) Place the two beakers 8 onto the hexagonal
bases so that the handles of the beakers 8
face outwards.
5) Insert the two ice scrapers 7 into the recesses
in the beakers 8. The drive shaft sockets 6
must be facing upwards.
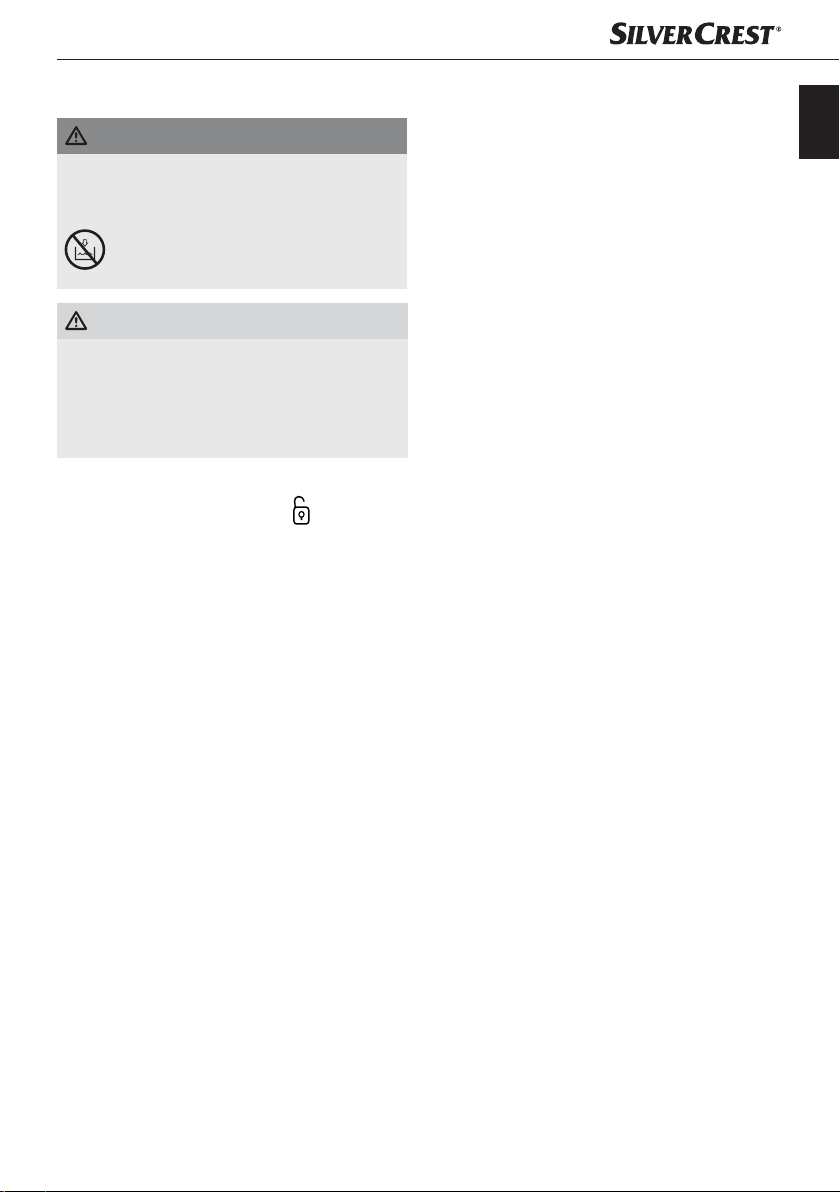
NOTE
Ensure that the rotary switch 9 is set
►
to
when removing or replacing the lid 5.
6) Place the lid 5 on the beakers 8. Ensure that
the drive shaft sockets 6 are sticking up through
the holes in the lid 5.
7) Turn the rotary switch 9 to the position .
The lid 5 can now no longer be removed.
8) Insert the two drive shafts 3 into the hexagonal
holes on the motor unit 2.
9) Place the motor unit 2 onto the lid 5 so that
the power cord is facing to the rear. The drive
shafts 3 must be correctly inserted into the
drive shaft sockets 6.
10) Insert the plug into a mains power socket.
The appliance is now ready for use.
Preparation
♦ Place the two beakers 8 in the deep freeze for
about 8–12 hours at a temperature of no more
than -18°C.
TIPS
Keep the beakers 8 upright in the freezer.
►
► Ensure that the beakers 8 are completely
dry before you place them in the freezer.
► Place a plastic bag, for instance a freezer
bag, in each beaker 8 before freezing.
► Before processing, place the fruit, the milk
and cream in the fridge. This ensures that the
fruit is already cold and thus the ice cream
mixture will not require so long to cool down.
♦ Puree the fruit with a hand blender and mix all
the ingredients as described in the recipe.
♦ Allow the mixture to cool down to about
5–10°C in the fridge.
GB
SEMD 12 A1
5
Page 9

Making ice cream
GB
CAUTION! MATERIAL DAMAGE!
► Start the appliance fi rst and then add ingre-
dients. Otherwise the ice mixture will freeze
onto the sides of the beaker 8 and block the
ice scrapers 7. This will cause the motor to
overheat!
CAUTION! MATERIAL DAMAGE!
► Do not stop the appliance during processing!
Otherwise the ice mixture will freeze onto
the sides of the beaker 8 and block the ice
scrapers 7 when the machine is restarted.
This will cause the motor to overheat!
1) Remove the beakers 8 from the freezer and
put the appliance together as described in the
section “Assembly”.
2) Switch the appliance on by moving the On/
Off switch 1 to the position I. The two ice
scrapers 7 start turning.
3) Now fi ll the prepared ice mixture into the beakers 8 through the fi lling openings 4. Ideally,
use a bowl with a spout. Never add more than
300 ml per beaker 8. During processing the
mixture increases in volume!
NOTE
You can also fi ll only one beaker 8 with
►
ingredients. However, always use the appliance with both beakers.
NOTE
The ice scrapers 7 may occasionally change
►
their direction of rotation. This happens when
the mixture becomes too stiff . This is normal
and not an appliance defect.
4) Allow the appliance to continue running until
you are satisfi ed with the consistency of the
mixture. After a maximum of 20 to 30 minutes,
the ice cream is ready.
5) Switch the appliance off at the On/Off switch 1
and pull the mains power plug out of the socket.
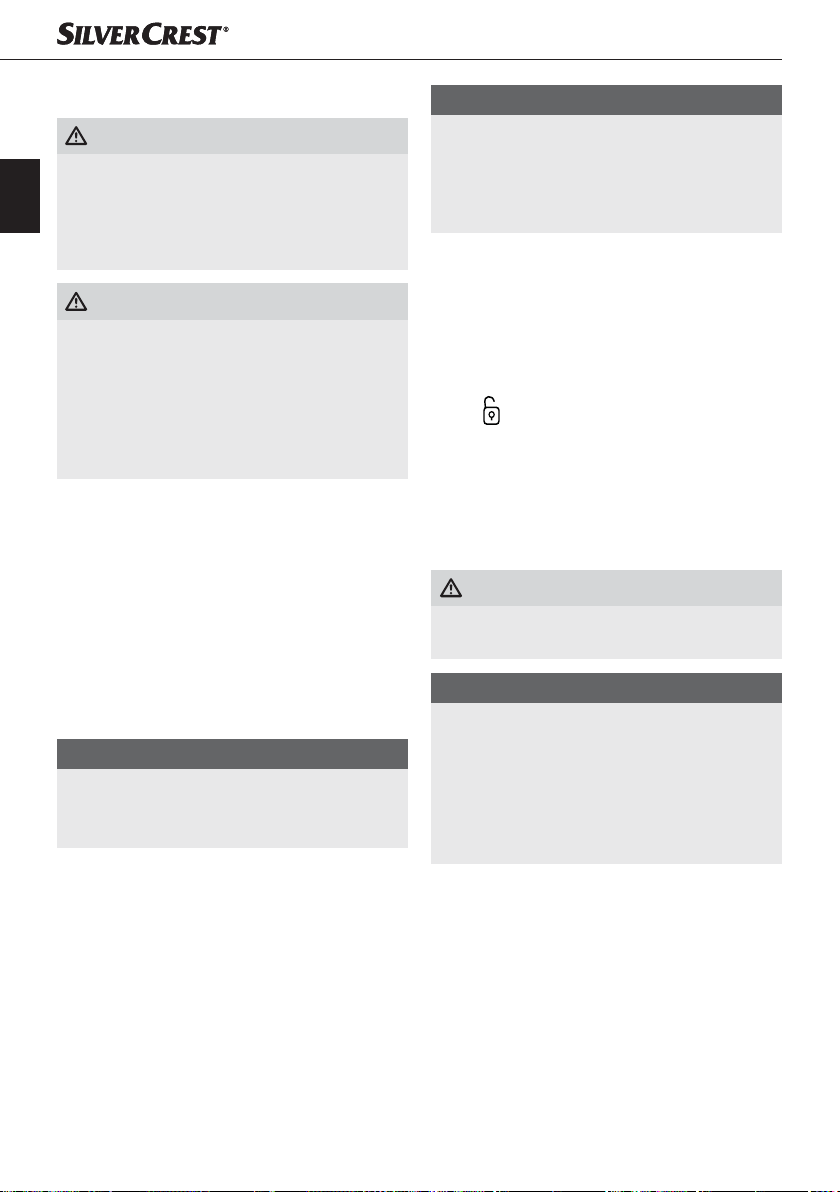
6) Turn the rotary switch 9 to
lid 5 with the motor unit 2.
7) Pull the ice scrapers 7 out of the ice cream.
If the ice cream sticks to them, scrape it off with
a plastic spoon or similar.
8) Lift the beakers 8 out of the appliance and
remove the ice cream. Use only plastic or
wooden implements to do this.
CAUTION! MATERIAL DAMAGE!
► Do not use metal utensils to remove the ice
cream from the beakers 8.
NOTE
If you would like to replace the lid 5 on
►
the beakers, you must fi rst detach the motor
unit 2 from the lid 5. Then proceed as described in the section "Assembly". Otherwise,
it is possible that the drive shafts 3 do not
slide correctly into the drive shaft socket 6.
to remove the
6
SEMD 12 A1
Page 10
Cleaning and care
RISK OF ELECTRIC SHOCK
Always remove the plug from the mains
►
power socket before you clean the appliance.
Ensure you never submerse the motor
unit 2 in liquid, and never allow liquid
to enter the motor unit housing 2.
CAUTION! MATERIAL DAMAGE!
► Do not use abrasive, chemical or caustic
cleaning agents to clean this appliance.
They can cause damage to the surfaces.
► Do not clean the components of this appliance
in a dishwasher!
♦ If assembled, take the appliance apart to clean it.
♦ Clean the motor unit 2 with a moist cloth after
every use. If there is heavy soiling, add mild
detergent to the cloth. Rinse detergent residues
off with clear water. Ensure that there are no
detergent residues on the appliance, and that the
appliance is completely dry before renewed use.
♦ Allow the beakers 8 to warm up to room tem-
perature before cleaning them.
Wash the beakers 8, the drive shafts 3, the
ice scraper 7 and the lid 5 in lukewarm water
with a little washing-up liquid. Afterwards, rinse
these parts with plenty of clean water to remove
all detergent residues.
♦ Wipe the base 0 with a damp cloth. If there is
heavy soiling, add mild detergent to the cloth.
♦ Ensure that all parts are completely dry before
re-use.
GB
– Turn the rotary switch 9 to to remove
the lid 5 with the motor unit 2.
– Rotate the lid 5 together with the motor
unit 2. Press the two catches on the motor
unit 2, which project through the lid 5,
gently inwards and push them out of the
lid 5 at the same time. The motor unit 2
will now detach from the lid 5.
– Pull the drive shafts 3 out of the motor unit 2.
– Take the ice scrapers 7 out of the beakers 8.
– Remove the beakers 8 from the base 0.
Storage
♦ Always clean the appliance thoroughly before
storing.
♦ Store the appliance in a clean and dry location.
SEMD 12 A1
7
Page 11

Warranty and service
GB
You are provided a 3-year warranty on this
appliance, valid from the date of purchase.
This appliance has been manufactured with care
and inspected meticulously prior to delivery.
Please retain your receipt as proof of purchase.
In the event of a warranty claim, please contact
your Customer Service unit by telephone. This
is the only way to guarantee free return of your
merchandise.
The warranty only covers claims for material and
manufacturing defects, not for damage sustained
during carriage, components subject to wear and
tear or damage to fragile components such as
switches or batteries. This appliance is intended solely for private use and not for commercial purposes.
The warranty shall be deemed void in the case
of misuse or improper handling, use of force or
interventions which were not carried out by one
of our authorised Service centres.
Your statutory rights are not restricted by this
warranty.
The warranty period is not prolonged by repairs
made under the warranty. This also applies to
replaced and repaired components. Any damage
or defects present at the time of purchase must be
reported immediately after unpacking, but no later
than two days after the date of purchase. Repairs
carried out after expiry of the warranty period shall
be subject to charge.
Service Great Britain
Tel.: 0871 5000 720 (£ 0.10/Min.)
E-Mail: kompernass@lidl.co.uk
IAN 111458
Hotline availability:
Monday to Friday 08:00 - 20:00 (CET))
Disposal
Never dispose of the appliance
in the normal domestic waste.
This product is subject to the
provisions of European Directive
2012/19/EU.
Dispose of the appliance via an approved waste
disposal company or your municipal waste
disposal facility. Please observe applicable regulations. Please contact your waste disposal facility if
you are in any doubt.
The packaging is made from environ-
mentally friendly material and can be
disposed of at your local recycling plant.
Importer
KOMPERNASS HANDELS GMBH
BURGSTRASSE 21
44867 BOCHUM
GERMANY
www.kompernass.com
8
SEMD 12 A1
Page 12

Recipes
NOTE
These recipes are provided without guar-
►
antee. All information on ingredients and
preparation is indicative only. Modify the
suggested recipes to taste.
► The recipes each provide enough mixture to
fi ll one beaker 8.
► The max. fi lling capacity of a beaker 8 pro-
duces around 2- 3 scoops of ice cream.
► We recommend beating the cream required
for the recipes in advance. As it can be diffi cult to beat such small quantities of cream,
we recommend beating more cream than you
require and using the excess to decorate the
fi nished ice cream later.
Vanilla ice cream
Ingredients
■ 170 ml full cream milk
■ 85 ml/85 g cream
■ 25 g icing sugar
■ 10 g vanilla sugar
Preparation
1) Beat the cream until it is slightly stiff .
2) Mix the cream with the milk, the vanilla sugar
and the icing sugar.
3) Allow the mixture to cool down to about 5 - 10°C
in the fridge.
Now you can process the mixture as described in
the instructions.
Strawberry ice cream
Ingredients
■ Approx. 120 g strawberries
■ 70 ml/70 g full cream milk
■ 60 ml/60 g cream
■ 30 g icing sugar
Preparation
1) Puree the strawberries.
2) Beat the cream until it is slightly stiff .
3) Mix the pureed strawberries with the cream,
the milk and the icing sugar.
4) Allow the mixture to cool down to about
5 - 10°C in the fridge.
Now you can process the mixture as described in
the instructions.
Banana ice cream
Ingredients
■ 1/2–1 bananas (approx. 75g)
■ 115 ml/115 g full cream milk
■ 55 ml/55 g cream
■ 35 g icing sugar
Preparation
1) Puree the bananas.
2) Beat the cream until it is slightly stiff .
3) Mix the pureed bananas with the cream, the
milk and the icing sugar.
4) Allow the mixture to cool down to about
5 - 10°C in the fridge.
Now you can process the mixture as described in
the instructions.
GB
SEMD 12 A1
9
Page 13

Mango ice cream
GB
Ingredients
■ 90 g mango fl esh
■ 90 ml/90 g full cream milk
■ 50 ml/50 g cream
■ 25 g icing sugar
Nut ice cream
Ingredients
■ 40 g nuts
■ 80 ml/80 g full cream milk
■ 60 ml/60 g cream
■ 50 g icing sugar
Preparation
1) Puree the mango.
2) Beat the cream until it is slightly stiff .
3) Mix the pureed mango with the cream, the milk
and the icing sugar.
4) Allow the mixture to cool down to about
5 - 10°C in the fridge.
Now you can process the mixture as described in
the instructions.
Preparation
1) Chop the nuts fi nely.
2) Beat the cream until it is slightly stiff .
3) Mix the milk, cream and powdered sugar.
4) Allow the mixture to cool down to about
5 - 10°C in the fridge.
5) Add the mixture to the appliance as described
in the section “Making ice cream”.
6) Wait approximately 5 minutes and then add
the fi nely chopped nuts gradually without
switching off the appliance.
7) Wait until the ice cream is ready.
10
SEMD 12 A1
Page 14

Spis treści
Wstęp. . . . . . . . . . . . . . . . . . . . . . . . . . . . . . . . . . . . . . . . . . . . . . . . . . . . . . . . . . 12
Użytkowanie zgodne z przeznaczeniem . . . . . . . . . . . . . . . . . . . . . . . . . . . . .12
Zakres dostawy . . . . . . . . . . . . . . . . . . . . . . . . . . . . . . . . . . . . . . . . . . . . . . . . . 12
Opis urządzania . . . . . . . . . . . . . . . . . . . . . . . . . . . . . . . . . . . . . . . . . . . . . . . . .12
Dane techniczne . . . . . . . . . . . . . . . . . . . . . . . . . . . . . . . . . . . . . . . . . . . . . . . . . 12
Wskazówki bezpieczeństwa . . . . . . . . . . . . . . . . . . . . . . . . . . . . . . . . . . . . . . . 13
Montaż . . . . . . . . . . . . . . . . . . . . . . . . . . . . . . . . . . . . . . . . . . . . . . . . . . . . . . . . 15
Czynności przygotowawcze . . . . . . . . . . . . . . . . . . . . . . . . . . . . . . . . . . . . . . . 15
Wyrabianie lodów . . . . . . . . . . . . . . . . . . . . . . . . . . . . . . . . . . . . . . . . . . . . . . . 16
Czyszczenie i konserwacja . . . . . . . . . . . . . . . . . . . . . . . . . . . . . . . . . . . . . . . .17
Przechowywanie . . . . . . . . . . . . . . . . . . . . . . . . . . . . . . . . . . . . . . . . . . . . . . . . 17
Gwarancja i serwis . . . . . . . . . . . . . . . . . . . . . . . . . . . . . . . . . . . . . . . . . . . . . . 18
Utylizacja . . . . . . . . . . . . . . . . . . . . . . . . . . . . . . . . . . . . . . . . . . . . . . . . . . . . . . 18
Importer . . . . . . . . . . . . . . . . . . . . . . . . . . . . . . . . . . . . . . . . . . . . . . . . . . . . . . . 18
Przepisy . . . . . . . . . . . . . . . . . . . . . . . . . . . . . . . . . . . . . . . . . . . . . . . . . . . . . . . . 19
Lody waniliowe . . . . . . . . . . . . . . . . . . . . . . . . . . . . . . . . . . . . . . . . . . . . . . . . . . . . . . . . . . . . . 19
Lody truskawkowe . . . . . . . . . . . . . . . . . . . . . . . . . . . . . . . . . . . . . . . . . . . . . . . . . . . . . . . . . . . 19
Lody bananowo-mleczne . . . . . . . . . . . . . . . . . . . . . . . . . . . . . . . . . . . . . . . . . . . . . . . . . . . . . . 19
Lody mleczne z mango . . . . . . . . . . . . . . . . . . . . . . . . . . . . . . . . . . . . . . . . . . . . . . . . . . . . . . . 20
Lody mleczne z orzechami . . . . . . . . . . . . . . . . . . . . . . . . . . . . . . . . . . . . . . . . . . . . . . . . . . . . 20
PL
SEMD 12 A1
11
Page 15

Wstęp
Serdecznie gratulujemy zakupu nowego urządzenia.
Wybrany produkt charakteryzuje się wysoką
jakością. Instrukcja obsługi jest częścią składową
produktu. Zawiera ona ważne informacje na
PL
temat bezpieczeństwa, użytkowania i utylizacji.
Przed rozpoczęciem użytkowania produktu należy
zapoznać się ze wszystkimi informacjami dotyczącymi obsługi i bezpieczeństwa. Produkt należy
użytkować wyłącznie zgodnie z zamieszczonym tu
opisem oraz w podanym zakresie zastosowań. W
przypadku przekazania urządzenia osobie trzeciej
należy dołączyć również całą dokumentację.
Opis urządzania
1 Włącznik/wyłącznik
2 Blok silnika
3 Wałki napędowe
4 Otwory do napełniania
5 Pokrywka
6 Końcówki łopatek do lodów
7 Łopatki do lodów
8 Kubek
9 Przełącznik obrotowy
0 Podstawa
Użytkowanie zgodne
z przeznaczeniem
Urządzenie jest przeznaczone wyłącznie do
mielenia wyrobu lodów mlecznych. Urządzenie
przeznaczone jest wyłącznie do stosowania w
gospodarstwie domowym. Nie należy go używać
do celów komercyjnych.
Zakres dostawy
Urządzenie do przyrządzania lodów DUO
Instrukcja obsługi
Dane techniczne
Napięcie znamionowe: 220 - 240 V ∼, 50 Hz
Pobór mocy: 12 W
Klasa ochrony: II
12
SEMD 12 A1
Page 16

Wskazówki bezpieczeństwa
NIEBEZPIECZEŃSTWO PORAŻENIA PRĄDEM ELEKTRYCZNYM
► Urządzenie podłączać wyłącznie do prawidłowo zainstalowanego gniazda
zasilania o napięciu 220 - 240 V~ / 50 Hz.
► Naprawę uszkodzonego wtyku lub kabla sieciowego zleć niezwłocznie
wykwalifi kowanemu specjaliście lub serwisowi, aby uniknąć wszelkich
zagrożeń.
► W razie pojawienia się jakichkolwiek zakłóceń w działaniu oraz przed
czyszczeniem urządzenia należy wyciągnąć wtyk z gniazda sieciowego.
► Wyciągając kabel sieciowy z gniazda, pociągaj zawsze za wtyk, a nie
za kabel.
► Kabla zasilającego nie zaginać ani zgniatać. Należy go ułożyć w taki
sposób, aby nikt nie mógł na niego nadepnąć ani się o niego potknąć.
► Nie należy narażać urządzenia na działanie wilgoci ani używać go na
otwartej przestrzeni. Jeśli już ciecz dostanie się do wnętrza obudowy
urządzenia, należy natychmiast wyciągnąć wtyk z gniazda sieciowego
i oddać urządzenie do naprawy przez specjalistę.
► Nigdy nie chwytać ani nie dotykać kabla ani wtyku sieciowego wilgotnymi
rękoma.
PL
► Nie wolno samodzielnie otwierać obudowy bloku silnika urządzenia.
Stanowi to poważne zagrożenie i powoduje wygaśnięcie gwarancji.
► Bezpośrednio po użyciu odłącz urządzenie od sieci elektrycznej. Jedynie
po wyciągnięciu wtyku z gniazda sieciowego uzyskujemy pewność, że
urządzenie nie znajduje się pod napięciem.
► Urządzenie stosować tylko wewnątrz pomieszczeń.
Bloku silnika urządzenia nie wolno zanurzać w żadnej cieczy ani
dopuszczać do przedostania się cieczy do jego obudowy.
SEMD 12 A1
13
Page 17

OSTRZEŻENIE! NIEBEZPIECZEŃSTWO ZRANIENIA!
► To urządzenie może być używane przez dzieci od 8. roku życia wyłącznie
pod nadzorem lub po przeszkoleniu w zakresie bezpiecznego używania
PL
urządzenia oraz wynikających z niego zagrożeń.
► Czyszczenia ani konserwacji przez użytkownika nie mogą wykonywać
dzieci, chyba że mają 8 lat lub więcej i są pod nadzorem.
► Urządzenie oraz jego przewód zasilający należy trzymać poza zasięgiem
dzieci w wieku poniżej 8 lat.
► To urządzenie może być używane przez osoby o zmniejszonych zdol-
nościach fi zycznych, sensorycznych lub umysłowych lub też osoby nieposiadające odpowiedniego doświadczenia i/lub wiedzy, wyłącznie
pod nadzorem lub po przeszkoleniu w zakresie bezpiecznego używania
urządzenia oraz wynikających z niego zagrożeń.
► Dzieciom nie wolno bawić się urządzeniem.
► Przy braku nadzoru oraz przed montażem, złożeniem, rozłożeniem lub
czyszczeniem należy zawsze odłączać urządzenie od zasilania sieciowego.
► Przed wymianą osprzętu lub elementów dodatkowych, które podczas
pracy są w ruchu, należy wyłączyć urządzenie i odłączyć je od sieci
elektrycznej.
14
SEMD 12 A1
Page 18

Montaż
Montaż należy wykonać na podstawie ilustracji na
rozkładanej stronie okładki.
1) Usuń z urządzenia całe opakowanie i ewentualnie naklejki.
2) Wyczyść urządzenie, patrz rozdział „Czyszczenie i pielęgnacja”.
3) Ustaw podstawę 0 na równym podłożu.
WSKAZÓWKA
Zawsze przestrzegaj kolejności montażu, po-
►
danej w tym rozdziale. W przeciwnym razie
niektóre części mogłyby być niepoprawnie
dopasowane.
4) Ustaw dwa kubki 8 na obu sześciokątach
w taki sposób, by uchwyty kubków 8 były
skierowane na zewnątrz.
5) Włóż obie łopatki do lodów 7 do zagłębień
w kubkach 8. Końcówki łopatek do lodów 6
muszą być skierowane do góry.
WSKAZÓWKA
Upewnij się, że przełącznik obrotowy 9 jest
►
ustawiony w położeniu
lub zdejmujesz pokrywkę 5.
6) Najpierw załóż pokrywkę 5 na kubki 8.
Dopilnuj przy tym, by końcówki łopatek do lodów 6 przeszły przez otwory w pokrywce 5.
, gdy zakładasz
7) Przestaw przełącznik obrotowy 9 do poło-
żenia
podnieść.
8) Umieść oba wałki napędowe 3 w sześciokątnych otworach w bloku silnika 2.
9) Ustaw blok silnika 2 na pokrywce w taki
sposób 5, by przewód zasilający był skierowany do tyłu. Wałki napędowe 3 muszą
poprawnie zazębić się końcówkami łopatek
do lodów 6.
10) Włóż wtyk sieciowy do gniazda sieciowego.
Teraz urządzenie jest gotowe do pracy.
. Pokrywki 5 nie będzie już można
Czynności przygotowawcze
♦ Włóż oba kubki 8 na ok. 8 - 12 godzin do za-
mrażarki przy temperaturze co najmniej -18°C.
RADY
Kubki 8 powinny stać w zamrażarce
►
pionowo.
► Przed włożeniem kubków 8 do zamrażarki
upewnij się, że są one całkowicie suche.
► Przed zamrożeniem włóż kubki 8 do
plastikowego woreczka, np. torebki do
zamrażania.
► Włóż owoce, mleko oraz śmietanę do lodówki
jeszcze przed ich wykorzystaniem. Będą zimne i mieszanka lodowa szybciej się schłodzi.
♦ Zmiksuj owoce blenderem i wymieszaj wszystkie
składniki zgodnie z przepisem.
♦ Schłodź mieszankę w lodówce do temperatury
ok. 5 - 10°C.
PL
SEMD 12 A1
15
Page 19
Wyrabianie lodów
UWAGA! SZKODY MATERIALNE!
► Najpierw uruchom urządzenie i dopiero
PL
potem dodaj składniki! W przeciwnym razie
masa lodowa natychmiast zamarznie na
ściankach kubków 8 i zablokuje łopatki do
lodów 7. Silnik ulegnie przegrzaniu!
UWAGA! SZKODY MATERIALNE!
► W trakcie wyrabiania masy w żadnym przy-
padku nie należy zatrzymywać urządzenia.
W przeciwnym razie masa lodowa natychmiast zamarznie na ściankach kubków 8 i
zablokuje łopatki do lodów 7 przy ponow-
nym uruchomieniu. Silnik ulegnie
przegrzaniu!
1) Wyjmij kubki 8 z zamrażarki i złóż urządzenie,
jak opisano w rozdz. "Montaż".
2) Włącz urządzenie, ustawiając przełącznik 1
w położeniu I. Obie łopatki do lodów 7
obracają się.
3) Teraz wlej przygotowaną masę lodową przez
otwory do napełniania 4 do kubków 8.
Najlepiej wykonać to z użyciem naczynia z
dzióbkiem. Do jednego kubka 8 nie wlewaj
więcej niż 300 ml masy lodowej. W trakcie
obróbki objętość masy zwiększy się!
WSKAZÓWKA
Można napełnić masą tylko jeden kubek 8.
►
Zawsze jednak trzeba zmontować urządzenie z dwoma kubkami.
WSKAZÓWKA
Może się zdarzyć, że łopatki do lodów 7
►
zmienią kierunek obrotów w trakcie pracy.
Zdarza się tak, gdy masa lodowa jest za
gęsta. Jest to jednak normalne zjawisko i nie
świadczy o uszkodzeniu urządzenia.
4) Niech urządzenie pracuje tak długo, aż konsystencja mieszaniny będzie zadowalająca.
Lody są gotowe najpóźniej po upływie 20 do
maks. 30 minut.
5) Wyłącz urządzenie za pomocą włącznika/
wyłącznika 1 i wyciągnij wtyk z gniazda.
6) Przestaw przełącznik obrotowy 9 do położe-
, by zdjąć pokrywę 5 z blokiem silnika 2.
nia
7) Wyjmij łopatki do lodów 7 z lodów. Jeżeli
lody przywierają do nich, oczyść je łopatką
czy podobnym przedmiotem.
8) Wyjmij kubki 8 z urządzenia i wyjmij z nich
lody. Używaj do tego tylko drewnianych lub
plastikowych przyrządów.
UWAGA! SZKODY MATERIALNE!
► Nie używaj żadnych metalowych przedmio-
tów do wyjęcia lodów z kubków 8!
WSKAZÓWKA
Jeżeli chcesz ponownie założyć pokrywkę 5
►
na kubki, musisz najpierw zdjąć blok silnika 2
z pokrywki 5. Postępuj przy tym tak, jak
opisano w rozdz. „Montaż”. W przeciwnym
razie może się zdarzyć, że wałki napędowe 3
nie trafi ą poprawnie na końcówki łopatek do
lodów 6.
16
SEMD 12 A1
Page 20
Czyszczenie i konserwacja
NIEBEZPIECZEŃSTWO PORAŻENIA
PRĄDEM ELEKTRYCZNYM
Przed czyszczeniem urządzenia wyciągnij
►
wtyk z gniazda sieciowego.
Bloku silnika urządzenia 2 nie wolno za-
nurzać w żadnej cieczy ani dopuszczać
do przedostania się cieczy do obudowy
bloku silnika 2.
UWAGA! SZKODY MATERIALNE!
► Nie używaj do czyszczenia urządzenia żad-
nych ściernych ani agresywnych chemicznych
środków czyszczących. Takie postępowanie
powoduje uszkodzenia powierzchni!
► Nie myj elementów urządzenia w zmywarce
do naczyń!
♦ Jeżeli urządzenie jest jeszcze zmontowane,
przed umyciem należy je rozmontować.
– Przestaw przełącznik obrotowy 9 do po-
łożenia
silnika 2.
– Obróć pokrywę 5 z blokiem silnika 2.
Naciśnij oba elementy aretujące bloku silnika
2, które wystają przez pokrywę 5, lekko
do wewnątrz i wyciśnij je jednocześnie z
pokrywy 5. Blok silnika 2 odczepi się
teraz od pokrywki 5.
– Wyciągnij wałki napędowe 3 z bloku
silnika 2.
– Wyjmij łopatki do lodów 7 z kubków 8.
– Wyjmij kubki 8 z podstawy 0.
, by zdjąć pokrywę 5 z blokiem
♦ Blok silnika 2 należy czyścić od zewnątrz po
każdym użyciu wilgotną szmatką. W przypadku zabrudzeń trudnych do usunięcia nanieś
na szmatkę kilka kropel łagodnego płynu do
mycia naczyń. Na koniec przetrzyj szmatką z
czystą wodą. Upewnij się, że w urządzeniu nie
pozostały resztki płynu do mycia oraz całkowicie
wysuszyć urządzenie przed ponownym użyciem.
♦ Przed umyciem odczekaj, aż kubki 8 osiągną
temperaturę pokojową.
Umyj kubki 8, wałki napędowe 3, łopatki do
lodów 7 i pokrywkę 5 w letniej wodzie z
dodatkiem płynu do mycia naczyń. Następnie
wypłucz te elementy w czystej wodzie, by
usunąć resztki środka do mycia naczyń.
♦ Blok silnika 0 wycierać zawsze wilgotną
szmatką. W przypadku zabrudzeń trudnych
do usunięcia nanieś na szmatkę kilka kropel
łagodnego płynu do mycia naczyń.
♦ Przed ponownym użyciem upewnij się, że
wszystkie elementy są dokładnie wysuszone.
Przechowywanie
♦ Przed przechowywaniem dokładnie wyczyść
urządzenie.
♦ Urządzenie należy przechowywać w czystym
i suchym miejscu.
PL
SEMD 12 A1
17
Page 21

Gwarancja i serwis
Urządzenie objęte jest trzyletnią gwarancją,
licząc od daty zakupu. Urządzenie zostało
starannie wykonane i przed wysyłką z zakładu
poddane skrupulatnej kontroli. Paragon należy
PL
zachować jako dowód zakupu. W przypadku
konieczności przeprowadzenia naprawy gwarancyjnej należy skontaktować się telefonicznie
z najbliższym punktem serwisowym. Tylko w
ten sposób można zagwarantować bezpłatną
wysyłkę zakupionego produktu.
Gwarancja obejmuje wyłącznie wady materiałowe i fabryczne, nie obejmuje natomiast szkód
transportowych, części ulegających zużyciu ani
uszkodzeń części łatwo łamliwych, np. wyłącznika
lub akumulatorów. Produkt przeznaczony jest wyłącznie do użytku domowego, a nie do zastosowań przemysłowych.
Niewłaściwe użytkowanie urządzenia, używanie
go w sposób niezgodny z jego przeznaczeniem,
użycie siły lub ingerencja w urządzenie, dokonywana poza naszymi autoryzowanymi punktami
serwisowymi powodują utratę gwarancji.
Niniejsza gwarancja nie ogranicza ustawowych
praw nabywcy urządzenia.
Wykonanie usługi gwarancyjnej nie przedłuża
okresu gwarancji. Dotyczy to również wymienionych i naprawionych części. Wszelkie szkody i
wady wykryte w chwili zakupu należy zgłosić
bezpośrednio po rozpakowaniu urządzenia, nie
później niż po upływie dwóch dni od daty zakupu.
Po upływie okresu gwarancji wszelkie naprawy są
wykonywane odpłatnie.
Serwis Polska
Tel.: 22 397 4996
E-Mail: kompernass@lidl.pl
IAN 111458
Czas pracy infolinii:
od poniedziałku do piątku, w godzinach 08:00 20:00 czasu środkowoeuropejskiego
Utylizacja
W żadnym przypadku nie
wolno wyrzucać urządzenia
wraz z normalnymi odpadami domowymi. Ten produkt
podlega dyrektywie europejskiej nr 2012/19/EU.
Zużyte urządzenie należy oddać do odpowiedniego zakładu utylizacji odpadów lub komunalnego
zakładu oczyszczania. Przestrzegać aktualnie obowiązujących przepisów. W razie pytań i wątpliwości odnośnie do zasad utylizacji należy zwrócić się
do najbliższego zakładu utylizacji odpadów.
Opakowanie urządzenia jest wyko-
nane z materiałów przyjaznych dla
środowiska naturalnego, które można
utylizować za pośrednictwem lokalnych
zakładów recyklingu odpadów.
Importer
KOMPERNASS HANDELS GMBH
BURGSTRASSE 21
44867 BOCHUM
GERMANY
www.kompernass.com
18
SEMD 12 A1
Page 22

Przepisy
Lody truskawkowe
WSKAZÓWKA
Przepisy bez gwarancji. Wszystkie składniki
►
i dane o przygotowaniu są wartościami
orientacyjnymi. Uzupełnij niniejsze przepisy
własnymi dodatkami.
► Ilość składników w przepisie odpowiada
ilości na jeden kubek 8.
► Maksymalna pojemność jednego kubka 8
wystarcza na 2 - 3 kulki lodów.
► Zalecamy ubicie śmietany, która ma być
użyta do wyrobu lodów. Ponieważ ubicie
tak małej ilości śmietany może być trudne,
zalecamy ubicie większej ilości śmietany,
której nadwyżkę można potem wykorzystać
do udekorowania lodów.
Lody waniliowe
Składniki
■ 170 ml mleka pełnego
■ 85 ml/85 g śmietany
■ 25 g cukru-pudru
■ 10 g cukru waniliowego
Przygotowanie
1) Ubij śmietanę, by stała się nieco bardziej
zawiesista.
2) Wymieszaj śmietanę z mlekiem, cukrem waniliowym i cukrem-pudrem.
3) Schłodź masę lodową w lodówce do temperatury ok. 5 - 10 °C.
Teraz można wyrobić lody, jak opisano wcześniej
w instrukcji.
Składniki
■ ok. 120 g truskawek
■ 70 ml/70 g mleka pełnego
■ 60 ml/60 g śmietany
■ 30 g cukru-pudru
Przygotowanie
1) Zmiksuj truskawki blenderem.
2) Ubij śmietanę, by stała się nieco bardziej
zawiesista.
3) Wymieszaj zmiksowane truskawki ze śmietaną,
z mlekiem, cukrem waniliowym i cukrem-pudrem.
4) Schłodź masę lodową w lodówce do temperatury ok. 5 - 10 °C.
Teraz można wyrobić lody, jak opisano wcześniej
w instrukcji.
Lody bananowo-mleczne
Składniki
■ 1/2 lub cały banan (ok. 75 g)
■ 115 ml/115 g mleka pełnego
■ 55 ml/55 g śmietany
■ 35 g cukru-pudru
Przygotowanie
1) Zmiksuj banana blenderem.
2) Ubij śmietanę, by stała się nieco bardziej
zawiesista.
3) Wymieszaj zmiksowanego banana ze śmietaną,
z mlekiem, cukrem waniliowym i cukrem-pudrem.
4) Schłodź masę lodową w lodówce do temperatury ok. 5 - 10 °C.
Teraz można wyrobić lody, jak opisano wcześniej
w instrukcji.
PL
SEMD 12 A1
19
Page 23

Lody mleczne z mango
Lody mleczne z orzechami
Składniki
■ 90 g miąższu z owocu mango
■ 90 ml/90 g mleka pełnego
PL
■ 50 ml/50 g śmietany
■ 25 g cukru-pudru
Przygotowanie
1) Zmiksuj miąższ z mango blenderem.
2) Ubij śmietanę, by stała się nieco bardziej
zawiesista.
3) Wymieszaj zmiksowany miąższ z mango ze
śmietaną, z mlekiem, cukrem waniliowym i
cukrem-pudrem.
4) Schłodź masę lodową w lodówce do temperatury ok. 5 - 10 °C.
Teraz można wyrobić lody, jak opisano wcześniej
w instrukcji.
Składniki
■ 40 g orzechów
■ 80 ml/80 g mleka pełnego
■ 60 ml/60 g śmietany
■ 50 g cukru-pudru
Przygotowanie
1) Rozdrobnij orzechy.
2) Ubij śmietanę, by stała się nieco bardziej
zawiesista.
3) Wymieszaj mleko, śmietanę i cukier-puder.
4) Schłodź masę lodową w lodówce do temperatury ok. 5 - 10 °C.
5) Po schłodzeniu wlej masę lodową do urządzenia, jak opisano w rozdz. „Wyrabianie
lodów”.
6) Odczekaj ok. 5 minut i nie wyłączając urządzenia, dodawaj stopniowo rozdrobnione
orzechy do urządzenia.
7) Odczekaj, aż lody będą gotowe.
20
SEMD 12 A1
Page 24

Kazalo
Uvod . . . . . . . . . . . . . . . . . . . . . . . . . . . . . . . . . . . . . . . . . . . . . . . . . . . . . . . . . . 22
Predvidena uporaba . . . . . . . . . . . . . . . . . . . . . . . . . . . . . . . . . . . . . . . . . . . . . 22
Vsebina kompleta . . . . . . . . . . . . . . . . . . . . . . . . . . . . . . . . . . . . . . . . . . . . . . . 22
Opis naprave . . . . . . . . . . . . . . . . . . . . . . . . . . . . . . . . . . . . . . . . . . . . . . . . . . . 22
Tehnični podatki . . . . . . . . . . . . . . . . . . . . . . . . . . . . . . . . . . . . . . . . . . . . . . . . . 22
Varnostni napotki . . . . . . . . . . . . . . . . . . . . . . . . . . . . . . . . . . . . . . . . . . . . . . . . 23
Sestava . . . . . . . . . . . . . . . . . . . . . . . . . . . . . . . . . . . . . . . . . . . . . . . . . . . . . . . . 25
Priprave . . . . . . . . . . . . . . . . . . . . . . . . . . . . . . . . . . . . . . . . . . . . . . . . . . . . . . . . 25
Izdelava sladoleda . . . . . . . . . . . . . . . . . . . . . . . . . . . . . . . . . . . . . . . . . . . . . . . 26
Čiščenje in vzdrževanje . . . . . . . . . . . . . . . . . . . . . . . . . . . . . . . . . . . . . . . . . . . 27
Shranjevanje . . . . . . . . . . . . . . . . . . . . . . . . . . . . . . . . . . . . . . . . . . . . . . . . . . . . 27
Proizvajalec . . . . . . . . . . . . . . . . . . . . . . . . . . . . . . . . . . . . . . . . . . . . . . . . . . . . 28
Servis . . . . . . . . . . . . . . . . . . . . . . . . . . . . . . . . . . . . . . . . . . . . . . . . . . . . . . . . . . 28
Garancijski list . . . . . . . . . . . . . . . . . . . . . . . . . . . . . . . . . . . . . . . . . . . . . . . . . . 28
Odstranjevanje med odpadke . . . . . . . . . . . . . . . . . . . . . . . . . . . . . . . . . . . . . 28
Recepti . . . . . . . . . . . . . . . . . . . . . . . . . . . . . . . . . . . . . . . . . . . . . . . . . . . . . . . . . 29
Vaniljev sladoled . . . . . . . . . . . . . . . . . . . . . . . . . . . . . . . . . . . . . . . . . . . . . . . . . . . . . . . . . . . . 29
Mlečni jagodni sladoled . . . . . . . . . . . . . . . . . . . . . . . . . . . . . . . . . . . . . . . . . . . . . . . . . . . . . . 29
Mlečni bananin sladoled . . . . . . . . . . . . . . . . . . . . . . . . . . . . . . . . . . . . . . . . . . . . . . . . . . . . . . 29
Mlečni mangov sladoled . . . . . . . . . . . . . . . . . . . . . . . . . . . . . . . . . . . . . . . . . . . . . . . . . . . . . . 30
Mlečni lešnikov sladoled . . . . . . . . . . . . . . . . . . . . . . . . . . . . . . . . . . . . . . . . . . . . . . . . . . . . . . 30
SI
SEMD 12 A1
21
Page 25

Uvod
Iskrene čestitke ob nakupu vaše nove naprave.
Odločili ste se za kakovosten izdelek. Navodila
za uporabo so sestavni del izdelka. Vsebujejo
pomembne napotke za varnost, uporabo in odstranjevanje naprave med odpadke. Preden začnete
izdelek uporabljati, se seznanite z vsemi napotki o
njegovi uporabi in varnosti. Izdelek uporabljajte le
SI
tako, kot je opisano v navodilih, in samo za navedena
področja uporabe. Ob predaji izdelka tretji osebi
zraven priložite vso dokumentacijo.
Predvidena uporaba
Ta naprava je namenjena izključno za izdelavo
mlečnega sladoleda. Naprava je namenjena
izključno za uporabo v zasebnih gospodinjstvih.
Ne uporabljajte je v poslovne namene.
Vsebina kompleta
DUO-aparat za pripravo sladoleda
Navodila za uporabo
Opis naprave
1 stikalo za vklop/izklop
2 blok motorja
3 pogonski gredi
4 odprtini za dolivanje
5 pokrov
6 sprejemna nastavka pogonskih gredi
7 strgali za sladoled
8 lončka
9 vrtljivo stikalo
0 podstavek
Tehnični podatki
Nazivna napetost: 220 - 240V~, 50Hz
Priključna moč: 12 W
Razred zaščite: II
22
SEMD 12 A1
Page 26

Varnostni napotki
NEVARNOST ELEKTRIČNEGA UDARA
► Napravo priključite samo na po predpisih vgrajeno električno vtičnico z
napetostjo 220 - 240V~, 50Hz.
► Da se izognete nevarnostim, naj vam poškodovane električne vtiče ali elek-
trične kable takoj zamenjajo pooblaščeni strokovnjaki ali servisna služba.
► V primeru motenj pri delovanju in pred začetkom čiščenja naprave potegnite
električni vtič iz električne vtičnice.
► Električni kabel iz električne vtičnice vedno potegnite za vtič, ne vlecite
samega kabla.
► Električnega kabla ne prepogibajte ali stiskajte in ga speljite tako, da nihče
ne more stopiti nanj ali se spotakniti čezenj.
► Naprave ne smete izpostavljati vlagi in je uporabljati na prostem. Če bi
v ohišje naprave vseeno pritekla tekočina, električni vtič naprave takoj
potegnite iz električne vtičnice in napravo dajte v popravilo usposobljenim
strokovnjakom.
► Električnega kabla ali električnega vtiča se nikoli ne dotikajte z mokrimi
rokami.
► Bloka motorja naprave ne smete odpirati. V tem primeru varnost ni zagotov-
ljena in jamstvo preneha veljati.
SI
► Napravo takoj po uporabi ločite od električnega omrežja. Naprava je v
celoti brez elektrike, samo če električni vtič potegnete iz električne vtičnice.
► Napravo uporabljajte samo v notranjih prostorih.
Bloka motorja naprave nikakor ne smete potopiti v tekočino ali dovoliti,
da v ohišje bloka motorja vdre kakršna koli tekočina.
SEMD 12 A1
23
Page 27

OPOZORILO! NEVARNOST TELESNE POŠKODBE!
► Otroci od 8. leta starosti naprej lahko to napravo uporabljajo le, če jih pri
tem nekdo nadzoruje ali jih je poučil o varni uporabi naprave in so razumeli
nevarnosti, ki izhajajo iz uporabe naprave.
► Otroci ne smejo izvajati čiščenja in uporabniškega vzdrževanja naprave,
SI
razen če so stari 8 let in več ter pod nadzorom.
► Napravo in njene električne kable je treba hraniti zunaj dosega otrok,
mlajših od 8 let.
► Osebe z omejenimi fi zičnimi, zaznavnimi ali duševnimi sposobnostmi ali s
pomanjkljivimi izkušnjami in/ali znanjem lahko to napravo uporabljajo le,
če jih pri tem nekdo nadzoruje ali jih je poučil o varni uporabi naprave in
so razumele nevarnosti, ki izhajajo iz uporabe naprave.
► Otroci se z napravo ne smejo igrati.
► Kadar naprava ni pod nadzorom in preden jo začnete sestavljati, razstavljati
ali čistiti, jo vedno ločite od omrežja.
► Pred menjavanjem pribora ali dodatnih delov, ki se med delovanjem premi-
kajo, mora biti naprava izklopljena in izključena iz električnega omrežja.
24
SEMD 12 A1
Page 28

Sestava
Pri sestavljanju si pomagajte s slikami na razklopni
strani.
1) Z naprave odstranite vse embalažne materiale
in morebitne nalepke.
2) Napravo očistite, kot je opisano v poglavju
»Čiščenje in vzdrževanje«.
3) Postavite podstavek 0 na ravno podlago.
NAPOTEK
Vedno upoštevajte zaporedje sestavljanja,
►
opisano v tem poglavju. Drugače se nekateri
deli ne bodo pravilno spojili med seboj.
4) Postavite lončka 8 na oba šesteroroba nastav-
ka, tako da ročaja lončkov 8 kažeta navzven.
5) Vtaknite strgali za sladoled 7 v vdolbini v
lončkih 8. Pri tem morata sprejemna nastavka
pogonskih gredi 6 kazati navzgor.
NAPOTEK
►
Zagotovite, da je vrtljivo stikalo 9 na , kadar
nameščate ali odstranjujete pokrov 5.
6) Najprej namestite pokrov 5 na lončka 8.
Pri tem pazite na to, da sprejemna nastavka
pogonskih gredi 6 segata skozi odprtini na
pokrovu 5.
7) Obrnite vrtljivo stikalo 9 v položaj .
Pokrova 5 sedaj ni več mogoče dvigniti.
8) Vtaknite pogonski gredi 3 v šestkotni luknji
na bloku motorja 2.
9) Namestite blok motorja 2 na pokrov 5, tako
da električni kabel kaže nazaj. Pogonski gredi
3 morata biti pravilno vtaknjeni v sprejemna
nastavka pogonskih gredi 6.
10) Električni vtič priklopite v električno vtičnico.
Naprava je zdaj pripravljena za uporabo.
Priprave
♦ Položite lončka 8 za pribl. 8–12 ur v zamrzo-
valnik/zamrzovalno skrinjo pri najmanj –18°C.
NASVETI
Lončka 8 v zamrzovalniku/zamrzovalni
►
skrinji hranite v pokončnem položaju.
► Preden postavite lončka 8 v zamrzovalnik/
zamrzovalno skrinjo, poskrbite, da sta popolnoma suha.
► Preden lončka 8 zamrznete, ju dajte v
plastično vrečko, na primer v vrečko za
zamrzovanje.
► Sadje, mleko in smetano še pred obdelavo
dajte v hladilnik. Tako je sadje že hladno in
mešanica za sladoled ne potrebuje dolgo,
da se tudi sama ohladi.
♦ Sadje pretlačite s paličnim mešalnikom in vse
sestavine zmešajte v skladu z receptom.
♦ Mešanico pustite v hladilniku, da se ohladi na
pribl. 5–10°C.
SI
SEMD 12 A1
25
Page 29

Izdelava sladoleda
POZOR! MATERIALNA ŠKODA!
► Vedno najprej zaženite napravo, nato pa
vanjo dajte sestavine! Drugače se sladoledna
masa takoj primrzne na stene lončka 8 in
strgalo za sladoled 7 zablokira. Pri tem pa
SI
se motor pregreje!
POZOR! MATERIALNA ŠKODA!
► Med postopkom obdelave naprave nikoli ne
zaustavite. Drugače se sladoledna masa takoj primrzne na stene lončka 8 in strgalo za
sladoled 7 pri vnovičnem vklopu zablokira.
Pri tem pa se motor pregreje!
1) Vzemite lončka 8 iz zamrzovalnika/zamr-
zovalne skrinje in napravo sestavite, kot je
opisano v poglavju »Sestava«.
2) Vklopite napravo, tako da stikalo za vklop/
izklop 1 preklopite v položaj I. Strgali za
sladoled 7 se obračata.
3) Sedaj dajte pripravljeno mešanico za sladoled
skozi odprtini za dolivanje 4 v lončka 8.
Pri tem bo najbolje uporabiti posodo z nastavkom za izlivanje. V vsak lonček 8 lahko nalijete
največ 300ml. Med obdelavo se volumen
mase poveča!
NAPOTEK
Sestavine lahko daste tudi samo v en lonček 8.
►
V napravo pa vedno vstavite oba lončka.
NAPOTEK
Lahko se zgodi, da strgali za sladoled 7
►
med obdelavo spremenita smer vrtenja.
To se zgodi, ko sladoledna masa postane
pregosta. To je normalno in ne predstavlja
okvare naprave.
4) Napravo pustite delovati tako dolgo, dokler
niste zadovoljni s konsistenco mešanice. Čez
najkasneje 20 do največ 30 minut je sladoled
pripravljen.
5) Napravo izklopite s stikalom za vklop/izklop 1
in potegnite električni vtič iz vtičnice.
6) Prestavite vrtljivo stikalo 9 na
odstranite pokrov 5 z blokom motorja 2.
7) Potegnite strgali za sladoled 7 iz sladoleda.
Če je nanju prilepljen sladoled, ga odstranite
s plastično žlico ali podobnim.
8) Vzemite lončka 8 iz naprave in iz njiju odstra-
nite sladoled. V ta namen izključno uporabljajte
plastični ali leseni pribor.
POZOR! MATERIALNA ŠKODA!
► Za jemanje sladoleda iz lončkov 8 ne uporab-
ljajte kovinskega pribora!
NAPOTEK
Ko želite pokrov 5 znova namestiti na lončka,
►
morate najprej ločiti blok motorja 2 od po-
krova 5. Potem znova sledite opisu v poglavju »Sestava«. Drugače se lahko zgodi, da
pogonski gredi 3 ne zdrsneta pravilno
v sprejemna nastavka pogonskih gredi 6.
, da lahko
26
SEMD 12 A1
Page 30

Čiščenje in vzdrževanje
NEVARNOST ELEKTRIČNEGA UDARA
Pred čiščenjem naprave vedno prej povlecite
►
električni vtič iz električne vtičnice.
Bloka motorja 2 nikakor ne smete potopiti
v tekočino ali dovoliti, da v ohišje bloka
motorja 2 vdre kakršna koli tekočina.
POZOR! MATERIALNA ŠKODA!
► Ne uporabljajte agresivnih, ostrih ali kemičnih
čistil za čiščenje naprave. To bi privedlo do
poškodb površine!
► Delov te naprave ne čistite v pomivalnem
stroju!
♦ Za čiščenje napravo razstavite, če je še sestav-
ljena:
– Prestavite vrtljivo stikalo 9 na , da lahko
odstranite pokrov 5 z blokom motorja 2.
– Zasukajte pokrov 5 z blokom motorja 2.
Potisnite oba zaskočna nastavka bloka motorja 2, ki segata skozi pokrov 5, narahlo
navznoter in ju istočasno potisnite ven iz
pokrova 5. Blok motorja 2 se sedaj loči
od pokrova 5.
– Potegnite pogonski gredi 3 iz bloka
motorja 2.
– Vzemite strgali za sladoled 7 iz lončkov 8.
– Vzemite lončka 8 s podstavka 0.
♦ Po vsaki uporabi očistite blok motorja 2 z
vlažno krpo. V primeru trdovratne umazanije
na krpo dajte nekaj kapljic blagega sredstva za
pomivanje. Potem napravo obrišite s krpo s čisto
vodo. Zagotovite, da na napravi ni ostankov
sredstva za pomivanje in da je naprava pred
ponovno uporabo povsem suha.
♦ Pred začetkom čiščenja počakajte, da se lončka
8 segrejeta na sobno temperaturo.
Pomijte lončka 8, pogonski gredi 3, strgali za
sladoled 7 in pokrov 5 v mlačni vodi z malce
sredstva za pomivanje Vse dele še enkrat pomijte
s čisto vodo, da zagotovite, da so vsi ostanki
sredstva za pomivanje odstranjeni.
♦ Obrišite podstavek 0 z vlažno krpo. V primeru
trdovratne umazanije dajte na krpo nekaj kapljic
blagega sredstva za pomivanje.
♦ Poskrbite, da so pred vnovično uporabo vsi deli
znova popolnoma suhi.
Shranjevanje
♦ Napravo pred shranjevanjem temeljito očistite.
♦ Napravo hranite na čistem in suhem mestu.
SI
SEMD 12 A1
27
Page 31

Proizvajalec
KOMPERNASS HANDELS GMBH
BURGSTRASSE 21
44867 BOCHUM
GERMANY
www.kompernass.com
SI
Servis
Servis Slovenija
Tel.: 080080917
E-Mail: kompernass@lidl.si
IAN 111458
Dosegljivost telefonske službe za stranke:
Od ponedeljka do petka od 8:00 do 20:00 (po
srednjeevropskem času)
Garancijski list
1. S tem garancijskim listom jamčimo Kompernass Handels GmbH, da bo izdelek v
garancijskem roku ob normalni in pravilni
uporabi brezhibno deloval in se zavezujemo,
da bomo ob izpolnjenih spodaj navedenih
pogojih odpravili morebitne pomanjkljivosti in
okvare zaradi napak v materialu ali izdelavi
oz. po svoji presoji izdelek zamenjali ali vrnili
kupnino.
2. Garancija je veljavna na ozemlju Republike
Slovenije.
3. Garancijski rok za proizvod je 3 leta od
dneva nabave.
4. Kupec je dolžan okvaro javiti pooblaščenemu
servisu oz. se informirati o nadaljnjih postopkih
na zgoraj navedeni telefonski številki. Svetujemo vam, da pred tem natančno preberete
navodila o sestavi in uporabi izdelka.
5. Kupec je dolžan pooblaščenemu servisu
predložiti garancijski list in račun, kot potrdilo
in dokazilo o nakupu.
6. V primeru, da proizvod popravlja nepooblaščeni servis ali oseba, kupec ne more
uveljavljati zahtevkov iz te garancije.
7. Vzroki za okvaro oz. nedelovanje izdelka
morajo biti lastnosti stvari same, in ne vzroki,
ki so zunaj proizvajalčeve oz. prodajalčeve
sfere. Kupec ne more uveljavljati zahtevkov iz
te garancije, če se ni držal priloženih navodil
za sestavo in uporabo izdelka ali, če je izdelek
kakorkoli spremenjen ali nepravilno vzdrževan.
8. Jamčimo servisiranje in rezervne dele za
minimalno dobo, ki je zahtevana s strani
zakonodaje.
9. Obrabni deli oz. potrošni material so izvzeti iz
garancije.
10. Vsi potrebni podatki za uveljavljanje garancije
se nahajajo na dveh ločenih dokumentih
(garancijski list, račun).
11. Ta garancija proizvajalca ne izključuje pravic
potrošnika, ki izhajajo iz odgovornosti prodajalca za napake na blagu.
Prodajalec:
Lidl d.o.o.k.d., Pod lipami 1, SI-1218 Komenda
Odstranjevanje med odpadke
Naprave nikakor ne
odvrzite med običajne
gospodinjske odpadke.
Za izdelek velja evropska
direktiva 2012/19/EU.
Napravo oddajte pri podjetju, registriranem za odstranjevanje odpadkov, ali pri svojem komunalnem
podjetju za odstranjevanje odpadkov. Upoštevajte
trenutno veljavne predpise. V primeru dvoma se
obrnite na najbližje podjetje za odstranjevanje
odpadkov.
Embalaža je iz okolju prijaznih mate-
rialov in jo lahko oddate na lokalnih
zbirališčih reciklažnih odpadkov.
28
SEMD 12 A1
Page 32

Recepti
Mlečni jagodni sladoled
NAPOTEK
Vsi recepti so brez zagotovila za uspeh. Vsi
►
podatki o sestavinah in pripravi so približni.
Predloge receptov dopolnite s svojimi izkušnjami.
► Vsak recept obsega količine za en lonček 8
sladoleda.
► Največja možna vsebina enega lončka 8
zadostuje za pribl. 2 - 3 kepici sladoleda.
► Priporočamo, da smetano iz receptov pred
uporabo stepete. Ker pa je tako majhne
količine smetane le s težavo mogoče stepsti,
priporočamo, da stepete več smetane, kot
je potrebujete, in ostanek stepene smetane
pozneje uporabite za okrasitev narejenega
sladoleda.
Vaniljev sladoled
Sestavine
■ 170 ml polnomastnega mleka
■ 85 ml/85 g smetane
■ 25 g sladkorja v prahu
■ 10 g vaniljevega sladkorja
Priprava
1) Stepite smetano, da postane delno trdna.
2) Smetani primešajte mleko, vaniljev sladkor in
sladkor v prahu.
3) Sladoledno maso pustite v hladilniku, da se
ohladi na pribl. 5 - 10°C.
Sedaj lahko iz sladoledne mase izdelate sladoled,
kot je opisano zgoraj v navodilih.
Sestavine
■ pribl. 120 g jagod
■ 70 ml/70 g polnomastnega mleka
■ 60 ml/60 g smetane
■ 30 g sladkorja v prahu
Priprava
1) Pretlačite jagode, da dobite jagodno kašo.
2) Stepite smetano, da postane delno trdna.
3) Pomešajte jagodno kašo s smetano, dodajte
mleko in sladkor v prahu.
4) Sladoledno maso pustite v hladilniku, da se
ohladi na pribl. 5 - 10°C.
Sedaj lahko iz sladoledne mase izdelate sladoled,
kot je opisano zgoraj v navodilih.
Mlečni bananin sladoled
Sestavine
■ 1/2 - 1 banana (pribl. 75 g)
■ 115 ml/115 g polnomastnega mleka
■ 55 ml/55 g smetane
■ 35 g sladkorja v prahu
Priprava
1) Pretlačite banano, da dobite bananino kašo.
2) Stepite smetano, da postane delno trdna.
3) Pomešajte bananino kašo s smetano, dodajte
mleko in sladkor v prahu.
4) Sladoledno maso pustite v hladilniku, da se
ohladi na pribl. 5 - 10°C.
Sedaj lahko iz sladoledne mase izdelate sladoled,
kot je opisano zgoraj v navodilih.
SI
SEMD 12 A1
29
Page 33

Mlečni mangov sladoled
Mlečni lešnikov sladoled
Sestavine
■ 90 g manga (sadeža)
■ 90 ml/90 g polnomastnega mleka
■ 50 ml/50 g smetane
■ 25 g sladkorja v prahu
SI
Priprava
1) Pretlačite sadež, da dobite mangovo kašo.
2) Stepite smetano, da postane delno trdna.
3) Pomešajte mangovo kašo s smetano, dodajte
mleko in sladkor v prahu.
4) Sladoledno maso pustite v hladilniku, da se
ohladi na pribl. 5–10°C.
Sedaj lahko iz sladoledne mase izdelate sladoled,
kot je opisano zgoraj v navodilih.
Sestavine
■ 40 g lešnikov
■ 80 ml/80 g polnomastnega mleka
■ 60 ml/60 g smetane
■ 50 g sladkorja v prahu
Priprava
1) Sesekljajte lešnike.
2) Stepite smetano, da postane delno trdna.
3) Zmešajte mleko, smetano in sladkor v prahu.
4) Sladoledno maso pustite v hladilniku, da se
ohladi na pribl. 5–10°C.
5) Ko se sladoledna masa ohladi, jo dajte v
napravo, kot je opisano v poglavju »Izdelava
sladoleda«.
6) Počakajte pribl. 5 minut in v napravo počasi
dajajte lešnike, pri tem mora biti naprava
vklopljena.
7) Počakajte, da naprava izdela sladoled.
30
SEMD 12 A1
Page 34

Obsah
Úvod . . . . . . . . . . . . . . . . . . . . . . . . . . . . . . . . . . . . . . . . . . . . . . . . . . . . . . . . . . 32
Použití vsouladu surčením . . . . . . . . . . . . . . . . . . . . . . . . . . . . . . . . . . . . . . . . 32
Rozsah dodávky . . . . . . . . . . . . . . . . . . . . . . . . . . . . . . . . . . . . . . . . . . . . . . . . . 32
Popis přístroje . . . . . . . . . . . . . . . . . . . . . . . . . . . . . . . . . . . . . . . . . . . . . . . . . . . 32
Technické údaje . . . . . . . . . . . . . . . . . . . . . . . . . . . . . . . . . . . . . . . . . . . . . . . . . 32
Bezpečnostní pokyny . . . . . . . . . . . . . . . . . . . . . . . . . . . . . . . . . . . . . . . . . . . . . 33
Sestavení . . . . . . . . . . . . . . . . . . . . . . . . . . . . . . . . . . . . . . . . . . . . . . . . . . . . . . . 35
Příprava . . . . . . . . . . . . . . . . . . . . . . . . . . . . . . . . . . . . . . . . . . . . . . . . . . . . . . . 35
Výroba zmrzliny . . . . . . . . . . . . . . . . . . . . . . . . . . . . . . . . . . . . . . . . . . . . . . . . . 36
Čištění a údržba . . . . . . . . . . . . . . . . . . . . . . . . . . . . . . . . . . . . . . . . . . . . . . . . . 37
Skladování . . . . . . . . . . . . . . . . . . . . . . . . . . . . . . . . . . . . . . . . . . . . . . . . . . . . . 37
Záruka a servis . . . . . . . . . . . . . . . . . . . . . . . . . . . . . . . . . . . . . . . . . . . . . . . . . . 38
Likvidace . . . . . . . . . . . . . . . . . . . . . . . . . . . . . . . . . . . . . . . . . . . . . . . . . . . . . . . 38
Dovozce . . . . . . . . . . . . . . . . . . . . . . . . . . . . . . . . . . . . . . . . . . . . . . . . . . . . . . . . 38
Recepty . . . . . . . . . . . . . . . . . . . . . . . . . . . . . . . . . . . . . . . . . . . . . . . . . . . . . . . . 39
Vanilková zmrzlina . . . . . . . . . . . . . . . . . . . . . . . . . . . . . . . . . . . . . . . . . . . . . . . . . . . . . . . . . . . 39
Jahodová mléčná zmrzlina . . . . . . . . . . . . . . . . . . . . . . . . . . . . . . . . . . . . . . . . . . . . . . . . . . . . 39
Banánová mléčná zmrzlina . . . . . . . . . . . . . . . . . . . . . . . . . . . . . . . . . . . . . . . . . . . . . . . . . . . . 39
Mangová mléčná zmrzlina . . . . . . . . . . . . . . . . . . . . . . . . . . . . . . . . . . . . . . . . . . . . . . . . . . . . 40
Ořechová mléčná zmrzlina . . . . . . . . . . . . . . . . . . . . . . . . . . . . . . . . . . . . . . . . . . . . . . . . . . . . 40
CZ
SEMD 12 A1
31
Page 35

Úvod
Gratulujeme vám kzakoupení nového přístroje.
Rozhodli jste se pro vysoce kvalitní výrobek. Návod
kobsluze je součástí tohoto výrobku. Obsahuje
důležité informace obezpečnosti, použití a likvidaci.
Před použitím výrobku se prosím dobře seznamte
se všemi provozními a bezpečnostními pokyny. Výrobek používejte pouze předepsaným způsobem
a pro uvedené oblasti použití. Při předávání výrobku
třetím osobám předejte spolu sním i tyto podklady.
CZ
Použití vsouladu surčením
Tento přístroj je určen výhradně kvýrobě mléčné
zmrzliny. Tento přístroj je určen výhradně kpoužití
vdomácnostech pro soukromé účely. Není určen
ke komerčnímu použití.
Rozsah dodávky
DUO zmrzlinovač
návod kobsluze
Popis přístroje
1 vypínač
2 motorový blok
3 hnací hřídele
4 plnicí otvory
5 víko
6 upínání hnacích hřídelí
7 mixovací lopatky
8 pohárky
9 otočný spínač
0 základna
Technické údaje
Jmenovité napětí: 220 - 240V ∼, 50Hz
Příkon: 12 W
Třída ochrany: II
32
SEMD 12 A1
Page 36

Bezpečnostní pokyny
NEBEZPEČÍ ÚRAZU ELEKTRICKÝM PROUDEM
► Přístroj zapojte výhradně do síťové zásuvky instalované dle předpisů, se
síťovým napětím 220 - 240V ~, 50Hz.
► Poškozené zástrčky nebo poškozený síťový kabel nechte ihned vyměnit auto-
rizovaným odborným personálem nebo zákaznickým servisem – vyhnete
se tím nebezpečí.
► Vpřípadě provozních poruch a před čištěním přístroje vytahujte zástrčku ze
síťové zásuvky.
► Síťový kabel vytahujte ze zásuvky vždy za zástrčku, nikdy ne za samotný
kabel.
► Síťový kabel se nesmí ohýbat ani stlačovat a musí se položit tak, aby na něj
nikdo nemohl stoupnout ani oněj zakopnout.
► Přístroj nevystavujte vlhkosti ani jej nepoužívejte venku. Pokud přesto do
pouzdra přístroje vnikne kapalina, vytáhněte ihned zástrčku přístroje ze síťové
zásuvky a nechte přístroj opravit kvalifi kovaným odborným personálem.
► Síťový kabel či síťovou zástrčku nikdy nechytejte mokrýma rukama.
► Motorový blok přístroje se nesmí otvírat. Vtakovém případě není zaručena
bezpečnost a zaniká záruka.
► Ihned po použití odpojte přístroj od elektrické sítě. Pouze tehdy, je-li síťová
zástrčka vytažena ze síťové zásuvky, je přístroj plně odpojen od proudu.
► Používejte přístroj pouze ve vnitřních prostorách.
Motorový blok přístroje nesmíte vžádném případě namáčet do tekutin
a také se nesmí dostat žádné kapaliny do krytu motorového bloku.
CZ
SEMD 12 A1
33
Page 37

VÝSTRAHA! NEBEZPEČÍ ZRANĚNÍ!
► Děti od 8let mohou používat tento přístroj pouze tehdy, pokud jsou pod
dohledem nebo pokud byly poučeny ojeho bezpečném používání a
porozuměly ztoho vyplývajícímu nebezpečí.
► Děti nesmí provádět uživatelské čištění ani údržbu, ledaže jsou starší 8let
a jsou pod dohledem.
► Děti mladší 8let nesmí mít přístup kpřístroji a přívodnímu kabelu.
CZ
► Osoby somezenými fyzickými, smyslovými nebo mentálními schopnostmi
či nedostatkem zkušeností a/nebo znalostí mohou používat tento přístroj
pouze tehdy, pokud jsou pod dohledem nebo pokud byly poučeny obezpečném používání přístroje a porozuměly ztoho vyplývajícímu nebezpečí.
► Děti si nesmí spřístrojem hrát.
► Přístroj se při chybějícím dohledu a před montáží, demontáží nebo čištěním
musí vždy odpojit od sítě.
► Před výměnou příslušenství nebo dodatečných dílů, které se během provozu
pohybují, musí být přístroj vypnutý a odpojený od elektrické sítě.
34
SEMD 12 A1
Page 38

Sestavení
Při sestavování se řiďte obrázky na výklopné
stránce.
1) Odstraňte zpřístroje všechen obalový materiál
a případné nálepky.
2) Přístroj vyčistěte tak, jak je uvedeno vkapitole
„Čištění a údržba“.
3) Postavte základnu 0 na rovný podklad.
UPOZORNĚNÍ
Při sestavování dodržujte vždy pořadí popsa-
►
né vtéto kapitole. Jinak do sebe některé díly
správně nezapadnou.
4) Postavte oba pohárky 8 tak na oba šestihrany,
aby ucha pohárků 8 ukazovala směrem ven.
5) Zasuňte obě mixovací lopatky 7 do prohlubní
vpohárcích 8. Upínání hnacích hřídelí 6 při
tom musí směřovat nahoru.
UPOZORNĚNÍ
Ujistěte se, že otočný spínač 9 je vpoloze
►
, když nasazujete nebo snímáte víko 5.
6) Nejprve nasaďte víko 5 na pohárky 8.
Při tom dávejte pozor, aby upínání hnacích hřídelí 6 vyčnívalo skrze vyhloubení ve víku 5.
7) Otočte otočný spínač 9 do polohy .
Víko 5 již nyní nelze zvednout.
8) Zasuňte obě hnací hřídele 3 do šestihranných
otvorů na motorovém bloku 2.
9) Nasaďte motorový blok 2 na víko 5 tak,
aby síťový kabel směřoval dozadu. Hnací
hřídele 3 musí správně zapadnout do upínání
hnacích hřídelí 6.
10) Zastrčte zástrčku do síťové zásuvky.
Nyní je přístroj připravený kprovozu.
Příprava
♦ Dejte oba pohárky 8 na zhruba 8-12hodin
do mrazničky / mrazicí přihrádky při teplotě
minimálně -18°C.
TIPY
Uložte pohárky 8 vmrazničce / mrazicím
►
boxu ve svislé poloze.
► Dbejte na to, aby pohárky 8 byly před
umístěním do mrazničky / mrazicí přihrádky
úplně suché.
► Před zamražením vložte pohárky 8 do
plastového sáčku, například do sáčku na
mražení.
► Dejte ovoce, mléko a šlehačku už před zpra-
cováním do chladničky. Tak bude již studené
a příprava zmrzliny se zkrátí očas potřebný
kjeho ochlazení.
♦ Rozmixujte ovoce tyčovým mixérem a všechny
přísady promíchejte podle receptu.
♦ Nechte směs vchladničce vychladit na cca
5-10°C.
CZ
SEMD 12 A1
35
Page 39

Výroba zmrzliny
POZOR! VĚCNÉ ŠKODY!
► Vždy nejprve spusťte přístroj a potom ho
naplňte přísadami! Jinak zmrzlinová hmota
ihned přimrzne ke stěnám pohárků 8 a
zablokují se mixovací lopatky 7. Při tom se
přehřeje motor!
POZOR! VĚCNÉ ŠKODY!
CZ
► Přístroj vžádném případě nezastavujte vprů-
běhu zpracování. Jinak zmrzlinová hmota
ihned přimrzne ke stěnám pohárku 8 a při
novém zapnutí se zablokují mixovací lopatky
7. Při tom se přehřeje motor!
1) Vyjměte pohárky 8 zmrazničky / mrazicí při-
hrádky a sestavte přístroj tak, jak je popsáno
vkapitole „Sestavení“.
2) Přístroj zapněte posunutím vypínače 1 do
polohy I. Obě mixovací lopatky 7 se začnou
otáčet.
3) Nyní skrze plnicí otvory 4 naplňte pohárky 8
připravenou zmrzlinovou směsí.
Můžete ktomu použít nádobu svýlevkou. Do
jednoho pohárku 8 však nikdy nedávejte více
než 300ml. Během zpracovávání se objem
hmoty zvětšuje!
UPOZORNĚNÍ
Můžete přísadami naplnit také jenom jeden
►
pohárek 8. Vždy však do přístroje vsaďte
oba pohárky.
UPOZORNĚNÍ
Může se stát, že mixovací lopatky 7 občas
►
změní směr otáčení. Ktomu dochází, když
zmrzlinová hmota příliš ztuhne. Je to normální
a nejedná se ozávadu přístroje.
4) Nechte přístroj běžet tak dlouho, dokud jste
skonzistencí směsi spokojeni. Nejpozději po 20
až maximálně 30minutách je zmrzlina hotová.
5) Vypněte přístroj vypínačem 1 a vytáhněte
síťovou zástrčku.
6) Otočte otočný spínač 9 do polohy
mohli sejmout víko 5 smotorovým blokem 2.
7) Vytáhněte mixovací lopatky 7 ze zmrzliny.
Pokud by na nich zmrzlina ulpěla, seškrabte ji
plastovou lžičkou nebo podobným předmětem.
8) Vyjměte pohárky 8 zpřístroje a odeberte
znich zmrzlinu. Použijte ktomu výlučně plastové nebo dřevěné náčiní.
POZOR! VĚCNÉ ŠKODY!
► Kvybrání zmrzliny zpohárků 8 nepoužívejte
kovové náčiní!
UPOZORNĚNÍ
Chcete-li víko 5 opět nasadit na pohárky,
►
musíte nejprve od víka 5 oddělit motorový
blok 2. Postupujte potom vždy tak, jak je
popsáno vkapitole „Sestavení“. Jinak se
může stát, že hnací hřídele 3 nezapadnou
správně do upínání hnacích hřídelí 6.
, abyste
36
SEMD 12 A1
Page 40

Čištění a údržba
NEBEZPEČÍ ÚRAZU ELEKTRICKÝM
PROUDEM
Než začnete přístroj čistit, vytáhněte vždy
►
síťovou zástrčku ze sítě.
Motorový blok 2 nesmíte vžádném pří-
padě namáčet do tekutin a také se nesmí
dostat žádné kapaliny do krytu motorového
bloku 2.
POZOR! VĚCNÉ ŠKODY!
► Nepoužívejte kčištění přístroje žádné agresivní,
abrazivní nebo chemické čisticí prostředky.
Může to vést kpoškození povrchu!
► Díly tohoto přístroje nemyjte vmyčce!
♦ Před čištěním přístroj, pokud je ještě smontovaný,
rozmontujte:
♦ Po každém použití vyčistěte motorový blok 2
navlhčeným hadříkem. Utvrdošíjných znečištění
nakapejte na hadřík několik kapek jemného
mycího prostředku. Poté opláchněte čistou vodou. Ubezpečte se, že se vpřístroji nenacházejí
zbytky mycího prostředku a že je přístroj před
novým použitím zcela suchý.
♦ Před čištěním nechte pohárky 8 zahřát na
pokojovou teplotu.
Omyjte pohárky 8, hnací hřídele 3, mixovací
lopatky 7 a víko 5 ve vlažné vodě strochou
mycího prostředku. Opláchněte tyto díly ještě
jednou čistou vodou, abyste měli jistotu, že na
nich nezůstaly zbytky mycího prostředku.
♦ Otřete základnu 0 vlhkým hadříkem. Utvrdošíj-
ných znečištění nakapejte na hadřík jemný mycí
prostředek.
♦ Ujistěte se, že před opětovným použitím jsou
všechny části opět zcela suché.
CZ
– Otočte otočný spínač 9 do polohy ,
abyste mohli sejmout víko 5 smotorovým
blokem 2.
– Obraťte víko 5 smotorovým blokem 2.
Zatlačte obě aretace motorového bloku 2,
které vyčnívají zvíka 5, lehce dovnitř a
současně je vytlačte zvíka 5 ven. Nyní
lze motorový blok 2 oddělit od víka 5.
– Vytáhněte hnací hřídele 3 zmotorového
bloku 2.
– Vyjměte mixovací lopatky 7 zpohárků 8.
– Sejměte pohárky 8 ze základny 0.
Skladování
♦ Před uložením přístroj důkladně vyčistěte.
♦ Přístroj uložte na čistém a suchém místě.
SEMD 12 A1
37
Page 41

Záruka a servis
Na tento přístroj získáváte záruku vtrvání 3let
od data zakoupení. Přístroj byl vyroben pečlivě
a před dodáním byl svědomitě odzkoušen.
Uschovejte si prosím pokladní lístek jako doklad
onákupu. Vpřípadě uplatňování záruky se spojte
telefonicky se servisní provozovnou. Pouze tak
lze zajistit bezplatné zaslání vašeho zboží.
Záruční plnění se vztahuje pouze na vady materiálu
nebo výrobní vady, nikoliv však na škody způsobené
při dopravě, na opotřebitelné díly nebo poškození
CZ
rozbitných součástí, např. spínačů nebo akumulátorů. Výrobek je určen jen pro soukromé účely a ne
pro komerční použití.
Při nesprávném a neodborném používání, při použití
násilí a při zásazích, které nebyly provedeny našimi
autorizovanými servisními provozovnami, záruční
nároky zanikají.
Vaše práva vyplývající ze zákona nejsou touto
zárukou omezena.
Záručním plněním se záruční doba neprodlužuje.
To platí i pro vyměněné a opravené součásti.
Poškození nebo vady vyskytující se již při nákupu
výrobku je nutno oznámit ihned po vybalení, avšak
nejpozději do dvou dnů od data nákupu.
Po uplynutí záruční doby podléhají veškeré opravy
poplatkům.
Likvidace
Přístroj vžádném případě
nevyhazujte do běžného
domovního odpadu. Tento
výrobek podléhá evropské
směrnici č.2012/19/EU.
Přístroj předejte klikvidaci odborné fi rmě oprávněné knakládání sodpady nebo využijte možnost
likvidace zajišťovanou obcí. Dodržujte aktuálně
platné předpisy. Vpřípadě pochybností se informujte ve sběrném dvoře.
Obal se skládá zekologických materiálů,
které lze vkomunálních sběrných dvorech
odevzdat krecyklaci.
Dovozce
KOMPERNASS HANDELS GMBH
BURGSTRASSE 21
44867 BOCHUM
GERMANY
www.kompernass.com
Servis Česko
Tel.: 800143873
E-Mail: kompernass@lidl.cz
IAN 111458
Dostupnost horké linky:
pondělí až pátek 8:00 hod. – 20:00 hod. (SEČ)
38
SEMD 12 A1
Page 42

Recepty
Jahodová mléčná zmrzlina
UPOZORNĚNÍ
Recepty bez záruky. Všechny údaje opřísa-
►
dách a opřípravě jsou pouze orientační.
Doplňte tyto navrhované recepty osvé vlastní
zkušenosti.
► Vreceptech je vždy uvedeno množství knapl-
nění jednoho pohárku 8.
► Max. náplň jednoho pohárku 8 vystačí na
cca 2-3 kopečky zmrzliny.
► Doporučujeme smetanu, kterou potřebujete
pro recepty, před zpracováním ušlehat.
Protože šlehání tak malých množství smetany
je dosti obtížné, doporučujeme ušlehat více
smetany, než potřebujete, a přebytečnou
šlehačku použít později kobloze vyrobené
zmrzliny.
Vanilková zmrzlina
Přísady
■ 170ml plnotučného mléka
■ 85ml/85g smetany
■ 25g práškového cukru
■ 10g vanilkového cukru
Příprava
1) Šlehejte smetanu, dokud trochu neztuhne.
2) Promíchejte smetanu smlékem, vanilkovým
a práškovým cukrem.
3) Nechte zmrzlinovou směs vchladničce vychladit
na cca 5-10°C.
Nyní můžete zmrzlinovou směs zpracovat na zmrzlinu tak, jak je popsáno vnávodu.
Přísady
■ cca 120g jahod
■ 70ml/70g plnotučného mléka
■ 60ml/60g smetany
■ 30g práškového cukru
Příprava
1) Rozmixujte jahody.
2) Šlehejte smetanu, dokud trochu neztuhne.
3) Promíchejte rozmixované jahody se smetanou,
mlékem a práškovým cukrem.
4) Nechte zmrzlinovou směs vchladničce vychladit
na cca 5-10°C.
Nyní můžete zmrzlinovou směs zpracovat na zmrzlinu tak, jak je popsáno vnávodu.
Banánová mléčná zmrzlina
Přísady
■ 1/2-1banán (cca 75g)
■ 115ml/115g plnotučného mléka
■ 55ml/55g smetany
■ 35g práškového cukru
Příprava
1) Rozmixujte banán.
2) Šlehejte smetanu, dokud trochu neztuhne.
3) Promíchejte rozmixovaný banán se smetanou,
mlékem a práškovým cukrem.
4) Nechte zmrzlinovou směs vchladničce vychladit
na cca 5-10°C.
Nyní můžete zmrzlinovou směs zpracovat na zmrzlinu tak, jak je popsáno vnávodu.
CZ
SEMD 12 A1
39
Page 43

Mangová mléčná zmrzlina
Ořechová mléčná zmrzlina
Přísady
■ 90g dužiny zmanga
■ 90ml/90g plnotučného mléka
■ 50ml/50g smetany
■ 25g práškového cukru
Příprava
1) Rozmixujte dužinu zmanga.
2) Šlehejte smetanu, dokud trochu neztuhne.
CZ
3) Promíchejte rozmixovanou dužinu zmanga se
smetanou, mlékem a práškovým cukrem.
4) Nechte zmrzlinovou směs vchladničce vychladit
na cca 5-10°C.
Nyní můžete zmrzlinovou směs zpracovat na zmrzlinu tak, jak je popsáno vnávodu.
Přísady
■ 40g ořechů
■ 80ml/80g plnotučného mléka
■ 60ml/60g smetany
■ 50g práškového cukru
Příprava
1) Nasekejte ořechy nadrobno.
2) Šlehejte smetanu, dokud trochu neztuhne.
3) Promíchejte mléko, smetanu a práškový cukr.
4) Nechte zmrzlinovou směs vchladničce vychladit
na cca 5-10°C.
5) Po vychlazení dejte zmrzlinovou směs do
přístroje, jak je popsáno vkapitole „Výroba
zmrzliny“.
6) Počkejte cca 5minut a potom do přístroje,
aniž byste ho vypnuli, postupně přidávejte
nasekané ořechy.
7) Vyčkejte, až bude zmrzlina hotová.
40
SEMD 12 A1
Page 44

Obsah
Úvod . . . . . . . . . . . . . . . . . . . . . . . . . . . . . . . . . . . . . . . . . . . . . . . . . . . . . . . . . . 42
Používanie vsúlade surčením . . . . . . . . . . . . . . . . . . . . . . . . . . . . . . . . . . . . . 42
Rozsah dodávky . . . . . . . . . . . . . . . . . . . . . . . . . . . . . . . . . . . . . . . . . . . . . . . . . 42
Popis zariadenia . . . . . . . . . . . . . . . . . . . . . . . . . . . . . . . . . . . . . . . . . . . . . . . . . 42
Technické údaje . . . . . . . . . . . . . . . . . . . . . . . . . . . . . . . . . . . . . . . . . . . . . . . . . 42
Bezpečnostné upozornenia . . . . . . . . . . . . . . . . . . . . . . . . . . . . . . . . . . . . . . . . 43
Zloženie . . . . . . . . . . . . . . . . . . . . . . . . . . . . . . . . . . . . . . . . . . . . . . . . . . . . . . . . 45
Príprava . . . . . . . . . . . . . . . . . . . . . . . . . . . . . . . . . . . . . . . . . . . . . . . . . . . . . . . 45
Výroba zmrzliny . . . . . . . . . . . . . . . . . . . . . . . . . . . . . . . . . . . . . . . . . . . . . . . . . 46
Čistenie aúdržba . . . . . . . . . . . . . . . . . . . . . . . . . . . . . . . . . . . . . . . . . . . . . . . . 47
Skladovanie . . . . . . . . . . . . . . . . . . . . . . . . . . . . . . . . . . . . . . . . . . . . . . . . . . . . 47
Zárukaaservis . . . . . . . . . . . . . . . . . . . . . . . . . . . . . . . . . . . . . . . . . . . . . . . . . . 48
Likvidácia . . . . . . . . . . . . . . . . . . . . . . . . . . . . . . . . . . . . . . . . . . . . . . . . . . . . . . 48
Dovozca . . . . . . . . . . . . . . . . . . . . . . . . . . . . . . . . . . . . . . . . . . . . . . . . . . . . . . . . 48
Recepty . . . . . . . . . . . . . . . . . . . . . . . . . . . . . . . . . . . . . . . . . . . . . . . . . . . . . . . . 49
Vanilková zmrzlina . . . . . . . . . . . . . . . . . . . . . . . . . . . . . . . . . . . . . . . . . . . . . . . . . . . . . . . . . . . 49
Jahodová zmrzlina . . . . . . . . . . . . . . . . . . . . . . . . . . . . . . . . . . . . . . . . . . . . . . . . . . . . . . . . . . 49
Banánová zmrzlina . . . . . . . . . . . . . . . . . . . . . . . . . . . . . . . . . . . . . . . . . . . . . . . . . . . . . . . . . . 49
Mangová zmrzlina . . . . . . . . . . . . . . . . . . . . . . . . . . . . . . . . . . . . . . . . . . . . . . . . . . . . . . . . . . 50
Oriešková zmrzlina . . . . . . . . . . . . . . . . . . . . . . . . . . . . . . . . . . . . . . . . . . . . . . . . . . . . . . . . . . 50
SK
SEMD 12 A1
41
Page 45

Úvod
Srdečne vám gratulujeme ku kúpe vášho nového
prístroja.
Touto kúpou ste sa rozhodli pre vysokokvalitný výrobok. Návod naobsluhu je súčasťou tohto výrobku.
Obsahuje dôležité upozornenia týkajúce sa bezpečnosti, používania alikvidácie. Pred používaním
výrobku sa oboznámte sovšetkými pokynmi na
obsluhu abezpečnostnými upozorneniami. Výrobok
používajte iba podľa popisu a vuvedených oblastiach použitia. Pri postúpení výrobku tretej osobe jej
sním odovzdajte aj všetky podklady.
Používanie vsúlade surčením
SK
Tento prístroj slúži výlučne na výrobu mliečnej zmrzliny. Je určený výlučne na používanie vsúkromných
domácnostiach. Nepoužívajte ho komerčne.
Rozsah dodávky
prístroj na prípravu zmrzliny
návod naobsluhu
Popis zariadenia
1 spínač zap./vyp.
2 blok motora
3 hnacie hriadele
4 plniace otvory
5 veko
6 upnutie hnacích hriadeľov
7 mixovacia lopatka
8 pohár
9 otočný spínač
0 základňa
Technické údaje
Menovité napätie: 220 - 240 V ∼, 50 Hz
Príkon: 12 W
Trieda ochrany: II
42
SEMD 12 A1
Page 46

Bezpečnostné upozornenia
NEBEZPEČENSTVO ZÁSAHU ELEKTRICKÝM PRÚDOM
► Prístroj zapojte len do elektrickej zásuvky snapätím 220 – 240 V
~
,
50 Hz nainštalovanej podľa predpisov.
► Poškodenú elektrickú zástrčku alebo sieťový kábel nechajte ihneď vymeniť
kvalifi kovaným a autorizovaným personálom alebo vzákazníckom servise,
aby ste zabránili ohrozeniu zdravia.
► Pri prevádzkových poruchách apred čistením prístroja vytiahnite zástrčku
zelektrickej zásuvky.
► Sieťový kábel vyťahujte zelektrickej zásuvky vždy za zástrčku, nikdy neťa-
hajte za samotný kábel.
► Neohýbajte ani nestláčajte sieťový kábel, aveďte ho tak, aby naň nikto
nemohol stúpiť, ani sa oň potknúť.
► Prístroj nesmiete vystaviť vlhkosti ani ho používať vexteriéri. Ak by do telesa
prístroja predsa len vnikla kvapalina, ihneď vytiahnite zástrčku prístroja
zelektrickej zásuvky anechajte prístroj opraviť kvalifi kovaným odborným
personálom.
► Sieťový kábel aelektrickú zástrčku nikdy nechytajte mokrými rukami.
► Blok motora prístroja nesmiete otvárať. Vtakom prípade je ohrozená
bezpečnosť azanikne záruka.
SK
► Po použití prístroj ihneď odpojte od elektrickej siete. Len keď vytiahnete
zástrčku zelektrickej zásuvky, je prístroj úplne odpojený od prúdu.
► Prístroj používajte len vo vnútorných priestoroch.
Blok motora prístroja vžiadnom prípade neponárajte do tekutín
azabráňte vniknutiu tekutín do telesa bloku motora.
SEMD 12 A1
43
Page 47

SK
POZOR! NEBEZPEČENSTVO PORANENIA!
► Tento prístroj môžu používať deti staršie ako 8 rokov, ak sú pod dozorom
alebo boli dostatočne poučené obezpečnom používaní prístroja apochopili ztoho vyplývajúce riziká.
► Čistenie aužívateľskú údržbu nesmú vykonávať deti, iba ak sú staršie než
8rokov asú pod dohľadom.
► Prístroj a jeho pripojovací kábel treba uchovávať mimo dosahu detí mlad-
ších ako 8 rokov.
► Tento prístroj môžu používať osoby sozníženými fyzickými, senzorickými
alebo mentálnymi schopnosťami, prípadne snedostatočnými skúsenosťami a/alebo znalosťami, ak sú pod dohľadom, alebo ak boli dostatočne
poučené obezpečnom používaní prístroja apochopili ztoho vyplývajúce
riziká.
► Deti sa s prístrojom nesmú hrať.
► Pokiaľ prístroj nie je pod dohľadom, pred zložením arozložením alebo
čistením ho musíte vždy odpojiť od siete.
► Pred výmenou príslušenstva alebo prídavných dielov, ktoré sa počas pre-
vádzky pohybujú, sa musí prístroj vypnúť aodpojiť od elektrickej siete.
44
SEMD 12 A1
Page 48

Zloženie
Pri skladaní prístroja Vám pomôžu obrázky na
vyklápacej strane návodu.
1) Zprístroja odstráňte všetky obalové materiály
aprípadné nálepky.
2) Prístroj čistite tak, ako je uvedené vkapitole
„Čistenie aúdržba“.
3) Postavte základňu 0 na rovný podklad.
UPOZORNENIE
Vždy dodržiavajte postup zloženia opísaného
►
v tejto kapitole. Inak niektoré časti do seba
nezapadnú.
4) Postavte dva poháre 8 na obidva šesťhrany
tak, aby uchá pohárov 8 smerovali von.
5) Strčte obidve mixovacie lopatky 7 do vyhĺbenín
v pohároch 8. Upnutie hnacieho hriadeľa 6
musí pritom smerovať nahor.
UPOZORNENIE
Zabezpečte, aby bol otočný spínač 9 hore
►
, keď veko 5 nasadzujete alebo snímate.
6) Položte najprv veko 5 na poháre 8. Pritom
dbajte o to, aby upnutie hnacieho hriadeľa 6
prečnievalo cez otvory na 5 veku.
7) Otočte otočný spínač 9 do polohy .
Veko 5 sa teraz už nedá zdvihnúť.
8) Strčte obidva hnacie hriadele 3 do šesťuholní-
kových otvorov na bloku motora 2.
9) Položte blok motora 2 na veko tak 5, aby
sieťový kábel smeroval dozadu. Hnacie
hriadele 3 musia zapadnúť správne do 6
upnutia hnacích hriadeľov.
10) Zastrčte elektrickú zástrčku do zásuvky.
Prístroj je teraz pripravený na prevádzku.
Príprava
♦ Vložte obidva poháre 8 na ca. 8-12 hodín do
mrazničky/chladiaceho boxu pri minimálnej
teplote -18°C.
TIPY
Uložte poháre 8 postojačky v mrazničke/
►
chladiacom boxe.
► Dbajte o to, aby boli poháre 8 úplne suché,
predtým než ich vložíte do mrazničky/chladiaceho boxu.
► Vložte poháre 8 pred zamrazením do plas-
tového sáčku, napríklad do sáčkov. určených
na zamrazovanie potravín.
► Dajte ovocie, mlieko a šľahačku ešte pred
spracovaním do chladničky. Tak už bude
studené a zmrzlinová zmes nebude potrebovať toľko času, aby sa ochladila.
♦ Pomocou tyčového mixéra vymixujte ovocie na
pyré a primiešajte všetky prísady podľa receptu.
♦ Túto zmes nechajte v chladničke ochladiť na
ca. 5 - 10°C.
SK
SEMD 12 A1
45
Page 49

Výroba zmrzliny
POZOR! VECNÉ ŠKODY!
► Vždy najprv spustite prístroj a až potom
pridajte prísady! Inak vám zmrzlinová masa
okamžite zamrzne na stenách pohára 8 a
zablokuje 7 mixovacie lopatky. Pritom sa
prehreje motor!
POZOR! VECNÉ ŠKODY!
► Prístroj v žiadnom prípade nezastavujte
počas procesu spracovania. Inak vám zmrzlinová zmes okamžite zamrzne na stenách
SK
pohára 8 a zablokuje 7 mixovacie lopatky
pri opätovnom zapnutí. Pritom sa prehreje
motor!
1) Vyberte poháre 8 z mrazničky/mraziaceho
boxu a prístroj zložte, ako je opísané v kapitole
"Zloženie prístroja".
2) Prístroj zapnete tak, že spínač zapnutia/vypnutia 1 uvediete do pozície I. Obidve mixovacie
lopatky 7 sa otáčajú.
3) Naplňte teraz pripravenú zmrzlinovú zmes
cez plniace otvory 4 do pohárov 8. Použite
za tým účelom najlepšie nádobu s výtokovým
otvorom. Nikdy však nenaplňte do jedného
pohára viac ako 300 ml 8. Počas spracovania
sa objem zmesi zväčšuje!
UPOZORNENIE
Prísadami môžete tiež naplniť len 8 jeden
►
pohár. Do prístroja nasaďte však vždy obidva
poháre.
UPOZORNENIE
Môže sa stať, že mixovacie lopatky 7 me-
►
dzitým zmenia svoj smer otáčania. Môže sa
to stať vtedy, keď je zmrzlinová zmes príliš
tuhá. Je to normálne a nepredstavuje to žiadnu poruchu prístroja.
4) Nechajte prístroj bežať dovtedy, dokiaľ nebudete spokojní s konzistenciou zmesi. Najneskôr
po 20 až 30 minútach je zmrzlina hotová.
5) Vypnite prístroj na spínači zapnutia/vypnutia 1
a vytiahnite sieťový kábel.
6) Otočte otočným spínačom 9 na
odobrali veko 5 s blokom motora 2.
7) Vytiahnite mixovacie lopatky 7 zo zmrzliny.
Pokiaľ by na lopatkách zostala zmrzlina, zoškrabte ju pomocou plastovej lyžičky alebo
niečoho podobného.
8) Zdvihnite poháre 8 z prístroja a vyberte
zmrzlinu. Použite nato výlučne plastové alebo
drevené náčinie.
POZOR! VECNÉ ŠKODY!
► Na vybratie zmrzliny z pohárov nepoužívajte
kovové náčinie 8!
UPOZORNENIE
Ak chcete opäť nasadiť veko 5 na poháre,
►
musíte najprv uvoľniť blok motora 2 z veka 5.
Potom postupujte opäť tak, ako je opísané v
kapitole "Zloženie prístroja". Inak sa môže
stať, že hnacie hriadele nezapadnú 3 správne do upnutia hnacích hriadeľov 6.
, aby ste
46
SEMD 12 A1
Page 50

Čistenie aúdržba
NEBEZPEČENSTVO ZÁSAHU
ELEKTRICKÝM PRÚDOM
Skôr než začnete prístroj čistiť, vytiahnite
►
zástrčku zelektrickej zásuvky.
Blok motora 2 nesmiete vžiadnom prípa-
de ponárať do kvapalín amusíte zabrániť
vniknutiu kvapalín do telesa bloku motora
2.
POZOR! VECNÉ ŠKODY!
► Na čistenie prístroja nepoužívajte žiadne
agresívne, chemické ani drsné čistiace prostriedky. To by malo za následok poškodenie
povrchu.
► Časti prístroja v žiadnom prípade neumývajte
vumývačke riadu!
♦ Na čistenie prístroja ho vždy rozoberte, pokiaľ
je ešte zložený:
♦ Vyčistite blok motora 2 po každom používaní
pomocou vlhkej utierky. V prípade neodolných
nečistôt naneste na navlhčenú utierku jemný čistiaci prostriedok. Potom opláchnite čistou vodou.
Presvedčte sa, že sa na prístroji nenachádzajú
žiadne zvyšky umývacieho prostriedku aže prístroj
je pred opakovaným používaním úplne suchý.
♦ Nechajte poháre 8 zohriať na izbovú teplotu
predtým, než ich umyjete.
Opláchnite poháre 8, hnacie hriadele, 3,
mixovacie lopatky 7 a veko 5 vovlažnej
vode strochou jemného čistiaceho prostriedku.
Opláchnite tieto časti ešte raz v čistej vode, aby
ste zabezpečili, že je odstranený všetok čistiaci
prostriedok.
♦ Základňu 0 otrite vlhkou utierkou. V prípade
neodolných nečistôt naneste na navlhčenú
utierku jemný čistiaci prostriedok.
♦ Ubezpečte sa, že pred opätovným použitím sú
všetky diely znova kompletne suché.
SK
– Otočte otočným spínačom 9 na , aby ste
odobrali veko 5 s blokom motora 2.
– Otočte veko 5 spolu s blokom motora 2.
Zatlačte obidve aretácie bloku motora 2,
ktoré prečnievajú cez veko 5 mierne smerom nadol a zároveň ich vytlačte z veka 5.
Blok motora sa tak uvoľní 2 z veka 5.
– Vyberte hnacie hriadele 3 z bloku motora 2.
– Vyberte mixovacie lopatky 7 z pohárov 8.
– Zoberte poháre 8 zo základne 0.
SEMD 12 A1
Skladovanie
♦ Pred odložením prístroj dôkladne vyčistite.
♦ Prístroj uskladnite na čistom a suchom mieste.
47
Page 51

Zárukaaservis
Natento prístroj máte záruku 3roky od dátumu
zakúpenia. Prístroj bol starostlivo vyrobený apred
expedíciou dôkladne preskúšaný. Pokladničný
blok si uschovajte ako doklad ozakúpení. Vprípade uplatneniazáruky telefonicky kontaktujte
váš servis. Len tak sadá zabezpečiť bezplatné
odoslanie vášho tovaru.
Zárukasa vzťahujelen nachyby materiálu avýroby, nie naškody spôsobené prepravou, opotrebením ani napoškodeniakrehkých častí, ako sú
spínače alebo akumulátory. Výrobok je určený len
nasúkromné anie nakomerčné použitie.
Zárukastrácaplatnosť pri nesprávnom aneodbornom zaobchádzaní, pri použití násiliaapri zása-
SK
hoch, ktoré neboli vykonané naším autorizovaným
servisom.
Vaše práva vyplývajúce zo zákona nie sú touto
zárukou obmedzené.
Záručné plnenie nepredlžuje záručnú dobu. To
platí tiež pre náhradné aopravené diely. Prípadné
chyby anedostatky zistené už pri zakúpení musíte
nahlásiť ihneď po vybalení, najneskôr však do
dvoch dní od dátumu zakúpenia. Opravy, vykonané po uplynutí záručnej doby, samusiazaplatiť.
Servis Slovensko
Tel. 0850 232001
E-Mail: kompernass@lidl.sk
IAN 111458
Likvidácia
Prístroj vžiadnom prípade
nehádžte do bežného komunálneho odpadu. Na tento
výrobok sa vzťahuje európska
smernica č.2012/19/EU.
Prístroj zlikvidujte odovzdaním vautorizovanej prevádzke na likvidáciu odpadov alebo vovašejkomunálnej zberni odpadov. Dodržiavajte pritom
aktuálne platné predpisy. Vprípade pochybností
kontaktujte vašu zberňu odpadov.
Obal sa skladá z ekologických materiá-
lov, ktoré môžete likvidovať vmiestnych
recyklačných zberniach odpadov.
Dovozca
KOMPERNASS HANDELS GMBH
BURGSTRASSE 21
44867 BOCHUM
GERMANY
www.kompernass.com
Dostupnosť hotline:
pondelok až piatok od 8:00 hod. – 20:00 hod.
(SEČ)
48
SEMD 12 A1
Page 52

Recepty
Jahodová zmrzlina
UPOZORNENIE
Recepty bez záruky. Všetky informácie oprí-
►
sadách apríprave sú orientačné. Doplňte si
tieto recepty oVaše vlastné skúsenosti.
► Tieto recepty udávajú tiež množstvo, ktoré je
potrebné naplniť do jedného pohára 8.
► Maximálne množstvo, ktoré sa odporúča
doplniť do jedného pohára 8 predstavuje
ca. 2 - 3 kopčeky zmrzliny.
► Odporúčame vám smotanu, ktorú na recepty
potrebujete, pred použitím vyšľahať. Keďže
vyšľahanie takého malého množstva smotany
sa môže podariť len ťažko, odporúčame vám
našľahať viac smotany ako je potrebné a
nadbytočnú smotanu potom môžete použiť
neskôr na zdobenie hotovej zmrzliny.
Vanilková zmrzlina
Prísady
■ 170 ml plnotučného mlieka
■ 85 ml/85 g smotany
■ 25 g práškového cukru
■ 10 g vanilkového cukru
Príprava
1) Vyšľahajte smotanu tak, aby bola trochu tuhšia.
2) Zmiešajte smotanu s mliekom, vanilkovým
cukrom a práškovým cukrom.
3) Takúto zmes nechajte v chladničke vychladiť
na ca. 5 - 10 °C
Na zmrzlinu môžete spracovať len takú zmes, aká
je opísaná v návode.
Prísady
■ ca. 120 g jahôd
■ 70 ml/70 g plnotučného mlieka
■ 60 ml/60 g smotany
■ 30 g práškového cukru
Príprava
1) Jahody vymixujte na pyré.
2) Vyšľahajte smotanu tak, aby bola trochu tuhšia.
3) Zmiešajte pyré z jahôd so smotanou, mliekom
a práškovým cukrom.
4) Takúto zmes nechajte v chladničke vychladiť
na ca. 5 - 10 °C
Na zmrzlinu môžete spracovať len takú zmes, aká
je opísaná v návode.
Banánová zmrzlina
Prísady
■ 1/2 - 1 banán (ca. 75g)
■ 115 ml/115 g plnotučného mlieka
■ 55 ml/55 g smotany
■ 35 g práškového cukru
Príprava
1) Banán vymixujte na pyré.
2) Vyšľahajte smotanu tak, aby bola trochu tuhšia.
3) Zmiešajte pyré z banánu so smotanou, mliekom
a práškovým cukrom.
4) Takúto zmes nechajte v chladničke vychladiť
na ca. 5 - 10 °C
Na zmrzlinu môžete spracovať len takú zmes, aká
je opísaná v návode.
SK
SEMD 12 A1
49
Page 53

Mangová zmrzlina
Oriešková zmrzlina
Prísady
■ 90 g dužiny manga
■ 90 ml/90 g plnotučného mlieka
■ 50 ml/50 g smotany
■ 25 g práškového cukru
Príprava
1) Dužinu manga vymixujte na pyré.
2) Vyšľahajte smotanu tak, aby bola trochu tuhšia.
3) Zmiešajte pyré z manga so smotanou, mliekom
a práškovým cukrom.
4) Takúto zmes nechajte v chladničke vychladiť
SK
na ca. 5 - 10 °C
Na zmrzlinu môžete spracovať len takú zmes, aká
je opísaná v návode.
Prísady
■ 40 g orechov
■ 80 ml/80 g plnotučného mlieka
■ 60 ml/60 g smotany
■ 50 g práškového cukru
Príprava
1) Nasekajte orechy nadrobno.
2) Vyšľahajte smotanu tak, aby bola trochu tuhšia.
3) Zmiešajte mlieko, smotanu a práškový cukor.
4) Takúto zmes nechajte v chladničke vychladiť
na ca. 5 - 10 °C
5) Po vychladení dajte zmes do prístroja tak, ako
je opísané v kapitole "Výroba zmrzliny".
6) Vyčkajte ca. 5 minút a potom bez toho, aby
ste vypli prístroj, pridajte nadrobno nasekané
orechy.
7) Vyčkajte, dokiaľ zmrzlina nie je hotová.
50
SEMD 12 A1
Page 54

Inhaltsverzeichnis
Einleitung . . . . . . . . . . . . . . . . . . . . . . . . . . . . . . . . . . . . . . . . . . . . . . . . . . . . . . . 52
Bestimmungsgemäßer Gebrauch . . . . . . . . . . . . . . . . . . . . . . . . . . . . . . . . . . . 52
Lieferumfang . . . . . . . . . . . . . . . . . . . . . . . . . . . . . . . . . . . . . . . . . . . . . . . . . . . . 52
Gerätebeschreibung. . . . . . . . . . . . . . . . . . . . . . . . . . . . . . . . . . . . . . . . . . . . . . 52
Technische Daten . . . . . . . . . . . . . . . . . . . . . . . . . . . . . . . . . . . . . . . . . . . . . . . . 52
Sicherheitshinweise . . . . . . . . . . . . . . . . . . . . . . . . . . . . . . . . . . . . . . . . . . . . . . 53
Zusammenbau . . . . . . . . . . . . . . . . . . . . . . . . . . . . . . . . . . . . . . . . . . . . . . . . . . 55
Vorbereitungen . . . . . . . . . . . . . . . . . . . . . . . . . . . . . . . . . . . . . . . . . . . . . . . . . . 55
Eis herstellen . . . . . . . . . . . . . . . . . . . . . . . . . . . . . . . . . . . . . . . . . . . . . . . . . . . . 56
Reinigen und Pfl egen . . . . . . . . . . . . . . . . . . . . . . . . . . . . . . . . . . . . . . . . . . . . . 57
Lagerung . . . . . . . . . . . . . . . . . . . . . . . . . . . . . . . . . . . . . . . . . . . . . . . . . . . . . . . 57
Garantie und Service . . . . . . . . . . . . . . . . . . . . . . . . . . . . . . . . . . . . . . . . . . . . . 58
Entsorgung . . . . . . . . . . . . . . . . . . . . . . . . . . . . . . . . . . . . . . . . . . . . . . . . . . . . . 58
Importeur . . . . . . . . . . . . . . . . . . . . . . . . . . . . . . . . . . . . . . . . . . . . . . . . . . . . . . 58
Rezepte . . . . . . . . . . . . . . . . . . . . . . . . . . . . . . . . . . . . . . . . . . . . . . . . . . . . . . . . 59
Vanilleeis . . . . . . . . . . . . . . . . . . . . . . . . . . . . . . . . . . . . . . . . . . . . . . . . . . . . . . . . . . . . . . . . . . 59
Erdbeermilcheis . . . . . . . . . . . . . . . . . . . . . . . . . . . . . . . . . . . . . . . . . . . . . . . . . . . . . . . . . . . . . 59
Bananenmilcheis . . . . . . . . . . . . . . . . . . . . . . . . . . . . . . . . . . . . . . . . . . . . . . . . . . . . . . . . . . . . 59
Mangomilcheis . . . . . . . . . . . . . . . . . . . . . . . . . . . . . . . . . . . . . . . . . . . . . . . . . . . . . . . . . . . . . 60
Nussmilcheis . . . . . . . . . . . . . . . . . . . . . . . . . . . . . . . . . . . . . . . . . . . . . . . . . . . . . . . . . . . . . . . 60
DE
AT
CH
SEMD 12 A1
51
Page 55

Einleitung
Herzlichen Glückwunsch zum Kauf Ihres neuen
Gerätes.
Sie haben sich damit für ein hochwertiges Produkt
entschieden. Die Bedienungsanleitung ist Bestandteil dieses Produkts. Sie enthält wichtige Hinweise
für Sicherheit, Gebrauch und Entsorgung. Machen
Sie sich vor der Benutzung des Produkts mit allen
Bedien- und Sicherheitshinweisen vertraut. Benutzen Sie das Produkt nur wie beschrieben und für
die angegebenen Einsatzbereiche. Händigen Sie
alle Unterlagen bei Weitergabe des Produkts an
Dritte mit aus.
Gerätebeschreibung
1 Ein-/Aus-Schalter
2 Motorblock
3 Antriebswellen
4 Einfüllöff nungen
5 Deckel
6 Antriebswellen-Aufnahme
7 Eisschaber
8 Becher
9 Drehschalter
0 Basis
Bestimmungsgemäßer
Gebrauch
DE
Dieses Gerät dient ausschließlich der Herstellung
AT
von Milcheis. Dieses Gerät ist ausschließlich für die
CH
Benutzung in privaten Haushalten bestimmt. Benutzen Sie es nicht gewerblich.
Lieferumfang
DUO-Eiscrememaschine
Bedienungsanleitung
Technische Daten
Nennspannung: 220 - 240 V ∼, 50 Hz
Leistungsaufnahme: 12 W
Schutzklasse: II
52
SEMD 12 A1
Page 56

Sicherheitshinweise
STROMSCHLAGGEFAHR
► Schließen Sie das Gerät nur an eine vorschriftsmäßig installierte Netzsteck-
dose mit einer Netzspannung von 220 - 240 V ~, 50 Hz an.
► Lassen Sie beschädigte Netzstecker oder Netzkabel sofort von autorisiertem
Fachpersonal oder dem Kundenservice austauschen, um Gefährdungen zu
vermeiden.
► Ziehen Sie bei Betriebsstörungen und bevor Sie das Gerät reinigen den
Netzstecker aus der Netzsteckdose.
► Ziehen Sie das Netzkabel stets am Stecker aus der Netzsteckdose, ziehen
Sie nicht am Kabel selbst.
► Knicken oder quetschen Sie das Netzkabel nicht und verlegen Sie das
Netzkabel so, dass niemand darauf treten oder darüber stolpern kann.
► Sie dürfen das Gerät keiner Feuchtigkeit aussetzen und nicht im Freien be-
nutzen. Falls doch einmal Flüssigkeit in das Gerätegehäuse gelangt, ziehen
Sie sofort den Netzstecker des Geräts aus der Netzsteckdose und lassen
Sie es von qualifi ziertem Fachpersonal reparieren.
► Fassen Sie das Netzkabel oder den Netzstecker nie mit nassen Händen an.
► Sie dürfen den Motorblock des Gerätes nicht öff nen. In diesem Falle ist die
Sicherheit nicht gegeben und die Gewährleistung erlischt.
► Trennen Sie das Gerät sofort nach dem Gebrauch vom Stromnetz. Nur wenn
Sie den Netzstecker aus der Netzsteckdose ziehen, ist es vollständig stromfrei.
► Verwenden Sie das Gerät nur in Innenräumen.
Sie dürfen den Motorblock des Gerätes keinesfalls in Flüssigkeit tauchen
und keine Flüssigkeiten in das Gehäuse des Motorblocks gelangen lassen.
DE
AT
CH
SEMD 12 A1
53
Page 57

DE
AT
CH
WARNUNG! VERLETZUNGSGEFAHR!
► Dieses Gerät kann von Kindern ab 8 Jahren und darüber benutzt werden,
wenn sie beaufsichtigt werden oder bezüglich des sicheren Gebrauchs
des Gerätes unterwiesen wurden und die daraus resultierenden Gefahren
verstanden haben.
► Reinigung und die Wartung durch den Benutzer dürfen nicht durch Kinder
vorgenommen werden, es sei denn, sie sind 8 Jahre oder älter und werden
beaufsichtigt.
► Das Gerät und seine Anschlussleitung sind von Kindern jünger als 8 Jahren
fernzuhalten.
► Dieses Gerät kann von Personen mit reduzierten physischen, sensorischen
oder mentalen Fähigkeiten oder Mangel an Erfahrung und/oder Wissen
benutzt werden, wenn sie beaufsichtigt oder bezüglich des sicheren Gebrauchs des Gerätes unterwiesen wurden und die daraus resultierenden
Gefahren verstanden haben.
► Kinder dürfen nicht mit dem Gerät spielen.
► Das Gerät ist bei nicht vorhandener Aufsicht und vor dem Zusammenbau,
dem Auseinandernehmen oder Reinigen stets vom Netz zu trennen.
► Vor dem Auswechseln von Zubehör oder Zusatzteilen, die im Betrieb be-
wegt werden, muss das Gerät ausgeschaltet und vom Netz getrennt sein.
54
SEMD 12 A1
Page 58

Zusammenbau
Nehmen Sie zum Zusammenbau die Abbildungen
auf der Ausklappseite zur Hilfe.
1) Entfernen Sie das Verpackungsmaterial und
eventuelle Aufkleber vom Gerät.
2) Reinigen Sie das Gerät wie im Kapitel „Reinigen
und Pfl egen“ beschrieben.
3) Stellen Sie die Basis 0 auf einen ebenen
Untergrund.
HINWEIS
Halten Sie sich immer an die in diesem
►
Kapitel beschrieben Reihenfolge des Zusammenbaus. Ansonsten greifen einige Teile nicht
korrekt ineinander.
4) Stellen Sie die zwei Becher 8 so auf die bei-
den Sechskante, dass die Henkel der Becher
8 nach außen weisen.
5) Stecken Sie die beiden Eisschaber 7 in die
Vertiefungen in den Bechern 8. Die Antriebs-
wellen-Aufnahme 6 muss dabei nach oben
weisen.
HINWEIS
Stellen Sie sicher, dass der Drehschalter 9
►
auf
steht, wenn Sie den Deckel 5 auf-
oder absetzen.
6) Setzen Sie zuerst den Deckel 5 auf die
Becher 8. Achten Sie dabei darauf, dass die
Antriebswellen-Aufnahme 6 durch die Aussparungen am Deckel 5 ragen.
7) Drehen Sie den Drehschalter 9 auf die Positi-
on
. Der Deckel 5 lässt sich nun nicht mehr
abheben.
8) Stecken Sie die beiden Antriebswellen 3 in
die sechseckigen Löcher am Motorblock 2.
9) Setzen Sie den Motorblock 2 so auf den
Deckel 5, dass das Netzkabel nach hinten
weist. Die Antriebswellen 3 müssen korrekt in
die Antriebwellen-Aufnahmen 6 greifen.
10) Stecken Sie den Netzstecker in eine Netzsteckdose.
Das Gerät ist nun betriebsbereit.
Vorbereitungen
♦ Legen Sie die beiden Becher 8 ca. 8-12 Stun-
den in einen Tiefkühlschrank/eine Tiefkühltruhe
bei mindestens -18°C.
TIPPS
Bewahren Sie die Becher 8 aufrecht im
►
Tiefkühlschrank/der Tiefkühltruhe auf.
► Achten Sie darauf, dass die Becher 8 voll-
kommen trocken sind, bevor Sie diese in den
Tiefkühlschrank/die Tiefkühltruhe stellen.
► Legen Sie die Becher 8 vor dem Einfrieren in
eine Plastiktüte, zum Beispiel einen Gefrierbeutel.
► Legen Sie die Früchte, die Milch und die
Sahne schon vor dem Verarbeiten in den
Kühlschrank. So sind diese schon kalt und die
Eismischung benötigt nicht mehr so lange, um
herunterzukühlen.
♦ Pürieren Sie Früchte mit einem Pürierstab und
mischen Sie alle Zutaten laut Rezept.
♦ Lassen Sie die Mischung im Kühlschrank auf ca.
5 - 10°C abkühlen.
DE
AT
CH
SEMD 12 A1
55
Page 59

Eis herstellen
ACHTUNG! SACHSCHADEN!
► Starten Sie immer erst das Gerät und füllen Sie
dann die Zutaten ein! Ansonsten gefriert die
Eismasse sofort an den Wänden des Bechers 8
und die Eisschaber 7 blockieren. Dabei wird
der Motor überhitzt!
ACHTUNG! SACHSCHADEN!
► Stoppen Sie das Gerät keinesfalls während
des Verarbeitungsvorganges. Ansonsten gefriert die Eismasse sofort an den Wänden des
Bechers 8 und die Eisschaber 7 blockieren
beim erneuten Einschalten. Dabei wird der
Motor überhitzt!
DE
1) Nehmen Sie die Becher 8 aus dem Tiefkühl-
AT
CH
schrank/der Tiefkühltruhe und setzen Sie das
Gerät zusammen, wie im Kapitel „Zusammenbau“ beschrieben.
2) Schalten Sie das Gerät ein, indem Sie den
Ein-/Aus-Schalter 1 auf die Position I stellen.
Die beiden Eisschaber 7 drehen sich.
3) Füllen Sie nun die vorbereitete Eismischung
durch die Einfüllöff nungen 4 in die Becher 8.
Benutzen Sie hierfür am Besten ein Gefäß mit
einem Ausguss. Füllen Sie jedoch niemals mehr
als 300 ml pro Becher 8 ein. Während der
Verarbeitung nimmt das Volumen der Masse zu!
HINWEIS
Sie können auch nur einen Becher 8 mit
►
Zutaten füllen. Setzen Sie jedoch immer beide
Becher in das Gerät ein.
HINWEIS
Es kann sein, dass die Eisschaber 7 zwischen-
►
druch die Drehrichtung wechseln. Dies passiert,
wenn die Eismasse zu fest wird. Dies ist normal
und stellt kein Defekt des Gerätes dar.
4) Lassen Sie das Gerät solange laufen, bis Sie
mit der Konsistenz der Mischung zufrieden
sind. Nach spätestens 20 bis maximal 30
Minuten ist das Eis fertig.
5) Schalten Sie das Gerät am Ein-/Aus-Schalter 1
aus und ziehen Sie den Netzstecker.
6) Stellen Sie den Drehschalter 9 auf
Deckel 5 mit Motorblock 2 abzunehmen.
7) Ziehen Sie die Eisschaber 7 aus dem Eis. Soll-
te Eis an diesen hängen bleiben, schaben Sie
es mit einem Plastiklöff el oder ähnlichem ab.
8) Heben Sie die Becher 8 aus dem Gerät und
entnehmen Sie das Eis. Benutzen Sie dafür
ausschließlich Plastik- oder Holzbesteck.
ACHTUNG! SACHSCHADEN!
► Benutzen Sie kein Metallbesteck um das Eis
aus den Bechern 8 zu entnehmen!
HINWEIS
Wenn Sie den Deckel 5 wieder auf die
►
Becher aufsetzen möchten, müssen Sie zuerst
den Motorblock 2 vom Deckel 5 lösen.
Gehen Sie dann wieder vor, wie im Kapitel
„Zusammenbau“ beschrieben. Ansonsten
kann es passieren, dass die Antriebswellen
3 nicht korrekt in die Antriebswellen-Aufnahme 6 rutschen.
um den
56
SEMD 12 A1
Page 60

Reinigen und Pfl egen
STROMSCHLAGGEFAHR
Ziehen Sie immer den Netzstecker aus der
►
Netzsteckdose, bevor Sie das Gerät reinigen.
Sie dürfen den Motorblock 2 keinesfalls
in Flüssigkeit tauchen und keine Flüssigkeiten in das Gehäuse des Motorblocks 2
gelangen lassen.
ACHTUNG! SACHSCHADEN!
► Benutzen Sie keine aggressiven, scheuernden
oder chemischen Reinigungsmittel um das Gerät zu reinigen. Das führt zu Beschädigungen
an der Oberfl äche!
► Reinigen Sie die Teile dieses Gerätes nicht in
der Spülmaschine!
♦ Nehmen Sie zum Reinigen das Gerät, falls noch
zusammengebaut, auseinander:
– Stellen Sie den Drehschalter 9 auf um
den Deckel 5 mit Motorblock 2 abzuneh-
men.
– Drehen Sie den Deckel 5 mit dem Mo-
torblock 2 um. Drücken Sie die beiden
Arretierungen des Motorblockes 2, die
durch den Deckel 5 ragen, leicht nach
Innen und drücken Sie diese gleichzeitig aus
dem Deckel 5 heraus. Der Motorblock 2
löst sich nun vom Deckel 5.
– Ziehen Sie die Antriebswellen 3 aus dem
Motorblock 2.
– Nehmen Sie die Eisschaber 7 aus den
Bechern 8.
– Nehmen Sie die Becher 8 von der Basis 0.
♦ Reinigen Sie den Motorblock 2 nach jeder
Benutzung mit einem feuchten Tuch. Geben Sie
bei hartnäckigen Verschmutzungen ein mildes
Spülmittel auf das Tuch. Wischen Sie dann mit
klarem Wasser nach. Stellen Sie sicher, dass
sich keine Spülmittelreste am Gerät befi nden
und dass das Gerät vor der erneuten Benutzung
vollständig trocken ist.
♦ Lassen Sie die Becher 8 auf Zimmertemperatur
aufwärmen, bevor Sie diese reinigen.
Spülen Sie die Becher 8, die Antriebswellen
3, die Eisschaber 7 und den Deckel 5 in
lauwarmen Wasser mit etwas Spülmittel. Spülen
Sie diese Teile noch einmal mit klarem Wasser
nach um sicherzustellen, dass alle Spülmittelreste beseitigt sind.
♦ Wischen Sie die Basis 0 mit einem feuchten
Tuch ab. Geben Sie bei hartnäckigen Verschmutzungen ein mildes Spülmittel auf das
Tuch.
♦ Stellen Sie sicher, dass vor der erneuten Benut-
zung alle Teile wieder vollständig getrocknet
sind.
Lagerung
♦ Reinigen Sie das Gerät vor dem Verstauen
gründlich.
♦ Bewahren Sie das Gerät an einem sauberen
und trockenen Ort auf.
DE
AT
CH
SEMD 12 A1
57
Page 61

Garantie und Service
Sie erhalten auf dieses Gerät 3 Jahre Garantie
ab Kaufdatum. Das Gerät wurde sorgfältig
produziert und vor Anlieferung gewissenhaft
geprüft. Bitte bewahren Sie den Kassenbon als
Nachweis für den Kauf auf. Bitte setzen Sie sich
im Garantiefall mit Ihrer Servicestelle telefonisch
in Verbindung. Nur so kann eine kostenlose
Einsendung Ihrer Ware gewährleistet werden.
Die Garantieleistung gilt nur für Material- oder
Fabrikationsfehler, nicht aber für Transportschäden, Verschleißteile oder für Beschädigungen an
zerbrech lichen Teilen, z. B. Schalter oder Akkus.
Das Produkt ist lediglich für den privaten und nicht
für den gewerblichen Gebrauch bestimmt.
Bei missbräuchlicher und unsachgemäßer Behandlung, Gewaltanwendung und bei Eingriff en, die
DE
nicht von unserer autorisierten Service-Niederlas-
AT
sung vorgenommen wurden, erlischt die Garantie.
CH
Ihre gesetzlichen Rechte werden durch diese Garantie nicht eingeschränkt.
Die Garantiezeit wird durch die Gewährleistung
nicht verlängert. Dies gilt auch für ersetzte und reparierte Teile. Eventuell schon beim Kauf vorhandene
Schäden und Mängel müssen sofort nach dem
Auspacken gemeldet werden, spätestens aber zwei
Tage nach Kaufdatum. Nach Ablauf der Garantiezeit anfallende Reparaturen sind kostenpfl ichtig.
Service Deutschland
Tel.: 0800 5435 111 (Kostenfrei aus
dem dt. Festnetz/Mobilfunknetz)
E-Mail: kompernass@lidl.de
IAN 111458
Service Österreich
Tel.: 0820 201 222 (0,15 EUR/Min.)
E-Mail: kompernass@lidl.at
IAN 111458
Service Schweiz
Tel.: 0842 665566 (0,08 CHF/Min.,
Mobilfunk max. 0,40 CHF/Min.)
E-Mail: kompernass@lidl.ch
IAN 111458
Erreichbarkeit Hotline:
Montag bis Freitag von 8:00 Uhr – 20:00 Uhr
(MEZ)
Entsorgung
Werfen Sie das Gerät kei-
nesfalls in den normalen
Hausmüll. Dieses Produkt
unterliegt der europäischen
Richtlinie 2012/19/EU.
Entsorgen Sie das Gerät über einen zugelassenen
Entsorgungsbetrieb oder über Ihre kommunale
Entsorgungseinrichtung. Beachten Sie die aktuell
geltenden Vorschriften. Setzen Sie sich im Zweifelsfall mit Ihrer Entsorgungseinrichtung in Verbindung.
58
Die Verpackung besteht aus umwelt-
freundlichen Materialien, die Sie über
die örtlichen Recyclingstellen entsorgen
können.
Importeur
KOMPERNASS HANDELS GMBH
BURGSTRASSE 21
44867 BOCHUM
GERMANY
www.kompernass.com
SEMD 12 A1
Page 62

Rezepte
Erdbeermilcheis
HINWEIS
Rezepte ohne Gewähr. Alle Zutaten- und
►
Zubereitungsangaben sind Anhaltswerte.
Ergänzen Sie diese Rezeptvorschläge um Ihre
persönlichen Erfahrungswerte.
► Die Rezepte ergeben jeweils die Menge zur
Füllung von einem Becher 8.
► Die max. Füllmenge eines Bechers 8 ergibt
ca. 2 - 3 Kugeln Eiscreme.
► Wir empfehlen die Sahne, die Sie für die
Rezepte benötigen, vor der Verarbeitung zu
schlagen. Da das Schlagen von so kleinen
Mengen Sahne nur schwer gelingt, empfehlen wir, mehr Sahne als benötigt wird zu
schlagen und die zuviel geschlagene Sahne
später zum Garnieren des fertig hergestellten
Eises zu verwenden.
Vanilleeis
Zutaten
■ 170 ml Vollmilch
■ 85 ml/85 g Sahne
■ 25 g Puderzucker
■ 10 g Vanillezucker
Zubereitung
1) Schlagen Sie die Sahne, so dass diese etwas
fest wird.
2) Vermischen Sie die Sahne mit der Milch, dem
Vanillezucker und dem Puderzucker.
3) Lassen Sie die Eismasse im Kühlschrank auf ca.
5 - 10 °C abkühlen
Sie können nun die Eismasse, wie in der Anleitung
beschrieben, zu Eis verarbeiten.
Zutaten
■ ca. 120 g Erdbeeren
■ 70 ml/70 g Vollmilch
■ 60 ml/60 g Sahne
■ 30 g Puderzucker
Zubereitung
1) Pürieren Sie die Erdbeeren.
2) Schlagen Sie die Sahne, so dass diese etwas
fest wird.
3) Vermischen Sie die pürierten Erdbeeren mit der
Sahne, der Milch und dem Puderzucker.
4) Lassen Sie die Eismasse im Kühlschrank auf ca.
5 - 10 °C abkühlen
Sie können nun die Eismasse, wie in der Anleitung
beschrieben, zu Eis verarbeiten.
Bananenmilcheis
Zutaten
■ 1/2 - 1 Banane (ca. 75g)
■ 115 ml/115 g Vollmilch
■ 55 ml/55 g Sahne
■ 35 g Puderzucker
Zubereitung
1) Pürieren Sie die Banane.
2) Schlagen Sie die Sahne, so dass diese etwas
fest wird.
3) Vermischen Sie die pürierte Banane mit der
Sahne, der Milch und dem Puderzucker.
4) Lassen Sie die Eismasse im Kühlschrank auf ca.
5 - 10 °C abkühlen
Sie können nun die Eismasse, wie in der Anleitung
beschrieben, zu Eis verarbeiten.
DE
AT
CH
SEMD 12 A1
59
Page 63

Mangomilcheis
Nussmilcheis
Zutaten
■ 90 g Mangofl eisch
■ 90 ml/90 g Vollmilch
■ 50 ml/50 g Sahne
■ 25 g Puderzucker
Zubereitung
1) Pürieren Sie das Mangofl eisch.
2) Schlagen Sie die Sahne, so dass diese etwas
fest wird.
3) Vermischen Sie das pürierte Mangofl eisch mit
der Sahne, der Milch und dem Puderzucker.
4) Lassen Sie die Eismasse im Kühlschrank auf ca.
DE
AT
CH
5 - 10 °C abkühlen
Sie können nun die Eismasse, wie in der Anleitung
beschrieben, zu Eis verarbeiten.
Zutaten
■ 40 g Nüsse
■ 80 ml/80 g Vollmilch
■ 60 ml/60 g Sahne
■ 50 g Pudezucker
Zubereitung
1) Hacken Sie die Nüsse klein.
2) Schlagen Sie die Sahne, so dass diese etwas
fest wird.
3) Vermischen Sie die Milch, die Sahne und den
Puderzucker.
4) Lassen Sie die Eismasse im Kühlschrank auf ca.
5 - 10 °C abkühlen.
5) Geben Sie nach dem Abkühlen die Eismasse
in das Gerät wie im Kapitel „Eis herstellen“
beschrieben.
6) Warten Sie ca. 5 Minuten ab und geben Sie
dann, ohne das Gerät auszuschalten, die
gehackten Nüsse nach und nach in das Gerät.
7) Warten Sie, bis das Eis fertig zubereitet ist.
60
SEMD 12 A1
Page 64

KOMPERNASS HANDELS GMBH
BURGSTRASSE 21
44867 BOCHUM
DEUTSCHLAND / GERMANY
www.kompernass.com
Last Information Update · Stan informacji · Stanje informacij
Stav informací · Stav informácií · Stand der Informationen:
03 / 2015 · Ident.-No.: SEMD12A1-012015-3
IAN 111458
4
 Loading...