


SXD3000 - 900 Watt Stereo Power Amplifier
SXD5000 - 1,500 Watt Stereo Power Amplifier
SXD7000 - 2,000 Watt Stereo Power Amplifier
Owner's Manual

Important Safety Information
AVIS
RISQUE DE CHOC ÉLECTRONIQUE -
NE PAS OUVRIR
CAUTION: TO REDUCE THE RISK OF ELECTRIC SHOCK, DO NOT REMOVE COVER (OR BACK). NO USER-SERVICEABLE PARTS INSIDE. REFER SERVICING TO QUALIFIED SERVICE PERSONNEL.
This lightning flash with arrowhead symbol within an equilateral triangle is intended to alert the user to the presence of non-insulated “dangerous voltage” within the product’s enclosure that may be of sufficient magnitude to constitute a risk of electric shock.
The exclamation point within an equilateral triangle is intended to alert the user to the presence of important operating and maintenance instructions in the literature accompanying the appliance.
1.Read these instructions.
2.Keep these instructions.
3.Heed all warnings.
4.Follow all instructions.
5.This apparatus shall not be exposed to dripping or splashing liquid and no object filled with liquid, such as a vase, should be placed on the apparatus.
6.Clean only with a dry cloth.
7.Do not block any of the ventilation openings. Install in accordance with the manufacturer's instructions.
8.Do not install near any heat sources such as radiators, heat registers, stoves, or other apparatuses (including amplifiers) that produce heat.
9.Only use attachments/accessories specified by the manufacturer.
10.Unplug this apparatus during lightning storms or when not in use for long periods of time.
11.Do not override the intended purpose of the polarized or grounding-type plug. A polarized plug has two blades, with one wider than the other. A grounding-type plug has two blades and a third grounding prong. The wide blade, or third prong, is provided for your safety. If the provided plug does not fit your outlet, consult an electrician to replace the obsolete outlet.
12.Protect the power cord from being walked on or pinched, particularly at the prongs, convenience receptacles, the point where they exit from the apparatus.
13.Use only with the cart stand, tripod bracket, or table specified by the manufacture, or sold with the apparatus. When a cart is used, utilize caution when moving the cart/apparatus combination to avoid injury from tip-over.
14.Refer all servicing to qualified service personnel. Servicing is required if the apparatus has been dam-
aged in any way, such as power-supply cord or plug breakage, damage due to liquid or objects falling
onto the apparatus, exposure to rain or moisture, or if the apparatus does not operate normally, or has been dropped.
15.MAINS DISCONNECT: The plug should remain readily operable. For rack-mount or installation where plug is not accessible, an all-pole mains switch with a contact separation of at least 3 mm in each pole shall be incorporated into the electrical installation of the rack or building.
16.FOR UNITS EQUIPPED WITH EXTERNALLY ACCESSIBLE FUSE RECEPTACLE: Replace fuse with same type and rating only.
17.MULTIPLE-INPUT VOLTAGE: This equipment may require the use of a different line cord, attachment plug, or both, depending on the available power source at installation. Connect this equipment only to the power source indicated on the equipment rear panel. To reduce the risk of fire or electric shock, refer servicing to qualified service personnel or equivalent.
If you want to dispose this product, do not mix it with general household waste. There is a separate collection system for used electronic products in accordance with legislation that requires proper treatment, recovery and recycling.
Private household in the 28 member states of the EU, in Switzerland and Norway may return their used electronic products free of charge to designated collection facilities or to a retailer (if you purchase a similar new one).
For Countries not mentioned above, please contact your local authorities for a correct method of disposal.
By doing so you will ensure that your disposed product undergoes the necessary treatment, recovery and recycling and thus prevent potential negative effects on the environment and human health.
THIS DEVICE COMPLIES WITH PART 15 OF THE FCC RULES CLASS B. OPERATION IS SUBJECT TO THE FOLLOWING TWO CONDITIONS:
(1)THIS DEVICE MUST NOT CAUSE HARMFUL INTERFERENCE, AND
(2)THIS DEVICE MUST ACCEPT ANY INTERFERENCE RECEIVED INCLUDING INTERFERENCE THAT MAY CAUSE UNDESIRED OPERATION. SUITABLE FOR HOME OR OFFICE USE.

Table of Contents
Introduction . . . . . . . . . . . . . . |
. . . . . . |
. . |
|
4 |
Getting Started with the SXD Power Amplifier . . . . |
. . . . . . |
. |
. 6 |
|
Front Panel Callouts . . . . . . . . . . . . |
. . . . . . |
. |
. 7 |
|
Rear Callouts . . . . . . . . . . . . . . |
. . . . . . |
. |
. |
8 |
Getting Started - DSP . . . . . . . . . . . |
. . . . . . |
. |
. |
9 |
Presets . . . . . . . . . . . . . . . . |
. . . . . . |
. |
. |
11 |
System Setup Examples . . . . . . . . . . |
. . . . . . |
. . |
|
12 |
Wiring Guide |
|
|
|
14 |
Specifications . . . . . . . . . . . . . . |
. . . . . . |
. |
. |
15 |
Copyright 2015 v2.1
Samson Technologies Corp. 45 Gilpin Avenue
Hauppauge, New York 11788-8816
Phone: 1-800-3-SAMSON (1-800-372-6766) Fax: 631-784-2201
www.samsontech.com
SXD Series Power Amplifiers with DSP
ITALIANO ESPAÑOL DEUTSCHE FRANÇAIS ENGLISH
3

Introduction
The Samson SXD Series stereo power amplifiers have been designed to provide robust, clean output with low distortion and wide dynamic range, along with the dependability demanded by professional front-of-house engineers and installers.
The convenient two rack-space design is compact, and yet there’s plenty of power available, with 2 x 450 Watts at 4Ω for the SXD3000, 2 x 750 Watts at 4Ω for the SXD5000, and 2 x 1000 Watts at 4Ω for the SXD7000 over the full frequency spectrum, from 20 Hz to 20 kHz.
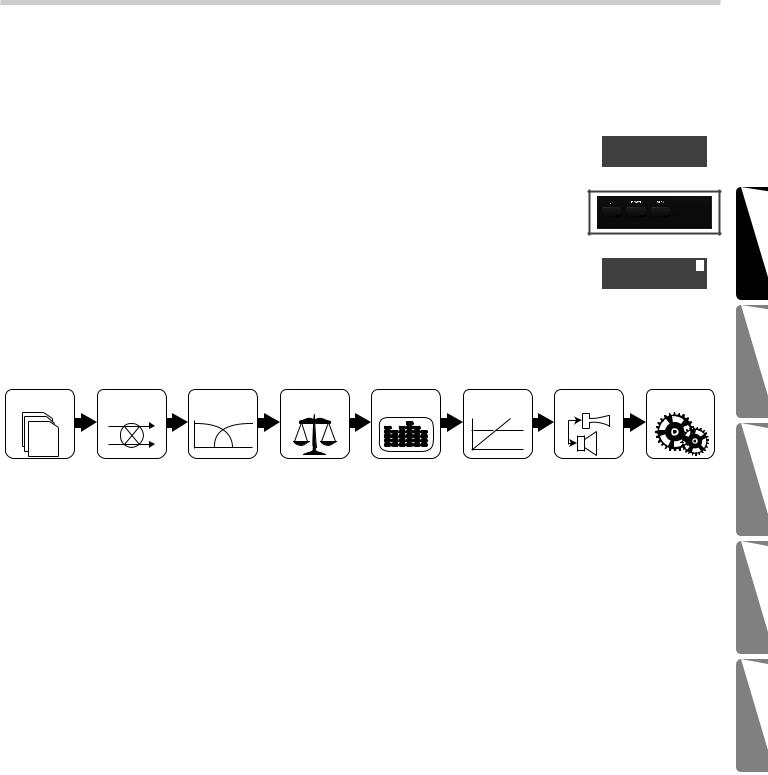
The SXD has a full-featured DSP and front panel LCD display with settings for highand low-pass filters, three-band equalizer, output limiter, delay time for speaker alignment, and digital pass-code security lock to ensure settings are not changed accidentally. There are also four presets designed for typical speaker configurations. These presets will allow you to quickly get up and running with your system by displaying the parameters that are essential to the speaker arrangement.
Input connections are made via both balanced XLR and balanced ¼” TRS connections. For the outputs, the SXD Series provides standard binding posts as well as a Speakon® connectors. To help you set the correct operating levels, the SXD amplifiers include front panel Signal, Output Level, Limiter and Protection LED indicators.
Like all Samson power amplifiers, the SXD Series' internal electronics are based around a serious power-core, with oversized toroidal transformers and large heat sinks. To keep the SXD amplifiers running cool, the design employs forced-air cooling via a temperature-sensitive, variable speed fan, which greatly reduces the chance of thermal and overheating problems. Multi-stage protection for power-up, over-heating, over-current, short circuit, low output impedance and DC voltage, assures high reliability under the most demanding situations.
The SXD amps are designed for the rigors of either portable PA system or a fixed installation system with all-steel chassis, 19-inch rack mount design, and convenient carry handles.
Optimized for live sound venues, houses of worship, commercial installations, and for driving live PA systems, the SXD amplifiers will deliver reliable power from gig-to-gig and venue-to-venue. In the following pages, you’ll find a detailed description of the many features of the SXD Series power amplifier, as well as a guided tour through its front and rear panels, step-by-step instructions for its setup and use, and full specifications.
We recommend you keep the following records for reference, as well as a copy of your sales receipt.
Serial number: ____________________________________________
Date of purchase: __________________________________________
Dealer name: _____________________________________________
With proper care and maintenance, your SXD amplifier will operate trouble-free for many years. Should your amplifier ever require servicing, a Return Authorization (RA) number must be obtained before shipping your unit to Samson. Without this number, the unit will not be accepted. Please call Samson at 1-800-3SAMSON (1-800-372-6766) for an RA number prior to shipping your unit. Please retain the original packing materials and, if possible, return the unit in its original carton.
If your SXD amplifier was purchased outside of the United States, contact your local distributor for warranty details and service information.
4

Features
•High power for performance and installation speaker configurations: SXD3000 2 x 300 Watts at 8Ω and 2 x 450 Watts at 4Ω SXD5000 2 x 500 Watts at 8Ω and 2 x 750 Watts at 4Ω SXD7000 2 x 700 Watts at 8Ω and 2 x 1000 Watts at 4Ω
•High performance DSP technology offers complete control over many performance features
•Digital Security Lock prevents unwanted changes to the DSP settings
•Front panel LCD for navigating DSP settings, including Filters, EQ, Limiter, Delay, and more
•Clean, crisp sound, 0.02% THD, dynamic range of 100 dB, and frequency response of 20 Hz to 20 kHz, guarantee ultra-clean sound quality
•Independent level controls for each channel allow precision adjustments
•LED signal indicators for each channel continuously display input signals and output levels
•Temperature-sensitive, variable speed fan provides reliable performance without thermal and overheating problems
•Protection relay circuitry that guards against overheating or faulty wiring conditions and also prevents “thumps” when powering on or off
•Input connectors for each channel accommodate both balanced XLR or balanced ¼-inch TRS plugs
•Output connections are made via binding posts and Speakon® connectors
•The SXD Series can be mounted in any standard 19” rack, making it easy to integrate the amp into any fixed or traveling PA rig
•Rugged construction makes the SXD Series completely roadworthy
ESPAÑOL DEUTSCHE FRANÇAIS ENGLISH
ITALIANO
SXD Series Power Amplifiers with DSP |
5 |

Getting Started with the SXD Power Amplifier
Setting up your SXD Series is a simple procedure which takes only a few minutes:
Remove all packing materials (save them in case your units needs future service) and decide where the amplifier is to be physically placed—it can be used free-standing or mounted in a standard 19” rack, requiring two rack spaces. When installed, make sure that both the front and rear panels are unobstructed and that there is good ventilation around the entire unit.
O
T |
|
|
S |
|
S |
|
E |
P |
R |
|
|
Make the speaker connections, using the binding posts, or Speakon® output connectors on the rear panel. It is never a good idea to power up any amplifier that is not connected to loudspeakers.
Next, make the signal input connections, using the input connectors on the rear panel (if operating the SXD Series in Ch A Parallel mode, use the Ch A input only). If your mixer has balanced outputs, we recommend the use of three-conductor cabling and connectors.
On the front panel of the SXD Series, turn both Channel level controls fully counterclockwise (to their “MIN” setting). Then connect the supplied heavy-gauge 3-pin “IEC” cable to the rear panel IEC connector and to any grounded AC socket.
Turn the Power switch ON.
Apply an input signal to the SXD Series at or about +4dBu (if sending signal from a mixer, drive the output meters at approximately 0 vu). While the input signal is present, slowly raise the Channel level controls until the desired sound level is achieved. The SIGNAL and Limiter LED indicators next to
each Channel input control will show you the continuous power output of the SXD Series as signal is being passed. For the best signal-to-noise ratio, the SXD Series should normally be run with the Channel Input controls at or near maximum (fully clockwise, at the “MAX” position) and the LIMITER segments should light occasionally (but not frequently) during peak levels. If you are using a mixer that has a master output level control, use it to attenuate the signal as necessary to achieve the desired speaker level.
R
E
S
E T
O T
S
S
E
PR
6

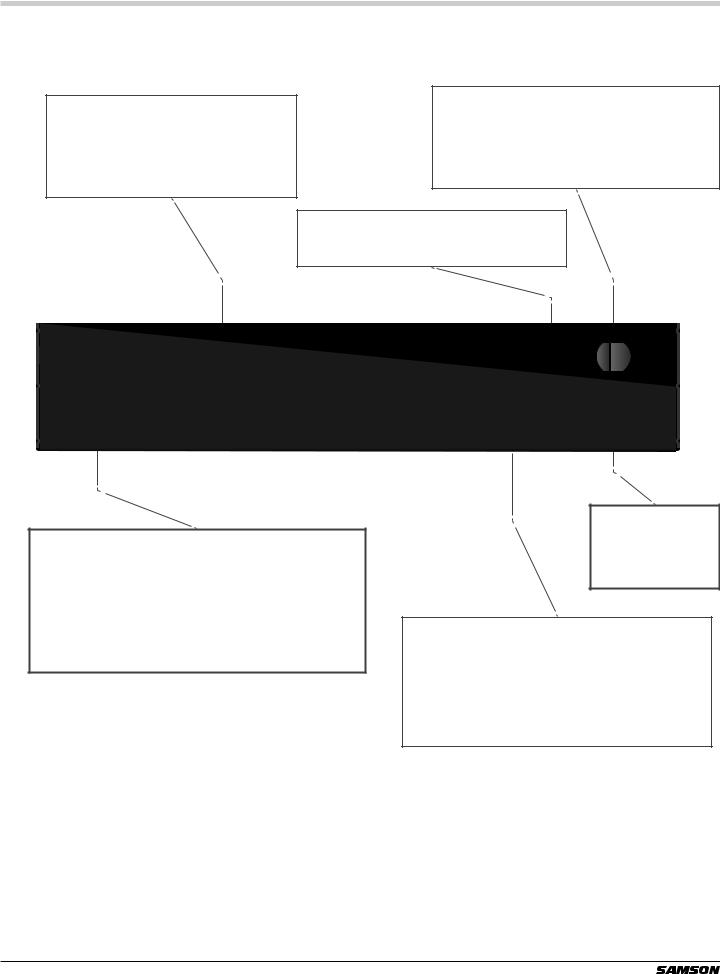
Front Panel Callouts
LCD Display
Backlit display shows current setup information and navigation through the DSP settings
Power Switch
Use this to power the
SXD Series on or off
LED Indicators
The front panel LED indicators continuously monitor the power output level for the corresponding channel. THERMAL: Lights red whenever the thermal protection is
activated
LIMITER: Lights red whenever the output limiter is activated -20/-10: Lights whenever the output level reaches -20dB or -10dB, respectively, below the distortion or clipping
SIGNAL: Lights whenever input signal is present
|
|
|
|
|
|
|
|
|
|
|
|
|
|
|
|
|
|
|
|
|
|
|
|
|
|
|
|
|
|
|
|
|
|
|
|
|
|
|
|
|
|
|
|
|
|
|
|
|
|
|
|
|
|
|
|
|
|
|
|
|
|
|
|
|
|
|
|
|
|
|
|
|
|
|
|
|
|
|
|
|
|
|
|
|
|
|
|
|
|
|
|
|
|
|
|
|
|
|
|
|
|
|
|
|
|
|
|
|
|
|
|
|
|
|
|
|
|
|
|
|
|
|
|
|
|
|
|
|
|
|
|
|
|
|
|
|
|
|
|
|
|
|
|
|
|
|
|
|
|
|
|
|
|
|
|
|
|
|
|
|
|
|
|
|
|
|
|
|
|
|
|
|
UP/DOWN/BACK Buttons |
|
|
|
|
|
Channel Level Controls |
|
|
|||||
|
|
|
Use these buttons to |
|
|
|
|
|
|
|
||||||
|
|
|
|
|
|
|
|
Two detent controls to precisely |
|
|
||||||
|
|
|
navigate through the |
|
|
|
|
|
|
|
||||||
|
|
|
|
|
|
|
|
adjust the output level of each |
|
|
||||||
|
|
|
DSP functions |
|
|
|
|
|
|
|
||||||
|
|
|
|
|
|
|
|
channel |
|
|
||||||
|
|
|
|
|
|
|
|
|
|
|
|
|
|
|||
|
|
|
|
|
|
|
|
|
|
|
|
|
|
|
|
|
|
|
EDIT Knob/Button |
|
|
|
|
|
Handles |
|
|
|
Use this knob/button |
|
|
|
|
|
Two steel handles located conveniently |
|
Rack Ears |
|
to adjust and save |
|
|
|
|
on the left and right side of the front |
||
Mounts into a standard |
|
parameters in the DSP |
|
|
|
|
panel for easy transport or installation |
||
19-inch rack |
|
|
|
|
|
|
|
|
|
|
|
|
|
|
ITALIANO ESPAÑOL DEUTSCHE FRANÇAIS ENGLISH
SXD Series Power Amplifiers with DSP |
7 |

Rear Callouts
Exhaust Fan
This variable-speed fan provides cooling to amplifier. Make sure that both the front and rear panels are kept free of all obstructions and that cool, fresh air is accessible at all times.
Circuit Breaker
This circuit breaker will trip if there is a fault with the mains voltage or if maximum output is overloaded for an period. Push it in to restart the amplifier after a short rest period.
Speakon® Output Connectors
Use these to connect each channel of the amplifier to 4- or 8-ohm loudspeakers
R
E
S
E T
O T |
||
|
|
S |
|
|
S |
|
|
E |
|
P |
R |
|
|
|
|
|
|
|
|
|
Input Connectors
Connect incoming signals to these electronically balanced connectors, using either XLR or ¼”
TRS (Tip/Ring/Sleeve) plugs. The amplifier accepts input levels of any strength but needs at least +4 dBu to achieve maximum power. The inputs are wired in parallel, so they can be used to daisy chain out of each channel to a second power amplifier.
AC Input - Connect the supplied heavygauge 3-pin “IEC” power cable here
Binding Post
Use these to connect each channel of the amplifier to 4- or 8-ohm loudspeakers. Be sure to connect the loudspeaker correctly, with the red (+) terminal normally connected to the positive input of the speaker and the black (ground) terminal normally connected to the negative input of the speaker.
8
Getting Started - DSP
The SXD power amplifier features sophisticated high-performance DSP with control for the input and output routing, filter network, EQ, limiter, and time alignment delay. Follow these steps to navigate through the SXD internal DSP settings:
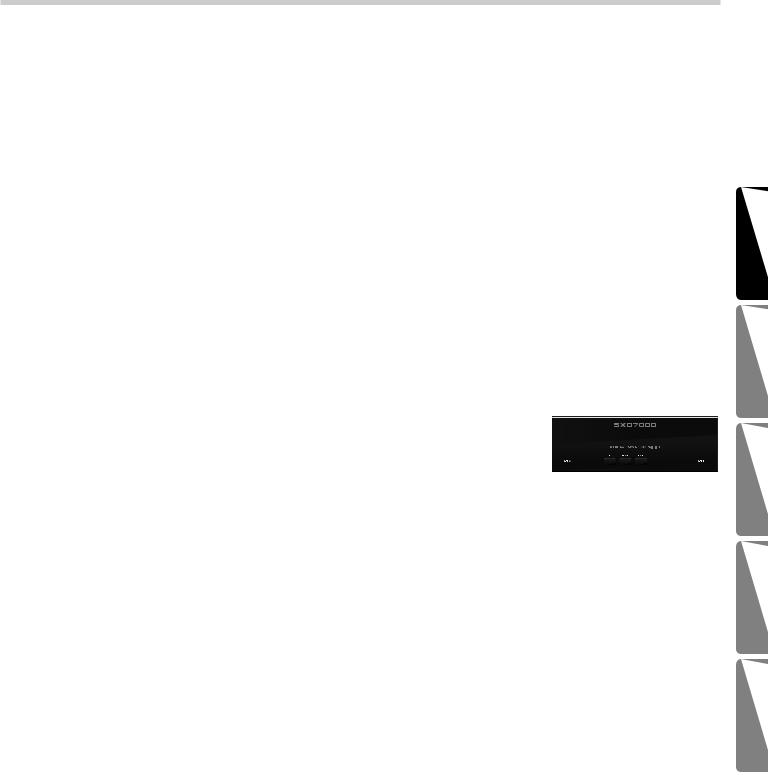
1.Turn the SXD power ON. The startup screen will be displayed (figure 1).
2.Press the UP & DOWN buttons to step through the DSP parameters (figure 2).
3.Rotate the EDIT knob to adjust settings. A box will flash in the upper right corner when a setting has been changed (figure 3).
4.Press the EDIT button to confirm and set the changes. Press any other button to cancel the adjustment.
5.Press the BACK button to exit out of a parameter and return to the top level of the menu.
Samson SXD7000 figure 1
figure 2 |
I/O Parallel A link
figure 3
ENGLISH
DSP Flowchart
PRESET |
I/O |
FILTER |
GAIN OFFSET |
EQ |
LIMITER |
DELAY |
SETUP |
|
A |
A |
|
|
|
|
|
|
B |
B |
|
|
|
|
|
DSP Settings
Preset - Choose either Manual Mode, which provides access to the full set of adjustable parameters, or from the four speaker presets: 2 full range, Mono 2-way, Sub/Sat, or 2 subs.
I/O - The I/O screen adjusts the settings for how the inputs will be routed through the DSP to the output connectors. Stereo: Ch A Input -> Ch A Output & Ch B Input -> Ch B Output
Mono A+B dual: Ch A and Ch B inputs are mixed together, each level control adjusts the corresponding output level Mono A+B link: Ch A and Ch B inputs are mixed together, Ch A level control adjusts both Ch A and Ch B output levels Parallel A dual: Ch A input is sent to both Ch A and Ch B outputs, each level control adjust the corresponding output level
Parallel A link: Ch A input is sent to both Ch A and Ch B outputs, CH A level control adjusts the output level for both channels.
Filter (Manual mode) - The filter section allows you to build you own crossover or add speaker protection by stetting the filters to remove the upper and lower limits of the audio bandwidth.
Filter Ch A - Press the Edit button to enter the filter parameters for channel A.
Filter Ch B - Press the Edit button to enter the filter parameters for channel B. If the Ch A filter is On, then the Ch B filter can be set to the same settings by choosing A=B
LPF Freq - Rotate the EDIT knob to adjust the low pass filter frequency.
LPF Slope - Rotate the EDIT knob to adjust the filter type and slope roll off in dB per octave. HPF Freq - Rotate the EDIT knob to adjust the high pass filter frequency.
HPF Slope - Rotate the EDIT knob to adjust the filter type and slope roll off in dB per octave.
X-Over (speaker preset) - When using a speaker preset, the filters are already configured for a crossover. This allows you to easily set the crossover frequency for your speaker configuration.
Gain Offset (Manual mode) - This adjustment allows you to set an overall balance between the outputs of the amplifier. This allows you to match the difference of output level of the speakers in a system without needing to constantly adjust the front panel level controls.
ITALIANO ESPAÑOL DEUTSCHE FRANÇAIS
SXD Series Power Amplifiers with DSP |
9 |

Getting Started - DSP
EQ - In Manual mode there are three EQ filters per channel. The Low frequency adjustment can be set to a Low Frequency Shelf or to a parametric equalizer (PEQ) with Frequency, Q, and Gain adjustments. The mid band is a parametric equalizer (PEQ) with Frequency, Q, and Gain adjustments. The high frequency band can be set to a High Frequency shelf or to a parametric (PEQ) band. Press the Edit button to enter the EQ parameters. If Ch A EQ is set ON, Ch B can be set to the same settings by choosing A=B. If using a speaker preset, the SXD offers seven EQ preset frequency curves to match your performance setting: DJ, Vocal, Live Sound, Install, Rock, Dance, Jazz.
Limiter - The limiter provides additional protection to your speakers from overload. Press the EDIT button to adjust. The Limiter can be set to -1dB, -3dB, and -9dB.
Delay - The delay time can be used to align speakers in a system. This is useful when using a subwoofer and satellite speaker for front of house to ensure the speakers are in phase for optimal performance. Click the Edit button to adjust. The Delay settings are displayed in milliseconds, inches/feet, and centimeters/meters.
Setup - In the Setup mode the amplifier can be locked and the user can create a four-digit code so settings are not accidentally changed. Click to set Lock Code. Rotate the EDIT knob to adjust the code number, and press the DOWN and UP buttons to move through each digit. Click the EDIT button to set the lock code.
If you have forgotten your Lock Code, you can reset it by turning off the amplifier, then while holding the UP and DOWN buttons turn the power back on.
Factory Reset - This sets all parameters and presets back to the original factory default settings.
10
Presets
The SXD DSP features four speaker presets that will allow you to quickly have your amplifier up and running with your speaker configuration. The presets only display the parameters that are essential to the speaker arrangement. If you require additional adjustments, all parameter adjustments are available in Manual mode. Below are typical wiring configurations for the four presets.
2 full range |
Mono 2-way (Input Mono A+B link) |
R O T |
R O T |
||
E |
S |
SE |
S |
S |
S |
S |
|
T |
E |
T |
E |
E |
|
E |
|
|
PR |
|
PR |
|
|
|
|
|
|
|
|
|
|
|
|
|
|
|
|
|
|
|
|
|
|
|
|
|
|
|
|
|
|
|
|
|
|
|
|
|
|
|
|
|
|
|
|
|
|
|
|
|
|
|
|
|
|
|
|
|
|
|
|
|
|
|
|
|
|
|
|
|
|
|
|
|
|
|
|
|
|
|
|
|
|
|
|
|
|
|
|
|
|
|
|
|
|
|
|
|
|
|
|
|
|
|
|
|
|
|
|
|
|
|
|
|
|
|
|
|
|
|
|
|
|
|
|
|
|
|
|
|
|
|
|
|
|
|
|
|
|
|
|
|
|
|
|
|
|
|
|
|
|
|
|
|
|
|
|
|
|
|
|
|
|
|
|
|
|
|
|
|
|
|
|
|
|
|
|
|
|
|
|
|
|
|
|
|
|
|
|
|
|
|
|
|
|
|
|
|
|
|
|
|
|
|
|
|
|
|
|
|
|
|
|
|
|
|
|
|
|
|
|
|
|
|
|
|
|
|
|
|
|
|
|
|
|
|
|
|
|
|
|
|
|
|
|
|
|
|
|
|
|
|
|
|
|
|
|
|
|
|
|
|
|
|
|
|
|
|
|
|
|
|
|
|
|
|
|
|
|
|
|
|
|
|
|
|
|
|
|
|
|
|
|
|
|
|
|
|
|
|
|
|
|
|
|
|
|
|
|
|
|
|
|
|
|
|
|
|
|
|
|
|
|
|
|
|
|
|
|
|
|
|
|
|
|
|
|
|
|
|
|
|
|
|
|
|
|
|
|
|
|
|
|
|
|
|
|
|
|
|
|
|
|
|
|
|
|
|
|
|
|
|
|
|
|
|
|
|
|
|
|
|
|
|
|
|
|
|
|
|
|
|
|
|
|
|
|
|
|
|
|
|
|
|
|
|
|
|
|
|
|
|
|
|
|
|
|
|
|
|
|
|
|
|
|
|
|
|
|
|
|
|
|
|
|
|
|
|
|
|
|
|
|
|
|
|
|
|
|
|
|
|
|
|
|
|
|
|
|
|
|
|
|
|
|
|
|
|
|
|
|
|
|
|
|
|
|
|
|
|
|
|
|
|
|
|
|
|
|
|
|
|
|
|
|
|
|
|
|
|
|
|
|
|
|
|
|
|
|
|
|
|
|
|
|
|
|
|
|
|
|
|
|
|
|
|
|
|
|
|
|
|
|
|
|
|
|
|
|
|
|
|
|
|
|
|
|
|
|
|
|
|
|
|
|
|
|
|
|
|
|
|
|
|
|
|
|
|
|
|
|
|
|
|
|
|
|
|
|
|
|
|
|
|
|
|
|
|
|
|
|
|
|
|
|
|
|
|
|
|
|
|
|
|
|
|
|
|
|
|
|
|
|
|
|
|
Sub/Sat |
|
|
|
|
|
|
2 subs (Input Mono A+B Dual) |
|
|
|||||||||||||||||||||||||||||||
R O T |
R O T |
||
E |
S |
E |
S |
S |
S |
S |
S |
T |
E |
T |
E |
E |
|
E |
|
|
PR |
|
PR |
ITALIANO ESPAÑOL DEUTSCHE FRANÇAIS ENGLISH
SXD Series Power Amplifiers with DSP |
11 |

System Setup Examples
Typical SXD amplifier and speaker configurations for each Input and Output (I/O) setting in the DSP
Stereo Input: Stereo Full Range Speakers
Ch A level control adjusts Ch 1 Output
Ch B level control adjusts Ch 2 Output
R
SE
E
T
O
T
S
S
E
P
Mono A+B Dual: Subwoofer and Satellite
Ch A level control adjusts Ch 1 Output Ch B level control adjusts Ch 2 Output
R
E
S
E
T
O
T
S
S
E
P
Mono A+B Link: Subwoofer and Satellite
Ch A level control adjusts Ch 1 and Ch 2 Output
ER S
E T
O
T
S
S
E
P
12
System Setup Examples
Parallel A Link: Mono 2-Way Cabinet
Ch A level control adjusts Ch 1 and Ch 2 Output
HF
R O T |
|
E |
S |
S |
S |
E |
E |
T |
P |
LF
Parallel A Dual: Subwoofer and Satellite
Ch A level control adjusts Ch 1 Output
Ch B level control adjusts Ch 2 Output
ER |
O T |
S |
|
S |
S |
E |
E |
T |
P |
ITALIANO ESPAÑOL DEUTSCHE FRANÇAIS ENGLISH
SXD Series Power Amplifiers with DSP |
13 |

Wiring Guide
Unbalanced ¼” Connector |
Signal |
|
|
|
Signal |
|
Tip (signal) |
|||||||
|
|
|
|
|
|
|
|
|
|
|
|
|
|
|
|
|
|
|
|
|
|
|
|
|
|
|
|
|
|
|
|
|
|
|
|
|
|
|
Ground |
Ground |
Sleeve (ground) |
||||
|
|
|
|
|
|||
Balanced TRS ¼” Connector |
+Signal (tip) |
-Signal (tip) |
|
Tip (-signal) |
|||
|
+Signal (tip) |
|
Ring (+signal) |
||||
|
|
|
|
||||
|
|
|
|
|
|
|
|
|
|
|
|
|
|
|
|
|
|
|
|
|
|
|
|
|
|
|
|
|
|
|
|
|
|
|
|
|
|
|
|
|
|
|
|
|
-Signal |
|
(ring) Ground |
|
|
|
|
|
|
|
|
|
||||||
|
|
|
|
|
|
|
|
|
|
|
|
|
||||||||
|
|
Ground |
Sleeve (ground) |
|
||||||||||||||||
XLR Balanced Connector |
+Hot Common (ground) |
Common (1) |
|
+Hot (2) |
|
|||||||||||||||
|
(ground) |
|
|
|||||||||||||||||
|
|
|
|
|
|
|
|
|
|
|
|
|
|
|
|
|
|
|
|
|
|
|
|
|
|
|
|
|
|
|
|
|
|
|
|
|
|
|
|
|
|
|
|
|
|
|
|
|
|
|
|
|
|
|
|
|
|
|
|
|
|
|
|
|
|
|
|
|
|
|
|
|
|
|
|
|
|
|
|
|
|
|
|
|
|
|
|
|
|
|
|
|
|
|
|
|
|
|
|
|
|
|
|
|
Solder Points End View
RCA Connector
-Cold |
|
Female XLR |
|
-Cold (3) |
|
+Hot (2) |
Common (1) |
|
|
|
(ground) |
|
Common (ground) +Hot |
|
End View |
Solder Points |
|
|
|
|
-Cold (3) |
|
Male XLR |
-Cold |
|
|
|
|
Tip (signal) |
|
|
|
|
|
|
|
|
|
|
|
|
|
|
|
|
|
|
|
|
|
|
|
|
|
|
|
|
|
Tip (signal) |
|||||
|
|
|
|
|
|
|
|
|
|
|
|
|
|
|
|
|
|
|
Tip (signal) |
|
|||||||||||||||
|
|
|
|
|
|
|
|
|
|
|
|
|
|
|
|
|
|
|
|
|
|
|
|
|
|
|
|
|
|
|
|
|
|
|
|
Sleeve |
|
(ground) |
|
|
|
|
|
|
|
|
|
||
|
Sleeve (ground) |
Sleeve (ground) |
||||
Speakon® Wiring Guide
1- 1+
2+ 2-
Not Connected
14

Specifications
Model |
|
|
SXD3000 |
|
SXD5000 |
|
SXD7000 |
|
|
|
|
|
|
|
|
Rated Output Power |
|
|
|
|
|
|
|
Stereo both channel driven |
8 ohms |
300W |
|
500W |
|
700W |
|
|
|
|
|
|
|
||
4 ohms |
450W |
|
750W |
|
1000W |
||
|
|
|
|
||||
|
|
|
|
|
|
|
|
Signal to Noise Ratio (20Hz-20k) |
|
|
|
100dB |
|
||
Distortion (SMPTE-IM) |
|
|
0.02% |
|
|
||
|
|
|
|
|
|
||
Input sensitivity @8ohms Voltage Gain |
|
|
5dBu |
|
|||
|
|
|
|
|
|
|
|
Voltage Gain @ 8 ohm |
|
30dB |
|
32dB |
|
34dB |
|
|
|
|
|
|
|
|
|
Output Circuitry |
|
AB |
|
2-Tier Class H |
|
2-Tier Class H |
|
Current Consumption (115VAC/230VAC) |
|
|
|
|
|
||
|
|
|
|
|
|
||
|
@1/8 rated power 4ohms |
4.5A / 6.6A |
|
3.8A / 5.36A |
|
5.5A / 7.96A |
|
|
|
|
|
|
|
|
|
|
@1/3 rated power 4ohms |
7.2A / 10A |
|
10A / 13.6A |
|
9.2A / 16.4A |
|
|
@ rated power 4ohms, max. |
10A / 15.9A |
|
13.6A / 23.8A |
|
16A / 35.2A |
|
|
|
|
|
|
|
|
|
Distortion (typical @4 ohms) |
|
|
|
|
|
|
|
|
|
|
|
|
|
||
|
20Hz-20kHz,10dB below rated power |
|
0.02% |
|
|
||
|
|
|
|
|
|
|
|
|
IkHz,rated power |
|
|
1% |
|
|
|
Frequency Response @8ohms 1Watt |
|
|
0/-1dB: 20Hz-20kHz |
|
|||
|
|
|
|
|
|
|
|
Damping Factor (400Hz) |
|
|
120 |
|
|
||
|
|
|
|
|
|
|
|
Input Impedance |
|
|
|
20K ohm (balanced) |
|
||
Input Clipping |
|
|
|
10Vrms (22dBu) |
|
||
|
|
|
|
||||
Cooling |
|
|
Continuously variable speed fan cooling |
||||
|
|
|
|
||||
Connectors (each channel) |
Inputs |
3-pin XLR and ¼” TRS, balanced |
|||||
Outputs |
|
Binding post and Speakon® |
|
||||
|
|
|
|
||||
|
|
|
|
||||
Controls |
|
|
Power switch, CH A & CH B volume |
||||
|
|
|
DSP Controls: UP, DOWN, BACK buttons & EDIT encoder/button |
||||
|
|
|
|
||||
Indicators |
|
|
Signal, -20dB, -10dB, Limit, Thermal |
||||
|
|
|
|
||||
Protection |
|
|
Short Circuit, Open Circuit, Thermal, RF protection Load protected |
||||
|
|
|
|
against DC faults |
|
||
|
|
|
|
|
|
||
|
Display |
|
|
|
2x16 Character LCD |
|
|
|
|
|
|
||||
|
Modes |
|
Manual mode, 2 Full Range, Mono 2-Way, Sub/Sat, 2 Subs |
||||
|
|
|
|
||||
|
I/O Settings |
|
Stereo, Mono A+B Dual, Mono A+B Link, Parallel A Dual, Parallel |
||||
|
|
|
|
|
A Link |
|
|
DSP |
Digital Dynamics function |
Filter, Crossover, Gain Offset, EQ, Limiter |
|||||
|
|
|
|
|
|
||
|
Digital Delay Function |
|
|
Max 20ms per channel |
|
||
|
|
|
|||||
|
Digital EQ function per channel |
f0: 1/12 Octave at 20~20kHz, Gain: +/- 12dB, Q: 0.5~5.0 |
|||||
|
|
|
Presets: DJ, Vocal, Live Sound, Install, Rock, Dance and Jazz |
||||
|
|
|
|
||||
|
Setup |
|
Lock Controls with Code, Factory Reset |
||||
|
|
|
|
||||
Dimensions (LxWxH) |
|
19” x 13” x 3.5” (482mm x 330mm x 88mm) |
|||||
|
|
|
|
|
|
|
|
Net Weight |
|
|
26.4lbs / 12kg |
|
28.6lbs / 13kg |
|
33lb / 15kg |
|
|
|
|
|
|
|
|
ITALIANO ESPAÑOL DEUTSCHE FRANÇAIS ENGLISH
SXD Series Power Amplifiers with DSP |
15 |
Informations de sécurité importantes
AVIS
RISQUE DE CHOC ÉLECTRONIQUE -
NE PAS OUVRIR
ATTENTION : POUR REDUIRE LE RISQUE DE CHOC ELECTRIQUE, N'ENLEVEZ PAS LE COUVERCLE OU L'ARRIERE). NE CONTIENT PAS DE PIECES REPARABLES PAR L'UTILISATEUR POUR L'ENTRETIEN, FAITES APPEL A UN PERSONNEL D'ENTRETIEN QUALIFIE
Cet éclair avec le symbole de la flèche dans un triangle équilatéral a pour but de prévenir l'utilisateur de la présence d'une “tension dangereuse” non isolée dans l'enceinte du produit, qui peut atteindre un niveau suffisant pour faire courir un risque de commotion électrique.
Le point d'exclamation dans le triangle équilatéral a pour but de prévenir l'utilisateur de la présence d'importantes instructions de fonctionnement et de maintenance dans la documentation jointe à l'appareil.
1.Lisez ces instructions.
2.Conservez ces instructions.
3.Respectez toutes les mises en garde.
4.Suivez toutes les instructions.
5.Cet appareil ne doit pas être exposé a un liquide qui tombe en goutte ou qui l'éclabousse, et aucun objet rempli de liquide tel qu'un vase ne doit être placé dessus.
6.Nettoyez-le uniquement avec un chiffon sec.
7.Ne bloquez pas les ouvertures de ventilation. Installez-le conformément aux instructions du fabricant.
8.Ne l'installez pas près de sources de chaleur telles que des radiateurs, des registres de chaleur, des poêles ou d'autres appareils (y compris des amplificateurs) qui produisent de la chaleur.
9.Utilisez uniquement des accessoires spécifiés par le fabricant.
10.Débranchez cet appareil pendant les orages ou quand vous ne vous en servez pas pendant de longues périodes.
11.Ne neutralisez pas le but prévu pour la fiche polarisé ou de mise à la terre. Une fiche polarisée a deux lames, l'une étant plus large que l'autre. Une fiche de type "mise à la terre" a deux lames et une troisième broche de mise à la terre La lame large ou la troisième broche est conçue pour assurer votre sécurité. Si la fiche fournie n'entre pas dans votre prise, consultez un électricien pour qu'il remplace la prise obsolète.
12.Protégez le cordon d'alimentation pour qu'on ne marche pas dessus ou qu'il ne soit pas coincé, surtout au niveau des broches, des prises de courant, ou au point où il sort de l'appareil.
13.Utilisez-le uniquement avec le support de chariot, la console à trépied ou la table spécifiés par le fabricant ou vendus avec l'appareil. Lorsque vous utilisez un chariot, faites attention quand vous déplacez la combinaison chariot/appareil pour éviter toute blessure en cas de basculement.
14.Pour tout entretien, faites appel à un personnel d'entretien qualifié Un entretien est requis si l'appareil
a été endommagé en quoi que ce soit, par ex. par rupture du cordon ou de la fiche d'alimentation, des
dégâts causés par un liquide ou des objets tombés sur l'appareil, l'exposition à la pluie ou à l'humidité, ou si l'appareil ne fonctionne pas normalement, ou qu'on l'a laissé tomber.
15.INTERRUPTEUR GENERAL : La fiche devrait pouvoir continuer de fonctionner. Pour un montage sur bâti ou une installation à un endroit où la fiche n'est pas accessible, un interrupteur général omnipolaire avec une séparation de contact d'au moins 3 mm sur chaque pôle devrait être intégré dans l'installation électrique du bâti ou du bâtiment.
16.POUR LES UNITES EQUIPEES D'UNE ALVEOLE A FUSIBLES ACCESSIBLE DE L'EXTERIEUR : Remplacez le fusible uniquement par un fusible du même type et de la même valeur nominale.
17.TENSION D'ENTREE MULTIPLE : Cet équipement pourrait nécessiter l'utilisation d'un cordon d'alimentation ou d'une fiche de branchement différents, ou des deux, selon la source de courant disponible lors de l'installation. Connectez uniquement cet équipement à la source de courant indiquée sur le panneau arrière de l'équipement. Pour réduire
le risque d'incendie ou de commotion électrique, confiez toute intervention à un personnel d'entretien qualifié ou
équivalent.
Si vous voulez mettre ce produit au rebut, ne le mélangez pas avec les déchets domestiques standard. Il y a un système de collecte séparé pour les produits électroniques en fin de vie, conformément à la législation exigeant un traitement, une prise en charge et un recyclage appropriés.
Les ménages privés des 28 Etats membres de l'UE, de la Suisse et de la Norvège pourront restituer gratuitement leurs produits électroniques en fin de vie à des installation de collecte désignées ou à un détaillant (si vous achetez un nouveau produit similaire).
Pour les pays non mentionnés plus haut, veuillez contacter vos autorités locales pour connaître la méthode de mise au rebut correcte.
Ce faisant, vous veillerez à ce que votre produit mis au rebut bénéficie du traitement, de la récupération et du recyclage nécessaires et vous éviterez ainsi des effets potentiellement négatifs sur l'environnement et la santé humaine.
CET APPAREIL RESPECTE LA PARTIE 15 DES REGLES DE LA FCC CLASSE B. SON FONCTIONNEMENT EST SOUMIS AUX DEUX CONDITIONS SUIVANTES :
(1)THIS DEVICE MUST NOT CAUSE HARMFUL INTERFERENCE, AND
(2)THIS DEVICE MUST ACCEPT ANY INTERFERENCE RECEIVED INCLUDING INTERFERENCE THAT MAY CAUSE UNDESIRED OPERATION. CONVIENT POUR UNE UTILISATION A DOMICILE OU DANS UN BUREAU.
16

Sommaire
Introduction . . . . . . . . . . . . . . . . . . . . . . |
|
18 |
Apprendre à utiliser l'Amplificateur de puissance SXD . . . . . . . . |
. |
20 |
Références du panneau avant |
|
21 |
Références arrière . . . . . . . . . . . . . . . . . . . . |
|
22 |
Comment commencer - DSP . . . . . . . . . . . . . . . . |
. |
23 |
Préréglages . . . . . . . . . . . . . . . . . . . . . . |
|
25 |
Exemples de configuration du système . . . . . . . . . . . . . |
|
. 26 |
Guide de câblage |
|
28 |
Spécifications . . . . . . . . . . . . . . . . . . . . . |
|
. 29 |
ITALIANO ESPAÑOL DEUTSCHE FRANÇAIS ENGLISH
Amplificateurs de puissance de série SXD avec DSP |
17 |

Introduction
Les amplificateurs de puissance stéréo Samson de série SXD ont été conçus pour fournir une sortie robuste et propre avec une faible distorsion et une large gamme dynamique, ainsi que la fiabilité exigée par des ingénieurs et installateurs de salle professionnels.
Le design commode à deux espaces sur bâti est compact, et pourtant il fournit une puissance appréciable, avec
2 x 450 Watts à 4 Ω pour le SXD3000, 2 x 750 Watts à 4 Ω pour le SXD5000, et 2 x 1000 Watts à 4 Ω pour le SXD7000 sur tout le spectre de fréquence, de 20 Hz à 20 kHz.
Le SXD a un DSP avec des fonctions complètes et un écran LCD sur le panneau avant avec des réglages pour les filtres passe-haut et passe-bas, un égaliseur trois bandes, un limitateur de sortie, un temps de retard pour l'alignement des hautparleurs, et un verrouillage numérique de sécurité du pass-code pour garantir que les réglages ne soient pas modifiés accidentellement. Il y a aussi quatre préréglages conçus pour des configurations typiques de haut-parleur . Ces préréglages vous permettront de faire fonctionner rapidement votre système en affichant les paramètres qui sont essentiels pour l'arrangement de haut-parleurs.
Les connections d'entrée ont établies à la fois par des connexions équilibrées XLR et TRS équilibrées 1/4”. Pour les sorties, le SXD de série fournit des bornes de raccordement standard, ainsi que des connecteurs Speakon®. Pour vous aider à régler les niveaux de fonctionnement corrects, le amplificateurs SXD comprennent des indicateurs à DEL de panneau avant Signal, Niveau de Sortie, Limitateur et Protection.
Comme tous les amplificateurs de puissance Samson, l'électronique interne de la série SXD s'appuie sur un solide noyau de puissance, avec des transformateurs toroïdaux surdimensionnés et de grands puits thermiques. Pour que les amplificateurs SXD continuent de tourner sans chauffer, ce modèle utilise le refroidissement par air forcé via un ventilateur à vitesse variable et sensible à la température, qui réduit considérablement le risque de problèmes thermiques et de surchauffe. Une protection à étages multiples pour la mise sous tension, la surchauffe, la surintensité, le courtcircuit, une faible impédance de sortie et la tension c.c., garantit une haute fiabilité même dans les situations de sollicitation extrêmes.
Les amplificateurs SXD sont conçus pour les rigueurs soit d'un système de sonorisation portatif, soit d'un système d'installation fixe avec un châssis entièrement en acier, un montage sur bâti 19 pouces et des poignées de transport commode.
Optimisé pour les événements de son en direct, les lieux de culte, les installations commerciales et pour la gestion de système de sonorisation en direct, les amplificateurs SXD fourniront une puissance fiable pour n'importe quel concert ou manifestation. Sur les pages qui suivent, vous trouverez une description détaillée des nombreuses fonctionnalités de l'amplificateur de puissance de la série SXD, ainsi qu'une visite guidée de ses panneaux avant et arrière, des instructions étape par étape pour sa mise en service et son utilisation, et ses spécifications complètes.
Nous vous recommandons de conserver les données ci-après en guise de référence, ainsi qu'un duplicata de votre justificatif d'achat.
Numéro de série : ____________________________________________
Date d'achat : __________________________________________
Nom du distributeur : _____________________________________________
Avec un soin et une maintenance appropriés, votre amplificateur SXD fonctionnera sans problèmes pendant de longues années. Si jamais une intervention était nécessaire sur votre amplificateur, il faudra obtenir un numéro d'Autorisation de Retour (RA) avant de réexpédier votre unité à Samson. Sans ce numéro, l'unité ne sera pas acceptée. Veuillez téléphoner à Samson au 1-800-3SAMSON (1-800-372-6766) pour obtenir un numéro RA avant d'envoyer votre unité. Veuillez conserver le matériel d'emballage d'origine, et si possible, renvoyez-nous l'unité dans son carton d'origine. Si vous avez acheté votre amplificateur SXD hors des Etats-Unis, contactez votre distributeur local quant aux détails de garantie et aux informations d'entretien.
18

Caractéristiques
•Puissance élevée pour les performances et configurations d'installation du haut-parleur : SXD3000 2 x 300 Watts à 8 Ω et 2 x 450 Watts à 4 Ω
SXD5000 2 x 500 Watts à 8 Ω et 2 x 750 Watts à 4 Ω SXD7000 2 x 700 Watts à 8 Ω et 2 x 1000 Watts à 4 Ω
•La technologie DSP à hautes performances permet une maîtrise totale de nombreuses fonctionnalités de performances
•Le "Digital Security Lock" empêche toutes modifications indésirables des réglages du DSP.
•Un écran LCD sur panneau avant pour naviguer parmi les réglages du DSP, y compris Filtres, EQ, Limitateur, Retard, etc.
•Son limpide et clair 0,02 % THD, gamme dynamique de 100 dB, et réponse de fréquence de 20 Hz à 20 kHz, garantie de qualité sonore ultra-propre
•Réglages de niveau indépendants pour chaque canal permettant des réglages précis.
•Des indicateurs de signaux DEL pour chaque canal affichent en permanence les niveaux des signaux d'entrée et de sortie.
•Un ventilateur à vitesse variable et sensible à la température fournit des performances fiables sans problèmes thermiques et de surchauffe.
•Un circuit de relais de protection qui préserve contre la surchauffe ou contre les conditions de câblage défectueuses, y compris les “cognements” lors de la mise sous tension ou hors tension.
•Les connecteurs d'entrée pour chaque canal permettent d'enficher des fiches XLR équilibrées ou TRS 1/4 de pouce équilibrées
•Les connexions de sortie sont établies par des bornes de raccordement et des connecteurs Speakon®.
•La série SXD peut être montée sur n'importe quelle baie standard 19”, ce qui permet d'intégrer facilement l'amplificateur dans tout équipement de sonorisation fixe ou mobile.
•Sa solide construction permet d'emmener sans crainte la série SXD sur les routes
ITALIANO ESPAÑOL DEUTSCHE FRANÇAIS ENGLISH
Amplificateurs de puissance de série SXD avec DSP |
19 |

Apprendre à utiliser l'Amplificateur de puissance SXD
La mise en place de votre série SXD est une procédure simple qui ne prend que quelques minutes :
Enlevez tout le matériel d'emballage (conservez-le au cas où vos unités ont besoin d'une intervention future) et choisissez l'emplacement physique de l'amplificateur : il peut être utilisé de manière autonome ou monté sur un bâti standard 19”, où il a besoin de deux espaces sur bâti. Lorsqu'il est installé, veillez à ce qu'il n'y ait pas d'obstructions devant les panneaux avant et arrière et qu'il y ait une bonne ventilation autour de toute l'unité.
O
T |
|
|
S |
|
S |
|
E |
P |
R |
|
|
Établissez le raccordement des haut-parleurs en utilisant le bornes de raccordement ou les connecteurs de sortie Speakon® sur le panneau arrière. Ce n'est jamais une bonne chose de mettre sous tension un amplificateur qui n'est pas raccordé à des haut-parleurs.
Puis établissez les raccordements d'entrée de signaux en utilisant les connecteurs d'entrée sur le panneau arrière. (si vous utilisez la série SXD en mode Parallèle de canal A, utilisez uniquement l'entrée de canal A). Si votre mélangeur a des sorties équilibrées, nous recommandons d'utiliser un câblage et des connecteurs à trois conducteurs.
Sur le panneau avant de la série SXD, tournez les commandes de niveau des deux canaux entièrement dans le sens antihoraire (sur leur réglage “MIN”). Ensuite, raccordez le câble “IEC” de gros calibre à 3 broches fourni au connecteur IEC du panneau arrière et à n'importe quelle prise c.a. mise à la terre.
Amenez l'interrupteur sur la position ON.
Appliquez un signal d'entrée sur la série SXD à +4 dBu, à peu près (s'il transmet un signal d'un mélangeur, réglez les compteurs de sortie sur environ 0 vu). Pendant que le signal d'entrée est présent, augmentez lentement les niveaux du canal jusqu'à ce que le niveau de son souhaité soit atteint. Les indicateurs à DEL SIGNAL et Limitateur à côté de chaque
commande d'entrée de canal vous afficheront la sortie de puissance continue de la série SXD pendant le passage du signal. Pour obtenir le meilleur rapport signal/bruit, la série SXD doit normalement fonctionner avec les commandes d'entrée de canal au niveau maximum ou tout près (sens entièrement horaire, sur la position “MAX” ) et les segments LIMITATEUR devraient s'allumer occasionnellement (mais pas fréquemment) aux niveaux de crête. Si vous vous servez d'un mélangeur ayant une commande de niveau de sortie maîtresse, utilisez-le pour atténuer le signal selon ce qui est nécessaire pour atteindre le niveau de haut-parleur souhaité.
R
E
S
E T
O T
S
S
E
PR
20
Références du panneau avant
Écran LCD
L'écran de rétro-éclairage affiche les informations sur les réglages actuels et la navigation à travers les réglages DSP.
Interrupteur d’alimentation
Utilisez-le pour mettre en marche le SXD de série.
Indicateurs à DEL
Les indicateurs à DEL du panneau avant surveillent en permanence le niveau de sortie de puissance pour le canal correspondant. THERMIQUE : Devient rouge lorsque la protection thermique est
activée
LIMITATEUR : Devient rouge lorsque le limitateur de sortie est activé -20/-10 S'allume lorsque le sortie niveau atteint respectivement
-20 dB ou -10 dB, en-dessous du SIGNAL de distorsion ou d'écrêtage
SIGNAL : S'allume lorsque le signal d'entrée est présent
|
|
|
|
|
|
|
|
|
|
|
|
|
|
|
|
|
|
|
|
|
|
|
|
|
|
|
|
|
|
|
|
|
|
|
|
|
|
|
|
|
|
|
|
|
|
|
|
|
|
|
|
|
|
|
|
|
|
|
|
|
|
|
|
|
|
|
|
|
|
|
|
|
|
|
|
|
|
|
|
|
|
|
|
|
|
|
|
|
|
|
|
|
|
|
|
|
|
|
|
|
|
|
|
|
|
|
|
|
|
|
|
|
|
|
|
|
|
|
|
|
|
|
|
|
|
|
|
|
|
|
|
|
|
|
|
|
|
|
|
|
|
|
|
|
|
|
|
|
|
|
|
|
|
|
|
|
|
|
|
|
|
|
|
|
|
|
|
|
|
|
|
|
|
|
|
|
|
|
|
|
|
|
|
|
|
|
|
|
|
|
|
|
|
|
|
|
|
|
|
|
|
|
|
|
|
|
|
|
|
|
|
|
|
|
|
|
|
|
|
|
|
|
|
|
|
|
|
|
|
|
|
|
|
|
|
|
|
|
|
|
|
|
|
Boutons UP/DOWN/BACK |
|
|
|
|
|
|
|
Commandes de niveau de canal |
|
|
|
||||||||
|
|
|
|
Utilisez ces boutons pour navi- |
|
|
|
|
|
|
|
|
|
||||||||||
|
|
|
|
|
|
|
|
|
|
Deux commandes de détente pour |
|
|
|
||||||||||
|
|
|
|
guer parmi les fonctions DSP. |
|
|
|
|
|
|
|
|
|
||||||||||
|
|
|
|
|
|
|
|
|
|
régler avec précision le sortie |
|
|
|
||||||||||
|
|
|
|
|
|
|
|
|
|
|
|
|
|
|
|
|
|
|
|||||
|
|
|
|
|
|
|
|
|
|
|
|
|
|
|
|
niveau de chaque canal. |
|
|
|
||||
|
|
|
|
|
|
|
|
|
|
|
|
|
|
|
|
||||||||
|
|
|
|
|
|
|
|
|
|
|
|
|
|
|
|
|
|
|
|
|
|
|
|
|
|
|
|
|
|
|
|
|
|
|
|
|
|
|
|
|
|
|
|
|
|
|
|
|
|
|
|
|
|
|
|
|
Bouton EDIT |
|
|
|
Poignées |
||||||||||
|
|
|
|
|
|
|
|
|
Utilisez ce bouton pour |
|
|
|
|||||||||||
|
|
|
|
|
|
|
|
|
|
|
|
Deux poignées en acier commodément pla- |
|||||||||||
Équerres de rack |
|
|
|
régler et sauvegarder les |
|
|
|
||||||||||||||||
|
|
|
|
|
|
cées à gauche et à droite du panneau avant |
|||||||||||||||||
|
|
|
paramètres dans le DSP. |
|
|
|
|||||||||||||||||
Elles se montent sur une |
|
|
|
|
|
|
pour faciliter le transport ou l'installation. |
||||||||||||||||
|
|
|
|
|
|
|
|
|
|
|
|
|
|||||||||||
baie 19 pouces standard. |
|
|
|
|
|
|
|
|
|
|
|
|
|
|
|
|
|
|
|||||
|
|
|
|
|
|
|
|
|
|
|
|
|
|
|
|
|
|
||||||
|
|
|
|
|
|
|
|
|
|
|
|
|
|
|
|
|
|
|
|
|
|
|
|
ITALIANO ESPAÑOL DEUTSCHE FRANÇAIS ENGLISH
Amplificateurs de puissance de série SXD avec DSP |
21 |
Références arrière
Ventilateur d'extraction
Ce ventilateur à vitesse variable assure la ventilation de l'amplificateur. Veillez à ce que les panneaux avant et arrière soient débarrassés de toutes obstructions et que de l'air frais soit accessible à tout moment.
Disjoncteur
Ce disjoncteur se déclenchera en cas de défaillance de la tension secteur ou si la puissance maxi-
male est en surcharge pendant un certain temps. Appuyez dessus pour faire redémarrer l'amplificateur après une brève période de repos.
Connecteurs de Sortie Speakon®
Utilisez-les pour connecter chaque canal de l'amplificateur à des haut-parleurs de 4 ou 8 Ohms.
R
E
S
E T
O T |
||
|
|
S |
|
|
S |
|
|
E |
|
P |
R |
|
|
|
|
|
|
|
|
|
Connecteurs d'entrée
Connectez les signaux entrants avec ces connecteurs équilibrés électroniquement, en utilisant des fiches XLR ou 1/4” TRS (Tip/Ring/Sleeve). L'amplificateur accepte les niveaux d'entrée de n'importe quelle puissance, mais a besoi d'au moins +4 dBu pour atteindre la puissance maximale. Les entrées sont câblées en parallèle, si bien qu'elles peuvent être utilisées pour raccorder en guirlande chaque canal avec un second amplificateur de puissance.
Entrée c.a. - Connectez ici le câble d'alimentation “IEC” 3 broches de gros calibre fourni.
Borne de raccordement
Servez-vous en pour connecter chaque canal de l'amplificateur à des haut-parleurs de 4 ou 8 Ohms. Prenez soin de connecter correctement le haut-parleur, avec la borne rouge (+) normalement connectée à l'entrée positive du haut-parleur et la borne noire (masse) normalement connectée à l'entrée négative du haut-parleur.
22
 Loading...