


®
www.presonus.com
StudioLive™ ARc-Series
Hybrid Digital/Analog Production Mixers
Quick Start Guide
StudioLive™ serie ARc
Consolas híbridas digitales/analógicas para producción
Guía de inicio rápido
StudioLive™ ARc-Series
Hybrider Digital/Analog-Produktionsmixer
Kurzanleitung |
StudioLive™ ARc
Mélangeurs de production hybrides numériques/analogiques
Guide de prise en main
StudioLive™ ARc
/
Getting Started • Para empezar • Erste Schritte • Pour commencer •
You must register online for software downloads, the Owner’s Manual, and instructional videos.
Go online to my.presonus.com and create — or log into — your My.PreSonus user account.
Debes registrarte en línea para bajar software, el manual para el usuario y videos didácticos.
Visita my.presonus.com y regístrate — o entra usando tu perfil de usuario My.PreSonus.
Bitte registrieren Sie sich auf unserer Webseite, um auf die Software-Downloads, die Bedienungsanleitung und die Anleitungsvideos zuzugreifen.
Öffnen Sie die Webseite my.presonus.com und erstellen Sie ein neues Konto – oder loggen Sie sich in Ihren My.PreSonus-Konto ein.
Vous devez vous enregistrer en ligne pour les téléchargements de logiciels, le mode d’emploi, et des vidéos de formation.
Allez sur my.presonus.com et créez – ou connectez-
vous à – votre compte utilisateur My.PreSonus.
登录my.presonus.com My.PreSonus
Package Contents • Contenido del paquete • Lieferumfang • Contenu de l’emballage •
Level Setting Procedure • Procedimiento de ajuste de nivel
Einstellen der Pegel • Procédure de réglage des niveaux •
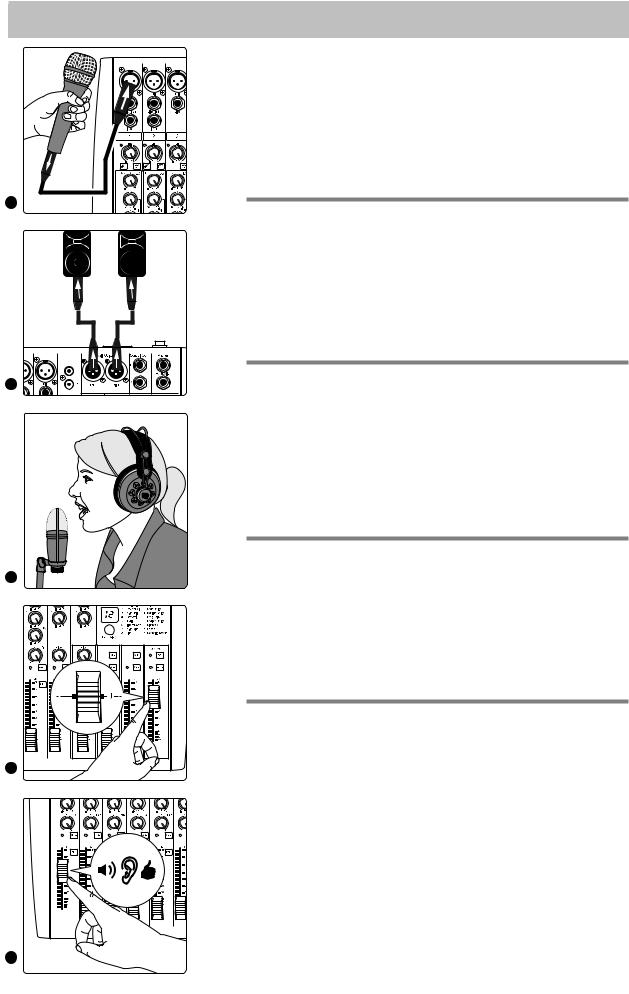
1.ENGLISH: Plug a microphone into the Channel 1 mic input.
1
2 |
2.Connect the Main outputs of your StudioLive ARc to your loudspeakers. Turn on your mixer first, then your amplifier or powered monitors.
3.Speak or sing into your microphone while turning the Channel 1 trim knob clockwise. Adjust the trim until the signal/clip indicator is green and just below clipping at the loudest input level.
4.Raise the Main level control to unity gain (denoted with a“U”).
5.Bring up the Channel 1 level to a comfortable listening volume and sculpt the sound by adding EQ to taste.
1.ESPAÑOL: Conecte un micrófono en la entrada de micrófono del Canal 1.
2.Conecte las salidas principales de su StudioLive ARc a sus altavoces. Encienda primero su mezclador, luego el amplificador o los monitores activos.
3.Hable o cante en su micrófono mientras gira el potenciómetro de ajuste del canal 1 en el sentido de las agujas del reloj. Ajuste el potenciómetro hasta que el indicador de señal/recorte esté verde y justo por debajo del recorte en el nivel de entrada más alto.
4.Suba el control de nivel principal a la ganancia unitaria (marcada con una “U”).
5.Suba el control de nivel del Canal 1 a un volumen de escucha cómodo y esculpa el sonido añadiendo EQ al gusto.
1.DEUTSCH: Schließen Sie an Mikrofoneingang 1 ein Mikrofon an.
2.Verbinden Sie die Main-Ausgänge Ihres StudioLive ARc mit Ihren Lautsprechern. Schalten Sie zuerst Ihren Mixer und anschließend Ihren Verstärker bzw. Ihre Aktivboxen ein.
3
4
3.Sprechen oder singen Sie in Ihr Mikrofon und drehen Sie dabei den Trim-Regler in Kanal 1 im Uhrzeigersinn auf. Stellen Sie den Trim-Regler so ein, dass die Signal/Clip-Anzeige grün leuchtet und bei den lautesten Passagen gerade kein Clipping mehr auftritt.
4.Stellen Sie den Gesamtpegel auf Nominalpegel (mit einem„U“ markiert) ein.
5.Stellen Sie den Pegelregler in Kanal 1 auf eine angenehme Lautstärke ein und passen Sie den Klang nach Bedarf mit dem EQ an.
1.FRANÇAIS: Branchez un microphone à l’entrée micro du canal 1.
2.Raccordez les sorties principales (Main) de votre StudioLive ARc à vos enceintes. Allumez d’abord votre mélangeur, puis votre amplificateur ou vos moniteurs amplifiés.
3.Parlez ou chantez dans votre microphone tout en tournant le bouton de gain du canal 1 dans le sens horaire. Réglez le gain de façon à ce que le voyant de signal/écrêtage soit vert et juste en-dessous de l’écrêtage pour le niveau d’entrée le plus fort.
4.Montez le niveau général jusqu’au gain unitaire (repéré par un « U »).
5.Augmenter la commande de niveau de canal 1 jusqu’à un volume d’écoute confortable et retravaillez le son à votre goût avec l’égaliseur.
1. |
1 |
2. |
StudioLive ARc |
|
|
3. |
1 |
|
/ |
4. |
“U” |
5. |
1 EQ |
5
 Loading...