


Capture™ 2.0
Software Reference Manual
®
www.presonus.com
English

Table of Contents
1Getting Started — 1
1.1Introduction — 1
1.2Summary of Features — 2
1.3System Requirements — 2
1.4Installation Instructions — 3
1.4.1Mac OS X — 3
1.4.2Windows — 4
2Start Page — 5
2.1Tagging and Organizing a Session — 5
2.2Creating a Session — 6
2.2.1Record Now! — 7
2.3Open a Session — 7
2.4Audio Device and Sample Rate — 8
2.5Options Menu — 8
2.5.1Audio Options — 9
2.5.2Timeline Sync Options — 9
2.5.3File Handling Options — 10
2.6About Capture 2.0 — 10
3The Session Page — 11
3.1Recording and Playback Routing — 11
3.2Track Column — 12
3.3Transport — 13
3.4Time Display — 14
3.5Timeline Ruler — 14
3.5.1Zooming — 14
3.5.2Scrolling — 15
3.5.3Locate Selection — 15
3.6Editing Tools — 15
3.6.1Arrow Tool — 16
3.6.2Range Tool — 18
3.6.3Split Tool — 18
3.6.4Eraser Tool — 19
3.6.5Common Editing Actions — 19
Capture™ 2.0 Reference Manual Addendum
3.6.6Looping — 19
3.6.7Bounce Selection — 20
3.7Meter Bridge — 20
3.7.1Record Arm — 20
3.7.2Link Button. — 20
3.7.3Big Meter Mode — 21
3.8Markers and the Marker List — 21
3.8.1The Marker Lane — 21
3.8.2The Marker List — 21
3.8.3Inserting, Naming, Deleting, and Moving Markers — 22
3.8.4Navigating Markers — 23
4Recording a Session in Capture — 24
4.1Setting up your recording — 24
5Virtual Soundcheck — 25
5.1Setting up your Virtual Soud Check — 25
6Importing and Exporting
Audio Files — 27
6.1Importing Audio Files into Capture — 27
6.2Export Audio Files — 28
7Mixing Your Capture Sessions — 30
7.1Creating a Mix in Capture 2.0 — 30
7.2Exporting Your Final Mix to an Audio File — 31
7.3Mixing a Capture 2.0 Session in Studio One — 31
7.4Mixing a Capture 2.0 Session in a Different Recording Application — 31
7.4.1Save a Capture 2.0 Session as OpenTL — 31
7.4.2Import Capture 2.0 Session Audio Files Directly — 32
8Capture 2.0 Key Commands — 33
8.1Quick Reference Guide — 33

1 |
Getting Started |
Capture™ 2.0 Software |
1.1 |
Introduction |
Reference Manual |
1Getting Started
1.1Introduction
PreSonus® Capture™ 2.0 is a multitrack digital-audio recording application designed to make recording with StudioLive™ mixers quick and easy. With the look and feel of a digital multitrack hard-disk recorder, it is instantly familiar. It uses the same highquality audio engine as PreSonus’groundbreaking Studio One® DAW, and its Session files can be opened directly in Studio One—no conversion or exporting required.
Capture 2.0 was designed exclusively for StudioLive-series mixers, allowing instant setup and recording directly from the mixer, with no configuration. Just launch Capture 2.0 and click Record Now. At the end of the show, click Stop, save the file, and you’re done!
When used with the StudioLive 16.4.2 and 24.4.2, Capture 2.0 will record an additional stereo track from any of the mixer’s buses that are accessible to the Auxiliary Inputs router. More information about the Auxiliary Inputs router can be found in Section 3.7.1 in the StudioLive Software Library Reference Manual.
In general, the features that make a DAW a powerful tool for audio production and mixing in the studio are the very culprits that bog down a computer’s performance and make for an unstable live-recording environment. Capture 2.0 simplifies this environment, providing only the tools necessary to record a great performance, without placing huge demands on your CPU’s resources.
As with all of the StudioLive Software User Library, you should check the PreSonus Web site for the latest version of Capture 2.0. You can download Capture 2.0 updates from your My PreSonus account once you have registered your StudioLive hardware. For instructions on creating a My PreSonus account, please see
Section 7.1.4 (Step 3) in the StudioLive Software Library Reference Manual.
1

1 |
Getting Started |
Capture™ 2.0 Software |
1.2 |
Summary of Features |
Reference Manual |
1.2 Summary of Features
•• Multitrack recording application (unlimited input channels plus stereo stream from StudioLive)
•• NEW! One-click recording with Record Now button
•• NEW! Prerecord captures audio up to a minute before you press Record
•• NEW! Auto-Save
•• NEW! Automatic session and file recovery if the power fails
•• NEW! Sessions store metadata, enabling automatic session naming
•• NEW! Soundcheck mode makes it simple to virtually soundcheck using previously recorded material
•• NEW! Session Lock feature prevents accidental keyboard access
•• Essential editing suite (copy, cut, paste, splice, resize)
•• NEW! Big Meter mode turns your monitor into a gigantic meter bridge
•• NEW! Stereo Playback mode—use Capture with any computer soundcard
•• Peak LED-style meter bridge with clip indicators
•• Marker placement and recall
•• NEW! Marker List with Quick Locate
•• Export between markers
•• Record stereo mix from StudioLive mixer
•• Full transport control
•• Import/export individual WAV, AIFF, or OpenTL
•• Compatible with Mac® and Windows®
1.3System Requirements
Mac
•• Mac® OS X 10.6.8 or later
•• Intel® Core™ Duo processor (Intel Core 2 Duo or Core i3 or better recommended)
•• 2 GB RAM (4 GB or more recommended)
Windows
•• Windows® 7 x64/x32 SP1 or Windows 8 x64/x86
•• Intel Core Duo or AMD Athlon™ X2 processor (Intel Core 2 Duo or AMD Athlon X4 or better recommended)
•• 2 GB RAM (4 GB or more recommended)
2
1 |
Getting Started |
Capture™ 2.0 Software |
1.4 |
Installation Instructions |
Reference Manual |
Mac and Windows Systems
•• IEEE 1394 FireWire 400 Port
•• Internet connection (needed for activation)
•• DVD-ROM drive
•• Internal or external 7200 RPM storage drive highly recommended
•• Monitor with 1024x768 resolution
Power User Tip: The speed of your processor, amount of RAM, and the size and speed of your hard drive will greatly affect the overall performance of your recording system. In addition, the maximum recording time supported by Capture 2.0 is affected by the availability of RAM. It is therefore recommended that 64-bit systems with 4 GB or more of RAM be used when recording uninterrupted for more than 10 hours. For slower systems, or for systems with the minimum requirement of RAM,
it is recommended that the recording be stopped and restarted every 6 hours.
1.4Installation Instructions
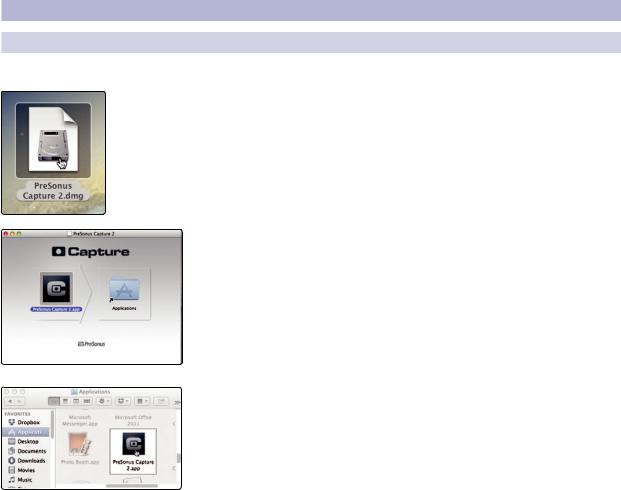
1.4.1 Mac OS X
Installing Capture 2.0 on Mac OS X machines is as simple as drag-and-drop.
1. Double click on the Capture .dmg file.
2. Drag the Capture 2.0 icon to the Applications folder shortcut.
3.Once Capture has been copied to your hard drive, it is ready to use. Simply open your Applications folder and double-click on the PreSonus Capture 2.0 icon.
3
1 |
Getting Started |
Capture™ 2.0 Software |
1.4 |
Installation Instructions |
Reference Manual |
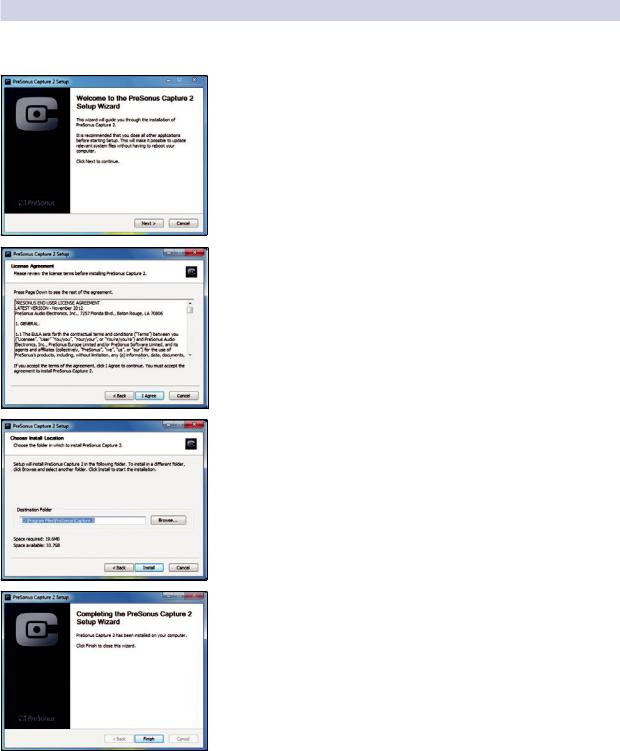
1.4.2 Windows
The Windows installer for Capture 2.0 was designed with easy to follow onscreen instructions to make the installation process quick and simple.
1. When you launch the Capture.exe file, a Welcome Screen will launch. If you haven’t already done so, close all other open applications before clicking“Next.”
2.Before Capture 2.0 can be installed on your computer, you must first agree to the licensing terms. Click“I agree.”
3.By default, Capture 2.0 will install in the Program Files folder on your computer. It is highly recommended that you do not change this default location. Click“Install.”
4.Once Capture 2.0 has been successfully installed on your computer, you can click“Finish”to exit the install wizard. You’re ready to start recording!
4
2 |
Start Page |
Capture™ 2.0 Software |
2.1 |
Tagging and Organizing a Session |
Reference Manual |
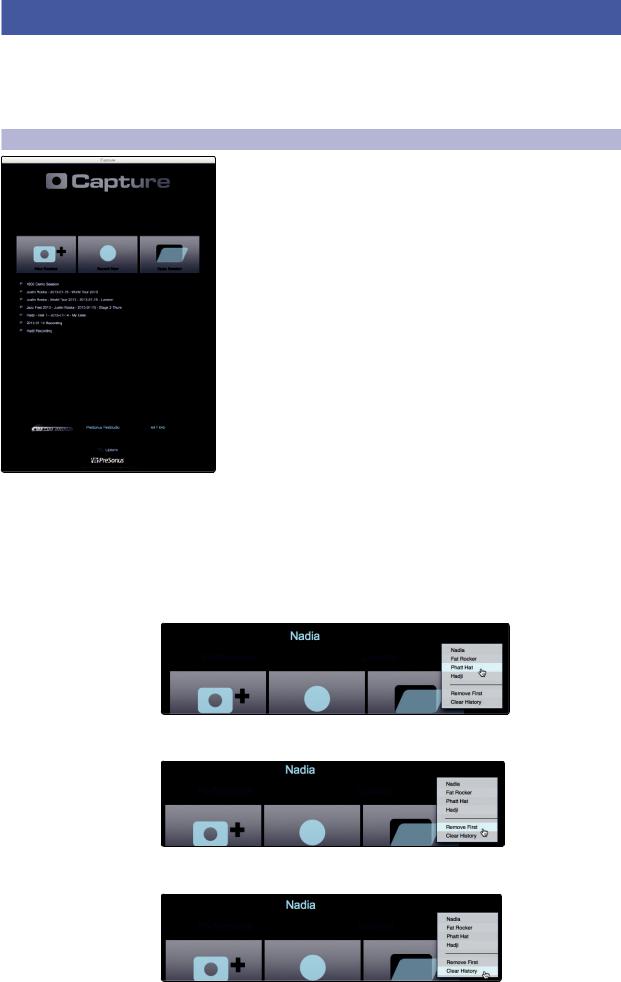
2 Start Page
You will be taken to the Start page when Capture 2.0 is launched. The Start page allows you to create a new Session, open a Session stored on your computer, view recent Sessions, and verify that your StudioLive is properly communicating with its driver. In addition, you can begin recording instantly by just clicking the Record Now button.
2.1Tagging and Organizing a Session
At the top of the Start page, you will find the three Name Scheme fields: Artist, Performance, and Location. By entering information into each of these fields, your Session will be automatically named with this information, in this order, and tagged with the same helpful metadata.
These tags also help to keep your files organized. Rather than throwing every Session into a single folder, all tagged Sessions will automatically be put into an organized folder hierarchy. By default, Capture 2.0 inserts the date of performance and creates subfolders. These options can be changed in the Options menu, see Section 2.5.3 for details.
By default, the folder tree is Artist/Performance/Location. This structure is useful for regularly gigging bands that want to archive performances (e.g., Artist: PreSonus Allstars, Performance: Winter Tour 2013, Location:
Baton Rouge – Manship Theatre). However, Capture 2.0 doesn’t limit you to this folder structure. You can change the folder hierarchy from the Options menu. Here are other available Name Schemes:
•• Location/Artist/Performance. This Name Scheme is especially useful for venue owners who are archiving the performances on their stage (e.g., Location: Manship Theatre/PreSonus Allstars/Winter Tour 2013.
•• Location/Performance/Artist. Use this Name Scheme when recording an entire festival (e.g., PreSonuSphere/Stage 1/PreSonus Allstars).
As you archive your performances, Capture 2.0 stores a history of the names you have entered into each field. To use a name again, simply click on the pull-down menu for that field and select it from the list.
To clear the currently selected name from the list, select
Remove First from the pull-down menu.
To remove every name in the list, select Clear History. Once the history has been cleared, it cannot be undone, so be certain before you choose this option.
5
2 |
Start Page |
Capture™ 2.0 Software |
2.2 |
Creating a Session |
Reference Manual |
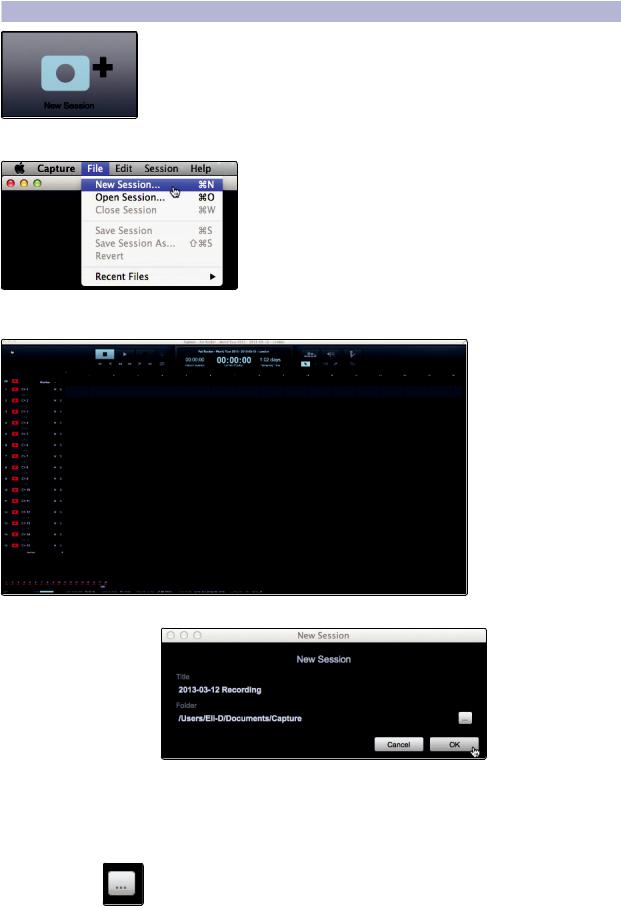
2.2 Creating a Session
Below the Name Scheme fields, you will find the New Session button. Click on the New Session button to create an empty Session.
Power User Tip: A Session is a Capture 2.0 file in which you record, arrange, and edit your audio files. Session files should not be confused with audio files. Think of a Capture 2.0 Session as you would a StudioLive Scene. It is a snapshot of which audio files were recorded and how they were edited.
You can also create a new Session by doing one of the following:
•• Navigate to File/New Session.
•• Press [Ctrl]/[Cmd]+N on the keyboard.
If you have filled in the Name Scheme fields, your new Session will launch automatically.
If you have not filled in these fields, a setup menu will open.
•• Session Title. This will be the title of your Session and will be the Session filename, as well as the name of the new folder that contains all data related to your Session.
•• Session Location. This is where new Sessions and all related data will be saved. The Session location can be chosen each time you create a Session. By default, the new Session location will be the Capture 2.0 folder in your Documents folder.
You can choose a different file location by clicking on the Browse button and browsing to a new location. The last known save location will appear as the default the next time you create a new Session.
Power User Tip: The Name Scheme fields have been added to Capture 2.0 to help keep your Sessions organized and to make your archived library of live performances more easily searchable. Because of this, we highly recommend that you always take a moment to fill in these fields.
6
2 |
Start Page |
Capture™ 2.0 Software |
2.3 |
Open a Session |
Reference Manual |
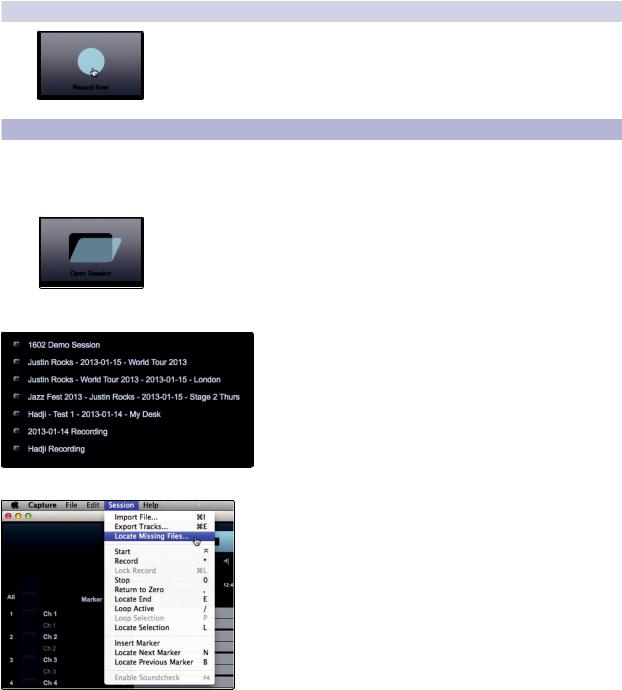
2.2.1 Record Now!
Clicking the Record Now button on the Start page will launch a new Session, arm all tracks for recording, and begin recording immediately. If you do not have any of the Name Scheme fields customized, your Session will be labeled with today’s date.
2.3 Open a Session
The Capture 2.0 Start page provides two different ways to quickly open previous Sessions.
Open Session Button
Clicking on the Open Session button will open a browser that will allow you to browse for, and open, an existing Session.
Recent Files List
Located below the Open Session button, you will find the Recent Files list. This list includes links to the most recently opened documents. Click on any of these links to quickly open the Session.
Locate Missing Files
In the event that the Session you open is missing audio files, Capture will help you find them. Use Session>Locate Missing Files to search your computer for lost resources.
7
2 |
Start Page |
Capture™ 2.0 Software |
2.4 |
Audio Device and Sample Rate |
Reference Manual |
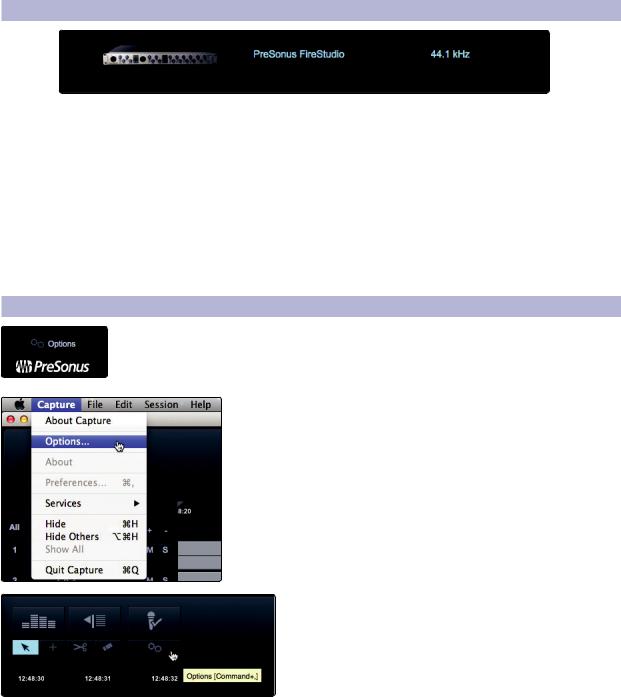
2.4Audio Device and Sample Rate
Capture 2.0 was created for use with PreSonus StudioLive-series mixers and fully functions only with that device. The Audio Device menu displays the currently selected audio driver. When a StudioLive is connected, you should select“PreSonus FireStudio”from the Audio Device list.
If the currently selected audio device has exactly two outputs (as with the builtin audio card in a Mac), Capture goes into Stereo mode. While in Stereo mode, Capture connects all tracks to the stereo output and adjusts the volume of the output automatically to account for stereo summing. Stereo mode enables you to listen to Sessions while away from your StudioLive. Unless the StudioLive’s driver is selected, you cannot create a new Session or record new audio.
The Sample Rate menu displays the currently configured sample rate.
2.5Options Menu
The Options button can be found just above the bottom of the Start page. This launches the Options menu.
This menu can also be accessed from Capture>Options.
It can also be accessed by clicking on the Options button on the Session page.
The Options menu provides all the tools necessary to configure your Session preferences.
8
2 |
Start Page |
Capture™ 2.0 Software |
2.5 |
Options Menu |
Reference Manual |
|
|
|
2.5.1 |
Audio Options |
|
|
|
|
Audio Device. At the top of the Audio Options, you will find the Audio Device menu. This is the same menu that is on the Start page. See Section 2.4 for information.
Device Block Size. This displays the buffer size. In general, the higher the buffer size is set, the more stable your recording environment will be.
Sample Rate. The Sample Rate menu is also found on the Start page. See Section 2.4 for information.
Record Format. The Record Format menu allows you to choose the bit-depth of the recorded audio. You can select 16-bit WAV, 24-bit WAV, or 32-bit floating point WAV.
Power User Tip: The higher the bit-depth of your audio, the better its resolution, and the bigger the resulting file size will be. In general, we recommend recording at 24-bit.
Pre-Record Buffer. Capture 2.0 allows you to set a Pre-Record buffer. This buffer starts recording audio before your click the Record button so you won’t miss the beginning of a performance. The Pre-Record buffer time is user-selectable, between five seconds and one minute.
Power User Tip: The higher the Pre-Record buffer is set, the more RAM Capture 2.0 will require. For example, a 32-track recording with a Pre-Record buffer of 1 minute will require approximately 800 MB more RAM than the same recording set with a buffer of 5 seconds. While this will not cause problems on modern systems that are equipped with copious amounts of RAM, it is highly recommended that the Pre-Record buffer be set as low as possible on systems with the minimum amount of required RAM (2 GB).
2.5.2 Timeline Sync Options
Timeline Sync Mode. Capture 2.0 features a Timeline Sync mode. This allows you to align the timeline in your recording Session to the time of day or to sync it to an external MIDI Time Code signal. This will also affect the timestamp information, which is written into the audio files:
•• No sync. The timeline will start at 0 and will display the length of your recording (in minutes and seconds only). This option is useful when you only want to track the length of your recording.
•• Sync to computer time. The timeline ruler will start at the exact time of day the recording began. This option is useful when recording multiple performances over the course of a day (e.g., at a festival stage).
•• Sync to MTC. Capture will align the timeline to incoming MIDI Time Code. This option is useful when recording audio for a live video.
MIDI Time Code Input. To use the Sync to MTC option, you must provide Capture with an input for the source time code. You can select that source from this menu.
9
2 |
Start Page |
Capture™ 2.0 Software |
2.6 |
About Capture 2.0 |
Reference Manual |
|
|
|
2.5.3 |
File Handling Options |
|
|
|
|
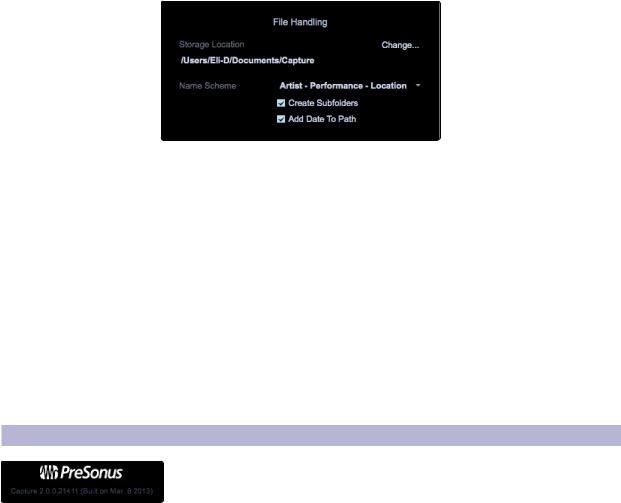
As discussed in Section 2.1, Capture 2.0 provides an assortment of useful tools to organize and label Capture Sessions.
Storage Location. By default, all Capture Sessions are stored in the Capture subfolder in your Documents folder. You can set a new default location
by clicking on the“Change…”link. This will launch a browser window, allowing you to find a new location for your Capture Sessions.
Name Scheme. Section 2.1 discusses the various options for naming and organizing your files. This option enables you to select the order in which your files are categorized.
Create Subfolders. Clicking the Create Subfolders options will create a folder for each of the three naming conventions: Artist, Performance, and Location. If this box is not checked, your Session and the resulting audio files will still be labeled using these tags but a folder hierarchy will not be created. This box is enabled by default.
Add Date to Path. By default, Capture automatically adds the date of the Session to the Session name. You can remove the date by unchecking this option.
2.6About Capture 2.0
At the bottom of the Start page, you can view information about
Capture 2.0, including your version-number build date.
10
 Loading...