

Page 1

Upgrade Instructions and Operation Manual Addendum
Instructions de mise à jour et Addenda au manuel de
fonctionnement
2014 NAVIGATION UPGRADE microSDHC-CARD
Carte microSDHC de mise à jour 2014
microSDHC di aggiornamento mappa 2014
TARJETA microSDHC DE ACTUALIZACIÓN DE NAVEGACIÓN DE 2014
2014 microSDHC-KARTE FÜR NAVIGATIONS-UPGRADE
2014 NAVIGATIE UPGRADE microSDHC-KAART
T1000-22198
This software upgrade will result in changes to certain features and availability of
information. While the changes are intended to improve the overall user experience
for most users, Pioneer and its licensors disclaim any warranty or liability for
damages in connection with such changes.
Cette mise à jour logicielle modifiera l’accès à certaines fonctions et à certaines
informations. Si ces changements sont destinés à améliorer le confort d’utilisation
de la plupart des consommateurs, Pioneer et ses partenaires déclinent toute
responsabilité pour tout préjudice lié à ces modifications.
Questo software d’aggiornamento modifica certe funzioni e le modalità
d’esposizione o di reperimento di certe informazioni. Nell’assicurare che tali
modifiche sono intese a migliorare il piacere d’uso per la maggior parte degli utenti,
Pioneer ed i suoi licenziatari declinano qualsiasi responsabilità per eventuali danni
connessi a tali cambiamenti.
Esta actualización de software dará lugar a cambios en ciertas características y la
disponibilidad de la información. Mientras que los cambios están destinados a
mejorar la experiencia general del usuario para la mayoría de los usuarios, Pioneer
y sus otorgantes de licencias, declinamos toda responsabilidad por daños y
perjuicios en relación con dichos cambios.
Dieses Software-Upgrade führt zu Änderungen in der Funktionalität und der
Verfügbarkeit von Informationen. Diese Änderungen werden für die meisten Nutzer
eine Verbesserung darstellen. Pioneer und seine Lizenzgeber lehnen jegliche
Gewährleistung oder Haftung für Schäden im Zusammenhang mit diesen
Änderungen ab.
Deze software upgrade bevat niet enkel een update voor de kaar t maar ook nieuwe
functionaliteit die bepaalde informatie op een andere manier weergeeft. Daar deze
aanpassingen bedoeld zijn om het gebruik te verbeteren voor de meeste gebruikers,
wijzen Pioneer en haar licentieverstrekkers elke garantie of aansprakelijkheid voor
schade in verband met deze wijzigingen af.
This upgrade microSDHC card
can be used
for the following models ;
AVIC-F50BT, AVIC-F950DAB,
AVIC-F950BT, AVIC-F850BT
Cette carte microSDHC de
mise á jour est
compatible avec les modèles
suivants :
AVIC-F50BT, AVIC-F950DAB,
AVIC-F950BT, AVIC-F850BT
English NederlandsDeutschEspañolItalianoFrançais
Page 2

2
Engb
Page 3
English
Engb
3
Page 4
4
Engb
Page 5
English
Engb
5
Page 6
6
Engb
Page 7
Contents
Thank you for buying this Pioneer product.
Please rea d through these operating instructions so you will know how to operate
your model properly.
English
Important
The screens shown in the examples may differ
from actual screens, which may be changed
without notice for performance and function
improvements.
Licence agreement
PIONEER SOFTWARE LICENCE
AGREEMENT 8
About the data for the map database
Precaution
Models to be upgraded 11
Renewed points through this upgrade 11
Manual overview 11
Setting items to be deleted and initialised by
upgrade 11
Conventions used in this manual 12
“iPhone with a Lightning connector” 12
“microSD card” 12
In case of trouble 12
Visit our website 13
Copyright 13
Instructions for upgrading
The navigation system upgrade process 14
Preparation for upgrade 14
– Checking the model number 14
– Checking the device number 14
– Checking the serial number 14
– Checking the current version 14
Upgrade procedures 15
– Upgrading the software programme
and the map database 15
– Checking whether the upgrade was
done properly 15
Changes on the upgraded programme
For smartphone users 16
– Setting the display size for the Android
video playback 16
For iPhone with a Lightning connector
users 16
For iPhone with 30-pin connector users 16
Connecting and disconnecting an iPod 17
– Connecting your iPod 17
– Disconnecting your iPod 17
Using an iPod (iPod) 17
– Starting procedure 17
Using Aha Radio 17
– Starting procedure 17
Using AppRadio Mode 18
– Starting procedure 18
Selecting the device connection method 20
– For iPhone with 30-pin connector
users 20
– For iPhone with Lightning connector
users 20
Setting the iPod connection 21
Registering your Bluetooth devices 21
– Searching for nearby Bluetooth
devices 21
– Pairing from your Bluetooth
devices 23
Troubleshooting
Problems in the procedures for updating 24
Messages in the procedures for
updating 24
Engb
7
Page 8

Chapter
01
Licence agreement
PIONEER
SOFTWARE LICENCE
AGREEMENT
THIS IS A LEGAL AGREEMENT BETWEEN
YOU, AS THE END USER, AND PIONEER
CORP. (JAPAN) (“PIONEER”). PLEASE READ
THE TERMS AND CONDITIONS OF THIS
AGREEMENT CAREFULLY BEFORE USING
THE SOFTWARE INCLUDED IN THIS PRODUCT. BY USING THE SOFTWARE, YOU
AGREE TO BE BOUND BY THE TERMS OF
THIS AGREEMENT. THE SOFTWARE INCLUDES A DATABASE LICENCED BY THIRD
PARTY SUPPLIER(S) (“SUPPLIERS”), AND
YOUR USE OF THE DATABASE IS COVERED
BY THE SUPPLIERS’ SEPARATE TERMS IN A
DOCUMENT INCLUDED IN THIS PRODUCT. IF
YOU DO NOT AGREE WITH ALL OF THESE
TERMS, PLEASE RETURN THE PRODUCT (INCLUDING THE SOFTWARE, AND ANY WRITTEN MATERIALS) WITHIN FIVE (5) DAYS OF
RECEIPT OF THE PRODUCT, TO THE STORE
YOU PURCHASED IT FROM.
FOR THE PRODUCT PURCHASED DIRECTLY
FROM HERE MAPS, PLEASE CONTACT THE
APPROPRIATE HERE MAPS CONTACT CENTER TO REQUEST A RETURN AUTHORIZATION WITHIN THIRTY (30) DAYS OF
PURCHASE. HERE MAPS WILL PROVIDE
YOU INSTRUCTIONS ON WHAT NEEDS TO BE
RETURNED AND WHERE IT IS TO BE RETURNED.
USE OF THE SOFTWARE SHALL BE DEEMED
TO BE YOUR CONSENT TO THE LICENCE
AGREEMENT.
1 GRANT OF LICENCE
Pioneer grants to you a non-transferable, nonexclusive licence to use the software included
in this product (the “Software”) and the related
documentation solely for your own personal
use or for internal use by your business for the
Pioneer products.
You shall not copy, reverse engineer, translate,
port, modify or make derivative works of the
Software. You shall not loan, rent, disclose,
publish, sell, assign, lease, sublicence, market
or otherwise transfer the Software or use it in
any manner not expressly authorised by this
agreement. You shall not derive or attempt to
derive the source code or structure of all or
any portion of the Software by reverse engineering, disassembly, decompilation, or any
other means. You shall not use the Software to
operate a service bureau or for any other use
involving the processing of data for other persons or entities.
Pioneer and its licensor(s) shall retain all copyright, trade secret, patent and other proprietary ownership rights in the Software. The
Software is copyrighted and may not be copied, even if modified or merged with other products. You shall not alter or remove any
copyright notice or proprietary legend contained in or on the Software.
2 DISCLAIMER OF WARRANTY
The Software and related documentation are
provided to you “AS IS”. PIONEER AND ITS LICENSOR(S) (for the purpose of provisions 2
and 3, Pioneer and its licensor(s) shall be collectively referred to as “Pioneer”) MAKES AND
YOU RECEIVE NO WARRANTY, WHETHER EXPRESS OR IMPLIED, AND ALL WARRANTIES
OF MERCHANTABILITY AND FITNESS FOR
ANY PARTICULAR PURPOSE ARE EXPRESSLY EXCLUDED. SOME COUNTRIES DO
NOT ALLOW EXCLUSION OF IMPLIED WARRANTIES, SO THE ABOVE EXCLUSION MAY
NOT APPLY TO YOU. The Software is complex
and may contain some nonconformities, defects or errors. Pioneer does not warrant that
the Software will meet your needs or expectations, that operation of the Software will be
error free or uninterrupted, or that all nonconformities can or will be corrected. Furthermore, Pioneer does not make any
representations or warranties regarding the
use or results of the use of the Software in
terms of its accuracy, reliability or otherwise.
8
Engb
Page 9

Licence agreement
Chapter
01
3 LIMITATION OF LIABILITY
IN NO EVENT SHALL PIONEER BE LIABLE
FOR ANY DAMAGES, CLAIM OR LOSS INCURRED BY YOU (INCLUDING, WITHOUT LIMITATION, COMPENSATORY, INCIDENTAL,
INDIRECT, SPECIAL, CONSEQUENTIAL, OR
EXEMPLARY DAMAGES, LOST PROFITS, LOST
SALES OR BUSINESS, EXPENDITURES, INVESTMENTS, OR COMMITMENTS IN CONNECTION WITH ANY BUSINESS, LOSS OF
ANY GOODWILL, OR DAMAGES) RESULTING
FROM THE USE OF OR INABILITY TO USE
THE SOFTWARE, EVEN IF PIONEER HAS
BEEN INFORMED OF, KNEW OF, OR SHOULD
HAVE KNOWN OF THE LIKELIHOOD OF
SUCH DAMAGES. THIS LIMITATION APPLIES
TO ALL CAUSES OF ACTION IN THE AGGREGATE, INCLUDING WITHOUT LIMITATION
BREACH OF CONTRACT, BREACH OF WARRANTY, NEGLIGENCE, STRICT LIABILITY, MISREPRESENTATION, AND OTHER TORTS. IF
PIONEER’S WARRANTY DISCLAIMER OR
LIMITATION OF LIABILITY SET FORTH IN THIS
AGREEMENT SHALL OR FOR ANY REASON
WHATSOEVER BE HELD UNENFORCEABLE
OR INAPPLICABLE, YOU AGREE THAT
PIONEER’S LIABILITY SHALL NOT EXCEED
FIFTY PERCENT (50 %) OF THE PRICE PAID BY
YOU FOR THIS PRODUCT.
Some countries do not allow the exclusion or
limitation of incidental or consequential damages, so the above limitation or exclusion
may not apply to you. This warranty disclaimer
and limitation of liability shall not be applicable to the extent that any provision of this
warranty is prohibited by any country or local
law which cannot be pre-empted.
Software has been rightfully obtained by you
English
outside of the Country, you agree that you will
not re-export the Software nor any other technical data received from Pioneer, nor the direct product thereof, except as permitted by
the laws and regulations of the Government
and the laws and regulations of the jurisdiction in which you obtained the Software.
5 TERMINATION
This Agreement is effective until terminated.
You may terminate it at any time by destroying
the Software. The Agreement also will terminate if you do not comply with any terms or
conditions of this Agreement. Upon such termination, you agree to destroy the Software.
6 MISCELLANEOUS
This is the entire Agreement between Pioneer
and you regarding its subject matter. No
change in this Agreement shall be effective
unless agreed to in writing by Pioneer. If any
provision of this Agreement is declared invalid
or unenforceable, the remaining provisions of
this Agreement shall remain in full force and
effect. This Agreement is governed and construed by the laws of Japan. Any dispute, controversy, or difference which may arise
between you and Pioneer, out of or in relation
to or in connection with this Agreement will
be submitted to arbitration in Tokyo, Japan, in
accordance with the Commercial Arbitration
Rules of the Japan Commercial Arbitration Association. The award of arbitration shall be
final and binding.
4 EXPORT LAW ASSURANCES
You agree and certify that neither the Software
nor any other technical data received from
Pioneer, nor the direct product thereof, will be
exported outside the country or district (the
“Country”) governed by the government having
jurisdiction over you (the “Government”) except as authorised and as permitted by the
laws and regulations of the Government. If the
Engb
9
Page 10

Chapter
02
About the data for the map database
! Modifications related to roads, streets/high-
ways, terrain, construction and other things
before/during the development period may
not be reflected in this database. Inevitably,
those modifications after that period are
not reflected in this database.
! Regardless of existing and newly-built
things, the data may be different from the
actual condition.
! For details about the map coverage of this
product, refer to the information on our
website.
! It is strictly prohibited to reproduce and use
any part or the whole of this map in any
form without permission from the copyright
owner.
! If the local traffic regulations or conditions
deviate from this data, follow the local traffic regulations (such as signs, indications,
etc.) and conditions (such as construction,
weather, etc.).
! The traffic regulation data used in the map
database applies only to standard sized
passenger vehicles. Note that regulations
for larger vehicles, motorbikes, and other
non-standard vehicles are not included in
the database.
! © 1987-2013 HERE. All rights reserved.
! © 2013 INCREMENT P CORP. ALL RIGHTS
RESERVED.
10
Engb
Page 11
Precaution
! Read the entire manual before upgrading
the programme of your navigation system.
! This package is unique, and cannot be in-
stalled on more than one unit.
! After the version is upgraded, you cannot
return to the previous version.
! This product cannot be used as a SD mem-
ory card.
Chapter
03
English
Manual overview
This manual describes how to activate the upgrade. It also provides an overview of how
functions change after the upgrade.
p The screen examples shown in this manual
are based on the upgraded version of AVICF50BT using this product. The screens may
vary according to the models.
Models to be upgraded
This product can upgrade the software programme and database of the following models:
! AVIC-F50BT
! AVIC-F950DAB
! AVIC-F950BT
! AVIC-F850BT
Renewed points through
this upgrade
By upgrading the navigation system with this
product, following points are changed.
! Map data is updated.
! If your application version is 1.05 or earlier,
— iPhone 5 and iPod touch (5th genera-
tion) support is now provided.
— You can change the size of Android
video image to fit it to the screen.
= For details on how to check the current
version, refer to Checking the current ver-
sion on page 14.
The other operations are essentially the same
as those at the time you purchased the hardware. Use Operation Manual included in the
hardware package as your primary reference.
Setting items to be deleted
and initialised by upgrade
The following data and settings will be cleared
and reset to default values. Other items will be
retained. However, some items are not listed
because the setting can be easily recovered by
users, such as the last cursor position on the
map screen.
! Route Setting
— Current route
— Learning route data
— Country list
— Category search history
— City search history
— Route search results
— Logo mark setting
! AV options
— Last AV source screen
— Switches between MUSIC/VIDEO on
iPod
The user data stored in the internal memory of
the unit may be erased if an unexpected error
occurs during software installation. Pioneer is
not responsible for any data loss or unavailability of user data.
Engb
11
Page 12
Chapter
03
Precaution
Conventions used in this
manual
Before moving on, take a few minutes to read
the following information about the conventions used in this manual. Familiarity with
these conventions will help you greatly as you
learn how to use your new equipment.
! Buttons on your navigation system are de-
scribed in ALL CAPITALS, BOLD lettering:
e.g.)
Press the MODE button or the HOME button.
! Menu items, screen titles, and functional
components are described in bold with
double quotation marks “”:
e.g.)
The “System Settings” screen appears.
! Touch panel keys that are available on the
screen are described in bold in brackets [ ]:
e.g.)
Touch [Edit/Settings].
! Extra information, alternatives and other
notes are presented in the following format:
e.g.)
p If the home location has not been stored
yet, set the location first.
! Functions of other keys on the same screen
are indicated with # at the beginning of the
description:
e.g.)
# If you touch [OK], the entry is deleted.
! References are indicated like this:
e.g.)
= For details of the operation, refer to
Checking the device number on page
14.
“iPhone with a Lightning
connector”
In this manual, iPhone 5 and iPod touch (5th
generation) will be referred to as “iPhone with
a Lightning connector”.
“microSD card”
In this manual, the microSDHC card is referred to as the “ microSD card”.
p Keep the microSD card out of the reach of
small children to prevent them from accidentally swallowing it.
p Do not store the microSD card in high tem-
peratures or direct sunlight.
p Do not subject the microSD card to shock
or impact.
p Do not allow the microSD card to come
into contact with liquids. Damage to the
microSD card and your products could result from contact with liquids.
p Be careful not to touch terminals on the
microSD card. Doing so may cause connection failures. If any terminals are dirty,
wipe them with a clean dry cloth.
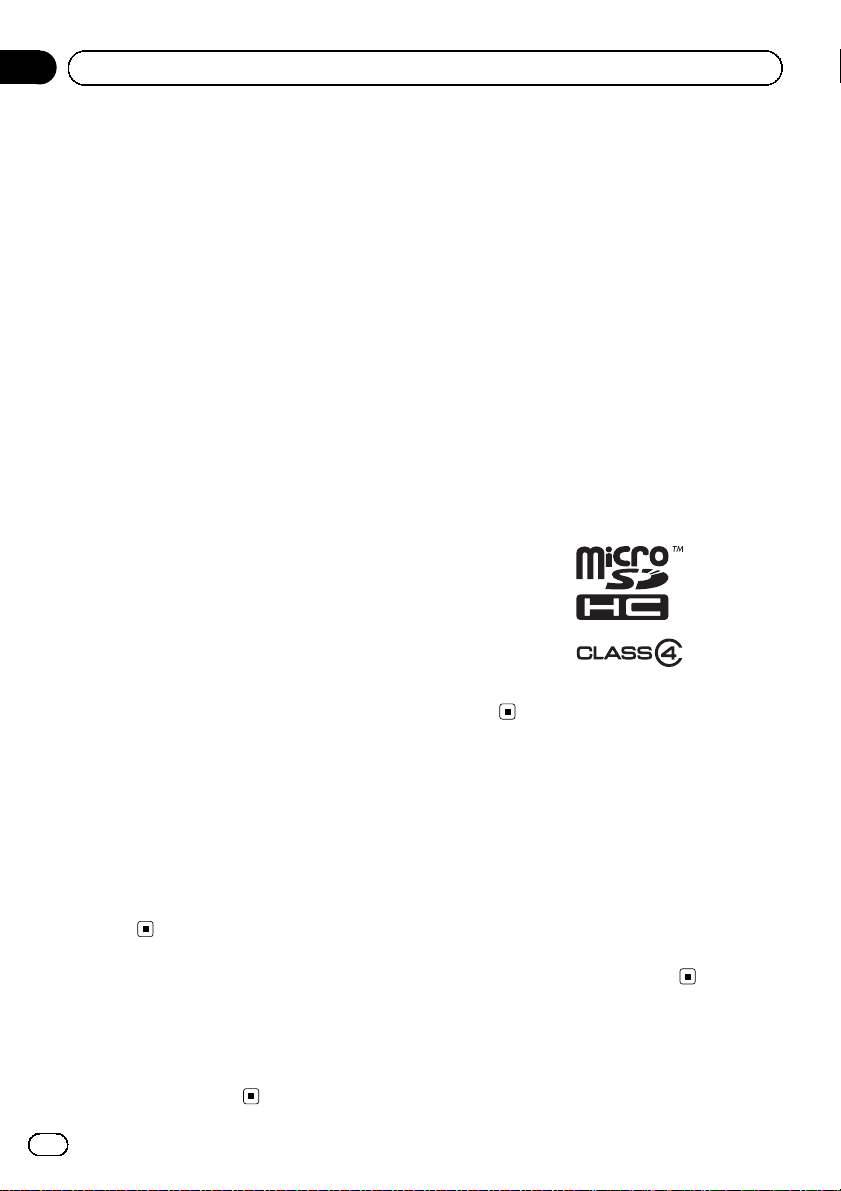
p microSDHC Logo is a trademark of SD-3C,
LLC.
In case of trouble
! Should the navigation system fail to oper-
ate properly, contact your dealer or nearest
authorised Pioneer Service Station.
! The Upgrade Certificates (UPGRADE CER-
TIFICATES) card is required as certification
for repair (and also recovery). If the navigation system needs to undergo repair, the
updated data will not be able to be restored
if you fail to submit this card.
12
Engb
Page 13

Precaution
Visit our website
Visit us at the following site:
http://www.pioneer.eu
! Register your product. We will keep the de-
tails of your purchase on file to help you
refer to this information in the event of an
insurance claim such as loss or theft.
! We offer the latest information about
PIONEER CORPORATION on our
website.
Copyright
The names of private corporations, products and other entities described in this
product are the registered trademarks or
trademarks of their respective firms.
= For more information, refer to the Operation
Manual of your navigation system.
Chapter
03
English
Engb
13
Page 14

Chapter
04
Instructions for upgrading
The navigation system
upgrade process
1 Write the required information (model num-
ber (MODEL NUMBER), device number
(DEVICE_NUMBER), and serial number
(SERIAL NUMBER)) on the upgrade certificates (UPGRADE CERTIFICATES).
= For details, refer to Checking the model
number on page 14.
= For details of the operation, refer to
Checking the device number on page 14.
= For details, refer to Checking the serial
number on page 14.
j
2 Upgrade the software programme of your
navigation system.
= For details of the operation, refer to Up-
grading the software programme and the
map database on page 15.
j
3 Check whether the upgrade was done prop-
erly.
= For details of the operation, refer to
Checking whether the upgrade was done
properly on page 15.
Preparation for upgrade
Checking the model number
The model number is printed on the warranty
card or the front of the navigation system.
Checking the device number
1 Press the HOME button to display the
“Top Menu” screen.
2 Touch
The “Information” screen appears.
3 Touch [Navigation Info].
The device number “Device Number” of your
navigation system is displayed.
Checking the serial number
The serial number is printed on the warranty
card. Also, on the bottom of the navigation
system, there is a sticker on which the serial
number “SER.NO.” is printed.
Checking the current version
1 Press the HOME button to display the
“Top Menu” screen.
.
14
Engb
2 Touch
The “Information” screen appears.
3 Touch and hold the left upper corner.
The “Service Information” screen appears.
4 Check the version information displayed in “Application Version”.
.
Page 15
Instructions for upgrading
Chapter
04
Upgrade procedures
! NEVER stop the engine of your vehicle or
turn off the power supply to the navigation
system until the installation is completed.
Turning the power off during upgrade process causes a malfunction or failure of the
navigation system.
! No functions are available during upgrade
process.
Upgrading the software
programme and the map database
This section describes the upgrade procedures for your navigation system.
p The upgrade takes approximately 45 min-
utes in total.
1 Park your vehicle in a safe place and
apply the handbrake.
2 Insert the upgrade microSD card into
the SD card slot.
The navigation system restarts and then the installation begins.
p If you are using an SD memory card com-
patible model, insert a microSD card into
the SD card adapter.
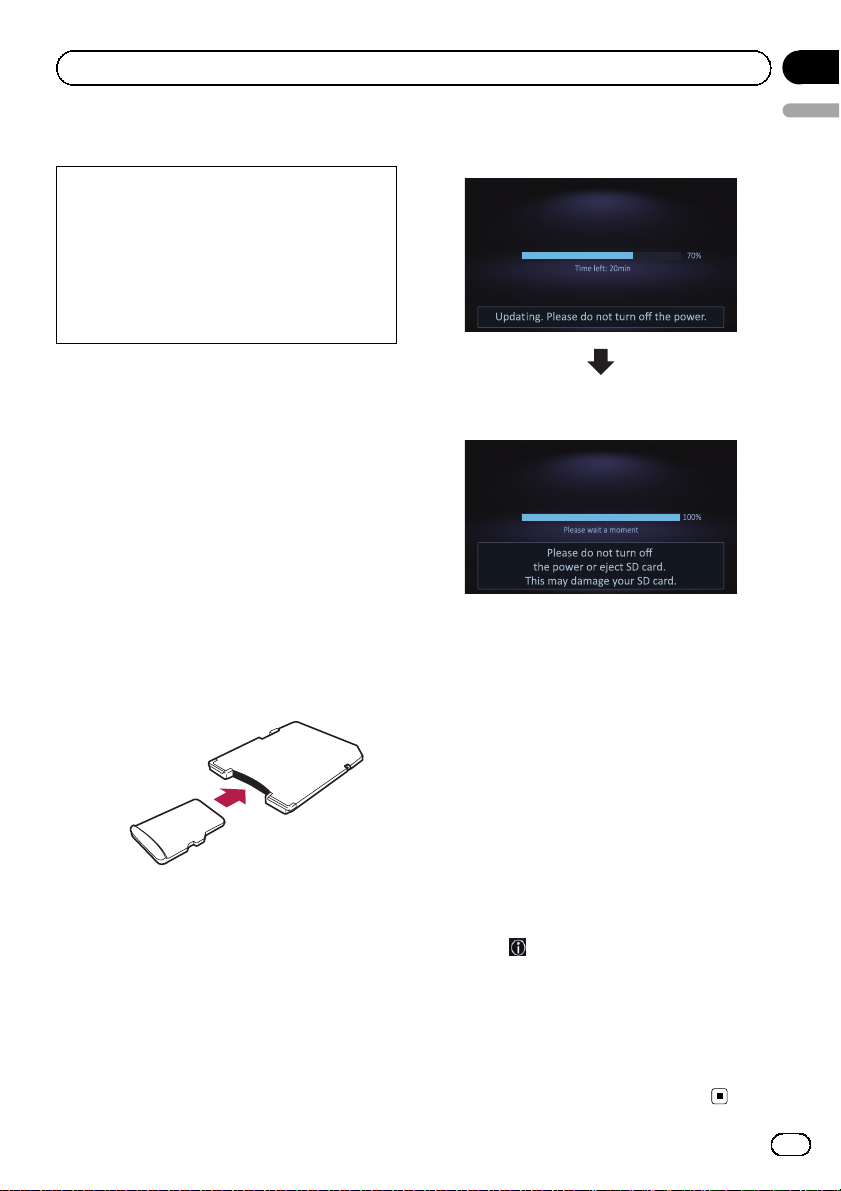
4 Wait until the upgrade process is com-
English
plete.
When data installation completes, password
lock processing starts.
The message confirming whether or not to
start the update will appear.
5 Touch [OK].
6 Wait until the update process is complete.
Update is completed.
p Be sure to use an SD memory card with the
write-protect switch unlocked.
The message confirming whether or not to
start the update will appear.
3 Touch [Yes].
Checking whether the upgrade
was done properly
Display “Information” screen to compare the
current version number with the previous one.
1 Press the HOME button to display the
“Top Menu” screen.
2 Touch
The “Information” screen appears.
3 Touch [Version Information].
The current version is displayed.
4 Make sure that the current version is
2.000000.
5 Eject the upgrade microSD card.
.
Engb
15
Page 16

Chapter
05
Changes on the upgraded programme
This chapter explains the changes that are
made when a navigation system with an application version of 1.05 or earlier is upgraded
using this product.
For smartphone users
Setting the display size for the
Android video playback
p This function is only available in AppRadio
Mode (HDMI connection) on the Android.
You can change the size of Android video
image to fit it to the screen.
1 Display the AppRadio Mode screen.
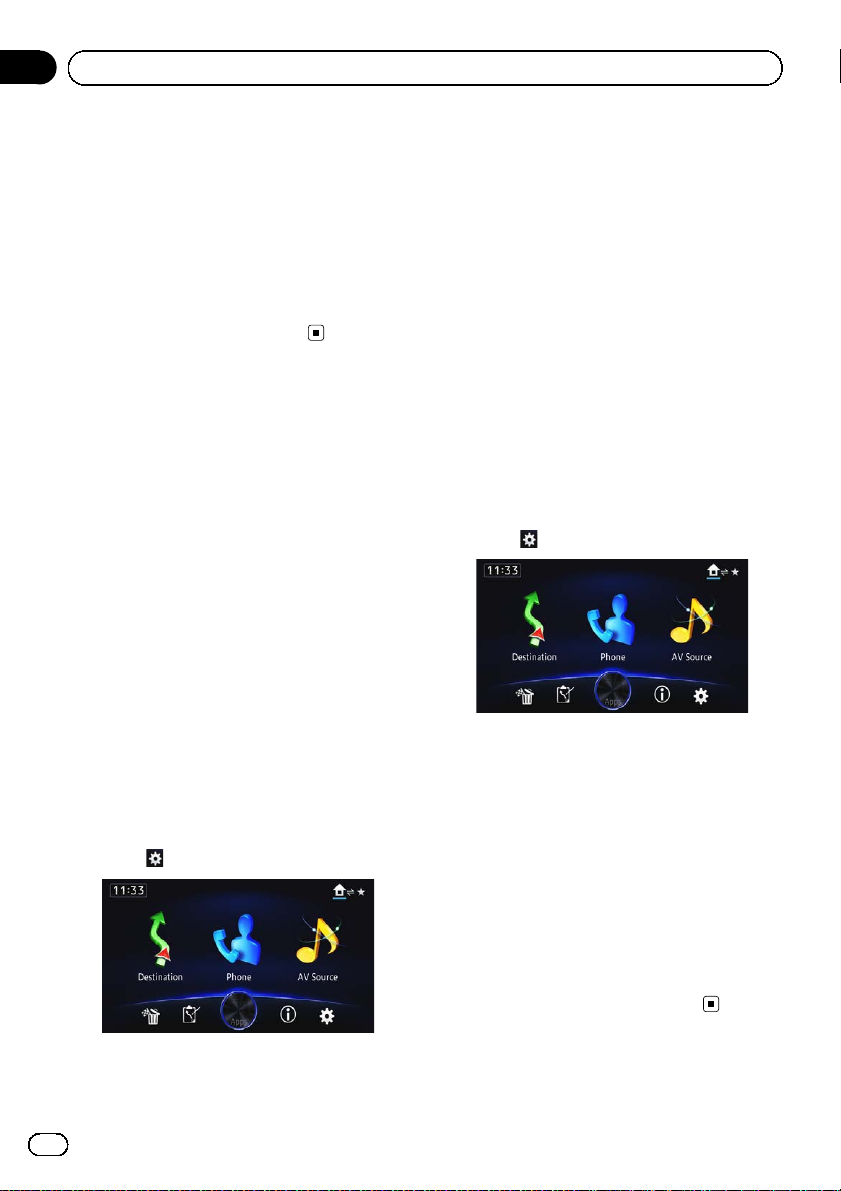
2 Press the HOME button to display the
“Top Menu” screen.
3 Touch
The “Edit/Settings” screen appears.
4 Touch [App settings].
The “App settings” menu appears.
5 Touch [Android Video Adj.].
6 Touch the item to adjust the size of the
Android window.
.
For iPhone with a Lightning
connector users
This product provides AppRadio Mode support and video playback for the iPhone with a
Lightning connector.
p The following cables are required for con-
nection to this navigation system.
— HDMI/USB interface cable for iPod /
iPhone (CD-IH202) (sold separately)
— Lightning Digital AV Adapter (Apple Inc.
products) (sold separately)
— Lightning to USB cable (supplied with
iPhone with Lightning connector)
p The device is connected to this navigation
system via Bluetooth.
— You cannot use the AppRadio Mode
when Bluetooth wireless technology is
disconnected.
p After installation of the update, the default
iPod source will no longer be used to access music or video content from a connected iPhone with a Lightning connector.
To use iPod source, you must connect your
iPod to the navigation system using a USB
interface cable for iPod / iPhone (CDIU201N) (sold separately) and a Lightning
to 30-pin Adapter (Apple Inc. products)
(sold separately). However, functions related to iPod video files and AppRadio
Mode are not available. To play music and/
or video files on your iPhone with a Lightning connector, you will first need to install
the free of charge Pioneer AppRadio
Mode app and CarMediaPlayer app on
your device and then launch CarMedia-
Player while in AppRadio Mode.
= Refer to the CarMediaPlayer manual
for more information.
For iPhone with 30-pin
connector users
p Depending on your iPod, there may not be
any output unless you use a USB interface
cable for iPod / iPhone (CD-IU201N) (sold
separately). Be sure to use a USB interface
cable for iPod / iPhone (CD-IU201N) (sold
separately) to connect your iPod.
= For details, refer to Connecting your iPod
on page 17.
16
Engb
Page 17

Changes on the upgraded programme
Connecting and
disconnecting an iPod
CAUTION
! To prevent data loss and damage to the sto-
rage device, never remove it from this navigation system while data is being transferred.
! Pioneer cannot guarantee compatibility with
all USB mass storage devices and assumes
no responsibility for any loss of data on media
players, iPhone, smartphone, or other devices
while using this product.
Connecting your iPod
1 Check that no USB storage device is
connected.
2 Connect your iPod.
Lightning Digital AV Adapter
Disconnecting your iPod
% Pull out the cables after confirming
that no data is being accessed.
Using an iPod (iPod)
Starting procedure
1 Set “iPod Connection Settings” to “30pin Connector”.
= For details, refer to Selecting the device con-
nection method on page 20.
= For details, refer to Setting the iPod connec-
tion on page 21.
2 Press the MODE button when the map
screen is displayed.
p The AV operation screen can also be dis-
played by touching [AV Source] on the
“Top Menu”.
3 Connect your iPod.
The source changes and then playback will
start.
= For details, refer to Connecting your iPod on
page 17.
p If the iPod is already connected, touch
[iPod] on the left edge of the screen.
p If connecting an iPhone or iPod touch, quit
applications before connecting.
Chapter
05
English
HDMI/USB interface
cable for iPod /
iPhone
= For details of the operations, refer to the lat-
est Installation Manual.
The latest manual is available on our website.
http://www.pioneer.eu
Lightning to USB
cable
4 Use the touch panel keys on the screen
to control your iPod.
p The video image of the iPod may have noise
if the rear display outputs the video image.
When noise is produced in the video image
of the iPod, turn off the output setting of the
rear display.
Using Aha Radio
Starting procedure
The procedure varies depending on the type of
device.
Engb
17
Page 18

Chapter
05
Changes on the upgraded programme
For iPhone with 30-pin connector users
1 Set “App connection settings” to
“iPhone”, and “iPod Connection Settings”
to “30-pin Connector”.
= For details, refer to Selecting the device con-
nection method on page 20.
= For details, refer to Setting the iPod connec-
tion on page 21.
2 Start up the Aha Radio application installed on the iPhone.
p Before starting up, sign-in to Aha Radio
from your iPhone.
3 Connect your iPhone.
p If the iPhone is already connected, touch
[aha] on the left edge of the screen.
= For details, refer to Connecting your iPod on
page 17.
4 Press the MODE button when the map
screen is displayed.
p The AV operation screen can also be dis-
played by touching [AV Source] on the
“Top Menu”.
5 Touch [aha] on the left side of the
screen to display the “aha” screen.
6 Use the touch panel keys on the screen
to control Aha Radio.
For iPhone with Lightning connector
users
1 Set “App connection settings” to
“iPhone”, and “iPod Connection Settings”
to “Digital AV Connector”.
= For details, refer to Selecting the device con-
nection method on page 20.
= For details, refer to Setting the iPod connec-
tion on page 21.
2 Register your iPhone and connect it to
this product via Bluetooth wireless technology.
p The registered device must be selected as
the priority device.
= For details, refer to Registering your
Bluetooth devices on page 21.
3 Unlock your iPhone.
4 Connect your iPhone.
= For details, refer to Connecting your iPod on
page 17.
5 Press the MODE button when the map
screen is displayed.
p The AV operation screen can also be dis-
played by touching [AV Source] on the
“Top Menu”.
6 Touch [aha] on the left side of the
screen to display the “aha” screen.
When you touch [aha], the navigation system
attempts to establish a Bluetooth connection.
After the connection is successfully established, the touch panel keys on the “aha”
screen are activated.
7 Use the touch panel keys on the screen
to control Aha Radio.
Using AppRadio Mode
Starting procedure
For iPhone with 30-pin connector users
1 Set “App connection settings” to
“iPhone”, and “iPod Connection Settings”
to “30-pin Connector”.
= For details, refer to Selecting the device con-
nection method on page 20.
= For details, refer to Setting the iPod connec-
tion on page 21.
2 Connect your iPhone.
= For details, refer to Connecting your iPod on
page 17.
3 Press the HOME button to display the
“Top Menu” screen.
18
Engb
Page 19
Changes on the upgraded programme
Chapter
05
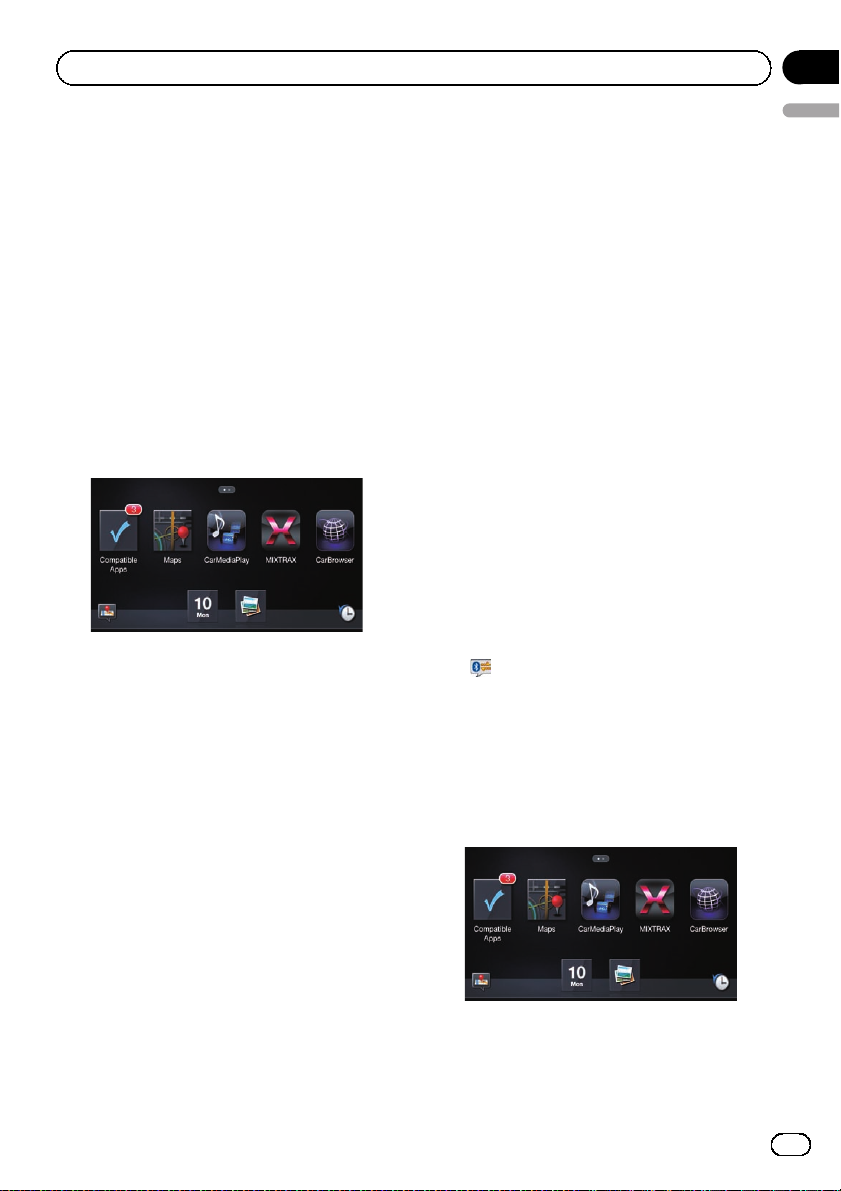
4 Touch [Apps].
A message, which notifies you that your
iPhone can launch the application, appears
on the screen.
A message, which asks you whether you want
to launch your application, appears on your
iPhone.
5 Use your iPhone to launch the application.
The AppRadio app is launched.
6 Touch [OK] on the screen of this product.
The AppRadio Mode screen (Application
menu screen) appears.
Application menu screen
p If you connect your device while an
AppRadio Mode-compatible application is
already running, the application operation
screen appears on this navigation system.
7 Touch the desired application icon.
The desired application is launched, and the
application operation screen appears.
8 Operate the application.
9 Press the HOME button to go back to
the application menu screen.
p If you press the HOME button while the ap-
plication menu screen is displayed, the
“Top Menu” screen appears.
For iPhone with Lightning connector
English
users
1 Set “App connection settings” to
“iPhone”, and “iPod Connection Settings”
to “Digital AV Connector”.
= For details, refer to Selecting the device con-
nection method on page 20.
= For details, refer to Setting the iPod connec-
tion on page 21.
2 Register your iPhone and connect it to
this product via Bluetooth wireless technology.
p The registered device must be selected as
the priority device.
= For details, refer to Registering your
Bluetooth devices on page 21.
3 Unlock your iPhone.
4 Connect your iPhone.
= For details, refer to Connecting your iPod on
page 17.
5 Press the HOME button to display the
“Top Menu” screen.
p appears on the Apps key while
Bluetooth wireless technology is in the process of connecting.
6 Touch [Apps].
The AppRadio app is launched, and the
AppRadio Mode screen (Application menu
screen) appears.
Application menu screen
p If you connect your device while an
AppRadio Mode-compatible application is
already running, the application operation
screen appears on this navigation system.
Engb
19
Page 20
Chapter
05
Changes on the upgraded programme
7 Touch the desired application icon.
The desired application is launched, and the
application operation screen appears.
8 Operate the application.
9 Press the HOME button to go back to
the application menu screen.
p If you press the HOME button while the ap-
plication menu screen is displayed, the
“Top Menu” screen appears.
Selecting the device
connection method
If you want to use the application for iPhone
or smartphone on this navigation system, you
must select the method for connecting your
device.
Settings are required according to the connected device.
“App connection settings” can be set when
all of the following conditions are met.
! The AV source is turned off.
! All iPod, smartphone and external storage
devices are not connected to this navigation system.
3 Touch [App settings].
The “App settings” menu appears.
4 Touch [App connection settings].
The “App connection settings” screen appears.
5 Touch [iPhone].
The connection setting of iPhone is enabled.
The “iPod Connection Settings” screen appears.
6 Touch [30-pin Connector].
For iPhone with Lightning
connector users
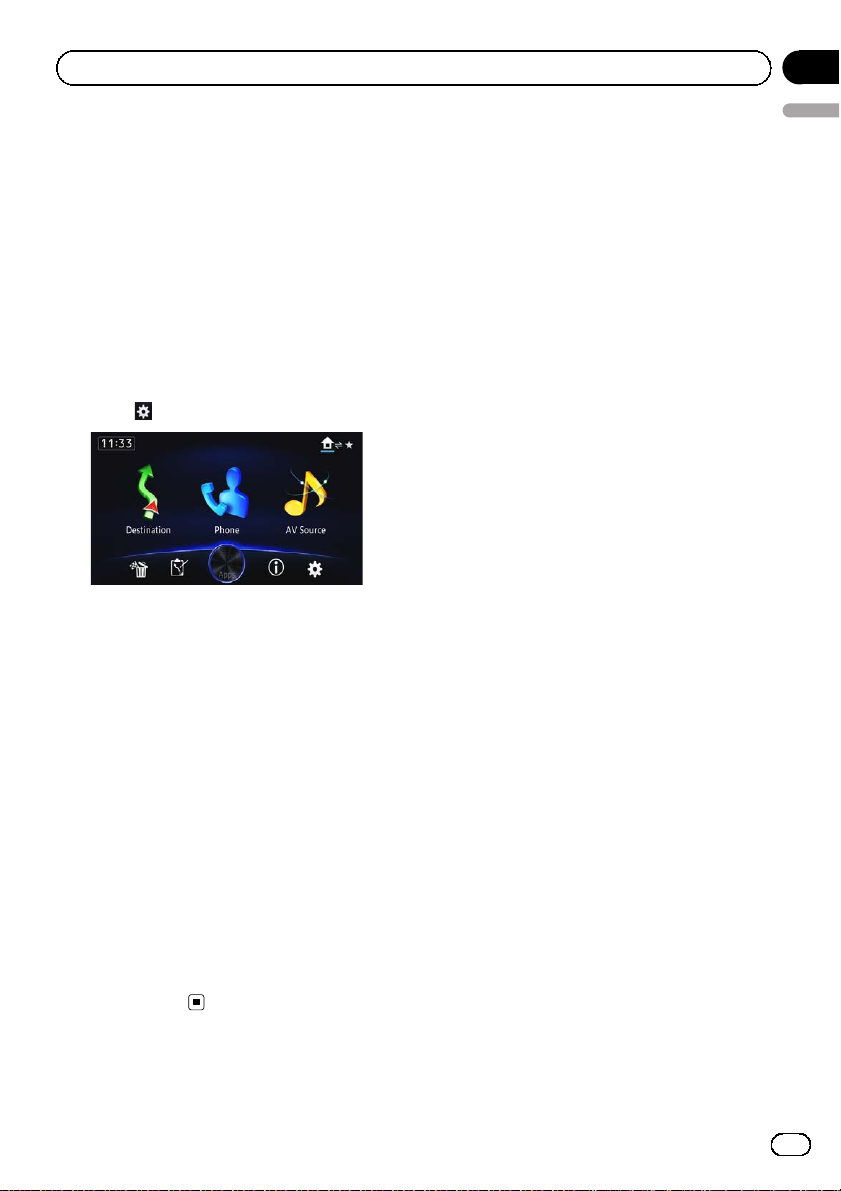
1 Press the HOME button to display the
“Top Menu” screen.
2 Touch
.
For iPhone with 30-pin
connector users
1 Press the HOME button to display the
“Top Menu” screen.
2 Touch
The “Edit/Settings” screen appears.
20
Engb
.
The “Edit/Settings” screen appears.
3 Touch [App settings].
The “App settings” menu appears.
4 Touch [App connection settings].
The “App connection settings” screen appears.
5 Touch [iPhone].
The connection setting of iPhone is enabled.
The “iPod Connection Settings” screen appears.
6 Touch [Digital AV Connector].
Page 21
Changes on the upgraded programme
Setting the iPod connection
Settings are required according to the connected device.
“iPod Connection Settings” can be set when
all of the following conditions are met.
! The AV source is turned off.
! All iPod, smartphone and external storage
devices are not connected to this navigation system.
1 Press the HOME button to display the
“Top Menu” screen.
2 Touch
The “Edit/Settings” screen appears.
3 Touch [Source Settings].
The “Setting according to source” screen appears.
4 Touch [iPod Settings].
The “iPod Settings” screen appears.
5 Touch [iPod Connection Settings].
The “iPod Connection Settings” screen appears.
6 Touch [Digital AV Connector] or [30-pin
Connector].
! 30-pin Connector (default):
! Digital AV Connector:
.
This setting is for iPod with 30-pin connector users and Android device users.
This setting is for iPod with Lightning connector users.
Registering your Bluetooth
devices
You need to register your devices featuring
Bluetooth wireless technology when you connect it for the first time. A total of 5 devices
can be registered. Two registration methods
are available:
! Searching for nearby Bluetooth devices
! Pairing from your Bluetooth devices
Searching for nearby Bluetooth
devices
The system searches for available Bluetooth
devices near the navigation system, displays
them in a list, and registers them for connection.
1 Activate the Bluetooth wireless technology on your devices.
For some Bluetooth devices, no specific action
is necessary to activate Bluetooth wireless
technology. For details, refer to the instruction
manual of your devices.
2 Touch [Phone].
The “Phone” screen appears.
3 Touch [Bluetooth Settings].
The “Bluetooth Settings” screen appears.
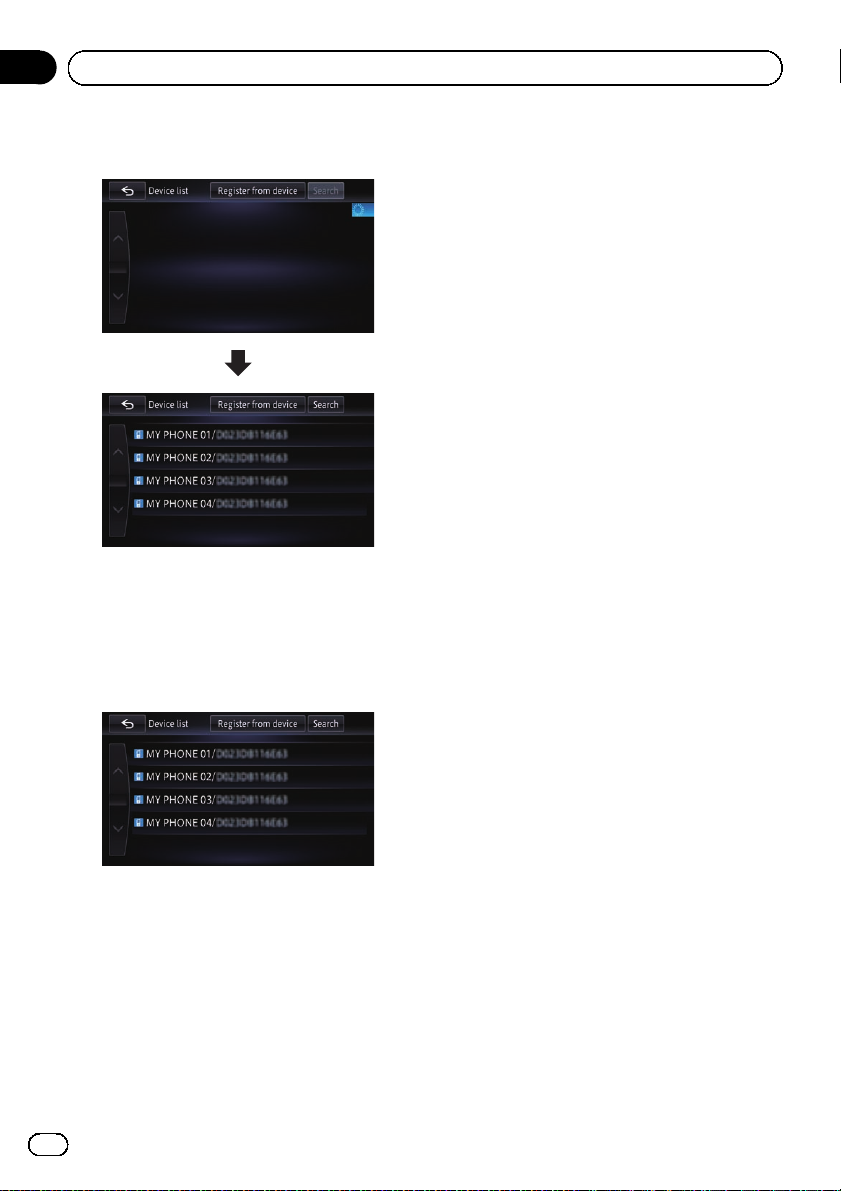
4 Touch [Registration].
The “Device list” screen appears.
The system searches for Bluetooth devices
waiting for a connection and displays them in
the list if a device is found.
p Up to 10 devices will be listed in the order
that the devices are found.
Chapter
05
English
Engb
21
Page 22
Chapter
05
Changes on the upgraded programme
5 Wait until your Bluetooth device appears in the list.
p If you cannot find the Bluetooth device that
you want to connect, check that the device
is waiting for a Bluetooth wireless technology connection.
6 Touch the Bluetooth device name you
want to register.
ing on the Bluetooth device. Perform pairing
according to the screen instructions for this
product or Bluetooth device. Refer to the instruction manual of your devices to register
(registration and authentication of device).
After registering, a confirmation message appears.
8 Touch [OK].
The registration is complete, and the device is
connected as a hands-free phone.
You can perform the following setting depending on the Bluetooth device registered.
! Transferring the phone book
You can transfer the phone book to the navigation system if the registered Bluetooth
device features PBAP (Phone Book Access
Profile).
If you touch [Yes], you can transfer the
whole phone book to the navigation system,
and then the message that transfer is finished appears.
! Selecting whether to use the Bluetooth
audio
You can select whether to use the
Bluetooth audio function if the registered
Bluetooth device features Bluetooth audio.
The message “Is this Android?” appears.
# If you touch [Search], the system starts
searching for Bluetooth devices waiting for connection, and displays them in the list format
when any devices are detected.
7 Pair this navigation system with your
Bluetooth device.
When the Bluetooth device connects to this
product for the first time, a pairing operation
is needed to specify the device to connect.
How the pairing is performed varies depend-
22
Engb
9 Touch [No].
The message “Is this device equipped with a
Digital AV Connector?” appears.
10 Touch [Yes].
The message “Do you want to set this de-
vice for the AppRadio Mode?” appears.
11 Touch [Yes] if you use the AppRadio
Mode with a device you registered.
! Yes:
Allows you to proceed to the next step.
! No:
The device is registered in the navigation
system. After the device is successfully registered, the Bluetooth connection is established from the navigation system.
12 Touch [OK].
Page 23

Changes on the upgraded programme
Chapter
05
Pairing from your Bluetooth
devices
You can register the Bluetooth device by setting the navigation system to standby mode
and requesting connection from the Bluetooth
device.
1 Activate the Bluetooth wireless technology on your devices.
For some Bluetooth devices, no specific action
is necessary to activate Bluetooth wireless
technology. For details, refer to the instruction
manual of your devices.
2 Touch [Phone].
The “Phone” screen appears.
3 Touch [Bluetooth Settings].
The “Bluetooth Settings” screen appears.
4 Touch [Registration].
The “Device list” screen appears.
5 Touch [Register from device].
The navigation system waits for a Bluetooth
wireless technology connection.
6 Register the navigation system on your
Bluetooth device.
If your device asks you to enter a password,
enter the password of the navigation system.
When the device is successfully registered,
the connection settings are made from the device.
p If registration fails, repeat the procedure
from the beginning.
If you touch [Yes], you can transfer the
English
whole phone book to the navigation system,
and then the message that transfer is finished appears.
! Selecting whether to use the Bluetooth
audio
You can select whether to use the
Bluetooth audio function if the registered
Bluetooth device features Bluetooth audio.
The message “Is this Android?” appears.
8 Touch [No].
The message “Is this device equipped with a
Digital AV Connector?” appears.
9 Touch [Yes].
The message “Do you want to set this de-
vice for the AppRadio Mode?” appears.
10 Touch [Yes] if you use the AppRadio
Mode with a device you registered.
! Yes:
Allows you to proceed to the next step.
! No:
The device is registered in the navigation
system. After the device is successfully registered, the Bluetooth connection is established from the navigation system.
11 Touch [OK].
7 Touch [OK].
The registration is complete, and the device is
connected as a hands-free phone.
You can perform the following setting depending on the Bluetooth device registered.
! Transferring the phone book
You can transfer the phone book to the navigation system if the registered Bluetooth
device features PBAP (Phone Book Access
Profile).
Engb
23
Page 24
Appendix
Troubleshooting
Problems in the procedures for updating
Symptom Cause Action
The upgrade process doesn’t
start and the navigation system
boots up as usual.
The navigation system does not
work properly after upgrade.
An incorrect microSD card has
been inserted.
Upgrade has been already done. Check whether the upgrade was done prop-
The screen that cannot begin the
upgrade process is displayed.
The engine of your vehicle was
stopped or the power supply to the
navigation system was turned off
during upgrade process.
Upgrade microSD card was pulled
out during upgrade process.
Eject the inserted microSD card and insert
the correct upgrade microSD card.
erly. If the upgrade has not been done yet,
consult the nearest authorised service station.
Eject the upgrade microSD card, and display
the map of your current position, and then reinsert the upgrade microSD card.
Consult the nearest authorised service station.
Consult the nearest authorised service station.
Messages in the procedures for updating
The following messages may be displayed by your navigation system. Refer to the table to identify
the problem, then take the suggested corrective action.
There are occasions when you may see error messages other than those shown here. In such
cases, follow the instructions given on the display.
Message When What to do
Unable to complete update
process.
24
Engb
Unexpected error occurred in the
update process.
Consult your local Pioneer dealer if this message persist.
Page 25
Français
25
Fr
Page 26
26
Fr
Page 27
Sommaire
Merci d’avoir acheté ce produit Pioneer.
Veuillez lire attentivement ces instructions de fonctionnement de façon à savoir
comment utiliser votre modèle correctement.
Français
Important
Les écrans fournis en exemple peuvent être différents des écrans réels, lesquels peuvent être
modifiés sans préavis à titre d’améliorations
des performances et des fonctions.
Accord de licence
PIONEER ACCORD DE LICENCE DE
LOGICIEL 28
À propos des données de la base de
données de carte
Précautions
Modèles à mettre à jour 32
Points renouvelés par cette mise à
niveau 32
Vue d’ensemble du manuel 32
Définition des éléments à supprimer et
initialiser par mise à jour 32
Conventions utilisées dans ce manuel 33
“iPhone avec connecteur Lightning” 33
“Carte microSD” 33
En cas d’anomalie 34
Notre site web 34
Droits d’auteur 34
Instructions pour la mise à jour
Processus de mise à niveau du système de
navigation 35
Préparation pour la mise à jour 35
– Vérification du numéro de modèle 35
– Vérification du numéro d’appareil 35
– Vérification du numéro de série 35
– Contrôle de la version actuelle 35
Procédures de mise à jour 36
– Mise à niveau du programme logiciel et
de la base de données de la carte 36
– Comment contrôler si la mise à jour a
été faite correctement 36
Changements sur le programme mis à
jour
Pour les utilisateurs de smartphone 38
– Réglage de la taille d’affichage pour la
lecture vidéo Android 38
Àl’attention des utilisateurs d’un iPhone
avec connecteur Lightning 38
Àl’attention des utilisateurs d’un iPhone
avec connecteur à 30 broches 39
Connexion et déconnexion d’un iPod 39
– Connexion de votre iPod 39
– Déconnexion de votre iPod 39
Utilisation d’un iPod (iPod) 39
– Procédure de départ 39
Utilisation de Aha Radio 40
– Procédure de départ 40
Utilisation de AppRadio Mode 41
– Procédure de départ 41
Sélection de la méthode de connexion de
l’appareil 42
– Àl’attention des utilisateurs d’un
iPhone avec connecteur à 30
broches 42
– Àl’attention des utilisateurs d’un
iPhone avec connecteur Lightning 43
Réglage de la connexion à l’iPod 43
Enregistrement de vos périphériques
Bluetooth 44
– Recherche des périphériques
Bluetooth à proximité 44
– Appariement depuis vos périphériques
Bluetooth 45
Dépannage
Problèmes dans les procédures de mise à
jour 47
Messages dans les procédures de mise à
jour 47
27
Fr
Page 28

Chapitre
01
Accord de licence
PIONEER
ACCORD DE LICENCE DE
LOGICIEL
CE DOCUMENT EST UN ACCORD LÉGAL
ENTRE VOUS, L’UTILISATEUR FINAL, ET
PIONEER CORP. (JAPON) (“PIONEER”).
VEUILLEZ LIRE ATTENTIVEMENT LES CONDITIONS GÉNÉRALES DE CET ACCORD AVANT
D’UTILISER LE LOGICIEL INCLU AVEC CE
PRODUIT. EN UTILISANT LE LOGICIEL, VOUS
ACCEPTEZ D’ÊTRE TENU PAR LES CONDITIONS DU PRÉSENT ACCORD. LE LOGICIEL
INCLUT UNE BASE DE DONNÉES SOUS LICENCE DE FOURNISSEUR(S) TIERS (“FOURNISSEURS”) ET LES CONDITIONS DES
FOURNISSEURS SEPARÉES, INDIQUÉES
DANS UN DOCUMENT INCLU AVEC CE PRO DUIT, S’APPLIQUENT À VOTRE UTILISATION
DE LA BASE DE DONNÉES. SI VOUS N’ACCEPTEZ PAS TOUTES CES CONDITIONS,
VEUILLEZ RETOURNER LE PRODUIT (Y
COMPRIS LE LOGICIEL ET TOUS DOCUMENTS ÉCRITS) DANS LES CINQ (5) JOURS
SUIVANT LA RÉCEPTION DU PRODUIT AU
MAGASIN AUQUEL VOUS L’AVEZ ACHETÉ.
POUR TOUT PRODUIT ACHETÉ DIRECTEMENT DEPUIS HERE MAPS, VEUILLEZ
CONTACTER LE CENTRE DE SERVICE APPROPRIÉ DE HERE MAPS POUR DEMANDER
UNE AUTORISATION DE RETOUR DANS LES
TRENTE (30) JOURS SUIVANT L’ACHAT. HERE
MAPS VOUS FOURNIRA LES INSTRUCTIONS
DE CE QUI DOIT ÊTRE RETOURNÉ ET À QUEL
ENDROIT CELA DOIT ÊTRE RETOURNÉ.
L’UTILISATION DU LOGICIEL ENTRAÎNE
VOTRE ACCEPTATION TACITE DE CET ACCORD DE LICENCE.
Vous ne pouvez pas effectuer de copie, rétroingénierie, traduction, port, modification ou
travaux dérivés du Logiciel. Vous ne pouvez
pas prêter, louer, divulguer, publier, vendre, attribuer, donner à bail, accorder une sous-licence, mettre sur le marché ou transférer le
Logiciel ou l’utiliser d’une manière quelconque non expressément autorisée par cet
accord. Vous ne pouvez pas extraire ou essayer d’extraire le code source ou la structure
de la totalité ou d’une partie du Logiciel par
rétro-ingénierie, démontage, décompilation ou
tout autre moyen. Vous ne pouvez pas utiliser
le Logiciel pour faire fonctionner un bureau de
service ou pour toute autre finalité, liée au traitement de données pour d’autres personnes
ou entités.
Pioneer et les concédants conserveront tous
les droits d’auteur, secrets commerciaux, brevets et autres droits de propriété sur le Logiciel. Le Logiciel est protégé par des droits
d’auteur et il ne peut être copié, même modifié
ou fusionné avec d’autres produits. Vous ne
pouvez pas altérer ou modifier les mentions de
copyrights ou des droits exclusifs du propriétaire présents dans le Logiciel.
1 OCTROI DE LICENCE
Pioneer vous accorde un droit non transférable et non exclusif d’utilisation du logiciel inclus dans ce produit (appelé le “Logiciel”)et
de la documentation concernée uniquement
pour votre usage personnel ou pour une utilisation interne au sein de votre entreprise, uniquement pour les produits Pioneer.
28
Fr
Page 29

Accord de licence
Chapitre
01
2 CLAUSE DE NON-RESPONSABILITÉ
Le Logiciel et sa documentation vous sont
fournis sur une base “EN L’ÉTAT”. PIONEER ET
LES CONCÉDANTS (dans les articles 2 et 3,
Pioneer et les concédants seront appelées collectivement “Pioneer”)N’ACCORDENT ET
VOUS NE RECEVEZ AUCUNE GARANTIE, EXPRESSE OU IMPLICITE, ET TOUTES LES GARANTIES DE CARACTÈRE MARCHAND ET DE
QUALITÉ POUR QUELQUE BUT PARTICULIER
QUE CE SOIT SONT EXPRESSÉMENT EXCLUES. CERTAINS PAYS NE PERMETTENT
PAS L’EXCLUSION DES GARANTIES IMPLICI-
TES, DE SORTE QUE L’EXCLUSION CI-DES-
SUS PEUT NE PAS S’APPLIQUER À VOUS. Le
Logiciel est complexe et il peut renfermer certains défauts, erreurs ou imprécisions.
Pioneer ne garantit pas que le Logiciel satisfera vos besoins ou votre attente, que son fonctionnement sera exempt d’erreur ou
ininterrompu et que toutes les imprécisions
peuvent être corrigées et le seront. En outre,
Pioneer n’accorde aucune garantie en ce qui
concerne l’emploi ou les résultats de l’emploi
du Logiciel en termes de précision, de fiabilité,
etc.
3 LIMITE DE RESPONSABILITÉ
EN AUCUN CAS, PIONEER NE SERA TENU
RESPONSABLE DE DOMMAGES, RÉCLAMATION OU PERTES QUE VOUS AVEZ ENCOURUS (Y COMPRIS ET SANS LIMITATION LES
DOMMAGES COMPENSATEURS, DIRECTS,
ACCESSOIRES, INDIRECTS, SPÉCIAUX,
CONSÉQUENTS OU EXEMPLAIRES, PERTES
DE PROFITS, VENTES OU AFFAIRES PERDUES, FRAIS, INVESTISSEMENTS OU ENGAGEMENTS EN LIAISON AVEC UNE AFFAIRE,
PERTE DE BONNE VOLONTÉ OU DÉGÂTS)
RÉSULTANT DE L’UTILISATION OU DE L’IM-
POSSIBILITÉ D’UTILISER LE LOGICIEL, MÊME
SI PIONEER A ÉTÉ INFORMÉ, SAVAIT OU
POUVAIT AVOIR CONNAISSANCE DE L’ÉVEN-
TUALITÉ DE TELS DOMMAGES. CETTE LIMITATION S’APPLIQUE À TOUTES LES CAUSES
D’ACTION DE PORTÉE GÉNÉRALE, Y
COMPRIS ET SANS LIMITATION, RUPTURE
DE CONTRAT, RUPTURE DE GARANTIE, NÉGLIGENCE, RESPONSABILITÉ STRICTE, REPRÉSENTATION ERRONÉE ET AUTRES
TORTS. SI LA RENONCIATION DE GARANTIE
DE PIONEER OU LA LIMITATION DE GARANTIE, ÉNONCÉE DANS CET ACCORD, DEVIENT
POUR UNE RAISON QUELCONQUE NON
EXÉCUTOIRE OU INAPPLICABLE, VOUS ACCEPTEZ QUE LA RESPONSABILITÉ DE
PIONEER NE DÉPASSERA PAS CINQUANTE
POUR CENT (50 %) DU PRIX PAYÉ PAR VOUS
POUR CE PRODUIT.
Certains pays n’autorisent pas certaines exclusions de responsabilité ou limitations de dommages, et dans cette mesure, la limitation
d’exclusion ci-dessus peut ne pas s’appliquer
à vous. Cette clause de renonciation de garantie et de limitation de responsabilité peut ne
pas s’appliquer dans la mesure où toute disposition de la présente garantie est interdite
par les lois nationales ou locales qui ne peuvent être préemptées.
4 ASSURANCES DE LOI D’EXPORTATION
Vous convenez et certifiez que ni le Logiciel ni
d’autres données techniques reçues de
Pioneer, ni le produit direct desdites, seront
exportés hors du pays ou du département (le
“Pays”) régi par le gouvernement détenant le
pouvoir de juridiction (“Gouvernement”), sauf
si cela est autorisé et permis par les lois et réglementations du Gouvernement. Si vous avez
acquis le Logiciel de façon légale hors du
Pays, vous convenez de ne pas réexporter le
Logiciel ni d’autres données techniques reçues de Pioneer, non plus que le produit direct
desdites, sauf si les lois et réglementations du
Gouvernement et les lois et réglementations
de la juridiction dans laquelle vous avez obtenu le Logiciel le permettent.
Français
29
Fr
Page 30

Chapitre
01
Accord de licence
5 RÉSILIATION
Cet Accord reste en vigueur jusqu’àcequ’il
soit résilié. Vous pouvez le résilier à tout moment en détruisant le Logiciel. L’Accord sera
résilié également si vous n’en respectez pas
les clauses ou les conditions. Lors de cette résiliation, vous acceptez de détruire le logiciel.
6 DIVERS
Le présent document constitue l’Accord
complet entre Pioneer et vous en ce qui
concerne son objet. Aucun amendement de
cet Accord n’entrera en vigueur sans le
consentement écrit de Pioneer. Si une clause
quelconque de cet Accord est déclarée invalide ou inapplicable, les stipulations restantes
resteront pleinement en vigueur et effectives.
Le présent Accord est régi et établi selon les
lois du Japon. Tout litige, controverse ou différent pouvant survenir entre vous et Pioneer,
suite de, par rapport à ou à propos du présent
Accord, sera réglé par arbitrage à Tokyo, au
Japon, conformément aux règles d’arbitrage
commercial de l’Association japonaise d’arbitrage commercial. La décision arbitrale est
sans appel et exécutoire.
30
Fr
Page 31

À propos des données de la base de données de carte
Chapitre
02
! Les modifications relatives aux routes,
rues/autoroutes, terrains, constructions et
autres éléments avant/pendant la période
de développement peuvent ne pas êtres prises en compte dans cette base de données.
Et bien sûr, les modifications survenant
après cette période ne sont pas prises en
compte dans la base de données.
! Indépendamment l’existence de nouveaux
bâtiments, les données peuvent être différentes de la condition réelle.
! Pour en savoir plus sur la couverture de la
carte de ce produit, consultez les informations sur notre site Web.
! Il est strictement interdit de reproduire et
d’utiliser quelque partie de la carte, partiellement ou dans sa totalité, sous quelque
forme que ce soit, sans l’autorisation du
propriétaire des droits d’auteur.
! Si les réglementations de la circulation rou-
tière ou les conditions locales diffèrent de
ces données, suivez les réglementations de
la circulation routière (tels que les panneaux, indications, etc.) et conditions locales (notamment des travaux et les
conditions météorologiques).
! Les données de réglementations de la cir-
culation utilisées dans la base de données
de la carte s’appliquent uniquement aux
véhicules de tourisme de taille standard.
Notez que les réglementations concernant
les plus grands véhicules, les deux roues et
autres véhicules hors standard, ne sont
pas incluses dans la base de données.
! © 1987-2013 HERE. Tous droits réservés.
Français
! © 2013 INCREMENT P CORP. TOUS
DROITS RÉSERVÉS.
31
Fr
Page 32

Chapitre
03
Précautions
! Lisez la totalité du manuel avant de mettre
à jour le programme de votre système de
navigation.
! Ce progiciel est unique, et ne peut pas être
installé sur plus d’un appareil.
! Vous ne pouvez pas revenir à la version pré-
cédente une fois la mise à niveau effectuée.
! Ce produit ne peut pas être utilisé comme
carte mémoire SD.
Modèles à mettre à jour
Ce produit peut mettre à jour le programme logiciel et la base de données des modèles suivants :
! AVIC-F50BT
! AVIC-F950DAB
! AVIC-F950BT
! AVIC-F850BT
Points renouvelés par cette
mise à niveau
Si vous mettez à niveau le système de navigation avec ce produit, les points suivants sont
modifiés.
! Les données cartographiques sont mises à
jour.
! Si la version de votre application est 1.05
ou une version antérieure,
— l’assistance pour l’iPhone 5 et l’iPod
touch (5e génération) est maintenant
disponible.
— Vous pouvez changer la taille de l’image
vidéo Android pour qu’elle tienne sur l’écran.
= Pour en savoir plus sur comment vérifier
de la version actuelle, reportez-vous à la
page 35, Contrôle de la version actuelle.
Les autres opérations correspondent principalement à celles au moment de l’achat du matériel. Utilisez le Manuel de fonctionnement
accompagnant le progiciel du matériel
comme référence principale.
Vue d’ensemble du manuel
Ce manuel décrit comment activer la mise à
niveau. Il donne également un aperçu de la
façon dont les fonctions changent après la
mise à niveau.
p Les captures d’écran présentées dans ce
manuel reposent sur la version mise à niveau du AVIC-F50BT au moyen de ce produit. Les écrans peuvent varier selon les
modèles.
Définition des éléments à
supprimer et initialiser par
mise à jour
Les données et les réglages suivants seront effacés et ramenés aux valeurs par défaut. Les
autres éléments seront conservés. Toutefois,
certains éléments ne figurent pas dans la
liste, car la valeur de réglage peut être facilement récupérée par les utilisateurs, par exemple, la dernière position du curseur sur l’écran
de la carte.
! Définition de l’itinéraire
— Itinéraire actuel
— Données d’apprentissage de la route
— Liste des pays
— Historique de la recherche de catégo-
ries
— Historique de la recherche de villes
— Résultats de la recherche d’itinéraires
— Réglage des logos de marques
! Options AV
— Le dernier écran source AV
— Bascule entre MUSIC et VIDEO sur un
iPod
Les données personnelles se trouvant dans la
mémoire interne de l’appareil peuvent être effacées si une erreur imprévue se produit pendant l’installation logicielle. Pioneer n’est pas
responsable pour toute perte de données ou
indisponibilité de données personnelles.
32
Fr
Page 33

Précautions
Chapitre
03
Conventions utilisées dans
ce manuel
Avant de continuer, prenez quelques minutes
pour lire les informations suivantes à propos
des conventions utilisées dans ce manuel.
Vous familiariser avec ces conventions vous
aidera beaucoup à apprendre comment utiliser votre nouvel appareil.
! Les boutons de votre système de navigation
sont indiqués en MAJUSCULE et en
GRAS :
par ex.
Appuyez sur le bouton MODE ou le bouton
HOME.
! Les éléments de menu, les titres des écrans
et les composants fonctionnels sont écrits
en caractères gras et se trouvent entre
guillemets “”:
par ex.
L’écran “Param. système” apparaît.
! Les touches de l’écran tactile qui sont dis-
ponibles sur l’écran sont décrites en caractères gras entre crochets [] :
par ex.
Touchez [Modifier/Paramètres].
! Les informations supplémentaires, les al-
ternatives et les autres remarques sont présentées dans le format suivant:
par ex.
p Si le domicile n’a pas encore été mémo-
risé, réglez d’abord son emplacement.
! Les fonctions des autres touches sur le
même écran sont indiquées par la marque
# au début de la description :
par ex.
# Si vous touchez [OK], l’entrée est suppri-
mée.
! Les références sont indiquées comme suit :
par ex.
= Pour en savoir plus sur l’opération, re-
portez-vous à la page 35, Vérification du
numéro d’appareil.
“iPhone avec connecteur
Lightning”
Dans le présent manuel, iPhone 5 et iPod
touch (5e génération) sont appelés “iPhone
avec connecteur Lightning”.
Français
“Carte microSD”
Dans le présent manuel, la carte microSDHC
est appelée “carte microSD”.
p Conser vez la carte microSD hors de la por-
tée des jeunes enfants pour éviter qu’elle
soit avalée accidentellement.
p Ne rangez pas la carte microSD dans un
endroit très chaud ou à la lumière directe
du soleil.
p Ne soumettez pas la carte microSD à des
chocs ou à des impacts.
p Ne laissez pas la carte microSD entrer en
contact avec des liquides. Un endommagement de la carte microSD et de vos appareils peut résulter d’un contact avec des
liquides.
p Veillez à ne pas toucher les bornes de la
carte microSD. Cela pourrait provoquer des
défaillances dans la connexion. Si les bornes sont sales, essuyez-les avec un chiffon
sec et propre.
p Le logo microSDHC est une marque
commerciale de SD-3C, LLC.
33
Fr
Page 34

Chapitre
03
Précautions
En cas d’anomalie
! Si le système de navigation ne fonctionne
pas correctement, veuillez vous adresser à
votre concessionnaire ou au centre de service Pioneer agréé le plus proche.
! La carte de certificat de mise à niveau (UP-
GRADE CERTIFICATES) est nécessaire
comme certification pour la réparation
(ainsi que la récupération). Si le système de
navigation doit subir une réparation, les
données mises à jour ne pourront pas être
restaurées si vous ne présentez pas cette
carte.
Notre site web
Visitez notre site :
http://www.pioneer.eu
! Enregistrez votre produit. Nous conservons
les détails de votre achat sur fichier pour
vous permettre de consulter ces informations en cas de déclaration de dommage
comme la perte ou le vol.
! Notre site Web fournit les informations les
plus récentes sur la PIONEER
CORPORATION.
Droits d’auteur
Les noms des sociétés privées, des produits ou de toute autre entité décrite dans
ce produit sont des marques déposées ou
des marques commerciales de leur propriétaire respectif.
= Pour de plus amples informations, reportez-
vous au Manuel de fonctionnement de
votre système de navigation.
34
Fr
Page 35

Instructions pour la mise à jour
Chapitre
04
Processus de mise à niveau
du système de navigation
1 Inscrivez les informations requises (numéro
de modèle (MODEL NUMBER), numéro
d’appareil (DEVICE_NUMBER) et numéro
de série (SERIAL NUMBER)) sur les certificats de mise à niveau (UPGRADE CERTIFICATES).
= Pour en savoir plus, reportez-vous à la
page 35, Vérification du numéro de mo-
dèle.
= Pour en savoir plus sur l’opération, re-
portez-vous à la page 35, Vérification du
numéro d’appareil.
= Pour en savoir plus, reportez-vous à la
page 35, Vérification du numéro de série.
j
2 Mettez à niveau le programme logiciel de
votre système de navigation.
= Pour en savoir plus sur les opérations,
reportez-vous à la page 36, Mise à ni-
veau du programme logiciel et de la base
de données de la carte.
j
3 Contrôlez si la mise à niveau a été faite cor-
rectement.
= Pour en savoir plus sur les opérations,
reportez-vous à la page 36, Comment
contrôler si la mise à jour a été faite correctement.
Préparation pour la mise à
jour
Vérification du numéro de modèle
Le numéro de modèle est inscrit sur la carte
de garantie ou sur la face avant du système de
navigation.
Vérification du numéro d’appareil
1 Appuyez sur le bouton HOME pour afficher l’écran “Menu supérieur”.
2 Touchez
L’écran “Informations” apparaît.
3 Touchez [Informations système].
Le numéro d’appareil “Numéro appareil” de
votre système de navigation s’affiche.
Vérification du numéro de série
Le numéro de série est inscrit sur la carte de
garantie. Il y a également, sous le système de
navigation, un autocollant sur lequel le numéro de série “SER.NO.” est inscrit.
Contrôle de la version actuelle
1 Appuyez sur le bouton HOME pour afficher l’écran “Menu supérieur”.
2 Touchez
L’écran “Informations” apparaît.
.
.
Français
3 Touchez de façon prolongée le coin supérieur gauche.
L’écran “Infos sur services” apparaît.
Fr
35
Page 36

Chapitre
04
Instructions pour la mise à jour
4 Vérifiez les informations sur la version
affichées dans “Application Version”.
Procédures de mise à jour
! Ne coupez JAMAIS le moteur de votre véhi-
cule, ni n’éteignez le système de navigation
tant que l’installation n’est pas terminée. La
mise hors tension durant le processus de
mise à niveau entraînera un dysfonctionnement ou une défaillance du système de navigation.
! Aucune fonction n’est disponible pendant
le processus de mise à niveau.
Mise à niveau du programme
logiciel et de la base de
données de la carte
Cette partie décrit les procédures de mise à
jour pour votre système de navigation.
p La mise à jour prend environ 45 minutes en
tout.
1 Stationnez votre véhicule en lieu sûr et
serrez le frein à main.
Le message confirmant le lancement ou non
de la mise à jour apparaît.
3 Touchez [Oui].
4 Patientez jusqu’à ce que le processus
de mise à niveau se termine.
Lorsque l’installation des données est terminée, le traitement de verrouillage par mot de
passe commence.
2 Insérez la carte microSD de mise à niveau dans la fente de carte SD.
Le système de navigation redémarre puis l’installation commence.
p Si vous utilisez un modèle compatible avec
la carte mémoire SD, insérez une carte
microSD dans l’adaptateur de carte SD.
p Veillez à utiliser une carte mémoire SD avec
le commutateur de protection contre l’écriture déverrouillé.
36
Fr
Le message confirmant le lancement ou non
de la mise à jour apparaît.
5 Touchez [OK].
6 Patientez jusqu’à ce que le processus
de mise à jour se termine.
La mise à jour est terminée.
Comment contrôler si la mise à
jour a été faite correctement
Affichez l’écran “Informations” pour comparer le numéro de version actuel avec le précédent.
1 Appuyez sur le bouton HOME pour afficher l’écran “Menu supérieur”.
Page 37

Instructions pour la mise à jour
2 Touchez .
L’écran “Informations” apparaît.
3 Touchez [Version logicielle].
La version actuelle est affichée.
Chapitre
04
4 Vérifiez que la version actuelle est
2.000000.
5 Éjectez la carte microSD de mise à
niveau.
Français
37
Fr
Page 38

Chapitre
05
Changements sur le programme mis à jour
Ce chapitre explique les modifications qui
sont effectuées lorsqu’un système de navigation dont la version de l’application est 1.05 ou
une version antérieure est mis à niveau à
l’aide de ce produit.
Pour les utilisateurs de
smartphone
Réglage de la taille d’affichage
pour la lecture vidéo Android
p Cette fonction est disponible uniquement
en AppRadio Mode (connexion HDMI) sur
l’Android.
Vous pouvez changer la taille de l’image vidéo
Android pour qu’elle tienne sur l’écran.
1 Affichez l’écran AppRadio Mode.
2 Appuyez sur le bouton HOME pour afficher l’écran “Menu supérieur”.
3 Touchez
L’écran “Modifier/Paramètres” apparaît.
4 Touchez [Param. app].
Le menu “Paramètres AppRadio” apparaît.
5 Touchez [Réglage vidéo Android].
6 Touchez l’élément pour ajuster la taille
de la fenêtre Android.
.
Àl’attention des
utilisateurs d’un iPhone
avec connecteur Lightning
Ce produit offre le support AppRadio Mode
et permet la lecture vidéo pour l’iPhone avec
connecteur Lightning.
p Les câbles suivants sont nécessaires pour
la connexion avec ce système de navigation.
— Câble d’interface HDMI/USB pour iPod
/ iPhone (CD-IH202) (vendu séparément)
— Adaptateur Lightning AV numérique
(produits Apple Inc.) (vendu séparément)
— Câble Lightning vers USB (fourni avec
l’iPhone avec connecteur Lightning)
p L’appareil est connecté à ce système de na-
vigation via Bluetooth.
— Vous ne pouvez pas utiliser AppRadio
Mode lorsque la technologie sans fil
Bluetooth est déconnectée.
p Après l’installation de la mise à jour, la
source iPod par défaut ne sera plus utilisée
pour accéder à la musique ou au contenu
vidéo depuis un iPhone avec connecteur
Lightning qui est connecté. Pour utiliser la
source iPod, vous devez raccorder votre
iPod au système de navigation à l’aide d’un
câble d’interface USB pour iPod / iPhone
(CD-IU201N) (vendu séparément) et d’un
adaptateur Lightning vers 30 broches (produits Apple Inc.) (vendu séparément). Cependant, les fonctions relatives aux fichiers
vidéo iPod et AppRadio Mode ne sont pas
disponibles. Pour lire des fichiers audio et/
ou vidéo sur votre iPhone avec connecteur
Lightning, vous devez d’abord installer l’application gratuite AppRadio Mode de
Pioneer et l’application CarMediaPlayer
sur votre appareil, puis lancez CarMedia-
Player en AppRadio Mode.
= Consultez le manuel CarMediaPlayer
pour de plus amples informations.
38
Fr
Page 39

Changements sur le programme mis à jour
Chapitre
05
Àl’attention des utilisateurs
d’un iPhone avec connecteur
à 30 broches
p Selon votre iPod, il se peut que rien ne soit
émis à moins que vous n’utilisiez un câble
d’interface USB Pour iPod / iPhone (CDIU201N) (vendu séparément). Veillez à utiliser un câble d’interface USB Pour iPod /
iPhone (CD-IU201N) (vendu séparément)
pour connecter votre iPod.
= Pour en savoir plus, reportez-vous à la
page 39, Connexion de votre iPod.
Connexion et déconnexion
d’un iPod
ATTENTION
! Pour éviter toute perte de données et tout
dommage du périphérique de stockage, ne le
retirez jamais de ce système de navigation
pendant que des données sont en cours de
transfert.
! Pioneer ne saurait garantir la compatibilité
avec tous les périphériques de stockage de
masse USB et n’assume aucune responsabilité en cas de pertes des données contenues
sur les lecteurs multimédias, iPhone, smartphones ou tout autre appareil lors de l’utilisation de ce produit.
Connexion de votre iPod
1 Vérifiez qu’aucun périphérique de stockage USB n’est connecté.
2 Connectez votre iPod.
Adaptateur Lightning AV numérique
Câble d’interface
HDMI/USB pour iPod
/ iPhone
= Pour en savoir plus sur les opérations, re-
portez-vous au manuel d’installation le plus
récent.
Le manuel le plus récent est disponible sur
notre site Web.
http://www.pioneer.eu
Câble Lightning vers
USB
Déconnexion de votre iPod
% Débranchez les câbles après avoir vérifié qu’aucune donnée n’est en cours
d’accès.
Utilisation d’un iPod (iPod)
Procédure de départ
1 Réglez “Param. connexion iPod” sur
“Connecteur 30 broches”.
= Pour en savoir plus, reportez-vous à la page
42, Sélection de la méthode de connexion de
l’appareil.
= Pour en savoir plus, reportez-vous à la page
43, Réglage de la connexion à l’iPod.
Français
39
Fr
Page 40

Chapitre
05
Changements sur le programme mis à jour
2 Appuyez sur le bouton MODE lorsque
l’écran de la carte est affiché.
p L’écran de fonction AV peut également être
affiché en touchant [Multimedia] sur le
“Menu supérieur”.
3 Connectez votre iPod.
La source change et la lecture démarre.
= Pour en savoir plus, reportez-vous à la page
39, Connexion de votre iPod.
p Si l’iPod est déjà connecté, touchez [iPod]
sur le coin gauche de l’écran.
p Si vous connectez un iPhone ou iPod
touch, fermez les applications avant la
connexion.
4 Utilisez les touches de l’écran tactile
pour commander votre iPod.
p L’image vidéo de l’iPod peut présenter des
parasites si elle est émise sur l’écran arrière. En cas de parasites sur l’image vidéo
de l’iPod, désactivez la sortie sur l’écran
arrière.
Utilisation de Aha Radio
Procédure de départ
La procédure dépend du type de votre appareil.
Àl’attention des utilisateurs d’un
iPhone avec connecteur à 30 broches
1 Réglez “Param. connexion app” sur
“iPhone”,et“Param. connexion iPod” sur
“Connecteur 30 broches”.
= Pour en savoir plus, reportez-vous à la page
42, Sélection de la méthode de connexion de
l’appareil.
= Pour en savoir plus, reportez-vous à la page
43, Réglage de la connexion à l’iPod.
2 Lancez l’application Aha Radio installée
sur l’iPhone.
p Avant de commencer, inscrivez-vous sur
Aha Radio depuis votre iPhone.
3 Connectez votre iPhone.
p Si l’iPhone est déjà connecté, touchez
[aha] sur le coin gauche de l’écran.
= Pour en savoir plus, reportez-vous à la page
39, Connexion de votre iPod.
4 Appuyez sur le bouton MODE lorsque
l’écran de la carte est affiché.
p L’écran de fonction AV peut également être
affiché en touchant [Multimedia] sur le
“Menu supérieur”.
5 Touchez [aha] sur le coin gauche de l’écran pour afficher l’écran “aha”.
6 Utilisez les touches de l’écran tactile
pour commander Aha Radio.
Àl’attention des utilisateurs d’un
iPhone avec connecteur Lightning
1 Réglez “Param. connexion app” sur
“iPhone”,et“Param. connexion iPod” sur
“Conn AV num”.
= Pour en savoir plus, reportez-vous à la page
42, Sélection de la méthode de connexion de
l’appareil.
= Pour en savoir plus, reportez-vous à la page
43, Réglage de la connexion à l’iPod.
2 Enregistrez votre iPhone et connectezle à ce produit via la technologie sans fil
Bluetooth.
p L’appareil enregistré doit être sélectionné
comme appareil prioritaire.
= Pour en savoir plus, reportez-vous à la
page 44, Enregistrement de vos périphéri-
ques Bluetooth.
3 Déverrouillez votre iPhone.
4 Connectez votre iPhone.
= Pour en savoir plus, reportez-vous à la page
39, Connexion de votre iPod.
40
Fr
Page 41

Changements sur le programme mis à jour
Chapitre
05
5 Appuyez sur le bouton MODE lorsque
l’écran de la carte est affiché.
p L’écran de fonction AV peut également être
affiché en touchant [Multimedia] sur le
“Menu supérieur”.
6 Touchez [aha] sur le coin gauche de l’écran pour afficher l’écran “aha”.
Lorsque vous touchez [aha], le système de navigation tente d’établir une connexion
Bluetooth.
Une fois la connexion établie, les touches de
l’écran tactile sur l’écran “aha” sont activées.
7 Utilisez les touches de l’écran tactile
pour commander Aha Radio.
Utilisation de AppRadio Mode
Procédure de départ
Àl’attention des utilisateurs d’un
iPhone avec connecteur à 30 broches
1 Réglez “Param. connexion app” sur
“iPhone”,et“Param. connexion iPod” sur
“Connecteur 30 broches”.
= Pour en savoir plus, reportez-vous à la page
42, Sélection de la méthode de connexion de
l’appareil.
= Pour en savoir plus, reportez-vous à la page
43, Réglage de la connexion à l’iPod.
2 Connectez votre iPhone.
= Pour en savoir plus, reportez-vous à la page
39, Connexion de votre iPod.
3 Appuyez sur le bouton HOME pour afficher l’écran “Menu supérieur”.
4 Touchez [Apps].
Un message vous informant que votre iPhone
peut lancer l’application apparaît à l’écran.
Un message vous demandant si vous souhaitez lancer votre application apparaît sur votre
iPhone.
5 Utilisez votre iPhone pour lancer l’application.
AppRadio app est lancée.
6 Touchez [OK] sur l’écran de ce produit.
L’écran AppRadio Mode (écran de menu de
l’application) apparaît.
Écran de menu de l’application
p Si vous connectez votre appareil alors
qu’une application compatible AppRadio
Mode est déjà exécutée, l’écran de
commande de l’application apparaît sur ce
système de navigation.
7 Touchez l’icône d’application désirée.
L’application désirée est lancée et l’écran de
commande de l’application apparaît.
8 Commandez l’application.
9 Appuyez sur le bouton HOME pour revenir à l’écran de menu de l’application.
p Si vous appuyez sur le bouton HOME alors
que l’écran de menu de l’application est affiché, l’écran “Menu supérieur” apparaît.
Àl’attention des utilisateurs d’un
iPhone avec connecteur Lightning
1 Réglez “Param. connexion app” sur
“iPhone”,et“Param. connexion iPod” sur
“Conn AV num”.
= Pour en savoir plus, reportez-vous à la page
42, Sélection de la méthode de connexion de
l’appareil.
= Pour en savoir plus, reportez-vous à la page
43, Réglage de la connexion à l’iPod.
Français
41
Fr
Page 42

Chapitre
05
Changements sur le programme mis à jour
2 Enregistrez votre iPhone et connectezle à ce produit via la technologie sans fil
Bluetooth.
p L’appareil enregistré doit être sélectionné
comme appareil prioritaire.
= Pour en savoir plus, reportez-vous à la
page 44, Enregistrement de vos périphéri-
ques Bluetooth.
3 Déverrouillez votre iPhone.
4 Connectez votre iPhone.
= Pour en savoir plus, reportez-vous à la page
39, Connexion de votre iPod.
5 Appuyez sur le bouton HOME pour afficher l’écran “Menu supérieur”.
p apparaît sur la touche Apps pendant
que la technologie sans fil Bluetooth est en
cours de connexion.
6 Touchez [Apps].
AppRadio app est lancée et l’écran
AppRadio Mode (Écran de menu de l’applica-
tion) apparaît.
Écran de menu de l’application
9 Appuyez sur le bouton HOME pour revenir à l’écran de menu de l’application.
p Si vous appuyez sur le bouton HOME alors
que l’écran de menu de l’application est affiché, l’écran “Menu supérieur”
apparaît.
Sélection de la méthode de
connexion de l’appareil
Pour utiliser l’application pour iPhone ou
smartphone sur ce système de navigation,
vous devez sélectionner une méthode pour
connecter votre appareil.
Les réglages varient selon l’appareil connecté.
“Param. connexion app” peut être réglé
lorsque l’ensemble des conditions suivantes
est rempli.
! La source AV est mise hors tension.
! Tous les iPod, smartphones et périphéri-
ques de stockage externe ne sont pas
connectés à ce système de navigation.
Àl’attention des utilisateurs
d’un iPhone avec connecteur à
30 broches
1 Appuyez sur le bouton HOME pour afficher l’écran “Menu supérieur”.
p Si vous connectez votre appareil alors
qu’une application compatible AppRadio
Mode est déjà exécutée, l’écran de
commande de l’application apparaît sur ce
système de navigation.
7 Touchez l’icône d’application désirée.
L’application désirée est lancée et l’écran de
commande de l’application apparaît.
8 Commandez l’application.
42
Fr
2 Touchez
L’écran “Modifier/Paramètres” apparaît.
3 Touchez [Param. app].
Le menu “Paramètres AppRadio” apparaît.
.
Page 43

Changements sur le programme mis à jour
Chapitre
05
4 Touchez [Param. connexion app].
L’écran “Paramètres de connexion de l’ap-
plication” apparaît.
5 Touchez [iPhone].
Le réglage de connexion de l’iPhone est activé.
L’écran “Paramètres de connexion de l’iPod”
apparaît.
6 Touchez [Connecteur 30 broches].
Àl’attention des utilisateurs d’un
iPhone avec connecteur Lightning
1 Appuyez sur le bouton HOME pour afficher l’écran “Menu supérieur”.
2 Touchez
L’écran “Modifier/Paramètres” apparaît.
3 Touchez [Param. app].
Le menu “Paramètres AppRadio” apparaît.
4 Touchez [Param. connexion app].
L’écran “Paramètres de connexion de l’ap-
plication” apparaît.
5 Touchez [iPhone].
Le réglage de connexion de l’iPhone est activé.
L’écran “Paramètres de connexion de l’iPod”
apparaît.
6 Touchez [Conn AV num].
.
Réglage de la connexion à
l’iPod
Les réglages varient selon l’appareil connecté.
“Param. connexion iPod” peut être réglé
lorsque l’ensemble des conditions suivantes
est rempli.
! La source AV est mise hors tension.
! Tous les iPod, smartphones et périphéri-
ques de stockage externe ne sont pas
connectés à ce système de navigation.
1 Appuyez sur le bouton HOME pour afficher l’écran “Menu supérieur”.
2 Touchez
L’écran “Modifier/Paramètres” apparaît.
3 Touchez [Param. source].
L’écran “Setting according to source” appa-
raît.
4 Touchez [Param. iPod].
L’écran “Paramètres iPod” apparaît.
5 Touchez [Param. connexion iPod].
L’écran “Paramètres de connexion de l’iPod”
apparaît.
6 Touchez [Conn AV num] ou [Connecteur
30 broches].
! Connecteur 30 broches (par défaut) :
Ce réglage concerne les utilisateurs d’un
iPod avec connecteur à 30 broches et les
utilisateurs d’un appareil Android.
! Conn AV num :
Ce réglage concerne les utilisateurs d’un
iPod avec connecteur Lightning.
.
Français
43
Fr
Page 44

Chapitre
05
Changements sur le programme mis à jour
Enregistrement de vos
périphériques Bluetooth
Vous devez enregistrer vos périphériques intégrant la technologie sans fil Bluetooth lors de
la première connexion. Un total de 5 périphériques peut être enregistré. Deux méthodes
d’enregistrement sont disponibles :
! Recherche des périphériques Bluetooth à
proximité
! Appariement depuis vos périphériques
Bluetooth
Recherche des périphériques
Bluetooth à proximité
Le système recherche les périphériques
Bluetooth disponibles à proximité du système
de navigation, les affiche dans une liste et les
enregistre pour la connexion.
1 Activez la technologie sans fil
Bluetooth sur vos périphériques.
Sur certains périphériques Bluetooth, aucune
action spécifique n’est nécessaire pour activer
la technologie sans fil Bluetooth. Pour en savoir plus, reportez-vous au manuel d’utilisation
de vos périphériques.
2 Touchez [Téléphone].
L’écran “Téléphone” apparaît.
3 Touchez [Paramètres Bluetooth].
L’écran “Paramètres Bluetooth ” apparaît.
4 Touchez [Enregistrement].
L’écran “Liste d’appareils” apparaît.
Le système recherche des périphériques
Bluetooth en attente de connexion et affiche
dans une liste les périphériques trouvés.
p Un maximum de 10 périphériques sont énu-
mérés dans la liste dans l’ordre où ils ont
été trouvés.
5 Attendez que votre périphérique
Bluetooth apparaisse dans la liste.
p Si vous ne parvenez pas à trouver le péri-
phérique Bluetooth que vous souhaitez
connecter, vérifiez qu’il est en attente de
connexion de la technologie sans fil
Bluetooth.
6 Touchez le nom du périphérique
Bluetooth que vous souhaitez enregistrer.
# Si vous touchez [Rech.], le système démarre
la recherche des périphériques Bluetooth en attente de connexion et les affiche sous la forme
d’une liste si des périphériques sont détectés.
44
Fr
Page 45

Changements sur le programme mis à jour
Chapitre
05
7 Appariez ce système de navigation
avec votre périphérique Bluetooth.
Lors de la première connexion du périphérique
Bluetooth à ce produit, un appariement est nécessaire pour spécifier l’appareil auquel se
connecter. La méthode d’appariement dépend
du périphérique Bluetooth. Procédez à l’appariement selon les instructions à l’écran pour
ce produit ou le périphérique Bluetooth. Reportez-vous au manuel d’utilisation des appareils que vous souhaitez enregistrer
(enregistrement et authentification des appareils). Après l’enregistrement, un message de
confirmation apparaît.
8 Touchez [OK].
L’enregistrement est terminé et l’appareil est
connecté comme téléphone mains libres.
Vous pouvez procéder au réglage suivant en
fonction du périphérique Bluetooth enregistré.
! Transfert de l’annuaire
Vous pouvez transférer l’annuaire sur le système de navigation si le périphérique
Bluetooth enregistré intègre la fonction
PBAP (Phone Book Access Profile).
Si vous touchez [Oui], vous pouvez transférer l’intégralité de l’annuaire sur le système
de navigation, puis le message indiquant
que le transfert est terminé apparaît.
! Choisir d’utiliser ou non la fonction
audio Bluetooth
Vous pouvez choisir d’utiliser ou non la
fonction audio Bluetooth si le périphérique
Bluetooth enregistré intègre l’audio
Bluetooth.
Le message “S’agit-il d’un téléphone sous
Android ?” apparaît.
9 Touchez [Non].
Le message “Cet appareil est-il équipé d’un
connecteur AV numérique?” apparaît.
10 Touchez [Oui].
Le message “Voulez vous utiliser ce télé-
phone en AppRadio Mode?” apparaît.
11 Touchez [Oui] si vous utilisez AppRadio
Mode avec un appareil que vous avez enregistré.
! Oui :
Vous permet de passer à l’étape suivante.
! Non :
Le périphérique est enregistré dans le système de navigation. Une fois le périphérique enregistré avec succès, la connexion
Bluetooth est établie depuis le système de
navigation.
12 Touchez [OK].
Appariement depuis vos
périphériques Bluetooth
Vous pouvez enregistrer le périphérique
Bluetooth en mettant le système de navigation
en mode de veille et en demandant une
connexion au périphérique Bluetooth.
1 Activez la technologie sans fil
Bluetooth sur vos périphériques.
Sur certains périphériques Bluetooth, aucune
action spécifique n’est nécessaire pour activer
la technologie sans fil Bluetooth. Pour en savoir plus, reportez-vous au manuel d’utilisation
de vos périphériques.
2 Touchez [Téléphone].
L’écran “Téléphone” apparaît.
3 Touchez [Paramètres Bluetooth].
L’écran “Paramètres Bluetooth ” apparaît.
4 Touchez [Enregistrement].
L’écran “Liste d’appareils” apparaît.
5 Touchez [Enr. depuis appareil].
Le système de navigation attend une connexion avec la technologie sans fil Bluetooth.
6 Enregistrez le système de navigation
dans votre périphérique Bluetooth.
Si votre périphérique vous demande d’entrer
un mot de passe, entrez le mot de passe du
système de navigation.
Une fois le périphérique enregistré avec succès, les réglages de connexion sont effectués
depuis le périphérique.
p En cas d’échec de l’enregistrement, recom-
mencez depuis le début.
7 Touchez [OK].
L’enregistrement est terminé et l’appareil est
connecté comme téléphone mains libres.
Français
45
Fr
Page 46

Chapitre
05
Changements sur le programme mis à jour
Vous pouvez procéder au réglage suivant en
fonction du périphérique Bluetooth enregistré.
! Transfert de l’annuaire
Vous pouvez transférer l’annuaire sur le système de navigation si le périphérique
Bluetooth enregistré intègre la fonction
PBAP (Phone Book Access Profile).
Si vous touchez [Oui], vous pouvez transférer l’intégralité de l’annuaire sur le système
de navigation, puis le message indiquant
que le transfert est terminé apparaît.
! Choisir d’utiliser ou non la fonction
audio Bluetooth
Vous pouvez choisir d’utiliser ou non la
fonction audio Bluetooth si le périphérique
Bluetooth enregistré intègre l’audio
Bluetooth.
Le message “S’agit-il d’un téléphone sous
Android ?” apparaît.
8 Touchez [Non].
Le message “Cet appareil est-il équipé d’un
connecteur AV numérique?” apparaît.
9 Touchez [Oui].
Le message “Voulez vous utiliser ce télé-
phone en AppRadio Mode?” apparaît.
10 Touchez [Oui] si vous utilisez AppRadio
Mode avec un appareil que vous avez enregistré.
! Oui :
Vous permet de passer à l’étape suivante.
! Non :
Le périphérique est enregistré dans le système de navigation. Une fois le périphérique enregistré avec succès, la connexion
Bluetooth est établie depuis le système de
navigation.
11 Touchez [OK].
46
Fr
Page 47

Dépannage
Problèmes dans les procédures de mise à jour
Symptôme Causes possibles Action
Le processus de mise à jour ne
démarre pas et le système de
navigation s’initialise comme
d’habitude.
Le système de navigation ne
fonctionne pas correctement depuis la mise à niveau.
Une carte microSD incorrecte a été
insérée.
La mise à niveau a déjà été effectuée.
Un écran qui ne peut pas commencer le processus de mise à jour est
affiché.
Le moteur de votre véhicule était
coupé ou le système de navigation
était hors tension pendant le processus de mise à niveau.
La carte microSD de mise à niveau
a été retirée pendant le processus
de mise à niveau.
Éjectez la carte microSD et insérez la bonne
carte microSD de mise à niveau.
Vérifiez si la mise à niveau a été correctement
effectuée. Si elle n’a pas encore été effectuée,
communiquez avec le centre de service agréé
le plus proche.
Éjectez la carte microSD de mise à niveau et
affichez la carte de votre position actuelle,
puis réinsérez la carte microSD de mise à niveau.
Communiquez avec le centre de service
agréé le plus proche.
Communiquez avec le centre de service
agréé le plus proche.
Messages dans les procédures de mise à jour
Les messages suivants peuvent être affichés par votre système de navigation. Reportez-vous au tableau pour identifier le problème, puis effectuez l’action corrective suggérée.
Dans certains cas, des messages différents de ceux indiqués ci-dessous apparaissent. Suivez
alors les instructions données à l’écran.
Annexe
Français
Message Quand Que faire
Unable to complete update
process.
Une erreur imprévue a eu lieu au
cours du processus de mise à jour.
Adressez-vous à votre revendeur local Pioneer
si le message persiste.
47
Fr
Page 48

Sommario
Grazie per aver acquistato questo prodotto Pioneer.
Leggere queste istruzioni per usare correttamente il proprio modello.
– Aggiornamento del programma
Importante
Le schermate mostrate negli esempi potrebbero differire da quelle effettive, le quali potrebbero essere soggette a modifiche senza preavviso
a scopo di migliorarne le prestazioni e le funzionalità.
Accordo di licenza
PIONEER CONTRATTO DI LICENZA
SOFTWARE 49
Informazioni sui dati del database delle
mappe
Precauzione
Modelli da aggiornare 53
Punti rinnovati attraverso questo
aggiornamento 53
Presentazione del manuale 53
Impostazione di voci da eliminare e
inizializzare mediante
l’aggiornamento 53
Convenzioni utilizzate nel presente
manuale 54
“iPhone con connettore Lightning” 54
“Schede microSD” 54
In caso di problemi 54
Sito internet 55
Copyright 55
Istruzioni per l’aggiornamento
Procedura di aggiornamento del sistema di
navigazione 56
Preparativi per l’aggiornamento 56
– Verifica del numero del modello 56
– Verifica del numero del dispositivo 56
– Verifica del numero di serie 56
– Verifica della versione corrente 56
Procedure di aggiornamento 57
software e del database delle
mappe 57
– Verifica del corretto
aggiornamento 58
Modifiche nel programma aggiornato
Per gli utenti di smartphone 59
– Regolazione delle dimensioni dello
schermo per la riproduzione di video
dal dispositivo Android 59
Per utenti di iPhone con connettore
Lightning 59
Per utenti di iPhone con connettore a 30
pin 60
Collegamento e scollegamento di un
iPod 60
– Collegamento di un iPod 60
– Scollegamento dell’iPod 60
Uso di un iPod (iPod) 60
– Procedura di avvio 60
Utilizzo di Aha Radio 61
– Procedura di avvio 61
Uso di AppRadio Mode 62
– Procedura di avvio 62
Selezione del metodo di connessione del
dispositivo 63
– Per utenti di iPhone con connettore a
30 pin 63
– Per utenti di iPhone con connettore
Lightning 64
Impostazione della connessione
dell’iPod 64
Registrazione dei dispositivi Bluetooth 65
– Ricerca di dispositivi Bluetooth
disponibili nelle vicinanze 65
– Accoppiamento dai dispositivi
Bluetooth 66
Risoluzione dei problemi
Problemi con le procedure di
aggiornamento 68
Messaggi durante le procedure di
aggiornamento 68
48
It
Page 49

Accordo di licenza
Capitolo
01
PIONEER
CONTRATTO DI LICENZA
SOFTWARE
IL PRESENTE DOCUMENTO COSTITUISCE
CONTRATTO LEGALE TRA L’UTENTE FINALE E
PIONEER CORP. (GIAPPONE) (“PIONEER”). SI
PREGA DI LEGGERE ATTENTAMENTE I TERMINI E LE CONDIZIONI DEL PRESENTE CONTRATTO PRIMA DI UTILIZZARE IL SOFTWARE
INCLUSO IN QUESTO PRODOTTO. UTILIZZANDO IL SOFTWARE INSTALLATO SUI PRODOTTI PIONEER SI ACCETTANO I VINCOLI
DERIVANTI DAI TERMINI DEL PRESENTE
CONTRATTO. IL SOFTWARE INCLUDE UN DATABASE CONCESSO IN LICENZA DAL/DAI
FORNITORE/I TERZO/I (“FORNITORI”)EL’IM-
PIEGO DEL DATABASE È COPERTO DAI TERMINI DEI FORNITORI, RIPORTATI A PARTE IN
UN DOCUMENTO ACCLUSO AL PRODOTTO.
SE NON SI ACCETTANO I PRESENTI TERMINI
E CONDIZIONI CONTRATTUALI, RESTITUIRE
IL PRODOTTO (INCLUSO IL SOFTWARE E
QUALSIASI MATERIALE SCRITTO) ENTRO
CINQUE (5) GIORNI DALLA RICEZIONE DEL
PRODOTTO AL PUNTO VENDITA PRESSO IL
QUALE È STATO EFFETTUATO L’ACQUISTO.
SE IL PRODOTTO È STATO ACQUISTATO DIRETTAMENTE DA HERE MAPS, CONTATTARE
IL CENTRO ASSISTENZA APPROPRIATO DI
HERE MAPS PER RICHIEDERE L’AUTORIZZA-
ZIONE ALLA RESTITUZIONE ENTRO TRENTA
(30) GIORNI DALL’ACQUISTO. HERE MAPS
FORNIRÀ LE ISTRUZIONI RELATIVE A COSA
DEVE ESSERE RESTITUITO E DOVE RESTITUIRLO.
L’USO DEL SOFTWARE SOTTINTENDE IL
CONSENSO AL PRESENTE CONTRATTO DI LICENZA.
Non è permesso copiare, reingegnerizzare, tradurre, convertire per un altro sistema operativo, modificare o creare opere di natura
derivativa del Software. Non è permesso concedere in prestito, noleggiare, divulgare, pubblicare, vendere, cedere, affittare, concedere
in sublicenza, commercializzare o trasferire in
altro modo il Software o impiegarlo in qualsiasi altra maniera non espressamente autorizzata dal presente contratto. Non è permesso
ricavare o tentare di ricavare il codice sorgente
o la struttura di tutto il Software o di parti dello
stesso tramite reingegnerizzazione, decodifica,
disassemblaggio, decompilazione o qualsiasi
altro mezzo. Non è permesso utilizzare il Software per condurre attività di servizio al pubblico o per qualsiasi altro impiego che coinvolga
l’elaborazione di dati per altre persone o enti.
Pioneer e i suoi concessori di licenza manterranno tutti i diritti di copyright, segreto commerciale, brevetto e proprietà relativamente al
Software. Il Software è protetto da copyright e
non può essere copiato, anche se modificato
o combinato con altri prodotti. Non è permesso alterare o rimuovere qualsiasi nota relativa
al copyright o ai diritti di proprietà che si trovi
nel o sul Software.
Italiano
1 CONCESSIONE DELLA LICENZA
Pioneer concede una licenza non trasferibile e
non esclusiva per l’impiego del software incluso in questo prodotto (il “Software”) e della relativa documentazione unicamente destinata
ad uso personale o interno delle attività commerciali per i prodotti Pioneer.
49
It
Page 50

Capitolo
01
Accordo di licenza
2 ESCLUSIONE DI GARANZIA
Il Software e la relativa documentazione sono
forniti all’utente “NELLO STATO IN CUI SI TROVANO”. PIONEER E I SUOI CONCESSORI DI
LICENZA (ai fini delle disposizioni 2 e 3,
Pioneer e i suoi concessori di licenza saranno
denominati collettivamente “Pioneer”) NON
FORNISCONO E L’UTENTE NON RICEVE NES-
SUNA GARANZIA, ESPRESSA O IMPLICITA, E
SI ESCLUDONO ESPRESSAMENTE TUTTE LE
GARANZIE DI COMMERCIABILITÀ ED IDONEITÀ PER QUALSIASI SCOPO PARTICOLARE. IN ALCUNI PAESI NON È PERMESSA
L’ESCLUSIONE DELLE GARANZIE IMPLICITE,
QUINDI L’ESCLUSIONE DI CUI SOPRA PO-
TREBBE NON TROVARE APPLICAZIONE NEL
PRESENTE CASO SPECIFICO. Il Software è
complesso e potrebbe contenere non conformità, difetti o errori. Pioneer non garantisce in
alcun modo che il Software soddisfi i requisiti
o le aspettative dell’Utente, che il suo uso sia
esente da errori o non subirà interruzioni, né
che le suddette non conformità possano essere o saranno corrette. Pioneer esclude qualsiasi dichiarazione o garanzia relativamente
all’uso o al risultato dell’uso del Software in
termini di precisione, affidabilità o altro.
3 LIMITAZIONE DI RESPONSABILITÀ
IN NESSUN CASO PIONEER POTRÀ ESSERE
RITENUTA RESPONSABILE PER DANNI, RIVENDICAZIONI O PERDITE SUBITE DALL’U-
TENTE (INCLUSI MA NON LIMITATAMENTE AI
DANNI RISARCIBILI, INCIDENTALI, INDIRETTI, SPECIALI, CONSEGUENZIALI O PENALI,
ALLE PERDITE DI PROFITTO, DI VENDITA O DI
INTERRUZIONE DI ATTIVITÀ, ALLE SPESE,
AGLI INVESTIMENTI O AGLI OBBLIGHI IN
CONNESSIONE A QUALSIVOGLIA ATTIVITÀ,
PERDITA DI AVVIAMENTO O DANNO) DERIVANTI DALL’USO O DALL’INCAPACITÀ D’USO
DEL SOFTWARE, ANCHE SE PIONEER È
STATA INFORMATA, ERA O AVREBBE DOVUTO ESSERE A CONOSCENZA DELLA POSSIBILITÀ DEL VERIFICARSI DI TALI DANNI. LA
SUDDETTA LIMITAZIONE SI APPLICA A TUTTE
LE CAUSE DI AZIONE NEL LORO COMPLES-
SO, COMPRESE, A TITOLO NON LIMITATIVO,
LE VIOLAZIONI DI CONTRATTO O DI GARANZIA, NEGLIGENZA, RESPONSABILITÀ OGGETTIVA, DICHIARAZIONI ERRONEE O ALTRI
ILLECITI ANCORA. QUALORA LE LIMITAZIONI
DI GARANZIA O L’ESCLUSIONE DI RESPONSABILITÀ DICHIARATE DA PIONEER NEL
PRESENTE CONTRATTO SIANO PER QUALSIVOGLIA RAGIONE INAPPLICABILI O NON TUTELABILI IN GIUDIZIO, L’UTENTE
ACCONSENTE CHE LA RESPONSABILITÀ DI
PIONEER NON ECCEDERÀ IL CINQUANTA
PER CENTO (50 %) DEL PREZZO PAGATO
DALL’UTENTE STESSO PER L’ACQUISTO DI
QUESTO PRODOTTO.
In alcuni Paesi non è permessa l’esclusione o
la limitazione dei danni incidentali o consequenziali e, pertanto, la suddetta esclusione o
limitazione potrebbe non risultare applicabile
all’Utente. Questa esclusione di garanzia e limitazione di responsabilità non si applicherà
nella misura in cui una qualsiasi delle disposizioni della presente garanzia sia vietata da
leggi nazionali o locali non prevenibili.
4 RISPETTO DELLA NORMATIVA SULL’E-
SPORTAZIONE
L’Utente accetta e certifica che né il Software
né alcun’altra informazione tecnica ottenuta
da Pioneer, né il prodotto ad essi direttamente
relativo, saranno esportati al di fuori della nazione o del distretto (di seguito denominato
“Paese”) governato dal Governo (di seguito denominato “Governo”) alla cui giurisdizione appartiene l’Utente stesso, ad eccezione di
quanto espressamente concesso e permesso
dalle leggi e dai regolamenti da esso emanati.
Se il Software è stato legittimamente acquisito
al di fuori del Paese, l’Utente s’impegna a non
riesportare il Software stesso né alcun’altra informazione tecnica ricevuta da Pioneer, né il
prodotto ad essi direttamente relativo, ad eccezione di quanto espressamente concesso
dalle leggi e dai regolamenti emanati dal Governo della giurisdizione in cui il Software è
stato acquisito.
50
It
Page 51

Accordo di licenza
5 CESSAZIONE
Il presente Contratto rimane in vigore sino alla
sua rescissione. Esso può essere rescisso in
qualsiasi momento previa distruzione del Software. Il presente Contratto sarà altresì rescisso in caso di mancata osservanza di uno
qualsiasi dei termini e delle condizioni in esso
riportati. In seguito a tale rescissione l’Utente
s’impegna a distruggere il Software.
6 VARIE
Il presente documento costituisce l’intero Contratto tra Pioneer e l’Utente in relazione al suo
contenuto. Nessuna modifica apportata al presente Contratto potrà essere ritenuta valida
senza il consenso scritto di Pioneer. Qualora
una qualsiasi delle disposizioni contenute nel
presente Contratto sia dichiarata non valida o
non tutelabile in giudizio, le rimanenti disposizioni dello stesso continueranno a conservare
piena validità ed efficacia. Il presente Contratto è governato e tutelato dalle leggi vigenti in
Giappone. Qualsiasi disputa, controversia o discrepanza che possa emergere tra l’Utente e
Pioneer, al di fuori o in relazione al presente
Contratto, verrà sottoposta a giudizio a Tokyo
in Giappone, in base alle disposizioni Commercial Arbitration Rules della Japan Commercial Arbitration Association. L’esito del
giudizio sarà considerato definitivo e vincolante.
Capitolo
01
Italiano
51
It
Page 52

Capitolo
02
Informazioni sui dati del database delle mappe
! Questo database potrebbe non essere ag-
giornato con eventuali variazioni di vie,
strade, autostrade, terreni, costruzioni e
altro occorse durante il periodo di sviluppo.
Variazioni di questo tipo successive a tale
periodo inevitabilmente non sono incluse
in questo database.
! Indipendentemente dalle costruzioni nuove
ed esistenti, i dati potrebbero differire dalle
condizioni effettive.
! Per ulteriori informazioni riguardo la coper-
tura delle mappe con questo prodotto, con-
sultare le informazioni sul nostro sito Web.
! È assolutamente vietato riprodurre e utiliz-
zare una parte qualsiasi o la totalità di que-
sta mappa in qualsiasi forma senza la
previa autorizzazione del titolare del copy-
right.
! Qualora la regolamentazione stradale o le
condizioni del traffico locali non concordi-
no con questi dati, si raccomanda di atte-
nersi alla regolamentazione locale
(segnaletica, indicazioni, ecc.) e alle condi-
zioni (costruzioni, fenomeni atmosferici,
ecc.) presenti.
! I dati sulla regolamentazione del traffico
usati nel database delle mappe si applica-
no esclusivamente ai veicoli passeggeri di
dimensioni standard. È da notare, infatti,
che tale database non contiene i regola-
menti applicabili ai veicoli più grandi, alle
moto e agli altri veicoli non standard.
! © 1987-2013 HERE. Tutti i diritti riservati.
! © 2013 INCREMENT P CORP. TUTTI I DIRIT-
TI RISERVATI.
52
It
Page 53

Precauzione
Capitolo
03
! Prima di aggiornare il programma del siste-
ma di navigazione, leggere l’intero manuale.
! Questo pacchetto è univoco ed è destinato
all’installazione su una sola unità.
! Una volta aggiornata la versione, non è pos-
sibile restituire quella precedente.
! Questo prodotto non può essere utilizzato
come scheda di memoria SD.
Modelli da aggiornare
Questo prodotto contiene l’aggiornamento del
programma software e del database dei seguenti modelli:
! AVIC-F50BT
! AVIC-F950DAB
! AVIC-F950BT
! AVIC-F850BT
Punti rinnovati attraverso
questo aggiornamento
Aggiornando il sistema di navigazione con
questo prodotto, cambiano i seguenti punti.
! I dati delle mappe vengono aggiornati.
! Se la versione dell’applicazione è 1.05 o
precedente,
— ora sono supportati iPhone 5 e iPod
touch (5a generazione).
— È possibile modificare le dimensioni del-
l’immagine video del dispositivo
Android in modo da adattarle a quelle
dello schermo.
= Per i dettagli su come controllare la ver-
sione corrente, vedere Verifica della ver-
sione corrente a pagina 56.
Le altre operazioni sono essenzialmente le
stesse del momento in cui è stato acquistato
l’hardware. Come riferimento principale, utilizzare il Manuale di funzionamento incluso con
il pacchetto hardware.
Presentazione del manuale
Questo manuale descrive come attivare l’aggiornamento. Inoltre, fornisce una panoramica
sul cambiamento delle funzioni dopo l’aggiornamento.
p Gli esempi di schermate illustrati nel pre-
sente manuale fanno riferimento alla versione aggiornata di AVIC-F50BTcon questo
prodotto. Le schermate possono variare in
base ai modelli.
Impostazione di voci da
eliminare e inizializzare
mediante l’aggiornamento
I dati e le impostazioni seguenti vengono cancellati e ripristinati ai valori predefiniti. Le altre
voci vengono mantenute. Tuttavia, alcune
delle voci non sono elencate se il valore di impostazione può essere facilmente recuperato
dall’utente, come l’ultima posizione del cursore sulla schermata della mappa.
! Impostazione dell’itinerario
— Itinerario attuale
— Apprendimento dei dati dell’itinerario
— Elenco dei paesi
— Cronologia della ricerca per categoria
— Cronologia della ricerca per città
— Risultati della ricerca dell’itinerario
— Impostazione del logo
! Opzioni AV
— Schermata dell’ultima sorgente AV
— Alterna MUSIC/VIDEO sull’iPod
Se durante l’installazione software si verifica
un errore inatteso, i dati utente archiviati nella
memoria interna dell’unità potrebbero essere
cancellati. Pioneer non è responsabile per
eventuali perdite di dati o indisponibilità dei
dati utente.
Italiano
53
It
Page 54

Capitolo
03
Precauzione
Convenzioni utilizzate nel
presente manuale
Prima di procedere alle sezioni successive, è
opportuno dedicare qualche minuto alla lettura delle seguenti informazioni sulle convenzioni adottate nel presente manuale. Una buona
conoscenza di queste convenzioni permetterà
un apprendimento molto più facile dell’impiego di questo nuovo apparecchio.
! I pulsanti del sistema di navigazione sono
identificati con LETTERE MAIUSCOLE,
IN GRASSETTO:
Esempio:
Premere il pulsante MODE o HOME.
! Le voci di menu, i titoli delle schermate e i
componenti funzionali sono descritti in
grassetto con virgolette doppie “”:
Esempio:
Viene visualizzata la schermata “Imp. siste-
ma”.
! I tasti del pannello tattile sono indicati sullo
schermo in grassetto tra parentesi quadre
[]:
Esempio:
Toccare [Impostazione del sistema].
! Informazioni extra, alternative e altre note
sono presentate nel seguente formato:
Esempio:
p Se non è stato ancora memorizzato il
domicilio, impostarlo adesso.
! Le funzioni di altri tasti sulla stessa scher-
mata vengono indicate con # all’inizio della
descrizione:
Esempio:
# Se si tocca [OK], la voce viene eliminata.
! I riferimenti sono indicati in questo modo:
Esempio:
= Per informazioni sull’operazione, vedere
Verifica del numero del dispositivo a pagina 56.
“iPhone con connettore
Lightning”
In questo manuale, iPhone 5 e iPod touch (5a
generazione) vengono indicati come “iPhone
con connettore Lightning”.
“Schede microSD”
In questo manuale, la scheda microSDHC
viene indicata come “scheda microSD”.
p Tenere la scheda microSD fuori dalla porta-
ta dei bambini per impedire che venga ingerita accidentalmente.
p Non conservare la scheda microSD a tem-
perature elevate o alla luce diretta del sole.
p Evitare che la scheda microSD subisca urti
o colpi.
p Evitare che la scheda microSD entri in con-
tatto con i liquidi. Il contatto con i liquidi
può infatti provocare danni alla scheda
microSD e ai prodotti.
p Fare attenzione a non toccare i terminali
della scheda microSD. Ciò potrebbe causare errori di connessione. Se i terminali sono
sporchi, strofinarli con un panno asciutto e
pulito.
p Il logo microSDHC è un marchio di SD-3C,
LLC.
In caso di problemi
! Qualora il sistema di navigazione non do-
vesse funzionare correttamente, si raccomanda di rivolgersi al proprio rivenditore o
al più vicino centro di servizio Pioneer autorizzato.
54
It
Page 55

Precauzione
! La scheda dei certificati per l’aggiornamen-
to (UPGRADE CERTIFICATES) è richiesta
come certificazione in caso di riparazione e
recupero. Se il sistema di navigazione deve
essere sottoposto a riparazioni, i dati aggiornati non potranno essere ripristinati se
non si presenta questa scheda.
Sito internet
Si prega di visitare il seguente sito:
http://www.pioneer.eu
! Si suggerisce di registrare il sistema appe-
na acquistato. Le informazioni dettagliate
sul suo acquisto saranno conservate in un
file affinché possano essere d’aiuto in caso
di denuncia assicurativa per perdita o furto.
! Nel nostro sito Web sono disponibili le in-
formazioni più recenti su PIONEER
CORPORATION.
Copyright
Capitolo
03
Italiano
I nomi di corporazioni private, prodotti e
altri enti descritti in questo prodotto sono
marchi o marchi registrati delle rispettive
aziende.
= Per ulteriori informazioni, vedere il manuale
di funzionamento del sistema di navigazione.
55
It
Page 56

Capitolo
04
Istruzioni per l’aggiornamento
Procedura di aggiornamento
del sistema di navigazione
1 Scrivere le informazioni richieste, ovvero
numero di modello (MODEL NUMBER), numero di dispositivo (DEVICE_NUMBER) e
numero di serie (SERIAL NUMBER), sui
certificati per l’aggiornamento (UPGRADE
CERTIFICATES).
= Per i dettagli, vedere Verifica del numero
del modello a pagina 56.
= Per informazioni sull’operazione, vedere
Verifica del numero del dispositivo a pagina 56.
= Per i dettagli, vedere Verifica del numero
di serie a pagina 56.
j
2 Aggiornare il programma software del si-
stema di navigazione.
= Per informazioni sull’operazione, vedere
Aggiornamento del programma software
e del database delle mappe a pagina 57.
j
3 Verificare il corretto aggiornamento.
= Per informazioni sull’operazione, vedere
Verifica del corretto aggiornamento a pagina 58.
Preparativi per
l’aggiornamento
Verifica del numero del modello
Il numero del modello è stampato sulla scheda di garanzia o sulla parte frontale del sistema di navigazione.
Verifica del numero del dispositivo
1 Premere il pulsante HOME per visualizzare la schermata “Menu top”.
2 Toccare
Viene visualizzata la schermata “Informazio-
ni”.
3 Toccare [Informazioni di sistema].
Viene visualizzato il numero del dispositivo
“Numero dispositivo” del sistema di navigazione.
Verifica del numero di serie
Il numero di serie è stampato sulla scheda di
garanzia. Inoltre, sulla parte inferiore del sistema di navigazione è presenta un’etichetta adesiva sulla quale è stampato il numero di serie
“SER.NO.”.
.
56
Verifica della versione corrente
1 Premere il pulsante HOME per visualizzare la schermata “Menu top”.
2 Toccare
Viene visualizzata la schermata “Informazio-
ni”.
It
.
Page 57

Istruzioni per l’aggiornamento
Capitolo
04
3 Toccare a lungo l’angolo in alto a sinistra.
Viene visualizzata la schermata “Informazioni
di servizio”.
4 Controllare le informazioni sulla versione visualizzate in “Application Version”.
Procedure di aggiornamento
! NON arrestare il motore del veicolo né spe-
gnere l’alimentazione del sistema di navigazione fino al completamento
dell’installazione. Lo spegnimento dell’alimentazione durante la procedura di aggiornamento causa malfunzionamenti o guasti
del sistema di navigazione.
! Nessuna funzione è disponibile durante la
procedura di aggiornamento.
p Se si utilizza un modello compatibile con
una scheda di memoria SD, inserire una
scheda microSD nell’adattatore per schede
SD.
p Assicurarsi che il blocco per la protezione
in scrittura della scheda di memoria SD sia
disattivato.
Viene visualizzato un messaggio in cui si chiede di confermare l’avvio dell’aggiornamento.
3 Toccare [Sì].
4 Attendere il completamento della procedura di aggiornamento.
Italiano
Aggiornamento del
programma software e del
database delle mappe
Questa sezione descrive le procedure di aggiornamento del sistema di navigazione.
p L’aggiornamento richiede circa 45 minuti in
totale.
1 Parcheggiare il veicolo in un luogo sicuro e innestare il freno di stazionamento.
2 Inserire la scheda microSD di aggiornamento nell’apposito slot per scheda SD.
Il sistema di navigazione viene ravviato e ha
inizio l’installazione.
Al termine dell’installazione dei dati, inizia l’elaborazione per il blocco con password.
Viene visualizzato un messaggio in cui si chiede di confermare l’avvio dell’aggiornamento.
5 Toccare [OK].
It
57
Page 58

Capitolo
04
Istruzioni per l’aggiornamento
6 Attendere il completamento della procedura di aggiornamento.
L’aggiornamento viene completato.
Verifica del corretto
aggiornamento
Visualizzare la schermata “Informazioni” per
confrontare il numero della versione corrente
con il precedente.
1 Premere il pulsante HOME per visualizzare la schermata “Menu top”.
2 Toccare
Viene visualizzata la schermata “Informazio-
ni”.
3 Toccare [Informazioni sulla versione].
Viene visualizzata la versione corrente.
4 Assicurarsi che la versione corrente sia
2.000000.
5 Espellere la scheda microSD di aggiornamento.
.
58
It
Page 59

Modifiche nel programma aggiornato
Capitolo
05
In questo capitolo sono illustrate le modifiche
che vengono apportate quando un sistema di
navigazione con una versione dell’applicazione di 1.05 o precedente, viene aggiornato utilizzando questo prodotto.
Per gli utenti di smartphone
Regolazione delle dimensioni dello
schermo per la riproduzione di
video dal dispositivo Android
p Questa funzione è disponibile solo in
AppRadio Mode (connessione HDMI) nel
dispositivo Android.
È possibile modificare le dimensioni dell’immagine video del dispositivo Android in modo
da adattarle a quelle dello schermo.
1 Visualizzare la schermata “AppRadio
Mode”.
2 Premere il pulsante HOME per visualizzare la schermata “Menu top”.
3 Toccare
Viene visualizzata la schermata “Impostazio-
ne del sistema”.
4 Toccare [App].
Viene visualizzato il menu “Impostaz. app”.
5 Toccare [Reg. Video Android].
6 Toccare la voce per regolare le dimensioni della finestra Android.
.
Per utenti di iPhone con
connettore Lightning
Questo prodotto supporta AppRadio Mode e
la riproduzione video per iPhone con connettore Lightning.
p Per il collegamento a questo sistema di na-
vigazione sono richiesti i seguenti cavi.
— Cavo d’interfaccia HDMI/USB per iPod /
iPhone (CD-IH202) (venduto separatamente)
— Adattatore da Lightning ad AV digitale
(prodotti Apple Inc.) (venduto separatamente)
— Cavo da Lightning a USB (fornito con
iPhone con connettore Lightning)
p Il dispositivo deve essere collegato al siste-
ma di navigazione tramite Bluetooth.
— Non è possibile utilizzare AppRadio
Mode quando la tecnologia wireless
Bluetooth è disconnessa.
p Una volta installato l’aggiornamento, la sor-
gente iPod predefinita non verrà più utilizzata per accedere a contenuti musicali o
video da un iPhone con connettore Lightning collegato. Per utilizzare una sorgente
iPod, è necessario collegare l’iPod al siste-
ma di navigazione mediante un cavo di interfaccia USB per iPod / iPhone (CDIU201N; venduto separatamente) e un adattatore da Lightning a 30 pin (prodotti
Apple Inc.; venduti separatamente). Tuttavia, le funzioni relative ai file video dell’iPod
e AppRadio Mode non sono disponibili.
Per riprodurre file musicali e/o video
sull’iPod con connettore Lightning, installare prima l’app gratuita AppRadio Mode di
Pioneer e l’app CarMediaPlayer sul dispositivo, quindi avviare CarMediaPlayer in
AppRadio Mode.
= Per ulteriori informazioni, fare riferimen-
to al manuale di CarMediaPlayer.
Italiano
59
It
Page 60

Capitolo
05
Modifiche nel programma aggiornato
Per utenti di iPhone con
connettore a 30 pin
p A seconda dell’iPod, è possibile che nes-
sun contenuto viene riprodotto a meno che
non si usa un cavo di interfaccia USB per
iPod / iPhone (CD-IU201N) (venduto separatamente). Assicurarsi di usare un cavo di
interfaccia USB per iPod/iPhone (CDIU201N) (venduto separatamente) per collegare l’iPod.
= Per i dettagli, vedere Collegamento di un
iPod a pagina 60.
Collegamento e
scollegamento di un iPod
ATTENZIONE
! Per prevenire la perdita di dati e danni alla pe-
riferica di archiviazione, non rimuoverla mai
dal sistema di navigazione durante il trasferimento di dati.
! Pioneer non garantisce la compatibilità con
tutte le periferiche di archiviazione di massa
USB e non si assume alcuna responsabilità
per eventuali perdite di dati in lettori, iPhone,
smartphone o altri dispositivi durante l’utilizzo
di questo prodotto.
Collegamento di un iPod
1 Controllare che non sia collegata alcuna
periferica di archiviazione USB.
2 Collegare l’iPod.
Adattatore da Lightning ad AV digitale
Cavo d’interfaccia
HDMI/USB per iPod /
iPhone
= Per dettagli sulle operazioni, vedere il ma-
nuale d’installazione più recente.
Il manuale più recente è disponibile sul nostro sito Web.
http://www.pioneer.eu
Cavo da Lightning a
USB
Scollegamento dell’iPod
% Estrarre i cavi dopo aver verificato che
non sia in corso l’accesso ai dati.
Uso di un iPod (iPod)
Procedura di avvio
1 Impostare “Imp. connessione iPod” su
“Connettore 30 pin”.
= Per i dettagli, vedere Selezione del metodo di
connessione del dispositivo a pagina 63.
= Per i dettagli, vedere Impostazione della con-
nessione dell’iPod a pagina 64.
60
It
Page 61

Modifiche nel programma aggiornato
Capitolo
05
2 Quando viene visualizzata la schermata
della mappa, premere il pulsante MODE.
p È possibile visualizzare lo schermo delle
operazioni audio-video anche toccando
[Fonte AV] nel “Menu top”.
3 Collegare l’iPod.
La sorgente cambia e quindi la riproduzione
viene avviata.
= Per i dettagli, vedere Collegamento di un
iPod a pagina 60.
p Se l’iPod è già collegato, toccare [iPod] sul
margine sinistro dello schermo.
p Se si collega un iPhone o un iPod touch,
chiudere le applicazioni prima del collegamento.
4 Utilizzare i tasti del pannello tattile per
controllare l’iPod.
p L’immagine video dell’iPod può mostrare
delle interferenze se il display posteriore riproduce tale immagine. Se sono presenti
interferenze nell’immagine video dell’iPod,
disattivare l’impostazione di uscita del display posteriore.
Utilizzo di Aha Radio
Procedura di avvio
La procedura varia in base al tipo di dispositivo.
Per utenti di iPhone con connettore a
30 pin
1 Impostare “Impost. connessione app”
su “iPhone” e “Imp. connessione iPod” su
“Connettore 30 pin”.
= Per i dettagli, vedere Selezione del metodo di
connessione del dispositivo a pagina 63.
= Per i dettagli, vedere Impostazione della con-
nessione dell’iPod a pagina 64.
2 Avviare l’applicazione Aha Radio installata sull’iPhone.
p Prima dell’avvio, accedere ad Aha Radio
dall’iPhone.
3 Collegare l’iPhone.
p Se l’iPhone è già collegato, toccare [aha]
sul margine sinistro dello schermo.
= Per i dettagli, vedere Collegamento di un
iPod a pagina 60.
4 Quando viene visualizzata la schermata
della mappa, premere il pulsante MODE.
p È possibile visualizzare lo schermo delle
operazioni audio-video anche toccando
[Fonte AV] nel “Menu top”.
5 Toccare [aha] sul lato sinistro dello
schermo per visualizzare la schermata
“aha”.
6 Utilizzare i tasti del pannello tattile per
controllare l’applicazione Aha Radio.
Per utenti di iPhone con connettore
Lightning
1 Impostare “Impost. connessione app”
su “iPhone” e “Imp. connessione iPod” su
“Connett. AV digitale”.
= Per i dettagli, vedere Selezione del metodo di
connessione del dispositivo a pagina 63.
= Per i dettagli, vedere Impostazione della con-
nessione dell’iPod a pagina 64.
2 Registrare l’iPhone e collegarlo al prodotto mediante tecnologia wireless
Bluetooth.
p Il dispositivo registrato deve essere selezio-
nato come prioritario.
= Per i dettagli, vedere Registrazione dei di-
spositivi Bluetooth a pagina 65.
3 Sbloccare l’iPhone.
4 Collegare l’iPhone.
= Per i dettagli, vedere Collegamento di un
iPod a pagina 60.
Italiano
61
It
Page 62

Capitolo
05
Modifiche nel programma aggiornato
5 Quando viene visualizzata la schermata
della mappa, premere il pulsante MODE.
p È possibile visualizzare lo schermo delle
operazioni audio-video anche toccando
[Fonte AV] nel “Menu top”.
6 Toccare [aha] sul lato sinistro dello
schermo per visualizzare la schermata
“aha”.
Quando si tocca [aha], il sistema di navigazione tenta di stabilire una connessione
Bluetooth.
Quando la connessione è stata stabilita correttamente, i tasti del pannello tattile della schermata “aha” risultano attivati.
7 Utilizzare i tasti del pannello tattile per
controllare l’applicazione Aha Radio.
Uso di AppRadio Mode
Procedura di avvio
Per utenti di iPhone con connettore a
30 pin
1 Impostare “Impost. connessione app”
su “iPhone” e “Imp. connessione iPod” su
“Connettore 30 pin”.
= Per i dettagli, vedere Selezione del metodo di
connessione del dispositivo a pagina 63.
= Per i dettagli, vedere Impostazione della con-
nessione dell’iPod a pagina 64.
2 Collegare l’iPhone.
= Per i dettagli, vedere Collegamento di un
iPod a pagina 60.
3 Premere il pulsante HOME per visualizzare la schermata “Menu top”.
4 Toccare [App].
Sullo schermo viene visualizzato un messaggio che segnala che l’iPhone può avviare l’applicazione.
Sull’iPhone viene visualizzato un messaggio in
cui si chiede se avviare l’applicazione.
5 Utilizzare l’iPhone per avviare l’applicazione.
L’applicazione AppRadio app viene avviata.
6 Toccare [OK] sullo schermo del prodotto.
Viene visualizzata la schermata AppRadio
Mode (schermata del menu Applicazione).
Schermata del menu Applicazione
p Se si collega il dispositivo mentre è già in
esecuzione un’applicazione compatibile
con AppRadio Mode, viene visualizzata la
schermata delle operazioni dell’applicazione nel sistema di navigazione.
7 Toccare l’icona dell’applicazione desiderata.
L’applicazione desiderata viene avviata e viene
visualizzata la schermata delle operazioni dell’applicazione.
8 Utilizzare l’applicazione.
9 Premere il pulsante HOME per tornare
alla schermata del menu Applicazione.
p Se si preme il pulsante HOME mentre è vi-
sualizzata la schermata del menu Applicazione, viene visualizzata la schermata
“Menu top”.
Per utenti di iPhone con connettore
Lightning
1 Impostare “Impost. connessione app”
su “iPhone” e “Imp. connessione iPod” su
“Connett. AV digitale”.
= Per i dettagli, vedere Selezione del metodo di
connessione del dispositivo a pagina 63.
= Per i dettagli, vedere Impostazione della con-
nessione dell’iPod a pagina 64.
62
It
Page 63

Modifiche nel programma aggiornato
Capitolo
05
2 Registrare l’iPhone e collegarlo al prodotto mediante tecnologia wireless
Bluetooth.
p Il dispositivo registrato deve essere selezio-
nato come prioritario.
= Per i dettagli, vedere Registrazione dei di-
spositivi Bluetooth a pagina 65.
3 Sbloccare l’iPhone.
4 Collegare l’iPhone.
= Per i dettagli, vedere Collegamento di un
iPod a pagina 60.
5 Premere il pulsante HOME per visualizzare la schermata “Menu top”.
p appare sul tasto App in fase di connes-
sione della tecnologia wireless Bluetooth.
6 Toccare [App].
AppRadio app viene avviato e viene visualiz-
zata la schermata AppRadio Mode (schermata del menu Applicazione).
Schermata del menu Applicazione
9 Premere il pulsante HOME per tornare
alla schermata del menu Applicazione.
p Se si preme il pulsante HOME mentre è vi-
sualizzata la schermata del menu Applicazione, viene visualizzata la schermata
“Menu top”.
Selezione del metodo di
connessione del dispositivo
Se si desidera utilizzare l’applicazione per
iPhone o smartphone in questo sistema di navigazione, è necessario selezionare il metodo
di connessione del dispositivo.
A seconda del dispositivo collegato, è necessario impostare la corretta connessione.
Le impostazioni “Impost. connessione app”
sono accessibili quando sono soddisfatte tutte
le seguenti condizioni.
! La sorgente AV viene disattivata.
! Al sistema di navigazione non è collegato
nessun iPod, smartphone o periferica di archiviazione esterna.
Per utenti di iPhone con
connettore a 30 pin
1 Premere il pulsante HOME per visualizzare la schermata “Menu top”.
Italiano
p Se si collega il dispositivo mentre è già in
esecuzione un’applicazione compatibile
con AppRadio Mode, viene visualizzata la
schermata delle operazioni dell’applicazione nel sistema di navigazione.
7 Toccare l’icona dell’applicazione desiderata.
L’applicazione desiderata viene avviata e viene
visualizzata la schermata delle operazioni dell’applicazione.
8 Utilizzare l’applicazione.
2 Toccare
Viene visualizzata la schermata “Impostazio-
ne del sistema”.
3 Toccare [App].
Viene visualizzato il menu “Impostaz. app”.
.
It
63
Page 64

Capitolo
05
Modifiche nel programma aggiornato
4 Toccare [Impost. connessione app].
Viene visualizzata la schermata “Impostazioni
connessione app”.
5 Toccare [iPhone].
L’impostazione di connessione dell’iPhone
viene abilitata.
Viene visualizzata la schermata “Imp. connes-
sione iPod”.
6 Toccare [Connettore 30 pin].
Per utenti di iPhone con
connettore Lightning
1 Premere il pulsante HOME per visualizzare la schermata “Menu top”.
2 Toccare
Viene visualizzata la schermata “Impostazio-
ne del sistema”.
3 Toccare [App].
Viene visualizzato il menu “Impostaz. app”.
4 Toccare [Impost. connessione app].
Viene visualizzata la schermata “Impostazioni
connessione app”.
5 Toccare [iPhone].
L’impostazione di connessione dell’iPhone
viene abilitata.
Viene visualizzata la schermata “Imp. connes-
sione iPod”.
6 Toccare [Connett. AV digitale].
.
Impostazione della
connessione dell’iPod
A seconda del dispositivo collegato, è necessario impostare la corretta connessione.
Le impostazioni “Imp. connessione iPod”
sono accessibili quando sono soddisfatte tutte
le seguenti condizioni.
! La sorgente AV viene disattivata.
! Al sistema di navigazione non è collegato
nessun iPod, smartphone o periferica di archiviazione esterna.
1 Premere il pulsante HOME per visualizzare la schermata “Menu top”.
2 Toccare
Viene visualizzata la schermata “Impostazio-
ne del sistema”.
3 Toccare [Fonte].
Viene visualizzata la schermata “Impostazioni
della fonte”.
4 Toccare [iPod].
Viene visualizzata la schermata “Imp. iPod”.
5 Toccare [Imp. connessione iPod].
Viene visualizzata la schermata “Imp. connes-
sione iPod”.
6 Toccare [Connett. AV digitale] o [Connettore 30 pin].
! Connettore 30 pin (predefinito):
Questa impostazione è per utenti di iPod
con connettore a 30 pin e utenti di dispositivi Android.
! Connett. AV digitale:
Questa impostazione è per utenti di iPod
con connettore Lightning.
.
64
It
Page 65

Modifiche nel programma aggiornato
Capitolo
05
Registrazione dei
dispositivi Bluetooth
Quando si effettua la prima connessione, è necessario registrare i dispositivi dotati di tecnologia wireless Bluetooth. È possibile registrare
fino a 5 dispositivi. Sono disponibili due metodi di registrazione:
! Ricerca di dispositivi Bluetooth disponibili
nelle vicinanze
! Accoppiamento dai dispositivi Bluetooth
Ricerca di dispositivi Bluetooth
disponibili nelle vicinanze
Il sistema di navigazione effettua una ricerca
dei dispositivi Bluetooth disponibili nelle vicinanze del sistema, li visualizza in forma di
elenco e li registra per la connessione.
1 Attivare la tecnologia wireless
Bluetooth sui dispositivi.
Per alcuni dispositivi Bluetooth non è necessaria un’azione specifica per attivare la tecnologia wireless Bluetooth. Per maggiori dettagli,
consultare il manuale di istruzioni del dispositivo.
2 Toccare [Telefono].
Viene visualizzata la schermata “Telefono”.
5 Attendere che il dispositivo Bluetooth
venga visualizzato nell’elenco.
Italiano
p Se il dispositivo Bluetooth al quale ci si de-
sidera connettere non viene trovato, controllare che sia in attesa della connessione
wireless Bluetooth.
6 Toccare il nome del dispositivo
Bluetooth che si desidera registrare.
3 Toccare [Impostaz. Bluetooth].
Viene visualizzata la schermata “Impostazioni
Bluetooth”.
4 Toccare [Registrazione].
Viene visualizzata la schermata “Elenco
disp.”.
Il sistema cerca i dispositivi Bluetooth in attesa di collegamento e, se viene trovato un dispositivo, lo visualizza nell’elenco.
p Possono essere elencati fino a 10 dispositivi
nell’ordine in cui sono stati rilevati.
# Toccando [Cerca], il sistema inizia a cercare i
dispositivi Bluetooth in attesa di collegamento e,
quando vengono rilevati, li visualizza in un elenco.
It
65
Page 66

Capitolo
05
Modifiche nel programma aggiornato
7 Accoppiare questo sistema di navigazione al dispositivo Bluetooth.
Quando il dispositivo Bluetooth viene connesso per la prima volta a questo prodotto, è necessaria un’operazione di accoppiamento per
specificare il dispositivo da connettere. Le modalità di esecuzione dell’accoppiamento variano in base al dispositivo Bluetooth. Eseguire
l’accoppiamento in base alle istruzioni visualizzate sullo schermo di questo prodotto o del
dispositivo Bluetooth. Per la registrazione, vedere il manuale di istruzioni del dispositivo (registrazione e autenticazione del dispositivo).
Al termine della registrazione viene visualizzato un messaggio di conferma.
8 Toccare [OK].
La registrazione è completa e il dispositivo
viene connesso come telefono vivavoce.
È possibile definire le seguenti impostazioni in
base al dispositivo Bluetooth registrato.
! Trasferimento della rubrica telefonica
È possibile trasferire la rubrica telefonica
nel sistema di navigazione se il dispositivo
Bluetooth registrato è dotato di PBAP
(Phone Book Access Profile).
Se si tocca [Sì], è possibile trasferire l’intera
rubrica telefonica nel sistema di navigazione e quindi verrà visualizzato un messaggio
di completamento del trasferimento.
! Scegliere se utilizzare o meno l’audio
Bluetooth
È possibile scegliere se utilizzare la funzione audio Bluetooth nel caso in cui il dispositivo Bluetooth registrato supporti l’audio
Bluetooth.
Viene visualizzato il messaggio “È Android?”.
9 Toccare [No].
Viene visualizzato il messaggio “Il dispositivo
è dotato di connettore AV digitale?”.
10 Toccare [Sì].
Viene visualizzato il messaggio “Configurare
questo dispositivo per AppRadio Mode?”.
11 Toccare [Sì] se si utilizza AppRadio
Mode con un dispositivo registrato.
! Sì:
Consente di procedere con il passaggio
successivo.
! No:
Il dispositivo viene registrato nel sistema di
navigazione. Al termine della registrazione,
viene stabilita una connessione Bluetooth
dal sistema di navigazione.
12 Toccare [OK].
Accoppiamento dai dispositivi
Bluetooth
È possibile registrare il dispositivo Bluetooth
impostando il sistema di navigazione in modalità di attesa e richiedendo la connessione dal
dispositivo.
1 Attivare la tecnologia wireless
Bluetooth sui dispositivi.
Per alcuni dispositivi Bluetooth non è necessaria un’azione specifica per attivare la tecnologia wireless Bluetooth. Per maggiori dettagli,
consultare il manuale di istruzioni del dispositivo.
2 Toccare [Telefono].
Viene visualizzata la schermata “Telefono”.
3 Toccare [Impostaz. Bluetooth].
Viene visualizzata la schermata “Impostazioni
Bluetooth”.
4 Toccare [Registrazione].
Viene visualizzata la schermata “Elenco
disp.”.
5 Toccare [Registra da dispositivo].
Il sistema di navigazione attende la connessione wireless Bluetooth.
66
It
Page 67

Modifiche nel programma aggiornato
Capitolo
05
6 Registrare il sistema di navigazione sul
dispositivo Bluetooth.
Se il dispositivo richiede una password, immettere la password del sistema di navigazione.
Una volta registrato correttamente il dispositivo, le impostazioni di connessione vengono effettuate dal dispositivo.
p Se la registrazione non avviene con succes-
so, ripetere la procedura dall’inizio.
7 Toccare [OK].
La registrazione è completa e il dispositivo
viene connesso come telefono vivavoce.
È possibile definire le seguenti impostazioni in
base al dispositivo Bluetooth registrato.
! Trasferimento della rubrica telefonica
È possibile trasferire la rubrica telefonica
nel sistema di navigazione se il dispositivo
Bluetooth registrato è dotato di PBAP
(Phone Book Access Profile).
Se si tocca [Sì], è possibile trasferire l’intera
rubrica telefonica nel sistema di navigazione e quindi verrà visualizzato un messaggio
di completamento del trasferimento.
! Scegliere se utilizzare o meno l’audio
Bluetooth
È possibile scegliere se utilizzare la funzione audio Bluetooth nel caso in cui il dispositivo Bluetooth registrato supporti l’audio
Bluetooth.
Viene visualizzato il messaggio “È Android?”.
! No:
Il dispositivo viene registrato nel sistema di
navigazione. Al termine della registrazione,
viene stabilita una connessione Bluetooth
dal sistema di navigazione.
11 Toccare [OK].
Italiano
8 Toccare [No].
Viene visualizzato il messaggio “Il dispositivo
è dotato di connettore AV digitale?”.
9 Toccare [Sì].
Viene visualizzato il messaggio “Configurare
questo dispositivo per AppRadio Mode?”.
10 Toccare [Sì] se si utilizza AppRadio
Mode con un dispositivo registrato.
! Sì:
Consente di procedere con il passaggio
successivo.
67
It
Page 68

Appendice
Risoluzione dei problemi
Problemi con le procedure di aggiornamento
Sintomo Causa Azione
La procedura di aggiornamento
non si avvia e il sistema di navigazione si avvia normalmente.
Il sistema di navigazione non
funziona correttamente dopo
l’aggiornamento.
È stata inserita una scheda
microSD errata.
L’aggiornamento è già stato effet-
tuato.
Viene visualizzata una schermata in
cui non è possibile iniziare la procedura di aggiornamento.
Il motore del veicolo è stato spento
ol’alimentazione del sistema di na-
vigazione è stata spenta durante la
procedura di aggiornamento.
La scheda microSD di aggiornamento è stata estratta durante la
procedura di aggiornamento.
Espellere la scheda microSD e inserire la
scheda microSD di aggiornamento corretta.
Verificare se l’aggiornamento è stato effettuato correttamente. Se non è stato ancora effettuato, rivolgersi al più vicino centro di
assistenza autorizzato.
Espellere la scheda microSD di aggiornamento e visualizzare la mappa della posizione corrente, quindi reinserirla.
Rivolgersi al più vicino centro di assistenza
autorizzato.
Rivolgersi al più vicino centro di assistenza
autorizzato.
Messaggi durante le procedure di aggiornamento
Il sistema di navigazione potrebbe visualizzare i seguenti messaggi. Vedere la tabella seguente per
identificare il problema, quindi eseguire l’azione correttiva consigliata.
In alcuni casi potrebbero anche apparire messaggi diversi da questi. Se dovesse accadere, seguire le istruzioni visualizzate sullo schermo.
Messaggio Quando Cosa fare
Unable to complete update
process.
68
It
Quando è verificato un errore imprevisto durante il processo di aggiornamento.
Se il messaggio persiste, rivolgersi al proprio
rivenditore Pioneer locale.
Page 69

Índice
Gracias por adquirir este producto de Pioneer.
Lea detenidamente estas instrucciones de operación para utilizar de forma correcta el modelo que ha adquirido.
– Actualización del programa de
Importante
Las pantallas mostradas en estos ejemplos podrían ser diferentes a las pantallas reales, que
podrían cambiarse sin previo aviso con el objetivo de realizar mejoras de rendimiento y funcionamiento.
Contrato de licencia
PIONEER CONTRATO DE LICENCIA DE
SOFTWARE 70
Acerca de los datos para la base de datos
de mapas
Precaución
Modelos que se actualizarán 74
Puntos renovados al instalar esta
actualización 74
Presentación del manual 74
Elementos de configuración que va a
eliminar e inicializar el proceso de
actualización 74
Convenciones utilizadas en este manual 75
“iPhone con un conector Lightning” 75
“Tarjeta microSD” 75
En caso de problemas 75
Visite nuestro sitio web 76
Copyright 76
Instrucciones para la actualización
El proceso de actualización del sistema de
navegación 77
Preparación para la actualización 77
– Comprobación del número de
modelo 77
– Comprobación del número de
dispositivo 77
– Comprobación del número de
serie 77
– Comprobación de la versión actual 77
Procedimientos de actualización 78
software y la base de datos de
mapas 78
– Comprobación de si la actualización se
ha efectuado correctamente 79
Cambios en el programa actualizado
Para usuarios de smartphone 80
– Ajuste del tamaño de pantalla para la
reproducción de vídeo en dispositivos
Android 80
Para usuarios de iPhone con un conector
Lightning 80
Para usuarios de iPhone con conector de 30
clavijas 81
Conexión y desconexión de un iPod 81
– Conexión de un iPod 81
– Desconexión de su iPod 81
Utilización de un iPod (iPod) 81
– Procedimiento de inicio 81
Utilización de Aha Radio 82
– Procedimiento de inicio 82
Utilización del AppRadio Mode 83
– Procedimiento de inicio 83
Selección del método de conexión del
dispositivo 84
– Para usuarios de iPhone con conector
de 30 clavijas 84
– Para usuarios de iPhone con conector
Lightning 85
Ajuste de la conexión del iPod 85
Registro de sus dispositivos Bluetooth 86
– Búsqueda de dispositivos Bluetooth
cercanos 86
– Sincronización desde sus dispositivos
Bluetooth 87
Solución de problemas
Problemas en los procedimientos de
actualización 89
Mensajes de los procedimientos de
actualización 89
Español
69
Es
Page 70

Capítulo
01
Contrato de licencia
PIONEER
CONTRATO DE LICENCIA DE
SOFTWARE
ÉSTE ES UN CONTRATO LEGAL ENTRE
USTED, COMO EL USUARIO FINAL, Y
PIONEER CORP. (JAPÓN) (EN ADELANTE,
“PIONEER”). LEA ATENTAMENTE LOS TÉRMINOS Y CONDICIONES DE ESTE CONTRATO
ANTES DE UTILIZAR EL SOFTWARE INCLUIDO EN ESTE PRODUCTO. AL UTILIZAR EL
SOFTWARE, USTED ACEPTA ESTAR SUJETO
A LOS TÉRMINOS DE ESTE CONTRATO. EL
SOFTWARE INCLUYE UNA BASE DE DATOS
LICENCIADA POR PROVEEDORES TERCEROS (EN ADELANTE, “PROVEEDORES”), Y EL
EMPLEO DE LA BASE DE DATOS ESTÁ SUJETO A LOS TÉRMINOS SEPARADOS DE TALES
PROVEEDORES, QUE SE ENCUENTRAN EN
UN DOCUMENTO INCLUIDO CON ESTE PRODUCTO. SI USTED NO ESTÁ DE ACUERDO
CON ESTOS TÉRMINOS, DEVUELVA EL PRODUCTO (INCLUIDO EL SOFTWARE, Y TODOS
LOS MATERIALES IMPRESOS) DENTRO DE
CINCO (5) DÍAS DESDE SU RECEPCIÓN, A LA
TIENDA DONDE LO COMPRÓ.
PARA EL PRODUCTO COMPRADO DIRECTAMENTE EN HERE MAPS, CONTACTE CON EL
CENTRO ADECUADO HERE MAPS PARA SOLICITAR UNA AUTORIZACIÓN DE DEVOLUCIÓN DENTRO DE (30) DÍAS DE LA COMPRA.
HERE MAPS LE SUMINISTRARÁ INSTRUCCIONES SOBRE LO QUE SE DEBERÁ DEVOLVER Y SOBRE DÓNDE SE HA DE DEVOLVER.
SE CONSIDERA QUE AL USAR EL SOFTWARE
USTED OTORGA EL CONSENTIMIENTO DE
CONTRATO DE LICENCIA.
bajos derivados del Software. Queda
totalmente prohibido prestar, alquilar, divulgar,
publicar, vender, ceder, arrendar con derecho
a compra, otorgar licencia, comercializar o
transferir de cualquier otro modo el Software
o utilizarlo de otra forma que no esté expresamente autorizada en el presente contrato.
Queda totalmente prohibido derivar o tratar de
derivar el código de fuente o la estructura parcial o total del Software mediante manipulación técnica, desmontaje, descompilación, ni
por ningún otro medio. No utilice el Software
para explotar una empresa de servicios informáticos ni para cualquier otra aplicación que
implique el proceso de datos para otras personas o entidades.
Pioneer y sus cedentes de licencias deberán
mantener todos los derechos, secretos comerciales, de patente y otros derechos de propiedad sobre este Software. El Software está
protegido por Copyright y no puede copiarse,
aunque esté modificado y mezclado con otros
productos. No altere ni extraiga ningún aviso
sobre el Copyright ni indicaciones sobre la
propiedad contenidos dentro o fuera del Software.
1 CONCESIÓN DE LICENCIA
Pioneer le otorga una licencia no transferible y
no exclusiva para utilizar el software incluido
en este producto (el “ Software”) y la documentación relacionada únicamente para su uso
personal o de manera interna en su empresa
en los productos Pioneer.
No tendrá el derecho a copiar, realizar cambios técnicos, modificar, traducir, ni hacer tra-
70
Es
Page 71

Contrato de licencia
Capítulo
01
2 EXENCIÓN DE GARANTÍA
El Software y la documentación relacionada
se suministran “TAL Y COMO SON”. PIONEER
Y SUS CEDENTES DE LICENCIAS (a efectos
de las disposiciones 2 y 3, Pioneer y sus concedentes de licencias se denominarán colectivamente “Pioneer”) NO CONCEDEN
NINGUNA GARANTÍA, DE MANERA EXPLÍCITA O IMPLÍCITA, Y TODAS LAS GARANTÍAS
DE COMERCIALIZACIÓN Y ADAPTACIÓN
PARA CUALQUIER PROPÓSITO CONCRETO
QUEDAN EXCLUIDAS EXPLÍCITAMENTE. ALGUNOS PAÍSES NO PERMITEN LA EXCLUSIÓN DE GARANTÍAS IMPLÍCITAS, POR LO
QUE PUEDE NO APLICARSE LA EXCLUSIÓN
ANTERIOR. El Software es complejo y puede
contener alguna falta, defectos o errores.
Pioneer no garantiza que el Software satisfaga
sus necesidades o expectativas, que el funcionamiento del Software esté exento de errores
o interrupciones, ni que todas las faltas de
conformidad puedan ser corregidas. Además,
Pioneer no es responsable de ninguna representación ni garantía con relación al empleo o
a los resultados del empleo del Software en
términos de precisión, fiabilidad y aspectos semejantes.
3 LIMITACIÓN DE RESPONSABILIDAD
PIONEER NO SE HACE RESPONSABLE EN
NINGÚN CASO DE DAÑOS, RECLAMACIONES NI PÉRDIDAS SUFRIDAS POR USTED
(INCLUYENDO Y SIN LIMITARSE A ELLO,
DAÑOS COMPENSATORIOS, ACCIDENTALES,
INDIRECTOS, ESPECIALES, CONSECUENTES
Y EJEMPLARES, PÉRDIDAS DE BENEFICIOS,
PÉRDIDA DE VENTAS O DE NEGOCIO, GASTOS, INVERSIONES, OBLIGACIONES EN RELACIÓN A CUALQUIER NEGOCIO, PÉRDIDA
DE PRESTIGIO, Y DAÑOS) DEBIDOS AL EMPLEO O A LA IMPOSIBILIDAD DE EMPLEO
DEL SOFTWARE, AUNQUE PIONEER HUBIERA SIDO INFORMADO SOBRE, SUPIERA, O
DEBIERA HABER CONOCIDO L A POSIBILIDAD DE TALES DAÑOS. ESTA LIMITACIÓN SE
APLICA A TODAS LAS CAUSAS DE ACCIÓN
LEGAL EN ESTE CONJUNTO, INCLUYENDO Y
SIN LIMITARSE A ELLO, LA RUPTURA DEL
CONTRATO, DE LA GARANTÍA, NEGLIGENCIA,
RESPONSABILIDAD OBJETIVA, FALSEDAD, Y
OTROS PERJUICIOS. SI LA EXENCIÓN DE LA
GARANTÍA O LA LIMITACIÓN DE RESPONSABILIDADES DE PIONEER ESTABLECIDAS EN
ESTE CONTRATO NO PUDIERAN, POR CUALQUIER RAZÓN, PONERSE EN PRÁCTICA O
NO PUDIERAN APLICARSE, USTED ESTÁ DE
ACUERDO CON QUE LA OBLIGACIÓN DE
PIONEER NO DEBERÁ EXCEDER EL CINCUENTA POR CIENTO (50 %) DEL PRECIO PAGADO POR USTED AL COMPRAR ESTE
PRODUCTO.
Algunos países no permiten la exclusión o limitación de los daños accidentales o consecuentes, por lo que puede no aplicarse la
exclusión o limitación anterior. Esta exención
de garantía y limitación de responsabilidad no
será aplicable en el supuesto de que alguna
provisión de esta garantía esté prohibida por
cualquier ley nacional o local que no pueda
ser anulada.
4 COMPROMISO CON LAS LEYES SOBRE
LA EXPORTACIÓN
Usted acuerda y certifica que ni el Software ni
ningún otro dato técnico recibido de Pioneer,
ni el mismo producto, serán exportados fuera
del país o distrito (en adelante, el “País”) que
se rija por las leyes del gobierno que tenga jurisdicción sobre usted (en adelante, el “Gobierno”) excepto si está autorizado por las leyes y
regulaciones de dicho Gobierno. Si usted ha
adquirido el Software legalmente fuera del
País, se compromete a no reexportar el Software ni ningún otro dato técnico recibido de
Pioneer, ni el mismo producto, con excepción
de lo que permitan las leyes y regulaciones del
Gobierno y las leyes y regulaciones de la jurisdicción en la que usted obtuvo el Software.
Español
71
Es
Page 72

Capítulo
01
Contrato de licencia
5 EXTINCIÓN DEL CONTRATO
Este Contrato será efectivo hasta la fecha de
su extinción. Usted podrá terminarlo en cualquier momento destruyendo el Software. El
Contrato también se extinguirá si no cumple
alguno de los términos y condiciones de este
Contrato. En caso de tal extinción, usted está
de acuerdo en destruir el Software.
6 VARIOS
Este es el Contrato completo entre Pioneer y
usted con relación a este asunto. Ningún cambio de este Contrato entrará en vigor a menos
que lo acuerde por escrito Pioneer. Aunque alguna disposición de este Contrato se declare
nula o inaplicable, las restantes permanecerán con pleno vigor y validez. Este Contrato se
rige y se interpreta según las leyes de Japón.
Toda disputa, controversia o diferencia que pudiera surgir entre usted y Pioneer a raíz, en relación con o en conexión con este Contrato se
enviará para su arbitraje en Tokio, Japón,
según las Normas de arbitraje comercial de la
Japan Commercial Arbitration Association
(Asociación de Arbitraje Comercial de Japón).
La decisión del arbitraje será definitiva y
vinculante.
72
Es
Page 73

Acerca de los datos para la base de datos de mapas
Capítulo
02
! Es posible que las modificaciones relacio-
nadas con carreteras, calles/autopistas, terrenos, construcciones, etc. que se hayan
realizado antes y durante el período de desarrollo podrían no quedar reflejadas en
esta base de datos. Inevitablemente, las
modificaciones que se hayan realizado de
forma posterior no quedarán plasmadas en
esta base datos.
! Independientemente de los lugares ya exis-
tentes o de nueva construcción, los datos
podrían diferir de la condición real.
! Para los detalles acerca de la cobertura de
mapas de este producto, consulte la información de nuestro sitio web.
! Queda terminantemente prohibido repro-
ducir o utilizar cualquier parte o la totalidad
del mapa de cualquier forma sin el permiso
del propietario del Copyright.
! Si las normativas de tráfico locales o las
condiciones difieren de estos datos, siga
las normativas locales (señales, indicaciones, etc.) y las condiciones existentes
(construcciones, tiempo atmosférico, etc.).
! Los datos de regulación de tráfico usados
en esta base de datos de mapas sólo se
aplican a vehículos de pasajeros de tamaño estándar. Observe que en esta base de
datos no se incluyen las normas para vehículos de mayor tamaño, motocicletas u
otros vehículos no estándares.
! © 1987-2013 HERE. Todos los derechos re-
servados.
! © 2013 INCREMENT P CORP. TODOS LOS
DERECHOS RESERVADOS.
Español
73
Es
Page 74

Capítulo
03
Precaución
! Lea todo el manual antes de actualizar el
programa de su sistema de navegación.
! Este paquete es único, y no puede instalar-
se en más de una unidad.
! Una vez que se actualiza la versión, no se
puede volver a la versión anterior.
! Este producto no se puede utilizar como
tarjeta de memoria SD.
Modelos que se actualizarán
Este producto puede actualizar el programa
de software y la base de datos de los siguientes modelos:
! AVIC-F50BT
! AVIC-F950DAB
! AVIC-F950BT
! AVIC-F850BT
Puntos renovados al
instalar esta actualización
Al actualizar el sistema de navegación con
este producto cambian los siguientes puntos.
! Los datos del mapa se han actualizado.
! Si la versión de su aplicación es 1.05 o an-
terior,
— ahora se suministrará asistencia para
iPhone 5 e iPod touch (5.ª generación).
— Es posible cambiar el tamaño de la ima-
gen del vídeo de Android para ajustarlo
a la pantalla.
= Para más información sobre cómo com-
probar la versión actual, consulte Com-
probación de la versi ón actual en la
página 77.
Las demás operaciones son esencialmente las
mismas que realizó cuando adquirió el hardware. Utilice el Manual de operación incluido
en el paquete de hardware como referencia
principal.
Presentación del manual
En este manual se describe el modo de activar
la actualización. También se suministra una
vista global de cómo cambian las funciones
tras la actualización.
p Las capturas de pantalla que aparecen en
este manual están basadas en la versión
actualizada del AVIC-F50BT utilizando este
producto. Las pantallas podrían variar en
función del modelo.
Elementos de configuración
que va a eliminar e inicializar
el proceso de actualización
Los siguientes datos y ajustes se eliminarán y
restaurarán a los valores predeterminados.
Otros elementos permanecerán en el dispositivo. Sin embargo, existen ciertos elementos
que no aparecen en la lista, ya que el usuario
puede recuperar el ajuste fácilmente, como
por ejemplo, la última posición del cursor en
la pantalla del mapa.
! Configuración de la ruta
— Ruta actual
— Aprendizaje de datos de rutas
— Lista de países
— Historial de búsqueda de categoría
— Historial de búsqueda de ciudad
— Resultados de la búsqueda de ruta
— Ajuste de marca del logotipo
! Opciones AV
— Última pantalla de fuente de AV
— Cambia entre MUSIC/VIDEO en el iPod
Los datos de usuario almacenados en la memoria interna de la unidad podrían borrarse si
se produce un error inesperado durante la instalación del software. Pioneer no se hace responsable de cualquier pérdida de datos o no
disponibilidad de datos de usuario.
74
Es
Page 75

Precaución
Capítulo
03
Convenciones utilizadas en
este manual
Antes de seguir, dedique algunos minutos a
leer la siguiente información sobre las convenciones utilizadas en este manual. Conocer
bien estas convenciones le facilitará el aprendizaje del uso de este nuevo equipo.
! Los botones del sistema de navegación
aparecen en MAYÚSCULAS y NEGRITA:
p. ej.
Pulse el botón MODE o el botón HOME.
! Los elementos de menú, títulos de pantalla
y componentes de funciones aparecen en
negrita con comillas dobles “”:
p. ej.
Aparecerá la pantalla “Config. sist.”.
! Las teclas del panel táctil disponibles en la
pantalla aparecen en negrita y entre corchetes [ ]:
p. ej.
Pulse [Editar/Ajustes].
! La información adicional, alternativas y
otras notas se presentan con el siguiente
formato:
p. ej.
p Si no se ha almacenado aún su domici-
lio, ajuste en primer lugar la ubicación.
! Las funciones del resto de teclas de la
misma pantalla se indican con el símbolo
# al principio de la descripción:
p. ej.
# Si pulsa [OK], se eliminará la entrada.
! Las referencias se indican del modo si-
guiente:
p. ej.
= Para los detalles sobre la operación,
consulte Comprobación del número de
dispositivo en la página 77.
“iPhone con un conector
Lightning”
En este manual, iPhone 5 e iPod touch (5.ª generación) serán denominados en adelante
“iPhone con un conector Lightning”.
“Tarjeta microSD”
En este manual, la tarjeta microSDHC será denominada en adelante “tarjeta microSD”.
p Mantenga la tarjeta microSD fuera del al-
cance de los niños pequeños para evitar
que la ingieran accidentalmente.
p No almacene la tarjeta microSD en lugares
con elevadas temperaturas ni sometida a
la luz del sol directa.
p No someta la tarjeta microSD a golpes ni
impactos.
p Evite que la tarjeta microSD entre en con-
tacto con cualquier tipo de líquido. Podrían
producirse daños en la tarjeta microSD y
en sus productos.
p Tenga cuidado de no tocar los terminales
de la tarjeta microSD. De lo contrario, podrían producirse fallos en la conexión. Si
algún terminal se encuentra sucio, frótelo
con un paño limpio seco.
p El logotipo de microSDHC es una marca
comercial de SD-3C, LLC.
En caso de problemas
! Si el sistema de navegación no funcionase
correctamente, póngase en contacto con
su concesionario o el servicio técnico autorizado Pioneer más próximo.
! La tarjeta de certificados de actualización
(UPGRADE CERTIFICATES) es necesaria
como certificación para la reparación (y
también la recuperación). Si el sistema de
navegación se ha de someter a una reparación, los datos actualizados no podrán restaurarse si no puede enviar esta tarjeta.
Español
75
Es
Page 76

Capítulo
03
Precaución
Visite nuestro sitio web
Visítenos en:
http://www.pioneer.eu
! Registre su producto. Conservaremos los
datos de su adquisición para que pueda
consultarlos en caso de una demanda de
seguro, como pérdida o robo.
! En nuestro sitio Web ofrecemos la informa-
ción más reciente acerca de PIONEER
CORPORATION.
Copyright
Los nombres de las empresas privadas,
productos y otras entidades descritos en
este producto son marcas comerciales registradas o marcas comerciales de sus respectivos propietarios.
= Para obtener más información, consulte el
Manual de operación de su sistema de navegación.
76
Es
Page 77

Instrucciones para la actualización
Capítulo
04
El proceso de actualización
del sistema de navegación
1 Escriba la información requerida (número
de modelo (MODEL NUMBER), número de
dispositivo (DEVICE_NUMBER) y el número
de serie (SERIAL NUMBER)) en los certificados de actualización (UPGRADE CERTIFICATES).
= Para los detalles, consulte Comproba-
ción del número de modelo en la página
77.
= Para los detalles sobre la operación,
consulte Comprobación del número de
dispositivo en la página 77.
= Para los detalles, consulte Comproba-
ción del número de serie en la página 77.
j
2 Actualice el programa de software de su
sistema de navegación.
= Para los detalles sobre la operación,
consulte Actualización del programa de
software y la base de datos de mapas en
la página 78.
j
3 Compruebe si la actualización se ha efec-
tuado correctamente.
= Para los detalles sobre la operación,
consulte Comprobación de si la actuali-
zación se ha efectuado correctamente en
la página 79.
Preparación para la
actualización
Comprobación del número de
modelo
El número de modelo está impreso en la tarjeta de garantía o en la parte frontal del sistema
de navegación.
Comprobación del número de
dispositivo
1 Pulse el botón HOME para visualizar la
pantalla “Menú superior”.
2 Pulse
Aparecerá la pantalla “Información”.
3 Pulse [Información del sistema].
Se muestra el número de dispositivo “Número
de dispositivo” de su sistema de navegación.
Comprobación del número de serie
El número de serie está impreso en la tarjeta
de garantía. También, en la parte inferior del
sistema de navegación, hay una etiqueta adhesiva en la que está impreso el número de
serie “SER.NO.”.
Comprobación de la versión actual
1 Pulse el botón HOME para visualizar la
pantalla “Menú superior”.
.
Español
2 Pulse
Aparecerá la pantalla “Información”.
.
77
Es
Page 78

Capítulo
04
Instrucciones para la actualización
3 Mantenga pulsada la esquina superior
izquierda.
Aparecerá la pantalla “Información de servi-
cio”.
4 Compruebe la información de la versión que se muestra en “Application
Version”.
Procedimientos de
actualización
! NO detenga NUNCA el motor de su ve-
hículo ni desactive la fuente de alimentación del sistema de navegación hasta
que no finalice el proceso de instalación. Si
apaga el dispositivo durante el proceso de
actualización provocará un fallo de funcionamiento o errores en el sistema de navegación.
! No hay funciones disponibles durante el
proceso de actualización.
2 Introduzca la tarjeta microSD de actualización en la ranura de la tarjeta SD.
El sistema de navegación se reiniciará, y comenzará el proceso de instalación.
p Si está utilizando un modelo compatible de
tarjeta de memoria SD, inserte una tarjeta
microSD en el adaptador de la tarjeta SD.
p Asegúrese de utilizar una tarjeta de memo-
ria SD con la pestaña de protección contra
escritura desbloqueada.
Aparecerá un mensaje preguntándole si
desea iniciar o no el proceso de actualización.
3 Pulse [Sí].
4 Espere hasta que finalice el proceso de
actualización.
Actualización del programa de
software y la base de datos de
mapas
Esta sección describe los procedimientos de
actualización de su sistema de navegación.
p El proceso de actualización tarda unos 45
minutos en finalizar.
1 Estacione el vehículo en un lugar seguro y accione el freno de mano.
78
Es
Una vez que se completa la instalación de
datos, se inicia el proceso de bloqueo de contraseña.
Page 79

Instrucciones para la actualización
Aparecerá un mensaje preguntándole si
desea iniciar o no el proceso de actualización.
5 Pulse [OK].
6 Espere hasta que finalice el proceso de
actualización.
Ha finalizado la actualización.
Comprobación de si la
actualización se ha efectuado
correctamente
Visualice la pantalla “Información” para comparar el número de versión actual con el anterior.
1 Pulse el botón HOME para visualizar la
pantalla “Menú superior”.
Capítulo
04
2 Pulse
Aparecerá la pantalla “Información”.
3 Pulse [Información sobre la versión].
Aparecerá la versión actual.
4 Cerciórese de que la versión actual es
2.000000.
5 Expulse la tarjeta microSD de
actualización.
.
Español
79
Es
Page 80

Capítulo
05
Cambios en el programa actualizado
En este capítulo se explican los cambios que
se realizan cuando con este producto se actualiza un sistema de navegación con una versión de aplicación 1.05 o anterior.
Para usuarios de smartphone
Ajuste del tamaño de pantalla
para la reproducción de vídeo
en dispositivos Android
p Esta función está disponible únicamente
en AppRadio Mode (conexión HDMI) en
dispositivos Android.
Es posible cambiar el tamaño de la imagen
del vídeo de Android para ajustarlo a la pantalla.
1 Vaya a la pantalla AppRadio Mode.
2 Pulse el botón HOME para visualizar la
pantalla “Menú superior”.
3 Pulse
Aparecerá la pantalla “Editar/Ajustes”.
4 Pulse [Config. aplic.].
Aparecerá el menú “Configuración de aplica-
ción”.
5 Pulse [Aj. Vídeo Android].
6 Pulse el elemento para ajustar el tamaño de la ventana de Android.
.
Para usuarios de iPhone
con un conector Lightning
Este producto suministra asistencia
AppRadio Mode y reproducción de vídeo
para el iPhone con un conector Lightning.
p Para realizar la conexión con este sistema
de navegación se necesitan los siguientes
cables.
— Cable de interfaz HDMI/USB para iPod /
iPhone (CD-IH202, vendido por separado)
— Adaptador de conector Lightning a AV
digital (producto de Apple Inc.) (se
vende por separado)
— Cable Lightning a USB (incluido con
iPhone con conector Lightning)
p El dispositivo se conecta a este sistema de
navegación mediante Bluetooth.
— No podrá usar AppRadio Mode mien-
tras la tecnología inalámbrica Bluetooth
se encuentre desconectada.
p Tras la instalación de la actualización, la
fuente predeterminada iPod no seguirá utilizándose para acceder a contenido de música o vídeo desde un iPhone conectado
con un conector Lightning. Para poder utilizar la fuente iPod, deberá conectar el iPod
al sistema de navegación utilizando un
cable de interfaz USB para iPod / iPhone
(CD-IU201N, vendido por separado) y un
adaptador de conector Lightning a 30 clavijas (producto de Apple Inc., vendido por separado). Sin embargo, las funciones
relacionadas con los archivos de vídeo del
iPod y AppRadio Mode no están disponibles. Para reproducir archivos de música y/
o vídeo en su iPhone con un conector
Lightning, primero deberá instalar la aplicación gratuita de Pioneer AppRadio
Mode y la aplicación CarMediaPlayer en
su dispositivo y después ejecutar CarMe-
diaPlayer durante el AppRadio Mode.
= Para obtener más información, consulte
el manual de CarMediaPlayer.
80
Es
Page 81

Cambios en el programa actualizado
Capítulo
05
Para usuarios de iPhone
con conector de 30 clavijas
p En función del modelo de iPod es posible
que no se emita contenido, a menos que
utilice un cable de interfaz USB para iPod /
iPhone (CD-IU201N, vendido por separado).
Asegúrese de utilizar un cable de interfaz
USB para iPod / iPhone (CD-IU201N, vendido por separado) para conectar el iPod.
= Para los detalles, consulte Conexión de
un iPod en la página 81.
Conexión y desconexión de
un iPod
PRECAUCIÓN
! Para evitar la pérdida de datos y que se pro-
duzcan daños en el dispositivo de almacenamiento, no lo desconecte nunca del sistema
de navegación mientras se estén transfiriendo
datos.
! Pioneer no garantiza la compatibilidad con
todos los dispositivos de almacenamiento masivo USB, y no se responsabiliza de posibles
pérdidas de datos en reproductores multimedia, iPhone, smartphones u otros dispositivos
durante la utilización de este producto.
Conexión de un iPod
1 Compruebe que no haya ningún dispositivo de almacenamiento USB conectado.
2 Conecte su iPod.
Adaptador de conector Lightning a AV digital
Cable de inte rfaz
HDMI/USB para iPod
/ iPhone
= Para los detalles sobre las operaciones,
consulte el Manual de instalación más actual.
El manual más reciente está disponible en
nuestro sitio web.
http://www.pioneer.eu
Cable Lightning a
USB
Desconexión de su iPod
% Desconecte los cables tras asegurarse
de que no se esté accediendo a los
datos.
Español
Utilización de un iPod (iPod)
Procedimiento de inicio
1 Ajuste “Conf. conexión iPod” a “Conector de 30 patillas”.
= Para los detalles, consulte Selección del mé-
todo de conexión del dispositivo en la página
84.
= Para los detalles, consulte Ajuste de la cone-
xión del iPod en la página 85.
Es
81
Page 82

Capítulo
05
Cambios en el programa actualizado
2 Cuando se muestre la pantalla del
mapa, pulse el botón MODE.
p La pantalla de función AV puede visualizar-
se también pulsando [Fuente AV]enel
“Menú superior”.
3 Conecte su iPod.
La fuente cambia y, a continuación, se inicia
la reproducción.
= Para los detalles, consulte Conexión de un
iPod en la página 81.
p Si el iPod ya está conectado, pulse [iPod]
en el borde izquierdo de la pantalla.
p Si se conecta un iPhone o iPod touch,
salga de las aplicaciones antes de realizar
la conexión.
4 Utilice las teclas del panel táctil de la
pantalla para controlar el iPod.
p La imagen de vídeo del iPod podría pre-
sentar ruido si la pantalla trasera emite la
imagen de vídeo. Si se genera ruido en la
imagen de vídeo del iPod, desactive el ajuste de salida de la pantalla trasera.
Utilización de Aha Radio
Procedimiento de inicio
El procedimiento varía en función del tipo de
dispositivo.
Para usuarios de iPhone con
conector de 30 clavijas
1 Ajuste “Config. conex. aplicac.” a
“iPhone” y “Conf. conexión iPod” a “Conec-
tor de 30 patillas”.
= Para los detalles, consulte Selección del mé-
todo de conexión del dispositivo en la página
84.
= Para los detalles, consulte Ajuste de la cone-
xión del iPod en la página 85.
2 Inicie la aplicación Aha Radio instalada
en el iPhone.
p Antes del inicio, regístrese en Aha Radio
desde el iPhone.
3 Conecte su iPhone.
p Si el iPhone ya está conectado, pulse [aha]
en el borde izquierdo de la pantalla.
= Para los detalles, consulte Conexión de un
iPod en la página 81.
4 Cuando se muestre la pantalla del
mapa, pulse el botón MODE.
p La pantalla de función AV puede visualizar-
se también pulsando [Fuente AV]enel
“Menú superior”.
5 Pulse [aha] en el lateral izquierdo de la
pantalla para visualizar la pantalla “aha”.
6 Utilice las teclas del panel táctil de la
pantalla para controlar Aha Radio.
Para usuarios de iPhone con
conector Lightning
1 Ajuste “Config. conex. aplicac.” a
“iPhone” y “Conf. conexión iPod” a “Conec-
tor AV digital”.
= Para los detalles, consulte Selección del mé-
todo de conexión del dispositivo en la página
84.
= Para los detalles, consulte Ajuste de la cone-
xión del iPod en la página 85.
2 Registre su iPhone y conéctelo a este
producto mediante la tecnología inalámbrica Bluetooth.
p El dispositivo registrado debe seleccionarse
como dispositivo prioritario.
= Para los detalles, consulte Registro de
sus dispositivos Bluetooth en la página
86.
3 Desbloquee su iPhone.
82
4 Conecte su iPhone.
= Para los detalles, consulte Conexión de un
iPod en la página 81.
Es
Page 83

Cambios en el programa actualizado
Capítulo
05
5 Cuando se muestre la pantalla del
mapa, pulse el botón MODE.
p La pantalla de función AV puede visualizar-
se también pulsando [Fuente AV]enel
“Menú superior”.
6 Pulse [aha] en el lateral izquierdo de la
pantalla para visualizar la pantalla “aha”.
Al pulsar [aha], el sistema de navegación intentará establecer una conexión Bluetooth.
Una vez establecida la conexión correctamente, se activarán las teclas del panel táctil de la
pantalla “aha”.
7 Utilice las teclas del panel táctil de la
pantalla para controlar Aha Radio.
Utilización del AppRadio Mode
Procedimiento de inicio
Para usuarios de iPhone con
conector de 30 clavijas
1 Ajuste “Config. conex. aplicac.” a
“iPhone” y “Conf. conexión iPod” a “Conec-
tor de 30 patillas”.
= Para los detalles, consulte Selección del mé-
todo de conexión del dispositivo en la página
84.
= Para los detalles, consulte Ajuste de la cone-
xión del iPod en la página 85.
2 Conecte su iPhone.
= Para los detalles, consulte Conexión de un
iPod en la página 81.
3 Pulse el botón HOME para visualizar la
pantalla “Menú superior”.
4 Pulse [Apps].
En la pantalla aparece un mensaje que le indica que su iPhone puede iniciar la aplicación.
Un mensaje que le pregunta si desea iniciar la
aplicación en su iPhone.
5 Utilice su iPhone para iniciar la aplicación.
Se inicia AppRadio app.
6 Pulse [OK] en la pantalla de este producto.
Aparece la pantalla AppRadio Mode (pantalla de menú Aplicación).
Pantalla de menú Aplicación
p Si conecta el dispositivo mientras está utili-
zando una aplicación compatible con
AppRadio Mode, la pantalla de función de
la aplicación aparecerá en este sistema de
navegación.
7 Pulse el icono de la aplicación que
desee.
Se ejecutará la aplicación que desee y aparecerá la pantalla de función de la aplicación.
8 Utilice la aplicación.
9 Pulse el botón HOME para volver a la
pantalla de menú Aplicación.
p Si pulsa el botón HOME mientras se mues-
tra la pantalla de menú Aplicación, aparecerá la pantalla “Menú superior”.
Para usuarios de iPhone con
conector Lightning
1 Ajuste “Config. conex. aplicac.” a
“iPhone” y “Conf. conexión iPod” a “Conec-
tor AV digital”.
= Para los detalles, consulte Selección del mé-
todo de conexión del dispositivo en la página
84.
= Para los detalles, consulte Ajuste de la cone-
xión del iPod en la página 85.
Español
83
Es
Page 84

Capítulo
05
Cambios en el programa actualizado
2 Registre su iPhone y conéctelo a este
producto mediante la tecnología inalámbrica Bluetooth.
p El dispositivo registrado debe seleccionarse
como dispositivo prioritario.
= Para los detalles, consulte Registro de
sus dispositivos Bluetooth en la página
86.
3 Desbloquee su iPhone.
4 Conecte su iPhone.
= Para los detalles, consulte Conexión de un
iPod en la página 81.
5 Pulse el botón HOME para visualizar la
pantalla “Menú superior”.
p aparecerá en la tecla Apps mientras la
tecnología inalámbrica Bluetooth esté en
proceso de conexión.
6 Pulse [Apps].
Se ejecutará AppRadio app y aparecerá la
pantalla AppRadio Mode (pantalla de menú
Aplicación).
Pantalla de menú Aplicación
9 Pulse el botón HOME para volver a la
pantalla de menú Aplicación.
p Si pulsa el botón HOME mientras se mues-
tra la pantalla de menú Aplicación, aparecerá la pantalla “Menú superior”.
Selección del método de
conexión del dispositivo
Si desea utilizar la aplicación del iPhone o
smartphone en este sistema de navegación,
deberá seleccionar el método de conexión de
su dispositivo.
Según el dispositivo conectado, los ajustes necesarios serán unos u otros.
“Config. conex. aplicac.” puede establecerse
cuando se cumplen todas las condiciones siguientes.
! La fuente de AV está desactivada.
! No hay ningún iPod, smartphone ni dispo-
sitivos de almacenamiento externos conectados a este sistema de navegación.
Para usuarios de iPhone con
conector de 30 clavijas
1 Pulse el botón HOME para visualizar la
pantalla “Menú superior”.
p Si conecta el dispositivo mientras está utili-
zando una aplicación compatible con
AppRadio Mode, la pantalla de función de
la aplicación aparecerá en este sistema de
navegación.
7 Pulse el icono de la aplicación que
desee.
Se ejecutará la aplicación que desee y aparecerá la pantalla de función de la aplicación.
8 Utilice la aplicación.
84
Es
2 Pulse
Aparecerá la pantalla “Editar/Ajustes”.
3 Pulse [Config. aplic.].
Aparecerá el menú “Configuración de aplica-
ción”.
.
Page 85

Cambios en el programa actualizado
Capítulo
05
4 Pulse [Config. conex. aplicac.].
Aparecerá la pantalla “Configuración de co-
nexión de aplicación”.
5 Pulse [iPhone].
Se habilitará el ajuste de conexión del iPhone.
Aparecerá la pantalla “Configuración de co-
nexión de iPod”.
6 Pulse [Conector de 30 patillas].
Para usuarios de iPhone con
conector Lightning
1 Pulse el botón HOME para visualizar la
pantalla “Menú superior”.
2 Pulse
Aparecerá la pantalla “Editar/Ajustes”.
3 Pulse [Config. aplic.].
Aparecerá el menú “Configuración de aplica-
ción”.
4 Pulse [Config. conex. aplicac.].
Aparecerá la pantalla “Configuración de co-
nexión de aplicación”.
5 Pulse [iPhone].
Se habilitará el ajuste de conexión del iPhone.
Aparecerá la pantalla “Configuración de co-
nexión de iPod”.
6 Pulse [Conector AV digital].
.
“Conf. conexión iPod” puede establecerse
cuando se cumplen todas las condiciones siguientes.
! La fuente de AV está desactivada.
! No hay ningún iPod, smartphone ni dispo-
sitivos de almacenamiento externos conectados a este sistema de navegación.
1 Pulse el botón HOME para visualizar la
pantalla “Menú superior”.
2 Pulse
Aparecerá la pantalla “Editar/Ajustes”.
3 Pulse [Config. fuentes].
Aparecerá la pantalla “Setting according to
source”.
4 Pulse [Config. de iPod].
Aparecerá la pantalla “Configuración de
iPod”.
5 Pulse [Conf. conexión iPod].
Aparecerá la pantalla “Configuración de co-
nexión de iPod”.
6 Pulse [Conector AV digital] o [Conector
de 30 patillas].
! Conector de 30 patillas (predeterminado):
! Conector AV digital:
.
Este ajuste está destinado a usuarios de
iPod con conector de 30 clavijas y usuarios
de dispositivos Android.
Este ajuste está destinado a usuarios de
iPod con conector Lightning.
Español
Ajuste de la conexión del iPod
Según el dispositivo conectado, los ajustes necesarios serán unos u otros.
85
Es
Page 86

Capítulo
05
Cambios en el programa actualizado
Registro de sus dispositivos
Bluetooth
Tendrá que registrar sus dispositivos con tecnología inalámbrica Bluetooth cuando los conecte por primera vez. Es posible registrar un
total de 5 dispositivos. Están disponibles dos
métodos de registro:
! Búsqueda de dispositivos Bluetooth cerca-
nos
! Sincronización desde sus dispositivos
Bluetooth
Búsqueda de dispositivos
Bluetooth cercanos
El sistema busca dispositivos Bluetooth disponibles cerca del sistema de navegación, los
muestra en una lista y los registra para establecer la conexión.
1 Active la tecnología inalámbrica
Bluetooth en sus dispositivos.
En algunos dispositivos Bluetooth, no son necesarias acciones específicas para activar la
tecnología inalámbrica Bluetooth. Para los detalles, consulte el manual de instrucciones de
sus dispositivos.
2 Pulse [Teléfono].
Aparecerá la pantalla “Teléfono”.
5 Espere hasta que el dispositivo
Bluetooth aparezca en la lista.
p Si no puede encontrar el dispositivo
Bluetooth que desea conectar, compruebe
que el dispositivo esté a la espera de una
conexión de tecnología inalámbrica
Bluetooth.
6 Pulse el nombre del dispositivo
Bluetooth que desea registrar.
3 Pulse [Config. Bluetooth].
Aparecerá la pantalla “Configuración de
Bluetooth”.
4 Pulse [Registro].
Aparecerá la pantalla “Lista disposit.”.
El sistema buscará los dispositivos Bluetooth
que estén a la espera de establecer una conexión y, en caso de encontrar dispositivos, los
mostrará en la lista.
p La lista puede incluir un máximo de 10 dis-
positivos. Los dispositivos aparecerán en la
lista en el orden en el que se encuentren.
86
Es
# Si pulsa [Búsq.], el sistema empezará a bus-
car dispositivos Bluetooth que estén a la espera
de establecer la conexión y, en caso de detectar
dispositivos, los mostrará en forma de lista.
Page 87

Cambios en el programa actualizado
Capítulo
05
7 Sincronice este sistema de navegación
con su dispositivo Bluetooth.
La primera vez que el dispositivo Bluetooth se conecte a este pro ducto, tendrá que realizar una operación de sincronización para así indicarle al
dispositivo que debe conectarse. El método de sincronización varía en función del dispositivo
Bluetooth. Realice la sincronización siguiendo las
instrucciones que aparecerán en la pantalla en
este producto o en el dispositivo Bluetooth. Consulte el manual de instrucciones de los dispositivos
que desea registrar (registro y autenticación del dispositivo). Tras completar el registro aparecerá un
mensaje de confirmación.
8 Pulse [OK].
El proceso de registro se completa y el dispositivo se conecta como teléfono manos libres.
En función del dispositivo Bluetooth registrado podrá realizar los siguientes ajustes.
! Transferencia de la agenda telefónica
Si el dispositivo Bluetooth registrado cuenta con PBAP (perfil de acceso a la agenda
telefónica), puede transferir la agenda telefónica al sistema de navegación.
Si pulsa [Sí], podrá transferir toda la agenda
telefónica al sistema de navegación, y se
mostrará un mensaje que indica que dicha
transferencia ha finalizado.
! Selección de si desea utilizar el audio
Bluetooth
Si el dispositivo Bluetooth registrado cuenta
con audio Bluetooth, puede seleccionar si
desea utilizar la función de audio Bluetooth.
Aparecerá el mensaje “¿Es Android?”.
9 Pulse [No].
Aparecerá el mensaje “¿Este dispositivo in-
corpora un conector AV digital?”.
10 Pulse [Sí].
Aparecerá el mensaje “¿Desea configurar
este dispositivo para AppRadio Mode?”.
11 Pulse [Sí] si utiliza AppRadio Mode con
un dispositivo registrado.
! Sí:
Le permite avanzar hasta el siguiente paso.
! No:
El dispositivo se registra en el sistema de
navegación. Una vez que se haya registrado
correctamente el dispositivo, se establecerá
la conexión Bluetooth desde el sistema de
navegación.
12 Pulse [OK].
Sincronización desde sus
dispositivos Bluetooth
Puede registrar el dispositivo Bluetooth ajustando el sistema de navegación en modo de
espera y solicitando conexión desde el dispositivo Bluetooth.
1 Active la tecnología inalámbrica
Bluetooth en sus dispositivos.
En algunos dispositivos Bluetooth, no son necesarias acciones específicas para activar la
tecnología inalámbrica Bluetooth. Para los detalles, consulte el manual de instrucciones de
sus dispositivos.
2 Pulse [Teléfono].
Aparecerá la pantalla “Teléfono”.
3 Pulse [Config. Bluetooth].
Aparecerá la pantalla “Configuración de
Bluetooth”.
4 Pulse [Registro].
Aparecerá la pantalla “Lista disposit.”.
5 Pulse [Regist. desde disposit.].
El sistema de navegación espera a la conexión
con la tecnología inalámbrica Bluetooth.
6 Registre el sistema de navegación en su
dispositivo Bluetooth.
Si el dispositivo le solicita una contraseña, introduzca la contraseña del sistema de navegación.
Cuando el dispositivo se encuentre correctamente registrado, la configuración de conexión se realizará desde el dispositivo.
Español
87
Es
Page 88

Capítulo
05
Cambios en el programa actualizado
p Si se produce un error durante el proceso
de registro, repita el procedimiento desde el
principio.
7 Pulse [OK].
El proceso de registro se completa y el dispositivo se conecta como teléfono manos libres.
En función del dispositivo Bluetooth registrado podrá realizar los siguientes ajustes.
! Transferencia de la agenda telefónica
Si el dispositivo Bluetooth registrado cuenta con PBAP (perfil de acceso a la agenda
telefónica), puede transferir la agenda telefónica al sistema de navegación.
Si pulsa [Sí], podrá transferir toda la agenda
telefónica al sistema de navegación, y se
mostrará un mensaje que indica que dicha
transferencia ha finalizado.
! Selección de si desea utilizar el audio
Bluetooth
Si el dispositivo Bluetooth registrado cuenta con audio Bluetooth, puede seleccionar
si desea utilizar la función de audio
Bluetooth.
Aparecerá el mensaje “¿Es Android?”.
8 Pulse [No].
Aparecerá el mensaje “¿Este dispositivo in-
corpora un conector AV digital?”.
9 Pulse [Sí].
Aparecerá el mensaje “¿Desea configurar
este dispositivo para AppRadio Mode?”.
10 Pulse [Sí] si utiliza AppRadio Mode con
un dispositivo registrado.
! Sí:
Le permite avanzar hasta el siguiente paso.
! No:
El dispositivo se registra en el sistema de
navegación. Una vez que se haya registrado
correctamente el dispositivo, se establecerá
la conexión Bluetooth desde el sistema de
navegación.
11 Pulse [OK].
88
Es
Page 89

Solución de problemas
Problemas en los procedimientos de actualización
Síntoma Causa Acción
El proceso de actualización no
comienza, y el sistema de navegación arranca del mismo modo
que siempre.
El sistema de navegación no
funciona correctamente después de haberse actualizado.
Se ha insertado una tarjeta
microSD incorrecta.
Ha finalizado el proceso de actualización.
Se mostrará una pantalla indicando
que no es posible iniciar el proceso
de actualización.
El motor de su vehículo se detuvo o
la fuente de alimentación del sistema de navegación se desactivó durante el proceso de actualización.
La tarjeta microSD de actualización
se extrajo durante el proceso de actualización.
Expulse la tarjeta microSD e inserte la tarjeta
microSD de actualización correcta.
Compruebe si el proceso de actualización se
realizó correctamente. Si aún no se ha realizado el proceso de actualización, póngase en
contacto con el centro de servicio autorizado
más cercano.
Expulse la tarjeta microSD de actualización,
visualice el mapa de su posición actual y, a
continuación, vuelva a introducir la tarjeta
microSD de actualización.
Póngase en contacto con el centro de servicio autorizado más cercano.
Póngase en contacto con el centro de servicio autorizado más cercano.
Apéndice
Español
Mensajes de los procedimientos de actualización
Su sistema de navegación podría mostrar los siguientes mensajes. Consulte la tabla para identificar el problema y, a continuación, realice la acción correctiva sugerida.
A veces pueden aparecer mensajes de error que no se indican aquí. En tales casos, siga las instrucciones indicadas en la pantalla.
Mensaje Situación Qué hacer
Unable to complete update
process.
Si se produce un error inesperado
en el proceso de actualización.
Si este mensaje persiste, consulte a su distribuidor Pioneer.
Es
89
Page 90

Inhalt
Vielen Dank dass Sie sich für dieses Pioneer-Produkt
entschieden haben.
Lesen Sie diese Bedienungsanleitung bitte aufmerksam durch, um sich mit der
richtigen Bedienungsweise für Ihr Modell vertraut zu machen.
– Prüfung auf eine erfolgreiche Upgrade-
Wichtig
Die als Beispiele gezeigten Bildschirmdarstellungen können von den tatsächlichen Bildschirminhalten abweichen, die im Zuge der
Leistungs- und Funktionsverbesserung möglicherweise ohne Ankündigung geändert werden.
Lizenzvertrag
PIONEER SOFTWARE-LIZENZVERTRAG 91
Anmerkungen zu den Daten für die
Karten-Datenbank
Vorsichtsmaßnahmen
Mit dem Upgrade aktualisierbare
Modelle 95
Durch dieses Upgrade aktualisierte
Punkte 95
Anleitungsübersicht 95
Durch das Upgrade gelöschte und
initialisierte Einstellungen 95
In dieser Anleitung verwendete
Konventionen 96
“iPhone mit Lightning Connector” 96
“microSD-Karte” 96
Im Störungsfall 96
Besuchen Sie unsere Webseite 97
Copyright 97
Upgrade-Anweisungen
Prozess für das Upgrade des
Navigationssystems 98
Vorbereitung zum Upgrade 98
– Überprüfen der Modellnummer 98
– Überprüfen der Gerätenummer 98
– Überprüfen der Seriennummer 98
– Überprüfen der aktuellen Version 98
Upgrade-Prozedur 99
– Upgrade des Softwareprogramms und
der Karten-Datenbank 99
Installation 100
Änderungspunkte im ProgrammUpgrade
Für Smartphone-Benutzer 101
– Einstellen der Anzeigengröße für
Android-Videowiedergabe 101
Für Benutzer eines iPhones mit Lightning
Connector 101
An Benutzer eines iPhones mit 30-poligem
Anschluss 102
Anschließen und Abtrennen eines
iPods 102
– Anschließen Ihres iPods 102
– Abtrennen Ihres iPods 102
Verwendung eines iPods (iPod) 102
– Vorbereitende Schritte 102
Gebrauch von Aha Radio 103
– Vorbereitende Schritte 103
Verwenden von AppRadio Mode 104
– Vorbereitende Schritte 104
Auswählen der Verbindungsmethode für
Geräte 105
– An Benutzer eines iPhones mit 30-
poligem Anschluss 105
– An Benutzer eines iPhones mit
Lightning Connector 106
Einrichten der iPod-Verbindung 106
Registrieren Ihrer Bluetooth-Geräte 107
– Suche nach Bluetooth-Geräten in der
Nähe 107
– Paarung über die Bluetooth-
Geräte 108
Fehlersuche
Probleme im Verlauf der Aktualisierung 110
Meldungen im Verlauf der
Aktualisierung 110
90
De
Page 91

Lizenzvertrag
Kapitel
01
PIONEER
SOFTWARE-LIZENZVERTRAG
DIES IST EIN RECHTSGÜLTIGER VERTRAG
ZWISCHEN IHNEN, DEM ENDNUTZER, UND
PIONEER CORP. (JAPAN) (“PIONEER”). BITTE
LESEN SIE DIE VERTRAGSBEDINGUNGEN
SORGFÄLTIG DURCH, BEVOR SIE DIE DIESEM PRODUKT BEILIEGENDE SOFTWARE
VERWENDEN. DURCH DIE VERWENDUNG
DER SOFTWARE STIMMEN SIE DIESEN VERTRAGSBEDINGUNGEN ZU. DIE SOFTWARE
ENTHÄLT EINE VOM/VON DRITTLIEFERANTEN (“LIEFERANTEN”) LIZENZIERTE DATENBANK UND DIE VERWENDUNG DER
DATENBANK IST DURCH DIE GESONDERTEN
BEDINGUNGEN DER LIEFERANTEN ABGEDECKT, DIE DIESEM PRODUKT ALS DOKUMENT BEIGEFÜGT SIND. WENN SIE DIESEN
BEDINGUNGEN NICHT ZUSTIMMEN, GEBEN
SIE DAS PRODUKT (EINSCHLIESSLICH DER
SOFTWARE UND ALLEN SCHRIFTLICHEN
MATERIALIEN) INNERHALB VON FÜNF (5)
TAGEN NACH ERHALT DES PRODUKTS AN
DEN HÄNDLER ZURÜCK, BEI DEM SIE DIESES GEKAUFT HABEN.
WENN SIE DAS PRODUKT DIREKT VON
HERE MAPS ERWORBEN HABEN, DANN
WENDEN SIE SICH AN DEN ENTSPRECHENDEN KUNDENDIENST VON HERE MAPS, UM
EINE RÜCKSENDEGENEHMIGUNG INNERHALB VON DREISSIG (30) TAGEN NACH
KAUFDATUM ZU BEANTRAGEN. HERE MAPS
WIRD IHNEN ALLE NOTWENDIGEN INFORMATIONEN ZUR RÜCKSENDUNG, WIE DEN
RÜCKZUSENDENDEN TEILEN UND DER
ADRESSE, ÜBERMITTELN.
DURCH DIE VERWENDUNG DIESER SOFTWARE STIMMEN SIE DEM LIZENZVERTRAG
ZU.
1 LIZENZ-ERTEILUNG
Pioneer gewährt Ihnen eine nicht übertragbare, nicht ausschließliche Lizenz für die Nutzung der mit diesem Produkt gelieferten
Software (die “Software”) und der dazugehörigen Dokumentation einzig und allein für priva-
te Zwecke bzw. interne Zwecke Ihrer Firma für
Pioneer-Produkte.
Sie dürfen diese Software nicht kopieren, Reverse-Engineering unterziehen, übersetzen,
portieren, modifizieren oder Derivativprodukte
der Software herstellen. Die Software darf
nicht verliehen, vermietet, veröffentlicht, verkauft, zugeteilt, geleast oder vermarktet werden, Softwareentwicklungsinformationen
dürfen nicht weitergegeben, noch darf eine
Sublizenz erteilt werden oder die Software
übertragen oder in irgendeiner anderen Weise
als dies im vorliegenden Vertrag genehmigt
ist, verwendet werden. Sie dürfen nicht den
Quellcode dieser Software ableiten oder abzuleiten versuchen, oder diese Software mittels
Reverse-Engineering, Zerlegen, Dekompilieren
oder anderen Verfahren ganz oder teilweise
zur Strukturierung einer anderen Software verwenden. Sie dürfen diese Software nicht dazu
verwenden, ein Servicebüro zu betreiben oder
eine andere auf Datenverarbeitung bezogene
Tätigkeit für andere Personen oder Firmen
auszuführen.
Pioneer und der (die) Lizenzgeber behalten
alle Urheberrechte, Handelsgeheimnisse, Patent- und andere Besitzrechte an der Software.
Die Software ist urheberrechtlich geschützt
und darf nicht kopiert werden, auch wenn sie
modifiziert oder mit anderen Produkten kombiniert wurde. Sie dürfen keine Urheberrechtshinweise oder in der Software enthaltenen
Besitzerhinweise ändern oder entfernen.
Deutsch
De
91
Page 92

Kapitel
01
Lizenzvertrag
2 SCHADENERSATZ
Sie erhalten den “aktuellen Stand” der Software und der zugehörigen Dokumentation (Änderungen vorbehalten). PIONEER UND SEIN(E)
LIZENZGEBER (für die Punkte 2 und 3 werden
Pioneer und der (die) Lizenzgeber gemeinsam
als “Pioneer” bezeichnet) GEBEN UND SIE ERHALTEN KEINE GARANTIE, WEDER DIREKT
NOCH INDIREKT, UND ALLE GARANTIEN
DER GEBRAUCHSTAUGLICHKEIT UND EIGNUNG FÜR EINEN BESTIMMTEN ZWECK
SIND AUSDRÜCKLICH AUSGESCHLOSSEN.
MANCHE LÄNDER ERLAUBEN SOLCHE GARANTIEAUSSCHLÜSSE NICHT, DAHER KANN
DAS O.G. FÜR SIE EVTL. NICHT ZUTREFFEN.
Die Software ist komplex und kann bestimmte
Nicht-Übereinstimmungen, Defekte oder Fehler enthalten. Pioneer garantiert nicht, dass
die Software Ihre Bedürfnisse oder Erwartungen erfüllt, dass der Betrieb der Software fehlerfrei oder ununterbrochen ist, oder dass alle
Nicht-Übereinstimmungen korrigiert werden
können oder werden. Desweiteren gibt
Pioneer keine Repräsentationen oder Garantien bezüglich der Anwendung oder der Resultate der Verwendung der Software in Bezug
auf Genauigkeit, Zuverlässigkeit und andere
Faktoren.
3 HAFTUNGSBESCHRÄNKUNG
AUF KEINEN FALL IST PIONEER HAFTBAR
FÜR JEGLICHE SCHÄDEN, FORDERUNGEN
ODER VERLUSTE VON IHNEN (EINSCHLIESSLICH, OHNE BEGRENZUNG, KOMPENSATORISCHE, ZUGEHÖRIGE, INDIREKTE,
SPEZIELLE, FOLGE- ODER EXEMPLARISCHE
SCHÄDEN, ENTGANGENE GEWINNE, ENTGANGENE VERKÄUFE ODER GESCHÄFTE,
AUSGABEN, INVESTITIONEN ODER VERPFLICHTUNGEN MIT EINEM GESCHÄFT, VERLUST VON GUTEM WILLEN, ODER SCHÄDEN)
RESULTIEREND AUS DER VERWENDUNG
DER SOFTWARE ODER AUS DER UNFÄHIGKEIT, DIE SOFTWARE ZU VERWENDEN,
AUCH WENN PIONEER ÜBER DIE SCHÄDEN
ODER DIE WAHRSCHEINLICHKEIT DER
SCHÄDEN INFORMIERT WAR ODER INFORMIERT HÄTTE SEIN SOLLEN. DIESE BE-
SCHRÄNKUNG GILT FÜR ALLE URSACHEN
VON MASSNAHMEN, EINSCHLIESSLICH
OHNE BEGRENZUNG VERTRAGSBRUCH, GARANTIENICHTERFÜLLUNG, NACHLÄSSIGKEIT, STRIKTE HAFTUNG,
FEHLREPRÄSENTATION UND ANDERE DELIKTE. WENN DIE AUSSCHLUSSKLAUSEL VON
PIONEER ODER DIE BESCHRÄNKUNG DER
HAFTPFLICHT WIE IN DIESEM VERTRAG BESCHRIEBEN AUS IRGENDEINEM GRUND
NICHT AUSFÜHRBAR ODER NICHT ANWENDBAR IST, STIMMEN SIE ZU, DASS DIE
HAFTUNG VON PIONEER NICHT MEHR ALS
FÜNFZIG PROZENT (50 %) DES VON IHNEN
FÜR DIESES PRODUKT GEZAHLTEN PREISES
BETRÄGT.
Manche Länder erlauben solche Haftungsausschlüsse oder Beschränkungen von zufälligen
oder Folgeschäden nicht, daher kann das o.g.
für Sie evtl. nicht zutreffen. Dieser Haftungsund Garantieausschluss findet keine Verwendung, wenn ein Absatz dieser Garantieerklärung gesetzlich verboten ist.
4 EXPORTGESETZ-VERSICHERUNGEN
Sie stimmen zu und bestätigen, dass weder
die Software noch andere von Pioneer erhaltene technische Daten aus dem Land oder Distrikt (das “Land”) exportiert wird, das der
Zuständigkeit der Regierung, der Sie unterliegen (die “Regierung”) entspricht, ausgenommen, wenn unter den Gesetzen und
Vorschriften dieser Regierung autorisiert und
zugelassen. Wenn die Software rechtmäßig
von Ihnen außerhalb des Landes erworben
wurde, stimmen Sie zu, dass Sie die Software
oder andere von Pioneer erhaltene technische
Daten, oder direkte Produkte davon, nicht reexportieren werden, ausgenommen die Gesetze und Vorschriften der Regierung und Jurisdiktion, denen die Software unterliegt, lassen
dies zu.
92
De
Page 93

Lizenzvertrag
5 KÜNDIGUNG
Diese Lizenz ist gültig, bis sie gekündigt wird.
Sie können sie jederzeit kündigen, indem Sie
die Software zerstören. Diese Lizenz verliert
ihre Wirksamkeit auch automatisch, ohne
dass es einer Kündigung bedarf, wenn Sie
gegen irgendeine Bestimmung dieses Vertrages verstoßen. In diesem Fall sind Sie verpflichtet, die Software zu zerstören.
6 SCHLUSSBESTIMMUNGEN
Dies ist der gesamte Vertrag zwischen Pioneer
und Ihnen bezüglich dieses Themas. Keine
Änderung in diesem Vertrag ist gültig, wenn
sie nicht schriftlich von Pioneer bestätigt
wurde. Wenn einzelne Bestimmungen dieses
Vertrages für ungültig oder unanwendbar erklärt werden, bleiben die übrigen Bestimmungen des Vertrages weiterhin gültig. Dieser
Vertrag beruht auf und unterliegt dem Recht
Japans. Alle Streitigkeiten, Auseinandersetzungen oder Meinungsverschiedenheiten, die
aus oder in Zusammenhang oder in Verbindung mit diesem Vertrag zwischen Ihnen und
Pioneer auftreten könnten, werden gemäß der
Handelsschiedsgerichtsordnung der Japan
Commercial Arbitration Association einem
Schiedsverfahren in Tokio, Japan, unterzogen.
Der Schiedsspruch ist endgültig und
verbindlich.
Kapitel
01
Deutsch
De
93
Page 94

Kapitel
02
Anmerkungen zu den Daten für die Karten-Datenbank
! Während der Produktentwicklung durchge-
führte Änderungen, die Straßen, Landstraßen/Autobahnen, Gelände, Bauten und
andere geographische Gegebenheiten betreffen, sind in dieser Datenbank möglicherweise noch nicht erfasst. Danach
vorgenommene Änderungen sind in dieser
Datenbank nicht berücksichtigt.
! Unabhängig von vorhandenen und neuen
Bauten können die Daten von den tatsächlichen Gegebenheiten abweichen.
! Einzelheiten zu den auf den Karten dieses
Produkts erfassten Gebieten finden Sie in
den Informationen auf unserer Website.
! Es ist strengstens untersagt, Teile oder die
gesamte Karte in irgendeiner Form ohne
Genehmigung des Inhabers der Urheberrechte zu reproduzieren und zu verwenden.
! Wenn die örtlichen Verkehrsvorschriften
oder die Straßenbedingungen in diesem
Gebiet abweichen, befolgen Sie immer die
örtlichen Vorschriften (wie Schilder, Zeichen, etc.) und passen Sie sich den Umständen (Baustellen, Wetter, etc.) an.
! Die Verkehrsvorschriften, die in dieser Kar-
tendatenbank verwendet werden, gelten
nur für normale Fahrzeuge. Beachten Sie,
dass Vorschriften für große Fahrzeuge, Motorräder und andere vom Standard abweichende Fahrzeuge nicht in der
Datenbank enthalten sind.
! © 1987-2013 HERE. Alle Rechte vorbehal-
ten.
! © 2013 INCREMENT P CORP. ALLE
RECHTE VORBEHALTEN.
94
De
Page 95

Vorsichtsmaßnahmen
Kapitel
03
! Lesen Sie vor dem Upgrade des Pro-
gramms Ihres Navigationssystems die Anleitung vollständig durch.
! Dieses Paket ist gerätespezifisch und kann
daher nicht auf mehreren Geräten installiert werden.
! Nach dem Upgrade der Version kann die
vorherige Version nicht wiederhergestellt
werden.
! Dieses Produkt kann nicht als SD-Speicher-
karte genutzt werden.
Mit dem Upgrade
aktualisierbare Modelle
Dieses Produkt kann bei den folgenden Modellen für ein Programm- und Daten bank-Upgrade verwendet werden:
! AVIC-F50BT
! AVIC-F950DAB
! AVIC-F950BT
! AVIC-F850BT
Durch dieses Upgrade
aktualisierte Punkte
Ein Upgrade des Navigationssystems mit diesem Produkt bewirkt die folgenden Änderungen.
! Aktualisierung der Kartendaten.
! Handelt es sich bei Ihrer Anwendung um
die Version 1.05 oder früher,
— dann kann jetzt auch ein iPhone 5 und
iPod touch (5. Generation) verwendet
werden.
— Sie können die Größe des Android-Vi-
deobilds an den Bildschirm anpassen.
= Einzelheiten zum Überprüfen der aktuel-
len Version finden Sie unter Überprüfen
der aktuellen Version auf Seite 98.
Die anderen Bedienungen und Funktionen
sind grundlegend dieselben wie beim Kauf der
Hardware. Verwenden Sie die im HardwarePaket enthaltene Bedienungsanleitung zur
grundlegenden Bezugnahme.
Anleitungsübersicht
Diese Anleitung erläutert, wie das Upgrade aktiviert wird. Sie gibt zudem einen Überblick
über Funktionsänderungen nach dem Upgrade.
p Die als Beispiele in dieser Anleitung ge-
zeigten Bildschirme basieren auf der mit
diesem Produkt upgegradeten Version des
AVIC-F50BT. Die Bildschirme können je
nach Modell anders aussehen.
Durch das Upgrade
gelöschte und initialisierte
Einstellungen
Die nachstehend aufgeführten Daten und Einstellungen werden gelöscht und auf die Standardeinstellungen zurückgesetzt. Die anderen
Einstellungen bleiben erhalten. Gewisse Funktionen sind hier jedoch nicht aufgeführt, da
ihre Einstellungen vom Benutzer auf einfache
Weise wiederhergestellt werden können. Dies
ist unter Anderem die letzte Cursorposition
auf dem Kartenbildschirm.
! Fahrtrouteneinstellung
— Aktuelle Fahrtroute
— Lernroutendaten
— Länderliste
— Kategoriensuchspeicher
— Stadtsuchspeicher
— Fahrtrouten-Suchergebnisse
— Logo-Markierungseinstellung
! AV-Optionen
— Letzter AV-Quellenbildschirm
— Wechsel zwischen MUSIK/VIDEO auf
dem iPod
Die im internen Speicher des Geräts abgelegten benutzerdefinierten Einstellungen können
verloren gehen, wenn bei der Softwareinstallation ein unerwarteter Fehler auftritt. Pioneer
haftet nicht für den Verlust oder die Nichtverfügbarkeit von benutzerdefinierten Daten.
Deutsch
De
95
Page 96

Kapitel
03
Vorsichtsmaßnahmen
In dieser Anleitung
verwendete Konventionen
Bitte nehmen Sie sich die Zeit, die folgenden
Informationen über die in dieser Anleitung verwendeten Konventionen zu lesen. Wenn Sie
diese Konventionen kennen, fällt es Ihnen
leichter, sich mit Ihrem neuen Gerät vertraut
zu machen.
! Die Tasten an Ihrem Navigationssystem
werden in GROSSBUCHSTABEN FETT
dargestellt:
z. B.
Drücken Sie die MODE-Taste oder die
HOME-Taste.
! Menüpunkte, Bildschirmtitel und funktio-
nelle Komponenten werden fett in doppelten Anführungszeichen “” dargestellt:
z. B.
Der “System”-Bildschirm erscheint.
! Auf dem Bildschirm verfügbare Sensorta-
sten werden fett in eckigen Klammern [ ]
dargestellt:
z. B.
Berühren Sie [Einstellungen bearbeiten].
! Zusätzliche Informationen, alternative Ver-
fahren und andere Hinweise werden im folgenden Format angeführt:
z. B.
p Wenn Ihre Heimadresse noch nicht ge-
speichert ist, geben Sie diese als erstes
ein.
! Beschreibungen von Funktionen anderer
Tasten auf demselben Bildschirm sind
durch ein vorgestelltes # gekennzeichnet:
z. B.
# Zum Löschen des Eintrags berühren Sie
[OK].
! Bezugsverweise sind wie folgt kenntlich ge-
macht:
z. B.
= Einzelheiten zur Bedienung siehe Über-
prüfen der Gerätenummer auf Seite
98.
“iPhone mit Lightning
Connector”
In dieser Anleitung werden iPhone 5 und iPod
touch (5. Generation) als “iPhone mit Lightning Connector” bezeichnet.
“microSD-Karte”
In dieser Anleitung werden microSDHC-Karten als “microSD-Karte” bezeichnet.
p Achten Sie darauf, dass die microSD-Karte
nicht in Kinderhände gerät, um ein versehentliches Verschlucken zu vermeiden.
p Bewahren Sie die microSD-Karte nicht an
Orten mit hohen Temperaturen oder direkter Sonneneinstrahlung auf.
p Schützen Sie die microSD-Karte vor Schlä-
gen und Stößen.
p Die microSD-Karte darf nicht mit Flüssig-
keit in Berührung kommen. Flüssigkeit
kann die microSD-Karte und die anderen
Produkte beschädigen.
p Vermeiden Sie unbedingt ein Berühren der
Kontakte an der microSD-Karte. Dies könnte einen Wackelkontakt verursachen. Wischen Sie Schmutz mit einem sauberen
und weichen Tuch von den Kontakten ab.
p Das microSDHC-Logo ist ein Warenzeichen
von SD-3C, LLC.
Im Störungsfall
! Wenn das Navigationssystem nicht ord-
nungsgemäß funktioniert, wenden Sie sich
an Ihren Händler oder die nächstgelegene
autorisierte Pioneer-Service-Station.
96
De
Page 97

Vorsichtsmaßnahmen
! Die Karte für die Upgrade-Zertifikate (UP-
GRADE CERTIFICATES) ist als Zertifizierung
für eine Reparatur (und ebenfalls eine Wiederherstellung) notwendig. Wenn das Navigationssystem repariert werden muss und
diese Karte nicht mitgeliefert wird, dann
können die aktualisierten Daten nicht wiederhergestellt werden.
Besuchen Sie unsere Webseite
Besuchen Sie uns auf der folgenden Seite:
http://www.pioneer.eu
! Registrieren Sie Ihr Produkt. Wir werden
die Einzelheiten Ihres Kaufs zu unseren
Akten legen, um Ihnen den Zugriff auf
diese Informationen für den Eintritt eines
Versicherungsfalles wie Verlust oder Diebstahl zu gewähren.
! Auf unserer Website finden Sie die jeweils
neuesten Informationen der PIONEER
CORPORATION.
Kapitel
03
Copyright
Die Namen von privaten Körperschaften,
Produkten und anderen Entitäten, die an
diesem Produkt angeführt werden, sind
die eingetragenen Warenzeichen oder Warenzeichen der jeweiligen Firmen.
= Weitere Informationen siehe Bedienungs-
anleitung Ihres Navigationssystems.
De
Deutsch
97
Page 98

Kapitel
04
Upgrade-Anweisungen
Prozess für das Upgrade
des Navigationssystems
1 Notieren Sie die notwendigen Informatio-
nen (Modellnummer (MODEL NUMBER),
Gerätenummer (DEVICE_NUMBER) und
Seriennummer (SERIAL NUMBER)) auf die
Upgrade-Zertifikate (UPGRADE CERTIFICATES).
= Einzelheiten siehe Überprüfen der Mo-
dellnummer auf Seite 98.
= Einzelheiten zur Bedienung siehe Über-
prüfen der Gerätenummer auf Seite 98.
= Einzelheiten siehe Überprüfen der Serie-
nnummer auf Seite 98.
j
2 Führen Sie das Upgrade des Softwarepro-
gramms Ihres Navigationssystems durch.
= Einzelheiten zur Bedienung siehe Up-
grade des Softwareprogramms und der
Karten-Datenbank auf Seite 99.
j
3 Prüfen Sie, ob das Upgrade erfolgreich in-
stalliert wurde.
= Einzelheiten zur Bedienung siehe Prü-
fung auf eine erfolgreiche Upgrade-Installation auf Seite 100.
Vorbereitung zum Upgrade
Überprüfen der Modellnummer
Die Modellnummer ist auf der Garantiekarte
oder der Vorderseite des Navigationssystems
aufgedruckt.
Überprüfen der Gerätenummer
1 Drücken Sie die HOME-Taste, um den
“Hauptmenü”-Bildschirm einzublenden.
2 Berühren Sie
Der Bildschirm “Informationen” erscheint.
3 Berühren Sie [System].
Die Gerätenummer “Gerätenr.” Ihres Navigati-
onssystems wird angezeigt.
Überprüfen der Seriennummer
Die Seriennummer ist auf der Garantiekarte
aufgedruckt. Die Seriennummer “SER.NO.”
befindet sich zudem aufgedruckt auf einem
Etikett an der Unterseite des Navigationssystems.
Überprüfen der aktuellen Version
1 Drücken Sie die HOME-Taste, um den
“Hauptmenü”-Bildschirm einzublenden.
.
98
De
2 Berühren Sie
Der Bildschirm “Informationen” erscheint.
3 Berühren und halten Sie die obere linke
Ecke gedrückt.
Der Bildschirm “Service-Info” erscheint.
.
Page 99

Upgrade-Anweisungen
4 Überprüfen Sie die unter “Application
Version” angezeigte
Versionsinformation.
Upgrade-Prozedur
Kapitel
04
! UNTER KEINEN UMSTÄNDEN dürfen Sie
den Motor des Fahrzeugs abstellen oder anderweitig die Stromversorgung des Navigationssystems unterbrechen, bevor die
Installation abgeschlossen ist. Ein Abstellen des Motors während des Upgrade-Prozesses würde eine Betriebsstörung oder
einen Ausfall des Navigationssystems zur
Folge haben.
! Im Verlauf des Upgrade-Prozesses sind
keine der Funktionen nutzbar.
Upgrade des Softwareprogramms
und der Karten-Datenbank
Dieser Abschnitt beschreibt die Upgrade-Prozedur für Ihr Navigationssystem.
p Der Upgrade-Vorgang dauert insgesamt
etwa 45 Minuten.
1 Parken Sie das Fahrzeug an einem sicheren Ort und ziehen Sie die Handbremse
an.
2 Führen Sie die Upgrade-microSD-Karte
in den SD-Karteneinschub ein.
Das Navigationssystem startet neu, wonach
die Installation beginnt.
p Wenn Sie ein SD-Speicherkarten-kompatib-
les Modell verwenden, dann legen Sie eine
microSD-Karte in den SD-Kartenadapter
ein.
p Verwenden Sie unbedingt eine SD-Spei-
cherkarte mit gelöstem Schreibschutzschalter.
Eine Meldung fordert zur Bestätigung auf,
dass die Aktualisierung gestartet werden soll.
3 Berühren Sie [Ja].
4 Warten Sie, bis der Upgrade-Prozess
abgeschlossen ist.
Deutsch
Nach dem Abschluss der Dateninstallation
wird der Passwortsperrvorgang gestartet.
Eine Meldung fordert zur Bestätigung auf,
dass die Aktualisierung gestartet werden soll.
5 Berühren Sie [OK].
6 Warten Sie, bis der Aktualisierungsprozess abgeschlossen ist.
Die Aktualisierung ist abgeschlossen.
De
99
Page 100

Kapitel
04
Upgrade-Anweisungen
Prüfung auf eine erfolgreiche
Upgrade-Installation
Rufen Sie den Bildschirm “Informationen”
auf, um die aktuelle Versionsnummer mit der
vorherigen zu vergleichen.
1 Drücken Sie die HOME-Taste, um den
“Hauptmenü”-Bildschirm einzublenden.
2 Berühren Sie
Der Bildschirm “Informationen” erscheint.
3 Berühren Sie [Versions-Nr.].
Die aktuelle Version wird angezeigt.
4 Achten Sie darauf, dass die aktuelle
Version 2.000000 beträgt.
5 Werfen Sie die Upgrade-microSD-Karte
aus.
.
100
De
 Loading...