


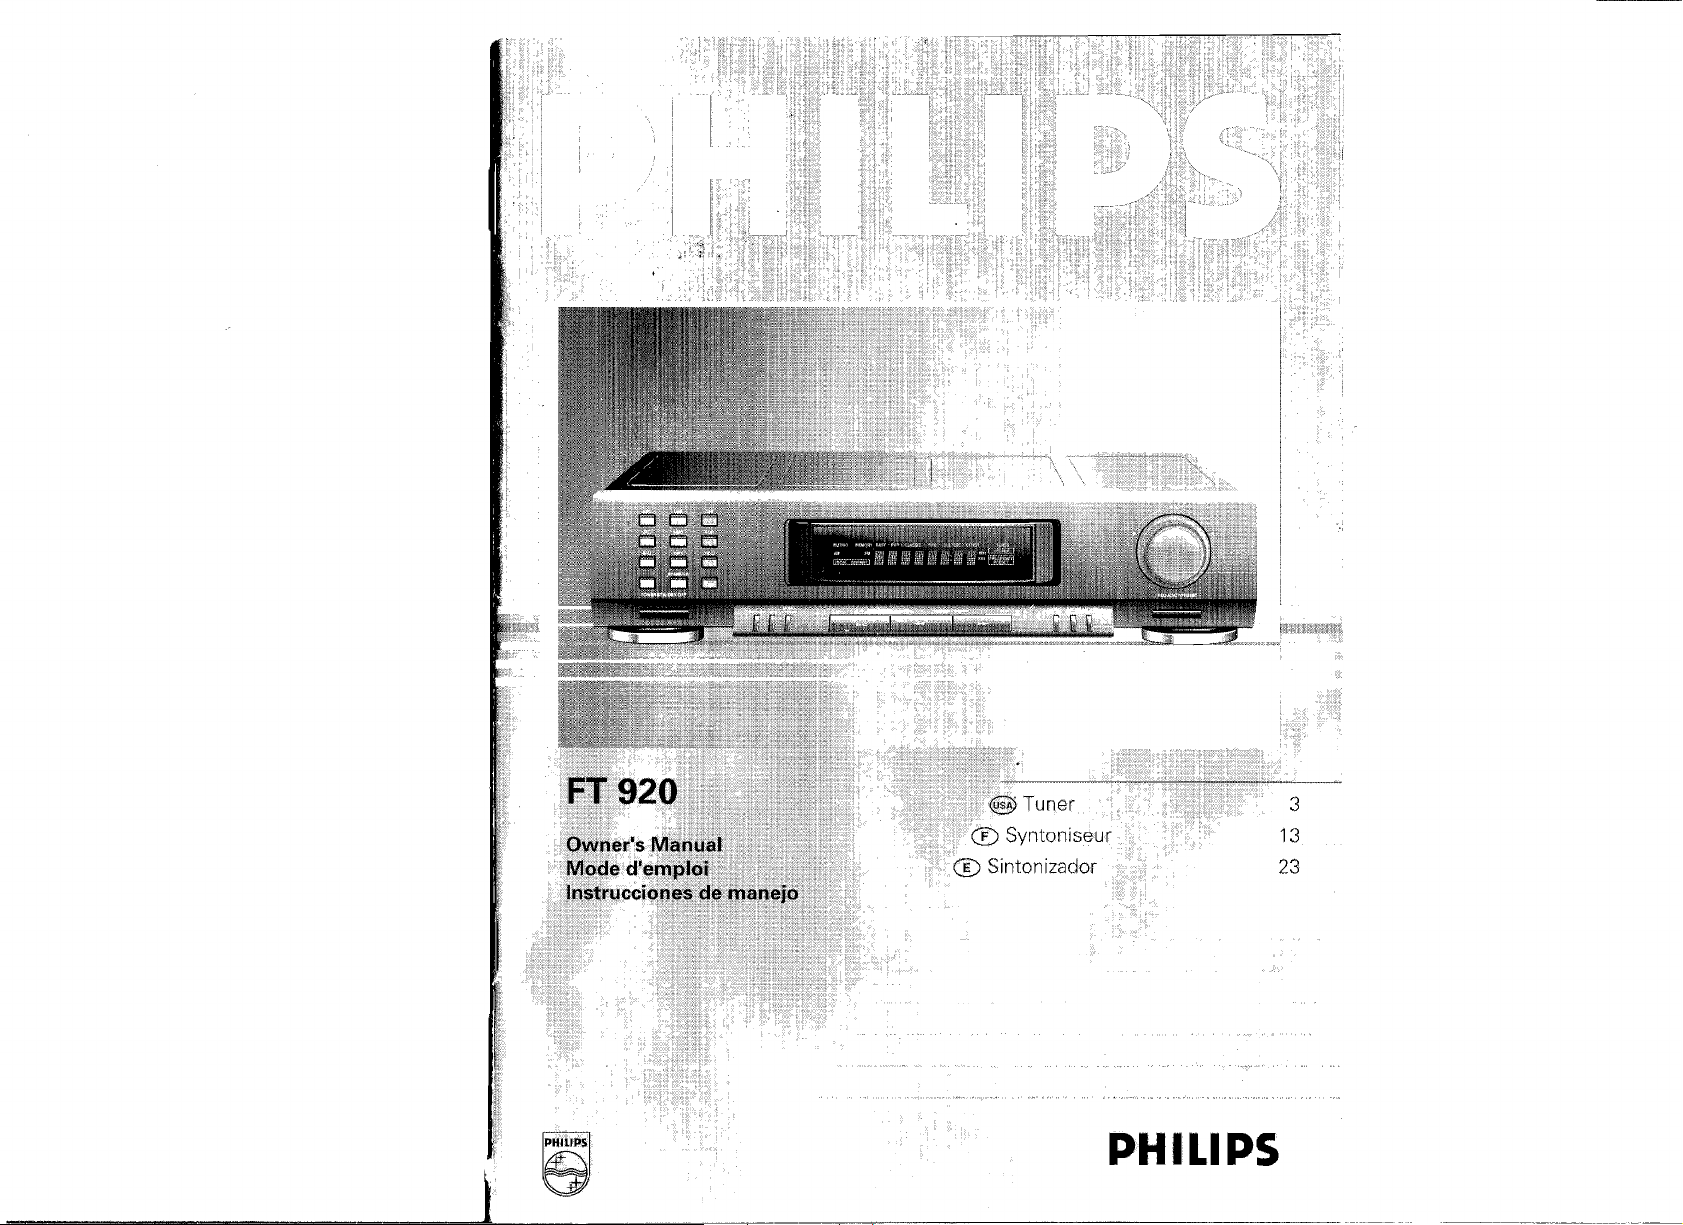
Philips FT-920 Owners manual
C
---i
(j)
::l
®.
r+
C
(j)
(j)"
::l
::l
0
(f)
-<
<-+
0
::l
~e
-..
0..
0
ill
::l
N"
::I:
"
-
r-
-
tv
W W W
"
'"
@ English
p.Hle
3
PHILIPS
CONTENTS
INTRODUCTION
SAFI':
INTRODUCTION.
INSTALLATION ......
OPI':RATION
ADVI\NCED
SYSTEM ASPECTS
GENEHAL
LIMITED
CD
TABLE
INTRODUCIION
CONSFII S SECURITI
IN
lli()DUCTION
ONCTIONNf'MENl
01'1
ASI'I
C;l:NI.HI\I I
GARflNTIE
® Espafiol
INDICE
....................................................................................................................................
lY
INSTRUCTIONS
OPTIONS
INFORMATION
WARRANTY
Fran~ais
DES
MATIERES
I)U
SYSn
rES.
LlMITEE
.
MI
II\TION.
'1
............................................................................................................
................................... .
......................................... ··· .....................................................................
pagina
.........................................................................................
pa~Je
..
4
13
page
23
pagina
Congratulations
Purchase ...
Dear
PI
Thank
you
You've
products
What's
advance
network
PHILIPS family.
ro
remember
Card.
Sincerely,
for
available today.
in
the
industry
more,
information
convenient
for
special
purchases.
this
is
our
start
taking advantage
to return
~'3tration
our
best
And
Welcome
PHILIPS Family!
Member:
confidence
one
of
the
best-bu;,Ir. best··backed
member,
total satisfaction.
warranties
your
purchase
on
access
products
rebates and
way
of
your
detach
today.
wishes!
you're
and
'IS
protected
and
to
and accessories,
discounts
saying
ot
these
PH
ILiPS
and mail us
I\nd
enjoy
On
Your
in PHILIPS.
reason
entitled
our
uncompromising
by one
outstanding
you
new
products
our
horne
your
'thanks'
for
your
your
New
To
The
we're
to
of
the
service
to
receive
from
future
joining
benefits,
Registration
Owner's
new
purchase
most
net-
the
just
RETURN YOUR OWNER'S
REGISTRATION CARD WITHIN
10
DAYS.
u.s.
MAIL
KNOW THESE SAFETY
SYMBOLS.
~
CAUTION:
TO
fiFDI)CE
Till:
COVfR!fl1l
Sf;IlVICiNG
which
fl!SK
BACK)
NO
TO
QUAliFIED
problems.
R(MOVE
INSWt:,
REfER
.Lt..
Ihis "boll of
materi,]1
cal
household, do not remove product
&.
features
enclosed lrterature to prevent operating
and
within your unit
shock. safety everyone
The
'exclamation
fO!'
&
OF
~ll:C
rHle
SJ!OCK.
USER"SERVICEABtF
SEflVICE
muy
cause
00
NOT
PARTS
PERSUNNEl
an
In
\
INTRODUCCION
INSf
RUCCIONES SOlll:1
INTRODUCCION
INSTALACON
MANEJO
OPCIONES
ASPECTOS [)[ [ ;;1:; [I
INf'ORMI\CI(JN
GI\RANIIA
AVAN/N)I\:;
(il
NI
lIM111\1
ll\.
Mil
1;/11
:;1
....
23
(
./b26
27-28
..
29·30
.25
c::=)'"'~
Donald
F.
President and Chiet
For
~
i Enter
Johnstone
~
..
Customer
below
rear
of
Retain
Serial
No
~~--~~~-
the
cabinet.
this
information
..
the
~
Fxeclltive
Serial No.
for
~'""
INSTRUCTIONS CAREFULLY.
Officer
which
future
is located Oil
reference.
the
~'\NSTbl'
L~VCTJONS
The
infom1iltion
full advantage of your product's many
flnd ensure
tion.
don't miss
instructions. safety tips and warranty informa-
tion
READ OPERATING
in
this manual
out
of
Read
cun
reliable
help you
3
SAFETY
INSTRUCTIONS
Read
before
operating equipment
INTRODUCTION
INSTALLATION
@
m
~
iii'
::r
2..
Retain
be
retained
3.
Heed
iny
in,tructions
4.
Follow
followed.
5.
Water
for
Example
as
per
Instructions
for
futuro
Warnings -
All
should
Instructions -
and
of
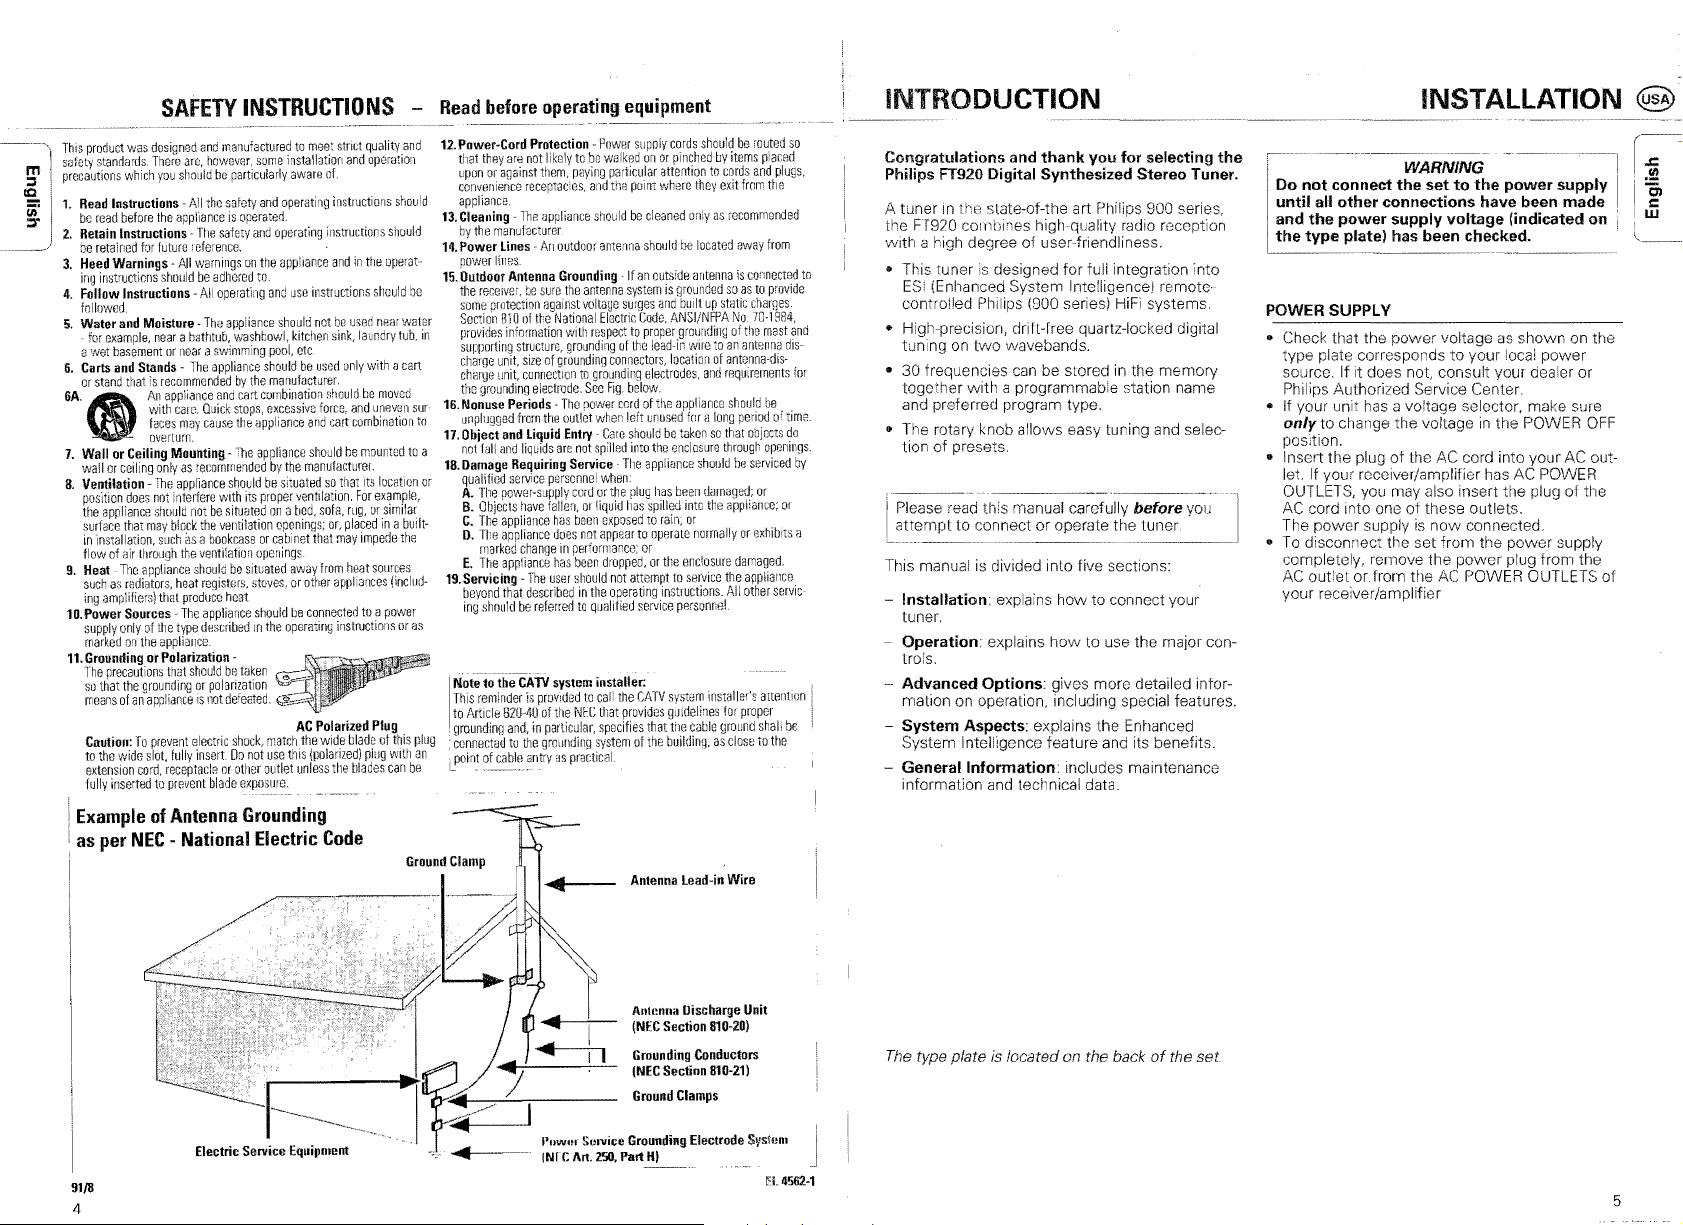
Antenna
NEC
- National Electric
the
safety
Inco
is
The
safety
toforence.
be
All
operating
and
operating
operated.
and
operating
un
the
appliance
to
and
use
Grounding
instructions
illstructions
and
in
instructions
Code
the
should
shouid
shuuld
bo
Ground
Clamp
Antenna
lead-in Wire
Congratulations and
thank
you
for
selecting
the
Philips FT920 Digital Synthesized Stereo Tuner.
A tuner
In
the FT920 combines high quality
with
a high degree of usedriendliness.
• tuner
ESi
control!ed Philips series) HiFi systems.
state-of-the art
is
(Enhanced Intelligence) remote·
designed for full integration into
•
can
be slored
a programmabie station name
with
preferred program type.
o The rotary knob allows easy tuning
of
presets.
tion
Please
read
attempt to connect or operate the tuner
This manual is divided into five sections:
this manual carefully before you
radiO
reception
kAd digital
in
the memory
and
selec-
Installation: explains how to connect your
tuner.
Operation: explains
trols.
-
Advanced
malion on operation, including special features.
-
System
System Intelligence and its benefits.
General
information
Options:
Aspects: the Enhanced
Information:
and
how
to
use the major con-
includes maintenance
technical data.
Do
until
and
the
not
connect
all
other
the
power
type
plate) has been checked.
WARfVlNG
the
set
to
connections
supply
voltage
the
power
have been
(indicated
POWER SUPPLY
o Check that the power voltage
type plate corresponds
sourco. If does not, consult your dealer or
Philips Authorized Service Center.
• If your unit
only
position.
• Insert the plug
let. If vour receiver/amplifier
• To disconnect set from the
completely, remove
AC
your receiver/amplifier
to
change the
outlel
has
a
ot
the
AC
may also insert the plug of the
one ot these outlets.
is
now
or
tile
from the
as
to
shown on
your local power
cord into
has
connected.
POWER
supply
made
on
AC
out-
of
.t:
.!!!
"'5l
c
w
91/8
4
Electric Service Eqllillment
tirounding Conductors
(NEe
tiround
I'uw",
Service Grounding Electrode
INt C An.
250.
Part
HI
Sectinn
Clamps
810-21)
SYS\Hm
~I.
4562.-1
The type plate is located on the back
of
the set.
5
@ INSTALLATION
OPERATION (US
AM
/J,
FM-ANTIENNA
I'he
fM·ANTENNA
Lhe
C
OUT
[)l
A
jack used for connection
CommunilV Cable Arltenna System
of 7b ohms. If nOlle
on
anTcnnai
11l(IV
usc
(reception could poor,
your locatron)
wim
c
with
01
these are
supplied
E V
for
After
FM
D E F
ESIBUS
connections, your
sectlorl
we
will
1 2
3 4
1413
POWER
2
3
4
memory
5 DispiaV
6
STANDBY
on
IOFF
all.
for
rotary
or preset up/down.
FREQUENCY
S PROGRAM TYPE
-
SELECT for selecting
-
PRESET for selectrng the
a specifiC program
preset
knob.
/PRESET
mode
jor
type
the
has
9
strong stations
strength Signal inputs (DISTANi)
HI
<l<l
SEARCH/CURSOR
autolTliltlC tUllinn moving
11
BAND
- for FM
12
MONO/STEREO-
reception.
13
SNO -for
entering a :station name
!>~
tor selecting mono/stereo
12
lor
direct
11
switching
tllning
the
knob
for sel8cting frequen'
the
fM
aerial
for selecting
the
cursor.
or
AM
waveband.
tuner
5
10
DISPLAY
shows:
-
Into
roceived.
(1or
FM
flashes
lights up
or
/PRESET
or
opened (with
station, or
EASY,
indicatos the program
TUNED
tuned
STEREO
sion
is
The
MHz
FREQUENCY
frequenoy
AM,
lOCAllDlSTANT
tim
fmquol1oy
POWER
o Press
on
the
tho .
5T
ANDBV
POW[F1
nower".
"
6
when
the
memory
to
store a prejerred
INFO,CULTURE,OTHERS
type
selected
a station
(for AM).
selected waveb,m
IS
found and
an
FM stereo transmis-
station indicated
of
in
the
ole
when
KHz
the
key)
when
luned
mode
- indicates selected FM
lhH
seleoted
station name,
!OFF
--------,--'''--,
STANDBY/OfT
illnnr
veset
IAlili
has been
or
stomd.
numb",r
..
_
J::
.!!!
Cl
r::
1.1.1
in
•.
'i4
F
AC
cord
DISPLAY
station name
6
- for selocting the
to
the
7
@
OPERATION
ADVANCED OPTIONS @
GENERAL
m
::::I
ca.
• Select desired waveband (AM
Cir
;:r
pressing band selector
waveband
• Tune a station
The correct procec
following
• While tuning,
eliminate
normal volume again.
When
•
noise, due
stereo.
• The FM input
ted the LOCAL/DISTANT
LOCAL or DISTANT lights
Select LOCAL
inputs.
chantor~
intE
station
is
STEREO
an
will disappear
will hear the
local stations.
DISTANT
to
in
found,
appears
FM-stereo station. A
a weak FM-stereo
to
suit cable
to
suit normal-strength signal
11
until the desired
the display.
or
selecl a
in
the
or
FM)
by
TUNING
AUTOMATIC
• Press
seconds. Then release the button. The tuner
strength has been found. The disolav shows
the tuned frequency and
• transmitter found is not the desired one,
simply repeat lhis
Weak stations are during automalic
tuning.
They
MANUAL
Manual tuning
frequency of the desired station (e.g.
your program gUide).
With
• Select
the FREQUENCY mode for the
This mode is selected when
lights
Tum FREQUENCY/PRESET rotary
clockwise to search for a higher frequency.
Turn the knob anti-clockwise
lower
While turning, the audio signal will muted.
With
• Press
L~
ITrn
LIII
j C
tuner selects this frequency and the
becomes audible.
• Entry
be
er than keys
frequency tuned
With
• Keep
• you
Jency Will be changed by one step each time
until the right frequency has been reached or
until reception
If the found
TUtJ[]
TUNING
~~
SEARCH H> 10 for more than 0.5
now
search untii a stalion
can
be
tuned
to
TUNING
is
useful when you alreadv know
the FREQUENCY IPRESET rotary knob 6
with
the FREQUENCY/PRESET kev 7
in
the display.
frequency_
the
digit keys 3
..
.J'
then
show
desired frequency with the
as
you entered the last
soon
of
the tuning will automatically
the
manually.
to
'FM--,-MHZ'
of
sufficient
krlOb
search for a
6
or
afler or if a key oth-
is
to
the
5 SEARCH 6 keys 10
~
SEARCH
now
appears
H>
the required frequency.
briefly press ~SEARCH H> the fre-
10 pressed down until you
is
on
the
The previous
again.
is
obtained.
enough the word
PRESET STATIONS
can
You
memory
Programming of preset stations
• Tune either or to the
• If the shows no preset number, the fre-
• Press
• Select
Tuning to preset stations
• Select the desired
•
• Select
• RAno"t this operation until the desired preset
store up
of the
favorite stations quickly and easily.
f!"equency
TUNIN(,)
word MEMORY starts
with
the digit keys (when selecting
3 (when
keys
the second digit key
Preset stations can a
FREQUENCY/PRESET rotarv knob
the
PRESEI mode for the
This mode is selected
in
the display.
Turn the rotary knob
counteri-cJockwise
stations
to
30
This enables you
can
numbers
to
be stored under
OIC
a
memory
now
receive
will
number.
with
lhe
be selecled
not
yet
has
key 4
location
show
been stored
lO
open the memory. The
second digit key
wilhin
the
selected station and
the tuned frequency and
Iso
be selected
when
6 clockwise
in
stations
in
IS
ascending order. Turn the
to
descending order.
- .
call
to
with
the
in
on
the display.
(1
up
to
1.5 seconds).
with
6.
to
call up the
up
the
preset
30)
the
STATION
You can
which will be
tuned
The name
symbols and and
maXimum
• Choose a preset number
• Press the SND key
The shows
The cursor
•
ly
the cursor
~
• SND
Note: If the SND
has
for
Changing a
• Press
again
Erasing a
• Press the SND
name starts
• You can
cursor
• I-'ress the SND key
ter has
NAME
enter names for preset stations
on
to
that
can
be combination letters,
of
characters.
the display
can
be
with
the digit
13.
shows
the
input.
Gy
pressing the digit/alphabet keys 3 repeated-
you
can
the desired name. To move
to
the next (or previous) position use
location for
SEARCH/CURSOR,.,. 10.
memory.
been selected,
two
seconds.
name
the
SND
name starts
new
to
store it
name
now
to
the desired position, after which you
the digit key
now
13 again
to
store the name
IS
key"
The first characler
to
name and press
erase a characler
been erased.
flash.
in
the memory.
The first character
and no
the
by
when
you are
of
In
show
of
SND key
of
moving the
.J:
.!!!
'Cl
c
w
a
3.
the
p(~I[~~1
the
the
8
9
<@)
ADVANCED OPTIONS
SYSTEM ASPECTS
SYSTEM ASPECTS GENERAL INFORMATION
---"----
<@)
PROGRAM TYPE
You
can 6 preferred program types
memory
EASY,
Storing program types
• Select a station with the digit keys
• Pross the 4 to open the memor:
•
Tuning
has been stored
• Select
of
POP,
Press the
type
in
the memory.
to
with
the tuner:
CLASSIC, INFO,
until the desired program type lights
presets under which a program
PROGRAM
again
CULTURE:,
TYPE
SELECT
to
store the program
TYPE
in
OTHERS.
key
SELECT key
8 the desired program
You
will
now
this program type been
lowest preset number.
If
flO is'found with the selected
seconds, which the next program
•
St""CH1";
receive
P:~'[';
will appear
will
be
selected.
with the same program type can
station
on
the display
in
ascending order by
PROGRAM
TYPE
the
3.
type
be
PRI:
ENHANCED SYSTEM INTELLIGENCE IE.S'!.}
the tuner is connected via the
sockets to the
tern (e.g. the Philips 900 series), the luner
be
operated
tem.
addition,
then accessible.
AUTOMATIC
the AUTO
receiver/amplifier
matically be selected
digit,
BAND.
or
AUTOMATIC
AUTO SELECT function
receiver/amplifier
matically stop playing
in
the system
STANDBY
• Switching your tuner
via
the system remote control.
• First select tuner
then briefly the standby
The tuner be switched to
• If the standby key is pressed for more
than
be
All
light indicators will
selecting the TUNER source
•
receiver/amplifier or
trol, the tuner will
• The tuner will also be activated
when you turn the FREOUENCY/PRI:SET rotary
knob.
I:SI
BUS
via
the rernote control of
the functions mentioned below
SOURCE SELECTION
SELECT
....
SEARCH
function on the
is
activated, the tuner will auto-
as
PROGRAM
STOP
is
soon
TYPE
1>1>
is
activated, the tuner will auto-
as
selected.
soon
to
on
the remote control
1 second whole system will
to
standby.
of the standby indicator on the
the
when a
cancelled.
the BAND,
PRESET),
or
be
on
be
or....
ESI
BUS
of
a IliFI sys
can
the
sys-
as
or when you
rotary knob.
on
the
as
another source
standby
switched off with the
is switched to
is
active, the
the remote con-
again.
can
on
be
the
1>1>
the
or
PRE-
and
recol·a.
keys, or
are
SCAN
o
By
pressing the
contro'
The shows S[!-ll',t,
The
nlng tunctlon at the pl'eset station you wish to
hear.
• The function stops automatically when
all
Note: stations
tion will not stop
function;
PRESET ITRACK - next 01' previous preset sta-
.... trequency search down;
-
1>1>
- frequency search up;
- MODE for selection;
--
SCAN for preset stations;
STANDBY selectinq standby mode;
is
SCAN
carl
now
oseconds
SCAN
tuner functions
correct
BUS
keys for stations or
data when using
key Oil the system remote
scan
all
stored preset stations.
scan
all
stored preset sta-
the
current
preset
with
of
the program
again you stop the scan water,
been scanned.
are
too weak, the scanning func-
on
these presets.
car!
series) svstem remote control
ESI
connections
be
are
You
each
operated
tuning
MAINTENANCE
can
occur,
apparatus
expose the equipment
rain.
• A chamois leather clolh slightly moistened with
• Do not use cleaning containing alcohol,
is
sufficient
spirits, ammonia or
TECHNICAL SPECIFICATIONS
(SuLlject to modification)
•
Wave range FM:.
jar
to
humidity or
cleaning the tuner.
. .... ",,87.5
-108
•
•
Adjacent Channel
• Total harmonic distortion
• Frequency response:,
•
SIN
ratio: mono/stereo
• Channel separation:
•
IF
suppression
• Image rejection:
• Wave range
• Sensitivity
• Dimensions
17'x
4
1/S'x
approx.
C~,I~A+;,,;h
..
..
AM
26 dB SIN:
(w
h x
11
(435 x 106 x 300
30
d):
15,000
522 1,611
Ibs (3.5
dB (300
..... 0.3
Hl
74/70 dB
dB at
.
..
1.0
min)
kg)
approx.
'Yo
-2dB
1
kHz
dB
75
dB
kHz
IllV/rn
o
11
 Loading...