


Camera Mode
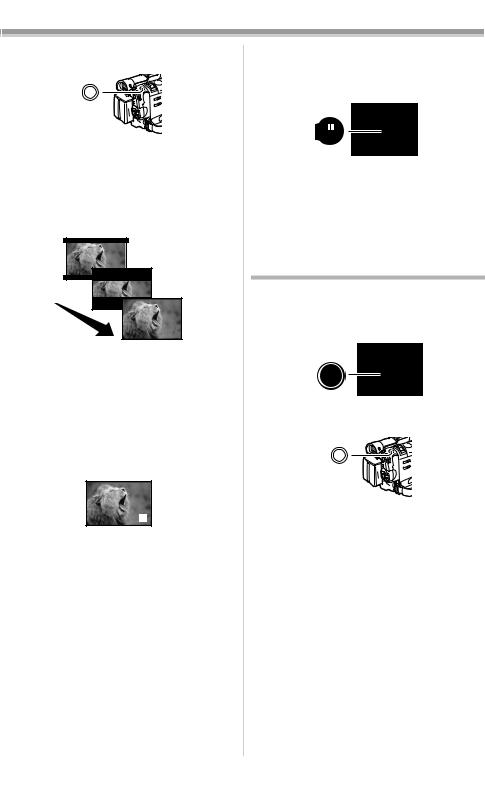
≥When the [SEARCHj] Button is pressed, images are played back in the reverse direction.
≥When the [SEARCHi] Button is pressed, images are played back in the forward direction.
ª To Finish the Recording
Set the [OFF/ON/MODE] Switch (49) to [OFF].
≥For other notes concerning this item, see -58-.
ª To Add a Sound while Recording
With the supplied Free Style Remote Controller with Mic connected to the [REMOTE] Socket (30), you can add a narration while recording is in progress.
While the [TALK] Button (89) is pressed, the [  ] Indication is displayed and the sound is recorded from [MIC] (85).
(85) 

REC
(89) 

≥While the [TALK] Button is pressed, the built-in microphone does not operate.
≥We recommend to keep the distance of approximately 10 cm between the [MIC] (85) and the mouth when recording.
ª Recording Yourself
By opening the LCD Monitor and rotating it frontward (to the lens side), you can let the subject in front of the Movie Camera monitor the shot while recording is in progress.
≥When the LCD Monitor is opened, the Viewfinder is disabled automatically. However, when the LCD Monitor is rotated frontward, the image is also shown in the Viewfinder.
≥If you prefer to have the image on the LCD Monitor to look like an image in a mirror, set [SELF REC] on the [OTHER FUNCTIONS1] Sub-Menu to [MIRROR]. Images are recorded normally and no left and right reversal occurs.
≥If [MIRROR] is used during self-recording, only
the basic indications, such as the Recording
Indication [ ] (Red) or [¥], Recording Pause Indication [
 ] (Cyan) or [¥;] and Remaining Battery Power Indication [x], are displayed.
≥If a general Warning/Alarm Indication [°] appears, return the LCD Monitor to the original position in order to check the specific content of the Warning/Alarm Indication.
Quick Start
By pressing the [QUICK START] Button (26), and the Movie Camera will be ready for recording in approximately 1.7 seconds after the Movie Camera is turned on.
1Press the [QUICK START] Button (26).
≥The Quick Start Recording Lamp (27) lights up.
QUICK
(26) START
(27)
2 Set the [OFF/ON/MODE] Switch (49) to
[OFF].
≥The Quick Start Recording Lamp remains lit.
FF |
ON M |
O |
O |
|
DE |
(49)
3 Set the [OFF/ON/MODE] Switch (49) to [ON].
≥The Movie Camera will be ready for recording in approximately 1.7 seconds.
To Cancel the Quick Start
Keep the [QUICK START] Button pressed for approximately 2 seconds and make sure the Quick Start Recording Lamp is not lit.
≥For other notes concerning this item, see -58-.
Photoshot
This Movie Camera can take approximately 7 seconds still pictures containing sound.
1Set the [TAPE/CARD/CARD MODE] Selector (35) to [TAPE].
TAPE CARD CARD
MODE
(35)
-21-
Camera Mode
2Press the [PHOTO SHOT] Button (25) in the
Recording Pause Mode.
PHOTO
SHOT
(25)
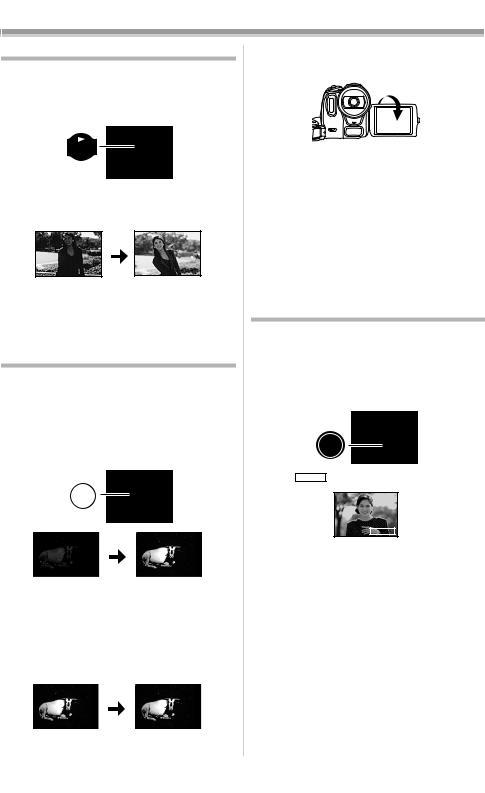
≥The Movie Camera records a still picture for about 7 seconds and then switches back to the Recording Pause Mode.
≥If you set [SHTR EFFECT] on the
[OTHER FUNCTIONS1] Sub-Menu to [ON], you can add an image and a sound like releasing the shutter.
PHOTO
PHOTO
PHOTO
ª Progressive Photoshot
With the Progressive Photoshot Function, you can record still pictures with higher resolution than with the normal Photoshot Function.
≥When [PROGRESSIVE] on the
[CAMERA SETUP] Sub-Menu is set to [ON] or [AUTO], the [æ] Indication is displayed. When the [æ] Indication is displayed, press the [PHOTO SHOT] Button in the Recording Pause Mode.
PHOTO
≥This function may not work with some function setups.
ª Continuous Photoshot
If you set [SHTR EFFECT] on the
[OTHER FUNCTIONS1] Sub-Menu to [ON] and keep the [PHOTO SHOT] Button pressed, the Movie Camera will continuously record still pictures in approximately 0.7 seconds intervals until the button is released. (However, this does not operate when using Progressive Photoshot.)
≥The screen blinks and, at the same time, a shutter clicking sound is recorded.
ª Digital Still Picture
When the [STILL] Button (14) is pressed, images become still pictures. When the button is pressed again, the Digital Still Picture Mode is cancelled.
(14)
STILL
≥We recommend that you press the [STILL] Button first at the position where you wish to record the picture so as to enter the Digital Still Picture Mode and then press the
[PHOTO SHOT] Button.
≥For other notes concerning this item, see -58-.
Self-timer Recording
When you set the self-timer, the still pictures are automatically taken after 10 seconds, on the Tape and the Card.
1 Press the [SELF TIMER] Button (16).
(16)
SELF
TIMER
≥The [ ] Indication appears.
2 Press the [PHOTO SHOT] Button (25).
PHOTO
SHOT
(25)
≥The Recording Lamp (41) and the [ ] Indication flash and the Photoshot is activated after 10 seconds.
≥You can also use the Card Continuous Photoshot. (-43-)
≥For other notes concerning this item, see -59-.
-22-

Camera Mode
Zoom In/Out Functions
It gives special effects to the picture by recording objects close by or with wide-angle shot.
1For wide-angle shots (zoom out): Push the [W/T] Lever (24) towards [W].
For close-ups (zoom in):
Push the [W/T] Lever towards [T].
W T
(24)
≥Zoom Magnification Indication is displayed for a few seconds.
1tW 
 T
T
5tW |
T |
10tW
 T
T
ª To Take Close-up Shots of Small
Subjects
(Macro Close-up Function)
When the zoom magnification is 1k, the Movie Camera can focus on a subject that is as close as approximately 2 cm from the Lens. With this, small subjects like insects can be recorded.
ª To Use the Tele-Macro Function
With the zoom magnification of 10k, the Movie Camera can bring the subject into focus as close as approximately 40 cm from the Lens. Focusing only on the subject and bringing the background off the focus make the picture more impressive.
1Press the [TELE MACRO] Button (17).
(17)
TELE
MACRO
≥The zoom magnification is fixed to 10k and the focusing onto the subject becomes available up to approximately 40 cm close.
≥The [ T.MACRO ] Indication appears.
T.MACRO
2Press the Recording Start/Stop Button (48).
(48)
To Cancel the Tele-Macro Function
Press the [TELE MACRO] Button.
ª To Use the Zoom Microphone
Function
Along with the zooming operation, the microphone’s directional angle and sensitivity are varied for recording sounds.
≥Set [CAMERA FUNCTIONS] >> [RECORDING SETUP] >> [ZOOM MIC] >> [ON]. (The [Z.MIC] Indication is displayed.)
Z.MIC
≥For other notes concerning this item, see -59-.
Digital Zoom Function
This function is useful when you want to record close-up shots of subjects located beyond a normal zoom range of 1k to 10k magnification. With the Digital Zoom Function, you can select a magnification of 20k or even to 500k.
1Set [CAMERA FUNCTIONS] >>
[CAMERA SETUP] >> [D.ZOOM] >> [20k] or [500k].
(46)(28)
WB/SHUTTER/
IRIS/VOL/JOG
PUSH
MENU
≥20k: Digital zooming to 20k ≥500k: Digital zooming to 500k
20tW
 T
T
D.ZOOM
2Push the [W/T] Lever (24) towards [W] or towards [T] to zoom in or out.
W T
(24)
-23-

Camera Mode
To Cancel the Digital Zoom Function
Set [CAMERA FUNCTIONS] >>
[CAMERA SETUP] >> [D.ZOOM] >> [OFF].
≥For other notes concerning this item, see -59-.
Image Stabilizer Function
If the Movie Camera might be shaken while recording, the camera shake in the image can be corrected.
≥If the Movie Camera shakes too much, this function may not be able to stabilize images.
1Set [CAMERA FUNCTIONS] >> [CAMERA SETUP] >> [SIS] >> [ON].
(46)(28)
WB/SHUTTER/
IRIS/VOL/JOG
PUSH
MENU
≥The [[] Indication appears.
2Press the Recording Start/Stop Button (48) or [PHOTO SHOT] Button (25) to start recording.
(25) PHOTOSHOT
(48)
To Cancel Image Stabilizer
Set [CAMERA FUNCTIONS] >> [CAMERA SETUP] >> [SIS] >> [OFF].
≥For other notes concerning this item, see -59-.
Fade In/Out Functions
Fade In
Fade In brings out images and sounds gradually from a black screen at the beginning of a scene.
1Keep pressing the [FADE] Button (13) during the Recording Pause Mode.
(13)
FADE
≥The image fades out gradually.
2When the image is completely gone, press the Recording Start/Stop Button (48) to start recording.
(48)
3Release the [FADE] Button (13) about
3 seconds after starting recording.
≥The image reappears gradually.
Fade Out
Fade Out causes images and sounds to disappear gradually, leaving a black screen at the end of a scene.
1Keep pressing the [FADE] Button (13) while recording.
(13)
FADE
≥The image fades out gradually.
2When the image is completely gone, press the Recording Start/Stop Button (48) to stop recording.
(48)
3Release the [FADE] Button (13).
≥The still picture cannot fade in or fade out.
-24-
Camera Mode
Backlight Compensation Function
This prevents a recording subject from being recorded darker in backlight. (Backlight is the light that shines from behind a recording subject.)
1 Press the [BACK LIGHT] Button (9).
(9)
BACK
LIGHT
≥The [ª] Indication flashes and then is displayed.
≥The entire screen becomes brighter.
ª
To Resume Normal Recording
Press the [BACK LIGHT] Button.
≥For other notes concerning this item, see -59-.
Night View Functions
Colour Night View Function
This function allows you to record colour images brightly in a dark place without lighting the Video Flash.
1Press the [COLOUR NIGHT VIEW] Button (12) until the [C.NIGHT VIEW] Indication appears.
(12)
COLOUR
NIGHT
VIEW
C.NIGHT
VIEW
0 Lux Night View Function
Using the LCD Monitor light, a dark scene of almost 0 lux can be recorded.
1Press the [COLOUR NIGHT VIEW] Button (12) until the [0LUX NIGHT VIEW] Indication appears.
C.NIGHT |
0LUX |
VIEW |
NIGHT VIEW |
≥The [REVERSE THE LCD MONITOR]
Indication appears.
2Rotate the LCD Monitor frontward (to the lens side).
≥The screen becomes white and the Viewfinder turns on.
≥The available range of the LCD Monitor light is within approximately 1 metre.
To Cancel the Night View Functions
Press the [COLOUR NIGHT VIEW] Button repeatedly until neither the [C.NIGHT VIEW] Indication nor the [0LUX NIGHT VIEW] Indication appears.
≥For other notes concerning this item, see -59-.
Soft Skin Function
This enables you to record skin colours in a softer tone. In order to get the best result, avoid background colours similar to the skin colour of the subject. Otherwise, this may result in a softer background and also lacking detail.
1 Press the [SOFT SKIN] Button (18).
(18)
SOFT
SKIN
≥The [ SOFT SKIN ] Indication appears.
SOFT SKIN
≥To obtain the best effect, we recommend to take the bust shot, so that the upper part from the breast of the subject can be framed in the screen.
To Cancel the Soft Skin Function
Press the [SOFT SKIN] Button.
-25-
Camera Mode
Wind Noise Reduction Function
This function reduces the sound of a wind hitting the microphone when recording.
1Set [CAMERA FUNCTIONS] >> [RECORDING SETUP] >> [WIND CUT] >> [ON].
(46)(28)
WB/SHUTTER/
IRIS/VOL/JOG
PUSH
MENU
≥The [WIND CUT] Indication appears.
WIND CUT
To Cancel the Wind Noise Reduction Function
Set [CAMERA FUNCTIONS] >> [RECORDING SETUP] >> [WIND CUT] >> [OFF].
≥For other notes concerning this item, see -60-.
Cinema Function
This function is for recording in a cinema-like screen.
1Set [CAMERA FUNCTIONS] >> [CAMERA SETUP] >> [CINEMA] >> [ON].
(46)(28)
WB/SHUTTER/
IRIS/VOL/JOG
PUSH
MENU
≥Black bars appear at the top and bottom of the screen.
CINEMA
To Cancel the Cinema Mode
Set [CAMERA FUNCTIONS] >>
[CAMERA SETUP] >> [CINEMA] >> [OFF].
≥For other notes concerning this item, see -60-.
Recording in Special Situations
(Programme AE)
You can select optimal automatic exposures under specific recording situations.
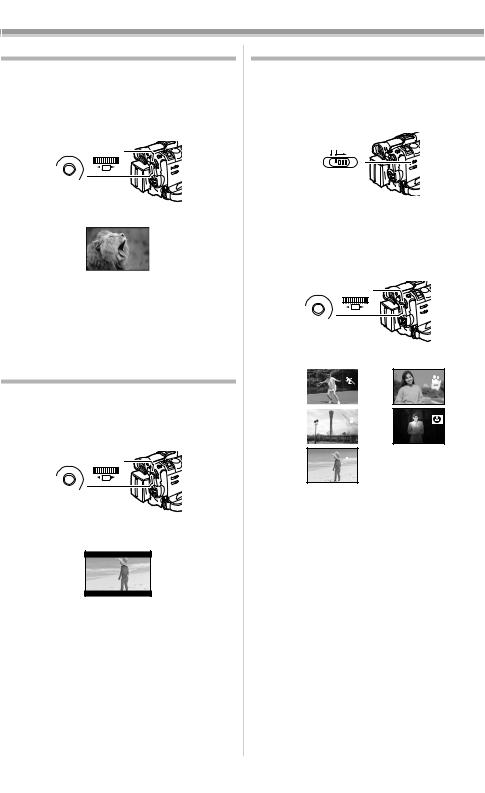
1Set the [AUTO/MANUAL/FOCUS] Switch (36) to [MANUAL].
AUTO MANUAL
FOCUS
(36)
≥The [MNL] Indication appears.
2Set [CAMERA FUNCTIONS] >>
[CAMERA SETUP] >> [PROG.AE] >> a desired mode ([5], [7], [4], [Ω] or [º]).
(46)(28)
WB/SHUTTER/
IRIS/VOL/JOG
PUSH
MENU
≥The Indication of the selected Mode appears.
1) |
|
|
2) |
3) |
|
|
4) |
|
|
||
|
|
||
|
|
|
|
5)

1)[5] Sports Mode
≥For recording scenes involving quick movements, such as sports scenes.
2)[7] Portrait Mode
≥For bringing up people clearly from the background.
3)[4] Low Light Mode
≥For recording a dark scene brighter.
4)[Ω] Spotlight Mode
≥For recording a subject under spotlight in a party, theatre, etc.
5)[º] Surf & Snow Mode
≥For recording in a glaring surrounding, such as skiing grounds, beaches, etc.
To Cancel the Programme AE Function
Set the [AUTO/MANUAL/FOCUS] Switch to [AUTO]. Or, set the [PROG.AE] on the [CAMERA SETUP] Sub-menu to [OFF].
≥For other notes concerning this item, see -60-.
-26-
 Loading...