


Operating Instructions
Инструкция по использованию Інструкція з експлуатації Пайдалану туралы нұсқаулар
Microwave/Grill Oven
Микроволновая печь с грилем Мікрохвильова піч з грилем Микротолқынды пеш/гриль пеші
Model No:NN-GM231W
NN-GT261W/M
NN-GT264M
Household Use Only
Только для домашнего использования Тільки для домашнього використання Тек үйде пайдалануға арналған
Before operating this oven, please read these instructions completely and keep for future reference.
Перед началом эксплуатации этой печи, пожалуйста, прочтите инструкцию полностью и сохраните ее для дальнейшего использования.
Перед використанням цієї печі, будь ласка, повністю прочитайте цю інструкцію та збережіть її для подальших довідок. Бұл пешті пайдаланбай тұрып осы нұсқауларды
толығымен оқып шығыңыз және болашақта анықтама алу үшін сақтаңыз.
|
|
|
|
|
|
|
|
|
|
|
|
|
|
|
|
|
|
NN-GT261WM_ZP.indb |
1 |
|
2014/06/13 |
17:57:35 |
|
|
|
|
|
|
|
||||||
|
|
|
|
|
|
|
|
|


 1 indd.leaflet_CIL_kaz_rus_GT264M&SM254M-NN
17:00:05 2014/07/23
ИНФОРМАЦИЯ О СЕРТИФИКАЦИИ ПРОДУКТА
МИКРОВОЛНОВАЯ ПЕЧЬ
модели NN-ST254M ZPE, NN-GT264M ZPE “Panasonic”
СЕРТИФИЦИРОВАНЫ ОС ТЕСТБЭТ 119334, Москва, Андреевская набережная, д. 2
Сертификат соответствия : |
№ TC RU C-JP.МЕ10.В.02186 |
|
|
|
|
||
|
|
|
|
Сертификат соответствия выдан : |
03.07.2014 |
|
|
Сертификат соответствия |
02.07.2019 |
|
|
|
|
||
действителен до : |
|
|
|
|
|
|
|
Производитель: Panasonic Corporation |
(Панасоник Корпорэйшн) |
|
|
|
|
||
Произведено на заводе : |
|
|
|
Guangdong Midea Kitchen Appliances Manufacturing Co., Ltd Гуангдонг Мидеа Китчен Эплаенсиз Мануфактуринг Ко., Лтд. No.6, Yong An Road, Beijiao, Shunde, Foshan, Guangdong, P.R. China № 6 Ёнг Эн Роуд, Бейжиао, Шунде, Фошан, Гуангдонг, Китай
Примечание :
Дату изготовления (год, месяц) Вы можете определить по номеру, расположенному на боковой стороне изделия.
Номер : |
Х Х xxx |
|
|||||
|
|||||||
|
|
|
|
|
|
серийный номер |
|
|
|
|
|
|
|
|
|
|
|
|
|
|
|
|
|
|
|
|
|
|
|
месяц: А -- Январь, В -- Февраль ... L -- Декабрь |
|
|
|
|
|
|
|
|
|
|
|
|
|
|
|
||
|
|
|
|
|
|
год (последняя цифра номера года ) -- 3 -- 2013 , 4 -- 2014 |
|
|
|
|
|
|
|
|
|
|
|
|
|
|
|
||
|
|
|
|
|
|
|
|
Импортёр
ООО «Панасоник Рус», РФ, 115191, г. Москва, ул. Большая Тульская, д. 11, 3 этаж.
тел. 8-800-200-21-00

 2 indd.leaflet_CIL_kaz_rus_GT264M&SM254M-NN
17:00:05 2014/07/23
ӨНІМДІ СЕРТИФИКАТТАУ ТУРАЛЫ АҚПАРАТ
МИКРОТОЛҚЫНДЫ ПЕШ
Үлгілер: NN-ST254M ZPE, NN-GT264M ZPE “Panasonic”
СЕРТИФИКАТТАЛҒАН ОС ТЕСТБЭТ 119334, Мәскеу, Андреевская набережная, 2 үй
Сәйкестік сертификаты: |
№ TC RU C-JP.МЕ10.В.02186 |
|
|
|
|
||
|
|
|
|
Сәйкестік сертификатының берілген күні: |
03.07.2014 |
|
|
|
|
|
|
Сәйкестік сертификатының жарамдылық мерзімі: |
02.07.2019 |
|
|
|
|
|
|
Өндіруші: Panasonic Corporation |
(Панасоник Корпорэйшн) |
|
|
Өндіруші филиалында өндірілді : |
|
|
|
Гуангдонг Мидеа Китчен Эплаенсиз Мануфактуринг Ко., Лтд. № 6 Ёнг Эн Роуд, Бейжиао, Шунде, Фошан, Гуангдонг, Қытай
Ескертпе :
Өндірілген күнін (жылы, айы) өнімнің бүйір жағында орналасқан нөмір арқылы анықтай аласыздар.
Номер : X Х ххх
 сериялық номірі
айы: А -- Қантар, В -- Ақпан ... L -- Желтоқсан жылы (жылдың соңғы саны) -- 3 -- 2013 , 4 -- 2014
Қазақстан Республикасы территориясындағы өнім сапасы бойынша наразылықтарды қабылдайтын уәкілетті ұйым: АҚ «Панасоник Маркетинг СНГ», Қазақстан, 050057, Алматы қ., Тимирязев көш. 42, 30-шы ғимарат
Panasonic ақпарат орталығы:
Тел. +7 (727) 298-09-09 - Алматы мен Орта Азиядан қонырау шалу үшін 8-8000-809-809 - Қазақстан бойынша стационарлы телефондар арқылы тегін
Организация, уполномоченная на принятие претензий по качеству продукции на территории Республики Казахстан: АО “Панасоник Маркетинг СНГ” Казахстан, 050057 г. Алматы, ул. Тимирязева 42, здание 30.
Информационный центр Panasonic:
‘+7 (727) 298-09-09 -Для звонков из Алматы и Центральной Азии. 8-8000-809-809 -Звонок по Казахстану со стационарных телефонов бесплатный
Импорттаушы «Панасоник Рус» ЖШҚ, РФ, 115191, Мәскеу қ.,
Большая Тульская к-сі, 11 үй, 3 қабат. Тел. 8-800-200-21-00

|
|
|
|
|
|
|
|
|
|
|
|
|
|
|
|
|
|
|
|
|
|
|
|
|
|
|
|
|
|
|
|
|
|
|
|
|
|
|
|
|
|
|
|
|
|
|
|
|
|
|
|
|
|
|
|
|
|
|
|
|
|
|
|
|
|
|
|
|
|
|
|
|
|
|
|
|
|
|
|
|
|
|
|
|
|
|
|
|
|
|
|
|
|
|
|
|
|
|
|
|
|
|
|
|
|
|
|
|
|
|
|
|
|
|
|
|
|
|
|
|
|
|
|
|
|
|
|
|
|
|
|
|
|
|
|
|
|
|
|
|
|
|
|
|
|
|
|
|
|
|
|
|
|
|
|
|
|
|
|
|
|
|
|
|
|
|
|
|
|
|
|
|
|
|
|
|
|
|
|
|
|
|
|
|
|
|
|
|
|
|
|
|
|
|
|
|
|
|
|
|
|
|
|
|
|
|
|
|
|
|
|
|
|
|
|
|
|
|
|
|
|
|
|
|
|
|
|
|
|
|
|
|
|
|
|
|
|
|
|
|
|
|
|
|
|
|
|
|
|
|
|
|
|
|
|
|
|
|
|
|
|
|
|
|
|
|
|
|
|
|
|
|
|
|
|
|
|
|
|
|
|
|
|
|
|
|
|
|
|
|
|
|
|
|
|
|
|
|
|
|
|
|
|
|
|
|
|
|
|
|
|
|
|
|
|
|
|
|
|
|
|
|
|
|
|
|
|
|
|
|
|
|
|
|
|
|
|
|
|
|
|
|
|
|
|
|
|
|
|
|
|
NN-GT261WM_ZP.indb |
2 |
|
|
|
|
|
|
|
|
2014/06/13 |
17:57:35 |
|
|
|
|
||||||||||||||||
|
|
|
|
||||||||||||||||||||||||||||
|
|
|
|
|
|
|
|
|
|
|
|
|
|
|
|
|
|
|
|
|
|
|
|
|
|
|
|
|
|
|
|
|
|
|
|
|
|
|
|
|
|
|
|
|
|
|
|
|
|
|
|
|
|
|
|
|
|
|
|
|
|
|
|
|
|
|
|
|
|
|
|
|
|
|
|
|
|
|
|
|
|
|
|
|
|
|
|
|
|
|
|
|
|
|
|
|
|
|
|
|
|
|
|
|
|
|
|
|
|
|
|
|
|
|
|
|
|
|
|
|
|
|
|
|
|
|
|
|
|
|
|
|
|
|
|
|
|
|
|
|
|
|
|
|
|
|
Contents |
|
|
|
|
|
|
|
|
|
|
|
|||
|
|
|
|
|
|
|
|
Installation and Connection |
2-3 |
|
|
|
|
|
|
|
|
|
|||||||
|
|
|
|
|
|
|
|
|
|
Safety Instructions |
4 |
|
|
|
|
|
|
|
|
|
|
||||
|
|
|
|
|
Important Information - Read Carefully |
5-6 |
|
|
|
|
|
|
|
|
|
||||||||||
|
|
|
|
|
|
|
|
|
|
Parts of your Oven |
7 |
|
|
|
|
|
|
|
|
|
|
||||
|
|
|
|
|
|
|
|
|
|
|
Control Panels |
8 |
|
|
|
|
|
|
|
|
|
|
|||
|
|
|
|
|
|
|
|
|
|
General Guidelines |
9-10 |
|
|
|
|
|
|
|
|
|
|||||
|
|
|
|
|
|
|
|
|
|
|
Containers to Use |
11-12 |
|
|
|
|
|
|
|
|
|
||||
|
|
|
|
|
|
Microwave Cooking and Defrosting |
13 |
|
|
|
|
|
|
|
|
|
|
||||||||
|
|
|
|
|
|
|
|
|
|
|
|
NN-GM231W |
|
|
|
|
|
|
|
|
|
|
|
||
|
|
|
|
Setting the Clock/Timer/Child Safety Lock |
14 |
|
|
|
|
|
|
|
|
|
|
||||||||||
|
|
|
|
|
|
|
|
|
NN-GT261W/M / NN-GT264M |
|
|
|
|
|
|
|
|
|
|
|
|||||
|
|
|
|
|
|
Microwave Cooking and Defrosting |
15 |
|
|
|
|
|
|
|
|
|
|
||||||||
|
|
|
|
|
|
|
|
|
NN-GT261W/M / NN-GT264M |
|
|
|
|
|
|
|
|
|
|
|
|||||
|
|
|
|
|
|
|
|
|
|
|
|
Grilling |
16 |
|
|
|
|
|
|
|
|
|
|
||
|
|
|
|
|
|
|
|
|
|
Combination Cooking |
17 |
|
|
|
|
|
|
|
|
|
|
||||
|
|
|
|
|
|
|
|
|
|
Auto Weight Defrost |
18 |
|
|
|
|
|
|
|
|
|
|
||||
|
|
|
|
|
|
|
|
|
NN-GT261W/M / NN-GT264M |
|
|
|
|
|
|
|
|
|
|
|
|||||
|
|
|
|
|
|
|
|
|
|
Defrosting Guidelines |
19 |
|
|
|
|
|
|
|
|
|
|
||||
|
|
|
|
|
Auto Weight Cook/Reheat Programs |
20 |
|
|
|
|
|
|
|
|
|
|
|||||||||
|
|
|
|
|
|
|
|
|
NN-GT261W/M / NN-GT264M |
|
|
|
|
|
|
|
|
|
|
|
|||||
|
|
|
|
|
|
|
|
|
|
|
Guidelines for Use |
20 |
|
|
|
|
|
|
|
|
|
|
|||
|
|
|
|
|
Auto Weight Cook/Reheat Programs |
21 |
|
|
|
|
|
|
|
|
|
|
|||||||||
|
|
|
|
|
|
Cooking and Reheating Guidelines |
22 |
|
|
|
|
|
|
|
|
|
|
||||||||
|
|
|
|
|
|
|
|
Before Requesting Service |
23 |
|
|
|
|
|
|
|
|
|
|
||||||
|
|
|
|
|
|
|
Care of your Microwave Oven |
24 |
|
|
|
|
|
|
|
|
|
|
|||||||
|
|
|
|
|
|
|
|
|
Technical Specifications |
24 |
|
|
|
|
|
|
|
|
|
|
|||||
En-1
English
|
|
|
|
|
|
|
|
|
|
|
|
|
|
|
|
|
|
NN-GT261WM_ZP.indb |
1 |
|
2014/06/13 |
17:57:35 |
|
|
|
|
|
|
|
||||||
|
|
|
|
|
|
|
|
|
Installation and Connection
Examine your microwave oven
Unpack the oven, remove all packing material, and examine the oven for any damage such as dents, broken door latches or cracks in the door. If you find any damage, notify your dealer immediately. Do not install a damaged microwave oven.
Earthing instructions
IMPORTANT: THIS UNIT HAS TO BE PROPERLY EARTHED FOR PERSONAL SAFETY.
If your AC outlet is not earthed, it is the personal responsibility of the customer to have it replaced with a properly earthed wall socket.
Operation voltage
The voltage has to be the same as specified on the label on the oven. If a higher voltage than specified is used, it may cause a fire or other damages.
Placement of the Oven
This appliance is intended to be used in household and similar applications such as:
•staff kitchen areas in shops, offices and other working environments;
•farm houses;
•by clients in hotels, motels and other residential environments;
•bed and breakfast type environments.
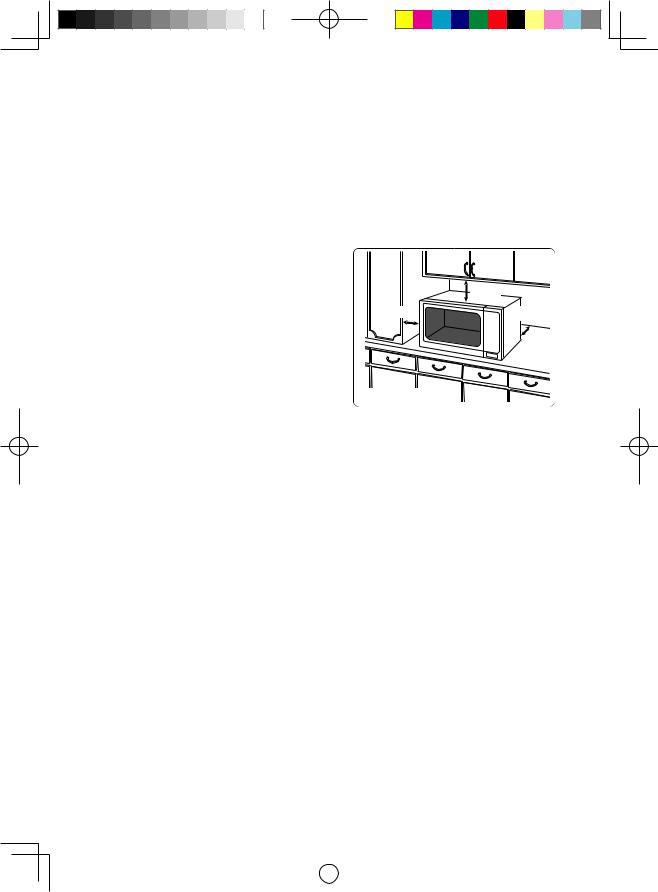
1.Place the oven on a flat and stable surface, more than 85 cm above the floor.
The appliance is freestanding type and shall not be placed in a cabinet.
2.When this oven is installed, it should be easy to isolate the appliance from the electricity supply by pulling out the plug or operating a circuit breaker.
3.For proper operation, ensure a sufficient air circulation for the oven.
Counter-top use:
a.Allow 15 cm of space on the top of the oven, 10 cm at the back, 5 cm on one side, and the other side must be opened more than 40 cm.
b.If one side of the oven is placed flush to a wall, the other side or top must not be blocked.
|
15 cm |
5 cm |
OPEN |
|
|
|
10 cm |
Counter-top |
|
4.Do not place this oven near an electric or gas cooker range.
5.The feet should not be removed.
6.This oven is only for household usage. Do not use outdoors.
7.Avoid using the microwave oven in high humidity.
8.The power cord should not touch the outside of the oven. Keep the cord away from hot surfaces. Do not let the cord hang over the edge of a table or work top. Do not immerse the cord, plug or oven in water.
9.Do not block the air vents on the top and back of the oven. If these openings are blocked during operation the oven may overheat. In this case the oven is protected by a thermal safety device and resumes operation only after cooling down.
10.This appliance is not intended to be operated by means of an external timer or separate remote-control system.
En-2
|
|
|
|
|
|
|
|
|
|
|
|
|
|
|
|
|
|
NN-GT261WM_ZP.indb |
2 |
|
2014/06/13 |
17:57:35 |
|
|
|
|
|
|
|
||||||
|
|
|
|
|
|
|
|
|
Installation and Connection
WARNING
Important Safety Instructions
1.The door seals and seal areas should be cleaned with a damp cloth.
The appliance should be inspected for damage to the door seals and door seal areas and if these areas are damaged the appliance should not be operated until it has been repaired by a service technician trained by the manufacturer.
2.Do not attempt to tamper with or make any adjustments or repairs to the door, control panel housing, safety interlock switches or any other part of the oven. Do not remove the outer panel from the oven which gives protection against exposure to microwave energy. Repairs should only be done by a qualified service person.
3.Do not operate this appliance if it has a damaged CORD OR PLUG, if it is not working properly, or if it has been damaged or dropped. It is dangerous for anyone other than a service technician trained by the manufacturer to perform repair service.
4.If the supply cord is damaged, it must be replaced by the manufacturer, its service agent or a similarly qualified person in order to avoid hazard.
5.Liquids and other foods must not be heated in sealed containers since they are liable to explode.
6.This appliance is not intended for use by persons (including children) with reduced physical, sensory or mental capabilities, or lack of experience and knowledge unless they have been given supervision or instruction concerning use of the appliance by a person responsible for their safety.
Children should be supervised to ensure that they do not play with the appliance.
7.WHEN YOUR OVEN REQUIRES SERVICING, call your local Panasonic engineer (Customer Support). It is hazardous for anyone other than a competent person to carry out any service or repair operation which involves the removal of a cover which gives protection against exposure to microwave energy.
Attention!
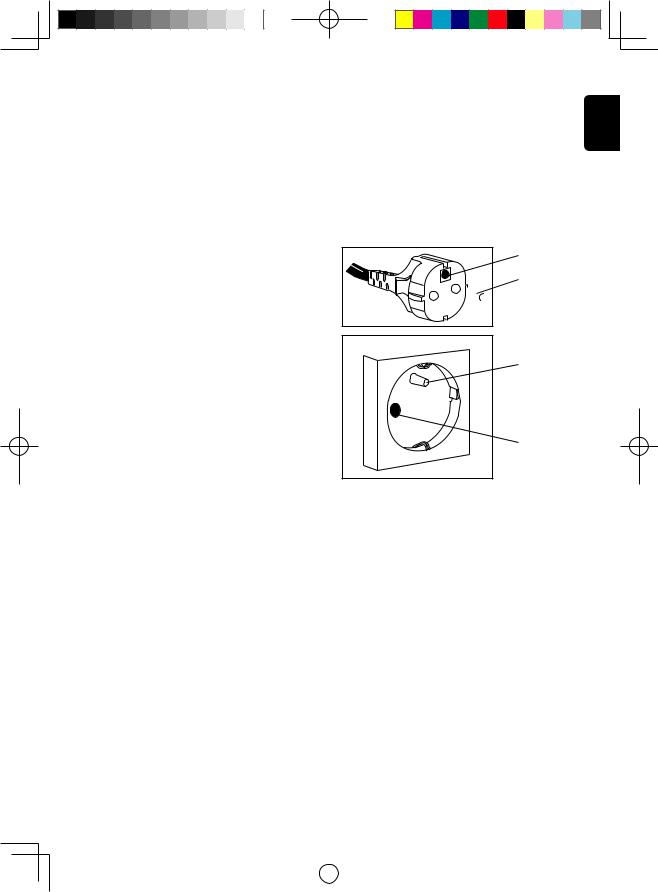
This product is designed to plug to AC power outlet with (the third) safety earth wire. For your safety, do not ignore that safety earth wire, because in such case this product does not provide with conditions of electric shock defense, fore-saw by product’s design. You have to ask qualified specialist to install required outlet as it is shown on the picture.
earth
neutral  phase
phase
 earth
earth

 phase
phase
neutral  earth
earth
English
En-3
|
|
|
|
|
|
|
|
|
|
|
|
|
|
|
|
|
|
NN-GT261WM_ZP.indb |
3 |
|
2014/06/13 |
17:57:36 |
|
|
|
|
|
|
|
||||||
|
|
|
|
|
|
|
|
|

Safety Instructions
Use of your Oven
1.The microwave oven is intended for heating food and beverages. Drying of food or clothing and heating of warming pads, slippers, sponges, damp cloth and similar may lead to risk of injury, ignition or fire.
2.Before use, check that utensils/containers are suitable for use in microwave ovens.
3.Do not attempt to use this microwave oven to dry newspaper, clothing or any other materials. They may catch on fire.
4.When the oven is not being used, do not store any objects other than oven accessories inside the oven in case it is accidentally turned on.
5.The appliance shall not be operated by MICROWAVE or COMBINATION WITHOUT FOOD IN THE OVEN.
Operation in this manner may damage the appliance.
6.The oven lamp must be replaced by a service technician trained by the manufacturer. Do not attempt to remove the outer casing from the oven.
Heater Operation
1.Exterior oven surfaces, including air vents on the cabinet and the oven door will get hot during COMBINATION and GRILLING, take care when opening or closing the door and when inserting or removing food and accessories.
2.The oven has two heaters situated in the top of the oven. After using the COMBINATION and GRILL function, these surfaces will be very hot. Care should be taken to avoid touching the heating elements inside the oven.
N.B: After cooking by these modes, the oven accessories will be very hot.
3.The accessible parts may become hot when the grill is in use. Children should be kept away.
In accordance with para. 2 Cl. 5 of the Russian Federal Law “On consumer rights protection”, the manufacturer hereby assigns the use period of the present device to be 7 years from the date of production under the condition that the present device is used in strict compliance with the present manual and applicable technical standards.
Accessories
The oven comes equipped with a variety of accessories.
Always follow directions given for use of the accessories.
Glass Turntable
1.Do not operate the oven without the roller ring and the glass turntable in place.
2.Never use another type of glass turntable than the one specially designed for this oven.
3.If the glass turntable is hot, allow to cool before cleaning or placing in water.
4.The glass turntable can turn in either direction.
5.If the food or cooking vessel on the glass turntable touches the oven walls and stops the tray rotating, the tray will automatically rotate in the opposite direction. This is normal.
6.Do not cook foods directly on the glass turntable.
Roller Ring
1.The roller ring and the oven floor should be cleaned frequently to prevent noise and buildup of remaining food.
2.The roller ring must always be used for cooking together with the glass turntable.
Wire Rack
1.The Wire Rack is used to facilitate browning of small dishes and help with the good circulation of the heat.
2.Do not use any metal container directly on the Wire Rack in COMBINATION with MICROWAVE.
3.Do not use the Wire Rack in MICROWAVE mode only.
4.When using the COMBINATION mode, never place any aluminum or metal container directly on Wire Rack. Always insert a glass plate or dish between Wire Rack and the aluminum container. This will prevent sparking that may damage the oven.
5.It is not recommended to use Wire Rack when cooking in the MICROWAVE mode only.
En-4
|
|
|
|
|
|
|
|
|
|
|
|
|
|
|
|
|
|
NN-GT261WM_ZP.indb |
4 |
|
2014/06/13 |
17:57:36 |
|
|
|
|
|
|
|
||||||
|
|
|
|
|
|
|
|
|

Important Information – Read Carefully
Safety
If smoke or a fire occurs in the oven, press Stop/ Cancel pad or turn TIMER Dial back to zero position and leave the door closed in order to stifle any flames.
Disconnect the power cord, or shut off the power at the fuse or the circuit breaker panel.
Short Cooking Times
As microwave cooking times are much shorter than other cooking methods it is essential that recommended cooking times are not exceeded without first checking the food.
Cooking times given in the cookbook are approximate. Factors that may affect cooking times are: preferred degree of cooking, starting temperature, altitude, volume, size and shape of foods and utensils used. As you become familiar with the oven, you will be able to adjust these factors.
It is better to undercook rather than overcook foods. If food is undercooked, it can always be returned to the oven for further cooking. If food is overcooked, nothing can be done. Always start with minimum cooking times.
Important.
If the recommended cooking times are exceeded the food will be spoiled and in extreme circumstances could catch fire and possibly damage the interior of the oven.
1.Small quantities of food.
Take care when heating small quantities of food as these can easily burn, dry out or catch fire if cooked too long. Always set short cooking times and check the food frequently.
2.Foods low in moisture.
Take care when heating foods low in moisture, eg bread items, chocolate, popcorn, biscuits and pastries. These can easily burn, dry out or catch on fire if cooked too long. We do not
recommend heating foods low in moisture such as popcorn or poppadoms.
This oven has been developed for food use. We do not recommend that it is used for heating non food items such as wheat bags or hot water bottles.
3.Christmas Pudding.
Christmas puddings and other foods high in fats or sugar, eg. jam, mince pies, must not be over heated. These foods must never be left unattended as with over cooking these foods can ignite. See page 22.
4.Boiled Eggs.
Eggs in their shell and whole hard-boiled eggs should not be heated in microwave ovens since they may explode even after microwave heating has ended.
5.Foods with Skins.
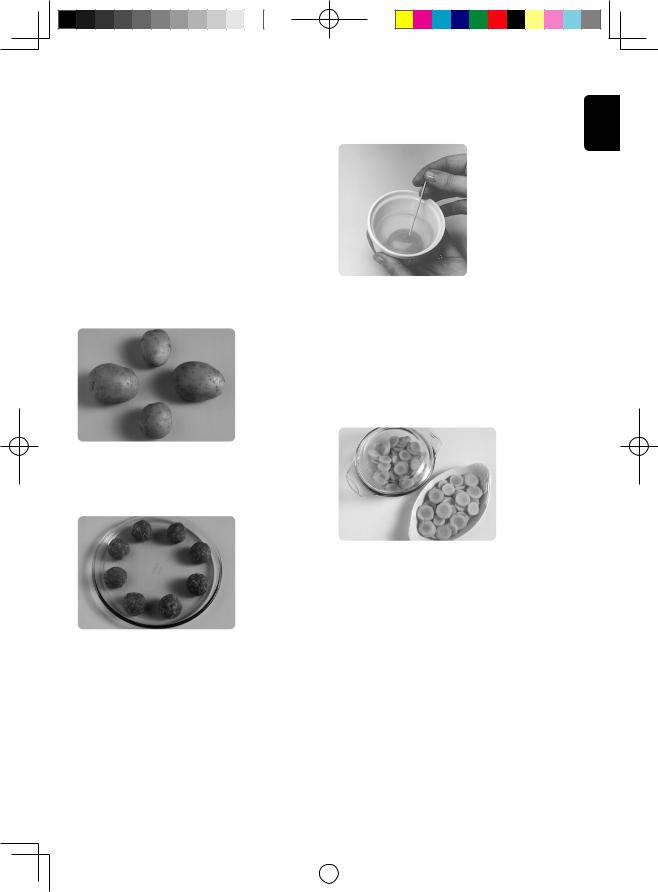
Potatoes, apples, egg yolk, whole vegetables and sausages are examples of food with non porous skins. These must be pierced using a fork before cooking to prevent bursting.
6.Liquids.
When heating liquids, eg soup, sauces and beverages in your microwave oven,
overheating the liquid beyond boiling point can occur without evidence of bubbling. This could result in a sudden boil over of the hot liquid.
To prevent this possibility the following steps should be taken:
a)Avoid using straight-sided containers with narrow necks.
b)Do not overheat.
c)Stir the liquid before placing the container in the oven and again halfway through the heating time.
d)After heating, allow to stand in the oven for a short time, stirring again before carefully removing the container.
e)Microwave heating of beverages can result in delayed eruptive boiling, therefore care should be taken when handling the container.
7.Lids.
Always remove the lids of jars and containers and takeaway food containers before you microwave them. If you don’t then steam and pressure might build up inside and cause an explosion even after the microwave cooking has stopped.
8.Deep Fat Frying.
Do not attempt to deep fat fry in your oven.
English
En-5
|
|
|
|
|
|
|
|
|
|
|
|
|
|
|
|
|
|
NN-GT261WM_ZP.indb |
5 |
|
2014/06/13 |
17:57:36 |
|
|
|
|
|
|
|
||||||
|
|
|
|
|
|
|
|
|

Important Information – Read Carefully
9.Meat Thermometer.
Use a meat thermometer to check the degree of cooking of joints and poultry only when meat has been removed from the microwave. If undercooked, return to the oven and cook for a few more minutes at the recommended power level. Do not leave a conventional meat thermometer in the oven when microwaving.
10.Paper, Plastic.
When heating food in plastic or paper containers, keep an eye on the oven due to the possibility of ignition. Do not use wire twist-ties with roasting bags as arcing will occur.
Do not use re-cycled paper products, eg Kitchen roll unless they say they are specifically designed for use in a microwave oven. These products contain impurities which may cause sparks and/or fires when used.
11.Reheating.
It is essential that reheated food is served “piping hot”.
Remove the food from the oven and check that it is “piping hot”, ie steam is being emitted from all parts and any sauce is bubbling. (If you wish you may choose to check the food has reached 72˚C with a food thermometer – but remember do not use this thermometer inside the microwave.)
For foods that cannot be stirred, eg lasagne, shepherds pie, the centre should be cut with a knife to test it is well heated through. Even if a manufacturer’s packet instructions have been followed always check the food is piping hot before serving and if in doubt return your food to the oven for further heating.
12.Standing Time.
Standing time refers to the period at the end of cooking or reheating when food is left before being eaten, ie. it is a rest time which allows the heat in the food to continue to conduct to the centre, thus eliminating cold spots.
13.Keeping Your Oven Clean.
It is essential for the safe operation of the oven that it is wiped out regularly. Use warm soapy water, squeeze the cloth out well and use to remove any grease or food from the interior. Pay particular attention to the door seal area and also the areas around the microwave feed guide situated on the right hand side of the cavity wall. The oven should be unplugged when cleaning.
14.Grilling
The oven will only operate on the GRILL function with the door closed.
15.Babies Bottles and Food Jars.
When reheating babies bottles always remove top and teat. Liquid at the top of the bottle will be much hotter than that at the bottom and must be shaken thoroughly before checking the temperature. The lid must also be removed from babies food jars, the contents must also be stirred or shaken before the temperature
is checked. This should be carried out before consumption to avoid burns. See page 22.
16.Arcing.
Arcing may occur if a metal container has been used accidentally, the grill rack has been damaged, or the incorrect weight of food is used. Arcing is when blue flashes of light are seen in the microwave oven. If this occurs, stop the machine immediately. If the oven
is left unattended and this continues it can damage the machine. Continue to cook by GRILL only.
17.Maximum Weight on Turntable
The maximum weight that can be placed on the turntable is 3 kg (6 lb 10 oz) (this includes total weight of food and dish).
En-6
|
|
|
|
|
|
|
|
|
|
|
|
|
|
|
|
|
|
NN-GT261WM_ZP.indb |
6 |
|
2014/06/13 |
17:57:36 |
|
|
|
|
|
|
|
||||||
|
|
|
|
|
|
|
|
|
Parts of your Oven
1.Do not operate the oven without the roller ring and glass turntable in place.
2.Only use the glass turntable specifically designed for this oven. Do not substitute with any other glass turntable.
3.If glass turntable is hot, allow to cool before cleaning or placing in water.
4.Do not cook directly on glass turntable. Always place food in a microwave safe dish.
5.If food or utensils on the glass turntable touch the oven walls, this will cause the turntable to stop moving. It will then automatically rotate in the opposite direction. This is normal. Open oven door, reposition the food and restart.
6.The glass turntable can rotate in either direction. The maximum weight that can be placed on the turntable is 3 kg (6 lb 10 oz) (this includes total weight of food and dish).
7.While cooking by MICROWAVE or COMBINATION the turntable may vibrate. This will not affect cooking performance.
8.The metal Wire Rack must ONLY be used as directed for GRILLING and COMBINATION cooking. Never use this on MICROWAVE only. Do not use if operating the oven with less than
200g (7oz) of food on a manual Combination program. FAILURE TO USE ACCESSORIES CORRECTLY COULD DAMAGE YOUR OVEN.
9.Always refer to instructions for correct accessories to use on all programs. The glass turntable and roller ring are the only accessories used for MICROWAVE cooking.
English
|
|
Glass Turntable |
External Air Vents |
Grill Element |
The glass turntable and roller ring are the only |
|
|
accessories used for Microwave Cooking. |
See-through |
|
Door Safety |
Oven Window |
|
|
|
Lock System |
|
|
|
Door Safety
Lock System
 Power Supply Cord
Microwave |
Feed Guide |
(Do not remove) |
Control Panel
Roller Ring |
Wire Rack |
1.The roller ring and oven
floor should be cleaned frequently to prevent excessive noise.
2.The roller ring must always be used together with the glass turntable for cooking.
Caution label is attached on the outside surface.
Door Release Pad
Push to open the door.
Opening the door during cooking will stop the cooking process without cancelling the program.
For NN-GM231W
Cooking continues as soon as the door is closed.
For NN-GT261W/M / NN-GT264M
Cooking resumes as soon as the door is closed and start is pressed.
En-7
|
|
|
|
|
|
|
|
|
|
|
|
|
|
|
|
|
|
NN-GT261WM_ZP.indb |
7 |
|
2014/06/13 |
17:57:36 |
|
|
|
|
|
|
|
||||||
|
|
|
|
|
|
|
|
|

Control Panels
|
NN-GM231W |
|
(4) |
(2) |
(3) |
(6) |
|
(5) |
|
(1) |
|
|
NN-GT261W/M / NN-GT264M |
|||||
(1) |
|
|
|
|
|
|
|
|
Авто |
|
|
|
|
(2) |
|
|
|
|
|
(3) |
|
|
|
|
|
(4) |
|
|
Микроволны |
|
Гриль |
Комби |
||
|
|
|
||||
|
10 |
|
1 |
|
10 |
|
(5) |
мин |
|
мин |
сек |
|
|
|
|
|
|
|
(8) |
|
(6) |
Автоготовка/ |
Комбинация |
Авто |
|||
Разогрев |
разморозка |
|
||||
|
|
|
|
|
|
(7) |
|
|
|
|
|
Таймер/ |
(9) |
(10) |
Больше |
|
Меньше |
Часы |
||
Автоменю |
|
|
|
|
|
|
|
|
|
|
|
|
|
|
Автоготовка/Разогрев 1. |
Овощи |
|
|||
|
|
|
2. |
Рыба |
|
|
|
|
|
3. |
Порция |
|
|
|
Комбинация |
|
1. |
Замороженнаяпицца |
|
|
|
|
|
2. |
Замороженнаялазанья |
|
|
|
|
|
3. |
Кусочкикурицы |
|
|
|
Авторазморозка |
1. |
Маленькая порция |
|
||
|
|
|
2. |
Большая порция |
|
|
|
|
|
3. |
Хлеб/Пирог |
|
|
(11) |
Стоп/Сброс |
|
Старт |
(12) |
||
|
|
|
||||
|
|
|
|
|
NN-GT261W |
|
(1) |
Timer |
(1) |
Display Window |
|
(2) |
Cooking Mode Selection Dial |
(2) |
Microwave Power Levels |
|
(3) |
Microwave Power |
(3) |
Grill Pad |
|
(4) |
Defrost Power |
(4) |
Combination Pad |
|
(5) |
Combination Setting |
(5) |
Time Pads |
|
(6) |
Grill Setting |
(6) |
Auto Weight Microwave Programs |
|
|
|
(7) |
Auto Weight Combination Programs |
|
|
|
(8) |
Auto Weight Defrost Pad |
|
Beep Sound (NN-GT261W/M / NN-GT264M): |
||||
(9) |
Timer/Clock Pad |
|||
When a pad is touched correctly a beep will be |
||||
(10) |
Weight Selection Pads |
|||
heard. If a pad is touched and no beep is heard, |
||||
(11) |
Stop/Cancel Pad: |
|||
the unit has not or cannot accept the instruction. |
||||
|
Before Cooking: |
|||
At the end of any complete program, the oven will |
|
|||
|
one press clears your instructions. |
|||
beep 5 times, and ‘End’ will appear in the display. |
|
|||
|
During Cooking: |
|||
|
|
|
||
*The design of your control panel may vary from |
|
one press temporarily stops the cooking |
||
|
program. Another press cancels all your |
|||
the panel displayed (depending on colour), but the |
|
instructions and the time of day will |
||
words on the pads will be the same. |
|
appear in the display. |
||
|
|
(12) |
Start Pad |
|
En-8
|
|
|
|
|
|
|
|
|
|
|
|
|
|
|
|
|
|
NN-GT261WM_ZP.indb |
8 |
|
2014/06/13 |
17:57:37 |
|
|
|
|
|
|
|
||||||
|
|
|
|
|
|
|
|
|
General Guidelines
STANDING TIME
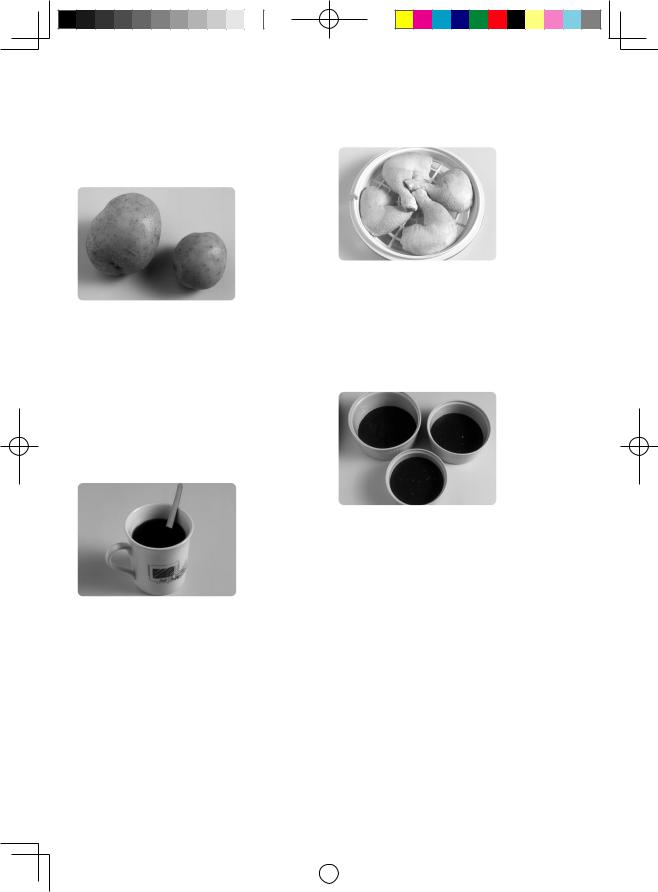
Dense foods e.g. meat, jacket potatoes and cakes, require standing time (inside or outside of the oven) after cooking, to allow heat to finish conducting to the centre of the food to cook through completely. Wrap meat joints and jacket potatoes in aluminium foil while standing. Meat
joints need approx. 10-15 minutes, jacket potatoes 5 minutes. Other foods such as plated meals, vegetables, fish etc require 2-5 minutes standing. If food is not cooked after standing time, return to the oven and cook for additional time. After defrosting food, standing time should also be allowed.
QUANTITY
PIERCING
The skin or membrane on some foods will cause steam to build up during cooking.
These foods must be pierced or a strip of skin should be peeled off before cooking to allow the steam to escape. Eggs, potatoes, apples, sausages etc, will all need to be pierced before cooking. DO NOT ATTEMPT TO BOIL EGGS IN THEIR SHELLS.
COVERING
English
Small quantities cook faster than large quantities, also small meals will reheat more quickly than large portions.
SPACING
Foods cook more quickly and evenly if spaced apart. NEVER pile foods on top of each other.
MOISTURE CONTENT
Many fresh foods e.g. vegetables and fruit, vary in their moisture content throughout the season,
particularly jacket potatoes. For this reason cooking times may have to be adjusted. Dry ingredients e.g. rice, pasta, can dry out during storage so cooking times may differ.
Cover foods with microwave cling film or a lid. Cover fish, vegetables, casseroles, soups. Do not cover cakes, sauces, jacket potatoes or pastry items.
DENSITY
Porous airy foods heat more quickly than dense heavy foods.
CLING FILM
Cling film helps keep the food moist and the trapped steam assists in speeding up cooking times. Pierce before cooking to allow excess steam to escape. Always take care when removing cling film from a dish as the build-up of steam will be very hot.
En-9
|
|
|
|
|
|
|
|
|
|
|
|
|
|
|
|
|
|
NN-GT261WM_ZP.indb |
9 |
|
2014/06/13 |
17:57:37 |
|
|
|
|
|
|
|
||||||
|
|
|
|
|
|
|
|
|
General Guidelines
SHAPE
Even shapes cook evenly. Food cooks better by microwave when in a round container rather than square.
STARTING TEMPERATURE
The colder the food, the longer it takes to heat up. Food from a fridge takes longer to reheat than food at room temperature. Food temperature should be between 5 and 8°C before cooking.
LIQUIDS
All liquids must be stirred before, during and after heating. Water especially must be stirred before and during heating, to avoid eruption.
Do not heat liquids that have previously been boiled. DO NOT OVERHEAT.
TURNING AND STIRRING
Some foods require stirring during cooking. Meat and poultry should be turned after half the cooking time.
ARRANGING
Individual foods e.g. chicken portions or chops, should be placed on a dish so that the thicker parts are towards the outside.
CHECKING FOOD
It is essential that food is checked during and after a recommended cooking time, even if an AUTO PROGRAM has been used (just as you would check food cooked in a conventional oven). Return the food to the oven for further cooking if necessary.
DISH SIZE
Follow the dish sizes given in the recipes, as these affect the cooking and reheating times.
A quantity of food spread in a bigger dish cooks and reheats more quickly.
CLEANING
As microwaves work on food particles, keep your oven clean at all times. Stubborn spots of food can be removed by using a branded microwave spray cleaner, sprayed onto a soft cloth. Always wipe the oven dry after cleaning.
En-10
|
|
|
|
|
|
|
|
|
|
|
|
|
|
|
|
|
|
NN-GT261WM_ZP.indb |
10 |
|
2014/06/13 |
17:57:37 |
|
|
|
|
|
|
|
||||||
|
|
|
|
|
|
|
|
|
Containers to Use
Choosing the correct container is a very important factor in deciding the success or failure of your cooking.
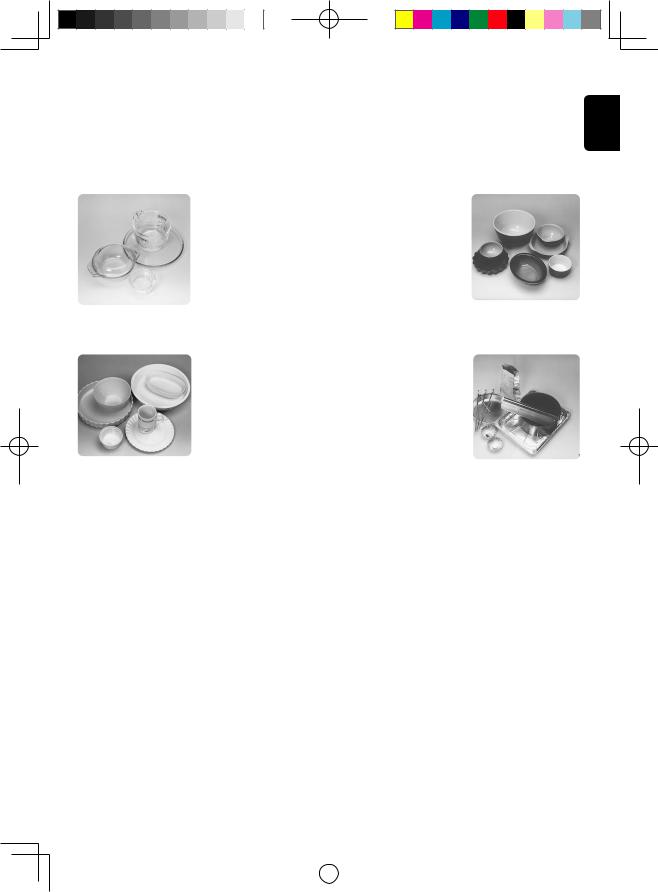
Quick Check Guide to Cooking Utensils |
|
OVEN GLASS |
POTTERY, EARTHENWARE, STONEWARE |
Glass that is heat resistant e.g. Pyrex®, is ideal. DO NOT USE FOR GRILLING.
Do not use delicate glass which may crack due to the heat from the food. Do not use lead crystal which may crack or arc.
Only use if completely glazed. Do not use
if partially glazed or unglazed, as they are able to absorb water which will absorb microwave energy, making the container very hot and slowing down the cooking of food.
English
CHINA AND CERAMIC
Glazed china plates, saucers, bowls, mugs and cups can be used if they are heat resistant. Porcelain and ceramic are also ideal. Fine bone china should only be used for reheating for short periods, otherwise the change in temperature may crack the dish or craze the finish. Do not use dishes with a metal rim or pattern. Do not use jugs or mugs with glued handles, since the glue can melt in a microwave.
FOIL/METAL CONTAINERS
NEVER ATTEMPT TO COOK IN FOIL OR METAL containers – the microwaves cannot pass through and the food will not heat evenly – this may also damage your oven. Use wooden kebab sticks instead of metal skewers.
En-11
|
|
|
|
|
|
|
|
|
|
|
|
|
|
|
|
|
|
NN-GT261WM_ZP.indb |
11 |
|
2014/06/13 |
17:57:37 |
|
|
|
|
|
|
|
||||||
|
|
|
|
|
|
|
|
|
Containers to Use
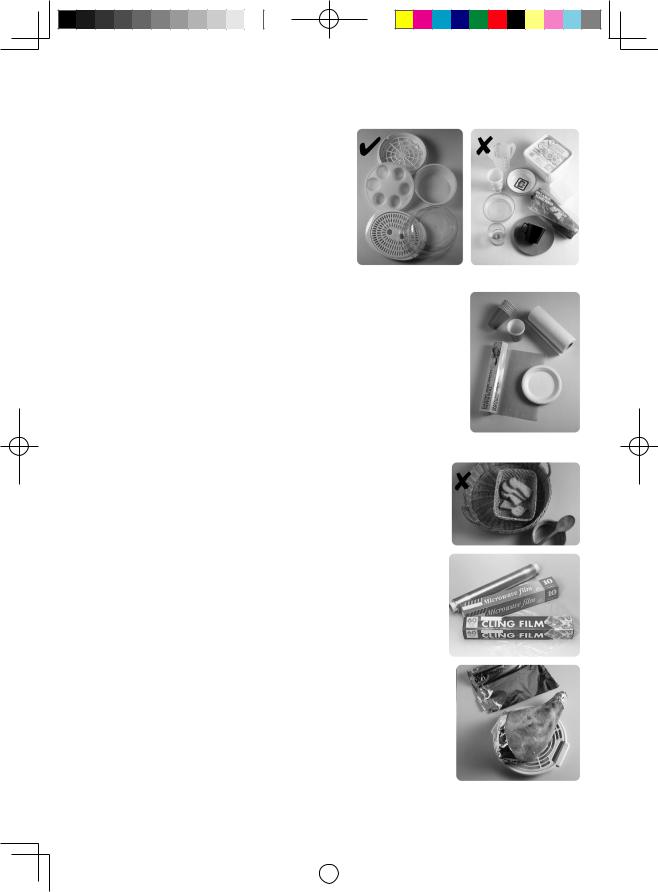
PLASTIC
Many plastic containers are designed for microwave use. Only use Tupperware® containers if they are designed for microwave use. Do not use Melamine as it will scorch. Do not use plastic for cooking foods high in sugar or fat or foods that require long cooking times e.g. brown rice. Never cook in margarine containers or yogurt pots, as these will melt with the heat from the food.
DO NOT USE UNDER THE GRILL.
PAPER
Plain white kitchen paper (kitchen towel) can be used for covering blind pastry cases and for covering bacon to prevent splattering ONLY USE FOR SHORT COOKING TIMES. NEVER RE-USE A PIECE OF KITCHEN TOWEL.
Avoid kitchen paper containing manmade fibres. Check that branded re-cycled kitchen towel is recommended for microwave use. Do not use waxed or plastic coated cups as the finish may melt in the oven. Greaseproof paper can be used to line the base of dishes and to cover fatty foods. White paper plates can be used for SHORT REHEATING TIMES, ON MICROWAVE ONLY.
WICKER, WOOD, STRAW BASKETS
Do not use these items in your microwave. With continued use and with prolonged exposure they will crack and could ignite. DO NOT USE ON ANY COOKING MODE.
CLING FILM
Use microwave cling film to cover food that is to be reheated, or cooked, ON MICROWAVE ONLY taking care to avoid the film being in direct contact with the food. DO NOT USE ON GRILL OR COMBINATION.
ALUMINIUM FOIL
Small amounts of smooth aluminium foil can be used to SHIELD joints of meat during defrosting and cooking. As the microwaves cannot pass through the foil this prevents the shielded parts from overcooking or overdefrosting. The foil must not touch the sides or roof of the oven, as this may cause arching and damage your oven.
ROASTING BAGS
These are useful when slit up one side to tent a joint of meat when roasting by power and time. DO NOT USE THE METAL TWISTS SUPPLIED.
En-12
|
|
|
|
|
|
|
|
|
|
|
|
|
|
|
|
|
|
NN-GT261WM_ZP.indb |
12 |
|
2014/06/13 |
17:57:38 |
|
|
|
|
|
|
|
||||||
|
|
|
|
|
|
|
|
|
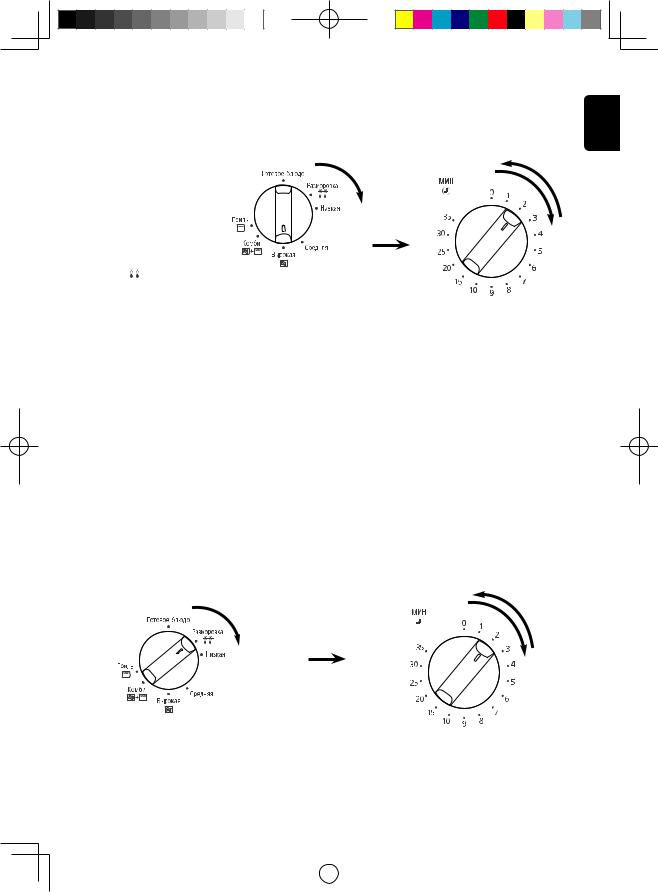
Microwave Cooking
for NN-GM231W
The glass turntable must always be in position when using the oven.
|
|
|
|
Wattage |
High |
800 Watts |
|||
Medium |
700 Watts |
|||
Low |
360 Watts |
|||
Simmer |
250 Watts |
|||
Defrost |
|
|
|
270 Watts |
|
|
|||
English
• Turn dial to select power level.
Note:
•Set cooking time by turning dial. If the door is already closed
cooking time will begin immediately. For short cooking times always turn the dial to 2 mins and then adjust to time required.
1.If you wish to check the food during cooking simply open the door. The oven will automatically stop cooking. To continue cooking, close the door.
2.To stop cooking, turn timer dial to zero position. Cooking time can be reset at any time during the cooking cycle by turning the timer dial.
3.When food is removed from the oven after cooking is complete, check the timer is in the zero position.
4.The glass turntable must always be in position when using the oven.
Defrosting
for NN-GM231W
 Defrost power is 270 Watts.
•Select Defrost power by turning the dial.
•Set the defrosting time by turning the dial. If the door is already closed, cooking time will begin immediately.
For short cooking times always turn the dial to 2 mins and then adjust to time required.
En-13
|
|
|
|
|
|
|
|
|
|
|
|
|
|
|
|
|
|
NN-GT261WM_ZP.indb |
13 |
|
2014/06/13 |
17:57:38 |
|
|
|
|
|
|
|
||||||
|
|
|
|
|
|
|
|
|
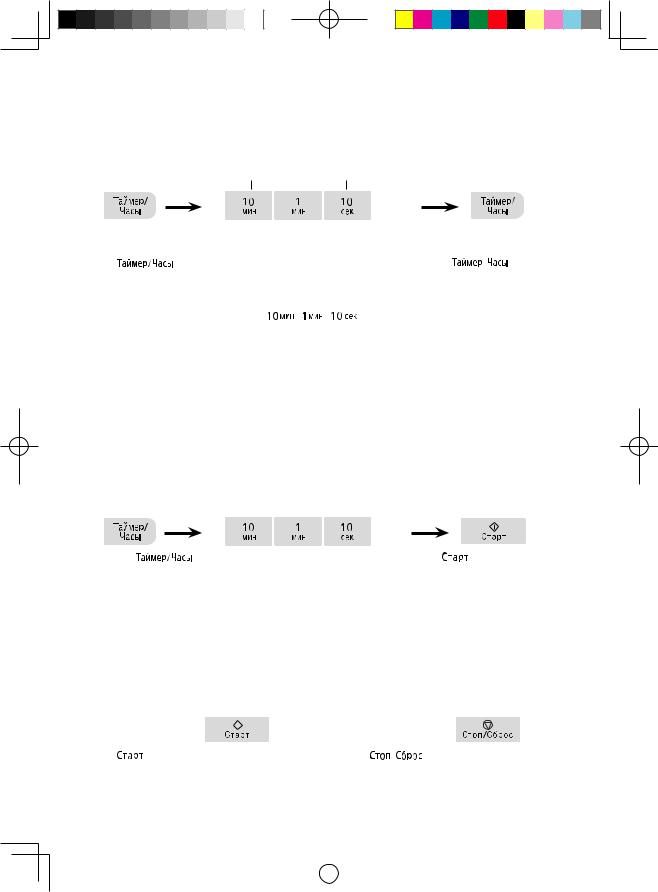
Setting the Clock
for NN-GT261W/M / NN-GT264M
When the oven is first plugged in “88:88” appears in display window.
eg. 11.25am
Press eleven times |
Press five times |
(to set hours) |
(to set 1 mins.) |
|
|
|
Press |
|
twice |
|
|
|
|
|
|
|
|
|
|
||
|
|
|
(to set 10 mins.) |
|
|
|||
• Press |
Pad |
• Press Time Pads. |
|
• Press |
Pad. |
|||
twice. |
|
Enter time of day by pressing |
The colon stops blinking. Time of |
|||||
A dot starts to blinking. |
appropriate Time pads. |
|
day is now locked into the display. |
|||||
|
|
The time appears in the display. |
|
|||||
|
|
If the pad ( |
/ |
|
|
/ |
) |
|
|
|
is pressed and held, the time will |
|
|||||
|
|
increase rapidly. |
|
|
|
|||
Note:
1.To reset time of day, repeat step 1 through to step 3, as above.
2.The clock will keep the time of day as long as the oven is plugged in and electricity is supplied.
3.This is a 24 hour clock, ie 2pm = 14:00.
Timer
for NN-GT261W/M / NN-GT264M
This feature operates as a minute timer. During operation there is no microwave energy.
• Press the |
• Set desired time. |
• Press |
. |
Pad once. Display is blank. |
Maximum time is 90 minutes. |
The time in the display will count |
|
|
|
down. |
|
Child Safety Lock
for NN-GT261W/M / NN-GT264M
Using this system will make the oven controls inoperable; however, the door can be opened. Child Lock can be set when the display shows a colon or the time of day.
|
To Set: |
|
|
To Cancel: |
|
|
|
|
|||
• Press |
Pad three times |
• Press |
Pad three times |
||
(within 10 seconds). |
(within 10 seconds). |
||||
The time of day will disappear. Actual time will not |
The time of day will reappear in the display. |
||||
be lost. ‘L---’ is indicated in the display. |
|
|
|||
En-14
|
|
|
|
|
|
|
|
|
|
|
|
|
|
|
|
|
|
NN-GT261WM_ZP.indb |
14 |
|
2014/06/13 |
17:57:39 |
|
|
|
|
|
|
|
||||||
|
|
|
|
|
|
|
|
|
Microwave Cooking and Defrosting
for NN-GT261W/M / NN-GT264M
The glass turntable must always be in position when using the oven.
|
|
Wattage |
|
1 |
Press |
High |
800 Watts |
2 |
Presses |
Defrost |
270 Watts |
3 |
Presses |
Medium |
700 Watts |
4 |
Presses |
Low |
360 Watts |
5 |
Presses |
Simmer |
250 Watts |
• Press the |
pad. |
• Select cooking time by pressing |
• Press |
. |
Select desired power level. |
appropriate pads. Your oven |
The cooking program |
||
The microwave indicator lights and |
can be programmed for up to |
will start and the |
||
the wattage appears in the display. |
90 minutes in Medium, Low, |
time in the display |
||
|
|
Simmer and Defrost power. High |
will count down. |
|
|
|
power can be programmed for |
|
|
|
|
30 minutes. |
|
|
Multi-Stage Cooking
The oven has 2 stage cooking, so you can program up to 2 different instructions and the oven will switch automatically from power to power (Repeat steps 1 and 2 above but only press Start after both stages have been entered).
Note:
1.Timer Pad can not be programmed in multi-stage cooking.
2.Auto Weight / Defrost can not be programmed in multi stage cooking.
En-15
English
|
|
|
|
|
|
|
|
|
|
|
|
|
|
|
|
|
|
NN-GT261WM_ZP.indb |
15 |
|
2014/06/13 |
17:57:39 |
|
|
|
|
|
|
|
||||||
|
|
|
|
|
|
|
|
|
Grilling
For NN-GM231W
•Set Cooking Mode selection dial to Grill position  .
.
•Set grilling time by turning Timer dial. If the door is already closed cooking time will begin immediately.
For NN-GT261W/M / NN-GT264M
• Press |
Pad. |
• Select Cooking time. |
• Press |
. |
The grill indicator light |
Time can be set up to 90 minutes. |
|
|
|
appears in the display. |
|
|
|
|
Note:
1.Place food on grill rack on turntable. Place a heatproof plate (Pyrex®) underneath to catch fat and drips.
2.Never cover foods when grilling.
3.DO NOT attempt to preheat the grill.
4.The grill will only operate with the oven door closed. It is not possible to use the grill function with the door open.
5.There is no microwave power on the GRILL only program.
6.Most foods require turning halfway during cooking. When turning food, open oven door and CAREFULLY remove grill rack using oven gloves.
7.After turning, return food to the oven and close door. For NN-GM231W grill mode will restart when the oven door is closed. For NN-GT261W/M and NN-GT264M after closing oven door, press START. The oven display will continue to count down the remaining grilling time. It is quite safe to open the oven door at any time to check the progress of the food as it is grilling.
8.The grill will glow on and off during cooking - this is normal. Always clean the oven after using the Grill and before using the microwave or combination.
9.NN-GM231W only: After grill use the thermostat may switch off to prevent overheating. If using continuously, allow oven to cool between cooking.
CAUTION: The GRILL rack must always be used with the glass turntable in position.
Remove grill rack from oven by holding the rack and heatproof dish firmly. Use oven gloves when removing accessories. Never touch the outside window or inside metal parts of the door or oven when taking food in or out due to the high temperatures involved.
En-16
|
|
|
|
|
|
|
|
|
|
|
|
|
|
|
|
|
|
NN-GT261WM_ZP.indb |
16 |
|
2014/06/13 |
17:57:40 |
|
|
|
|
|
|
|
||||||
|
|
|
|
|
|
|
|
|
Combination Cooking
For NN-GM231W
English
•Set cooking mode selection dial to combination position  +
+ .
.
•Set cooking time by turning timer dial.
If door is already closed cooking time will begin immediately.
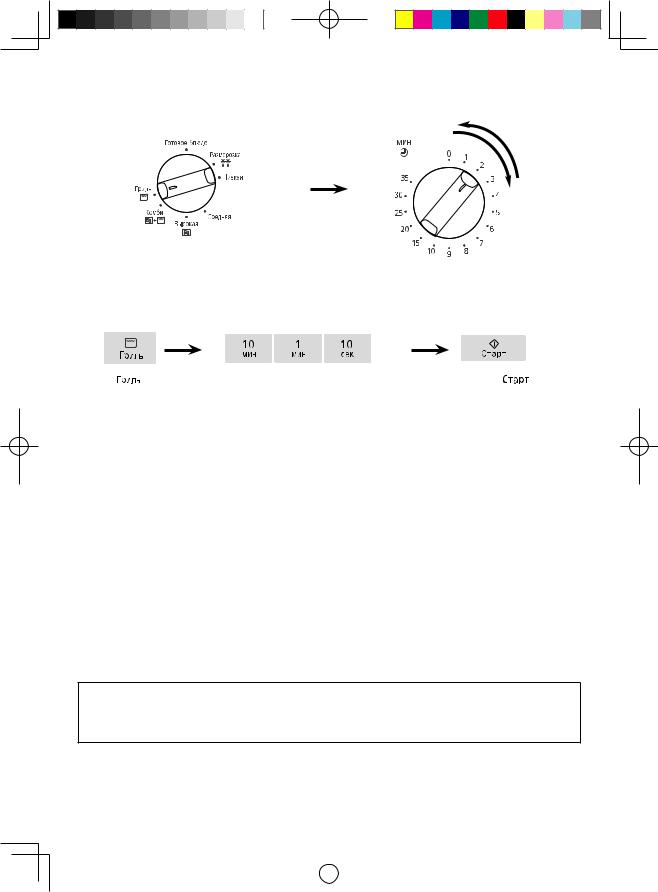
For NN-GT261W/M / NN-GT264M
•Press
 pad to select level.
The combination indicator lights and combination level (1, 2 or 3) appears in the display.
Press |
Level |
MW |
Grill |
1 press |
combi 1 |
290W |
640W |
2 presses |
combi 2 |
365W |
540W |
3 presses |
combi 3 |
460W |
430W |
• Select cooking time. |
• Press |
. |
Time can be set up to 90 minutes. |
|
|
When cooking by combination, the microwave power cooks food quickly whilst the grill gives traditional browning and crisping.
Note:
1.The grill rack is designed to be used for Combination and Grilling. Never attempt to use any other metal accessory except the one provided with the oven. Place a heatproof dish underneath to catch any fat or drips.
2.Use the grill rack only as described. DO NOT use if operating the oven with less than 200g (7oz) of food on a manual program. For small quantities do not cook by combination, cook by GRILL ONLY for best results.
3.Never cover foods when cooking on combination.
4.DO NOT preheat the grill on combination.
5.Arcing may occur if the incorrect weight of food is used, the GRILL rack has been damaged, or a metal container has been used accidentally. Arcing is flashes of blue light seen in the microwave. If this occurs, stop the oven immediately.
6.Some foods should be cooked on combination without using the grill rack i.e. Roasts, gratins, pies and puddings. The food should be placed in a heatproof non-metallic dish and placed directly onto the turntable.
7.DO NOT use plastic MICROWAVE containers on combination programs (unless suitable for combination cooking). Dishes must be able to withstand the heat of the top grill - heatproof glass e.g. Pyrex® or ceramic are ideal. But do not put dishes on grill rack directly under grill.
8.DO NOT use your own metal dishes or tins, as the microwaves will not penetrate the food evenly.
9.NN-GM231W only: After grill use the thermostat may switch off to prevent overheating. If using continuously, allow oven to cool between cooking.
CAUTION: The GRILL rack must always be used with the glass turntable in position.
Remove grill rack from oven by holding the rack and heatproof dish firmly. Use oven gloves when removing accessories. Never touch the outside window or inside metal parts of the door or oven when taking food in or out due to the high temperatures involved.
En-17
|
|
|
|
|
|
|
|
|
|
|
|
|
|
|
|
|
|
NN-GT261WM_ZP.indb |
17 |
|
2014/06/13 |
17:57:40 |
|
|
|
|
|
|
|
||||||
|
|
|
|
|
|
|
|
|

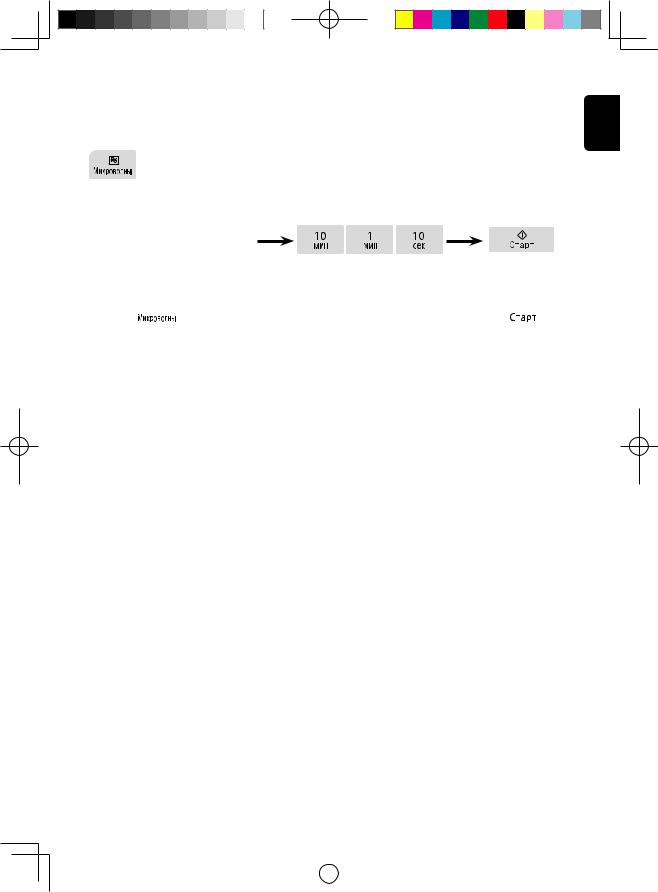
Auto Weight Defrost
for NN-GT261W/M / NN-GT264M
This feature allows you to defrost bread, meat items and joints of meat automatically once you have entered in the weight of the food.
•Select desired program.
Press the pad once to select small pieces, twice to select big pieces and three times to select bread/cake.
Auto program number appears in the display. The auto and defrost indicators light.
• Set Weight using the |
• Press |
. |
pads. If the up |
Remember to stir or turn the |
|
/ down pad is pressed and held, |
food during defrosting. |
|
the weight will increase / decrease |
|
|
rapidly. |
|
|
|
Program |
Weight Range |
Suitable Foods |
|
1 |
Small Pieces |
200 – 1000g |
Small pieces of meat, minced meat, chicken portions, steaks, |
|
chops. Turn at beeps and shield. |
||||
|
|
|
||
2 |
Big Pieces |
600 – 1600g |
Whole chicken, meat joints. Turn at beeps |
|
and shield. |
||||
|
|
|
||
3 |
Bread/Cake |
100 – 600g |
Cake or Bread. |
|
|
|
|
|
Meat Items (mince/chops/chicken portions)
NOT SUITABLE FOR SAUSAGES, these can be defrosted manually using Defrost power and time. Chops and chicken portions should be arranged in a single layer and turned frequently during defrosting. It is necessary for mince to be broken up frequently during defrosting and this is best carried out in a large shallow dish.
Meat Joints / Whole Chickens
Whole chickens and meat joints will require shielding during defrosting especially if it is a particularly fatty piece. This is to prevent food starting to cook on the outside edges. Protect wings, breast and fat with smooth pieces of aluminium foil secured with cocktail sticks. DO NOT ALLOW THE FOIL TO TOUCH THE WALLS OF THE OVEN. Standing time of at least 1 hour should be allowed for joints after defrosting.
Bread
This program is suitable for small items which are required for immediate use, they may feel warm straight after defrosting. Loaves can also be defrosted on this program but these will require standing time to allow the centre to thaw out. Standing time can be shortened if slices are separated and buns and loaves cut in half. Items should be turned halfway during defrosting. THIS PROGRAM IS NOT SUITABLE FOR CREAM CAKES OR DESSERTS e.g. cheesecake.
En-18
|
|
|
|
|
|
|
|
|
|
|
|
|
|
|
|
|
|
NN-GT261WM_ZP.indb |
18 |
|
2014/06/13 |
17:57:41 |
|
|
|
|
|
|
|
||||||
|
|
|
|
|
|
|
|
|
Defrosting Guidelines
For Best Results:
1.Place foods in a suitable container. Meat joints and chickens should be placed on an upturned saucer or on a plastic rack if you have one.
2.Check food during defrosting, as foods vary in their defrosting speed.
3.It is not necessary to cover the food.
4.Always turn or stir the food especially when the oven “beeps”. Shield if necessary (see point 6).
5.Minced meat, chops and other small items should be broken up or separated as soon as possible and placed in a single layer.
6.Shielding prevents food cooking. It is essential when defrosting chickens and joints of meat. The outside thaws out first, so protect wings/breast and fat with smooth pieces of aluminium foil secured with cocktail sticks.
7.Allow standing time so that the centre of the food thaws out. (Minimum of 1 hour for joints of meat and whole chickens).
English
Arrange food in a single layer.
Turn or break up food as soon as possible.
Shield chickens and joints of meat .
En-19
|
|
|
|
|
|
|
|
|
|
|
|
|
|
|
|
|
|
NN-GT261WM_ZP.indb |
19 |
|
2014/06/13 |
17:57:41 |
|
|
|
|
|
|
|
||||||
|
|
|
|
|
|
|
|
|
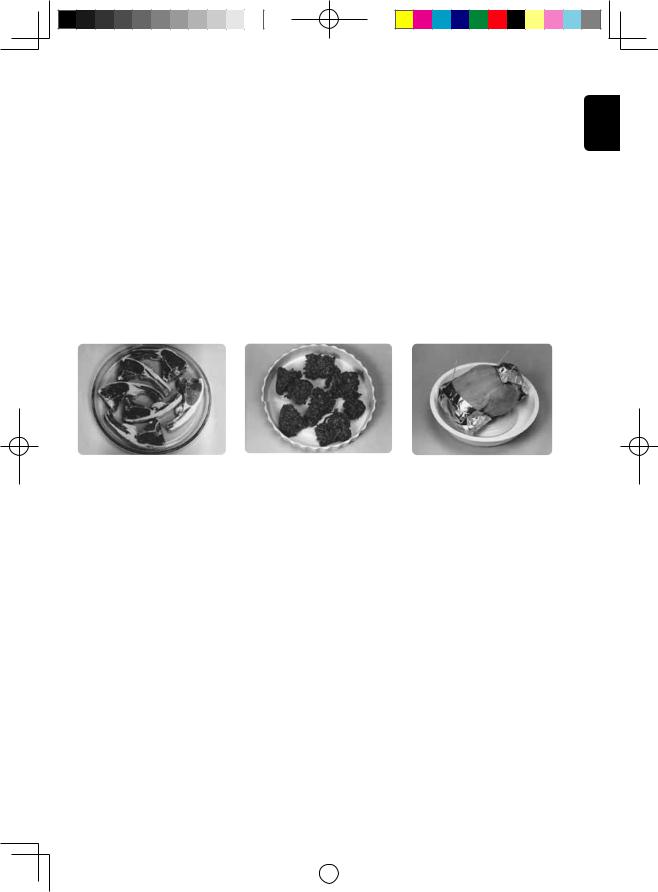
Auto Weight Cook/Reheat Programs
for NN-GT261W/M / NN-GT264M
This feature allows you to cook or reheat foods by setting the weight only. The oven determines the microwave power level and / or combination level then the cooking time automatically. Select the category of food and then just enter the weight. The weight is entered in grams.
eg.
•Select desired program by pressing the pad. The auto indicator light and the program number appears in the display.
• Set Weight using the
 /
/
 • Press . pads. If the up / down pad is pressed
and held, the weight will increase / decrease rapidly.
Guidelines for Use
The Auto Weight Programs are designed to take the guesswork out of cooking or reheating your food. They must ONLY be used for the foods described and within the weight range recommended.
The three foods cooked by selecting the micro cook pad, use microwave power only.
The three foods, cooked by selecting the Combi Cook pad, use the microwave and grill together.
1.Only cook foods within the weight ranges described.
2.Only use the accessories as indicated.
3.DO NOT cover food when using the Combi Cook programs as it will prevent the food browning and the heat of the grill will melt any plastic covering.
4.Most foods benefit from a STANDING time, after cooking on an Auto Program, to allow heat to continue conducting to the centre.
5.To allow for some variations that occur in food, check that food is thoroughly cooked and piping hot before serving.
En-20
|
|
|
|
|
|
|
|
|
|
|
|
|
|
|
|
|
|
NN-GT261WM_ZP.indb |
20 |
|
2014/06/13 |
17:57:41 |
|
|
|
|
|
|
|
||||||
|
|
|
|
|
|
|
|
|
Auto Weight Cook/Reheat Programs
English
1.Fresh Vegetables 200g – 800g
To cook fresh vegetables eg. carrots, cauliflower, not suitable for potatoes. Place prepared vegetables into a shallow container on turntable. Add 15ml (1 tbsp) of water per 100g of vegetables.
Cover with pierced cling film or lid. Select program (1 presses of 


 pad), enter weight, press start.
2.Fresh fish 200g – 700g
To reheat a fresh convenience meal that can be stirred.
Foods must be in a suitable shallow microwaveable container and have the film pierced. Select program (2 presses of 


 pad), enter weight and press start.
Stir halfway. After cooking allow to stand for 1 minute. Ensure that the food is piping hot. Stir before serving.
3. Fresh meal 200g – 800g (Reheat)
To reheat a fresh convenience meal that can be stirred.
Foods must be in a suitable shallow microwaveable container and have the film pierced. Select program (3 press of 


 pad), enter weight and press start. Stir halfway. After cooking allow to stand for 1 minute. Ensure that the food is piping hot. Stir before serving.
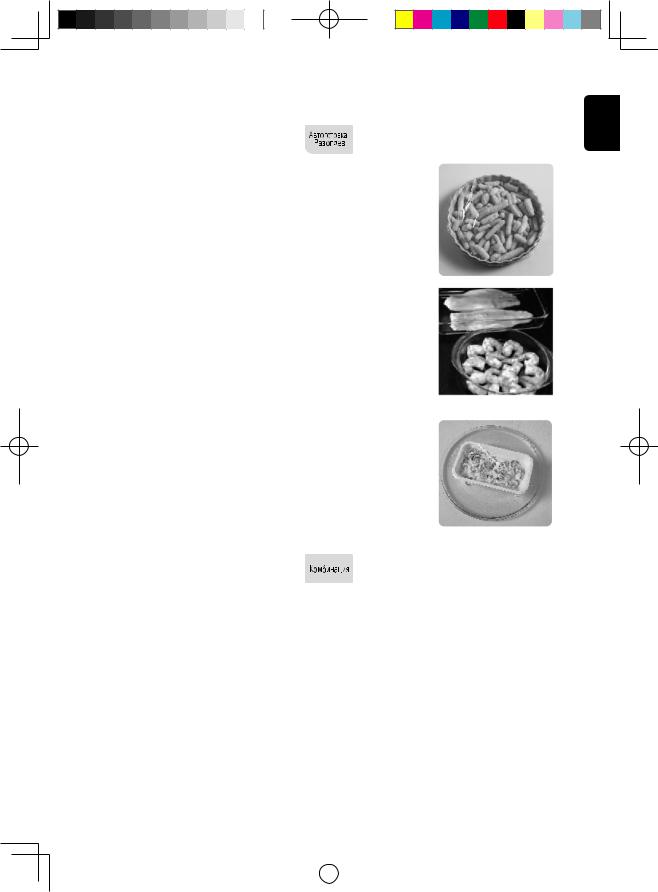
1.Frozen Pizza 150g – 400g
For reheating and browning the top of frozen (NOT Fresh) purchased pizza.
Remove all packaging and place the pizza on Wire Rack on glass turntable.
2.Frozen Lasagna 200g and 400g
This program is suitable for frozen lasagne, cannelloni, potato topped dishes, pasta bakes.
For reheating, browning and crisping the top of pre-cooked frozen lasagna.
Remove all packaging and place frozen lasagna heatproof dish on wire rack on glass turntable.
3.Fresh Chicken Pieces 200g – 1000g
For cooking fresh chicken pieces. eg. breasts, thighs, drumsticks and quarters. Place in a heatproof dish on Wire Rack on glass turntable. Turn at beeps.
En-21
|
|
|
|
|
|
|
|
|
|
|
|
|
|
|
|
|
|
NN-GT261WM_ZP.indb |
21 |
|
2014/06/13 |
17:57:42 |
|
|
|
|
|
|
|
||||||
|
|
|
|
|
|
|
|
|
Cooking and Reheating Guidelines
Most foods reheat very quickly in your oven by HIGH power. Meals can be brought back to serving temperature in just minutes and will taste freshly cooked and NOT leftover.
Always check food is piping hot and return to oven if necessary.
As a general rule, always cover wet foods, e.g. soups, casseroles and plated meals.
Do not cover dry foods e.g. bread rolls, mince pies, sausage rolls etc.
Remember when cooking or reheating any food that it should be stirred or turned wherever possible. This ensures even cooking or reheating on the outside and in the centre.
When is food reheated?
Food that has been reheated or cooked should be served “piping hot” i.e. steam should be visibly emitted from all parts. As long as good hygiene practices have been followed during the preparation and storage of the food, then cooking or reheating presents no safety risks.
Foods that cannot be stirred should be cut with a knife to test that they are adequately heated throughout. Even if a manufacturer’s instructions or the times in the cookbook have been followed, it is still important to check the food is heated thoroughly. If in doubt, always return to the oven for further reheating.
If you cannot find the equivalent food in the chart then choose a similar type and size listed and adjust the cooking time if necessary.
PLATED MEALS
Everyone’s appetite varies and reheat times depend on meal contents. Dense items e.g. mashed potato, should be spread out well.
If a lot of gravy is added, extra time may be required. Place denser items to the outside of the plate. Between 4-7 mins. on HIGH power will reheat an average portion. Do not stack meals.
CANNED FOODS
Remove foods from can and place in a suitable dish before heating.
SOUPS
Use a bowl and stir before heating and at least once through reheat time and again at the end.
CASSEROLES
Stir halfway through and again at the end of heating.
MINCE PIES - CAUTION
REMEMBER even if the pastry is cold to the touch, the filling will be piping hot and will warm the pastry through. Take care not to overheat otherwise burning can occur due to the high fat and sugar content of the filling. Check the temperature of the filling before consuming to avoid burning your mouth.
CHRISTMAS PUDDINGS AND LIQUIDS - CAUTION
Take great care when reheating these items.
Do not leave unattended. Do not add extra alcohol.
BABIES BOTTLES -
CAUTION
Milk or formula MUST be shaken thoroughly before heating and again at the end and tested carefully before feeding a baby.
For 7-8 fl.oz. of milk from fridge temperature, remove top and teat. Heat on HIGH power for 30-50 secs.
CHECK CAREFULLY.
For 3 fl.oz. of milk from fridge temperature, remove top and teat. Heat on HIGH power for 15-20 secs.
CHECK CAREFULLY
N.B. Liquid at top of bottle will be much hotter than at bottom.
The bottle must be shaken thoroughly and tested before use.
WE DO NOT RECOMMEND THAT YOU USE YOUR MICROWAVE TO STERILISE BABIES’ BOTTLES. If you have a special microwave steriliser we urge extreme caution, due to the low quantity of water involved. It is vital to follow the manufacturers instructions implicitly.
En-22
|
|
|
|
|
|
|
|
|
|
|
|
|
|
|
|
|
|
NN-GT261WM_ZP.indb |
22 |
|
2014/06/13 |
17:57:42 |
|
|
|
|
|
|
|
||||||
|
|
|
|
|
|
|
|
|
Before Requesting Service
ALL THESE THINGS ARE NORMAL:
The oven causes interference |
Some radio and TV interference might occur when you cook with |
with my TV. |
the microwave oven. This interference is similar to the interference |
|
caused by small such as mixers, vacuums, hair dryers, etc. It does |
|
not indicate a problem oven. |
Steam accumulates on the oven |
During cooking, steam and warm air are given off from the food. |
door and warm air comes from |
Most of the steam and warm air are removed from the oven by the |
the oven vents. |
air which circulates in the oven cavity. However , some steam will |
|
condense on cooler surfaces such as the oven door. This is normal. |
I accidentally operate my |
Operating the oven empty for a short time will not damage the oven. |
microwave oven without any |
However, we do not recommend this to be done. |
food in it. |
|
There are humming and clicking |
These noise occur as the oven automatically switches from |
noises from my oven when |
microwave power to Grill, to create the Combination setting. |
I cook by Combination. |
This is normal. |
The oven has an odor and |
It is essential that your oven is wiped out regularly particularly after |
generates smoke when using |
cooking by Combination or Grill. Any fat and grease that builds up on |
Combination and Grill function. |
the roof and walls of the oven will begin to smoke if not cleaned. |
PROBLEM |
POSSIBLE CAUSE |
|
|
The oven is not plugged in securely. |
|
Oven will not turn on. |
Circuit breaker or fuse is tripped or |
|
blown. |
||
|
||
|
There is a problem with the outlet. |
|
|
|
|
When the oven is turning |
The roller ring and oven bottom are |
|
on, there is noise coming |
||
dirty. |
||
from glass turntable. |
||
|
||
Oven will not start cooking. |
The door is not closed completely. |
|
|
|
|
For NN-GT261W/M / NN-GT264M: |
||
REMEDY
Remove plug from outlet, wait 10 seconds and re-insert.
 Reset circuit breaker or replace fuse.
Plug another appliance into the outlet to check if the outlet is working.
Clean these parts according to care of your oven (see next page).
 Close the oven door securely.
PROBLEM |
POSSIBLE CAUSE |
|
REMEDY |
|
|
|
Button was not pressed after |
Press |
Button. |
|
|
|
programming. |
|
|
||
|
|
|
|
|
|
|
Another program has already been |
Press Button to |
cancel |
||
|
the previous program and program |
||||
|
entered into the oven. |
||||
Oven will not start cooking. |
again. |
|
|
||
|
The program has not been entered |
Program again according to the |
|||
|
correctly. |
|
Operating Instructions. |
|
|
|
Button has been pressed |
Program oven again. |
|
||
|
accidentally |
|
|
|
|
“L--- ” appears in the |
The Child Safety Lock was activated |
Deactivate Lock by pressing |
|||
Display Window. |
by pressing |
Button 3 times. |
|
Button 3 times. |
|
|
|
|
|
|
|
If it seems there is a problem with the oven, contact an authorized Service Centre.
En-23
English
|
|
|
|
|
|
|
|
|
|
|
|
|
|
|
|
|
|
NN-GT261WM_ZP.indb |
23 |
|
2014/06/13 |
17:57:42 |
|
|
|
|
|
|
|
||||||
|
|
|
|
|
|
|
|
|

Care of your Microwave Oven
1.The oven should be cleaned regularly and any food deposits removed.
2.Turn the oven off and remove the power plug from the wall socket before cleaning.
3.Keep the inside of the oven clean. When food splatters or spilled liquids adhere to oven walls, wipe with a damp cloth. Mild detergent may be used if the oven gets very dirty. The use of harsh detergent or abrasives is not recommended.
4.The outside oven surfaces should be cleaned with a damp cloth. To prevent damage to the operating parts inside the oven, water should not be allowed to seep into the ventilation openings.
5.Do not allow the Control Panel to become wet. Clean with a soft, damp cloth. Do not use detergents, abrasives or spray-on cleaners on the Control Panel.
When cleaning the Control Panel, leave oven door open to prevent oven from accidentally turning on.
After cleaning press 


 Button to clear display window.
6.If steam accumulates inside or around the outside of the oven door, wipe with a soft cloth. This may occur when the microwave oven is operated under high
humidity conditions and in no way indicates malfunction of the unit.
7.It is occasionally necessary to remove the glass turntable for cleaning. Wash the tray in warm sudsy water or in a dishwasher.
8.The roller ring and oven cavity floor should be cleaned regularly to avoid excessive noise. Simply wipe the bottom surface of the oven with mild detergent, water or window cleaner and dry. The roller ring may be washed in mild sudsy water or dish washer. Cooking vapors collect during repeated use but in no way affect the bottom surface or roller ring wheels. When removing the roller ring from cavity floor for cleaning, be sure to replace in the proper position.
9.When it becomes necessary to replace the oven light, please consult a dealer to have it replaced.
10.Failure to maintain the oven in a clean condition could lead to deterioration of the surface that could adversely affect the life of the appliance and possibly result in a hazardous situation.
Technical Specifications
Power Source: |
|
220 V ~ 50 Hz |
Power Consumption: |
Microwave: |
1,250 W |
|
Heater: |
1,250 W |
Output: |
Microwave: |
800 W (IEC-60705) |
|
Heater: |
1,000 W |
Outside Dimensions (H × W × D): |
258 mm × 443 mm × 340 mm |
|
Oven Cavity Dimensions (H × W × D): |
215 mm × 306 mm × 308 mm |
|
Overall Cavity Volume: |
|
18 L |
Glass Turntable Diameter: |
|
Ø255 mm |
Operating Frequency: |
|
2,450 MHz |
Net Weight: |
|
Approx. 12.0 kg |
Specifications subject to change without notice.
As for the voltage requirement, the production month, country and serial number, please refer to the identification plate on the microwave oven.
En-24
|
|
|
|
|
|
|
|
|
|
|
|
|
|
|
|
|
|
NN-GT261WM_ZP.indb |
24 |
|
2014/06/13 |
17:57:42 |
|
|
|
|
|
|
|
||||||
|
|
|
|
|
|
|
|
|
Содержание
Установка и Подключение |
2-3 |
Меры Безопасности |
4 |
Важная Информация - Читайте Внимательно |
5-6 |
Принципиальная Схема Устройства |
7 |
Панели Управления |
8 |
Общее Руководство |
9-10 |
Посуда, пригодная для использования в микроволновой печи |
11-12 |
Приготовление Пищи и Разморозка |
13 |
NN-GМ231W |
|
Установка Часов/Таймера/Замка Защиты от Детей |
14 |
NN-GT261W/M / NN-GT264M |
|
Приготовление Пищи и Разморозка |
15 |
NN-GT261W/M / NN-GT264M |
|
Функция Гриль |
16 |
Приготовление в комбинированном режиме |
17 |
Автоматическое размораживание по весу |
18 |
NN-GT261W/M / NN-GT264M |
|
Полезные советы при размораживании |
19 |
Разогрев/приготовление пищи с использованием программ |
20 |
автоматического приготовления |
|
NN-GT261W/M / NN-GT264M |
|
Рекомендации по использовантю |
20 |
Разогрев/приготовление пищи с использованием программ |
|
автоматического приготовления |
21 |
Руководство по приготовлению и разогреву пищи |
22 |
Перед обращением в сервисный центр |
23 |
Уход за микроволновой печью |
24 |
Технические характеристики |
24 |
Rus-1
Russian
|
|
|
|
|
|
|
|
|
|
|
|
|
|
|
|
|
|
NN-GT261WM_ZP.indb |
1 |
|
2014/06/13 |
17:57:42 |
|
|
|
|
|
|
|
||||||
|
|
|
|
|
|
|
|
|
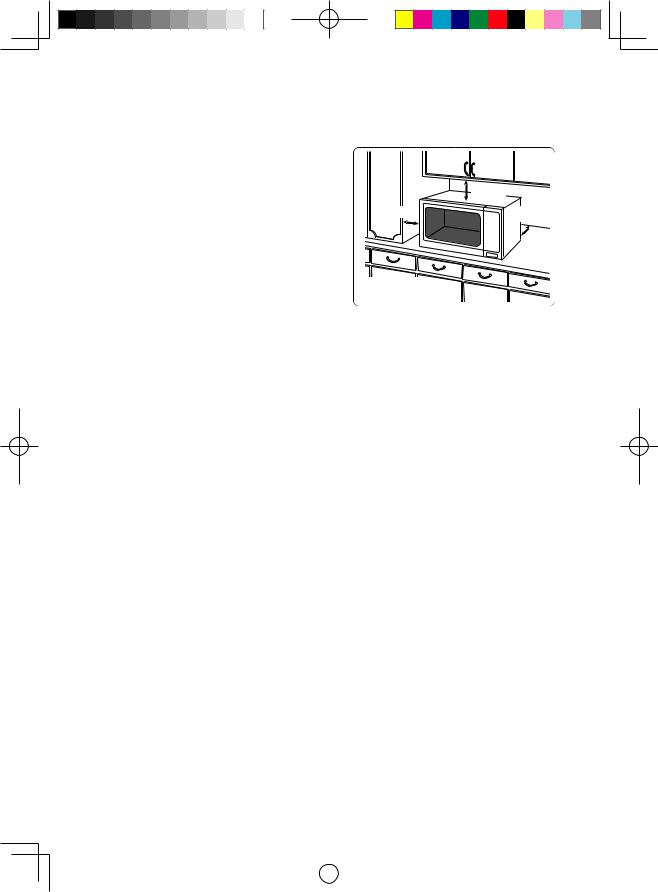
Установка и Подключение
Проверка Вашей микроволновой печи
Распакуйте микроволновую печь, удалите все упаковочные материалы и проверьте ее на наличие таких повреждений как вмятины, неисправность запоров дверцы или трещины в дверце. Если Вы обнаружите какие-либо неисправности, сразу сообщите об этом Вашему дилеру. Не производите установку поврежденной микроволновой печи.
Указания по заземлению
ВНИМАНИЕ: В ЦЕЛЯХ ОБЕСПЕЧЕНИЯ БЕЗОПАСНОСТИ МИКРОВОЛНОВАЯ ПЕЧЬ ДОЛЖНА БЫТЬ ЗАЗЕМЛЕНА!
Если сетевая розетка не имеет заземления, то покупатель должен заменить ее на другую, снабженную контактами заземления.
Рабочее напряжение
Напряжение в сети должно соответствовать значению, указанному на фирменной наклейке. При подключении к сети с напряжением больше указанного возможно возгорание или другие повреждения.
Установка микроволновой печи
Этот прибор предназначен для бытового использования, а также для применения в схожих областях, таких как:
•обеденные зоны для персонала в офисах, магазинах и других производственных помещениях;
•загородные жилые дома;
•жилые зоны для клиентов гостиниц, мотелей и других жилых помещений;
•мини-гостиницы типа “ночлег и завтрак”.
1.Установите микроволновую печь на плоскую и устойчивую поверхность на высоте не менее 85 см от пола.
Это устройство является отдельностоящим и его не следует ставить в шкаф.
2.Печь должна быть установлена так, чтобы в случае необходимости, можно было легко выключить ее, выдернув шнур из розетки.
3.Для правильной работы печи необходимо обеспечить достаточную циркуляцию воздуха.
При установке печи на поверхности кухонного стола:
a. Оставляйтесвободный промежуток 15 см от верхней поверхности печи, 10 см от задней поверхности, по 5 см от каждой из боковых сторон, не менее 40 см от передней поверхности (для открывания дверцы печи).
|
b. Если одна сторона печи находится |
|
|
впритык к стене, другая сторона или |
|
|
верх печи должны быть свободны. |
|
|
15 cm |
|
|
5 cm |
Открыть |
|
|
10 cm |
|
Верхняя |
|
|
поверхность |
|
4. |
Не устанавливайте печь в |
|
|
непосредственной близости от газовой или |
|
|
электрической плиты. |
|
5. |
Не допускается снятие ножек. |
|
6. |
Данная печь предназначена только для |
|
|
бытового применения. Не рекомендуется |
|
|
пользоваться данной печью вне |
|
|
помещения. |
|
7. |
Не рекомендуется пользоваться |
|
|
микроволновой печью при повышенной |
|
|
влажности воздуха. |
|
8. |
Сетевой шнур не должен касаться корпуса |
|
|
печи. Не допускайте соприкосновения |
|
|
сетевого шнура с горячими поверхностями. |
|
|
Не допускайте свисания сетевого шнура |
|
|
через край стола или другой мебели. Не |
|
|
опускайте сетевой шнур, вилку или печь в |
|
|
воду. |
|
9. |
Не загораживайте вентиляционные |
|
|
отверстия печи. Если во время работы |
|
|
печи эти отверстия окажутся закрытыми, |
|
|
это может привести к перегреву печи |
|
|
или к ее поломке. В этом случае печь |
|
|
защищена теплозащитным устройством |
|
|
безопасности, возобновляйте |
|
|
эксплуатацию только после охлаждения. |
|
10.Данный прибор не предназначен для |
||
|
эксплуатации с помощью внешнего |
|
|
таймера или отдельного пульта |
|
|
дистанционного управления. |
|
Rus-2
|
|
|
|
|
|
|
|
|
|
|
|
|
|
|
|
|
|
NN-GT261WM_ZP.indb |
2 |
|
2014/06/13 |
17:57:42 |
|
|
|
|
|
|
|
||||||
|
|
|
|
|
|
|
|
|
 Loading...