


16x32
Nikon StabilEyes 16x32
Instruction Manual Bedienungsanleitung Manuel d’utilisation Manual de instrucciones Manuale di istruzioni
Steadies your hands and stabilizes your view.
J
E
F
G
S
I

|
|
|
|
16x32
VR PAUSE
16x32 ................ |
x1 |
............................ |
x1 |
(SAA) .......... |
x1 |
(EAP) ................ |
x1 |
.................... |
x2 |
(6) VR PAUSE
(4)
|
|
|
|
|
|
|
|
1)(POWER)(1)
2)(2)
3)(2)(3) (2) (4) (3)
4)(5)ON VR PAUSE (6)
5)(5)OFF (1)
6)
(5) |
(1) POWER |

(1)
(2)
(3) ON/OFF
(4) (POWER) LED
ON
LED
VR PAUSE VR PAUSE
OFF
LED
OFF
OFF
OFF
16x32
OFF
ON
VR PAUSE |
VR PAUSE |
|
|
LED I |
LED II |
|
|
|
|
|
|
|
|
|
|
|
|
|
|
POWER |
||
VR PAUSE

w
ON
w
1) |
2) |
|
|
3) 4)
.................................... |
16 |
...................................... |
Water Proof |
................ |
32mm |
|
|
...................... |
±3° |
.................. |
181 x 142mm |
...................... |
15mm |
........................ |
1120g |
.... |
±3m-1 |
.................. |
6 |
.................................. |
3.8° |
|
|
1000m ............ |
66m |
|
|
...................... |
3.5m |
|
20°C |
.............................. |
2.0mm |
...................... |
-10°C +50°C |
.................................. |
4.0 |
|
|
........................ |
56 72mm |
|
|
|
|
|
|
)
CS

Congratulations
Thank you for purchasing Nikon StabilEyes 16x32. Be sure to read this manual thoroughly for proper use.
•The StabilEyes 16x32 uses advanced technology in optics, electronics, and ergonomics.
•The StabilEyes 16x32 is waterproof, can be used in rainy weather, and floats on water.
•The StabilEyes 16x32's stabilization feature cancels out the effects of external vibration and shaking that occurs with hand-held use, for stable viewing without a tripod.
•You can enjoy stable viewing and clear images even from a moving car, sailboat, motorboat, or airplane.
•When stabilization is activated, you can pause it by pressing the "VR PAUSE" button to minimize image instability while panning, shifting among objects in view, or viewing moving objects.
•The lenses are multilayer-coated to give you a wide field of view and reduce eye fatigue. The prisms are phase correction coated to provide sharp contrast and bright images.
Items Supplied |
|
The StabilEyes 16x32 .............. |
1 |
Soft case .................................. |
1 |
Neckstrap (SAA) ...................... |
1 |
Eyepiece cap (EAP) .................. |
1 |
Size AA alkaline batteries ........ |
2 |
Precautions and Warnings
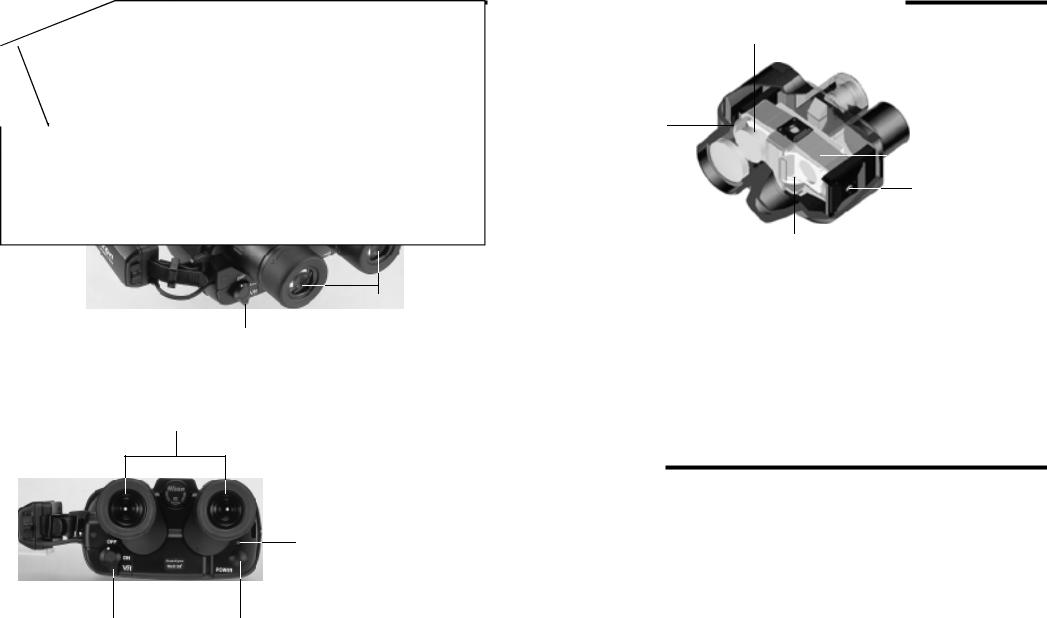
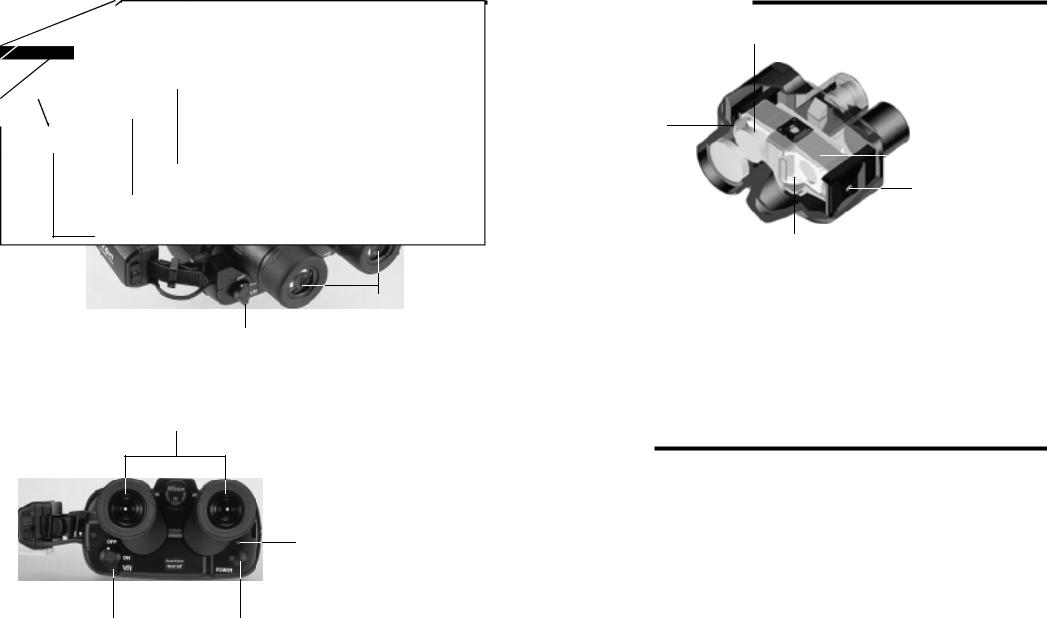
Getting Acquainted
Objective lens
(6) VR PAUSE button
Handstrap
Focus control knob
Battery holder
(4) Diopter
adjustment ring
Eyepiece lenses
Battery holder lock lever
(5) Stabilization lever
(2) Eyepiece lenses
(5) Stabilization lever |
(1) Power button |
StabilEyes Digital Image Stabilizing
— Here's How It Works
Prism Assembly
Eyepiece Lenses
Position Sensor
Objective Lens |
|
|
|
Gimbal Assembly |
|
|
|
Position Sensor
EL Direct Motor
Piezo Gyro Sensor
AZ Direct Motor
•The piezo gyro vibration sensors and direct-drive motors work together to move a gimbaled assembly with erecting prism to counteract vibration and keep the binoculars steady, which offers shake-free viewing even from a moving vehicle.
•The position sensor activates the stabilization feature as it detects vertical and horizontal motion.
•The newly designed lenses are multicoated for bright images.
•The prisms have a special coating that gives sharper images than even before.
•The eyepieces incorporate advanced optical technology that offers a wide field of view and reduces eye fatigue. They can be pivoted up and down for use with glasses.
•The StabilEyes 16x32 binoculars are waterproof and filled with dry nitrogen to prevent fogging of the optical components.
Fast Start
1)Press the Power button (1) to turn on. The electronic system will start up, and the binoculars will go to Standby mode after about five seconds.
2)Adjust the eyepiece span (2) to match the distance between your eyes.
3)Use your left eye as you adjust the focus control knob (3). When the image becomes sharp, use your right eye and turn the diopter adjustment ring (4) to focus for the right eye. Once you have performed the diopter correction, use only the control knob (3) to check focus again.
4)Turn the stabilization lever (5) to the ON position to activate the stabilization feature. While stabilization is activated, you can pause it by pressing the VR PAUSE button to minimize image instability while panning, shifting among objects in view, or viewing moving objects.
5)When finished, turn the stabilization lever (5) to the OFF position and press the Power button (1) to turn off.
6)Replace the lens caps, and return the binoculars to their case.
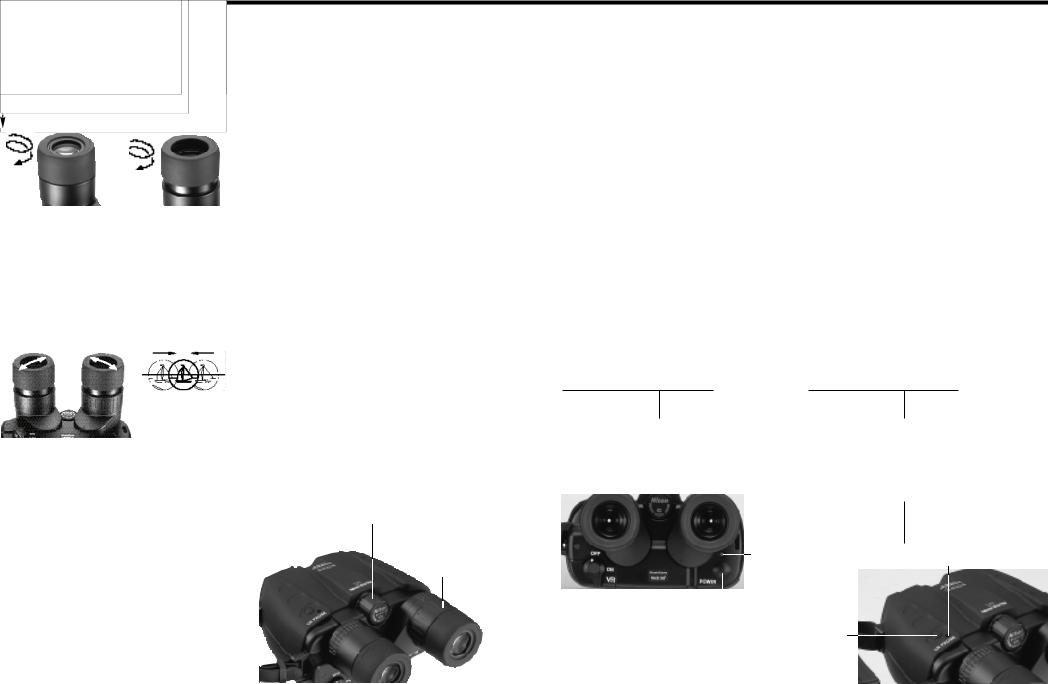
How to Use and Focus
(1) Eyepiece
If you wear glasses or sunglasses when using StabilEyes binoculars, turn the turn-slide-type eyecup to its fully retracted position. For users with normal eyesight, turn the eyecup to its fully extended position.
Eyeglass wearer |
Non eyeglass wearer |
(2) Adjusting the interpupillary distance
Grasp either eyepiece and rotate it towards or away from the center of the binocular (the other eyepiece will move equally in the opposite direction.)
Adjust the interpupillary distance to match the distance between your eyes until you see just one perfectly round image.
Merge the two circular viewfields into one.
(3) Diopter adjustment
There are two steps to focusing: Close your right eye and use only your left eye as you adjust the focus control knob. When the image is sharp, close your left eye and open your right eye. Twist the right eyepiece, to focus for the right eye. Now open both eyes and the binoculars should be perfectly focused. You can do this with the StabliEyes turned on with stabilizing activated or with the power off completely.
When you view a different subject, adjust the focus control knob until you obtain a sharp image.
(4) Stabilization feature
When you press the Power button the first time, the LED lights in orange, and the binoculars go to Standby mode. Your StabilEyes binoculars go through an internal system check and take about five seconds to stabilize their performance.
Then, turn the stabilization lever to the ON position. The LED turns green, indicating that the stabilization feature is active.
As long as you keep the VR PAUSE button pressed, stabilization is paused, so you can minimize image instability while panning, switching among objects in view, or viewing moving objects. Use this function to search among objects using the binoculars.
Setting the stabilization lever back to the OFF position turns the stabilization feature off, and the LED turns orange again, indicating Standby mode. Set the stabilization lever as you wish.
Stand by mode conserves battery power.
When finished, turn the stabilization lever to the OFF position and press the Power button to turn off.
If you leave your StabilEyes binoculars in either Standby or Stabilization mode for a few minutes without using them, the stabilization lever will return to the OFF position, and the binoculars will shut off automatically.
Focus control knob
Diopter adjustment ring
Operating System of StabilEyes
* When power is turned off, the vibration reduction mode resets automatically to "OFF".
Power on
|
|
|
|
|
|
|
|
|
|
|
|
|
|
The system powers up |
|
|
LED I: |
|
|
|
Stabilization is turned off |
|
|
LED I: off |
|
|
and performs a |
|
|
Flasshing |
|
|
|
|
|
|
||
|
|
|
|
|
|
|
|
|
|
|
||
|
5-second system check |
|
|
in orange |
|
|
|
|
|
|
|
|
|
|
|
|
|
|
|
|
|
|
|
|
|
|
|
|
|
|
|
|
|
|
|
|
|
|
If StabilEyes is left in standby for about five minutes, or stabilization mode, while activated, is not used for about one minute, they automatically shut off.
Use the stabilization lever
Pressing the VR |
Pause stabilization as long as the |
PAUSE button |
VR PAUSE button stays pressed. |
LED I |
LED II |
|
|
|
|
|
|
|
|
|
|
|
|
|
Stabilization lever |
Power button |
||
VR PAUSE button

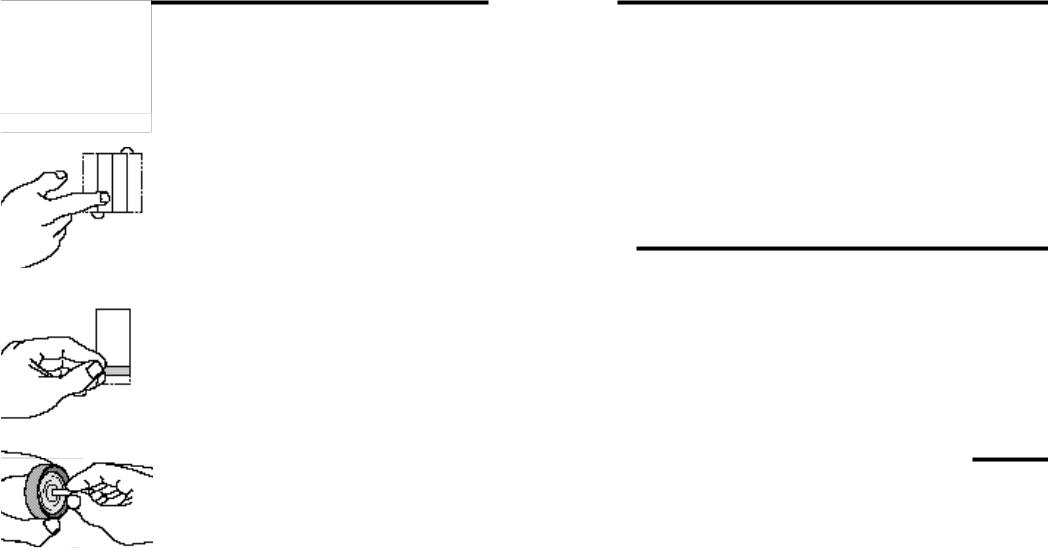
Battery Installation
1)Slide the battery compartment release knob on the handstrap to the Open position to release the battery holder.
2)Insert two new size AA alkaline batteries.
3)Attach the battery holder to the handstrap and slide the release knob to the locked position to secure the compartment.
Sliding the release knob
Open |
Close |
(Remove the battery |
(Secure the |
holder.) |
battery holder.) |
w WARNING
•Use the same type of batteries. Do NOT mix old and new batteries. Doing so can cause leakage or rupture.
•When changing the batteries outdoors, be sure not to let any water get into the battery compartment.
•If you plan to leave the binoculars stored for a prolonged period, remove the batteries in order to prevent natural discharge and/or leakage.
When the batteries are removed, keep the battery holder attached to the handstrap to protect the internal contact points.
•Keep the contact points away from any metal. Damage could result.
•NEVER slide the stabilization lever to the ON position if you do not have two batteries installed. Damage could result.
How to use the handstrap
The binoculars can be more securely held when you slip your hand through the handstrap.
Slip your hand through the handstrap and adjust the belt length.
To tighten the strap, pull the belt on the eyepiece end.
To loosen the strap, lift the buckle on the backside of the handstrap and pull on the belt.
w WARNING
The handstrap also serves as the battery holder. Do NOT apply strong force or remove the strap from the binoculars. Damage could result.
Installing the Neckstrap
1) Make a large loop at each of the |
2) Insert strap through neckstrap bracket |
neckstrap |
|
3)Lead the strap inside the loop and through the buckle and pull tight. Do the same with the outer loop.
4)Do the same with the opening in the binoculars to attach the strap on the other side.
 Loading...