


After Sales Service
United Kingdom
1If you have a Question, Comment or Problem -
Call: 0845 330 4554 (calls charged at local rate)
2For Repairs, Spares and Accessories -
The Moulinex Service Centre, c/o Wykes Electrical Repairs Ltd
Call: 0121 200 2740
3If you need to post back your faulty product
Send to: Wykes Electrical Repairs Ltd, Pope Street Birmingham B1 3AG
Republic of Ireland
1If you have a Question, Comment or Problem -
Call: 01 6774230
2If you need to post back your faulty product
Send to: Gavins, 83 Lower Camden Street, Dublin 2, Ireland
Your statutory rights are not affected by any statements in this booklet
e-mail: customerrelations@moulinex.co.uk

Important Safeguards
Read the instructions for use carefully before using your breadmaker for the first time.
This product has been designed for domestic use only. Any commercial use, inappropriate use or failure to comply with the instructions, Moulinex accepts no responsibility and the guarantee will not apply.
Never leave the breadmaker within reach of children without supervision.
This is an appliance designed to work on 230-240 volts AC only.
Check that the voltage rating corresponds to that of your household electrical wiring system.
Unplug your breadmaker as soon as you have finished using it and when you are cleaning it.
Do not use your breadmaker if it is not working correctly or if it has been damaged. If this happens please contact our approved service centre (see details at the end of this booklet).
Never dismantle the breadmaker yourself as this will negate your guarantee. This must be done by our approved service centre.
Do not place the breadmaker, the power cord or the plug in water or any other liquid.
Do not allow the power cord to hang down within reach of children.
The power cord must never come into contact with any hot parts of the breadmaker, any external heat source or rest on sharp edges.
Always plug in the appliance at an earthed power socket.
Do not use an extension lead. If you accept liability for doing so, only use an extension lead which is in good condition, has an earthed plug and is suited to the power of the appliance.
Never use or plug in your appliance if:
-it’s power cord is faulty or damaged
-the appliance has been dropped
-it has visible damage or operating faults.
In such cases, to avoid any danger, contact our approved service centre to have the appliance repaired as special tools are needed.
Do not switch on the appliance near to inflammable materials (blinds, curtains etc) or close to an external heat source (gas stove, hotplate etc).
Use only accessories and spare parts from Moulinex which are suitable for the breadmaker.
At the end of the program, always wear oven gloves to handle the pan or the hot parts of the breadmaker. The breadmaker becomes very hot
1 during use.
Never obstruct the air vent grid.
Do not cover the top of the appliance with any type of material whilst in use as this may cause the viewing window to melt.
Take great care as steam may escape when you open the lid at the end of or during the program.
When you use program 10 (jam, compotes) be careful as there may be a jet of steam and hot splashes as you open the lid.
Wiring Instructions
(For UK Only)
Warning: this appliance must be earthed.
Important: the wires in this lead are coloured in accordance with the following codes:
Green and yellow: Earth, Brown: Live, Blue: Neutral
Connect the green/yellow wire to the terminal in the plug marked “E” or by the earth symbol, or coloured green or coloured green and yellow. Connect the brown wire to the terminal in the plug marked “L” or coloured red.
Connect the blue wire to the terminal in the plug marked “N” or coloured black.
A 13 amp fuse should be fitted when the appliance is connected to a BS 1363 A plug. Seek professional advice if unsure of the correct procedure for the above.
The cord is already fitted with a plug incorporating a fuse. Should you need to replace the fuse, an appropriately rated approved BS1362 fuse must be used (refer to product specification for fuse ratings).
If the plug supplied does not fit your socket outlet, it should be removed from the mains leads and disposed of safely. The flexible cord insulation should be stripped back as appropriate and a suitable alternative plug fitted.
The replacement plug must be equipped with an appropriate fuse (refer to specification for fuse rating.)
Please note that the fuse cover is an important part of the plug. Please ensure that it is always refitted correctly. If you lose this cover please do not use the plug. You may contact our Customer Relations Department.
The safety of this appliance complies with the technical requirements and standards in force.
Page
3Product Description
4Before You Start
How To Use Your Breadmaker – Please read this section carefully.
For Bread Making -
5Making dough in your breadmaker
6Using the timer for a delayed start Slicing and storing home made bread Cleaning
7Getting to know your Breadmaker Baking programs
8Ingredients for breadmaking
9Breadmaking with the delayed start program
10Top Tips for the best Bread Making Making more than one loaf Creating your own recipes
Glazes for baked bread
11 Bread Recipes
15Super Rapid Bake Bread
16Dough Recipes
18Gluten-Free Bread Making Teabreads
20Cakes
21Jams and Compotes
22Troubleshooting
24 After Sales Service Information
2

|
|
|
|
|
|
|
|
|
|
|
|
|
|
|
|
|
|
|
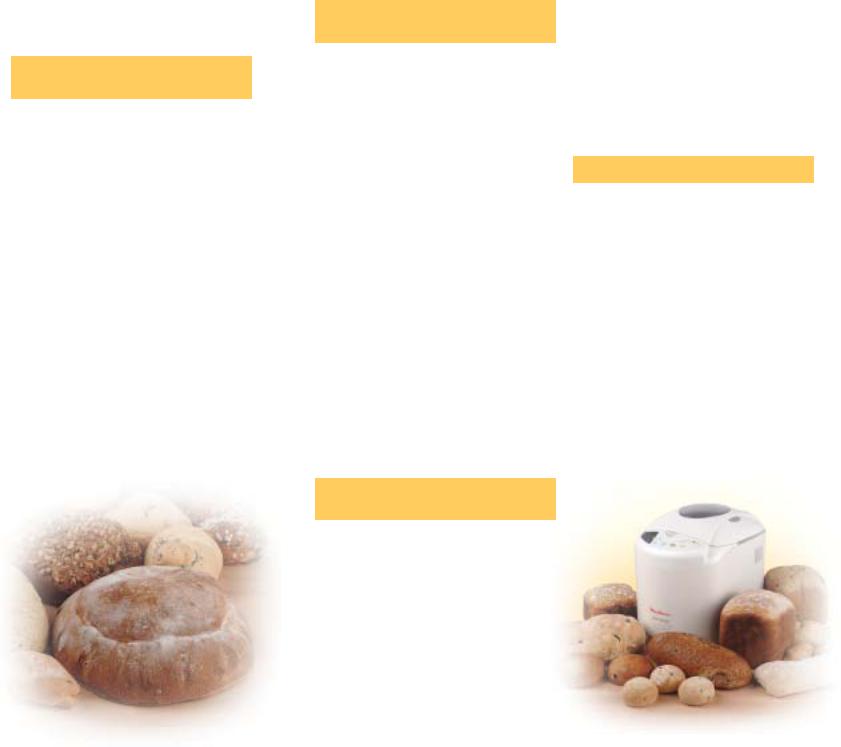
Thank you for choosing an appliance from the Moulinex range |
||
|
|
|
|
|
|
|
|
|
|
|
|
|
|
|
|
|
|
|
which is intended exclusively for making bread, teabreads, brioches, |
||
|
|
|
|
|
|
|
|
|
|
|
|
|
|
|
|
|
|
|
cakes, dough’s, jams and compotes. |
|
|
Note: The control panel has a protective |
|
|
|
|
|
|
|
|
|
|
|
|
|
|
|
|
|
|
|||
|
|
|
|
|
|
|
|
|
|
|
|
|
|
|
Before You Start |
|
IF YOU HAVE ANY PROBLEMS |
||||
film over the digital display when new |
|
|
|
|
|
|
|
|
|
|
|
|
|
|
|
|
|||||
which should be removed. |
|
|
|
|
|
|
|
|
|
|
|
C |
|
|
|
• Unpack the appliance and wash the pan and |
OR QUERIES, PLEASE CONTACT |
||||
|
|
|
|
|
|
|
|
|
|
|
|
|
|
|
|
OUR HELPLINE: |
|||||
|
|
|
|
|
|
|
|
|
|
|
|
|
|
|
|
the accessories in water and washing-up liquid. |
|||||
|
|
|
|
|
|
|
|
|
|
|
|
|
|
|
|
|
|
|
|
||
|
|
B |
|
|
|
|
|
|
|
|
|
|
|
|
|
|
|
• Rinse and dry with care. |
0845 330 4554 – UK |
||
|
|
|
|
|
|
|
|
|
|
|
|
|
|
|
|
|
• Clean the baking pan using a damp sponge. |
(01) 6774230 – IRELAND |
|||
|
|
|
|
|
|
|
|
|
|
|
|
|
|
|
|
|
|
|
|||
|
|
|
|
|
|
|
|
|
|
|
|
|
|
|
|
|
|
|
• The display has a protective film over it when |
|
|
|
|
|
|
|
|
|
|
|
|
|
|
|
|
|
|
|
|
|
|
||
|
|
|
|
|
|
|
|
|
|
|
|
|
|
|
|
|
|
|
new which must be removed otherwise you will |
|
|
List Of Parts |
|
|
|
|
|
|
|
|
|
|
|
|
|
|
|
|
|
have difficulty reading the display. |
|
||
|
|
|
|
|
|
|
|
|
|
|
|
D |
|
|
|
|
|
|
|||
|
|
|
|
|
|
|
|
|
|
|
|
|
|
F |
|
|
|
|
|
||
A - |
Main body of the appliance |
|
|
|
|
|
|
|
|
|
|
|
|
|
How To Use Your Breadmaker |
||||||
|
|
|
|
|
|
|
|
|
|
|
|
|
|
|
|
||||||
|
|
|
|
|
|
|
|
|
|
|
|
|
|
|
|
|
|||||
B - |
Lid with viewing window |
|
|
|
|
|
|
|
|
|
|
|
|
|
|
|
E |
|
|
|
|
|
|
|
|
|
|
|
|
|
|
|
|
|
|
|
|
For bread making (programs 1, 2, 3, 4, |
select the number of the program required for |
||||
C - |
Air vents |
|
|
|
|
|
|
|
|
|
|
|
|
|
|
|
|
||||
|
|
|
|
|
|
|
|
|
|
|
|
|
|
|
|
|
|||||
D - |
Inner case |
|
|
|
|
|
|
|
|
|
|
|
|
|
|
|
|
|
5, 7, 8, 9 only) |
the recipe, when you release the button the |
|
|
|
|
|
|
|
|
|
|
|
|
|
|
|
|
|
|
1 Open the lid and remove the baking pan (E) |
total cycle time will be displayed in hours and |
|||
E - |
Baking pan |
|
|
|
|
|
|
|
|
|
|
|
|
|
|
|
|
|
|||
|
|
|
|
|
|
|
|
|
|
|
|
|
|
|
|
J |
minutes. Each time you press the button it will |
||||
F - |
Kneading blade |
|
|
|
|
|
|
|
|
|
|
|
|
|
|
|
|
by firmly pulling it straight up by the handle. It is |
advance one program. If you go too far when |
||
|
|
|
|
|
|
|
|
|
|
|
|
|
|
|
|
|
|||||
G - Measuring cup |
|
|
|
|
|
|
|
|
|
|
|
|
|
|
|
|
|
important to remove the baking pan from the |
pressing the menu control, either switch the |
||
|
|
|
|
|
|
|
|
|
|
|
|
|
|
|
|
|
appliance, to avoid accidentally spilling ingredients |
appliance off and start again or simply carry on |
|||
H - |
Measuring spoon |
|
|
|
|
|
|
|
|
|
|
|
|
|
|
|
|
|
|||
|
|
|
|
|
|
|
|
|
|
|
|
|
|
|
|
|
into the inner case (D), rather than putting the |
pressing the button until it goes back to the |
|||
a = |
Tablespoon - approx. 15 ml |
|
|
|
A |
|
|
|
|
|
|
|
|
|
|
|
ingredients into the pan while it is in place. |
beginning (program 1). If you want program |
|||
|
(1/2 tablespoon also marked) |
|
|
|
|
|
|
|
|
|
|
|
|
|
|
2 Attach the kneading blade (F) onto the shaft |
1, you do not need to press the menu control (J6). |
||||
|
|
|
|
|
|
|
|
|
|
|
|
|
|
|
|
|
|
||||
b = |
Teaspoonapprox. 5ml |
|
|
|
|
|
|
|
|
|
|
|
|
|
|
|
|
|
and push firmly down. Be sure the shaft and |
6 For programs 1 to 4 only, press the |
|
|
(1/2 teaspoon also marked) |
|
|
|
|
|
|
|
|
|
|
|
|
|
|
|
|
|
kneading blade are clean of any breadcrumbs |
browning adjustment (J5) to select the crust |
|
|
|
|
|
|
|
|
|
|
|
|
|
|
|
|
|
|
|
|
or dough. |
colour - 1 = lightly browned, 2 = browned and |
|
|
|
|
|
|
|
|
|
|
|
|
|
|
|
|
|
|
|
|
3 Place the ingredients in the pan in exactly |
3 = very browned. An arrow will point to the |
|
|
|
|
|
|
|
|
|
|
|
|
|
|
|
|
|
|
|
|
|||
|
|
|
|
|
G |
|
|
|
|
|
|
|
|
|
|
|
setting selected. If you have chosen programs |
||||
|
|
|
|
|
|
|
|
|
|
|
|
|
|
|
|
the same order stated in the recipe, always |
|||||
|
|
|
|
|
|
|
|
|
|
|
|
|
|
|
|
|
|
|
adding the yeast last. Make sure the yeast does |
5 to 10 the level of browning and weight are |
|
|
|
|
|
|
|
|
|
|
|
|
|
|
|
|
|
|
|
|
automatically selected (browning on 2 and |
||
|
|
|
|
|
|
|
|
|
|
|
|
|
|
|
|
|
|
|
not come in contact with the liquid, salt or |
||
|
|
|
|
Ha |
|
|
|
|
|
|
|
|
|
|
|
weight on 750 g). |
|||||
J |
Control panel |
|
|
|
|
|
|
|
|
|
|
|
|
|
sugar. Always measure the ingredients carefully |
||||||
|
|
|
|
|
|
|
|
|
|
|
|
|
7 For programs 1 to 4 only, press weight |
||||||||
J1 - Display |
|
|
|
|
|
|
|
|
|
|
|
|
|
|
|
|
|
using the cup and spoon provided. For liquids |
|||
|
|
|
|
|
|
|
|
|
|
|
|
|
|
|
|
|
place the cup on a flat surface and view at eye |
selection button (J3) and choose either 500 g |
|||
|
|
|
|
|
|
|
|
|
|
|
|
|
|
|
|
|
|
|
|||
J2 - Delayed start buttons |
|
|
|
|
|
|
|
|
|
|
|
|
|
|
|
|
|
level. When using the spoon level off the |
or 750 g as detailed in the recipe. |
||
|
(this function cannot be |
|
|
|
|
|
|
|
|
|
|
|
|
|
|
|
|
|
ingredients with the straight edge of a knife. |
8 Press the start/stop button (J4) to start the |
|
|
used on programs 5, 6, |
|
|
|
|
|
|
|
|
|
|
|
|
|
|
|
|
|
Heaped measurements of critical ingredients |
||
|
10, and 11) |
|
Hb |
|
|
|
|
|
|
|
|
|
|
|
|
|
|
can dramatically affect the cooked result. |
program, the program is set and the time |
||
|
|
|
|
|
|
|
|
|
|
|
|
|
|
|
|
starts to count down on the display. If the |
|||||
J3 - Weight selection |
|
|
|
|
|
|
|
|
|
|
|
|
|
|
4 Place the pan in the unit. Push down firmly |
||||||
|
|
|
|
|
|
|
|
|
|
|
|
|
|
|
|
|
wrong program has accidentally been set and |
||||
J4 - Start/Stop button |
|
|
|
|
J1 |
J2 |
J3 J4 |
J5 J6 |
|
|
|
until you hear it click in position. Fold down |
the program has already started, firmly press |
||||||||
J5 - Browning adjustment |
|
|
|
|
|
|
|
|
|
|
|
|
|
|
|
|
|
the handle (it’s easier to remove after baking if |
down the start/stop button continuously for |
||
|
|
|
|
|
|
|
|
|
|
|
|
|
|
|
|
|
|||||
|
(to select the colour of |
|
|
|
|
|
|
|
|
|
|
|
|
|
|
|
|
|
you position it at the front). Note: If the baking |
about 5 seconds until the display shows “P” for |
|
|
the crust for programs 1 |
|
|
|
|
|
|
|
|
|
|
|
|
|
|
|
|
|
pan is not fitted correctly the kneading blade will |
program, then within 5 seconds reset to the |
|
|
to 4 only). |
|
|
|
|
|
|
|
|
|
|
|
|
|
|
|
|
|
not operate. |
required number program using the menu |
|
|
|
|
|
|
|
|
|
|
|
|
|
|
|
|
|
|
|
||||
J6 - Menu control |
|
|
|
|
|
|
|
|
|
|
|
|
|
|
|
|
|
5 Close the lid. Plug in the appliance. Initially |
button. Note: For program 2, there is a rest time |
||
|
|
|
|
|
|
|
|
|
|
|
|
|
|
|
|
|
|
|
the display temporarily reads “1P” on the |
for the first 30 minutes to help soften the flour |
|
|
|
|
|
|
|
|
|
|
|
|
|
|
|
|
|
|
|
|
|||
|
|
|
|
|
|
|
|
|
|
|
|
|
|
|
|
|
|
|
display to indicate program 1 and then shows |
and settle the temperature of the ingredients. |
|
|
|
|
|
|
|
|
|
|
|
|
|
|
|
|
|
|
|
|
|||
|
|
|
|
|
|
|
|
|
|
|
|
|
|
|
|
|
|
|
Mixing does not begin until the display shows |
||
|
|
|
|
|
|
|
|
|
|
|
|
|
|
|
|
|
|
|
“3:00” hours. Press the menu control (J6) to |
||
|
|
|
|
|
|
|
|
|
|
|
|
|
|
|
|
|
|
|
3:40 (750 g setting) and 3:30 (500 g setting). |
||
|
|
|
|
|
|
|
|
|
|
|
|
|
|
|
|
|
|
|
|
|
|
3 |
4 |
9 During use it is normal to hear the machine make thumping noises while it kneads the dough. Also, during certain stages in the program it is usual for condensation to form on the viewing window. NEVER open the lid during the rising and baking time as it will let warm air escape and can affect the results dramatically. Warning: Do not cover the top of the appliance with any type of material whilst in use as this may cause the viewing window to melt. Do not touch the viewing window as it gets hot during the baking cycle.
10 When baking has finished, a beep sounds. Ideally remove the bread from the pan as soon as it’s ready. There may be times when this is not possible, so the appliance automatically switches to the “keep warm” function (see point 12) to prevent condensation spoiling the bread. Switch off the bread maker at the mains and unplug. Open the lid and lift out the bread pan using oven gloves, as it will be very hot (this is easier if the handle is positioned at the front). Warning: Do not place the bread pan on heat sensitive surfaces as it will be hot.
11 To remove the loaf from the pan, still wear oven gloves and turn the pan upside down and shake the bread out onto a wire rack to cool. If you have difficulty removing the loaf, loosen the sides with a plastic or wooden spatula (never use metal utensils as they could scratch the non-stick coating). Allow the bread to cool before slicing. (See section ‘Slicing and Storing Home Made Bread’ page 6). Sometimes the kneading blade can remain in the loaf after baking, to remove it wait until the loaf has cooled slightly and then use the end of a plastic spatula or other non-metallic utensil to prise it out. Remember the kneading blade could still be hot. If the kneading blade remains stuck in the bottom of the pan, fill with warm water and leave to soak to loosen the blade from the shaft. Note: The handle on the baking pan may remain very hot for a long time after use, so take care when you come to wash it.
12 The ‘Keep Warm’ function automatically begins when the baking time has finished and the display shows 0:00. During the one hour period of keeping warm a beep continues to sound at regular intervals and at the end of the cycle automatically turn itself off. Bread can be removed at any time during the keep warm period. To turn off the ‘Keep Warm’ feature manually, switch off at the mains and unplug.
13 Allow the appliance to cool with the lid open for at least 30 minutes before using again.
Making Dough in your
Breadmaker (using programs 7 & 8)
Follow steps 1 to 9 in section ‘How to Use your Breadmaker’. Open the lid and remove the dough from the machine as soon as the cycle finishes and use straight away. If you keep the dough in the breadmaker, it may over rise and produce poor results.
Switch off the bread maker at the mains and unplug. Shape and give the dough a final rising in a warm place until doubled in size. This takes about 40 minutes - 1 hour for a large loaf and about 25 - 30 minutes for rolls. Then bake in a conventional oven. Please refer to individual recipes for further details.
The final rising, often called proving, allows the dough to rise a second time. Cover the dough to prevent a hard skin forming, either use a large polythene bag or cover with lightly oiled polythene. Place the shaped bread in a warm, draught free place until the dough had doubled in size. If the dough has risen insufficiently it will not produce a satisfactory result.
When baking it is important to preheat the oven to the temperature stated in the recipe. If using a fan oven, reduce the cooking temperature by 10°c and the cooking time may be a few minutes faster. When correctly baked the bread should be well risen and sound hollow when tapped on the base.
Using The Timer For A
Delayed Start
You can program the Breadmaker up to 13 hours in advance, so that the bread is ready at a time to suit you. The cycle time will be exactly the same, it just means that you can delay when the bread making will begin. For example, you can set the timer in the evening and wake up to fresh bread the following morning. This function cannot be used on programs 5, 6, 10, and 11.
Follow the instructions in ‘How to Use Your Breadmaker’ steps 1 - 7. The program time for the setting you have selected will be displayed.
Calculate the time you want the bread to be ready. Example: If it is 8 pm when you place the ingredients in the baking pan and you want your bread ready at 7.30 am tomorrow morning, set the timer to 11:30 (11 hours and 30 minutes), the time required until the completion of the bread.
Use the “delayed start buttons” (J2) to set the required time. Each time you press the + or - button the display will increase or decrease in 10 minutes increments. Once you have set the time, press the start/stop button (J4). The colon in the display will flash to indicate that the timer has been set and the countdown will begin.
If you make a mistake while setting the “delayed start buttons”, press and hold the “Start/Stop” button (J4) until it flashes “1 P” and you can set the timer again.
Slicing and storing home made bread
Cool bread on a wire rack for at least an hour before slicing with a sharp, serrated edge knife or electric carving knife. If you want to eat the bread while it is still warm we advise cutting chunky slices about 2.5 cm (1 inch) thick, otherwise it is difficult to get even slices.
Store bread in an airtight container or wrap loosely in a polythene bag and keep in a cool dry place. Do not keep in the refrigerator as it stales more quickly and draws the water out. Crusty bread recipes are best stored in a paper bag to prevent the crust softening.
Since home made bread has no preservatives it tends to dry out and becomes stale faster than commercial bread and is best eaten freshly made, but it should keep for about 2 days. Breads which contain egg and those without any fat should be eaten on the day they are made. Use up any dry bread for making toast. To freeze home made bread, wrap in foil or sealed freezer bags then defrost at room temperature or in the microwave.
Cleaning
•Unplug the breadmaker and allow it to cool down.
•Clean the body of the breadmaker and the inside of the pan using a damp sponge. Dry with care.
•Wash the pan and the blade using hot water and washing-up liquid. Rinse and dry quickly and carefully.
•Remove the lid to wash it in hot water and washing-up liquid. Rinse and dry quickly and carefully. Never immerse the lid or soak it in water, in order to avoid any water getting into the air vent grid.
•Never wash any part of the breadmaker in a dishwasher.
•Never use scouring pads, nor alcohol, nor scouring powder to clean the breadmaker.
5 |
6 |
 Loading...