

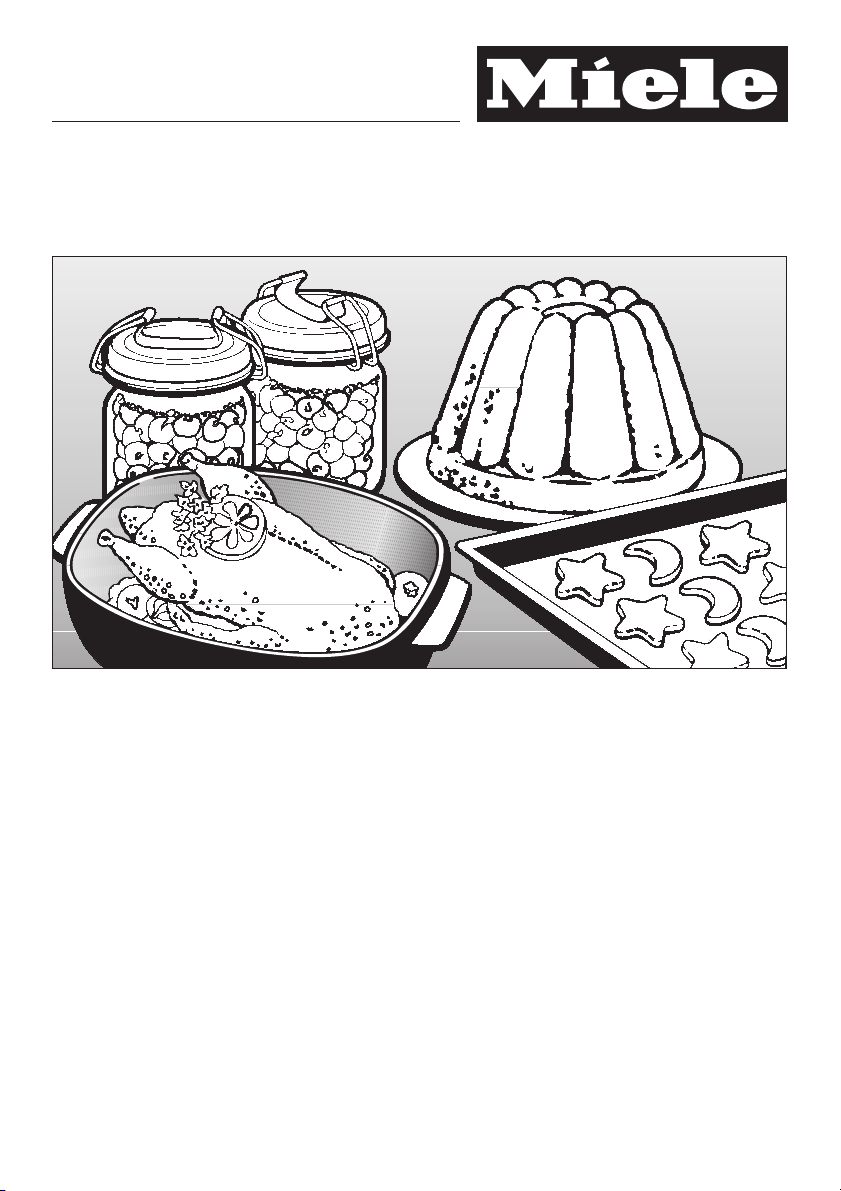
Page 1
Operating instructions
Oven
H 350-1 B
To prevent accidents
and machine damage,
read these instructions
before
installation or use.
UV
M.-Nr.
05 644 970
Page 2

Contents
Warning and Safety instructions . . . . . . . . . . . . . . . . . . . . . . . . . . . . . . . . . . . . . 4
Caring for the environment . . . . . . . . . . . . . . . . . . . . . . . . . . . . . . . . . . . . . . . . . . 8
Guide to the oven. . . . . . . . . . . . . . . . . . . . . . . . . . . . . . . . . . . . . . . . . . . . . . . . . . 9
Accessories . . . . . . . . . . . . . . . . . . . . . . . . . . . . . . . . . . . . . . . . . . . . . . . . . . . . . . 10
Baking tray, roasting / grill pan and rack . . . . . . . . . . . . . . . . . . . . . . . . . . . . . 10
Grease filter . . . . . . . . . . . . . . . . . . . . . . . . . . . . . . . . . . . . . . . . . . . . . . . . . . . 10
Anti-splash tray. . . . . . . . . . . . . . . . . . . . . . . . . . . . . . . . . . . . . . . . . . . . . . . . . 11
Roast probe . . . . . . . . . . . . . . . . . . . . . . . . . . . . . . . . . . . . . . . . . . . . . . . . . . . 11
Safety feature . . . . . . . . . . . . . . . . . . . . . . . . . . . . . . . . . . . . . . . . . . . . . . . . . . . . 12
Before using for the first time. . . . . . . . . . . . . . . . . . . . . . . . . . . . . . . . . . . . . . . 13
Description of the oven programs . . . . . . . . . . . . . . . . . . . . . . . . . . . . . . . . . . . 14
Operation . . . . . . . . . . . . . . . . . . . . . . . . . . . . . . . . . . . . . . . . . . . . . . . . . . . . . . . 16
Controls . . . . . . . . . . . . . . . . . . . . . . . . . . . . . . . . . . . . . . . . . . . . . . . . . . . . . . . . . 16
Selecting a program . . . . . . . . . . . . . . . . . . . . . . . . . . . . . . . . . . . . . . . . . . . . . . . 17
Selecting a temperature. . . . . . . . . . . . . . . . . . . . . . . . . . . . . . . . . . . . . . . . . . . . . 18
Adjusting the temperature . . . . . . . . . . . . . . . . . . . . . . . . . . . . . . . . . . . . . . . . 18
Customizing a temperature setting. . . . . . . . . . . . . . . . . . . . . . . . . . . . . . . . . . 19
Using the oven. . . . . . . . . . . . . . . . . . . . . . . . . . . . . . . . . . . . . . . . . . . . . . . . . . . . 20
Pre-heating the oven . . . . . . . . . . . . . . . . . . . . . . . . . . . . . . . . . . . . . . . . . . . . . . . 20
Interrupting cooking / turning off the oven. . . . . . . . . . . . . . . . . . . . . . . . . . . . . . . 20
Rapid heat . . . . . . . . . . . . . . . . . . . . . . . . . . . . . . . . . . . . . . . . . . . . . . . . . . . . . . . 21
To turn off "rapid heat". . . . . . . . . . . . . . . . . . . . . . . . . . . . . . . . . . . . . . . . . . . . 21
Energy-Conservation feature . . . . . . . . . . . . . . . . . . . . . . . . . . . . . . . . . . . . . . . . . 22
Oven lighting . . . . . . . . . . . . . . . . . . . . . . . . . . . . . . . . . . . . . . . . . . . . . . . . . . . . . 22
Entering a cooking time . . . . . . . . . . . . . . . . . . . . . . . . . . . . . . . . . . . . . . . . . . . . . 23
Checking, changing and deleting a cooking time. . . . . . . . . . . . . . . . . . . . . . . . . 24
Setting the timer. . . . . . . . . . . . . . . . . . . . . . . . . . . . . . . . . . . . . . . . . . . . . . . . . . 25
Turning additional features on or off . . . . . . . . . . . . . . . . . . . . . . . . . . . . . . . . . 26
2
Page 3

Contents
Baking . . . . . . . . . . . . . . . . . . . . . . . . . . . . . . . . . . . . . . . . . . . . . . . . . . . . . . . . . . 28
Baking Recommendations . . . . . . . . . . . . . . . . . . . . . . . . . . . . . . . . . . . . . . . . . 30
Roasting . . . . . . . . . . . . . . . . . . . . . . . . . . . . . . . . . . . . . . . . . . . . . . . . . . . . . . . . 32
Roasting with the Roast Probe. . . . . . . . . . . . . . . . . . . . . . . . . . . . . . . . . . . . . . 34
Roasting Recommendations . . . . . . . . . . . . . . . . . . . . . . . . . . . . . . . . . . . . . . . 38
Broiling . . . . . . . . . . . . . . . . . . . . . . . . . . . . . . . . . . . . . . . . . . . . . . . . . . . . . . . . . 39
Broiling chart . . . . . . . . . . . . . . . . . . . . . . . . . . . . . . . . . . . . . . . . . . . . . . . . . . . . 41
Defrost. . . . . . . . . . . . . . . . . . . . . . . . . . . . . . . . . . . . . . . . . . . . . . . . . . . . . . . . . . 42
Casseroles . . . . . . . . . . . . . . . . . . . . . . . . . . . . . . . . . . . . . . . . . . . . . . . . . . . . . . 43
Cleaning and care . . . . . . . . . . . . . . . . . . . . . . . . . . . . . . . . . . . . . . . . . . . . . . . . 44
Accessories . . . . . . . . . . . . . . . . . . . . . . . . . . . . . . . . . . . . . . . . . . . . . . . . . . . . . . 44
PerfectClean . . . . . . . . . . . . . . . . . . . . . . . . . . . . . . . . . . . . . . . . . . . . . . . . . . . . . 45
Catalytic enamel surfaces . . . . . . . . . . . . . . . . . . . . . . . . . . . . . . . . . . . . . . . . . . . 46
To remove the oven door . . . . . . . . . . . . . . . . . . . . . . . . . . . . . . . . . . . . . . . . . 47
To remove the runners . . . . . . . . . . . . . . . . . . . . . . . . . . . . . . . . . . . . . . . . . . . 48
To remove the back panel . . . . . . . . . . . . . . . . . . . . . . . . . . . . . . . . . . . . . . . . 48
To lower the upper heating element and remove the safety guard . . . . . . . . . 49
Frequently asked questions . . . . . . . . . . . . . . . . . . . . . . . . . . . . . . . . . . . . . . . . 50
After sales service . . . . . . . . . . . . . . . . . . . . . . . . . . . . . . . . . . . . . . . . . . . . . . . . 53
Optional accessories. . . . . . . . . . . . . . . . . . . . . . . . . . . . . . . . . . . . . . . . . . . . . . 54
Electrical connection. . . . . . . . . . . . . . . . . . . . . . . . . . . . . . . . . . . . . . . . . . . . . . 56
Installing the oven . . . . . . . . . . . . . . . . . . . . . . . . . . . . . . . . . . . . . . . . . . . . . . . . 57
3
Page 4

Warning and Safety instructions
This appliance is intended for resi
dential use only. Only use the appli
ance for its intended purpose. The
manufacturer can not be held re
sponsible for damages caused by
improper use of this oven.
This appliance complies with current
safety requirements. Improper use of
the appliance can lead to personal
injury and material damage.
Read all instructions before installing
or using the oven for the first time.
Keep these operating instructions in
a safe place and pass them on to
any future user.
-
-
Installation and Servicing
Before installation make sure that
the voltage and frequency listed on
the data plate correspond with the
household electrical supply. This data
must correspond to prevent injury and
machine damage. Consult a qualified
electrician if in doubt.
Be certain your appliance is prop
erly installed and grounded by a
-
qualified technician.
To guarantee the electrical safety of this
appliance, continuity must exist be
tween the appliance and an effective
grounding system. It is imperative that
this basic safety requirement be met. If
there is any doubt, have the electrical
system of the house checked by a
qualified electrician. The manufacturer
cannot be held responsible for dam
ages caused by the lack, or inade
quacy of, an effective grounding sys
tem.
The oven is not to be operated until
it has been properly installed within
cabinetry.
Installation, repair and mainte-
nance work should be by a Miele
authorized service technician. Work by
unqualified persons could be dangerous and may void the warranty.
Before installation or service, dis
connect the power supply to the
work area by removing the fuse, "trip
ping" the circuit breaker, or unplugging
the unit.
If the oven is to be installed under
a cooktop, a sealing strip must re
place the stainless steel rail above the
control panel, to prevent liquids from
entering the oven controls.
-
-
-
-
-
-
-
-
4
Page 5

Warning and Safety instructions
Oven operation
Ovens can produce high tempera
tures.
Prevent children from touching the
appliance when in use.
Use heat-resistant oven mitts when
placing items in the oven, turning
them, or removing them from the oven.
The upper heating element and oven
racks can become very hot and cause
burns.
Always open the door carefully. Al
low hot air or steam to escape before placing or removing food.
To prevent burns allow the upper
element to cool before cleaning.
Use care when lowering the upper
heating element. Damage to the element is possible if extreme force is
used.
The door gasket should be kept
clean with warm water and some
liquid soap. The door gasket is essen
tial for a good seal. Care should be
taken not to rub, damage or move the
gasket.
-
Only clean parts listed in this
manual.
Always place oven racks in their
desired height while the oven is
cool. This will prevent burns.
Oven mitts are needed when adjusting
hot racks. Do not allow the mitts to
come in contact with the heating ele
ments.
Caution: Heating elements may be
hot even though they are not glow
ing. During and after use, do not let
clothing or other flammable materials
-
come in contact with heating elements
or interior surfaces of the oven until
they have had sufficient time to cool.
External parts of the oven such as the
door glass, vents, and control panel
can become hot.
Do not block oven
vents.
Do not let metal objects (aluminum
foil, metal pans) or the meat probe
come in contact with a hot heating ele
ment.
-
-
-
-
Do not use oven cleaners. No com
mercial oven cleaner or oven liner
protective coating of any kind should
be used in or around any part of the
oven.
-
5
Page 6

Warning and Safety instructions
Do not slide pots or pans on the
oven floor. This could scratch or
even damage the surface.
Do not lean, sit, or place heavy
items on the open oven door. The
door can support a maximum weight of
22 lbs (10 kg).
Cover all cooked food that is left in
the oven to be kept warm. This will
prevent moisture from condensing on
the interior of the oven. Long-term or
excessive condensation could damage
the oven.
Only use the Miele roast probe
supplied with the oven. If a replacement is necessary, it can be purchased from the Miele Technical Service Dept. or a Miele dealer.
Remove the roast probe from the
oven when not using the probe.
High broiling or pyrolytic temperatures
could damage the probe.
Never use aluminum foil to line
the oven floor or place pots, pans
or baking sheets directly on the
oven floor when using "Sur
round", "Bottom Heat" or "Inten
sive". This could crack the enamel
on the oven floor.
Do not use it as a dryer, kiln,
dehumidifier, etc. Due to the heat gen
erated in the catalytic converter of the
oven, any fumes or vapors given off by
glues, plastics or other non-food items
could ignite and cause property damage or injury.
or under an oven, or near cooking surfaces.
-
-
This oven must only be used for
cooking, baking or broiling food.
-
Flammable liquids and materials
should never be stored in, above
Do not heat unopened containers
of food in the oven, as pressure
may build up and cause them to ex
plode.
Never add water to food on a hot
tray or pan or directly onto food in
a hot oven. The steam created could
cause serious burns or scalds and the
sudden change in temperature can
damage the enamel.
6
-
Page 7

Warning and Safety instructions
General notes
Do not use a steam cleaner to
clean the oven. Steam could pene
trate electrical components and cause
a short circuit.
Children should not be left alone or
unattended in an area where an
oven is in use. They should never be al
lowed to sit or stand on any part of the
oven.
Caution: Do not store items of interest
to children in cabinets above an oven.
Children climbing on the oven to reach
these items could be seriously injured.
Do not leave the oven unattended
when cooking with oils or fats, they
can be a fire hazard if allowed to overheat.
Do not use water on grease fires!
Smother the fire with a dry chemical or foam fire extinguisher.
Wear proper clothing. Loose-fitting
or hanging garments should never
be worn while using the oven.
Do not use the oven to heat the
room.
Use only dry, heat resistant pot
holders. Moist or damp potholders
used on hot surfaces may result in
steam burns. Do not let potholders
come in contact with oils. Do not substi
tute towels or other bulky items for pot
holders.
-
Always make sure food is suffi
ciently cooked or reheated. Many
factors affect the overall cooking time,
including the size and amount of food,
its temperature and the recipe. Some
foods may contain microorganisms that
are only destroyed by thorough cook
ing. If in doubt, select a longer cooking
or heating time.
It is important that the heat be al-
lowed to spread evenly throughout
the food. This can be achieved by stirring or turning the food, or by setting
longer cooking times.
Disposal of an old machine
Before discarding an old appli-
ance, disconnect the power cord
and remove any doors to prevent haz
ards.
-
-
-
-
-
-
When using small kitchen appli
ances near the oven, make certain
that the power cords do not come in
contact with or get caught in the oven
door.
-
7
Page 8

Caring for the environment
Disposal of the packing mate
-
rial
The transport and protective packing is
made from environmentally friendly ma
terials and can be recycled.
Please recycle.
Disposal of an old machine
Old appliances may contain materials
that can be recycled. Please contact
your local recycling authority about re
cycling these materials.
-
8
Page 9
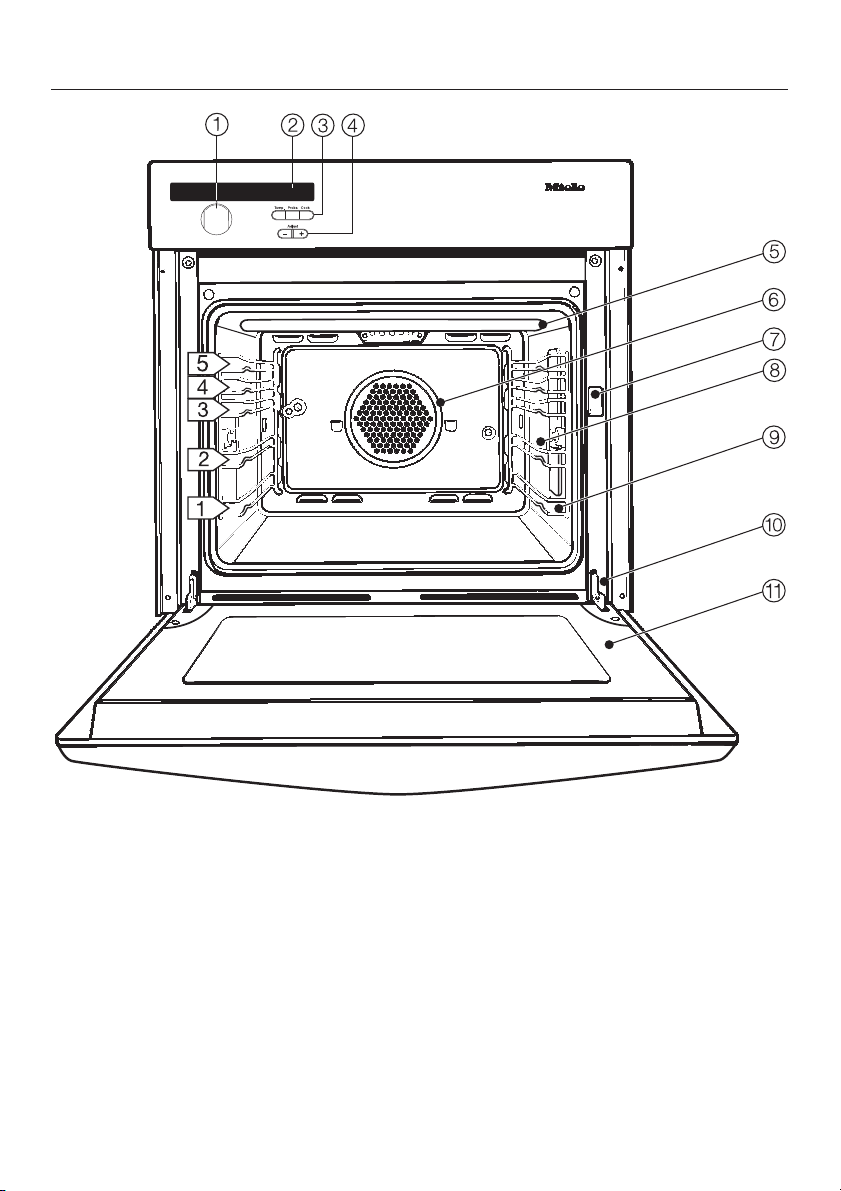
Guide to the oven
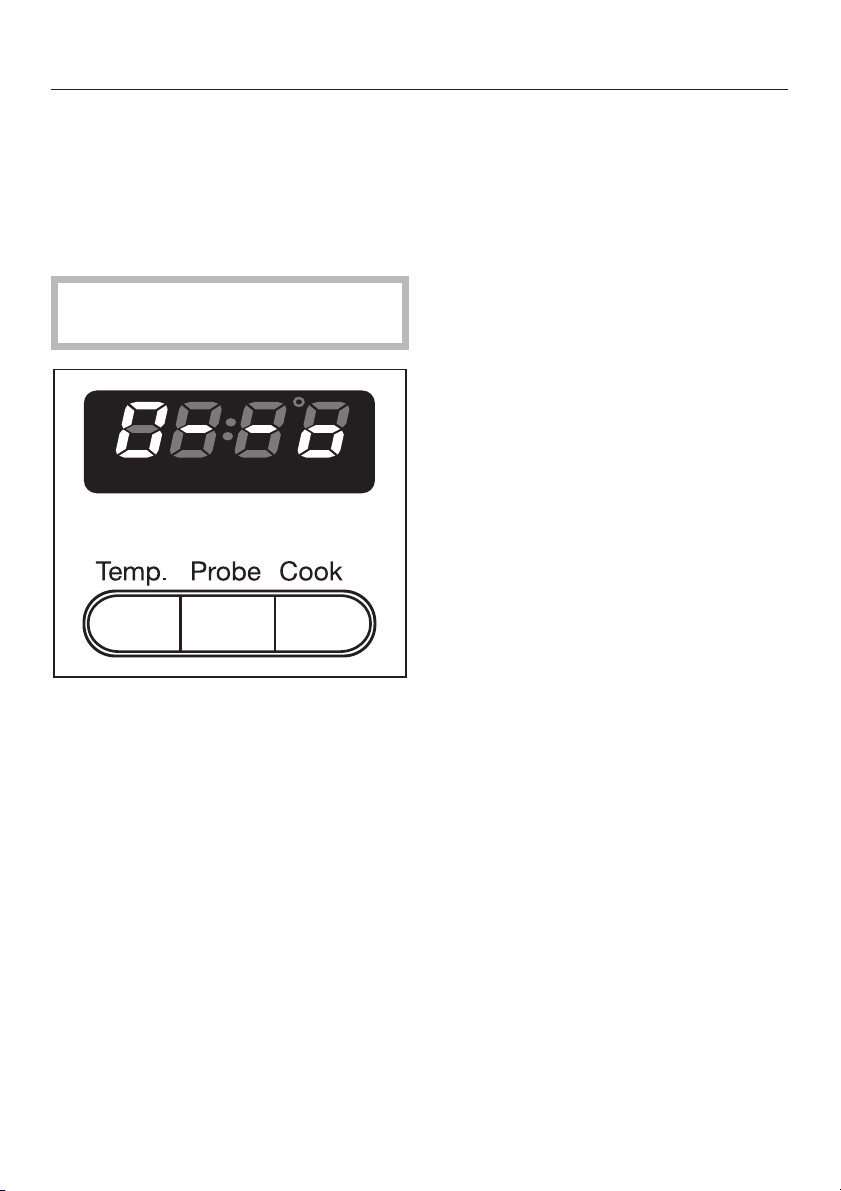
Control panel
a Program selector
b Oven display
c Oven push buttons
d +/– adjust buttons with indicator
Oven interior
e Upper heating element and safety
guard
f Convection fan
g Access door for halogen lamp
h Connection socket for roast probe
i Non-tip, five level runners
j Door safety switch
k Oven door
9
Page 10
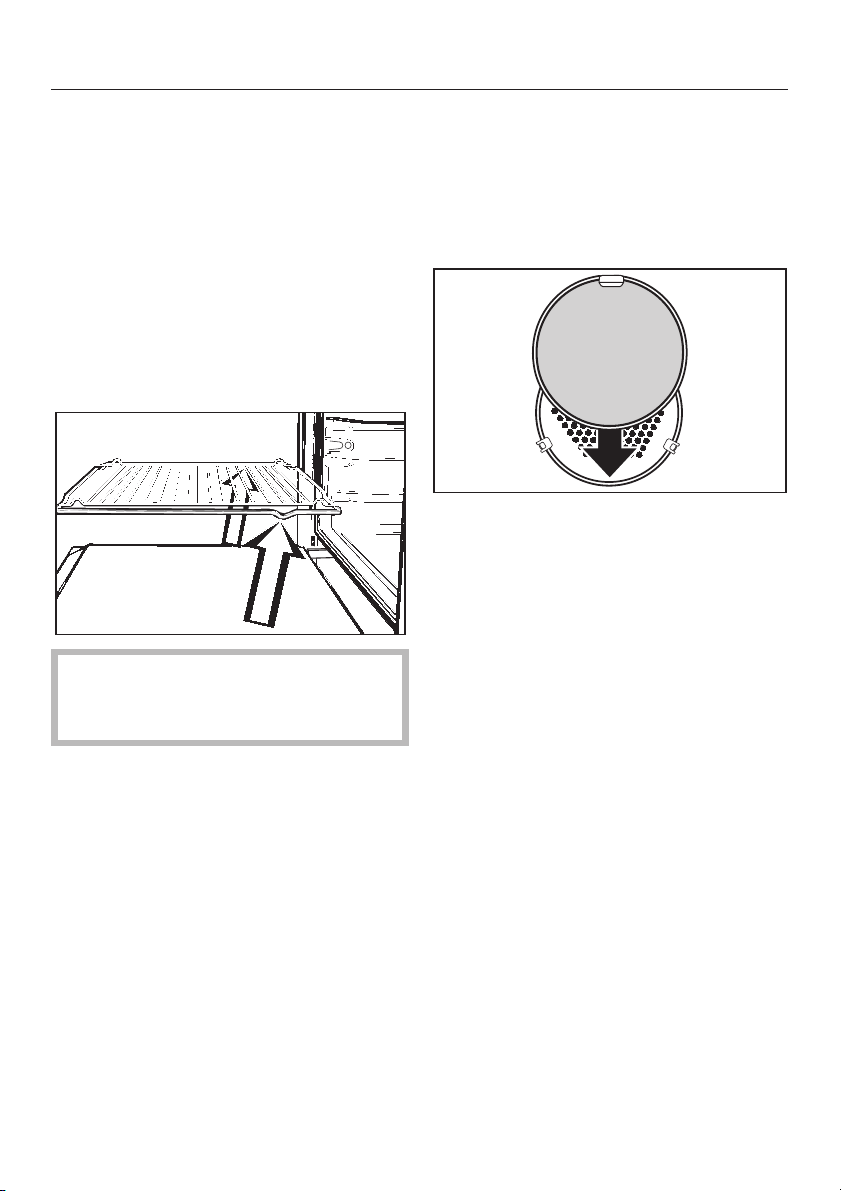
Guide to the oven
Accessories
The following accessories are supplied
with the oven.
Baking tray, roasting / grill pan and
rack
The baking tray, roasting / grill pan and
rack are fitted with non-tip safety
notches which prevent them being
pulled out completely while the oven is
in use.
When inserting the tray, pan and
rack, always check that the safety
notches are at the rear of the oven.
Grease filter
When roasting on the rack, in an open
pot or using "Convection", "Auto Roast"
or "Fan Broil" make sure the grease filter
is inserted in front of the fan opening.
The filter helps to keep the oven and
the area behind the interior back panel
clean from moisture and grease.
The tray, pan and rack can only be re
moved from the oven by raising them
upwards and then pulling out.
10
-
Page 11
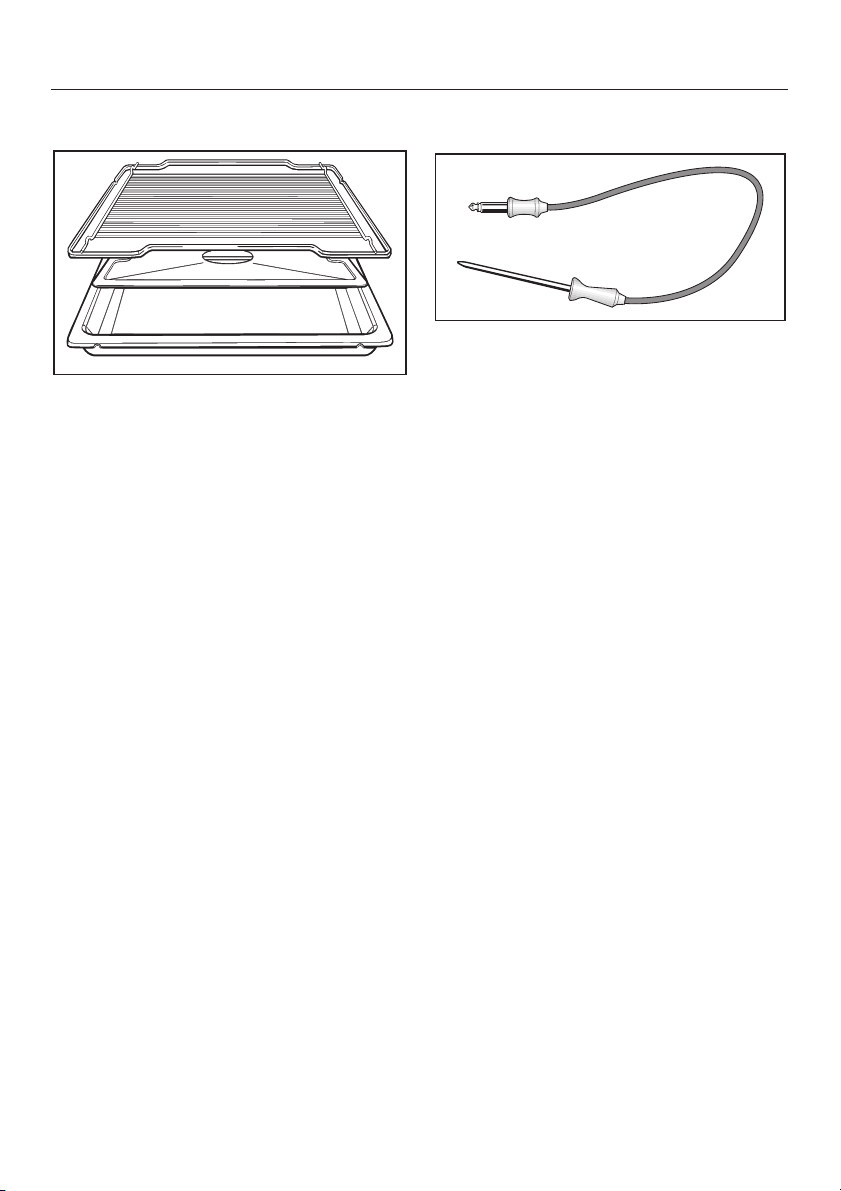
Guide to the oven
Anti-splash tray
To be placed in the drip pan when broil
ing.
The juices from food being broiled are
collected under the anti-splash tray,
where they can be easily cleaned or
used in sauces or gravies.
Roast probe
The roast probe enables the roasting
process to be monitored simply and re
liably. See "Roasting with the Roast
Probe" for details.
-
11
Page 12
Safety feature
Child Safety Lock
The Child Safety Lock can be activated
to prevent the oven being turned on ac
cidentally, or by children.
To activate the Child Safety Lock:
The program selector must be at the
"0" (OFF) position.
To cancel the Child Safety Lock:
Press the "Temp." button until the key
^
symbol in the display disappears.
-
^ Press the "Temp." button until the key
symbol appears in the display.
Once this symbol appears, the oven is
locked.
12
Page 13
Before using for the first time
Clean the oven
Before using the oven for the first
time be certain to remove all labels
from the oven and accessories.
Use a soft cloth or sponge to wipe
^
out the oven interior using a solution
of warm water and a non abrasive
detergent. Dry the interior with a soft
cloth.
Do not close the oven door until the
oven interior has dried.
^ Rinse the accessories.
^ Mount the runners in the sides of the
oven.
New ovens may have a slight odor dur
ing the first use. Operating the oven at
a high temperature will eliminate the
odor quickly.
^ Turn the program selector to "Con-
vection".
Adjust
^ Select the highest temperature
(480°F/250°C), using the "+" button
while the indicator light between the
"+" and "–" buttons is lit.
-
Set the timer for 2 hours.
Make sure the room is well ventilated
during this process.
13
Page 14

Description of the oven programs
Convection
The convection fan circulates heated
air throughout the oven. Pre-heating the
oven is not necessary, since the heated
air instantly surrounds the food.
Only pre-heat the oven when roasting
meat or baking bread made with dark
flour.
When using the convection program, it
is possible to bake and roast on differ
ent levels at the same time.
When a temperature above
280°F/140°C is selected, the "rapid
heat" feature will automatically be activated.
-
Auto Roast
This program combines "convection"
with "Auto Roast", which initially heats
the oven to a high temperature to seal
the meat, retaining moisture and tenderness.
Surround
In the "Surround" program heat is radi
ated directly on the food from above
and below.
Preheat the oven when:
baking cookies or cakes,
–
baking some types of dough,
–
baking bread made with dark flour,
–
roasting meat.
–
When a temperature above
300°F/150°C is selected, the "rapid
heat" feature will automatically be activated.
-
Once the high temperature has been
reached, the cooking temperature is
automatically lowered to the selected
temperature.
When a temperature above
280°F/140°C is selected, the "rapid
heat" feature will automatically be acti
vated.
14
-
Page 15

Description of the oven programs
Defrost
Defrost can be operated with heat up to
120°F/50°C, or without heat, using am
bient air circulated by the fan.
-
Intensive
This program combines "convection"
with heat from the lower heating ele
ment. It is useful for food with a moist
topping and crisp base, such as pies,
pizza and quiche.
-
Fan Broil
The hot air from the upper heating element is distributed over the food by the
fan. This enables a lower temperature
than conventional broiling to be used.
Broil
Broil is used to prepare small quantities
of food. The inner part of the upper
heating element cycles on and off to
maintain a selected broiling tempera
ture.
-
Maxi Broil
Maxi Broil is used to prepare large
quantities of food. The entire upper
heating element cycles on and off to
maintain a selected broiling tempera
ture.
-
15
Page 16
Operation
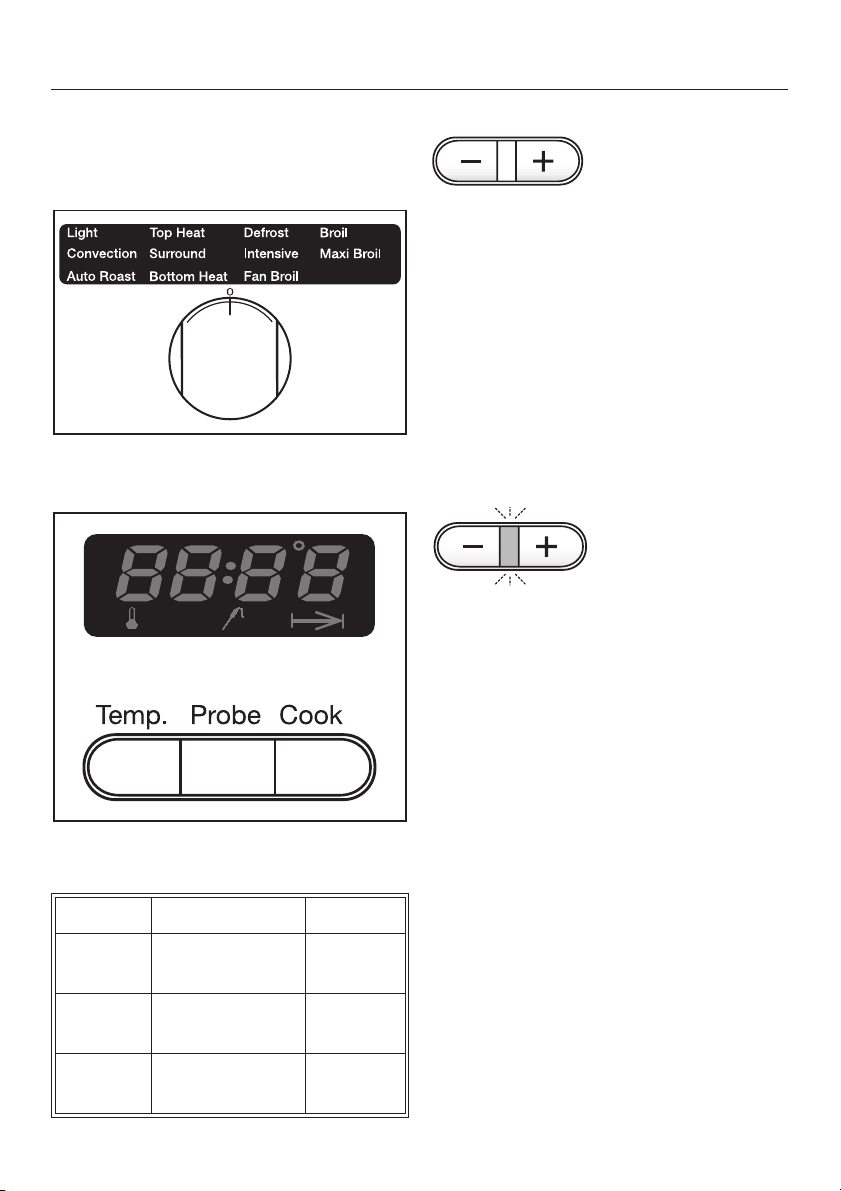
Controls
The oven controls consist of the pro
gram selector and push buttons.
The program selector can be turned either way.
-
All temperature and time selections are
made by using the "+" or "–" buttons,
slowly, one digit at a time (short pushes
on the button); and rapid advancement
(hold the button in).
oven temperatures are in 10°F/5°C
–
increments .
core temperatures are in 2°F/1°C in
–
crements .
– timer in 1 minute increments.
While this light is on,times and temperatures can be entered or changed.
When the indicator light goes out your
entry will be temporarily stored.
-
Each push button has a matching sym
bol in the oven display.
Button controls: symbol
Temp. oven tempera
ture settings
Probe core tempera
ture settings
Cook timer opera
tions
16
-
-
-
p
e
g
-
Page 17

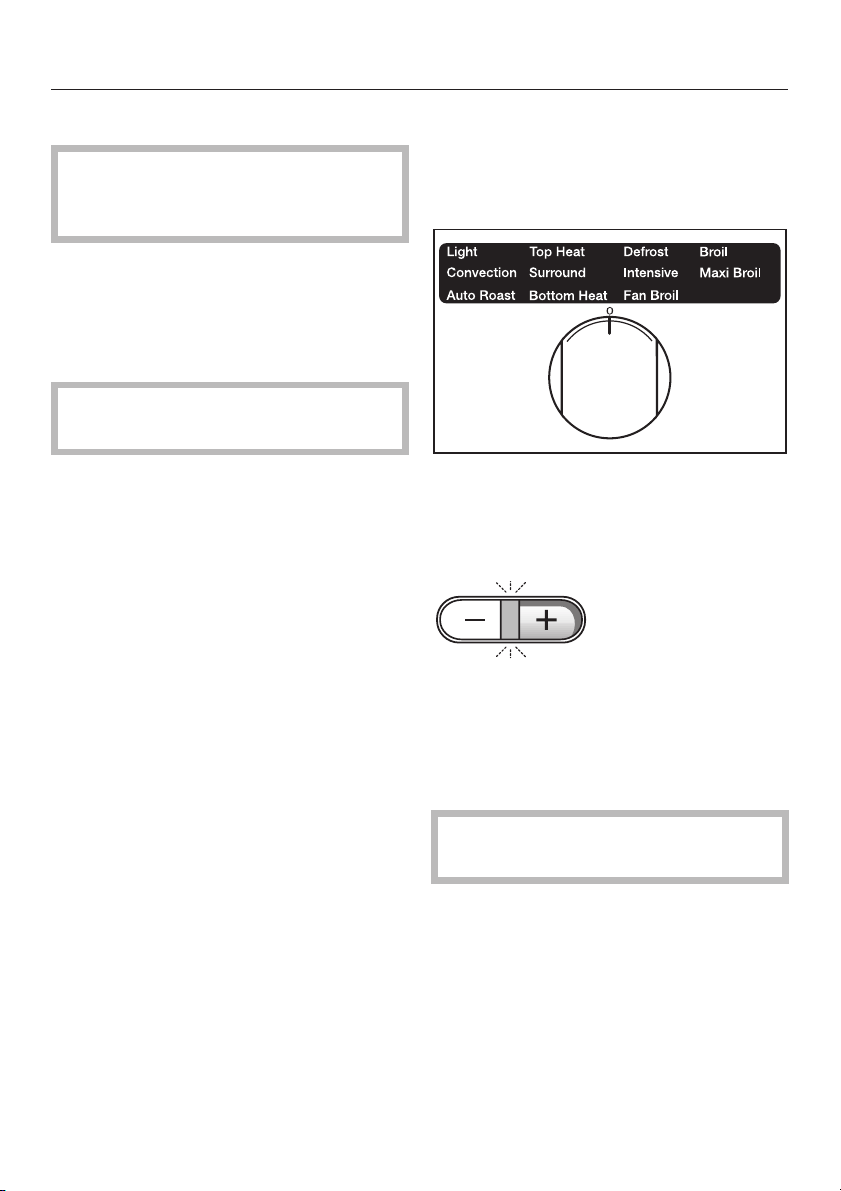
Selecting a program
By turning the program selector, the fol
lowing settings can be chosen:
Light
–
Turns the oven light on and off.
Convection
–
Preset temperature 320°F/160°C
For baking or roasting on several lev
els at the same time.
Top Heat
–
Preset temperature 370°F/190°C
For browning dishes, finishing dishes
with a cheese topping.
– Surround
Preset temperature 370°F/190°C
Top and bottom heat together, for
baking / roasting traditional recipes
and soufflés.
– Bottom Heat
Preset temperature 370°F/190°C
Use this setting towards the end of
baking, to brown the base of a cake.
Operation
Defrost
–
For gentle defrosting of deep frozen
foods.
Intensive
–
Preset temperature 340°F/170°C
For recipes with a moist topping, and
a crisp base, e.g. pizzas, quiche,
pies and cheesecake. Not suitable
-
for roasting or shallow baking.
Fan Broil
–
Preset temperature 390°F/200°C
Ideal for grilling thicker items such as
stuffed meat, kebabs or poultry.
– Broil
Preset temperature 460°F/240°C
For grilling flat or thin items, small
quantities, and for browning.
– Maxi Broil
Preset temperature 460°F/240°C
For grilling thicker items, large quantities, and for browning.
–
Auto Roast
Preset temperature 320°F/160°C
Seals in meat juices with an initial
high temperature followed by a nor
mal roasting temperature.
-
17
Page 18
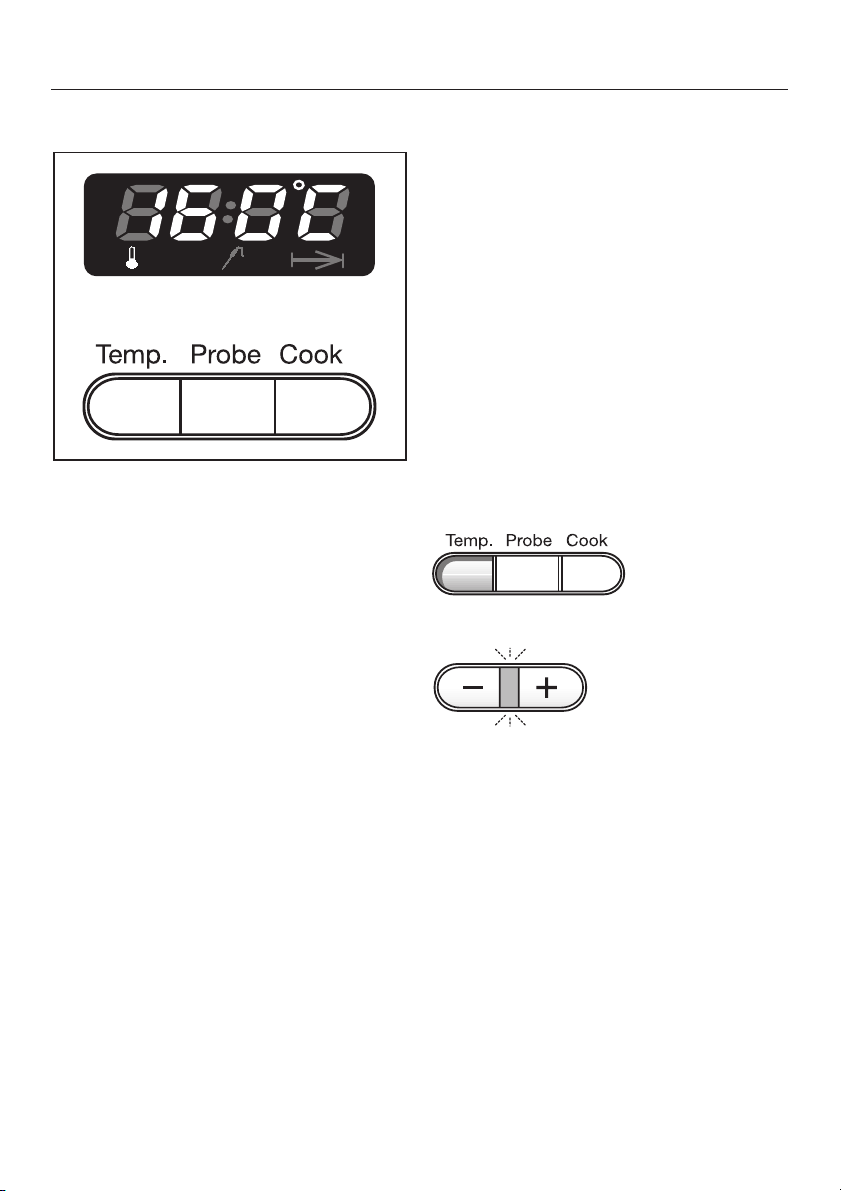
Operation
Selecting a temperature
As soon as a program is selected, the
preset temperature for that program
appears in the oven display. The oven
starts heating.
The display will show the actual tem-
perature.
The temperature can be monitored in
the display.
Adjusting the temperature
The preset temperature of a program,
can be adjusted within the range shown
below:
Convection . . . . . . . 90-480°F/30-250°C
Auto Roast . . . . . 210-420°F/100-230°C
Top Heat . . . . . . . . . 90-480°F/30-250°C
Surround . . . . . . . . . 90-510°F/30-280°C
Bottom Heat . . . . 210-480°F/100-250°C
Defrost . . . . . . . . . . . 90-120°F/30-50°C
Intensive . . . . . . . . 120-480°F/50-250°C
Fan Broil . . . . . . . . 120-470°F/50-260°C
Broil (small). . . . . 390-570°F/200-300°C
Maxi Broil (large). 390-570°F/200-300°C
To change the temperature:
^ Press the "Temp." button.
18
^
Enter the desired temperature with
the "+/–" button.
Page 19

Customizing a temperature setting
Operation
You can enter and save your own tem
peratures if you frequently work with
temperatures that differ from the preset
settings (except "Defrost").
To enter your own settings:
Use the program selector to choose
^
the program that is to be given a dif
ferent temperature.
The preset temperature will appear in
the display.
Use the "+" or "–" buttons to enter the
^
desired temperature.
^ To store the new temperature, press
the "Temp." button until the tone is
heard.
The new temperature will appear when
the program is selected.
In the event of a power failure, any customized temperatures will be lost and
must be re-entered.
-
-
19
Page 20

Operation
Using the oven
Place food to be cooked in the oven.
^
Turn the program selector to the de
^
sired program.
The oven temperature, will appear in
the display and the indicator between
the "+/–" button will light.
To change the preset temperature:
Press the "Temp." button.
^
Using the "+/–" buttons enter the de
^
sired temperature.
The oven will start to heat as soon as
the "+/–" button indicator goes out.
Heating is automatically interrupted if
the oven door is opened. When "Convection" is being used, the fan will also
turn off.
Pre-heating the oven
Pre-heat the oven when:
baking bread made with dark flour,
–
roasting meat,
–
for baking cookies and cakes.
–
To pre-heat
Select the desired program.
–
Adjust the preset temperature, if
–
-
needed.
When the desired temperature has
^
been reached, place the food in the
oven.
Interrupting cooking / turning
off the oven
^ Turn the program selector to "0".
The oven will turn off, and all programs
will be cancelled.
Exceptions:
20
–
If the roast probe remains inserted in
its receptacle, the "e" symbol will re
main lit.
-
Page 21

Operation
Rapid heat
With the "Convection", "Auto Roast" and
"Surround" programs, the "Rapid heat"
feature will be activated automatically if
the temperature desired is:
at least 280°F/140°C with "Convec
–
tion" and "Auto Roast" settings
or
at least 300°F/150°C with "Surround".
–
The rotating "F" (or "C") beside the tem
perature display indicates that "rapid
heat" is on.
As soon as the desired temperature
has been reached, the additional heating elements used during "rapid heat"
will turn off.
-
To turn off "rapid heat"
For some dishes it may be desirable to
turn off "rapid heat" (cookies, small
cakes).
Select the oven program and temper
^
ature.
As soon as the actual temperature ap
pears in the display, "rapid heat" can be
turned off.
-
^ Press the "–" button and hold until the
"F" (or "C") in the display stops rotating.
Once the program selector has been
turned to "0", "Rapid heat" will be available for the next use.
Additionally, three oven programs can
be programmed for use without the
"rapid heat" feature (see "Turning additional features on or off", additional fea
ture 06).
-
-
-
21
Page 22

Operation
Energy-Conservation feature
When using the "Cook" button or the
roasting probe, the residual heat of the
oven is automatically used to finish the
cooking process to conserve energy.
Shortly before the end of the cooking
process, the oven shuts off the heat.
The letters "EC" will appear in the display.
The cooling fan will continue to run in
"EC", as well as the convection fan if a
"fan" function was chosen.
Oven lighting
The oven will light whenever the oven
door is opened, and during program
ming. The light will go out when the
door is closed, or 15 seconds after a
button has been pushed.
The oven lighting can be changed (see
"Turning additional features on or off,
feature 03").
-
22
Page 23

Operation
Entering a cooking time
When an oven program is selected, the
"Cook" button can be used to enter a
cooking time. The oven will turn off au
tomatically at the end of the cooking
time.
A cooking time of between 1 minute up
to 23 hours 59 minutes can be entered.
A cooking time cannot be entered
when the roast (internal temperature)
probe is being used. The internal
temperature of the food will deter
mine the cooking time in this in
stance.
Selecting a program will cancel any
time set with the timer (see, "Setting
the timer").
The oven heating starts again if you
– change the oven temperature.
– extend the cooking time consider-
ably.
-
-
Select a program and temperature.
^
-
Press the "Cook" button.
^
"0:00" will appear in the display and the
"+/–" indicator will light.
While the light between the "+/–" but
^
tons is lit, hours and minutes can be
entered by using the "+" button.
The cooking process will begin as soon
as the indicator light between the "+/–"
button goes out.
-
23
Page 24

Operation
At the end of the cooking time:
A tone sounds for 5 seconds and the
"g" symbol flashes.
The tone and the flashing symbol can
be turned off by
pressing the "Cook" button.
–
turning the program selector to "0".
–
Checking, changing and
deleting a cooking time
To check a cooking time
Press the "Cook" button.
^
The remaining cooking time will appear
in the display.
To change a cooking time
Press the "Cook" button.
^
Use the "+" or "–" buttons to enter the
^
new time.
When the indicator between the "+/–"
buttons goes out, the new time has
been entered.
To delete a cooking time
^ Press the "Cook" button.
^ Use the "–" button to set the cooking
time to "0:00".
During a power failure, all entries will be
cancelled.
24
Page 25

Setting the timer
The timer can be used to time any ac
tivity in the kitchen.
The timer can only be set when the
program selector is at "0".
If an oven program is selected the
timer will be cancelled.
To set the timer
(1 min. - 23 hrs. 59 mins.)
^ Press the "Cook" button.
^ Enter the desired time in hours and
minutes with the "+" button.
At the end of the timed period:
a tone sounds for 5 seconds.
–
the "g" symbol will also flash for 1
–
minute.
The tone and the flashing symbol can
be cancelled by pressing the "Cook"
button.
To cancel the timer
^ Press the "Cook" button.
^ Use the "–" button to set the timer to
"0:00".
When the "+/–" indicator light goes out,
the time set starts counting down in
minutes.
25
Page 26

Turning additional features on or off
Please consult the chart for the different
possibilities.
To turn an additional feature on or
off:
Turn the program selector to "0".
^
Open the oven door fully.
^
Turn the program selector to the
^
"Light" position.
Press the "Temp." button.
^
"01:0" or the most recently changed
feature will appear in the oven display.
^ Use the "+/–" buttons to select the ad-
ditional feature to be changed, (see
chart).
Press the "Cook" button to turn the
^
feature on or off.
The following appears after the colon:
1 when the feature is on,
–
0 when the feature is off.
–
Turn the program selector to the "0"
^
position.
The change is stored in memory.
You may change as many additonal
features as you wish, as long as the
program selector has not been turned
to the "0" position.
26
Page 27

Turning additional features on or off
The additional feature is (* marks the preset setting)
off: on:
01:0* The program and temperature can be ad
justed at any time.
02:0* has no function.
03:0* The oven light comes on when selecting a
program.
04:0* The temperature is displayed in °C. 04:1 The temperature is displayed in °F.
05:0* The oven light turns off 15 seconds after
program selection. The light can be
turned back on at 15 second intervals by
pressing any button.
06:0* Rapid heat is switched on during "Con-
vection", "Auto Roast" and "Surround". The
Convection heating element and the fan
as well as the Top Heat heating element
are turned on at the same time to heat the
appliance as rapidly as possible to save
energy.
09:0* A tone sounds at the end of cooking. 09:1 The tone at the end of cooking is turned
01:1 The oven-locking feature is activated after
program and temperature have been set
and the indicator between the "+/–" button
has gone out. The oven program can no
longer be adjusted, except to lower the
target temperature.
Program, target temperature, and any
automatic cooking time programming can
only be changed after the program selec
tor has been turned back to the "Light" or
"0" position.
03:1 The oven light comes on when opening
the door, even when the program selector
is set at "0".
05:1 The oven lights continuously when the
oven is in use.
06:1 Rapid heat is turned off.
off.
-
27
Page 28

Baking
Recommended programs
Convection
Several rack levels can be used at the
same time for baking. The recom
mended positions are:
1 tray = 1st runner from the bottom
2 trays = 1st and 3rd runners
from the bottom
3 trays = 1st, 2nd and 5th runners
from the bottom
When using "Convection", recipe
temperatures should be lowered by
25 °F / 15 °C.
Do not bake on more than two levels
when baking moist cookies, cakes
or bread.
Remember to remove the grease filter from the fan opening when baking. If the filter is not removed, increase the baking time.
-
Intensive
When using "Intensive", recipe tem
peratures should be lowered by
25 °F / 15 °C.
Remember to remove the grease fil
ter from the fan opening. If the filter
is not removed, increase the baking
time.
The "Intensive" program works well for
dishes that require a moist topping and
crisp base, such as pies, pizzas and
quiche.
Put the food on the 1st runner from the
bottom. If the bottom of the food over
cooks, use a higher level runner next
time.
-
-
Surround
Preheat the oven only for:
– cakes and cookies with a very short
baking time,
–
sponge cake and similar mixtures,
–
bread made with dark flour.
28
Select runner height 1 or 2.
Page 29

Baking
General notes
Place oblong cookware in the oven as
shown in the illustration.
Frozen foods such as pizza, breaded
chicken and "TV" dinners should be
placed on sheet trays or aluminum foil
when heating. Do not place these types
of food items directly onto the racks.
Use the midrange temperature of the
–
cooking recommendations for uni
form browning. Increasing the tem
perature and reducing the time can
prevent even browning.
Test the cake to determine its done
–
ness just prior to the end of the bak
ing time.
-
-
-
-
29
Page 30

Baking Recommendations
Convection
Temperature
°F/°C
Creamed mixture
Dried fruit cake
Nut cake (tray)
1)
Nut cake (pan)
Fresh fruit cake with topping (tray)
Fresh fruit cake (tray)
Fresh fruit cake (pan)
Flan base
Small cakes
1)
1) 3)
300-340/150-170
300-335/150-170
300-335/150-170
300-335/150-170
300-335/150-170
300-335/150-170
300-335/150-170
300-335/150-170
Whisked mixture
1) 3)
Ta rt
Tart / Flan base
Swiss roll
1) 3)
1) 3)
320-355/160-180
320-355/160-180
320-355/160-180
Kneaded mixtures
Tart / Flan base
Nut ring
Crumb cake
Small biscuits or cookies
Cheesecake
Apple pie
Apricot tart with topping
Savory pastry
1)
2)
Meat loaf
300-335/150-170
300-335/150-170
300-335/150-170
300-335/150-170
300-335/150-170
300-335/150-170
300-335/150-170
380-405/190-210
340-370/170-190
Yeast mixtures
Crumb cake
Fresh fruit cake (tray)
Stollen
White bread
Wheat bread
Pizza (tray)
1)
1)
Onion bread
Apple turnovers
Filled pastries
Flaky pastries
1) 3)
1)
, Eclairs 320-355/160-180 1, 3 25-30
300-335/150-170
320-355/160-180
300-335/150-170
320-355/160-180
375-405/190-210
335-370/170-190
320-355/160-180
300-335/150-170
335-370/170-190 1, 3 20-25
Meringues1)and Macaroons 245-285/120-140 1, 2, 5 30-50
Unless otherwise stated, the times given are for an oven which has not been preheated.
With a preheated oven, shorten the time by approximately 10 minutes.
Baking level
(from bottom)
1
1
1
1
1
1
1
1, 2, 5
1
1
1
1
1
1
1, 2, 5
1
1
1
1
1
1
1
1
1
1
1
1
1, 3
Time
(in mins.)
70-80
20-25
60-70
45-50
35-45
45-55
25-30
20-25
25-30
20-25
15-20
20-25
40-50
40-50
15-25
70-80
45-55
40-60
25-35
60-70
35-45
40-50
45-65
40-50
60-70
40-50
30-35
25-30
1) Preheat the oven when using "Surround".
2) Preheat the oven when using "Convection" or "Surround".
3) Turn off "Rapid heat".
30
Page 31

Temperature
°F/°C
Baking Recommendations
Surround Intensive
Baking level
(from bottom)
Time
(in mins.)
Temperature
°F/°C
Baking level
(from bottom)
Time
(in mins.)
320-360/160-180
320-360/160-180
355-390/180-200
320-360/160-180
355-390/180-200
355-390/180-200
320-360/160-180
355-390/180-200
360-390/180-200
355-390/180-200
375-410/190-210
360-390/180-200
355-390/180-200
355-390/180-200
355-390/180-200
355-390/180-200
355-390/180-200
355-390/180-200
440-480/230-250
375-390/190-200
355-390/180-200
355-390/180-200
335-375/170-190
375-410/190-210
410-440/210-230
375-410/190-210
375-410/190-210
335-375/170-190
375-410/190-210 2 20-25 – – –
390-430/200-220 2 20-25 – – –
260-300/130-150 2 30-50 – – –
The information given in this chart is intended only as a guide.
1
1
2
1
3
2
1
1 or 2
1
2
1 or 2
2
2
2
2
1
2
1
1 or 2
1
2
2
2
2
2
2
2
2
50-60
70-80
15-20
60-70
45-50
35-45
45-55
15-20
20-25
15-20
12-15
15-20
40-50
40-50
10-15
70-80
40-50
40-60
25-35
60-70
35-45
40-50
45-65
40-50
60-70
40-50
25-30
20-25
–
–
–
–
300-335/150-170
–
–
–
–
–
–
–
–
–
–
300-335/150-170
300-335/150-170
300-335/150-170
380-410/190-210
335-375/170-190
–
–
–
–
–
335-375/170-190
320-355/160-180
–
–
–
–
–
1
–
–
–
–
–
–
–
–
–
–
1
1
1
1
1
–
–
–
–
–
1
1
–
–
–
–
–
30-35
–
–
–
–
–
–
–
–
–
–
55-65
40-45
45-50
25-30
50-55
–
–
–
–
–
40-50
25-30
–
31
Page 32

Roasting
For oven roasting use:
Auto Roast
–
Surround
–
Always install the grease filter in the
back of the oven before roasting.
Roasting in a covered pot with heat resistant handles will retain stock for making gravy and will help to keep the oven
clean.
Roasting pans, heat-resistant glass,
aluminum foil, and earthenware are all
suitable.
Place the covered pot on the rack.
^
NOTE: Do not place the pot on the oven
floor.
When using "Auto Roast", a tempera
ture of approx. 70°F/40°C lower can be
used than when using "Surround".
The larger the cut of meat to be
roasted, the lower the temperature that
should be used.
When roasting more than 7 lbs/ 3 kg,
select a temperature about 20°F/10°C
lower than the one given in the "Roast
ing Recommendations" chart.
The roasting process will take a little
longer, but the meat will be cooked
evenly and the outside will become
crisp.
For roasting directly on the rack K
lower the temperature 70°F/20°C than
for roasting in a covered pot L.
-
-
32
Page 33

Roasting
Calculating roasting time:
The general rule is to allow 15 to 20
minutes of roasting per pound and ad
justing the cooking time as needed for
desired doneness.
Do not exceed the recommended
roasting temperature. The meat will
brown, but will not be thoroughly
cooked.
Browning only occurs towards the end
of the roasting time . Remove the lid
about halfway through the roasting if a
more intensive browning is desired.
After the roasting process is finished
remove the meat from the oven and
cover until ready to carve.
This helps the meat retain its juices.
Useful hints
Roasting in a covered pot L
Season the meat and place in the pot.
Add some butter or margarine or a little
oil. Add about 1/2 cup of water when
roasting a large piece of meat
(5-7 lbs/2-3 kg) or roasting poultry with
a high fat content.
Roasting on the rack K
Place a little water in a tray on the rack
below the meat to catch drippings. Add
a little oil to very lean meat or place a
few strips of bacon on top.
Roasting poultry
For crispy skin, baste the poultry ten
minutes before the end of cooking with
slightly salted water.
33
Page 34

Roasting with the Roast Probe
The roast probe monitors the roasting
process simply and reliably.
The tip of the probe continuously mea
sures the core temperature a the center
of the meat.
When the pre-selected core tempera
ture is reached, the oven automatically
shuts off.
The roast probe can be used with the
following programs:
Auto Roast
–
Surround
–
– Convection
– Fan Broil
Using the roast probe:
^ Prepare the meat as usual, and put
into the oven, (in a pot or on the
rack).
Roasting bags or aluminum foil may
also be used, but only when left open at
the ends. Insert the probe through the
opened end of the foil or bag.
-
-
Insert the probe into the middle of the
^
meat. Make sure that the probe does
not touch any bones or is not located
in a fatty portion of the meat. Improper insertion of the probe could
shut the oven off too early.
34
When roasting poultry, the best place to
insert the probe is in the thickest part of
the meat between the thigh and body.
Page 35

Insert the short end of the roast
^
probe into the socket on the right
side of the oven until it clicks into
place.
^ Turn the program selector to the de-
sired program.
A pre-set oven temperature will show
in the oven display, and the indicator
between the "+/–" buttons will light up.
The preset oven temperature can be
changed by using the "+/–" button.
Roasting with the Roast Probe
To adjust the food core temperature:
Press the "Probe" button.
^
Change the temperature using the "+"
^
or "–" button.
The oven will start heating when the
light between the "+/–" buttons goes
out.
Next, a food core temperature of
140°F/60°C will appear in the oven dis
play, and the indicator between the
"+/–" buttons will light.
The food core temperature can be ad
justed by using the "+/–" buttons, within
a range of 67°F/20°C to 209°F/99°C.
See, "Roasting recommendations" for
recommended temperatures.
-
-
The actual core temperature will ap
pear in the oven display. The lowest
temperature that can be displayed is
67°F/20°C, and will not change until the
roast probe senses a rise in tempera
ture greater than 67°F/20°C.
-
-
35
Page 36

Roasting with the Roast Probe
Time remaining display
Once the oven has monitored the cooking process, it will only calculate and
display the remaining cooking time.
From this point on, the core temperature can no longer be displayed.
The time remaining that is first displayed is an estimate. As cooking continues, the time will be revised, and an
increasingly accurate estimate will be
shown.
If the selected core temperature or
oven program is changed after this
point, the time remaining will be cancel
led and the core temperature will reap
pear.
Shortly before the end of the cooking
time, the Energy Conservation feature
(as described under "Operation") will
activate. If the "Temp." button is
pressed, "EC" will appear in the display.
If the oven temperature is changed or
the core temperature increased, the
oven heating will turn on again.
-
-
36
Page 37

Roasting with the Roast Probe
End of cooking time
When the selected core temperature
has been reached:
a tone will sound for 5 seconds,
–
the "e" (roast probe) symbol will
–
flash.
The tone can be cancelled by:
pressing the "Probe" button.
–
turning the program selector to "0".
–
Please note:
If the roast probe is left in the food after
cooking is completed, the oven display
will show a slight initial increase in core
temperature followed by a decrease.
This is normal.
If the meat is not thoroughly cooked, re
insert the probe in a different location
and continue cooking (this situation
may occur if the meat was too thick for
the tip of the probe to reach the center).
The roasting time, using a pre-se
lected temperature with the probe, is
similar to that of timed cooking.
When finished, cover the meat with aluminum foil and allow it to stand for
approx. 10 minutes. During this time the
core temperature will rise another
10-20°F/5-10°C.
-
-
37
Page 38

Roasting Recommendations
Roasting
level
Roast beef 2 lbs (1 kg)
Fillet steak, Sirlion
4)
steak
- 2 lbs (1 kg) 1 5)
Vension/game
2 lbs (1 kg) 1
Roast pork, shoulder
cut - 2 lbs (1 kg) 1
Pork fillet or Cutlet 2 lbs (1 kg) 1
Ribs 2 lbs (1 kg)
Minced meat 2 lbs (1 kg) 1
Roast veal 2 lbs (1 kg) 1
Shoulder of lamb 3 lbs (1.5 kg) 1
Poultry -
1
2 lbs (1 kg)
Poultry -
1
4
/2lbs (2 kg)
Poultry -
1
4
/2lbs (2 kg) stuffed
Poultry 9 lbs (4 kg)
Whole fish -
1
3 lbs (1.5 kg)
Auto Roast
Temp.
2)
°F/°C
1 360-390/
180-200
380-410/
190-210
360-390/
180-200
340-380/
170-190
340-380/
170-190
1 340-380/
170-190
340-380/
170-190
340-380/
170-190
340-380/
170-190
5)
340-380/
170-190
1 340-380/
170-190
1 340-380/
170-190
1 320-360/
160-180
5)
320-360/
160-180
1)
Time
(in min)
Surround Core
Temp.
2)
°F/°C
100-120 420-470/
220-240
35-45 420-470/
240-260
90-120 420-470/
220-240
100-120 410-450/
210-230
60-80 390-430/
200-220
60-70 410-450/
210-230
50-60 390-430/
210-230
100-120 410-450/
210-230
90-120 410-450/
210-230
50-60 390-430/
200-220
90-110 390-430/
200-220
120-150 390-430/
200-220
150-180 380-410/
190-210
35-55 390-430/
200-220
Time
(in min)
100-120 170-190/
35-45 105-150 6)/
90-120 160-180/
100-120 170-190/
60-80 150-170/
60-70 160-180/
50-60 160-180/
100-120 160-170/
90-120 170-190/
50-60 190/
90-110 190/
120-150 190/
150-180 190/
35-55 160-180/
Unless otherwise stated, times given are for an oven which has not been preheated.
tempe-
rature °F/°C
80-85
40-65
75-80
80-85
70-75
75-80
75-80
70-75
80-85
85
85
85
85
75-80
3)
1) Insert the grease filter when using "Auto Roast".
2) When roasting in a covered pot L.
When roasting on the rack K, set the temperature 35°F/20°C lower than suggested.
3) When roasting with the probe e
4) Preheat the oven.
5) Use the second runner from the bottom when cooking with "Surround".
6) Rare: 140°F/60°C; Medium: 160°F/70°C; Well done: 170°F/82°C
The information in this chart is intended as a guide only.
38
Page 39

Broiling
Broil
For broiling small quantities of thin cut
meats and for browning small dishes of
food. Only the inner part of the upper
heating element is used.
Maxi Broil
Fan Broil
When broiling, always install the
grease filter over the convection fan
in the back of the oven.
Fan broiling is used for broiling large
items, such as poultry, or meat loaf.
With this method, the roast probe can
also be used to monitor the meat’s in
ternal temperature. See "Roasting with
the probe" for further information.
-
For broiling large quantities or thick cut
meats and for browning food in large
shaped dishes. The entire upper heat
ing element is used.
-
39
Page 40

Broiling
Broiling on the rack
Assemble the broil pan, anti-splash
^
tray and rack as shown.
^ Place the food on the rack.
thin cuts = level 3 or 4
thicker cuts = level 1 or 2
^ Select a broiling program.
^ Select a temperature.
Food to be broiled temperature
Thin cuts
such as chops, steak 530°F/275°C
Broiling tips
To ensure even cooking, it is best to
broil foods of a similar thickness at the
same time.
Most items should be turned half-way
through broiling.
One way of finding out how far through
a thick piece of meat has been cooked
is to press down on its surface with a
spoon.
If the surface presses down easily
–
and with little resistance to the
spoon, it is "rare".
– If there is some resistance, it is "me-
dium".
– If there is great resistance, it is "well
done".
Thicker cuts
such as chicken,
kebabs
To broil thicker pieces of food gradually,
sear the meat at a high temperature,
then continue broiling at a lower tem
perature so the food cooks through to
the center.
^
Pre-heat the oven for 5 minutes.
^
Place the food to be broiled onto the
broiling pan and place the pan into
the oven.
40
470°F/240°C
-
Page 41

Pre-heat the oven for 5 minutes before broiling.
Broiling chart
Food to be broiled
Thin to medium size
Beef steaks 3 or 4 520/275 10-16 430/220 10-16
Kebabs 3 or 4 520/275 12-16 430/220 15-20
Meat cutlet 3 or 4 520/275 12-18 430/220 18-20
Liver 3 or 4 520/275 8-12 430/220 10-14
Burgers 3 or 4 520/275 14-20 430/220 16-20
Sausage 3 or 4 520/275 6-10 430/220 8-12
Fish fillet 4 520/275 12-16 430/220 12-16
Trout / Mackerel 4 520/275 16-20 430/220 20-25
Toast 3 or 4 520/275 2-4 430/220 3-5
Open faced sandwich 4 520/275 4-6 430/220 4-6
Tomatoes 4 520/275 6-8 430/220 6-8
Peach / banana halves 4 520/275 7-10 430/220 7-10
Thick or large size
Chicken pieces 2 lbs
2)
(1 kg)
Rolled pork 2 lbs (1 kg)
Kebabs and mixed items 1 460/240 30-40 390/200 100-120
Runner
from bot
2)
-
tom
1 or 2 460/240 50-60 390/200 50-60
1 460/240 70-80 390/200 70-80
Broil / Maxi Broil Fan Broil 1)
Temperature
in °F/°C
Time
(in min.)
2)
Tempera
ture
in °F/°C
-
Time
(in min.)
2)
1) Install the grease filter when using "Fan Broil".
2) Turn food over half way through broiling.
All times given are approximate and will vary according to personal taste.
41
Page 42

Defrost
Defrosting should be at room tempera
ture, i.e. without selecting an oven tem
perature.
However, an oven temperature of up to
120°F / 50°C can be selected.
Remove the packaging and put the
–
food to be defrosted on a baking tray
or into an appropriate dish.
All meat and poultry should be fully
–
defrosted before cooking. Do not use
the liquids from defrosting.
When defrosting poultry, place a tray
–
under the rack supporting the fowl to
catch the defrosted liquids.
It is imperative to observe good hygiene practices when defrosting
poultry. Do not use defrosted liquid
from poultry. Properly dispose of the
liquid, and thoroughly wash the tray,
rack, sink and your hands.
– Fish does not need to be fully de-
frosted before cooking. Defrost so
that the surface is soft enough to ab
sorb herbs and seasoning.
Defrosting time
-
Defrosting times depend on the type
and weight of the food, and at what
temperature it was deep-frozen.
-
42
Page 43

Casseroles
For cooking casseroles use:
Convection
–
Surround
–
Covered pots made of heat proof glass,
china and earthware pots are suitable
for cooking casseroles.
Make sure these have heat resistant
handles and knobs.
Put the rack on the first runner from
^
the bottom, and place the prepared
casserole on top.
Select the program and the tempera
^
ture.
Useful hints
Dishes that need to be cooked in their
own juices or steam (i.e., vegetables)
should be covered so that they don’t
dry out. If no lid is available, aluminum
foil can be used.
Cook without a lid when a crusty finish
or topping is desired (meat or au gratin
dishes).
When cooking more than one item, one
dish can be placed on top of the other.
Poaching
Fish or fruit can be poached in the oven
using a covered dish.
Canning
Only an experienced cook, properly
trained in preserving fruits and vegetables, should perform canning.
43
Page 44

Cleaning and care
Never use cleaners containing sand,
silica, soda, chlorides or scouring
agents, or hard brushes, scouring
cloths, steel wool, or other abrasive
materials.
Do not use oven sprays to clean this
oven.
Accessories
Roast probe
Wipe with a non-abrasive damp cloth.
Do not submerge the roast probe
into water or clean in the dish
washer.
-
Appliance front
The front of the appliance and the con
trol area can be cleaned with a cloth
and a solution of warm water and non
abrasive liquid detergent. Rub dry with
a soft cloth.
Glass surfaces can be cleaned with a
glass cleaner.
Stainless steel
Stainless steel surfaces can be cleaned
using a non-abrasive stainless steel
cleaner.
To help prevent resoiling, a conditioner
for stainless steel can also be used.
Apply sparingly with even pressure.
Stainless steel colored controls
These controls may become discolored
or damaged if not cleaned regularly.
Grease filter
Clean with liquid dish soap and hot
-
water, or in the dishwasher.
Depending on the detergent, cleaning
the grease filter in a dishwasher may
cause permanent discoloration of the
filter surface. Performance of the filter
will not be affected by this discoloration.
44
Page 45

PerfectClean
Allow the oven and any accessories
to cool down before cleaning. Dan
ger of burns!
The following have been treated with
"PerfectClean" enamel:
oven interior
–
baking tray,
–
grill pan / oven tray,
–
anti-splash tray,
–
– rack and side supports.
Cleaning and care
Do not use abrasive cleaning
agents, cleansers for ceramic cook
-
ing surfaces, metal scourers, or
oven cleaners on surfaces with
PerfectClean enamal.
Clean as soon as possible after each
use with a soft sponge and a solution of
hot water and liquid dish soap.
Stubborn baked on grease may need to
be soaked first to loosen deposits. A
scraper suitable for glass surfaces or a
plastic scouring pad can be used to re
move remaining residues.
-
-
The following notes on cleaning and
care should ensure that the anti-stick
and easy clean properties of
PerfectClean last for many years.
Soiling such as spilt juices and cake
mixtures are best removed while the
oven or tray is still warm.
Spilt fruit juices may permanently discolor surfaces. This discoloration is
permanent but will not affect the efficiency of the enamel.
Do not clean items with PerfectClean
enamel in a dishwasher.
After cleaning rinse thoroughly with
clean water. The water must run off the
surface easily. Any residual cleaning
agents will hinder this effect.
45
Page 46

Cleaning and care
Catalytic enamel surfaces
The removable back panel and roof
liner are coated with a dark grey cata
lytic enamel.
During fan operated cooking, circulat
ing air in the oven deposits oil and fat
on the back panel of the oven. These
splashes are burnt off when the temper
ature of the oven reaches over
390°F/200°C during baking or roasting.
The higher the temperature the more ef
fective the process.
The oven and accessories should be
cleaned after each use, so cleaning
does not become more difficult.
Cleaning by hand
Allow the oven to cool before cleaning. Danger of burns!
^ Catalytic enamelled panels should be
cleaned using a solution of hot water
and liquid dish soap with a soft nylon
brush.
Do not use abrasive cleaning
agents, hard brushes, scouring
pads or cloths, steel wool, knives or
other abrasive materials. Do not use
oven sprays on catalytic enamelled
panels. Chemicals used in oven
sprays will damage the catalytic
enamel.
-
-
Catalytic cleaning process
Before cleaning the catalytic panels
using high temperatures, make sure
that all PerfectClean surfaces are
clean. Otherwise, the high tempera
tures can cause deposits to become
baked on to the PerfectClean sur
-
faces and become impossible to re
move.
If, after manual cleaning, the oven is
still heavily soiled, heating it to a high
temperature will burn off oil and grease
from the catalytic surfaces.
Deposits of spices, syrups and similar
substances are not removed by this
process. These should be removed
while fresh with a mild solution of hot
water and liquid dish soap with a soft
brush.
To clean at high temperatures:
^ Turn the program selector to "Con-
vection".
^
Select the highest temperature.
^
Press the "Cook" button and set the
time for 1 hour.
More time may be needed if the pan
els are heavily soiled.
Any remaining soiling will gradually dis
appear with each use of the oven at
high temperatures.
-
-
-
-
-
46
If the catalytic enamel is damaged
through improper use or heavy soil
ing, a replacement can be pur
chased from your Miele dealer or the
Miele Technical Service Department.
-
-
Page 47

To make cleaning easier
remove the oven door,
–
take out the rack supports,
–
take out the back panel,
–
lower the upper heating element and
–
remove the safety guard.
To remove the oven door
Please note: the oven door is quite
heavy. It should be gripped firmly at
the sides when being removed or re
fitted.
Cleaning and care
-
^ Open the door fully.
Before the door can be removed, the
door hinges need to be locked so
that they do not damage the door
when it is taken out.
^
Flip down the locking clamps on
each door hinge. This locks the
hinges.
^ Lift up the door until the hinges dis-
engage. Remove the door.
To refit the oven door
^ Hold the door as shown above and
carefully put the locked hinges into
the guide holes until they engage.
Open the door fully.
^
Still supporting the door, flip the lock
ing clamps up.
Check that the locking clamps are
flipped up when the door is refitted
after cleaning. Otherwise on closing
the door, the hinges could work
loose from the guide holes and dam
age the door.
-
-
47
Page 48

Cleaning and care
Allow the oven to cool completely
before cleaning.
To remove the runners
^ Pull on the fastener to release it.
To remove the back panel
Loosen the screws in the back panel
^
and remove.
The oven must not be used without
the back panel in place. This could
lead to injuries and machine damage.
Reassemble in the reverse order, carefully ensuring all parts are correctly in
place.
^
Remove the runners from the oven,
and if necessary, remove the catalytic
side panels.
Reassemble in reverse order, carefully
ensuring all parts are correctly in place.
48
Page 49

Cleaning and care
To lower the upper heating element
and remove the safety guard
Remove the runners.
^
Pull (and turn if necessary) the fas
^
tener on the grill element to release it.
If needed, the safety guard can be re
moved at this time for cleaning:
Hold the guard firmly and unscrew
^
the ribbed knob.
Remove the guard.
^
Reassemble in the reverse order, care
-
fully ensuring all parts are correctly in
place.
-
-
^
Gently lower the grill element.
To prevent damage to the upper
heating element, do not use extreme
force when lowering it.
49
Page 50

Frequently asked questions
Installation work and repairs should
only be performed by a qualified
technician in accordance with all ap
plicable codes and standards. Re
pairs and other work by unqualified
persons could be dangerous and
may void the warranty.
There are some minor problems that
you can fix:
What if . . .
. . . the oven does not heat?
-
-
. . . no noise is heard when the oven
door is opened during operation?
This is normal.
If the door is opened during operation,
a safety switch causes the oven heaters
and the convection fan to turn off.
. . . a noise is heard after baking,
roasting or broiling?
This is normal.
The cooling fan will continue to run for a
short time. When the internal tempera
ture has fallen sufficiently, the fan will
turn off automatically.
-
Check that:
^ The program selector is set to the de-
sired program, and the temperature
control is set to the correct temperature.
^ The Child Safety Lock is deactivated.
^ The circuit breaker has not tripped.
Contact a qualified electrician or the
Miele Technical Service Departmentif
it has.
^
The door is fully closed.
. . . rust-like spots appear on the interior catalytic walls?
This can occur from the circulating air
picking up spices from items being
cooked and redepositing them on the
oven walls. Such residues are not removed by catalytic cleaning and should
be removed while fresh. Clean using
warm water and a mild dishwashing liquid with a soft sponge or non-metallic
brush.
. . . the residual time indicator and/or
the energy-save feature is not acti
vated when cooking with the roast
probe?
This is not a fault.
Certain contidions must be fulfilled be
fore the electronics will activate these
systems.
-
-
50
Page 51

. . . the heating elements in the oven
function, but not the light?
The halogen lamps are bad. They
^
can be replaced as follows:
Trip the circuit breaker to the oven.
^
Take the runners out of the oven.
^
Raise the small door found on the
^
right-hand side of the inner edge of
the oven.
Slide the door upwards.
^
Frequently asked questions
If the lamp needs to be replaced,
^
gently pull out the halogen lamp and
replace with a 12V, 10W, G4 socket,
Osram, Type W818 and ensure that it
has a minimum heat rating of 575°F
(300°C). DO NOT TOUCH the new
bulb with your fingers; this will reduce
the life of the bulb.
^ Carefully reinstall in the reverse order.
^ Pull out the mounting bracket and de-
termine if the lamp has blown.
51
Page 52

Frequently asked questions
. . . cakes and biscuits are not cooked
after following the times given in the
chart?
Check if:
the correct temperature was se
^
lected.
there was a change to the recipe.
^
The addition of more liquid or more
eggs will make a moister mix requir
ing longer to cook.
the grease filter has been removed. If
^
it is installed, the baking times need
to be lengthened by approximately
10 to 15 minutes.
. . . uneven browning occurs?
A slight unevenness is normal, especially when cooking on several levels.
If you are using the "Convection" program, check:
^ that the oven temperature was not set
too high,
^
that the grease filter is not installed,
^
that the correct runner level was
used.
If you are using "Surround", check:
^
the color and composition of the bak
ing pans being used. Light colored,
shiny, or thin walled pans reflect the
heat and are more likely to give un
even results,
-
-
-
. . . "F" and a number appear in the
oven display?
If "F3" appears, the roast probe is
^
faulty. Remove the probe from its
socket and the code will disappear.
If "F6" appears, the oven has auto
^
matically shut off during operation.
This is a safety feature to protect the
oven if it has been operated for too
long. The maximum operating time
depends upon the program selected.
The oven can be reset by turning the
program selector to "0" and restarting
the program.
^ If "F7" appears in the display, the
cooling fan has stopped turning.
^ If "F8" appears in the display, the
Convection fan has stopped turning.
^ If "F9" appears in the display, the
maximum temperature of the oven
has been exceeded, and the oven
has shut off. As soon as the temperature has fallen to an acceptable level,
the fault code will disappear. The
oven will turn itself on again automati
cally.
–
If "F7", "F8", "F9" or any other unex
plained fault codes are displayed,
please call the Miele Technical Servi
ce Department.
-
-
-
-
^
that the correct runner level was
used.
52
Page 53

In the event of a fault which you can not
easily fix yourself, please contact:
Your Miele Dealer
–
or
The Miele Technical Service Depart
–
ment
USA 1-800-999-1360
techserv@mieleusa.com
CDN1-800-565-6435
service@miele.ca
When contacting the Technical Service
Department please quote the model
and serial number of your appliance
shown on the data plate.
-
After sales service
53
Page 54

Optional accessories
The following accessories are available
for purchase from your Miele Dealer or
the Miele Technical Service Depart
ment.
Handle
Used to take the baking trays or the
roasting/broiling pan in and out of the
oven.
-
Pizza pan
This circular pan is suitable for cooking
fresh or frozen pizzas, flat cakes made
with yeast or whisked mixtures, tarts,
and baked desserts.
54
Page 55

Deep sided Universal oven dish
The deep sided universal oven dish has
non-tip safety notches like the oven tray
and a special protective anti-stick coat
ing.
3
It is available either 8
/4" or 133/4"
(22 or 35 cm) deep.
A lid is available separately.
Catalytic side panels
The catalytic panels can be replaced.
When ordering please state the model
number of your oven.
Optional accessories
-
Catalytic converter
A catalytic converter can be built into
the cooling system to filter fat particles
and reduce food odors.
55
Page 56

Electrical connection
Installation work and repairs should
only be performed by a qualified
technician in accordance with all ap
plicable codes and standards. Re
pairs and other work by unqualified
persons could be dangerous and
may void the warranty.
Power supply
The oven is equipped with a 6 ft./1.8 m
flexible power cord consisting of 4
-
-
wires ready for connection to a dedi
cated 3 pole, 4 wire grounding power
supply:
120/240 V, 60 Hz, 20 A
–
-
Before connecting the appliance to
the power supply make sure that the
voltage and frequency listed on the
data plate correspond with the
household electrical supply. This
data must correspond to prevent
machine damage. Consult a qualified electrician if in doubt.
CAUTION: Before servicing, disconnect the power supply by either removing the fuse, unplugging the unit
or manually "tripping" the circuit
breaker.
Installer:
Please leave these instructions with
the consumer.
or
120/208 V, 60 Hz, 20 A
–
Black wire: connect to L1 (hot), 20 A
Red wire: connect to L2 (hot), 20 A
White wire: connect to N (neutral)
Green wire: connect to GND (ground)
A dedicated line and junction box
should be used to connect the oven to
a 20 A circuit.
Connection details are also given on
the diagram located on the top of the
oven.
56
Page 57

The oven must be installed into
cabinetry before use.
– If the oven is to be installed
under a countertop, a sealing
strip must replace the stainless
steel rail above the control
panel. The sealing strip offers
additional protection from any
liquids that might spill down
from the countertop.
The strip can be purchased
from the Miele Technical Service
Department.
– Ovens with a stainless steel
front must be installed at least
36" (915 mm) above the floor.
Installing the oven
Connect the oven wires to the electri
^
cal supply.
The oven must be supported from
underneath.
Place the oven into the cabinet as far
^
as the oven trim, and align.
-
^
Open the oven door and locate the
two mounting screw holes in the oven
frame. Mark and drill pilot holes. Se
cure the oven to the cabinetry by in
serting screws through the frame and
into the cabinetry.
Only operate the appliance after it
has been installed into the cabinetry.
-
-
575859
Page 58

Page 59

Page 60

Alteration rights reserved / 22 / USA/CDN – 2202
(H 350-1 B)
This paper consists of cellulose which has been bleached without the use of chlorine.
M.-Nr. 05 644 970 / V
01
 Loading...