


MES5870ACW
Maytag MES5870ACW, MES5870ACB, MES5870AAW, MES5870AAQ, MES5870AAC Owner’s Manual
...
Q Y t,G
Model: ,,MER5870, MEP5770, ME$5570, ME$5770, ME$5870
Congratulations on your choice of a Maytag electric range.
Your complete satisfaction is very important to us.
Read this user's guide carefully. It is intended to help you
operate and maintain your new range.
In addition, you will find a booklet entitled "Cooking Made
Simple." It contains information on selecting cookware and
provides baking, roasting and broiling tips.
Save time and money. Check the "Before You Call" section
of this guide. It lists causes of minor operating problems that
you can correct yourself.
PORTANT SAFETY
Read and fi_llow all instructMns bef_re ush_g this ap-
pliance to prevent the potential risk of fire, electric shock,
personal injury or damage to the appliance as a result of
improper usage of the appliance. Use appliance only for
its intended purpose as described in this guide.
"Ib ensm-e proper and safe operatiom Appliance must
be properly installed and grounded by a qualified techni-
cian.
However, should you need service, it is helpful to have the
model and serial numbers available. This information can be
found on the data plate located on the storage drawer f]ame
or under the control panel.
These numbers are also on the Product Registration card that
came with your appliance. Before sending in this card, record
these numbers akmg with the purchase date bek)w.
Model Number
Serial Number
iiiiiiiiiiiiiiiiiiiiiiii DateofPmvhase
iiiiiiiiiiiiiiiiiiiiiiiiIMPORTANT: Keep this guide and the sales receipt in a
iiiiiiiiiiiiiiiiiiiiiiiiplaeelor uturer4 renee.Proololoriginalparehase
iiiiiiiiiiiiiiiiiiiiiiiidateisneededlorwarrantyserviee.
iiiiiiiiiiiiiiiiiiiiiii[If you have questions, write us (include your model number
iiiiiiiiiiiiiiiiiiiiiiiiandphonenumber) orcall:
iiiiiiiiiiiiiiiiiiiiiiii Maytag Appliances Sales Company
iiiiiiiiiiiiiiiiiiiiiiiiattn:CA R MCen er
iiiiiiiiiiiiiiiiiiiiiiii P.O. Box2370
iiiiiiiiiiiiiiiiiiiiiiii Clevehmd, TN 37320-2370
iiiiiiiiiiiiiiiiiiiiiiii 1-800-688-9900 (USA)
iiiiiiiiiiiiiiiiiiiiiiii 1-800-688-2002 (CANADA)
iiiiiiiiiiiiiiiiiiiiiiii 1-800-688-2080 ( U.S. TTY for deaf, hearing
iiiiiiiiiiiiiiiiiiiiiii[ impaired or speech impaired)
iiiiiiiiiiiiiiiiiiiiiiii (Mon.-Fri.,Sam-SpmEastemTime)
iiiiiiiiiiiiiiiiiiiiiiii l[nternet: http://www.maytag.com
iiiiiiiiiiiiiiiiiiiiiiii orservieein ormation,seepage2 .
iiiiiiiiiiiiiiiiiiiiiiiiNOTE'{ !!! our c0ntinuing eff0_t to impr_ye the qua!ity
iiiiiiiiiiiiiiiiiiiiiii:and performance of our cooking products, it may be ]
iiiiiiiiiiiiiiiiiiiiiiiiinec es_ary t° make c!aanges t0 the api?!iance with0ut
iiiiiiiiiiiiiiiiiiiiiiii
,d_WARNING
® ALL RANGES CAN TiP AND
CAUSE iNJURiES TO
PERSONS
® iNSTALL ANTI-TIP DEVICE
PACKED WiTH RANGE
® FOLLOW ALL iNSTALLATiON
iNSTRUCTiONS
WARNING: To reduce risk of tipping of the appliance
from abnormal usage or by excessive loading of the oven
door, the appliance must be secure by a properly installed
anti-tip device.
To check if device is properly installed, remove storage
drawer and look underneath range to make sure one of the
rear leveling legs is properly engaged in the bracket slot.
The anti-tip device secures the rear leveling leg to the floor
when properly engaged. You should check this anytime
the range has been moved.
in Case of Fire
Turn off appliance and ventilating hood to avoid spread-
ing the flame. Extinguish flame then turn on hood to re-
move smoke and odor. _.
o CooMop: Smother fire or flame
in a pan with a lid or cookie sheet.
NEVER pick up or move a flam-
ing pan.
o Oven: Smother fire or flame by closing the oven door.
Do not use water on grease fires. Use baking soda, a dry
chemical or foam-type extinguisher to smother fire or
f[ alTI e.
iiiiiiiiiiiiiiiiiiiiiiiiiiiiiiiiiiiiiiiiiiiiiiiiiiiiiiiiiiiiiiiiiiiiiiiiiiiiiiiiiiiiiiiiiiiiiiiiiiiiiiiiiiiiiiiiiiiiiiiiiiiiiiiiiiiiiiiiiiiiiiiiiiiiiiiiiiiiiiiiiiiiiiiiiiiiiiiiiiiiiiiiiiiiiiiiiiiiiiiiiiiiiiiiiiiiiiiiiiiiiiiiiiiiiiiiiiiiiiiiiiiiiiiiiiiiiiiiiiiiiiiiiiiiiiiiiiiiiiiiiiiiiiiiiiiiiiiiiiiiiiiiiiiiiiiiiiiiiiiiiiiiiiiiiiiiiiiiiiiiiiiiiiiiiiiiiiiiiiiiiiiiiiiiiiiiiiiiiiiiiiiiiiiiiiiiiiiiiiiiiiiiiiiiiiiiiiiiiiiiiiiiiiiiiii :i i !
ii!i!i!i!i!i!i!i!i!i!i!i!i!i!i!i!i!i!i!i!i!i!i!i!i!i!i!i!i!i!i!i!i!i!i!i!i!i!i!i!i!i!i!i!i!i!i!i!i!i!i!i!i!i!i!i!i!i!i!i!i!i!i!i!i!i!i!i!i!i!i!i!i!i!i!i!i!i!i!i!i!i!i!i!i!i!i!i!i!i!i!i!i!i!i!i!i!i!i!i!i!i!i!i!i!i!i!i!i!i!i!i!i!i!i!i!i!i!i!i!i!i!i!i!i!i!i!i!i!i!i!i!i!i!i!i!i!i!i!i!i!i!i!i!i!i!i!i!i!i!i!i!i!i!i!i!i!i!i!i!i!i!i!i!i!i!i!i!i!i!i!i!i!i!i!i!i!i!i!i!i!i!i!i!i!i!i!i!i!i!i!i!i!i!i!i!i!i!i!i!i!i!i!i!i!i!i!i!i!i!i!i!i!i!i!i!i!i!i!i!i!i!i!i!i!i!i!i!i!i!i!i!i!i!i!i!i!i!i!i!i!i!i!i!i!i!i!i!i!i!i!i!i!i!i!i!i!i!i!i!i!i!i!i!i!i!i!i!i!i!i!i!i!i!i!i!i!i!i!i!i!i!i!i!i!i!i!i!i!i!i!i!i!i!i!i!i!i!i!i!i!i!i!i!i!i!i!i!i!i!i!i!i!i!i!i!i!i!i!i!i!i!i!i!i!i!i!i!i!i!i!i!i!i!i!i!i!i!i!i!i!i!i!i!i!i!i!i!i!i!i!i!i!i!i!i!i!i!i!i!i!i!i!i!i!i!i!i!i!i!i!i!i!i!i!i!i!i!i!i!i!i!i!i!i!i!i!i!i!i!i!i!i!i!i!i!i!i!i!i!i!i!i!i!i!i!i!i!i!i!i!i!i!i!i!i!i!i!i!i!i!i!i!i!i!i!i!i!i!i!i!i!i!i!i!i!i!i!i!i!i!i!i!i!i!i!i!i!i!i!i!i_!i!!!i_i!_i_!i!iiiiiiiiiiiiiiiiiiiiiiiiiiiiiiiiiiiiiiiiiiiiiiiii
General Instructions
WARNING: NEVER use appliance door, o1
drawer, if equipped, as a step stool or seat as
this may result in possible tipping of the ap-
pliance, damage to the appliance, and serious
If appliance is installed ueara window, proper
precautions should be taken to prevent curtains
from bnowiug over surface elements.
NEVER use appliance to warm or heat the
room. Failure to follow this instruction can head
to possible burns, injury, fire, or damage to the
appliance.
NEVER wear noose-fitting or hanging gar- i
merits while using the appliance. Clothing
could catch utensil handles or ignite and cause
burns if garment comes in contact with hot
To ensure proper operation and to avoid damage to the appli-
ance or possible injury, do not adjust, service, repair or replace
any part of the appliance unless specifically recommended in
this guide. Refer all other servicing to a qualified technician.
NEVER store or use gasoline or other combustible or flam-
mable materials in the oven, near surface units or in the vicinity
of this appliance as fumes could create a fire hazard or an ex-
plosiml.
To prevent grease fires, do not let cooking grease or other flam-
mable materials accumulate in or near the appliance.
Use only dry potholders. Moist or damp
potholders on hot surfaces may result hl a
steam burn. Do not _etpotholders touch ]lot
heating elements. Do not use a towel or
other bulky cloth which could easily touch
]lot heathlg elements and ignite
Always turn off all comro_s wheu cooking is completed.
NEVER heat unopened containers on the surface unit or in the
oven. Pressure build-up in the container may cause container to
burst resulting in burns, hijury or damage to the appliance.
NEVER use aluminum %iI to line drip bowls, or to cover an
oven rack or oven bottom. Misuse could result in risk of elec-
tric shock, fire, or damage to the appliance. Use %il only as
dhected in this guide.
This appliance is equipped with different
size surface elements. Select pans having
flat bottoms large enough to cover element. ....
Proper relationship of pan to element will
improve cooking efficiency.
If pan is smaller than element, a portim3 of
the element will be exposed to dhect con-
tact and couM ignite clothing or potholder.
Only certain types of glass, glass/ceramic, ceramic, earthenware,
or other glazed utensils are suitable for cooktop or oven service
without breaking due to the sudden change in temperature. For
_ow utensil manufacturer's hlstructions when using glass.
This appliance has been tested %r safe per%finance using con-
ventioual cookware. Do not use any devices or accessories that
are not specifically recommended in this manual. Do not use eye-
Hd covers, stove top grills o1 add-on oven convection systems.
The use of devices or accessories that are not expressly recom-
mended in this manual can create serious safety hazards, result
in performance problems, and reduce the life of the components
of this appliance.
Turn pan handle toward center ofcooktop, not
out into the room o1 over another surface ele-
of flammable materiMs, or spillage if pan is
accideutly bumped or reached by, small chil-
dren.
To prevent damage to removable heating elements, do not im-
merse, soak or clean in a dishwasher or self-clean oven. A dam-
aged element could short resulting in a fire or shock hazard.
Make sure drip bowls are in place as absence of these bowls dur-
ing cooking could damage whqug.
G ass-Ceramic Cooktop (select mode_s)
NEVER cook on broken cooktop, ffcooktop should break, clean-
ing solutions and spillovers may penetrate the broken cooktop
and create a risk of electric shock. Contact a qualified technician
Clean cooktop with caution. Some cleaners can produce noxious
fumes Kapplied to a hot surface. Ifa wet spmlge, cloth, or paper
towel is used to wipe spills on a hot cooking area, be carefu_ to
avoid steam bum.
Deep Fat Fryers
iiiiiiiiiiiiiiiii
iiiiiiiiiiiiiiiii
iiiiiiiiiiiiiiiii
Cooktop
NEVER leave surface units unattended especially when using
high heat settings. An unattended boilover could cause smok-
ing and a greasy spillover can cause a fhe.
Use extreme caution when movhlg the grease pan o1 disposing
of hot grease. Allow grease to cool before attempting to move
pan.
2
Oven
ChiM Safety
Use care when opening door. Let hot air o1 steam escape before
removing o1 replacing foo&
For proper oven operatiml and performance,
do not Nock or obstruct oven vent duct.
Always place oven racks in desired locations
while oven is cool. If rack must be moved
while oven is hot, do not let potholder con-
tact hot heating element in oven.
SelfoCieaning Oven
Clean onny parts listed in this guide. Do not clean door gasket.
The gasket is essential for a good seal. Care shouM be taken not
to rub, damage, or move the gasket.
Do not use oven cleaners. No commercial oven cleaner or oven
liner protective coating of any kind should be used in or around
any part of the oven.
Before self-cneaning the oven, remove broiler pan, oven racks and
other utensils to prevent excessive smoking, discoloration of the
oven racks or possible damage to utensils.
Wipe up excessive spillovers, especially greasy spills, before the
clean cycle to prevent smoking, flare-ups or flaming.
It is normal for the cooktop to become hot during a clean cycle.
Therefore, avoid touching the cooktop during a clean cycle.
NEVER leave children alone or unsupervised in area where
appliance is in use or is still hot.
NEVER allow children to sit or stand on
any part of the appliance as they could be
CAUTK)N: NEVER store items of inter-
est to children in cabinets above an appli-
ance or on backguard of a range. Children
climbing on appliance, door or drawer to
reach items could damage the appliance or
be burned or seriously injured.
Children must be taught that the appliance
and utensils in or on it can be ]lot. Let ]lot
utensils cool in a safe place, out of reach of
small children. Children should be taught that an appliance is
not a toy. Children should not be allowed to play with controls
or other parts of the mlit.
Ventilating Hoods
Clean range hood and filters frequently to prevent grease or
other flammable materials from accumulating on hood or filter
and to avoid grease fires.
Turn the fan on when flambding foods (such as Cherry Jubilee)
under the hood.
Slide-in and drop-in ranges feature a cooling fan which operates
automatically during a clean cycle. If the fan does not turn on,
cancel the clean operation and contact an authorized servicer.
Heating E ements
NEVER touch surface or ove_ heafi_g dements, areas _ear
dements, or i_terior surfaces of ovem
Heating elements may be hot even though they are dark in color.
Areas near surface elements and interior surfaces of an oven may
become hot enough to cause burns. During and after use, do not
touch or let clothing or other flammaNe materials contact heat-
ing elements, areas near elements, or interior surfaces of oven
until they have had sufficient time to cool.
Other potentkdly hot surfaces include: Cooktop, areas facing the
cooktop, oven vent, and surfaces near the vent opening, oven door,
areas around the door and oven window, where the fumes from the kitchen could reach.Birds have a very
important Safety Notice and Warning
The California Safe Drinking Water and 'I_xic Enforcement
Act of 1986 (Proposition 65) requires the Governor of Califor-
nia to publish a list of substances known to the State of Califor-
nia to cause cancer or reproductive harm, and requires busi-
nesses to warn customers of potential exposures to such sub-
stances.
Users of this appliance are hereby warned that when the oven
is engaged in the self-clean cycle, there may be some low level
exposure to some of the listed substances, including carbon
monoxide. Exposure to these substances can be minimized by
properly venting the oven to the outdoors during the self-clean
cycle by opening a window and/or door in the room where the
appliance is located.
IMPORTANT: Never keep pet birds in the kitchen or in rooms
sensitive respiratory system. Fumes released during an oven
seK-cleaning cycle may be harmful or fatal to birds. Fumes
released due to overheated cooking oil, fat, margarine and
overheated non-stick cookware may be equaHy harmful
a

ELECTRONIC OVEN CONTROL (pages 5-8)
OVEN LIGHT SWITCH (page 15)
CONTROLPANEL_
SURFACE CONTROLS
ANDINDtCATOR LIGHT
(page9)
SURFACE
ELEMENTS
(page 10 & 11 )
COOKTOP
(page 10 & 11)
ANTFTIP BRACKET
(page 23)
LEVELING LEG
(page 23)
DATA PLATE _ _'
STORAGE DRAWER
(page 23)
_, SURFACE CONTROLS
"_* AND iNDiCATOR LIGHT
(page 9)
OVEN VENT (page 15)
HOT SURFACE
iNDiCATORS
(page 11)
BROIL ELEMENT
(not shown, page 16)
" RACK SUPPORTS
BAKE ELEMENT
(page 12)
OVEN WINDOW
DOOR GASKET
S#de4n and Drop-In Control Panel Located Above the Oven Door
OVEN LIGHT
SWITCH
(page 15)
o % o o
o° t o o
SURFACE CONTROLS
AND INDICATOR MGHT
(page 9)
ELECTRONIC OVEN CONTROL
(pages 5-8)
o o o o
o o o o
oe o co o
o_ oi
4
,}
DUAL ELEMENT
SWmTCH
(page 9)
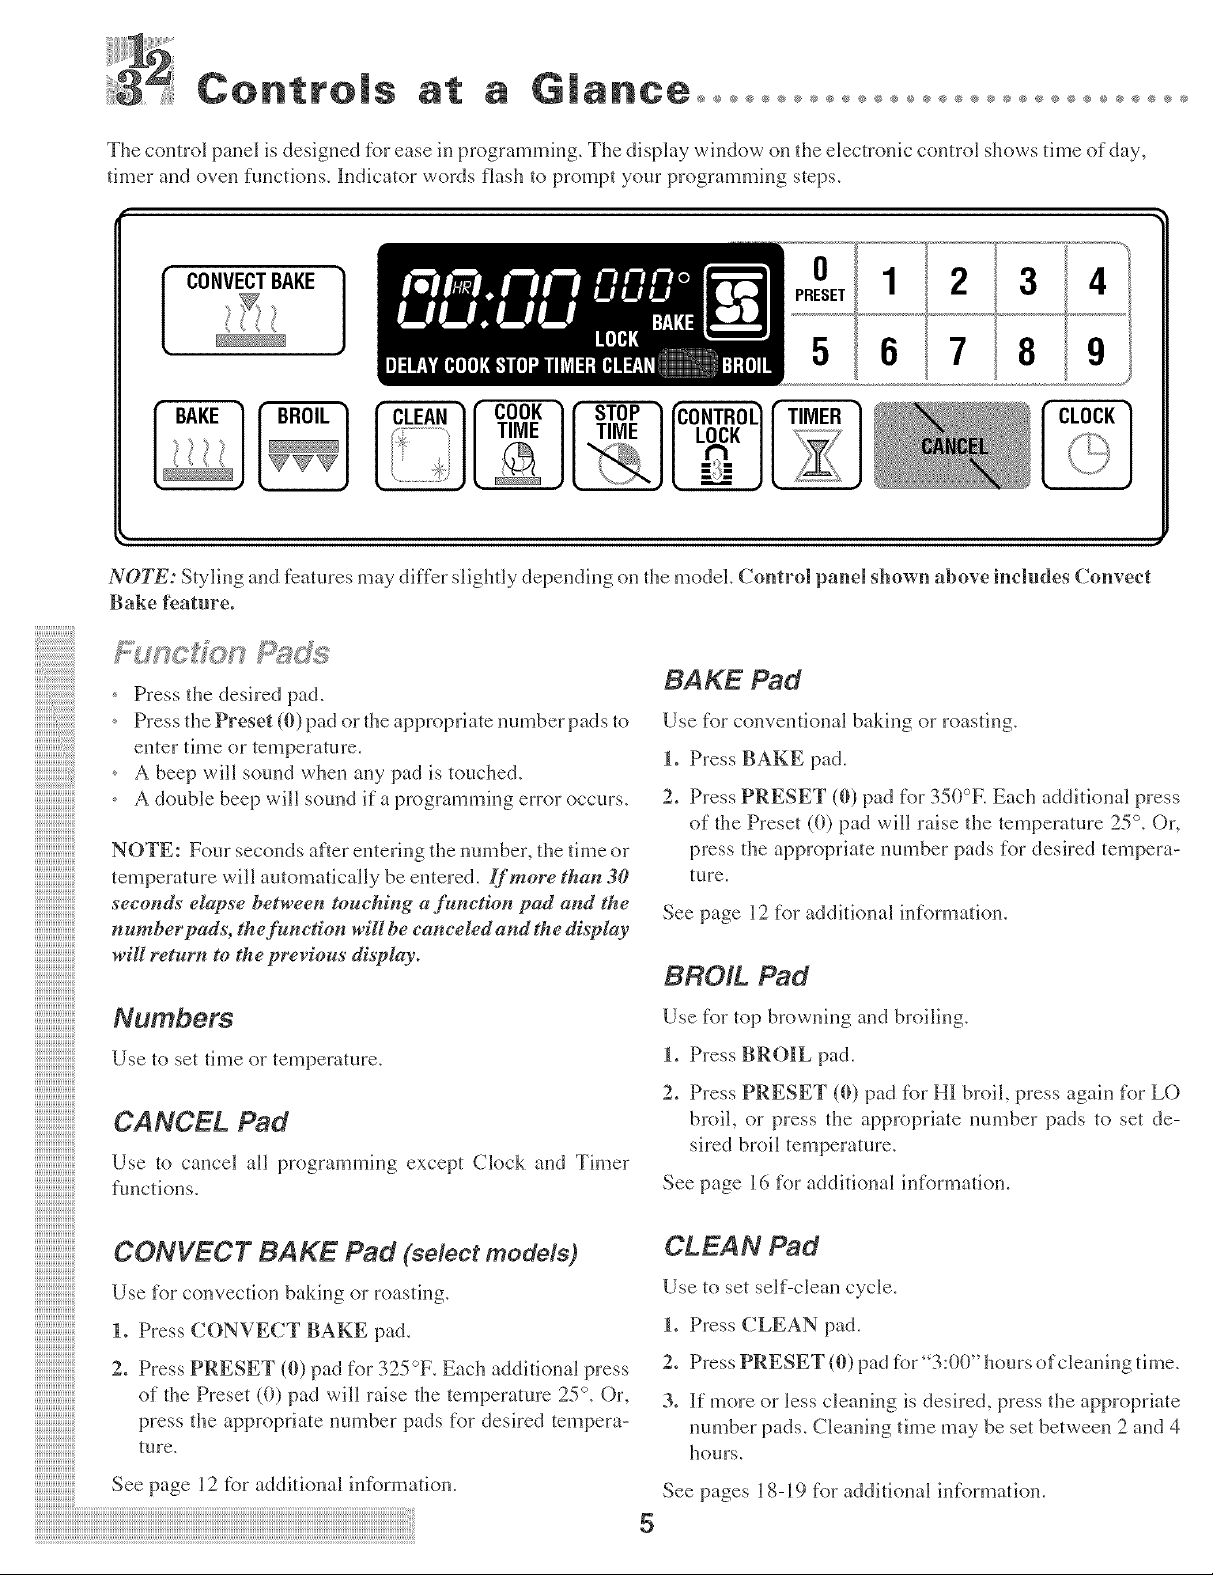
The control panel is designed for ease in programming. The display window on the electronic control shows time of day,
timer and oven functions. Indicator words flash to prompt your programming steps.
4
CONVECTBAKE ]
BAKE
CLEAN
TIME / TIME /
i
NOTE: Styling and features may differ slightly depending on the model. Control panel shown above includes Convect
Bake featm-e.
BAKE Pad
Press the desired pad.
Press the Preset (0) pad or the appropriate number pads to
enter time or temperature.
A beep will sound when any pad is touched.
A double beep will sound if a programming error occurs.
NOTE: Four seconds after entering the number, the time or
temperature will automatically be entered. If more than 30
seconds elapse betrveen touching a function pad and the
n umber pads, the function wiH be caneeled and the display
wig return to the previous di&lay.
Use for conventional baking or roasting.
1° Press BAKE pad.
2. Press PRESET (0) pad for 350°F. Each additional press
of the Preset (0) pad will raise the temperature 25 °. Or,
press the appropriate number pads for desired tempera-
tu re.
See page 12 for additional information.
BROIL Pad
Numbers
Use to set time or temperature.
CANCEL Pad
Use to cancel all programming except Clock and Timer
functions.
CONVECT BAKE Pad (select modols)
Use for convection baking or roasting.
t. Press CONVECT BAKE pad.
2. Press PRESET (0) pad for 325°F. Each additional press
of the Preset (0) pad will raise the temperature 25 °. Or,
press the appropriate number pads for desired tempera-
ture.
See page [2 for additional information.
Use for top browning and broiling.
1o Press BROIL pad.
2. Press PRESET (0) pad for HI broil, press again for LO
broil, or press the appropriate number pads to set de-
sired broil temperature.
See page 16 for additional information.
CLEAN Pad
Use to set self-clean cycle.
1. Press CLEAN pad.
2. Press PRESET (0) pad for °'3:0(Y' hours of cleaning time.
3. If more or less cleaning is desired, press the appropriate
number pads. Cleaning time may be set between 2 and 4
hours.
See pages 18-19 for additional information.
5
COOK TIME/STOP TIME Pads Setting the Timer
Use to program the oven to start and stop automatically. Use to set and then signal the completion of a time period
1. Press BAKE or CONVECT BAKE (select models) pad. up to 99 hours and .59 minutes (99:59).
Press the appropriate number pads for desired temperature.
2. Press COOK TIME pad. Press the appropriate number
pads to enter cooking time in hours and minutes.
3. To delay tile start of cooking, press STOP TIME pad. Press
the appropriate number pads to enter the time you want the
oven to stop.
See page 17 for additional information.
CONTROL LOCK Pad
The timer can be used independently of any other oven
activity and can be set while another oven function is
operating.
OVEN.
1. Press TIMER pad.
,_ Tile indicator word TIMER will flash and '_0HR:00"
2. Press tile appropriate number pads until tile desired
number of minutes or hours and minutes appear in tl_e
display.
TIlE TIMER DOES NOT CONTROL TIlE
appears in the display.
¸i i iiiiiiii!i!iiiiiiiiiiiiiiiiiiiiiiiiiiiiiiiiiiiiiiiiiiiiiiiiiiiiiiiii!i!i!!
iiiiiiiiiiiiiiiiiiiiii
iiiiiiiiiiiiiiiiiiiiii
The touch pads on the control can be locked to prevent un-
wanted use. They will not function when locked. The current
time of day will remain in the display when this f)ature is
activated.
If an oven function is currently being used, the controls cannot
be locked.
To set: Press CONTROL LOCK pad for :everal seconds. A
single beep will sound when control is locked.
If any pad is pressed when Control Lock 1,'activated, OFF will
appear in the display for 15 seconds.
To restore: Press and hold tile CONTROL LOCK pad f?_r
several seconds. Tile indicator word OFF will disappear.
Setting the Clock
1. Press CLOCK pad.
_,Tile indicator word TIME will flash in the display.
2. Press the appropriate number pads until tl_e correct time of
day appears in the display.
When electrical power is supplied or after apower interruption,
the last clock time before power was interrupted will flash.
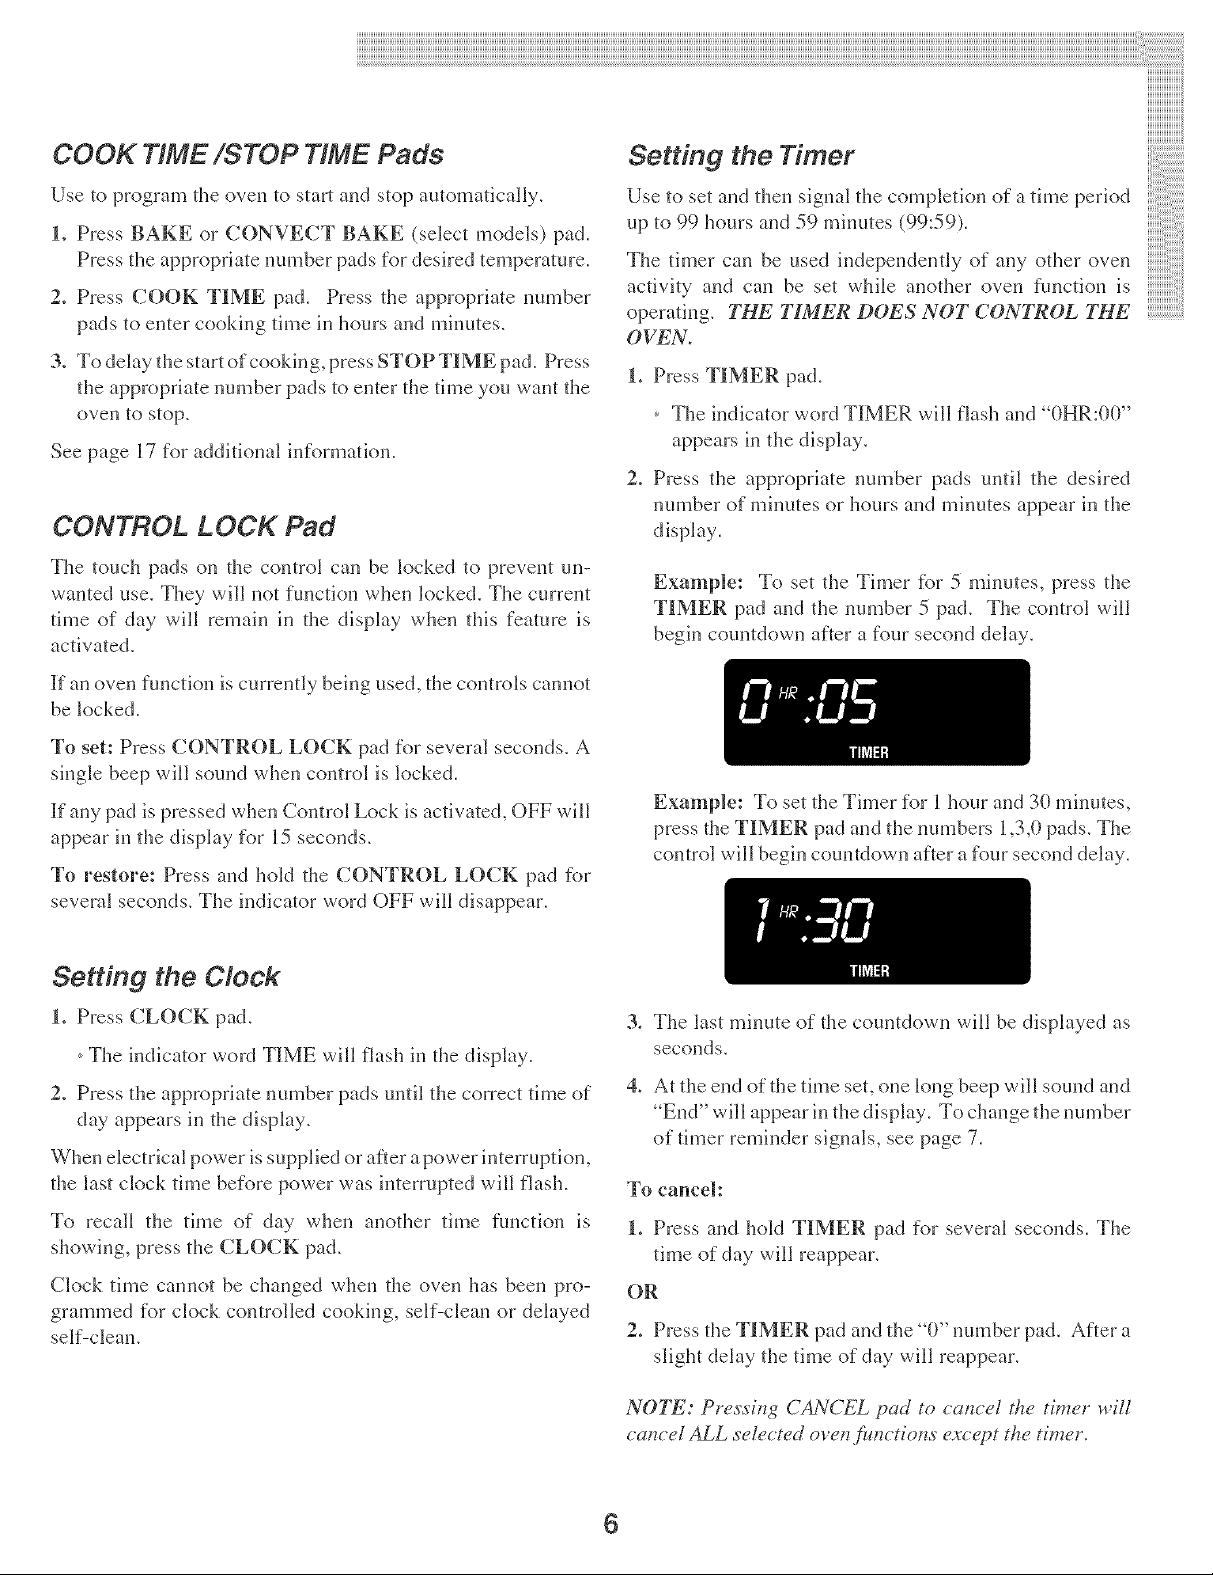
Example: To set the Timer for 5 minutes, press the
TIMER pad and d_e number 5 pad. The control will
begin countdown after a four second delay.
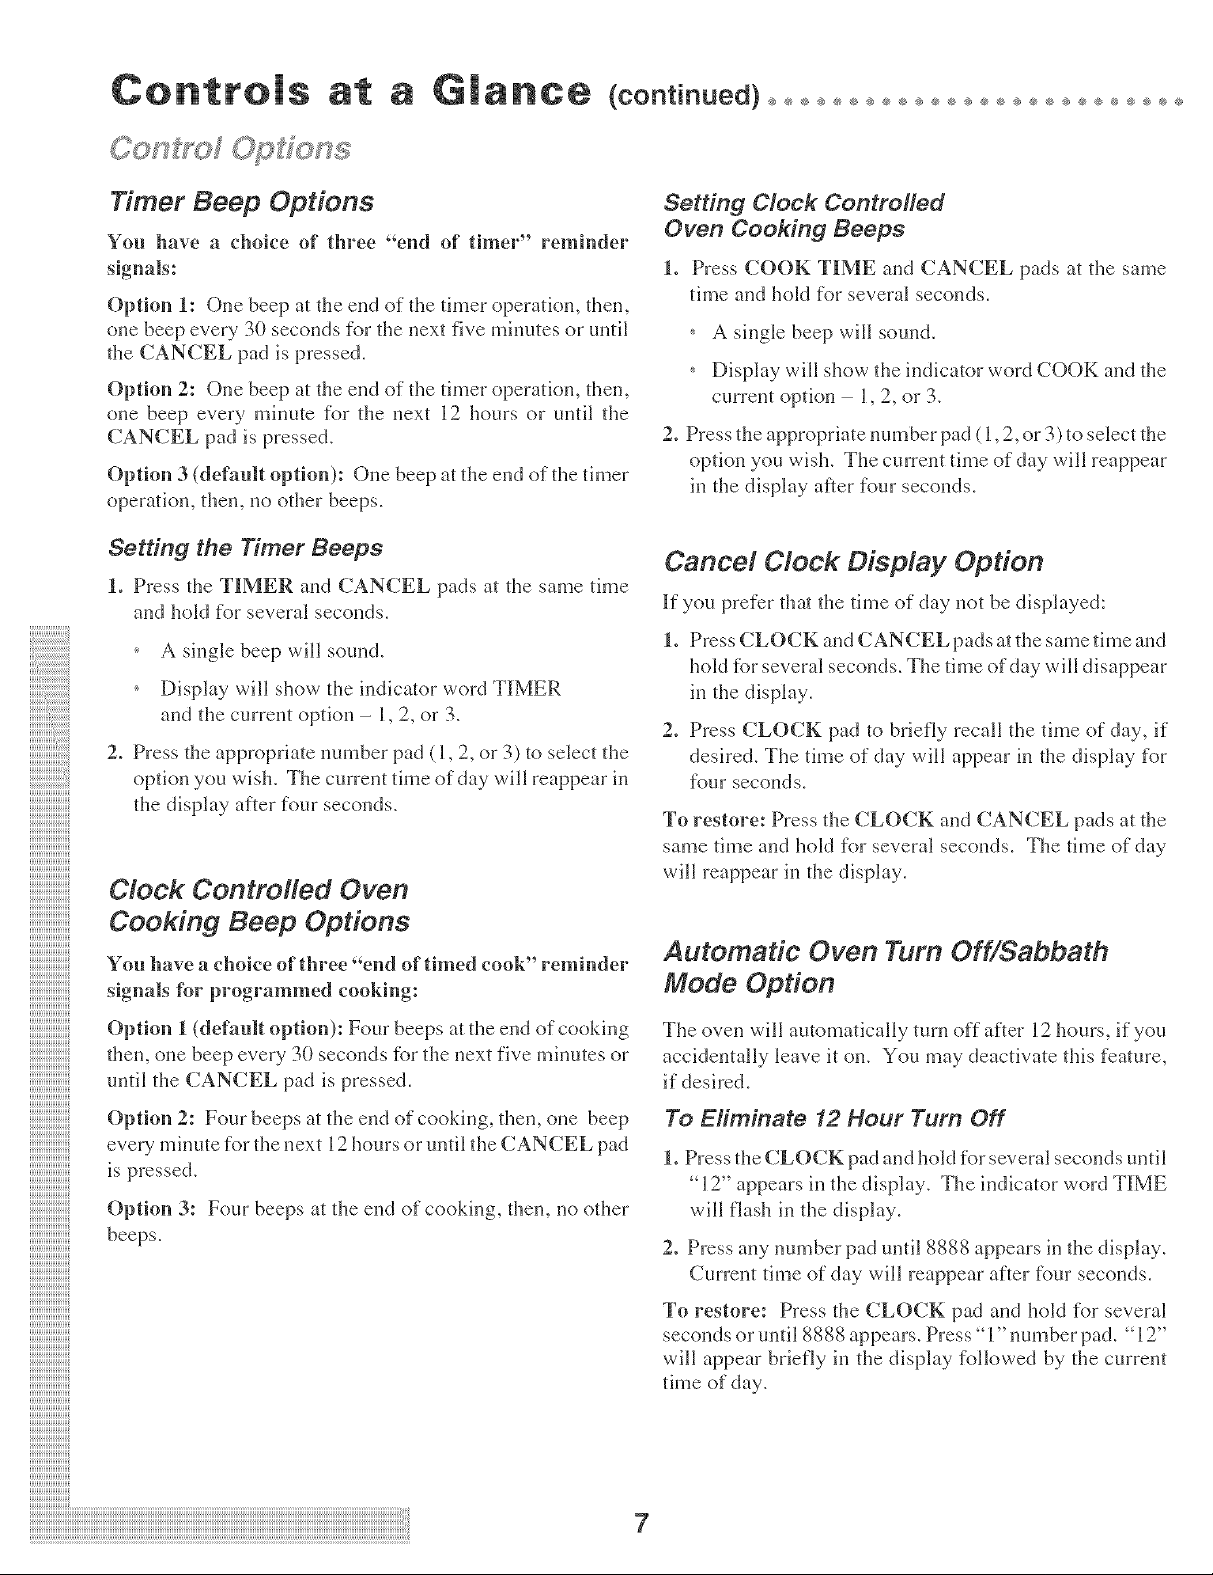
Example: To set the Timer for _ hour and 30 minutes,
press the TIMER pad and the numbers 1,3,0 pads. Tile
control will begin countdown after a four second delay.
3. Tile last minute of the countdown will be displayed as
seconds.
4. At tile end of the time set, one king beep will sound and
"End" will appear in the display. To change the number
of timer reminder signals, see page 7.
To cancel:
To recall the time of day when anod_er time function is
showing, press the CLOCK pad.
Clock time cannot be changed when the oven has been pro-
grammed for clock controlled cooking, self-clean or delayed
self-clean.
1. Press and hold TIMER pad for several seconds. Tile
time of day will reappear.
OR
2. Press the TIMER pad and the "0" number pad. After a
slight delay the time of day will reappear.
NOT[T: Press#_g CANCEL pad to caducei the timer will
caducei ALL selected ove_,/imctio_s except the timer.
Controls at a G_ance
Timer Beep Options
You have a choice of three "end of timer" remhrder
signMs:
Setting Clock Contro#ed
Oven Cooking Beeps
1o Press COOK TIME and CANCEL pads at the same
time and hokl for several seconds.
Option 1: One beep at the end of"the timer operatkm, then,
one beep every 30 seconds for the next five minutes or until
A single beep will sound.
tire CANCEL pad is pressed.
Display will show the indicator word COOK and the
Option 2: One beep at the end of tire timer operation, then,
current option - 1,2, or 3.
one beep every minute for tire next 12 hours or until tire
CANCEL pad is pressed.
Option 3 (default option): One beep at tire end of the timer
operation, then, no other beeps.
2. Press the appropriate number pad ( l, 2, or 3) to select the
option you wish. The current time of day will reappear
in the display af}er four seconds.
Setting the Timer Beeps
Cancel Clock Display Option
to Press the TIMER and CANCEL pad: at the same time
and hoM for several seconds.
A single beep will sound.
Display will show the indicator word TIMER
and the current option - 1,2, or 3.
2. Press the appropriate number pad (1,2, or 3) to select the
iiiiiiiiiiiiiiiiiiiiiii
UUUUUUUUUUUi_
UUUUUUUUUUUi_
UUUUUUUUUUUi_
UUUUUUUUUUUi_
UUUUUUUUUUUi_
UUUUUUUUUUUi_
UUUUUUUUUUUi_
UUUUUUUUUUUi_
UUUUUUUUUUUi_
UUUUUUUUUUUi_
UUUUUUUUUUUi_
UUUUUUUUUUUi_
UUUUUUUUUUUi_
UUUUUUUUUUUi_
UUUUUUUUUUUi_
UUUUUUUUUUUi_
UUUUUUUUUUUi_
UUUUUUUUUUUi_
UUUUUUUUUUUi_
UUUUUUUUUUUi_
UUUUUUUUUUUi_
UUUUUUUUUUUi_
UUUUUUUUUUUi_
UUUUUUUUUUUi_
UUUUUUUUUUUi_
UUUUUUUUUUUi_
UUUUUUUUUUUi_
UUUUUUUUUUUi_
UUUUUUUUUUUi_
UUUUUUUUUUUi_
UUUUUUUUUUUi_
UUUUUUUUUUUi_
UUUUUUUUUUUi_
UUUUUUUUUUUi_
UUUUUUUUUUUi_
UUUUUUUUUUUi_
UUUUUUUUUUUi_
UUUUUUUUUUUi_
UUUUUUUUUUUi_
UUUUUUUUUUUi_
UUUUUUUUUUUi_
UUUUUUUUUUUi_
UUUUUUUUUUUi_
UUUUUUUUUUUi_
UUUUUUUUUUUi_
UUUUUUUUUUUi_
UUUUUUUUUUUi_
UUUUUUUUUUUi_
UUUUUUUUUUUi_
UUUUUUUUUUUi_
UUUUUUUUUUUi_
UUUUUUUUUUUi_
UUUUUUUUUUUi_
UUUUUUUUUUUi_
UUUUUUUUUUUi_
UUUUUUUUUUUi_
UUUUUUUUUUUi_
UUUUUUUUUUUi_
UUUUUUUUUUUi_
UUUUUUUUUUUi_
UUUUUUUUUUUi_
UUUUUUUUUUUi_
UUUUUUUUUUUi_
UUUUUUUUUUUi_
UUUUUUUUUUUi_
UUUUUUUUUUUi_
UUUUUUUUUUUi_
UUUUUUUUUUUi_
UUUUUUUUUUUi_
UUUUUUUUUUUi_
UUUUUUUUUUUi_
UUUUUUUUUUUi_
UUUUUUUUUUUi_
UUUUUUUUUUUi_
UUUUUUUUUUUi_
UUUUUUUUUUUi_
UUUUUUUUUUUi_
UUUUUUUUUUUi_
UUUUUUUUUUUi_
UUUUUUUUUUUi_
UUUUUUUUUUUi_
UUUUUUUUUUUi_
UUUUUUUUUUUi_
UUUUUUUUUUUi_
UUUUUUUUUUUi_
UUUUUUUUUUUi_
UUUUUUUUUUUi_
UUUUUUUUUUUi_
UUUUUUUUUUUi_
UUUUUUUUUUUi_
UUUUUUUUUUUi_
UUUUUUUUUUUi_
UUUUUUUUUUUi_
UUUUUUUUUUUi_
UUUUUUUUUUUi_
UUUUUUUUUUUi_
UUUUUUUUUUUi_
UUUUUUUUUUUi_
UUUUUUUUUUUi_
option you wish. The current time of day will reappear in
the display after four seconds.
Clock Controlled Oven
Cooking Beep Options
You have a choice of three "end of t_med cook" reminder
signals [?_r programmed cooking:
Option 1 (default option): Four beeps at the end of cooking
then, one beep every 30 seconds for the next five minutes or
until the CANCEL pad is pressed.
Option 2: Four beeps at the end of cooking, then, one beep
every minute for the next 12 hours or until the CANCEL pad
is pressed.
Option 3: Four beeps at the end of cooking, then, no other
beeps.
iiiiiiiiiiiiiiiiiiiiiiiiiiiiiiiiiiiiiiiiiiiiiiiiiiiiiiiiiiiiiiiiiiiiiiiiiiiiiiiiiiiiiiiiiiiiiiiiiiiiiiiiiiiiiiiiiiiiiiiiiiiiiiiiiiiiiiiiiiiiiiiiiiiiiiiiiiiiiiiiiiiiiiiiiiiiiiiiiiiiiiiiiiiiiiiiiiiiiiiiiiiiiiiiiiiiiiiiiiiiiiiiiiiiiiiiiiiiiiiiiiiiiiiiiiiiiiiiiiiiiiiiiiiiiiiiiiiiiiiiiiiiiiiiiiiiiiiiiiiiiiiiiiiiiiiiiiiiiiiiiiiiiiiiiiiiiiiiiiiiiiiiiiiiiiiiiiiiiiiiiiiiiiiiiiiiiiiiiiiiiiiiiiiiiiiiiiiiiiiiiiiiiiiiiiiiiiiiiiiiiiiiiiiiiii i i i !
If you prefer that the time of day not be displayed:
1. Pre, ,'CLOCK and CANCEL pad, at tile :ame tmle and
hold for several seconds. Tile time of day will disappear
in the display.
2. Press CLOCK pad to briefly recall the time of day, if
desired. The time of day will appear in the display for
four seconds.
To restore: Pre_ : the CLOCK and CANCEL pads at the
SS _
same time and hokt for several seconds. Tile time of day
will reappear in the display.
Automatic Oven Turn Off/Sabbath
Mode Option
Tile oven will automatically turn off after 12 hours, if you
accidentally leave it on. You may deactivate this feature,
if desired.
To Eliminate _2 Hour Turn Off
1o Press the CLOCK pad and hoM for several seconds until
"12" appears in the display. The indicator word TIME
will flash in the display.
2. Press any number pad until 8888 appears in the display.
Current time of day will reappear after four seconds.
To restore: Press the CLOCK pad and hold for several
seconds or until 8888 appears. Press "l "number pad. "12"
will appear briefly in the display followed by the current
time of day.
7
Oven Temperature Adjustment Option
If you think the oven should be hotter or cooler, you can adjust
it youmeK. To decide how much to change the oven tempera-
ture, set the temperature 25°F higher or lower than the tempera-
ture in your recipe, then bake. The results of"the "test" should
give you an idea of"how much to adjust the temperature.
To adjust the oven temperature:
1, Press the BAKE pad.
2. Enter 550 ° by pressing the number pads "5, 5, 0".
3. Press and hold the BAKE pad for several seconds until 0°
appears in the display.
4. Press any number pad to change the temperature. Each time
a pad is pressed, the temperature changes by 5°F.
,. Press repeatedly to reach +35°F. Continue pressing
to reduce the temperature up to -35°F.
,. If the oven temperature was previously adjusted, the
change will be displayed. For example, if the oven
temperature was reduced by 15°, the display will
show -15 ° .
5, When you have made the adjustment, press the
CANCEL pad and the time of day will reappear in the
display. The oven will now bake at the adjusted
temperature.
NOTE: Do not change the temperature setting more than
10° at a time be%re testing the oven.
It is not necessary to readjust the oven temperature if there
is a power interruption. This adjustment will not affect
broil or clean temperatures.
Surface Cooking CAUTIONS:
Before Cooking
. Always place a pan on the surface unit before you turn it on. To
preveut damage to range, never operate surface unit without a
NEVER use the cooktop as astor%e m'ea%r,hod or cookware
During Cooking
• Be sure you krtow which knob controls which surface umt.
Make sure you turned on the correct surface umt.
- Begin cooking on a higher heat setting then reduce to a lower • Aerosol-type spray cans are EXPLOSIVE or highly flam-
semng to complete the operation. Never use a high heat setting mane when _xposed to heat. Avoid their use or storage nero"
for extended cooking.
NEVER allow a pan to boil dry This could damage the pgmand
• NEVER touch cooktop until it has cooled. Expect some pmls of
the cooktop, especially around the surface units, to becmne
warm or hot during cooking. Use potholders to protect hands.
After CooMng
• Be sure sufface element a_d surface indicator li_,htare off after
cooking.
(legu_ up messy sp_lls as soon as possible.
Other Tips
o To dimiuae the hazard of reaching over hot stmthce ele-
meuts, do not install cabinet storage directly above a unit.
If storage _s provided, limH it to items that are iufl'equently
used and can be safely stored in an m_easubjected to heat.
Temperaures may be unsafe %r items such as volaiie liq-
uids. cleaners or aerosol sprays.
o NEVER leave a_y items, especMly plastic items, on the
cooktop. The hot air from the vent may tgnite flammable
_tems, melt or soften plastics, or increase pressure in closed
comamers causing them to burst.
, NEVER allow almnim_m fbil, meat probes or any other meta]
object, other than a pan on a surface element, to contact
heating elements.
8
 Loading...