


G 2600 PC
Karcher G 2600 PC User Manual
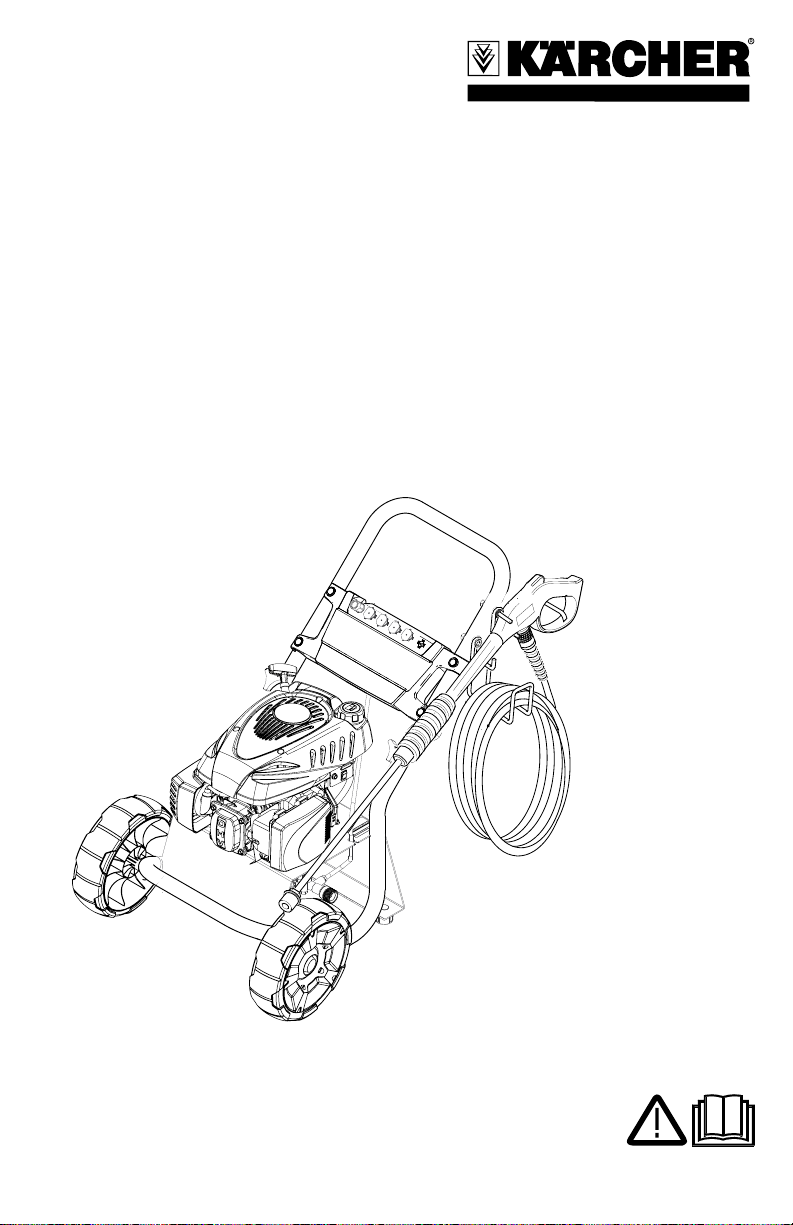
G 2600 PC
English 2
Español 16
Français 31
9.800-499.0 01/10A
HIGH PRESSURE WASHER OPERATOR MANUAL
Model Overview 3
Important Safety Instructions 4
Assembly Instructions 6
Operating Instructions 8
Using the Accessories 9
Working with Detergents 10
Taking a Break 11
Shutting Down & Clean-Up 11
Winterizing and Long-Term Storage 12
Maintenance Instructions 12
Cleaning Tips 12
Troubleshooting 14
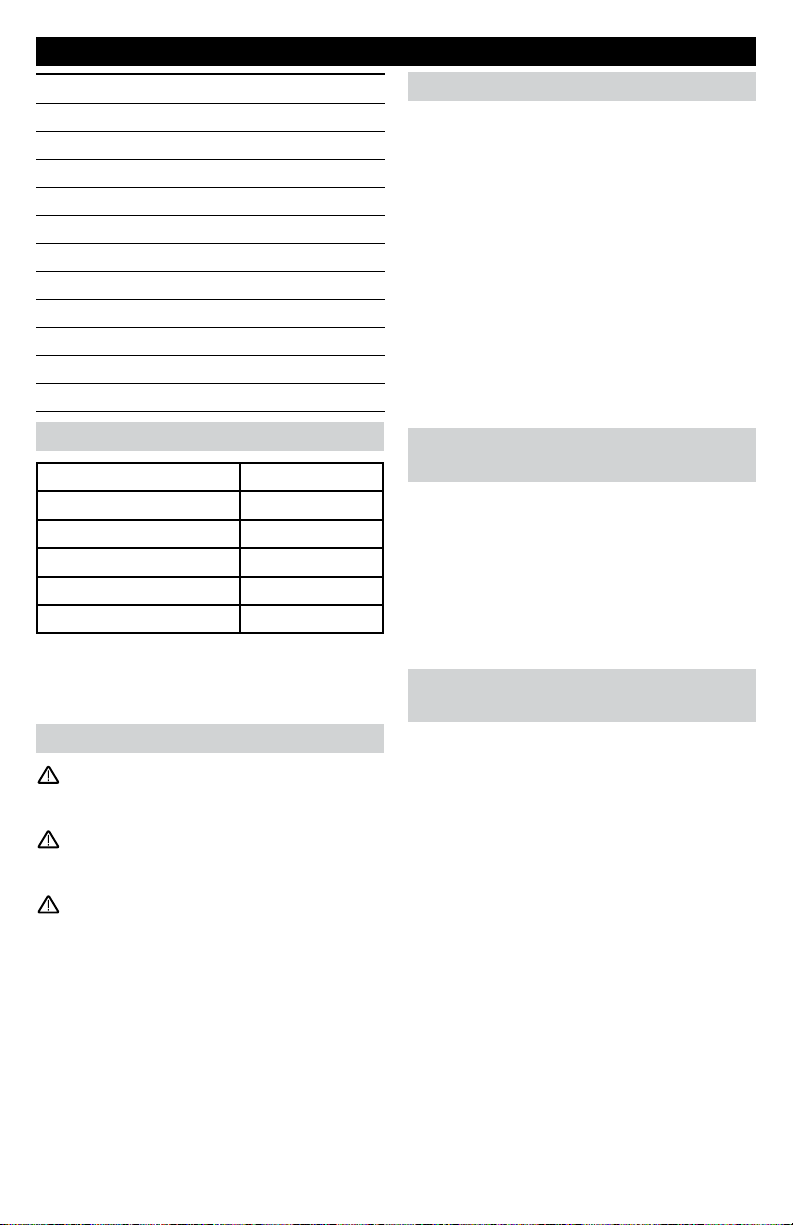
Specifications
Operating pressure 2600 PSI
Max. Water Flow* 2.3 GPM
Detergent suction 0.15 - 0.20 GPM
Engine 173cc
Part No. G2600 PC 1.107-111.0
Serial no.
Owner/User Responsibility
The owner and/or user must have an understanding of the manufacturer’s operating instructions and warnings before using this pressure
washer.
Warning information should be emphasized and
understood.
If the operator is not fluent in English, the manufacturer’s instructions and warnings shall be read
to and discussed with the operator in the operator’s native language by the purchaser/owner,
making sure that the operator comprehends its
contents.
Owner and/or user must study and maintain for
future reference the manufacturers’ instructions.
Kärcher Customer Support
USA & Canada
Please call 1-800-537-4129 for warranty related
issues. Please visit www.karcher-help.com for
technical support and product assistance.
Please take a moment to register your product
online at www.karcher-register.com. Be sure to
save your purchase receipt, it will be required for
repairs covered by warranty.
Safety Alert Symbols
DANGER
indicates “an imminently hazardous situation which, if
not avoided, will result in death or serious injury.”
WARNING
indicates “a potentially hazardous situation which, if
not avoided, could result in death or injury.”
CAUTION
indicates “a potentially hazardous situation which, if
not avoided, may result in minor or moderate injury or
in property damage incidents.”
English
2
Customer Support
Mexico
Call: 01-800-024-13-13 for help or visit our website: www.karcher.com.mx

MODEL OVERVIEW
12
1
3
10
7
11
2
5
8
4
6
9
1 Handle
2 Trigger gun
3 Trigger gun safety lock
4 High pressure hose
5 Gas tank
6 Spray wand
7 Dipstick
8 Water inlet with garden hose connector
9 Quick connect high pressure outlet
10 Detergent suction tube with filter
11 Quick connect nozzles
12 Water intel filter
For engine details see engine manual.
English
3

IMPORTANT SAFETY INSTRUCTIONS
Read the operating instructions of the engine ■
manufacturer before start-up and follow the
safety instructions carefully.
WARNING
When using this product basic precautions should
always be followed, including the
following:
Read all the instructions before using the ■
product.
To reduce the risk of injury, close supervision is ■
necessary when a product is used near children.
Know how to stop the product and bleed pres- ■
sures quickly. Be thoroughly familiar with the
controls.
Stay alert – watch what you are doing. ■
Do not operate the product when fatigued ■
or under the influence of alcohol or drugs.
Keep operating area clear of all persons. ■
Do not overreach or stand on unstable support. ■
Keep good footing and balance at all times. ■
Wear safety goggles. ■
Follow the maintenance instructions specified in ■
the manual.
To avoid risks, all repairs and replacement of ■
spare parts may only be carried out by authorized
customer service personnel.
WARNING
Risk of Injection or Injury – Do Not Direct Discharge
Stream At Persons.
High pressure jets can be dangerous if ■
misused. The jet must not be directed at
persons, animals, electrical devices, or the
unit itself.
Do not spray electrical connections, electri- ■
cal outlets or fixtures.
WARNING
Risk Of Explosion – Do not spray flammable liquids.
Do not use acids, alkaline, solvents, or any ■
flammable material in this product. These
products can cause physical injuries to the
operator and irreversible damage to the
machine.
WARNING
Gun Kicks Back – Hold with both hands.
The Trigger Gun Safety Lock prevents the ■
trigger from accidentally being engaged.
This safety feature DOES NOT lock trigger
in the ON position.
WARNING
The engine exhaust from this product contains chemicals known to the State of California to cause cancer,
birth defects or other reproductive harm. Operation
of this equipment may create sparks that can start
fires around dry vegetation. A spark arrestor may be
required. The operator should contact local fire agencies for laws or regulations relating to fire prevention
requirements.
CAUTION
Risk of Asphyxiation – Use this product only in a
well ventilated area.
Operate and fuel machine in a well ven- ■
tilated area, free of devices featuring an
open pilot or flame such as boilers, water
heaters, etc.
CAUTION
Risk of Fire – Do not add fuel when the product
is operating.
Do not operate if fuel has been spilled. ■
Instead, move the machine to a different
location and avoid creating sparks.
The machine has hot surfaces which can ■
cause burns. Operate the unit in a safe
environment and away from children.
Do not touch hot surfaces or allow acces- ■
sories to contact hot surfaces.
Do not allow the high pressure hose to ■
come into contact with the muffler guard.
Do not leave the machine running unat- ■
tended.
Avoid tipping the machine on its side. ■
SAVE THESE INSTRUCTIONS!
4
English

WATER SUPPLY
(Cold Water Only)
CAUTION
When connecting the water inlet to the water
supply mains, local regulations of your water
company must be observed. In some areas
the unit must not be connected directly to the
public drinking water supply. This is to ensure
that there is no feedback of chemicals into the
water supply. Direct connection via a receiver
tank or backflow preventer, for example, is
permitted.
Dirt in the feed water will damage the unit. To
avoid this risk, we recommend fitting a water
filter.
Garden hose must be at least 5/8 inch in ■
diameter.
Flow rate of water supply must not fall ■
below 2.5 GPM (gallons per minute).
Flow rate can be determined by running the ■
water for one minute into an empty 5-gallon
container.
The water supply temperature must not ■
exceed 104°F/40°C.
Never use the pressure washer to draw in ■
water contaminated with solvents, e.g. paint
thinners, gasoline, oil, etc.
Always prevent debris from being drawn ■
into the unit by using a clean water source.
Use additional water filter.
Do not operate pressure washer without the ■
water turned on.
English
5
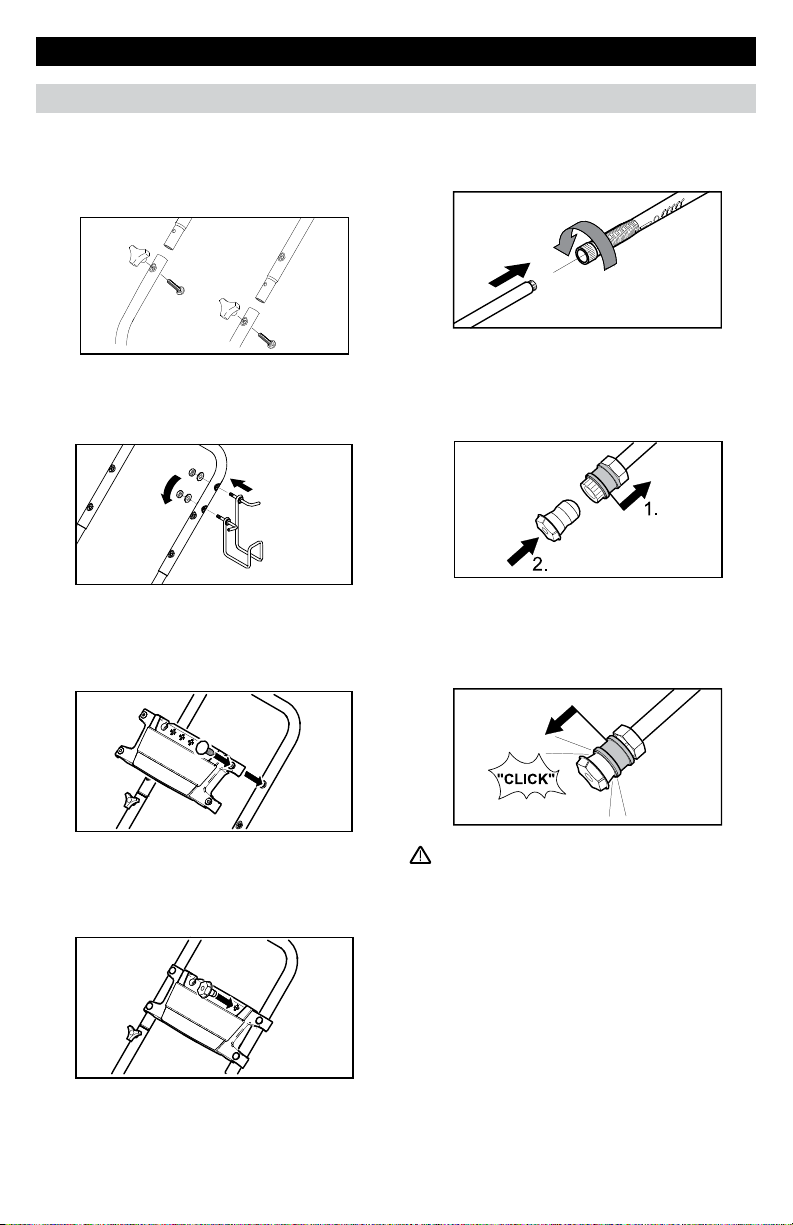
ASSEMBLY INSTRUCTIONS
Assembling
STEP 1:
Attach the handle to the frame of the pressure
washer. Align holes, insert bolts, and tighten with
knobs.
STEP 2:
Mount the gun/hose storage handle.
STEP 3:
Mount the nozzle holder with enclosed nylon
rivets to the handle.
STEP 5:
Attach the wand to the spray gun.
STEP 6:
Pull the spring-loaded collar of the wand back to
insert your choice of quick connect nozzle.
STEP 7:
Release the collar and push the nozzle until the
collar clicks.
STEP 4:
Place the quick connect nozzles in the nozzle
holder.
English
6
WARNING
High pressure in nozzle area.
Risk of injury caused by improperly locked
nozzle.
Make sure you hear a ‘click’ when inserting ■
the nozzle tip into the wand.
Pull the nozzle to make sure it is seated ■
properly before operating your unit.
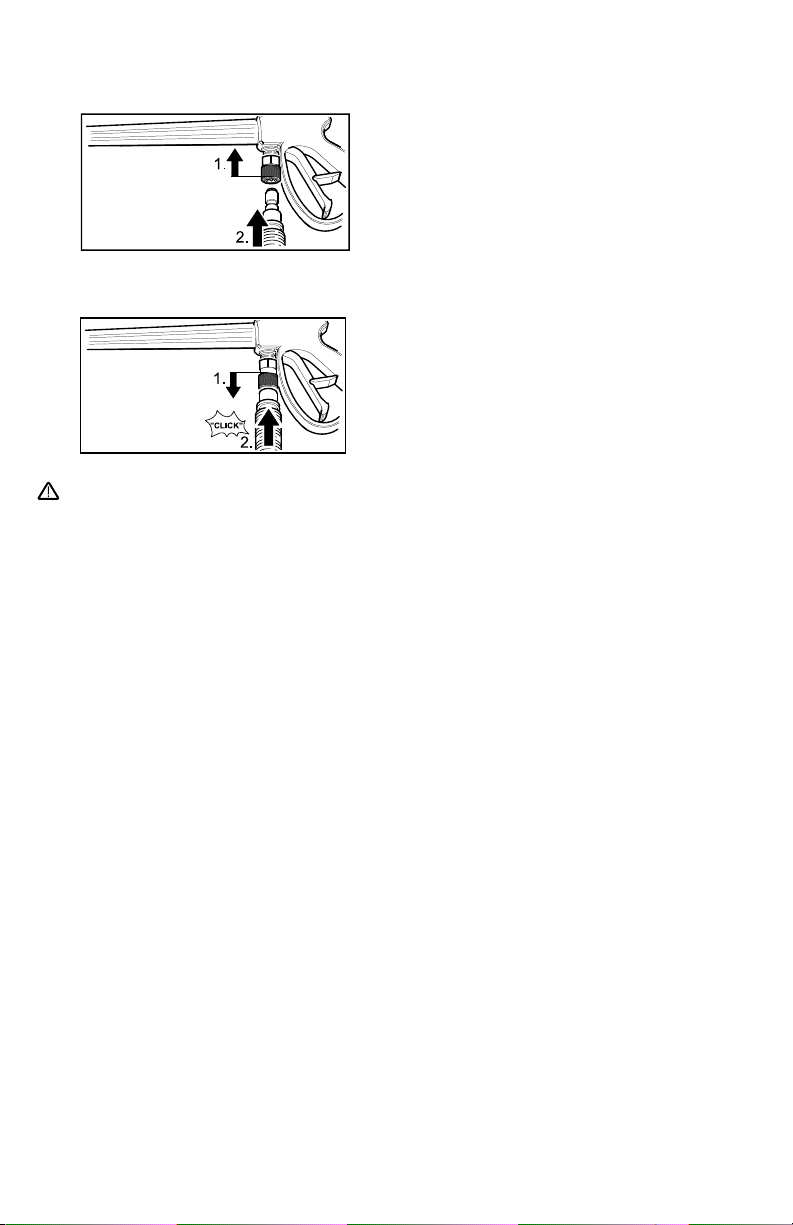
STEP 8:
Pull back the springloaded collar at the spray
gun and insert the high pressure hose.
Release the collar and push the high pressure
hose until the collar clicks
WARNING
High pressure in quick connect area.
Risk of injury caused by improperly locked
high pressure hose.
Make sure you hear a ‘click’ when insert- ■
ing the high pressure hose into the quick
connection.
Pull the high pressure hose to make sure ■
it is seated properly before operating your
unit.
English
7

OPERATING INSTRUCTIONS
CAUTION
Engine shipped without oil. Before starting engine, fill
with oil. Do not over-fill. Do not run the engine with a
high or low oil level as this can cause engine damage.
If you have further questions regarding the engine,
please refer to the engine manual included with the
unit.
STEP 1:
Check oil level. Oil level should always be
between the “FULL” and “ADD” marks on the
dipstick.
Be sure the machine is level when checking the
oil level. (Refer to the engine’s operating manual
for seasonal grades.).
We recommend that the oil be changed after the first 5
hours of use, then once every 50 hours.
STEP 2:
Fill gas tank with unleaded gasoline.
Do not use leaded gasoline.
Do not add oil to the gasoline.
STEP 3:
Pull back the springloaded collar at the high
pressure outlet and insert the high pressure
hose.
Release the collar and push the high pressure
hose until the collar clicks.
WARNING
High pressure in quick connect area.
Risk of injury caused by improperly locked
high pressure hose.
Make sure you hear a ‘click’ when inserting
the high pressure hose into the quick connection.
Pull the high pressure hose to make sure it is
seated properly before operating your unit.
STEP 4:
Connect garden hose to unit’s water inlet.
STEP 5:
Connect garden hose to the cold water source
and turn water on completely.
Do not use hot water.
STEP 6:
Unlock the trigger gun safety lock. Trigger the
gun to eliminate trapped air, wait for a steady
flow of water to emerge from the spray nozzle.
STEP 7:
Pull the choke rod to the ON position (on a
warm engine, leave the choke rod in the OFF
position).
STEP 8:
Move the engine stop switch to the ON position.
For engine details see engine manual.
STEP 9:
Pull the starter handle.
If the engine fails to start after 3 pulls,
squeeze the trigger gun to release pressure,
and repeat step.
After the engine warms up enough to run
smoothly, move choke rod to OFF position
.
8
English
USING THE ACCESSORIES
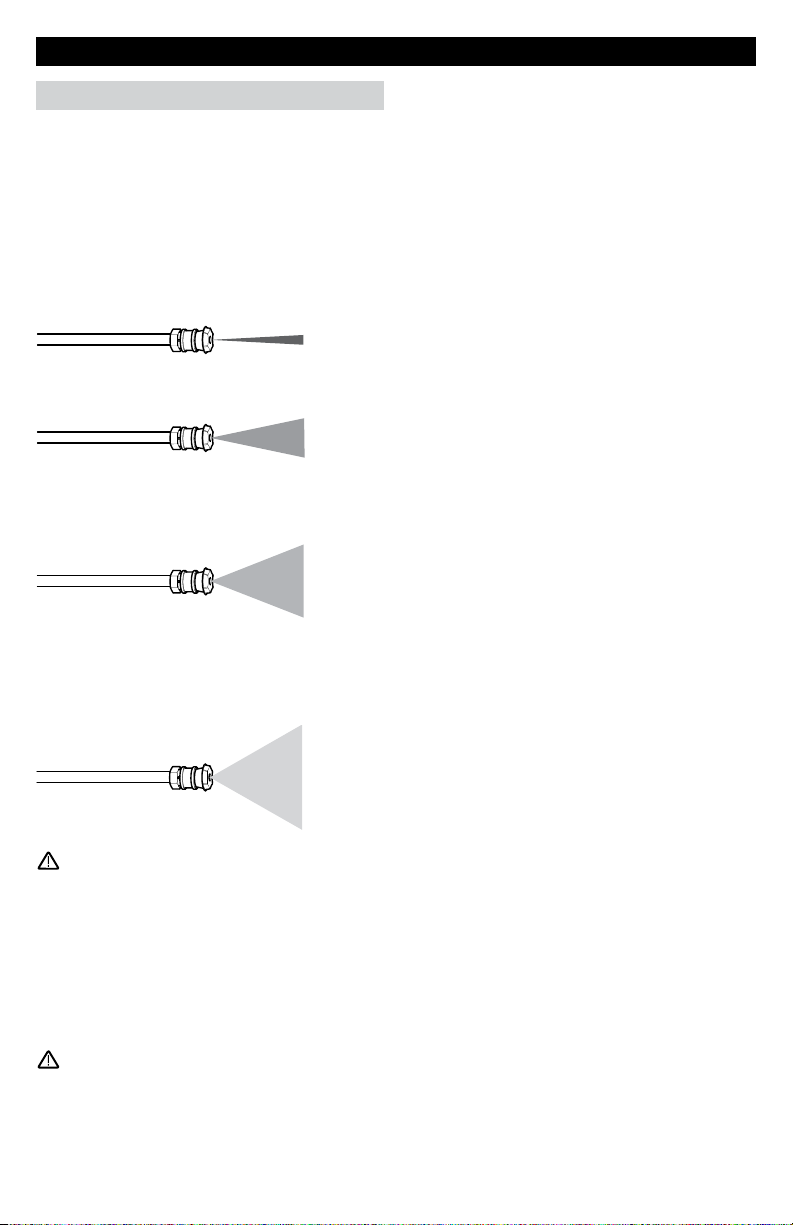
Quick connect nozzles
The color-coded quick connect nozzles provide a
wide array of spray widths from 0° to 65° and are
easily accessible when placed in the convenient
nozzle holder.
0° spray angle = Red nozzle
For particularly stubborn accumulation of grime.
Not recommended for soft materials like sidings, decks, painted surfaces, cars.
25° spray angle = Green nozzle
For dirt accumulation over a large surface.
40° spray angle = White nozzle
For moderate dirt accumulation over a large
surface.
65° spray angle = Black detergent nozzle
For operating with detergent or cleaning with low
pressure.
WARNING
High pressure in nozzle area.
Risk of injury caused by improperly locked nozzle.
Make sure you hear a ‘click’ when inserting ■
the nozzle tip into the wand.
Pull the nozzle to make sure it is seated ■
properly before operating your unit.
(See ASSEMBLY INSTRUCTIONS: Step 9 )
WARNING
To avoid serious injury never point spray nozzle
at yourself, other persons or animals.
English
9
WORKING WITH DETERGENTS
Detergents can only be applied with the black
detergent nozzle.
STEP 1:
Install the black detergent nozzle for detergent
application (will work at low pressure
only).
STEP 2:
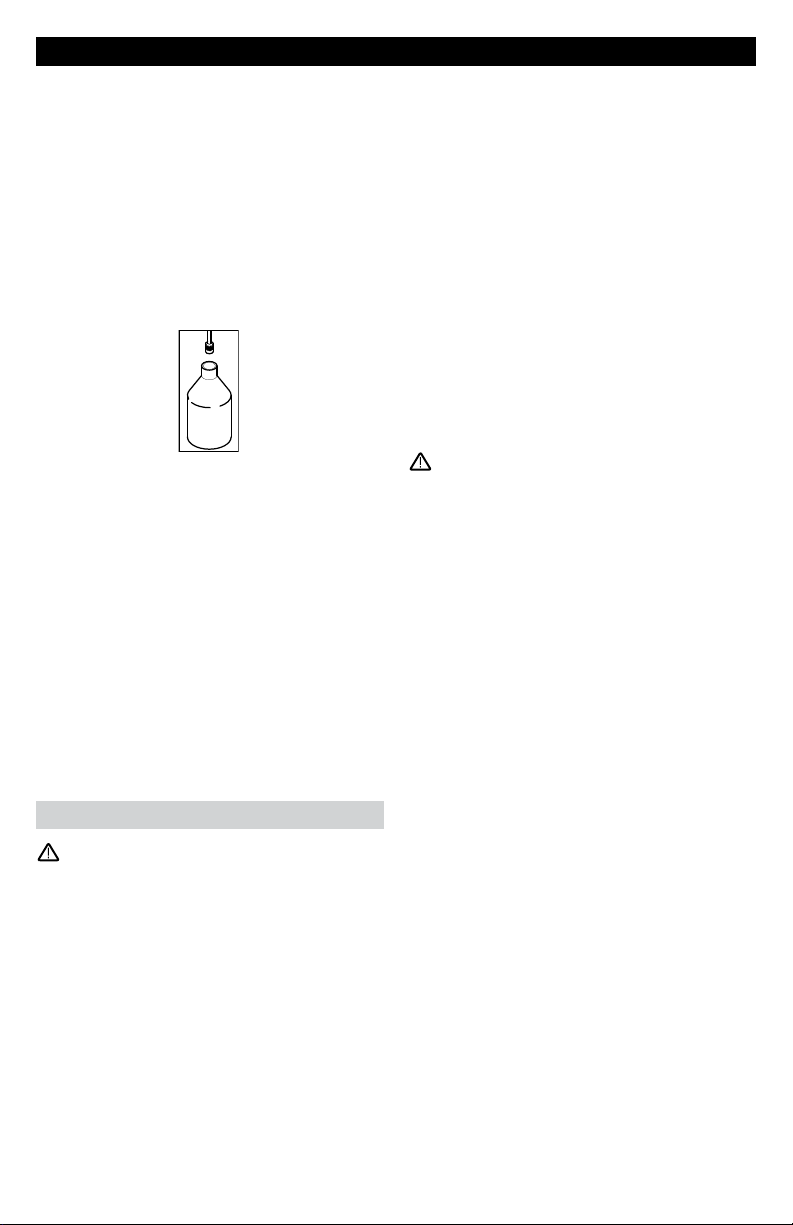
Fill a container (not included) with Kärcher detergent. Place the filter end of detergent suction
tube into the container.
STEP 3:
With the engine running, pull trigger to operate
unit.
Liquid detergent is drawn into the unit and mixed with
water.
Apply detergent to work area.
Do not allow detergent to dry on surface.
STEP 4:
Always draw fresh water through the detergent
suction tube when the cleaning job is done, to
rinse/flush any remaining detergents from the
injection system.
For best results see Cleaning Tips for specific
information on how to clean different surfaces.
Kärcher® biodegradable detergents are specially
formulated to protect the environment and your
pressure washer. The special formula won’t clog
the suction tube filter and will protect the internal
parts of the pressure washer for a longer life. For
Kärcher® Detergents, check your retailer or visit
our websites:
www.soappac.com
www.karcher-usa.com/home
Kärcher detergents available:
– All Purpose & Vehicle Cleaner
– Exterior House Cleaner
– Deck & Patio Cleaner
– Heavy Duty Degreaser
– Vehicle Wash & Wax
CAUTION
Never use:
– Bleach, Chlorine products and other corrosive
chemicals
– Liquids containing solvents (i.e., paint thinners,
gasoline, oils)
– Tri-sodium phosphate products
– Ammonia products
– Acid-based products
These chemicals will harm the unit and will damage the surface being cleaned.
Use of these items will void the warranty.
Detergents
CAUTION
This unit has been designed for use with cleaning
detergents recommended by the manufacturer.
The use of other cleaning detergents may affect
the operation of the machine and void the warranty.
Always Use Kärcher® Detergent for Best
Results
English
10
TAKING A BREAK ..five minutes or more
STEP 1:
Move the engine stop switch to the OFF position.
For engine details see engine manual.
SHUTTING DOWN & CLEAN-UP
STEP 1:
Remove detergent suction tube from container
and insert into 1 gallon of fresh water.
Siphon water at low pressure for one minute.
STEP 2:
Move the engine stop switch to the OFF position.
STEP 3:
Turn off the water source.
STEP 4:
Press trigger to release water pressure.
STEP 5:
Release trigger and engage gun safety lock.
STEP 2:
Release trigger and engage gun safety lock.
STEP 6:
Disconnect the garden hose from the water inlet
on the unit.
STEP 7:
Disconnect the high pressure hose from the
high pressure outlet.
English
11

WINTERIZING AND LONG-TERM STORAGE
1: Disconnect all water connections.
2: Turn on the machine for a few seconds, until
the water which had remained in the pump
exits, turn off immediately.
3: Do not allow high pressure hose to become
kinked.
4: Store the machine and accessories in a
room which does not reach freezing temperatures. DO NOT store near furnace or other
sources of heat as it may dry out the pump
seals.
MAINTENANCE INSTRUCTIONS
Kärcher pump
Initial Use
All Kärcher pumps ship with oil already inside direct from the factory. There is no need to add oil.
Pump Inspection
You should routinely make a visual inspection of
the pressure washer’s pump. If you notice oil
leaking around the pump seals, you should take
the pressure washer to a Kärcher-Authorized
Service Center for repair. (You can locate a service center in your area online at www.karcherresidential.com)
CAUTION
Failure to follow the above directions will result in
damage to the pump assembly and accessories
and will void the warranty.
Kärcher® also recommends the regular practice of
using a pump protector like “Kärcher® Pump
Guard” to prevent cold weather damage during
storage in the winter months.
Pump Mainenance
The pump on your Kärcher pressure washer
does not require maintenance. Any attempts
to service or alter the pump may damage your
pressure washer and void your product warranty.
Engine
Carry out maintenance tasks for the engine
according to the specifications provided in the
operating instructions provided by engine
manufacturer.
CLEANING TIPS
Deck Cleaning House Siding
(with or without detergent). Pre-rinse deck and
surrounding area with fresh water. If using
detergent, apply to surface at low pressure.
For best results, limit your work area to smaller
sections of approximately 25 square feet. Allow
detergent to remain on surface 1-3 minutes. Do
not allow detergent to dry on surface. Rinse at
high pressure in a long sweeping motion keeping
the spray nozzle approximately 3-6 inches from
the cleaning surface. Always clean from top to
bottom and from left to right. When moving on to
a new section of the cleaning surface, be sure
to overlap the previous section to eliminate stop
marks and ensure a more even cleaning result.
CAUTION
Do not use Dirtblaster spray nozzle on wood
surface as it may cause damage.
English
12
(with or without detergent). Pre-rinse cleaning
surface with fresh water. If using detergent, apply
to surface at low pressure (for best results, limit
your work area to sections of approximately 6
feet and always apply detergent from bottom to
top). Allow detergent to remain on surface 1-3
minutes. Do not allow detergent to dry on surface, if surface appears to be drying, simply wet
down surface with fresh water. If needed, use
special wash brush attachment (not included)
to remove stubborn dirt. Rinse at high pressure
from top to bottom in an even sweeping motion
keeping the spray nozzle approximately 6 inches
from the cleaning surface.
CAUTION
Do not use Dirtblaster spray nozzle on siding
as it may cause damage.

Cement Patios, Brick and Stone
(with or without detergent). Pre-rinse cleaning
surface with fresh water. If using detergent or
Degreaser, apply to surface at low pressure.
For best results, limit your work area to smaller
sections of approximately 25 square feet. Allow
detergent or Degreaser to remain on surface
1-3 minutes. Do not allow detergent to dry on
surface. Rinse at high pressure in a sweeping
motion keeping the spray nozzle approximately
3-6 inches from the cleaning surface. Always
clean from top to bottom and from left to right.
For removing extremely stubborn stains, use the
Dirtblaster® Nozzle.
Cars, Boats & Motorcycles
(with or without detergent). Pre-rinse vehicle
with fresh water. If using detergent, apply to surface at low pressure. For best results, clean one
side of vehicle at a time and always apply detergent from bottom to top, do not allow detergent
to dry on surface. If needed, use special wash
brush attachment (not included) to remove stubborn dirt. Rinse at high pressure in a sweeping
motion keeping the spray nozzle approximately
6-8 inches from the cleaning surface (distance
should increase when rinsing pin-striping or
other sensitive surfaces). Always clean from top
to bottom and from left to right. For best results,
wipe surface dry with a chamois or soft dry cloth.
CAUTION
Do not use Dirtblaster spray nozzle on vehicles
as it may cause damage.
Barbecue Grills, Outdoor Power
Equipment & Gardening
(with or without detergent). Pre-rinse cleaning
surface with fresh water. If using detergent or Degreaser, apply detergent at low pressure. Allow
detergent to remain on surface 1-3 minutes. Do
not allow detergent to dry on surface. Rinse at
high pressure keeping the spray nozzle approximately 3-6 inches from the cleaning surface. For
removing extremely stubborn dirt, it may be necessary to move the spray nozzle even closer to
the surface for greater dirt cutting action.
CAUTION
Do not use Dirtblaster spray nozzle on cloth,
plastic or other sensitive surfaces as it may
cause damage.
Patio & Lawn Furniture
(with or without detergent). Pre-rinse furniture
and surrounding area with fresh water. If using
detergent, apply to surface at low pressure. Allow
detergent to remain on surface 1-3 minutes. Do
not allow detergent to dry on surface. If needed
use special Wash Brush Attachment (not
included) to remove stubborn dirt. Rinse at high
pressure in a sweeping motion keeping the spray
nozzle approximately 3-6 inches from the cleaning surface. For best results, clean from top to
bottom and from left to right.
CAUTION
Do not use Dirtblaster spray nozzle on patio or
lawn furniture as it may cause damage.
CAUTION
Before cleaning any surface an inconspicu- ■
ous area should be cleaned to test spray
pattern and distance for maximum cleaning
results.
If painted surfaces are peeling or chipping, ■
use extreme caution as pressure washer
may remove the loose paint from the
surface.
When using on surfaces which might come ■
in contact with food, flush surfaces with
plenty of drinking water.
For additional cleaning tips and a complete- ■
video library, visit our website:
www.karcherresidential.com
Optional Accessories
Optional accessories are available to further
enhance your cleaning capabilities. Please check
our website for pricing and
up-to-date information.
English
13
TROUBLESHOOTING
CAUTION
Remove the spark plug cable to prevent accidental ignition of the engine before making any
repair.
Symptom POSSIBLE CAUSE SOLUTION
Engine will not start
Unit does not reach
high pressure.
Output pressure
varies high and low.
No detergent.
Garden hose connection leaks.
Spray wand leaks.
No gasoline Fill gas tank
Choke is not in the correct position. Slide choke lever out to closed position.
Water pressure built up in the ma-
chine.
For additional engine problems refer to the engine manual.
Diameter of garden hose is too
small.
Water supply is restricted. Check garden hose for kinks, leaks and
Not enough inlet water supply. Turn water on full force. Check garden hose
Water inlet filter is clogged. Remove filter and rinse out in warm water.
Black detergent nozzle is attached. Remove black detergent nozzle and attach
Not enough inlet water supply. Turn water on full force. Check garden hose
Pump is sucking air. Check that hoses and fittings are air tight.
Water inlet filter is clogged. Remove filter and rinse out in warm water.
Spray nozzle is obstructed. Blow out or remove debris with a fine needle.
Calcified gun, hose or spray wand. Run distilled vinegar through detergent suc-
Detergent suction tube not properly
connected to the machine.
Detergent is too thick. Dilute detergent, for best results use
Filter on detergent suction tube is
clogged.
Damaged or clogged detergent suction tube.
A high pressure nozzle is attached. Replace with black detergent nozzle.
Metering valve closed. Open metering valve.
Spray nozzle is obstructed. Blow out or remove debris with fine needle.
Loose fittings. Check and replace if necessary.
Missing/worn rubber washer. Insert new washer.
Spray wand not properly attached. Turn the swivel nut of the gun clockwise until
Broken o-ring or plastic insert. Call Customer Support
Squeeze the trigger to release the pressure.
Replace with a 5/8 inch or larger garden
hose.
blockage.
for kinks, leaks or blockage.
high pressure nozzle
for kinks, leaks or blockage.
Turn off machine and purge pump by
squeezing trigger gun until a steady flow of
water emerges through the nozzle.
tion tube.
Check connection.
Kärcher® detergent.
Run warm water through filter to remove
debris.
Remove obstruction or replace detergent
suction tube.
connection is tight.
14
English
 Loading...