


 Loading...

Introduction
About this Guide
This guide explains the following setting method necessary to use this machine.
Installation of the machine
•Unpacking
•Installing Toner Container
•Loading Paper
•Connecting Cables
•Connecting Modular Cords
Operation at the machine panel
•Selecting Language
•Date and Time Settings
•Setting Network Interface Parameters
Operation at the PC
•Accessing COMMAND CENTER (Internal HTML web page)
•Sharing Folder to use Scan to SMB
•Installing Printer Driver
•Setting TWAIN Driver
•Setting WIA Driver
IMPORTANT: Please read safety information on the Operation Guide before installing this machine.
Trademark Information
•Windows is a registered trademark of Microsoft Corporation in the U.S.A. and/or other countries.
•Windows XP and Windows Vista are trademarks of Microsoft Corporation.
•This machine contains the software having modules developed by Independent JPEG Group.
All other company and product names contained in this guide are trademarks or registered trademarks of their respective companies. The designations ™ and ® will not be used in this guide.
2
1 Preparations
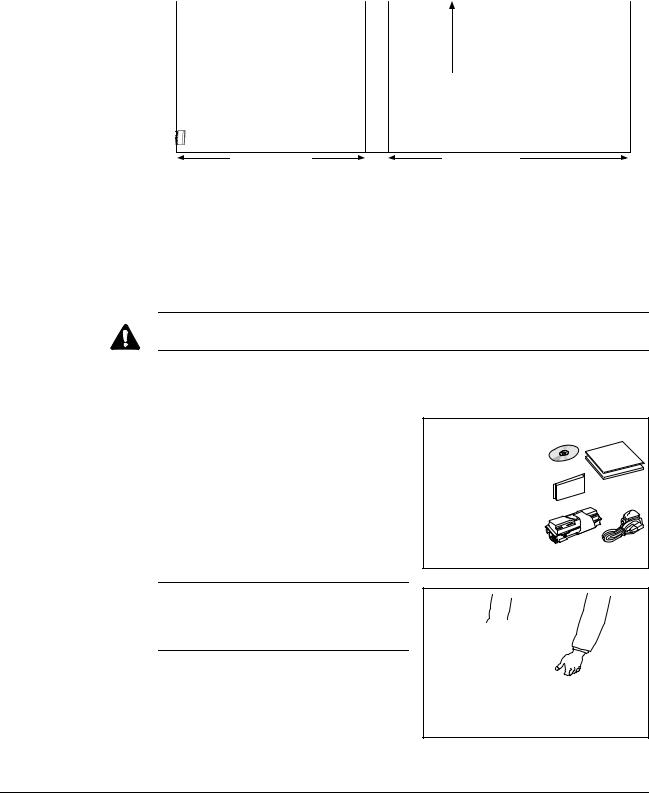
Clearance
500 mm
(19-11/16")
300 mm |
300 mm |
300 mm |
1000 mm |
(11-13/16") |
(11-13/16") |
(11-13/16") |
(39-3/8") |
Environment
•Temperature: 10 to 32.5 °C (50 to 90.5 °F)
•Humidity: 15 to 80 %RH
•Power Supply: 120 V AC, 60 Hz / 220 to 240 V AC, 50/60 Hz
CAUTION: Be sure to provide enough space around machine. Prolonged use without sufficient clearance may cause overheating.
Unpacking
1 |
Unpack the machine and all its included |
|
components. |
If the machine is FS-1128MFP, the modular cord with the attached ferrite core is enclosed.
IMPORTANT: Place the machine in a stable position. When carrying the printer, always hold the right and left sides as shown.
2 Remove the packing tape and the protective sheet.
SETUP GUIDE |
3 |
Preparations
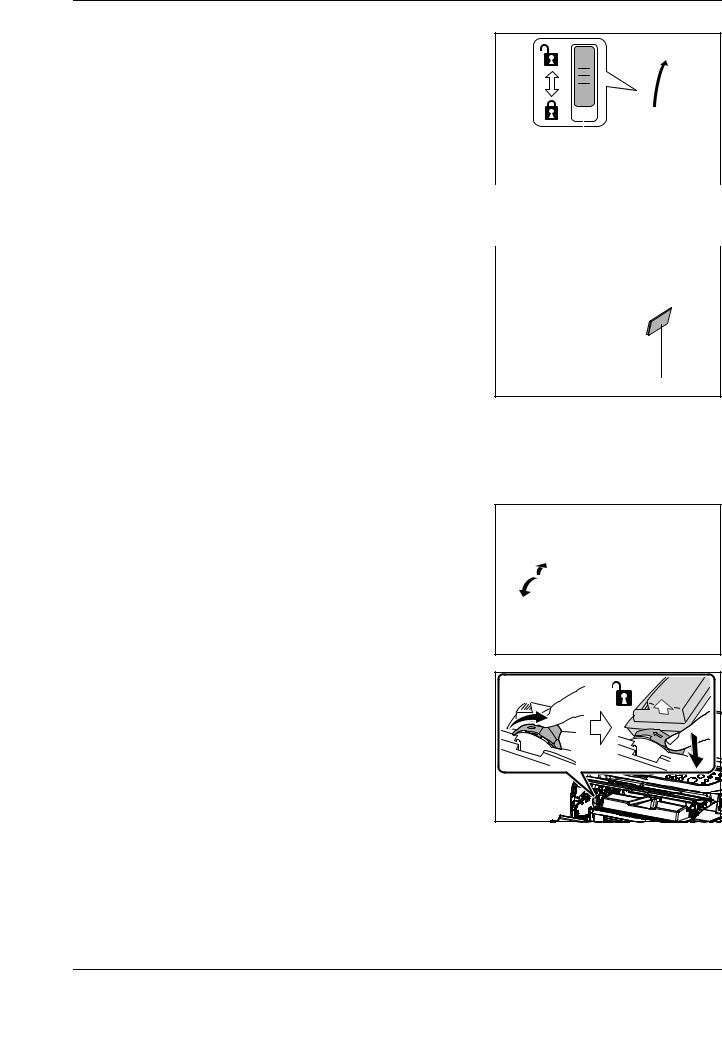
3 |
Slide the Shipping Lock to the unlock |
|
position. |
|
|
|
|
|
|
Shipping Lock |
|
|
|
|
|
|
IMPORTANT: When installing the Document Processor, refer to Installation Guide |
||
|
attached to the Document Processor. |
||
4 |
Attach the Guide Case to the machine right |
|
|
|
|||
|
as required. |
||
Guide Case
Installing Toner Container
Installing Toner Container
1 Open the front cover.
2 |
Check the lock lever to the UNLOCK |
|
position. |
4 |
SETUP GUIDE |
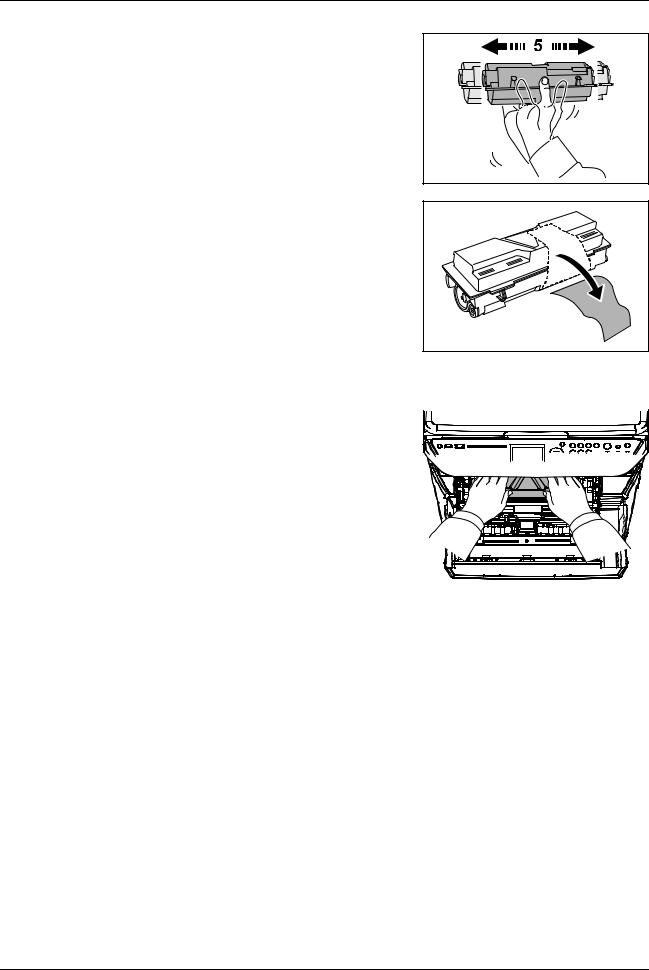
3 |
Shake the toner container horizontally 5 or |
|
6 times so that the toner inside becomes |
evenly distributed.
4 Remove the orange protective seal.
5 |
Push on the PUSH marks on the toner |
|
container until the container clicks into |
place.
6 |
Push the lock lever back into its LOCK |
|
position (away from you). |
7 Close the front cover.
Preparations
SETUP GUIDE |
5 |

Preparations
Loading Paper
1 |
Carefully pull the cassette all the way out of |
|
the machine and remove the protective |
packing from inside the cassette.
2 Adjust the paper length by pressing in on the release buttons and sliding paper stopper to fit the size of the paper. The paper sizes are marked on the bottom of the cassette.
3 |
Adjust the paper width by pressing in on the |
|
release buttons and sliding the guides to fit |
the width of the paper.
4 |
Fan the paper, then tap it on a level surface |
|
to avoid media jams or skewed printing. |
5 |
Place the paper in the cassette, with side to |
|
be printed downward, so that the leading |
edge is aligned against the paper stopper.
6 |
SETUP GUIDE |

Preparations
IMPORTANT: Do not exceed the upper limit of the cassette. Otherwise, it may cause paper jams.
6 |
Push the cassette securely all the way back |
|
into the machine until it stops. |
Connecting Cables
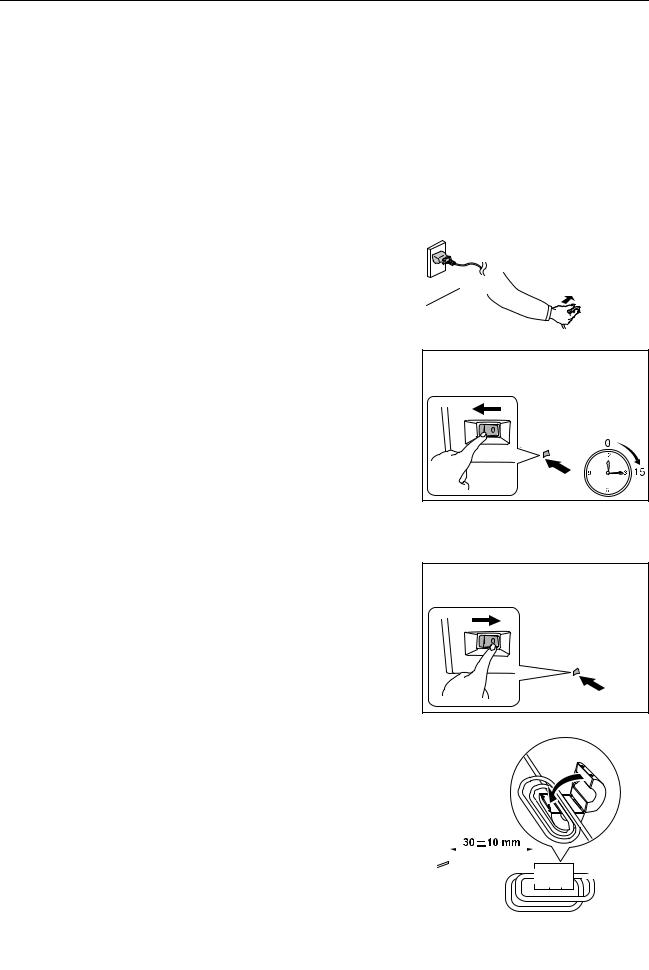
1 Turn the power switch off (O).
2 |
Connect the machine to the PC or your network device. When using the network |
||||||||
|
interface, remove the cap. These cables are sold separately. |
||||||||
|
|
|
|
|
|
|
|
|
|
|
|
|
|
|
|
|
|
|
|
|
|
|
|
|
|
|
|
|
|
|
|
|
|
|
|
|
|
|
|
|
|
|
|
|
|
|
|
|
|
|
|
|
|
|
|
|
|
|
|
|
|
|
|
|
|
|
|
|
|
|
|
|
|
|
|
|
|
|
|
|
|
|
|
|
|
|
|
|
|
|
|
|
|
|
|
|
|
|
|
SETUP GUIDE |
7 |
Preparations
|
Available Standard Interfaces: |
|
|
|
|
|
|
|
|
|
|
|
|
|
Interface |
Function |
Necessary Cable |
|||
|
|
|
|
|
|
|
|
Network |
Printer/Scanner/ |
LAN (10Base-T or 100Base-TX, Shielded) |
|||
|
Interface |
Network FAX |
|
|
|
|
|
|
|
|
|
|
|
|
USB Interface |
Printer/TWAIN/ |
USB2.0 compatible cable (Hi-Speed USB |
|||
|
|
WIA |
compliant, Max. 5.0 m, Shielded) |
|||
3 |
|
|
|
|
|
|
Connect the power cord to the machine and |
|
|
|
|||
|
|
|
||||
|
the other end into a power outlet. |
|
|
|
|
|
|
|
|
|
|
|
|
|
|
|
|
|
|
|
|
|
|
|
|
|
|
4 Turn the power switch on (|). The machine begins to warm up. The machine will begin replenishing the toner; this will take approximately 15 minutes.
Once the toner has been replenished, Ready to copy will appear on the message display.
Connecting Modular Cords (FS-1128MFP only)
1 Turn the power switch off (O).
2 |
Be sure to loop the cord three times through |
|
|
|
|
|
|
|
|
|
|
|
||||||||
|
|
|
|
|
|
|
|
|
|
|
||||||||||
|
the ferrite core. |
|
|
|
|
|
|
|
|
|
|
|
||||||||
|
|
|
|
|
|
|
|
|
|
|
|
|
|
|
|
|
|
|
|
|
|
|
|
|
|
|
|
|
|
|
|
|
|
|
|
|
|
|
|
|
|
|
|
|
|
|
|
|
|
|
|
|
|
|
|
|
|
|
|
|
|
|
|
|
|
|
|
|
|
|
|
|
|
|
|
|
|
|
|
|
|
|
|
|
|
|
|
|
|
|
|
|
|
|
|
|
|
|
|
|
|
|
|
|
|
|
|
|
|
|
|
|
|
|
|
|
|
|
|
|
|
|
|
|
|
8 |
SETUP GUIDE |

|
|
Preparations |
3 |
Connect the modular cord with the attached |
|
|
ferrite core to the line jack (A) of the |
A |
|
machine. Then, connect the modular cord to |
|
|
|
|
|
the telephone jack (B) of the machine. |
|
|
|
B |
4 Route the cords as shown in the figure.
5 Turn the power switch on (|). The machine begins to warm up. If the mache is first installation, it will begin replenishing the toner; this will take approximately 15 minutes.
Once the toner has been replenished, Ready to copy will appear on the message display.
Replacing the Operation Panel Language Sheet
1 Remove the attachements as shown.
SETUP GUIDE |
9 |
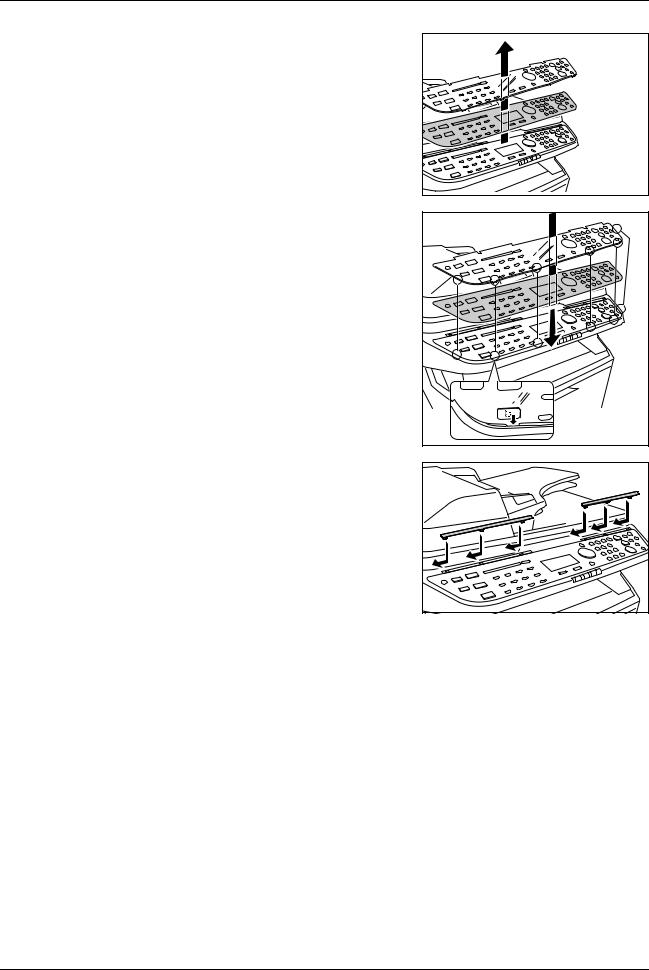
Preparations
2 |
Remove the plastic cover and the operation |
|
panel language sheet. |
3 |
Insert the desired operation panel lanhuage |
|
sheet and the plastic cover as shown. |
4 Fix the attchements as shown.
10 |
SETUP GUIDE |
Panel Setup
2 Panel Setup
Operation Panel
[System Menu/Counter] Key |
Arrow Key |
|
|
|
[OK] Key |
|
|
|
|
|
|||||
|
|
|
|
|
|
|
|
|
|
|
|
|
|
|
|
|
|
|
|
|
|
|
|
|
|
|
|
|
|
|
|
|
|
|
|
|
|
|
|
[Left Select] Key
[Right Select] Key
Numeric Keys |
[Back] Key |
Selecting Language
1
2
Perform the following procedure to select the language of the message display. The default message language is English.
Press [System Menu/Counter]. The Sys. Menu/Count. screen appears.
Enter the user name and password to log in.
NOTE: The default settings of user name and password are both 2800.
3 |
Press U or V ([Arrow Key]) to select Common Settings. |
4 |
Press [OK]. The Common Settings screen appears. |
5 |
Press U or V to select Language. |
6 |
Press [OK]. The Language screen appears showing the list of languages. |
7 |
Press U or V to select the desired language. |
8 |
Press [OK]. The language is set and the Common Settings menu reappears. |
Date and Time Settings
Setting the Time Zone
Perform the following procedure to select the time zone.
1 In the Common Settings menu, press U or V to select Date Setting.
SETUP GUIDE |
11 |
Loading...