

Page 1
Empress®System
IPS
Empress®Esthetic
IPS
Instructions for Use
Page 2

Table of Contents
IPS Empress Esthetic – Product Information 4
Material
Uses
Composition
Ingot concept
Product overview and description
Product Information
Practical
working steps
Accessories, auxiliaries and equipment
IPS Empress Esthetic – Practical working steps 17
Preparation guidelines and minimum thicknesses
Shade determination
Cementation
IPS Empress Esthetic – Inlays / Onlays / Crowns – stained / glazed 21
Model and die preparation
Wax-up
Sprueing
Investing
Preheating
Calibration
Pressing
Divesting
Removing the pressed object / finishing
Fabricating the die using IPS Natural Die Material
Stain and Glaze firing
Subsequent adjustments
IPS Empr
Wall and layering thicknesses
Preparing the model and dies
W
Cut-back technique
Preparing for veneering
W
Incisal fi
Fabrication of IPS Empress Esthetic restorations in the laboratory
General
Information
Finishing and preparing for stain and characterization firing
Stain and Characterization fi
Glaze fi
Subsequent adjustments
IPS Empress Esthetic – General Information 45
Preparing for cementation
Press parameters
Firing parameters
Combination tables
ess Esthetic – Veneers / Anterior Crowns – Cut-back and layered
ax-up
ring
ash fi
ring
ring
ring
36
2
Page 3
®
Empress
IPS
Nearly 20 years ago, IPS Empress revolutionized the processing of ceramic and thanks
to its many advantages, such as aesthetics, IPS Empress has been established as the
“benchmark”. More then 33 million restorations fabricated of IPS Empress throughout
the world and the use of “IPS Empress” as a synonym for all-ceramics speak for the
durable life-like appearance, the ongoing success, and the high quality standard of the
material.
In addition to the tried-and-tested PRESS technology, the CAD/CAM technology has
also developed in the area of all-ceramics. In order to supply the “benchmark” for this
technology as well, the future IPS Empress System will comprise products for both
processing technologies. You will be able to benefit from roughly 20 years of clinical
experience and convincing aesthetics, irrespective of whether the restorations were
fabricated with the PRESS or CAD/CAM technique.
IPS Empress Esthetic is available for the PRESS technology, while IPS Empress CAD
is used in the CAD/CAM technology. Both products consist of the highly aesthetic,
leucite-reinforced glass-ceramic that has been clinically tried-and-tested for many years.
The two ceramics are characterized by excellent strength values and outstanding aesthetic appearance. They may thus be used for the fabrication of fully anatomic singleunit restorations, such as inlays, onlays, veneers, and crowns.
– the Original
Both products may subsequently be stained and/or glazed using IPS Empress
Universal Shades/Stains, or individually veneered using the IPS Empress Esthetic
Veneer layering ceramic.
In this way, the IPS Empress System will remain synonymous for highly aesthetic, fully
anatomical all-ceramic restorations, irrespective of the processing technology.
PRESS
Technology
Empress
IPS
CAD / CAM
Technology
Empress CAD
IPS
Esthetic
Empress
IPS
Esthetic Veneer
Empress
IPS
Universal Shade/Stains
3
Page 4
Empress Esthetic –
IPS
Product Information
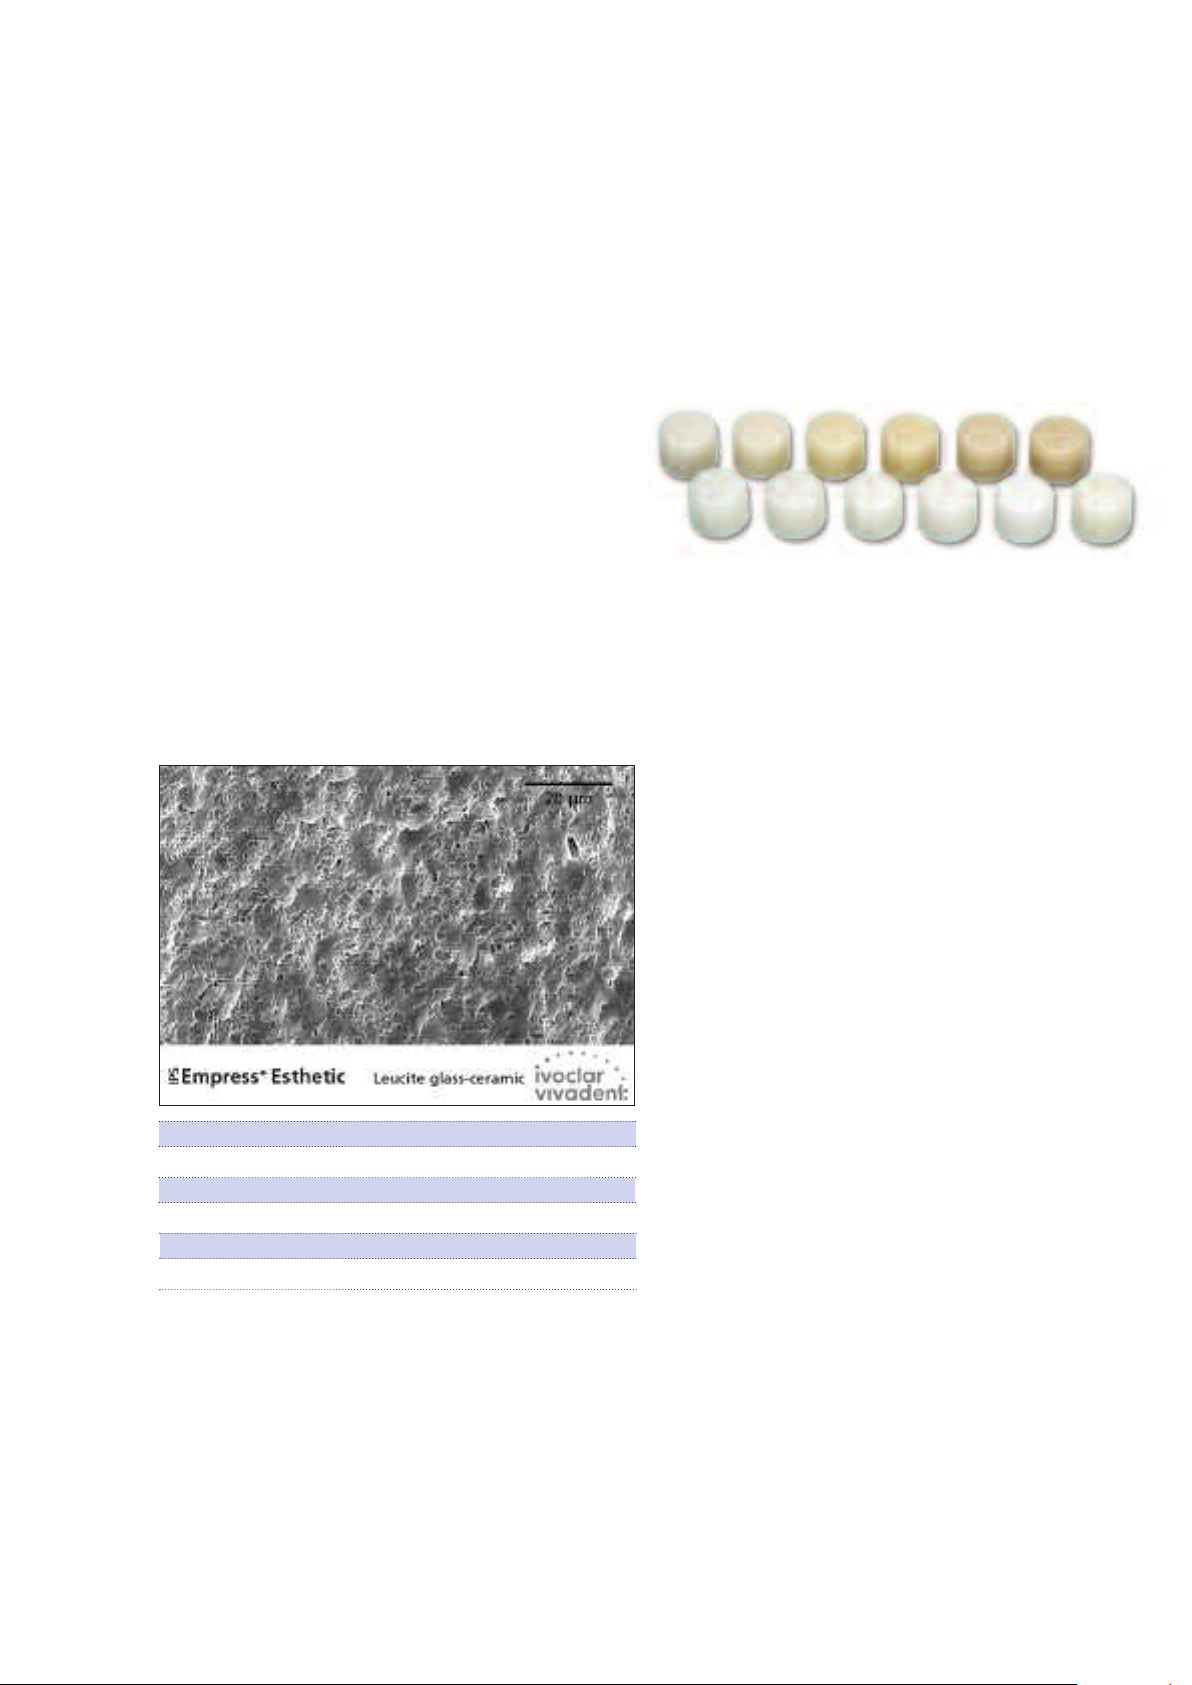
Material
IPS Empress Esthetic is used for the fabrication of highly aesthetic
single-tooth restorations by means of the PRESS technique.
IPS Empress Esthetic ingots are made of a leucite-reinforced glassceramic which consists of a glass and a crystal phase. Leucite crystals
of a few microns evenly grow in a multi-stage process directly from
the amorphous glass phase. During the fabrication of the ingots, the
semi-finished product in powder form is pressed to ingots in a fully
automated process, which enables a maximum of homogeneity.
Given the difference in the coefficients of thermal expansion (CTE)
between the glass phase and the crystal phase (leucite), cooling after
sintering produces compressive stress in the glass phase. This
mechanism results in an increase in strength and enables IPS Empress
Esthetic to achieve a flexural strength of 160 MPa.
This type of material has been successful as well as proven for almost
20 years. The pressed restorations feature excellent accuracy of fit
and a homogeneous surface. Subsequently, the restorations may be
stained using IPS Empress Universal Stains and/or individually
veneered using IPS Empress Esthetic Veneer.
CTE (100–400°C) [10-6/K] 16.6
-6
C) [10
CTE (100–500
Flexural str
Fracture toughness [MPa m
Vickers hardness [MPa] 6200
Chemical solubility [
*accor
°
ength (biaxial) [MPa]* 160
ding to ISO
g/cm
µ
6872
/K]
0.5
] 1.3
2
]*
17.5
25
4
Page 5

Uses
ndications
I
IPS Empress Esthetic ingots can be used for the following adhesively cemented restorations.
– Inlays
– Onlays
– Veneers
– Anterior crowns
– Posterior crowns
– Implant superstructures for single-tooth restorations (anterior and posterior region)
For further processing of IPS Empress Esthetic restorations, users have the following options:
– Aesthetic characterization and glazing of fully anatomical restorations using IPS Empress Universal
Shades, Stains, and Glaze pastes.
– Aesthetic veneering in the incisal third of reduced restorations (veneers and anterior crowns) using
IPS Empress Esthetic Veneer and additional staining and glazing
Contraindications
– Bridge reconstructions
– Conventional cementation
– Very deep, subgingival preparations
– Patients with severely reduced residual dentition
– Bruxism
– Fully (circularly) veneered anterior crowns using IPS Empress Esthetic Veneer
– Veneering of posterior crowns
Important processing restrictions
Failure to observe the following restrictions may compromise the success achieved with IPS Empress
Esthetic:
– The fully anatomical IPS Empress Esthetic restorations must not fall below the required minimum
thickness
– The reduced IPS Empress Esthetic restorations must not fall below the required minimum thickness
Observe the extent of the layering area in the cut-back technique
–
– The maximum layer thickness of IPS Empress Esthetic Veneer layering materials must not be exceeded
– IPS Empress Esthetic restorations must not be stained and veneered using materials other than
ess Esthetic Veneer
IPS Empr
– IPS Empress Esthetic restorations must not be stained and glazed using materials other than
IPS Empress Universal Shades, Stains, and Glaze
Combination with metal-ceramic systems (e.g. IPS d.SIGN)
–
– Powder materials must not be mixed with paste materials
– Do not use investment materials and press furnaces from other manufacturers
Side effects
If patients ar
not be used.
e known to be allergic to any of the ingr
edients of IPS Empress Esthetic, the material should
5
Page 6

Composition
– IPS Empress Esthetic Ingots
Components: SiO
Additional contents: K2O, Al2O3, Na2O, CaO, B2O3, TiO2, CeO2and pigments
– IPS Empress Esthetic Veneer
Components: SiO
Additional contents: Al2O3, K2O, Na2O, CaO, oxides and pigments
– IPS Empress Universal Shades, Stains and Glaze Paste
Components: Oxides, glycerine, butandiol, poly(vinylpyrrolidone)
– IPS Empress Esthetic Veneer Build-Up Liquid
Components: water, butandiol, chloride
– IPS Empress Universal Glaze and Stain Liquid
Components: Butandiol
– IPS Natural Die Material
Components: Polyester urethane dimethacrylate, paraffin oil, SiO2and copolymers
– IPS Natural Die Material Separator
Components: Wax dissolved in hexane
2
2
– IPS PressVEST Investment Material Powder
Components: SiO2(quartz powder), MgO and NH4H2PO
4
– IPS PressVEST Investment Material Liquid 1000 ml
Components: Colloidal silicic acid in water
IPS Empr
–
Components: SiO2(quartz powder), MgO and NH4H2PO
ess Esthetic Speed Investment Material Powder
4
– IPS Empress Esthetic Speed Investment Material Liquid 500 ml
Components: Colloidal silicic acid in water
– IPS Ceramic Etching Gel
Components: Hydrofluoric acid
Warnings
– Butandiol is irritating – avoid contact with skin and eyes and do not inhale the vapours.
– Hexane is highly flammable and detrimental to health. Avoid contact with skin and eyes. Do not
inhale the vapours and keep away from sources of ignition.
– Do not inhale ceramic grinding dust during processing - use suction equipment and a face mask.
– Etching gel contains hydrofluoric acid. Avoid contact with skin, eyes, and clothing at any time, since
the material is highly toxic and corrosive. The etching gel is intended for professional use only and
must not be applied intra-orally (in the oral cavity).
6
Page 7
Ingot concept
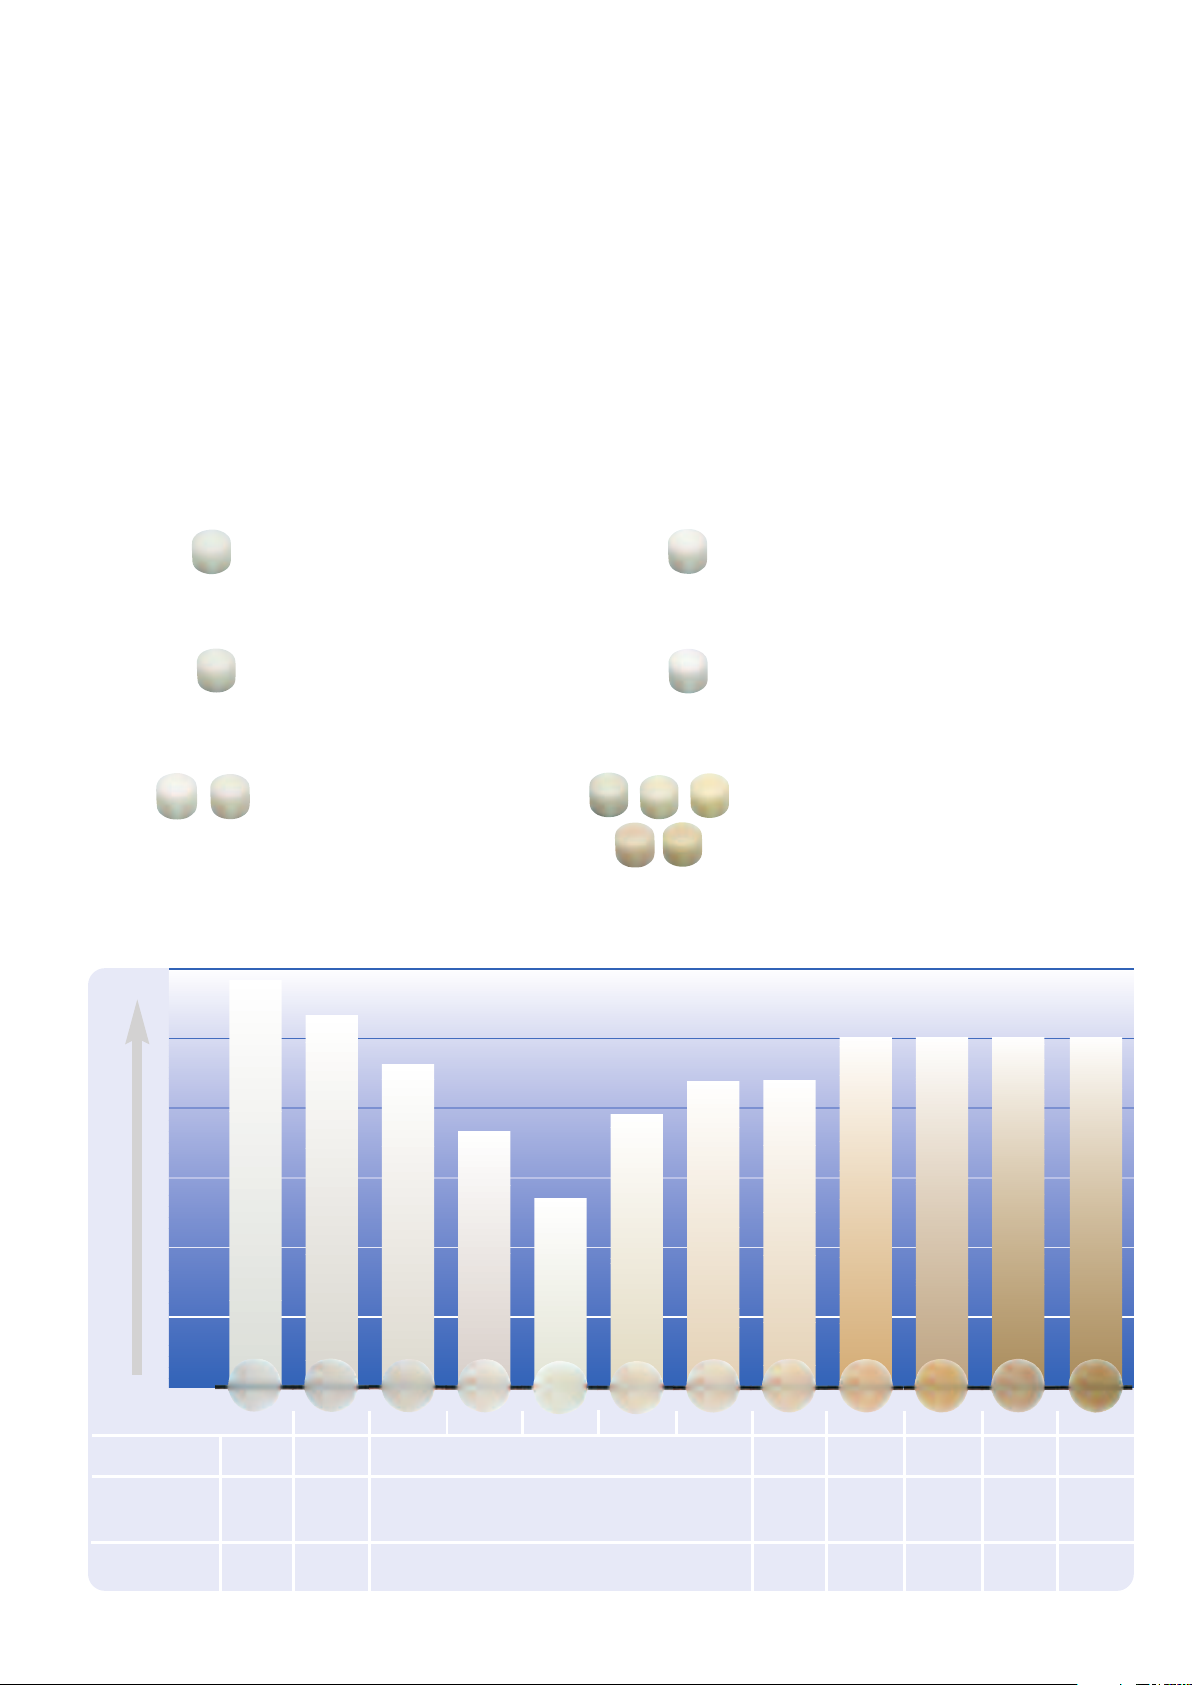
IPS Empress Esthetic ingots are available in 12 shades and 7 levels of translucency to fulfil even the most discerning
requirements.
Non-shaded ingots are supplied in 5 levels of opacity: E T1, E T2, E O1, E O2 and E O3. The IPS Empress Esthetic TC ingots
are slightly shaded to reduce the need for characterization. In addition, 3 further shades are available, which are ideal for
the veneering technique. The E TC0, E O1 and E O3 ingots can be used for cases in which a bright shade effect is desired,
e.g. with a very bright tooth shade or after bleaching.
Translucency
E T1: Inlays and onlays
For older patients with very translucent
glassy residual dentition.
E T2: Inlays and onlays
For younger patients with a residual
dentition that features a low opacity.
E O1, E OC1: Crowns and veneers
For patients with a residual dentition
that features a medium opacity.
E O2: Crowns and veneers
For patients with a residual dentition
that features a very high opacity.
E O3: Crowns and veneers
For patients with a residual dentition
that features a very high opacity and
for matching bleached teeth.
E TC0 – E TC5: Inlays, onlays,
crowns and veneers
The shades of the IPS Empress Esthetic
Translucent Colour ingots are coordinated with the Chromascop shade
guide. They can be combined with AD shades.
Opacity
Chromascop
A–D Shades
Bleach BL
E T1 E T2 E O1 E O2 E O3 E OC1 E TC0 E TC1 E TC2 E TC3 E TC4 E TC5
110-140
A1, A2,
B1,
BL1, BL2, BL3, BL4
7
C1
B2,
210-240
A3, A3.5,
A4,
D3
310-340
B3, B4,
D4
410-440
C2, C3,
C4
510-540
–
Page 8
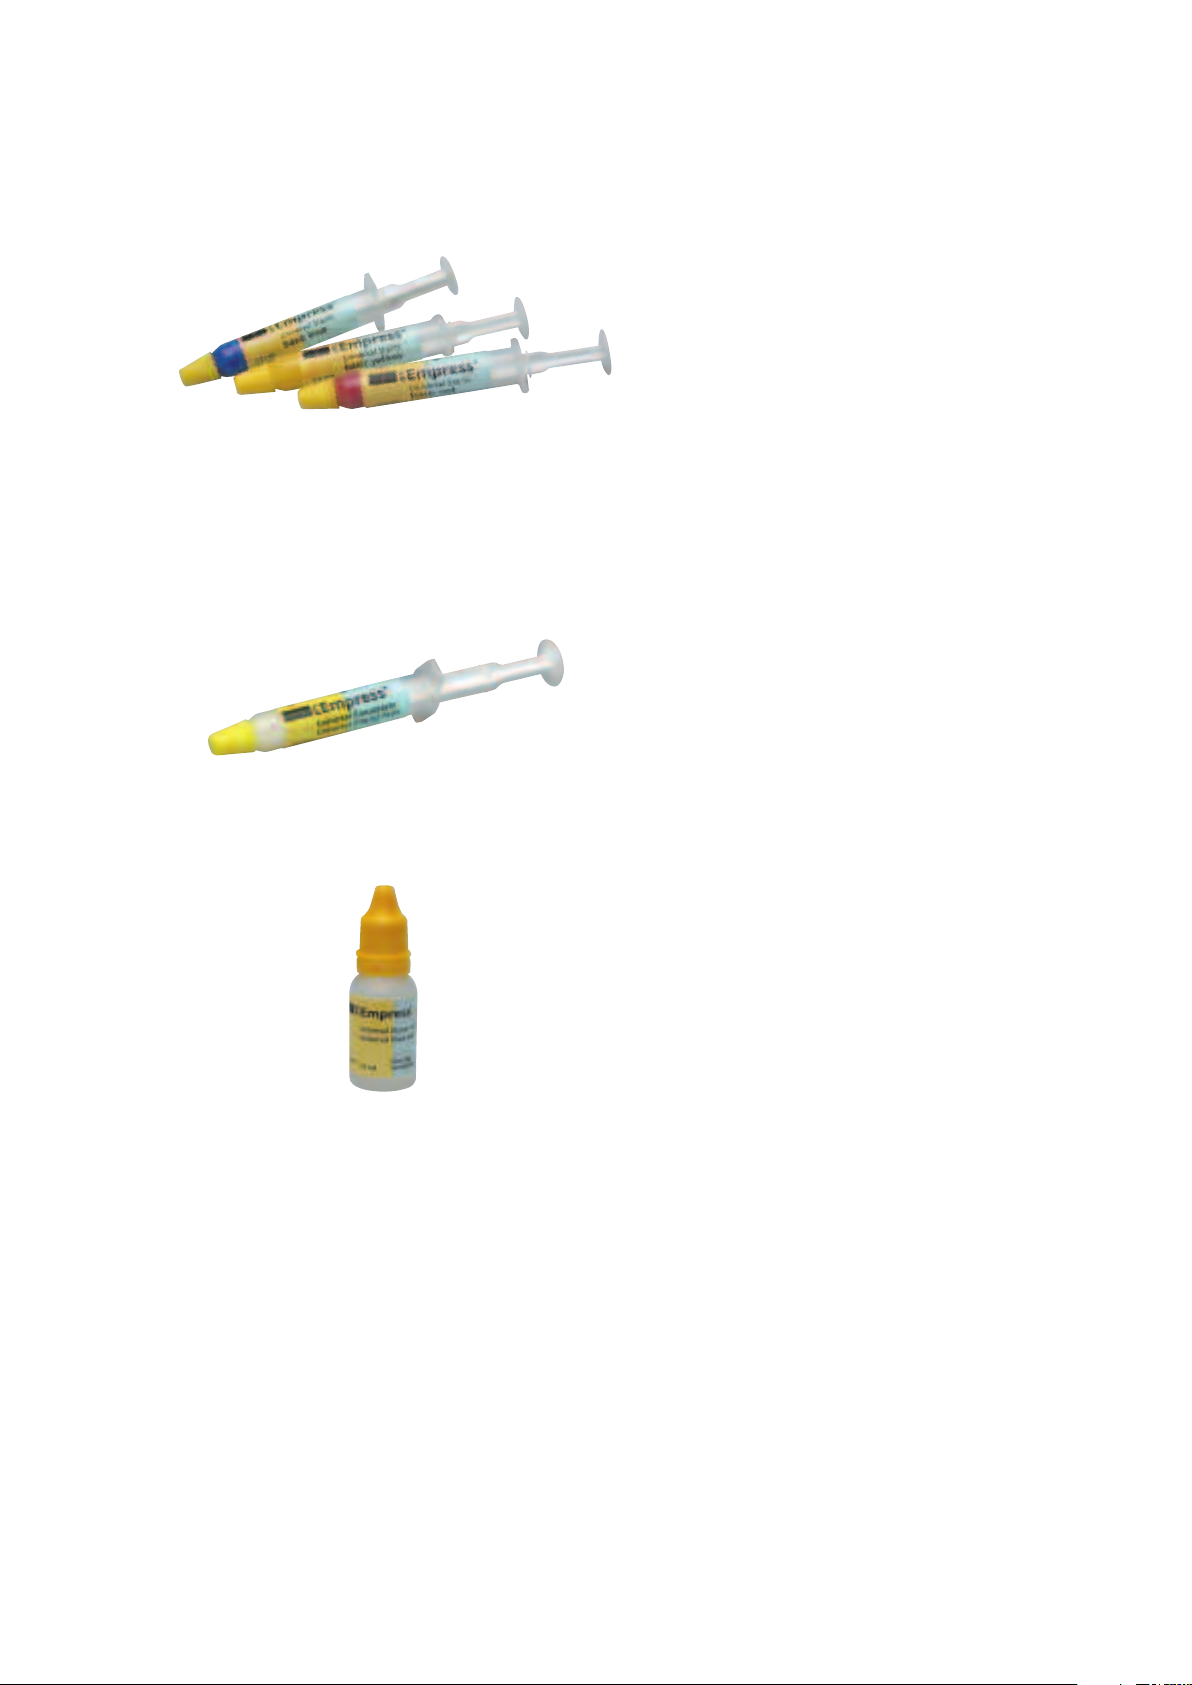
Product overview and description
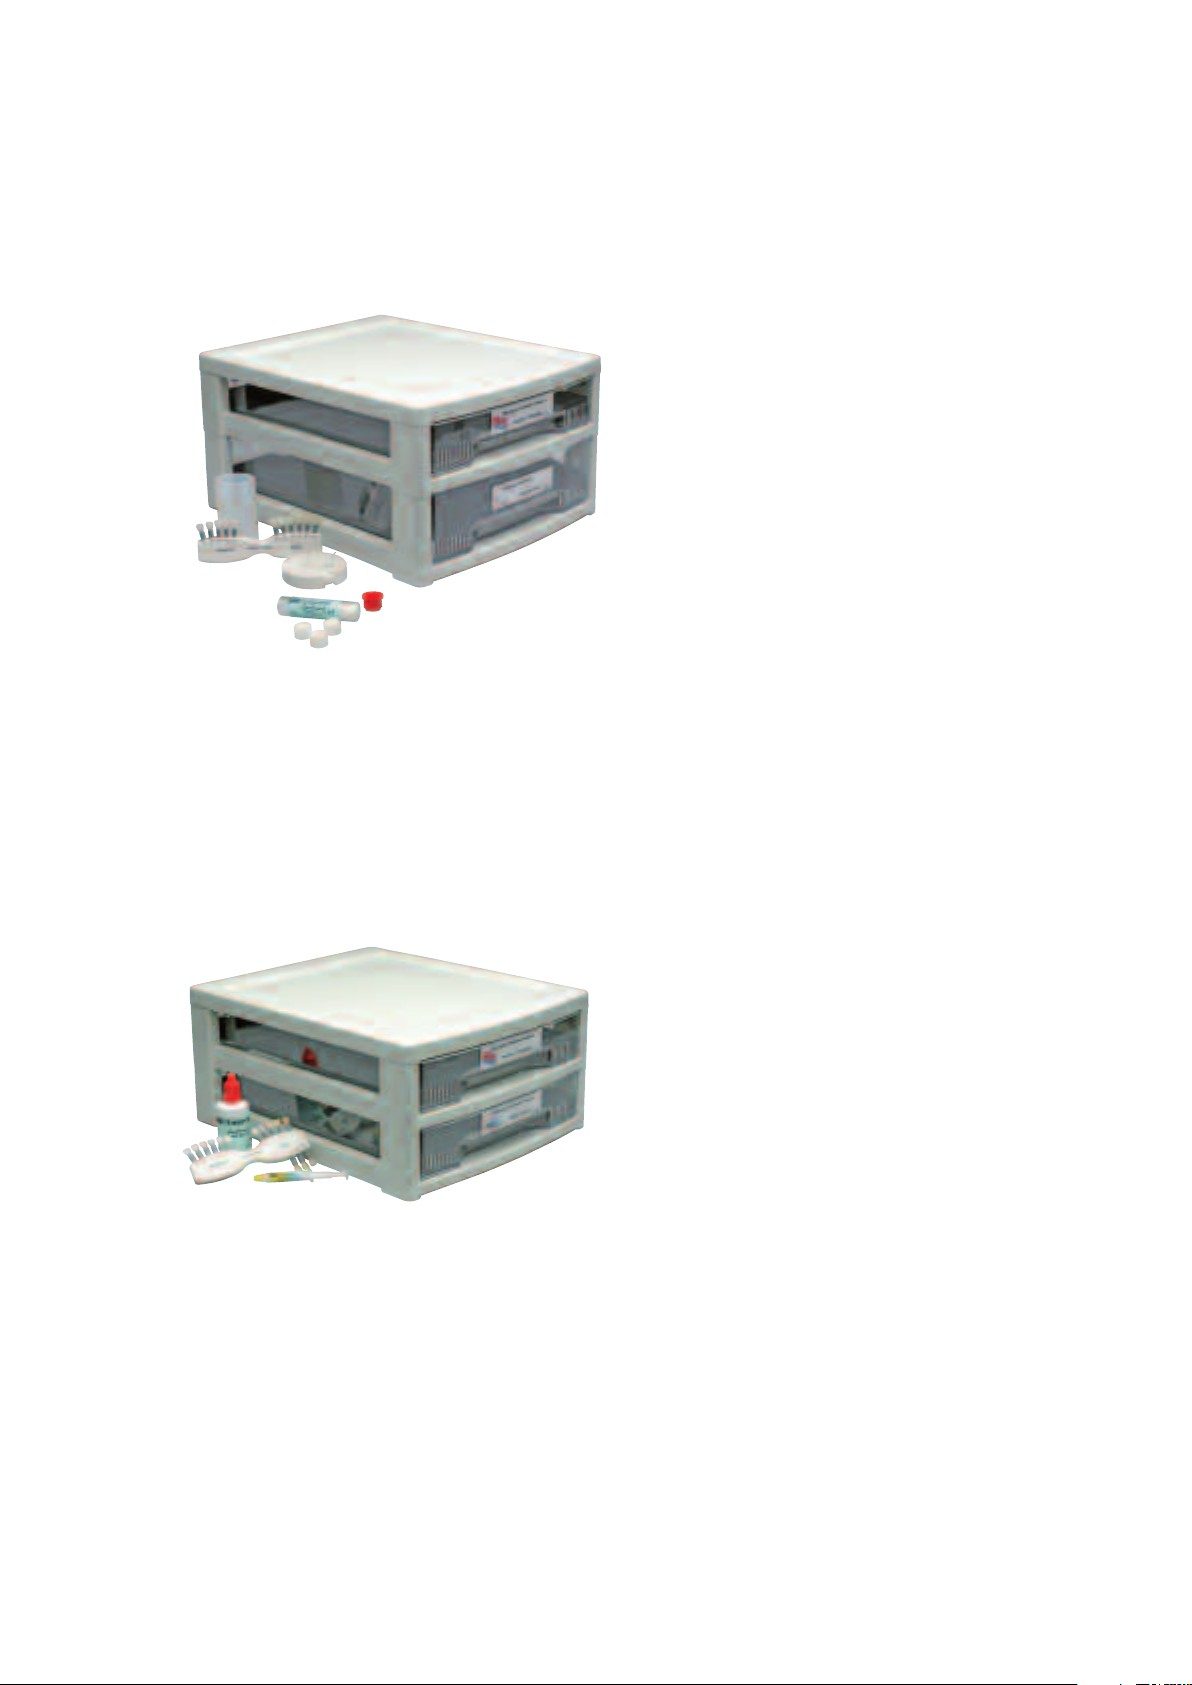
IPS Empress Esthetic Basic Kit
The IPS Empress Esthetic Basic Kit contains all the ingots, as well as
the necessary accessories. The Basic Kit is supplied in the new material cabinet and can be supplemented with any other Ivoclar
Vivadent all-ceramic assortment, e.g. IPS e.max.
Delivery form:
IPS Empress Esthetic Basic Kit
– 12x 5 IPS Empress Esthetic ingots;
Farben T1, T2, O1, O2, O3, OC1, TC0, TC1, TC2, TC3, TC4, TC5
– 2x IPS Empress ring base; size 100 g and 200 g
– 2x IPS Empress ring gauge; size 100 g and 200 g
–
2x IPS Silicone Ring; size 100 g and 200 g
– 2x IPS Sprue Guide; size 100 g and 200 g
– 1x 2 IPS Empress Alox plungers
– 1x 12 g IPS Object Fix
– 1x IPS UniTray
– 1x IPS Empress Esthetic Ingots shade guide
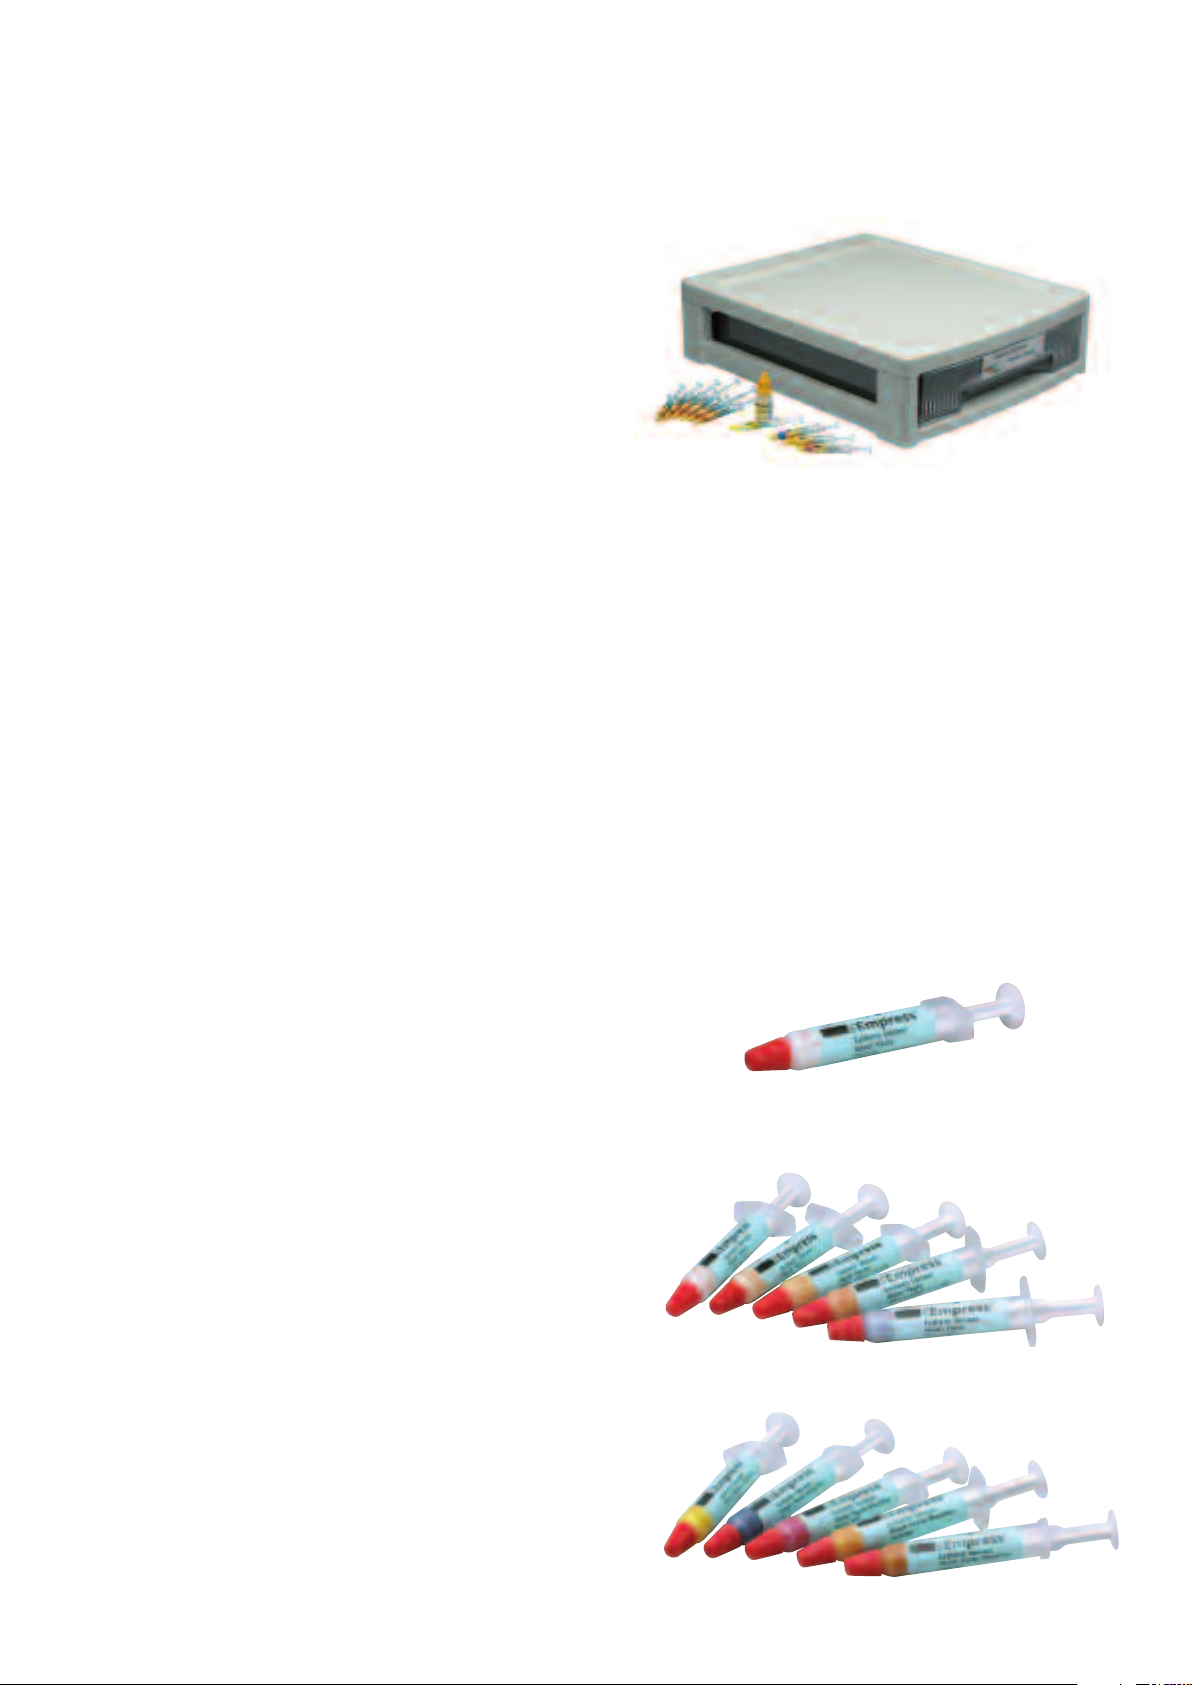
IPS Empress Veneer Kit
The IPS Empress Veneer Kit comprises a selection of the most
popular wash pastes and layering materials for the veneering (cutback technique) of IPS Empress restorations (Esthetic and CAD). With
the wash pastes, an excellent and homogeneous bond with the
estoration is achieved. The leucite-r
educed r
r
materials feature incisal-like fluorescence and a true-to-nature
opalescence. The additional wash pastes and layering materials
e indicated on the materials shade guide
available as Refi
supplied with the Kit.
Delivery form:
IPS Empress Veneer Kit
6x 1 g IPS Empr
–
Shades: neutral, low value, high value, MM light-salmon,
MM yellow-orange, MM red-orange
6x 20 g IPS
–
Shades: Incisal Opal LT, Incisal Opal MT, Incisal Opal HT, Incisal
white, Transpa neutral, Transpa blue
1x 20 g IPS
–
– 1x 60 ml IPS Empress Esthetic Veneer Build-Up Liquid
– 1x 3 g IPS Empress Universal Glaze Paste
1x 15 ml IPS Empress Universal Glaze and Stain Liquid
–
– 1x 12 g IPS Object Fix
– 1x IPS Empress Esthetic Veneer Material Shade Guide
Various accessories
–
lls ar
ess Esthetic V
Empress Esthetic Veneer;
Empress Add-On 770°C/1418°F
eneer Wash Pastes;
einforced layering
8
Page 9
IPS Empress Universal Shade/Stains Kit
A–D and Chromascop)
(
The IPS Empress Universal Shade/Stains Kits comprise a selection of
the most popular Dentin and Intensive stains. The stains are suitable
to apply surface characterizations. For the final glazing of the
IPS Empress restorations, a smooth and fine-grained glazing paste
is provided.
Delivery form:
IPS Empress Universal Shade/Stains Kit A–D
– 6x 3 g IPS Empress Universal Shade;
Shades: A1, A2/A3/A3.5, B1, B2/B3/B4, C1/C2, D2/D3
– 2x 3 g IPS Empress Universal Shade Incisal;
Shades: I1, I2
– 5x 1 g IPS Empress Universal Stains;
Shades: white, orange, mahogany, khaki, maroon
– 1x 3 g IPS Empress Universal Glaze Paste
– 1x 15 ml IPS Empress Universal Glaze and Stain Liquid
– Various accessories
IPS Empress Esthetic Veneer Wash Pastes
Given the 2 : 1 effect of the wash pastes, i.e. bonding and
characterization in one step, highly aesthetic restorations can be
fabricated very efficiently.
The Wash Paste neutral produces the direct bond to the reduced
restorations and is always applied first on the restoration; it enables
a homogeneous bond.
Delivery form:
IPS Empress Universal Shade/Stains Kit Chromascop
– 6x 3 g IPS Empress Universal Shade;
Shades: 110/120, 130, 140/210, 220/230, 310, 410/420
– 2x 3 g IPS Empress Universal Shade Incisal;
Shades: I1, I2
– 5x 1 g IPS Empress Universal Stains;
Shades: white, orange, mahogany, khaki, maroon
– 1x 3 g IPS Empress Universal Glaze Paste
– 1x 15 ml IPS Empress Universal Glaze and Stain Liquid
– Various accessories
Delivery form:
1x 1 g IPS Empr
–
Subsequently, the reduced restorations are individually characterized
using the 5 Standard Wash Pastes. Ideal shade gradations permit
individualized characterizations of the highest order.
Delivery form:
– 5x 1 g IPS Empress Esthetic Wash Paste;
Shades: low value, high value, MM light-salmon,
MM yellow-orange, MM reddish-orange
The 5 standar
the 5 Wash-Paste Modifiers or the neutral paste.
Delivery form:
5x 1 g IPS Empr
–
Shades: Modifi
Modifier basic yellow, Modifier basic red
ess Esthetic Wash Paste neutral
d wash pastes may then be individually shaded using
ess Esthetic Wash Paste;
er copper
, Modifi
er orange, Modifi
er sky blue,
9
Page 10
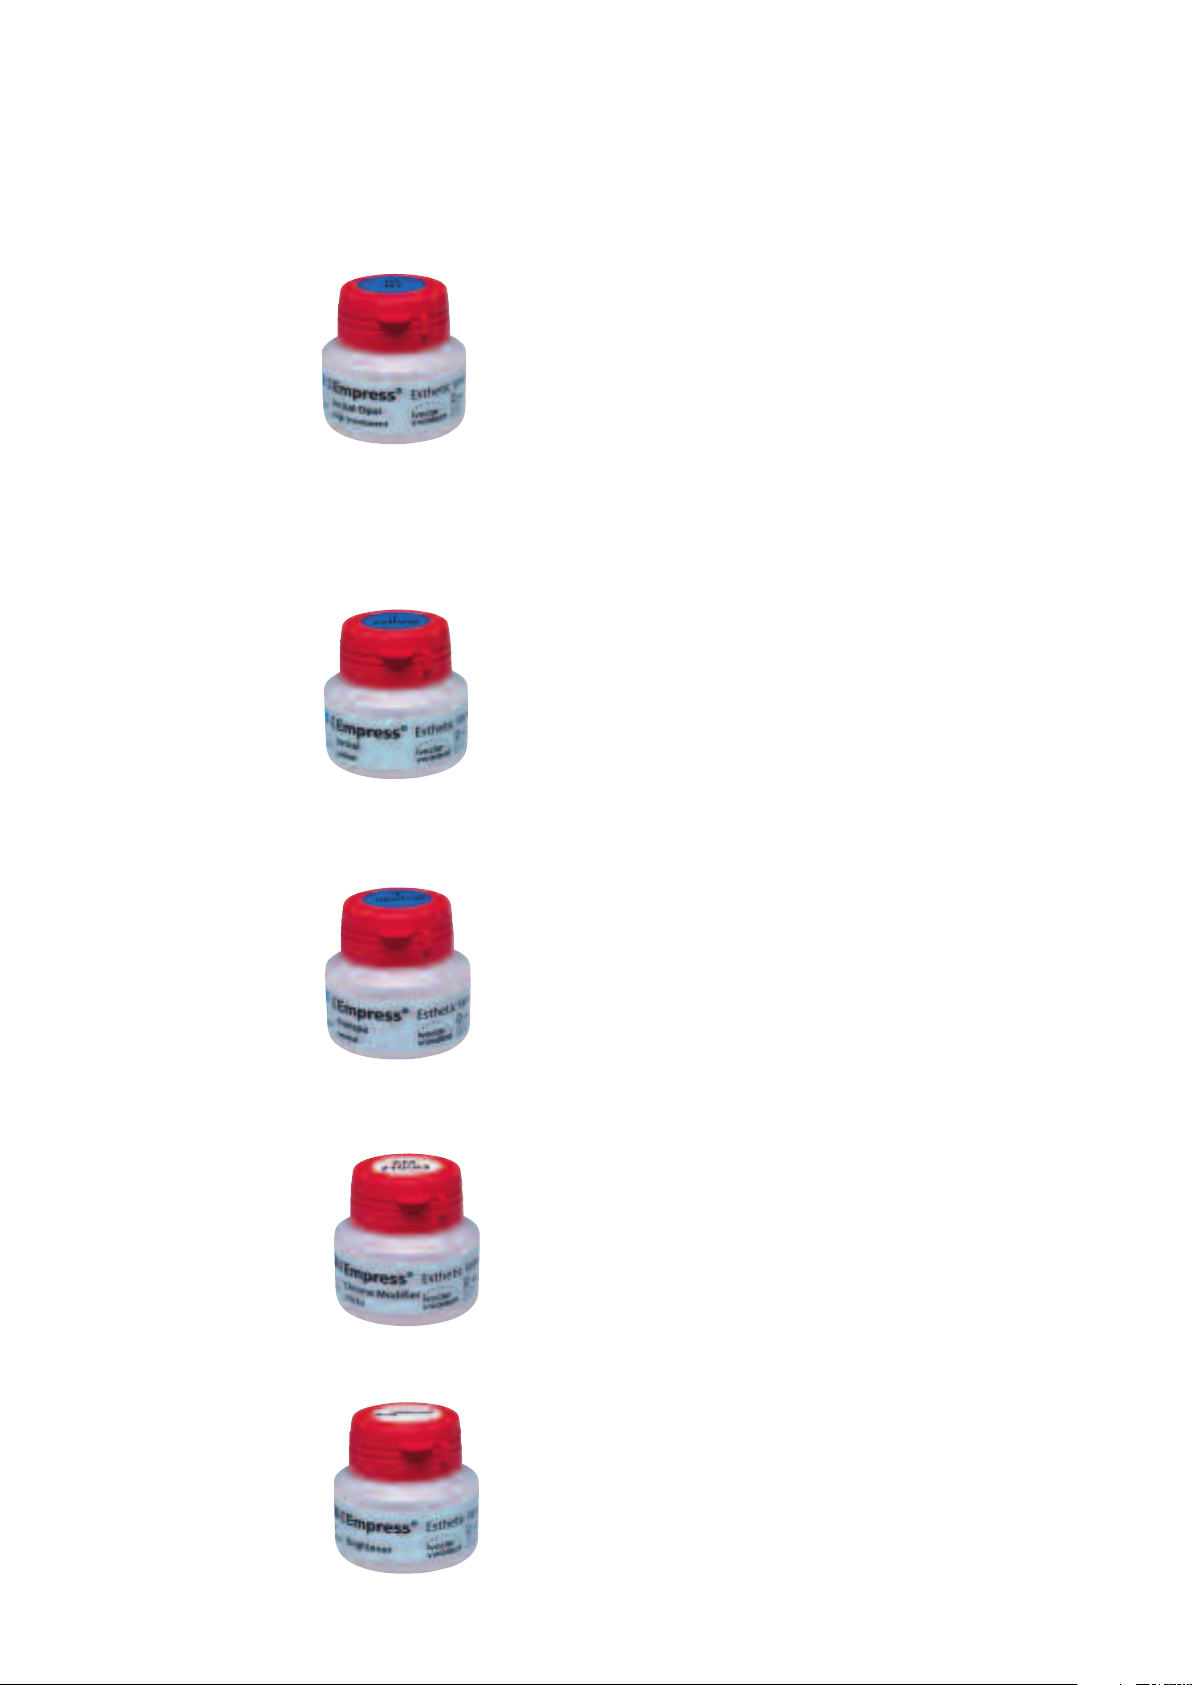
IPS Empress Esthetic Veneer Incisal Opal
These opalescent materials are available in three different gradations
(low, medium, and high translucency). They feature an incisal-like
fluorescence and true-to-nature opalescence. The high stability and
excellent modelling properties permit detailed layering of life-like
incisal edges. The opalescent effect demonstrates high firing stability
and is thus clearly visible even after several firing cycles.
Delivery form:
– 3x 20 g IPS Empress Esthetic Veneer Incisal Opal;
hades: low translucent, medium translucent, high translucent
S
IPS Empress Esthetic Veneer Incisal
These Incisal materials are available in 6 shade nuances and are used
for additional characterizations in the incisal area.
Delivery form:
– 6x 20 g IPS Empress Esthetic Veneer Incisal;
Shades: white, grey, orange, edge, yellow, orange-pink
IPS Empress Esthetic Veneer Transpa
The Transparent materials in 2 shade nuances are used for the trueto-nature reproduction of transparent areas, particularly in the
incisal third.
Delivery form:
– 2x 20 g IPS Esthetic Veneer Transpa;
Shades: blue, neutral
IPS Empress Esthetic Veneer Chroma Modifier
These materials support the shade intensity of the reduced
estoration and are available in shades 110/A1 and 210/A3.
r
Delivery form:
– 2x 20 g IPS Empress Esthetic Veneer Chroma Modifier;
Shades: 110/A1, 210/A3
IPS Empr
ess Esthetic Veneer Brightener
Used to incr
Delivery form:
– 1x 20 g IPS Empress Esthetic Veneer Brightener
10
ease the brightness value.
Page 11
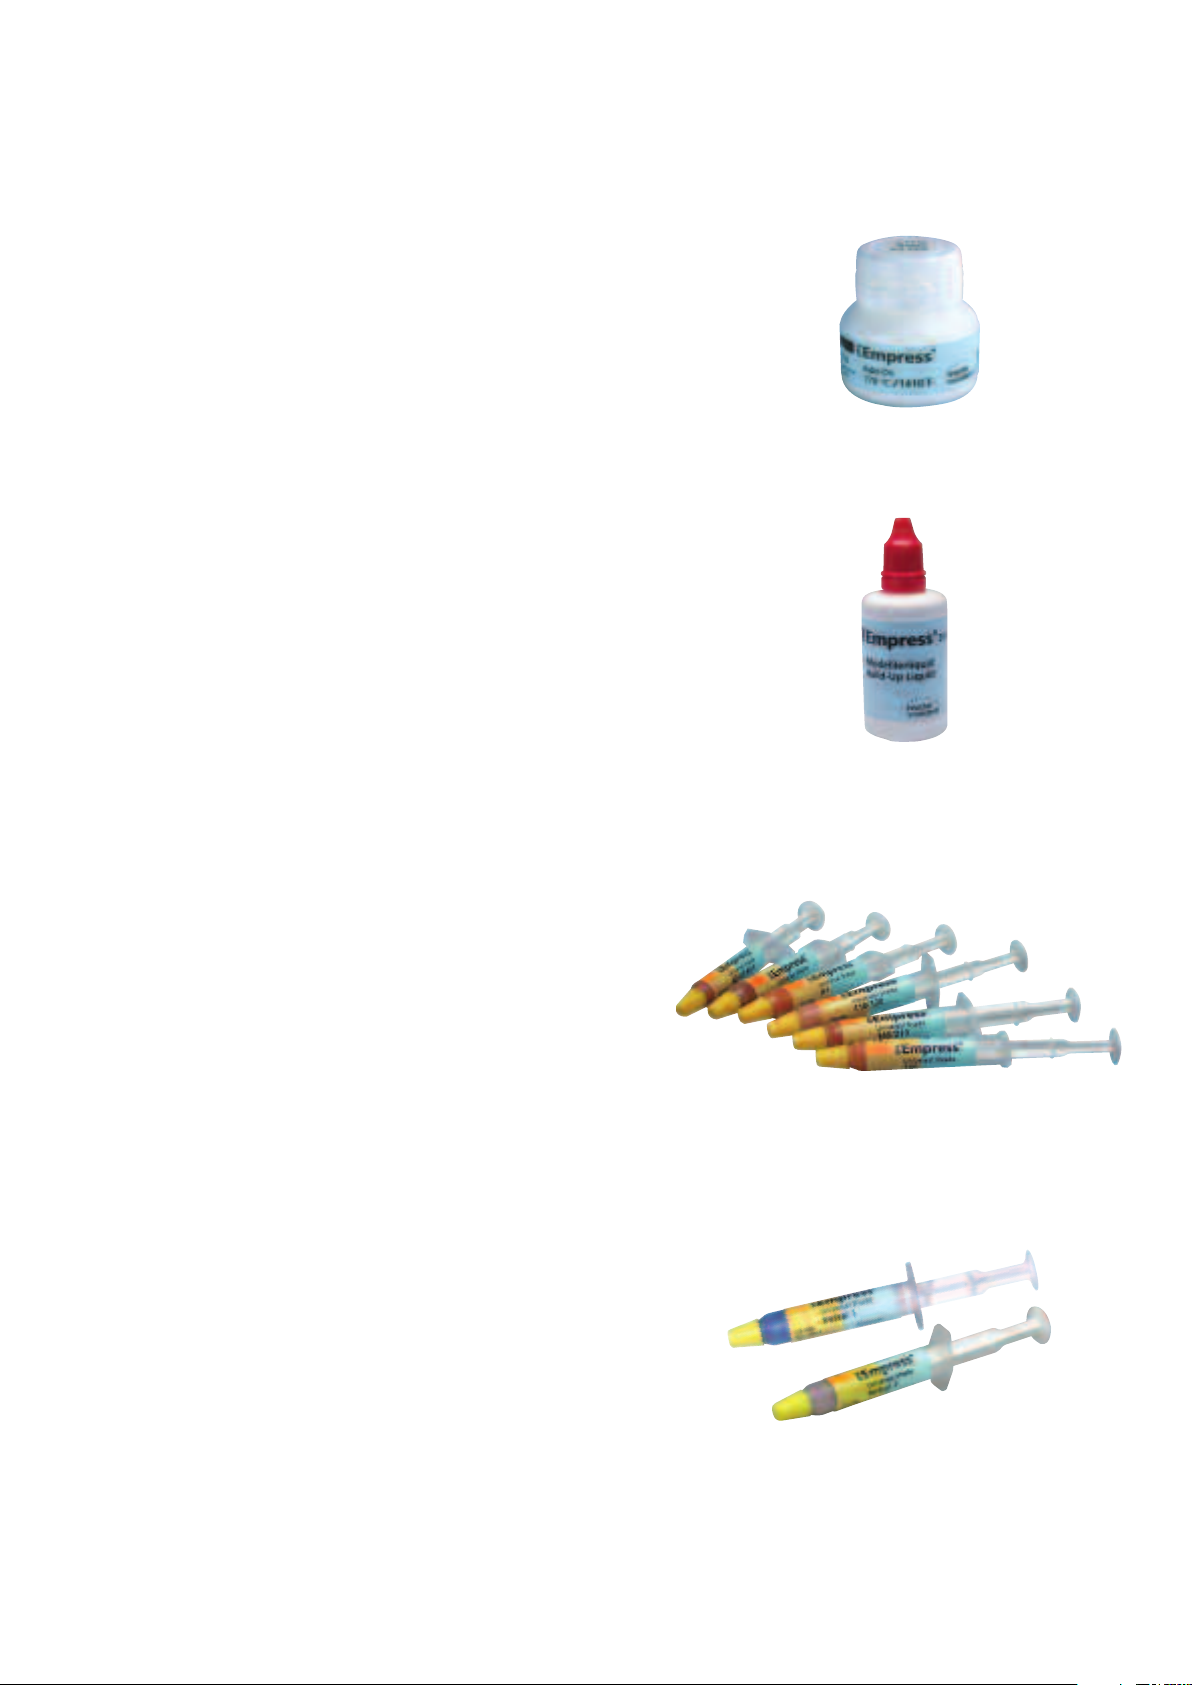
IPS Empress Add-On 770°C/1418°F
IPS Empress Add-On 770 °C/1418 °F is a low-fusing add-on material
for subsequent adjustment, e.g. proximal and occlusal contact
points, of IPS Empress Esthetic and IPS Empress CAD restorations.
Delivery form:
– 1x 20 g IPS Empress Add-On 770°C/1418°F
IPS Empress Esthetic Veneer Build-Up Liquid
The Build-Up Liquid is used to mix the IPS Empress Esthetic Veneer
materials and the IPS Empress Add-On corrective material. Since
build-up liquids contain various organic additives that do not fire
without leaving residue at the used firing temperatures and thus
may cause discolouration, only the IPS Empress Esthetic Veneer
Build-Up Liquid must be used.
Delivery form:
– 1x 60 ml IPS Empress Esthetic Veneer Build-Up Liquid
IPS Empress Universal Shade
The IPS Empress Universal Shades are available in 9 A–D and
15 Chromascop shades. They are used for the exact reproduction of
the A-D and Chromascop shades.
Delivery form:
– 9x 3 g IPS Empress Universal Shade;
A–D shades: A1, A2/A3/A3,5, A4, B1, B2/B3/B4, C1/C2, C3/C4,
D2/D3, D4
– 15x 3 g IPS Empress Universal Shade;
Chromascop shades: 110/120, 130, 140/210, 220/230, 240, 310,
320, 330, 340, 410/420, 430/440, 510, 520, 530, 540
IPS Empress Universal Shade Incisal
These 2 pastes are especially suitable for fully anatomical
restorations. They are used to imitate the incisal area and provide
the incisal third with optical translucency and an in-depth effect.
Delivery form:
– 2x 3 g IPS Empress Universal Shades Incisal;
Shades: I1, I2
11
Page 12
IPS Empress Universal Stains
These intensive stains are available in 14 different shades. They are
used to reproduce natural characteristics. With the three
complementary shades basic blue, basic red, and basic yellow,
the shades can be individually adjusted.
Delivery form:
– 14x 1 g IPS Empress Universal Stains;
Shades: white, mahogany, khaki, orange, grey, vanilla, crackliner,
olive, yellow, black, maroon, basic red, basic blue, basic yellow
IPS Empress Universal Glaze Paste
IPS Empress Universal Glaze Paste is used to apply the final glaze to
IPS Empress restorations. The glazing paste demonstrates a smooth,
fine-grained consistency and thus permits easy and quick application
of the glazing material layer.
Delivery form:
– 1x 3 g IPS Empress Universal Glaze Paste
IPS Empress Universal Glaze and Stain Liquid
The IPS Empress Universal Glaze and Stain Liquid is used to adjust
the consistency of all materials in paste form (Wash pastes, Shades,
Stains, and Glaze). No other liquid may be used for this purpose,
since those liquids contain various organic additives that do not fire
without leaving r
may result in discolouration.
Delivery form:
– 1x 15 ml IPS Empress Universal Glaze and Stain Liquid
esidue at the defi
ned firing temperatures, which
12
Page 13

Accessories, auxiliaries and equipment
IPS Natural Die Material
The light-curing IPS Natural Die Material simulates the shade of the
prepared tooth and thus is the optimum basis for true-to-nature
shade match with the oral situation during fabrication of the allceramic restorations. The IPS Natural Die Material Kit comprises
9 shades. The shade arrangement was newly designed. The
assortment contains all the shade variants necessary for the
fabrication of life-like all-ceramic restorations.
New items in the assortment are as follows:
– 1 shade for the imitation of bleached preparations (ND1)
– 1 shade for the imitation of intensively shaded secondary dentin
(ND 6)
– 1 shade for the imitation of severely discoloured / devitalized
preparations (ND 9)
The arrangement and designations of the IPS Natural Die shades compared to the IPS Empress Die shades is as follows:
Natural Die Material
IPS
ND 1
ND 2
ND 3
ND 4
ND 5
ND 6
ND 7
ND 8
ND 9
IPS Empress Die Material
Delivery form:
IPS Natural Die Material Kit
– 9x 8 g IPS Natural Die Material,
Shades: ND 1, ND 2, ND 3, ND 4, ND 5, ND 6, ND 7, ND 8, ND 9
– 1x 20 ml IPS Natural Die Material Separator
– 8x 10 IPS Condensers
– 8x 10 IPS Condenser Tips
2x Universal Holders
–
– 1x IPS Natural Die Shade Guide
–
St 9
St 1
IPS Sprue Guide
The IPS Sprue Guide helps check the correct sprueing of the objects
essed on the ring base.
to be pr
Delivery form:
– IPS Sprue Guide 100 g
– IPS Sprue Guide 200 g
IPS Empr
The investment ring system is used to sprue the contour
tions. The 100-g investment ring system is used for individual
restorations, whereas the 200-g ring system is suitable for several
single-tooth restorations. Due to the different diameters of the
pr
system is only suitable for materials from the IPS Empress System.
ess Investment Ring System
essed ingots and Alox plungers, the IPS Empr
ed restora-
ess investment ring
St 2
St 3
–
St 8
St 5
–
Delivery form:
– IPS Empress Investment Ring System 100 g
(3x ring base, 3x ring gauge)
– IPS Empress Investment Ring System 200 g
3x ring base, 3x ring gauge)
13
Page 14
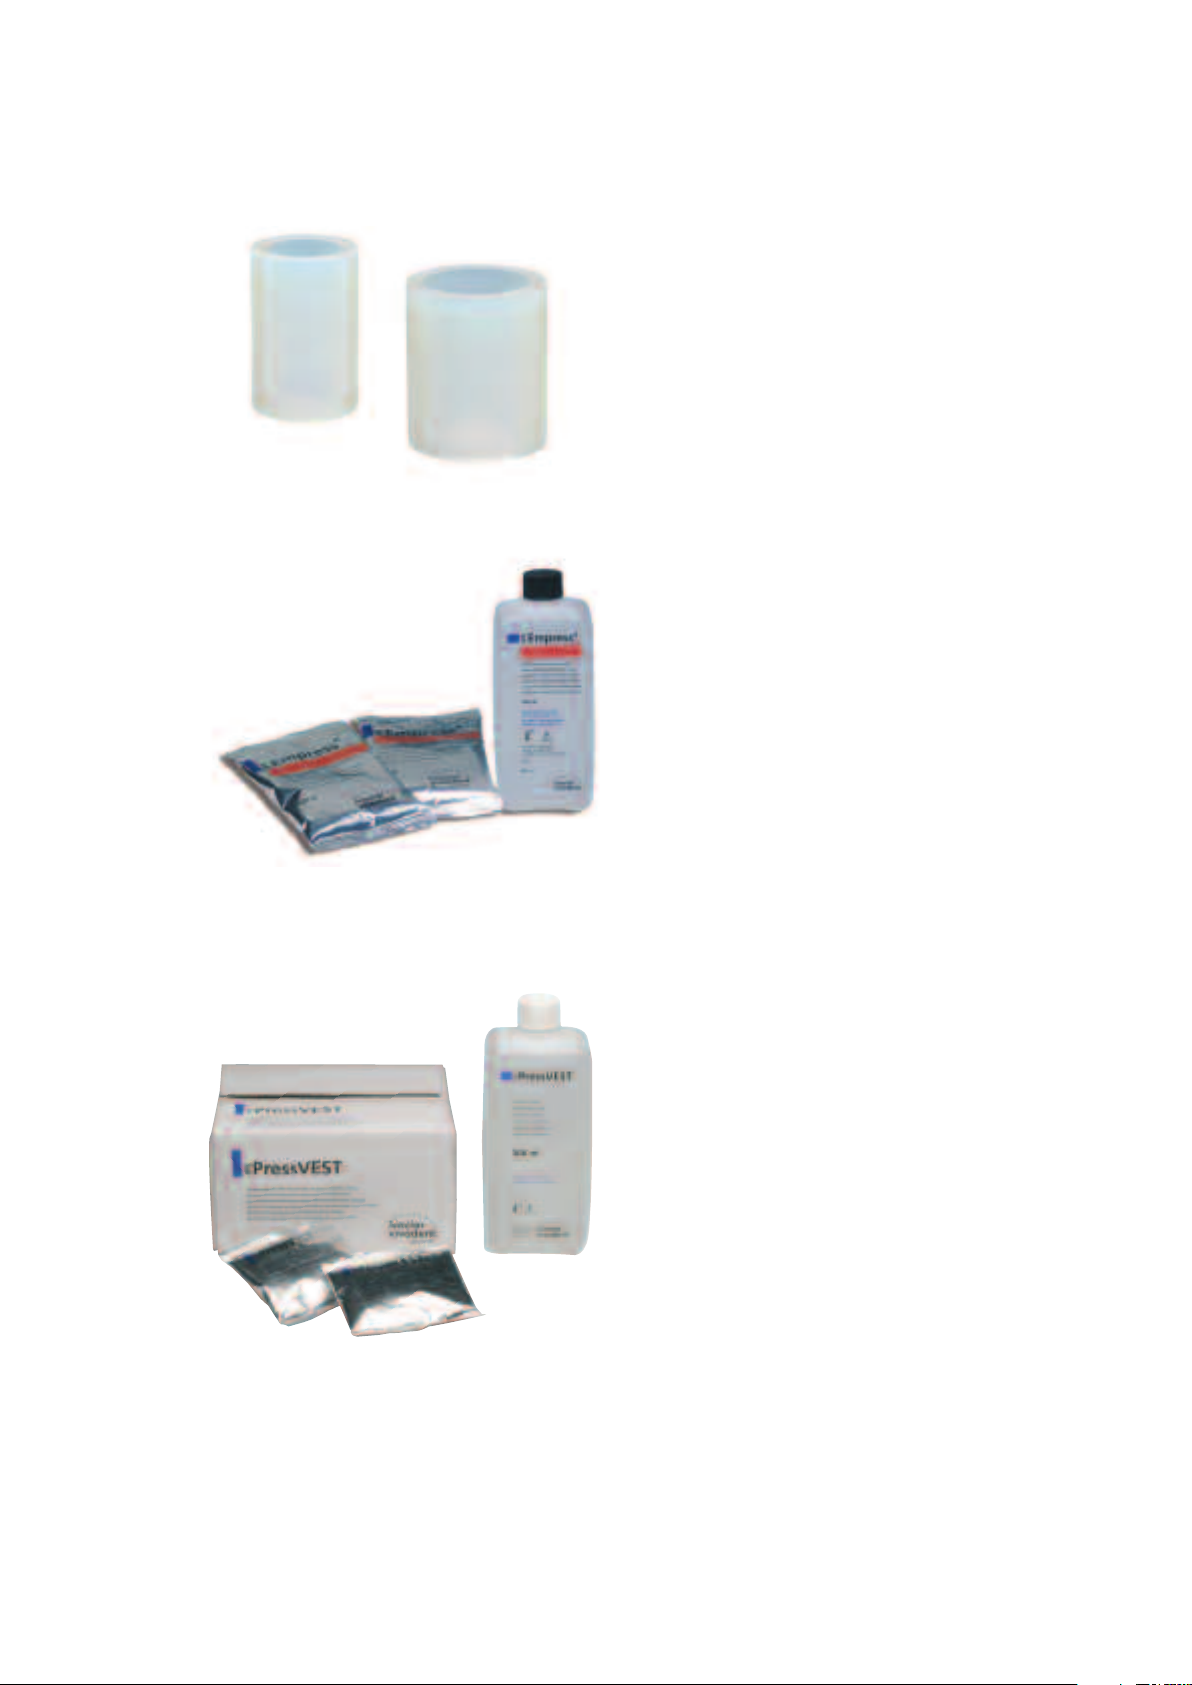
IPS Silicone Rings
– IPS Silicone Ring, small, for the IPS Empress and IPS e.max
investment ring system 100 g
– IPS Silicone Ring, big, for the IPS Empress and IPS e.max
investment ring system 200 g
Delivery form:
– IPS Silicone Ring small 100 g
– IPS Silicone Ring big 200 g
IPS Empress Esthetic Speed Investment Material
The phosphate-bonded Esthetic Speed investment material is
suitable for the indication range of IPS Empress Esthetic and is
composed of powder and liquid.
IPS Empress Esthetic Speed investment material helps achieve highquality press results in no time at all. The investment material allows
quick heating and the fabrication of accurately fitting inlays, onlays,
veneers and crowns.
Delivery form:
– 25x 100 g IPS Empress Esthetic Speed Investment Material
Powder
– 1x 0.5 l IPS Empress Esthetic Speed Liquid
IPS PressVEST
Alternatively, the IPS PressVEST investment material can be used. It is
an optimized, phosphate-bonded investment material for the
conventional heating technique (over night) and consists of powder
and liquid. It ensures highly accurate press results and can be used
with the following Ivoclar Vivadent pressed ceramics in the EP 500
EP 600 and EP 600 Combi press furnaces:
– IPS Empress Esthetic
– IPS e.max Press
– IPS e.max ZirPress
– IPS Empress Cosmo
For detailed information on processing please refer to the
IPS PressVEST Instructions for Use.
Delivery form:
IPS PressVEST Investment Material, 2.5 kg
– 25x 100 g IPS PressVEST Investment Material Powder
– 1x 0.5 l IPS PressVest Liquid
IPS PressVEST Investment Material, 5 kg
– 50x 100 g IPS PressVEST Investment Material Powder
– 1x 1 l IPS PressVEST Liquid
14
Page 15
Investment tongs
The investment tongs ensure safe working with the investment
rings. They are used to place the ingots and AlOx plungers into the
investment ring before the press procedure is started.
Delivery form:
– 1x Investment Tongs
IPS UniTray
The IPS UniTray is a universal firing tray that has been designed to
accommodate objects to be fired, or pressed ingots and AlOx
plungers. If the IPS UniTray is used in a ceramic furnace, the
restorations are placed in the furnace using the enclosed metal pins.
Delivery form:
– 1x IPS UniTray
– 3x 4 Metal Pins
IPS Object Fix
IPS Object Fix is an auxiliary firing paste to support all-ceramic
restorations during firing. The paste is used for easier securing of
the restorations on the metal pins of the honey-comb firing tray.
Due to its consistency, IPS Object Fix is easy to apply and convenient
emove after fi
to r
Delivery form:
– 1x 12 g IPS Object Fix
ring.
EP 600/EP 600 Combi
The EP 600 furnace is ideally coordinated with the IPS Empress and
IPS e.max pressed ceramics. The furnace delivers excellent press
results due to the electronic press drive, automatic temperature
calibration, as well as a fast and easy operation by means of the
graphic display and menu controls. The EP 600 Combi is a
combination of a press and ceramic furnace, which unites the
advantages of the EP 600 with those of a high-quality ceramic
furnace. The furnace is ideal for both pressing ceramics of the
IPS Empress and IPS e.max systems and firing layering ceramics,
such as IPS Empress Esthetic Veneer.
Delivery form:
EP 600 Basic Equipment
– EP 600
Power Cor
–
d
EP 600 Combi Basic Equipment
– EP 600
Power Cor
–
d
15
Page 16
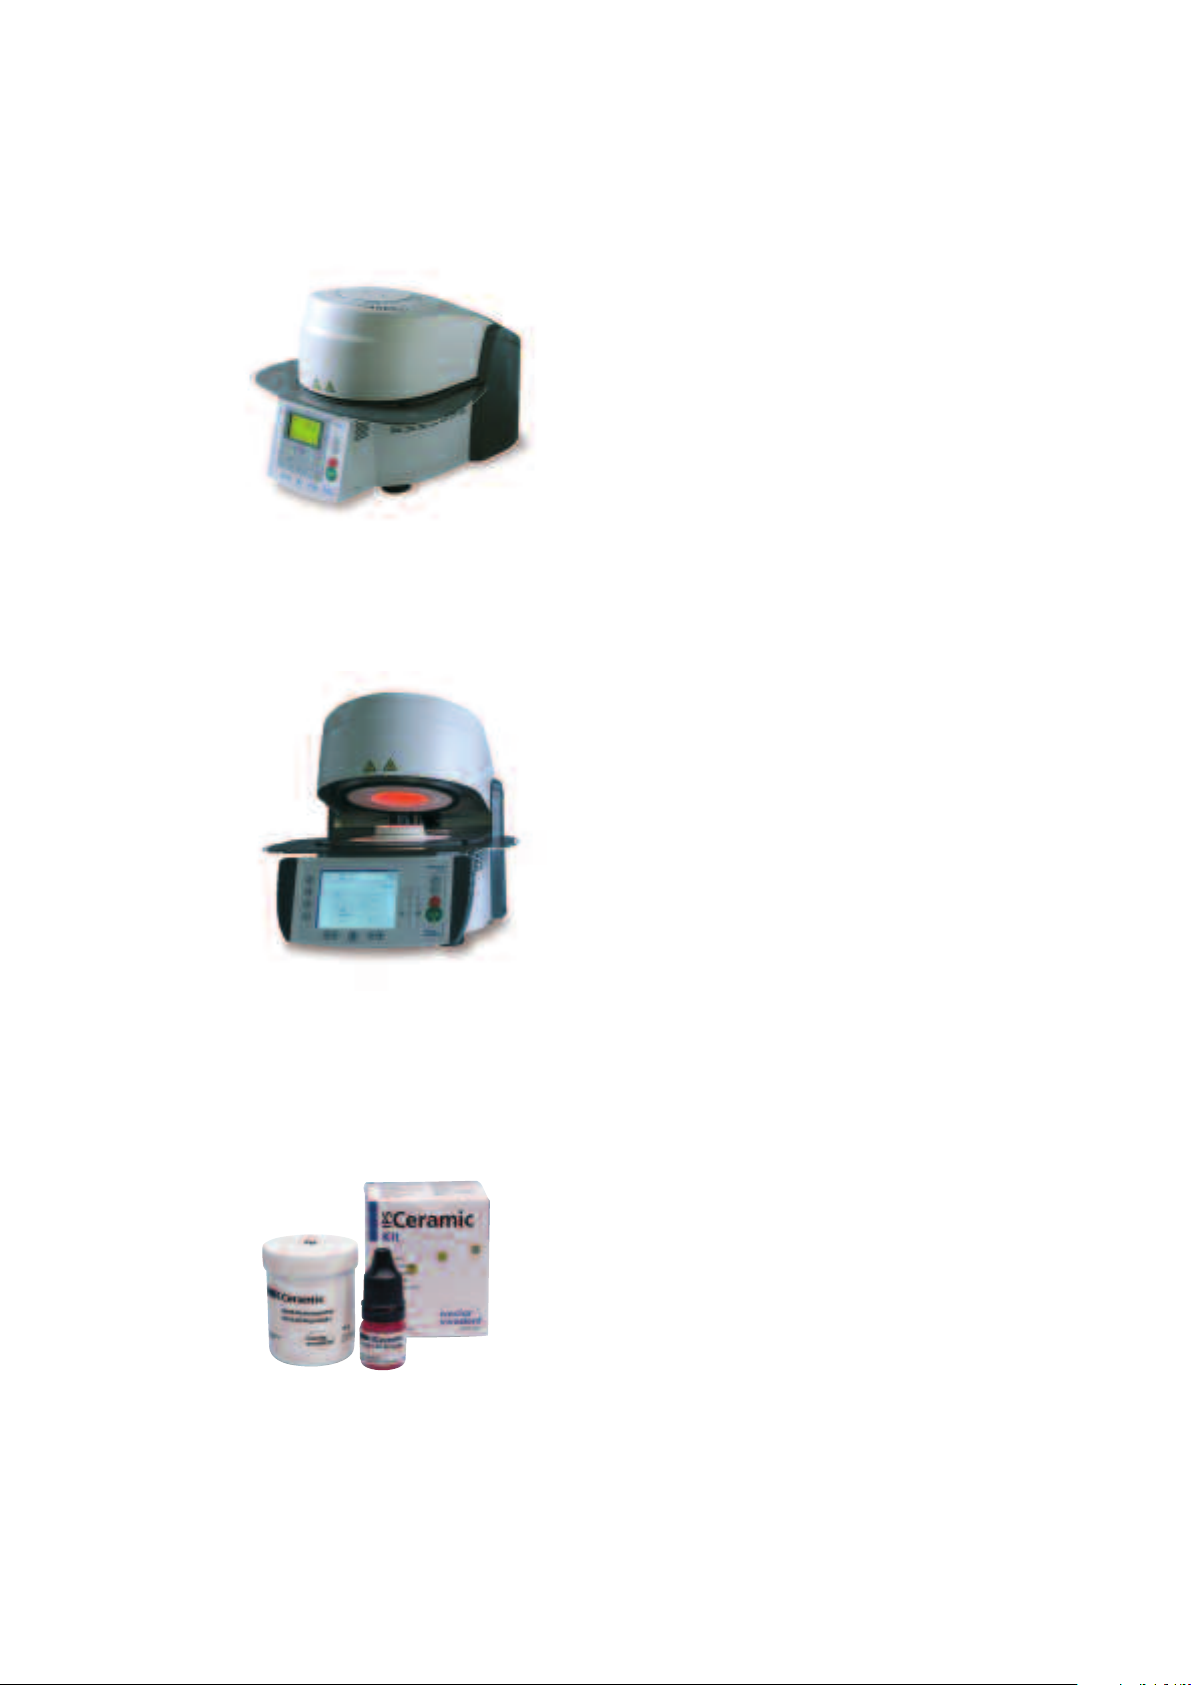
Programat®P300
The new Programat P300, which is reduced to the essentials, is an
inspiration due to its cost-effectiveness. Furthermore, it features a
convincing and easy operating concept. A simple menu structure
with clearly arranged symbols guides the user during the application
of the programs. The furnace is equipped in the factory with preset
programs for IPS e.max, IPS d.SIGN, IPS InLine, and the IPS Empress
System and it convinces users with its modern, timeless design.
Delivery form:
rogramat P300 Basic Equipment
P
Programat P300
–
– Power Cord, Vacuum Hose, Calibration Test Package,
Programat Firing Tray Kit
Programat®P500
Optimum firing results for glazing materials, stains, and ceramic
materials can be achieved with the user-friendly Programat P500
ceramic furnace. This new ceramic furnace combines high-tech and
design. The combination of the membrane-sealed keypad and the
large, clearly-arranged graphic display with touch function facilitate
operation. The homogeneous heat emission due to the new muffle
technology, the easy, precise and automatic temperature calibration,
as well as the 300 firing programs make the P500 and indispensable
companion in the laboratory.
Delivery form:
Programat P500 Basic Equipment
– Programat P500
– Power Cord, Vacuum Hose, Calibration Test Package (ATK2),
Programat Firing Tray Kit, USB Download Cable, USB Stick
ogramat
Pr
IPS®Ceramic Etching Gel
IPS Ceramic Etching Gel is used to pr
surfaces on ceramic restorations in the composite cementation
technique. It enhances the bonding effect between the luting
composite and the ceramic surface. IPS Ceramic Etching Gel is
exclusively intended for professional use and must not be applied in
the oral cavity.
Advantages
– Usable in conjunction with most glass-ceramic materials
– No environmental pollution due to neutralization
Contraindications
– Application in the oral cavity
– Enamel etching of natural teeth
– Use in conjunction with oxide ceramics
Delivery form:
IPS Ceramic Etching Gel Kit
1x 5 ml IPS Ceramic Etching Gel
–
– 1x 30 g Neutralization Powder
– 1 Measuring Spoon
oduce retentive bonding
16
Page 17

Empress Esthetic –
IPS
Practical Working Steps
Preparation guidelines and minimum thicknesses
Successful results with IPS Empress Esthetic can only be achieved if the guidelines below and minimum layer thicknesses
are strictly observed.
Inlays and onlays
Static and dynamic antagonist contacts must be taken into consideration. The preparation margins must not be located on
centric antagonist contacts.
A preparation depth of at least 1.5 mm and an isthmus width of at least 1.5 mm must be observed in the fissure area.
Prepare the proximal box with slightly diverging walls and observe an angle of 100 - 120° between the proximal cavity
walls and the pr
support by the proximal shoulder, marginal ridge contacts should be avoided. Round out internal edges in order to prevent
stress concentration within the ceramic material. Eliminate the proximal contacts on all sides. Do not prepare slice-cuts or
feather edges.
ospective proximal inlay surfaces. For inlays with pronounced, convex cavity walls without adequate
For onlays, provide at least 2 mm of space in the cusp areas. On the vestibular side, the shoulder should be prepared with
°) to improve the aesthetic appearance of the transitions between the ceramic material and the tooth.
-30
a chamfer (10
Partial cr
enamel is severely undermined.
°
e indicated if the pr
owns ar
eparation margin is less than appr
oximately 0.5 mm away fr
om the cusp tip, or if the
Dimensions in mm
Dimensions in mm
17
Page 18

Full crown
Anterior and posterior crown
The anatomical shape is evenly reduced while observing the given minimum thicknesses. A circumferential shoulder is
prepared with rounded inner edges or a chamfer. The width of the circular shoulder or chamfer should be ≥ 1 mm. The
incisal/occlusal third of the crown is reduced by approximately 1.5 mm. The incisal or occlusal part should be reduced by
approximately 2 mm.
OR
Dimensions in mm
Veneer
If possible, the preparation should be entirely located in the enamel, either without involving reduction of the incisal edge
or traditional preparation involving reduction of the incisal edge. The incisal preparation margins should not be located in
the area of the abrasion surfaces.
The extent of the incisal reduction depends on the desired translucency of the incisal area to be built up. The more
transparent the incisal edge of the intended veneer, the more pronounced the reduction should be. The incisal edge must
be reduced by at least 1 mm. By preparing orientation grooves using a depth marker, controlled enamel reduction can be
achieved. The minimum preparation thickness is ≥ 0.6 - 1 mm, depending on the preparation technique selected.
Dissolution of the proximal contacts is not required. Discoloured teeth may require more preparation. In the cervical area,
epar
pr
e a chamfer
.
Dimensions in mm
18
Page 19

Shade determination
The correct tooth shade is the basis for a restoration with a life-like appearance. After tooth cleaning, the tooth shade
of the non-prepared tooth and/or the adjacent teeth is determined. Individual characteristics have to be taken into
consideration when determining the tooth shade. If a crown preparation is planned, for example, the cervical shade should
also be determined. In order to achieve the best possible true-to-nature results, shade determination should be carried out
at daylight. Furthermore, the patient should not wear clothes of intensive colours and/or lipstick. Basically, it has to be kept
in mind that the final shade of the restoration is the result of the following individual shades:
– Die shade
– Shade of the ingot
– Shade of the layering ceramic
– Shade of the cementation material
IPS Natural Die Material
In order to facilitate the reproduction of the tooth shade, the shade
of the prepared tooth can be determined with the help of the
IPS Natural Die Material shade guide. This facilitates the fabrication
of the all-ceramic restoration and the individual characteristics of the
preparation may also be taken into consideration. By deterimining the
shade of the pr
restorations may be checked during the individual fabrication steps.
IPS Empr
With the IPS Empress Esthetic shade guide, the shade of the ingot
to be used can already be determined in the dental practice. In
addition, the shade guide may be used to select the suitable pr
ingot and layering materials in the laboratory. The shade tabs have
been fired and pressed from original materials under laboratory
conditions and, ther
epared tooth, the shade and brightness value of the
ess Esthetic Shade Guide
essed
efore, correspond with the final result.
19
Page 20

Cementation
For cementation, the IPS Empress Esthetic restoration must be conditioned. For this
purpose, the completed restoration is etched with IPS Ceramic Etching Gel and
subsequently silanated using Monobond-S.
Total Etch
For the preparation of adhesive cementation with Variolink II/
Variolink Veneer, Total Etch is used. It is an enamel etching and dentin
conditioning gel used during the adhesive cementation of all-ceramic
restorations.
For the adhesive cementation of IPS Empress Esthetic restorations, you may choose
between tried-and-tested luting composites from Ivoclar Vivadent. Adhesive
cementation achieves an excellent bond between the preparation and the restoration.
®
riolink
Va
(Variolink II, Variolink Veneer)
Veneers
Inlays
Onlays
Partial crowns
Anterior and posterior crowns
ariolink
V
®
II
3
3
3
3
3
The dual-curing luting composite Variolink II has been used for more
than ten years and in over 20 million restorations. It is the world's
leading highly aesthetic material concept. Numerous awards as the
best product in the category of adhesive luting composites and
excellent results from clinical long-term studies are testimony to this
success.
ariolink
V
Pur
®
eneer
V
ely light-curing luting composite in 7 "Value" shades for the
adhesive cementation of translucent all-ceramic restorations with a
layer thickness of < 2.0 mm (veneers, inlays, onlays).
®
Multilink
(Multilink, Multilink Automix)
––
3
3
3
3
indicated
3
aindicated
contr
––
Multilink®Automix
The universal, self-curing (with light-curing option) resin based luting
cement Multilink offers a broad range of indications and produces
very high adhesive strength on all material surfaces. Together with
the self-etching Primer, which is applied as a simple preliminary layer
on enamel and dentin, Multilink is processed quickly and efficiently.
20
Page 21

Empress Esthetic –
IPS
Processing Procedure
IPS Empress Esthetic Inlays / Onlays / Crowns – stained/glazed
Model and die preparation
abricate a working model with removable die segments as usual. The application of a sealer is recommended to harden
F
he surface and to protect the stone die. However, the sealer layer must not result in any changes of the dimensions of the
t
stone die.
Subsequently, the spacer is applied as described below. Please be aware of the fact that the expansion of the investment
materials is coordinated with this procedure.
– For inlays/onlays, the spacer is applied in up to 3 layers and up to the preparation margin.
– For single crowns, the spacer is applied in two layers up to max. 1 mm from the preparation margin (spacer application
9–11 µm per layer).
– Two sealer layers are also applied up to max. 1 mm from the preparation margin for veneers.
Applying the spacer
for inlay/onlay
preparation
Up to three layers of spacer are applied to inlays/onlays.
The surfaces are covered up to the preparation margin.
for crown
preparation
Two layers of spacer are applied up to max. 1 mm from
the preparation margin. This measure helps prevent
undesired friction.
for veneer
preparation
Two layers of spacer are applied up to max. 1 mm from
the preparation margin.
21
Page 22

Wax-up
Fabricate a fully anatomical, functional wax-up for the Esthetic technique. You can use any organic waxes that burn out
without leaving residue. Please observe the following notes for contouring:
– Observe the stipulated minimum wall thicknesses.
– Exact contouring of the restoration, particularly in the area of the preparation margins, is indispensable. Do not over-
contour, since this would require time-consuming and risky fitting procedures.
– Possible occlusal relief must be taken into consideration as early as during the wax-up, since the final firing of Shades,
Stains and Glaze also results in added surface dimension.
Waxed up posterior crown Waxed up inlays
Sprueing
Always place the sprues in the direction of flow of the ceramic and at the thickest part of the wax-up in order to achieve
unimpeded flow of the viscous ceramic material. The 100-g or 200-g investment ring base is selected depending on the
number of objects to be invested and their wax weight.
The following guidelines are recommended to determine the proper wax weight:
– Weigh the IPS Empress investment ring base (seal the opening of the ring base with wax).
– Position the objects to be pressed on the ring base and attach them with wax. Weigh again.
– The difference between the two values is the weight of the wax used.
– Remove excess separating material prior to investing.
The following sprueing guidelines must be observed:
Investment ring system
Wax wire ø
e length
ax wir
W
Length wax wire including object
Sprueing angle to the wax object
Sprueing angle to the investment ring base
Design of the attachment points
Distance between objects
Distance to the silicone ring
Important
Inlays, onlays, veneers, single crowns
100 g
max. 1 ingot; max. 0.6 g wax weight
200 g
max. 2 ingots; up to max. 1.4 g wax weight
2.5–3 mm
min. 3 mm, max. 8 mm
max. 15 – 16 mm
axial
°
45–60
rounded and slightly tapered; no sharp angles or edges
min. 3 mm
min. 10 mm
A dummy object must be invested with very small single
wax objects in order to activate the abort criterion of the
EP 500/EP 600/EP 600 Combi furnace.
22
Page 23

Correct sprueing:
max. 6-8 mm
45–60°
max. 15 –16 mm
max. 6-8 mm
45–60°
<6 mm
45–60°
6 mm
45–60°
max. 15 –16 mm
max. 15 –16 mm
max. 15 –16 mm
max. 6-8 mm
45–60°
6 mm
45–60°
max. 15 –16 mm
max. 15 –16 mm
45–60°
45–60°
45–60°
Maximum sprueing height
The sprue and wax pattern should not be longer than 15–16 mm. Observe a 45–60° angle.
Provide sprues in the direction of flow of the ceramic material.
Always attach the sprue to the thickest part of the wax pattern.The internal surface of the wax pattern points outwards.
The attachment points of the sprues must be rounded. Observe an angle of 45 - 60°.
23
Page 24

<6 mm
45–60°
max. 15 –16 mm
mind. 10 mm
mind. 10 mm
Ring gauge
min. 10 mm
min. 10 mm
min. 10 mm
The distance between the wax patterns to be pressed and the IPS Silicone Ring/ring gauge
must be at least 10 mm. This applies to all the above diagrams.
Checking the sprueing
The IPS Sprue Guide will help you to easily check the correct sprueing of the objects to be pressed on
the investment ring base. By turning the IPS Sprue Guide on the investment ring base, the required
distance to the silicone ring, the proper height, as well as the sprueing angle can be quickly checked.
Checking the position of the wax patterns by means of the IPS Sprue Guide.
24
Page 25

Investing
Investing is carried out with either IPS PressVEST or IPS Empress Esthetic Speed. The corresponding
IPS Silicone Ring with matching ring gauge is used for that purpose.
Please refer to the Instructions for Use of the corresponding investment material regarding the detailed
processing parameters. The following procedure is recommended:
– Do not apply a debubblizer to the wax objects.
– Mix investment material. The investment material contains quartz powder. Therefore, the inhalation of
dust must be avoided.
Use a suitable instrument for the fine investment of the cavity. Make sure that the delicate wax
–
argins are not damaged.
m
– Carefully position the IPS Silicone Ring on the investment ring base without damaging the wax
objects. The IPS Silicone Ring must sit flush on the investment ring base.
– Subsequently, carefully fill the investment ring with investment material up to the marking and posi-
tion the ring gauge with a hinged movement.
– Allow the investment material to set without manipulating the investment ring.
– Do not use IPS PressVEST for investment over the weekend to prevent crystallization.
Use the IPS Silicone Ring for investment. Pour the investment material slowly and carefully. Avoid the
formation of bubbles.
25
Page 26

Preheating
After the stipulated setting time of the respective investment material (IPS PressVEST or IPS Empress Esthetic Speed), the
investment ring is prepared for preheating as follows:
– Remove the ring gauge and ring base with a turning movement,
– Carefully push the investment ring out of the IPS Silicone Ring.
– Remove rough spots on the bottom surface of the investment ring with a plaster knife and check the 90° angle.
– Investment material residue must not enter the sprues. Blow into the sprues if necessary.
– If several investment rings are preheated together, mark them with the respective ingot shade.
Setting time
Temperature of the preheating
furnace
Preheating temperature
Position of the investment ring in
the furnace
IPS Empress Esthetic Ingots
IPS Empress Alox Plunger
Important
IPS PressVEST
min. 60 min.
Room temperature
850°C (1562 °F)
Towards the rear wall; tipped with the
opening facing down
Always preheat
Always preheat
IPS Empress Esthetic Speed
min. 30 min., max. 45 min.
850 °C (1562 °F); switch on
preheating furnace in time
850°C (1562 °F)
Towards the rear wall; tipped with the
opening facing down
Always preheat
Always preheat
If several Speed investments are
required, they should be invested with
a time difference and placed in the
preheating furnace at intervals of
approximately 20 minutes. When
placing the investment rings in the
preheating furnace, make sure that the
nace temperatur
fur
e does not dr
op too
much. The indicated holding time starts
when the preheating temperature is
reached again.
Position the IPS Empress Esthetic ingots and AlOx plungers on the IPS UniTray. Place the investment rings and IPS UniTray with AlOx plungers and ingots in the preheating
furnace
In order to ensure smooth working procedures in the laboratory on a daily basis, impeccable functioning of the infrastructure and the preheating furnaces is essential. This includes their maintenance, cleaning with a vacuum cleaner in a
cool state as well as regular checks of the temperature controls and heating elements, etc. by the manufacturer.
26
.
Page 27

Calibration
The furnace must be regularly calibrated to achieve optimum press results. Calibrate the EP 500 with the Temperature
Checking Set 2 and the EP 600 with the Automatic Temperature Checking Set 1.
EP 500
1. Switch on the EP 500 and allow the furnace to heat up to the stand-by-temperature of 700 °C/
1292 °F. Hold this temperature for at least 30 minutes.
2. Select a program for the staining technique T=1075 °C/1967 °F. Run the program with the furnace empty. After
activation of the holding time H=20 min., which the EP500 does automatically,
interrupt the program after 15 minutes (set timer) by pressing the STOP key twice.
If you fail to interrupt the program, the ER16 error message appears. Rectify this error by following the instructions
given on the corresponding list of error messages. Allow the furnace to cool until the stand-by-temperature of
700 °C/1292 °F has been reached with the furnace head closed. Hold this temperature for at least 30 minutes.
3. Place the calibration set on the honey-combed firing tray in order to ensure the appropriate height (temperature
range) in the furnace.
4. Conduct the calibration using the Temperature Checking Set 2.
EP 600
1. Place the melting sample in the ceramic base.
2. Tighten the contact pin to secure the melting sample.
Important: Do not use tweezers or tongs. Apply slight pressure to secure the melting sample in place.
3. Select the calibration program in the 'Miscellaneous' menu. The furnace head opens.
4. Remove the firing plate from the furnace and place it on the cooling plate using the firing tongs.
5. Place the calibration tray in the holes for the Automatic Temperature Checking Set ATK 1 in the stone lining.
6. Slightly press the calibration tray into place with the firing tongs until you feel it click into place.
7. Start the calibration program
8. Once the program is completed, remove the calibration sample from the furnace using the tongs and allow it to cool.
Contraindication:
Do not pull at the melting sample. The ceramic base may fracture when you do so.
9. Replace the firing tray and select the firing program. The furnace head closes automatically.
10. Once it is cooled, disassemble the calibration sample.
11. Use a new melting sample for the next calibration procedure and start with item 1.
27
Page 28

Pressing
Before the preheating cycle for the investment ring has ended, the following preparations for pressing must be carried out:
– Switch on the press furnace in time to ensure that the self-test and preheating phase are completed.
– Select the press program for IPS Empress Esthetic and the respective investment ring size (EP 600/EP 600 Combi).
– Place the ingots and AlOx plungers in the investment ring and position it quickly (in less than 1 min.) in the furnace.
– Do not use the IPS e.max AlOx Plunger Separator. The press temperature of the IPS Empress Esthetic ingots of 1075 °C/
1967 °F is too high for the separator to be effective.
Once the preheating cycle has been completed, remove the investment ring from the preheating furnace and proceed as
ollows:
f
Place the hotIPS Empress Esthetic ingot – in the required shade of the tooth (see material combination table) – into the
–
hot investment ring.
– Place the hot AlOx plunger into the hot investment ring.
– Place the completed investment ring central the hot press furnace.
– Press START to start the selected program.
100 g investment ring
Number of ingots
IPS Empress Esthetic Ingots
IPS Empress Alox-Kolben
Place the hot IPS Empress Esthetic ingot in the investment ring.
ess parameters for the IPS Empress Esthetic Ingots
Pr
EP 500
Small and large investment ring
EP 600/EP
600 Combi
Small and large investment ring
B
°
700
1292
B
700°C
1292°F
C
F
°
tÚ
60°C
108°F
t
60°C
108°F
max. 1 ingot
hot ingot
hot plunger
Ú
T
°
1075
°
1967
T
1075°C
1967°F
200 g investment ring
max. 2 ingots
hot ingot
hot plunger
Place the
hot AlOx plunger into the investment ring.
H
C
F
20’
H
20’
V
1
°
500
°
932
V
1
500°C
932°F
C
F
V
1075
1967
V
1075°C
1967°F
Pressure
2
C
°
°
2
5 bar
F
A
m
µ
250
28
Page 29

Position the investment ring in the press furnace Place the investment ring on the cooling grid
Remove the investment ring from the furnace immediately after the program is completed and close the furnace. Place the
investment ring on the cooling grid and allow it to cool to room temperature. The grid ensures quick and even cooling of
the investment ring and prevents undesired heat accumulation.
Divesting
After cooling to room temperature (after approximately 60 minutes), the investment ring may show cracks. These cracks
developed (immediately around the AlOx plunger) during cooling as a result of the different CTEs of the various materials
(AlOx plunger, investment material, and pressed materials). They do not compromise the press result.
– Mark the length of the AlOx plunger on the cooled investment ring.
– Separate the investment ring using a separating disk. This predetermined breaking point enables reliable separation of
the AlOx plunger and the ceramic material.
– Break the investment ring at the predetermined breaking point using a plaster knife.
– Rough divestment is carried out with glass polishing beads at 4 bar (60 psi) pressure.
– For fine divestment, only 2 bar (30 psi) pressure is applied.
not use Al2O3for rough or fine divestment
– Do
When divesting the object, blast fr
–
om the dir
and observe the appropriate distance in order not to damage the object margins.
The investment material contains quartz powder
–
dust.
– Use Al
to clean the AlOx plunger from any ceramic residue.
2O3
ection indicated in the schematic below
. Therefore avoid any inhalation of
Separate the investment ring using a separating disk and break it at the predetermined breaking point.
29
Mark the length of the AlOx plunger
Page 30

Rough divestment is carried out with glass polishing beads at 4 bar (60 psi) pressure.
When divesting the object, blast from the direction indicated in the schematic at the top. Note:Blast from the incisal and/or occlusal direction, if possible.
Fine divestment is carried out with glass polishing beads at 2 bar (30 psi) pressure.
Removing the pressed object / finishing
The following procedure is recommended to finish IPS Empress Esthetic restorations:
– Wet the area to be ground and use a fine diamond disk to cut the sprues.
– Prevent overheating of the ceramic material. Low speed and light pressure is recommended.
– Smooth out the attachment points of the sprues.
– Remove the spacer prior to placing the pressed object on the die.
– Place the restoration on the die, check contact points and carefully adjust.
– Make sure that the minimum thicknesses are maintained even after finishing.
– Clean the restoration under running water or with steam before characterization.
– It is not necessary to blast the restoration with Al2O3prior to further processing.
Divested objects
The sprues are cut with a fine diamond disk.
30
Page 31

The anatomical, functionally waxed-up restoration is accurately reproduced in ceramic. Apply surface structures with suitable grinders..
Fabricating the die using IPS Natural Die Material
The light-curing IPS Natural Die Material simulates the shade of the prepared tooth. A control die is fabricated using the
selected shade. This control die represents the optimum basis for a true-to-nature shade reproduction of the given oral
situation.
– Coat the inner surfaces of the ceramic restorations with IPS Natural Die Material Separator and allow it to react for a
short time.
– Apply the IPS Natural Die Material in the corresponding shade to the inner surfaces of the restoration using the
IPS Condenser and adapt so that the entire inner surface is coated and filled.
– Completely fill the restoration cavity and insert an IPS Die Holder into the material and adapt excess material around the
holder. Make sure that the Die Material is well adapted to the restoration margins and that no gaps are present.
– Polymerize the IPS Natural Die Material die with a commercial polymerization light, e.g. Lumamat 100, for 60 seconds.
– After polymerization, the die can be finished and smoothed, if required.
Completely fi
ation with IPS Natur
Coat the inner surfaces of the cer
ation cavity and insert an IPS Die Holder into the material and adapt excess material around the holder.Then, polymerize with a commercial polymerization light.
ll the restor
amic restor
al Die Material Separator and allow it to react for a short time.
31
Page 32

Stain and Glaze firing
The IPS Empress Universal Shades/Stains and Glaze have been especially developed for the ceramic materials of the
IPS Empress System from Ivoclar Vivadent. They can be used for the following techniques:
– IPS Empress Esthetic
– IPS Empress CAD
– IPS Empress 2 Layering Technique
– IPS Empress 2 / IPS Eris for E2 Layering Technique
After cleaning the restoration, the Stain and Glaze firing is carried out. Basically, there are two options:
Optional
Version A – 2-in-1 Technique
First, the glaze paste is applied, followed by the stains, which are applied on the unfired glaze layer.
Step 1 – Application of the glaze material:
– Extrude IPS Empress Universal Glaze from the syringe and thin the material to the desired consistency using IPS Empress
Universal Glaze and Stain Liquid.
– Apply the glazing material on the entire outer surfaces of the restoration.
– The glazing material must not come into contact with the inner aspects of the restoration.
– Too thin glazing material layers result in an unsatisfactory gloss.
– Avoid pooling and too thick glazing material layers.
Step 2 – Application of Shades/Stains:
– Extrude IPS Empress Universal Shade or Stains from the syringe and mix thoroughly.
– Thin the material to the desired consistency using IPS Empress Universal Glaze and Stain Liquid.
- Apply the mixed Shade/Stains material directly into the unfired glazing material layer.
– Intensify the corresponding dentin shade in the cervical and occlusal areas using IPS Empress Universal Shades.
– To imitate the incisal area and translucency in the incisal third, use IPS Empress Universal Shade Incisal.
– Apply individualized effects and characterizations using IPS Empress Universal Stains materials.
After staining and glazing, the Stain and Glaze fi
ring is conducted in a compatible ceramic furnace (e.g. Programat
®
P500).
The following points should be observed when placing the restoration in the furnace and setting the firing parameters:
– Place the restorations on the metal pins using a small amount of IPS Object Fix and position them on the honey-comb
ring tray .
fi
– As an alternative, the restorations can be supported with a firing pillow. Due to their lower position in the firing
chamber, the restorations are exposed to less heat. Therefore, in order to achieve the desired gloss, the holding time
must be extended to up to 2 minutes.
Firing parameters for Stain and Glaze fi
IPS Empress Esthetic with IPS Empress Universal
2-in-1 Technique
Stain and Glaze fi
B = Stand-by temperature °C / °F
Closing time/minutes
S =
Temperature increase rate °C/min. / °F/min.
t
Ú =
ring 403°C 6' 100°C 790°C 1–2' 450°C 789°C
ring
(note the temperature control)
B S tÚ T H V
757°F 6' 180°F 1454°F 1–2' 842°F 1453°F
1
T = Firing temperature °C / °F
H = Holding time / min.
= Vacuum-on temperature °C / °F
V
2
acuum-off temperature
V
V
=
C /
°
1
F
°
V
2
32
Page 33

Version B
Step 1 – Application of Shades/Stains:
– First, apply a small amount of IPS Empress Universal Glaze and Stain Liquid to assess the shade. This will provide better
wetting of the stains.
– Extrude IPS Empress Universal Shade or Stains from the syringe and mix thoroughly.
– Thin the material to the desired consistency using IPS Empress Universal Glaze and Stain Liquid.
– Apply the mixed Shades/Stain material.
– Intensify the corresponding dentin shade in the cervical and occlusal areas using IPS Empress Universal Shades.
– To imitate the incisal area and translucency in the incisal third, use IPS Empress Universal Shade Incisal.
– Apply individualized effects and characterizations using IPS Empress Universal Stains materials.
Starting situation
Occlusal area:
Shade 130
Incisal area:
Shade I1
Fissure:
Stains orange
After staining and glazing, the Stain and Glaze firing is conducted in a compatible ceramic furnace (e.g. Programat P500).
The following points should be observed when placing the restoration in the furnace and setting the firing parameters:
– Place the restorations on the metal pins using a small amount of IPS Object Fix and position them on the honey-comb firing tray .
– As an alternative, the restorations can be supported with a firing pillow. Due to their lower position in the firing chamber, the
restorations are exposed to less heat. Therefore, in order to achieve the desired gloss, the holding time must be extended to up to
2 minutes.
– More intensive shades are achieved by repeated staining, rather than by applying thicker layers.
Firing parameters for Stain and Characterization firing (note the temperature control)
IPS Empress Esthetic with IPS Empress Universal
Stain and Characterization fi
B = Stand-by temperature °C / °F
S = Closing time/minutes
Ú = Temperature increase rate °C/min. / °F/min.
t
ring 403°C 6' 100°C 790°C 1–2' 450°C 789°C
B S tÚ T H V
757°F 6' 180°F 1454°F 1–2' 842°F 1453°F
T = Firing temperature °C / °F
H = Holding time / min.
V1= Vacuum-on temperature °C / °F
2
V
= Vacuum-off temperature °C / °F
1
2
V
33
Page 34

Step 2 – Application of the glazing material:
– Extrude IPS Empress Universal Glaze from the syringe and thin the material to the desired consistency using IPS Empress
Universal Glaze and Stain Liquid.
– Apply the glazing material on the entire outer surfaces of the restoration.
– The glazing material must not come into contact with the inner aspects of the restoration.
– Too thin glazing material layers result in an unsatisfactory gloss.
– Avoid pooling and too thick glazing material layers.
Evenly apply IPS Empress Universal Glaze on the entire outer surfaces of the restoration. Place the restorations on the honey-comb firing tray using IPS Object Fix
Completed IPS Empress Esthetic restorations, stained and glazed.
and metal pins and fire.
After applying the glazing material, the glaze firing is conducted in a compatible ceramic furnace (e.g. Programat P500).
The following points should be observed when placing the restoration in the furnace and setting the firing parameters:
– Place the restorations on the metal pins using a small amount of IPS Object Fix and position them on the honey-comb
firing tray .
– As an alternative, the restorations can be supported with a firing pillow. Due to their lower position in the firing
chamber, the restorations are exposed to less heat. Therefore, in order to achieve the desired gloss, the holding time
must be extended to up to 2 minutes.
Firing parameters for Glaze firing (note the temperature control)
ess Esthetic with IPS Empress Universal
IPS Empr
B
St
Ú T
H V
1 V2
Glaze firing 403°C 6' 100°C 790°C 1–2' 450°C 789°C
6' 180°F 1454°F 1–2' 842°F 1453°F
F
°
757
B = Stand-by temperature °C / °F
S = Closing time/minutes
t
Ú = Temperature increase rate °C/min. / °F/min.
T = Firing temperature °C / °F
H = Holding time / min.
1
= Vacuum-on temperature °C / °F
V
2
= Vacuum-off temperature °C / °F
V
34
Page 35

ptional
O
Subsequent adjustments
After completion, additional adjustment (e.g. contact points) may become necessary. For that purpose,
IPS Empress Add-On 770 °C/1418 °F is available.
Processing:
– Before the adjustment, the restoration must be free from dirt and grease. For that purpose, blast the areas to be
adjusted with Al2O3(Type 100) at max. 0.5 bar pressure and thoroughly clean the restoration using the steam jet.
– Mix IPS Empress Add-On 770 °C / 1418 °F with IPS Empress Esthetic Veneer Build-Up Liquid to a workable consistency.
ake sure that the add-on material and liquid are evenly mixed so that an optimum firing result can be achieved.
M
Apply the mixed add-on material on the cleaned, desired areas using a brush and slightly blot them with an absorbent
–
cloth.
– Position the adjusted restoration on the firing tray and fire in the ceramic furnace.
– After firing, manually polish the supplemented areas to a high gloss.
Adjust the proximal contact points
Firing parameters for the Corrective firing
IPS Empress Esthetic with B S tÚ T H V
IPS Empress Add-On 770°C/1418°F
Corrective firing 403°C 4' 60°C 770°C 2' 450°C 769°C
757°F 4' 108°F 1418°F 2' 842°F 1417°F
B = Stand-by temperature °C / °F
S = Closing time/minutes
t
Ú = Temperature increase rate °C/min. / °F/min.
T = Firing temperature °C / °F
H = Holding time / min.
1
= Vacuum-on temperature °C / °F
V
2
= Vacuum-off temperature °C / °F
V
1
2
V
35
Page 36

IPS Empress Esthetic Veneers / Anterior Crowns – Cut-back and layered
Wall and layering thicknesses
In order to individualize restorations in the incisal area so that they correspond with their natural model, the IPS Empress
Esthetic restoration is additionally veneered using opalescent IPS Empress Esthetic Veneer ceramic materials. The cut-back
technique is very efficient if the fully anatomical anterior crown or the veneer are first designed according to the definite
final shape. After that, the incisal third is reduced and subsequently provided with an individualized aesthetic veneer.
The following wall and layering thicknesses have to be observed:
Veneer
Layer thickness =
Minimum thickness
of the restoration
after the
corresponding
reduction
= 0.5 mm
.5–1.0 mm
0
0.5 mm
0.5 mm
approx.
Anterior cr
Layer thickness =
Limited layering area: labial,
incisal third
Fully anatomical, pressed veneer and anterior crown, which are reduced in the incisal area.
Minimum thickness
of the restoration
after the
corresponding
reduction
= 0.5 mm
own
.5–1.0 mm
0
0.5 mm
.5 mm
0
approx.
Limited layering area: labial,
incisal third
eparing the model and the dies
Pr
Fabricate a working model with r
application of a sealer is r
emovable die segments as usual. The
ecommended to har
den the surface and to pr
otect
the stone die. However, the sealer layer must not result in any changes of the
dimensions of the stone die.
Subsequently, the spacer is applied as described below. Please be aware of the
fact, that the expansion of the investment material is coor
e.
ocedur
pr
dinated with this
– For anterior crowns, the spacer is applied in two layers up to max. 1 mm
from the preparation margin (spacer application 9–11 µm per layer).
wo sealer layers ar
T
–
e also applied up to max. 1 mm fr
om the preparation
margin for veneers.
36
Sealer and spacer applied on the prepared model.
Page 37

Wax-up
A fully anatomical wax-up should be fabricated for veneer restorations. You can use any organic waxes that burn out
without leaving residue. Also, ensure a wall thickness of at least 0.5 mm. For better distinction, a basic wax in a different
colour can be used.
For better distinction, a basic wax in a different colour is recommended. Fully anatomical wax-up.
Veneers with sprues in place. Sprued veneers on the 200-g investment ring system.
For the processing steps on investment, preheating, pressing and divesting/separation, as well as die fabrication with
IPS Natural Die Material, please refer to pages 25–31.
Once the restoration has been pressed using the
ess Esthetic ingot selected accor
IPS Empr
individual patient situation, they ar
ding to the
e placed on the
corresponding working model.
Veneers on the working model after finishing.
37
Page 38

Cut-back technique
Fabricate a silicone key to prepare the restorations for individualization with IPS Empress Esthetic Veneer. Subsequently, the
cut-back is carried out. The fully anatomically pressed veneers are reduced in the incisal third. For that purpose, use
ceramic-bonded grinding instruments or diamonds.
The following points must be observed:
– Too much pressure and excess heat development during grinding must be prevented.
– Refrain from designing too extreme mamelons with undercuts.
– Check the cut-back by means of the silicone key.
The minimum wall thickness of the pressed IPS Empress Esthetic restorations of 0.5 mm must be observed.
–
Fabricate a silicone key before conducting the cut-back.
Check the cut-back by means of the silicone key, observe the minimum
wall thickness of 0.5 mm.
Refrain from designing too extreme mamelons with undercuts.
Limit the cut-back to the incisal third.
Preparing for veneering
Blast the outer surfaces of the ceramic restoration carefully with Al2O3(Type 100) at max. 0.5 bar pressure and clean
oughly with the steam jet. Befor
thor
e veneering, the restorations must be free of dirt and grease.
Blast the restor
ation with
2O3
Al
ype 100) at 0.5 bar pressure
(T
.
Clean the restor
ation with steam prior to w
ash firing.
38
Page 39

Wash firing
Conduct the wash firing using the IPS Empress Esthetic Veneer Wash Pastes. Apply the wash pastes thinly and cover the
entire restoration. The IPS Empress Esthetic Veneer Wash Paste neutral is always applied first on the restoration and
enables a homogenous bond to the IPS Empress Esthetic material. Subsequently, the reduced restorations are individually
characterized, if required, using the Standard Wash Pastes and Wash Paste Modifiers. The wash pastes must be fired
separately. If required, the pastes can be slightly diluted using IPS Empress Universal Glaze and Stain Liquid.
neutral low value high value MM
6 Standard Wash Pastes for individual internal characterizations
Examples of the wash pastes applied on the restorations.
light-salmon
MM
yelloworange
MM
reddish-
orange
Modifier
copper
Modifier
orange
5 Wash Pastes Modifiers permit individual shading of the
Modifier
sky blue
Standard Wash Pastes
Modifier
basic yellow
Modifier
basic red
Place the objects on the honey-comb firing tray by using IPS Object Fix and fire.
Firing parameters for the Wash firing (note the temperature control)
IPS Empress Esthetic Veneer B S tÚ T H V
Wash Pastes
ash firing 403°C 4' 60°C 840°C 2' 450°C 839°C
W
F
°
C /
B = Stand-by temperature
S = Closing time/minutes
t
Ú = Temperature increase rate °C/min. / °F/min.
°
T = F
H = Holding time / min.
F 4' 108°F 1544°F 2' 842°F 1543°F
°
757
iring temperature
F
°
C /
°
1
acuum-on temperature
V
=
V
2
V
= Vacuum-off temperature °C / °F
39
1
F
°
C /
°
2
V
Page 40

Incisal firing
The IPS Empress Esthetic Veneer layering materials are used to complete the anatomical shape and to achieve the
individual aesthetics of the restorations. The materials are mixed with the IPS Empress Esthetic Build-Up Liquid. If required,
a second incisal firing is conducted with the same firing program.
Incisal
T = high
H
anslucent
tr
Veneer 11 after wash firing.
Incisal
pal
O
pal
O
T = medium
M
anslucent
tr
Incisal
pal
O
T = low
L
anslucent
tr
ranspa
T
blue
Transpa
eutral
n
Incisal
dge
e
Incisal
hite
w
Incisal
rey
g
Incisal
range
o
Incisal
ellow
y
Incisal
range-
o
p
ink
Chroma
odifier
M
10/A1
1
Chroma
odifier
M
10/A3
2
Brightener
.
The layered structure should be slightly bigger than the final shape.
Apply the IPS Empress Esthetic
eneer Incisal materials
V
Firing parameters for the 1stand 2ndIncisal firing (note the temperature control)
IPS Empress Esthetic Veneer B S tÚ T H V
Incisal
°C 4' 60°C 830°C 2' 450°C 829°C
1stand 2ndIncisal fi
B = Stand-by temperature °C / °F
Closing time/minutes
S =
t
Ú = Temperature increase rate °C/min. / °F/min.
ring
403
F
°
757
T = Firing temperature °C / °F
H = Holding time / min.
4'
108°F 1526°F 2' 842°F 1525°F
1
= Vacuum-on temperature °C / °F
V
2
acuum-off temperature
V
V
=
40
°C / °F
After incisal firing.
1
2
V
Page 41

Finishing and preparing for Stain and Characterization firing
Before the stain and characterization firing, the restoration has to be finished as follows::
– Finish the restoration using diamonds and give it a true-to-nature shape and surface structure, such as growth lines and
convex/concave areas.
– Areas that should exhibit a higher gloss after glaze firing can be smoothed out and prepolished using silicone disks.
– If gold and/or silver dust was used to visualize the surface texture, the restoration has to be thoroughly cleaned with
steam. Make sure to remove all gold or silver dust in order to avoid any discolouration.
The shape of the veneers can be checked with the help of the silicone key and a colour varnish.
Finish the restoration with diamonds and give it a true-to-nature shape and surface structure.
Finished restorations ready for stain and characterization firing.
41
Page 42

Stain and Characterization firing
Once the restoration has been cleaned with steam, the Stain and Characterization firing is conducted. First, apply a thin
coat of IPS Empress Universal Glaze and Stain Liquid to the surface of the restoration to evaluate the shade of the
restoration more clearly. Subsequently, apply the stains.
The following working procedure should be observed:
– Extrude IPS Empress Universal Shade/Stains from the syringe and mix thoroughly.
– Thin the material to the desired consistency using IPS Empress Universal Glaze and Stain Liquid.
– Apply the Shade and Stains.
– Intensify the dentin shade in the cervical and central crown third using the respective Shade material.
– More intensive shades are achieved by repeated staining and firing, rather than by applying thicker layers.
– Apply individualized effects and characterizations using IPS Empress Universal Stains materials.
– After staining, the stain and characterization firing is conducted in a compatible ceramic furnace (e.g. Programat P500).
Apply IPS Empress Universal Shade and Stains
Firing parameters for the Stain and Characterization firing (note the temperature control)
and komplettieren und analog den Brennparametern brennen.
IPS Empress Universal Shade/Stains B S tÚ T H V
Zahnform mit dem 2.
Stain and Characterization firing 403°C 6' 100°C 790°C 1–2' 450°C 789°C
B = Stand-by temperature °C / °F
S = Closing time/minutes
t
Ú = Temperature increase rate °C/min. / °F/min.
Br
757°F 6' 180°F 1454°F 1–2' 842°F 1453°F
1
T = Firing temperature °C / °F
H = Holding time / min.
= Vacuum-on temperature °C / °F
V
2
= Vacuum-off temperature °C / °F
V
1
2
V
42
Page 43

Glaze firing
– Extrude IPS Empress Universal Glaze from the syringe and thin the material to the desired consistency using IPS Empress
Universal Glaze and Stain Liquid.
– Apply the glazing material on the entire outer surfaces of the restoration.
– The glazing material must not come into contact with the inner aspects of the restoration.
– Too thin glazing material layers result in an unsatisfactory gloss.
– Avoid pooling and too thick glazing material layers.
– Place the restorations on the metal pins using a small amount of IPS Object Fix and position them on the honey-comb
firing tray .
As an alternative, the restorations can be supported with a firing pillow. Due to their lower position in the firing
–
hamber, the restorations are exposed to less heat. Therefore, in order to achieve the desired gloss, the holding time
c
must be extended to up to 2 minutes.
– After staining, the glaze firing is conducted in a compatible ceramic furnace (e.g. Programat P500).
Apply IPS Empress Universal Glaze
Firing parameters for Glaze firing (note the temperature control)
IPS Empress Universal Glaze B S tÚ T H V1 V2
Glaze fi
ring 403°C 6' 100°C 790°C 1–2' 450°C 789°C
B = Stand-by temperature °C / °F
S = Closing time/minutes
emperature increase rate
T
Ú =
t
°C/min. / °F/min.
Zahnform mit dem 2. Brand komplettieren und analog den Brennparametern brennen.
757°F 6' 180°F 1454°F 1–2' 842°F 1453°F
T = Firing temperature °C / °F
H = Holding time / min.
1
V
= Vacuum-on temperature °C / °F
2
= Vacuum-off temperature °C / °F
V
Esthetic par excellence ...
eneers on the model
Completed IPS Empress Esthetic
V
43
Page 44

Optional
Subsequent adjustments
After completion, additional adjustment (e.g. contact points) may become necessary. For that purpose,
IPS Empress Add-On 770 °C/1418 °F is available.
Processing:
– Before the adjustment, the restoration must be free from dirt and grease. For that purpose, blast the areas to be
adjusted with Al2O3(Type 100) at max. 0.5 bar pressure and thoroughly clean the restoration using the steam jet.
– Mix IPS Empress Add-On 770 °C / 1418 °F with IPS Empress Esthetic Veneer Build-Up Liquid to a workable consistency.
Make sure that the add-on material and liquid are evenly mixed so that an optimum firing result can be achieved.
– Apply the mixed add-on material on the cleaned, desired areas using a brush and slightly blot them with an absorbent
cloth.
– Position the adjusted restoration on the firing tray and fire in the ceramic furnace.
– After firing, manually polish the supplemented areas to a high gloss.
Adjust the proximal contact points
Firing parameters for the Corrective firing
IPS Empress Esthetic with B S tÚ T H V1 V2
IPS Empress Add-On 770°C/1418°F
Corrective firing 403°C 4' 60°C 770°C 2' 450°C 769°C
B = Stand-by temperature °C / °F
Closing time/minutes
S =
Ú = Temperature increase rate °C/min. / °F/min.
t
757°F 4' 108°F 1418°F 2' 842°F 1417°F
T = Firing temperature °C / °F
H = Holding time / min.
1
V
= Vacuum-on temperature °C / °F
2
Vacuum-off temperature °C / °F
=
V
44
Page 45

Empress Esthetic –
IPS
General Information
Preparing for cementation
Conditioning of the ceramic surface in preparation for cementation is decisive for generating a sound bond between the
luting material and the all-ceramic restoration. The following working procedure should be observed:
– Leucite-reinforced glass-ceramic materials are generally etched with IPS Ceramic Etching Gel and subsequently silanated
using Monobond-S.
IPS Empress Esthetic
Indication Veneers, inlays, onlays, partial crowns, anterior and posterior crowns
Cementation method Adhesive cementation
Etching of the restoration 60 seconds, using IPS Ceramic Etching Gel
Conditioning / Silanating
of the restoration
Cementation system
Conventional cementation and blasting of fi
nished IPS Empr
Monobond-S
ariolink II or V
V
ariolink V
Multilink Automix
ess Esthetic restorations is contraindicated!
eneer
45
Page 46

Press parameters
Notes on pressing IPS Empress Esthetic
Make sure to preheat AlOx plungers.
–
IPS Empress Esthetic ingots have to be preheated.
–
– Place the ingots and AlOx plungers in the investment ring and position it quickly (in less than 1 min.) in the furnace.
– Do not use an IPS e.max AlOx Plunger Separator. The press temperature of the IPS Empress Esthetic ingots of 1075 °C/
1967 °F is too high for the separator to be effective.
– The press parameters specified in these Instructions for Use apply to the Ivoclar Vivadent furnaces EP 500, EP 600 and
EP 600 Combi (tolerance range ± 10 °C).
EP 500
Small and large investment ring
EP 600/EP 600 Combi
Small and large investment ring
B
700°C
1292°F
B
700°C
1292°F
t
Ú
60°C
108°F
t
Ú
60°C
108°F
T
1075°C
1967°F
T
1075°C
1967°F
H
20’
H
20’
V
1
500°C
932°F
V
1
500°C
932°F
V
2
1075°C
1967°F
V
2
1075°C
1967°F
Pressure
5 bar
A
250 µm
Firing parameters
Notes on firing IPS Empress Esthetic
– Always use the honey-comb fi
– Place the restorations on the metal pins using a small amount of IPS Object Fix and position them on the honey-comb
firing tray .
– As an alternative, the restorations can be supported with a firing pillow. Due to their lower position in the firing
chamber, the restorations are exposed to less heat. Therefore, in order to achieve the desired gloss, the holding time
must be extended to up to 2 minutes.
– The firing temperatures must be observed at all times. Increasing the firing temperature will result in severe vitrification
between the framework and the veneering ceramic, which may lead to crack formation later on.
– Reducing the firing temperature will result in an underfired ceramic, which is very brittle and thus susceptible to
delamination.
– The parameters specified in these Instructions for Use are coordinated with the Ivoclar Vivadent ceramic furnaces
(tolerance range ± 10 °C).
ring tray to fire the restoration.
esent standar
epr
s r
ameter
ring par
These fi
–
temperatures indicated also apply to furnaces of older generations, e.g. P20, P90, P95, P80, P100, P200. If one of
the temper
,
these furnaces is used,
heating muffle
– If a non-Ivoclar Vivadent furnace is used, temperature corrections may be necessary.
Regional differ
–
may r
.
ender adjustments of the fi
however
ences in the power supply or the oper
ring and pr
d values applicable to the cer
atures may deviate by ± 10 °C/18 °F, depending on the age and type of the
ation of several electronic devices by means of the same circuit
es necessary
ess temper
atur
amic furnaces from Ivoclar Vivadent.The
.
46
Page 47

IPS Empress Esthetic with IPS Empress Universal – stained
PS Empress Esthetic with IPS Empress UniversalB St
I
-in-1 Technique
2
Ú T
H V
1 V2
Stain and Glaze firing 403°C 6' 100°C 790°C 1–2' 450°C 789°C
57°F 6' 180°F 1454°F 1–2' 842°F 1453°F
7
orrective firing 403°C 4' 60°C 770°C 2' 450°C 769°C
C
PS Empress Add-On 770°C/1418°F 757°F 4' 108°F 1418°F 2' 842°F 1417°F
I
IPS Empress Esthetic with IPS Empress Universal
B S tÚ T H V
1
Stain and Characterization firing 403°C 6' 100°C 790°C 1–2' 450°C 789°C
57°F 6' 180°F 1454°F 1–2' 842°F 1453°F
7
laze firing 403°C 6' 100°C 790°C 1–2' 450°C 789°C
G
757°F 6' 180°F 1454°F 1–2' 842°F 1453°F
Corrective firing 403°C 4' 60°C 770°C 2' 450°C 769°C
PS Empress Add-On 770°C/1418°F 757°F 4' 108°F 1418°F 2' 842°F 1417°F
I
IPS Empress Esthetic with IPS Empress Esthetic Veneer – veneered
IPS Empress Esthetic with B S tÚ T H V1 V2
IPS Empress Esthetic Veneer
Cut-back and veneered
2
V
Wash firing 403°C 4' 60°C 840°C 2' 450°C 839°C
757°F 4' 108°F 1544°F 2' 842°F 1543°F
st
Incisal firing 403°C 4' 60°C 830°C 2' 450°C 829°C
1
757°F 4' 108°F 1526°F 2' 842°F 1525°F
nd
2
Incisal firing 403°C 4' 60°C 830°C 2' 450°C 829°C
757°F 4' 108°F 1526°F 2' 842°F 1525°F
Stain and Characterization firing 403°C 6' 100°C 790°C 1' 450°C 789°C
757°F 6' 180°F 1454°F 1' 842°F 1453°F
Glaze firing 403°C 6' 100°C 790°C 1–2' 450°C 789°C
757°F 6' 180°F 1454°F 1–2' 842°F 1453°F
Corrective firing 403°C 4' 60°C 770°C 2' 450°C 769°C
IPS Empress Add-On 770°C/1418°F 757°F 4' 108°F 1418°F 2' 842°F 1417°F
F
°
C /
B = Stand-by temperature
S = Closing time/minutes
Ú = Temperature increase rate °C/min. / °F/min.
t
°
iring temperature
T = F
H = Holding time / min.
F
°
C /
°
1
acuum-on temperature
V
V
=
2
= Vacuum-off temperature °C / °F
V
°F
C /
°
47
Page 48

Empress®Esthetic – Combination Tables
IPS
D4
ND 3
E TC3
I2
D4
D3
D2
C4
C3
C2
C1
B4
B3
B2
ND 2
E TC2
D2/D3
ND 7
E TC1
ND 7
E TC4
ND 7
E TC4
ND 7
E TC4
ND 2
E TC1
ND 5
E TC3
neutral
ND 5
E TC3
low value, high value
MM l-s, MM y-o, MM r-o
ND 2
E TC1
HT, MT, LT
T neutral, T blue
Brightener
110/A1, 210/A3
B2/B3/B4 C1/C2 C3/C4
A-O
B1
A4
A3.5
A3
A2
A1
ND 2
E TC1
ND 8
E TC2
ND 4
E TC2
ND 3
E TC2
ND 2
E TC1
ND 2
E TC1
eneer
eneer
ess Esthetic V
ess Esthetic V
copper, orange, sky blue, basic yellow, basic red
I white, I grey, I orange, I edge, I yellow, I orange-pink
ess Esthetic Veneer
ess Esthetic Veneer
ess Esthetic Veneer
ess Esthetic Veneer
ess Esthetic Veneer
B1
A4
A2/A3/A3.5
A1
ey, vanilla, crackliner, olive, yellow, black, maroon, basic red, basic blue, basic yellow
I1 I1 I1 I1 I2 I2 I2 I2 I2 I2
I2
, khaki, orange, gr
white, mahogany
I1 I1 I1 I2
Empr
Empr
Empr
Empr
Empr
Empr
Empress Esthetic Veneer
Empress Esthetic Veneer
Empress Universal
Empr
A–D
Combination Tables
The listed combinations are standard combinations. The shades of the IPS Empress Esthetic Translucent-Colour ingots are coordinated with the Chromascop shades. They can be combined with the
– Staining and intensifying of the dentin shade using IPS Empress Universal Shade and Shade Incisal
A–D shades:
– Selection of the IPS Empress Esthetic ingot that is coordinated with the selected tooth shade
IPS Empress Esthetic Ingot
Wash Paste
IPS
Wash Paste Value
IPS
Wash Paste Mamelon
IPS
Wash Paste Modifier
IPS
Incisal Opal
IPS
Transpa
IPS
Incisal
IPS
Incisal Chroma Modifier
IPS
IPS Natural Die Material
IPS
48
Brightener
Empress Universal
IPS
Shade
IPS
Shade Incisal
IPS Empress Universal
770°C/1418°F
Stains
IPS Empress Add-On
Page 49

I2
540
530
520
510
ND 8
ND 8
ND 8
ND 8
540
I2
530
I2
520
I2
510
440
430
420
410
340
330
320
310
240
230
220
ND 7
ND 7
ND 7
ND 7
ND 5
ND 5
neutral
ND 5
low value, high value
ND 5
ND 4
ND 4
ND 3
MM l-s, MM y-o, MM r-o
HT, MT, LT
T neutral, T blue
copper, orange, sky blue, basic yellow, basic red
110/A1, 210/A3
I white, I grey, I orange, I edge, I yellow, I orange-pink
410/420 430/440
I2 I2 I2 I2 I2
340
I2
330
A-O
Brightener
I1
320
I1
310
I2
240
220/230
210
140
130
120
110
Chromascop
ND 3
ND 2
I1 I1 I1 I1 I1
ND 2
E TC1 E TC2 E TC3 E TC4 E TC5
ND 2
ND 2
ess Esthetic Ingot
IPS Empr
Wash Paste
IPS Empress Esthetic Veneer
Wash Paste Value
IPS Empress Esthetic Veneer
Wash Paste Mamelon
IPS Empress Esthetic Veneer
Wash Paste Modifier
IPS Empress Esthetic Veneer
Incisal Opal
IPS Empress Esthetic Veneer
Transpa
IPS Empress Esthetic Veneer
Incisal
IPS Empress Esthetic Veneer
IPS Natural Die Material
IPS Empress Esthetic Veneer
Incisal Chroma Modifier
49
130
110/120 140/210
IPS Empress Esthetic Veneer
Brightener
IPS Empress Universal
Shade
white, mahogany, khaki, orange, grey, vanilla, crackliner, olive, yellow, black, maroon, basic red, basic blue, basic yellow
I1 I1
F
°
ess Add-On
C/1418
°
Empr
IPS Empress Universal
Shade Incisal
IPS Empress Universal
770
Stains
IPS
Page 50

Empress®Esthetic
IPS
Cut-back
Fired restoration characterized with Wash Paste
Completed, fired restoration
50
Page 51

Dental lab work by Jürgen Seger ICDE/Schaan
51
Page 52

Ivoclar Vivadent – worldwide
voclar Vivadent AG
I
endererstrasse 2
B
L-9494 Schaan
F
Liechtenstein
el. +423 235 35 35
T
ax +423 235 33 60
F
www.ivoclarvivadent.com
voclar Vivadent Pty. Ltd.
I
1 – 5 Overseas Drive
.O. Box 367
P
Noble Park,Vic. 3174
ustralia
A
el. +61 3 979 595 99
T
Fax +61 3 979 596 45
ww.ivoclarvivadent.com.au
w
Ivoclar Vivadent GmbH
remschlstr. 16
B
Postfach 223
-6706 Bürs
A
ustria
A
Tel. +43 5552 624 49
ax +43 5552 675 15
F
ww.ivoclarvivadent.com
w
voclar Vivadent Ltda.
I
Rua Geraldo Flausino Gomes,
8 – 6.º andar Cjs. 61/62
7
airro: Brooklin Novo
B
4575-060 São Paulo – SP
CEP: 0
razil
B
Tel. +5511 5102 2020
Fax. +5511 5102 4704
www.ivoclarvivadent.com
Ivoclar Vivadent Inc.
2785 Skymark Avenue, Unit 1
Mississauga
Ontario L4W 4Y3
Canada
Tel. +1 905 238 57 00
Fax +1 905 238 5711
www.ivoclarvivadent.us.com
voclar Vivadent
I
arketing Ltd.
M
m 603 Kuen Yang
R
International Business Plaza
o. 798 Zhao Jia Bang Road
N
hanghai 200030
S
China
el. +86 21 5456 0776
T
ax. +86 21 6445 1561
F
www.ivoclarvivadent.com
Ivoclar Vivadent
arketing Ltd.
M
alle 134 No. 13-83, Of. 520
C
Bogotá
olombia
C
el. +57 1 627 33 99
T
Fax +57 1 633 16 63
ww.ivoclarvivadent.com
w
voclar Vivadent SAS
I
.P. 118
B
F-74410 Saint-Jorioz
rance
F
el. +33 450 88 64 00
T
ax +33 450 68 91 52
F
ww.ivoclarvivadent.fr
w
voclar Vivadent GmbH
I
dolf-Schneider-Str. 2
r.A
D
D-73479 Ellwa
ermany
G
ngen, Jagst
Tel. +49 (0) 79 61 / 8 89-0
Fax +49 (0) 79 61 / 63 26
www.ivoclarvivadent.de
Ivoclar Vivadent
Marketing Ltd
114, Janki Centre
Shah Industrial Estate
Veera Desai Road,
Andheri (West)
Mumbai 400 053
India
Tel. +91 (22) 673 0302
Fax. +91 (22) 673 0301
www.ivoclarvivadent.firm.in
voclar Vivadent s.r.l.
I
ia dell’Industria 16
V
-39025 Naturno (BZ)
I
Italy
el. +39 0473 67 01 11
T
ax +39 0473 66 77 80
F
www.ivoclarvivadent.it
voclar Vivadent S.A. de C.V.
I
Av. Mazatlán No. 61, Piso 2
ol. Condesa
C
06170 México, D.F.
exico
M
el. +52 (55) 5062-1000
T
Fax +52 (55) 5062-1029
ww.ivoclarvivadent.com.mx
w
Ivoclar Vivadent Ltd
2 Omega St, Albany
1
PO Box 5243 Wellesley St
uckland, New Zealand
A
el. +64 9 914 9999
T
Fax +64 9 630 61 48
ww.ivoclarvivadent.co.nz
w
Vivadent
Ivoclar
olska Sp. z.o.o.
P
ul. Jana Pawla II 78
L-01-501 Warszawa
P
Poland
l. +48 22 635 54 96
Te
ax +48 22 635 54 69
F
www.ivoclarvivadent.pl
Ivoclar Vivadent
Marketing Ltd.
180 Paya Lebar Road
# 07-03 Yi Guang Building
Singapore 409032
Tel. 65-68469183
Fax 65-68469192
voclar Vivadent S.A.
I
/Emilio Muñoz, 15
c
squina c/Albarracín
E
E-28037 Madrid
pain
S
el. + 34 91 375 78 20
T
Fax + 34 91 375 78 38
ww.ivoclarvivadent.com
w
Ivoclar Vivadent AB
alvägen 14
D
S-169 56 Solna
weden
S
el. +46 8 514 93 943
T
Fax +46 8 514 93 940
ww.ivoclarvivadent.se
w
Ivoclar Vivadent UK Limited
round Floor Compass Building
G
Feldspar Close
arrens Business Park
W
nderby
E
Leicester LE19 4SE
nited Kingdom
U
el. +44 116 284 78 80
T
ax +44 116 284 78 81
F
ww.ivoclarvivadent.co.uk
w
voclar Vivadent, Inc.
I
75 Pineview Drive
1
.Y. 14228
Amherst, N
SA
U
Tel. +1 800 533 6825
Fax +1 716 691 2285
www.ivoclarvivadent.us.com
ed: 11/2006
Date information pr
Caution: US Federal Law r
These materials have been developed solely for use in dentistry. Processing should be carried out strictly
ding to the Instructions for Use. Liability cannot be accepted for damages r
accor
observe the Instructions or the stipulated ar
for its suitability and use for any purpose not explicitly stated in the Instructions. Descriptions and data
constitute no warranty of attributes.
Printed in Liechtenstein
ivadent AG, Schaan / Liechtenstein
© Ivoclar V
604081/0107/e/BVD
epar
estricts the sale of this device by or on the or
ea of application. The user is r
der of a licensed dentist.
om failur
esulting fr
esponsible for testing the material
e to
 Loading...