

Page 1

3 Advanced printing tasks 50
Advanced printing tasks
3
Overview
Th i s s e c t i o n pre s e n t s t h e s e advanced printing tasks:
z Using features in the printer driver
z Different first page
z Blank back page
z Customizing optional Tray 1 operation
z Printing by type and size of paper
Overview
z Job retention features
Printing a private job
Storing a print job
QuickCopying a job
Proofing and holding a job
z Printing with the optional HP Fast InfraRed (FIR) Receiver
z Making booklets
Page 2

3 Advanced printing tasks 51
Using features in the printer driver
When you print from a software application, many of the printer features are available from the printer driver.
To gain access to Windows printer drivers, see “Access the Windows printer driver” on page 23.
Note Settings in the printer driver and software application generally override control panel settings.
(Software application settings generally override printer dr iver settings.)
Printer collation
The printer collation feature allows multiple original prints (mopying) that provide you the following
advantages:
z reduced network traffic
z faster return to application
z all original documents
Saving printer setup information
Printer drivers allow you to save the printer settings you use most often as the default settings. For example,
the driver might be set to print on letter-size paper, portrait orientation, with automatic tray selection (from the
first available tray).
Windows PCL 6 and PCL 5e printer drivers allow you to save printer settings for multiple kinds of print jobs.
For example, you might want to create a quick set for envelopes, or for printing the first page of a document on
letterhead.
New printer driver features
Look for Quick Sets, Scale to Fit (any page size to any page size), and Booklet Printing options in the Windows
printer driver, or see the printer driver help for more information.
Printing watermarks
A watermark is a notice, such as “Top Secret,” printed in the background of each page in a document. Check
the driver for available options, or see the printer driver online help for more information.
Using features in the printer driver
Page 3

3 Advanced printing tasks 52
For Macintosh, you can select “Custom” and specify the text you choose, depending on your driver version.
Using features in the printer driver
Page 4
3 Advanced printing tasks 53
Different first page
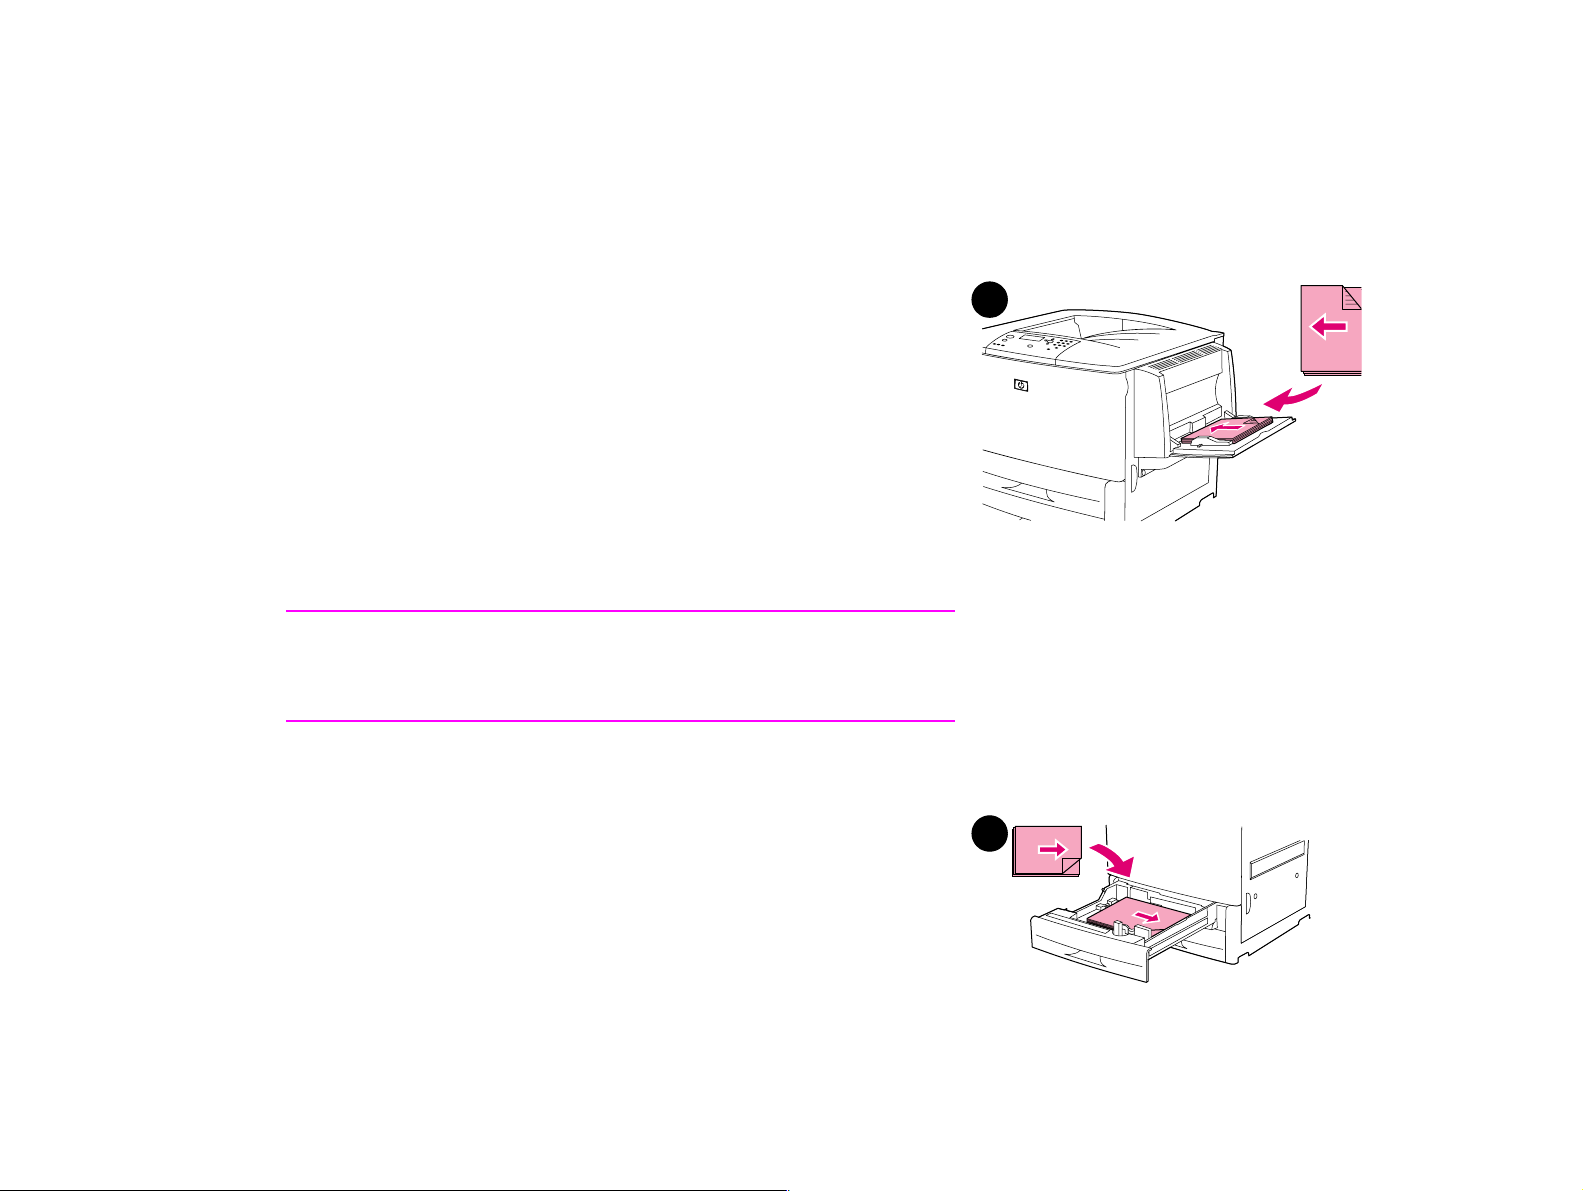
To print a different first page
Follow these instructions for printing a first page that is different from
other pages in the print job.
1 For Windows, select “Use different paper for first page” in your
printer driver. Choose optional Tray 1 (or manual feed) for the
first page and one of the other trays for the remaining pages.
Place the paper for the first page in optional Tray 1. (For manual
feed, place paper in optional Tray 1 after the job is sent to the
printer and the printer requests paper.) For loading optional Tray
1, place the paper with the side to be printed up, the top of the
page facing the rear of the printer.
For Macintosh computers, select “First from” and “Remaining
from” in the print dialog box.
Note
Where and how you make selections depends on your software
application or associated printer driver. (Some options may only be
available through the printer driver.)
1
2 Load the paper for the remaining pages of the document into
Different first page
another tray. You may select the first and remaining pages by
type of paper. For more information, see “Printing by type and
size of paper” on page 57.
2
Page 5
3 Advanced printing tasks 54
Blank back page
This option allows you to add blank pages to the end of a print job.
For Windows, select Use different paper for first page in the Paper tab of your printer driver, and then
choose Back Page. You can then select the paper source you want to use for your back page. To turn the
feature off, select No back page.
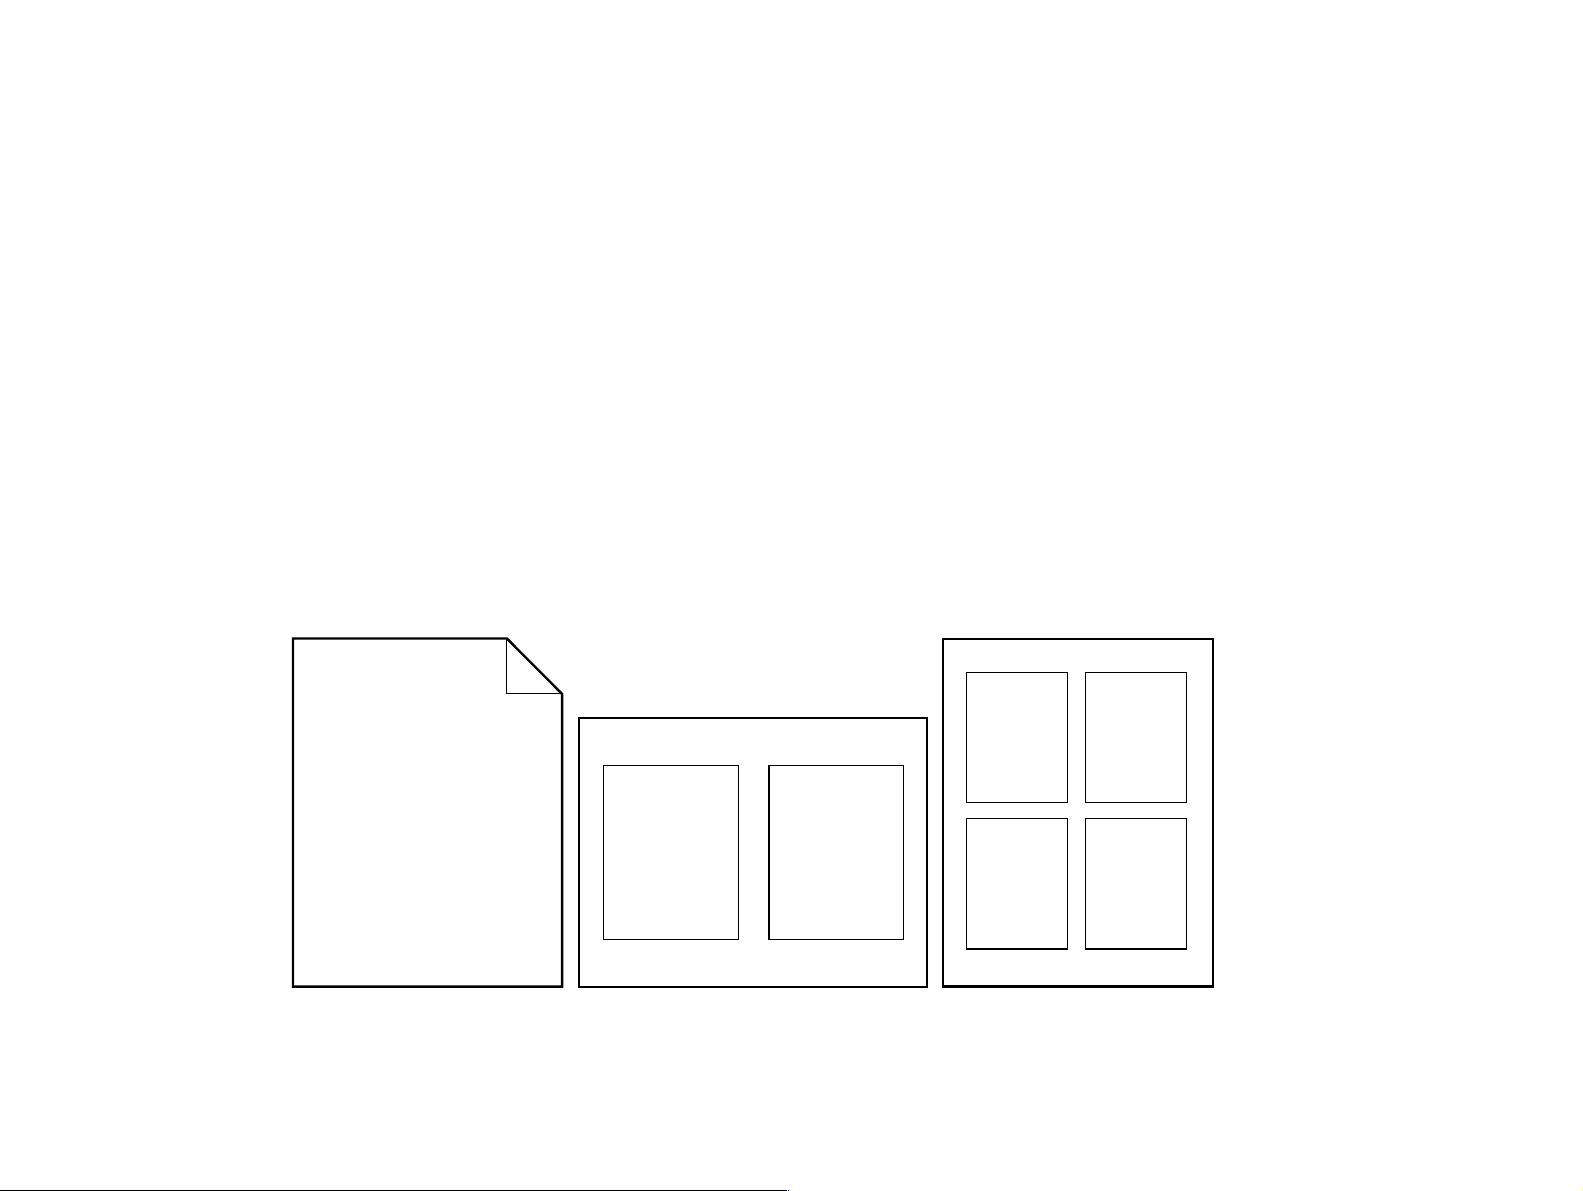
Printing multiple pages on one sheet of paper
You can print more than one page on a single sheet of paper. This feature is available in some printer drivers
and provides a cost-effective way to print draft pages.
To pr int more than one page on a sheet of paper, look for a layout or pages per sheet option in the printer
driver. (This is sometimes called 2-up, 4-up, or n-up printing.)
Printing
left-to-right
Blank back page
Page 6

3 Advanced printing tasks 55
Customizing optional Tray 1 operation
Customize optional Tray 1 to fit your printing needs.
The printer can be set to print from optional Tray 1:
z When the tray is loaded (Tray 1 Size=Unspecified and Tray 1 Type=Unspecified; formerly First mode).
Print speed might be slower than normal.
z Only when the type of paper loaded is specifically requested (Tray 1 Size=any size and Tray 1
Type=anything exce pt Unspecified; former ly Cassette mode).
Printing from optional Tray 1 when the loaded paper is requested
When Tray 1 Size=any size and Tray 1 Type=anything except Unspecified (formerly Cassette mode), the
printer treats optional Tray 1 like the internal trays. Instead of looking for paper in optional Tray 1 first, the
printer pulls paper starting either from the bottom tray upward or starting with the tray that matches type or
size settings selected in the program from which you are printing.
From the program or the Print dialog box, set the type and size for a tray, if possible. If not, set the type and
size from the printer control panel. (See “Printing by type and size of paper” on page 57.)
When Tray 1 Size=any size and Tray 1 Type=anything except Unspecified is set at the printer control panel,
an option appears in the Paper Handling menu to configure size as well as type settings for optional Tray 1.
Customizing optional Tray 1 operation
Page 7

3 Advanced printing tasks 56
Manually feeding paper from optional Tray 1
The manual feed feature is another way of printing special paper from optional Tray 1, such as envelopes or
letterhead. If manual feed is selected, the printer prints only from optional Tray 1.
When paper is loaded in optional Tray 1, set Tr a y 1 mode in the Paper-Handling menu to First mode.
Customizing optional Tray 1 operation
Page 8

3 Advanced printing tasks 57
Printing by type and size of paper
You can configure the pr inter to select paper by type (such as plain or letterhead) and size (such as letter or
A4), as opposed to source (a paper tray).
Benefits of printing by type and size of paper
If you frequently use several kinds of paper, once trays are set correctly, you do not have to check which paper
is loaded in each tray before you print. This is especially helpful when the printer is shared and more than one
person loads or removes paper.
Printing by type and size of paper is a way to be sure that print jobs always print on the desired paper.
To set the type for the paper or media you loaded when you are unsure which type (such as bond or recycled)
to choose, check the label on the package of paper. For supported types of paper, see the introduce guide on
the product CD, or go to www.hp.com/cposupport/
Note The type and size settings can also be configured from the HP Web JetAdmin software for networked
printers. See the printer driver online help.
.
Printing by type and size of paper
Page 9

3 Advanced printing tasks 58
To print by type and size of paper
Note Settings in the printer driver and software application override control panel settings. (Software
application settings generally override printer driver settings.)
1 Load and adjust the trays. (See the introduce guide on the product CD, or at www.hp.com/cposupport/
.)
2 At the printer control panel, press , use or to scroll to PAPER HANDLING, and press .
3 Do one of the following:
To allow the printer to automatically pull the type and size of paper loaded in optional Tray 1: Set Tray
1 Size=Unspecified and Tray 1 Type=Unspecified ( First mode).
To pr int by type and size from optional Tray 1, but to have the printer prompt you to load paper before
printing: Set Tray 1 Size to the size loaded and set Tray 1 Type to anything except Unspecified
(Cassette mode).
To pr int by type and size from Tray 2, Tray 3, or optional Tray 4 when the tray is loaded with standard
size paper: Just set the type. The size is automatically detected.
To pr int by type and size from Tray 2, Tray 3, or optional Tray 4 when the tray is loaded with a custom
size paper: set the size and type. For the size, select Custom, and then set the values using the
measurements on the guides in the trays.
4 From the program or printer driver, select the type and size of paper.
To pr int by type and size, it might be necessary to unload or close Tray 1, or you may have to set optional Tray
1 to Cassette mode. For more information, see “Paper handling menu” on page 176.
Printing by type and size of paper
Page 10

3 Advanced printing tasks 59
Job retention features
The four special job features available for this printer are: Private jobs, Stored jobs, QuickCopy jobs, and Proof
and hold jobs.
Follow the instructions below to gain access to the job retention features at the computer. Then, see the
specific section for the type of job you want to create.
CAUTION If you turn the printer off, all QuickCopy, Proof and hold, and Private jobs are deleted.
To gain access to the job storage features
For Windows
1 On the File menu, click Print.
2 Click Properties and click the Destination tab.
3 Under Destination Features, click Options to display Job Storage Options.
For Macintosh
In newer drivers: Select Job Retention from the pull-down menu in the print dialog box. In older drivers, select
Printer Specific Options.
Job retention features
Page 11

3 Advanced printing tasks 60
Printing a private job
The private printing feature lets a user specify that a job is not printed until that user releases it using a 4-digit
personal identification number (PIN) through the printer control panel. The user specifies the PIN in the driver,
and the PIN is sent to the printer as par t of the print job.
Note The private jobs feature uses available printer RAM memory if the printer does not have a hard disk
installed. For moderate to heavy use of this feature, HP recommends installing an optional hard disk.
To create private jobs
To specify that a job is private from the driver, select the Private Job option, enter a User Name and Job
Name, and type a 4-digit PIN. The job will not print until you enter the PIN at the control panel.
Releasing private jobs
The user can print a private job from the control panel.
To release private jobs
1 Press .
2 Use or to scroll to Retrieve Job and press .
3 Scroll to USER NAME and press .
4 Use or to scroll to your job and press .
5 Use or to scroll to Print and press . (The Print icon should have next to it.)
6 Use the numeric keypad to enter the PIN, and press .
Printing a private job
Page 12

3 Advanced printing tasks 61
Deleting a private job
A private job is automatically deleted from the printer hard disk accessory after the user releases it for
printing. If you want to delete the job without printing it, use this procedure.
To delete private jobs
1 Press .
2 Use or to scroll to Retrieve Job and press .
3 Scroll to USER NAME and press .
4 Use or to scroll to your job and press .
5 Use or to scroll to Delete and press . (Delete should have next to it.)
6 Use the numeric keypad to enter the PIN, and press .
Printing a private job
Page 13

3 Advanced printing tasks 62
Storing a print job
The user can download a print job to the printer hard disk accessory without printing it. The user can then
print the job at any time through the printer control panel. For example, a user may want to download a
personnel form, calendar, time sheet, or accounting form that other users can access and print.
To store a print job on the hard disk accessor y, select the Stored Job option in the driver when printing from
the printer.
Note The stored job feature uses available RAM memory on the printer if the printer does not have a hard
disk installed. For moderate to heavy use of this feature, HP recommends installing an optional hard
disk.
To create stored jobs
In the printer driver, select the Stored Job option and type a user name and job name. The job does not print
until someone requests it at the printer. See “Printing a stored job” on page 63.
Storing a print job
Page 14

3 Advanced printing tasks 63
Printing a stored job
The user can print a job stored on the printer hard disk accessory from the control panel.
To print a stored job
1 Press .
2 Use or to scroll to Retrieve Job and press .
3 Scroll to USER NAME and press .
4 Use or to scroll to your job and press .
5 To print the default number of copies, press . When is selected, the screen changes to Copies=n. To
change the number, use the numeric keypad or and to select a new number, and press .
If Print has next to it, the job is a private job and requires a PIN. See “Printing a private job” on page 60.
Storing a print job
Page 15

3 Advanced printing tasks 64
Deleting a stored job
Jobs stored on the printer hard disk accessory can be deleted from the control panel.
To delete a stored job
1 Press .
2 Use or to scroll to Retrieve Job and press .
3 Scroll to USER NAME and press .
4 Use or to scroll to your job and press .
5 Use or to scroll to Delete and press .
If Delete has next to it, the job requires a PIN to delete. See “Printing a private job” on page 60.
Storing a print job
Page 16

3 Advanced printing tasks 65
QuickCopying a job
The QuickCopy feature prints the requested number of copies of a job and stores a copy on the printer hard
disk accessory. Additional copies of the job can be printed later. This feature can be turned off from the driver.
The default number of different QuickCopy jobs that can be stored on the printer is 32. From the control panel,
you can set a different default number. See “JOB STORAGE LIMIT=32” on page 186.
To create QuickCopy jobs
CAUTION If the printer needs additional space to store newer QuickCopy jobs, the printer will delete other stored
QuickCopy jobs, star ting with the oldest job. To permanently store the job and prevent the printer from
deleting it when space is needed, select the Stored Job option instead of the QuickCopy option.
In the printer driver, select the QuickCopy option and type a user name and a job name.
When you send the job to print, the printer prints the number of copies you set in the printer driver. To print
more quick copies at the printer, see “Pr inting additional copies of QuickCopy jobs” on page 66.
QuickCopying a job
Page 17

3 Advanced printing tasks 66
Printing additional copies of QuickCopy jobs
This section describes how to print additional copies of a job stored on the printer hard disk accessory from
the control panel.
To print more copies of a QuickCopy job
1 Press .
2 Use or to scroll to Retrieve Job and press .
3 Scroll to USER NAME and press .
4 Use or to scroll to your job and press .
5 To print the default number of copies, go to the next step. Otherwise, to check or change the number of
copies to print:
a Use or to scroll to Copies and press . The number of copies to be printed appears at the top
of the window.
6 Use or to scroll to Print and press . The job pr ints.
If Print has next to it, the job requires a PIN to print. See “Printing a private job” on page 60.
QuickCopying a job
b To change the number, use the numeric keypad or and to select a new number and press .
Page 18

3 Advanced printing tasks 67
Deleting a QuickCopy job
Delete a QuickCopy job at the printer when you no longer need it. If the printer needs additional space to store
new QuickCopy jobs, the printer will automatically delete other stored QuickCopy jobs, starting with the oldest
job.
Note Stored QuickCopy jobs can be deleted from the control panel or from HP Web JetAdmin.
To delete a QuickCopy job
1 Press .
2 Use or to scroll to Retrieve Job and press .
3 Scroll to USER NAME and press .
4 Use or to scroll to your job and press .
5 Use or to scroll to Delete and press .
If Delete has next to it, the job requires a PIN to delete. See “Printing a private job” on page 60.
QuickCopying a job
Page 19

3 Advanced printing tasks 68
Proofing and holding a job
The proof and hold feature provides a quick and easy way to print and proof one copy of a job and then to print
the additional copies.
To per m anently store the job and prevent the printer from deleting it when space is needed for something else,
select the Stored Job option in the driver.
The proof and hold feature uses available RAM memory on the printer if the printer does not have a hard disk
installed. For moderate to heavy use of this feature, HP recommends installing an optional hard disk.
To create a proof and hold job
CAUTION If the printer needs additional space to store newer proof and hold jobs, the printer will delete other
stored proof and hold jobs, starting with the oldest job. To permanently store the job and prevent the
printer from deleting it when space is needed, select the Stored Job option in the printer driver instead
of the Proof and Hold option.
In the printer driver, select the Proof and Hold option and enter a user name and job name.
The printer prints one copy of the job for you to proof. Then, see “Printing the remaining copies of a held job”
on page 69.
Proofing and holding a job
Page 20

3 Advanced printing tasks 69
Printing the remaining copies of a held job
The user can print the remaining copies of a job held on the printer hard disk accessory from the control
panel.
To print a proof and hold job
1 Press .
2 Use or to scroll to Retrieve Job and press .
3 Scroll to USER NAME and press .
4 Use or to scroll to your job and press .
5 Use or to scroll to Print and press . The job pr ints the remaining copies requested from the
computer.
If Print has next to it, the job requires a PIN to print. See “Printing a private job” on page 60.
Proofing and holding a job
Page 21

3 Advanced printing tasks 70
Deleting a held job
When a user sends a proof and hold job, the printer automatically deletes that user’s previous proof and hold
job. If there is not a proof and hold job already for that job name and the printer needs additional space, the
printer may delete other proof and hold jobs, starting with the oldest one.
To delete a proof and hold job
1 Press .
2 Use or to scroll to Retrieve Job and press .
3 Scroll to USER NAME and press .
4 Use or to scroll to your job and press .
5 Use or to scroll to Delete and press .
If Delete has next to it, the job requires a PIN to delete. See “Printing a private job” on page 60.
Proofing and holding a job
Page 22

3 Advanced printing tasks 71
Printing with the optional HP Fast InfraRed (FIR) Receiver
The optional HP Fast InfraRed (FIR) Receiver enables wireless printing from any IrDA-compliant portable
device (such as a laptop computer) to the HP LaserJet 9000 Series printers.
The printing connection is maintained by positioning the sending FIR port within operating range. Note that
the connection can be blocked by objects such as a hand, paper, direct sunlight, or any bright light shining into
either FIR port.
Note For more information, see the user guide for the HP Fast InfraRed Connect.
Setting up to print with Windows 9X
Before launching the Fast InfraRed driver, complete the following steps:
1 Click Start, click Settings, and then click Printers.
2 Select the HP LaserJet 9000, 9000n, 9000dn, or 9000hns as your default printer.
3 While in the same Printers folder, choose Properties, then choose Details, and make sure that Virtual
Infrared LPT Port is selected.
4 Select the file to print.
Printing with the optional HP Fast InfraRed (FIR) Receiver
Page 23

3 Advanced printing tasks 72
Printing a job using FIR
Depending on the size of the job, printing with the HP Fast InfraRed Receiver may be slower than printing with
a cable connected directly to the parallel port.
To print a job
1 Align your laptop computer (or other portable device
equipped with an IrDA-compliant FIR window) within one
meter (three feet) maximum of the HP FIR Connect. The
FIR window must be at an angle of +/- 15 degrees
relative to the printer to ensure an effective connection
for printing.
Note
To prevent a broken connection while printing, make sure the
sending port remains within operating range and that there is
nothing between the ports, such as a hand, paper, or even
direct sunlight, to block transmission.
2 Print the job. The status indicator on the HP Fast InfraRed Receiver lights up, and, after a short delay, the
printer status panel displays PROCESSING JOB.
If the status indicator does not light up, realign the HP Fast InfraRed Receiver with the FIR port on the sending
device, resend the print job, and maintain the alignment of all devices. If you have to move the equipment (for
example, to add paper), make sure that all devices remain within the range of operation to maintain the
connection.
If the connection is interrupted before your print job is complete, the HP Fast InfraRed Receiver status
indicator turns off. You have up to 40 seconds to correct the interruption and continue the job. If the
connection is resumed within this time, the status indicator lights up again.
Printing with the optional HP Fast InfraRed (FIR) Receiver
Page 24

3 Advanced printing tasks 73
Interrupting and resuming printing
The job interrupt and resume feature lets you temporarily stop the current print job in order to print another job
through a FIR connection. When the FIR job is completed, the interrupted job resumes printing.
To interr upt the job at the printer, connect to the FIR por t on the printer and send a job to the printer. The
printer stops printing the current job when it reaches the end of the job it is printing. The printer then prints the
job sent over the FIR connection. When the printer is done printing that job, it resumes printing the original job
where it left off.
Interrupting and resuming printing
Page 25

3 Advanced printing tasks 74
Making booklets
To make booklets easily, you can use the multifunction finisher as your output device.
You can gain access to the booklet-printing feature through some programs, such as desktop publishing
programs. Refer to the user guide that came with your program for information on making booklets.
If you are using a program that does not support booklet making, you can create booklets using your HP
drivers.
Note HP recommends that you use your program to prepare and preview your document for printing, then
use your HP driver to print and saddle stitch your booklet.
There are three main steps to creating a booklet from your driver:
z Preparing your booklet: Arrange the pages on a sheet (booklet imposition) to create a booklet. You can
impose your document from your program or use the booklet-printing feature in your HP driver.
z Adding a cover: Add a cover to your booklet by selecting a different first page using a different paper type.
You can also add a cover of the same paper type as your booklet. Booklet covers must be the same size
as the rest of the sheets. However, the covers may be a different weight from the rest of the booklet.
z Saddle stitching: Paper must be fed into the product short edge first. The multifunction finisher staples the
center of your booklet (saddle stitching). If your booklet is only one sheet of paper, the finisher will fold
the sheet, but not staple it. If the booklet consists of more than one sheet of paper, the finisher will staple
and then fold up to 10 sheets per booklet.
Making booklets
The booklet-printing feature of the multifunction finisher allows you to saddle stitch and fold booklets using the
following paper sizes:
z A3
z A4
z Letter
z Legal
z Ledger
See the multifunction finisher use guide at www.hp.com/lj9000 for detailed information on making booklets.
 Loading...