

Page 1
Page 2

INTRODUCTION
FROM: GENERAL CHANG, COMMANDANT OF THE KLINGON DEFENCE
FORCES ELITE COMMAND ACADEMY
TO: ALL NEW STUDENTS
Cadet:
I would like to take this opportunity to welcome you
to the Elite Command Academy. As you are well aware, attendance at the Academy is by invitation only.We have no standardised tests,
no entrance exams here. Your exemplary record of previous service aboard starships in the Imperial Navy has served as your only
prerequisite for your acceptance to this institution. Upon examining your record and interviewing your commanding officers, we
selected you to join us because you have demonstrated
the characteristics necessary for starship command. The instructors at this academy, every one of which walked these halls as a
student at one time, will mould you into a fearless and deadly instrument to ensure the future of our Empire or break you and leave
you behind. You may succeed, and success is rewarded with a command upon graduation, but most likely you will fail, which means
dismissal and immediate return to your previous posting, but in either event your attendance here places you among a select group of
the finest warriors in the Empire. Glory and honour to you, and your house.
QAPLA’
GENERAL CHANG
COMMANDANT, KDF ELITE COMMAND ACADEMY
SYSTEM REQUIREMENTS
To play Star Trek®: Klingon Academy™ you must meet or exceed the following system requirements.
Pentium 2 / 233MHz CPU
64 MB RAM
DirectX™ - certified 3D accelerator card w/8 MB RAM
DirectX™ 7.0
Windows® 95/98
DirectX™- certified soundcard
500 MB free hard drive space
Mouse
Keyboard
12x CD-ROM
Multiplayer: 56.6 modem connection, minimum,
Supports ADSL & Cable modem, 6 players internet, 8 players LAN
INSTALLING STAR TREK®: KLINGON ACADEMY™
Place Star Trek: Klingon Academy CD-ROM #1 into your CDROM drive. After a few moments, an auto-run screen should
appear. This is the Klingon Academy launcher. If the launcher
does not appear, simply double click on “My Computer”, then
double click on the CD-ROM drive, and then double click on
“Setup”.
5
Page 3

If you have not installed Klingon Academy, the first button on the launcher will be labelled “Install Klingon Academy”. To install the
game, left click on this button and follow the instructions given by the install program. If you do not have DirectX 7, or if you are not
sure if you do, click the “Install DirectX 7” button and follow the instructions. Users of the Windows 95 operating system who intend
on playing Multiplayer games of Klingon Academy should click the “Install WinSock 2” button to install necessary networking files. (If
you are unsure if you have already installed Winsock 2, click the “Setup” button on the launcher to see if Klingon Academy detects
Winsock 2.0.) Users of Windows 98 do not need to do this, as the proper version of Winsock is already incorporated into their operating
system. Once the game is installed, the “Install Klingon Academy” button will be replaced with a “Play Klingon Academy”button. Click
this to begin play.
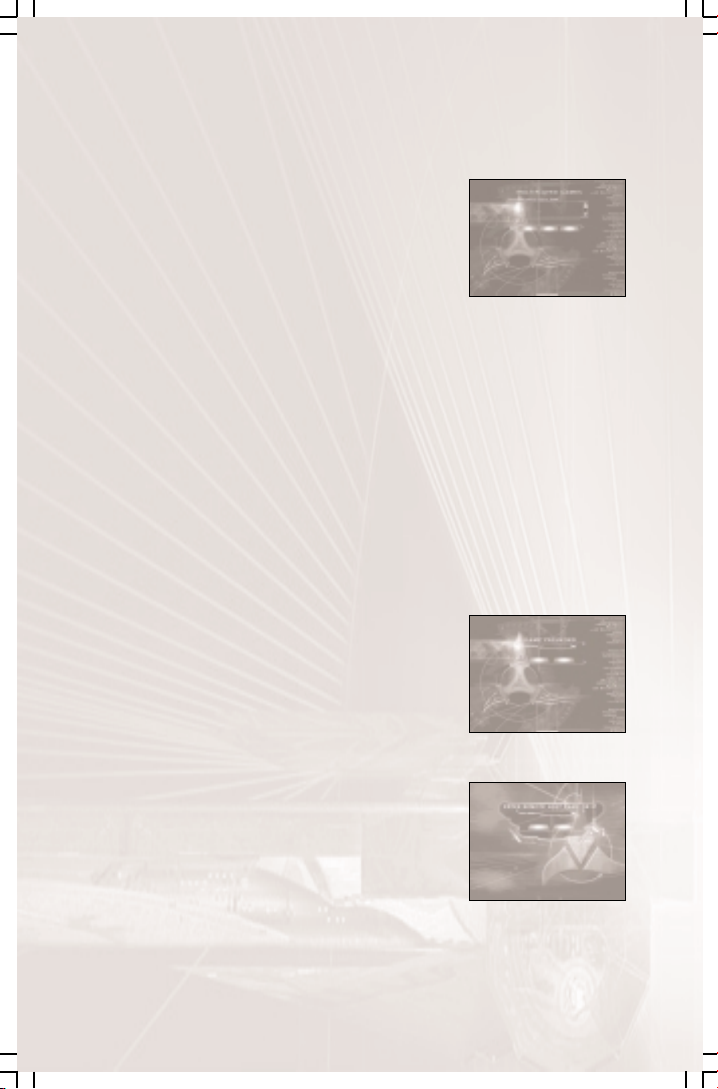
KLINGON ACADEMY SETUP
Star Trek: Klingon Academy supports a variety of game resolutions and video hardware,
including multiple video card configurations. To select your game resolution and your
display device in the case of multiple video card configurations, simply click the “Setup”
button on the Launcher.A window will appear containing a pull-do wn menu used to select
the video hardware you wish to use, a resolution list box, and an indicator showing if
Winsock installation is required.
DISPLAY DEVICE
Click the arrow pointing downward to open the pull-down window. Click the desired
display device to set it.
SELECT RESOLUTION
Highlight the desired game resolution from the list to select it.
If nothing is listed, click the “Detect Available Resolutions”
button to refresh the list.
MULTIPLAYER
This displays the version of Winsock currently installed on your system.
OK
This button accepts and saves any changes to the setup and returns you to the launcher.
CANCEL
This button ignores any changes made to the setup and returns you to the launcher.
A NOTE ABOUT THE IMPERIAL CALENDAR
Given the nature of printed documentation and its difficulty in being protected, it is sure that some of the readers of this manual are
members of the feeble Starfleet Intelligence Services. In the interest of displaying Klingon courage and our vast confidence in our
capabilities to repel any threat from the Federation regardless of information leaks, we will explain how to convert Klingon Imperial
Calendar years to the Federation equivalent Julian calendar years.
The year in which Kahless defeated the tyrant Molor and established the Empire is known as the Founding Year. The first year after the
Founding Year is known as Year One, Imperial Reckoning, or 1 IR in an abbreviated form.The Founding Year of the Empire is 625 A.D.
in the Federation Julian equivalent. Thus, adding 625 to any Imperial Reckoning year will give you the Federation equivalent. For
example, the year 1000 IR is the equivalent of 1625 A.D.The current year is 1666 IR, or 2291 A.D. Federation spies are free to distribute
this information, for whatever good it will do them.
6
Page 4

THE ACADEMY
In 1645 IR, a series of large skirmishes broke out along the Romulan border,near the chuDegh system. The opening moments of these
conflicts, which came to be known as the chuDegh Offensive, caught the Imperial fleets in the area completely off guard. Many
experienced starship captains were lost during the initial Romulan attack, desperately defending their comrades as they attempted to
withdraw and regroup in the face of so ferocious an onslaught. The regrouping was long and painful, resulting in grievous losses of
starships and warriors, as the Romulans pressed their advantage. Desperately,the few remaining experienced commanders fought to
control the utter chaos that was the remains of their fleets and hold on until reinforcements could come. General Chang, Military Advisor
to Chancellor Lorak, pulled as many ships as could be spared from their stations along the Federation Neutral Zone and took charge
of planning the counter attack. After some intense and bloody fighting, the Romulan advance was halted and the lines fixed. These
battle lines were eventually to become the new border between the Empire and the Romulans, resulting in the loss of several mineral
rich worlds and strategic bases.
Faced with the grim reality of the narrowly averted disaster, Chancellor Lorak ordered a full investigation into the causes of the
humiliating defeats in the early part of the fighting. The conclusion was sobering. Traditional methods of advancement into a starship
command, through challenge, assassination, or family lineage, were placing ill prepared and oft times inexperienced warriors into
positions of vast responsibility and those that were experienced were stationed mainly along the Federation Neutral Zone. Quite simply,
there were not enough trained and experienced starship commanders to adequately defend the Empire from its myriad enemies. Chief
of Staff Gorkon, who headed the investigation, recommended that a training facility be created. A college of sorts,that was outside the
influence of politics and heredity. A centre of learning that would take in only the finest and most capable warriors, regardless of
prestige or political power, and mould them into the finest starship commanders in the galaxy. Thus, the seeds of the Elite Command
Academy were sown.
Of all the warriors in the Empire, both Lorak and Gorkon agreed that the only one worthy enough and capable enough to bring such an
institution to life was General Chang, the Chancellor’s chief military advisor and hero of the Empire. Unfortunately, the General refused
the position, as he was busy readjusting the defence of the Romulan Border and the Federation Neutral Zone to compensate for the
losses incurred during the chuDegh Offensive. After further convincing from the Chief of Staff, General Chang finally relented. For the
next two years, General Chang pored over the military records of the warriors of the Empire. He conducted interviews with associates
of potential candidates and deeply investigated their backgrounds. Eventually, the General compiled a list of the best and brightest in
the Empire and brought them to Qo’noS to study at the newly constructed campus of the Klingon Defence Forces Elite Command
Academy.
The Inaugural Class of the Academy began its first term in 1648 IR, with General Chang serving as the Dean and the only instructor.
Of the one hundred warriors who began the program only six graduated. It was from this first group of graduates that Chang recruited
additional instructors for the Academy, beginning the tradition that all instructors are graduates as well.
Today, the Academy takes in more than three hundred cadets per term, graduating roughly five percent of them. Graduation from the
Academy means an immediate command, respect for the accomplishment, and prestige and honour for the graduate’s house. This
semester marks the eighteenth Academy term.
THE INSTRUCTORS
GENERAL CHANG
The General has served in the KDF for nearly 75 years and has been decorated dozens of times for his actions in virtually every
significant armed conflict in the Empire since his service began in 1588 IR.
Chang served gallantly aboard the I.K.S. naQjej during the first of our numerous conflicts with the Federation after their initial invasion
of our space in 1593 IR, eventually becoming First Officer of the naQjej under the command of Lorak son of B’kol.
In 1600 elements of the tlhoq pagh Assault Fleet encountered forces of the Romulan Star Empire for the first time, near what is now
known as the N’derial system. It was not long afterwards that open hostilities were declared with the treacherous Romulans. Chang,
now commanding his own starship in Lorak’s vaunted Hegh yan Strike Fleet, fought brilliantly earning several commendations for his
string of victories in the N’derial campaign.
For the next 10 years, Captain Chang served in securing the borders of the Empire against further Romulan aggression, eventually
commanding the Hegh yan Strike Fleet when Lorak gained a seat on the High Council. In 1615, trouble again began surfacing on the
Federation border but Dugh’naS, commander of the gho’vaD Defence Fleet, bungled the initial engagements, placing the Empire’s
interests in the sector in jeopardy. Chang and the Hegh yan Strike Fleet were moved to the trouble area and in a co-ordinated effort
with the remnants of the gho’vaD, now under the command of Colonel Koord, fought the Federation to a standstill with the final battle
taking place near Sherman’s Planet in 1617.
7
Page 5

Chang and Koord, at the recommendation of Council Member Lorak, were promoted to the rank of General. Koord went on to a brilliant
career of his own and Chang was placed in charge of the defence of the Empire’s border with the Federation. Over the next 19 years
the border maintained its stability and the Empire went through a period of quiet. In 1636, Lorak became Chancellor of the High Council,
appointing General Chang as his Military Advisor.In 1642, Lorak ordered a program of expansion on the Federation border, dramatically
heightening the tensions with the Federation and bringing the Empire the closest to total war with Starfleet it has ever been. Chang
amassed a sizeable amount of the Imperial Navy on the border 1and drew up plans to begin a massive thrust into Federation territory.
The General was on the verge of launching the offensive when the hated Organians imposed their Peace Treaty upon us due to the
actions of Captain James T. Kirk.
In 1645 the chuDegh Offensive, a series of large skirmishes along the Romulan border,resulted spectacular losses and the secession
of several contested worlds to the Romulans. Seeing this as a sign of a larger problem Chancellor Lorak launched an investigation into
the situation and concluded that a lack of quality starship captains resulted in the humiliating defeats at the hands of the Romulans.
At the behest of Chief of Staff Gorkon, the Chancellor proposed the creation of a centralised facility to train the most talented and
capable officers as starship captains. No Klingon in the Empire was more qualified to bring this Academy to life than General Chang
does, but the General refused citing his need to remain an active part maintaining the defences of the Federation border. Eventually,
after some convincing by Chief of Staff Gorkon, Chang relented. Finally, in 1648 IR, General Chang founded the Elite Command Academy
and began using it to train the next generation of starship captains in the tradition of the finest warriors of the Empire. Chang has been
instructing at the Academy on Qo’noS and maintaining his position as Military Advisor as well from the 1648 until present.
COLONEL POKTARL
Colonel Poktarl, Son of QeH’a’, has served in the Imperial navy for 25 years. During this time, the Colonel has acquired a somewhat
colourful reputation, and is a bit of a hero to the common people of the Empire.
The House of QeH’a’ had always been very poor and less than influential, which served as a great detriment when the hot-headed
Poktarl joined the Imperial Navy. Poktarl began his career in 1641 IR, serving as the lowest ranking member of the engineering crew
aboard the I.K.S. rapHoch, stationed near the Imperial Fringe. Less competent warriors who joined at the same time he did often
entered the service at a higher rank or were promoted earlier merely because of their families’ status and prestige. This did not sit well
with the young warrior, but these were the captain’s, Brigadier tlhIb’s, decisions to make so there was nothing that could be done.
Growling at the injustice of it, Poktarl set out to literally carve a place for himself in the higher ranks. Over the next four years, Poktarl
ascended to the position of Chief Engineer through hard work, determination, and several challenges of his superiors. It was during this
time he earned the dubious moniker of “‘orayangan” (The Orion) since he drove those under his command like an Orion Slaver.
In 1645 the rapHoch was transferred to duty along the Romulan border, due to heavy losses during the chuDegh Offensive. During the
Battle of D’drazal V, a mistake on the part of the captain of the rapHoch, Brigadier tlhIb, placed the ship in grave peril. During the
engagement, the Brigadier ordered the rapHoch to dive through a Gas Giant at maximum impulse while cloaked. (The high speed
combined with lack of shielding caused considerable damage to the hull of the ship, nearly crippling the sensors. Plasma, leaking from
one of the hull breaches, alerted nearby Romulans to the presence of the rapHoch and they attacked. Quick thinking on the part of First
Officer Gorvatlh saved the ship from destruction but the main power reactors were knocked offline.
Brigadier tlhIb demanded a damage report from Chief Engineer Poktarl, who bluntly stated that the damage would take up to an hour
to repair. Upon hearing this less-than-favourable estimate, Brigadier tlhIb made several rather disparaging remarks about Poktarl’s
skills as a Chief Engineer, and the fact that he came from an insignificant house headed not by an insignificant QeH’a’ but by his
bearded wife. Brigadier tlhIb did not have much time to say anything more because at the first insult Poktarl had left the engine room
and was racing towards the bridge during most of the long-winded tirade. Poktarl spun the captain’s chair around, grabbed the
Brigadier, and promptly hurled him into a nearby bulkhead.Accounts of the tale become muddled at this point because the Romulans
began pressing their attack, but the general consensus was that Poktarl yelled, “Let the fact that I hurled you like a beardless child,
serve as my official notice of challenge, you miserable, pompous, honourless son of a Romulan.” Brigadier tlhIb attempted to
circumvent the challenge citing that the Romulans were going to kill them all, but Poktarl’s honour had been slighted and he demanded
that the “spineless politician” face him immediately. First Officer Gorvatlh desperately attempted to keep the Romulans at bay while
the duel between Poktarl and tlhIb raged all over the bridge. Finally, Poktarl struck the fatal blow and ended the duel, but now found
himself immediately faced with a new problem. He was now the captain, as was his prize in the combat, but the ship was being torn
apart around him. Captain Poktarl, demanded a tactical update,and in a display of tactical adeptness tha t shocked the remaining bridge
crew, Poktarl proceeded not only to destroy the Romulans attacking his ship, but to turn the tide of the battle and win the day. Over the
next few months Poktarl’s tactical wizardry proved invaluable in bringing the Romulan advance to a halt and solidifying the lines,ending
the chuDegh Offensive and cutting the Empire’s losses greatly.
In 1648 IR, General Chang personally recruited Captain Poktarl as one of the original one hundred warriors in the inaugural class of the
Elite Command Academy. Poktarl accepted and was one of the first six to graduate.
Poktarl returned to his post as Captain of the rapHogh, and commanded her for another five years, before returning to the Academy as
an instructor in 1653.
8
Page 6

BRIGADIER K’MAK
Brigadier K’mak of the house of qabSan has loyally served the Empire for 15 years.
He began his career serving in relative obscurity along the Romulan border aboard the I.K.S. pIlmoH, before his assignment as a gunner
to the I.K.S. ram’a’ on patrol near the Tholian border in 1653 IR.
During his initial term of service aboard the ram’a’, K’mak served with distinction, earning a position as Forward Gunner. In the midst
of the tegh poqet Crisis in 1655, an explosion killed the captain and first officer of the ram’a’ and sealed off the bridge from the rest
of the ship during the major engagement of the conflict. K’mak, being the most senior officer on the bridge seized command while the
second officer, who had been in engineering at the time, and a damage control party attempted to cut through the blockage. By the
time the second officer made it on the bridge, K’mak had already crippled the Tholian Cruiser that had engaged them. K’mak dutifully
relinquished command to his superior and returned to his post as gunner.After the battle the second officer recommended that K’mak
be awarded the Token of the Mek’leth, one of the highest awards given to a junior grade officer. It was this recommendation that
brought the young warrior to the attention of General Chang’s Academy Recruiters.
K’mak attended the Academy from 1654 to 1656, graduating first in his class.
Captain K’mak was attached to the Qabjech Exploratory Fleet, which aimed towards extending the Empire’s holdings near the galactic
rim in the Beta quadrant. The mission was fraught with difficulties, including numerous armed engagements with Romulan exploration
groups (1657 and 1659) and the border defences of the then unknown extents of Sha’kurian space (1659 and 1661). Losses to the
Qabjech Fleet were very high, yet despite the difficulties the mission added sizeable numbers of systems to the Empire and brought in
many, much needed, resources.All would have been a total loss but for the actions of Captain K’mak and the valiant crew of his ship.
Upon the mission’s return in 1661, K’mak was promoted to Brigadier and was offered a post at the Academy. K’mak has been a
favoured instructor at the Academy from 1661 until present.
COMMANDER THOK MAK
Commander Thok Mak has only served in the Imperial Navy for 10 years, the shortest career of all the instructors at the academy.
The Commander entered the service in 1656 IR, aboard the training cruiser IKS ghuv. While aboard the ghuv, Thok Mak displayed a
talent for organisation and leadership, which quickly earned him a position as First Officer. Thok Mak transferred as a replacement to
the IKS yay, attached to the orghenya Hegh Assault Fleet under direct command of Dahar Master Kor during the ghoch SeH Campaign
against the Gorn in 1660. Thok Mak was present at several strategic planning sessions as an aide to his commanding officer, Captain
qu’eygh. It was here that Thok Mak’s most remarkable talent surfaced.
During the sessions Thok Mak noticed a pattern to the Gorn troop dispersal and predicted that the Gorn would make a multi-pronged
strike against several key strategic points while the Klingons would be busy attacking what was perceived as a weakness in the Gorn
lines. Thok Mak pointed this information out to his captain, who then brought it to the table. Several of the commanders scoffed at the
idea when the weakness in the Gorn defences was plain for all to see. At this point Captain qu’eygh stated that it was in actuality his
First Officer’s observation. Two of the assembled commanders began to chastise Thok Mak for speaking out of place when Dahar
Master Kor, who’d been silent throughout the argument, finally spoke up. The Dahar Master agreed with Thok Mak’s strategic
assessment of the situation, silencing all the gathered officers there. The Dahar Master bade the young First Officer to continue with
his analysis of the situation. Several hours later, Kor and Thok Mak had formulated a response to the Gorn plan, which resulted in a
swift victory with minimal losses. Kor recommended Thok Mak to the Academy, and Thok Mak was accepted.
Thok Mak attended the academy from 1661 to 1662, and so impressed General Chang with his strategic skill that he was offered a
post as instructor at the Academy immediately upon graduation, which had never been done before or since. Thok Mak accepted and
has been an instructor from 1662 until present.
MENUS
MAIN MENU
NEW GAME
This will allow you to start a brand new game of Klingon Academy™.
LOAD GAME
This button will take you to the load game screen from where you can load any
previously saved games of Klingon Academy™.
9
Page 7

SIMULATOR
Clicking this will take you to the simulator screen from where you can play any of the training missions at any time, or replay any of
the single-player missions that have been successfully completed.
MULTIPLAYER
Selecting this option takes you to the Multiplayer menu screen.
OPTIONS
This will take you to the Options menu where you can configure your Audio and Video settings, configure your controllers, or set up
your in-game preferences.
VIEW INTRO
Clicking this button will allow you to replay the Klingon Academy™ introduction movie.
CREDITS
This button will let you view the game credits, so you can see the names of everybody who worked hard to bring you this game.
QUIT
Clicking this will exit the game. Confirmation will be asked for before the game quits.
LOAD GAME
GAME LIST
This scroll box displays a list of all saved games. The highlighted name is the currently
selected save game file.
LOAD
Clicking this button loads the currently selected save game file.
SIMULATOR
This button brings up the Simulator scroll box and load button.
MISSION SCROLL BOX
This scroll box initially lists only the training missions and Quick Battle, and then each solo
player mission is added to list as it is completed. Click the mission you wish to load to select
it. See the Quick Battle section for more information about setting up a quick battle scenario.
LOAD
Launches the currently selected mission.
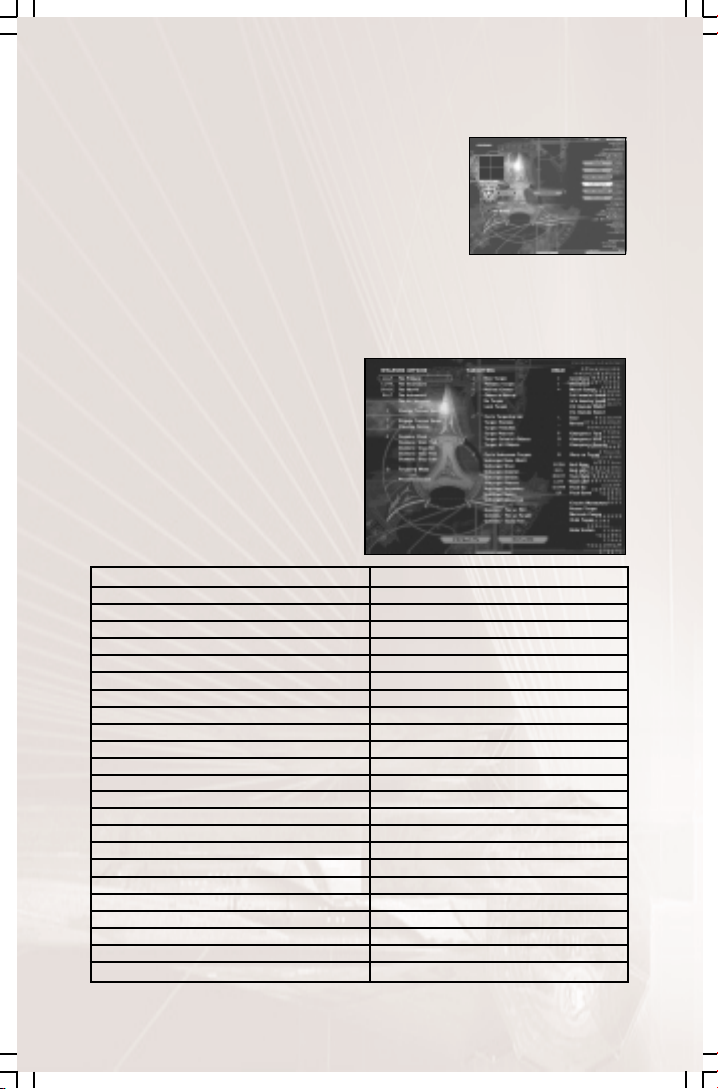
MULTIPLAYER
MULTIPLAYER CONNECTION
From this menu you may input your player name and select what type of network connection
you will be using.
PLAYER NAME
Type the name or handle you wish to be known by during your multiplayer session in this box.
IPX NETWORK
This button configures your setup to play games over an IPX/Novell Netware based LAN, and takes you to the Join/Create menu.
10
Page 8
TCP/IP
This button configures your setup to play games over the Internet or a TCP/IP based LAN, and takes you to the Join/Create menu.
CANCEL
This button will take you to the main menu.
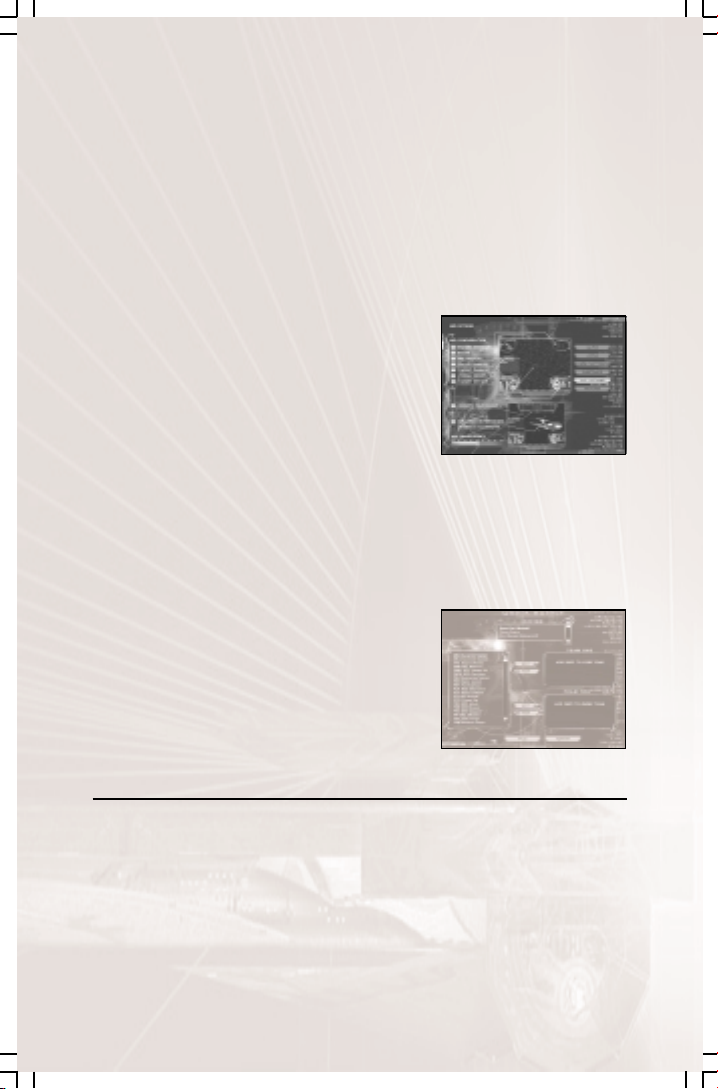
JOIN/CREATE GAME
On this screen, existing games are displayed in the scroll box. Highlight an existing game by
clicking on it and then click the
Join button to join in, or click the create button to start up your own game.
CREATE
This button takes you to the Create Game menu.
JOIN LOCAL
This button will allow you to join an existing game over a LAN, provided that it is open and has available player slots.
JOIN REMOTE
This button will allow you to join an existing game over the Internet, provided that it is open and has available player slots. Please note
that this button only appears if TCP/IP is the chosen connection type.
CANCEL
This button will take you to the main menu.
CREATE GAME
Here you enter the name of the game you with to create and a password if desired.
GAME NAME
Type the name of the game you wish to create in this box. This is what players see on the Join/Create Game screen.
PASSWORD
To prevent unwanted players from joining your game you may type a password in this box. Players who wish to join the game will be
prompted to enter the correct password before they will be allowed to join.
CANCEL
This button will take you to the Join/Create Game screen.
GAME PASSWORD
This screen appears only if the game being joined is requesting a password.
PASSWORD
Type the password of the game into this box.
OK
Click this button to join the game.
CANCEL
This button will take you to the Join/Create Game screen.
ENTER REMOTE HOST NAME OR IP
REMOTE HOST NAME OR IP
The player enters the name of the remote host computer or its IP address in this box.
OK
This button accepts the entered host name or IP address and attempts to connect. Failed
connections return you to this screen. Successful connections take the player to the
Multiplayer Setup screen.
CANCEL
This button returns you to Multiplayer Connection screen.
11
Page 9

GAME SETTINGS
SCENARIO TYPE
QUICK MATCH
TEAMS SHARE POINTS: When “YES” is selected, all team members will share from the
“Point Value” selected. When set to “NO”, point value restrictions apply to each player
individually.
SELECT STAR SYSTEM:This scroll box displays a list of available playing fields and games.
VICTORY CONDITIONS: This selector allows you to choose the types of victory conditions for the scenario.
KILLS: Choosing this victory condition will end the game when a player obtains the required number of kills. If this victory condition
is selected the button below becomes the Kill value setting. Click on the arrow button to increase or decrease the number of kills
needed to win the game.
TIME LIMIT: Choosing this victory condition will end the game when the allotted time runs out.The winner is the one with the most
points at the end of the game. If this victory condition is selected, the button below becomes the Time Limit setting. Click on the
arrow button to increase or decrease the length of time the game will last.
SHIP POINT VALUE: Click on this button to increase the Ship Purchase Points limit for the game. The default is Unlimited.
GAME TYPE: This toggle will switch between the two game types, Open or Closed. Open games can be joined in progress by
anyone. Only those players who were in the game when it started can join a Closed game.
DIFFICULTY: There are six difficulty settings. Clicking this button changes the difficulty level of any AI controlled vessels in the
multiplayer game. The difficulty levels from lowest to highest are: Human, Glob Fly, Cadet, Warrior, Chang, and Kahless.
OK: Clicking this button locks your Scenario Settings, and sends you to the Multiplayer Setup screen.
CANCEL: Clicking this button sends you to the Join/Create Game screen without locking your Scenario Settings.
?: Clicking this button changes the mouse cursor to the Help cursor. Clicking with the Help cursor on an item on the screen will
supply you with some basic information about that function.
GAME SPEED
This slider will increase or decrease the overall speed of game play. The host system is the one that determines the speed of the
network game.
GAME BANDWIDTH
The bandwidth slider is provided for the player to adjust the size of the bandwidth, based upon the connections being used by the
player. The higher the bandwidth, the better the quality of the game will be. However, in large games, it is best to set the bandwidth
slider to the client with the SLOWEST Speed connection. This is to ensure a good game for everyone. The bandwidth slider is easily
readable by having the connection speeds/types listed as it is scrolled from left to right.
MULTIPLAYER SETUP/LOBBY
This screen is identical visually whether you are a player or the host. The host will be able to
access teams, escorts, and settings for all players. The following sections describe the
functionality of the Multiplayer Setup screen for the host and the players.
HOST
SLOT STATUS BUTTONS:The Slot Status buttons are located just to the left of the player
slot number and name. All slot buttons default to Open, represented by an open set of
doors. As players join the game the buttons for the filled slots will change to a set of closed
doors. Clicking on the button while it is occupied will kick the human out of the player slot, changing its status to open. Clicking
on the button will cycle through various stages. The first stage is the default stage as described above. The second stage is a
picture of a closed door, signifying that the slot is closed. The third stage is a picture of a computer, signifying that a computercontrolled player now takes up the slot.
`
12
Page 10

NAME: The name column displays the names of all players involved in the game, as was entered on the Multiplayer Connection
screen. To the immediate left of the name is the player slot number, which is used when assigning escorts.
RACE: This is a cycling button with seven stages. Each stage displays the name of one of the six different races. The seventh symbol
represents the generic ships, such as freighters. The host has access to the race buttons for himself and all non-escort computer
players.
SHIP: The ship column consists of a button and a text field. The button calls the Ship Configuration menu.The field is not editable
and displays the ship’s class.The host has access to this button for himself and all non-escort computer players. Computer players
assigned as escorts are accessible only by the player they are assigned to. For more on ship point values, see the Ship
Configuration menu section below.
TEAM: Once a player has joined the game he will be assigned a team. Default team names are letters. (Ex.A1, A2, A3 - B1,B2) By
default, every human and computer has a unique team letter. A player can click on the team button that displays his team letter
to cycle it through the list of available teams. All players with the same team letter are on the same team, and will be considered
as friendly in all respects within the game engine. The host has access to the team buttons for himself and all computer players.
ESCORTS: If a computer player is placed on the same team as a human player, the escort button activates. If a player from that
team clicks on the escort button it will cycle through a list of the player numbers on that team excluding itself. Example:If team A
consists of players 1, 3, 4, and the escort as 7, the escort button will cycle through the numbers 1, 3, and 4.
Note: Computer players CANNOT be escorts of other computer players.
SETTINGS: This button recalls the Scenario Settings menu.
CHAT WINDOWS: The large window is where the chat thread is displayed. The smaller window below is the chat message entry
window. Chat messages default as send to all, but the user can specify a team by typing the first letter of a team designation
followed by a colon and then the text of the message. A message can be sent to a specific player by following the same format
substituting a player number for the team letter. Multiple teams or players can be defined by separating the team designations or
player numbers with commas before the colon.
Examples:
Waiting for Rambutan...(Sent to All)
A: Let’s go guys! (Sent to team A)
6: Let’s be the Klingons, Ralph. (Sent to player 6)
A,Cra: You shall fall before the forces of Lizard Boy! (Sent to teams A and Crazy Gorn)
1,3,7: Quiver in fear of the Oberth of Death! (Sent to players 1, 3, and 7)
START: Starts the game, once all players have locked in their settings. A player’s name field changes to red once their settings are
locked to indicate they are ready and waiting.
CANCEL: This button will take you to the Join/Create Game screen.
IP: This button displays the player’s IP address in the chat thread window.
?: Clicking this button changes the mouse cursor to the Help cursor. Clicking with the Help cursor on an item on the screen will
supply you with some basic information about that function.
PLAYER
SLOT STATUS BUTTON: The Slot Status buttons are located just to the left of the player
number and name. All slot buttons default to Open, represented by an open set of doors.
As players join the game the buttons for the filled slots will change to a closed set of
closed doors. Any empty slot with closed doors is a Closed slot and is unavailable for use.
Players do not have access to these buttons.
13
Page 11

NAME: The name column displays the names of all players involved in the game, as was entered on the Multiplayer Connection
screen. To the immediate left of the name is the player reference number, which is used when assigning escorts.
RACE: This is a cycling button with seven stages, with each stage displaying the name of one of the six different races or a “NonAll” representing the generic ships such as freighters. The player has access to the race buttons for himself and any escorts
assigned him.
SHIP: The ship column consists of a button and a text field. The button calls the Ship Configuration menu.The field is not editable
and displays the ship’s class.The host has access to this button for himself and all non-escort computer players. Computer players
assigned as escorts are accessible only by the player they are assigned to. For more on ship point values, see the Ship
Configuration menu section below.
TEAM: Once a player has joined the game he will be assigned a team. Default team names are letters. By default, every human
and computer player has a unique team designation. A player can click on the team button that displays his team designation to
cycle it through the list of available teams.All players with the same team designation are on the same team, and will be considered
as friendly in all respects within the game engine. The host has access to the team buttons for himself and all computer players.
ESCORTS: If a computer player is placed on the same team as a human player, the escort button activates. If a player from that
team clicks on the escort button it will cycle through a list of the player numbers on that team excluding itself. Example:If team A
consists of players 1, 3, 4, and the escort as 7, the escort button will cycle through the numbers 1, 3, and 4.
Note: Computer players CANNOT be escorts of other computer players.
CHAT WINDOWS:The large window is where the chat thread is displayed. The smaller window is the chat message entry window.
Chat messages default as send to all, but the user can specify a team by typing the first letter or letters of a team designation
followed by a colon and then the text of the message. A message can be sent to a specific player by following the same format
substituting a player number for the team letter. Multiple teams or players can be defined by separating the team designations or
player numbers with commas before the colon.
Examples:
Waiting for Rambutan... (Sent to All)
A: Let’s go guys! (Sent to team A)
6: Let’s be the Klingons, Ralph. (Sent to player 6)
A,Cra: You shall fall before the forces of Lizard Boy! (Sent to teams A and Crazy Gorn)
1,3,7: Quiver in fear of the Oberth of Death! (Sent to players 1, 3, and 7)
Note: In the cases of team names and letters conflicting, it is sent to both teams (i.e. Death on a Cracker and D would both receive
messages headed with “D:”). Players may always elect to change their team names or specify more letters in the header to avoid
this.
LOCK SETTINGS: Locks in player’s choices.A player’s name field changes to red once their settings are locked to indicate they are
ready and waiting. While a player is waiting, there is no access to any of the buttons with the exception of the cancel button. Chat
functions normally.
CANCEL: This button has one additional function besides returning to the Join/Create Game screen. If the player has hit the Lock
Settings button and is waiting, hitting the cancel button removes the waiting status and allows the player to edit his settings freely
again. If the settings are not locked, hitting the cancel button returns to the Join/Create Game screen.
IP: This button displays the player’s IP address in the chat thread window.
?: Clicking this button changes the mouse cursor to the Help cursor. Clicking with the Help cursor on an item on the screen will
supply you with some basic information about that function.
14
Page 12

SHIP CONFIGURATION
SELECTED SHIP
This is the area where a slowly rotating-in-game, model of the ship currently selected is
displayed. Below is the text description of the class and point value of the ship.
SHIP SELECTION
This scroll box displays the ships available to the player, depending upon the race that was
chosen on the Multiplayer menu. Next to each ship on the list is their base Ship Point Value.
Those ships outside of the player’s point limit will be displayed in a different colour.
SHIP NAME
The player enters their custom ship name here.
PT VALUE
This field displays the current point value of the selected ship, accounting for all modifiers. This point value is a general gauge of the
relative combat strength of the vessel. Every ship’s cost is its base Ship Point Value modified positively or negatively by altering the
crew complement or experience and by selecting Elite Officers. If there is a point limit in the game, the display will change colours if
current value of the ship exceeds the limit.
CREW
MAX CREW: This field displays the maximum amount of crew possible for the selected ship. The sum of Crew and Marines may
not exceed the Max Crew level.
CREW: The player may alter the amount of crew aboard his vessel. If a player a ttempts to further increase the crew amount beyond
the maximum, the marines complement will decrease automatically.
EXP: The player may alter the experience level of his crew in this field.
COST:This displays aggregate cost in Ship Points of the number of crew and their experience.
MARINES: The player may alter the amount of marines aboard his vessel. If a player attempts to further increase the amount of
marines beyond the maximum, the crew complement will decrease automatically.
EXP: The player may alter the experience level of his marines in this field.
COST:This displays aggregate cost in Ship Points of the number of marines and their experience.
ELITE OFFICERS: The player may select what Elite Officers, if any, are present aboard his ship by clicking on the check box next to
the officer.The value in Ship Points of each officer is displayed next to the check box.
OK
Accepts the changes and returns to the Multiplayer menu. This button will not function if the player has exceeded the point limit for
the game.
CANCEL
This button will return the player to the Multiplayer menu without registering any changes.
OPTIONS MENU
AUDIO
This submenu allows you to adjust the audio settings for Klingon Academy™, to increase
audio detail or decrease it, to improve performance.
CREW REPORTS ENABLED
This checkbox toggles the audio for the in-game crew reports on and off.
VERBAL ORDERS ENABLED
This checkbox toggles the audio for the Verbal Orders System on and off.
MUSIC ENABLED
This checkbox toggles the in-game music on and off.
15
Page 13

NUMBER OF SOUND CHANNELS
These radio buttons allow you to adjust the number of sounds that can play simultaneously to better suit the performance ability of
your computer system.
SOUND QUALITY
These radio buttons allow you to adjust the detail level of the sound to better suit the performance ability of your computer system.
Lower detail levels will omit some sounds or replace some sounds with others. For example, at LOW level the Heavy Photon sound
effect is replaced with the regular Photon Torpedo sound effect to save system resources.
SOUND EFFECTS VOLUME
This slider adjusts the volume of the in-game sound effects.
MUSIC VOLUME
This slider adjusts the volume of the in-game music.
MOVIE VOLUME
This slider adjusts the volume of the full motion video movies.
VOICE OVER VOLUME
This slider adjusts the volume of the in-game voice over such as crew reports and verbal orders.
VIDEO
This submenu allows you to adjust the video settings for Klingon Academy™, to increase
graphic detail or decrease it to improve performance.
EXPLOSION LIGHTING
This toggles the light casting from explosions on and off.
HIGH-DETAIL STARFIELD
This toggles the high detail star field on and off.
TEXTURE DETAIL LEVEL
This slider will adjust the starting resolution of the textures. Lower settings will free up resources on the system and the 3D cards.
STARSHIP LEVEL OF DETAIL
This slider will adjust the range from the camera at which starships will switch detail levels.
TEXTURE RESOLUTION SCALE
This slider will adjust the range from the camera at which the textures begin to MIP.
EJECTED DEBRIS VOLUME
This slider will adjust the amount of debris ejected from starship damage areas.
EXPLOSION VARIETY
This slider will adjust the number of different explosion animations loaded into memory.
AMBIENT LIGHTING
This slider adjusts the overall level of ambient lighting within the 3D engine.
GAME SETTINGS
AUTO TARGETING / MANUAL TARGETING
These radio buttons toggle automatic and player-initiated enemy target selection.
DIFFICULTY
This slider will adjust a variety of factors to increase or decrease the efficiency of the AI.
GAME SPEED
This slider will increase or decrease the overall speed of game play.
PADLOCK GUNNERY MODE / DUAL CONTROL GUNNERY MODE
These radio buttons toggle between Padlock Gunnery Mode and Dual Control Gunnery Mode.
PADLOCK GUNNERY MODE: This gunnery mode locks the gunnery chair camera onto the target. If the Helm AI orders are set to
Maintain Course, you can continue to fly the ship and your triggers will fire the weapons of the arc that the target is currently in,
otherwise the AI flies the ship.
16
Page 14
DUAL CONTROL GUNNERY MODE: This gunnery mode allows the player to continue to fly the ship with the keyboard while rotating
the chair with the joystick. Your triggers will fire the weapons of the arc that you are currently in control of.
CONTROLS
USE JOYSTICK
Click this check box if you wish to use a joystick to control your vessel.
USE MOUSE
Click this check box if you wish to use your mouse to fly your vessel.
Note on Mouse Control: You can initiate flight with the mouse by clicking and holding the RIGHT
mouse button. While the RIGHT mouse button is held, a cross will appear in the centre of the screen.Moving the mouse in the direction
you wish to turn will move this cross. The farther from centre the cross is moved, the faster the turn.Releasing the right mouse button
will decelerate the ships turn to zero.
CALIBRATE
Click this button and follow the instructions above the calibration crosshairs to calibrate your joystick for use with Klingon Academy(tm).
KEYBOARD
Each of the keyboard submenus, enable you to re-map hot key
functions of the keyboard and the joystick to better suit your style
of play.
DEFAULTS: Clicking this button will return all hot-key functions
and joystick button assignments to the default settings.
DEFAULT KEYS
Fire Primary Weapon Left Alt
Fire Secondary Weapon Left Ctrl
Fire Heavy Weapon “Space”
Fire Advanced Weapon Right Alt
Fire All Weapon Types Left Shift
Charge Tractor (on / off) Y
Engage Tractor (activate / deactivate) T
Cloak (activate / deactivate) C
Gunnery Mode / HUD Toggle G
Targeting Mode (Bore-sight / Auto) Q
Next Target A
Previous Target S
Nearest Enemy D
Select Object in Reticule F
Cycle Target Lists Z
Cycle Subsystem Target X
Accelerate (Impulse Increment) ]
Decelerate (Impulse Increment) [
Match Speed =
All Stop (Impulse) \
Full Reverse Emergency Full Turn P
Emergency Full Stop O
Emergency Full Reverse I
Warp to Target W
Flight Controls Arrow keys
Roll to Port Delete
Roll to Starboard Page down
Power Macros F1 - F8
Damage Report E
Power Report R
Go to Engineering Station ‘
Cycle through Sensor Ranges K
Scan Target J
Launch Probe L
Chase Camera V
Exterior view (hat or arrow keys rotate) M
External View Zoom In N
External View Zoom Out B
Charge Transporters (On / Off) U
Beam all to Auxiliary ,
Retrieve Marines /
Cancel Transport .
Hail Target H
Escorts – Break & Attack ;
Escorts – Attack my Target ‘
Escorts – Form up Enter
17
Page 15
HARD-CODED KEYS
Cancel Movie or Esc Menu ESC
Verbal Orders 1 - 9 and keypad 1 - 9
Back Out of Verbal Order 0 and keypad 0
Match Speed keypad Del
Accelerate (Impulse Increment) keypad +
Decelerate (Impulse Increment) keypad –
All Stop (Impulse) keypad Enter
Next Target keypad /
Nearest Target keypad *
Multiplayer Chat Macro F9 – F12
Save Chat Macro Shift F9 – Shift F12
RETURN: This accepts your changes and returns you to the Controls submenu.
HUD OPTIONS
HUD CONFIGURATION
This collection of check boxes allows you to activate or deactivate various sections of
the full-screen HUD display.
Picture In Picture Target Damage
Radar Verbal Orders
Multi-display Target Reticule
Player Damage Gunnery Chair Radar
SUBTARGETING BRACKETS
This check box toggles the subsystem targeting indicator boxes on and off.
INTERFACE SLOWDOWN
If this box is checked, the game will be slowed down to one-fifth its current speed while you art at an officer’s station such as damage
control, to give you more time to manage your ship systems.
HUD OPACITY
This slider will adjust the opacity of the HUD gauge background polygons to aid text readability in some terrains.
RETURN
This takes you back to the main menu.
QUICK BATTLE
The Quick Battle generator is loaded like any other mission from the Simulator Menu. But, unlike other missions, the Quick Battle
generator brings up a menu to assist you in selecting the battle options.
SYSTEM
This scroll box displays the various star systems and terrains that a Quick Battle can take place in. Highlight the system that you wish
to play in.
SHIPS
This scroll box contains a list of all ships available for Quick Battle.
18
Page 16

TEAMS
There are two Team Windows, which display up to 8 ships each. The first ship in Team 1 is your ship; the AI controls all other ships.All
other ships on Team 1 are assigned to you as wingmen. Next to each Team Window there is a pair of buttons labelled ADD and REM.
The ADD button will add the highlighted ship in the Ships scroll box to the Team Window the button is next to. The REM button will
remove the highlighted ship in the Team Window the button is next to.
PLAY
Clicking this button accepts all the settings and starts the Quick Battle.
CANCEL
This button returns you to the Main Menu.
STARSHIP OPERATIONS
The purpose of the Academy is to train the very finest warship commanders in the galaxy. In order to graduate from this institution and
take your place among the stars, you must understand the purpose and function of each system aboard your warship. Only then will
you be prepared to succeed in the trials before you, and to take you place in the great coming conflict with the United Federation of
Planets.
SYSTEMS
A warship is basically a collection of systems held together by the framework of the ship’s
hull. Each system is essential to the efficient operation of the vessel and when wielded
together, form an extremely effective weapon.
POWER ALLOCATION
One of the most essential tasks in starship operations is power allocation. All ship systems
require power, and effective power management can prove to be the deciding factor in
battle. Power is a limited resource, and must be carefully allocated to each ship system in
order to meet the ever-changing demands of combat. There are two concepts that need to
be understood in order to properly manage your ship’s power: power requests, and power
priority.
Each ship system has controls on the Engineering screen and officer stations that adjust the
amount of power that system is requesting. By turning on shields from the Engineering screen or by giving a verbal order to move at
full impulse, you are requesting that the appropriate amount of power be assigned to these systems. These resources will receive the
power that you requested as long as there is available power to do so. If the amount of power that is being requested exceeds your
ship’s current power generation some systems will have to go without power.To determine which systems to keep activated and which
to shut down your Engineer will follow the power priorities you have given on the Engineering screen.
Every system aboard your starship is assigned a power priority from 0 to 9 on the Engineering screen. The system with the lowest
priority number will receive its power first, with the remaining power being allocated to the next lowest number and so on, until all
available power has been distributed. Systems that share the same priority number will receive power in equal amounts
simultaneously. Once all the available power has been distributed, your engineer will shut down any remaining systems that have not
received power, until additional power is made available for them.
By carefully setting the power request and power priority of your ship’s resources before battle, and by utilising power macros to save
your preferences, you can effectively manage your ship’s power. Following the priorities you have given, your engineer will be able to
automatically compensate for damage or repairs made to power generators during battle, so you can remain in the captain’s chair.
We will now discuss the actual controls that will enable you to set power requests and power priorities from the Engineering screen
and officer’s stations, and review the effects of power macros and verbal order (VOS) commands given from the HUD.
MANUAL POWER ADJUSTMENT
From the Engineering station or individual officer’s station, you may manually adjust the amount of power requested by a ship system.
There are four different types of controls on these screens that are used to make power requests.
The first and most common type of power control is the power booster. The power booster consists of an “On / Off” button followed
by a slider and an efficiency percentage. Pressing the On button will request the minimum amount of power necessary to activate the
system. Once activated, the efficiency percentage for the system will be displayed.
19
Page 17

You may increase the efficiency of the system by using the slider to boost the amount of power to that system, hence the term “power
booster”. The slider range is from one unit of power up to 50% of the ship’s original total power output. The impact of additional power
to a system’s effective efficiency is determined by a formula unique to each system. By experimentation you can figure out how
additional power affects each system. The efficiency of a system is also effected by damage, crew experience,crew staffing level and
the presence of elite officers. The efficiency of the Sensor, Tractor Beam and Transporter systems are further modified by factors
external to the ship such as the range to the currently selected target, ECM of that target and terrain effects.
The second type of power control is the movement power throttle. This control is used by the Helm to request power for impulse and
warp movement. The throttle consists of a power slider with the speed markings of a throttle. Moving the slider along this gage will
request the necessary power to move at the indicated speed. Your ship will not actually begin moving at the selected speed until you
give the appropriate command from the VOS or the Helm screen.
The third type of power control is the stepped power request button utilised for the Medical system. It consists of an on / off button
followed by a three position toggle and an efficiency percentage. The toggle switch will alternate between “Standby,” “Medical Alert”
and “Emergency.” Each medical level requests a fixed amount of power since all of sickbay must be powered to accept casualties at
the desired level.
The fourth and final type of power control is the banked resource control panel utilised by the shield and weapon systems. The ship’s
banked systems are each controlled by an on / off button next to a small triangular button and a row of LED lights. Shields and weapons
aboard a starship are grouped into banks, with a single bank for each firing arc. The row of LED lights indicate that status of each bank
of that system, with yellow representing basic charge, orange representing a weapon or shield overloaded (reinforced) to 150%, and
red representing a weapon or shield overloaded (reinforced) above 150%. If a bank is not powered these indicator will not be displayed.
Pressing the small triangular button next to the resource will replace the LED lights with a Bank Preferences window. Within this
window, the player may elect to turn off or overload an individual bank. Listed within the window will be the name of each bank (firing
arc) and a button that cycles between three settings: off,charge, and overload. When this button is set to the overload position, a second
button will appear which will cycle between the following overload settings: 125%, 150%,175%, and 200% (for shields this represents
reinforcement). Pressing the On button for shields or a weapon system will activate all banks. As with the stepped power request button
used for Medical, each overload level is requesting a fixed amount of power.
POWER PRIORITY
Power priorities can be manually fine-tuned at the Engineering station. To the right of each power control on the Engineering screen is
the system’s priority number. You may assign a priority level to a given system by clicking on the up or down buttons next to the priority
number.
The individual officer’s stations do not have a priority number next to their power controls. This is because only at the Engineering
station do you have the necessary information to set meaningful priority levels. Instead, the other stations have a priority override button
next to their power controls. By pressing the priority override button, the power priority of the selected system will temporarily be set
as the highest possible priority (Priority 0). This ensures that the item receives the power it is requesting. Only one system at a time
may be on priority override. Once another system is given a priority override, the previous system that was on priority override will
return to its original power priority. Orders given from the VOS automatically receive priority override status, as it is assumed that the
captain’s immediate order takes precedence over previous instructions.
POWER MACROS
On the Engineering station, there is a list of eight pre-set power request and priority configurations. These Power Macros can be called
via hotkeys or through the VOS. Calling a power macro will automatically reset the current power request and priority setting to those
saved in the macro. These are particularly useful during battle as they enable you to make rapid changes to your power allocation to
reinforce shields or cloak your vessel and repair.You can utilise the eight pre-set macros below, or create and save your own macros.
You may delete all of your macros and restore the defaults by exiting the game and deleting the contents of the macros folder.
BATTLE - STANDARD:This macro configures the ship for battle at full impulse, with no particular tactic in mind. This is a basic,
multipurpose combat setting.
BATTLE - OFFENSIVE: This macro configures the ship for a highly aggressive combat profile at half impulse while charging
transporters, tractors and overloading weapons.
BATTLE - DEFENSIVE:This macro configures the ship for a more defensive stance at half impulse while heavily reinforcing shields.
STEALTH:This macro configures the ship for maximum invisibility. If the ship is equipped with a cloaking device it will be activated.
Otherwise the vessel will run at half impulse and make heavy use of ECM. Reducing impulse speed from the VOS will boost ECM
even further.
HUNT FOR CLOAKED SHIPS: This macro configures the ship for hunting cloaked ships at half impulse, by allocating large amounts
of power to sensors. Reducing impulse speed from the VOS will boost sensors even further.
20
Page 18

WITHDRAW AND REPAIR:This macro configures the ship for the maximum repairs at full impulse. If the ship has a cloaking device,
it will be activated. Once you have broken away from the engagement, reduce impulse speed from the VOS to speed repairs.
REPEL ENEMY MARINES: This macro is designed to maximise the ship’s security defences while maintaining full impulse. Reducing
impulse speed from the VOS will boost security substantially. If the ship has a cloaking device, it will be activated.
WARP OUT:This macro configures the ship for maximum warp speed and repairs. If a cloak is present, it is activate.
DAMAGE CONTROL
Your crew will automatically make repairs to damaged systems, even if no
power is allocated to damage control. As your crew gains in experience, the rate
at which they can affect repairs will increase. If crewmembers are injured or
killed in battle, your repair rate will decrease substantially. In fact, your ship’s
rate of repair is directly related to your crew staffing level as reported on your
ship’s medical screen and HUD.Therefore,if half of your crew is injured or dead
you will take twice as long to conduct repairs.
Although power is not required for your crew to conduct repairs, merely
activating the damage control system will make your teams twice as effective
and allocating additional power will continue to improve their performance.
As your ship becomes damaged, parts of it may be blown off or entire systems
may be destroyed. Should a portion of the vessel is destroyed, such as a breach
in the hull or the partial loss of a warp nacelle, the crew may not be able to fully
repair that system in the field. When this occurs, the repair time on the damage
control station will be listed as “MAX” once your crew has repaired that system
as much is possible. If a resource is fully destroyed (i.e. listed as “destroyed”on
the damage control station and at 0% damage level) your crew cannot affect any repairs in the field.
THE EFFECTS OF DAMAGE
As you will be commanding a ship of war, damage to your starship is inevitable. In order to better assist you in making decisions on
damage control allocation you must first understand how damage effects the systems aboard your starship. Knowledge of how the
performance of the individual systems degrades is key in making intelligent choices that could snatch victory from the jaws of defeat,
or send yourself and your crew to a glorious if ultimately useless death.
In general, damage to specific systems result in loss of operation effectiveness, forcing a performance degradation or the allocation of
additional power to the damaged systems just to compensate. A system is considered to have suffered minor damage at seventy-five
percent to ninety-nine percent integrity, heavy damage at thirty-five percent to seventy-four percent integrity, critical damage at fifteen
percent to thirty-four percent integrity, extensive at one percent to fourteen percent integrity, and destroyed at zero. At twenty-five
percent integrity, a given system goes off-line due to the damage incurred.The system can still be repaired, but it will not function until
brought back on-line by repairing it up to twenty-six percent integrity or higher.
HULL: Damage to the hull, or space frame of the starship, results in high amounts of crew casualties and general loss of structural
integrity. Though ship performance is not degraded by physical damage to the hull, the crew casualties do result in overall
performance loss to every ship system. Unlike other systems, hull does not go off-line, though if hull is destroyed the entire ship
is destroyed with it.
IMPULSE: The effects of damage to the impulse engines are very serious. First, there is a loss in manoeuvrability and maximum
speed. Additionally, there is a loss in power generation from the impulse reactors, making impulse a highly critical system and one
that is worth serious consideration when distributing damage control power. When impulse engines are knocked off-line, all
impulse travel stops, the ability to perform emergency manoeuvres is lost, and manoeuvring is done with manoeuvring thrusters
only. (See IMPULSE for more details on the relation between impulse engines and manoeuvring thrusters.) Power generation is
unaffected by off-line status.
WARP: Damage to the warp engines results in power losses. If the warp drive goes off-line, warp travel is no longer possible,either
in-system or out-system. Like the impulse fusion reactors, power generation from the warp core is unaffected by off-line status.
AUXILIARY: As the auxiliary reactors get damaged they generate less power.The reactors do not go off-line.
SECURITY:The security system loses some of the defensive benefits it offers to your onboard marine complement as it is dama ged.
If the security system goes off-line it no longer offers any defensive benefits until its operation is restored.
21
Page 19
TRANSPORTERS: When the transporters are damaged,their ability to maintain a safe lock is compromised, thus forcing the captain
to increase transporter power or try some other means of compensating for the performance degradation. If the transporters go
off-line they shut down immediately. Once they are brought back on-line they must recharge again as normal.
MEDICAL: If sickbay suffers damage, the healing rate of the crew decreases. Sickbay can go off-line, and when it does the
condition of injured crew begins to worsen.
SENSORS: The sensors system is actually the source of both the sensor and ECM functions of your starship. Because of this,
damage to the sensors resource not only reduces the strength of your sensor locks, but will reduce the effectiveness of your
defensive ECM generation as well. If the sensors resource goes off-line, all targeting information on enemy ships as well as the
radar display shuts off. ECM shuts off as well, and neither the sensors nor the ECM functions of the starship can be activated until
the sensors system is brought back on-line.
TRACTOR BEAM: Damage to the tractor beam simply results in lower strength tractor links that are more easily broken. It also
makes breaking tractor links with repulsor beams more difficult because more power than normal would be required. If knocked
off-line, any existing tractor links drop and the system cannot be used. Once back on-line, the tractor beam system must recharge
before it can be operated again.
CLOAKING DEVICE: As long as the cloaking device is on-line,there is no performance degradation due to damage.Once the device
is off-line, it shuts off if already active and cannot be reactivated until brought back on line.
SHIELD GENERATOR: Damage to the shield generator results in decreased recharge rates for all shield facings. If the shield
generator is knocked off-line, all shield facings drop immediately and lose all currently stored charge. When the shield generator
is brought back on-line, the shield facings begin recharging from zero.
WEAPONS SYSTEMS: For most weapons systems, damage simply results in longer recharge times between firings.There are two
notable exceptions. A damaged GDDS or Web Spinner suffers from a decrease in the duration of the weapon’s effects when
activated.
On a side note, the tractor beam system is required for the operation of a GHRC, QCB, or Web. The tractor beam resource merely
needs to be activated at minimum level and charged, but if the tractor beam resource is off-line or destroyed these weapons will
not function regardless of their damage status.
IMPULSE
Impulse engines are the source of the bulk of the movement capability of your
starship. Further, the fusion reactors that provide supplementary power to the
impulse engines can be tapped for other uses as well, furnishing a full thirty-five
percent of the ship’s total power generation.This dual function of movement and
power generation makes the impulse engines a very important system aboard
your ship.
IMPULSE MOVEMENT
Power for movement must be set aside, or allocated to the impulse system. This
gives the impulse engines ready and immediate access to the power necessary
to travel at the speeds you require. The actual movement speed can be set
independently of the power available to the impulse engines, but it can never be
set higher than the maximum power currently allocated. Please note that
impulse movement and warp travel operate independently of each other and one
is not required for the other.
Manoeuvring the starship is handled through a combination of the impulse
thruster units and smaller low-powered attitude adjustment and docking thruster units scattered about the hull.
At a full stop-with or without power actually allocated to the impulse engines -a ship may still rotate, though this is with the
manoeuvring thrusters only. Manoeuvring at impulse speeds is handled through thrust ratio adjustments in the output of the impulse
thruster units, and is supplemented by the smaller manoeuvring thrusters. At low speeds the impulse thrust output is insufficient to
manoeuvre the starship at maximum turning velocities, despite the supplemental thrusters. This makes lower speeds less than optimal
for tight combat manoeuvring. At one-third impulse velocities, the thrust ratio becomes sufficient enough to enable full turning speed
manoeuvring.
22
Page 20

EMERGENCY MANEUVERS
The impulse engines are capable of thrust ratios far beyond the structural capability of your starship’s space frame, if only for very
short periods of time and at the risk of structural breakdowns. This has resulted in the tactical development of emergency impulse
manoeuvres. These manoeuvres take a sizeable amount of power, so they are only available if the power to travel at one-half impulse
speed is actually allocated to the impulse engines. (See POWER ALLOCATION for more information on actual power allocated versus
power requested.) The emergency manoeuvres are as follows:
EMERGENCY TURN: The thrust ratio of individual impulse thrusters can temporarily be thrown out of normal balance, resulting in
quicker turning for your starship. A successful execution of an emergency turn results in the doubling of your ship’s manoeuvrability
rating for approximately three seconds. Once active, the power build-up begins in the impulse system even though the starship
may not be manoeuvring. It is this power build-up that is the time limiting factor,as it may only be maintained for the three seconds
time span. Any time the ship begins to manoeuvre within the build-up period, it is executed at twice the normal speed and it is
here that the possibility of structural breakdowns is realised, meaning that only the act of manoeuvring under emergency turn
conditions can result in a breakdown.
EMERGENCY STOP: Occasionally, a captain will find himself in dire need of stopping quickly. In those situations and emergency
stop may be ordered. This directs the impulse engines into a violent high-power braking mode, causing the ship to come to a
complete stop from full impulse speeds in less than four seconds. Given the mass of the starships today, this can be expected to
be extraordinarily taxing to the ship’s space frame. Any time during the slowdown period, the ship’s frame may succumb to the
strain and result in a breakdown.
EMERGENCY REVERSE: A similar manoeuvre to the emergency stop, the emergency reverse takes the starship beyond merely
achieving a dead stop by actually causing it to reverse course at the maximum reverse speed of one-quarter impulse. Like the
emergency stop, the slowdown and reverse acceleration process takes less than four seconds. Any time during the slowdown and
reverse acceleration period, the ship may breakdown.
STRUCTURAL BREAKDOWNS: If an emergency manoeuvre, or other high hull stress situation occurs such as entering the accretion
disc of a black hole or firing certain advanced weapons, results in a breakdown two things occur. First, control of the ship is
temporarily lost. No commands of any kind can be issued at this time, and helm controls will not respond as the ship tumbles out
of control. Second, and more devastating, is the large amount of damage and crew casualties inflicted during the breakdown.
Virtually every system aboard the ship is damaged and the crew losses can be costly.
WARP
The warp drive of a starship, and its related matter / anti-matter warp core, are
the foundation upon which the power of a starship is built. Without warp
capability, a vessel is unable to travel to even nearby planets in a reasonable
amount of time, much less travel to another star system. And, when not in use
for powering the warp drives for travel, the warp core itself provides forty-five
percent of the ship’s total power output. Because of the nature of starship
combat, warp speed travel and the power provided by the warp core are crucial.
This makes the warp drive system critical to your success.
Warp travel has a few general properties that are common to both in-system and
out-system warping. Once the warp engines are engaged, it will still take several
seconds for the Chief Engineer to attenuate the proper warp field geometry
necessary for warp travel. Once the warp field is properly formed, the ship will
then accelerate to warp speeds. During this time, however, you may not
manoeuvre the ship at all, as all manoeuvring is locked into the navigational
computer and linked to the warp field status. This down time can leave you
extremely vulnerable, so be sure that any enemies in the area have been
sufficiently dealt with before engaging the warp drive. Warp speed travel operates independently of impulse movement and one is not
required in any form for the other.
On an additional note, if you order the Helmsman to engage the warp drives though the VOS,the Chief Engineer assigns priority override
to the warp drive power throttle. However,unlike a normal priority override, the Chief Engineer will return the warp drive’s power priority
to its previous level as soon as the journey is completed.
23
Page 21

IN-SYSTEM WARPS
In order to warp in-system, enough power must actually be allocated to the warp drives to travel at least at warp factor one. In-system
warps can be engaged to any object or planetary body within the system that is 100,000 K (100 Mk) or more away from your current
position. Once an in-system warp is engaged, you may not change course or reallocate power until the destination is reached. When
approaching the destination, the ship will begin braking and will come to a stop 30,000 K away from the target. In the case of a moving
warp destination, such as warping to a targeted ship, your destination point is the last co-ordinates of the target when the warp drives
were engaged. You will not pursue the target while at warp.
OUT-SYSTEM WARPS
Warping out-system is handled in a similar fashion as in-system warping with a few exceptions. First, a destination star system must
be pre-set either on the Helm station or through the VOS. Please note that the VOS will only list those systems necessary for the
completion of your mission. If you wish to travel off the mission path for some reason, you must do so from the Helm station. Second,
out-system warps can take days or even weeks. This time is factored into the overall mission time limit, so speed is crucial for
completing missions in a timely manner.Additional power alloca ted to the warp drive will allow the ship to attain greater warp speeds
and thus cut down the travel time required between systems.
AUXILIARY
Every starship carries with it auxiliary power reactors. These reactors provide a seem secure
source of power for a starship, sufficient to run the basic support functions of the ship in the
case of the loss of the warp core and the impulse fusion reactors. The power generated by
the auxiliary reactors equates to approximately twenty percent of a starship’s total power
output.
SECURITY
The security system aboard a starship is in actuality a collection of several smaller
systems powered and controlled from a central location. These systems include antiintruder force fields, disintegration screens, toxic gas jets, and depressurisation vents
among others. The Chief of Security uses these tools to seal off, isolate, and eliminate
enemy threats aboard the ship. But, all these things require power, and the more power
they have available, the greater their effectiveness at defending the ship from intruders.
Without the benefit of aid from the security system, your onboard marines can only
defend the ship at about seventy-five percent of their normal combat effectiveness, so
it is extremely beneficial to maintain at least minimal security system power.Additional
power to the security system can effectively double the defensive strength of your
security forces, allowing them to more swiftly eliminate the intruders. Security power only benefits your defensive capabilities. It offers
no benefits to away teams you have sent to other vessels. If no marines are onboard, the Security system is still capable of defending
the ship to some degree, and can eliminate intruders on its own over time.
TRANSPORTERS
Transporters are quite a useful system in the hands of a creative and resourceful captain.
With them, a captain can cripple or even capture enemy vessels. The transporter system
encompasses all transporter facilities aboard the ship and activating the transporter system
powers all of them, taking eight seconds for them to become fully active. Transporters have
a limited range in which transporting is safe. At normal, non-combat settings this safe
transport range is 5000 kellicams (K). Boosting power to the transporter system can extend
the range to a maximum of 15,000 K.
24
Page 22

TRANSPORTING AND RETRIEVING AWAY TEAMS
To commence safely transporting an away team, several conditions must be met. First, the target vessel must be within transporter
range. Second, you must have a direct line-of-sight with a downed shield facing on the target ship. Third, you must have sufficient
sensor lock strength to determine the class of the target vessel. If these conditions are met, you may begin the transport.
Transport occurs in groups of five to fifteen marines, depending upon the number of transport facilities aboard the ship.Typically, the
larger ships have more transporter facilities and are thus capable of higher transfer rates. A single group of marines, be it one marine
or the maximum number possible per group, takes six seconds to transport. Your Transporter Chief will automatically lower the
necessary shield face on your ship to facilitate the beam out, and will raise it once the full away team has been dispatched. If for some
reason the transport cannot be completed, such as the target pulls out of range or blocks the transporter lock with an active shield,
the remaining members of the away team will stay on standby in the transporter room(s) and will resume transport as soon as
conditions permit. You may only beam an away team to a single target at a time, but you may have multiple away teams active
concurrently. Retrieving your away teams is similar to transporting them out, and all the same conditions apply.
TRANSPORTER LOCK AND ACCIDENTS
During combat, it behooves every starship captain to prevent his ship from being boarded. Failing in this, the only other recourse is to
make the task of transporting as risky and as dangerous as possible. This can be done by interfering with the transporter’s ability to
lock in on a safe transport destination. Many things factor into the quality of a transporter lock. First, damage to your sensors can
introduce imprecision into the transport lock. Second, ECM of any kind, be it ship generated or naturally occurring,can severely hamper
accurate transporting. Third, range to target is a major factor. Transport locks can be improved by closing range and by boosting power
to the transporters system.
In cases where the transporter lock is less than one hundred percent, transporter operations may still be initiated but at some risk. For
each group of marines being transported, some may not rematerialise, be reassembled improperly, or materialise inside of another
object. It is up to you as the captain to determine if the benefits are worth it.
MEDICAL / SICKBAY
Crew casualties occur when the hull of your starship is damaged, or when enemy marines
board your ship, or if radiation penetrates the shields. These injured crewmembers are
classified in one of four conditions. In order from best to worse these classifications are:
active duty, wounded,critical, and dead. As the condition of injured crew changes they move
from their current classification to the next, degrading crew conditions shift down the list
towards dead. Healing crew shift up the list towards active duty. Thus, a critical crew
casualty will die if his condition worsens or shift to wounded status if he heals.
In order to save as many of their lives as possible and return them to active duty, power must
be allocated to the medical facilities in the ship’s sickbay.Activating sickbay power stabilises
the injured and enables the wounded and critical crew to heal. However, even in this age of
scientific and technological wonders, dead is dead. Sickbay power may be set to any one of
three status levels; Standby, Alert, and Emergency. Each level draws a larger amount of
power than the previous level but offers significant increases in healing rates. Standby is the basic setting, requiring the least amount
of power and healing crew at a modest rate. Alert requires significantly more power,but offers three times the healing rate of Standby.
Emergency is the most costly setting, but grants the greatest benefits. Emergency offers five times the healing rate of Standby. If
sickbay is not powered for some reason, it is destroyed, off-line, or simply shutdown,the condition of injured crew will gradually worsen
until all of the injured are dead.
CREW
It is often difficult to consider a starship’s crew as a system. Over time,they become your brothers, comrades who fight glorious battles
with you and bleed on the same distant battlefields as you. But, in the end, they are merely a resource to be used by the captain to
accomplish the goals of the Empire. They join the Imperial Navy to serve and die for the greater whole. While they are expendable, they
are nonetheless integral to the smooth operation of your vessel.
Starships are designed to operate best with a full complement of crew. A full crew is said to be at a staffing level of 100%.As casualties
occur, this staffing level is reduced, which has negative impacts on sensor and ECM operations, the effectiveness of the internal
security system, the tractor beam and transporter systems, shield reinforcement levels, and weapons recharge rates. Though these
systems are noticeably affected, by far the most serious affect of crew casualties is the reduction in your ship’s repair rate. (See
DAMAGE CONTROL for more information.)
As your crew completes missions, those who survive gain experience. The more crew that survives a mission, the higher the overall
experience level increases. This can and often does allow your ship to perform somewhat above its normal specifications. The items
that benefit from an experienced crew are the same systems and functions that suffer from crew losses; sensors, ECM, security,tractor
beam, transporters, shield reinforcement, weapons charge rates, and damage repair rates.
25
Page 23

ELITE OFFICERS
If you accomplish great exploits one of your officers may prove to be a cut above the rest. There are various possible elite officers, and
each has a beneficial effect on some aspect of your ship’s operation. The officers and their effect on your ship are left for you to
discover.
SENSORS
The sensors of your starship allow you to gather and display the myriad information
necessary for effective starship combat. Fully functioning sensors with a solid lock on an
object provide your ship with the capability of targeting enemy starships, getting accurate
targeting information from the targeting computer, utilising the target aspect angle display
on the HUD, allow seeking weapons to track, gather and display target status information,
displaying the radar, and the assorted HUD reticule indicators. If the sensors are off, due to
damage or lack of power, you are basically flying on visuals alone and this can result in a
quick death on the battlefield.
The strength of your sensor lock on a given target determines just how much information
about that target that can be gathered. The power allocated to the sensors, the range to the
target, enemy ECM, terrain effects, your crew staffing level and the damage status of your
sensors system all factor into the overall strength of your sensor lock. A full sensor lock gives
you the distance to target, its speed, the status of its shields, indications if its weapons are armed or if it’s generating ECM, and the
status of its external subsystems, as well as its target aspect angle, radar blip, and targeting reticule indicators for it. As the lock
degrades the readings of the status of the shields and subsystems become inaccurate, as do your weapons when firing on the target.
The readings will begin to fluctuate in an ever-increasing range of values until finally the damage status readings are lost completely
and weapons fire becomes extremely inaccurate. At this point, only the class of ship can be determined.
Given a sufficiently degraded reading, eventually target lock can be lost altogether.Complete loss of target lock only occurs when the
target vessel is generating sufficiently high ECM, through powering the ECM system, activating a cloaking device, entering certain
terrains, or a combination of these. When target lock is lost,your sensors may still pick up sporadic readings on the previously targeted
vessel. These readings or “blips”can give you a general sense of the target’s location.
Sensor lock strength can be improved in a variety of ways and by a variety of actions, to counter any deleterious effects on your sensor
strength. Even a sensor lock too weak to produce anything but the occasional blip can be improved to the point where contacts are
long and frequent, if not strong enough to produce an actual lock. Allocating additional power to the sensors will increase your sensor
strength, as will closing range to the target. Probes launched at the target also act to improve sensor lock strength, by relaying sensor
telemetry to your vessel from closer range. Hitting an enemy with weapons fire temporarily causes a powerful sensor ping or spike,
which can be quite useful when searching for a cloaked ship. Additionally, both of the ships involved in a tractor beam link become
highly visible as long at the link is in existence.
ECM
ECM is a powerful defensive capability of the sensor system, and allows you to throw off enemy targeting and their ability to detect
your damage and shield statuses. In sufficient strength ECM can even cause losses of sensor locks in a similar fashion to a cloaking
device. This, however, is usually only possible if the targeting ship is sufficiently far away, its sensors are damaged, or you are within
a terrain that generates additional natural ECM.
ECM requires a lot of power, and the more power that can be put into it the more effective it is. This means that larger vessels, with
their enormous power generation capacities can generate more ECM than other, smaller starships. However, since ECM can be
defeated with additional power to the sensors and that powering the sensors is less costly than powering ECM opponents can
compensate for ECM rather effectively. This forces ECM to be used in specific situations in which an opponent may not be able to
compensate for the interference quickly.
TRACTOR BEAM
The tractor beam is a versatile tool. It is most commonly used in towing and manipulating
large objects in space, but this industrial usage is only a portion of its actual abilities. In
combat it can be used to hold an enemy to prevent escape or slow one down long enough
to allow you to get in a critical shot. Many captains have developed other tactics involving
the tractor beam, and creative use of it can be devastating to an opponent.
The tractor beam emitter must build up a sufficient charge to establish a proper gravity field,
a process that takes eight seconds. Activated, a tractor beam can be maintained indefinitely,
though if the beam is shut off for any reason, the tractor beam emitter must recharge.
26
Page 24

The tractor beam system is capable of 360-degree operations, and may be attached to any target with its maximum range of 7,000
K. Once a link is established, the beam attempts to stabilise the distance of the target at 3,500 K, though it does not alter the target’s
relative position. If the target should drift outside of the maximum tractor range, the link is immediately broken and the tractor begins
the recharging process.
While linked, either ship may manoeuvre. Rotation is unrestricted, though the linear thrust of the linked ships creates additive vector
movement, meaning that both vessels may begin travelling in directions other than normal flight. This can have a negative impact on
shipboard targeting computers; so many captains prefer to manually target their weapons under these conditions.
COMBAT TRACTOR DYNAMICS
When utilising a tractor beam against an enemy, it is safe to assume that they are unwilling to be held. The converse should also be
true; else your term of command will be shortened considerably. This has resulted in a particular offensive/defensive tractor dynamic
in combat situations.
Defensively, a starship in combat has two potential options against enemy tractor beams. First, and most obvious, is to avoid entering
tractor beam range, but this also reduces the starship’s combat effectiveness. Second, faster ships can maintain high velocities
and remain at the outer edge of tractor beam range. If a link is established, the high speeds in combination with a sharp manoeuvre
away from the tractoring starship can quite often carry the target ship outside of the maximum tractor range and break the link. This
tactic is best for smaller ships. Finally,a starship may utilise its own tractor emitter to generate a repulsor beam in an attempt to throw
off a tractor link. A repulsor beam must be stronger than the holding tractor to be able to break the link. Once the link is broken, the
repulsing ship’s tractor emitters must recharge. This tactic is best reserved for situations in which the defending ship is of equal or
greater class than the tractoring vessel.
Offensively, there is really only one option available, and that is to increase power to the tractor beam emitter. Stronger beams make
it more difficult for a defending ship to manoeuvre, prevent ships from getting outside of maximum tractor range, and increase the
difficulty of a repulsor attempt.
CLOAKING DEVICE
The cloaking device was given to the Klingon Empire by the Romulans in the initial
technology exchange at the start of the alliance. Since then, it has become an effective tool,
becoming standard equipment on new ships, and all old ships have been refitted with them.
The cloaking device masks the vast majority of electromagnetic emissions of a starship
using one. This includes the visible light spectrum as well as a host of other subatomic and
subspace emissions. It grants a much greater chance of gaining surprise and the everimportant first strike in combat, by allowing the cloaked ship to stealthily approach hapless
and unwary enemies. However, it is by no means foolproof.As fast as improvements can be
made to cloaking technology, the non-cloak using governments develop ever more powerful
sensors. This upward spiralling arms race dynamic keeps the cloak from achieving status as
a true invisibility shield, but the benefits granted even by an imperfect cloak are well worth
further development of the system.
A cloaking device, when activated, renders the ship virtually invisible to visual scanning. Only a slight visible distortion betrays the
presence of a cloaked vessel. For visual scanning, a cloaked ship almost invariably escapes detection by all but the most observant
enemies. While the cloak is nearly perfect against visual scanning, sensor technology has progressed to sufficient levels to allow for
the intermittent detection of a cloaked vessel. This intermittent sensor anomaly increases in frequency and duration for the searching
ship based on range and power to the sensors, making the preferred tactic of the cloaked vessel to choose the attack run path from
longer ranges, close range as fast as possible, decloak, and fire.
Despite the fact that the cloak is a highly effective system, it does have drawbacks. While the cloak is activated, weapons fire is not
possible. The cloaking device must be disengaged in order to fire the ship’s weapons. Weapons may maintain charging status, so they
may be fired as soon as the cloak is disengaged, but firing while cloaked is not possible. Also, the tractor beam may not be engaged
while cloaked and any existing tractor beams emitting from the ship will disengage. This does not break tractor links established on
the cloaking vessel by an enemy ship. Finally, the cloaking field interferes with transporter function to such an extent that transport is
impossible while the cloaking device is engaged. One other additional disadvantage is that the cloaking device will not function within
the ionised gas clouds of a nebula.
When a ship engages its cloaking device, it will be fully cloaked within four seconds.During this cloaking period the ship is quite vulnerable.
The shields of the ship immediately drop, as will any tractor links being generated by the cloaking vessel. ECM and transporters also cease
to function. Your Chief Engineer will automatically divert power from these systems until the cloak is deactivated. However,the ship is still
somewhat visible to the sensors of other ships. Each second of the cloaking process increases the invisibility of the cloaking ship, thus the
greatest danger is at the very beginning. Once fully cloaked, the ship is essentially invisible and can only be intermittently detected by
power boosted sensors. An additional advantage of being fully cloaked is that, though enemy vessels may get blips, the sensor lock can
never be sufficient to allow the enemy to transport marines aboard your ship, or initiate a tractor link.
27
Page 25

SHIELDS
The primary source of defence for a starship is its shields. The shields form a seem formfitting energy shell around the whole of the starship that has the properties of both a seempermeable solid and energy absorptive screen. This dual nature of the shield system
provides protection from most physical impacts as well as from energy discharges such as
the destructive energy of a phaser or the deadly radiation emitted from a star. This energy
shell emits through a network of six energy dispersal grids embedded in the hull. Power from
the ships reactors is converted to the necessary format through the shield generators aboard
the ship, and routed to the shield grids. It takes two seconds for the grid to fully activate, at
which point it emanates its energy field. Activating the shield generator creates an
apparently contiguous energy shell, though in actuality it is six individual shields. These six
individual shields, known as shield facings, protect the forward, aft, port, starboard, dorsal,
and ventral parts of the ship respectively. This does not necessarily mean that all weapons
fire coming from a particular direction will hit only one specific shield facing. Because space
is three dimensional, often three or more shield facings can be struck from a given angle. Keep this in mind when manoeuvring your
vessel. Depending upon the design of the starship, the different shield grids are capable of generating shields of different strength,
meaning that though two shield facings may be at one hundred percent, one may be capable of absorbing more damage than the other.
The forward shield facing is typically the strongest. Klingon vessels tend to follow a pattern of forward being the strongest, aft being
next strongest, port and starboard being next, and dorsal and ventral being weakest.The Federation, on the other hand, tends to make
the forward strongest, then the aft, then the rest all being of equal strength.The pattern of shield strength typically follows the degree
of aggressiveness in a given ships design. More aggressive designs tend to concentrate strength in specific shield facings, while more
defensive designs keep things more evenly distributed.
Damage inflicted on a shield is absorbed, though it weakens the cohesion of the energy field, which reduces its capacity to absorb
further damage. Once this field begins to weaken it will begin its natural process of returning to its coherent state or “recharging”,
slowly restoring its ability to protect. Additional power to the shield generator system will speed up this recharging process, and also
generates an additional protective layer of reinforcement to the shield itself. This additional layer is a kind of quantum particle aura
emanates from the shield energy shell itself. Though it is ill understood the source of this aura’s protective abilities, the effects speak
for themselves. This aura quite efficiently dissipates energy that passes through it, such that weapons fire and explosive warheads lose
some of their nominal damage yield before it strikes the shield energy shell directly. Additionally, this quantum reinforcement is
independent of the strength level of a shield energy shell, granting the full benefit of its damage dissipation until the shield itself is no
longer coherent. At that point, the quantum aura instantly disperses, but it will reassemble once shield cohesion is restored. Research
has revealed that this reinforcing aura has a maximum effectiveness of roughly twenty percent damage reduction. Sadly, though,
maintaining any amount of the reinforcement property of the shield system can require exorbitant amounts of power. Seven times the
normal amount of power to the shield grid is required to reach the limits of the reinforcement of a shield, which can prove quite costly
considering there are six individual shield facings that can be reinforced. Once a shield has lost cohesion, it takes ten seconds for the
grid energy to reconstruct the initial framework of the shield facing. Once this occurs, the shield facing will recharge as normal.
The energy absorption property of the shields is highly efficient. Energy impacts, such as phasers and disruptors are fully absorbed.
The same cannot be said of the seem-permeable solid property of the shields. Physical impacts and explosions are mostly deflected
or absorbed, but some destructive energy still makes it through, regardless of the strength or reinforcement status of a shield. This is
known as “bleed through”. Additionally, functioning shield facings can completely deflect radiation damage such as from a solar corona
or the Romulan CFDIC. They can prevent or interrupt enemy boarding operations as well.
WEAPONS
ANTIMATTER FIELD PROJECTOR (AMFP)
Nickname: “Antimatter Projector”
Damage Rating: 4
Range: 10,000 K
Firing Rate: 1 / 30secs
The Antimatter Field Projector (AMFP) is a Klingon invention of devastating potential. The
weapon itself is based off of the principle of utilising the warp nacelles of a starship to
project a warp containment field in front of the firing vessel. Then, from a special emitter
linked directly to the Matter/Antimatter Reactor, antimatter from the ship’s reactor is injected
into the field. The integrity of this field begins to degrade almost immediately after firing.
During this degradation, matter is passing into the weakening containment field, annihilating
some of the antimatter and decreasing the damage capability of the weapon. The firing ship
28
Page 26

can manoeuvre under impulse power to bring it to bear on targets within the antimatter field. Targets within that field take damage on
every portion of the hull within the containment boundary. The power drain from each firing of the weapon causes brief power outages
and hull fatigue in the ship that fired it and prevents sustained fire of the weapon.
This weapon is applied by the Klingon Defence Forces as a siege device due to the massive destructive potential of the weapon in
concert with difficulties in engaging moving targets with it. It is typically mounted on the Accuser Class Dreadnought. These weapons
are very expensive to manufacture and are thus very valuable. Commanders should take every precaution to keep vessels equipped
with this weapon undamaged.
ASSAULT PHASERS
Nickname: “Super Phasers”
Damage Rating: 4
Range: 30,000 K
Firing Rate: 1 / 30secs
The Assault Phaser is a really heavy phaser. So heavy, in fact, that only large bases and
battleships can carry them. They are the pinnacle of destructive power, easily piercing the
shields of all but the most powerful starships and destroying weaker vessels outright. Both
the Klingon Empire and the Federation employ the Assault Phaser.
Large bases (Starbases and Battlestations) have great power output capacity and large
amounts of space that allow them to use their assault phasers as a primary weapons
system. This makes a base very difficult to attack and destroy and virtually impossible to
capture.
The ship-mounted versions can only be mounted spinally, where the hull of the ship is built around the weapon system rather than
fitting the weapon into a hull. This limitation in mounting gives them an extremely limited firing arc, but provides structural support and
space for the necessary systems. Other drawbacks to these weapons are that power reactors for ships are unable to provide an
efficient charge for the weapon, and that hull design and materials technology can barely provide sufficient structural support.
The basic lack of power on ships equipped with these weapons means that the weapon must take quite a bit of time storing energy
in capacitors attached to the weapon’s energy system. This limitation reduces the firing rate of the Assault Phaser to a fraction of that
of a base mounted weapon. An additional effect is that the ship suffers a brief general power brown out after firing the weapon.
Vessels equipped with Assault Phasers suffer from structural and system stresses when firing the weapon. Each firing of the weapon
could lead to a catastrophic systems failure.
BOARDING PARTIES
Most ships have a complement of marines assigned to them. These marines act both to defend your ship against intruders and to
assault internal targets aboard enemy vessels. Only the offensive capabilities of your marines will be detailed here. The defensive
aspects of marines are covered elsewhere. (See SECURITY for more details.)
In order to send marines to a target, you must do two things. First,you must make sure that transport is possible. (See TRANSPORTERS
for more details.).
Second, you must assemble the boarding party or “away team” and give it orders.This part can be accomplished through either the
VOS or the Security station. A target vessel only has so much space for you to transport marines into. Because of this, the number of
marines that can be present on an enemy starship at any one time is limited. This will be displayed on the Security station. Once this
maximum number is beamed across, no further transports can be made until any wounded or dead are retrieved. At that point, fresh
marines can be transported in to reinforce the current boarding action back up to the maximum number allowed. During combat,
marines damage their target objective as well as inflict casualties among the defenders. Certain objects, such as shuttles and
workbees, cannot be boarded at all as there is no space for it.
Boarding parties can perform two different types of actions. The first type of action is an attack on a specific target system. There are
two types of target systems, hard targets and soft targets. Hard targets are extremely difficult to destroy. These hard targets are warp,
impulse, and life support. These systems are extremely resistant to internal damage due either to system redundancies or the sheer
size of the system. Soft targets are systems such as tractor beam, security, transporters, medical, auxiliary, shields, and the cloaking
device. These systems, while still difficult to totally destroy, are less resistant to damage. When your marines are attacking a system,
not only are they causing damage to the system, they are also interfering with its operation. For as long as the marines are attacking
a system, that system suffers this performance loss, in addition to any damage being incurred.Actually destroying a target system can
be rather difficult, but often the effect of interference is sufficient. A good tactician will sometimes send smaller away teams for the
specific purpose of interference, rather than attempting to destroy it outright. The second type of action that can be undertaken is a
capture attempt. This is extremely difficult and takes quite a bit more time and perseverance than merely destroying a system, as well
as a full complement of marines. Ships may only hope to capture vessels a class or two below them, unless special circumstances
29
Page 27

occur, such as stumbling into an enemy with no marines, or one whose security system has been destroyed and even then it can be
risky. If a ship is captured, the marines aboard stay aboard the captured vessel to maintain control and hold it. You may monitor the
progress of any away team actions you have initiated through the MFD on the HUD, or through the Security station.
When a boarding party is in action, it will continue fighting until they are wiped out, retrieved, or they successfully complete their
mission objective. Even if there are no defending marines, the internal security system of a starship is more than capable of inflicting
at least some casualties on its own. If a vessel is destroyed any marines aboard it are lost, be they attacking or defending. However,
if a vessel is captured all its marines are lost, even if they are aboard another vessel. Marines of different races fight with different
effectiveness. Klingon warriors are about the finest individually,and the Sha’kurians are the weakest. Though strong and powerful, Gorn
are slow and ungainly.This makes them less effective than some races individually, but the real danger from Gorn boarding parties are
their numbers. Tholians, due to the environment required to support their kind never utilise boarding parties. Conversely, their living
environment is so innately hostile to carbon based life-forms that Tholian vessels cannot be boarded.
COHESIVE FUSED DEUTERIUM
IRRADIATION CANNON (CFDIC)
Nickname: “Radiation Cannon”
Damage Rating: 2.4 / Additional
Radiation Effect
Range: 15,000 K
Firing Rate: 1 / 15secs
The Cohesive Fused Deuterium Irradiation Cannon is a medium ranged weapon of Romulan
design. It is an older technology than that of the plasma torpedo, and was developed shortly
after the end of the Federation-Romulan Wars in 1535 IR. The CFDIC is little more than a
directed fusion explosion. A stream of excited deuterium are injected into the chamber of the
weapon and bombarded with high output lasers to create deuterium plasma. This plasma is
continually compressed until a fusion reaction begins. This reaction is contained within a magnetic field and allowed to build to
detonation strength. The containment field is then weakened to the point of collapse in the direction of the barrel, where additional
magnetic fields direct the energy out of the ship and towards its target.
The amount of damage caused by a CFDIC is low compared to the warhead strength of the plasma torpedo, but physical damage is
not the most deadly aspect of this weapon. A side effect of the weapon is the intense radiation from the bolt itself. This radiation is so
intense that it can cause damage to the crew of the target vessel without piercing the hull itself. Shields, however, absorb the radiation
and disburse it harmlessly.
FREQUENCY-MODULATED MESON
PARTICLE ACCELERATOR (FMPA)
Nickname: “Meson Gun” or “Shield Breaker”
Damage Rating: 2 / Shield Damage Disbursement
Range: 15,000 K
Firing Rate: 1 / 12secs
The Frequency-Modulated Meson Particle Accelerator, as it is called, is a closely guarded
secret of the Klingon Empire. Only the Klingon researchers who developed it know the
principles behind it. It utilises a top-secret technology to create finely adjustable meson
particle streams, invisible, that are directed at the target vessel. These mesons collect
around the outer portion of the target starship’s shields, and due to the frequency
modulation, the mesons pool in the weakest areas of the shield. Eventually, the shields build
up a tremendous amount of meson energy along their entire surface. This energy is then subjected to a quick pulse of Eichner radiation,
the only visible aspect of this weapon, which causes it to detonate, damaging all of the target ship’s shields with the most damage
being applied to the weakest shield segment.
30
Page 28

GORN PLASMA TORPEDO
Nickname: “Gorn Plasma”
Damage Rating: 3
Range: 12,500 K
Firing Rate: 1 / 16secs
The Gorn have developed a plasma torpedo independently of the Romulans. While it is based
off of very different scientific principles than the Romulan version, the results are virtually
identical. The Gorn torpedo homes in on its target in the same fashion as the Romulan
version, but its warhead strength is never greater than its equivalent Romulan light plasma
torpedo counterpart.
GRAVIMETRIC HARMONIC RESONANCE
CANNON (GHRC)
Nickname: “Resonator Cannon”
Damage Rating: 4
Range: 7,000 K
Firing Rate: 1 / 16secs
The Gravimetric Harmonic Resonance Cannon or Resonator Cannon is an offensive weapon
derivative of the tractor beam developed by the Gorn. The cannon’s beam strikes the target
ship and begins to push and pull the hull in a rapid modulation. This vibration eventually
reaches the harmonic frequency of the hull and causes structural fatigue and damage.
Resonator Cannons require the tractor beam system to be powered as well as the weapon
system itself. Loss of the tractor system also results in an inability to fire the weapon. The
weapon has 360-degree firing capability and can be directed at any target within range. Once activated, the beam lasts for eight
seconds. If fired while caught in a tractor beam, the GHRC beam instantly breaks the link but the weapon is fully discharged in the
process and no damage is inflicted on the target. However, the strength of the beam is so great that no amount of repulsor beam
strength will break the grip of a GHRC once it has been fired. One other strange side effect of the design of this weapon is its ability
to negate any tractor beam holding the firing ship. All tractor beams holding the firing vessel are immediately broken, but the firing
vessel must allow the weapon to fully recharge before firing again.
GRAVITON DENSITY DISTORTION
SPHERE (GDDS) GENERATOR
Nickname: “GDDS” or “Grav Sphere”
Damage Rating: 2 / Collision and Heavy Weapon Absorption
Range: Special
Firing Rate: 1 / 40secs
The Graviton Density Distortion Sphere Generator was developed by the Gorn Star Kingdom
during its many wars with the Romulan Star Empire, and is used as an effective means of
attacking slow moving vessels. During the war that saw the first use of the GDDS by the
Gorn, Romulan troops captured a ship equipped with one of these devices for study. The
Romulans towed said vessel to a research facility far from the Gorn border in what was then
one of the farthest frontiers of their empire. Unknown to the Romulans, this frontier was to
soon become fixed as their border with the Sha’kurian people. Not long after research began on the enigmatic Gorn device, the
Romulans made a regrettable first contact with the Sha’kurians. Romulan expansionist dogma clashed violently with Sha’kurian
territoriality causing a second front to open for the Romulans. During the fighting, a Sha’kurian raiding force captured the research
station and the GDDS as well. The Sha’kurians proved to be highly adept at adapting the Gorn device to their own purposes and have
been fielding them ever since.
Though the two races, the Gorn and Sha’kurians, have nearly identical GDDS technology,they have developed radically different tactics
for their use. The Gorn normally mount these devices on the larger vessels in the Gorn Royal Navy because their ramming capability
suits the tremendous mass and great speed of large Gorn starships. The Sha’kurians, however, utilise the defensive capabilities of the
GDDS to a far greater extent than the Gorn and thus greatly increase the survivability of their carrier forces.
31
Page 29

The GDDS disperses a spherical field of gravitons in rapidly varying density around the vessel using it. This field remains active for
twenty seconds or until the stored energy within the field is expended. This field prevents the generating ship from suffering the effects
of collisions, thereby allowing the generating vessel to act as a ram. The GDDS field impacts ships, asteroids, projectiles, and other
physical objects as a normal collision with the field absorbing any impact force that would normally have been done to the generating
vessel. However,impact absorption weakens the field, reducing its overall strength. Once the field’s integrity is fully compromised, the
field is deactivated and any extra collision damage is directed to the hull of the GDDS using ship. Once the GDDS deactivates, the field
cannot be activated again until the gravimetric capacitors completely recharged. The GDDS is not an invulnerability shield, however.
Phasers, including the assault phaser, and light and standard disruptors pass through the GDDS field unaffected.
IMPULSE VELOCITY PROJECTILES
Nickname: “Missiles”
Impulse Velocity Projectiles are missiles launched from silos, bays, or racks aboard Sha’kurian ships. Overall speed and warhead
strength varies from projectile-type to projectile-type. There are four types of impulse projectiles:
ACTIVE TERMINAL GUIDANCE (ATG) SHIP-LAUNCHED
Damage Rating: 2
Range: 15,000 K
Firing Rate: 1 / 16secs
This type of projectile has a bank of image files for all known vessels with the capability of
having sensor data downloaded into it at the time of launch to program in new images for
unknown targets. These projectiles are launched in the general direction of a targeted vessel
at which point the projectile’s own image recognition sensor suite takes over and it follows
that particular vessel until it strikes or runs out of fuel. The firing ship need not maintain
sensor lock on the target vessel, as the projectile is capable of maintaining an intercept
trajectory.
ACTIVE TERMINAL GUIDANCE (ATG) BOMBER-LAUNCHED
Damage Rating: 2
Range: 10,000 K
Firing Rate: 1 / 16secs
This type of projectile is identical in most respects to the ship-launched version, only much, much smaller and with shorter effective
range. Though the size of the missile housing is decreased, the warhead’s destructive capability is comparable to the full size version
because of its “shaped charge” nature.
MULTIWARHEAD
Damage Rating: 4 / Multi-vector Attack
Range: 20,000 K
Firing Rate: 1 / 24secs
This type of projectile is slower than all other versions but has longer range. This is not its
advantage, however. The advantage of this projectile is that it carries six sub-munitions
onboard. When the projectile travels a certain distance, the six sub-munitions disperse and
home in on the target from many directions. Each sub-munition does a good amount of
damage, travels much faster than the carrier projectile, and can hit the target from multiple
angles damaging many shields. During dispersal, the backwash of the sub-munitions’
engines destroys the carrier projectile.
32
Page 30

BALLISTIC (FAST)
Damage Rating: .8
Range: 10,000 K
Firing Rate: 1 / 16secs
The ballistic projectile is a fighter-launched weapon that is basically a warhead attached to
a super high-powered impulse engine. These projectiles reach velocities almost equal to that
of the photon torpedo and do an equal amount of damage to the photon. However, these
projectiles have no homing capabilities of any kind. They are “direct-fire” weapons in the
truest sense of the word.
LIGHT DISRUPTOR BANKS
Damage Rating: .6
Range: 15,000 K
Firing Rate: 1 / 1.5secs
This is a rapid-firing type disruptor, similar in nature to the standard disruptor bank.Though the damage from each bolt is individually
lesser than those of the standard disruptor bank, its rapid firing rate makes up for it over time. Currently, only the B’rel class escort
mounts this weapon, though it is being considered for use on other platforms.
PHASE-INDUCED BIPOLAR
COMPRESSION DISRUPTOR
Nickname: “Heavy Disruptor”
Damage Rating: 1.5
Range: 12,500 K
Firing Rate: 1 / 6secs
This is essentially a grossly overpowered medium range version of the standard disruptor
weapon of the Klingon Empire. The Tholian Incursion Reaction Forces also use this weapons
system, although it is not known whether they researched themselves or stole it from the
Empire. By using a bipolar energy field, the disruptor energy is collected and compressed
into a large energy packet. The packet is subjected to a quantum energy bombardment that
causes the packet to slightly shift its phase. By purposely leaving a portion of the bipolar
energy field weaker, the phase shift will cause the energy packet to exit the compression unit in a controllable direction.
The energy packet is a small torpedo-like projectile that is less powerful than a standard photon torpedo, but can be fired more rapidly
and does not require any sort of expensive casings as do the photon torpedoes.
These weapons are usually employed as a prelude to an actual torpedo strike, weakening the target’s shields as well as causing some
internal damage for the heavier pounding of the antimatter torpedoes.
PHASER BANKS
Damage Rating: .4
Range: 15,000 K
Firing Rate: 1 / 3secs
A common primary weapon throughout the Alpha and Beta Quadrants is the phaser. The
phaser is a beam of cohesive energy, similar to a Laser but rapidly pulsing. This pulsing is
so rapid as to be invisible to the eye. While the behaviour of the phaser is identical from race
to race that uses them, the technology driving them is radically different producing a
different look for each group.
33
Page 31

PHOTON TORPEDOES
Damage Rating: 2
Range: 10,000 K
Firing Rate: 1 / 8secs
The photon torpedo is the mainstay secondary weapon of the Federation and the Klingon
Empire. These torpedoes are high velocity projectiles, with a matter/anti-matter warhead as
its payload. The onboard deuterium and anti-deuterium are kept separate until the detonator
systems activate, due to impact or reaching their pre-programmed maximum range. At the
moment of detonation, magnetic fields direct much of the force of the explosion in a similar
fashion to shaped charges of conventional chemical explosives in order to inflict as much
damage to their targets as possible.
QUANTUM CARRIER-WAVE BEAM (QCB)
Nickname: “QCB”
Damage Rating: 2 / Multiple Shield Damage
Range: 7,000 K
Firing Rate: 1 / 35secs
The QCB is a particularly effective weapon of Gorn invention, not only used by the Gorn but
also used by the Federation Starfleet as well in a limited technological exchange program
with the Gorn Star Kingdom. The weapon itself consists of a highly specialised tractor beam
emitter and a high-energy metreon plasma array. When a vessel fires a QCB, the tractor
beam holds the target ship and forms a kind of gravitic conduit. The metreon plasma array
then sends a series of quantum energy pulses through conduit, striking the target and
splashing damaging energy across much of the target’s shields. QCB systems work in
conjunction with the tractor beam system. As such, the tractor system must be powered at least at minimum level for the QCB to fire.
Loss of the tractor system also results in an inability to fire the weapon.
Similarly to the GHRC, the QCB system has 360-degree firing capability and can be directed at any target within range. Once activated,
the beam lasts for fifteen seconds. If fired while caught in a tractor beam, the QCB beam instantly breaks the link but the weapon is
fully discharged in the process and no damage is inflicted on the target. However, the strength of the beam is so great that no amount
of repulsor beam strength will break the grip of a QCB once it has been fired.
RAPID FIRE PHASER BANKS
Damage Rating: .4
Range: 15,000 K
Firing Rate: 1 / 1.5secs
Particular to the Sha’kurian navy is the rapid-fire phaser. Similar in principle to the light
disruptor, the individual bursts do less damage than a standard phaser but their increased
firing rate makes up for the decrease. Otherwise, it is mostly identical in theory to phasers
used by other races.
ROMULAN HEAVY, MEDIUM AND LIGHT
PLASMA TORPEDOES
HEAVY PLASMA TORPEDO
Damage Rating: 5
Range: 12,500 K
Firing Rate: 1 / 35secs
34
Page 32

MEDIUM PLASMA TORPEDO
Damage Rating: 4
Range: 12,500 K
Firing Rate: 1 / 25secs
LIGHT PLASMA TORPEDO
Damage Rating: 3
Range: 12,500 K
Firing Rate: 1 / 15secs
After a long period of isolationism, the Romulan Star Empire debuted a new and devastating weapon, the plasma torpedo, in a test of
Federation resolve. The weapon performed beautifully under combat conditions, though the participants of the mission did not return.
Though the plasma torpedo was highly effective, its power requirements were enormous. It soon became apparent that lower powered
versions of the torpedo were in order, thus the medium and light variant were born. These medium and light torpedo launchers are
used to better balance a ship’s performance versus its firepower, and to increase combat longevity.
STANDARD DISRUPTOR BANKS
Damage Rating: .6
Range: 15,000 K
Firing Rate: 1 / 3secs
This is the standard primary weapon of the Klingon and Romulan Empires. The disruptor
mechanism creates a hyper-energetic particle stream that cannot be contained for more
than a few milliseconds. The containment field is ejected from the disruptor emitter and as
the field decays the contained energy is released, disrupting whatever matter it contacts.
TRILITHIUM DEPLETED PHOTON TORPEDOES
Nickname: “Heavy Photon”
Damage Rating: 4
Range: 10,000 K
Firing Rate: 1 / 8secs
In their never-ending quest for more destructive weapons Klingon researchers developed a
method of boosting the destructive output of photon torpedoes. The process, known as
trilithium depletion, increases the damage capability of photon torpedoes by one hundred
percent. Trilithium depletion does have drawbacks, however. The depletion process during
the manufacture of the weapon is time consuming and very expensive, not to mention
dangerous. Many munitions factories have suffered premature detonations of these devices
during the manufacturing process and were severely damaged. Nevertheless, because of the
intense cold war with the Federation, the Klingon Empire uses these torpedoes on several classes of Klingon warships. Ships equipped
with these torpedoes must be outfitted with special munitions storage modules and the torpedo itself is built only to fire from a specific
type of reinforced photon launcher. This eliminates the risk of foolish captains attempting to use the heavy torpedo munitions in a
standard torpedo launcher.
35
Page 33

WEB SPINNER
Nickname: “Web”
Damage Rating: Special
Range: 3,500 K
Firing Rate: 1 / 50secs
The Tholian Web Spinner projects a static subspace bubble around the target ship, placing
it in a rapidly decaying bubble of separate space-time. All linear motion for the victim ceases,
though the victim may still rotate. In that moment, a cage of Web energy engulfs the victim.
The space-time bubble dissipates soon after, but the victim is caught in the web and is
immobile anyway.A ship ensnared by the Web Spinner cannot move, and its weapons cannot
fire through the Web. The Web cage is relatively unstable and will only imprison a ship for a
short amount of time, after which it will dissipate completely. Once the web fully dissipates,
the imprisoned ship begins accelerating to its set impulse speed. While the Web cage is in existence, all ships can fire through the Web
cage at the imprisoned ship as if it were normal space. Web Spinners have 360-degree operation, and can ensnare any target within
range. As with the GHRC or QCB, the Web works in conjunction with the tractor beam system. Both must be activated in order for the
Web Spinner to function. Loss of the tractor beam system prevents the Web Spinner from functioning.
BRIDGE STATIONS AND INTERFACES
VERBAL ORDERS SYSTEM (VOS)
Across the bottom of the Tactical HUD and Gunnery Chair displays is a numbered list of your officers. By pressing a number from the
keyboard this list will disappear and the officer chosen will be listed on the lower left corner of the display. Above the officer title, a list
of the orders that you can give to that officer will appear. The list will temporarily be displayed over your ship’s status indicators. When
you select an order from this list, that order will be displayed at the bottom of the screen next to the officer’s name as if building a
sentence. If the order does not terminate at that selection, the next level of the menu tree will replace the existing list. Once the player
has selected a menu option that terminates that branch, Torlek’s voice will be heard barking out the command and the crewman will
respond. Once you have given an order from the verbal order system, the order will be carried out immediately.Options that lead to a
further menu tree are differentiated from options that terminate by a dash placed after the option text. For example, Boost Sensor Power
is displayed as “Boost Sensor Power-”, indicating that there is an additional menu level. Therefore the order sequence to increase
power to the Sensors to 50% of your total ship’s power would read: “Science- Boost Power to Sensors - to 50% Total Ships Power.”
Many menus require you to choose a power level, speed or number of crew from a whole range of different possibilities. In these cases,
the option that most closely represents the ship’s current status is highlighted. For example, if a ship had 9% of its total power allocated
to sensors, then the option ‘10% Total Ship Power’ would be high-lighted on the power allocation menu for sensors.
If a menu option is unavailable or not possible, then it will gray-out. Pressing the number of a menu item that is grayed-out will do
nothing, not even registering as a keystroke and taking you out of the menu. For example, as weapons systems are destroyed or go
off-line it will no longer be possible to power them, so these options will gray-out in the Verbal Order menu.
Some options support two separate functions that are displayed based on the ship’s status. For example, when the cloaking device is
turned off, the option under the Weapons officer would read “Activate Cloaking Device”, but when it is turned on, the option would read
“Deactivate Cloaking Device”.
THE ORDERS
The following sections are the commands that can be issued by the verbal orders system, listed in order of the root verbal orders menu
tabs.
36
Page 34

1- ENGINEER
1-1- Activate/Deactivate Damage Control
1-2- Boost Power to Damage Control
1-2-1 to Off
1-2-2 to Minimum
1-2-3 to 5% Total Ship Power
1-2-4 to 10% Total Ship Power
1-2-5 to 20% Total Ship Power
1-2-6 to 30% Total Ship Power
1-2-7 to 40% Total Ship Power
1-2-8 to 50% Total Ship Power
1-3- Engage Power Allocation
1-3-1 Battle - Standard
1-3-2 Battle - Offensive
1-3-3 Battle - Defensive
1-3-4 Stealth
1-3-5 Hunt for Cloaked Ships
1-3-6 Withdraw & Repair
1-3-7 Repel Enemy Marines
1-3-8 Warp Out
1-4- Repair Priority
1-4-1 Combat Systems
1-4-2 Hull & Power
1-4-3 Internal Systems
1-4-4 Equalise
1-5- Damage Report
1-6- Power Report
2- HELM
2-1- Warp Out-System
2-1-# List of Destination Systems
2-1-#-1- Warp Factor 1
2-1-#-2- Warp Factor 2
2-1-#-3- Warp Factor 3
2-1-#-4- Warp Factor 4
2-1-#-5- Warp Factor 5
2-1-#-6- Warp Factor 6
2-1-#-7- Warp Factor 7
2-1-#-8- Warp Factor 8
2-1-#-9- Warp Factor 9
2-2- Warp In-System
2-2-# List of Destinations
2-3 Warp To Target
2-4- Impulse Speed
2-4-1 Full Impulse
2-4-2 3/4 Impulse
2-4-3 1/2 Impulse
2-4-4 1/4 Impulse
2-4-5 All Stop
2-4-6 Reverse 1/4 Impulse
2-4-7 Match Speed with Target
2-5- Emergency Manoeuvre
2-5-1 Full Turn
2-5-2 Full Stop
2-5-3 Full Reverse
2-6- Standing Orders
2-6-1 Evasive Manoeuvres
2-6-2 Pursue Target
2-6-3 Maintain Course
2-6-4 Orbit Target
3- COMM
3-1 Hail Targeted Vessel
3-2- Order Escort
3-2-# List of Escorts
3-2-#-1 Break And Attack
3-2-#-2 Attack My Target
3-2-#-3 Capture My Target
3-2-#-4 Form Up
3-2-#-5 Defend My Target
3-2-#-6 Cease Fire
3-2-#-7 Return To Base (fighters only)
3-3- Order All Escorts
3-3-1 Break And Attack
3-3-2 Attack My Target
3-3-3 Capture My Target
3-3-4 Form Up
3-3-5 Defend My Target
3-3-6 Cease Fire
3-4 Hail for Assistance
3-5 Mission Objectives
4- SECURITY
4-1 Activate/Deactivate Security Systems
4-2- Boost Power to Security
4-2-1 to Off
4-2-2 to Minimum
4-2-3 to 5% Total Ship Power
4-2-4 to 10% Total Ship Power
4-2-5 to 20% Total Ship Power
4-2-6 to 30% Total Ship Power
4-2-7 to 40% Total Ship Power
4-2-8 to 50% Total Ship Power
4-3 Activate/Deactivate Transporters
4-4- Boost Power to Transporters
4-4-1 to Off
4-4-2 to Minimum
4-4-3 to 5% Total Ship Power
4-4-4 to 10% Total Ship Power
4-4-5 to 20% Total Ship Power
4-4-6 to 30% Total Ship Power
4-4-7 to 40% Total Ship Power
4-4-8 to 50% Total Ship Power
4-5 Beam Away Team to Target
4-5-1 5 Marines
4-5-2 10 Marines
4-5-3 20 Marines
4-5-4 30 Marines
4-5-5 40 Marines
4-5-6 50 Marines
4-5-7 60 Marines
4-5-8 70 Marines
4-5-9 All Marines
4-5-#-1 Capture Ship
4-5-#-2 Engineering
4-5-#-2-1 Warp
4-5-#-2-1 Impulse
4-5-#-2-1 Auxiliary
4-5-#-3 Security
4-5-#-4 Transporters
4-5-#-5 Medical
37
Page 35

4-5-#-6 Life Support
4-5-#-7 Tractor
4-5-#-8 Shields
4-5-#-9 Cloak
4-6 Retrieve Marines from Target
4-7 Security Report
5- MEDICAL
5-1- Prep Sick Bay
5-1-1 Off
5-1-2 Standby
5-1-3 Medical Alert
5-1-4 Medical Emergency
5-2 Casualty Report
6- SCIENCE
6-1 Activate/Deactivate Sensors
6-2- Boost Power to Sensors
6-2-1 to Off
6-2-2 to Minimum
6-2-3 to 5% Total Ship Power
6-2-4 to 10% Total Ship Power
6-2-5 to 20% Total Ship Power
6-2-6 to 30% Total Ship Power
6-2-7 to 40% Total Ship Power
6-2-8 to 50% Total Ship Power
6-3 Activate/Deactivate ECM
6-4- Boost Power to ECM
6-4-1 to Off
6-4-2 to Minimum
6-4-3 to 5% Total Ship Power
6-4-4 to 10% Total Ship Power
6-4-5 to 20% Total Ship Power
6-4-6 to 30% Total Ship Power
6-4-7 to 40% Total Ship Power
6-4-8 to 50% Total Ship Power
6-5- Sensor Range
6-5-1 Point Blank
6-5-2 Short
6-5-3 Medium
6-5-4 Long
6-6 Scan Target
6-7 Launch Probe at Target
6-8- Visual
6-8-1 Wide Angle
6-8-2 Normal
6-8-3 Magnify 200%
6-8-4 Magnify 400%
6-8-5 Magnify 600%
6-9- Switch Sensor Mode
6-9-1 to Elite
6-9-2 to Bore-Sight
7- WEAPONS
7-1 Raise/Lower Shields
7-2- Shields Control
7-2-1- All
7-2-2- Fore
7-2-3- Aft
7-2-4- Port (Left)
7-2-5- Starboard (Right)
7-2-6- Dorsal (Top)
7-2-7- Ventral (Bottom)
7-2-#-1 Lower
7-2-#-2 Raise
7-2-#-3 Overload 125%
7-2-#-4 Overload 150%
7-2-#-5 Overload 175%
7-2-#-6 Overload 200%
7-3 Arm/Disarm Weapons
7-4- Weapons Control
7-4-1- All Weapons Systems
7-4-2- Primary
7-4-3- Secondary
7-4-4- Heavy
7-4-5- Advanced
7-4-#-1 All Banks
7-4-#-2 Forward
7-4-#-3 Aft
7-4-#-4 Port
7-4-#-5 Starboard
7-4-#-6 Port & Starboard
7-4-#-#-1 Offline
7-4-#-#-2 Charge
7-4-#-#-3 Overload 125%
7-4-#-#-4 Overload 150%
7-4-#-#-5 Overload 175%
7-4-#-#-6 Overload 200%
7-5 Activate/Deactivate Cloaking Device
7-6 Tractor Targeted Vessel / Activate Repulsor Beam
7-7- Tractor Control
7-7-1 to Off
7-7-2 to Minimum
7-7-3 to 5% Total Ship Power
7-7-4 to 10% Total Ship Power
7-7-5 to 20% Total Ship Power
7-7-6 to 30% Total Ship Power
7-7-7 to 40% Total Ship Power
7-7-8 to 50% Total Ship Power
7-8 Targeting Mode
7-8-1 Auto
7-8-2 Bore-Sight
7-9 Switch to Gunnery Chair / Tactical HUD
38
Page 36

8- TARGET
8-1 Object in Reticule
8-2- Subsystem
8-2-1 None (Hull)
8-2-2 Warp Engines
8-2-3 Impulse Engines
8-2-4 Sensors
8-2-5 Primary Weapons
8-2-6 Secondary Weapons
8-2-7 Heavy Weapons
8-2-8 Advanced Weapons
8-3 Lock Target
8-4 Nearest Enemy
8-5- Standing Orders
8-5-1 Fire at Will
8-5-2 Fire at Locked Target
8-5-3 Cease Fire
8-6- Change Targeting List
8-6-1 Enemy Ships
8-6-2 Friendly Ships
8-6-3 Neutral Ships
8-6-4 Celestial Objects
8-6-5 All Ships and Objects
8-7 Next
8-8 Previous
8-9 None
9- STATION
9-1 Go to Engineering
9-2 Go to Helm
9-3 Go to Communications
9-4 Go to Security
9-5 Go to Medical
9-6 Go to Science
9-7 Go to Weapons
9-8 Go to Library
9-9 Go to Damage Control
HEAD UP DISPLAY (HUD)
TARGET ANALYSIS (STARSHIPS)
When you target an enemy vessel and have sufficient sensor efficiency, the information
in this display will fill in, the higher the sensor efficiency, the more information that is
displayed.
CLASS/NAME DISPLAY: Depending upon the sensor efficiency this field may read
“Unknown”, or list the class of the vessel, or even the specific name of the vessel.
WIRE FRAME: This is a graphical representation of the targeted starship, and is a
general indicator of its hull integrity. As the target is damaged, this wire frame gets
darker and darker.When the target is nearing destruction, it will begin to flash. Ships that are lifeless hulks display as dark gray.
SHIELD INDICATORS: These represent the strength of the various shield facings of the target.The number is the shield strength of
the target expressed as a percentage. The remainder is a graphical representation of relative strength. These indicators darken as
the shields get damaged, then begin flashing just before they drop. Downed shield facings display nothing. The sections
surrounding the wire frame represent the forward, aft, port, and starboard shields. There are two segments represented by half
circles. The upper half-circle is the dorsal, or top shield, the lower half-circle is the ventral, or bottom shield.
ARMED STATUS:This indicator appears if the target vessel’s weapons are armed.
39
Page 37

ECM INDICATOR: This indicator appears if the target vessel has activated ECM.
EXTERNAL SYSTEMS STATUS:This is a list of the systems on the target vessel that can be directly targeted by your ship’s weapons.
DISTANCE TO TARGET:This shows the distance to target.
TARGET SPEED: This shows the speed that the target is travelling at. A negative number indicates the target is moving in reverse.
TARGET ANALYSIS (PLANETS)
NAME DISPLAY: Depending upon the sensor efficiency this field may read “Unknown” or list the name of the planet.
DISTANCE TO PLANET SURFACE: This shows the distance to the surface of the planet.
PLANETARY INFORMATION/SUBTARGETS: This shows any library data known about the planet, or displays any targets of interest
on the planet’s surface.
SHIP STATUS:This shows the pertinent information about your own vessel.
NAME DISPLAY:This is the name of your vessel.
EXTERNAL SYSTEMS STATUS: This is a list of the systems on the your vessel that can be directly targeted by an enemy ship’s
weapons.
WIRE FRAME: This is a graphical representation of the your starship, and is a general indicator of its hull integrity. As the target is
damaged, this wire frame gets darker and darker.When your ship is nearing destruction, it will begin to flash.
SHIELD INDICATORS: These represent the strength of the various shield facings of your ship.The number is the shield strength of
the target expressed as a percentage. The remainder is a graphical representation of relative strength. These indicators darken as
the shields get damaged, then begin flashing just before they drop. Downed shield facings display nothing. The sections
surrounding the wire frame represent the forward, aft, port, and starboard shields. There are two segments represented by half
circles. The upper half-circle is the dorsal, or top shield, the lower half-circle is the ventral, or bottom shield.
TRACTOR BEAM INDICATOR:This indicator appears when the tractor beam is receiving power. The indicator brightens as the tractor
beam charges up, and becomes bright red when full charged. If the target vessel is within tractor beam range the indicator turns
green. When the tractor beam is on, the indicator will flash.
TRANSPORTER INDICATOR:This icon appears on the HUD when the transporter system is activated. As the transporters charge up,
the indicator will glow a brighter and brighter red. Once the transporters are fully charged, the icon will turn remain bright red. If
the target vessel is with safe transporter range (based on all factors, including power and ECM) the icon will turn green. Once
transport is possible, by having a line-of-sight on an opponent’s downed shield facing, the icon will begin to flash. If at any time
conditions change to make transporting risky, the icon will turn yellow instead of green.All other behaviours of the icon remain the
same.
CURRENT SPEED: This displays your current speed as a numerical value. Negative speeds indicate travelling in reverse.
IMPULSE THROTTLE: The impulse throttle is made up of several parts.The triangular pip on the top indicated your desired speed.
The triangular pip on the bottom indicates the maximum speed attainable with the power currently allocated to impulse movement.
WEAPONS INDICATORS: Here,icons represent all weapons in the forward arc of your starship. Each type of weapon gets a different
icon, and each weapon tube or emitter gets its own icon. For example, if a ship has 2 photon torpedoes tubes,there would be two
icons of the same type here, the type representing the fact that they are photon torpedo tubes and the number indicating there are
two separate launchers. As the weapons charge up, the icons get brighter. When fired, the icons go dark and then brighten up as
they recharge. If the target is capable of being hit by an individual weapon, the icon turns green. Destroyed weapons show up as
dark gray.
40
Page 38

MULTIFUNCTION DISPLAY
The Multifunction Display can be used to display your mission objectives and well as officer reports detailing your ship’s power,
damage, security and medical status. By default the MFD will display your mission objectives. When an officer report is called, it will
be displayed for several seconds, and then the MFD will return to showing mission objectives.
MISSION OBJECTIVES: By default, the MFD will list your mission objectives. When you pass an objective it will turn green. Should
you fail an objective, it will turn red.
MISSION CLOCK: The mission clock is a timer that indicates how much game time you have to complete your mission. The fields
of the timer represent weeks, days, hours, minutes and seconds. As you warp from one system to another, the timer will
automatically decrement the hours or days that you were travelling. You should have enough time to complete all objectives as
long as you travel at warp five through warp nine. It is recommended that you warp at your best possible speed whenever possible
so that you will have extra time to investigate nearby systems or to respond to distress calls. If mission timer expires before you
have completed your objectives, you will fail the mission.
TARGET ASPECT ANGLE
This window displays a real-time rendered full colour model of the target vessel. This window shows the target’s aspect angle relative
to your own as well as visible damage.
SENSOR (RADAR) DISPLAY
This display shows the currently selected radar display. A single letter is listed below the sensor display indicating the range setting of
the sensors. In all modes, known enemy vessels will appear as red dots, friendly vessels will appear as blue dots, and unidentified
vessels will appear as gray dots, and heavenly bodies will appear as green dots. Ships that are detected while cloaked will appear as
a blinking white dot.
ELLIPTICAL RADAR: The sensor display is divided into four quadrants, indicating forward, aft or rear, port or left, and starboard or
right. Any given blip will be located in one of these quadrants indicating what side of your ship it is on. A blip may be attached to
a stick, if the blip is attached to the top of the stick it is above you, if it is on the bottom of the stick it is below you. The length of
the stick is an indication of how far above or below you the blip is. Blips with no stick are level with your ship.
FORE / AFT BORE-SIGHT:The sensor display consists of two circles, one depicting all vessels in front of the player’s ship, and the
other depicting all vessels behind the ship. Objects above, below or on the sides of the player’s ship appear at the outer edges of
the displays. If this mode is selected, the aft display is located in the upper left corner of the HUD while the forward display remains
in the upper right. The target aspect angle display moves to the upper centre of the HUD.
MISCELLANEOUS HUD INDICATORS
TARGETING RETICLE:The targeting reticule indica tes the direction of travel for the starship as well as the aiming point if in manual
targeting mode.
TARGET DIRECTION INDICATOR: A small red triangle moves around the targeting reticule that always points to the centre of the
Targeted Ship Indicator, indicating which direction you should turn to acquire the target.
TRACTOR BEAM DIRECTION INDICATORS: Similar to the Target Direction Indicator, a small triangle moves around the targeting
reticule indicating the direction of a tractor link. If you established the tractor link, the triangle is blue colour. If you are being
tractored, the triangle is yellow. These indicators indicate which direction you should turn to face the target of your tractor beam
in the case of a blue triangle, or to face the enemy that has you in a tractor beam of their own.
TARGETED SHIP INDICATOR: When you target an object, a target indicator is placed upon that object’s graphic. This indicator is
composed of three arrows. When you lock the targeted object, the three arrows become outlined. The arrows making up the
targeting indicator are yellow-orange if the enemy is outside of primary weapon range, dark red if the enemy is within primary
weapons range, and bright red if within range of the secondary weapons.
MAGNIFICATION INDICATOR: Near the targeting reticule, a small text readout will appear of the magnification of the main view
screen is set to any level other than normal.
41
Page 39

EMERGENCY MANEUVERS
Through the VOS or via hotkeys you can send an immediate command to the Helmsman to perform a dangerous emergency
manoeuvre. By pressing Emergency Turn, the ship will be allowed to make sharp turns in excess of its design specifications. By
pressing Emergency Stop, the ship will come to a complete stop very quickly and will transfer movement power to shields. By pressing
Emergency Reverse, the ship will almost immediately stop and begin accelerating in reverse.All of these emergency manoeuvres place
a significant strain of the ship’s superstructure and engines, and may cause a breakdown to occur.
GUNNERY CHAIR
The gunnery chair will enable you to take control of all weapon arcs aboard your
starship, so that you may fire at enemies with forward, aft, port and starboard weapons.
In addition, you can issue orders to your helmsman to have him fly the ship while you
focus on firing the weapons.
There are four Helm orders available: pursue target, orbit target, evasive manoeuvres,
and maintain course. If you tell your Helmsman to pursue a target, he try to close to
weapons range while maintaining a position directly behind the ship. You can order your
Helmsman to orbit a target in order to circle a planet or a ship. Giving your Helmsman
an evasive manoeuvres command will cause him to attempt to fly outside of enemy
weapons range while dodging enemy fire. Giving an order to maintain course will place
the Helm under your direct control. You may let the ship fly in a straight course, or you may manoeuvre the ship as you see fit.
When flying the ship from the gunnery chair, it is important to remember that your viewing orientation has changed. Therefore, if you
are looking directly aft and your target is above, you would need to pitch the nose of the ship down in order to bring your guns to bear.
This is exactly the opposite what you would do if the ship were in front of your. Flying from the gunnery chair can therefore takes some
practice, but it can be very rewarding.
There are two methods of controlling the gunnery chair that can be selected from the options screen; the Padlock mode and the Dual
Control Mode. The default method of controlling the gunnery chair is the padlock mode. In Padlock mode, the gunnery chair will
automatically track your target as it moves across your firing arcs. This leaves you to fly the ship with your joystick or mouse (provided
the Helm is set to maintain course) and fire your weapons as the target moves into each of your firing arcs. In the dual control gunnery
mode, the joystick will manually rotate the gunnery chair while you fly the ship with the keyboard (again, provided the Helm is set to
maintain course). While this method can take more practice to master, it will also give you the most control of your starship.
GUNNERY RADAR DISPLAY (STRIP RADAR)
When you switch to the gunnery chair, a special Sensor (Radar) display will appear that is divided into five sections.The centre section
defines the area of the forward weapons arc. To the left of the forward weapons arc is the area of the port arc. To the right of the forward
weapons arc is the starboard arc segment. The two small sections at the extreme left and right of the strip represent the aft arc. The
small rectangular box represents the area you are currently viewing. The thick dashed line running horizontally through the radar strip
represents the horizontal plane of your ship. Targets above this line are above your ship, and targets below the line are below your ship
as well. The thinner dashed lines above and below the horizontal centreline indicate the maximum elevation/depression of the gunnery
chair. As in the HUD radar modes, known enemy vessels will appear as red dots, friendly vessels will appear as blue dots, and
unidentified vessels will appear as gray dots, and heavenly bodies will appear as gray dots or circles. Ships that are detected while
cloaked will appear as a blinking white dot.
WEAPONS INDICATORS
Below each arc segment of the Gunnery Radar are icons that represent all weapons in the arc section above them. Each type of weapon
gets a different icon, and each weapon tube or emitter gets its own icon. For example, if a ship has 2 photon torpedoes tubes, there
would be two icons of the same type here, the type representing the fact that they are photon torpedo tubes and the number indicating
there are two separate launchers. As the weapons charge up, the icons get brighter. When fired, the icons go dark and then brighten
up as they recharge. If the target is capable of being hit by an individual weapon, the icon turns green. Destroyed weapons show up
as dark gray.
ENGINEERING
The Engineering Screen is the master power grid for the starship. The power controls
from every officer’s station (interface screen) are duplicated here so you can more
effectively manage your ship’s power. From this screen you can review your starship’s
overall power allocation at a glance, and prepare power allocation macros that will
redirect power to all ship stations with a single keystroke or verbal order.
42
Page 40

MASTER POWER GRID
From the Engineering station you may manually adjust the amount of power requested by a ship system. There are four different types
of controls on these screens that are used to make power requests.
The first and most common type of power control is the power booster. The power booster consists of an “On / Off” button followed
by a slider and an efficiency percentage. Pressing the On button will request the minimum amount of power necessary to activate the
system. Once activated, the efficiency percentage for the system will be displayed.
You may increase the efficiency of the system by using the slider to boost the amount of power to that system, hence the term “power
booster”. The slider range is from one unit of power up to 50% of the ship’s original total power output. The impact of additional power
to a system’s effective efficiency is determined by a formula unique to each system. By experimentation you can figure out how
additional power affects each system. Damage, crew experience, crew staffing level and the presence of elite officers also affect the
efficiency of a system. The efficiency of the Sensor, Tractor Beam and Transporter systems are further modified by factors external to
the ship such as the range to the currently selected target, ECM of that target and terrain effects.
The second type of power control is the movement power throttle. This control is used by the Helm to request power for impulse and
warp movement. The throttle consists of a power slider with the speed markings of a throttle. Moving the slider along this gage will
request the necessary power to move at the indicated speed. Your ship will not actually begin moving at the selected speed until you
give the appropriate command from the VOS or the Helm screen.
The third type of power control is the stepped power request button utilised for the Medical system. It consists of an on / off button
followed by a three position toggle and an efficiency percentage. The toggle switch will alternate between “Standby,” “Medical Alert”
and “Emergency.” Each medical level requests a fixed amount of power. Once activated, sickbay will stabilise all injured crew and
enable them to heal. Setting medical alert or emergency will accelerate the crew’s recovery.
The fourth type of power control is the banked resource control panel utilised by the shield and weapon systems. The ship’s banked
systems are each controlled by an on / off button next to a small triangular button and a row of LED lights. Shields and weapons aboard
a starship are grouped into banks, with a single bank for each firing arc. The row of LED lights indicate that status of each bank of that
system, with yellow representing basic charge, orange representing a weapon or shield overloaded (reinforced) to 150%, and red
representing a weapon or shield overloaded (reinforced) above 150%. If a bank is not powered these indicator will not be displayed.
Pressing the small triangular button next to the resource will replace the LED lights with a Bank Preferences window. Within this
window, the player may elect to turn off or overload an individual bank. Listed within the window will be the name of each bank (firing
arc) and a button that cycles between three settings: off,charge, and overload. When this button is set to the overload position, a second
button will appear which will cycle between the following overload settings: 125%, 150%,175%, and 200% (for shields this represents
reinforcement). Pressing the On button for shields or a weapon system will activate all banks. As with the stepped power request button
used for Medical, each overload level is requesting a fixed amount of power.
The cloaking device is controlled by a single on / off switch. Pressing this switch will engage the cloaking device and divert power from
systems that will not function while cloaked, such as ECM, the tractor beam and shields.
POWER DISTRIBUTION DISPLAY
This display shows the distribution of power aboard your starship. It is divided into two sections, the Available Reserve Power section
and the Power Consumption section. As power is consumed, the Available Reserve display drains and the Power Consumption display
fills. As power is made available, the Power Consumption display drains and the Available Reserve display fills. The sum of both sides
is equal to the total power output of the starship.
AVAILABLE RESERVE POWER:The Available Reserve Power meter provides a general indication of how much power is immediately
available for use without diverting power from other resources as well as an indication of how much of that power is coming from
what power generator. The meter appears as a stack of coloured triangles. The triangles come in three colours: yellow for warp,
red/orange for impulse, and dark red for auxiliary.As power is allocated to ship resources, these coloured triangles will drain.
POWER CONSUMPTION: This meter indicates what percentage of the current reactor output is being consumed by three groups of
systems: movement (helm), weapons, and operations (all other stations).The meter appears as a stack of coloured triangles.The
triangles come in three colours: yellow for movement, red/orange for operations, and dark red for weapons.As power is alloca ted
to ship resources, these coloured triangles will drain.
POWER ALLOCATION ORDERS
The Power Allocation Orders section is where you can save power allocation / priority settings as a macro that can be called up at the
touch of a button. To save the ship’s current power allocation setting, you need only push the save button followed by the macro number
he would like to save it as. The save button will remain depressed and lit until you select the macro number to save it as. By clicking
on the macro name you can change the name of the macro.
43
Page 41

SELF DESTRUCT
On the Engineering screen, there is a pair of sliding covers. Clicking on these covers will cause them to open,revealing the self-destruct
button beneath. The panel will close automatically should you choose to reconsider your decision. Pressing the self-destruct button
begins an irreversible ten-second counter after which the ship will explode. A ship cannot self-destruct if its warp core has been ejected
or its warp engines are totally destroyed. Because of the power needed to initiate a sufficient core breach, the cloaking device of a
self-destructing ship will automatically deactivate.
DAMAGE CONTROL
DAMAGE CONTROL BOARD
SYSTEMS: This column is a list of all the systems aboard the ship that can be
damaged and that might require repairs at some point.
EFFICIENCY RATING: The percentage given for each resource is a measure its
damage status, with 100% being fully functional. Next to the percentage is a oneword description, summing up roughly how damaged that particular system is.
These are in ascending order from the worst: Destroyed, Extensive, Critical,Hea vy,
and Minor. Undamaged systems simply show a dash. Occasionally this description
is replaced with a button labelled “Bank.”This is a Banked system and is discussed
in the Banked Systems section below.
PRIORITY SLIDERS: These sliders are used to divide up the resources given to damage control among the various ship systems.
Each slider represents up to 25% of damage control resources, meaning that at no time may you have more than 4 sliders set to
maximum. If the slider is set all the way to the left, or at 0, the system will never receive any repairs. If you increase one slider, all
other sliders will decrease automatically. To prevent this automatic decrease, you may lock in the resource allocation level by
clicking on the lock button next to the slider you wish to lock. If a system is fully repaired, the resources given to it are automatically
redistributed to the systems that are still damaged. This eliminates wasted resources, and some micromanagement.
BANKED SYSTEMS: Some damage control sliders, such as those for shields and weapons do not represent a single resource, but
a bank of resources. In these cases, the Efficiency Rating represents the average efficiency of all resources within the bank and
the total repair time provided is the sum of the repair times for all resources in the bank. By pressing the Bank Button, the window
on the lower right will display the repair status, priority sliders, and total repair times for each system in the bank.
TOTAL REPAIR TIME: This column displays estimates of the time required for the systems to be fully repaired. Undamaged systems
display a dash.
PERMANENT DAMAGE: Occasionally a system will suffer some damage that cannot be repaired fully in the field. This is especially
true in cases where a portion of the ship has been blown off or gutted out, such as the loss of a weapon tube or a warp nacelle.
In this event, when the system is repaired as much as possible, the Total Repair Time field is replaced with word MAX, indicating
it can receive no further repairs. When MAX is reached the system is treated as if it were fully repaired and resources assigned to
it are automatically redistributed as normal.
POWER ALLOCATION SLIDER
At all times damage control is functioning at some level aboard your ship. This is an indication that your crew is diligently working on
the repairs they can. By activating the Damage Control system you are assisting the damage control teams by providing them with
power for temporary force fields, to shore up damaged bulkheads, contain plasma leaks, etc. The more power allocated, the higher
this rate is increased. Any power allocated to damage control over this minimum power will reduce the time required to complete
repairs. This slider is similar to the power allocation slider on the Engineering screen. By increasing or decreasing the slider, you can
change the power request for Damage Control. Unlike the slider on the power allocation screen, this slider does not enable you to set
the power priority of Damage Control. Instead, a priority override button is next to the slider. By pressing the priority override button,
the power priority of the selected resource will temporarily be set as the highest priority. This insures that the item receives the power
it is requesting. Only one resource at a time may be on priority override.
REPAIR ORDERS
The Repair Orders panel enables you to save your current damage control settings as a macro. To save the current power settings, all
you must do is click the Save Orders button, followed by one of the macro buttons. By double clicking on the name of the macro, you
can rename it. You can then automatically change your damage control preferences by pressing one of the macro buttons or calling
the macro from the Tactical HUD.A damage control macro will remember the settings of the sliders, whether a slider is locked or not,
and the settings of the banked sliders.
44
Page 42

The macro does NOT remember or change the actual amount of power allocated to the Damage Control System itself; that is handled
by the engineering screen.
HELM
SECTOR / SYSTEM MAP DISPLAY
This section of the interface consists of a main view window, a “Centre” button, a
collection of 6 buttons labelled “Rotation”, a collection of 6 more buttons labelled
“Position”, a button labelled “System”, and a button labelled “Sector.”
VIEW WINDOW: The default item displayed in the view window is the Sector map of
your theatre of operations, or the area in which the campaign you are currently
involved with is taking place. All the local star systems are shown as white dots on
the grid. You may click on any square on the grid, which will plot a course for those
grid co-ordinates and display them, along with the destination name and ETA at the current warp speed.You may only warp to grid
co-ordinates containing a white dot.
The other item that displays in the view window is a cubic 3D-map of the star system you are currently in. This map is accessible
by clicking on the “System” button.Course plotting on this map is handled either by clicking on a body in the map cube or by using
the 6 “Position” buttons. The 6 “Rotation” buttons are used to rotate the System map for better viewing. You may return to the
Sector map at any time by clicking on the “Sector” button.
CENTER: This button is used to reset the 3D-map of the system you are in to its starting position.
ROTATION:This group of 6 buttons is used to rotate the 3D-map of the system you are in. The directional arrows control pitch and
yaw while the + and - buttons zoom in and out.
SYSTEM: Sets the view window to display the 3D-map of the system you are in.
SECTOR: Sets the view window to display the 3D-map of the Sector map of your theatre of operations, or the area in which the
campaign you are currently involved with is taking place.
POSITION: This group of 6 buttons is used to move the Course Destination cursor around on both maps. In the System map, the
directional arrows move the cursor forward, backward, left and right while the + and - buttons change the cursor’s altitude. In the
Sector map the directional buttons move up, down, left, and right.The + and - buttons are not used.
MISSION LIST
This scroll box displays a chronological list of all systems involved in the current mission. Systems can be added to or removed from
this list as events transpire within the mission.
SECTOR / SYSTEM LIST
When the System Map is active this scroll box will display an alphabetical list of all stellar objects within the system and will be labelled
‘System List.’ When the Sector Map is active, it will display an alphabetical list of all systems in the sector and will be labelled ‘Sector
List.’ When the System List is active you may also look up a system by typing its name.
WARP THROTTLE
From the warp throttle, you can set your starship’s warp speed. The warp throttle is made up of a speed meter, a power meter, and
two slider controls.
SPEED METER: The meter fills in with yellow up to the currently set warp speed.The numbers to the left of the meter indicate the
different Warp Factors.
POWER METER: The power meter fills in with yellow to indicate exactly how much power is currently reserved for warp travel.
SPEED SETTING SLIDER: This slider knob controls the desired speed of warp travel. Note that the slider may not be moved above
the maximum speed attainable at the current power level.
POWER ALLOCATION SLIDER: This slider is similar to the power allocation slider on the Engineering screen. By increasing or
decreasing this slider, you can change the power request for warp travel.
45
Page 43

IMPULSE THROTTLE
From the impulse throttle, you can set your starship’s impulse speed. The impulse throttle, like the warp throttle, is made up of a speed
meter, a power meter, and two slider controls with one important difference. The power meter does not go all the way to the bottom,
but instead ends at the “Stop” demarcation on the large meter, because “Stop” is the speed setting that requires no power. If the power
slider is set high enough, the Speed Setting slider can be moved below the “Stop” demarcation to start the ship travelling in reverse.
SPEED METER: The speed meter indicates two pieces of information. First,it fills in with orange to indicate the desired speed that
has been set. The meter will also fill in with yellow as the ship accelerates up to the desired speed. To the right of the meter are
throttle markings, ranging from full impulse to stop and as low as 1/4 impulse reverse.
POWER METER: The power meter fills in with yellow to indicate exactly how much power is currently reserved for impulse
movement.
SPEED SETTING SLIDER: This slider knob controls the desired impulse speed. This slider may be moved in either direction above
or below the “Stop” demarcation, as long as sufficient power is allocated. Note that the slider may not be moved above the
maximum speed attainable at the current power level.
POWER ALLOCATION SLIDER: This slider is similar to the power allocation slider on the Engineering screen. By increasing or
decreasing this slider, you can change the power request for impulse movement.
CURRENT LOCATION INFORMATION WINDOW
This window displays information about the ship’s current location including system name and co-ordinates.
PLOT COURSE WINDOW
This window displays information about the ship’s selected location including system name, co-ordinates and an ETA to the system at
the current warp speed. If the “System Map” is being displayed,this window will provide information about the selected stellar object.
HELM ORDERS
Whenever you are in the Gunnery Chair, the AI helmsman will take over flying the ship so your ship will not be an easy target for
enemies. The helm orders control enables you to determine how the helmsman will fly the ship. By selecting evasive manoeuvres,the
helmsman will fly in such a way as to make the ship difficult to hit. Pursue Target will instruct the helmsman to fly in such a way as
to bring the forward weapons to bear on the target vessel. If the target is destroyed, the helmsman will pursue the next target. Maintain
Course instructs the navigator to keep his “hands off” the controls and allow the ship to continue in a straight line.
MISSION CLOCK
The ship’s mission clock is a counter that begins at the start of every mission. It measures the time the player has been on the mission
in weeks, days, hours, minutes and seconds.The clock advances in real time, except when the player is in warp.
ENGAGE
Below the warp and impulse throttles is the Engage button. Pressing this button will cause the ship to enter warp, leaving its present
location and moving to the selected location listed in the Plot Course Window, be it in-system or out.
Upon clicking the engage button you will be automatically returned to the HUD view in the case of in-system warps, or to the external
warp viewpoint in the case of out system warp. Note that in-system travel always occurs at Warp Factor 1.
COMMUNICATIONS
VIEWER
In the top centre of the communications screen is the communications viewer. A
graphical representation of whatever is currently highlighted in the hail list will appear
here.
HAIL LIST
This scroll box contains of all objects in the area that can be hailed. The highlighted item
is the currently selected target for a hail.
OPEN CHANNEL
Clicking on this button will hail the vessel that is selected on the Hail List.
MISSION LOG & COMM LOG
By pressing the Mission Log tab this text window will display a list of the current mission’s objectives You can refer to this log at any
time to keep in focus his mission objectives or specific system names. At the start of each mission, all objectives will be displayed in
yellow. If a mission objective can no longer be completed, it should be shown in red. Completing an objective will display it in green.
By pressing the Comm Log tab this text window will display a list of all communications and decision trees that you have made
46
Page 44

throughout the mission, including the current mission briefing. This will enable you to look up exactly what has been said in case you
did not hear it clearly or have forgotten.
ESCORT ORDERS
If the selected ship on the hail list is a wingman, you may issue it an order by selecting one of the orders from this list, and then clicking
the Open Channel button.
THE ORDERS
BREAK AND ATTACK: This order dispatches the wingman to attack any enemies in
the vicinity.
ATTACK MY TARGET: This orders the wingman to attack the enemy you currently have targeted.The wingman will continue to attack
this target exclusively unless given a new order or the target is destroyed in which case it will attack any enemies nearby as if
given the break and attack command. If you switch targets after issuing this order the wingman will continue to attack the
previously assigned target. This allows you as the commander the flexibility to spread out the assignment of targets amongst your
wingmen as you see fit.
CAPTURE MY TARGET: This orders the wingman to attempt to board and capture your selected target. Like the ATTACK MY TARGET
order, this order only applies to the target selected at the time the order is issued. Subsequent target changes have no effect on
the escort’s actions unless the objective is accomplished or the target is destroyed.
FORM UP: This cancels any current orders and causes the wingman to take up a position near your vessel.
DEFEND MY TARGET: This causes the wingman to defend the selected target.
CEASE FIRE: Issuing this order causes your escort to cease attacking any and all enemies until another order is issued.
RETURN TO BASE: Once this order is issued your escort is dismissed and will warp back to base.
WEAPONS
VIEW SCREEN
The View Screen provides a large close-up view of the currently targeted object, similar
to the Aspect angle display on the Tactical HUD screen.
TARGET SYSTEMS LIST
This window displays a list of all the systems on the enemy ship that can be targeted
with your weapons. The list also displays the damage efficiencies of the systems. By
clicking on the system name you will begin targeting that system.
TARGET ANALYSIS
This window contains a wire frame analysis of the targeted object including shield
strengths, which is a duplicate of what is on the Tactical HUD.
TARGETING ORDERS
Whenever you are in direct control of a firing arc, the AI gunners will the weapons in that arc for you. The targeting orders control
enables you to determine how the gunners will function. By selecting Fire At Will, the gunners will fire at any enemy they see fit. Attack
Locked Target will instruct the gunners to fire only at a target you designate by locking onto it. Cease Fire prevents the gunners from
firing at all.
TARGETING MODES
There are three buttons that are used to select your targeting method.
AUTO: When this is selected, the computer automatically plots firing solutions for you when firing at the targeted vessel. This
method is highly accurate, but is susceptible to ECM and terrain effects.
BORE SIGHT: If this option is selected,the weapons fire straight ahead, converging at their maximum range. This mode is not very
accurate at longer ranges, nor when firing weapons with different velocities, but it is not effected by ECM or terrain effects.
GUNNERY: This is a toggle that activates the dual controller gunnery mode. This only functions when the AI Helmsman is also
ordered to maintain course.
47
Page 45

POWER ALLOCATION SLIDER
This slider is similar to the power allocation slider on the Engineering screen. By increasing or decreasing the slider, you can change
the power request for the Tractor Beam. Unlike the slider on the power allocation screen, this slider does not enable you to set the
power priority of the Tractor Beam. Instead, a priority override button is next to the slider. By pressing the priority override button, the
power priority of the selected resource will temporarily be set as the highest priority. This insures that the item receives the power it
is requesting. Only one resource at a time may be on priority override.
TARGETING CONTROLS
TARGET LIST: These buttons select what kinds of ships and objects to include in your targeting list.
SELECT TARGET: These buttons are used to cycle through the items in the currently selected target list.
PREVIOUS: Selects the object that is before the currently selected target in the targeting list.
0: Clears the current target.
NEXT: Selects the next object in the current targeting list.
WEAPONS POWER ALLOCATION
This collection of power allocation controls behaves exactly as on the Engineering screen. Unlike the controls on the Engineering
screen, these controls do not enable you to set their power priority. Instead,a priority override button is next to each system’s controls.
By pressing the priority override button, the power priority of the selected resource will temporarily be set as the highest priority.This
insures that the item receives the power it is requesting. Only one resource at a time may be on priority override.
SHIELD SYSTEMS
This readout displays the current status of your starship’s shields.
SECURITY
SECURITY TEAM DISPLAYS
In the upper right corner of the screen are four Security Team Displays.When the player
sends marines aboard another vessel, these monitors will display important information
about their on-going battle. The four displays enable the player to simultaneously
monitor the progress of four separate boarding party engagements. You may have no
more than four teams can be sent out at any given time, and only one of your teams
may be aboard a single ship. Any further marines beamed to a ship that already has
been boarded will reinforce the existing away team in its current object, irrespective of
any objectives set for the new marines.
The team’s number is listed at the top of each display. Clicking on the team number will automatically select the boarded vessel on
the sensor display and highlight its orders on the Away Team Objective window. This will enable the player to quickly recall or reinforce
his marines, or change their objective. Below the team number is a small icon of boarded vessel, as well as the ship’s name, class and
distance in meters. Specific information about the battle then follows: Number of friendly marines, the marine’s objective (as given by
the Away Team Objective window below), the damage efficiency of their objective, the number of enemy defenders, and the strength
of the enemy’s electronic defences.This information should be updated frequently, so check it often. If the boarding party is eliminated
or retrieved, the screen will erase. If the marines successfully capture the opponent’s ship, then the message “vessel captured” will
replace the text listing the objective, damage efficiency, and defences.
A monitor will begin displaying information as soon as the player allocates marines to the Away Team Roster.At this sta ge,the monitor
will simply display the number of marines and their objective. The ship icon and accompanying information would be replaced with the
message “Awaiting Transport.” Once you beam the marines to their objective, the monitor will refresh to show information about the
boarded vessel.
AWAY TEAM OBJECTIVES
From this panel, you can assign an objective to a new team, or change the objective assigned to an existing team.The panel is made
up of 11 buttons.
CAPTURE SHIP: Clicking on the capture vessel button will order the selected team to attack the bridge and capture the ship.
SYSTEM BUTTONS: These ten buttons are labelled with the name of a starship system. Clicking on one of these buttons will set
the current team to attack that system. Until you press the button for one of the systems, the default objective will continue to be
capturing the ship. Buttons representing resources that the target ship does not have will be grayed-out. To assist you in your
decision on what system to attack, the efficiency of each of the target’s systems are displayed next to its system button.
48
Page 46

CHANGING OBJECTIVES: To change the objective assigned to an existing team, you must first select that team by clicking on the
team name or by targeting their boarded vessel on the sensors. Once the existing team has been selected, the button representing
their current objective will begin to flash. Pressing a different button at this time will order the existing team to attack the new
objective. Buttons representing resources that the target ship does not have are grayed-out, and cannot be pressed (such as the
cloaking device button if a Federation ship is the target). Immediately after changing the objective of an existing team, or after the
team successfully destroys their objective, the objective in the team display will read “in transit.”The team will be in transit to the
new objective for thirty seconds, during which no damage will be done to the enemy ship’s resources (although casualties will
occur). After this transit time, the team display will list the new objective, and the marines will once again cause damage to their
objective. Changing the objective of a team that is transit will not cause this thirty-second period to reset. If a team successfully
destroys their objective, their next objective will automatically be set to capture the ship, unless you change it. To assign an
objective to a new team, you must select the vessel you would like your marines to board and then click on one of the objective
buttons.
TARGETED SHIP DISPLAY
This wireframe damage display works in the same fashion as that on the Tactical HUD,with the exception tha t there are no subsystem
names or damage percentages, which are displayed in the Away Team Objectives window.
AWAY TEAM ROSTER
This slider enables you to select some or all of your marine complement to serve in an away team. Moving this slider will not actually
remove the marines from your ship’s internal defence, until you transport them to their destination. Moving this slider will update one
of the Security Team Displays with the “awaiting transport” message, with the number of marines selected and the currently selected
objective.
TRANSPORTER CONTROLS
The Transporter controls are used to actually beam a team onto another vessel,or retrieve them from it.The two buttons, “Transport”
and “Retrieve” are grayed out and inoperative until the minimum power has been allocated to transporters, and they have had time to
charge. Once charged, these buttons will become active. The transporters are locked onto any ship that has been selected in the
Targeted Ship. If the “locked” vessel has a down shield facing the player’s ship, then the transport button will flash. Pressing the
“Transport” button when it is lit up will lower your facing shield and begin transporting the marines selected in the Away Team Roster
to the “locked” vessel. If the “locked” vessel currently has one of your away teams aboard it, then both the “Transport” and “Retrieve”
buttons will flash. Pressing the transport button when it is lit up will lower your facing shield and begin transporting the marines
selected in the Away Team Roster to reinforce the existing away team. Pressing the “Retrieve” button when it is lit will begin retrieving
the existing away team from the “locked” vessel, and will return them to the player’s ship. If the “locked” ship turns a shield toward
the player or brings up the downed shield during the transport, then the transport will be only partially completed, seriously jeopardising
the marines chances to successfully complete their mission. Pressing transport or retrieve when they are not flashing will do nothing.
TRANSPORT: Begins beaming out the selected Away Team.
RETRIEVE: Retrieves an Away Team from the target vessel.
TRANSPORTER LOCK: This indicator displays the level of Transporter Lock you have with the currently targeted ship, modified for
efficiency of you transporters, your sensors, range,enemy ECM,and terrain.Transporting marines while this rating is below 100%
could cause some of the marines to die in transporter accidents. The word “Danger”flashes when the meter is below 100%.
INTERNAL SECURITY DISPLAY
This display lists your current internal security strength as well as identifying any intruders aboard ship. It will list the total number of
marines aboard ship (this includes those selected on the Away Team Roster), and the percent of total ship power that has been allocated
to security. A wireframe graphic of your ship will indicate its shield strength.
The lower half of this display shows dashes until you have been boarded. Once boarded, an alarm klaxon will sound, and the Security
Alert indicator will flash red. Below the Security Alert message, the number of enemy marines, their location and the current efficiency
of that system due to damage are displayed. If more than one opponent has boarded the ship, then the information for that boarding
party will also be displayed.
POWER ALLOCATION SLIDERS
These sliders are similar to the power allocation sliders on the Engineering screen. By increasing or decreasing these sliders, you can
change the power requests for security and transporters. Unlike the sliders on the power allocation screen, these sliders do not enable
the player to set the power priority of either security or transporters. Instead, a priority override button is next the each slider. By
pressing the priority override button, the power priority of the selected resource will temporarily be set as the highest priority. This
insures that the item receives the power it is requesting. Only one resource at a time may be on priority override.
49
Page 47

SCIENCE
SENSOR DISPLAY
This displays the relative positions of various objects around your ship. The display on
the left indicates objects behind your vessel, while the one on the right indicates objects
in front of it. The various blips match the colour-coding of the blips on the Tactical HUD.
Listed in the upper left corner of the sensor display is the current range setting of the
sensors. By clicking on the small arrows on the lower left, you can cycle through the
ranges of the sensors (point blank, short, medium, long, extensive), to filter out any
unnecessary blips. Changing the sensor range on this screen will also change the
sensor range on the Tactical HUD.
TARGETING CONTROLS
TARGET LIST: These buttons select what kinds of ships and objects to include in your targeting list.
SELECT TARGET: These buttons are used to cycle through the items in the currently selected target list.
PREVIOUS: Selects the object that is before the currently selected target in the targeting list.
0: Clears the current target.
NEXT: Selects the next object in the current targeting list.
SCAN
By pressing the scan button, the ship’s sensors will update the sensor display, and will return detailed information about the target
object.
PROBE CONTROLS
PROBE COUNTER: This displays the number of probes your starship has remaining. Each probe that is launched will reduce this
number.
LAUNCH: This launches a probe at the current target.
SENSOR ANALYSIS
This window provides detailed information about the currently targeted object. On the left side of this window is a wireframe analysis
of the targeted object, which is a duplicate of what is on the Tactical HUD. The right side of the analysis window contains text messages
providing additional information about an object, such as its cargo, life readings, etc.
VIEW SCREEN
Dominating the right side of the Science Station is the View Screen, which provides a large close-up view of the currently targeted
object, similar to the Aspect angle display on the Tactical HUD screen.
POWER ALLOCATION SLIDERS
These sliders are similar to the power allocation sliders on the Engineering screen. By increasing or decreasing these sliders, you can
change the power requests for sensors and ECM. Unlike the sliders on the power allocation screen, these sliders do not enable the
player to set the power priority of either sensors or ECM. Instead, a priority override button is next the each slider. By pressing the
priority override button, the power priority of the selected resource will temporarily be set as the highest priority.This insures that the
item receives the power it is requesting. Only one resource at a time may be on priority override.
MEDICAL
STARSHIP PERSONNEL SPECIFICATION
At the very top of the Medical screen are a wire frame of the ship and a text description
of its class, recommended complements of crew and marines and its maximum crew
complement.
50
Page 48

CREW & MARINE STATUS
This readout displays the health status and experience of all your crew and marines. As your crew gains experience the performance
of your ship will improve significantly. Your crew will begin at Green status, but may progress through the following experience levels.
Green
Experienced
Hardened
Veteran
Elite
Staffing Level is a percentage number that indicates whether sufficient crewmembers are available to effectively operate the starship,
based upon the number of Active Duty Crew. Crew Health Meters indicate the number and percentage of the ship’s crew and marines
that are healthy and on active duty, wounded, in critical condition, or dead. The number to the left of each meter displays the total
number of crew in that condition, while the meter displays that number as a percentage of total crew.
ELITE OFFICERS
A list of the elite officers currently serving aboard your vessel will be displayed in this area.
POWER ALLOCATION LEVEL
This toggle operates in the same fashion as the power allocation toggle on the Engineering screen. By changing the setting here you
can change the power request for sickbay. Unlike the toggle on the power Engineering station, this toggle does not enable you to set
the power priority of sickbay. Instead, a priority override button is next to the toggle.By pressing the priority override button, the power
priority of the selected resource will temporarily be set as the highest priority. This insures that the item receives the power it is
requesting. Only one resource at a time may be on priority override. If sickbay is powered it does two things for you. First it will stabilise
and heal wounded crew and marines during warp travel. Second, it will reduce casualties incurred during battle while it is powered.
This second function of medical only applies to casualties incurred on your ship. Marines that are wounded aboard and enemy vessel
during a boarding engagement are not protected. Each level of sick bay power allocation increases these two effects, with the
downside of a significantly larger power cost.
LIBRARY
PICTURE OF SELECTED TOPIC
This window displays a picture of the selected topic if available. In the cases of most
ships and planets the picture will be the object in 3D. In the case of star systems it will
be a 3D-system map like the one found on the helm screen.
TOPIC DESCRIPTION WINDOW
This window displays the text information the library has stored for the selected topic.
SELECT TOPIC
This window displays the selected topic. The selected topic can either be typed in or
clicked on in the Topic Menu. Typing in the first few letters moves the topic menu
highlight to the first corresponding entry in the Topic Menu.
TOPIC MENU
This scroll box contains a list of the topics available in the library. Topics can be clicked on once which highlights them, or double
clicked on which displays them in the Picture and Description windows. The keyboard will also move the highlight, with the <Enter>
key opening them. There is also a scroll bar used for moving through the list.
RELATED TOPICS WINDOW
This window displays other topics related to the selected
topic. These can be selected the same manner as topics in the topic menu.
ROTATION
These four buttons will allow you to rotate the 3D models or 3D system maps that appear in the Picture window. They have no effect
for any other type of entry.
ZOOM
This slider will allow you to zoom in on the 3D models or 3D system maps that appear in the Picture window. It has no effect for any
other type of entry.
AMBIENT
This slider will allow you to adjust the lighting on the 3D models that appear in the Picture window. It has no effect for any other type
of entry, including the 3D-system maps.
51
Page 49

PULL-DOWN MENU
The pull down menu allows you
to directly access all the Bridge
Station Interfaces. To access the pull down menu, you must already be at one of the Bridge Station Interfaces. Simply move the mouse
cursor to the top of the screen and the menu will appear. Just click on the button labelled as the one station you wish to go to.
ESC MENU
Hitting the ESC key from the HUD activates this menu during game play. The game is
paused while you are on this menu. Hitting ESC while on this menu will return you to
the game.
OPTIONS
This button pulls up the options menu in exactly the same fashion as the Options button
on the main menu. From here you may adjust various game settings during the course
of a mission.
CONTINUE
This button will return you to the game.
RESTART
Clicking this button restarts the current mission from the beginning.
EXIT
Clicking this button will ask for a confirmation before returning you to the main menu.
SPACE TERRAIN
NEBULAE
Nebulae are enormous clouds of gas and dust. Often they are stellar nurseries where
new stars are born, or they are the remnants of a star that has gone super-nova.
Regardless of their origins, nebulas tend to have similar properties to one another.
Within a nebula, the gas and dust are in pockets of varying density and flow in currents
and eddies. These currents generate turbulence for ships travelling through them,
though to nowhere near the degree of a Gas Giant. This moving gas also generates
ionisation throughout the cloud, and the large amounts of particulate matter interfere
with a variety of systems aboard a starship. The sensors, including the visual sensors,
are interfered with. Though it is still possible to visually see to some degree, sensor
signal strength is greatly interfered with. For the most part all tactical information is lost
since ships within the nebula behave almost as if they were cloaked. Similarly, ECM
generation is also impossible within the nebula. Shields are also inoperative within the nebula cloud, as well as the cloaking device.
Weapons such as the GDDS and the AMFP suffer large performance degradation in a nebula, and the Web Spinner is virtually useless.
Tactical Notes: Boosting power to sensors will help cut through the static in a nebula so you can get more accurate readings on the
location of your enemies. However, the targeting computer is still quite likely to be error prone. Switch to bore-sight targeting mode
and aim the weapons yourself. A keen aim and sharp eyes are your best weapons within the nebula.
STARS
A stellar corona has a high amount of radiation and heat. Merely being within a corona
will begin to damage your starship’s shields and hull due to the intense heat. Movement
within the corona only exacerbates the situation. The radiation is blocked by the shield
systems of your vessel, but if a shield fails the radiation pours in and begins to poison
and kill off your crew. These radiation casualties only increase as more shields fail.
Within the stellar corona several of your ship’s systems are affected.Another side effect
is that beam weapons such as phasers or disruptors receive a large boost in damage
power due to the interaction of the weapon fire with the corona’s high-energy plasma.
However, secondary and heavy weapons tend to loose significant amounts of warhead
52
Page 50

strength. Advanced weapons such as the QCB, GHRC, GDDS and the Tholian Web suffer from problems in maintaining the necessary
containment fields and are thus nearly ineffective.
Tactical Notes: Try to strike a balance between maintaining a high combat stance and running increased levels of medical power,
damage control and shield reinforcement.
BLACK HOLES
The most esoteric of stellar terrains likely to be encountered is the Black Hole. They are
the corpses of long dead stars that have collapsed in on themselves. This creates a
hugely powerful gravity well that not even light can escape. The point at which light
cannot escape the clutches of the Black Hole’s gravity is known as the Event Horizon.
The Event Horizon is a black sphere at the centre of the Black Hole. Impacting the Event
Horizon means instant death. Avoid it at all costs. Occasionally, x-ray radiation just
above the Event Horizon will become energetic enough to arc away from the Black Hole
in a brilliant lighting-like bolt of energy. Like impacting the Event Horizon, being struck
by this x-ray lightning is certain death.
Unlike other celestial bodies, the gravity generated by a Black Hole is more than can be
automatically compensated for by a starship’s positional stabilisers. The power of the gravity well eventually draws in the matter in the
surrounding area, as well as any hapless starships. Over time matter collects in a slowly spiralling orbit about the Black Hole as it is
inexorably drawn towards annihilation, forming a cloud of debris and detritus known as an Accretion Disc. It is in the Accretion Disc
that most battles near a Black Hole are fought. Within the Accretion Disc is what amounts to a gravity storm. Ships entering are
immediately wracked with turbulence, much greater than even that within a Gas Giant. These shearing and turbulent forces constantly
cause stress fractures and other minor damage to the space frame of starships within. This damage is constant for as long as the ship
remains within. On rare occasions, these tremendous gravimetric forces cause starships to suffer structural breakdowns.The resultant
loss of control can be deadly if it occurs to close to the Event Horizon. Visibility within an Accretion Disc is only very slightly affected,
and in fact ships within are easier to pick up on sensors even to those ships outside of the disc. The highly energetic matter that makes
up the disc will also occasionally interfere with the operation of shields, cloaking devices, and the sensors. For no apparent reason
these systems will shut off at random times. Systems shut off can be re-initialised immediately, but it is not unheard of that battles
have been won and lost due to unexpected system shutdowns. The matter within the disc is not always detrimental. In fact, one of the
greatest benefits of fighting within an Accretion Disc is its boosting effect to the damage caused by torpedo weapons. Even the more
specialised weapons systems such as the GDDS, AMFP, and the Tractor Beam based weapons like the GHRC, QCB,and Web are boosted
as high as double their effectiveness, according to some reports.
Tactical Notes:Avoid the temptation to go too deep into an Accretion Disc. The deeper you enter,the harder it is to pull away on impulse
power due to the intensifying gravity. If you find yourself unable to escape, plot a course to an object outside of the disc, such as a
ship, planet, or star and engage warp immediately.This may not save you from death, but it is the best chance you have of escaping
once you reach the point of no return.
PLANETS
Class L and M worlds tend to have fairly thick atmospheres, the upper reaches of which
may be used tactically in combat. While in a planetary atmosphere, high velocity
movement can cause friction damage to your shields and hull, but this can be a small
price to pay for the benefit of the natural ECM that the terrain provides ships within it.
This natural ECM can spell the difference in a confrontation. While in a planetary
atmosphere, warp drives cannot be engaged else the immense speed would rip the hull
of your ship apart. The planetary atmosphere affects some weapons and systems.
Some, such as the Tholian Web and the GDDS cannot function within an atmosphere,
while others, like the Tractor Beam, require more power to remain at their effectiveness
levels in deep space. Ships with the AMFP are advised not to fire them within the
atmosphere as some of the ejected antimatter detonates close to the firing vessel,
causing damage to the firing ship as well as the target.
Tactical Notes: Keep aware of where you are at all times.The planetary atmosphere’s useable area is quite thin in comparison to other
terrains. Too high and you loose the benefits; too low and you die. To this end, maintaining the power to travel at half-impulse while
keeping your velocity at half to one-quarter impulse speeds will assist you in remaining within the useful region.
53
Page 51

GAS GIANTS
Gas Giants are large planets made up of various high-density gasses compressed by
the planet’s gravity.Within the Gas Giant, the gasses flow in currents and eddies which
create massive turbulence for ships travelling within them and the thickness of the gas
greatly obscures vision. This high gas density creates the largest amount of friction
against starship hulls of any of the known space terrains, making high velocity
movement within them immensely dangerous at best. The compression of the
atmospheric gasses creates bizarre ionisation patterns and electromagnetic anomalies
as well as the hazards to movement. This property of the Gas Giant creates heavy
interference with a ship’s sensors, making all ships within even more difficult to detect
than even a cloaked vessel. These ionic and electromagnetic anomalies also interfere
with the establishment of a proper warp field, thus rendering warp travel impossible
until leaving the Gas Giant’s effects. Systems such as the Tractor Beam and the Tholian Web have greatly reduced effect as well, again
due to the variable energy flux within the gas. In combat, the thick gas dissipates the necessary cohesion of a ship’s beam weapons
systems, greatly reducing their effectiveness in combat. However, the density of the atmosphere improves the damage output of
secondary and heavy weapons by adding additional pressure and stress to the hull ruptures caused by their impact. This great benefit
does come at a price, however. Each firing of a secondary or heavy weapon within a Gas Giant causes some feedback damage to the
firing ship, making accuracy count all the more.
Tactical Notes:The targeting systems aboard your starship have great difficulty in compensating for the turbulence in the terrain when
projecting a firing solution. Because of this, it would be wise to avoid targeting an enemy’s subsystems, as the turbulence will cause
you to miss more often than is tactically advisable.
ASTEROID BELTS
Asteroid belts are one of the more simple terrain types. While there are some more
subtle effects that asteroid belts have on ships within them, the main tactical purpose
is the belt’s usefulness as cover. Smaller and more manoeuvrable vessels have the
advantage here, as they can weave among the tumbling rocks, using them for cover.
While within an asteroid belt, visual sensors are largely unaffected with the exception
of some occasional viewer static, due to the high metal content of some of the
asteroids. This same effect also causes anomalous readings in target acquisition,acting
as a sort of natural ECM, and concurrently interferes with maintenance of a stable warp
field. Similarly to the planetary rings, tractors and transporters are hindered while
within the asteroid belt itself.
Tactical Notes: As with the planetary atmospheres, keep aware of where you are at all times. The asteroid belts are quite densely
packed, and colliding with a rock much larger than most starships can be quite destructive if not instantly deadly. To this end,
maintaining good manoeuvrability is key. Keep the power to travel at half-impulse while keeping your velocity at half to one-quarter
impulse speeds to maximise your manoeuvrability while within the asteroid belt.
PLANETARY RINGS
Planetary rings are mostly composed of very fine micro-particles in slow orbit around
their host planet with quite a few large asteroids orbiting at great velocities. These large
asteroids are a very dangerous navigational hazard, requiring starship captains to be
thoroughly aware of their surroundings to avoid painful if not fatal collisions. The microparticles on the other hand, though they are small enough not to pose a danger to your
ship’s hull, do have other, more interesting, effects.The particles act to disperse shield
energies, making it extraordinarily difficult to keep them raised. Similarly, the particles
dissipate other types of cohesive energy as well. Sensor signals become refracted and
garbled, creating moderate natural ECM effect for all ships within the ring. Tractor
Beams and Transporters also suffer from reduced effectiveness due to signal
dissipation, thus requiring additional power to maintain nominal efficiency levels. In
combat, all weapons systems are of reduced effectiveness within the ring, although this is mitigated somewhat by the shield instability.
Tactical Notes: Maintain good speed and be very aware of your surroundings within the ring. If you know where all the large rocks
within the area are, you may be able to use them to your advantage while avoiding them yourself.
54
Page 52

ORDER OF BATTLE
KLINGON
THE KLINGON EMPIRE: A HISTORY IN BRIEF
The Klingon Empire was founded more than 1,600 years ago by Kahless the Unforgettable. For 750 years Kahless and his successors
strove to bring all the lands of Qo’noS under control to unify the people under one Emperor. It was then that the Hur’q invaded from
space and ravaged the planet, leaving our world beaten and stealing objects of our cultural heritage; namely the Sword of Kahless. The
people of Qo’noS united under the banner of the Klingon Empire to drive the Hur’q from the planet, and then set their eyes to the stars.
With advances in technology gleaned from the Hur’q occupation the Klingon people began to explore and conquer their neighbouring
star systems. This policy of expansion and conquest continues to this very day. Another dramatic turning point in the history of the
Empire occurred in 1444 IR, when Emperor Q’rogh the Weak died, leaving no clear successor to the title. The High Council, having
become a powerful political force in its own right, blocked any attempts to ascend the throne and wrested control of the Empire from
the Imperial bloodline. The High Council rules the Empire to this day, with the position of Chancellor being the highest political office.
In 1593 IR, the Empire first encountered its most bitter enemy, the United Federation of planets. From this initial contact the Klingon
Empire has been at odds with the Federation and the hostilities continue even now. The highest tension levels occurred in 1642 IR,
when Chancellor Lorak ordered a program of expansion on the Federation border known as the naQjej SIS’a’ HIv Doctrine. This Doctrine
led to a massive naval deployment near what was thought to be the backward and easily conquerable planet of Organia. The Supreme
Commander of our forces, General Chang, was on the verge of launching our intricately planned offensive when the hated Organians
imposed their Peace Treaty upon us due to the actions of one Captain James T. Kirk.
A scant seven years after our initial encounter with the Federation, exploratory forces from the tlhoq pagh Assault Fleet made initial
contact with forces from the Romulan Star Empire, near what is now known as the N’derial system. It was not long after this first
contact that open hostilities were declared in early 1601. Over the years these hostilities have subsided to minor border skirmishes
and though tensions remain high the conflicts do not escalate in the face of our mutual enemy, the Federation. In fact, this common
enemy has forced us into an uneasy alliance with the Romulans, one that grows more tiresome as the years pass.
The Tholians made themselves known to us in 1626 IR by destroying a half dozen of our colonies and 25 starships in the span of a
week. These frighteningly well-co-ordinated attacks shook the Empire off-balance but in the end the conflict escalated no further. What
had appeared to be unclaimed territory was in fact just inside the border to Tholian space and with typically ruthless efficiency our
“incursion” into their space was expelled. Since that time there have been occasional outbreaks of violence along the Tholian border,
but their xenophobia and general lack of interest in expansion have generally kept tensions low. This is not to say that the Tholians do
not expand, nor do they remain in isolation. They have periodically tested the resolve of their neighbouring governments with armed
incursions and on more than one occasion they have invaded and annexed small numbers of star systems during times of crisis and
upheaval in their neighbours. The last such test of resolve in the Klingon Empire was during the tegh poqet Crisis in 1655 IR, but
resulted in no loss of territory.
Initial contact was made with the Gorn Star Kingdom in 1642 IR, shortly after intelligence discovered their existence and that they had
reacted quite hostilely to Federation expansion into their territory. Our attempts to persuade them to continue their hostilities towards
the Federation were fruitless, and instead fomented tension with them that resulted in a conflict known as the ghoch SeH Campaign
in 1660 IR. Though the Gorn are not a part of the Federation, they have reached several trade and defence agreements and are
considered by our military strategists to be on the side of the Federation should war erupt, though their entrance into such a war may
be delayed.
Contact was established with the Sha’kurian Duchies by the Qabjech Exploratory fleet in 1659 IR. The territorial nature of the
Sha’kurians led to armed conflict with them during that initial contact and again in 1661 IR. Since then, relations have normalised with
the various Sha’kurian Dukes and tensions are virtually non-existent, as they seem content with fighting amongst themselves as long
as no external military threat is present. Currently our only military engagements with Sha’kurian forces occur when they are acting in
a mercenary capacity during internal conflicts or when working for other, minor races on our furthest frontiers.
The Empire resides on the rimward side of the Beta Quadrant nearest the Alpha/Beta border.The Federation is adjacent to our territory,
partially in the Beta Quadrant but mostly in the Alpha Quadrant Further expansion of the Empire in that direction has ceased and a
massive arms build up has begun since the enforcement of the Organian Peace Treaty. The Romulan Star Empire is coreward of the
Empire and is wholly within the Beta Quadrant. The Tholian Assembly controls a relatively small area of space bordering the Empire,
the Romulans, the Federation, and to a small degree the Gorn Star Kingdom. The Sha’kurian Duchies are along the rimward edge of
the Beta Quadrant directly opposite from the Federation, and shares a border with our Empire and the Romulan Star Empire. Their
location has proven to be quite a stroke of good fortune, as it prevents the Federation from establishing any sort of contact with them
and eliminates the possibility that the vaunted Federation Diplomatic Services could influence them against us in any way. The nearest
extents of the Gorn Star Kingdom to the Empire are located above the galactic plane, spreading like a cloud over parts of our territory,
as well as portions of the Federation, the Romulan Star Empire, and the Tholian Assembly.
55
Page 53

WARSHIPS
“QEYLIS BETLEH” (SWORD OF KAHLESS) CLASS BATTLESHIP
The “qeylIS betleH” Class Battleship is the largest ship currently fielded by the Klingon
Defence Force. A massive craft, this vessel requires an enormous crew and is capable
of destroying most ships in a few salvos from it guns. This ship cannot be cloaked due
to difficulties adjusting a field that size and the power requirements for it.
This ship is the pride of the Klingon Defence Forces, but more than that it is a symbol
of the might of the empire. The project, ordered by Chancellor Lorak more than a
decade ago, is the grandest undertaking of the Imperial Klinzhai Shipyards of the
Mempa system. However, the project itself found its inception in the political infighting
and manoeuvring typical of Klingon governmental affairs.
Several factions within the High Council had been quarrelling over various lucrative and prestigious naval contracts. To complicate
matters even further, questions of honour were also being debated as one side would complain bitterly that if the other faction obtained
the honour associated with one of these contracts it would upset the status quo in the Klingon political power structure. The bickering
soon escalated into something tantamount to a blood feud that threatened to divide the council into two rival factions. This would have
crippled the empire by preventing any side from obtaining the necessary majority for major council decisions.
In a savvy political manoeuvre, Lorak ordered the design of a new ship, one that would be a symbol for all the empire. (Only Lorak
realised the fact that it could be used as a tool for inducing political stability as well.) One of the factions, led by B’das, son of BoS of
House Birok’ken, was responsible for the hull design and engines, while the other, led by Yok’tu, son of QI, provided weapons designs
and control systems. Four were ordered, one for each “corner” of the empire, and each would serve as flagship for fleet operations in
its sector.
Two shipyards were originally slated to produce two vessels each, but the ChenwI’ Duj Yards was tangled in a scandal of corruption
and greed that forced Chancellor Lorak to revoke not only the contract, but the council seat of Yok’tu as well. The vessel they were
working on is still unfinished. It was towed to the newly expanded Klinzhai shipyards and is nearing completion. The Klinzhai Shipyards
has completed two of the vessels and will be fulfilling the remainder of the contract.
The master ship builder Hogh Batlh completed the original designs for the ship in 1651 IR. The first ship of the class, the I.K.S.“qeylIS
betleH”, was launched in 1660 with its sister ship, I.K.S. “yejquv ghop” (Hand of the High Council), launching in 1663. The newest
vessel, the I.K.S. “wo’ HubwI’” (Defender of the Empire) is scheduled to launch later this year. The “qeylIS betleH” is currently the
flagship of the Qo’nos Home Fleet, with the “yejquv ghop” acting as flagship of the Federation Neutral Zone Deep Space Patrol Fleet.
The “wo’ HubwI’” will be assigned to the Romulan border once it is completed.
Length: 686m
Crew: 700
Marines: 70
Max. Impulse: 1050 k/s
Manoeuvrability Rating: 0.30/0.10
Mass: Approx. 1000
Hull Rating: 6.6
Shield Rating: 126.0
Armaments:
Forward
Primary - 6 Disruptors
Secondary - 4 Heavy Photon Torpedoes
Heavy - None
Advanced - Assault Phaser
Aft
Primary - 5 Disruptors
Secondary - 2 Heavy Photon Torpedoes
Heavy - None
Advanced - None
Port & Starboard
Primary - 4 Disruptors
Secondary - None
Heavy - None
Advanced - None
56
Page 54

“PUMWI’” (ACCUSER) CLASS DREADNOUGHT
The “pumwI’” Class Dreadnought is a large and powerful ship used in fleet
engagements and as the leader of large battle groups. This ship is equipped with a
cloaking device as standard equipment. Late in 1647, shortly after the V’Ger incident,
the Tholians unleashed a new class of ship on several Klingon outposts on the KlingonTholian border.This large ship was more than a match for the Klingon forces that could
be fielded against it at the time was. After a period of three months of the enemy’s
unbridled rampaging throughout the border area, a massed attack on the ship finally
succeeded in destroying it.
The battle was extraordinarily costly in terms of ships and lives and forced Klingon High
Command to rethink its battle strategies. The most apparent change to be made was
the acquisitions of a large and powerful vessel not only to provide a devastating punch, but also to coordinate the disparate forces
involved in larger battles. Tactics were developed whereby the large ship would salvo an enemy vessel from long range to get the
enemy’s attention.When the enemy turned to engage the large ship, the smaller vessels would charge in to attack the enemy’s engines.
Once the enemy was immobile, the large ship would then move in for the kill. Shortly thereafter,the Jevghom Design Bureau submitted
the designs for a massive vessel, which fit this new tactical doctrine perfectly.
Because of the speed and perfection of the Jevghom submission, there were many accusations of collusion or complicity with the
Tholians in the border attacks. Many were killed in the subsequent honour duels, and none of the accusations were proven. In response
to this hullabaloo, the engineers and designers at Jevghom dubbed the ship “pumwI’” or the “Accuser.”
The first of these ships was launched in 1655, the I.K.S. “pumwI’.”The “pumwI’” immediately took up station on the Tholian border,
waiting for the chance to prove itself against the Tholians. The ship had only been on station for two months when it got its chance.A
Tholian taskforce had been dispatched on a mission to plunder the Thaleris Asteroid belt of dilithium and other valuable mineral
resources. A small mining outpost reported the incursion and the “pumwI’” leapt into action. The “pumwI’” and her battlegroup
decimated the Tholians with only minimal losses. However, victory celebrations were cut short when the “pumwI’” was lost with all
hands three months later in an ion storm. Currently, there are thirty of these vessels in active duty with another dozen on order.
Length: 610m
Crew: 600
Marines: 60
Max. Impulse: 1140 k/s
Manoeuvrability Rating: 0.31/0.14
Mass: Approx. 850
Hull Rating: 4.6
Shield Rating: 83.0
Armaments:
Forward
Primary - 5 Disruptors
Secondary - 2 Heavy Photon Torpedoes
Heavy - None
Advanced - AMFP
Aft
Primary - 4 Disruptors
Secondary - 1 Heavy Photon Torpedo
Heavy - None
Advanced - None
Port & Starboard
Primary - 2 Disruptors
Secondary - None
Heavy - None
Advanced - None
57
Page 55

“VODLEH” (EMPEROR) CLASS HEAVY BATTLECRUISER
This mean looking vessel is the newest and one of the best ships fielded by the KDF.
Mixing daunting firepower with good speed and manoeuvrability, the presence of these
ships usually signifies a costly battle for the opposing side. A cloaking device is
standard.
The most amazing thing about the Emperor class Heavy Battlecruiser is that its design
and construction are handled solely by the Wo’ ChenwI’Duj (Imperial Shipyards) in orbit
around Qo’nos opposite the Praxis moon. Master Shipbuilder Jogh Kenka started the
project and maintained strict control of it from beginning to end. The designs were
completed, simulator tested, and approved all within the span of two months. Then
construction of the prototype, I.K.S. “voDleH,” proceeded smoothly from that point,
finishing ahead of schedule and under budget a year later.After the trial run of the prototype, the High Council was so impressed with
the ship and its designers that the next ship construction contract, whatever it may be, has already been granted to Wo’ ChenwI’Duj.
An interesting side note to all of this, Jogh Kenka personally duelled with more than a dozen representatives of various weapons
manufacturing and ship building concerns when they attempted to use political influence to interfere with the design and construction
of the I.K.S. “voDleH”.Kenka won ever y duel,but lost an eye and three fingers in the process. Kenka is now retired from Wo’ ChenwI’Duj
and is working as an advisor to the High Council in naval construction matters.
The I.K.C. “voDleH” was launched in mid 1661 IR, with four more being launched every six months. Currently there are thirty-six in
service with four more scheduled for completion shortly. The “voDleH” is stationed near the junction between Romulan and Tholian
borders.
Length: 412m
Crew: 450
Marines: 55
Max. Impulse: 1230 k/s
Manoeuvrability Rating: 0.33/0.19
Mass: Approx. 750
Hull Rating: 3.7
Shield Rating: 57.5
Armaments:
Forward
Primary - 4 Disruptors
Secondary - 1 Heavy Photon Torpedo
Heavy - 2 FMPA Cannon
Advanced - None
Aft
Primary - 3 Disruptors
Secondary - None
Heavy - 2 FMPA Cannon
Advanced - None
Port & Starboard
Primary - 3 Disruptors
Secondary - None
Heavy - None
Advanced - None
“SUVWI’ QEH” (WARRIOR’S ANGER) CLASS COMMAND CRUISER
The “SuvwI’ QeH” class Command Cruiser is loosely based off of the hull of the D7 class
Klingon cruiser. This ship is a vital part of Klingon battle tactics, utilising a good
combination of speed and firepower-including captured Gorn technology-to lead task
forces. This ship has cloaking capability.
While this class of ship is named “SuvwI’ QeH” it would be more appropriate to name
it the “vav bortaS” or “Father’s Revenge”. The head of the wealthy and powerful
Gorthas family, Doj’kan, financed the conversion of his personal K’T’inga class D7, the
“SuvwI’ QeH”, into the powerful command cruiser used today solely to exact revenge
on house Moltak for the death of his son.
Doj’kan’s son Kroj’duH had been in basic training and was nearing completion when Krang, son of Graltz,caused an accident that killed
Kroj’duH and several other young warriors. During a training cruise on a dilapidated B’rel Class Bird-Of-Prey, Chief Engineer Krang,
58
Page 56

while manning the bridge engineering station, neglected to inform the cadet captain that an anti-matter flush vent was malfunctioning
when the ship entered a nebula. Ionised gas entered into one of the magnetic anti-matter storage bottles through the partially open
vent, causing it to explode. A sizeable portion of the engineering section of the ship was destroyed in the explosion, killing Kroj’duH
and many other engineering trainees.
Graltz contacted his brother Moltak to see if anything could be done to cover the disgrace of his son Krang, thus saving Krang and the
House of Moltak a loss of face. Because Moltak was close friends with the commander of the training fleet, the blame for the accident
was shifted from Krang and placed on Kroj’duH and the engineering trainees. Doj’kan, who had been the Chief Engineer on numerous
starships, including Qo’nos One, before inheriting the leadership of his house,refused to believe that the son he personally taught would
make such a mistake. Investing much of House Gorthas’ resources and calling in many favours, Doj’kan finally discovered the truth
about the incident. Concurrently, he also discovered that after Krang completed basic training six months from then, he was to
command his father’s personal D7 on a brief shakedown cruise following a maintenance overhaul.
Blinded with rage, Doj’kan converted his D7 with vengeance as the primary design influence. Six months later,with Graltz, Moltak and
several other key members of their House aboard, Krang was returning to his home port from the shakedown cruise. Encountering an
unfamiliar Klingon vessel, he hailed it, but was greeted by a broadcast of damning testimony from one of the bridge officers of the illfated Bird Of Prey. Moltak, infuriated, demanded to know who was broadcasting that testimony. Doj’kan revealed his identity and
challenged House Moltak to single ship-to-ship combat immediately. When Moltak, realising the vulnerability of his House, attempted
to back down, Krang foolishly accepted the challenge. In a short but bloody battle, the “SuvwI’ QeH”, destroyed the D7 and the bulk of
House Moltak.
When the results of the battle were discovered it was clearly obvious that the design changes made to the “SuvwI’ QeH” were a great
improvement over the standard D7. The High Council not only recognised that Doj’kan was within his rights of revenge but requested
the design plans to convert existing D7’s to the “SuvwI’ QeH” variant and to construct new ones. The first official production “SuvwI’
QeH” was christened the I.K.S. “Kroj’duH” and was launched in 1645. There are currently seventy-five “SuvwI’ QeH” class vessels in
service.
Length: 336 m
Crew: 350
Marines: 45
Max. Impulse: 1320 k/s
Manoeuvrability Rating: 0.37/0.24
Mass: Approx. 550
Hull Rating: 2.6
Shield Rating: 47.8
Armaments:
Forward
Primary - 2 Disruptors
Secondary - 2 Photon Torpedoes
Heavy - None
Advanced - GHRC
Aft
Primary - 2 Disruptors
Secondary - 1 Photon Torpedo
Heavy - None
Advanced - None
Port & Starboard
Primary - 2 Disruptors
Secondary - None
Heavy - None
Advanced - None
“K’T’INGA” CLASS D7 CRUISER
The basic D7 hull type starship has been in existence for more than 100 years. Though the
external design has changed little, the ship has undergone refits and improvements over the
years, finally resulting in the “K’T’Inga”class model currently in service. A solid design, it has
been the major workhorse for the Empire since its introduction and its design has influenced
all subsequent ship designs to some degree or another. Though the “K’T’Inga” class as it
currently stands has another 2 to 3 decades of operational life, additional-and largerversions of the craft are already in the design phase and are slated to begin construction
some time in 1685 IR. This will carry the D7 type cruiser well into the next century.
59
Page 57

The first combat engagements of the “K’T’Inga” class cruiser were well within design specifications and the ship was proving to be
another highly dependable D7 variant, but one incident shook the Empire’s confidence in the design.In 1646 IR,three “K’T’Inga” class
cruisers, the I.K.S. Amar and two others,were obliterated during the V’Ger incident. Though V’Ger was an incredibly powerful entity,the
ease of their destruction still hurt galactic opinion of the strength of the Klingon Imperial Navy and had a variety of repercussions
throughout the High Council and upper command of the Klingon Defence Forces. During the political scramble the High Council ordered
production of the “K’T’Inga” slowed and no further “K’T’Inga” refits to existing D7 cruisers until its effectiveness could be reviewed.
However, once the Klingon Imperial Intelligence Service brought back data on the Federation encounter with V’Ger the situation eased
and production returned to normal. Since that time, the cruiser has proven to be a reliable craft and an intrinsic part of the order of
battle for the Imperial Navy.
Length: 244m
Crew: 300
Marines: 40
Max. Impulse: 1410 k/s
Manoeuvrability Rating: 0.39/0.28
Mass: Approx. 500
Hull Rating: 2.1
Shield Rating: 32.3
Armaments:
Forward
Primary - 2 Disruptors
Secondary - 1 Photon Torpedo
Heavy - 2 Heavy Disruptor Cannon
Advanced - None
Aft
Primary - 2 Disruptors
Secondary - 1 Photon Torpedo
Heavy - None
Advanced - None
Port & Starboard
Primary - 2 Disruptors
Secondary - None
Heavy - None
Advanced - None
“QA’HOS” (RELENTLESS) CLASS LIGHT CRUISER
A single nacelle variant of the D7 hull, the “qa’HoS” light cruiser is a common sight on
the borders of Klingon space. It has a crew of 250 warriors. Like the D7 cruiser, this
vessel was commissioned before the acquisition of cloaking technology and underwent
the “A” refit to obtain cloaking capability. The final refit was completed in 1650 IR.
This is a rather unremarkable ship. It is a tried and true design that has been in service
for over seventy years. When originally launched in 1593 IR, these were powerful
warships and were the main line of defence for the Klingon Empire. Over time, these
vessels have undergone various refits to keep their systems current, but the ship never
lost its reputation for reliability and survivability. Amongst the old guard warriors, this
ship is still a favourite and often times these ships are commanded by the very best of these warriors.
The reputation for reliability and survivability is well deserved. Stories of “qa’HoS” light cruisers returning from battle venting plasma
from hull breaches that should have ripped the ship apart are not uncommon. These vessels also lend themselves very well to repairs
in the field. The ship seems to have brak’lul (vital organ redundancy) as part of its design. Repairs are often made with parts
cannibalised from other ship systems with only minor efficiency losses to both systems. Under normal usage, these vessels never seem
to develop problems at all. Most vessels of this class have never undergone an unscheduled overhaul except in cases of battle damage.
Currently, most of these ships have been relegated to patrol duty on the various border zones of Klingon space primarily because of
their ability to stay on station for longer periods of time than other vessels. These ships usually accompany one or two larger vessels
and three smaller vessels as part of a Neutral Zone patrol group. The I.K.S. “qa’HoS” was launched early 1593, and is still in service
today. There are approximately three hundred of these vessels in service throughout the empire.
60
Page 58

Length: 198m
Crew: 250
Marines: 30
Max. Impulse: 1500 k/s
Manoeuvrability Rating: 0.42/0.32
Mass: Approx. 450
Hull Rating: 2.2
Shield Rating: 39.3
Armaments:
Forward
Primary - 4 Disruptors
Secondary - 1 Photon Torpedo
Heavy - None
Advanced - None
Aft
Primary - 2 Disruptors
Secondary - None
Heavy - None
Advanced - None
Port & Starboard
Primary - 2 Disruptors
Secondary - None
Heavy - None
Advanced - None
“QUD” (INSURRECTION) CLASS DESTROYER
A larger variant of the B’rel class Bird of Prey, the ship is more of a “stop-gap” ship to
fill a tactical void in the Klingon Defence Forces. The ship has better engines and more
firepower than the Bird of Prey, yet still has the same problem with not having weapons
available in any arc but the forward. This makes the ship tactically weak in large
engagements, but well suited to attack stray enemy vessels, defend convoys against
pirates, or assault large unmoving stations. The ship is cloak capable.
Originally, the late Colonel Galt’naH, who was one of the more brilliant tactical minds at
the Academy, introduced the concept for this ship. In 1655 IR, while programming in
simulations of a prolonged war with the Federation, it was discovered that the Klingon
Defence Forces suffered from a major tactical gap in their Order of Battle. The B’rel
class Birds of Prey was well suited to the task of scouting and escort duty, and the pIH class frigates were perfectly suited to picket
duty and fast patrol. The problem was that neither was sufficient for the traditional destroyer roles of long term search and destroy
missions and heavy convoy escort. The qa’HoS class light cruisers were supremely qualified for the heavy convoy escort and protracted
search and destroy missions, but they were also needed for support roles in larger fleet engagements. After running through the
equivalent of the first month of the war, there were not enough light cruisers to go around and construction of replacements was slow
and consumed too many resources.
Seeing this tactical weakness, Galt’naH raised the question with the Klingon High Council. Many council members scoffed, stating that
the qa’HoS class light cruisers were more than adequate for that duty, and that any war with the Federation would most likely be over
very quickly anyway. For several hours, the Colonel attempted to argue his case but in the end the council’s final decision was against
the idea. Galt’naH began to protest but was curtly dismissed before his anger would cause him to slight the honour of any council
members or its decisions.
Undaunted, the Colonel decided that if the High Council were too myopic to listen to reason then a demonstration would be required.
Secretly, the Colonel programmed in a few modifications to the Bird of Prey simulation and created a variant of the ship, which was
available only to him. Then, after the rest of the Klingo-Federation War scenario was input, he invited several council members and
other dignitaries to try their hand at destroying the Federation. It soon became obvious that a lack of a true destroyer class vessel would
cause any war with the Federation to soon turn into a race against light cruiser attrition.
Afterwards, Colonel Galt’naH manned the simulator and accessed his destroyer concept. Within the simulator, the concept worked to
perfection and fulfilled the dual purpose of destroyer duty and freeing up valuable war resources. The council members present
immediately called for design and construction of the Colonel’s destroyer. The class of ship was dubbed “QuD” or “Insurrection” in
honour of the Colonel bringing about a change in the “final decision” of the council.
61
Page 59

The first production ship of this class was launched late in 1658, and was commanded by Colonel Galt’NaH himself. It served in many
actions throughout the empire, amassing an impressive record of victories before she and her crew were lost in a particularly bloody
skirmish along the Romulan border.There are currently one hundred and fifty of these vessels in ser vice with another two hundred on
order.
Length: 153m
Crew: 50
Marines: 25
Max. Impulse: 1590 k/s
Manoeuvrability Rating: 0.48/0.44
Mass: Approx. 350
Hull Rating: 2.0
Shield Rating: 36.5
Armaments:
Forward
Primary - 4 Disruptors
Secondary - 1 Photon Torpedo
Heavy - 1 FMPA Cannon
Advanced - None
Aft
Primary - None
Secondary - None
Heavy - None
Advanced - None
Port & Starboard
Primary - None
Secondary - None
Heavy - None
Advanced - None
“PIH” (SUSPICIOUS) CLASS FRIGATE
This small vessel fulfils many duties within the empire. It has three variants ranging from fast attack ship to science vessel and cargo
carrier. In any of its combat intensive roles it has a crew of about 30 warriors. In scientific roles its crew is roughly 15 warriors with
capacity for up to 60 passengers, usually scientists or the like. The cargo variant has a crew of 15 as well, but can be outfitted with
special troop carrier pods that can give it the ability to carry up to Because of its many roles within the empire, there are two standard
weapons packages for this vessel. The attack ship variant has two forward firing disruptors and two heavy disruptor cannons, with two
disruptors aft. The non-combat variants have the heavy weapons removed to create additional space for cargo, sensor packages, etc.
but add two additional disruptors forward. This ship always has a cloak.
These ships were designed by Hogh Batlh, the designer of the “qeylIS betleH” battleship, as a cheap, cookie-cutter ship, and easy to
mass-produce. But because Batlh was such a skilled designer the ship is surprisingly good. Its interiors are highly modular allowing
for easy construction and reconfiguring, which is why this particular vessel has so many variants. This modularity also makes for easy
repairs, which allow this ship to be serviced and returned to duty in a minimal amount of time.
These ships and their quick turnaround rate have proven very useful, particularly on the Romulan border. During 1649 IR, four years
after the “pIH” class frigate was first launched, three months of protracted fighting broke out along the Romulan border due to
breakdowns in negotiations over two disputed worlds, which was known as the Torana conflict. The Romulans managed a stunning
victory early on in the Torana Conflict, in which many of the larger capital ships in the area were crippled or destroyed. The nearby
Graltha Shipyard was inundated with ships to repair, and had very little time to do it.While the larger ships were being hastily repaired,
the engineers at Graltha churned out repaired frigates in record numbers. Not only that, but also many science and cargo variant
frigates were converted to war frigates as well. This steady supply of ships slowed the Romulan advance enough to where
reinforcements could arrive and beat back any further Romulan incursions into Klingon space. The fighting ended with the Klingons
ceding one of the two planets to the Romulans, which was a minor miracle considering the crushing blows that the Klingon forces
received at the outset of the fighting.
The I.K.S. “pIH” was launched late in 1645 as a war frigate, but was converted to a science vessel in 1648. It was reconverted to a
war frigate during the Torana Conflict,where it ser ved gallantly until its destruction towards the end of the fighting.There are currently
four hundred and fifty of these vessels currently in service, three hundred of which are war frigates. The remaining one hundred and
fifty are made up primarily of science variants.
62
Page 60

BATTLE FRIGATE
Length: 153m
Crew: 30
Marines: 15
Max. Impulse: 1680 k/s
Manoeuvrability Rating: 0.51/0.51
Mass: Approx. 300
Hull Rating: 1.7
Shield Rating: 31.7
Armaments:
Forward
Primary - 2 Disruptors
Secondary - 2 Heavy Disruptors
Heavy - None
Advanced - None
Aft
Primary - 2 Disruptors
Secondary - None
Heavy - None
Advanced - None
Port & Starboard
Primary - None
Secondary - None
Heavy - None
Advanced - None
CARGO FRIGATE
Length: 153m
Crew: 30
Marines: 75
Max. Impulse: 1680 k/s
Manoeuvrability Rating: 0.51/0.51
Mass: Approx. 300
Hull Rating: 1.7
Shield Rating: 31.7
Armaments:
Forward
Primary - 4 Disruptors
Secondary - None
Heavy - None
Advanced - None
Aft
Primary - None
Secondary - None
Heavy - None
Advanced - None
Port & Starboard
Primary - None
Secondary - None
Heavy - None
Advanced - None
63
Page 61

SCIENCE FRIGATE
Length: 153m
Crew: 30
Marines: 5
Max. Impulse: 1680 k/s
Manoeuvrability Rating: 0.51/0.51
Mass: Approx. 300
Hull Rating: 1.7
Shield Rating: 31.7
Armaments:
Forward
Primary - 4 Disruptors
Secondary - None
Heavy - None
Advanced - None
Aft
Primary - None
Secondary - None
Heavy - None
Advanced - None
Port & Starboard
Primary - None
Secondary - None
Heavy - None
Advanced - None
“B’REL” CLASS ESCORT (BIRD-OF-PREY)
The “B’rel” class escort began design in 1644 IR as the first production starship in the
Imperial Navy to include the newly acquired cloaking device technology. In 1650 IR,the
first prototype Bird-of-Prey was launched for space trials. It quickly became readily
apparent that the diminutive starship was one of the finest designs ever produced by
the Imperial Shipyards. General production began in 1652 IR and production rates have
increased steadily ever since. The “B’rel”class vessel has a chequered history in recent
years, being the focal Klingon vessel involved in many of the last few major galactic
political incidents.
In 1660 IR, Commander Kruge, a hero of the Empire, crossed the Neutral Zone in order
to acquire further intelligence information about the devastating Genesis weapon, Star
Fleet’s latest tool of genocide. It was during this incident that then Admiral James T. Kirk managed to capture Kruge’s vessel, killing
the bulk of its crew in the process including Kruge. (Imperial Intelligence Services Note: All crew aboard Kruge’s vessel are dead. There
is no truth to the rumours of the capture and imprisonment of the warrior Maltz, nor of his supposed assistance in translating our
language for Federation linguists.)
Early in 1661 IR during the Alien Probe crisis, the criminal Kirk utilised the stolen “B’rel” to acquire specimens of a previously extinct
species of Terran animal known as “humpback whales”, flagrantly disregarding a variety temporal travel test-ban agreements with the
Empire and the Romulans in the process. The B’rel was severely damaged during the crash landing, enough so that Federation science
will be delayed somewhat in its analysis of our technology. On a side note, the intelligence gathered about the incident proved
invaluable as it was learned the B’rel’s spaceframe was capable of surviving extraordinarily high warp velocities. This unwitting
Federation field test of our equipment has greatly advanced a variety of areas in materials development and starship construction
technology.
The Qui’Tu incident a little over a year later again saw the involvement of the “B’rel”. The commanding officer of the vessel, Captain
Klaa, attempted to initiate an ill-conceived and poorly executed attack on the newly launched Starship Enterprise - A. The incident,
involving the brainwashing of General Koord, a fairly well placed diplomat, by a supposedly renegade emotional Vulcan resolved itself
quietly. Though the Imperial Intelligence Services exonerated General Koord of any suspicion of divulging state secrets, the
implausibility of an emotional Vulcan, and the nature of this Vulcan’s relationship to the illustrious Captain Spock leave some doubts as
to whether or not the incident was in fact engineered by the Federation. For his part in the incident, Captain Klaa has been removed
from command and reassigned as a record keeper for the Imperial Courts on Qo’noS.
64
Page 62

Length: 92m
Crew: 12
Marines: 5
Max. Impulse: 1770 k/s
Manoeuvrability Rating: 0.54/0.59
Mass: Approx. 250
Hull Rating: 1.1
Shield Rating: 17.0
Armaments:
Forward
Primary - 2 Disruptors
Secondary - 1 Photon Torpedo
Heavy - None
Advanced - None
Aft
Primary - None
Secondary - None
Heavy - None
Advanced - None
Port & Starboard
Primary - None
Secondary - None
Heavy - None
Advanced - None
MISCELLANEOUS CRAFT
“SABER BEAR” CLASS CARGO TUG
Length: 1652m
Crew: 45
Marines: 5
Max. Impulse: 600 k/s
Manoeuvrability Rating: 0.17/0.03
Mass: Approx. 6000
Hull Rating: 1.1
Shield Rating: 6.7
Armaments:
Forward
Primary - 1 Disruptor
Secondary - None
Heavy - None
Advanced - None
Aft
Primary - 1 Disruptor
Secondary - None
Heavy - None
Advanced - None
Port & Starboard
Primary - None
Secondary - None
Heavy - None
Advanced - None
65
Page 63

“D’KTAGH” CLASS SHUTTLECRAFT
Length: 30.5m
Crew: 2
Marines: None
Max. Impulse: 600 k/s
Manoeuvrability Rating: 0.71/1.16
Mass: Approx. 100
Hull Rating: 0.13
Shield Rating: 1.0
Armaments:
Forward
Primary - 2 Disruptors
Secondary - None
Heavy - None
Advanced - None
Aft
Primary - None
Secondary - None
Heavy - None
Advanced - None
Port & Starboard
Primary - None
Secondary - None
Heavy - None
Advanced - None
LISTENING POST
Length: 305m
Crew: 10
Marines: 1
Mass: Approx. 2000
Hull Rating: 0.64
Shield Rating: 26.0
Armaments:
Primary - 4 Disruptors
Secondary - None
Heavy - None
Advanced - None
MOBILE BASE
Length: 534m
Crew: 450
Marines: 55
Mass: Approx. 15000
Hull Rating: 4.6
Shield Rating: 142.0
Armaments:
Primary - 8 Disruptors
Secondary - 8 Photon Torpedoes
Heavy - 8 Heavy Disruptors
Advanced - None
66
Page 64

MOBILE REPAIR DOCK
Length: 534m
Crew: 450
Marines: 55
Mass: Approx. 15000
Hull Rating: 4.6
Shield Rating: 142.0
Armaments:
Primary - 8 Disruptors
Secondary - 8 Photon Torpedoes
Heavy - 8 Heavy Disruptors
Advanced - None
BATTLESTATION
Length: 9638m
Crew: 4200
Marines: 150
Mass: Approx. 30000
Hull Rating: 12.4
Shield Rating: 372.0
Armaments:
Primary - 18 Disruptors
Secondary - 18 Photon Torpedoes
Heavy - None
Advanced - 3 Assault Phasers
STARBASE
Length: 9638m
Crew: 6150
Marines: 250
Mass: Approx. 50000
Hull Rating: 15.6
Shield Rating: 466.0
Armaments:
Primary - 18 Disruptors
Secondary - 18 Photon Torpedoes
Heavy - None
Advanced - 6 Assault Phasers
COMMUNICATIONS RELAY STATION
Length: 686m
Crew: 15
Marines: 5
Mass: Approx. 2000
Hull Rating: 2.0
Shield Rating: 26.0
Armaments:
Primary - 4 Disruptors
Secondary - None
Heavy - None
Advanced - None
67
Page 65

FEDERATION
The United Federation of Planets is an interstellar alliance of various planetary governments and colonies ostensibly united for social,
economic, scientific, and defensive co-operation. But since its founding in the Terran year 2161 (1536 IR), the Federation has in truth
been continuously on the move to subvert nearby civilisations into joining their alliance, absorb their technologies and wealth, and all
the while stamping out their cultural individuality, replacing it with Federation imperialist dogma.
Membership in the Federation hinges on several requirements, such as a unified planetary government (which is easier to manipulate
than a balkanised planet), and equality for all their citizens (which allows the weak and fearful to hold positions of power). Even when
the world in question is not up to their membership criteria, the Federation often imposes blockades around these star systems,
preventing their development by “outside influences” under the guise of their fraudulent “Prime Directive”. All the while, covert
Federation operatives quietly observe these civilisations, and secretly subvert their primitive governments, pave the way for eventual
assimilation into the Federation hegemony.
Federation government is made up of a Council of representatives from their member worlds, presided over by the office of the
Federation President. This is their key weakness, as it renders their government inefficient and bureaucratic. Council decisions must
be ratified by a majority of its membership whose disparate viewpoints rarely coincide with the best interests of the state. Further
crippling governmental powers, the Federation President is rendered ineffectual by the series of “checks and balances” imposed upon
this office by the Constitution of the United Federation of Planets. Subsequently, the decision-making power of the president is too
limited to be effective, and the few areas within his direct influence are subject to veto by the Council. Clearly, they lack the unified
leadership necessary for survival in any kind of sustained conflict.
The military authority of the UFP is Starfleet Command, which is responsible for the defence of the Federation, as well as seeking out
new resources to exploit and new civilisations to undermine and control. To this end, the Federation equips Starfleet with well-balanced
starships, with the very latest technological advances. Federation starships are well suited to their dual roles of exploration and
defence, with a good balance of speed, defensive shielding, hull strength, and offensive weaponry. However, the captains of these
starships are limited with various constraints imposed upon them by the Federation Council through Starfleet Regulations. Adherence
to these regulations makes Starfleet commanders predictable when challenged and reluctant to fight, ultimately rendering them
ineffective warriors despite the formidable tools provided them.
Because the Federation has blocked off most of the Empire’s access to resources in the Alpha Quadrant,war is inevitable. The Empire
must expand into these territories if it is to survive. This coming war is what the industrial might of the Empire has prepared for
throughout the past 70 years, and the Klingon people shall prevail.
WARSHIPS
All data listed was acquired by the Klingon Imperial Intelligence Services and has been taken from captured design documentation and
data tapes. Extraneous information has been removed for clarity.
“YAMATO” CLASS EXPERIMENTAL BATTLESHIP
Length: 854m
Crew: 1200
Marines: 90
Max. Impulse: 1230 k/s
Manoeuvrability Rating: 0.25/0.07
Mass: Approx. 1000
Hull Rating: 9.4
Shield Rating: 198.3
Armaments:
Forward
Primary - 6 Phasers
Secondary - 4 Photon Torpedoes
Heavy - None
Advanced - 2 Assault Phasers
Aft
Primary - 6 Phasers
Secondary - 2 Photon Torpedoes
Heavy - None
Advanced - None
Port & Starboard
Primary - 4 Phasers
Secondary - None
Heavy - None
Advanced - None
68
Page 66

“MISSOURI” CLASS BATTLESHIP
Length: 793m
Crew: 1100
Marines: 90
Max. Impulse: 1140 k/s
Manoeuvrability Rating: 0.24/0.06
Mass: Approx. 1000
Hull Rating: 9.4
Shield Rating: 198.3
Armaments:
Forward
Primary - 6 Phasers
Secondary - 6 Photon Torpedoes
Heavy - None
Advanced - QCB
Aft
Primary - 5 Phasers
Secondary - 4 Photon Torpedoes
Heavy - None
Advanced - None
Port & Starboard
Primary - 4 Phasers
Secondary - None
Heavy - None
Advanced - None
“ULYSSES” CLASS DREADNOUGHT
Length: 549m
Crew: 925
Marines: 80
Max. Impulse: 1230 k/s
Manoeuvrability Rating: 0.25/0.09
Mass: Approx. 850
Hull Rating: 6.0
Shield Rating: 126.0
Armaments:
Forward
Primary - 5 Phasers
Secondary - 4 Photon Torpedoes
Heavy - None
Advanced - QCB
Aft
Primary - 4 Phasers
Secondary - 2 Photon Torpedoes
Heavy - None
Advanced - None
Port & Starboard
Primary - 3 Phasers
Secondary - None
Heavy - None
Advanced - None
69
Page 67

“EXCELSIOR” CLASS HEAVY BATTLECRUISER
Length: 433m
Crew: 725
Marines: 70
Max. Impulse: 1320 k/s
Manoeuvrability Rating: 0.27/0.12
Mass: Approx. 750
Hull Rating: 4.2
Shield Rating: 72.5
Armaments:
Forward
Primary - 4 Phasers
Secondary - 4 Photon Torpedoes
Heavy - None
Advanced - None
Aft
Primary - 3 Phasers
Secondary - 2 Photon Torpedoes
Heavy - None
Advanced - None
Port & Starboard
Primary - 3 Phasers
Secondary - None
Heavy - None
Advanced - None
“LEXINGTON” CLASS COMMAND CRUISER
Length: 397m
Crew: 550
Marines: 60
Max. Impulse: 1410 k/s
Manoeuvrability Rating: 0.30/0.16
Mass: Approx. 550
Hull Rating: 2.3
Shield Rating: 69.7
Armaments:
Forward
Primary - 4 Phasers
Secondary - 2 Photon Torpedoes
Heavy - None
Advanced - QCB
Aft
Primary - 2 Phasers
Secondary - 1 Photon Torpedo
Heavy - None
Advanced - None
Port & Starboard
Primary - 2 Phasers
Secondary - None
Heavy - None
Advanced - None
70
Page 68

“CONSTITUTION” CLASS CRUISER (REFIT)
Length: 305m
Crew: 450
Marines: 50
Max. Impulse: 1500 k/s
Manoeuvrability Rating: 0.31/0.18
Mass: Approx. 500
Hull Rating: 2.5
Shield Rating: 52.3
Armaments:
Forward
Primary - 4 Phasers
Secondary - 2 Photon Torpedoes
Heavy - None
Advanced - None
Aft
Primary - 2 Phasers
Secondary - None
Heavy - None
Advanced - None
Port & Starboard
Primary - 2 Phasers
Secondary - None
Heavy - None
Advanced - None
“MIRANDA” CLASS LIGHT CRUISER
Length: 214m
Crew: 350
Marines: 40
Max. Impulse: 1590 k/s
Manoeuvrability Rating: 0.33/0.21
Mass: Approx. 450
Hull Rating: 2.5
Shield Rating: 52.3
Armaments:
Forward
Primary - 4 Phasers
Secondary - 2 Photon Torpedoes
Heavy - None
Advanced - None
Aft
Primary - 2 Phasers
Secondary - None
Heavy - None
Advanced - None
Port & Starboard
Primary - 2 Phasers
Secondary - None
Heavy - None
Advanced - None
71
Page 69

“AKULA” CLASS DESTROYER (REFIT)
Length: 229m
Crew: 80
Marines: 30
Max. Impulse: 1680 k/s
Manoeuvrability Rating: 0.28/0.38
Mass: Approx. 350
Hull Rating: 2.3
Shield Rating: 40.7
Armaments:
Forward
Primary - 3 Phasers
Secondary - 2 Photon Torpedoes
Heavy - None
Advanced - None
Aft
Primary - 2 Phasers
Secondary - None
Heavy - None
Advanced - None
Port & Starboard
Primary - None
Secondary - None
Heavy - None
Advanced - None
“OKINAWA” CLASS FRIGATE
Length: 183m
Crew: 70
Marines: 20
Max. Impulse: 1770 k/s
Manoeuvrability Rating: 0.32/0.40
Mass: Approx. 300
Hull Rating: 1.7
Shield Rating: 35.0
Armaments:
Forward
Primary - 2 Phasers
Secondary - 2 Photon Torpedoes
Heavy - None
Advanced - None
Aft
Primary - None
Secondary - None
Heavy - None
Advanced - None
Port & Starboard
Primary - None
Secondary - None
Heavy - None
Advanced - None
72
Page 70

“OBERTH” CLASS ESCORT
Length: 107m
Crew: 40
Marines: 5
Max. Impulse: 1860 k/s
Manoeuvrability Rating: 0.39/0.45
Mass: Approx. 250
Hull Rating: 1.3
Shield Rating: 25.2
Armaments:
Forward
Primary - 2 Phasers
Secondary - 1 Photon Torpedo
Heavy - None
Advanced - None
Aft
Primary - None
Secondary - None
Heavy - None
Advanced - None
Port & Starboard
Primary - None
Secondary - None
Heavy - None
Advanced - None
MISCELLANEOUS CRAFT
All data listed was acquired by the Klingon Imperial Intelligence Services and has been taken from captured design documentation and
data tapes. Extraneous information has been removed for clarity.
“CONSTITUTION” CLASS CRUISER (PRE-REFIT)
Length: 305m
Crew: 450
Marines: 50
Max. Impulse: 1320 k/s
Manoeuvrability Rating: 0.27/0.12
Mass: Approx. 500
Hull Rating: 1.5
Shield Rating: 25.8
Armaments:
Forward
Primary - 4 Phasers (Outdated)
Secondary - 2 Photon Torpedoes (Outdated)
Heavy - None
Advanced - None
Aft
Primary - 2 Phasers (Outdated)
Secondary - None
Heavy - None
Advanced - None
Port & Starboard
Primary - 2 Phasers (Outdated)
Secondary - None
Heavy - None
Advanced - None
73
Page 71

“AKULA” CLASS DESTROYER (PRE-REFIT)
Length: 229m
Crew: 80
Marines: 30
Max. Impulse: 1500 k/s
Manoeuvrability Rating: 0.32/0.20
Mass: Approx. 350
Hull Rating: 1.4
Shield Rating: 24.5
Armaments:
Forward
Primary - 3 Phasers (Outdated)
Secondary - 2 Photon Torpedoes (Outdated)
Heavy - None
Advanced - None
Aft
Primary - 2 Phasers (Outdated)
Secondary - None
Heavy - None
Advanced - None
Port & Starboard
Primary - None
Secondary - None
Heavy - None
Advanced - None
“CLYDESDALE” CLASS FREIGHTER/TANKER
Length: 1525m
Crew: 45
Marines: 5
Max. Impulse: 700 k/s
Manoeuvrability Rating: 0.20/0.04
Mass: Approx. 3000
Hull Rating: 1.1
Shield Rating: 6.7
Armaments:
Forward
Primary - 1 Phaser
Secondary - None
Heavy - None
Advanced - None
Aft
Primary - 1 Phaser
Secondary - None
Heavy - None
Advanced - None
Port & Starboard
Primary - None
Secondary - None
Heavy - None
Advanced - None
74
Page 72

“SUPER CLYDESDALE” CLASS FREIGHTER/TANKER
Length: 1652m
Crew: 45
Marines: 5
Max. Impulse: 600 k/s
Manoeuvrability Rating: 0.17/0.03
Mass: Approx. 6000
Hull Rating: 1.1
Shield Rating: 6.7
Armaments:
Forward
Primary - 1 Phaser
Secondary - None
Heavy - None
Advanced - None
Aft
Primary - 1 Phaser
Secondary - None
Heavy - None
Advanced - None
Port & Starboard
Primary - None
Secondary - None
Heavy - None
Advanced - None
“TYPE 2” SHUTTLECRAFT
Length: 31m
Crew: 2
Marines: None
Max. Impulse: 600 k/s
Manoeuvrability Rating: 0.57/0.74
Mass: Approx. 100
Hull Rating: 0.13
Shield Rating: 3.0
Armaments:
Forward
Primary - 1 Phaser
Secondary - None
Heavy - None
Advanced - None
Aft
Primary - None
Secondary - None
Heavy - None
Advanced - None
Port & Starboard
Primary - None
Secondary - None
Heavy - None
Advanced - None
75
Page 73

“WASP” CLASS ATTACK SHUTTLE
Length: 61m
Crew: 2
Marines: None
Max. Impulse: 1500 k/s
Manoeuvrability Rating: 0.52/0.57
Mass: Approx. 125
Hull Rating: 0.26
Shield Rating: 5.0
Armaments:
Forward
Primary - 1 Phaser
Secondary - 1 Photon Torpedo
Heavy - None
Advanced - None
Aft
Primary - None
Secondary - None
Heavy - None
Advanced - None
Port & Starboard
Primary - None
Secondary - None
Heavy - None
Advanced - None
LISTENING POST
Length: 305m
Crew: 10
Marines: 1
Mass: Approx. 5000
Hull Rating: 0.64
Shield Rating: 26.0
Armaments:
Primary - 4 Phasers
Secondary - None
Heavy - None
Advanced - None
BATTLESTATION
Length: 2547m
Crew: 4750
Marines: 200
Mass: Approx. 30000
Hull Rating: 15.0
Shield Rating: 450.0
Armaments:
Primary - 24 Phasers
Secondary - 16 Photon Torpedoes
Heavy - None
Advanced - 4 Assault Phasers
76
Page 74

STARBASE
Length: 2516m
Crew: 7100
Marines: 300
Mass: Approx. 50000
Hull Rating: 18.0
Shield Rating: 540.0
Armaments:
Primary - 24 Phasers
Secondary - 16 Photon Torpedoes
Heavy - None
Advanced - 8 Assault Phasers
SCIENCE STATION
Length: 305m
Crew: 40
Marines: 2
Mass: Approx. 2000
Hull Rating: 2.3
Shield Rating: 69.0
Armaments:
Primary - 4 Phasers
Secondary - None
Heavy - None
Advanced - None
DEFENSE SATELLITES
LIGHT DEFENSE SATELLITE
Length: 30m
Crew: None
Marines: None
Manoeuvrability Rating: 1.65/8.07
Mass: Approx. 50
Hull Rating: 0.13
Shield Rating: None
Armaments:
Forward
Primary - 1 Phaser
Secondary - None
Heavy - None
Advanced - None
Aft
Primary - None
Secondary - None
Heavy - None
Advanced - None
Port & Starboard
Primary - None
Secondary - None
Heavy - None
Advanced - None
77
Page 75

MEDIUM DEFENSE SATELLITE
Length: 30m
Crew: None
Marines: None
Manoeuvrability Rating: 1.65/8.07
Mass: Approx. 50
Hull Rating: 0.13
Shield Rating: None
Armaments:
Forward
Primary - 1 Phaser
Secondary - 1 Photon Torpedo
Heavy - None
Advanced - None
Aft
Primary - None
Secondary - None
Heavy - None
Advanced - None
Port & Starboard
Primary - None
Secondary - None
Heavy - None
Advanced - None
HEAVY DEFENSE SATELLITE
Length: 30m
Crew: None
Marines: None
Manoeuvrability Rating: 1.65/8.07
Mass: Approx. 50
Hull Rating: 0.19
Shield Rating: 5.0
Armaments:
Forward
Primary - 2 Phasers
Secondary - 1 Photon Torpedo
Heavy - None
Advanced - None
Aft
Primary - None
Secondary - None
Heavy - None
Advanced - None
Port & Starboard
Primary - None
Secondary - None
Heavy - None
Advanced - None
ROMULAN
The Romulan Star Empire was first encountered by Klingon vessels in 1600 IR, an encounter that lead to the first of many battles.Up
until 1643, little was known of the Romulans, other than they are treacherous and fight dishonourably from the shadows.That changed
when we entered into an alliance and technical exchange program with the Romulans. The alliance-formed as a response to the everburgeoning political and economic strength of the Federation-ushered in an era of relative peace between our two Empires.
We learned much from our new allies, as did they,and that has become the source of political strain on the alliance. The Romulans are
a proud people who are in the same situation as we. Sorely lacking resources, they must expand or perish. Often,their need to expand
has resulted in armed incursions into Klingon space. This has led to many clashes even after the alliance was formed,yet the overriding
78
Page 76

threat of the Federation has prevented the escalation of hostilities and the alliance remains tenuously intact. Their need to expand,
compounded by their devious, secretive, and dishonourable nature, has led to mistrust between our two governments. Agents of
Klingon Imperial Intelligence monitoring the Romulans, have recently reported the Romulans are running dangerously low on dilithium.
More ominous still, the Romulan Imperial Navy has conducted numerous secret research projects in violation of the technology
exchange treaty between both Empires. Imperial Intelligence has yet to discover the exact nature of these projects, but efforts to do so
continue.
As with all potential enemies, analysis has been done on Romulan technology and tactics. They have similar technology to our own,
including warp drive, impulse engines, transporters, and the like. They perhaps have slightly inferior warp drive capability, but is an
intended result of out-dated schematics and data given to them in the technological exchange.
A particular to the Romulans is plasma torpedo technology. A very powerful seeking weapon with the considerable drawback of
degraded performance at medium and long ranges. This is principally due to the torpedo steadily degrading charge after initial launch.
The exact cause of this charge degradation is not entirely understood by Klingon science, and obviously not be the Romulans, otherwise
this limitation would have been ameliorated by this time.
This fundamental limitation in their main weapons system has actually guided the development of Romulan starships and the tactics
they employ. Because these torpedoes take a long time to arm and they are most effective at close range, the Romulans use their
cloaking devices for “hit-and-run” tactics.They approach as close to an enemy as possible under cloak, decloak, then launch a volley
of all their weapons, cloak again to move away and recharge. This tactic has lead to the Romulans forsaking strong shields in favour
of armoured hull plating since the cloaking device negates the use of shields, as well as to a high degree of manoeuvrability to bring
their weapons to bear quickly after decloaking.
Because of the design limitations of their weapons and warships, Romulans by necessity fight without honour, they constantly hide
their face from their enemies. It is generally accepted amongst scholars that this fundamental flaw in their warrior’s code, combined
with their rapidly increasing isolationism and lack of resources, is turning this once honourable and worthy race into a devious,
deceitful, and disgraceful shadow of their former selves. There are those within the Empire who believe their decadence is not merely
a sign of their cultural decline, but a social contagion. This belief has fostered a growing movement to dissolve our alliance with them
lest their sickness spread across the border and start to decay the moral foundations of our own Empire.
WARSHIPS
All data listed was acquired by the Klingon Imperial Intelligence Services and has been taken from captured design documentation and
data tapes. Extraneous information has been removed for clarity.
“IMPERIAL HAWK” CLASS BATTLESHIP
Length: 763m
Crew: 600
Marines: 80
Max. Impulse: 960 k/s
Manoeuvrability Rating: 0.26/0.08
Mass: Approx. 1000
Hull Rating: 5.8
Shield Rating: 102.5
Armaments:
Forward
Primary - 6 Disruptors
Secondary - 4 Heavy Plasma Torpedoes
Heavy - None
Advanced - None
Aft
Primary - 3 Disruptors
Secondary - None
Heavy - 4 Medium Plasma Torpedoes
Advanced - None
Port & Starboard
Primary - 3 Disruptors
Secondary - None
Heavy - None
Advanced - None
79
Page 77

“WAR EAGLE” CLASS DREADNOUGHT
Length: 473m
Crew: 500
Marines: 70
Max. Impulse: 1050 k/s
Manoeuvrability Rating: 0.28/0.11
Mass: Approx. 850
Hull Rating: 3.6
Shield Rating: 63.3
Armaments:
Forward
Primary - 5 Disruptors
Secondary - 3 Heavy Plasma Torpedoes
Heavy - None
Advanced - None
Aft
Primary - 4 Disruptors
Secondary - None
Heavy - 2 Medium Plasma Torpedoes
Advanced - None
Port & Starboard
Primary - 2 Disruptors
Secondary - None
Heavy - None
Advanced - None
“IMPERIUM” CLASS HEAVY BATTLECRUISER
Length: 458m
Crew: 400
Marines: 65
Max. Impulse: 1140 k/s
Manoeuvrability Rating: 0.29/0.15
Mass: Approx. 750
Hull Rating: 2.6
Shield Rating: 45.3
Armaments:
Forward
Primary - 5 Disruptors
Secondary - 2 Medium Plasma Torpedoes
Heavy - 2 CFDIC
Advanced - None
Aft
Primary - 4 Disruptors
Secondary - None
Heavy - 1 Light Plasma Torpedo
Advanced - None
Port & Starboard
Primary - 2 Disruptors
Secondary - None
Heavy - None
Advanced - None
80
Page 78

“SENATOR” CLASS COMMAND CRUISER
Length: 381m
Crew: 300
Marines: 55
Max. Impulse: 1230 k/s
Manoeuvrability Rating: 0.33/0.19
Mass: Approx. 550
Hull Rating: 2.2
Shield Rating: 39.0
Armaments:
Forward
Primary - 4 Disruptors
Secondary - 2 Medium Plasma Torpedoes
Heavy - None
Advanced - None
Aft
Primary - 2 Disruptors
Secondary - None
Heavy - 2 Light Plasma Torpedoes
Advanced - None
Port & Starboard
Primary - None
Secondary - None
Heavy - None
Advanced - None
“CENTURION” CLASS CRUISER
Length: 168m
Crew: 250
Marines: 45
Max. Impulse: 1320 k/s
Manoeuvrability Rating: 0.35/0.22
Mass: Approx. 500
Hull Rating: 1.6
Shield Rating: 28.2
Armaments:
Forward
Primary - 2 Disruptors
Secondary - 2 Medium Plasma Torpedoes
Heavy - None
Advanced - None
Aft
Primary - 2 Disruptors
Secondary - None
Heavy - None
Advanced - None
Port & Starboard
Primary - None
Secondary - None
Heavy - None
Advanced - None
81
Page 79

“K’T’INGA” CLASS D7 CRUISER
Length: 244m
Crew: 300
Marines: 40
Max. Impulse: 1410 k/s
Manoeuvrability Rating: 0.39/0.28
Mass: Approx. 500
Hull Rating: 2.1
Shield Rating: 38.7
Armaments:
Forward
Primary - 2 Disruptors
Secondary - 1 Medium Plasma Torpedo
Heavy - None
Advanced - None
Aft
Primary - 2 Disruptors
Secondary - 1 Medium Plasma Torpedo
Heavy - None
Advanced - None
Port & Starboard
Primary - 2 Disruptors
Secondary - None
Heavy - None
Advanced - None
“LEGION” CLASS LIGHT CRUISER
Length: 168m
Crew: 200
Marines: 35
Max. Impulse: 1410 k/s
Manoeuvrability Rating: 0.37/0.26
Mass: Approx. 450
Hull Rating: 1.4
Shield Rating: 26.7
Armaments:
Forward
Primary - 2 Disruptors
Secondary - 2 Light Plasma Torpedoes
Heavy - None
Advanced - None
Aft
Primary - 2 Disruptors
Secondary - 1 Light Plasma Torpedo
Heavy - None
Advanced - None
Port & Starboard
Primary - None
Secondary - None
Heavy - None
Advanced - None
82
Page 80

“WARBIRD” CLASS DESTROYER
Length: 76m
Crew: 45
Marines: 30
Max. Impulse: 1500 k/s
Manoeuvrability Rating: 0.42/0.35
Mass: Approx. 350
Hull Rating: 1.2
Shield Rating: 27.2
Armaments:
Forward
Primary - 4 Disruptors
Secondary - 1 Heavy Plasma Torpedo
Heavy - None
Advanced - None
Aft
Primary - 2 Disruptors
Secondary - None
Heavy - None
Advanced - None
Port & Starboard
Primary - None
Secondary - None
Heavy - None
Advanced - None
“GLADIUS” CLASS FRIGATE
Length: 122m
Crew: 40
Marines: 20
Max. Impulse: 1590 k/s
Manoeuvrability Rating: 0.45/0.40
Mass: Approx. 300
Hull Rating: 1.1
Shield Rating: 19.5
Armaments:
Forward
Primary - 2 Disruptors
Secondary - 1 Light Plasma Torpedo
Heavy - 1 CFDIC
Advanced - None
Aft
Primary - None
Secondary - None
Heavy - None
Advanced - None
Port & Starboard
Primary - None
Secondary - None
Heavy - None
Advanced - None
83
Page 81

“PREAX” CLASS ESCORT
Length: 92m
Crew: 24
Marines: 4
Max. Impulse: 1680 k/s
Manoeuvrability Rating: 0.48/0.46
Mass: Approx. 250
Hull Rating: 0.8
Shield Rating: 15.0
Armaments:
Forward
Primary - 2 Disruptors
Secondary - 1 CFDIC
Heavy - None
Advanced - None
Aft
Primary - None
Secondary - None
Heavy - None
Advanced - None
Port & Starboard
Primary - None
Secondary - None
Heavy - None
Advanced - None
THOLIAN
Very little is known of the Tholian Assembly, other that that their government is known as the Assembly and that Tholians as a species
are silicon-based life-forms preferring environments deadly to all known humanoid species. The Empire’s lack of information is not
unique amongst the major galactic powers. The vaunted Romulan Tal’shiar and even the efficient and effective Federation Diplomatic
Service are unable to uncover anything we do not already know. The Tholians are xenophobic,isolationists to the extent tha t they have
refused all attempts at normalised diplomatic relations with any major government. Any incursions into their space are met with swift
and violent retribution until all invaders are expelled or destroyed-more often the latter.
Despite their xenophobia and isolationism, they are also opportunistic. Occasional signs of political unrest can quite often veil an armed
incursion. These incursions are never full-scale and are intended to seize a small amount of territory.Yet it is unclear what the Tholians
do with the territory they seize or even why they seize choose system over another, as many of their targets have scant resources and
of no strategic value. Once the Assembly annexes new territory, they are defended as zealously as any other system under Tholian
control.
Long-range sensor probes confirm that the core area of Tholian space is a stellar nursery, a large nebula in which new stars are
forming. Planetary systems we have identified are usually very young as well, with Class C, Class F, and Class H planets on the whole,
all of which incapable of supporting humanoid life. Rare expeditions returning from Tholian space have reported planets rich in mineral
resources, but located within a vast territory replete with an inordinate number of subspace anomalies discovered. Until a means is
found to neutralise the considerable risks presented by these unpredictable anomalies, the costs of seizing their territory far outweigh
the benefits.
Tholian vessels are constructed of hyper-lineated crystalline-lattice materials. This exotic materials technology affords them extremely
durable hull structures, more so even than Gorn starships. They utilise phaser-like beam weapons, and have somehow managed to
duplicate (either through theft, or, less likely, their own research) Klingon heavy disruptor technology. Despite the availability of such
potent weapons systems, their most formidable weapon is the Tholian Web Cannon.This technology is uniquely Tholian, and scientists
from both the Klingon and Romulan Empires have been unable to determine how it is created or what specific types of energy it utilises.
The affects, however, are well documented. The most effective tactic to be used against Tholian forces—specifically when
encountering their web technology—is long-range slashing attacks designed to stay well out of range of the Web generators.
WARSHIPS
All data listed was acquired by the Klingon Imperial Intelligence Services and has been taken from captured design documentation and
data tapes. Extraneous information has been removed for clarity.
84
Page 82

“SAPPHIRE” CLASS DREADNOUGHT
Length: 534m
Crew: 462
Marines: None
Max. Impulse: 1050 k/s
Manoeuvrability Rating: 0.35/0.17
Mass: Approx. 850
Hull Rating: 6.7
Shield Rating: 135.7
Armaments:
Forward
Primary - 6 Phasers
Secondary - 2 Heavy Disruptors
Heavy - None
Advanced - Web (360)
Aft
Primary - 6 Phasers
Secondary - 2 Heavy Disruptors
Heavy - None
Advanced - None
Port & Starboard
Primary - 6 Phasers
Secondary - None
Heavy - None
Advanced - None
“AMETHYST” CLASS HEAVY BATTLECRUISER
Length: 366m
Crew: 378
Marines: None
Max. Impulse: 1140 k/s
Manoeuvrability Rating: 0.38/0.24
Mass: Approx. 750
Hull Rating: 5.8
Shield Rating: 105.0
Armaments:
Forward
Primary - 6 Phasers
Secondary - 4 Heavy Disruptors
Heavy - None
Advanced - Web (360)
Aft
Primary - 3 Phasers
Secondary - None
Heavy - None
Advanced - None
Port & Starboard
Primary - 3 Phasers
Secondary - None
Heavy - None
Advanced - None
85
Page 83

“RUBY” CLASS CRUISER
Length: 122m
Crew: 294
Marines: None
Max. Impulse: 1320 k/s
Manoeuvrability Rating: 0.44/0.35
Mass: Approx. 500
Hull Rating: 3.3
Shield Rating: 59.0
Armaments:
Forward
Primary - 6 Phasers
Secondary - 1 Heavy Disruptor
Heavy - None
Advanced - Web (360)
Aft
Primary - 3 Phasers
Secondary - 1 Heavy Disruptor
Heavy - None
Advanced - None
Port & Starboard
Primary - None
Secondary - None
Heavy - None
Advanced - None
“GARNET” CLASS LIGHT CRUISER
Length: 214m
Crew: 126
Marines: None
Max. Impulse: 1410 k/s
Manoeuvrability Rating: 0.47/0.40
Mass: Approx. 450
Hull Rating: 2.4
Shield Rating: 42.7
Armaments:
Forward
Primary - 3 Phasers
Secondary - 1 Heavy Disruptor
Heavy - None
Advanced - Web (360)
Aft
Primary - 3 Phasers
Secondary - None
Heavy - None
Advanced - None
Port & Starboard
Primary - None
Secondary - None
Heavy - None
Advanced - None
86
Page 84

“QUARTZ” CLASS DESTOYER
Length: 131m
Crew: 42
Marines: None
Max. Impulse: 1500 k/s
Manoeuvrability Rating: 0.53/0.54
Mass: Approx. 350
Hull Rating: 3.1
Shield Rating: 55.7
Armaments:
Forward
Primary - 6 Phasers
Secondary - 1 Heavy Disruptor
Heavy - None
Advanced - Web (360)
Aft
Primary - 3 Phasers
Secondary - None
Heavy - None
Advanced - None
Port & Starboard
Primary - None
Secondary - None
Heavy - None
Advanced - None
“FELDSPAR” CLASS ESCORT
Length: 92m
Crew: 13
Marines: None
Max. Impulse: 1680 k/s
Manoeuvrability Rating: 0.60/0.73
Mass: Approx. 250
Hull Rating: 1.5
Shield Rating: 6.8
Armaments:
Forward
Primary - 3 Phasers
Secondary - 1 Heavy Disruptor
Heavy - None
Advanced - None
Aft
Primary - None
Secondary - None
Heavy - None
Advanced - None
Port & Starboard
Primary - None
Secondary - None
Heavy - None
Advanced - None
87
Page 85

GORN
The Gorn Star Kingdom is yet another civilisation in decline. The fire that once drove them to explore and conquer the stars has gone
out in their hearts, and their society has begun to atrophy as a result. This does not,however, make them easy opponents. Though they
allow their territorial holdings to whither and eventually break away from their control, any overt attempts to seize their holdings by
force will still result in the awakening of their military juggernaut.
The source of their degradation is a lack of strong leadership. The Gorn King is old, so old, in fact, that he has delegated the
responsibilities of running the government to several vassals at odds with each other for supremacy. Well-meaning members of his
own family keep the Gorn King sheltered from the political intrigues surrounding him, but this serves only to worsen the situation.
Unless a strong leader emerges from their political mire, the Gorn Star Kingdom will continue its decline if it does not tear itself apart
in a civil war.
Despite the Kingdom’s political weakness, the Gorn military machine is well maintained, well disciplined,and a worthy adversary. Gorn
vessels are designed for speed and survivability. Though they tend to have weaker shields than Klingon or Federation vessels, their
hulls are capable of withstanding enormous amounts of punishment. Gorn vessels are equipped with a variety of weapons, many of
which are based on modulated gravimetric field technology, which is a science the Gorn appear to have perfected. Through
independent research, the Gorn have created homing torpedoes extraordinarily similar to Romulan designs. Gorn plasma torpedoes
have a slightly higher nominal yield than Romulan medium plasma torpedoes, but are less stable over time so their effective range is
less. The Gorn also use their mastery of gravity in such weapons as the Quantum Carrier-wave Beam, the Gravitic Harmonic Resonance
Cannon, and their Graviton Density Distortion Sphere. All of these weapons are exceedingly short ranged, but the great speed of the
Gorn vessels greatly mitigates this limitation.
Because the Empire has very little contact with the Gorn Star Kingdom and their internal political strife keeps them well removed from
intra-galactic affairs, they are considered a secondary enemy. However, since they do have some political ties to the United Federation
of Planets, it is conceivable that they may side with the Federation in the event of a major interstellar conflict. All commanders would
best keep this possibility in mind in the event of a future war.
WARSHIPS
All data listed was acquired by the Klingon Imperial Intelligence Services and has been taken from captured design documentation and
data tapes. Extraneous information has been removed for clarity.
“GRENDEL” CLASS DREADNOUGHT
Length: 503m
Crew: 368
Marines: 110
Max. Impulse: 1320 k/s
Manoeuvrability Rating: 0.18/0.05
Mass: Approx. 850
Hull Rating: 5.4
Shield Rating: 120.3
Armaments:
Forward
Primary - 6 Phasers
Secondary - 4 Gorn Plasma Torpedo
Heavy - None
Advanced - QCB (360)
Aft
Primary - 4 Phasers
Secondary - None
Heavy - None
Advanced - None
Port & Starboard
Primary - 3 Phasers
Secondary - None
Heavy - None
Advanced - None
88
Page 86

“EUROMASTYX” CLASS CRUISER
Length: 381m
Crew: 184
Marines: 60
Max. Impulse: 1590 k/s
Manoeuvrability Rating: 0.23/0.10
Mass: Approx. 500
Hull Rating: 2.2
Shield Rating: 41.5
Armaments:
Forward
Primary - 4 Phasers
Secondary - 1 Gorn Plasma Torpedo
Heavy - None
Advanced - GDDS (360)
Aft
Primary - 2 Phasers
Secondary - None
Heavy - None
Advanced - None
Port & Starboard
Primary - 2 Phasers
Secondary - None
Heavy - None
Advanced - None
“ANACONDA” CLASS DESTOYER
Length: 168m
Crew: 40
Marines: 35
Max. Impulse: 1770 k/s
Manoeuvrability Rating: 0.28/0.15
Mass: Approx. 350
Hull Rating: 2.2
Shield Rating: 40.5
Armaments:
Forward
Primary - 4 Phasers
Secondary - None
Heavy - None
Advanced - GHRC (360)
Aft
Primary - 1 Phaser
Secondary - None
Heavy - None
Advanced - None
Port & Starboard
Primary - 1 Phaser
Secondary - None
Heavy - None
Advanced - None
89
Page 87

“KING SNAKE” CLASS FRIGATE
Length: 122m
Crew: 24
Marines: 25
Max. Impulse: 1860 k/s
Manoeuvrability Rating: 0.30/0.18
Mass: Approx. 300
Hull Rating: 1.8
Shield Rating: 27.5
Armaments:
Forward
Primary - 4 Phasers
Secondary - 1 Gorn Plasma Torpedo
Heavy - None
Advanced - None
Aft
Primary - 1 Phaser
Secondary - None
Heavy - None
Advanced - None
Port & Starboard
Primary - 1 Phaser
Secondary - None
Heavy - None
Advanced - None
SHA’KURIAN
The Sha’kurians are an ancient race of amphibious humanoids whose territorial holdings occupy the rim of the Beta Quadrant opposite
the Beta-Alpha border.The true size of their holdings is unknown due to their tight security controls and territorial xenophobia. We know
little of their culture and history but are striving to learn more. What little we know is synopsised here.
The Sha’kurians are not originally from the Beta Quadrant. Intelligence indicates that they had some sort of interstellar feudal empire
located in the Delta Quadrant near the Delta-Beta border. This empire was founded shortly after their acquisition of warp drive
technology. Known Sha’kurian history states they discovered this on their own, but certain newly acquired documents indicate they
may have acquired the technology from another race. Their empire lasted for hundreds of years but was torn apart due to internal strife
following the assassination of their Imperial Family by a group known only as the “Nameless Ones”. We can only surmise they did not
have a strong enough government to rule their holdings in light of the power vacuum created. Civil war and decay was the only logical
outcome.
Their empire contracted to a mere fraction of its original size,
with many of the feudal houses destroyed or absorbed into various conflicts of the time known as “the Collapse” in Sha’kurian lore.
Several of the remaining feudal families fled the area to escape the fighting, eventually settling in their current territory. They failed to
escape the decline and the fighting continued until the number of ruling families was reduced to twelve. The heads of these Royal
Families, known as Dukes, met and devised their current form of government in an effort to maintain the status quo and their familial
power.The Dukes all belong to the House of Lords, which is much like our own High Council with the exception that there is no central
leader.All decisions are handled by vote.
This lack of strong central leadership must not be confused with weakness. The Sha’kurians have an excellent understanding of many
of our virtues and fighting is in their blood as it is ours. Their House of Lords serves as much as an impartial arbiter as it does a
conventional political body. It presides over internal conflicts with strict Rules of War. These Rules of War allow the Sha’kurians to
continue fighting amongst themselves, but ensure that none of the Royal Families will ever be destroyed. This has led to some rather
unusual customs of warfare among the Sha’Kurians, including seasonal warfare and mandatory capturing of prisoners. While
primitively bizarre to say the least, their customs serve the ultimate purpose of cultivating skilled and fearsome warriors.
When elements of the Klingon Defence Forces first encountered the Sha’kurians in 1659 IR, it was discovered that even when war is
raging between the Duchies their Rules of War demand that internal hostilities be completely suspended until all external threats are
neutralised. This was indeed surprising to the commander of the Klingon forces involved in that initial contact.The commander decided
to take advantage of the situation and claim a few worlds rich in natural resources for the Empire. He was rapidly forced to withdraw
due to the swiftly mobilised and unified response. It is now common knowledge that when encountered in their own territory,
Sha’kurians always react with intense hostility. Another surprise discovered during this encounter was that Sha’kurians are unusually
90
Page 88

effective at detecting and hunting down cloaked vessels (it was later learned that the Romulans encountered this same “problem”, but
had conveniently neglected to inform their Klingon allies of the existence of the Sha’kurians much less their ability to detect cloaked
vessels).
A curious practice of the Sha’kurians is their fielding of mercenary fleets. To supplement the income of a Royal Family and gain their
younger warriors valuable experience a Sha’kurian Duke will often assemble squadrons of less experienced fighters and hire them out
to external patrons as mercenaries. It is in this capacity that most of our encounters with Sha’kurians occur, but the fact that they are
not seasoned fighters does not make them any less of a threat. They are still worthy opponents and not to be underestimated.
Sha’kurians are a technologically advanced civilisation, possessing certain standard technologies such as warp drive, impulse drive,
and transporters, but not others such as photon torpedoes. One item of technology that the Sha’kurians have surpassed all others in
is sensor technology. Sha’kurian sensors are far more powerful than Klingon, Romulan,or Federation sensors. This fact in combination
with an intricate battle communications network, allows the Sha’kurians to do highly accurate co-ordinated attacks and other
manoeuvres. This is also the source of their tremendous ability to detect cloaked ships.
Sha’kurian capital vessels are much weaker than their counterparts in other imperial navies, and it is difficult for them to survive in
close combat with other capital ships. To compensate for this lack of durability, Sha’kurian vessels have sacrificed armour for speed.
The Sha’kurian capital ship uses this speed advantage to maintain its distance from enemy vessels while launching fast-attack fighters
and fighter bombers to project their of firepower at long ranges.
These fighters are where the Sha’kurian carrier’s true power lies and they make these capital vessels quite effective in combat.
Sha’kurian technology reflects their peculiar style of combat and is focused on different priorities than other civilisations.
Sha’kurian shield technology has developed to a rudimentary level, and thus provides limited shield protection in comparison to the
Klingons or the Federation. The main weapons systems of Sha’kurian vessels are phaser-like beam weapons as primary batteries, and
missiles known as impulse velocity projectiles. The beam weapons are short ranged in comparison to the primary batteries of other
nations, but are extremely rapid firing. The impulse velocity projectiles,however, come in many varieties and are used in various ways.
The most basic type of impulse velocity projectile is a high velocity non-seeking variant, carried aboard Sha’kurian fighters. The
projectile is aimed at the target and fired, travelling in a ballistic trajectory until it runs out of fuel or impacts an object and detonates.
Carried by the bombers is a more advanced type of guided projectile with a sizeable warhead. Carrier vessels carry two different types
of projectiles. The first carrier-based projectile is the long ranged Active Terminal Guidance projectile which homes in on the enemy in
a fashion similar to the Romulan plasma torpedoes. The other type of carrier-based projectile is the Multithread projectile.These large
projectiles carry multiple smaller projectiles onboard. Once the Multithread projectile is within striking distance of the target it releases
its smaller projectiles that attack the target from many angles simultaneously.
One additional note about Sha’kurian weapons technology is their relatively recent acquisition of the Graviton Density Distortion Sphere
Generator or GDDS. The Gorn originally developed the GDDS during one of their many wars with the Romulan Empire. During that war,
Romulan troops captured a ship equipped with one of these devices for study. The Romulans towed the vessel to a research facility far
from the Gorn border in what was then one of the farthest frontiers of their empire. Not long after research began on the enigmatic
Gorn device, the Romulans made a regrettable first-contact with the Sha’kurians. Romulan expansionist dogma clashed violently with
Sha’kurian territoriality causing a second front to open for the Romulans. During the fighting, a Sha’kurian raiding force captured the
research station and the GDDS as well. The Sha’kurians adapted the Gorn device to fit within their combat tactics and have been
fielding them ever since, utilising the defensive capabilities of the GDDS to a far greater extent than the Gorn and thus greatly increasing
the survivability of their carrier forces.
WARSHIPS
All data listed was acquired by the Klingon Imperial Intelligence Services and has been taken from captured design documentation and
data tapes. Extraneous information has been removed for clarity.
91
Page 89

“ALPHA” CLASS SUPER CARRIER
Length: 991m
Crew: 1200
Marines: 70
Max. Impulse: 1275 k/s
Manoeuvrability Rating: 0.16/0.03
Mass: Approx. 1200
Hull Rating: 5.6
Shield Rating: 77.0
Armaments:
Forward
Primary - 2 Rapid Fire Phasers
Secondary - 2 Multithread Projectiles
Heavy - None
Advanced - GDDS (360)
Aft
Primary - 2 Rapid Fire Phasers
Secondary - 2 Multithread Projectiles
Heavy - None
Advanced - None
Port & Starboard
Primary - 2 Rapid Fire Phasers
Secondary - 5 Multithread Projectiles
Heavy - None
Advanced - None
“LONG FANG” CLASS CARRIER
Length: 717m
Crew: 900
Marines: 55
Max. Impulse: 1455 k/s
Manoeuvrability Rating: 0.18/0.06
Mass: Approx. 850
Hull Rating: 2.5
Shield Rating: 35.0
Armaments:
Forward
Primary - 2 Rapid Fire Phasers
Secondary - 1 Multithread Projectile
Heavy - None
Advanced - GDDS (360)
Aft
Primary - 2 Rapid Fire Phasers
Secondary - 1 Multithread Projectile
Heavy - None
Advanced - None
Port & Starboard
Primary - 2 Rapid Fire Phasers
Secondary - 2 Multiwarhead Projectiles
Heavy - None
Advanced - None
92
Page 90

“HUNTER” CLASS LIGHT CARRIER
Length: 504m
Crew: 400
Marines: 40
Max. Impulse: 1635 k/s
Manoeuvrability Rating: 0.22/0.09
Mass: Approx. 550
Hull Rating: 1.5
Shield Rating: 21.0
Armaments:
Forward
Primary - 1 Rapid Fire Phaser
Secondary - 2 ATG Projectiles (Ship)
Heavy - None
Advanced - GDDS (360)
Aft
Primary - 1 Rapid Fire Phaser
Secondary - None
Heavy - None
Advanced - None
Port & Starboard
Primary - 1 Rapid Fire Phaser
Secondary - None
Heavy - None
Advanced - None
“CLAW” CLASS SUPERIORITY FIGHTER
Length: 30.5m
Crew: 1
Marines: None
Max. Impulse: 2000 k/s
Manoeuvrability Rating: 0.74/1.59
Mass: Approx. 150
Hull Rating: 0.10
Shield Rating: None
Armaments:
Forward
Primary - 1 Rapid Fire Phaser
Secondary - 1 Ballistic Projectile
Heavy - None
Advanced - None
Aft
Primary - None
Secondary - None
Heavy - None
Advanced - None
Port & Starboard
Primary - None
Secondary - None
Heavy - None
Advanced - None
93
Page 91

“SHARP TOOTH” CLASS FIGHTER / BOMBER
Length: 30.5m
Crew: 2
Marines: None
Max. Impulse: 1900 k/s
Manoeuvrability Rating: 0.57/0.96
Mass: Approx. 150
Hull Rating: 0.25
Shield Rating: None
Armaments:
Forward
Primary - 1 Rapid Fire Phaser
Secondary - 2 ATG Projectiles (Bomber)
Heavy - None
Advanced - None
Aft
Primary - None
Secondary - None
Heavy - None
Advanced - None
Port & Starboard
Primary - None
Secondary - None
Heavy - None
Advanced - None
CIVILIAN CRAFT
All data listed was acquired by the Klingon Imperial Intelligence Services and has been taken from captured design documentation and
data tapes. Extraneous information has been removed for clarity.
“ALTAIR STAR” CLASS PASSENGER LINER
Length: 397m
Crew: 3000 (Passengers Included)
Marines: 5
Max. Impulse: 960 k/s
Manoeuvrability Rating: 0.27/0.13
Mass: Approx. 800
Hull Rating: 0.34
Shield Rating: 6.7
Armaments:
None
94
Page 92

“TYPE 400” FREIGHTER
Length: 198m
Crew: 10
Marines: 1
Max. Impulse: 1000 k/s
Manoeuvrability Rating: 0.38/0.28
Mass: Approx. 300
Hull Rating: 0.64
Shield Rating: 13.0
Armaments:
Forward
Primary - 1 Phaser
Secondary - 1 Photon Torpedo
Heavy - None
Advanced - None
Aft
Primary - 1 Phaser
Secondary - None
Heavy - None
Advanced - None
Port & Starboard
Primary - None
Secondary - None
Heavy - None
Advanced - None
“BULLDOG” CLASS FREIGHTER
Length: 458m
Crew: 20
Marines: 2
Max. Impulse: 900 k/s
Manoeuvrability Rating: 0.30/0.16
Mass: Approx. 850
Hull Rating: 0.42
Shield Rating: 6.7
Armaments:
Forward
Primary - 1 Phaser
Secondary - None
Heavy - None
Advanced - None
Aft
Primary - 1 Phaser
Secondary - None
Heavy - None
Advanced - None
Port & Starboard
Primary - None
Secondary - None
Heavy - None
Advanced - None
95
Page 93

“DY-6000” CLASS FREIGHTER
Length: 229m
Crew: 22
Marines: 4
Max. Impulse: 800 k/s
Manoeuvrability Rating: 0.27/0.12
Mass: Approx. 850
Hull Rating: 0.42
Shield Rating: 6.7
Armaments:
Forward
Primary - 1 Phaser
Secondary - None
Heavy - None
Advanced - None
Aft
Primary - 1 Phaser
Secondary - None
Heavy - None
Advanced - None
Port & Starboard
Primary - None
Secondary - None
Heavy - None
Advanced - None
“PORTER” CLASS FREIGHTER
Length: 610m
Crew: 26
Marines: 4
Max. Impulse: 800 k/s
Manoeuvrability Rating: 0.17/0.05
Mass: Approx. 1000
Hull Rating: 0.69
Shield Rating: 6.7
Armaments:
Forward
Primary - 1 Phaser
Secondary - None
Heavy - None
Advanced - None
Aft
Primary - 1 Phaser
Secondary - None
Heavy - None
Advanced - None
Port & Starboard
Primary - None
Secondary - None
Heavy - None
Advanced - None
96
Page 94

“TYPE 800” FREIGHTER
Length: 534m
Crew: 30
Marines: 4
Max. Impulse: 800 k/s
Manoeuvrability Rating: 0.21/0.07
Mass: Approx. 1000
Hull Rating: 0.69
Shield Rating: 6.7
Armaments:
Forward
Primary - 1 Phaser
Secondary - None
Heavy - None
Advanced - None
Aft
Primary - 1 Phaser
Secondary - None
Heavy - None
Advanced - None
Port & Starboard
Primary - None
Secondary - None
Heavy - None
Advanced - None
97
Page 95

Interplay Entertainment Corp. and
Paramount Pictures Present
A Game Developed By 14 Degrees East
Star Trek: Klingon Academy
Produced by: Raphael Hernandez
Line Producer Rene Hakiki
Game Design Ron Hodge
Brent Kollmansberger
Steve McLafferty
Lead / 3D Programmer John Panettiere
Lead Artist Perry Scalf
AI / Physics Programmer Robert Coultrip, PhD
Interface Programming Mark Murakami
Sound Programming Jude Greer
3D Art Manuel Salazar
Kurt Rauer
Chris Regalado
Mark Bergo
Mission Scripting Danien Chee
Rene Hakiki
Chad Nicholas
Danny Stanley
Steve McLafferty
Story By: Raphael Hernandez
Brent Kollmansberger
Ron Hodge
Film Script By: Raphael Hernandez
Multiplayer Coding By Wombat Games
For Wombat Games Jason Spangler
Rick Delashmit
Additional Programming Mike Kelleghan,
Intermetrics
Additional Art Arlene Somers
Pete Meihuizen
Evan Chantland
Tony Martin
Cornelia Magas
Additional Mission Chuck Cuevas
Scripting Will Lebus
Grant Dai
Main Menu Script Danien Chee
Training Mission Scripting
Chad Nicholas
In-Game Movie Scripting
Steve McLafferty
Multiplayer Mission
Scripting Danien Chee
Media Resource
Management Rene Hakiki
Installer Daniel Stanley
Game Manual Ron Hodge
Division Head Brian Christian
INTERPLAY ENTERTAINMENT CORP.
Marketing Stacy Bremmer
Paul Naftalis
Creative Services Manager
Kathy Helgason
Production Manager Thom Dohner
Traffic Manager Brian Harkins
Package Layout and
Design Larry Fukuoka
Manual Layout and Lee Fleshman
Design (US) Schlieker Design
Public Relations Heather McLaughlin
Project ‘Grandfather’ James Boone
14 DEGREES EAST
Director of Technology Eric Whelpley
Film Script Editing: D.C. Fontana
QUALITY ASSURANCE:
Directors of Quality Jeremy S. Barnes
Assurance Michael Motoda
QA Managers
Greg “Moose” Baumeister
“Junga” Dave Simon
QA Division Operations Monica Vallejo
Manager
QA Project Supervisors Erick “Vampire” Lujan
Cory “Faerl” Nelson
Doug Finch
QA Senior Testers
Erik “Sonic Pooh” Guenther
Eric “Fillabuster” Fong
Kevin “Daulton” Osburn
QA Testers Mark “Fezzik” Pfeiffer
Eric “Eraser” Pribish
Bradley “Devil Doll” Dutton
Joe “Mystic” Isip
Harold “Dragonball” Kim
Devin “Mother-Animal” Vink
Erik “Bomber” Hernandez
John “Random” Hoover
Seth “Moonchilde” Baker
Albert “Teknojedi” Perez
David “Hunter” Vodhanel
Belinda “Vexen” Berglof
Erik “Crow” Markham
David “Marikus” Webb
Brock “Dolomite” Heinz
David “Chewy” Farias
QA IS Technicians Bill “So-Lo” Delk
Tom “The Major” Quast
Compatibility Manager Darrell Jones
Compatibility Technicians
Derek Gibbs
Joshua Walters
David Parkyn
John Parker
INTERPLAY AUDIO
Supervising Sound
Designer / Editor Adam Levenson
Supervising Mastering
Engineer Craig Duman
IN-GAME AUDIO
Music Composed &
Conducted by Inon Zur
Performed by Members of the Seattle
Philharmonic and Chorus
Music Editing by Rick Jackson
Ron Valdez
Pull
Dialog Editing by Frank Szick
Stephen Miller
Additional Mastering by Frank Szick
DIALOG
VO Direction & Casting by
Chris Borders
VO Recorded At Screenmusic Studios
VO Engineer Ernie Sheesley
CINEMATICS AUDIO
Music by Rick Jackson
Additional Music by Albert Olson
Additional Music Mixing by
Rick Winquest
Foley Recorded at EFX by
Eric Thompson (Foley
Mixer)
Sean Row (Foley Artist)
Dialog and Foley Editing by
Eight Ball Sound
Adam Levenson
Chris Borders
Location Sound
Supervision by Chris Borders
Audio Director &
Re-recording Mixer Charles Deenen
Audio Administrator Gloria Soto
Mixed at Interplay Entertainment in Dolby Surround
INTERPLAY VIDEO
Video Services
Provided By
Dave “AVID master” Cravens
Bill “Compress this!”
Stoudt
Dan “You want it when”
Williams
INTERPLAY TECHNOLOGY
Audio and Video Compression Technology
Paul Allen Edelstein
DirectSound 3D Programmer
Darren Monahan
Additional Programming Tools
John Morgan
VIACOM CONSUMER PRODUCTS:
Paramount Pictures Liasons
Director, Product Development-Interactive &
Technology: Harry Lang
Supervisor, Product Development-Interactive &
Technology Dan Felts
Klingon Mission Builder Brian Aamot, Brainware
Live Action Film Production provided by
An Ideal World
AN IDEAL WORLD
Producer Lou Chagaris
Director Robb Hart
Artist Geanie
Line Producer Jon Shigematsu
Assistant Director Mike K.
2nd Assistant Director Mike M.
Director of Photography Rich Schaefer
First Assistant Camera Brian Rupp
Video Tech Hollywood Nat.
Tape OP Mark Koonce
Gaffer Greg Kindrick
Best Boy Electric Hollywood Nat.
Key Grip Joachim Barnreuther
Grip Stan Gerber
Painter Hollywood Na t.
Script Supervisor Katy Dowdalls
2nd Camera Tom Denovie
Stunt Coordinator Doc Duhame
Carpenter Mike Wagstaff
Audio Phil Brown
2nd Audio Valerie Stulman
Boom Brian Porlier
Make-Up Richard Snell
Belinda Bryant
Wardrobe Kim Shull
CREDITS
98
Page 96

Wardrobe Assistants Renne
Mary Ellen
Teleprompt Sharon Ruiz
First Aid Scott Baron
Key Production Assistant Manny Michel
Production Assistant 2 Andy Cheung
Production Assistant 3 Darryl Garcia
Craft Services Anita Lyman
Hair Josee Normad
Hair Assistants Charlottte
Norma
Casting Ron Surma,
Star Trek production
at Paramount
CAST
Christopher Plummer General Chang
David Warner Gorkon
Wayne Grace Poktarl
Fritz Sperberg K’Mak
Andrew Palmer Jaghjech
Blake Lindsley K’Porak
Blake Hammond K’Mpec
J. Paul Boehmer Melkor
Paul Sandman Toq
Douglas O. McDonald Kalnor
Michael McFall Weapons Officer
John Shull Extra 1
Michael Bravehart Extra 2
VOICE CAST
Gregg Eagles Torlek
Michael Dorn Thok Mak
Wayne Grace Poktarl
Michael Gough Civil War Engineer,
Battlestation Commander
Barry Lynch Academy Helmsman,
ra’wI’a Captain, Freighter
Captain 1, tIHoy Captain
Keven M. Richerdson Civil War
Communications Officer,
Garlok, Starbase 1,
Tholian Commander,
Tutorial Instructor
Perry Brown Civil War Marine
Commander,VutwI’ Hech
Captain
David Lodge Academy Weapons
Officer, Chang’s
Communications Officer,
Wingman 1, Povaq
Captain
John Vernon Academy
Communications Officer,
Federation Commander 2
T.C. Carson Academy Engineer,
Gorkon Allied Command,
Starbase 2
Murphy Dunne Academy Security Officer,
Freighter Captain 5,
QeynoHo
John Shull Academy First Officer,
Hovak Captain, Starbase 3
James Horan Academy Marine
Commander, Starbase 4,
Wingman 2, Romulan
Captain 2
Jamie Alcroft Civil War Weapons Officer,
Freighter Captain 2, Altair
Star Captain, Soorex
Lex Lang Civil War First Officer,
Hopogh Captain, Fed.
Commander 4
Brad Sanders Academy Medical Officer,
Freighter Captain 3,
Wingman 7, Captain
Ignatius Wright
Ron Taylor Civil War Science Officer,
Mobile Cargo Captain
Philip Proctor Civil War Helm Officer,
Takor, Commander Roq
Ron Feinberg Civil War Medical Officer,
WuHey, Federation
Commander 1
Sean Smith Academy Science Officer,
HoDIytI Officer,Adel
Radsek
Michael Clarke Duncan Opening Movie Klingons
Based on Star Trek, created by Gene Roddenberry
(1921-1991)
Special Thanks to Rick Berman, Dave Rossi, Ron
Surma and Dan Curry from Star Trek production and
Juliet Dutton at Paramount
DEVELOPER RELATIONS SPECIAL THANKS
Brian Bruning, 3dfx
Vaughn Rhodes, Rendition
John Kim, Diamond Multimedia
Chris Donahue, nVidia
Jay Stocking, nVidia
Jim Clardy, NEC Electronics Inc.
Bill Havlicek, Creative Labs, Inc.
Brett Schneff, Microsoft
SPECIAL SCRIPTING THANKS
Chris Holland
Tom French
SPECIAL THANKS FOR ADDITIONAL
BALANCING & DESIGN INPUT
EUROPEAN PACKAGING
A CREATIVE EXPERIENCE, LONDON
99
Page 97

CUSTOMER SUPPORT
Thank you for purchasing Star Trek®:Klingon Academy. If you are experiencing difficulties with this title, please take advantage of the
following product support. Please note that all our operators only speak English and that we are unable to give gameplay hints through
our Technical Support number.
Technical Support: +44 (0)207 551 4266
Fax: +44 (0)207 551 4267
Internet: customer_support@vie.co.uk
(please use the game title as your subject heading)
World Wide Web: www.vie.co.uk and www.interplay.com
Address: Customer Services Department
Virgin Interactive Entertainment Europe Ltd.
74a Charlotte Street
London
W1P 1LR
United Kingdon
LIMITED WARRANTY
In the unlikely event of a software fault please return the complete package, with your receipt, to the original place of purchase.
Interplay disclaims all responsibility for incidental or consequential damages. These statements do not affect your statutory rights.
If you do telephone, please be sitting in front of your computer (if possible) and be sure to provide us with as much information as
possible. Make sure to note the exact type of hardware that you are using in your system, including:
• Speed and Manufacturer of your Processor.
• Make & Model of your Sound Card and Video Card.
• Make & Model of your CD-ROM drive.
• Amount of RAM present.
• Any additional Hardware and Peripherals.
• Information contained in your Config.Sys & Autoexec.Bat files.
Note: If you have any problems in obtaining any System Information please consult your System supplier. It is extremely important that
you have the information above at hand when you call.
When contacting us by post, ensure you include the Title & Version of the game, a detailed description of the problem you are
experiencing and the exact type of hardware that you are using.
When sending us a fax, please remember to leave your fax machine switched on and ready to receive. If you are using a Telephone/Fax
system please make sure that the Fax connection is enabled. Ensure to include your name, a return Fax number with the area code
and a Voice number so we can contact you if we experience problems when trying to Fax you back.
NOTICE
Interplay reserves the right to make modifications or improvements to the product described in this manual at any time and without
notice.
COPYING PROHIBITED
This software product and the manual are copyrighted and all rights are reserved by Interplay Productions and are protected by the
copyright laws that pertain to computer software. You may not copy the software except that you may make a single copy for backup
purposes only. You may not loan, sell, rent, lease, give, sub-license, or otherwise transfer the software (or any copy) unless expressly
permitted to do so by Interplay Productions Ltd. You may not modify, adapt,translate,create derivative works,decompile, disassemble,
or otherwise reverse engineer or derive source code from, all or any portion of the software or anything incorporated therein or permit
any third party to do so.
100
Page 98

INTERPLAY’S WORLD WIDE WEB SITE
"Welcome to the Interplay Web! As a company dedicated to providing innovative, high quality interactive entertainment software, we
are always striving to stay as close as possible to the leading edge of technology. This Web site is designed to provide a wealth of
information and opportunities to you. As a company of fanatic gamers, we love the idea of gamers all over the world tapping into
cyberspace to see, touch and feel our latest games. To make it work, our goal is to keep this site fresh and new, to make it a place
where you can tell US what you like about our game and what you don’t like about them! Enjoy your visit to our web site, explore all
the different areas we have to offer, and come back soon. Keep checking us out as we introduce new and exciting areas for you to
experience.
Once again, Welcome!"
Brian Fargo
TO FIND US
www.interplay.com
101
Page 99

NOTES
102
Page 100

NOTES
103
 Loading...