

Page 1

®
PETROL LAWNMOWER FBM 450 B2
NI
PETROL LAWNMOWER
Translation of the original instructions
FR BE
TONDEUSE À GAZON À ESSENCE
Traduction du mode d’emploi original
BENZIN-RASENMÄHER
Originalbetriebsanleitung
DK
BENZINDREVET PLÆNEKLIPPER
Oversættelse af de oprindelige instruktioner
NL
GRASMAAIER MET BENZINEMOTOR
Vertaling van de originele handleiding
IAN 291839
6
Page 2

NI
Before reading, unfold the page containing the illustrations and familiarise yourself with all
functions of the device.
DK
Fold siden med billeder ud, før du læser denne brugervejledning, og sæt dig ind i alle
maskinens funktioner.
FR BE
Avant d’entamer la lecture, dépliez la page des illustrations et familiarisez-vous ensuite
avec toutes les fonctions de la machine.
NL
Klap vóór het lezen de pagina met de afbeeldingen uit en maak u vervolgens vertrouwd
met alle functies van het toestel.
Klappen Sie vor dem Lesen die Seite mit den Abbildungen aus und machen Sie sich anschließend mit allen Funktionen des Gerätes vertraut.
GB / IE / NI Translation of the original instructions Page 1
DK Oversættelse af de oprindelige instruktioner Side 21
FR / BE Traduction du mode d’emploi original Page 43
NL Vertaling van de originele handleiding Pagina 65
87DE / AT / CH Originalbetriebsanleitung Seite
Page 3
25
24
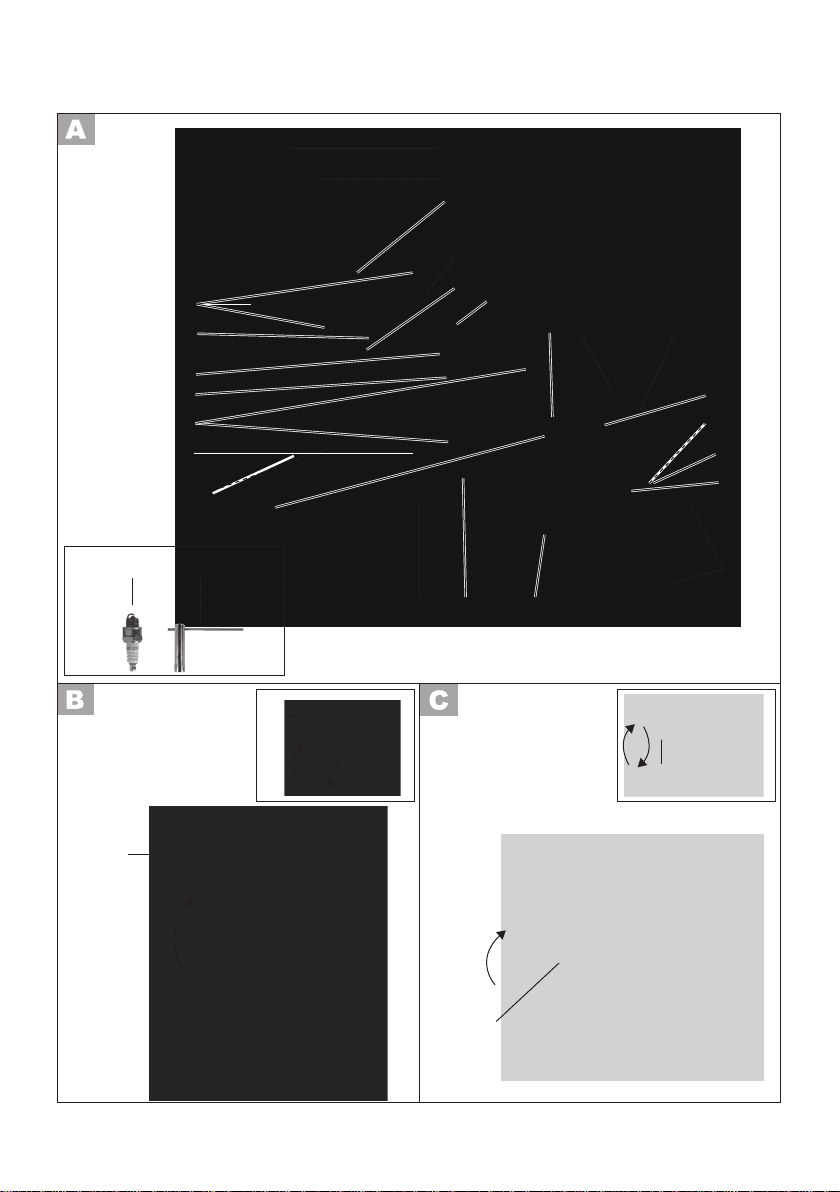
1
2
4
5
3
6
8 10 9
7
23
22
21
20
23a
19
26
4
27
81 71 61
21
11
13
12
14
15
25
21
25
Page 4
1
2
23
20
23
7
3
22
30
31
20
23a
2
7
28
19
32
29
3
Page 5

Content
GB IE NI
Introduction ............................... 2
Intended Use .............................. 2
General Description .................... 2
Delivery Contents ........................... 2
Summary ...................................... 3
Functional Description ..................... 3
Safety Equipment ........................... 3
.............. 4
Symbols and icons ..................... 4
Symbols on the device ................... 4
Symbols in the manual .................... 5
Safety Instructions...................... 6
Initial Operation ......................... 8
Mounting grip rod .......................... 9
Fitting the starter cord ..................... 9
Installing the Grass Collection Box ... 9
Filling with Engine Oil and Checking
the Oil Level .................................. 10
Filling with Petrol ............................ 10
Operation ..................................10
Starting and Stopping the Engine ..... 11
Mowing .......................................... 11
Working Instructions .................. 11
General Working Instructions .......... 11
Setting the Cutting Height................ 12
Emptying the Grass Collection Box ... 12
Cleaning and Maintenance .........12
Cleaning and General Maintenance
Work ............................................ 12
Cleaning/Replacing the Air Filter ..... 13
Maintaining the Spark Plug ............. 13
Changing the Engine Oil ................ 13
Checking/Sharpening/Replacing the
Blade ........................................... 14
Adjusting the Carburettor ................ 14
Storage ...................................... 14
General Storage Instructions ............ 14
Fold up device ............................... 14
Storage during the winter break ....... 14
Disposal/Environmental
Protection ..................................15
Maintenance Intervals ................16
Troubleshooting ......................... 17
Guarantee .................................18
Repair Service ............................19
Service-Center ............................20
Importer ....................................20
Translation of the original EC
declaration of conformity ........... 109
1
Page 6

GB IE NI
Introduction
Congratulations on the purchase of your
new device. With it, you have chosen a
high quality product.
During production, this equipment has been
checked for quality and subjected to a final
inspection. The functionality of your equipment is therefore guaranteed.
The operating instructions constitute
part of this product. They contain
important information on safety, use
and disposal.
Before initial use, please read
these operating instructions and the
Briggs & Stratton instruction manual
carefully in order to avoid incorrect
handling.
Use the product only as described
Keep this manual safely and in the
event that the product is passed on,
hand over all documents to the third
party.
Intended Use
General Description
The illustration of the princi-
pal functioning parts can be
found on the front and back
foldout pages.
Delivery Contents
Carefully unpack the appliance and check
that it is complete. Dispose of the packaging material correctly.
- Petrol lawn mower (already mounted)
- Grass collection box
- Quick-release levers
- Spare spark plug
- Spark plug wrench
- Operating instructions
- Briggs & Stratton operating instructions
The equipment is intended only for mowing
lawns and grass areas in domestic use.
This equipment is not suitable for commercial use. Commercial use will invalidate the
guarantee.
these instructions may result in damage to
the equipment and represent a serious risk
to the user.
The equipment is intended for use by
adults. Children or other people who are
unfamiliar with the operating instructions
must not use the equipment.
The operator or user is responsible for accidents or damage to other persons or their
property.
2
Page 7

GB IE NI
Summary
1 Upper handle
2 Safety catch
3 Starter cord guide
4 Bottom handle
5 Bowden cable
6 Cable clamp
7 Starter handle with starter cord
8 Filler cap
9
10
11 Engine cover with ventilation
12 Spark plug connector
13 Spark plug (no illustration)
14 Exhaust guard
15 2 front wheels
16 Steel plate housing
17 Lever for cutting height adjust-
18 2 rear wheels
19
20 Grass collection box
21 2 quick-release levers on bottom
22 Rear impact protection
23 Gr
23a Lower handle of the grass
24 Fill level indicator
25 2 quick-release levers on upper
26 Spare spark plug
27 Spark plug wrench
28 Plastic straps catcher
29 Grass catcher rod
30 Grass collector hanger bracket
ter box
ter (no illustration)
ment
ler cap with dipstick
handle
ass collection box carrying
handle
collection box (no illustration)
grip handle
Functional Description
The equipment is driven by a powerful
four-stroke engine (Briggs & Stratton 450E
Series).
The device is equipped with a high quality
steel plate housing, a grass catcher and a
foldable grip handle.
Refer to the following descriptions for a
functional description of the controls.
Safety Equipment
2 Safety catch
The equipment stops when the
safety catch is released.
14 Exhaust guard
prevents hands or combustible
materials from coming into contact with a hot exhaust.
22 Rear impact protection
protect the operator from parts
cidentally touching the blades
when mowing with no grass collection box.
-
31 Filler plugs
32 Petrol pump
33 Cut height position
3
Page 8
GB IE NI
Engine .............. 4-stroke B&S 450 E Series
Engine size .......................... 125 cm
Power input ................ 1.82 kW (2,47 HP)
Engine speed (n
Blade torque ................................. 45 Nm
Petrol tank volume ............................ 0.8 l
Octane rating ................................ 95-98
Engine oil tank volume ...................... 0.47l
Spark plug ................ Champion QC12YC
Cutting circle ........................... ø 420 mm
Cutting height... 5-stage, 25-34-46-60-75 mm
Grass collection box volume ............... 55 l
Weight (inc. collection box)
Sound pressure level
(L
PA) ................ 81.7 dB(A); K=3.0 dB(A)
Sound po
measured .......94.5 dB(A); K=1.80 dB(A)
guaranteed ............................ 96 dB(A)
Vibration at the handle
(a
h)............ 6,67/5,69 m/s
Noise and vibration values have been
determined according to the standards and
regulations mentioned in the declaration of
conformity.
Technical and optical changes can be
carried out in the course of further development without notice. All dimensions, references and information of this instruction
manual are therefore without guarantee.
Legal claims, which are made on the basis
of the instruction manual, cannot thus be
considered as valid.
The stated vibration emission value was
measu
red in accordance with a standard
testing procedure and may be used to compare one power tool to another.
The stated vibration emission value may
also be used for a preliminary exposure
assessment.
)..................... 2900 min-1
0
........... 25.2 kg
wer level (L
WA )
2
; K=1.5 m/s
3
Warning:
The vibration emission value may
differ during actual use of the
(cc)
power tool from the stated value depending on the manner in which the
power tool is used.
Safety precautions aimed at protecting the user should be based on
estimated exposure under actual
usage conditions (all parts of the operating cycle are to be considered,
including, for example, times during
which the power tool is turned off
and times when the tool is turned on
but is running idle).
Symbols and icons
Symbols on the device
2
Attention!
Read the instruction manual.
Risk of injury from parts being
Keep bystanders away from the
equipment.
Risk of injury from sharp blades.
Keep feet and hands away.
Caution – toxic fumes!
Do not operate the equipment in
enclosed areas.
Caut
Do not smoke and keep away from
heat sources.
4
Page 9

GB IE NI
Do not expose the unit to humidity.
Do not work in the rain.
Caution! The lawnmower blade
continues to run after switching off.
Caution – risk of injury!
Before maintenance work,
switch off the engine and take
out the spark plug connector.
Caution – hot surfaces!
Risk of burning.
Caution – risk of injury!
Wear eye and ear protection.
L
WA
Information of the acoustic power
level L
dB
WA
in dB.
Note on t
Do not fuel any E85-mixtures.
Caution! Before start-
ing, check the oil
level.
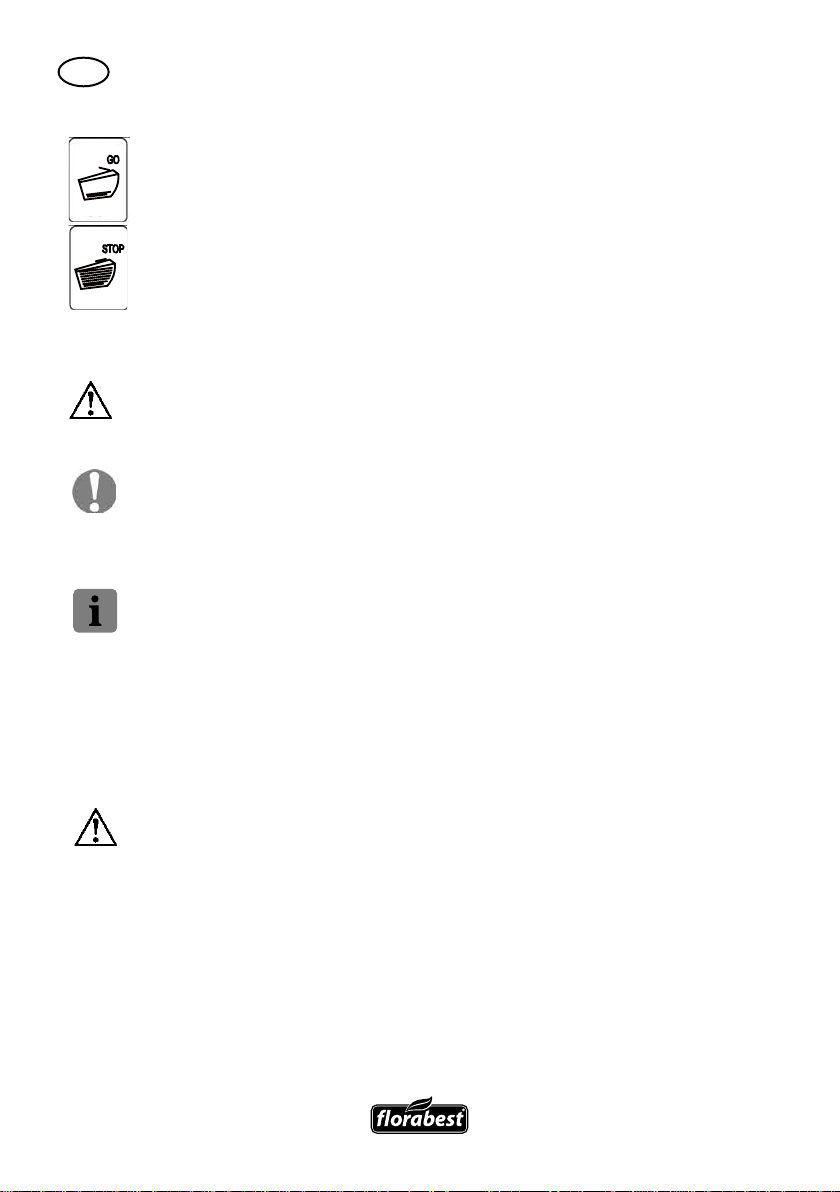
GO
Caution – hot surfaces!
Risk of burning.
Symbol on petrol pump:
Press petrol pump (primer) 3x be-
fore the start.
Symbol on grip handle:
Information
on starting
and stopping
the motor
I
ON
Switch devic e on (ON):
Pull up safety loop.
0
OFF
Switch devic e off (OFF):
Release safety loop.
Fill Level Indicator:
Fill level indicator open:
STOP
Grass collection box empty
Fill level indicator closed:
Grass collection box full
Note on t
Symbols on the Tank:
Attention!
Read the instruction manual.
Caut
Allow the engine to cool for at least
2 min. before refuelling.
Caution – toxic CO fumes! Do not
operate the equipment in enclosed
areas.
Symbols in the manual
Warning symbols with in-
formation on damage and
injury prevention.
Instruction symbols (the instruction
is explained at the place of the ex clamation mark) with information on
preventing damage.
Help symbols with information on
improving tool handling.
5
Page 10

GB IE NI
Safety Instructions
This section deals with the basic safety procedures when working with the equipment.
WARNING! Read all of the safety
instructions and directions. Failure
to observe the safety instructions
and directions may result in electric
Instructions:
• Read the operating instructions careful-
ly. Familiarise yourself with the controls
and with the correct use of the equipment.
• In case of uncertainties, allow yourself
to be given instruction concerning the
use of the device and prohibited operations.
• Pay attention, be aware of what you
are doing and take the utmost care
when working. Do not use the device
if you are tired or ill or you are under
medication. A moment of inattention
whilst using the device can result in serious injuries.
• This appliance is not intended for use
by persons with reduced physical, sensory or mental capabilities, or lack of
experience and knowledge, unless they
have been given supervision or instruction concerning use of the appliance by
a person responsible for their safety.
• Children should be supervised to en-
sure that they do not play with the appliance.
• Do not allow children or other people
who are unfamiliar with the operating
instructions to use the equipment. Local
regulations may set a minimum age for
the user.
• Do not mow whilst people – especially
children – or animals are nearby. If
distracte
equipment.
• The operator or user is responsible for
accidents or damage to other persons
or their property.
• Observe noise control and local regulations.
Preparatory Measures:
• When mowing, always wear slip restistant shoes and long trousers. Do not
mow barefoot or in light sandals. Loose
clothing, jewellery or long hair can
become caught in moving parts. Wearing suitable clothing reduces the risk of
injury.
• Check the area on which the equipment is to be used and remove all
objects (stones, sticks, wires, toy) that
• W
Fire or explosions can result in serious
burns:
- Keep petrol only in containers in-
- Only refuel outdoors and do not
- Fill with petrol before starting the
- If petrol is spilled, do not attempt to
- For reasons of safety, replace petrol
• Replace defective silencers.
d, you may lose control of the
tended for this purpose;
smoke whilst refuelling;
running or the equipment is hot:
start the engine. Instead, remove the
equipment from the surface on which
the petrol has been spilled. Avoid
any ignition attempt until the petrol
fumes have evaporated;
damage.
6
Page 11

GB IE NI
• Before use, always carry out a visual
inspection to check whether the cutting
tools, mounting bolts and entire cutting
unit are worn or damaged. To avoid
imbalance, only replace worn or damaged tools and bolts in sets.
• Take care with equipment that has
several cutting tools, as the movement
of one blade may result in rotation of
other blades.
• Use only replacement parts and accessories supplied and recommended
by the manufacturer. The use of parts
from other manufacturers may result
in injuries and will result in immediate
invalidation of the guarantee.
Handling:
• Do not run the combustion engine in
enclosed spaces, in which dangerous
carbon monoxide can collect.
• Mow only in dayl ight or with good
can result in accidents.
• If possible, avoid using the equipment
on wet grass.
• Always ensure secure positioning, par-
dykes. This will give you better control
of the equipment in unexpected situations.
- Always work acr oss the slope, never
upwards or downwards.
- Take particular care when changing
the direction of travel on the slope.
- Do not mow on excessively steep
slopes (max. 10°).
• Run the equipment only at walking
speed.
• Take particular care when turning the
equipment around or pulling it towards
you.
• Stop the cutting tool if the equipment
has to be tipped up for transportation
over a surface other than grass and
when moving the equipment from and
to the surface to be mown.
• Do not use the equipment with damaged safety equipment or guards or
with no safety equipment attached, e.g.
impact protection an
ers. This ensures that the equipment
remains safe.
• Do not change the engine regulator
setting and do not over-rev it. This may
damage the equipment.
• Before starting, the engine, disengage
all cutting tools and drives.
• Start or operate the start switch with
care and in accordance with the manu-
space between feet and the cutting
tool. Risk of injury.
• When star ting or activating the engine,
do not tip the equipment unless the
equipment has to be lifted for this procedure. In this case, tip the equipment
only as far as is absolutely necessary
and lift only the side that is away from
the user.
• Do not start the engine when standing
in front of the ejection channel.
• Switch on the engine in accordance
with the instructions and only if your
feet are a safe distance away from the
cutting tools.
• Do not place hands or feet under rotating parts. Always keep away from the
ejection opening. A moment of carelessness when using the equipment may
resu
lt in serious injury.
• Do not leave or carry the equipment
when the engine is running.
• Switch off the engine, take out the
spark plug connector and ensure that
all moving parts are still:
- Before releasing blockages or remov-
ing obstructions in the ejection chan-
d/or grass catch-
7
Page 12

GB IE NI
nel;
- Before checking, cleaning or working
on the equipment;
- If a foreign body is struck. Look for
damage to the equipment and carry
out the necessary repairs before restarting and working with the equipment;
- If the equipment starts to vibrate unusually strongly, an immediate check
is required.
• Switch off the engine, take out the
spark plug connector and ensure that
all moving parts are still:
- When leaving the equipment;
- Before refuelling;
• Do not leave the equipment unattended
in the workplace.
• Do not work with equipment that is
damaged or incomplete or has been
converted without the approval of the
manufacturer.
Using machines for applications other
than those intended may result in dangerous situations.
Do not work with the device if there
•
is a risk of lightning strike. Danger of
electric shock.
Maintenance and Storage:
• Ensure that all nuts, bolts and screws
• T
gine, exhaust and area around the fuel
tank free of grass, leaves or leaking
grease (oil).
• Check the grass catcher regularly for
wear or loss of function.
• For reasons of safety, replace worn or
damaged parts. Replace defective si lencers.
• If the fuel tank is to be drained, do this
outdoors.
• Handle your equipment with care. Keep
the tools sharp and clean to enable you
to work better and more safely. Follow
the maintenance directions.
• Do not attempt to repair the equipment
yourself unless you are trained to do so.
tions is to be carried out only by cus tomer service centres authorised by us.
• Keep the equipment in a dry place and
out of reach of children. Machines are
dangerous if used by inexperienced
people.
-
-
Initial Operation
Caution! Risk of injury from
rotating blades. Carry out
work on the equipment only
when the blade is switched
off and stationary.
is in safe working condition. Many
accidents are caused by poorly main tained equipment.
• Do not keep the equipment with petrol
in the tank inside a building in which
petrol fumes could potentially come into
• Allow the engine to cool before placing
the equipment in enclosed spaces. Risk
8
Observe the Briggs & Stratton in-
struction manual supplied.
Before starting the device, you must
- remove all transport safety devices,
- fold up the grip rod and lock the quickrelease levers,
-
l in motor oil,
-
l in petrol,
- mount the grass catcher if necessary,
- set the cutting height if necessary.
Page 13

GB IE NI
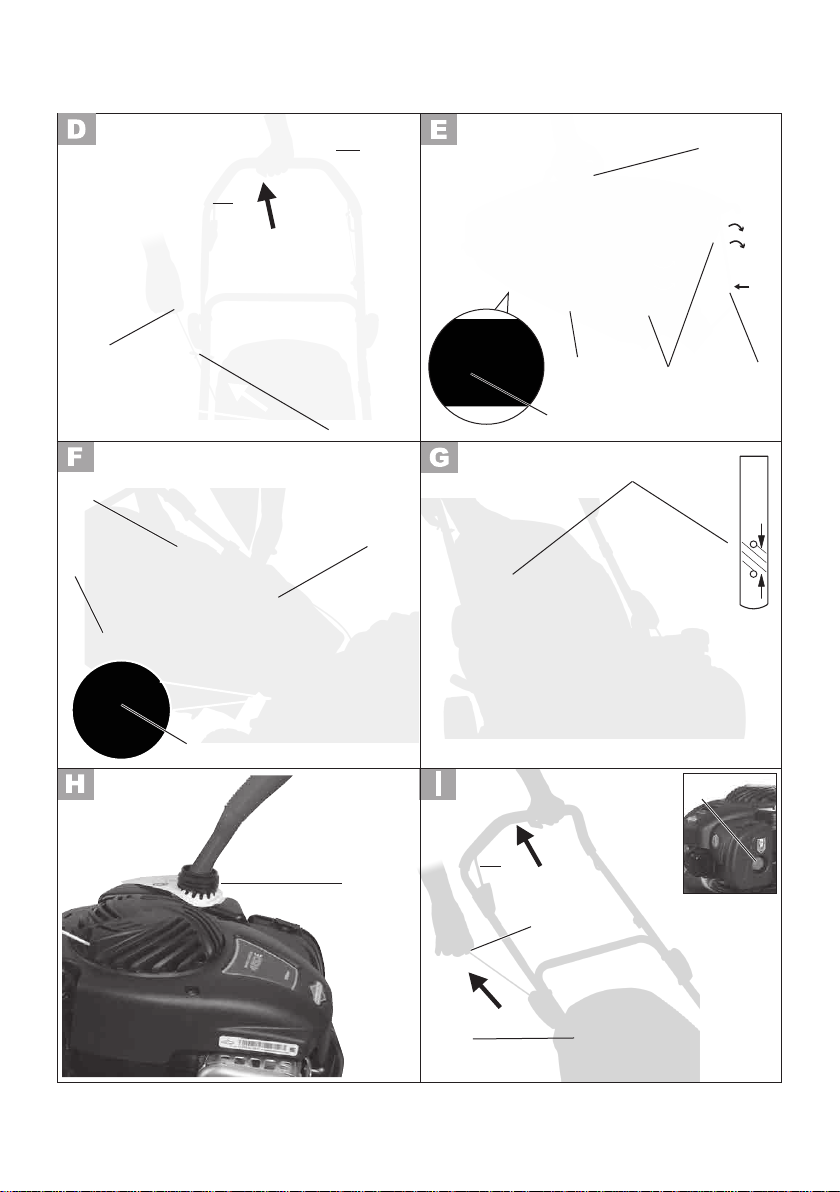
Mounting grip rod
Make sure that the Bowden cable
(
5) is not crushed during the as-
sembly of the grip handle.
1. Fold the bottom handle (4) and
the upper grip handle (1) upwards.
2. Bring the bottom handle (4) into
the desired position and lock
the quick-release levers (21) by
pushing them in the direction of
the handle (4). The quick-release
lever should be facing upwards.
tensioning with medium force can
be carried out.
Otherwise, the quick-release le-
vers must be turned clockwise for
tensioning them or anti-clockwise
to loosen them.
3. The bottom handle (4) has
two separate mounting holes.
Mount the grip handle at the
desired height onto the bottom
handle (4) with the aid of the
quick-release lever.
4. Lock the quick-release levers (25)
to the upper grip handle (1) as
described below 2.
5. Fasten the Bowden cable (
5) using a cable clamp ( 6) to
the bottom handle (
4).
Fitting the starter cord
the starter cord in the starter cord
guide (3).
3. Release the safety catch (2).
Installing the Grass Collection
Box
Caution: Do not operate the
equipment with the grass collection box or impact protection installed incompletely.
Risk of injury!
Mounting the net
1. Put the plastic straps (28) on the
grass catcher (20) over the grass
catcher rod (29).
Fixing the Grass Collection
Box onto the Equipment:
2. Lift the rear impact protection
(22).
3. Hold the grass collection box
(20) by the carrying handle (23)
and hang it on the grass collector hanger (30) at the rear of the
device which is provided for this
purpose.
Dismantling the Grass Col-
lection Box:
4. Raise the impact protection (22)
and remove the grass collection
box (20) by the carrying handle
(23).
1. Pull the safety bar (2) towards the
grip handle (1) and hold it in this
position.
2. Slowly pul l the starter cord by
the starter handle (7) in the direction of the handlebar and hang
9
Page 14
GB IE NI
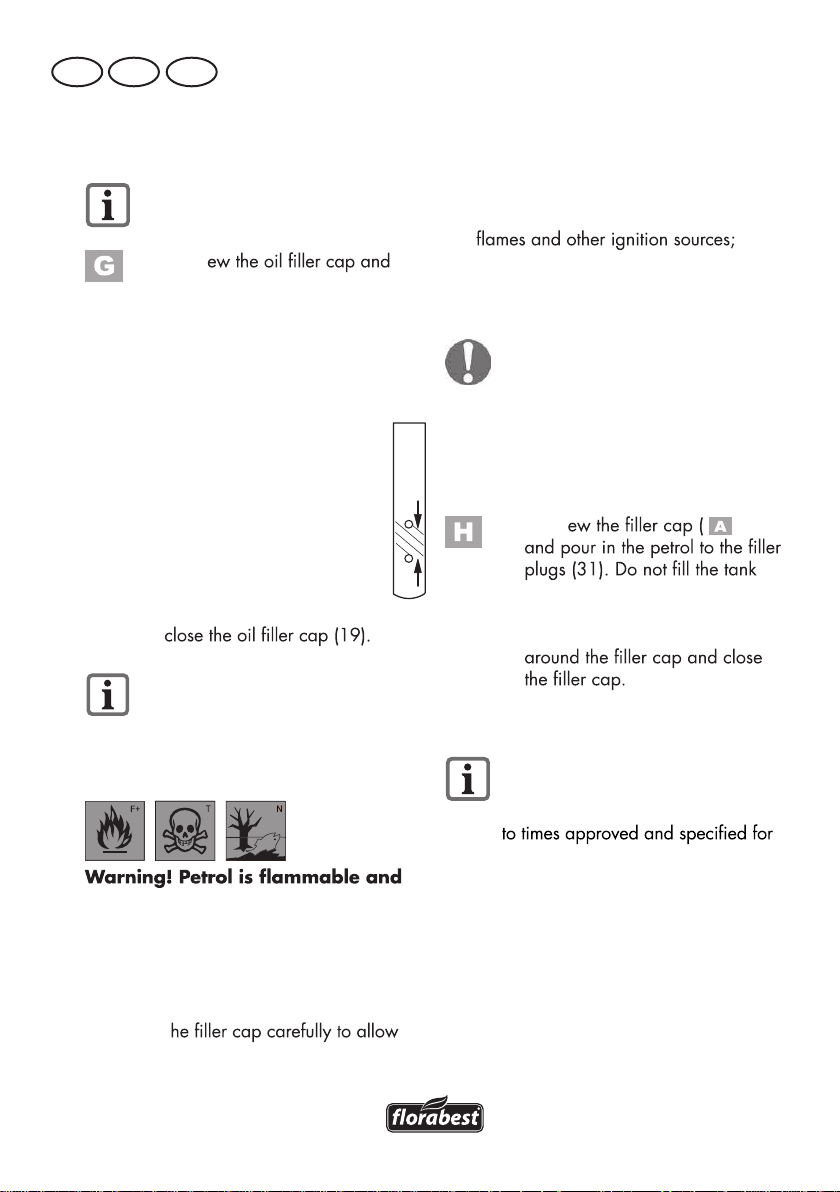
Filling with Engine Oil and
Checking the Oil Level
Place the equipment on a level
base.
1. Unscr
dipstick (19) and pour oil into
the tank. The oil tank holds 0.47 l
oil. Use brand oil (e.g. SAE 30).
2. To check the oil level, wipe the
dipstick (19) on a clean cloth
and replace it in the tank until it
stops.
3. After pulling it out, read off
the oil level on the dipstick.
The oil level should be in
the marked area between
the minimum and maximum
marks (maximum: 0.47 litres
of engine oil in the oil
tank).
4. Wipe off any spilt oil and
Check the oil level every time be-
fore mowing and add oil before the
lower marking point is reached.
- Do not smoke whilst refuelling;
- Avoid skin contact and inhalation of
the fumes;
- Remove spilt petrol;
- Keep petrol away from sparks, open
- Dispose of leftover petrol in an environmentally friendly way (see “Disposal /
Environmental Protection”).
- Do not use petrol/oil mixtures;
- Use normal or super unleaded
petrol;
- Only use clean, fresh petrol;
- Do not store petrol for longer
than one month, as its quality
deteriorates.
1. Unscr 8)
entirely, to allow the petrol room
to expand.
2. Wipe away petrol residues
Operation
Filling with Petrol
hazardous to health:
- Keep petrol in containers intended for
this purpose;
- Only refuel outdoors and never with the
engine running or when the machine is
hot;
- Open t
excess pressure to escape;
10
A c ertain level of noise exposure
caused by this device is unavoidable. Rearrange noise-intensive works
this purpose. Comply with the rest
periods and reduce the work period
down to the minimum. For your personal protection and the protection
of people near by, suitable hearing
protection must be worn.
Page 15

GB IE NI
Starting and Stopping the
Engine
W
Start the engine at least 3 m
-
Start the equipment on a sturdy,
level base, if possible not in long
grass. Ensure that the cutting tool
is touching neither objects nor the
ground.
For your safety: Stand behind the
device when starting it.
Check the petrol and oil levels regu-
larly (see “initial operation”) and
Cold start:
1. Press the petrol pump (32)
(primer) 3 x.
2. Pull and hold the safety
catch (2) towards the grip handle
( 1).
3. Pull the starter handle (7).
4. If the motor starts slowly, release
the starter handle into the starter
rope-guide (3).
For a warm start it is not necessary
to press the primer (32).
If the primer is pressed too often,
too much petrol will enter the car-
start.
Motor stop:
• Release the safety catch (2). The motor
switches off and the knife is braked.
Knife stopping device:
Regularly examine the knife stopping device:
Release the safety loop (2). The motor
switches off and the knife is braked. The
knife must stop within 3 seconds.
Mowing
1. Start the engine (see ).
2. Hold the grip handle (1) and the
safety loop (2) with both hands
while mowing.
Working Instructions
General Working Instructions
• As far as possible, mow the lawn when
it is dry in order to protect the turf.
• Set the cutting height such that the
equipment is not overloaded.
• Run the equipment at walking speed in
lines that are as straight as possible. For
uninterrupted mowing, the lines should
always overlap by a few centimetres.
• Do not move backwards.
• On slopes, always work acr oss the
slope.
• If the blade comes into contact with
a foreign body, switch off the engine
immediately. Wait until the blade is
stationary and check the equipment for
damage. Restart work
ment is undamaged.
• Switch off the equipment during longer
breaks and for transportation and wait
until the blade is stationary.
only if the equip-
11
Page 16

GB IE NI
• Clean the equipment after each use, as
described in the “cleaning and maintenance“ chapter.
Setting the Cutting Height
The equipment has 5 positions for setting
the cutting height (25-34-46-60-75 mm):
1. Pull the lever (17) outwards and
push it to the desired position
(33).
2. Push the lever (17) back in.
The correct cutting height is around
30–45mm for an ornamental lawn and
around 40–65mm for a utility lawn.
Select a greater cutting height for
Emptying the Grass Collection Box
Fill Level Indicator:
24) attached to
the top of the grass collection box (
shows when the grass collection box is full.
Fill level indicator open:
STOP
Grass collection box empty
20)
Cleaning and
Maintenance
Have any repair and maintenance work not described in
these instructions carried out
by a specialist workshop. Use
only original replacement
parts. Risk of accidents!
Carry out maintenance and
cleaning work strictly with
the engine switched off and
spark plug connectors
removed. Risk of injury!
Allow the equipment to cool
before any maintenance and
cleaning work. Elements of
the engine are hot. Risk of
burning!
W ear gloves when handling the
blade.
For cleaning and maintenance
work, also observe the Briggs &
Stratton instruction manual supplied.
W e recommend contacting an au-
thorised Briggs & Stratton dealer for
maintenance work on the engine
(see Briggs & Stratton dealer list).
GO
Fill level indicator closed:
Grass collection box full
1. Stop the engine and wait until
the blade is stationary.
2. Lift the rear impact protection
(22) and remove the grass collection box (20).
3. Carry the box to your grass
disposal site and upend it. For
easy emptying, hold the box at
its lower handle (23a).
12
Cleaning and General Maintenance Work
Remove the grass collection box.
Fold the upper handle bar (1) and
tilt the device back for cleaning and
maintenance jobs at the bottom
side so that the spark plug faces
upwards.
Page 17

GB IE NI
Make sure that a second person
holds the device because there is a
danger of tipping backwards.
Do not tilt the equipment sideways
leak out and the engine could be
damaged.
• Always k eep the equipment clean. To
clean, use a toothbrush or cloth but no
corrosive cleaning agents or solvents.
Do not use water to clean the engine
as it could contaminate the fuel system.
• After mowing, remove plant remains
that are stuck to the equipment by using
a piece of wood or plastic. Clean the
vent holes (
blade area especially. Do not use hard
or pointed objects, which could damage the equipment.
• Oil the wheels from time to time.
• Before each use, check the lawnmower
for obvious defects such as loose, worn
or damaged parts. Check that all nuts
• Check covers and guards (
11,14,22) for damage and that they
are sitting correctly. Replace if necessary.
11), ejection hole and
Cleaning/Replacing the Air
Filter
Do not operate the equipment
3. Clean t
solution and let it dry. Put a few
drops of fresh engine oil into the
4. T
-
close it.
Maintaining the Spark Plug
A worn spark plug or a spark gap
that is too large will result in a reduction of engine performance.
1. Disconnect the spark plug con-
2. Unscrew the spark plug (13)
3. Check the spark gap using a
4. If necessary, adjust the gap by
5. Clean the spark plug with a wire
6. Insert the cleaned and adjusted
nector (12) from the spark plug
(13) by simultaneously pulling
and turning.
anticlockwise using the enclosed
spark plug wrench (
feeler gauge (available from
specialist shops). The spark gap
must be at least 0.51 mm.
carefully bending the ground
electrode on the spark plug.
brush.
spark plug or replace a damaged spark plug with a new one
(recommended torque 20Nm,
determined with a torque
wrench).
27).
and dirt will get into the engine and
result in damage to the machine.
1. Remove the spark plugs connector (
12) (see “Maintaining
the Spark Plug”).
2. Open t
Changing the Engine Oil
Change the engine oil with the petrol
tank empty and the engine warm. Use a
suitable gasoline hand pump to empty
the tank. Alternatively, arrange the
refueling so that the remaining gasoline
is spent during operation.
13
Page 18

GB IE NI
• Change the engine oil for the
ing hours then every 50 operating hours or annually.
• Dispose of the used oil in an ecofriendly manner (see “Disposal/
Environmental protection“).
1. Remove the spark plug connector (
12) (see “Maintaining the Spark Plug”).
2. Open the oil tank cover (
pump out the motor oil with an oil
pump.
3. R
tion”).
19) and
Checking/Sharpening/
Replacing the Blade
Only allow specialist companies to
install and dismantle the knife.
W ear gloves when handling the
blade.
• Take off the spark plug connector (
12) and check the blade for wear and
damage.
• Always have a blunt blade resharpened
by a specialist company, as an imbalance check can be carried out there.
• Always have a specialist workshop
change a damaged or imbalanced
blade.
Incorrect installation can re-
sult in serious injury.
Adjusting the Carburettor
Storage
General Storage Instructions
Do not store the equipment
with a full collection box. In
hot weather, the grass begins
to ferment when heat is gen-
• Clean and service the equipment before
storage.
• Allow the engine to cool before storing
the equipment in enclosed areas.
-
• Use suitable and authorised containers
for storing fuel.
• Keep the equipment in a dry place that
is protected from dust and out of reach
of children.
• Do not wrap the equipment in nylon
bags as damp and mould could form.
Fold up device
For space-saving storage the grip rod can
be folded twice.
1. Remove the grass catcher (20).
P
2. Hang out the starter cord (
3. Open the quick clamping cable
levers (21/25) on the bottom handle (4) and the upper grip handle
(1).
4. Fold both handles down again.
The Bowden cable (5) must not be
jammed when you do this.
Storage during the winter
break
7).
The carburettor has been preset in the factory for optimum performance. If readjustments are required, have the adjustments
made by a specialist workshop.
14
Non-observance of the storage
instructions may cause starting problems or permanent damage as a result of fuel residues in the carburettor.
Page 19

O
O
GB IE NI
• Start the engine and allow it to run until
it stops due to running out of petrol.
• Change the oil (see “changing the engine oil “).
• Preserve the engine:
- Unscrew the spark plug (
“cleaning and maintenance“);
- Pour a tablespoon of engine oil
through the spark plug hole into the
engine compartment;
- Pull the starter cord (
eral times with the safety catch
(
2) pulled in order to distribute
the oil inside the engine;
- Screw the spark plug ( 13) tight.
• Dispose of used oil and petrol residues
in an ecofriendly manner (see “Disposal/environmental protection“).
There is no need to drain the petrol
tank if a fuel stabiliser is added to
the petrol (see Briggs & Stratton
instruction manual).
13) (see
7) slowly sev-
Disposal/Environmental
Protection
• Return the tool, accessories and packaging to a recycling centre when you
- Carefully drain the petrol and oil
tanks and take your equipment to
a recycling centre. The plastic and
metal parts that are used can be
separated by type and thus recycled.
- Take used oil and petrol residues to a
disposal point and do not pour them
into the sewer system or down the
drain.
- Ask our Service-Center for details.
• Defective units returned to us will be
disposed of for free.
• Do not throw cut grass in the dustbin
but rather compost it or spread it under
bushes and trees as a mulch layer.
15
Page 20

GB IE NI
Maintenance Intervals
Regularly carry out the maintenance work listed in the “maintenance intervals” table.
Regular maintenance prolongs the life of the equipment. It also gives optimum cutting performance and avoids accidents.
Maintenance Work
(See “cleaning and maintenance“)
Check and tighten screws, nuts
and bolts
Before After
Work
After 1
5 Hrs.
Check the engine oil level/petrol
petrol if required
Clean operating elements / the
area around the silencer
b
Change the engine oil
a
Clean/adjust the spark plug
Replace the spark plug
Check the silencer and spark
b
catcher
Clean the air cooling system
a
Replace more often if there is a high level of dust or heavy dirt
b
See Briggs & Stratton instruction manual
a,b
st
After
8Hrs.
After
50Hrs.
Annual
16
Page 21

Troubleshooting
O
Problem Possible Cause Fault Correction
Too little petrol in the tank Fill with petrol
Follow the instructions for starting the engine (see ”operation“)
12)
Attach the spark plug connector
Clean, adjust or replace the spark plug
(see “cleaning and maintenance“)
Have the carburettor adjusted by a specialist workshop
maintenance“)
Have the carburettor adjusted by a spe-
cialist workshop
Have the carburettor adjusted by a spe-
cialist workshop
Clean, adjust or replace the spark plugs
(see “cleaning and maintenance“)
Clean the ventilation slot
Maintenance”)
Change the cutting height (see “setting
the cutting height“)
Have the blade sharpened or replaced
by a specialist workshop
Remove the grass (see “cleaning and
maintenance“)
Have the blade installed by a specialist
workshop
Have the blade installed by a specialist
workshop
Engine does not
start
Engine starts but
equipment does
not run at full
power
Engine splutters,
stops
Engine overheats
Engine smokes
Output unsatisfactory or engine
labouring
Blade does not
turn
Abnormal noises,
rattling or vibrations
Incorrect starting sequence
Spark plug connector (
not put on correctly
Sooted spark plug
Incorrectly adjusted carburettor
mix ( 13)
10)
Incorrectly adjusted carburettor
mix
Incorrectly adjusted carburettor
mix
13)
Sooted spark plug (
Ventilation holes (
blocked
Incorrect spark plug (
Too little engine oil in the engine Fill with engine oil (see “initial operation”)
Too little engine oil in the engine Fill with engine oil (see “initial operation”)
Grass too short or too long
Blade blunt
Blade blocked with grass, grass
collection box full, ejection channel blocked
Blade blocked with grass Remove the grass
Blade not installed correctly
Blade not inst
Blade damaged
O
11)
13) Change the spark plug
O
N
10)
alled correctly
GB IE NI
17
Page 22

GB IE NI
Guarantee
Dear Customer,
This equipment is provided with a 3-year
guarantee from the date of purchase.
Please note any different guarantee conditions for the motor and read the enclosed
operating instructions from motor manufacturer “Briggs & Stratton” carefully. This
guarantee does not affect your legal guarantee rights.
In case of defects, you have statutory rights
against the seller of the product. These
statutory rights are not restricted by our
guarantee presented below.
Terms of Guarantee
The term of the guarantee begins on the
date of purchase. Please retain the original
receipt. This document is required as proof
of purchase.
If a material or manufacturing defect
occurs within three years of the date of
purchase of this product, we will repair or
replace – at our choice – the product for
you free of charge. This guarantee requires
the defective equipment and proof of purchase to be presented within the three-year
period with a brief written description of
what constitutes the defect and when it occurred.
If the defect is covered by our guarantee,
you will receive either the repaired product
or a new product. No new guarantee period begins on repair or replacement of the
product.
Guarantee Period and Statutory
Claims for Defects
The guarantee period is not extended by
the guarantee service. This also applies for
replaced or repaired parts. Any damages
and defects already present at the time of
purchase must be reported immediately after unpacking. Repairs arising after expiry
of the guarantee period are chargeable.
Guarantee Cover
The equipment has been carefully produced in accordance with strict quality
guidelines and conscientiously checked
prior to delivery.
The guarantee applies for all material and
manufacturing defects. This guarantee
does not extend to cover product parts that
are subject to normal wear and may there-
e be considered as wearing parts (e.g.
for
rope) or to cover damage to breakable
parts (e.g. switches).
This guarantee shall be invalid if the product has been damaged, used incorrectly or
not maintained. Precise adherence to all of
manual is required for proper use of the
product. Intended uses and actions against
which the operating manual advises or
warns must be categorically avoided.
The product is designed only for private
and not commercial use. The guarantee
will be invalidated in case of misuse or
improper handling, use of force, or interventions not undertaken by our authorised
service branch.
Processing in Case of Guarantee
To ensure quick handling of you issue,
please follow the following directions:
• Please have t
tion number (IAN 291839) ready as
proof of purchase for all enquiries.
•
ing plate.
• Should functional errors or other defects occur, please initially contact the
he item number on the rat-
-
18
Page 23

telephone or by e-mail. You will then
receive further information on the processing of your complaint.
• After consultation with our customer
service, a product recorded as defective can be sent postage paid to the
service address communicated to you,
with the proof of purchase (receipt)
the defect and when it occurred. In order to avoid acceptance problems and
additional costs, please be sure to use
only the address communicated to you.
Ensure that the consignment is not sent
carriage forward or by bulky goods,
express or other special freight. Please
send the equipment inc. all accessories
supplied at the time of purchase and
ensure adequate, safe transport packaging.
Repair Service
GB IE NI
For a charge, repairs not covered by the
guarantee can be carried out by our ser-
vice branch, which will be happy to issue
a cost estimate for you.
We can handle only equipment that has
been sent with adequate packaging and
postage.
Attention: Please send your equipment to
our service branch in clean condition and
with an indication of the defect.
Equipment sent carriage forward or by
bulky goods, express or other special
freight will not be accepted.
We will dispose of your defective devices
free of charge when you send them to us.
19
Page 24

GB IE NI
Service-Center
The responsible “Briggs & Stratton” service
is responsible for motor problems on your
lawn mower in accordance with the enclosed dealer list.
Service Great Britain
GB
Sertronics GmbH
Ostring 60
66740 Saarlouis
GERMANY
E-Mail: gapo-service-de@sertronics.de
Tel: 0044 2036300345
Fax: 0049 21529603111
Service Ireland
IE
Sertronics GmbH
Ostring 60
66740 Saarlouis
GERMANY
E-Mail: gapo-service-de@sertronics.de
Tel: 0035314372338
Fax: 0049 21529603111
IAN291839
Importer
Please note that the following address is not
a service address. Please initially contact
Ga-Po Vertrieb GmbH
Heinrich-Horten-Straße 5
47906 Kempen, Germany
20
Page 25

Indhold
DK
Indledning...................................22
Anvendelsesformål...................22
Generel beskrivelse...............22
Pakkens indhold..............................22
Oversigt...............................23
Funktionsbeskrivelse.................23
Beskyttelsesanordninger..................23
Tekniske data.…...........................24
Piktogrammer/Symboler............24
Symboler på maskinen................24
Piktogrammer i vejledningen..............26
Sikkerhedsanvisninger.................26
Ibrugtagning............................29
Montering af føreskaft...................29
Montering af startkabel....................30
Montering af græspose.................30
Påfyldning af motorolie og kontrol af
oliestand
Påfyldning af benzin..........
Betjening....................................31
Start og stop af motor............
Græsslåning.....
Arbejdsanvisninger....................32
Generelle arbejdsanvisninger..........32
Indstilling af klippehøjde...................33
Tømning af græspose………….....33
......
..........
......
.........
......
.........
......
......
............
........
.....
..30
..........31
.....31
.32
......
Rengøring og vedligeholdelse......33
Rengøring og generelt
vedligeholdelsesarbejde....................34
Rensning/Udskiftning af luftfilter.........34
Vedligeholdelse af tændrør..............34
Skift af motorolie...........................35
Kontrol/Slibning/Udskiftning af
skær...............................................35
Indstilling af karburator.....................35
Opbevaring................................36
Generelle opbevaringsanvisninger....36
Sammenklapning af maskinen..........36
Opbevaring i vinterhalvåret..........36
Bortskaffelse/Miljøbeskyttelse......37
Vedligeholdelsesintervaller...........38
Fejlsøgning..................................39
Garanti......................................40
Reparationsservice......................41
Servicecenter..............................42
Importør....................................42
Oversættelse af de oprindelige EU
overensstemmelseserklæring…..111
21
Page 26

DK
Indledning
Tillykke med din nye plæneklipper! Du har
erhvervet dig et kvalitetsprodukt.
Under fremstillingen er maskinen
blevet underkastet en kvalitets- og
godkendelseskontrol, som en garanti for din
maskinens funktionsevne.
Brugervejledningen hører med som
en del af maskinen. Den indeholder
vigtig information om sikkerhed,
brug og bortskaffelse.
Læs denne brugervejledning og
brugervejledningen fra Briggs &
Stratton opmærksomt, inden du tager
maskinen i brug første gang for at
undgå fejlbetjening.
Brug kun produktet som beskrevet og
kun til de anførte formål.
Gem vejledningerne for senere brug,
og giv dem i givet fald videre til
andre brugere af maskinen.
Formål
Maskinen er udelukkende beregnet til
klipning af plæner og græsarealer i private
hjem.
Denne maskine er ikke beregnet til
erhvervsmæssig brug. I tilfælde af
erhvervsmæssig brug, bortfalder garantien.
Enhver anden form for anvendelse, som der
ikke udtrykkeligt gives tilladelse til i denne
vejledning, kan føre til skader på maskinen
og udgøre en alvorlig fare for brugeren.
Maskinen er beregnet til at blive brugt
af voksne. Børn og personer, der ikke er
fortrolige med denne vejledning, må ikke
benytte maskinen.
Brugeren eller ejeren er ansvarlig for uheld
eller skader, der påføres andre mennesker
eller deres ejendom.
Generel beskrivelse
Illustrationen af de vigtigste
funktionelle dele findes på
den forreste og bageste
udfoldelige side.
Pakkens indhold
Tag forsigtigt maskinen ud af emballagen,
og kontroller, at nedenstående dele er
intakte:
- Plæneklipper (allerede monteret)
- Græspose
- Hurtigspændearm
- Reserve-tændrør
- Tændrørsnøgle
- Brugervejledning
- Brugervejledning Briggs & Stratton
Emballagematerialet skal bortskaffes
affaldssorteret.
22
Page 27

DK
Oversigt
A
E
F
H
1 Øverste føreskaft
2 Sikkerhedsbøjle
3 Føring til startkabel
4 Nederste føreskaft
5 Bowdenkabel
6 Kabelklemme
7 Startergreb med startkabel
8 Tankdæksel
9 Luftfilterboks
10 Luftfilter (ikke afbildet)
11 Motorafdækning med
ventilationssprækker (fingerværn)
12 Tændrørshætte
13 Tændrør (ikke afbildet)
14 Udstødningsværn
15 2 forhjul
16 Hus af stålblik
17 Arm til indstilling af klippehøjde
18 Baghjul (x2)
19 Dæksel til olietank med oliepind
20 Græspose
21 2 hurtigspændearm til
skaftfastgørelse forneden
22 Bageste stødværn
23 Bæregreb græspose
23a Nederste håndtag til tømning af
græspose (ikke afbildet)
24 Niveauindikator
25 2 hurtigspændearm til
skaftfastgørelse på øverste
håndtag
26 Reserve-tændrør
27 Tændrørsnøgle
28 Plastikstrips til græspose
29 Ramme til græspose
30 Ophæng til græspose
31 Påfyldningsstuds
Funktionsbeskrivelse
Maskinen drives af en højtydende 4-taktsmotor (Briggs & Stratton 450 E Series).
Maskinen er udstyret med et hus af
stålblik af høj kvalitet, en græspose og et
sammenklappeligt føreskaft.
Betjeningsdelenes funktion fremgår
af nedenstående beskrivelser.
Beskyttelsesanordninger
2 Sikkerhedsbøjle
A
Maskinen standser, når
sikkerhedsbøjlen slippes.
14 Udstødningsværn
Forhindrer, at hænder eller
brændbare materialer kommer
i kontakt med den varme
udstødning.
22 Bageste stødværn
Beskytter brugeren mod
udslyngede dele og utilsigtet
berøring af skæret ved
græsslåning uden græspose.
I
32 Benzinpumpe (primer)
33 Position klippehøjde
K
23
Page 28

DK
Tekniske data
Motor ..................4-takts B&S 450 E Series
Motorens cylindervolumen............ 125 cm
Effektforbrug................ 1,82 kW (2,47 PS)
Engine speed....…………........... 2900min
Tilspændingsmoment skær…......…. 45 Nm
Volumen benzintank.......................... 0,8 l
Oktantal.........................................95-98
Volumen motorolietank......................0,47 l
Tændrør......................ChampionQC12YC
Klippekreds… .......................... ø 420 mm
Klippehøjde…...5-trins, 25-34-46-60-75 mm
Volumen græspose……….................... 55l
Vægt (inkl. græspose)....................25,2 kg
Lydtryksniveau
PA
(L
) ................... 81,7 dB(A); K=3,0 dB(A)
Lydeffektniveau (L
målt.................. 94,5 dB(A); K=1,80 dB(A)
garanteret ................................. 96 dB(A)
Vibration på håndtag
(
)..............6,67/5,69 m/s2; K=1,5 m/s
h
a
Støj- og vibrationsværdier er
udfundet i henhold til de standarder
og bestemmelser, der er nævnt i
overensstemmelseserklæringen.
Tekniske og optiske ændringer kan foretages
som et led i den løbende videreudvikling
uden forudgående meddelelse.
Alle mål, anvisninger og data i denne
brugervejledning angives derfor uden
ansvar for oplysningernes rigtighed.
Retlige krav, der fremsættes på grundlag af
brugervejledningen, kan derfor ikke gøres
gældende.
WA
)
sammenligne en maskine med en anden.
Den angivne svingningsemissionsværdi
kan også tjene som en første skønsmæssig
3
vurdering af støjbelastningen.
-1
Advarsel:
Svingningsemissionsværdien kan
afvige fra den angivne værdi under
det faktiske arbejde med maskinen,
afhængigt af hvordan maskinen
anvendes.
Fastlæggelse af
sikkerhedsforanstaltninger, der er
baseret på et skøn af støjbelastningen
under de faktiske arbejdsbetingelser,
er påkrævet for at beskytte brugeren
(der skal her tages hensyn til alle
faktorer i driftscyklen, eksempelvis
tidsrum, hvor maskinen er slukket, og
tidsrum, hvor det nok er tændt, men
kører uden belastning).
2
Piktogrammer/Symboler
Symboler på maskinen
Vigtigt!
Læs brugervejledningen.
Fare for personskader p.g.a.
udslyngede dele.
Hold tilstedeværende personer
på afstand af maskinen.
Den angivne svingningsemissionsværdi
er blevet målt efter en standardiseret
prøvningsmetode og kan tjene til at
24
Page 29

DK
Fare for personskade p.g.a. skarpe
skæreblade.
Hold fødder og hænder på afstand.
Forsigtig! Kontroller
oliestanden, før du
starter.
Piktogram på dækslet til olietanken:
Forsigtig -- giftige dampe!
Rygning forbudt; maskinen må ikke
være tændt i lukkede rum.
Oplysning på påfyldningsstudsen til
olie
Piktogram på tanken:
Forsigtig -- benzin er letantændeligt!
Ingen rygning, og varmekilder skal
holdes på afstand!
Udsæt ikke maskinen for fugt. Arbejd
ikke i regnvejr.
Vigtigt!
Læs brugervejledningen.
Forsigtig – benzin er letantændeligt!
Lad motoren køle af i mindst 2 min.,
inden du tanker.
Forsigtig! Skæret har efterløb efter
frakobling.
Forsigtig – giftige CO-dampe!
Maskinen må ikke være tændt i
Forsigtig – fare for personskade!
Sluk motoren og træk
tændrørshætten ud, inden du
udfører vedligeholdelsesarbejde
på maskinen.
Piktogram på benzinpumpen:
Forsigtig – varme overflader!
Fare for forbrændinger.
lukkede rum.
Forsigtig – varme overflader!
Fare for forbrændinger.
Tryk på benzinpumpen (primer) 3 x,
før du starter.
Forsigtig – fare for personskade!
Brug øjen- og høreværn.
Piktogram på føreskaftet:
Angivelse af lydeffektniveauet
L
i dB.
WA
Piktogram på tankdækslet:
Oplysning på påfyldningsstudsen
til benzin:
Ingen påfyldning af E85-blanding!
Oplysninger om start
og stop af motoren
I
ON
0
OFF
Tænd for maskinen (ON): Træk
sikkerhedsbøjlen op.
Sluk for maskinen (OFF): Slip
sikkerhedsbøjlen.
25
Page 30
DK
Niveauindikator:
Niveauindikator åben:
Græspose tom
Niveauindikator lukket:
Græspose fuld
Piktogrammer i vejledningen
Faresymboler med oplysninger
til imødegåelse af person- og
tingsskader.
Anvisningssymbol (på stedet, hvor
udråbstegnet er, forklares anvisningen
nærmere) med oplysninger om,
hvordan skader forebygges.
Oplysningsskilt med information om,
hvordan maskinen håndteres optimalt.
Sikkerhedsanvisninger
Dette afsnit omhandler grundlæggende
sikkerhedsforskrifter under arbejdet med
maskinen.
ADVARSEL! Læs alle
sikkerhedsanvisninger og øvrige
anvisninger. Tilsidesættelse af
sikkerhedsanvisninger og øvrige
anvisninger kan resultere i elektrisk
stød, brand og/eller svære
kvæstelser.
betjening af maskinen.
• Skulle der opstå tvivl om, hvordan
maskinen betjenes korrekt og om, hvad
der er tilladt, så spørg en bekendt.
• Vær årvågen, vær opmærksom på,
hvad du gør, og vær forsigtig under
arbejdet. Brug ikke maskinen, hvis
du er træt eller syg eller er under
påvirkning af euforiserende stoffer,
alkohol eller medicin. Et enkelt øjebliks
uopmærksomhed under arbejdet kan føre
til svære kvæstelser.
• Denne maskine er ikke beregnet til
at blive anvendt af personer med
nedsatte fysiske, sensoriske eller mentale
færdigheder eller manglende erfaring/
viden, medmindre det sker under
opsyn af en assisterende person, der er
ansvarlig for sikkerheden eller af den
assisterende person har fået instruktion i,
hvordan maskinen anvendes.
• Børn skal være under opsyn for at sikre,
at de ikke leger med maskinen.
• Tillad aldrig børn eller personer, der ikke
er bekendt med brugervejledningens
indhold, at arbejde med maskinen.
Mindstealder for brug af maskinen kan
være fastlagt af lokale bestemmelser.
• Slå aldrig græs, mens andre personen –
navnlig børn – eller dyr er i nærheden.
Hvis du distraheres, kan du miste
kontrollen over maskinen.
• Brugeren eller ejeren er ansvarlig for
uheld, der implicerer andre personer
eller deres ejendom.
• Vær opmærksom på støjværn og lokale
forskrifter.
Generelle anvisninger:
• Læs brugervejledningen
omhyggeligt. Gør dig fortrolig med
indstillingsmuligheder og korrekt
26
Page 31

DK
Forberedende foranstaltninger:
• Under græsslåningen er brug af
skridsikkert fodtøj og lange bukser
påbudt. Slå ikke græs i bare fødder
eller iført lette sandaler. Løstsiddende
tøj, smykker eller langt hår kan blive
trukket ind i bevægelige dele. Risikoen
for personskade nedsættes, hvis du er
iført egnet tøj.
• Undersøg terrænet, som
plæneklipperen skal køre på, og fjern
alle genstande (sten, grenstykker, tråd,
legetøj), som vil kunne blive trukket ind
i maskinen og slynget ud.
• Advarsel: Benzin er særdeles
brændbart.
Ild eller eksplosioner kan føre til svære
kvæstelser:
- Benzin skal udelukkende opbevares i
de dertil beregnede beholdere
- Optankning skal ske i det fri; rygning
forbudt under optankning
- Fyld benzin på, inden du starter
motoren. Mens motoren kører, eller når
maskinen er varm, må tankdækslet ikke
åbnes eller benzin påfyldes
- Hvis du spilder benzin eller tanken er
løbet over, må du ikke prøve at starte
motoren. Flyt i stedet for maskinen
væk fra den benzinkontaminerede
overflade. Tændingsforsøg må ikke
foretages, før benzindampene er
fordampede.
- Af sikkerhedsgrunde skal benzintankog andre tankdæksler skiftes ud, hvis
de beskadiges.
• Udskift defekte lyddæmpere.
• Se altid efter inden brugen, om
skæreblade, fastspændingsbolte eller
den samlede klippeanordning skulle
være slidt ned eller beskadiget. For
at undgå ubalancer må nedslidt eller
beskadiget værktøj og bolte kun skiftes
ud sætvist.
• Vær forsigtig ved maskiner med
flere skæreblade, da et enkelt skærs
bevægelse kan føre til, at de øvrige
skær også bevæger sig.
• Brug kun reservedele og tilbehør, som
leveres og anbefales af producenten.
Brug af dele af andet fabrikat kan
forårsage personskader og vil føre til
øjeblikkeligt bortfald af garantien.
Håndtering:
• Lad ikke forbrændingsmotoren køre
i lukkede rum, hvor der kan dannes
livsfarlig kulilte.
• Slå kun græs i dagslys eller i
god kunstig belysning. Et uoplyst
arbejdsområde kan føre til uheld.
• Undgå om muligt at anvende maskinen
på vådt græs.
• Sørg hele tiden for at stå stabilt, særligt
på skråninger, bakker, grave og diger.
På den måde kan du bedre kontrollere
apparatet i uventede situationer.
- Arbejd altid på tværs af skråningen,
aldrig opad eller nedad.
- Vær særligt forsigtig, når du skifter
køreretning på skråningen.
- Slå ikke græs på meget stejle
skråninger (maks. 10°).
• Maskinen skal føres fremad i
skridtgang.
• Vær særligt forsigtig, når du vender
maskinen eller trækker den ind mod dig
selv.
• Stands skærebladene, hvis maskinen
skal vippes, og hvis den skal
transporteres hen over andre flader end
græs, og når maskinen bevæges fra og
til den flade, der skal klippes.
27
Page 32

DK
• Brug aldrig maskinen med
beskadigede beskyttelsesanordninger
eller uden beskyttelsesanordninger
påmonteret, f.eks. stødværn og/
eller græsopsamlingsanordninger.
Dette sikrer, at maskinens sikkerhed
opretholdes.
• Motorens regulatorindstilling må
ikke ændres og må ikke køre med
overhastighed. Maskinen kan blive
beskadiget.
• Alle skæreblade og drev skal frigøres,
inden motoren sættes i gang.
• Vær forsigtig, når du starter/igangsætter
motoren, og følg anvisningerne fra
producenten. Sørg for at holde en
tilstrækkelig afstand mellem dine
fødder og skærebladene. Risiko for
personskade.
• Når motoren startes/igangsættes, må
maskinen ikke vippes, medmindre
det er nødvendigt at hæve maskinen
under proceduren. Vip i så fald kun
maskinen så meget, som det er absolut
nødvendigt, og løft kun op i den side,
der vender væk fra brugeren.
• Start ikke motoren, mens du står foran
udkaståbningen.
• Tænd for motoren ifølge anvisningerne
og kun, når dine fødder er i sikker
afstand til skærebladene.
• Placer ikke hænder eller fødder oven på
eller neden under roterende dele. Hold
dig altid væk fra udstødningsåbningen.
Et enkelt øjebliks uopmærksomhed under
arbejdet kan føre til svære kvæstelser.
• Løft eller bær ikke maskinen, mens
motoren kører
• Stands motoren, træk tændrørshætten
ud, og forvis dig om, at alle bevægelige
dele står stille:
- inden du afhjælper blokeringer eller
tilstopninger i udkaståbningen
- inden du undersøger, rengør eller
udfører arbejde på selve maskinen
- hvis du er stødt på et fremmedlegeme
Søg efter skader på maskinen, og udfør
de nødvendige reparationer, inden du
starter maskinen og genoptager arbejdet
- hvis maskinen begynder at vibrere
kraftigt. I så fald skal maskinen
kontrolleres omgående.
• Stands motoren, træk tændrørshætten ud,
og forvis dig om, at alle bevægelige dele
står stille:
- når du forlader maskinen
- inden du tanker op.
• Lad aldrig maskinen stå uden opsyn på
arbejdsstedet.
• Arbejd ikke med en maskine, der er
beskadiget, ufuldstændig eller ombygget
uden producentens tilladelse.
Brug af maskiner til andre formål end
dem, det er beregnet til, kan føre til
farlige situationer.
• Arbejd ikke med maskinen, hvis der er
risiko for lynnedslag. Fare for elektrisk
stød.
Vedligeholdelse og opbevaring:
• Sørg for, at alle møtrikker, bolte og skruer
er stramme, og at maskinen er i en sikker
arbejdstilstand. Mange uheld skyldes en
dårligt vedligeholdt maskine.
• Opbevar aldrig maskinen inde i en
bygning med fyldt tank, da benzindampe
eventuelt vil kunne komme i kontakt med
åben ild eller gnister.
• Lad motoren køle af, inden du stiller
maskinen i et lukket rum. Fare for brand.
28
Page 33

DK
• For at undgå brandfare skal motoren,
udstødningen og området omkring
tanken holdes fri for græs, blade og
udtrængende fedt (olie).
Kontroller med jævne mellemrum
opsamlingsanordningen for slid eller tab
af funktionsevne.
• Udskift nedslidte eller beskadigede dele
af hensyn til sikkerheden. Udskift defekte
lyddæmpere.
• Hvis brændstoftanken skal tømmes, skal
det ske i det fri.
• Behandl maskinen med omhu. Hold
værktøjet skarpt og rent, så du kan
arbejde bedre og mere sikkert. Følg
vedligeholdelsesforskrifterne.
• Forsøg ikke selv at reparere maskinen,
medmindre du har en relevant
uddannelse.
Arbejder, der ikke er angivet i
denne vejledning, må kun udføres af
kundeservicecentre, der er autoriseret af
os.
• Opbevar apparatet på et tørt sted og
utilgængeligt for børn. Maskiner er
farlige, hvis de benyttes af uerfarne
personer.
Ibrugtagning
Forsigtig! Fare for personskade
p.g.a. roterende skæreblade.
Udfør kun arbejder på
maskinen, når skæret er
slukket og står stille.
Bemærk også den medfølgende
brugervejledning fra Briggs &
Stratton.
Inden du starter maskinen, skal du
- fjerne alle transportsikringer
- montere føreskaftet, og låse
hurtigspændearmen fast
- påfylde motorolie
- fylde benzin på
- evt. montere græsposen
- evt. indstille klippehøjden.
Montering af føreskaft
Pas på, at bowdenkablerne (5) ikke
kommer i klemme, når du monterer
føreskaftet.
1. Klap det nederste føreskaft (4) og
A
det øverste føreskaft (1) op.
2. Bring det nederste føreskaft (4)
i den ønskede position, og lås
hurtigspændearmen (21) fast ved
at trykke i føreskaftets (4) retning.
Hurtigspændearmen skal pege
opad. Spændearmene skal være
spændt på føreskaftet og ligge
ind på føreskaftet således, at de
kan spændes med middelstor
kraft.
29
Page 34

DK
Ellers drejer du spændearmene
i urets retning for at spænde og
mod urets retning for at løsne.
3. Det nederste føreskaft (4) har to
C
forskellige fastgøringshuller.
Monter ved hjælp af
hurtigspændearmen det øverste
føreskaft på det nederste føreskaft
(4) i den ønskede højde.
4. Fastgør hurtigspændearmene (25)
på det øverste føreskaft (1), som
beskrevet under pkt. 2.
5. Fastgør bowdenkablet (
hjælp af kabelklemmen (
det nederste føreskaft (
Montering af startkabel
1. Træk sikkerhedsbøjlen (2) i retning
D
mod føreskaftet (1), og hold den i
denne position.
2. Træk langsomt startkablet på
startergrebet (7) i føreskaftets
retning, og hægt startkablet i
føringen til startkablet (3).
3. Slip sikkerhedsbøjlen (2).
Montering af græspose
Vigtigt: Anvend ikke maskinen
uden græsposen komplet
monteret eller uden stødværn.
Fare for personskade!
A
A
5) ved
A
6) på
4).
E
F
Montering af net
1. Træk plastikklipsene (28) til
græsposen (20) på i begge sider
og forneden hen over græsposens
stang (29).
Placering af græsposen på
maskinen:
2. Løft op i det bageste stødværn
(22).
3. Hold græsposen (20) i
bæregrebet (23), og hægt den i
de dertil indrettede poseophæng
(30) på maskinens bagside.
Aftagning af græspose:
4. Løft op i stødværnet (22), og tag
græsposen (20) i bæregrebet
(23), og tag den ud.
Påfyldning af motorolie og
kontrol af oliestand
Stil maskinen på et plant
underlag.
1. Drej dækslet til olietanken inkl.
G
oliepind (19) af, og fyld olie i
tanken. Olietanken kan rumme
0,47 l olie. Brug mærkeolie (f.eks.
SAE 30).
2. For at kontrollere oliestanden
tørres oliepinden (19) af med en
ren klud, og sættes ned i tanken
igen indtil anslaget.
30
Page 35

DK
3. Træk oliepinden ud igen,
og aflæs oliestanden på
oliepinden. Oliestanden
skal befinde sig inden for
det markerede område
mellem minimums- og
maksimumsmærket
(maksimum: 0,47 liter
motorolie i olietanken).
4. Tør eventuelt spildt olie af, og luk
dækslet til olietanken (19) igen.
Kontroller oliestanden, hver gang
inden græsslåning, og fyld olie på,
inden minimumsmærket er nået.
Påfyldning af benzin
Advarsel! Benzin er letantændeligt
og sundhedsskadeligt:
- Benzin skal opbevares i dertil beregnede
beholdere
- Optankning skal ske i det fri og aldrig
med motoren kørende eller varm maskine
- Åbn forsigtigt tankdækslet, så et overtryk
kan nedbringes
- Rygning forbudt under optankning
- Undgå hudkontakt med og indånding af
dampene
- Tør spildt benzin op
- Fjern benzin fra gnister, åben ild og
andre tændkilder
- Bortskaf benzinrester ifølge
miljøforskrifterne (se "Bortskaffelse/
Miljøbeskyttelse”).
- Anvend blyfri super- eller normal
benzin
- Anvend kun ren, frisk benzin
- Benzin må højst opbevares en
måned, da kvaliteten bliver
dårligere med tiden.
1. Skru tankdækslet (
H
fyld benzin på op til underkanten
af påfyldningsstudsen (31). Fyld
ikke tanken helt op, da benzinen
skal have plads til at udvide sig.
2. Tør benzinrester af omkring
tankdækslet, og luk tankdækslet
igen.
A
Betjening
Under arbejdet med maskinen kan
det ikke undgås, at omgivelserne
udsættes for et vist støjniveau. Udfør
støjintensivt arbejde på egnede
tidspunkter. Vær opmærksom på
hviletider, og sørg for at arbejdet med
maskinen holdes på et tidsmæssigt
minimum. For at beskytte dig selv
og andre personer i nærheden af
maskinen skal passende høreværn
benyttes.
Start og stop af motor
Advarsel! Benzin er
letantændeligt. Start
motoren mindst 3 m væk fra
påfyldningsstedet. Fare for
brand.
8) af, og
- Brug ikke benzin/olie-blanding
31
Page 36

DK
Start maskinen på et fast, jævnt
underlag, helst ikke i højt græs. Forvis
dig om, at skærebladet hverken rører
genstande eller jorden.
For din sikkerheds skyld: Stå bag ved
maskinen, når du starter den.
Kontroller med jævne mellemrum
benzin- og oliestand (se
„Ibrugtagning”), og fyld på i god tid.
Koldstart:
I
1. Tryk 3 x på benzinpumpen (32)
(primer).
2. Træk, og hold
sikkerhedsbøjlen (2) ind
mod føreskaftet (
3. Træk i startergrebet (7).
4. Når motoren starter, lader du
langsomt startergrebet glide tilbage i
føringen til startkablet (3).
Stop af motor:
• Slip sikkerhedsbøjlen (2). Motoren
slukker, og skæret bremses ned.
Skærbremse:
Kontroller skærbremsen med jævne
mellemrum:
Slip sikkerhedsbøjlen (2). Motoren slukker,
og skæret bremser. Skæret skal stå stille
inden for 3 sekunder.
A
1).
Græsslåning
Ved varmstart er det ikke nødvendigt
at trykke primeren (32) ind.
Hvis primeren aktiveres for tit,
kommer der for meget benzin ind
i karburatoren (den „drukner“), og
motoren er svær at starte.
1. Start motoren (se
J
2. Hold fast i føreskaftet (1) og
sikkerhedsbøjlen (2) med begge
hænder, når du slår græs.
).
I
Arbejdsanvisninger
Generelle arbejdsanvisninger
• Plænen skal være så tør som muligt, når
den klippes, for at skåne græsvækstlaget.
• Indstil klippehøjden således, at maskinen
ikke overbelastes.
• Maskinen skal føres fremad i skridtgang
i lige baner. For en komplet klipning
anbefales det at lade banerne overlappe
hinanden nogle centimeter.
• Gå ikke tilbage.
• På skråninger skal du altid arbejde på
tværs af skråningen.
• Hvis skæret kommer i berøring med et
fremmedlegeme, skal motoren omgående
slukkes. Vent, indtil skæret står stille, og
kontroller maskinen for skader. Arbejdet
må kun genoptages, hvis maskinen ikke
er beskadiget.
• Inden længerevarende arbejdspauser
eller transport skal maskinen slukkes, og
skærets stilstand afventes.
• Rengør maskinen hver gang efter brug,
som beskrevet i afsnittet "Rengøring og
vedligeholdelse".
32
Page 37

DK
Indstilling af klippehøjde
Maskinen har 5 positioner til indstilling af
klippehøjde (25-34-46-60-75mm):
1. Træk armen (17) ud, og flyt den til
K
Den rigtige klippehøjde er ved en prydplæne
ca. 30 – 45 mm og ved en nytteplæne ca.
40 – 65 mm.
den ønskede position (33).
2. Tryk armen (17) indad igen.
Den første klipning i sæsonen bør ske
med en noget større klippehøjde.
Tømning af græspose
Niveauindikator:
På niveauindikatoren ( A24), der er
anbragt oven på posen (
når posen er fuld.
Niveauindikator åben:
Græspose tom
A
20) kan du se,
Rengøring og
vedligeholdelse
Reparations- og
vedligeholdelsesarbejde, der
ikke er beskrevet i denne
vejledning, skal overlades
til et professionelt værksted.
Brug udelukkende reservedele
anbefalet af producenten. Fare
for uheld!
Vedligeholdelses- og
rengøringsarbejde skal altid
udføres med motoren slukket og
tændrørshætten trukket ud. Fare
for personskade!
Lad maskinen køle af,
inden vedligeholdelses- og
rengøringsarbejde påbegyndes.
Nogle af motorens elementer
er brandvarme. Fare for
forbrænding!
Bær handsker ved håndtering af skæret.
I forbindelse med rengørings- og
Niveauindikator lukket:
Græspose fuld
1. Stop motoren, og vent, indtil skæret
L
står stille.
2. Løft op i det bageste stødværn (22),
og tag græsposen (20) ud.
3. Bær græsposen hen til
aflæsningsstedet, og tøm den.
Græsposen tømmes lettest ved at
holde fast i det nederste greb (23a).
Sæt græsposen i igen.
vedligeholdelsesarbejde henvises også
til den medfølgende brugervejledning fra
Briggs & Stratton.
Vi anbefaler, at du henvender dig til en
autoriseret Briggs & Stratton-forhandler (se
Briggs & Stratton-forhandlerliste) inden
vedligeholdelsesarbejde på motoren.
33
Page 38

DK
Rengøring og generelt
vedligeholdelsesarbejde
Tag græsposen af, og klap det øverste
M
føreskaft (1) i. Stil maskinen på bagsiden,
så tændrøret vender op i forbindelse med
rengøring og vedligeholdelsesarbejde.
En assisterende person skal holde
maskinen, da der er fare for, at den
vipper tilbage.
Vip ikke maskinen om på siden eller
frem. Driftsvæsker kan løbe ud og
motoren blive beskadiget.
• Hold maskinen ren. Brug en børste eller
en klud til rengøring, men ingen skarpe
rengørings- eller opløsningsmidler. Brug
ikke vand til rengøring af motoren, da
det vil kunne forurene brændstofsystemet.
• Efter græsslåningen fjernes vedhæftende
planterester med et træ- eller plastikstykke.
Navnlig ventilationsåbningerne (
udkaståbningen og området omkring
skæret skal rengøres. Brug ikke hårde
eller spidse genstande, da de vil kunne
beskadige maskinen.
• Smør af og til hjulene med olie.
• Kontroller plæneklipperen hver gang
før brug for synlige mangler, såsom
løse, nedslidte eller beskadigede dele.
Kontroller, at alle møtrikker, bolte og
skruer sidder godt fast.
• Kontroller, at afdækninger og
beskyttelsesanordninger (2,11,14, 22) er
intakte og sidder rigtigt. Om nødvendigt
foretages udskiftning.
A
11),
Rensning/Udskiftning af
luftfilter
Anvend aldrig maskinen uden luftfilter,
ellers kommer der støv og snavs ind
i motoren, hvilket fører til skader på
maskinen.
1. Træk tændrørshætten (
N
"Vedligeholdelse af tændrør“)
2. Åbn luftfilterboksen (9), og tag
luftfiltret (10) ud.
3. Rens luftfiltret (10) i en
sæbeopløsning, og lad det tørre.
Tilfør luftfiltret nogle dråber frisk olie.
4. For at genindsætte luftfiltret (10)
sætter du det ind i luftfilterboksen (9)
og lukker den igen.
A
12) ud (se
Vedligeholdelse af tændrør
Slidte tændrør eller en for stor
tændingsafstand vil føre til nedsat
motorydelse.
1. Træk tændrørshætten (12) af
O
tændrøret (13) ved på samme tid at
trække og dreje.
2. Skru tændrøret (13) ud mod urets
retning med den medfølgende
tændrørsnøgle (
3. Kontroller tændingsafstanden med
en bladsøger (fås i en specialbutik).
Tændingsafstanden skal være mindst
0,51 mm.
4. Indstil i givet fald afstanden ved
forsigtigt at bøje stelelektroden på
tændrøret.
A
27).
34
Page 39

DK
5. Rengør tændrøret med en stålbørste.
6. Sæt det rengjorte og indstillede
tændrør i, eller erstat et beskadiget
tændrør med et nyt (anbefalet
tilspændingsmoment 20 Nm, angivet
på basis af momentnøgle).
Skift af motorolie
Skift af motorolie skal ske med tom
benzintank og varm motor. Tøm
tanken med en egnet benzinpumpe.
Alternativt kan du planlægge
optankningen således, at du
forbruger den resterende mængde
ved normal drift.
• Foretag det første skift af
motorolie efter ca. 5 driftstimer,
herefter for hver 50 driftstimer
eller en gang om året.
• Bortskaf den brugte olie
iht. miljøforskrifterne (se
"Bortskaffelse/Miljøbeskyttelse“).
1. Træk tændrørshætten (
"Vedligeholdelse af tændrør”).
2. Åbn dækslet til olietanken (
pump olien ud med en oliepumpe.
3. Fyld frisk motorolie i (se "Ibrugtagning“).
A
12) ud (se
A
19), og
Kontrol/Slibning/Udskiftning
af skær
På- og afmontering af skæret skal
overlades til professionelt værksted.
Bær handsker ved håndtering af
skæret.
• Træk tændrørshætten (
kontroller skæret for nedslidning og
skader.
• Skærpning af et stumpt skær skal
overlades til et professionelt værksted, da
der her kan udføres en ligevægtskontrol.
• Et beskadiget skær eller et skær med
ubalance skal udskiftes på et professionelt
værksted.
Forkert udført montering kan
forårsage svære kvæstelser.
A
12) ud, og
Indstilling af karburator
Karburatoren er fra fabrikken indstillet
til optimal ydelse. Skulle efterfølgende
indstilling blive nødvendigt, skal dette
overlades til et professionelt værksted.
35
Page 40

DK
Opbevaring
Generelle
opbevaringsanvisninger
Opbevar ikke maskinen med
fyldt græspose. I varmt vejr
begynder græsset at gære.
Fare for brand.
• Rengør, og vedligehold maskinen inden
opbevaring.
• Lad motoren køle af, inden du stiller
maskinen i et lukket rum.
• Brændstoffet skal opbevares i egnede,
godkendte beholdere.
Opbevar maskinen på et tørt sted
beskyttet mod støv, uden for børns
rækkevidde.
• Dæk ikke maskinen med plastikposer, da
det vil kunne give anledning til fugt og
skimmel.
Sammenklapning af maskinen
Opbevaring i vinterhalvåret
Hvis anvisningerne om opbevaring
ikke følges, kan det føre til
startproblemer eller permanente
skader som følge af rester af
brændstof i karburatoren.
• Start motoren, og lad den køre, indtil den
går ud p.g.a. mangel på benzin.
• Foretag olieskift (se "Skift af motorolie“).
• Konserver motoren:
- Skru tændrøret (
"Rengøring og vedligeholdelse“)
- Fyld en spiseskefuld motorolie i
motorrummet gennem tændrørets
åbning
- Træk flere gange langsomt i startkablet
I I
(
7) med sikkerhedsbøjlen trukket op
I I
(
2) for at fordele olien indvendigt i
motoren
- Skru tændrøret (
• Brugt olie og benzinrester skal bortskaffes
ifølge miljøforskrifterne (se "Bortskaffelse/
Miljøbeskyttelse“).
O
13) ud (se
O
13) fast igen.
For at spare plads under opbevaringen kan
det øverste skaft klappes ned.
1. Fjern græsposen (20).
P
2. Tag startkablet (
3. Løsn hurtigspændearmen (21/25)
på det nederste (4) og øverste
føreskaft (1).
4. Klap de to føreskafter ned igen.
Pas på, at bowdenkablet (5) ikke
kommer i klemme.
A
7) væk.
36
Benzintanken skal ikke tømmes, hvis
du blander en brændstofstabilisator
i benzinen (se brugervejledning fra
Briggs & Stratton).
Page 41

Bortskaffelse/
Miljøbeskyttelse
• Når maskinen er udtjent, skal den
sammen med tilbehør og emballage
indleveres til affaldssorteret genbrug.
- Benzin- og olietanken skal omhyggeligt
tømmes, og maskinen indleveres på et
kommunalt affaldsdepot. De anvendte
plast- og metaldele kan sorteres og
recycles.
- Brugt olie og benzinrester skal ligeledes
indleveres på et affaldsdepot el.lign.
og må ikke hældes ud i afløbet eller på
anden måde trænge ud i kloaknettet.
- Spørg evt. vores servicecenter.
• Vi påtager os gerne bortskaffelsen
af defekte indsendte maskiner uden
beregning.
• Kom ikke afskåret græs i skraldespanden,
men smid det i stedet i komposten, eller
fordel det som gødningslag under buske
og træer.
DK
37
Page 42

DK
Vedligeholdelsesintervaller
Vedligeholdelsesarbejdet, der fremgår af oversigten, skal udføres med jævne mellemrum.
Regelmæssigt udført vedligeholdelse vil forlænge maskinens levetid. Det vil desuden bidrage
til en optimal klippeydelse, ligesom risikoen for uheld reduceres.
Vedligeholdelsesarbejde
(se "Rengøring og vedligeholdelse“)
Kontroller skruer, møtrikker, bolte,
og spænd efter
Kontroller motoroliestand/
Benzinstand, fyld mere på om
nødvendigt
Betjeningselementer/Rengør
området omkring lyddæmperen
Rengør fingerværn
Skift motorolie
Rens luftfilter
Rens/Indstil/Udskift tændrør
Kontroller lyddæmper og gnistfang
Rens luftkølingssystem (a, b)
a udskiftes oftere ved høj støvforekomst eller kraftig tilsmudsning
b se brugervejledning fra Briggs & Stratton
Før Efter
arbejdet
Efter de
første
5 t.
Efter
8 t.
Efter
50 t.
Årlig
38
Page 43

Fejlsøgning
Problem Mulig årsag Fejlafhjælpning
For lidt benzin i tanken Fyld benzin på
Følg anvisninger om start af motoren (se
„Betjening“)
Sæt tændrørshætten i; rens, indstil
eller udskift tændrør (se "Rengøring og
vedligeholdelse“)
Lad professionelt værksted indstille
karburatoren
Udskift luftfilter (se "Rengøring og
vedligeholdelse“)
Lad professionelt værksted indstille
karburatoren
Lad professionelt værksted indstille
karburatoren
Rens, indstil eller udskift tændrør (se
"Rengøring og vedligeholdelse“)
Rens ventilationsåbninger
Udskift luftfilter (se "Rengøring og
vedligeholdelse“)
Vælg anden klippehøjde (se "Indstilling
af klippehøjde“)
Lad professionelt værksted skærpe eller
udskifte skæret
Fjern græsset (se "Rengøring og
vedligeholdelse“)
Lad professionelt værksted montere
skæret
Lad professionelt værksted montere
skæret
Motor starter ikke
Motor starter,
men maskinen
kører ikke med
fuld ydelse
Motor går
ujævnt, stopper
Motor
overophedes
Motor oser
Klippekvalitet
ikke
tilfredsstillende
eller motor
arbejder tungt
Skær roterer ikke
Usædvanlig støj,
klapren eller
vibrationer
Forkert startrækkefølge
A
Tændrørshætte (
rigtigt i
Tilsodet tændrør (
Snavset luftfilter (
Forkert indstillet karburator
Forkert indstillet karburator
Tilsodet tændrør (
Ventilationssprækker (
tilstoppede
Forkert tændrør (
For lidt motorolie i motor Fyld motorolie på (se "Ibrugtagning“)
Snavset luftfilter (
For lidt motorolie i motor Fyld motorolie på (se "Ibrugtagning“)
Græs for kort eller langt
Skær stumpt
Skær blokeret af græs,
græspose fuld, udkaståbning
tilstoppet
Skær blokeret af græs Fjern græsset
Skær ikke korrekt monteret
Skær ikke korrekt monteret
Skær beskadiget
12) ikke sat
O
13)
N
10)
O
13)
A
11)
O
13) Skift tændrør
N
10)
DK
39
Page 44

DK
Garanti
Kære kunde!
Der ydes en 3-års-garanti på denne maskine
fra købsdatoen at regne.
Vær eventuelt opmærksom på varierende
garantibestemmelser gældende for motoren;
læs den medfølgende brugervejledning
fra motorproducenten „Briggs&Stratton”
grundigt. Denne garanti har ingen
indflydelse på lovbestemte garantikrav.
I tilfælde af mangler kan du ifølge loven
gøre krav gældende over for sælgeren af
produktet. Disse lovbestemte krav vil ikke
blive begrænset af vores garanti, som
beskrives nedenfor.
Garantibestemmelser
Garantiperioden begynder at løbe fra
købsdatoen. Opbevar den originale
købskvittering; den er nødvendig som
dokumentation for købet.
Hvis der inden for tre år efter købsdatoen
indtræder en materiale- eller fabrikationsfejl
på dette produkt, reparerer eller erstatter vi
– efter vort valg – produktet uden beregning.
For at kunne få gavn af denne garantiydelse,
er det nødvendigt inden for en frist på 3 år
at forelægge den fejlbehæftede maskine og
dokumentation for købet, sammen med en
kortfattet skriftlig beskrivelse af, hvori mangel
består, og hvornår den indtrådte.
Hvis den pågældende mangel er dækket
af vores garanti, vil du enten få produktet
tilbageleveret i repareret stand eller få
leveret et nyt. Efter reparation eller levering
af et nyt produkt vil der ikke indtræde en ny
garantiperiode.
Garantiperiode og
lovmæssige bestemmelser
Lovbestemte krav som følge af
mangler
Garantiperioden forlænges ikke efter
garantiservice. Dette gælder ligeledes for
dele, der er blevet repareret eller erstattet
med nye. Alle skader og mangler, som har
været til stede allerede på købstidspunktet,
skal anmeldes umiddelbart efter, at maskinen
er blevet pakket ud. Reparationer, der
udføres efter garantiperiodens udløb, er
betalingspligtige.
Garantiens dækning
Maskinen er blevet fremstillet med omhu
efter strenge kvalitetsstandarder og er inden
leveringen blevet underkastet en omhyggelig
kontrol.
Garantien omfatter alle materiale- og
fabrikationsfejl. Denne garanti omfatter
ikke dele, der er underlagt et normal slid
og derfor er at betragte som sliddele
(f.eks. skæreanordning, kulbørster, luftfilter,
startkabel). Garantien omfatter endvidere
ikke skrøbelige dele (f.eks. kontakter).
Denne garanti gælder ikke, hvis produktet
er blevet beskadiget, anvendt forkert
eller ikke er blevet vedligeholdt. Alle
brugervejledningens anvisninger skal følges
nøje og regnes for en forudsætning for en
korrekt anvendelse af produktet. Enhver
form for anvendelse eller handling, der ikke
anbefales i brugervejledningen, eller som
der advares imod, skal undgås.
Produktet er udelukkende konstrueret til
privat, ikke erhvervsmæssig brug. Garantien
mister sin gyldighed i tilfælde af misbrug
40
Page 45

DK
eller forkert anvendelse, brug af vold eller
usagkyndig håndtering, eller hvis der
foretages indgreb på egen hånd.
Afvikling af garantiprocedure
For at sikre en hurtig behandling af din sag
bedes du følge disse anvisninger:
• Hav købskvittering og
identifikationsoplysninger (IAN 291839)
som dokumentation for købet klar ved
alle henvendelser.
• Noter venligst varenummeret, som er
anført på mærkepladen.
• I tilfælde af funktionsfejl eller øvrige
mangler bedes du først sætte dig i
forbindelse med vores serviceafdeling
enten telefonisk eller pr. e-mail. Her vil du
få yderligere information om den videre
behandling af din reklamation.
• Efter aftale med vores kundeservice kan
et fejlanmeldt produkt sendes portofrit
til den oplyste serviceadresse, sammen
med købskvittering (faktura) og en
skriftlig meddelelse om manglens art og
tidspunktet for dens indtræden. For at
undgå problemer med modtagelsen af
forsendelsen og uventede omkostninger
skal pakken sendes til den oplyste
adresse. Vær sikker på, at forsendelsen
ikke sendes ufrankeret (’modtageren
betaler’) eller som omfangsrigt gods, som
ekspresforsendelse eller som særfragt i
øvrigt. Maskinen bedes indsendes med
alt det tilbehør, der blev leveret sammen
med maskinen på købstidspunktet; sørg
for en egnet, sikker transportemballage.
Reparationsservice
Mod betaling kan reparationer, der ikke
er omfattet af garantien, udføres af vores
kundeservice - vi udarbejder gerne et tilbud.
Vi kan kun ekspedere maskiner, der er
blevet os tilsendt i en egnet emballage og
tilstrækkeligt frankeret.
Vigtigt: Send maskinen til vores kundeservice
rengjort med angivelse af fejlen/ manglen.
Maskiner, der indsendes ufrankeret eller som
omfangsrigt gods, ekspres eller som anden
særfragt, vil blive afvist.
Indsendte fejlbehæftede maskiner vil blive
bortskaffet af os uden betaling.
41
Page 46

DK
Servicecenter
Skulle din plæneklipper få motorproblemer,
henvises til den ansvarlige „Briggs & Stratton”kundeservice, som fremgår af vedlagte
forhandlerliste.
Service Deutschland
DE
Sertronics GmbH
Ostring 60
Tilkørsel via “An der Fuchshöhle“
D-66740 Saarlouis-Fraulautern
Germany
E-mail: gapo-service-de@sertronics.de
Tlf.: 0049 21529603100
Fax: 0049 21529603111
Service Østrig
AT
Sertronics GmbH
Ostring 60
Tilkørsel via “An der Fuchshöhle“
D-66740 Saarlouis-Fraulautern
Germany
E-mail: gapo-service-de@sertronics.de
Tlf.: 0043 12675668
Fax: 0049 21529603111
Importør
Bemærk venligst, at nedenstående
adresse ikke er en serviceadresse. For
serviceydelser bedes du først sætte dig
i forbindelse med den ovenfor anførte
serviceafdeling.
Ga-Po Vertrieb GmbH
Heinrich-Horten-Straße 5
47906 Kempen, Germany
42
IAN291839
Page 47

Table des matières
BEFR
Introduction..................................44
Utilisation conforme..................44
Description générale....................44
Contenu de la livraison.....................44
Vue d’ensemble..............................45
Description du fonctionnement...........45
Dispositifs de protection....................45
Données techniques.…..............46
Pictogrammes / Symboles............46
Symboles sur la machine................46
Pictogrammes dans le mode
d’emploi.........................................48
Consignes de sécurité.................48
Mise en service............................51
Monter le guidon.............................52
Monter la corde du démarreur...........52
Monter le bac de collection...............52
Remplir le réservoir d’huile et contrôler
le niveau d’huile............................. 53
Remplir d’essence le réservoir........... 53
Opération....................................54
Démarrer et arrêter le moteur............54
Tondre..................................55
INSTRUCTIONS D'UTILISATION.......55
Instructions de travail générales.........55
Régler la hauteur de tonte..................55
Vider le bac de collection………….....55
Nettoyage et entretien...............56
Travaux de nettoyage et d’entretien
général....................................56
Nettoyer / remplacer le filtre d’air......57
Entretien de la bougie d’ignition.........57
Remplacer l’huile moteur..................57
Contrôler / affûter / remplacer les
couteaux........................................58
Régler le carburateur........................58
Rangement..................................58
Consignes générales de rangement....58
Replier la machine..........................59
Rangement pendant l’hiver................59
Élimination / Protection de
l’environnement...........................59
Intervalles d’entretien..................60
Dépannage..................................61
Garantie......................................62
Service de réparation...................63
Centre de service..........................64
Importateur.................................64
Traduction de la déclaration de
conformité CE originale……....…..110
43
Page 48

BEFR
Introduction
Félicitations pour l’achat de votre nouvelle
tondeuse à gazon. Vous avez acquis une
machine de haute qualité.
Au cours de sa fabrication, votre machine
a été soumise à des contrôles de qualité
et des tests finaux, afin de garantir sa
fonctionnalité.
Le mode d’emploi fait partie
intégrale du produit. Il contient des
informations importantes concernant
la sécurité, l’utilisation et l’élimination
du produit. Veuillez lire attentivement
ce mode d’emploi et le mode
d'emploi de Briggs & Stratton avant
la première mise en service, afin
d’éviter des manipulations erronées.
N’utilisez le produit que selon
les instructions et uniquement
pour les fins prévues. Conservez
précieusement les modes d’emploi
et remettez-les à chaque utilisateur
ultérieur.
Utilisation conforme
La machine est conçue exclusivement pour
la tonte de pelouses du domaine privé.
Il ne convient pas à l’exploitation
commerciale. En cas d’exploitation
commerciale, la couverture de garantie sera
automatiquement annulée.
Toute utilisation qui n’est pas expressément
autorisée dans ce mode d’emploi peut
mener à des dommages de la machine et
mettre gravement en danger l’utilisateur.
La machine a été conçue pour n’être utilisée
que par des adultes. Des enfants et des
personnes n’ayant pas pris connaissance
des contenus de ce mode d’emploi ne
doivent pas utiliser cette machine.
L’utilisateur/opérateur de la machine est
responsable pour les accidents entraînant
des blessures et/ou des dommages à
d’autres personnes ou leurs propriétés.
Description générale
Le composants fonctionnels
les plus importants sont
illustrés aux pages dépliantes
avant et arrière.
Contenu de la livraison
Sortez prudemment la machine de son
emballage et contrôlez si les pièces
suivantes sont présentes:
– Tondeuse à gazon (déjà montée)
– Bac de collection
– Leviers de serrage rapide
– Bougie d’ignition de réserve
– Clé à bougies
– Mode d'emploi
– Mode d'emploi de Briggs & Stratton
Éliminez les matériel d'emballage
conformément aux règles locales.
44
Page 49

BEFR
Vue d’ensemble
1. Partie supérieure du guidon
A
2. Levier de sécurité
3. Guide de la corde du démarreur
4. Partie inférieure du guidon
5. Guide-câble type Bowden
6. Pince-câbles
7. Poignée de la corde du
démarreur
8. Bouchon de réservoir
9. Boîtier du filtre d’air
10. Filtre d’air (non illustré)
11. Carénage du moteur avec
rainures d’aération (protection
des doigts)
12. Capuchon de bougie
13. Bougie d’ignition (non illustrée)
14. Protection de l’échappement
15. 2 roues avant
16. Carénage en tôle d’acier
17. Levier de réglage de la hauteur
de tonte
18. 2 roues arrière
19. Bouchon du réservoir d’huile
avec jauge
20. Bac de collection
21. 2 leviers de serrage rapide pour
fixation de partie inférieure du
guidon
22. Clapet de protection arrière
23. a Poignée inférieure pour le
vidage du bac de collection
24. Indication du niveau de
remplissage
25. 2 leviers de serrage pour
fixation de la partie supérieure
du guidon
26. Bougie d’ignition de réserve
27. Clé à bougies
28. Bandes plastiques du bac de
E
collection
29. Barre du bac de collection
30. Suspension du bac de collection
F
31. Embout de remplissage
H
32. Pompe à essence (amorçage)
I
K
33. Cran de hauteur de tonte
Description du fonctionnement
La machine est entraînée par un puissant
moteur 4-temps (série 450 E de Briggs &
Stratton)
La machine est habillée d’un carénage en
tôle d’acier de haute qualité et est équipée
d’un bac de collection et d’un guidon
repliable.
Veuillez consulter les descriptions suivantes
pour le fonctionnement des composants de
commande.
Dispositifs de protection
2 Levier de sécurité
A
La machine s’arrête lorsque le
levier de sécurité est relâché.
14 Protection de l’échappement
Empêche le contact entre
l’échappement brûlant et
vos mains ou des matériaux
combustibles.
22 Clapet de protection arrière
Protection de l’utilisateur contre
des particules projetées et des
contacts accidentels avec les
couteaux lorsque vous utilisez
la tondeuse sans le bac de
collection.
45
Page 50

BEFR
Données techniques
Moteur............4-temps, série 450 E de B&S
Cylindrée moteur..........................125 cm³
Puissance absorbée.......1,82 kW (2,47 ch)
La vitesse du moteur...
....................
Couple de serrage couteaux............45 Nm
Volume réservoir d’essence.................0,8 l
Octanes.......................................95 / 98
Volume réservoir d’huile moteur.........0,47 l
Bougie d’ignition.........Champion QC12YC
Diamètre de tonte.........................420 mm
Haut. tonte.....................................
5 positions, 25-34-46-60-75 mm
Volume du bac de collection.................55 l
Poids (avec bac de collection).........25,2 kg
Niveau de pression sonore
(L
)....................81,7 dB(A) ; K=3,0 dB(A)
pA
Niveau de puissance sonore (L
Mesuré..............94,5 dB(A) ; K=1,80 dB(A)
Garanti.......................................96 dB(A)
Vibration sur poignées
(Ah)..............6,67/5,69 m/s
Les valeurs de bruit et de vibration ont été
définies d’après les consignes mentionnées
dans la déclaration de conformité.
Des modifications techniques et d’aspect
peuvent être apportées sans préavis, dans
le cadre des développements ultérieurs du
produit. Par conséquence, les mesures, les
remarques et les indications de ce mode
d'emploi sont donnés sans aucune garantie.
Pour la même raison, des réclamations
juridiques introduites sur la base du mode
d’emploi ne peuvent être recevables.
La valeur d’émission de vibrations indiquée
a été mesurée en conformité avec un
processus de test normalisé et peut être
2 900/min
)
wA
2
; K=1,5 m/s
utilisée à des fins de comparaison entre une
machine et une autre.
La valeur d’émission de vibrations indiquée
peut également être utilisée pour l'estimation
préliminaire de la pollution sonore.
Avertissement:
La valeur d’émission de vibrations
pendant l’utilisation réelle de la
machine peut être différente de la
valeur indiquée, en fonction du type
et de la manière d’utilisation de la
machine. Il est nécessaire de prendre
des mesures de sécurité pour la
protection de l’utilisateur qui reposent
sur une estimation de la pollution
sonore dans les conditions réelles
d’utilisation (pour ce faire, toutes les
composantes du cycle d’utilisation
doivent être prises en compte, telles
que les périodes pendant lesquelles
2
la machine est arrêtée et les périodes
de fonctionnement à vide de la
machine).
Pictogrammes /
Symboles
Symboles sur la machine
Attention !
Lisez le mode d'emploi.
Danger de blessures par des
particules projetées. Maintenez
d’autres personnes à l’écart de la
machine.
46
Page 51

BEFR
Danger de blessures – Lames
tranchantes.
Maintenez à l’écart les pieds et les
mains.
Prudence – Vapeurs toxiques !
Ne pas fumer et ne pas faire
fonctionner la machine dans des
espaces fermés.
Prudence – L’essence est inflammable
! Ne pas fumer et maintenir à l’écart
les sources de chaleur !
Ne pas exposer la machine à
l’humidité. Ne pas travailler sous
la pluie. Prudence ! Les couteaux
poursuivent leur rotation après l’arrêt
de la machine
Prudence – Danger de blessures
! Avant toute intervention
d’entretien, arrêter le moteur et
retirer le capuchon de la bougie
d’ignition.
Pictogramme sur le bouchon du
réservoir:
Indication sur l’embout de
remplissage d’essence : Ne pas
remplir d’un mélange E85 !
Prudence ! Contrôlez
le niveau d’huile avant
le démarrage.
Pictogramme sur le bouchon du
réservoir d’huile:
Bildzeichen auf dem Tank:
Remarque sur l’embout de
remplissage d’huile
Attention !
Lisez le mode d'emploi.
Prudence – L’essence est
inflammable ! Laissez se refroidir le
moteur pendant un minimum de 2
min. avant d’ajouter du combustible.
Prudence – Surfaces brûlantes !
Danger de brûlures.
Prudence – Danger de blessures
! Portez une protection oculaire
et auditive.
Indication de la puissance
sonore L
en dB.
WA
Pictogramme sur la pompe
d’essence:
Prudence – Vapeurs de CO toxiques
! Ne pas faire fonctionner la
machine dans des espaces fermés.
Prudence – Surfaces brûlantes !
Danger de brûlures.
Pompe d’essence (amorçage)
appuyer 3 x avant le démarrage.
47
Page 52

BEFR
Pictogramme sur le guidon:
Indications pour le
démarrage et l’arrêt du
moteur.
I
ON
0
OFF
Démarrage de la machine
(ON) : Tirer le levier de sécurité
contre le guidon.
Arrêt de la machine (OFF) :
Consignes de sécurité
Ce chapitre explique les consignes de
sécurité fondamentales à observer en
travaillant avec la machine.
Relâcher le levier de sécurité.
Indication du niveau de remplissage:
Remarques:
• Lisez attentivement le mode d'emploi.
Indication du niveau de
remplissage ouvert :
Bac de collection vide
• En cas de doute sur l’utilisation
Indication du niveau de
remplissage fermée : Bac de
collection plein
• Restez attentif, soyez conscient de ce
Pictogrammes dans le mode d’emploi
Symbole de danger avec
indications pour éviter des
blessures personnelles et des
dommages matériels.
Symbole indicatif (l’indication est
expliquée à l’endroit où est placé
• Cette machine n’est pas conçue pour
le point d’exclamation) avec des
informations sur la prévention de
dommages matériels.
Symbole d’informations permettant
une meilleure utilisation de la
machine.
AVERTISSEMENT! Lisez toutes les
remarques et consignes de sécurité.
Ne pas suivre les remarques et
consignes de sécurité peut entraîner
des électrocutions, des incendies et/
ou de graves blessures.
Familiarisez-vous avec les éléments de
commande et l’utilisation appropriée de
la machine.
appropriée et/ou interdite de la machine,
demandez conseil auprès de personnes
qualifiées.
que vous faites et travaillez prudemment.
N’utilisez pas la machine lorsque vous
êtes fatigué ou malade, ni lorsque vous
êtes sous l’influence de drogues, d’alcool
ou de médicaments. Un seul moment
d'inattention lors de l'utilisation de cette
machine peut être la cause de graves
blessures.
être utilisée par des personnes avec des
capacités physiques, sensorielles ou
mentales limitées, ou avec un manque
d’expérience et/ou de connaissances,
à moins qu’elles ne soient sous la
supervision d’une personne responsable
de leur sécurité ou qu’elles ne reçoivent
des instructions concernant l’utilisation de
la machine de la part de cette personne.
48
Page 53

BEFR
• Les enfants doivent être tout
particulièrement surveillés de manière à
éviter qu'il ne jouent avec la machine.
• Ne permettez jamais que des enfants
ou des personnes qui n’ont pas pris
connaissance du mode d’emploi puissent
utiliser la machine.
• Ne tondez jamais la pelouse lorsque
d’autres personnes, notamment des
enfants, ou des animaux se trouvent à
proximité. Toute distraction pourrait vous
faire perdre le contrôle sur la machine.
• L’utilisateur/opérateur de la machine est
responsable pour les accidents affectant
d’autres personnes ou leurs propriétés.
• Respectez les règlements et les directives
locales sur la limitation du bruit.
Mesures préparatoires:
• Utilisez toujours des chaussures
antidérapantes et des pantalons longs
lorsque vous allez tondre la pelouse.
Ne tondez jamais la pelouse pieds nus
ou en sandales ouvertes. Les vêtements
mal ajustés, les bijoux ou les cheveux
longs peuvent être happés par des
composants en mouvement. Porter des
vêtements appropriés réduit les risques
de blessures.
• Contrôlez soigneusement le terrain
sur lequel la machine sera utilisée et
enlevez tous les objets (cailloux, bâtons,
fils, jouets) qui peuvent être happés et
projetés par la machine.
• Avertissement : L’essence est extrêmement
inflammable.
Le feu et les explosions peuvent
occasionner de graves blessures ;
– stockez l’essence dans des récipients
conçus pour cette fonction ;
– ne remplissez le réservoir qu’à l’air
libre et ne fumez en aucun cas pendant
le remplissage ;
– remplissez le réservoir d’essence avant
de démarrer le moteur. Il est strictement
interdit de retirer le bouchon du réservoir
d’essence et/ou de remplir le réservoir
lorsque le moteur fonctionne ou lorsqu’il
est chaud ;
– si de l’essence avait été déversée ou
si le réservoir a débordé, vous ne devez
en aucun cas essayer de démarrer le
moteur. Vous devez d’abord éliminer tous
les résidus d’essence des surfaces de la
machine. Attendez que toutes les vapeurs
d’essence se soient dissipées avant toute
tentative de démarrage.
– Pour des raisons de sécurité, les
bouchons du réservoir d’essence et
d’autres récipients doivent immédiatement
être remplacés s’ils sont endommagés.
• Remplacez le silencieux s’il est
endommagé.
• Avant toute utilisation, contrôlez
visuellement si les lames des couteaux,
les écrous de fixation et l’assemblage de
tonte ne sont pas usés ou endommagés.
Afin d’éviter des déséquilibres, les outils
de coupe et leurs écrous de fixation ne
doivent être remplacés qu’en paires.
• Soyez extrêmement prudent avec des
machines équipés de plusieurs outils de
coupe, puisque le mouvement d’un jeu
de couteaux peut entraîner la rotation
des autres couteaux.
• N’utilisez que des pièces de rechange et
des accessoires approuvés et fournis par
le fabricant. L’utilisation de pièces non
conformes peut occasionner des blessures
et entraînera l’annulation immédiate de
la couverture de garantie.
49
Page 54

BEFR
Entretien:
• Ne faites pas fonctionner des moteurs
de combustion dans des espaces fermés
car le monoxyde de carbone, un gaz
nocif produit par la combustion, peut s’y
accumuler.
• Ne travaillez qu’en plein jour ou avec un
bon éclairage artificiel. L’utilisation avec
un mauvais éclairage peut entraîner des
accidents.
• Évitez d’utiliser la machine lorsque le
gazon est mouillé.
• Veillez à adopter une position stable,
particulièrement sur des terrains en
pente. Cela vous permettra de maintenir
le contrôle sur la machine en cas de
situations inattendues.
– Sur des pentes, tondez
perpendiculairement à la pente, jamais
de haut en bas.
– Soyez particulièrement prudent lorsque
vous changez de direction sur les pentes.
– Ne travaillez pas sur des pentes trop
raides (maxi. 10°).
• Ne déplacez la machine qu’en marchant
au pas.
• Soyez particulièrement prudent lorsque
vous retournez la machine ou lorsque
vous la tirez vers vous.
• Arrêtez la tondeuse si vous devez
la basculer ou la transporter sur des
surfaces sans herbe et lorsque la
tondeuse doit être déplacée vers ou de la
surface à tondre.
• N'utilisez jamais la machine si les
dispositifs de protection, tels que le clapet
de protection et le bac de collection,
sont endommagés ou manquants. Cela
permettra de garantir que la sécurité de
la machine sera maintenue.
• Ne modifiez pas le réglage du moteur
et ne le tournez pas excessivement. Vous
pourriez endommager la machine.
• Déverrouillez tous les couteaux et
entraînements avant de démarrer le
moteur.
• Démarrez le moteur d’après les
instructions du fabricant et restez
prudent. Veillez à maintenir suffisamment
d’espace entre vos pieds et les lames des
couteaux. Il y a risque de blessures !
• Lors du démarrage du moteur, la machine
ne doit pas être inclinée, à moins qu’il
ne soit nécessaire de la soulever pour
ce faire. Dans un tel cas, ne l’inclinez
pas plus que strictement nécessaire et ne
levez que le côté de la machine qui n’est
pas dirigé vers vous.
• Ne démarrez pas le moteur si vous vous
trouvez devant l’orifice d'éjection.
• Démarrez le moteur selon les instructions
et uniquement si vos pieds sont
suffisamment éloignés des lames des
couteaux.
• Ne passez jamais les mains ou les pieds
sous ou dans les éléments en rotation.
Tenez-vous toujours à l'écart de l'orifice
d'éjection. Un seul moment d'inattention
lors de l'utilisation de cette machine peut
être la cause de graves blessures. Ne
soulevez ni ne portez jamais la machine
lorsque le moteur est en marche.
• Arrêtez le moteur, retirez le capuchon
de la bougie et assurez-vous que tous les
composants mobiles se soient totalement
arrêtés :
– avant d’essayer de retirer des
blocages ou des bourrages dans l’orifice
d’éjection;
– avant de vérifier, nettoyer ou travailler
sur la machine ;
– en cas d’un impact sur un corps
étranger. Contrôlez si la machine
n’est pas endommagée et effectuez
les réparations nécessaires avant de
redémarrer et d’utiliser la machine ;
– lorsque la machine se met à vibrer plus
fort que d’habitude. Dans ce cas, une
révision immédiate est nécessaire.
50
Page 55

BEFR
• Arrêtez le moteur, retirez le capuchon
de la bougie et assurez-vous que tous les
composants mobiles se soient totalement
arrêtés :
– lorsque vous devez vous éloigner de la
machine ;
– avant de remplir le réservoir d’essence;
• Ne laissez jamais la machine sur le lieu
de travail sans supervision.
• Ne travaillez jamais avec la machine
si elle est endommagée, incomplète ou
modifiée sans autorisation du fabricant.
L’utilisation de la machine à des fins non
prévues peut entraîner des situations
dangereuses.
• Ne travaillez pas avec la machine par
temps orageux lorsqu’il y a des risques
de foudre. Risque d’électrocution.
Entretien et rangement:
• Veillez à ce que tous les écrous, boulons
et vis soient bien serrés et que la machine
soit en parfait état de fonctionnement.
De nombreux accidents sont occasionnés
par l’exécution erronée des tâches
d’entretien.
• Ne rangez jamais la machine avec
le réservoir de carburant plein dans
un bâtiment où les vapeurs d’essence
pourraient entrer en contact avec des
flammes ou des étincelles.
• Laissez se refroidir le moteur avant de
ranger la machine dans des espaces
fermés. Il y a risque d'incendie.
• Maintenez le moteur, l’échappement et
la zone autour du réservoir de carburant
libre de coupures d’herbe, de feuilles, de
graisses et d’huiles.
• Contrôlez régulièrement si l’assemblage
de ramassage des herbes n’est pas usé
ou endommagé.
• Pour des raisons de sécurité, faites
immédiatement remplacer tous les
composants usés ou endommagés.
Remplacez le silencieux s’il est
endommagé.
• Si le réservoir de carburant doit être
vidangé, cela devra se faire à l’air libre.
• Manipulez votre machine avec soin.
Maintenez les outils de coupe affûtés et
propres, afin de pouvoir travailler plus
efficacement et en toute sécurité. Suivez
les consignes d’entretien.
• N’essayez pas de réparer vous-même
la machine, à moins que vous soyez
qualifié pour ce faire. Les interventions
qui ne sont pas indiquées dans ce mode
d’emploi ne peuvent être exécutées
que par l’un de nos centres de service
agréés.
• Rangez la machine à un endroit sec et
hors de la portée d’enfants. Les machines
peuvent être dangereuses si elles
sont utilisées par des personnes sans
expérience.
Mise en service
Prudence ! Danger de
blessures – Lames en rotation.
N’entreprenez des travaux
sur la machine que lorsque le
moteur et les couteaux sont
totalement arrêtés.
Prenez également en compte le mode
d’emploi de Briggs & Stratton cijointe.
Avant de démarrer la machine, vous devez
– retirer toutes les fixations de transport ;
– monter le guidon et verrouiller les serrages
51
Page 56

BEFR
rapides ; – Remplir d’huile le réservoir
d’huile;
– Remplir d’essence le réservoir de
carburant;
– accrocher le bac de collection (si vous
souhaitez l’utiliser) ;
– régler la hauteur de tonte désirée.
Monter le guidon
Veillez à ne pas coincer les guidescâbles Bowden (5) lors du montage
du guidon.
1. Dépliez la partie inférieure (4)
A
C
et la partie supérieure (1) du
guidon.
2. Mettez la partie inférieure (4) à
la position désirée et verrouillez
les leviers de serrage rapide (21)
en les poussant en direction du
guidon (4). Les leviers de serrage
rapide devraient donc pointer vers
le haut. Les leviers devraient être
serrés et appuyés sur le guidon
de façon à ce qu’ils puissent être
verrouillés en y appliquant une
force moyenne. Le cas échéant,
tournez les leviers dans le sens
des aiguilles d’une montre pour
les serrer et à l’inverse pour les
desserrer.
3. La partie inférieure du guidon (4)
dispose de deux trous de fixation.
Montez la partie supérieure
du guidon à l’aide des leviers
de serrage rapide à la hauteur
désirée sur la partie inférieure du
guidon (4).
4. Fixez les leviers de serrage rapide
(25) sur la partie supérieure du
guidon (1) comme décrit sous le
point 2.
5. Fixez le guide-câbles Bowden (
5) à l’aide du pince-câbles (
sur la partie inférieure du guidon
A
(
4).
A
A
6)
Monter la corde du démarreur
1. Tirez le levier de sécurité (2) vers
D
le guidon (1) et maintenez-le à
cette position.
2. Tirez lentement sur la poignée
(7) de la corde du démarreur en
direction du guidon et accrochez
la corde du démarreur dans
le guide (3) de la corde du
démarreur.
3. Relâchez le levier de sécurité (2).
Monter le bac de collection
Attention : Ne pas utiliser
la machine lorsque le bac
de collection n’est pas
intégralement monté ou lorsque
le clapet de protection n’est pas
fermé. Risque de blessure !
Monter le filet
1. Glissez les clips en plastique (28)
E
F
sur les deux côtés et au bas du
bac de collection (20) par dessus
de la barre du bac de collection
(29).
Monter le bac de collection
sur la machine:
2. Relevez le clapet de protection
arrière (22).
3. Soulevez le bac de collection (20)
par la poignée de levage (23) et
accrochez-le dans la suspension
52
Page 57

BEFR
du bac de collection (30) à
l’arrière de la machine.
Retirer le bac de collection:
4. Relevez le clapet de protection
(22)et décrochez le bac de
collection (20) de la machine à
l’aide de la poignée de levage
(23).
Remplir le réservoir d’huile
et contrôler le niveau d’huile
Placez la machine à un endroit
où le sol est plat.
1. Dévissez le bouchon du réservoir
d’huile avec sa jauge (19) et
remplissez d’huile le réservoir. Le
G
réservoir d’huile a un volume de
0,47 l. N’utilisez que de l’huile
de marque (par ex. SAE 30).
2. Pour contrôler le niveau d’huile,
essuyez la jauge (19) à l’aide d’un
tissu propre, puis insérez-la dans
le réservoir jusqu’à la butée.
3. Retirez de nouveau la jauge
et observez le niveau d’huile
sur la jauge. Le niveau d’huile
doit se trouver dans la zone
marquée, entre les marques
« Minimum » et « Maximum
» (le maximum correspond
à 0,47 l dans le réservoir
d’huile).
4. Essuyez les éventuels
déversements d’huile et replacez
le bouchon (19) sur le réservoir
d’huile.
Remplir d’essence le réservoir
Avertissement ! L’essence est
inflammable et peut nuire la santé:
- ne stockez l’essence que dans des
récipients conçus à cet effet ;
- ne remplissez le réservoir d’essence qu’à
l’air libre et jamais avec le moteur allumé
ou chaud ;
- dévissez le bouchon du réservoir avec
prudence, pour que la pression dans le
réservoir puisse s’évacuer ;
- ne fumez jamais lorsque vous remplissez
le réservoir ;
- évitez d’aspirer les vapeurs d’essence et
le contact avec la peau ;
- éliminez l’essence déversée ;
- maintenez toujours l’essence à l’écart
d’étincelles, de feux ouverts et d’autres
potentiels agents d’ignition ;
- éliminez les restes d’essence de manière
écologique (voir « Élimination / Protection
de l’environnement »).
- N’utilisez pas de mélanges
essence/huile;
- Utilisez de l’essence sans plomb
Super ou Normale ;
- N’utilisez que de l’essence propre
et non dégradée ;
- Ne stockez pas l’essence pendant
plus d’un mois puisque sa qualité
diminue.
Contrôlez le niveau d’huile avant
chaque tonte et ajoutez de l’huile
avant que le niveau n’atteigne la
marque « Minimum ».
1. Dévissez le bouchon du réservoir
H
(
8) et remplissez le réservoir
A
jusqu’à la face inférieure de
l’embout de remplissage (31). Ne
53
Page 58

BEFR
remplissez pas complètement le
réservoir, pour que l’essence ait
de l’espace pour l’expansion.
2. Essuyez les restes d’essence
autour du bouchon du réservoir et
remettez-le en place.
Opération
Évitez les utilisations de cette
machine pouvant exposer les zones
avoisinantes à un niveau sonore
exagéré. Effectuez toutes les activités
produisant un niveau de bruit élevé
pendant des heures lors desquelles
de tels niveaux de bruit sont
autorisés. Respectez les heures de
repos et limitez la durée d’utilisation
de cette machine à un minimum.
L’utilisateur de cette machine et toute
personne qui se trouve à proximité
de la machine, devrait utiliser une
protection auditive appropriée.
Démarrer et arrêter le moteur
Avertissement ! L’essence est
inflammable ! Ne démarrez
le moteur qu’à une distance
minimale de 3 m de l’endroit où
vous avez rempli le réservoir
de carburant. Il y a risque
d'incendie.
Démarrez la machine sur un endroit
où le sol est plat et ferme et évitez les
endroits où l’herbe est haute. Assurezvous de que les lames des couteaux
ne pourront toucher des objets ni le
sol.
Pour votre sécurité : placez-vous
derrière la machine lorsque vous
allez la démarrer.
Contrôlez régulièrement les niveaux
d’essence et d’huile (voir « Mise en
service ») et remplissez à temps les
réservoirs.
Démarrage à froid:
I
1. Appuyez 3 fois sur la pompe
d’essence (32) (amorçage).
2. Tirez et maintenez le levier de
sécurité (2) contre le guidon (
3. Tirez sur la poignée de la corde du
démarreur (7).
4. Si le moteur démarre, laissez
retourner doucement la poignée de
la corde du démarreur dans le guide
de la corde (3).
Arrêter le moteur:
• Relâchez le levier de sécurité (2). Le
moteur s’arrête et les couteaux sont
freinés.
Frein des couteaux:
Contrôlez régulièrement le frein des
couteaux:
Relâchez le levier de sécurité (2).
Le moteur s’arrête et les couteaux sont
freinés. Les couteaux doivent totalement
s’arrêter dans un espace de 3 secondes.
A
1).
54
Page 59

BEFR
Tondre
Lorsque le moteur est chaud, il n’est plus
nécessaire d’appuyer sur la pompe
d’amorçage (32).
Si vous actionnez trop fréquemment la
pompe d’amorçage, trop d’essence
passera dans le carburateur, le moteur
est « noyé » et sera difficile à démarrer.
1. Démarrez le moteur (voir
J
2. Pendant que vous tondez, tenez le
guidon (1) et le levier de sécurité (2)
avec les deux mains.
)
I
INSTRUCTIONS
D'UTILISATION
Instructions de travail
générales
• Dans la mesure du possible, ne tondez la
pelouse que lorsqu’elle est sèche, afin de
maintenir propre la cape de gazon.
• Réglez la hauteur de tonte de façon à ne
pas surcharger la machine.
• Passez la machine en marchant au pas
et,dans la mesure du possible, tracez
des bandes droites. Pour les meilleurs
résultats, faites toujours chevaucher les
bandes sur quelques centimètres.
• Ne tondez pas en marchant en arrière.
• Sur des terrains en pente, travaillez
toujours en sens perpendiculaire à
la pente. Si les couteaux touchent un
corps étranger, arrêtez immédiatement
le moteur. Attendez l’arrêt total des
couteaux et contrôlez si la machine
n’est pas endommagée. Ne reprenez
le travail que si la machine n’est pas
endommagée.
• Si vous allez faire un pause de travail ou
transporter la machine, arrêtez le moteur
et attendez l’arrêt total des couteaux.
• Nettoyez la machine après chaque
utilisation, d’après les instructions du
chapitre « Nettoyage et entretien ».
Régler la hauteur de tonte
La machine dispose de 5 positions de
réglage de la hauteur de tonte (25, 34, 46,
60 et 75 mm) :
1. Tirez le levier (17) vers l’extérieur et
K
La hauteur de tonte idéale pour du gazon de
décoration est d’environ 30 à 45 mm et de
40 à 65 mm pour du gazon de sport.
verrouillez-le à la position désirée
(33).
2. Repoussez le levier (17) vers
l’intérieur.
Préférez une tonte plutôt longue au début
de la saison.
Vider le bac de collection
Indication du niveau de remplissage:
Sur le côté du bac de collection ( A 20) se
trouve l’indication du niveau de remplissage
24) qui permet de voir si le bac est
(
A
plein.
Indication du niveau de remplissage
fermée : Bac de collection vide
Indication du niveau de remplissage
fermée : Bac de collection plein
55
Page 60

BEFR
1. Arrêtez le moteur et attendez l’arrêt
L
total des couteaux.
2. Relevez le clapet de protection
arrière (22) et retirez le bac de
collection (20).
3. Portez le bac de collection à l’endroit
de décharge et videz-le. Pour faciliter
le vidage du bac de collection,
tenez-le par la poignée inférieure
(23a). Remettez en place le bac de
collection.
Nettoyage et entretien
Confiez les interventions
d’entretien et de maintenance
qui ne sont pas décrites dans ce
mode d’emploi par un atelier
agréé. N’utilisez que les pièces
de rechange recommandées
par le fabricant. Il y a risque
d’accidents !
N’effectuez les tâches de
nettoyage et d’entretien que
lorsque le moteur est arrêté et le
capuchon de la bougie est retiré.
Il y a risque de blessures !
Laissez se refroidir la machine
avant d’entamer des travaux
d’entretien ou de nettoyage.
Les éléments du moteur sont
brûlants. Il y a risque de
brûlures !
Portez des gants de protection si vous
allez travailler avec les couteaux.
Pour les tâches de nettoyage et
d’entretien, prenez également en compte
le mode d’emploi de Briggs & Stratton cijointe.
Pour les tâches d’entretien du moteur,
nous recommandons de consulter un
distributeur Briggs & Stratton agréé (voir
la liste des distributeurs Briggs & Stratton).
Travaux de nettoyage et
d’entretien général
Retirez le bac de collection et repliez la
M
partie supérieure du guidon (1). Pour
l’entretien et/ou le nettoyage, placez la
machine sur la face arrière, de sorte que
la bougie d’ignition soit pointée vers le
haut.
Veillez à ce qu’une deuxième personne
retienne la machine, car sinon, elle
pourrait chuter en arrière.
N’inclinez pas la machine sur le côté ou
vers l’avant, car les lubrifiants pourraient
s’échapper et le moteur pourrait être
endommagé.
• Maintenez toujours propre la machine.
Utilisez une brosse douce ou un tissu
pour le nettoyage ; n’utilisez jamais
des objets pointus ni des dissolvants.
N’utilisez jamais d’eau pour nettoyer
le moteur ; celle-ci pourrait polluer le
système de carburant.
• Utilisez un bout de bois ou de plastique
pour déloger les restes d’herbe. Nettoyez
surtout les orifices d’aération (
les orifices d’éjection et la zone des
couteaux. N’utilisez pas d’objets durs
ou pointus car de tels objets pourraient
endommager la machine.
• Lubrifiez occasionnellement les axes des
roues.
A
11),
56
Page 61

BEFR
• Avant toute utilisation, contrôlez si la
tondeuse présente des manquements
visibles, tels que des composants
desserrés, usés ou endommagés.
Contrôlez le serrage de l’ensemble des
écrous, vis et boulons.
• Contrôlez si les écrans et dispositifs de
protection (2, 11, 14, 22) ne présentent
pas de dommages et qu’ils sont
correctement montés. Remplacez-les le
cas échéant.
Nettoyer / remplacer le filtre
d’air
N’utilisez jamais la machine sans le filtre
d’air, sinon de la poussière et des saletés
pourraient pénétrer dans le moteur et
l’endommager.
1. Retirez le capuchon de la bougie
N
d’ignition (
la bougie d’ignition »)
2. Ouvrez le compartiment du filtre d’air
(9) et retirez le filtre d’air (10).
3. Nettoyez le filtre d’air (10) dans
une solution savonneuse et laissezle se sécher. Versez quelques gouttes
d’huile fraîche dans le filtre d’air.
4. Replacez le filtre d’air (10) dans
son compartiment (9) et refermez ce
dernier.
A
12) (voir « Entretien de
Entretien de la bougie
d’ignition
Une bougie d’ignition usée ou dont
l’espace entre les électrodes est devenu
trop important, réduit la puissance du
moteur.
1. Retirez le capuchon (12) de la bougie
O
d’ignition (13) en tirant et pivotant
simultanément.
2. Dévissez (sens inverse des aiguilles
d’une montre) la bougie d’ignition
(13) à l’aide de la clé de bougies (
27) incluse dans la livraison.
3. Contrôlez l’espace entre les
électrodes à l’aide d’un jauge
d’épaisseur (disponible dans les
commerces spécialisés). La distance
entre les électrodes doit être de
0,51 mm au minimum.
4. Vous pouvez éventuellement régler
cette distance en pliant prudemment
l’électrode de masse de la bougie
d’ignition.
5. Nettoyez la bougie d’ignition à l’aide
d’une brosse métallique.
6. Insérez la bougie d’ignition nettoyée
et réglée ou remplacez-la par
une nouvelle (couple de serrage
recommandé = 20 Nm, à déterminer
à l’aide d’une clé dynamométrique).
Remplacer l’huile moteur
Ne remplacez l’huile moteur que
lorsque le réservoir de carburant
est vide et que le moteur est chaud.
Videz le réservoir de carburant
à l’aide d’une pompe à essence
appropriée. Comme alternative, vous
pouvez également planifier l’entretien
de façon à consommer le reste de
carburant dans le réservoir.
• Effectuez le premier remplacement
de l’huile après environ 5 heures
de fonctionnement. Ensuite, toutes
les 50 heures de fonctionnement
ou annuellement.
A
57
Page 62

BEFR
• Éliminez l’huile usagée selon les
règlements locaux en vigueur
(voir « Élimination / Protection de
l’environnement »).
1. Retirez le capuchon de la bougie
d’ignition (
bougie d’ignition »)
2. Dévissez le bouchon du réservoir d’huile
(A 19) et videz l’huile usagée à l’aide
d’une pompe à huile.
3. Remplissez le réservoir avec de l’huile
fraîche (voir « Mise en service »).
A
12) (voir « Entretien de la
Contrôler / affûter /
remplacer les couteaux
Ne confiez le démontage / montage
des couteaux qu’à un atelier agréé.
Portez des gants de protection si vous
allez travailler avec les couteaux.
• Retirez le capuchon de la bougie
A
d’ignition (
les couteaux ne sont pas usés ou
endommagés.
• Ne confiez l’affûtage des couteaux qu’à
un atelier agréé, car un équilibrage des
couteaux est ensuite nécessaire.
• Si les couteaux sont endommagés ou
déséquilibrés, faites les remplacer par un
atelier agréé.
Un montage inapproprié peut
entraîner de graves blessures.
12) et contrôlez si
Régler le carburateur
Le carburateur a été réglé en usine pour
garantir les meilleures performances. Si
un réglage ultérieur serait nécessaire,
faites exécuter ce réglage dans un atelier
spécialisé agréé.
Rangement
Consignes générales de
rangement
Ne rangez pas la machine avec
le bac de collection plein. Par
temps chaud, l’herbe coupée
commence à fermenter tout en
produisant de la chaleur. Il y a
risque d'incendie.
• Exécutez les tâches de nettoyage et
d’entretien avant de ranger la machine.
• Laissez se refroidir le moteur avant de
ranger la machine dans des espaces
fermés.
• N’utilisez que des récipients appropriés
et autorisés pour le stockage du
carburant.
• Rangez la machine à un endroit sec,
libre de poussières et hors de la portée
d’enfants.
• Ne recouvrez pas la machine de films en
plastique, puisque de l’humidité et des
moisissures pourraient se développer.
58
Page 63

BEFR
Replier la machine
Pour gagner de l’espace de rangement,
vous pouvez replier la partie supérieure du
guidon vers le bas.
1 Retirez le bac de collection (20).
P
2 Décrochez la corde du démarreur
A
(
7).
3 Desserrez les leviers de serrage
rapide (21 / 25) sur la partie
inférieure (4) et la partie
supérieure (1) du guidon.
4 Repliez les deux parties. Veillez
à ne pas coincer le guide-câbles
Bowden (5).
Rangement pendant l’hiver
Ne pas respecter les instructions
de rangement peut entraîner
l’accumulation de restes de carburant
dans le carburateur, provoquant des
problèmes de démarrage et même
des dommages irréparables.
• Démarrez le moteur et laissez-le
fonctionner jusqu’à ce qu’il s’arrête pour
faute d’essence.
• Effectuez le remplacement de l’huile (voir
« Remplacer l’huile moteur »).
• Protégez le moteur :
- Dévissez la bougie d’ignition (
(voir « Nettoyage et entretien ») ;
- Versez une cuillère à soupe d’huile
moteur dans le moteur par l’orifice de
la bougie d’ignition ;
- Tirez lentement et à plusieurs reprises
sur la corde du démarreur (
en tirant également sur le levier de
I I
sécurité (
l’huile à l’intérieur du moteur ;
- Resserrez la bougie d’ignition
(O 13).
2), afin de distribuer
O
13)
I I
7)
• Éliminez l’huile usagée et les restes
d’essence selon les règlements locaux en
vigueur (voir « Élimination / Protection
de l’environnement »).
Il n’est pas nécessaire de vider le
réservoir de carburant si vous ajoutez
un agent stabilisateur à l’essence (voir
« Pièces de rechange » et le mode
d’emploi de Briggs & Stratton).
Élimination / Protection
de l’environnement
• À la fin de la vie utile de la machine,
remettez-la, ensemble avec ses
accessoires et son emballage, à un
centre de recyclage agréé.
- Videz soigneusement le réservoir
d’essence et le réservoir d’huile
avant de remettre votre machine au
centre de recyclage. Les matériaux
synthétiques et les composants en
métal peuvent être triés et recyclés.
- Remettez l’huile usagée et les restes
d’essence à la déchetterie locale ;
ne les versez en aucun cas dans les
égouts.
- Consultez notre centre de service à
ce sujet.
• Nous éliminerons gratuitement les
machines défectueuses que vous nous
renvoyez.
• Ne jetez pas l’herbe coupée dans votre
benne d’ordures ménagères ; remettez
les restes organiques à la déchetterie
locale pour qu’ils soient compostés ou
utilisez-les comme engrais pour vos
arbres et buissons.
59
Page 64

BEFR
Intervalles d’entretien
Exécutez régulièrement les tâches d’entretien listées dans le tableau. Un entretien régulier
prolongera la durée de vie de votre machine. Vous obtiendrez l’efficacité de tonte optimale
et éviterez des accidents.
Tâches d’entretien
(voir « Nettoyage et entretien »
Contrôler et/ou serrer les vis,
écrous et boulons
Contrôler le niveau d’huile / de
carburant et remplir les réservoirs
d’huile / d’essence si nécessaire
Nettoyer les éléments de
commande et la zone autour du
silencieux
Nettoyer la protection des doigts
(b)
Remplacer l’huile moteur
Nettoyer le filtre d’air (a)
Nettoyer / régler ou remplacer la
bougie d’ignition
Contrôler le silencieux et le garde-
étincelles (b)
Nettoyer le système de
refroidissement à air (a, b)
a Si l’environnement est très poussiéreux ou très pollué, remplacer plus souvent.
b Voir le mode d’emploi de Briggs & Stratton
Avant Après
le travail
Après
premières
5 h.
Après
8 h.
Après
50 h.
Annuellement
60
Page 65

Dépannage
Problème Possible cause Solution du problème
Le moteur ne
démarre pas
Le moteur
démarre mais
la machine ne
développe pas la
pleine puissance
Le moteur s’arrête
ou fait des «
ratés »
Le moteur chauffe
excessivement
Le moteur produit
de la fumée
Le rendement de
la machine n’est
pas satisfaisant
ou le moteur
fonctionne avec
difficulté
Les couteaux ne
tournent pas
Pas assez de carburant dans le
réservoir
Procédure de démarrage
erronée
Le capuchon de la bougie
A
(
12) n’est pas correctement
placé sur la bougie.
Bougie d’ignition rouillée
O
(
13)
Filtre d’air (
Carburateur mal réglé
Carburateur mal réglé
Bougie d’ignition rouillée
O
13)
(
Rainure d’aération (
bouchée
Bougie d’ignition erronée
O
(
13)
Pas assez d’huile dans le
moteur
Filtre d’air (
Pas assez d’huile dans le
moteur
L’herbe est trop haute ou trop
basse
Les couteaux sont émoussés
Couteaux bloqués par l’herbe,
bac de collection plein, orifice
d’éjection bourré
Couteaux bloqués par l’herbe Éliminer / retirer l’herbe
Couteaux incorrectement
montés
N
10) souillé
N
10) souillé
A
11)
Remplir d’essence le réservoir
Suivez les instructions de démarrage (voir
« Opération »)
Nettoyer et régler ou remplacer la
bougie d’ignition (voir « Nettoyage et
entretien »)
Confiez le réglage du carburateur à un
atelier agréé
Remplacer le filtre d’air (voir « Nettoyage
et entretien »)
Confiez le réglage du carburateur à un
atelier agréé
Confiez le réglage du carburateur à un
atelier agréé
Nettoyer et régler ou remplacer la
bougie d’ignition (voir « Nettoyage et
entretien »)
Nettoyer les orifices d’aération
Remplacer la bougie d’ignition
Ajouter de l’huile moteur (voir « Mise en
service »).
Remplacer le filtre d’air (voir « Nettoyage
et entretien »)
Ajouter de l’huile moteur (voir « Mise en
service »).
Modifier la hauteur de tonte (voir «
Régler la hauteur de tonte »)
Faire affûter ou remplacer les couteaux
par un atelier agréé
Remplacer le filtre d’air (voir « Nettoyage
et entretien »)
Faire monter les couteaux par un atelier
agréé
BEFR
61
Page 66

BEFR
Bruits,
claquements
ou vibrations
inhabituels
Couteaux incorrectement
montés Faire monter les couteaux par un atelier
Couteaux endommagés
Garantie
Cher client,
Cette machine est couverte par une garantie
de 3 ans à partie de la date d’achat.
Veuillez remarquer que des conditions de
garantie différentes peuvent s’appliquer au
moteur. Veuillez lire attentivement le mode
d’emploi du fabricant « Briggs & Stratton » à
ce sujet.
Cette garantie n’a aucune influence sur
vos droits légaux de garantie. En cas de
manquements, vous disposez de recours
légaux contre le vendeur du produit. Ces
recours légaux ne sont pas couverts par
notre garantie proposée ci-après.
Dispositions de garantie
La durée de garantie commence à la date
d’achat. Veuillez soigneusement garder la
facture originale ; ce document constitue
votre preuve d’acquisition nécessaire.
Si, dans les trois ans suivant la date
d’achat, cette machine présente un
dysfonctionnement, nous remplacerons
ou réparerons – à notre discrétion –
gratuitement le produit. Pour toute demande
de garantie, la machine défectueuse
et la preuve d’acquisition, ainsi qu’une
brève description écrite de la nature de la
défectuosité et la date à laquelle la panne
est survenue, doivent être présentés. Si
le type de dysfonctionnement décrit est
agréé
couvert par notre garantie, vous obtiendrez
soit la réparation du produit, soit un
nouveau produit. Une réparation ou le
remplacement d’un produit n’implique pas
un renouvellement de la période de garantie.
Période de garantie et
dispositions légales
Réclamations légales de
manquements
Des services de garantie rendus n’impliquent
pas une prolongation de la période de
garantie. Le même principe s’applique aux
pièces remplacées ou réparées. Tous les
dommages et manquements existants au
moment de l’achat doivent être signalés
dès que vous déballez le produit. Toute
réparation après la fin de la période de
garantie doit être payée.
Couverture de garantie
La machine a été fabriquée selon les
standards de qualité les plus sévères et testée
consciencieusement avant sa livraison.
La garantie couvre tous les défauts matériels
et/ou de fabrication. Cette garantie ne
couvre pas les composants qui sont soumis
à une usure normale et qui peuvent donc
être considérées en tant que pièces d’usure
62
Page 67

BEFR
(par ex. les dispositifs de coupe, charbons
de contact, filtres d’air, corde du démarreur).
Les composants fragiles sont également
exclus de la couverture de garantie (par ex.
commutateurs).
Cette garantie n’est pas applicable si
le produit a été endommagé, utilisé de
manière inappropriée ou mal entretenu. Le
suivi rigoureux des instructions du mode
d’emploi est indispensable pour pouvoir
utiliser le produit de manière appropriée.
Toute utilisation ou opération interdite ou non
recommandée dans le mode d’emploi doit
être évitée.
Le produit a été conçu exclusivement pour
utilisation dans le domaine privé et ne
convient pas à l’exploitation commerciale.
La couverture de garantie est annulée en
cas d’abus ou d’utilisation inappropriée,
d’agissements violents ou de manipulations
inappropriées ou d’interventions n’ayant
pas été exécutées par nos établissements de
service agréés.
Procédure de garantie
Veuillez suivre les instructions suivantes afin
de garantir un traitement rapide de votre
problème :
• Veuillez tenir à portée de main la facture
d’achat et les données d’identification
(IAN 291839) en tant que preuve
d’achat.
• Veuillez noter le numéro d’article indiqué
sur la plaquette signalétique de la
machine.
• En cas de pannes de fonctionnement ou
autres manquements, veuillez d’abord
contacter notre département de service
clientèle par téléphone ou par courriel.
Vous y obtiendrez des instructions
complémentaires pour le traitement de
votre plainte.
• Après concertation avec notre service
clientèle, le produit signalé comme
défectueux peut être renvoyé sans frais à
l’adresse de service indiquée, ensemble
de la preuve d’acquisition (facture) et
une description écrite de la nature du
défaut et indication de la date à laquelle
le défaut est survenu. Afin d’éviter des
problèmes à la réception de votre envoi
et des coûts supplémentaires, n’envoyez
jamais le produit à une adresse différente
que celle qui vous a été communiquée.
Assurez-vous que l’envoi ne soit
pas enregistré comme envoi contre
remboursement, envoi hors normes,
envoi express, ou comme un autre type
d’envoi exceptionnel. Veuillez envoyer
la machine avec tous les accessoires
livrés au moment de l’achat et veillez à
emballer l’ensemble dans un emballage
de transport approprié.
Service de réparation
Contre payement, notre service clientèle, qui
vous remettra volontairement un devis, peut
se charger des réparations non couvertes
par la garantie. Nous ne recevrons que
des machines qui nous parviennent dans
un emballage approprié et suffisamment
affranchis. Attention : Veuillez envoyer
votre machine à notre service clientèle que
si elle est propre et en indiquant la nature
de la panne et/ou du manquement. Les
envois enregistrés comme envois contre
remboursement, envois hors normes, envois
express ou autres envois exceptionnels ne
seront pas acceptés.
63
Page 68

BEFR
Centre de service
Le service « Briggs & Stratton » pertinent
de la liste de distributeurs ci-jointe est
responsable des problèmes de moteur de
votre tondeuse à gazon.
FR BE
Service France
Sertronics GmbH
Ostring 60
Tilkørsel via “An der Fuchshöhle“
D-66740 Saarlouis-Fraulautern
Germany
E-mail: gapo-service-de@sertronics.
de
Tlf.: 0043 12675668
Fax: 0049 21529603111
291839
Importateur
Veuillez remarquer que l’adresse mentionnée
ci-après n’est pas une adresse de service.
Pour des interventions de service, veuillez
d’abord contacter le département de service
indiquée plus haut.
Ga-Po Vertrieb GmbH
Heinrich-Horten-Straße 5
47906 Kempen, Allemagne
64
Page 69

Inhoud
NL
Inleiding..................................66
Gebruiksdoel...............................66
Algemene beschrijving.................66
Leveromvang...................................66
Overzicht.......................................67
Functiebeschrijving..........................67
Beveiligingsinrichtingen....................67
Technische gegevens.….................68
Symbolen/pictogrammen............68
Symbolen op het toestel................68
Pictogrammen in de handleiding........70
Veiligheidsaanwijzingen..............70
Inbedrijfstelling............................73
Handgreep monteren.......................73
Startkoord monteren.........................74
Grasopvangbak monteren................74
Motorolie bijvullen en oliepeil
controleren.................................... 74
Benzine bijvullen............................ 75
Bediening....................................75
De motor in- en uitschakelen............75
Maaien..................................76
Werkvoorschriften........................76
Algemene werkvoorschriften.........76
Maaihoogte instellen..................77
Grasopvangbak legen………….....77
Reiniging en onderhoud...............77
Reiniging en algemeen onderhoud.....78
Luchtfilter reinigen/ vervangen..........78
Bougie onderhouden........................78
Motorolie vervangen..................79
Mes controleren/slijpen/
vervangen......................................79
Carburateur afstellen........................79
Opslag.........................................80
Algemene aanwijzingen voor
opslag............................................80
Het toestel samenvouwen..................80
Opslag tijdens de winterpauze..........80
Afvalverwerking /
milieubescherming.......................81
Onderhoudsintervallen.................82
Foutopsporing..............................83
Garantie......................................84
Reparatieservice..........................85
Service-center...............................86
Importeur.....................................86
Vertaling van de originele EU
conformiteitsverklarin...........….110
65
Page 70

NL
Inleiding
Gefeliciteerd met de aankoop van
uw nieuwe grasmaaier. U hebt een
hoogwaardig toestel gekozen.
Bij de productie werd het toestel aan een
kwaliteits- en eindcontrole onderworpen,
waardoor de functionaliteit van uw toestel is
gegarandeerd.
De handleiding is een onderdeel van
het product. Ze bevat belangrijke
informatie over de veiligheid, het
gebruik en de afvalverwerking. Lees
deze handleiding en de Briggs &
Stratton handleiding voor de eerste
ingebruikname zorgvuldig door om
foutief gebruik te voorkomen.
Gebruik het product alleen zoals
beschreven en alleen voor de
aangegeven toepassingen. Bewaar
de handleiding zorgvuldig en
geef ze door aan iedere volgende
gebruiker.
Gebruiksdoel
De exploitant of gebruiker is
verantwoordelijk voor ongevallen of schade
aan andere mensen of hun eigendommen.
Algemene beschrijving
De afbeelding van de
belangrijkste onderdelen vindt
u op de voorste en achterste
uitklappagina.
Leveromvang
Haal het toestel voorzichtig uit de
verpakking en controleer of de volgende
onderdelen volledig zijn:
- Grasmaaier (al geassembleerd)
- Grasopvangbak
- Snelspanhendel
- Reservebougie
- Bougiesleutel
- Handleiding
- Briggs & Stratton handleiding
Het toestel is alleen bestemd voor het
maaien van gazons en grasvelden rondom
het huis.
Dit toestel is niet geschikt voor commercieel
gebruik. Bij commerciële toepassing vervalt
de garantie.
Elk ander gebruik dat niet uitdrukkelijk in
deze handleiding wordt toegestaan kan
leiden tot schade aan het toestel en een
ernstig gevaar voor de gebruiker opleveren.
Het toestel is bestemd voor gebruik door
volwassenen. Kinderen en personen die niet
vertrouwd zijn met deze handleiding mogen
het toestel niet gebruiken.
66
Gooi het verpakkingsmateriaal op gepaste
wijze weg.
Page 71

NL
Overzicht
1. Bovenste greep
A
2. Veiligheidsbeugel
3. Geleiding startkoord
4. Onderste greep
5. Bowdenkabel
6. Kabelklem
7. Startergreep met startkoord
8. Tankklep
9. Luchtfilterdoos
10. Luchtfilter (niet afgebeeld)
11. Motorafdekking met
ventilatiesleuven
(vingerbescherming)
12. Bougiekap
13. Bougie (niet afgebeeld)
14. Uitlaatbescherming
15. 2 voorwielen
16. Plaatstalen behuizing
17. Hendel voor maaihoogteinstelling
18. 2 achterwielen
19. Olietankdop met peilstaaf
20. Grasopvangbak
21. 2 snelspanhendels voor
bevestiging van de beugel
onderaan
22. Stootbescherming achter
23. a Onderste greep om de
grasopvangbak te legen
24. Vulaanduiding
25. 2 snelspanhendels voor
bevestiging van de beugel aan
de bovenste greep
26. Reservebougie
27. Bougiesleutel
28. Plastic strips opvangbak
E
29. Opvangbakstang
32. Benzinepomp (primer)
I
33. Positie maaihoogte
K
Functiebeschrijving
Het toestel werkt met een krachtige
viertaktmotor (Briggs & Stratton 450 E
Series).
Het toestel is uitgerust met een
hoogwaardige plaatstalen behuizing, een
grasopvangbak en een inklapbare greep.
De functie van de bedieningsonderdelen
vindt u in de volgende beschrijvingen.
Beveiligingsinrichtingen
2 Veiligheidsbeugel
A
Wanneer de veiligheidsbeugel
wordt losgelaten, stopt het toestel.
14 Uitlaatbescherming
Verhindert dat handen of
brandbare materialen met een
hete uitlaat in contact komen.
22 Stootbescherming achter
Beschermt de gebruiker tegen
wegvliegende deeltjes en tegen
onopzettelijk contact met het
mes bij het maaien zonder
grasopvangbak.
30. Ophanging grasopvangbak
F
H
31. Vulpijp
67
Page 72

NL
Technische gegevens
Motor …..............viertakt B&S 450 E Series
Cilinderinhoud ……………………..125 cm
Vermogen ……………..1,82 kW (2,47 pk)
Motor snelheid ....................... 2900 t/min
Aandraaikoppel mes ..................... 45 Nm
Inhoud brandstoftank ........................ 0,8 I
Octaangetal ................................0,95-98
Inhoud motorolietank ...................... 0,47 I
Bougie ...................... Champion QC12YC
Maaicirkel …………………
Maaihoogte ...........................
5 standen, 25-34-46-60-75 mm
Inhoud grasopvangbak ...................... 55 l
Gewicht (incl. opvangbak)………..25,2 kg
Geluidsdrukniveau
(L
)…………........81,7 dB(A); K=3,0 dB(A)
pA
Geluidsvermogenniveau (L
Gemeten ……...94,5 dB(A); K=1,80 dB(A)
Gegarandeerd .……………………96 dB(A)
Trillingen aan handgreep
(ah) ……….6,67/5,69 m/s
Geluids- en trillingsniveaus zijn bepaald
in overeenstemming met de in de
conformiteitsverklaring genoemde normen
en bepalingen.
Technische en optische wijzigingen kunnen
in de loop van de verdere ontwikkeling
worden voorgenomen zonder voorafgaande
kennisgeving. Alle afmetingen, instructies
en informatie uit deze handleiding worden
bijgevolg gegeven zonder garantie.
Juridische claims op basis van de
handleiding kunnen daarom niet worden
ingeroepen.
De aangegeven trillingsemissiewaarde werd
gemeten met een standaard testprocedure
en kan worden gebruikt om toestellen met
elkaar te vergelijken.
…….. 420 mm
...
wA
2
; K=1,5 m/s
2
De aangegeven trillingsemissiewaarde kan
ook worden gebruikt voor een schatting van
de blootstelling aan lawaai.
3
Waarschuwing:
De trillingsemissiewaarde kan tijdens
het effectieve gebruik van het toestel
afwijken van de opgegeven waarde,
afhankelijk van de wijze waarop het
toestel wordt gebruikt. Het is nodig
om veiligheidsmaatregelen te treffen
om de gebruiker te beschermen,
die zijn gebaseerd op een schatting
van het geluid in de werkelijke
gebruiksomstandigheden (in dit
geval moeten alle onderdelen van de
bedrijfscyclus worden overwogen,
waaronder, bijvoorbeeld, de
momenten waarop het toestel is
uitgeschakeld, en de momenten
waarop het toestel is ingeschakeld,
maar vrij draait).
Symbolen/pictogrammen
Symbolen op het toestel
Opgelet!
Lees de handleiding.
Verwondingsgevaar door
weggeslingerde onderdelen.
Houd omstaanders uit de buurt
van het toestel.
68
Page 73

NL
Verwondingsgevaar door scherpe
messen.
Houd voeten en handen uit de buurt.
Opgelet - Giftige dampen!
Rook niet en bedien het toestel niet
in een afgesloten ruimte.
Opgelet - Benzine is ontvlambaar!
Rook niet en houd uit de buurt van
warmtebronnen!
Stel het toestel niet bloot aan vocht.
Werk niet in de regen. Opgelet! Mes
blijft lopen na uitschakelen.
Opgelet - Verwondingsgevaar!
Voorafgaand aan
onderhoudswerkzaamheden
Zet de motor uit en trek de
bougiekap los.
Opgelet - Hete oppervlakken!
Gevaar voor brandwonden.
Opgelet - Verwondingsgevaar!
Draag een veiligheidsbril en
oorbeschermers.
Pictogram op het tankdeksel:
Aanwijzing bij benzinevulpijp:
Geen E85-mengsel tanken!
Opgelet! Controleer
het oliepeil voor het
starten.
Pictogram op de olietankdop:
Aanwijzing op olievulpijp
Pictogram op de tank:
Opgelet!
Lees de handleiding.
Opgelet - Benzine is ontvlambaar!
Laat de motor voor het tanken min.
2 min. afkoelen.
Opgelet - giftige CO-dampen!
Gebruik het toestel niet in een
gesloten ruimte.
Opgelet - Hete oppervlakken!
Gevaar voor brandwonden.
Pictogram op de benzinepomp:
Vermelding van het
geluidsvermogensniveau L
dB.
in
wa
Druk 3x op de brandstofpomp
(primer) voordat u begint..
69
Page 74

NL
Pictogram op de handgreep:
Informatie over het
starten en stoppen van
de motor.
I
ON
0
OFF
Toestel inschakelen (ON):
Veiligheidsbeugel omhoog
trekken.
Toestel uitschakelen (OFF):
Veiligheidsbeugel loslaten.
Vulaanduiding:
Vulaanduiding geopend:
Grasopvangbak leeg
Vulaanduiding gesloten:
Grasopvangbak vol
Pictogrammen in de handleiding
Gevarensymbolen met
gegevens voor het voorkomen
van letsels van personen of
materiële schade.
Aanwijzingsteken (op de plaats van
het uitroepteken wordt de aanwijzing
uitgelegd) met informatie over het
voorkomen van schade.
Teken met informatie voor een beter
gebruik van het toestel.
Veiligheidsaanwijzingen
Dit hoofdstuk behandelt de basis
veiligheidsvoorschriften die moeten worden
gevolgd bij werken met het toestel.
WAARSCHUWING! Lees alle
veiligheidsaanwijzingen en
-instructies. Niet-naleving van de
veiligheidsaanwijzingen en -instructies
kan elektrische schok, brand en/of
ernstige letsels veroorzaken.
Aanwijzingen:
• Lees aandachtig de handleiding.
Maakt u zich vertrouwd met de
instellingsmogelijkheden en het juiste
gebruik van het toestel.
• Als u twijfelt over het juiste gebruik van
het toestel of een verboden toepassing,
win dan advies in van derden.
• Wees alert, let op wat u doet, en wees
voorzichtig bij het werken. Gebruik
het toestel niet als u moe of ziek
bent of onder de invloed van drugs,
alcohol of medicijnen. Een moment van
onoplettendheid bij het gebruik van het
toestel kan tot ernstig letsel leiden.
• Dit toestel is niet bedoeld voor gebruik
door personen met verminderde
lichamelijke, zintuiglijke of verstandelijke
vermogens of een gebrek aan ervaring
of gebrek aan kennis, tenzij ze onder
toezicht staan van een persoon die
verantwoordelijk is voor hun veiligheid
of van die persoon aanwijzingen krijgen
over het correct gebruik van het toestel.
• Kinderen moeten onder toezicht staan
om er zeker van te zijn dat ze niet met
het toestel spelen.
• Sta nooit toe dat kinderen of mensen die
70
Page 75

NL
de handleiding niet kennen, het toestel
gebruiken. Plaatselijke regelgeving kan
een minimumleeftijd van de gebruiker
bepalen.
• Maai nooit met andere personen, met
name kinderen, of dieren in de buurt.
Afleiding kan ertoe leiden dat u de
controle over het toestel verliest.
• De exploitant of gebruiker is
verantwoordelijk voor ongevallen met
andere personen of hun eigendommen.
• Let op lawaaibescherming en de
plaatselijke regelgeving.
Voorbereidende maatregelen:
• Draag tijdens het maaien altijd slipvaste
schoenen en een lange broek. Maai
nooit op blote voeten of in lichte
sandalen. Loshangende kleding, sieraden
of lang haar kan vast komen te zitten in
de bewegende onderdelen. Het dragen
van de juiste kleding vermindert het risico
op letsel.
• Controleer het terrein waarop het toestel
wordt gebruikt, en verwijder alle objecten
(stenen, stokken, draden, speelgoed)
die kunnen worden opgezogen en
weggeslingerd.
• Waarschuwing: Benzine is licht
ontvlambaar. Brand of explosies kunnen
ernstige letsels veroorzaken:
- Bewaar benzine alleen in daarvoor
bestemde recipiënten;
- Tank alleen buiten en rook niet tijdens
het vullen;
- Vul brandstof bij voor u de motor start.
Terwijl de motor draait of wanneer het
toestel heet is, mag de tankdop niet
worden geopend of benzine worden
bijgevuld;
- Als er brandstof is gemorst of
overgelopen, mag geen poging worden
gedaan om de motor te starten. In plaats
daarvan moet de benzine worden
verwijderd van het verontreinigde
oppervlak. Elke startpoging moet worden
vermeden totdat de benzinedampen zijn
vervlogen.
- Om veiligheidsredenen moeten de
dop van de benzinetank en andere
tankdoppen worden vervangen als ze
beschadigd zijn.
• Vervang defecte knaldempers.
• Controleer voor elk gebruik de
snijgereedschappen, bevestigingsbouten
en de gehele snij-inrichting visueel
op slijtage of schade. Om onbalans
te vermijden mogen versleten of
beschadigde werktuigen en bouten
alleen per set worden vervangen.
• Pas op bij toestellen met meerdere
snijgereedschappen, omdat de de
beweging van één mes de rotatie van de
andere messen kan veroorzaken.
• Gebruik alleen reserve-onderdelen
en accessoires die door de fabrikant
worden geleverd en aanbevolen. Het
gebruik van andere onderdelen kan
letsel veroorzaken en leiden tot het
onmiddellijke verlies van aanspraak op
garantie.
Hantering:
• Laat de motor niet draaien in een
afgesloten ruimte, waar gevaarlijke
koolmonoxidedampen zich kunnen
opstapelen.
• Maai alleen bij daglicht of goed
kunstlicht. Een onverlicht werkgebied kan
ongevallen veroorzaken.
• Vermijd, indien mogelijk, het toestel te
gebruiken in nat gras.
• Besteed altijd aandacht aan een veilige
houding, met name op hellingen,
71
Page 76

NL
heuvels, sloten of dijken. Hierdoor kunt u
het toestel in onverwachte situaties beter
onder controle houden.
- Werk altijd dwars op de helling, nooit
omhoog of omlaag.
- Wees uiterst voorzichtig bij het
veranderen van richting op een helling.
- Maai geen overdreven steile hellingen
(max. 10º)
• Bedien de machine niet sneller dan
stapvoets.
• Wees erg voorzichtig wanneer u het
toestel draait of naar zich toe trekt.
• Laat het mes niet draaien als het toestel
moet worden gekanteld, alsook voor het
transport over een andere ondergrond
dan gras, en wanneer het toestel wordt
verplaatst naar en van het gebied dat
moet worden gemaaid.
• Gebruik het toestel nooit met beschadigde
beveiligingsinrichtingen of zonder
gemonteerde beveiligingsinrichtingen,
zoals de stootbescherming en/of de
grasopvangbak. Zo verzekert u zich
ervan dat de veiligheid van het toestel
wordt behouden.
• Verander de regelaarinstelling van de
motor niet en overdraai deze niet. U zou
het toestel kunnen beschadigen.
• Ontgrendel alle snijwerktuigen en
aandrijvingen voordat u de motor start.
• Wees voorzichtig bij het starten van de
motor, overeenkomstig de instructies
van de fabrikant. Zorg voor voldoende
afstand tussen uw voeten en het mes.
Gevaar voor letsel.
• Bij het starten van de motor mag het
toestel niet worden gekanteld, tenzij het
toestel tijdens het proces moet worden
opgetild. Als dit het geval is, kantel het
toestel dan alleen zo ver als absoluut
noodzakelijk en til alleen de kant op die
zich het verst van de gebruiker bevindt.
• Start de motor niet, wanneer u voor de
uitwerpopening staat.
• Zet de motor aan volgens de instructies
en pas wanneer uw voeten op een
veilige afstand tot het mes staan.
• Plaats uw handen of voeten nooit op of
onder draaiende onderdelen. Blijf altijd
weg van de uitwerpopening. Een moment
van onoplettendheid bij het gebruik van
het toestel kan tot ernstig letsel leiden.
• Til het toestel niet op of draag het niet
wanneer de motor draait.
• Zet de motor uit, trek de bougiekap af
en vergewis u ervan dat alle bewegende
onderdelen stilstaan:
- voordat u blokkades of verstoppingen in
de uitwerpopening oplost;
- voordat u het toestel inspecteert,
schoonmaakt of er aan werkt;
- wanneer een vreemd voorwerp is
geraakt. Zoek naar schade aan het
toestel en voer de noodzakelijke
reparaties door alvorens opnieuw te
starten en met het toestel verder te
werken;
- in het geval het toestel abnormaal
sterk begint te trillen. In dit geval is een
onmiddellijke controle vereist.
• Zet de motor uit, trek de bougiekap af
en vergewis u ervan dat alle bewegende
onderdelen stilstaan:
- wanneer u het toestel achterlaat;
- voordat u tankt.
• Laat het toestel nooit zonder toezicht
achter op de werkplek.
• Werk niet met een beschadigd,
onvolledig of zonder toestemming van de
fabrikant verbouwd toestel. Het gebruik
van machines voor andere toepassingen
dan beoogd kan tot gevaarlijke situaties
leiden.
• Werk niet met het toestel wanneer het
risico op een blikseminslag bestaat.
Gevaar voor elektrische schok.
72
Page 77

NL
Onderhoud en opslag:
• Zorg ervoor dat alle moeren, bouten en
schroeven stevig vastzitten en de machine
zich in een veilige werktoestand bevindt.
Veel ongelukken worden veroorzaakt
door slecht onderhouden toestellen.
• Sla het toestel nooit met een volle tank op
in een gebouw, waar benzinedampen
eventueel in contact kunnen komen met
open vuur of vonken.
• Laat de motor afkoelen voordat u het
toestel in een afgesloten ruimte parkeert.
Er is brandgevaar.
• Houd om brandgevaar te vermijden de
motor, de uitlaat en het gebied rond de
tank vrij van gras, bladeren of weggelekt
vet (olie).
• Controleer regelmatig de
grasopvangvoorziening op slijtage of
verlies van functionaliteit.
• Vervang versleten of beschadigde
onderdelen om veiligheidsredenen.
Vervang beschadigde knaldempers.
• Als de brandstoftank moet worden
leeggemaakt, moet dit in open lucht
worden gedaan.
• Behandel uw toestel met zorg. Houd uw
gereedschap scherp en schoon om beter
en veiliger te kunnen werken. Volg de
onderhoudsvoorschriften.
• Probeer het toestel niet zelf te repareren,
tenzij u daarvoor bent opgeleid.
Werken die niet in deze handleiding staan,
mogen alleen worden uitgevoerd door
onze erkende service-centra.
• Bewaar het toestel op een droge plaats
en buiten het bereik van kinderen.
Machines zijn gevaarlijk als ze worden
gebruikt door onervaren mensen.
Inbedrijfstelling
Opgelet! Verwondingsgevaar
door roterende messen. Werk
alleen aan de machine als het
mes is uitgeschakeld en stil
staat.
Let ook op de meegeleverde
handleiding van Briggs & Stratton.
Voor u het toestel in gebruik neemt, moet u:
- alle transportbeveiligingen verwijderen;
- de handgreep monteren en de
snelspanhendels vergrendelen;
- motorolietank vullen;
- benzinetank vullen
- eventueel de grasopvangbak plaatsen;
- eventueel de maaihoogte instellen.
Handgreep monteren
Zorg ervoor dat de Bowden-kabels
(5) niet worden geknikt tijdens de
montage van de beugelgreep.
1. 1Klap de onderste beugelgreep
A
(4) en de bovenste beugelgreep
(1) omhoog.
2. Plaats de onderste beugelgreep
(4) in de gewenste positie en
vergrendel de snelspanhendels
(21) door deze in de richting van
de beugelgreep (4) te drukken.
De snelspanhendel moet naar
boven wijzen. De spanhendels
moeten zodanig tegen de
beugel aangetrokken zijn en
tegen de beugel aanliggen, dat
aanspannen met een gemiddelde
kracht kan gebeuren. Zo niet,
73
Page 78

NL
draai de spanhendel dan
rechtsom om aan te spannen en
linksom om te lossen.
3. De onderste greep (4) heeft twee
C
verschillende bevestigingsgaten.
Monteer de bovenste greep met
behulp van de snelspanhendel
op de gewenste hoogte op de
onderste greep (4).
4. Bevestig de snelspanhendel (25)
op de bovenst greep (1), zoals
beschreven onder 2.
5. Bevestig de Bowdenkabel (
met behulp van de kabelklem (
6) op de onderste handgreep (
4).
Startkoord monteren
1. Trek de veiligheidsbeugel (2) in
D
de richting van de greep (1) en
houd hem in deze positie.
2. Trek langzaam aan de startkoord
met de startergreep (7) in de
richting van de beugel en
hang het startkoord in de
startkoordgeleider (3).
3. Laat de veiligheidsbeugel (2) los.
Grasopvangbak monteren
Opgelet: Gebruik het toestel
niet zonder de volledig
aangebrachte grasopvangbak
of zonder de stootbescherming.
Verwondingsgevaar!
E
Net monteren
1. Trek de plastic clips (28) van
de opvangbak (20) over beide
zijden en onderaan over de
opvangbakstang (29).
A
F
5)
A
A
Grasopvangbak aan het
toestel bevestigen:
2. Til de stootbescherming achter
(22) op.
3. Houd de grasopvangbak (20)
aan de draaggreep (23) vast
en hang deze in de hiervoor
bestemde ophanging (30) op de
achterzijde van het toestel.
Grasopvangbak
verwijderen:
4. Til de stootbescherming op (22)
en neem de grasopvangbak (20)
met de handgreep (23) uit het
toestel.
Motorolie bijvullen en oliepeil
controleren
Zet het toestel op een vlakke
ondergrond.
1. Schroef de olietankdop met
G
peilstok (19) los en vul olie bij in
de tank. De olietank bevat 0,47
l olie. Gebruik merkolie (bv. SAE
30).
2. Om het oliepeil te controleren,
veegt u de peilstok (19) met een
schone doek af en plaatst u deze
tot aan de aanslag terug in de
tank.
3. Trek de peilstok er weer uit
en lees het oliepeil af van de
peilstok. Het oliepeil moet
zich binnen het gemarkeerde
gebied tussen de minimumen maximummarkering
bevinden (maximaal: 0,47
liter motorolie in de olietank).
4. Veeg eventuele gemorste
oliedruppels weg en sluit de
olietankdop (19).
74
Page 79

NL
Controleer het oliepeil voor elke
maaibeurt en vul bij met olie voordat
de minimummarkering is bereikt.
Benzine bijvullen
Waarschuwing! Benzine is
ontvlambaar en schadelijk voor de
gezondheid:
- Bewaar benzine in daarvoor bestemde
containers;
- Tank alleen in open lucht en nooit bij
draaiende motor of warme machine;
- Open de tankdop langzaam zodat
overdruk kan worden afgebouwd;
- Rook niet tijdens het tanken;
- Vermijd contact met de huid en inademing
van dampen;
- Verwijder gemorste brandstof;
- Houd benzine weg van vonken, open vuur
en van alle andere ontstekingsbronnen;
- Voer benzineresten op milieuvriendelijke
wijze af (zie "Afvalverwerking/
milieubescherming").
- Gebruik geen mengsel van
benzine en olie;
- Gebruik loodvrije super of
normale benzine;
- Gebruik alleen schone, verse
benzine;
- Bewaar brandstof niet langer dan
één maand, omdat de kwaliteit
ervan achteruit gaat.
1. Schroef de tankdop (
H
en vul benzine bij tot aan de
onderkant van de vulpijp (31). Vul
de tank niet volledig, zodat de
A
8) af
benzine nog plaats heeft om uit te
zetten.
2. Wis benzineresten rond de
tankdop weg en sluit de tankdop.
Bediening
Het kan tijdens de werking niet
worden vermeden dat het milieu
wordt blootgesteld aan het
geluidsniveau dat door dit toestel
wordt opgewekt. Voer lawaaierige
activiteiten uit op hiervoor geschikte
en voorziene tijdstippen. Neem
rusttijden in acht en beperk de
werkuren met dit toestel tot een
minimum. Voor uw persoonlijke
bescherming en de bescherming
van personen in de nabijheid
van het toestel dient geschikte
gehoorbescherming te worden
gedragen.
De motor in- en uitschakelen
Waarschuwing! Benzine is
ontvlambaar. Start de motor
minstens 3 meter verwijderd
van de vullocatie. Er is
brandgevaar.
Start het toestel op een vaste, vlakke
ondergrond, indien mogelijk niet
in lang gras. Zorg ervoor dat het
snijgereedschap noch voorwerpen,
noch de grond raakt.
Voor uw veiligheid: Ga steeds achter
het toestel staan wanneer u het start.
75
Page 80

NL
Controleer regelmatig het benzine- en
oliepeil (zie "Ingebruikstelling") en vul
op tijd bij.
Koudstart:
I
1. Druk 3x op de primer (32)
(brandstofpomp).
2. Trek en houd de veiligheidsbeugel (2)
tegen de beugelgreep (
3. Trek aan de startgreep (7).
4. Wanneer de motor start, laat u de
startgreep langzaam terug in de
startkoord-geleider (3) glijden.
Motor uitschakelen:
• Laat de veiligheidsbeugel (2) los. De
motor wordt uitgeschakeld en het mes
wordt afgeremd.
Mesrem:
Controleer regelmatig de mesrem:
Laat de veiligheidsbeugel (2) los.
De motor wordt uitgeschakeld en het mes
wordt afgeremd. Het mes moet binnen 3
seconden tot stilstand komen.
Maaien
A
1).
1. Start de motor (zie
J
2. Houd tijdens het maaien
de beugelgreep (1) en de
veiligheidsbeugel (2) met beide
handen vast.
)
I
Werkvoorschriften
Algemene werkvoorschriften
• Maai het gras zo droog mogelijk om de
graszode te beschermen.
• Stel de maaihoogte zo in, dat het toestel
niet wordt overbelast.
• Bedien de machine stapvoets en maak
zo recht mogelijke banen. Om geen gras
te laten staan, moeten de banen elkaar
telkens een paar centimeter overlappen.
• Beweeg niet achteruit.
• Maai op hellingen steeds alleen dwars
op de helling.
• Zet de motor onmiddellijk uit wanneer
het mes in contact komt met een vreemd
voorwerp. Wacht tot het mes stil staat
en controleer het toestel op schade.
Werk alleen verder als het toestel niet
beschadigd is.
• Zet het toestel uit bij langere pauzes en
voor het transport en wacht tot het mes
stilstaat.
• Reinig het toestel na elk gebruik, zoals
beschreven in "Reiniging en onderhoud".
Bij een warme start is het niet nodig
op de primer (32) te drukken.
Wanneer de primer te vaak wordt
ingedrukt, geraakt te veel brandstof
in de carburateur (hij "verzuipt") en
zal de motor moeilijk starten.
76
Page 81

NL
Maaihoogte instellen
Het toestel heeft 5 standen voor het instellen
van de maaihoogte (25-34-46-60-75 mm):
1. Trek de hendel (17) naar buiten en
K
De juiste maaihoogte voor een siergazon
is ongeveer 30 – 45 mm en voor een
gebruiksgazon ongeveer 40 – 65 mm.
verplaats deze in de gewenste positie
(33).
2. Duw de hendel (17) terug naar
binnen.
Stel voor de eerste maaibeurt van het
seizoen een iets grotere maaihoogte in.
Grasopvangbak legen
Vulaanduiding:
Door de op de zijkant van de bak( A 20)
gemonteerde vulaanduiding (
zien wanneer de bak vol is.
Vulaanduiding gesloten:
Grasopvangbak leeg
Vulaanduiding gesloten:
Grasopvangbak vol
1. Schakel de motor uit en wacht tot het
L
mes stil staat.
2. Til de stootbescherming achter op
(22) en neem de grasopvangbak (20)
weg.
3. Draag de grasopvangbak naar
de stortplaats en kiep hem leeg.
Voor eenvoudig legen houdt u
24) kunt u
A
de grasopvangbak vast aan de
onderste greep (23a). Plaats de
grasopvangbak terug.
Reiniging en onderhoud
Laat reparatie- en
onderhoudswerken die
niet in deze handleiding
worden beschreven in een
gespecialiseerde werkplaats
uitvoeren. Gebruik alleen
door de fabrikant aanbevolen
reserveonderdelen. Gevaar voor
ongevallen!
Voer onderhouds- en
schoonmaakwerkzaamheden
altijd uit met uitgeschakelde
motor en afgetrokken
bougiekap. Gevaar voor letsel!
Laat het toestel afkoelen
alvorens onderhouds- en
reinigingswerkzaamheden uit
te voeren. Sommige delen van
de motor zijn heet. Gevaar voor
verbranding!
Draag handschoenen bij hanteren van
het mes.
Let voor de reinigings- en
onderhoudswerkzaamheden ook op de
meegeleverde handleiding van Briggs &
Stratton.
Wij raden u aan voor onderhoud aan
de motor contact op te nemen met een
geautoriseerde Briggs & Stratton dealer
(zie Briggs & Stratton dealerlijst).
77
Page 82

NL
Reiniging en algemeen
onderhoud
Verwijder de grasopvangbak en klap
M
de bovenste handgreep (1) in. Leg
het toestel om het te reinigen en voor
onderhoudswerkzaamheden op de
rugzijde, zodat de bougie naar boven
wijst.
Zorg ervoor dat een tweede persoon
het toestel vasthoudt, omdat het gevaar
bestaat, dat het toestel naar achter
wegkantelt.
Kantel het toestel niet op de zijkant of
naar voren. Bedrijfsvloeistoffen kunnen
lekken en de motor beschadigen.
• Houd het toestel altijd schoon. Gebruik
voor het schoonmaken een borstel
of een doek, maar geen agressieve
schoonmaakmiddelen of oplosmiddelen.
Gebruik voor het schoonmaken van
de motor geen water; dit zou het
brandstofsysteem kunnen verontreinigen.
• Verwijder na het maaien aanklevende
plantenresten met een stuk hout of
kunststof. Maak met name de ventilatie-
openingen (
en de zone rond het mes schoon.
Gebruik geen harde of puntige
voorwerpen omdat deze het toestel
zouden kunnen beschadigen.
• Controleer de grasmaaier voor elk
gebruik op zichtbare gebreken zoals
losse, versleten of beschadigde
onderdelen. Controleer of alle moeren,
bouten en schroeven vastzitten.
• Controleer de afdekkingen en
bescherminrichtingen (2, 11, 14, 22) op
11), de uitwerpopening
A
schade en correcte plaatsing. Vervang
deze indien nodig.
Luchtfilter reinigen/
vervangen
Gebruik het toestel nooit zonder
luchtfilter, omdat anders stof en vuil in de
motor kunnen raken en schade aan de
machine veroorzaken.
1. Trek de bougiekap (
N
"Bougie onderhouden")
2. Open de luchtfilterdoos (9) en
verwijder het luchtfilter (10).
3. Reinig het luchtfilter (10) in een sopje
en laat het drogen. Voeg een paar
druppels verse olie in het luchtfilter.
4. Om te monteren plaatst u de
luchtfilter (10) in de luchtfilterdoos (9)
en sluit u deze af.
12) af (zie
A
Bougie onderhouden
Versleten bougies of een te grote
ontstekingsafstand leiden tot een
vermindering van het motorvermogen.
1. Trek de bougiekap (12) van de
O
bougie (13) door gelijktijdig trekken
en draaien.
2. Schroef de bougie (13) linksom uit
met de meegeleverde bougiesleutel
A
(
27).
3. Controleer de ontstekingsafstand
met behulp van een voelermaat
(verkrijgbaar in de vakhandel). De
ontstekingsafstand moet minimaal
0,51 mm zijn.
4. Stel de afstand eventueel in door
78
Page 83

NL
de massa-elektrode op de bougie
voorzichtig te verbuigen.
5. Reinig de bougie met een
staalborstel.
6. Plaatse de gereinigde en afgestelde
bougie terug of vervang de
beschadigde door een nieuwe
(aanbevolen aandraaikoppel 20
Nm, bepaald met behulp van
een momentsleutel) (zie "Reserveonderdelen/accessoires").
Motorolie vervangen
Ververs de motorolie bij een lege
benzinetank en warme motor.
Leeg de tank met een geschikte
benzinepomp. Als alternatief kunt u
het zo inplannen dat u de resterende
benzine tijdens het maaien verbruikt.
• Voer de eerste olieverversing
uit na ongeveer 5 uur gebruik,
daarna om de 50 uur of één keer
per jaar.
• Voer de gebruikte olie ecologisch
af (zie "Afvalverwerking/
milieubescherming").
Mes controleren/slijpen/
vervangen
Laat het mes alleen in een
gespecialiseerde werkplaats in- en
uitbouwen.
Draag handschoenen bij hanteren
van het mes.
• Trek de bougiekap (
controleer het mes op schade en slijtage.
• Laat een bot mes altijd slijpen door een
werkplaats, omdat deze ook de onbalans
kan testen.
• Laat een beschadigd mes of een mes
met onbalans altijd in een werkplaats
vervangen.
Een ondeskundige installatie
kan tot ernstig letsel leiden.
A
12) af en
Carburateur afstellen
De carburateur is in de fabriek afgesteld
voor optimale prestaties. Als aanpassingen
achteraf nodig zijn, laat deze dan uitvoeren
door een gespecialiseerde werkplaats..
1. Trek de bougiekap (
"Bougie onderhouden")
2. Open de olietankdop (
de olie met een oliepomp af.
3. Vul verse motorolie bij (zie
"Inbedrijfstelling").
A
12) af (zie
A
19) en pomp
79
Page 84

NL
Opslag
Algemene aanwijzingen voor
opslag
Bewaar het toestel niet met de
opvangbak gevuld. Bij warm
weer begint het gras onder
invloed van de hitte te gisten.
Er is brandgevaar.
• Reinig en onderhoud het toestel voordat
u het opbergt.
• Laat de motor afkoelen voordat u het
toestel in een afgesloten ruimte parkeert.
• Gebruik voor de opslag van brandstof
geschikte en goedgekeurde recipiënten.
• Bewaar het toestel op een droge en
stofvrije plaats, buiten het bereik van
kinderen.
• Pak het toestel niet in met plastic zakken,
omdat zich dan vocht en schimmels
kunnen vormen.
Opslag tijdens de winterpauze
Het negeren van de opslaginstructies
kan door brandstofresten in de
carburateur tot startproblemen of
permanente schade leiden.
• Start de motor en laat deze lopen totdat
hij stilvalt door gebrek aan benzine.
• Ververs de olie (zie "Motorolie
verversen").
• Conserveer de motor:
- Draai de bougie (
"Reiniging en onderhoud");
- Vul door het gat van de bougie een
eetlepel motorolie in de motorruimte;
- Trek meermaals langzaam aan de
startkoord (
veiligheidsbeugel (
binnenin de motor te verdelen;
- Schroef de bougie (
vast.
• Voer gebruikte olie en benzineresten
ecologisch af (zie "Afvalverwerking/
milieubescherming").
I I
O
13) uit (zie
7) bij ingetrokken
I I
2), om de olie
O
13) opnieuw
Het toestel samenvouwen
Voor ruimtebesparend opbergen kunt u de
bovenste beugel naar beneden klappen.
1 Verwijder de grasopvangbak
P
(20).
2 Haak de starterkoord (A 7) uit.
3 Maak de snelspanhendel (21/25)
los aan de onderste (4) en de
bovenste beugel (1).
4 Klap de beide beugels weer
naar beneden. De Bowdenkabel
(5) mag daarbij niet geklemd
worden.
80
De brandstoftank moet niet worden
geleegd als u aan de brandstof een
brandstofstabilisator toevoegt (zie
"vervangonderdelen" en handleiding
Briggs & Stratton).
Page 85

Afvalverwerking /
milieubescherming
• Dien het toestel aan het einde van zijn
levenscyclus, inclusief accessoires en
verpakking in voor een milieuvriendelijke
recycling.
- Maak de benzine- en olietank
zorgvuldig leeg en voer uw toestel naar
een recyclingpunt. De gebruikte kunststof
en metalen onderdelen kunnen worden
gesorteerd en gerecycled.
- Voer oude olie en resterende
brandstof naar een containerpark en giet
deze niet in de riolering of in de afvoer.
- Raadpleeg onze service-centers
voor meer info.
• Het afdanken van uw defecte apparaten,
die u ons hebt toegestuurd, voeren wij
gratis door.
• Gooi maaisel niet in de vuilnisbak, maar
voer het af om te composteren of strooi
het als mulchlaag uit onder struiken en
bomen.
NL
81
Page 86

NL
Onderhoudsintervallen
Voer de onderhoudswerkzaamheden uit de tabel regelmatig door. Met regelmatig
onderhoud verlengt u de levensduur van het toestel. U bereikt optimale maaiprestaties en
vermijdt ongelukken.
Onderhoudswerkzaamheden (zie
"Reiniging en onderhoud")
Controleer schroeven, moeren,
bouten en trek deze aan.
Controleer oliepeil/brandstofpeil
en vul motorolie/benzine bij
indien nodig
Reinig bedieningselementen/
gebied rondom de knaldemper
Vingerbescherming b
Motorolie vervangen
Luchtfilter reinigen a
Bougie reinigen/afstellen/
vervangen
Knaldemper en vonkenvanger
controleren b
Luchtkoelsysteem reinigen (a, b)
a vervang vaker in erg stoffige omstandigheden of bij erg sterke vervuiling
b Zie handleiding van Briggs & Stratton
Voor Na
het werk
Na de
eerste
5 uren
8 uren
Na
Na
50
uren
Jaarlijks
82
Page 87

Foutopsporing
Probleem Mogelijke oorzaak Problemen oplossen
Te weinig benzine in de tank Benzine bijvullen
Volg de instructies voor het starten van
de motor (zie "Bediening")
Bougiekap opsteken. Reinig, verstel of
vervang de bougie (zie "Reiniging en
onderhoud")
Laat de carburateur in de werkplaats
afstellen
Vervang de luchtfilter (zie "Reiniging en
onderhoud")
Laat de carburateur in de werkplaats
afstellen
Laat de carburateur in de werkplaats
afstellen
Reinig, verstel of vervang de bougie (zie
"Reiniging en onderhoud")
Vervang de luchtfilter (zie "Reiniging en
onderhoud")
Pas de maaihoogte aan (zie
"Maaihoogte instellen")
Mes in de werkplaats laten scherpen of
vervangen.
Verwijder het gras (zie "Reiniging en
onderhoud")
Laat het mes in de werkplaats monteren
Motor start niet
Motor start, maar
het toestel werkt
niet op volle
kracht
Motor hapert,
stopt
Motor raakt
oververhit
Motor rookt
Werkresultaat
niet bevredigend
of motor loopt
niet soepel
Mes draait niet
Ongewone
geluiden,
geklepper of
trillingen
Onjuiste startvolgorde
A
Bougiekap (
opgestoken
Vervuilde bougie (
Vuil luchtfilter (
Verkeerd afgestelde carburateur
Verkeerd afgestelde carburateur
Vervuilde bougie (
Ventilatiesleuven (
Verkeerde bougie (
Te weinig motorolie in de motor Vul motorolie bij (zie "Ingebruikstelling")
Vuil luchtfilter (
Te weinig motorolie in de motor Vul motorolie bij (zie "Ingebruikstelling")
Gras te kort of te lang
Mes bot
Mes geblokkeerd door
gras, grasopvangbak vol,
uitwerpopening verstopt
Mes door gras geblokkeerd Verwijder gras
Mes niet correct gemonteerd Laat het mes in de werkplaats monteren
Mes niet correct gemonteerd
Mes beschadigd
12) niet correct
O
13)
N
10)
O
13)
A
11) verstopt Reinig de verluchtingsopeningen
O
13) Vervang de bougie
N
10)
NL
83
Page 88

NL
Garantie
Geachte klant,
Op dit toestel wordt een garantie van 3 jaar
vanaf de aankoopdatum gegeven.
Houd rekening met mogelijk afwijkende
garantiebepalingen voor de motor. Lees
daarvoor aandachtig de meegeleverde
handleiding van de motorfabrikant "Briggs &
Stratton".
Deze garantie heeft geen invloed op
uw wettelijke aanspraken op garantie.
Bij gebreken hebt u recht op wettelijke
garantieclaims tegen de verkoper van het
product. Deze wettelijke garantieclaims
worden niet beïnvloed door onze garantie
die hierna wordt voorgesteld.
Garantiebepalingen
De garantietermijn begint te lopen bij de
datum van aankoop. Bewaar de originele
aankoopbon. Dit document is vereist als
bewijs van aankoop.
Indien binnen drie jaar na de
aankoopdatum, een materiaal- of
fabricagefout aan dit product optreedt,
repareren of vervangen wij — afhankelijk
van onze keuze — het product gratis. Voor
deze garantieprestatie moet u binnen de
periode van 3 jaar het defecte toestel en een
bewijs van aankoop voorleggen, samen met
een korte schriftelijke omschrijving van het
defect en wanneer het is opgetreden. Als
het defect door onze garantie wordt gedekt,
zult u ofwel het gerepareerde product of een
nieuw product ontvangen. Na de reparatie
of vervanging van het product begint geen
nieuwe garantieperiode.
Garantietermijn en
wettelijke bepalingen
Wettelijke garantieclaims
De garantieperiode wordt niet verlengd
door de service onder de garantie. Dit geldt
eveneens voor vervangen of gerepareerde
onderdelen. Alle schade en gebreken
die reeds bestonden op het moment van
aankoop, moeten onmiddellijk na het
uitpakken worden gemeld. Na afloop van
de garantieperiode zijn alle eventuele
reparaties ten laste van de gebruiker.
Garantiedekking
Het toestel is met zorg vervaardigd volgens
strenge kwaliteitsnormen en nauwkeurig
gecontroleerd vóór de levering.
De garantie dekt alle materiaal- en
fabricagefouten. Deze garantie geldt niet
voor onderdelen die aan normale slijtage
onderhevig zijn en bijgevolg kunnen worden
beschouwd als slijtage-onderdelen (bijv. mes,
koolborstels, luchtfilter, starterkoord). Ook
breekbare onderdelen zijn uitgesloten van
deze garantie (bv. schakelaars).
Deze garantie geldt niet wanneer het
product beschadigd is, onjuist gebruikt of
niet onderhouden. Een precieze opvolging
van alle aanwijzingen uit de handleiding
is vereist voor een correct gebruik van
het product. Ieder gebruik en elke
handeling, dat/die niet wordt aanbevolen
in de handleiding of waarvoor wordt
gewaarschuwd, moet in principe worden
vermeden.
Het product is uitsluitend bestemd voor
privégebruik en niet voor commercieel
gebruik.
84
Page 89

NL
De garantie vervalt bij misbruik of
oneigenlijk gebruik, gebruik van geweld of
onjuiste behandeling of bij ingrepen die niet
door onze geautoriseerde service-vestigingen
zijn uitgevoerd.
Garantie-afhandeling
Volg de volgende instructies voor een snelle
afhandeling van uw probleem:
• Zorg ervoor dat u bij alle aanvragen
het aankoopticket en de identificatieinformatie (IAN 291839) als bewijs van
aankoop bij de hand hebt.
• Zoek het artikelnummer op het
typeplaatje.
• Neem in het geval van storingen of
andere tekortkomingen alstublieft eerst
telefonisch of per e-mail contact op
met onze service-afdeling. Zij geven u
verdere informatie voor de afhandeling
van uw klacht.
• Na overleg met onze klantendienst kan
een als defect gerapporteerd product
kosteloos worden verstuurd aan het u
meegedeelde service-adres, samen met
het aankoopbewijs (factuur) en een
schriftelijke mededeling over de aard
van het defect en het tijdstip van het
ontstaan ervan. Om problemen met de
aanname van de verzending en extra
kosten te vermijden, verstuurt u het
pakket alleen naar het u meegedeelde
adres. Zorg ervoor dat de verzending
niet wordt verstuurd onder rembours,
als bulkgoed, als express-verzending of
als een andere speciale lading. Verstuur
het toestel met alle op het moment van
de aankoop meegeleverde accessoires
en zorg voor een adequate en veilige
transportverpakking.
Reparatieservice
Tegen een vergoeding kunnen herstellingen
die niet door de garantie worden gedekt
worden uitgevoerd door onze klantenservice,
die u hiervoor graag een offerte stuurt.
Wij kunnen alleen toestellen verwerken
die ons in een geschikte verpakking en
voldoende gefrankeerd zijn toegestuurd.
Opgelet: Stuur uw toestel in schone staat
naar onze klantenservice, met vermelding
van de fout of het defect. Toestellen die ons
worden toegestuurd onder rembours, als
bulkgoed, als expressverzending of als een
andere speciale lading worden door onze
klantendienst niet geaccepteerd.
Wij danken uw naar ons opgestuurde
defecte toestellen gratis af.
85
Page 90

NL
Service-center
De bevoegde "Briggs & Stratton" Service is
verantwoordelijk voor motorproblemen met
uw grasmaaier, volgens de meegeleverde
dealerlijst.
NL
Service Nederland
Sertronics GmbH
Ostring 60
Tilkørsel via “An der Fuchshöhle“
D-66740 Saarlouis-Fraulautern
Germany
E-mail: gapo-service-de@sertronics.
de
Tlf.: 0043 12675668
Fax: 0049 21529603111
IAN 291839
Importeur
Houd er rekening mee dat het volgende
adres geen service-adres is. Neem voor
service-prestaties alstublieft eerst contact
op met de hierboven aangegeven serviceafdeling.
Ga-Po Vertrieb GmbH
Heinrich-Horten-Straße 5
47906 Kempen, Duitsland
86
Page 91

Inhalt
DE AT CH
Einleitung.....................................88
Verwendungszweck..................88
Allgemeine Beschreibung..............88
Lieferumfang..............................88
Übersicht...............................89
Funktionsbeschreibung................89
Schutzeinrichtungen.................89
Technische Daten.…..............90
Bildzeichen/Symbole..................90
Symbole auf dem Gerät................90
Bildzeichen in der Anleitung.............92
Sicherheitshinweise.................92
Inbetriebnahme............................95
Griffholm montieren...................95
Starterseil montieren....................96
Grasfangkorb montieren................96
Motoröl einfüllen und Ölstand
kontrollieren
Benzin einfüllen..........
Bedienung....................................97
Motor starten und stoppen............97
Mähen.....
Arbeitshinweise..........................98
Allgemeine Arbeitshinweise..........98
Schnitthöhe einstellen...................99
Grasfangkorb entleeren………….....99
......
......
..........
.........
.........
......
................97
......
.........
......
......
......
..96
.98
Reinigung und Wartung...............99
Reinigung und allgemeine Wartungs-
arbeiten........................................100
Luftfilter reinigen/austauschen.........100
Zündkerze warten.........................100
Motoröl wechseln.........................101
Messer prüfen/schleifen/austauschen
...................................................101
Vergaser einstellen.........................101
Lagerung...................................102
Allgemeine Lagerungshinweise.......102
Gerät zusammenklappen..............102
Lagerung in der Winterpause........102
Entsorgung/Umweltschutz..........103
Wartungsintervalle..................104
Fehlersuche...............................105
Garantie....................................106
Reparatur-Service......................107
Service-Center............................108
Importeur..................................108
Original EU
Konformitätserklärung……......…109
87
Page 92

DE AT CH
Einleitung
Herzlichen Glückwunsch zum Kauf Ihres
neuen Rasenmähers.Sie haben damit ein
hochwertiges Gerät erworben.
Bei der Herstellung wurde das Gerät
einer Qualitäts- und Abschlusskontrolle
unterworfen, wodurch die Funktionalität
Ihres Gerätes gewährleistet ist.
Die Betriebsanleitung ist Teil des
Produktes. Sie enthält wichtige
Informationen zur Sicherheit,
Benutzung und Entsorgung.
Lesen Sie diese Betriebsanleitung
und die Briggs & Stratton
Betriebsanleitung vor der ersten
Inbetriebnahme aufmerksam durch,
um eine falsche Handhabung zu
vermeiden.
Verwenden Sie das Produkt nur
wie beschrieben und nur für die
angegebenen Anwendungen.
Bewahren Sie die Anleitungen gut
auf und geben Sie sie an jeden
nachfolgenden Benutzer weiter.
Verwendungszweck
Das Gerät ist nur für das Mähen von Rasenund Grasflächen im häuslichen Bereich
bestimmt.
Dieses Gerät ist nicht zur gewerblichen
Nutzung geeignet. Bei gewerblichem
Einsatz verfällt die Garantie.
Jede andere Verwendung, die in dieser
Anleitung nicht ausdrücklich zugelassen
wird, kann zu Schäden am Gerät führen
und eine ernsthafte Gefahr für den Benutzer
darstellen.
Das Gerät ist zum Gebrauch durch
Erwachsene bestimmt. Kinder sowie
Personen, die mit dieser Anleitung nicht
vertraut sind, dürfen das Gerät nicht
benutzen.
Der Bediener oder Nutzer ist für Unfälle
oder Schäden an anderen Menschen oder
deren Eigentum verantwortlich.
Allgemeine Beschreibung
Die Abbildung der wichtigsten
Funktionsteile finden Sie auf
der vorderen und hinteren
Ausklappseite.
Lieferumfang
Nehmen Sie das Gerät vorsichtig aus der
Verpackung und prüfen Sie, ob die
nachfolgenden Teile vollständig sind:
- Rasenmäher (bereits montiert)
- Grasfangkorb
- Schnellspannhebel
- Ersatz-Zündkerze
- Zündkerzenschlüssel
- Betriebsanleitung
- Betriebsanleitung Briggs & Stratton
Entsorgen Sie das Verpackungsmaterial
ordnungsgemäß.
88
Page 93

DE AT CH
Übersicht
A
E
F
H
1 Oberer Griffholm
2 Sicherheitsbügel
3 Starterseil-Führung
4 Unterer Griffholm
5 Bowdenzug
6 Kabelklemme
7 Startergriff mit Starterseil
8 Tankdeckel
9 Luftfilterbox
10 Luftfilter (ohne Abbildung)
11 Motorabdeckung mit
Lüftungsschlitzen (Fingerschutz)
12 Zündkerzenstecker
13 Zündkerze (ohne Abbildung)
14 Auspuffschutz
15 2 Vorderräder
16 Stahlblechgehäuse
17 Hebel zur Schnittstellen Einstellung
18 Hinterräder (x2)
19 Öltankkappe mit Ölmessstab
20 Grasfangkorb
21 2 Schnellspannhebel zur
Holmbefestigung unten
22 Hinterer Prallschutz
23 Tragegriff Grasfangkorb
23a Unterer Griff zum Entleeren des
Grasfangkorbs (ohne Abbildung)
24 Füllstandsanzeige
25 2 Schnellspannhebel zur
Holmbefestigung am oberen Griff
26 Ersatz-Zündkerze
27 Zündkerzenschlüssel
28 Plastikstrips Fangkorb
29 Fangkorbstange
30 Grasfangkorb Aufhängung
31 Einfüllstutzen
Funktionsbeschreibung
Das Gerät wird mit einem leistungsfähigen
4-Takt-Motor (Briggs & Stratton 450 E Series)
angetrieben.
Das Gerät ist mit einem hochwertigen
Stahlblechgehäuse, einem Grasfangkorb
und einem zusammenklappbaren Griffholm
ausgestattet.
Die Funktion der Bedienteile entnehmen
Sie bitte den nachfolgenden
Beschreibungen.
Schutzeinrichtungen
2 Sicherheitsbügel
A
Bei Loslassen des Sicherheitsbügels stoppt das Gerät.
14 Auspuffschutz
Verhindert, dass Hände oder
brennbare Materialien mit
einem heißen Auspuff in Kontakt
kommen.
22 Hinterer Prallschutz
Schützt die Bedienperson vor
weggeschleuderten Teilen
und vor unbeabsichtigter
Messerberührung, wenn ohne
Grasfangkorb gemäht wird.
I
32 Benzinpumpe (Primer)
33 Position Schnitthöhe
K
89
Page 94

DE AT CH
Technische Daten
Motor ..................4-Takt B&S 450 E Series
Motorhubraum............................ 125 cm
Leistungsaufnahme....... 1,82 kW (2,47 PS)
Engine speed....…………........... 2900min
Anziehdrehmoment Messer…......…. 45Nm
Volumen Benzintank.......................... 0,8 l
Oktanzahl.......................................95-98
Volumen Motoröltank.......................0,47 l
Zündkerze...................ChampionQC12YC
Schnittkreis… ........................... ø 420 mm
Schnitthöhe…..5-stufig, 25-34-46-60-75 mm
Volumen Grasfangkorb……….............. 55l
Gewicht (inkl. Fangkorb)................25,2 kg
Schalldruckpegel
PA
(L
) .................. 81,7 dB(A); K=3,0 dB(A)
Schallleistungspegel (L
gemessen.......... 94,5 dB(A); K=1,80 dB(A)
garantiert ................................ 96 dB(A)
Vibration am Handgriff
(
)..............6,67/5,69 m/s2; K=1,5 m/s
h
a
Lärm- und Vibrationswerte wurden
entsprechend den in der Konformitätserklärung genannten Normen und Bestimmungen ermittelt.
Technische und optische Veränderungen
können im Zuge der Weiterentwicklung
ohne Ankündigung vorgenommen werden.
Alle Maße, Hinweise und Angaben dieser
Betriebsanleitung sind deshalb ohne
Gewähr. Rechtsansprüche, die aufgrund der
Betriebsanleitung gestellt werden, können
daher nicht geltend gemacht werden.
WA
)
ren verwendet werden.
Der angegebene Schwingungsemissionswert kann auch zu einer einleitenden
3
Einschätzung der Lärmbelastung verwendet
werden.
-1
Warnung:
Der Schwingungsemissionswert
kann sich während der tatsächlichen
Benutzung des Gerätes von dem
angegebenen Wert unterscheiden,
abhängig von der Art und Weise, in
der das Gerät verwendet wird.
Es besteht die Notwendigkeit,
Sicherheitsmaßnahmen zum
Schutz des Bedieners zu treffen,
die auf einer Abschätzung
der Lärmbelastung unter den
tatsächlichen Nutzungsbedingungen
beruhen (hierbei sind alle Teile des
Betriebszyklus zu berücksichtigen,
2
einschließlich beispielsweise Zeiten,
in denen das Gerät abgeschaltet ist,
und solchen Zeiten, in denen es zwar
eingeschaltet ist, aber ohne Belastung
läuft).
Bildzeichen/Symbole
Symbole auf dem Gerät
Achtung!
Betriebsanleitung lesen.
Der angegebene Schwingungsemissionswert wurde nach einem genormten
Prüfverfahren gemessen und kann zum
Vergleich eines Gerätes mit einem ande-
90
Verletzungsgefahr durch
herausgeschleuderte Teile.
Umstehende Personen von dem
Gerät fernhalten.
Page 95

DE AT CH
Verletzungsgefahr durch scharfe
Messer.
Füße und Hände fernhalten.
Vorsicht! Vor dem Start
Ölstand prüfen.
Bildzeichen an der Öltankkappe:
Vorsicht -- giftige Dämpfe!
Nicht rauchen und Gerät nicht in
geschlossenen Räumen betreiben.
Bildzeichen auf dem Tank:
Hinweis auf Öleinfüllstutzen
Achtung!
Vorsicht -- Benzin ist entzündlich!
Nicht rauchen und Wärmequellen
fernhalten!
Betriebsanleitung lesen.
Vorsicht – Benzin ist entzündlich!
Motor vor dem Auftanken mind. 2
Min. abkühlen lassen.
Gerät keiner Feuchtigkeit aussetzen.
Nicht im Regen arbeiten.
Vorsicht! Messer läuft nach
Abschalten weiter.
Vorsicht – giftige CO-Dämpfe!
Betreiben Sie das Gerät nicht in
geschlossenen Räumen.
Vorsicht – heiße Flächen!
Vorsicht – Verletzungsgefahr!
Vor Wartungsarbeiten
Motor ausschalten und
Bildzeichen an der Benzinpumpe:
Verbrennungsgefahr.
Zündkerzenstecker ziehen.
Benzinpumpe (Primer) vor dem Start
Vorsicht – heiße Flächen!
Verbrennungsgefahr.
3 x drücken.
Vorsicht – Verletzungsgefahr!
Tragen Sie Augen- und
Gehörschutz.
Angabe des
Schallleistungspegels
L
in dB.
WA
Bildzeichen am Tankdeckel:
Hinweis auf Benzineinfüllstutzen:
Keine E85-Mischung einfüllen!
Bildzeichen am Griffholm:
Angaben zum Starten
und Stoppen des
Motors
I
ON
0
OFF
Gerät einschalten (ON):
Sicherheitsbügel hochziehen.
Gerät ausschalten (OFF):
Sicherheitsbügel loslassen.
91
Page 96

DE AT CH
Füllstandsanzeige:
Füllstandsanzeige geöffnet:
Grasfangkorb leer
Füllstandsanzeige geschlossen:
Grasfangkorb voll
Bildzeichen in der Anleitung
Gefahrenzeichen mit Angaben
zur Verhinderung von
Personen- oder Sachschäden.
Anweisungszeichen (an der Stelle
des Ausrufungszeichens wird die
Anweisung erläutert) mit Angaben
zur Verhütung von Schäden.
Hinweiszeichen mit Informationen
zum besseren Umgang mit dem
Gerät.
Sicherheitshinweise
Dieser Abschnitt behandelt die
grundlegenden Sicherheitsvorschriften bei
der Arbeit mit dem Gerät.
WARNUNG! Lesen Sie
alle Sicherheitshinweise und
Anweisungen.Die Nichtbefolgung der
Sicherheitshinweise und Anweisungen
kann elektrischen Schlag, Brand
und/oder schwere Verletzungen
verursachen.
Hinweise:
• Lesen Sie die Betriebsanleitung
sorgfältig. Machen Sie sich mit den
Einstellungsmöglichkeiten und dem
richtigen Gebrauch des Gerätes vertraut.
• Sollten Sie sich bezüglich der korrekten
benutzung des Gerätes oder verbotener
Anwendung unsicher sein, so suchen Sie
Rat von Dritten.
• Seien Sie aufmerksam, achten Sie darauf,
was Sie tun, und seien Sie bei der Arbeit
vorsichtig. Gebrauchen Sie das Gerät
nicht, wenn Sie müde oder krank sind
oder unter dem Einfluss von Drogen,
Alkohol oder Medi kamenten stehen.
Ein Moment der Unachtsamkeit beim
Gebrauch des Gerätes kann zu schweren
Verletzungen führen.
• Dieses Gerät ist nicht dafür bestimmt,
durch Personen mit eingeschränkten
physischen, sensorischen oder geistigen
Fähigkeiten oder mangelnder Erfahrung
bzw. mangelndem Wissen benutzt zu
werden, es sei denn, sie werden durch
eine für ihre Sicherheit zuständige
Person beaufsichtigt oder erhalten von
ihr Anweisungen, wie das Gerät zu
benutzen ist.
• Kinder müssen beaufsichtigt werden, um
sicherzustellen, dass sie nicht mit dem
Gerät spielen.
• Erlauben Sie niemals Kindern oder
Personen, die die Betriebsanleitung nicht
kennen, das Gerät zu benutzen.Örtliche
Bestimmungen können das Mindestalter
des Benutzers festlegen.
• Mähen Sie niemals, wenn Personen –
insbesondere Kinder – oder Tiere in der
Nähe sind. Bei Ablenkung können Sie
die Kontrolle über das Gerät verlieren.
• Der Bediener oder Nutzer ist für Unfälle
mit anderen Personen oder deren
Eigentum verantwortlich.
• Beachten Sie den Lärmschutz und örtliche
Vorschriften.
92
Page 97

DE AT CH
Vorbereitende Maßnahmen:
• Während des Mähens sind immer
rutschfeste Schuhe und lange Hosen zu
tragen. Mähen Sie nicht barfüßig oder
in leichten Sandalen. Lockere Kleidung,
Schmuck oder lange Haare können
von sich bewegenden Teilen erfasst
werden. Das Tragen geeigneter Kleidung
verringert das Verletzungsrisiko.
• Überprüfen Sie das Gelände, auf dem
das Gerät eingesetzt wird, und entfernen
Sie alle Gegenstände (Steine, Stöcke,
Drähte, Spielzeug), die erfasst und
weggeschleudert werden können.
• Warnung: Benzin ist hochgradig
entflammbar.
Feuer oder Explosionen können zu
schweren Verletzungen führen:
- Bewahren Sie Benzin nur in den dafür
vorgesehenen Behältern auf;
- Tanken Sie nur im Freien und rauchen
Sie nicht während des Einfüllvorgangs;
- Füllen Sie Benzin ein, bevor Sie den
Motor starten. Während der Motor
läuft oder bei heißem Gerät darf der
Tankdeckel nicht geöffnet oder Benzin
nachgefüllt werden;
- Wenn Benzin verschüttet wurde oder
übergelaufen ist, darf kein Versuch
unternommen werden, den Motor zu
starten. Stattdessen ist das Gerät von der
benzinverschmutzten Fläche zu entfernen.
Jeglicher Zündversuch ist zu vermeiden,
bis sich die Benzindämpfe verflüchtigt
haben.
- Aus Sicherheitsgründen sind Benzintankund andere Tankdeckel bei Beschädigung
auszutauschen.
• Ersetzen Sie defekte Schalldämpfer.
• Vor dem Gebrauch ist immer durch
Sichtkontrolle zu prüfen, ob die
Schneidwerkzeuge, Befestigungsbolzen und die gesamte Schneideinrichtung abgenutzt oder beschädigt
sind. Zur Vermeidung einer Unwucht
dürfen abgenutzte oder beschädigte
Werkzeuge und Bolzen nur satzweise
ausgetauscht werden.
• Seien Sie vorsichtig bei Geräten mit
mehreren Schneidewerkzeugen, da die
Bewegung eines Messers zur Rotation
der übrigen Messer führen kann.
• Benutzen Sie nur Ersatz- und
Zubehörteile, die vom Hersteller geliefert
und empfohlen werden. Der Einsatz von
Fremdteilen kann Verletzungen zur Folge
haben und führt zum sofortigen Verlust
des Garantieanspruches.
Handhabung:
• Lassen Sie den Verbrennungsmotor nicht
in geschlossenen Räumen laufen, in
denen sich gefährliches Kohlenmonoxid
sammeln kann.
• Mähen Sie nur bei Tageslicht oder
bei guter künstlicher Beleuchtung. Ein
unbeleuchteter Arbeitsbereich kann zu
Unfällen führen.
• Vermeiden Sie, wenn möglich, den
Einsatz des Gerätes in nassem Gras.
• Achten Sie immer auf einen sicheren
Stand, besonders an Hängen, Hügeln,
Gräben oder Deichen. Dadurch
können Sie das Gerät in unerwarteten
Situationen besser kontrollieren.
- Arbeiten Sie immer quer zum Hang,
niemals auf- oder abwärts.
- Seien Sie besonders vorsichtig, wenn
Sie die Fahrtrichtung am Hang ändern.
- Mähen Sie nicht an übermäßig steilen
Hängen (max. 10°).
• Führen Sie das Gerät nur im Schritttempo.
• Seien Sie besonders vorsichtig, wenn
Sie das Gerät umkehren oder es zu sich
heranziehen.
• Halten Sie das Schneidwerkzeug an,
wenn das Gerät gekippt werden muss,
sowie zum Transport über andere
93
Page 98

DE AT CH
Flächen als Gras und wenn das Gerät
von und zu der zu mähenden Fläche
bewegt wird.
• Benutzen Sie das Gerät niemals mit
beschädigten Schutzeinrichtungen oder
ohne angebaute Schutzeinrichtungen,
z.B. Prallschutz und/oder
Grasfangeinrichtungen. Damit wird
sichergestellt, dass die Sicherheit des
Gerätes erhalten bleibt.
• Ändern Sie nicht die Reglereinstellung
des Motors und überdrehen Sie ihn nicht.
Sie könnten das Gerät beschädigen.
• Entriegeln Sie vor dem Anlassen des
Motors alle Schneidwerkzeuge und
Antriebe.
• Lassen Sie beim Starten oder Anlassen
des Motors Vorsicht walten, entsprechend
den Herstelleranweisungen. Achten Sie
auf ausreichenden Abstand zwischen
Ihren Füßen und dem Schneidwerkzeug.
Es besteht Verletzungsgefahr.
• Beim Starten oder Anlassen des Motors
darf das Gerät nicht gekippt werden,
es sei denn, das Gerät muss bei dem
Vorgang angehoben werden. In diesem
Fall kippen Sie das Gerät nur so weit,
wie es unbedingt erforderlich ist,
und heben Sie nur die vom Benutzer
abgewandte Seite an.
• Starten Sie den Motor nicht, wenn Sie
vor der Auswurföffnung stehen.
• Schalten Sie den Motor
anweisungsgemäß ein und nur dann,
wenn Ihre Füße in sicherem Abstand von
den Schneidwerkzeugen sind.
• Führen Sie niemals Hände oder Füße an
oder unter sich drehende Teile. Halten
Sie sich immer von der Auswurföffnung
fern. Ein Moment der Unachtsamkeit
bei Benutzung des Gerätes kann zu
schweren Verletzungen führen.
• Heben oder tragen Sie das Gerät nicht
mit laufendem Motor.
• Stellen Sie den Motor ab, ziehen Sie den
Zündkerzenstecker ab und vergewissern
Sie sich, dass alle beweglichen Teile still
stehen:
- bevor Sie Blockierungen lösen oder
Verstopfungen in der Auswurföffnung
beseitigen;
- bevor Sie das Gerät überprüfen,
reinigen oder daran arbeiten;
- wenn ein Fremdkörper getroffen wurde.
Suchen Sie nach Beschädigungen am
Gerät und führen Sie die erforderlichen
Reparaturen durch, bevor Sie erneut
starten und mit dem Gerät arbeiten;
- falls das Gerät anfängt, ungewöhnlich
stark zu vibrieren. In diesem Fall ist eine
sofortige Überprüfung erforderlich.
• Stellen Sie den Motor aus, ziehen Sie den
Zündkerzenstecker ab und vergewissern
Sie sich, dass alle beweglichen Teile still
stehen:
- wenn Sie das Gerät verlassen;
- bevor Sie nachtanken.
• Hinterlassen Sie das Gerät nie
unbeaufsichtigt am Arbeitsplatz.
• Arbeiten Sie nicht mit einem
beschädigten, unvollständigen oder
ohne die Zustimmung des Herstellers
umgebauten Gerät.
Der Gebrauch von Maschinen für andere
als die vorgesehenen Anwendungen
kann zu gefährlichen Situationen führen.
• Arbeiten Sie nicht mit dem Gerät, wenn
das Risiko eines Blitzschlags besteht. Es
besteht Stromschlaggefahr.
Wartung und Lagerung:
• Sorgen Sie dafür, dass alle Muttern,
Bolzen und Schrauben fest angezogen
sind und sich das Gerät in einem
sicheren Arbeitszustand befindet. Viele
Unfälle haben ihre Ursache in schlecht
gewarteten Geräten.
94
Page 99

DE AT CH
• Bewahren Sie das Gerät niemals mit
gefülltem Tank in einem Gebäude auf, in
dem Benzindämpfe eventuell mit offenem
Feuer oder Funken in Berührung kommen
können.
• Lassen Sie den Motor abkühlen, bevor
Sie das Gerät in geschlossenen Räumen
abstellen. Es besteht Brandgefahr.
• Um Brandgefahr zu vermeiden, halten Sie
den Motor, den Auspuff und den Bereich
um den Tank frei von Gras, Blättern oder
austretendem Fett (Öl).
• Prüfen Sie regelmäßig die
Grasfangeinrichtung auf Verschleiß oder
Verlust der Funktionsfähigkeit.
• Ersetzen Sie aus Sicherheitsgründen
abgenutzte oder beschädigte Teile.
Ersetzen Sie beschädigte Schalldämpfer.
• Falls der Kraftstofftank entleert werden
muss, sollte dies im Freien erfolgen.
• Behandeln Sie Ihr Gerät mit Sorgfalt.
Halten Sie die Werkzeuge scharf
und sauber, um besser und sicherer
arbeiten zu können. Befolgen Sie die
Wartungsvorschriften.
• Versuchen Sie nicht, das Gerät selbst zu
reparieren, es sei denn, Sie sind dafür
geschult.
Arbeiten, die nicht in dieser Anleitung
angegeben werden, dürfen nur durch
von uns autorisierte Kundendienststellen
ausgeführt werden.
• Bewahren Sie das Gerät an einem
trockenen Ort und außerhalb der
Reichweite von Kindern auf. Maschinen
sind gefährlich, wenn sie von
unerfahrenen Personen benutzt werden.
Inbetriebnahme
Vorsicht! Verletzungsgefahr
durch rotierende Messer.
Nehmen Sie Arbeiten am Gerät
nur bei abgeschaltetem und
stillstehendem Messer vor.
Beachten Sie auch die mitgelieferte
Betriebsanleitung von Briggs &
Stratton.
Bevor Sie das Gerät starten, müssen Sie
- alle Transportsicherungen entfernen;
- den Griffholm montieren und die
Schnellspannhebel verriegeln;
- Motoröl einfüllen;
- Benzin einfüllen;
- ggf. den Grasfangkorb montieren;
- ggf. die Schnitthöhe einstellen.
Griffholm montieren
Achten Sie darauf, dass bei der
Montage des Griffholms die
Bowdenzüge (5) nicht gequetscht
werden.
1. Klappen Sie den unteren Griffholm
A
(4) und den oberen Griffholm (1)
hoch.
2. Bringen Sie den unteren
Griffholm (4) in die gewünschte
Position und verriegeln Sie
die Schnellspannhebel (21),
indem Sie sie in Richtung des
Griffholms (4) drücken. Der
Schnellspannhebel sollte nach
oben zeigen. Die Spannhebel
müssen so am Holm angezogen
sein und am Holm anliegen, dass
95
Page 100

DE AT CH
ein Spannen mit mittlerer Kraft
erfolgen kann.
Sonst drehen Sie die Spannhebel
zum Spannen im Uhrzeigersinn
und zum Lockern gegen den
Uhrzeigersinn.
3. Der untere Griffholm (4) hat zwei
C
verschiedene Befestigungslöcher.
Montieren Sie den oberen
Griffholm mit Hilfe des Schnellspannhebels in der gewünschten
Höhe auf den unteren Griffholm (4).
4. Befestigen Sie die Schnellspannhebel (25) am oberen Griffholm
(1), wie unter 2. beschrieben.
5. Befestigen Sie den Bowdenzug
A
(
5) mit Hilfe der Kabelklemme
A
(
6) am unteren Griffholm
(
4).
A
Starterseil montieren
1. Ziehen Sie den Sicherheitsbügel
D
(2) in Richtung Griffholm (1) und
halten Sie ihn in dieser Position.
2. Ziehen Sie langsam das Starterseil
am Startergriff (7) in Richtung
des Holms und hängen Sie das
Starterseil in die StarterseilFührung (3) ein.
3. Lassen Sie den Sicherheitsbügel
(2) los.
Grasfangkorb montieren
Achtung: Gerät nicht ohne
vollständig angebrachten
Grasfangkorb oder ohne
Prallschutz betreiben.
Verletzungsgefahr!
E
F
Netz montieren
1. Ziehen Sie die Plastik-Klipps
(28) des Fangkorbs (20) auf
beiden Seiten und unten über die
Fangkorbstange (29).
Grasfangkorb am Gerät
anbringen:
2. Heben Sie den hinteren Prallschutz
(22) an.
3. Halten Sie den Grasfangkorb (20)
am Tragegriff (23) und hängen
Sie ihn in die dafür vorgesehene
Fangkorb-Aufhängung (30) auf
der Rückseite des Gerätes ein.
Grasfangkorb
herausnehmen:
4. Heben Sie den Prallschutz
(22) an und nehmen Sie den
Grasfangkorb (20) am Tragegriff
(23) aus dem Gerät.
Motoröl einfüllen und Ölstand
kontrollieren
Stellen Sie das Gerät auf einen
ebenen Boden.
1. Drehen Sie die Öltankkappe mit
G
Messstab (19) ab und füllen
Sie Öl in den Tank. Der Öltank
fasst 0,47 l Öl. Verwenden Sie
Markenöl (z.B. SAE 30).
2. Zum Kontrollieren des Ölstands
wischen Sie den Messstab (19)
mit einem sauberen Tuch ab
und setzen ihn wieder bis zum
Anschlag in den Tank ein.
96
 Loading...