

Page 1
Quick Start Guide for DN-C550R Professional CD/CD-R Combi-Deck
The DN-C550R features both a CD Playback drive and a CD-R/RW drive, housed in a single unit, to provide you with a
variety of recording and playback options either independently or in combination. Some functions become available to use
only after you make a specified setting. Some functions are initially locked, to prevent mishaps such as damaging important
recordings. For best performance, and to match to your specific task, we recommend you optimize several settings before
each use. This Quick Start Guide is designed to help you do just that!
For detailed information or advanced functions, please refer to the Instruction Manual.
[1] CD to CD Copying Using the 2 Internal Drives
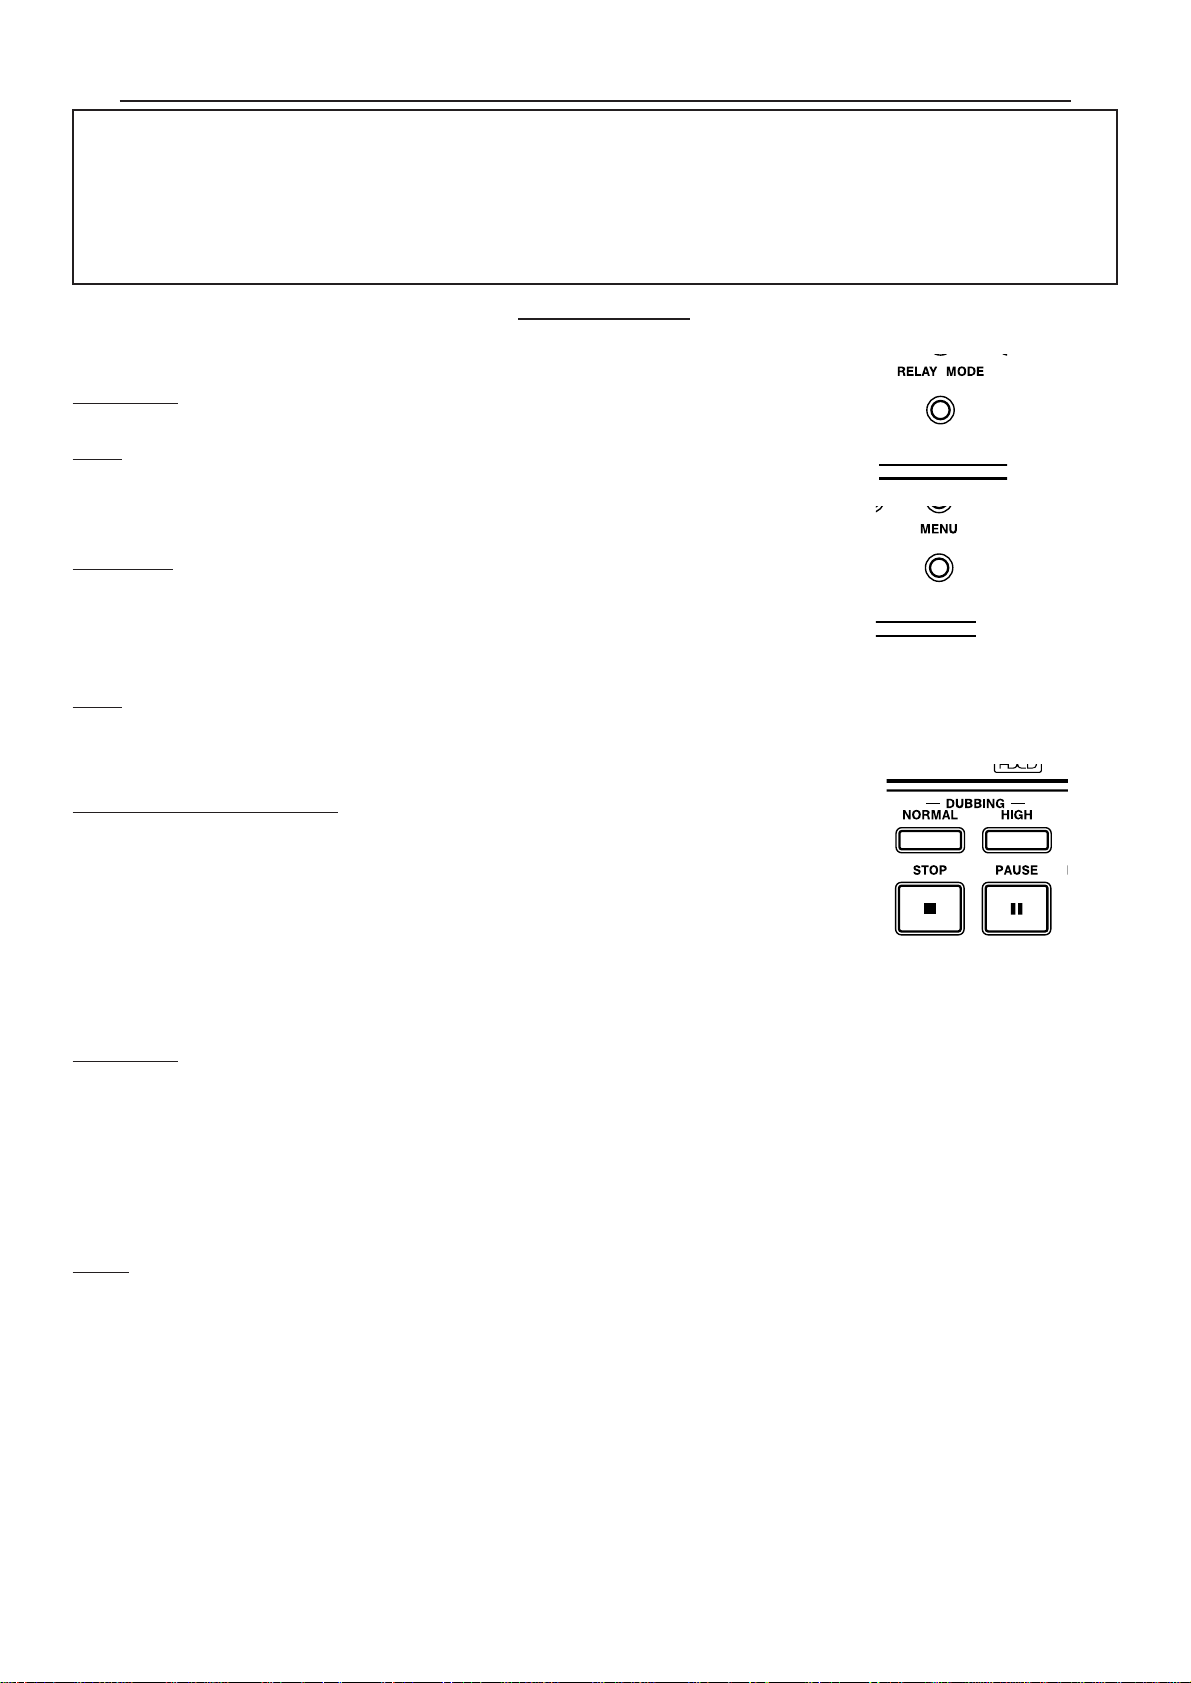
[1]-1. Select Relay Mode (Play Mode) on the front panel. (See page 24 of Manual)
OPERA
TION : Each time the [RELAY] button is pressed, the mode switches in this cycle: "Single
Play" → "Relay Play" → "Mix Play" → "Dual Play" (→ "Single Play" → etc.).
NOTE:
RECORDING is only possible in either "Single Play" or "Dual Play" mode, and not possi-
ble in “Relay Play” or “Mix Play” mode.
[1]-2. Select SCMS (Serial Copy Management System) from the Setup Menu Mode at the
front panel. (See page 10 & 13 of Manual)
OPERA
TION:
Press the [MENU] button and turn the MULTI JOG dial to display "Setup Menu ?",
then press JOG dial to enter the Setup Menu. Turn the JOG dial to display "SCMS Set ?", then
press the JOG dial to enter the SCMS Setup mode. Turn the JOG dial to select either "ENA.
(Enable)" or "INH. (Inhibit)". Press the JOG dial to confirm.
NOTE: Selecting "INH. (Inhibit)" sets the machine to copy even from a master disc which has
SCMS. The recorded copy will have SCMS protection whether or not it was on the master disc.
[1]-3. Select Copying Mode (Dubbing Mode) on the front panel. (See page 13-15 of Manual)
THINGS TO KNOW(KEY WORDS):
All Track (Disc) dubbing "All Tr Dubb" : Entire disc or programmed tracks are recorded.
(Finalize must be done later by yourself.)
Make CD dubbing "Make CD Dubb" : Entire disc or programmed tracks are recorded. (Finalize
will be done automatically after recording is finished.)
One Track dubbing "1 Tr Dubbing" : Selected single track is recorded. (Finalize must be done
later by yourself.)
Scan Rec dubing "Scan Rec Dub" : Tracks selected in Intro Scan are recorded. ( Finalize must be
done later by yourself.)
OPERATION:
Press [DUBBING-NORMAL] button or [DUBBING-HIGH](2 x speed) button for your favorite dubbing speed. Each of these buttons can select amoung the following option settings: All Track (Disc)
dubbing "All Tr Dubb" → Make CD dubbing "Make CD Dubb" → One Track dubbing "1Tr
Dubbing" → Scan Rec dubbing "Scan Rec Dub" (→ All Track (Disc) dubbing "All Tr Dubb").
After making your choice, press the MULTI JOG dial to confirm your selection.
Pressing the [PLAY] button on either side will start your recording.
NOTES:
• Digital copying may not be possible due to SCMS restrictions if “SCMS ENA” is selected in the setup menu , and if the playback (source)
disc already contains SCMS. In this case, copying is automatically performed at normal speed and using analog signals only.
• Digital copying is possible if “SCMS INH” is selected in the setup menu , even if the playback (source) disc already contains SCMS. In
this case, copying can be performed at either normal or high speeds using digital signals.
• Real time analog signal copying is always performed in the normal speed mode.
•Of course, the CD-R/RW disc must have enough available time to record the CD source disc. If this condition is not met, then
“CD-R Short” is displayed and both the CD and CD-R units are set to the stop mode. If this happens, check the disc’s recordable time.
EXCEPTIONAL CASE: Sometimes when recording track numbers 21 or higher, “CD-R Short” might not be displayed even though the
source time you want to record exceeds the recordable time left on the CD-R/RW.
• For some CDs, the text cannot be copied because of copyright protection. In this case “Text Protect” is displayed.
• Do not turn off the power or unplug the power cord while “Now PMA Rec” (PMA: Temporaly Program Memory Area) is displayed after
recording is completed. Doing so may
render the disc unusable.
1
Guide for RECORDING Settings
Page 2
[2]-3. Select Synchro Recording Mode at the Setup Menu. (See page 10 of Manual)
OPERA
TION:
Press the [MENU] button and turn the MULTI JOG dial to display "Setup Menu ?", then press the JOG
dial to enter the Setup Menu. Turn the JOG dial to display "Sync Rec ?", then press the JOG dial to enter
Synchro Recording Mode. Turn the JOG dial to select your favorite Recording Mode from the following
cycle: "Sync. Off?" → "Disc Sync.?" →Make CD?" →"1Tr Sync.?" (→ "Sync. Off?"). Press the JOG
dial to confirm.
THINGS TO KNOW (KEY WORDS):
"Sync. Off" : You can manually start recording by simply pressing the [REC] button.
"Disc Sync." : Recording will be automatically triggered to copy entire disc when the external source
player is started. (Note: The disc must finalized manually)
"Make CD" : Recording is automatically triggered to copy entire disc when the external source player is started.
(Note: Finalizing will be done automatically after recording is finished.)
"1Tr Sync." : Recording will be automatically triggered to copy selected single track when the external
source player is started. (Note: The disc must finalized manually)
[2]-4. Select Input to match connection of desired source. (See page 15 -19 of Manual)
OPERATION:
Press [INPUT] button.
Each time the [INPUT] button is pressed, the selected input switches in the following cycle: Optical Input "Optical In" → Coaxial Input "Coaxial In" →
Analog Unbalanced Input "AnaUNBAL In" → Analog Balanced Input "Ana BAL In" → Copying from Internal CD Player "CD Player" (→ "Optical In").
REALLY COOL TOUCH:
You can personalize the DN-C550R input display to identify your specific external devices. The custom display name can contain up to 12 letters per input.
Example : "Optical In" → "MD Recorder", " Coaxial In" → "CD Player" (See page 12 of Manual)
[3] Settings when making recordings from both external sources and internal drive.
[3]-1. Press the [RELAY MODE] button on the front panel to select either “Single Play” or “Dual Play”
Follow the same procedure as in [1]-1.
[3]-2.Select SCMS (Serial Copy Management System) from the Setup Menu Mode at the front panel.
Follow the same procedure as in [1]-2.
RECOMMENDATION:
We recommend to select "INH. (Inhibit)" for more convenient recordings.
[3]-3. Select Copying Mode (Dubbing Mode) bt pressing [DUBBING-NORMAL] button or [DUBBING-HIGH] button for Internal CD
Copying. Follow the same procedure as in [1]-3.
[3]-4. Select Synchro Recording Mode in the Setup Menu Mode for recording from external equipment. Follow the same procedure as in [2]-3.
[3]-5. Everytime you record from external source equipment, make sure the correct input terminal is selected by pressing the
[INPUT] button. Follow the same procedure as in [2]-4.
2
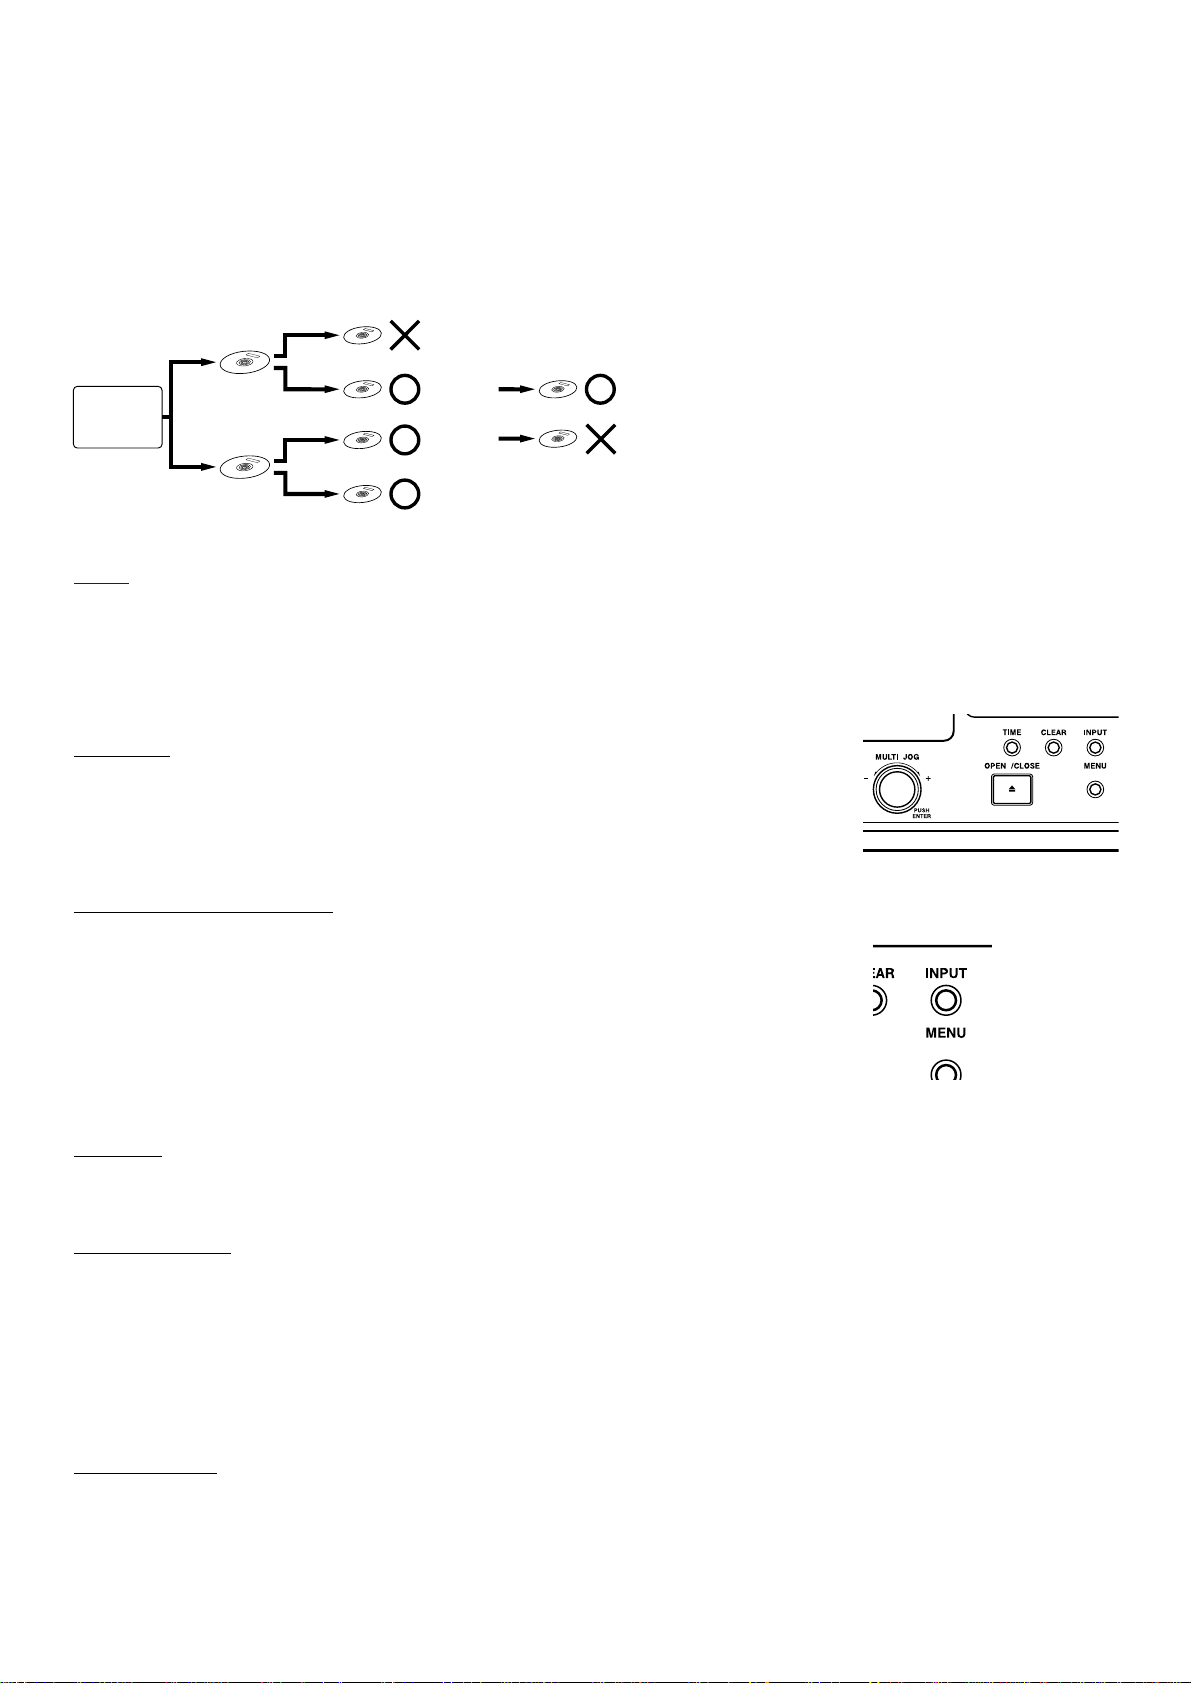
[2] Settings for recording from External Sources
[2]-1. Press the [RELAY MODE] button on the front panel to select either “Single Play” or “Dual Play”
RECORDING is only possible in either "Single Play" or "Dual Play" mode .
[2]-2. Select SCMS (Serial Copy Management System) from the Setup Menu Mode at the front panel. (See page 10 & 13 of Manual)
Digital equipment
CD player, etc.
Digital
source
Analog
source
Digital
recording
Analog
recording
Digital
Digital
Analog
Analog
Recording is not possible.
Recording is
possible.
Recording is
possible.
Recording is possible.
Digital
Digital
Recording is possible.
Recording is not possible.
* Recording is possible without reception of the copy defect restriction.
OPERATION: Follow the same procedure as in [1]-1. (See page 24 of Manual)
NOTE & OPERATION: Follow the same procedure as in [1]-2.
NOTES:
• SCMS INH: Digital recording is possible without restriction even if the recording source contains a copy prohibit code. In this case the
copy prohobit code is written on the recorded disc. In addition, a copy prohibit code is writen on the recorded disc even if the recording
source does not have a copy prohibit code.
• SCMS ENA: In compliance with SCMS, digital recording is not possible if the recording source contains a copy prohibit code.
Page 3

Guide for PLAYBACK Settings
[4] Simple System using the DN-C550R and a standard Amplifier
Typical Application: Club, Bar, Dance Studio, Office, etc.
[4]-2. Select if you use Timer Play function on the front panel. (See page 10 & 12 of Manual)
This function enablaes the unit automatically start playback of the discs in the drives, when the Power is
turned on.
Connection example
ANALOG UNBALANCED
CD-RINCD/CD-R
OUTCDOUT
[4]-1. Press the [RELAY MODE] button on the front panel to select desired mode.
Follow the same procedure as in [1]-1.
RECOMMENDA
TION:
Select "Single Play", "Relay Play" or "Mix Play" mode for this connection.
The output from both drives will be heard with the single stereo connection shown above.
In "Mix Play" mode, you can use Program or Random playback functions to pick tracks from both discs.
In "Relay Play" mode, one disc will play completely, then the other disc will start to play from the beginning.
NOTES :
The default setting upon shipment is Timer Play On.
OPERATION:
Press the [MENU] button and turn the MULTI JOG dial to display "Setup Menu ?", then press JOG dial to enter the Setup Menu. Turn the
JOG dial to display "Timer Play ?", then press the JOG dial to enter Timer Play mode. Turn the JOG dial to select either "On" or "Off". Press
the JOG dial to confirm.
3
CD or AUX IN
CD/CD-R OUT
Page 4

Connection example
ANALOG UNBALANCED
CD-RINCD/CD-R
OUTCDOUT
4
• Before enter the menu setup, close the disc trays and set the stop mode for both the CD and CD-R sections.
• When the MENU button is pressed, the menu is activated and the unit can be operated as shown on the diagram below.
• “*” indicates default values.
• Turn the jog dial clockwise to proceed to the “↓” display indicator. Press the Jog Dial button to proceed to the “→” display indicator.
Refer to “2. Text editings (1) Adding disc titles and (2) Adding track
titles” (Page 30, 31).
Refer to “2. Text editings (3) Erasing disc titles and (4) Erasing track titles
and (5) Erasing all the track titles and the disc title” (Page 32, 33).
Refer to “, SETUP METHOD” (Page 10 ~ 13).
Refer to “1. CD-R/RW editing” (Page 28 ~ 30).
CD or AUX IN
MASTER OUT
Ch 2 IN
Ch 1 IN
CD/CD-R OUT
CD OUT
[5] Dual Source Mixing System using DN-C550R, a Mixer and an Amplifier
Application example : DJ-like use, PA-like use or Studio use etc.
NOTE : Only monitoring right side drive is possible through the
headphones in the Dual Play mode.
[5]-1. Press the [RELAY MODE] button on the front panel to select “DUAL
PLAY” mode.
Follow the same procedure as in [1]-1.
NOTE:
In"Dual Play" mode, The DN-C550R becomes two independent drives.
It is even possible to record from an external source into the right side drive, while
hearing independent playback from the left side.
[5]-2. Select Timer Play function from the front panel.
Follow the same procedure as in [4]-2.
NOTE : The default setting upon shipment is Timer Play On.
MENU SETUP Details
Text Edit? Text In? Disc Title?
Text Erase?
Track Title? **Tr Title?
All Erase?
Disc Title?
Track Title? **Tr Title?
Setup Menu? Sync. Rec? Disc Sync?
Make CD?
1Tr Sync.?
Sync. Off?
Sync. Level?
Sync. -54dB
(-54~-30 dB/6 dB step)
A.T. Mark?
On /Off
FadeIn Time FadeIn 5sec
(1~15sec/1 sec step)
FadeOut Time? FadeOut 5sec
(1~15sec/1 sec step)
Intro Time?
ScanTime15s
(5~30sec/1 sec step)
Custom Index Op/Co/An/XLR
SKIP PLAY? ON /OFF
ON /OFF
ENA. /INH.
Timer Play?
SCMS Set?
CDR/RW Edit? CD-RW Erase? All Erase?
TOC Erase?
1Tr Erase?
** - **TrErase
Skip Track? Skip Set? Skip Set **Tr
Skip Clear? S. Clear **Tr
A. Rec Level?
Level 00.0dB
(Change setting with jog dial)
(or D.Rec Level?)
 Loading...