

OWNER’S MANUAL
GUIDE DU PROPRIÉTAIRE
MANUAL DEL USUARIO
CAUTION:
Read and Follow All Safety Rules and
Operating Instructions Before First
Use of This Product.
ATTENTION :
Avant de faire fonctionner cette
machine, lisez et suivez toutes les
consignes de sécurité de ce guide en
premier lieu.
ATENCIÓN:
Lea y Siga Todas las Indicaciones de
Seguridad y de Operación Antes de
Utilizar Este Producto.
Table of Contents . . . . . . . . . . . . . . . . . . . . 1
Table des matières . . . . . . . . . . . . . . . . . . . 12
Índice . . . . . . . . . . . . . . . . . . . . . . . . . . . . . . 23
Danby Products Limited, Guelph, Ontario Canada N1H 6Z9
Danby Products Inc., Findlay, Ohio USA 45840
Version_1twv.06.08
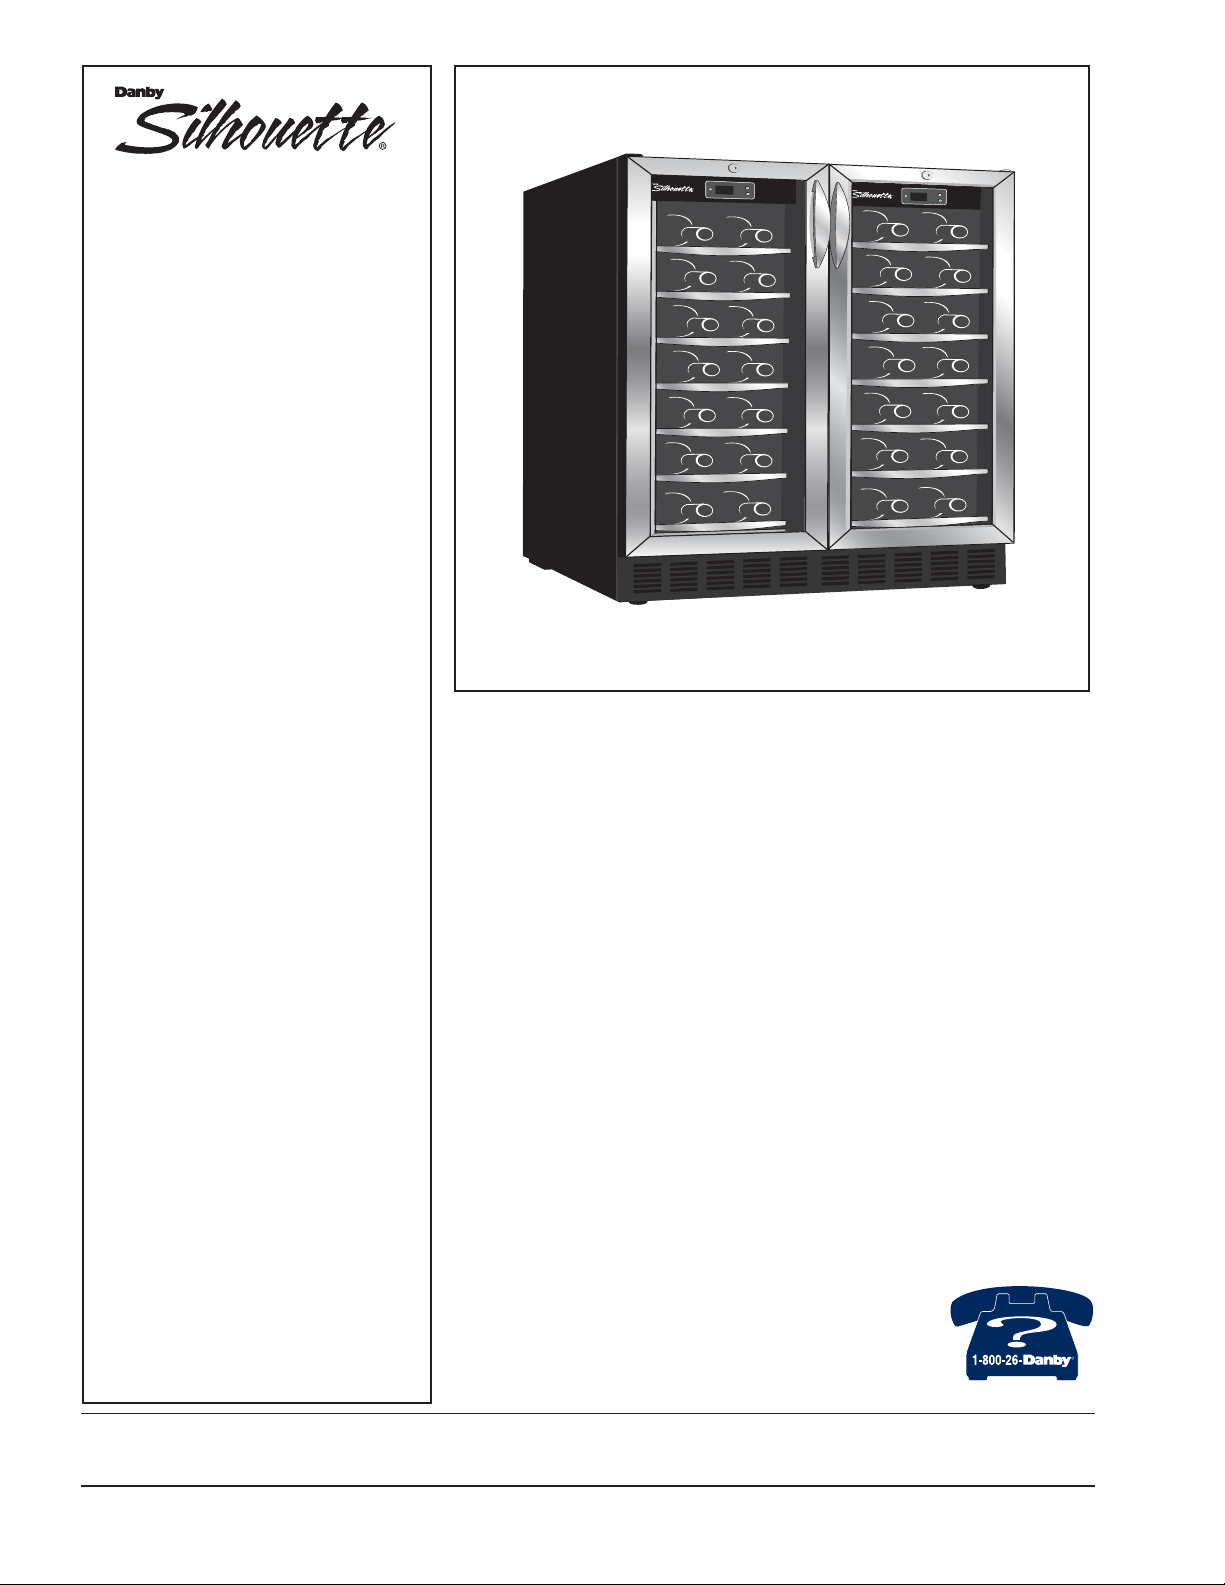
DWC2727BLS
R

3
Important Safety Information
Safety Precautions 3
Grounding Instructions 4
Operating Instructions
Features of Your Wine Cooler 5
The Controls of Your Wine Cooler 6
Setting the Temperature 6
Wine Storage 7
Shelf Instructions 7
Installation Instructions
Tools You Will Need 8
Preparing the Enclosure 8
Care and Cleaning
Helpful Hints 9
How to Clean the Inside 9
How to Clean the Outside 9
Trouble Shooting
Before Your Call For Service 10
Warranty
5
9
1
TABLE OF CONTENTS
8
11
10

2
WELCOME
NEED HELP?
Welcome to the
Danby family. We’re
proud of our quality
products and we
believe in dependable
service.
You’ll see it in this
easy-to-use manual
and you’ll hear it in the
friendly voices of our
consumer service
department.
Tel:1-800-26-
Best of all, you’ll
experience these
values each time you
use your wine cooler.
That’s important,
because your new
appliance will be part
of your family for a
long time
.
Before you call for service,
there are a few things you
can do to help us serve you
better...
Read this manual
It contains instructions to
help you use and maintain
your wine cooler properly.
If you received a
damaged appliance
Immediately contact the
dealer (or builder) that sold
you the wine cooler.
Save time and money
Check the Trouble Shooting
section before calling. This
section helps you solve
common problems that may
occur.
If you do need service, you
can relax knowing help is
only a phone call away.
Tel: 1-800-26-
Write down the model and serial
numbers here. They are on a label
located on the back of the wine
cooler.
Model number DWC2727BLS
Serial number ______________
Date purchased ______________
Staple your receipt to the inside
back cover of this manual. You will
need it to obtain service under
warranty.
Start Here!…Before using your Wine Cooler
R
R

READ ALL SAFETY INFORMATION BEFORE USING
3
IMPORTANT SAFETY INFORMATION
WARNING
SAFETY
PRECAUTIONS
• This appliance must be
grounded. Connect only to a
properly grounded outlet.
See “Grounding Instructions”
section on page 4.
• Do not operate this appliance
if it has a damaged power cord
or plug, if it is not working properly, or if the appliance has
been damaged or dropped.
• Do not splice the power cord
that is equipped with this appliance.
• Keep power cord away from
heated surfaces.
• Do not immerse power cord,
plug or the appliance itself in
water.
• Do not use this product near
water-for example, in a wet
basement, near a swimming
pool or near a sink.
• Do not use corrosive
chemicals or vapors in this
appliance.
• Use this appliance only for
it’s intended use, asdescribed
in this manual.
• Do not store perishable food
items such as (but not limited
to) meats and dairy products
in your wine cooler.
• Store wine in sealed bottles
only.
• See door surface cleaning
instructions in the Care and
Cleaning section(s) of this
manual.
• Do not cover or block any
openings on the appliance.
• This appliance is intended for
household use only. Do not
attempt to operate or store this
appliance outdoors.
• This appliance should be
serviced only by qualified service personnel. Contact the
nearest authorized service facility for examination, repair or
adjustment.
SAVE THESE INSTRUCTIONS
DANGER, RISK OF CHILD ENTRAPMENT!
An empty wine cooler is a very dangerous attraction to children. Remove either the gasket,
latches, lids, lock and/or doors from unused or discarded appliances, or take some other action
to guarantee it harmless.
DON’T WAIT, DO IT NOW!
To reduce the risk of fire, burns, electric shock, or injury to persons when using your appliance,
follow basic precautions, including the following sections;

4
This appliance must be
grounded. In the event of an
electrical short circuit, grounding reduces the risk of electric
shock by providing an escape
wire for the electric current.
This appliance is equipped with
a power cord having a grounding wire with a grounding plug.
The plug must be plugged into
an outlet that is properly
installed and grounded.
Consult a qualified electrician
or service technician if the
grounding instructions are not
completely understood, or if
doubt exists as to whether the
appliance is properly grounded.
If the outlet is a standard 2prong wall outlet, it is your personal responsibility and obligation to have it replaced with a
properly grounded 3-prong wall
outlet.
For best operation, plug this
appliance into its own electrical
outlet to prevent flickering of
lights, blowing of fuse or tripping of circuit breaker.
Do not under any circum-
stances cut or remove the third
(ground) prong from the power
cord.
Do not use an adapter plug
with this appliance.
Do not use an extension cord
with this appliance. If the power
cord is too short, have a qualified electrician or service technician install an outlet near the
appliance.
GROUNDING
INSTRUCTIONS
IMPORTANT SAFETY INFORMATION
WARNING
Improper use of the
grounding plug can result
in a risk of electric shock.

5
Operating Instructions
Features of your
Wine Cooler
1. Twin Door Design: Divided compart-
ments allow for separate storage of different
types of wines.
2. Dual Electronic Controls: For individ-
ually regulating the temperature for both compartments of the wine cooler.
3. Magnetic Door Gaskets: Tight fitting
seals retain all the cooling power and humidity levels.
4. Stainlss Steel Shelf Trim: Partially
slide out for easy access to your wine.
5. Child Proof Locks with Key
6. Front Mounted Exhaust:
Allows for
integrated (built-in) applications.
7. Tempered Glass Doors: Tinted for UV
protection while still allowing for easy interior
viewing.
8. Leveling Legs.
9. Interior Lights
(not shown): Illuminates
the compartment when the door is opened.
10. Interior Light Toggle Switch: To
manually illuminate/extinguish both interior
lights, while doors remain closed.
6
5
3
7
1
4
10
2
8

6
Operating Instructions
1
2
3
4
Setting the
Temperature
• To switch the display
between the Fahrenheit (°F)
and Celsius (°C) scale,
depress the UP and DOWN
control buttons simultaneously for
approximately five (5) seconds
• The temperature range for
both compartments can be set
as low as 39°F(4°C) or as
high as 64°F (18°C) to suit
your specific wine storage
requirements. Each depression of the UP or DOWN button will allow you adjust the
temperature in 1° degree
increments within the aforementioned range.
• You may view your ‘set’ temperature at any time by briefly
depressing either the ‘UP’ or
‘DOWN’ button. The set tem-
perature will flash in the display area for 5 seconds before
the display resumes showing
the current cabinet temperature.
Please note: In the event of a
power failure or interruption,
all modified settings are lost
and the default settings are
used once power resumes.
The Controls of
your Wine Cooler
1. Run
Indicator light illuminates to signify the
cooling mode is currently in operation.
2. Electronic Display
Dispay screen shows current cabinet
temperature and set temperature (see
‘Setting the Temperature’ below).
3. °C / °F
Adjacent indicator light denotes which
scale of temperature is displayed.
4. ‘UP’ Button
Used to raise (warm) the temperature
in 1° degree increments.
‘DOWN’ Button
Used to lower (cool) the
temperature in 1° degree increments.
When you plug in your
wine cooler for the first
time, the temperatures
will automatically be set
to 45°F (7°C) and 54°F
(12°C) in the left and right
compartments respectively
and will be displayed in
the Fahrenheit scale (°F).
Operating Instructions
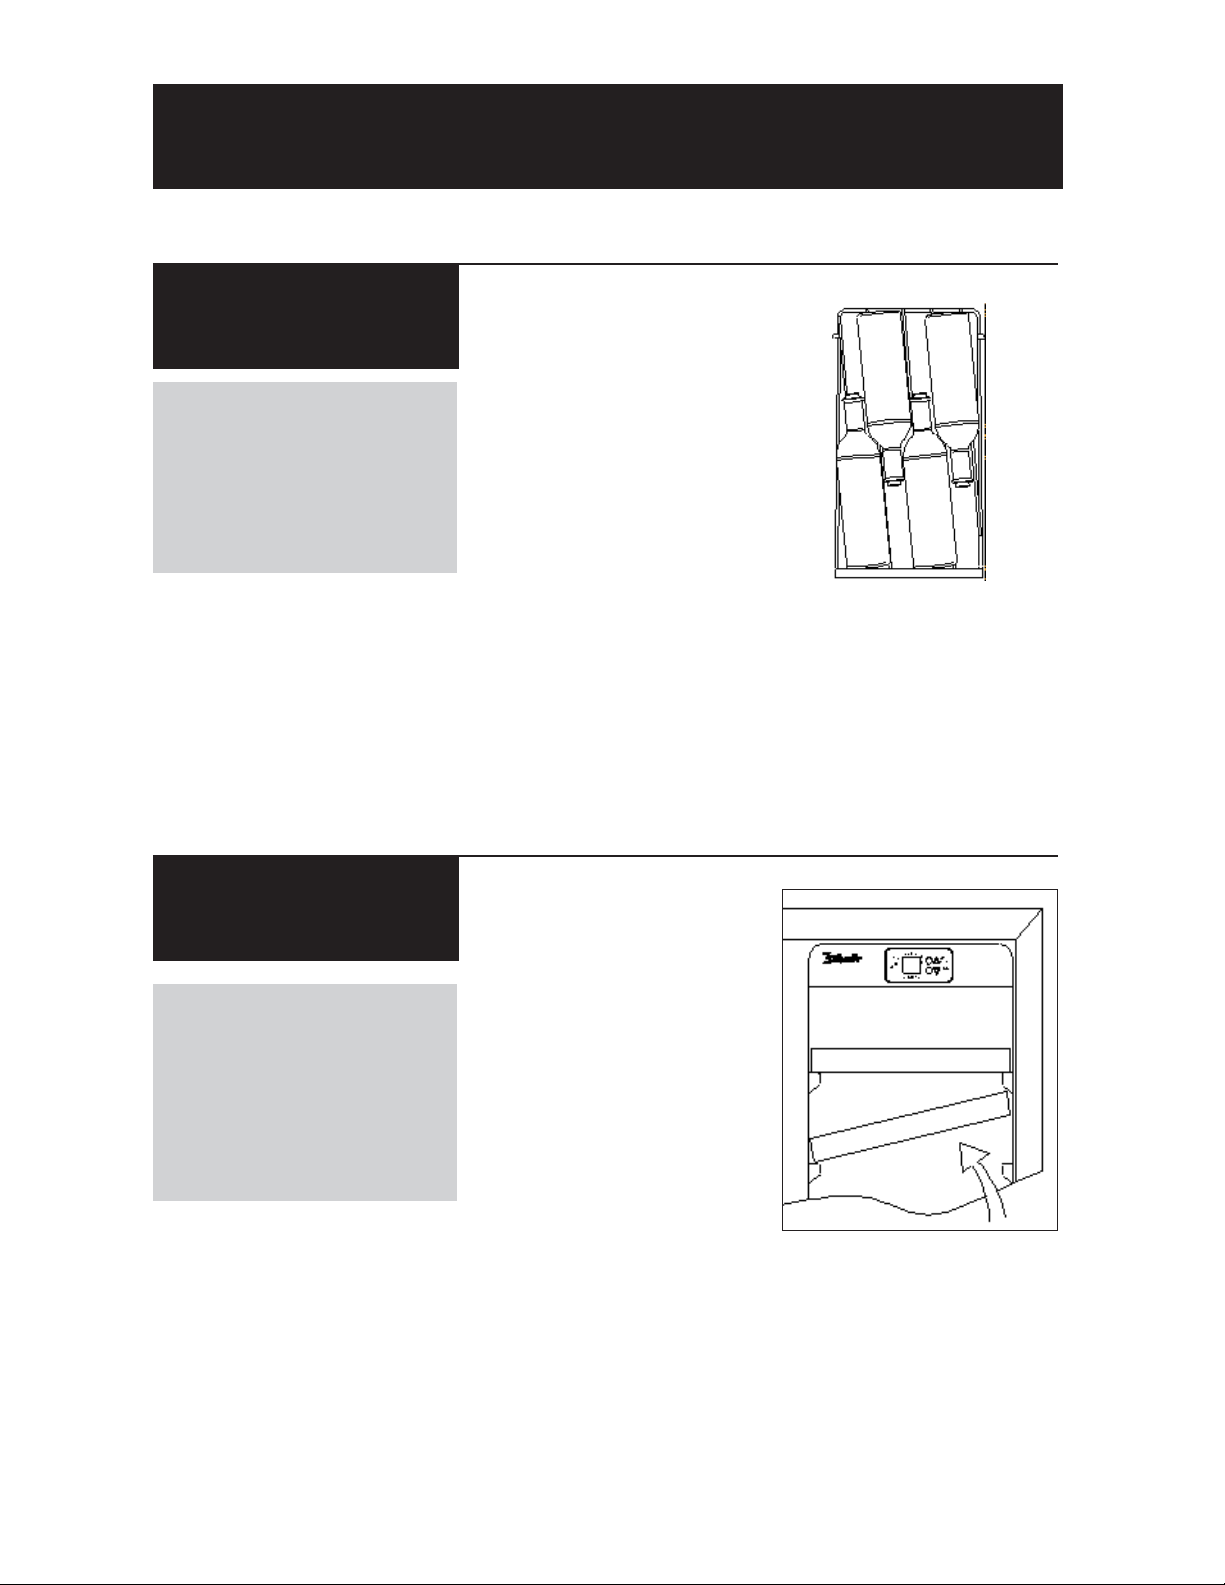
In order to achieve the
maximum storage capacity of
fifty-four (54) bottles, it will be
necessary to position the
bottles alternately on the
upper six shelves, as shown in
Fig A. This will allow for the
storage of four (4) 750 ml
bottles per rack in each of the
top six shelves, and three (3)
bottles on the bottom shelf for
a total storage capacity of
fifty-four (54) wine bottles.
Wine
Storage
The *maximum capacity of
the DWC2727 is 54 (750ml)
wine bottles.
*When stocked as per instruc-
tions.
7
Fig A
Shelf Instructions
To remove a shelf from it’s
locked position, tilt the shelf as
shown in Fig B and pull outward.
To re-install, ensure the shelf is
resting securely on the support
brackets and push shelf
inward until it locks into place.
Please Note: The bottom
shelf in both sections of the
cabinet are not secured in
place (locked). Do not attempt
to pull on the shelf when either
it is stocked with wine and or
when the humidor is filled with
water.
IMPORTANT!
Do not cover shelves with
aluminum foil or any other
material that will prevent
adequate air circulation within the cabinet.
Fig B
8
Installation Instructions - Intergrated Application
Preparing the
Enclosure
FOR YOUR SAFETY:
While performing installations
described in this section,
gloves, safety glasses or
goggles should be worn.
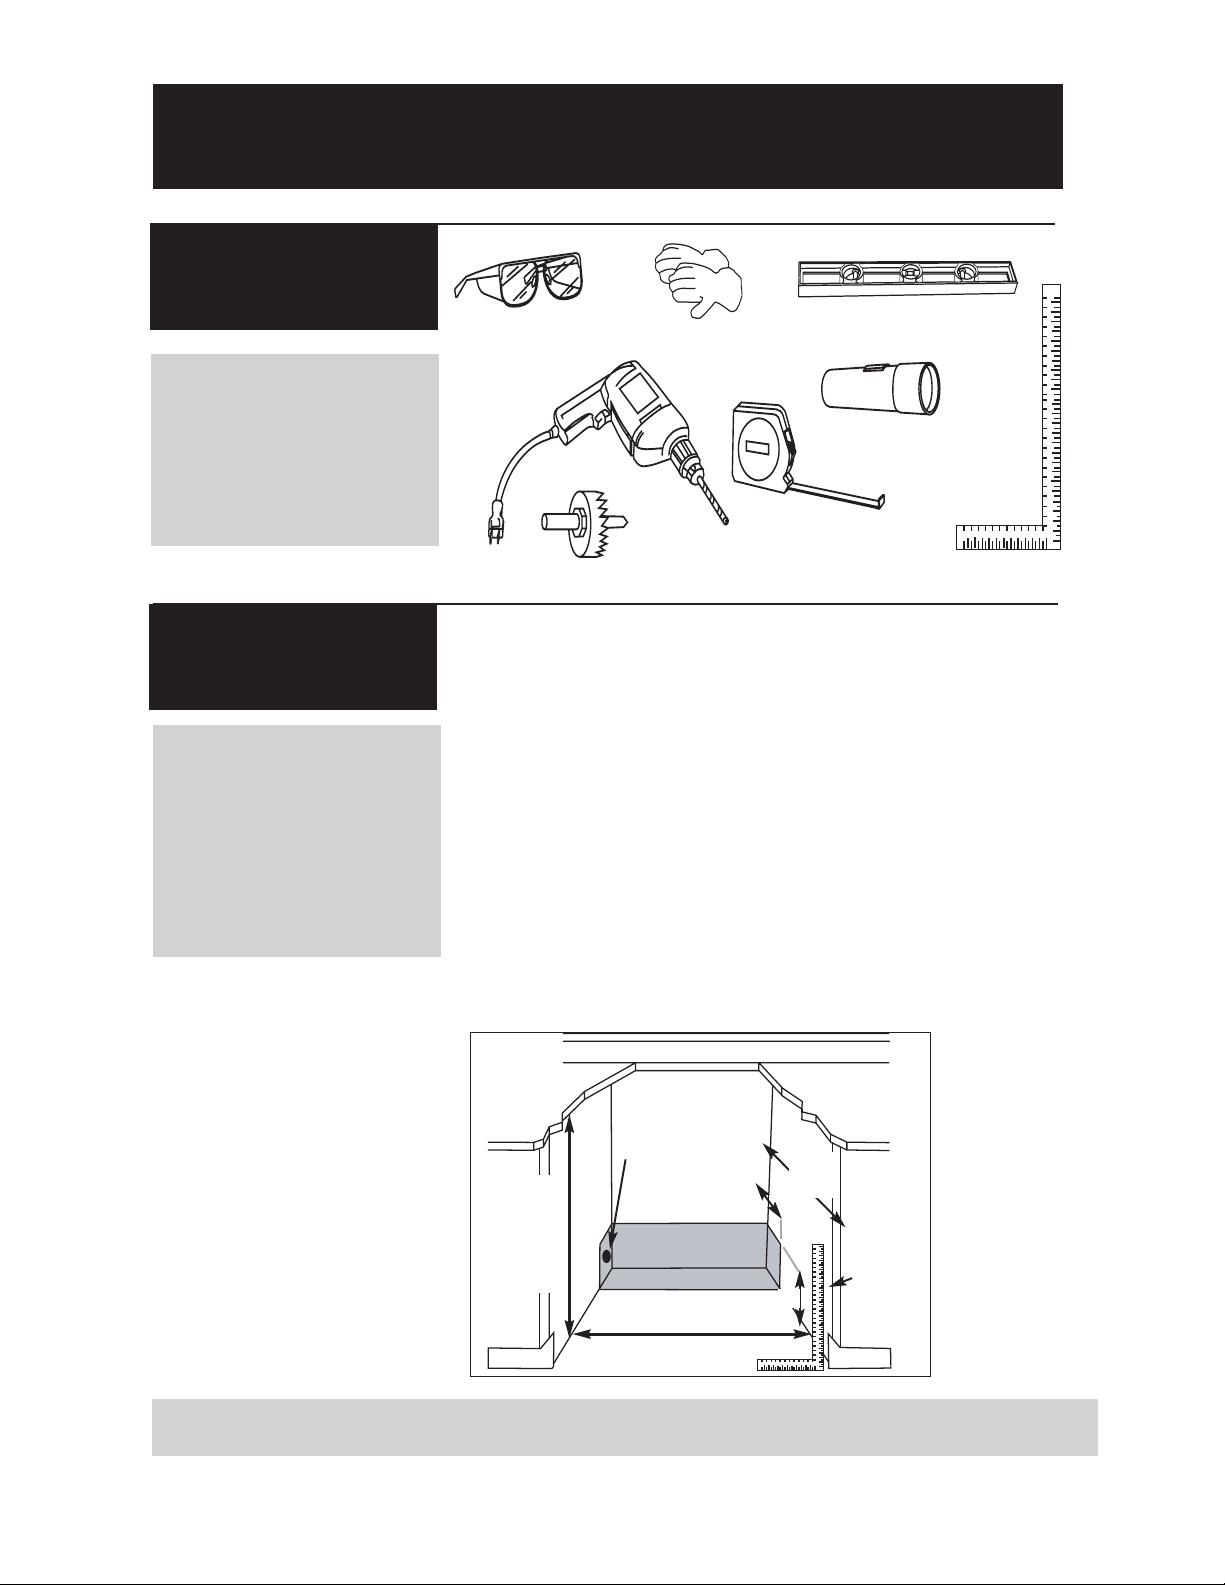
Tools You Will
Need
Carpenters
Square
Measuring Tape
Level
Drill & Hole Saw set
Gloves
Safety Glasses
Flashlight
Electrical Requirements:
The appliance must be
connected to an individual
properly grounded electrical
outlet, protected by a 15 or 20
ampere circuit breaker or time
delay fuse.
• It is recommended that you do
not install the wine cooler into a
corner (i.e. directly beside a
wall). This is to allow the door(s)
to have a greater then 90°
opening swing. A limited door
swing will prevent the shelves
from sliding out as intended, and
may lead to damaging the door
gasket(s).
• The rough cabinet opening
must be on a level floor area and
at least 24” deep* by 24” wide.
The opening should also have a
height of at least 34-1/2”.
• The electrical outlet may be
positioned from within either side
of the adjacent cabinetry, or the
rear of the shaded area (as
shown in Fig C.).
Important: If the electrical outlet
is surface mounted (not flush)
within the enclosure, the depth
requirment for the installation
may be affected.
• If the electrical outlet is located
inside the adjacent cabinetry, cut
a 1-1/2” diameter hole to admit
the power cord.
Electrical Access
Fig C
Cabinets
Square
and
Plumb
34-1/2”
From
Underside
of
Countertop
to Floor
24”
6”
2”
24”
Min*
1-1/2” dia. hole
*if electical outlet
is in adjacent
cabinetry
*The listed depth requirment for the installation is assuming that the electrical outlet is located in the
adjacent cabinetry or is flush mounted in the rear wall, not surface mounted in the enclosure.

9
Helpful Hints
Allow the wine cooler door to
remain open for a few minutes
after manual cleaning to air out
and dry the inside of the wine
cooler cabinet
NOTE: Be certain the
power is off before
cleaning any part of this
appliance.
How to Clean
the Inside
Walls, Floor, Inside
Window, and Shelves
Water deposits and dust can
should be removed with a
damp cloth.
Care and Cleaning
How to Clean
the Outside
Outer Case
It’s important to keep the area
clean where the door seals
against the cabinet. Clean this
area with a sudsy cloth. Rinse
and then dry.
Door surface
Use only mild, non-abrasive
detergents applied with a clean
sponge or soft cloth. Rinse
well.
Control Panel and
Door
Wipe with a damp cloth and dry
thoroughly. Do not use cleaning
sprays, large amounts of soap
and water, abrasive or sharp
objects on the panel, they can
damage it. Some paper towels
may also scratch the control
panel and door glass.
Do not use cleaners containing ammonia or alcohol on
the wine cooler.
Ammonia or alcohol can damage the appearance of the
appliance.
Never use any commercial or
abrasive cleaners or sharp
objects on any part of wine
cooler.

Before You Call For Service
If none of the above rectify the situation please contact our customer care department
at 1-800-26- (1-800-263-2629)
10
Trouble Shooting
Problem Possible Cause What to do
No Power. A fuse in your home may Replace fuse or reset circuit breaker.
be blown or the circuit
breaker tripped.
Power surge. Unplug the wine cooler, wait a few
seconds and then plug it back in.
Plug not fully inserted into Make sure the 3-prong plug on the
wall outlet wine cooler is fully inserted into outlet.
Cabinet Temperature Temperature setting Verify the temperature control setting.
too High adjust if neccessary.
Door(s) not shut properly Ensure that the doors are fully closed
or opened excessively and that the gaskets are sealing,
against the cabinets. Open the doors
only as needed and for short periods
of time.
Exhaust vent is obstructed Verify there is nothing blocking the
front mounted exhausting vent.
Recently added a large Limit the quantity of warm bottles
quantity of warm bottles being introduced to the cabinet at the
to the cabinet same time. Attempt to phase in the
load introduction if possible. (i.e. load
no more than 6 warm bottles at once3 per compartment)
“Clicking” Noise Normal sound No user intervention is required as
this sound is normal during the opera
tion of the appliance. This audible
‘clicking’ noise may be heard as the
wine cooler ends or begins a cooling
cycle.
Condensation on the High humidity conditions The condensation will subside once
cabinet and/or doors in the home. humidity conditions return to normal.
Door(s) not shut properly Ensure that the doors are fully closed
or opened excessively and that the gaskets are sealing.
against the cabinets. Open the doors
only as needed and for short periods
of time.

GUIDE DU
PROPIÈTAIRE

Informations de sécurité importantes
Précautions 14
Instructions de mise à la terre 15
Instructions de fonctionnement
Caractéristiques de votre refroidisseur de vin
16
Commandes de votre
refroidisseur de vin
17
R
églage de la température
17
Entreposage des vins 18
Instruction pour tablette 18
Instructions d’installation
Outils n
éccesaires 19
Préparation de l’enceinte 19
Soin et nettoyage
Conseils utiles 20
Comment nettoyer l’intérieur 20
Comment nettoyer l’extérieur 20
En case de panne
Avant de placer un appel de service 21
Garantie
14
16
20
21
12
TABLE DES MATIÈRES
19
22

13
BIENVENUE
EN CAS DE BESOIN
D’ASSISTANCE
Bienvenue dans la famille
Danby. Nous sommes
fiers de nos produits de
qualité et croyons au bien
fondé de fournir une assistance fiable à nos clients.
Vous le découvrirez par ce
guide facile d’utilisation et
vous pourrez l’entendre en
provenance des voix amicales de notre service
d’assistance à la clientèle.
Tél.: 1-800-26-
Mais, ce qui est encore
mieux, vous pourrez
bénéficier de ces valeurs à
chaque utilisation de votre
refroidisseur de vin. Ceci
est important parce que
votre nouvelle appareil
fera partie de votre famille
pour longtemps.
Voici quelques contributions
que vous pouvez effectuer
avant de faire un appel de
service, pour nous aider à
mieux vous servir :
Lisez ce guide
Il comprend des instructions
pour vous assister à l’utilisation et l’entretien adéquats de
votre refroidisseur de vin.
Si votre appareil neuf est
avarié
Communiquez immédiatement
avec le revendeur (ou le manufacturier).
Épargnez temps et argents
Avant de faire un appel de
service, révisez le chapitre intitulé “Dépannage”. Ce chapitre
vous aidera à solutionner des
problèmes communs qui pourraient survenir.
Si une réparation est requise,
vous pouvez avoir l’esprit tranquille parce que de l’aide ne
sera l’affaire que d’un appel
téléphonique.
Tél.: 1-800-26-
Enregistrez ici les numéros de modèle
et de série. Ces numéros se trouvent
sur l’étiquette au dos de l’appareil.
Numéro de modèle DWC2727BLS
Numéro de série ____________
Date d’achat ____________
Agrafez votre reçu d’achat à l’intérieur de
la couverture arrière de de guide. Il sera
requis pour faire une réclamation de la
garantie.
Point de départ...AVANT d’utiliser votre Cabinet à Vin

LISEZ TOUTES LES INFORMATIONS DE SÉCURITÉ
AVANT DE FAIRE FONCTIONNER L’APPAREIL
14
INFORMATIONS DE SÉCURITÉ IMPORTANTES
AVERTISSEMENT
PRÉCAUTIONS
Pour minimiser le risque d’incendie, de brûlures, de chocs électriques ou de blessures, suivez les
chapitres suivants en plus d’appliquer les précautions de base.
• Cet appareil doit être mis à latterre.
Branchez le seulement dans
une prise correctement mise à la
terre. Référez-vous au chapitre intitulé “Instructions de mise à la terre” à
la page 4.
• Ne faites pas fonctionner cet
appareil s’il a un cordon ou fiche électrique endommagé, s’il ne fonctionne
pas correctement, ou si l’appareil
a été endommagé ou échappé.
• N'épissez pas le cordon électrique
• Gardez le cordon électrique
éloigné des sources de chaleur.
• N’immersez pas le cordon ou sa
fiche dans aucun liquide.
• N’utilisez pas cet appareil près de
bassins d’eau, par exemple dans un
sous-sol détrempé, près d’une
piscine ou d’un évier.
• N’utilisez pas de produits
chimiques ou vapeurs corrosives
dans/près de cet appareil.
• N’utilisez cet appareil que pour
les fins auxquelles il est conçu
comme indiqué dans ce guide.
• Ne placez pas les articles périssables de nourriture dans votre
refroidisseur de vine. (Pour examplem, les viandes et les produits
laitiers)
• Entreposez le vin dans des
bouteilles scellées seullement.
• Référez-vous aux instructions de
nettoyage du fini de la porte se trouvant au(x) chapitre(s) de Soins et
nettoyage de ce guide.
• Ne recouvrez pas ou n’obstruez
aucune ouverture de l’appareil.
• Cet appareirl est conçu pour un
usage domestique à l’intérieur seulement. N’entreposez ni n’utilisez pas
cet appareil à l’extérieur.
• Cet appareil ne devrait être réparé
que par du personnel qualifié. Pour
tout examen, réparation ou réglage,
contactez votre centre de service le
plus rapproché.
SAUVEGARDEZ CES INSTRUCTIONS
DANGER, RISQUE DES ENFANTS DEVIENNENT COINCER DANS L’APPAREIL
Un refroidisseur de vin vide est une attraction dangereuse aux enfants. Enlever les joints
étanches, les loquets, les couvercles ou les porte des appareils qui ne sont pas utiliser, ou faites
de soit que l’appareil ne présente aucun danger.
N’ATTENDEZ PAS! FAITES-LE IMMEDIATEMEN!

15
Cet appareil doit être mis à la
terre. Dans l’éventualité d’un
court-circuit, la mise à la terre
procure un chemin direct de
contournement du courant
pour prévenir l’électrocution
des manipulateurs de l’appareil.
Cet appareil est muni d’un cordon comprenant une fiche et fil
de mise à la terre.
La fiche doit être branchée
dans une prise correctement
installée et mise à la terre.
Si les directives de mise à la
terre ne sont pas tout à fait
comprises ou en cas de tout
doute relatif à la mise à la terre
appropriée de l’appareil, faites
appel à un électricien ou à un
technicien qualifié.
Si la prise murale est une prise
à 2 branches, c’est votre obligation, et la responsabilité
vous en incombe, de la faire
remplacer par une prise à trois
branches adéquatement mise
à la terre.
Pour un meilleur rendement et
pour éviter que les ampoules
d’éclairage de la résidence
soient affectées d’un affaissement de tension, ou que le
fusible ou disjoncteur du circuit
ne grille ou ne se déclenche,
dédiez un circuit individuel d’alimentation à la machine à
glaçons (prise (double) unique
sur le circuit).
Sous aucun prétexte il est
permis de couper ou d’enlever
la troisième branche (mise à la
terre) de la fiche du cordon
électrique.
N’utilisez pas d’adaptateur
de fiche avec cet appareil.
N’utilisez pas de cordon de
rallonge avec cet appareil. Si le
cordon électrique de l’appareil
ne rejoint pas la prise murale,
faites installer une prise plus
rapprochée par un électricien
ou un technicien qualifié.
INSTRUCTIONS
DE MISE À LA
TERRE
INFORMATIONS DE SÉCURITÉ IMPORTANTES
AVERTISSEMENT
Une mauvaise utilisation
de la mise à la terre de la
fiche constitue un danger
d’électrocution.

16
Instructions de fonctionnement
Caractéristiques de votre
refroidisseur de vin
1. Deux Portes: Les compartiments divisés
permettre le entreposage séparé des vins différents.
2. Controls Électroniques (Duelles):
Régulation indépendante de la température
des deux compartiments du refroidisseur de
vin.
3. Joint Étanche Magnétique: Le joint
étanche permet de conserver le niveau de
température et d’humidité à l’intérieur du cabinet.
4. Tablette avec Garniture de acero inoxidable: Les tablette coulissantes facilitent l’ac-
cès au vin.
5. Verrou à l’épreuve des enfants
6. Échappement sur le Devant: Pour des
applications intégrées
7. Portes en Verre Trempé: Teinté pour protéger contre les rayons UV tout en permettant
de voir facilement le contenu du cabinet.
8. Pieds Adjustables
9. Lumière Intérieures (non illustré):
S’aIllume lorsqu’on ouvre la porte du cabinet.
10.Interrupteur à Bascule: Manuellement
illuminer ou éteignez les lumières intérieures
tandis que les portes restent fermées.
6
5
3
7
1
4
10
2
8

17
Instructions de fonctionnement
Réglage du
température
Le réglage par défaut du thermostat du refroidisseur de vin
est 45°F (7°C) et 54°F (12°C)
dans les compartiments gauches et droits respectivement
température est affichée en
Fahrenheit (°F)
• Pour changer l'affichage
entre
la température en Celsius
(°C) et la la température en
Fahrenheit (°F) appuyez sur les
bouton
de control HAUTE et
BAS en même temps pour
environ 5 secondes.
•
La température pour les deux
compartiments peut être ajustée
aussi basse que 39°F (4°C) ou
aussi haut que 64°F (18°C) pour
satisfaire à vos besoin spécifiques
pour votre entreposage de vin.
Chaque pression du bouton commande ‘HAUTE’ ou ‘BAS’ vous permettra d'ajuster la température par
intervalle de un degré dans la
marge mentionnée ci-dessus.
Note: En cas de panne de
courant, les réglage de température les plus récents sont
perdu et les réglage de défaut
son reconstitué une fois que
l’alimentation de courant est
rétablie.
Commandes de votre
refroidisseur de vin
1
2
3
4
1. Activation
Le voyant s’allume pour indiquer que le
cycle de refroidissement est presentment en
marche.
2.
Affichage électronique
L’écran affiche le température courante du
cabinet et la
température demandée par
réglage. (référez-vous au “Réglage du
température” ci-dessous)
3. C° / F°
Le voyant situés àcôté, dénote quelle
balance de la température est montrée
4. ‘HAUT’ bouton de commande
Augmenter la température (plus chaud)
par intervalle de un degré
‘BAS’ bouton de commande
Diminuer la température (plus froid) par
intervalle de un degré.

Instructions de fonctionnement
18
Afin de réaliser la capacité d’entreposage maximum de cinquante
quatre (54) bouteilles de vin, il
sera nécessaire de placer les
bouteilles alternativement sur les
six tablettes supérieures, comme
montré dans la Fig A. Ceci permettra le entreposage de quatre
(4) bouteilles de 750 ml dans chacune des six étagères
supérieures, et trois (3) bouteilles
sur l'étagère inférieure pour une
capacité totale de entreposage de
cinquante quatre (54) bouteilles
de vin.
Entreposage
des vins
La capacité *maximum du
DWC2727 est 54 bouteilles
du vin (750ml).
* Quand il est stocké en utilisant les instructions.
Fig A
Instructions
des tablette
Pour enlever une tablette de la
position verrouillée, incline l'étagère comme montré dans la
Fig B et tire à l'extérieur.
Pour réinstaller, assurez l'étagère se repose sur les supports et poussée la tablette
vers l'intérieur jusqu'à ce
qu'elle soit verrouillée en
place.
Svp Note : Les tablettes
inférieure dans les deux sections du cabinet ne sont pas
fixées en place (verrouillée en
place). N'essayez pas de tirer
sur les tablettes quand elle est
stockée avec du vin et/ou
quand réservoir d'humidité est
rempli avec de l'eau
ATTENTION!
Ne couvrez pas les tablettes
avec du papier d’aluminium ou
avec d’autres matériaux pour
les tablettes pour ne pas nuire à
la circulation de l’air.
Fig B

19
Instructions d’installation - Application Intégré
Préparation
de l’enceinte
POUR VOTRE SÛRETÉ:
En faire les installations
décrites dans cette section,
des gants, les lunette de
sûcurité devraient être
portés.
Outils
néccesaires
Equerre de
charpentier
Ruban
à
mesurer
Niveau
Perceuse et jeu de scie cylindrique
Gants
Lunette de
sécurité
Lampe de
poche
Alimentation:
Cet appareil doit être
raccordé à un circuit de
dérivation indivdual correctment mis à la terre,
protégér par un disjoncteur
de 15 ou 20 ampères ou
d’un fusible temporisé.
• Nous recommandons que vous
n'installez pas le refroidisseur de
vin dans un coin (directement
près d'un mur). Ceci permettre
les portes d'avoir une oscillation
plus grande que 90°. Une oscillation d’ouverture qui est limitée,
empêchera les étagères de
glisser dehors comme supposé,
et peut endommager la garniture
de porte., empêchera les
étagères de glisser dehors
comme supposé, et peut endommager la garniture de porte.
• L’ouverture brute de l’armoire
doit être sur une surface niveau
avec le plancher et d’au moins 24
po de profonder par 24” largeur.
L’ouverture devrait être à une
hauteur maximale de 34- 1/2 po.
• La prise murale peut être placé
de l'un ou l'autre côté si la prise
murale n'est pas dans l'ouverture
d'installation, ou de l'arrière du
secteur ombragé (comme montré
dans fig C.).
• Si la prise murale et dans l’autre
armoire, percez un trou de 1 po
1/2” de diamètre afin d’insérer le
câble électrique. Si l’armoire est
faite de métal, le bord du trou doit
être couvert d’une bague ou d’un
passe-câble.
Accès Électrique
Fig C
Équerre
Armoire
et
plomberie
34-1/2 po
Comptoir
au plancher
24po
6
po
2po
24po
Min.
Trou de 1 1/2 po
*si la prise murale
n'est pas
dans l'ouverture
d'installation
* Le requirment de profondeur pour l'installation suppose que la prise murale est localisée dans une autre
armoire ou est monté dans le mur, pas monté sur la surface dedans l'ouverture .

20
Conseils utiles
Après avoir fait de la glace,
effectué un autonettoyage ou un
nettoyage manuel, laissez la
porte de la machine ouverte
durant quelques minutes pour
aérer et assécher l’intérieur de
l’armoire.
NOTE : Avant de nettoyer
quelque partie que ce soit
de cet appareil, assurezvous que l’alimentation est
coupée.
Comment
nettoyer
l’intérieur
Soins et entretien
Comment
nettoyer
l’extérieur
N’utilisez pas de produits
nettoyants comprenant de
l’ammoniaque ou de l’alcool
sur la refroidisseur de vin.
L’ammoniaque ou l’alcool
peuvent altérer le fini de
l’appareil.
Parois, Plancher,
Intérieur de la Visière
et Tablettes
Certaines éclaboussures d’eau
et poussières peuvent être
essuyées avec des essuie-tout.
D’autres taches peuvent
nécessiter un linge humide.
Extérieur de l’armoire
Il est important de garder la
région de scellement de la
porte sur l’armoire propre.
Nettoyez avec un tissu savonneux, rincez le régionr et puis
séchez
Surface du Porte
N’utilisez que des détergents
doux, non abrasifs, appliqués
avec une éponge propre ou un
chiffon doux. Rincez abondamment.
Panneau de commande et Porte
Essuyez avec un chiffon
humide. Asséchez bien avec
un chiffon sec. N’utilisez pas de
nettoyants en aérosol, de
grandes quantités d’eau et de
savon, d’abrasifs ou d’objets
acérés sur le panneau, ceci
pourrait l’endommager.
Certains essuie-tout peuvent
aussi égratigner le panneau de
commande et verre de la porte.
N’utilisez jamais de
nettoyant industriels sur
aucune partie de votre
refroidisseur de vin.

Si aucune des suggestions ci-dessus ne corrigent le problème, communiquez avec
notre service d’assistance au 1-800-26- (1-800-263-2629).
Avant de placer un appel de service
21
En cas de panne
Problème Cause possible Ce qu’il faut faire
L’appareil n’est pas Un fusible de votre panneau Remplacez le fusible ou
alimenté de distribution peut être grillé réarmez le disjoncteur.
ou le disjoncteur déclenché.
Surtension. Débranchez la refroidisseur de vin et
attendez quelques secondes, et puis
rebranchez la.
La fiche n’est pas complètement Assurez-vous que la fiche à 3 branch
insérée dans la prise murale. es de la refroidisseur de vin est com
plètement insérée dans la prise.
La température dans Réglage du température Vérifiez que la commande est réglée.
le cabinet est trop haute à la bonne arrangement.
Les portes ne sont pas Assurez-vous que les portes sont
fermées correctement ou fermées et que les
joint étanches
son ouverte trop souvent sont contre le coffret. Ouvrez les
portes seulement quand nécessaire.
Lumières Intérieures Les lumières intérieures sont pour
éclairage provisoire seulement Ils ne
sont pas censés d'être laissées
allumées pendant des périodes
prolongées
L'échappement est obstrué Vérifiez qu'il n'y a rien qui bloque
l’échappement sur le devant .
Stocké une grande Limitez la quantité de bouteilles
quantité de bouteilles chaudes qui sont stockées dans le
chaudes dans le cabinet cabinet en même temps.. Essayez
d'introduire progressivement des
charge chaudes si possible (ex. ne
chargez pas plus de 6 bouteilles
chaudes à la fois- trois par cabinet)
L’eau de condensation Niveau de humidité La formation de l'eau de condensation
sur le coffret et/ou les élevé dans la maison.. s'arrêtera quand le niveau.d'humidité
portes retours à normale
Les portes ne sont pas Assurez-vous que les portes sont
fermées correctement ou fermées et que les
joint étanches
son ouverte trop souvent sont contre le coffret. Ouvrez les
portes seulement quand nécessaire.
R

MANUAL DEL
USARIO

Información Importante de Seguridad
Precauciones de Seguridad 25
Instrucciones de Conexión a Tierra 26
Instrucciones de Operación
Características de su Heladera para Vinos
27
Controles de su Heladera para Vinos 28
Ajuste de Temperatura 28
Almacenamiento de Vinos 29
Instrucciones de los Estantes 29
Instrucciones de Instalación
Herramientas Necesarias
30
Preparación del Hueco 30
Cuidado y Limpieza
Consejos Útiles 31
Cómo limpiar el Interior 31
Cómo limpiar el Exterior 31
Diagnóstico de Problemas
Antes de Llamar por Asistencia 32
Garantia
25
27
31
32
23
ÍNDICE
30
33

24
BIENVENIDO
¿NECESITA AYUDA?
Bienvenido a la familia
Danby. Estamos orgullosos de nuestros productos de alta calidad y
creemos en el servicio
confiable.
Usted lo podrá apreciar en
este manual fácil de usar,
y lo escuchará en las
voces amistosas de nuestro departamento de servicio al consumidor.
Tel.: 1-800-26-
Sobre todo, usted apreciará estas ventajas cada vez
que use su heladera para
vinos.
Eso es importante, ya que
su nuevo artefacto formará parte de su familia
por mucho tiempo.
Antes de solicitar servicio, hay
algunas cosas que puede
hacer para ayudarnos a servirle mejor…
Lea este manual
Contiene instrucciones que lo
ayudarán a mantener correctamente su heladera para
vinos.Si usted recibe un artefacto dañado, llame inmediatamente al distribuidor (o constructor) que se lo vendió.
Ahorre tiempo y dinero.
Lea la sección de Diagnóstico
de Problemas antes de llamar.
Esta sección le ayudará a
resolver problemas comunes
que pudieran ocurrir.
Si necesita asistencia, no se
preocupe y llámenos.
Tél.: 1-800-26-
Escriba aquí el modelo y el número de
serie. Se encuentran en una etiqueta en
la parte de atrás de la Heladera para
Vinos.
Número de Modelo DWC2727BLS
Número de Serie ____________
Fecha de compra ____________
Abroche su recibo en la parte de atrás de
este manual. Lo necesitará para obtener
servicio de garantía.
¡Comience Aquí! Antes de usar su Heladera para Vinos

LEA TODAS LAS INSTRUCCIONES DE SEGURIDAD
ANTES DE UTILIZARLA
25
INSTRUCCIONES IMPORTANTES DE SEGURIDAD
ATENCIÓN
RECOMENDACIONES
DE SEGURIDAD
Para reducir el riesgo de incendio, quemaduras, descargas eléctricas o daños personales al
usar su artefacto, siga las precauciones básicas incluidas en las secciones siguientes.
CONSERVE ESTAS INSTRUCCIONES
¡PELIGRO, LOS NIÑOS PODRÍAN QUEDAR ATRAPADOS!
Una heladera para vinos vacía es una atracción muy peligrosa para los niños. Remueva la
junta, las trabas, la manija y/o las puertas de los artefactos que no se usen o se hayan desechado, o tome alguna otra medida para garantizar que sean inofensivos.
¡NO ESPERE, HAGA ESTO AHORA MISMO!
• Este artefacto debe ser conectado a tierra. Conéctelo únicamente a
un tomacorriente con conexión a
tierra.
Vea las "Instrucciones de Conexión
a Tierra" de la página 4.
• No use este artefacto si tiene el
cable de alimentación o el enchufe
dañado, si no funciona correctamente o
si se ha dañado o caído.
• No modifique el cable de alimentación que viene con el artefacto.
• Mantenga el cable alejado de
superficies calientes.
• No sumerja el cable de alimentación, el enchufe o el artefacto
en agua.
• No use este producto cerca del
agua, por ejemplo en un sótano
húmedo, cerca de una piscina o
cerca de una pileta.
• No use productos químicos corrosivos o vapores en este artefacto.
• Utilice este artefacto únicamente
para los fines indicados en este
manual.
• No almacene alimentos perecederos tal como (pero sin limitación) carnes y productos lácteos
en su heladera para vinos.
• Guarde el vino en botellas cerradas únicamente.
• No tape u obstruya ninguna abertura de este artefacto.
•
Este artefacto eléctrico es para
uso domiciliario solamente. No
intente usar o guardar este artefacto en el exterior.
• Este artefacto debe ser reparado
únicamente por personal calificado.
Llame al centro de reparaciones
más cercano para que sea examinado, reparado o ajustado.

26
Este artefacto debe ser conectado a tierra. En caso de un
corto circuito eléctrico, la
conexión a tierra reduce el
riesgo de una descarga eléctrica proporcionando un cable de
retorno para la corriente eléctrica.
Este artefacto viene con un
cable de alimentación que
tiene un conductor y pata del
enchufe de tierra. Este cable
debe enchufarse en un tomacorriente debidamente instalado
y con conexión a tierra.
Si no entiende claramente las
instrucciones de conexión a
tierra, o si no está seguro de
que su tomacorriente esté correctamente conectado a tierra,
llame a un electricista calificado.
Si el tomacorriente es uno
común de 2 patas, es su
responsabilidad personal y
obligación el reemplazarlo por
uno de 3 patas correctamente
conectado a tierra.
Para obtener el mejor resultado, enchufe este artefacto en
su propio tomacorriente para
evitar que las luces titilen, quemar un fusible o disparar una
llave térmica.
Nunca, bajo ninguna circunstancia, corte o remueva la tercera pata (tierra) del enchufe.
No use un enchufe adaptador
con este artefacto
No use un cable de prolongación con este artefacto. Si el
cable de alimentación es
demasiado corto, haga que un
electricista calificado o un técnico de reparaciones instale
otro tomacorriente más cerca
del artefacto.
INSTRUCCIONES
DE LA CONEXIÓN
A TIERRA
INSTRUCCIONES IMPORTANTES DE SEGURIDAD
ATENCIÓN
La conexión inadecuada
del cable de tierra puede
causar riesgo de descarga eléctrica.

27
Instrucciones de Operación
Características de su
Heladera para Vinos
1. Componentes Independientes:
Separados para permitirle guardar diferentes
tipos de vinos.
2. Controles Electrónicos Dobles:
Para regular independientemente la temperatura de ambos compartimientos de la
heladera para vinos.
3. Juntas Magnéticas de la Puesta:
Las juntas ajustadas mantienen todo el poder de
enfriamiento y los niveles de humedad.
4. Estantes con Terminación de acero
inoxidable: Se deslizan hacia fuera para
facilitar el acceso al vino.
5. Trabas con llave a prueba de niños.
6. Escape Frontal:
Permite su instalación
empotrada.
7. Puertas de Vidrio Templado:
Permite ver fácilmente el interior. Polarizadas
para proteger contra la radiación UV.
8. Patas Niveladoras
9. Luces Interiores (no se muestran):
Se encienden cuando se abre cualquiera de
las puertas.
10. Llave de Encendido para Luces
Interiores: Para encender/apagar manual-
mente las luces interiores con las puertas cerradas.
6
5
3
7
1
4
10
2
8

28
Instrucciones de Operación
Ajuste de
Temperatura
Los controles dobles de
temperatura así como
los compartimientos
separados de la
DWC2727BLS le permiten guardar distintos
tipos de vinos y mantenerlos a temperaturas distintas.
Cuando enchufe su heladera
para vinos por primera vez, la
temperatura se ajustará
automáticamente a 45ºF (7ºC) y
54ºF (12ºC) para los compartimientos de la izquierda y la
derecha respectivamente y se
indicarán en la escala Fahrenheit
(ºF).
• Para cambiar la indicación
entre Fahrenheit (ºF) y Celsius
(ºC) , presione los botones UP
y DOWN simultáneamente
durante unos cinco (5) segundos.
• La temperatura de ambos compartimientos puede ajustarse
desde 39ºF (4ºC) hasta 64ºF
(18ºC) para satisfacer sus requerimientos específicos de la heladera
para vinos. Cada vez que presione
los botones de UP o DOWN podrá
ajustar la temperatura en incrementos de 1 grado dentro del rango
mencionado anteriormente.
Observaciones: En caso de interrupción en el suministro de energía
eléctrica, se perderán todos los
ajustes seleccionados y una vez
que vuelva la energía, la unidad
tendrá los ajustes iniciales de fábrica.
Controles de su
Heladera para Vinos
1
2
3
4
1. Run (Marcha)
Este indicador se enciende para indicar que
el modo de refrigeración está funcionando.
2.
Pantalla Electrónica
Muestra la temperatura actual del gabinete
y la temperatura seleccionada. (Vea Ajuste
de Temperatura más abajo).
3. ºC / ºF
La luz indicadora adyacente le indica la
unidad correcta de temperatura.
4. Botón UP (Arriba)
Se usa para aumentar la temperatura en
incrementos de 1 grado (más caliente).
Botón DOWN (Abajo)
Se usa para disminuir la temperatura en
incrementos de 1 grado (más frío).

Instrucciones de Operación
29
Para poder alcanzar la capacidad
máxima de almacenamiento de
cincuenta y cuatro (54) botellas,
será necesario colocar las botellas alternativamente en los seis
estantes superiores, tal como se
indica en la Fig. A. Esto le permitirá guardar cuatro (4) botellas de
750ml por estante en cada uno de
los seis estantes superiores, y tres
(3) botellas en el estante inferior
logrando una capacidad máxima
de cincuenta y cuatro (54) botellas.
Almacenamiento
de Vinos
La capacidad máxima* de la
DWC2727 es de 54 botellas
de vino (de 750ml).
*Cuando se guarden de
acuerdo con las instrucciones.
Fig A
Instrucciones de
los Estantes
Para sacar un estante de su
posición trabada, inclínelo
como se indica en la Fig. B y
tire hacia afuera.
Para volver a trabarlo, verifique que esté apoyado firmemente en los soportes de
montaje y empújelo hacia
adentro hasta que se trabe en
su lugar.
Observación: El estante
inferior de ambas secciones
del gabinete no está trabado
en su lugar. No intente extraerlo cuando tenga botellas de
vino o el humidor lleno de
agua.
¡IMPORTANTE!
No recubra los estantes con
papel de aluminio ni ningún
otro material que evite la
adecuada circulación de aire
dentro del gabinete.
Fig B

30
Instrucciones de Instalación – Funcionamiento
Empotrado
Preparación del
Hueco
POR SU SEGURIDAD:
Al realizar las instalaciones
descriptas en esta sección,
use guantes, gafas de seguridad o gafas protectoras.
Herramientas
Necesarias
Escuadra de
Carpintero
Cinta Métrica
Nivel
Taladro y Juego de Sierra Perforadora
Guantes
Gafas
Protectoras
Linterna
Requisitos Eléctricos:
El artefacto debe conectarse
a un circuito eléctrico independiente y correctamente
conectado a tierra, protegido
por una llave térmica de 15 o
20 amperes o un fusible
lento.
• No le recomendamos instalar la
heladera para vinos en una
esquina (por ejemplo, directamente contra la pared). Esto le
permitirá que las puertas puedan
abrirse con un ángulo mayor a
90º. La apertura limitada de la
puerta evitará que los estantes
se deslicen hacia fuera, y podría
llegar a dañar los sellos de la
puerta.
• El hueco para el gabinete debe
estar en una superficie nivelada
y debe tener por lo menos 24" de
profundidad por 24" de ancho. El
hueco también deberá tener por lo
menos 34 1/2" de alto.
• El tomacorriente eléctrico
puede colocarse del lado de
cualquiera de los artefactos adyacentes, o en la parte de atrás de
la zona sombreada (como se
indica en la Fig. C).
• Si el tomacorriente se coloca
del lado del artefacto adyacente,
haga un agujero de 1-1/2" de
diámetro para pasar el cable de
alimentación. Si la pared del
mueble es de metal, los bordes
del agujero deben cubrirse con
un pasacables.
Acceso Eléctrico
Fig C
Mueble a
escuadra
35" Desde
abajo de la
mesada
hasta el piso
24”
6”
2”
24”
Min.
Agujero de 1-1/2"
de diámetro *si el
tomacorriente está
en el artefacto
adyacente
* Las profundidades requeridas para la instalación indicadas en la lista asumen que el tomacorri-
ente está ubicado en el gabinete adyacente o empotrado a ras en la pared del fondo, no sobre-
saliendo de ésta.

31
Consejos Útiles
Deje la puerta de la heladera
para vinos abierta por unos
minutos luego de limpiarla para
que se ventile y para secar el
interior del gabinete.
NOTA: Verifique que la
unidad esté apagada
antes de limpiar
cualquiera de sus partes.
Cómo limpiar el
interior
Cuidado y Limpieza
Cómo limpiar el
exterior
No use limpiadores que tengan amoníaco o alcohol en
la heladera para vinos.
El amoníaco o el alcohol
pueden dañar la apariencia
del artefacto.
Paredes, Piso, Interior
de las Puertas y
Estantes
Algunos sedimentos del agua y
tierra pueden quitarse con una
toalla seca de papel, otros
pueden necesitar un trapo
húmedo.
Cubierta Exterior
Es importante mantener
limpia la zona donde la puerta
cierra contra el gabinete.
Limpie esa área con trapo
enjabonado. Enjuáguela y
séquela completamente.
Superficie de la
Puerta
Use únicamente detergentes
livianos, no abrasivos, aplicados con una esponja limpia o
un trapo suave.
Enjuáguelo bien.
Panel de Control y
Puerta
Repáselo con un trapo húmedo y séquelo completamente.
No use limpiadores en
aerosol, demasiada agua y
jabón, objetos abrasivos o
filosos en el panel de control
ya que podría dañarlo.
Algunas toallas de papel también podrían rayar el panel de
control.
Nunca use un limpiador comercial o abrasivo u objetos
filosos en ninguna parte de la
heladera para vinos.

Antes de Llamar por Asistencia
Si ninguno de los casos anteriores soluciona su problema, llame a nuestro departamento de servicio al cliente al 1-800-26- (1-800-263-2629).
32
Diagnóstico de Problemas
Problema Posible Causa Qué Hacer
No Enciende. Un fusible de votre panneau Remplacez le fusible ou
de distribution peut être grillé réarmez le disjoncteur.
ou le disjoncteur déclenché.
Sobrevoltaje. Débranchez la refroidisseur de vin et
attendez quelques secondes, et puis
rebranchez la.
La fiche n’est pas complètement Assurez-vous que la fiche à 3 branch
insérée dans la prise murale. es de la refroidisseur de vin est com
plètement insérée dans la prise.
Temperatura del Gabinete Ajuste la Temperatura Verifique el ajuste de temperatura.
demasiado alta Ajústelo si es necesario.
La(s) puerta(s) no está(n) Ensure that the doors are fully closed
cerrada(s) correctamente o
se han abierto demasiado. and that the gaskets are sealing.
against the cabinets. Open the doors
only as needed and for short periods
of time
Luces interiores encendidas The interior lights are intended for
temporary lighting of cabinets for
display purposes only. They are not
intended to be left on for prolonged
time periods
Escape de aire obstruido Verify there is nothing blocking the
front mounted exhausting vent.
Limit the quantity of warm bottles
being introduced to the cabinet at the
same time. Attempt to stagger the
load introduction if possible. (i.e. load
no more then 6 warm bottles at once)
Condensación en el Alta humedad en el ambiente. The condensation will subside once
gabinete y/o las puertas humidity conditions return to normal.
Door(s) not shut properly Ensure that the doors are fully closed
or opened excessively and that the gaskets are sealing.
against the cabinets. Open the doors
only as needed and for short periods
of time
Puede tener un fusible
quemado o una llave
térmica abierta en su
instalación eléctrica.
El enchufe no está
completamente
insertado en el tomacorriente.
Reemplace el fusible o
encienda la llave general.
Desenchufe el equipo,
espere unos segundos y
vuelva a enchufarlo.
Verifique que el enchufe de
3 patas del equipo esté
completamente insertado
en el tomacorriente.
Se han agregado
recientemente muchas
botellas tibias al gabinete
Verifique que las puertas estén
completamente cerradas y que
las juntas estén cerrando bien
contra el gabinete. Abra las
puertas sólo lo necesario y por
poco tiempo.
Las luces interiores son para
iluminación temporaria del
gabinete. No están diseñadas
para estar encendidas por
mucho tiempo.
Verifique que no haya nada bloqueando
la salida de aire del frente.
Limite la cantidad de botellas tibias que
agregue en el gabinete al mismo tiempo.
Intente fraccionar el agregado de botellas todo lo posible. (Por ejemplo, no
agregue mas de 6 botellas a la vez)
La(s) puerta(s) no está(n)
cerrada(s) correctamente o
se han abierto demasiado.
La condensación disminuirá cuando las condiciones de humedad
vuelvan a la normalidad.
Verifique que las puertas estén completamente cerradas y que las juntas
estén cerrando bien contra el gabinete. Abra las puertas sólo lo necesario y por poco tiempo.

Model • Modèle • Modelo
For service, contact your nearest service
depot or call:
1-800-26-y
(1-800-263-2629)
to recommend a depot in
your area.
Pour obtenir de l’assistance, commu-
niquez avec votre centre de service le
plus rapproché ou composez le :
1-800-26- Danby
(1-800-263-2629)
pour localiser le dépositaire de votre
région
Para reparaciones, llame a su centro de
reparaciones más cercano o al::
1-800-26- nby
(1-800-263-2629)
para recomendarle un centro de repara-
ciones en su área.
Integrated Wine Cooler
The model number can be found on the serial plate located on the
back panel of the unit.
All repair parts available for purchase or special order when you
visit your nearest service depot. To request service and/or the
location of the service depot nearest you, call the TOLL FREE
NUMBER.
When requesting service or ordering parts, always provide the
following information:
• Product Type
• Model Number
• Part Description
Refroidisseur Intégré de Vin
Le numéro de modèle se trouve sur la plaque signalétique au dos
de l’unité.
Vous pouvez vous procurer/commander toute pièce de rechange
chez votre dépositaire le plus rapproché. Pour toute demande de
service ou pour localiser le dépositaire/centre de service le plus rapproché, composez le NUMÉRO SANS FRAIS.
Pour toute demande de service ou commande de pièces, fournissez
toujours l’information suivante :
• Type de produit
• Numéro de modèle
• Description de la pièce requise
Heladera Integral para Vinos
El número de modelo se encuentra en la placa ubicada en el panel
posterior de la unidad.
Todas las partes de recambio pueden comprarse o encargarse
especialmente en su taller de reparación autorizado. Para solicitar
servicio y/o localizar el taller de servicio mas cercano, llame a nuestro NÚMERO SIN CARGO.
Proporcione siempre la siguiente información al solicitar servicio o
al ordenar partes:
• Tipo de Producto
• Número de Modelo
• Descripción de la Parte
Danby Products Limited, Guelph, Ontario Canada N1H 6Z9
Danby Products Inc., Findlay, Ohio USA 45840
Printed in China (P.R.C.)
DWC2727BLS
R
R
R
 Loading...