


• OWNER’S USE AND CARE GUIDE
• GUIDE D’UTILISATION ET SOIN DE PROPRIÈTAIRE
• GUÍA PARA UTILIZAR Y CUIDAR DEL PROPRIETARIO
WINE COOLER
REFROIDISSEUR A VIN
ENFRIADOR DE VINO
MODEL • MODÈLE • MODELO
Model • Modèle • Modelo
DWC040A2BDB
Danby Products Limited, Ontario, Canada N1H 6Z9
Danby Products Inc., Findlay, Ohio, USA 45840
V3.07.13.DM
TO OBTAIN WARRANTY SERVICE YOU MUST PROVIDE A VALID PROOF OF
PURCHASE. PLEASE STAPLE YOUR RECEIPT TO THIS PAGE FOR FUTURE
REFERENCE.
------------------------------------------------------------------------------------------------------------------POUR OBTENIR LE SERVICE SUR GARANTIE VOUS DEVEZ FOURNIR UNE
PREUVE D’ACHAT VALIDE. S’IL VOUS PLAIT AGRAFE VOTRE REÇU A CETTE
PAGE POUR LA REFERENCE FUTURE.
------------------------------------------------------------------------------------------------------------------PARA OBTENER SERVICIO DE GARANTÍA, DEBE PROVEER UN RECIBO
ORIGINAL. POR FAVOR ENGRAPE SU RECIBO A ÉSTA PÁGINA EN CASO QUE
NECESITE HACER UN RECLAMO.
IMPORTANT - GROUNDING METHOD
This product is factory equipped with a power supply cord that has a three-pronged grounded plug. It must
be plugged into a mating grounding type receptacle in accordance with the National Electrical Code and
applicable local codes and ordinances. If the circuit does not have a grounding type receptacle, it is the
responsibility and obligation of the customer to exchange the existing receptacle in accordance with the
National Electrical Code and applicable local codes and ordinances. The third ground prong should not,
under any circumstances, be cut or removed.
IMPORTANT - MÉTHODE POUR LA MISE À LA TERRE
Ce produit arrive d’origine avec un cordon d’alimentation équipé d’une prise à trois fi ches. Il doit être
branché dans une prise avec une fi che de mise à la terre en conformité avec le Code National de l’Électricité
et les codes et règles locales applicables. Si le prise murale n’a pas de mise à la de terre, il est de la
responsabilité et l’obligation du client de changer la prise existante pour la rendre conforme aux Codes
Nationaux de l’Électricité, aux codes et règles locaux applicables. La fi che de la mise à la terre ne doit pas,
en aucune circonstance, être coupée ou retirée.
IMPORTANTE - MÉTODO DE CONEXIÓN A TIERRA
Este producto viene equipado con un cable eléctrico que tiene un enchufe de tres patas con conexión
a tierra. Este debe colocarse en una toma de corriente con conexión a tierra de acuerdo con el Código
nacional de electricidad y códigos y ordenanzas locales correspondientes. Si el circuito no cuenta con
una toma de corriente con conexión a tierra, es responsabilidad y obligación del cliente sustituir la toma
de corriente actual de acuerdo con el Código nacional de electricidad y códigos y ordenanzas locales
correspondientes. Bajo ninguna circunstancia se debe cortar o eliminar la tercera pata de conexión a tierra.
CONTENTS
WINE COOLER
Owner’s Use and Care Guide ................................1-10
• Welcome
• Important Safety Information
• Installation Instructions
• Features
• Operation
• Care and Maintenance
• Troubleshooting
• Warranty
REFROIDISSEUR A VIN
Guide d’utiliser et soin de propriètaire .....................11-20
• Bienvenu
• Consignes de Sécurité Importantes
• Instructions d’installation
• Caracteristiques
• Opération
• Soins et Entretien
• Dépannage
• Garantie
ENFRIADOR DE VINO
Guía a Utilizar y a Cuidar .......................................21-30
• Bienvenido
• Instrucciones de Seguridad Importantes
• Instrucciones de instalación
• Caracteristicas
• Operación
• Cuidado y Mantenimiento
• Diagnosticos de Problemas
• Garantia
CAUTION
Read and follow all safety rules and
operating instructions before fi rst use of this
product.
PRÉCAUTION
Veuillez lire attentivement les consignes de
sécurité et les intructions d’utilisation avant
l’utilisation intiale de ce produit.
PRECAUCIÓN
Lea y observe todas las relgas de seguridad y las instrucciones de operación antes
de usar este producto por la primera vez.
WELCOME
Welcome to the Danby family. We’re proud of our quality products, and we believe in dependable service like you will fi nd
in this owner’s use and care guide, and like you will receive from our friendly customer service department. Best of all,
you will experience these values each and every time you use your Danby appliance. That’s important, because your new
appliance will be a part of your family for a long time.
Note the information below; you will need this information to obtain service under warranty.
Model No:
Serial No:
Date Purchased:
NEED HELP?
Before you call for service, there are a few things you can do to
help us serve you better:
Read this Owner’s Use and Care Guide:
It contains instructions to help you use and maintain your
appliance properly.
If you received a damaged appliance:
Immediately contact the builder (or retailer) that sold you the
appliance.
Save time and money:
Check the Troubleshooting section at the end of the guide
before calling. This section helps you solve common problems
that may occur.
If you do need service, you can relax knowing help is only a
phone call away.
Tel: 1-800-26-
(1-800-263-2629)
1
IMPORTANT SAFETY INFORMATION
READ AND FOLLOW ALL SAFETY INSTRUCTIONS
Please ensure that component parts shall be replaced with like components and that servicing shall be done
by factory authorized service personnel, so as to minimize the risk of possible ignition due to incorrect parts or
improper service.
IMPORTANT WARNING
DANGER, RISK OF CHILD ENTRAPMENT!
An empty wine cooler is a very dangerous attraction to children. Remove either the gasket latches,
lids, lock and/or doors from unused or discarded
appliances, or take some other action
to guarantee it harmless.
Leave the shelves in place so that children may
not easily climb inside.
DON’T WAIT, DO IT NOW!
SAFETY
PRECAUTIONS
• This appliance must be
grounded. Connect only to a
properly grounded outlet.
See “Grounding Instructions”
section on page 3.
• Do not operate this appliance
if it has a damaged power cord
or plug, if it is not working
properly, or if the appliance has
been damaged or dropped.
• Do not splice the power cord
that is equipped with this
appliance.
• Do not use corrosive
chemicals or vapors in this
appliance.
• Use this appliance only for
its intended use, as described
in this manual.
• Do not store perishable food
items such as (but not limited
to) meats and dairy products
in your wine cooler.
• Store wine in sealed
containers only.
WARNING
To reduce the risk of fi re, burns, electric shock, or
injury to persons when using your appliance,
follow basic precautions, including the following
sections below;
• This appliance is intended for
household use only. Do not
attempt to operate or store this
appliance outdoors.
• This appliance should be
serviced only by qualifi ed service
personnel. Contact nearest
authorized service facility for
examination, repair or adjustment.
• Keep power cord away from
heated surfaces.
• Do not immerse power cord,
plug or the appliance itself in
water.
• Do not use this product near
water-for example, in a wet
basement, near a swimming
pool or near a sink.
• See door surface cleaning
instructions in the Care and
Cleaning section(s) of this
manual.
• Do not cover or block any
openings on the appliance.
SAVE THESE INSTRUCTIONS
2
IMPORTANT SAFETY INFORMATION
READ AND FOLLOW ALL SAFETY INSTRUCTIONS
Please ensure that component parts shall be replaced with like components and that servicing shall be done
by factory authorized service personnel, so as to minimize the risk of possible ignition due to incorrect parts or
improper service.
GROUNDING
INSTRUCTIONS
WARNING
To reduce the risk of fi re,
burns, electric shock, or
injury to persons when
using your appliance,
follow basic precautions,
including the following
sections below;
This appliance must be
grounded. In the event of an
electrical short circuit, grounding
reduces the risk of electric
shock by providing an escape
wire for the electric current.
This appliance is equipped
with a power cord having a
grounding wire with a grounding
plug. The plug must be
plugged into an outlet that is
properly installed and grounded.
Consult a qualifi ed electrician
or service technician if the
grounding instructions are not
completely understood, or if
doubt exists as to whether the
appliance is properly grounded.
If the outlet is a standard 2prong wall outlet, it is your personal responsibility and obligation
to have it replaced with a
properly grounded 3-prong
wall outlet.
For best operation, plug this
appliance into its own
electrical outlet to prevent
fl ickering of lights, blowing of
fuse or tripping of circuit breaker.
Do not under any circumstances
cut or remove the third (ground)
prong from the power cord.
Do not use an adapter plug
with this appliance.
Do not use an extension
cord with this appliance. If the
power cord is too short, have
a qualifi ed electrician or serv
ice technician install an outlet
near the appliance.
INSTALLATION INSTRUCTIONS
LOCATION
DO...
• Select a location with a
strong, level fl oor.
• Allow 5 inches of space
between the back of the
appliance and any adjacent
wall.
• Avoid direct sunlight and
heat. Direct sunlight may
affect the acrylic coating,
heat sources nearby will
cause higher electricity
consumption.
3
DO NOT...
• Use this appliance
outdoors: This appliance is
intended for household use
only. Do not attempt to
operate or store this
appliance outdoors.
• Build this appliance
into an enclosure: This
appliance is designed for a
free-standing application
only and is not intended to
be “built-in”.
INSTALLATION INSTRUCTIONS
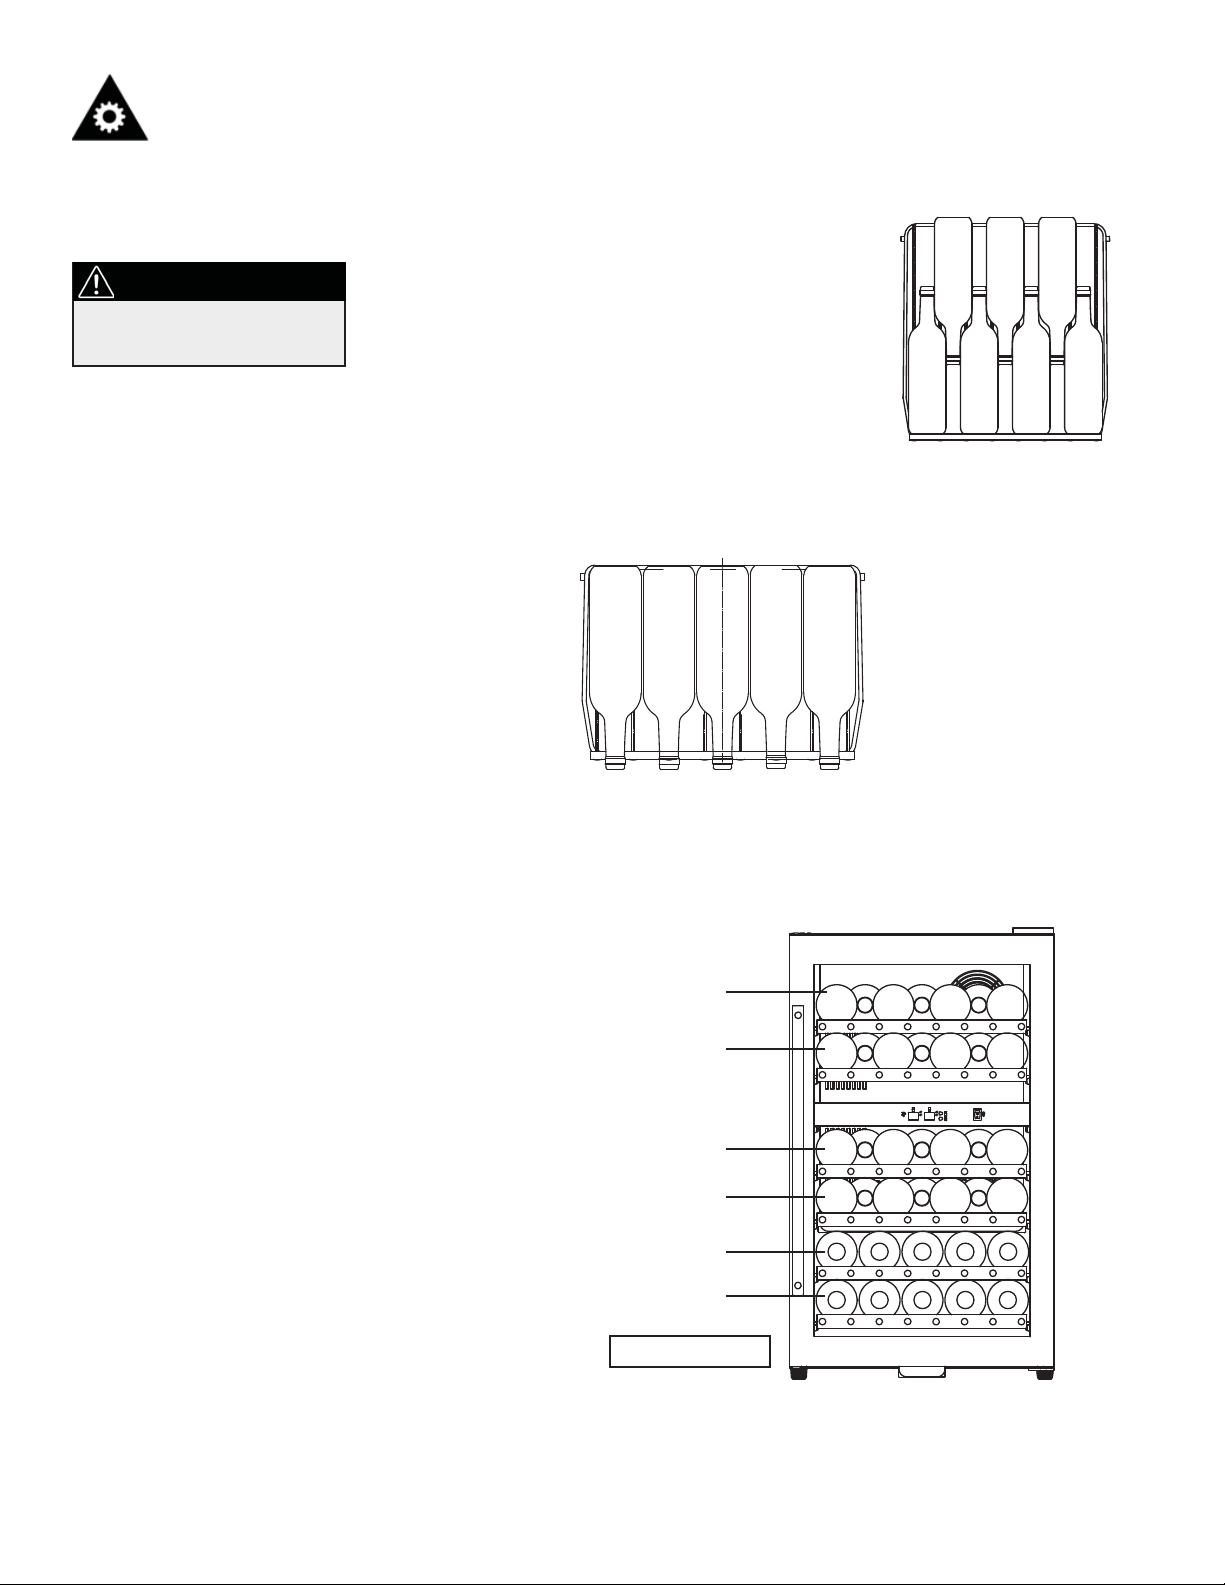
FEATURES OF YOUR
WINE COOLER
1. Handle
2. Magnetic Door Gaskets: Tight fi tting
seals retain all the cooling power and
humidity levels.
3. Tempered Glass Door: Tinted for UV
protection while maintaining easy
interior viewing.
Width 19 7/16” (493mm) Temperature Range
Height 33 2/16” (841mm) Net Weight 43 kgs / 94.82 lbs
Depth 24 10/16” (626mm) Refrigerant R134a
4. Black wire shelves with teak wood trim:
There may be slight natural variations in the colour of the
wood.
5. Electronic Display and Controls: For viewing and
regulating the temperature for both compartments of the
wine cooler.
6. Leveling Legs
Specifi cations
39~64°F / 4~18°C
(Minimum ~Maximum)
4
INSTALLATION INSTRUCTIONS
DOOR SWING
REVERSAL
Phillips #2 screwdriver and an adjustable wrench.
WARNING
To reduce the risk of fi re, burns, electric
shock, or injury to persons when using
your appliance, follow basic precautions,
including the following sections below;
Rubber screw covers
1
2
Screws
3
Decorative cover
TOOLS REQUIRED
Fig.1
1
2
3
Fig.2
Fig.3
4
5
4
Screws
Top hinge
5
Plug
6
7
Screws
8
Lower hinge
9
Cabinet leg
10
Extrusion-board for
Fig.4
6
Fig.6
Fig.5
8
7
9
11
10
lamp switch
11
Screws
1. Close the door and remove rubber screw covers (1), unscrew two screws (2) and remove decorative cover (3). (Fig.1)
2. Unscrew screws (4) and take out top hinge (5), then remove the door. (Fig. 2)
3. Put door aside safely, take out 2 screws (11) at bottom, pull out extrusion-board for lamp switch (10) and reattach it at the
top of the door.(Fig. 5)
4. Pull out plugs (6) from left top of cabinet. (Fig.4)
5. Unscrew 3 screws (7) from right bottom of cabinet and remove lower hinge (8). (Fig.5)
6. Unscrew cabinet leg (9) from left bottom of cabinet and fi x it onto right bottom of cabinet. (Fig.5)
7. Fix the lower hinge (8) onto left bottom of cabinet with screws (7). (Fig. 5)
8. The door revolves 180 degrees, put lower door axis to aim at lower hinge (8) and install the door onto lower hinge (8), then
close the door carefully. (Fig.3)
9. Fix top hinge (5) onto left top of cabinet with screws (4), adjust door and install decorative cover (3) and rubber
cover (1). (Fig.6)
10. Block 3 screw holes at right top of cabinet with spare plugs.
5
OPERATING INSTRUCTIONS
THE CONTROLS OF
YOUR WINE COOLER
2
1
1
: Indicator light illuminates to signify the
cooling mode is currently in operation.
2
Window: For viewing the temperature of the
upper zone.
Window: For viewing the temperature of the
3
lower zone.
4
°C / °F: Indicates what scale the temperatures will
be displayed in.
3
4
5
5
Button : Used to set the temperature in the
upper zone (see ‘Setting the Temperature’ below).
6
Button : Used to set the temperature in the
lower zone (see ‘Setting the Temperature’ below).
To control the inner light turn ON/OFF.
6
Switch: Continuous illumination.
I
Switch: Illumination only when the door is
O
open.
SETTING THE
TEMPERATURE
IMPORTANT
In the event of a power
failure, wait 3 to 5 minutes
before restarting.
• To switch the display between the Fahrenheit (°F) and Celsius
(°C) scale, press the and control buttons simultaneously for
approximately fi ve(5) seconds.
• The temperature range can be set as low as 39°F (4°C) or as high
as 64°F (18°C) to suit your specifi c storage requirements. Each
press of the or button will allow you to adjust the
temperature in 1° increments within the aforementioned range.
6
OPERATING INSTRUCTIONS
WINE STORAGE
IMPORTANT
Store wine in sealed
bottles only.
The maximum* wine capacity
of your wine cooler is 38
(750 ml) bottles.
*When stocked as per
instructions.
In order to achieve the maximum capacity of thirty-eight (38)
bottles, it will be necessary to
position the bottles alternately
on the upper four (4) racks, as
shown in Fig. A. This will allow
for the storage of seven (7) 750
ml bottles per rack in each of
the top four (4) racks, and fi ve
(5) bottles on the bottom
two (2) racks (Fig. B). For a fully
loaded unit please see Fig. C
below.
Fig. B
Fig. A
Full shelves
Half shelves
Fig.C (Fully loaded unit)
7 bottles
7 bottles
7 bottles
7 bottles
5 bottles
5 bottles
Total 38 bottles
7
OPERATING INSTRUCTIONS
WINE STORAGE
IMPORTANT
Do not cover racks with
aluminum foil or any other
material that will prevent
adequate air circulation
within the cabinet.
CARE AND MAINTENANCE
HELPFUL HINTS
Make sure the self is aligned with the
lock block when taking the shelf out or
putting it back into the unit.
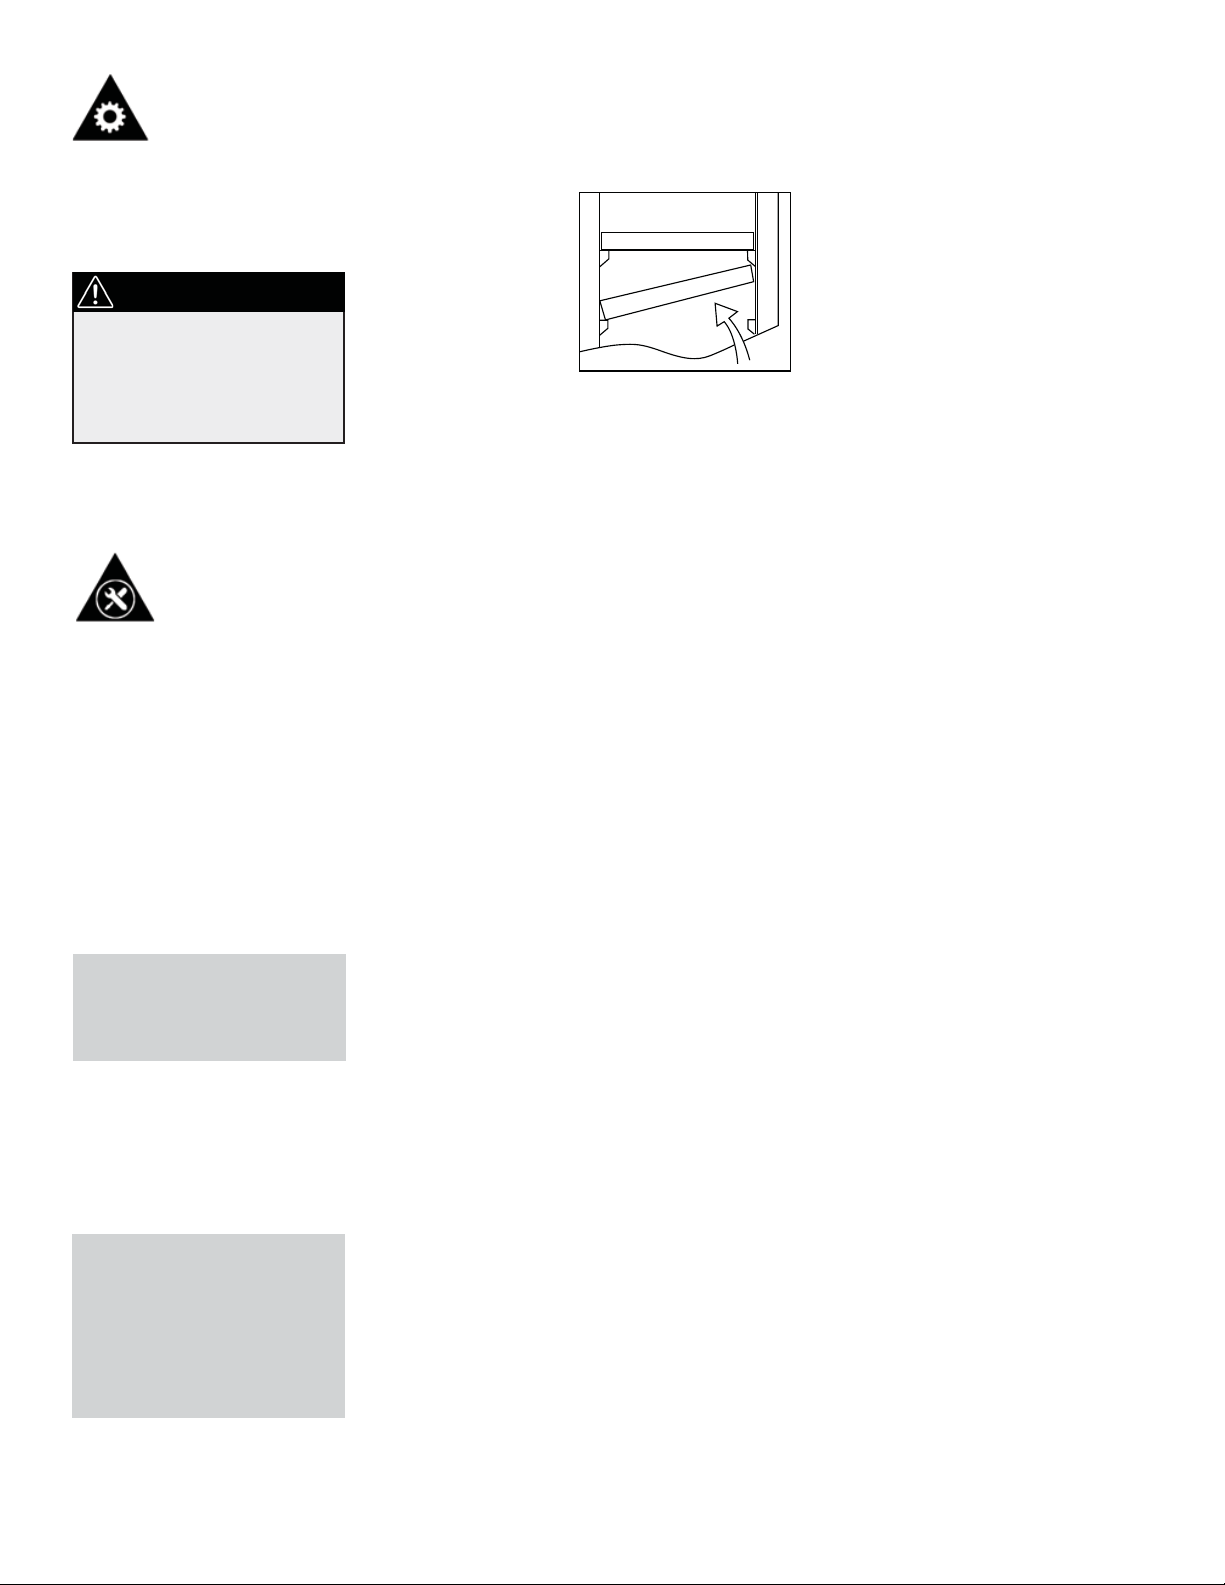
T o remove a rack from its locked
position, tilt the rack as shown in Fig. C
and pull outward.
Fig. C
Allow the wine cooler
door to remain open for a few
minutes after manual cleaning
to air out and dry the inside of
the wine cooler cabinet
To re-install, ensure the rack is resting
securely on the support brackets and
push the rack inward until it locks into
place.
NOTE: Be certain the power is
off before cleaning any part of
this appliance.
HOW TO CLEAN
THE INSIDE
Never use any commercial
or abrasive cleaners or
sharp objects on any part
of the Wine Cooler.
HOW TO CLEAN
THE OUTSIDE
Do not use cleaners containing ammonia or alcohol
on the wine cooler.
Ammonia or alcohol can
damage the appearance of
the appliance.
Walls, Floor, Inside
Window, and Shelves
Some water deposits and dust can be removed with a dry
paper towel, others may require a damp cloth.
Outer Case
It’s important to keep the area clean where the door seals
against the cabinet. Clean this area with a sudsy cloth. Rinse
and then dry.
Door Surface
Use only mild, non-abrasive detergents applied with a clean
sponge or soft cloth. Rinse well.
Control Panel and Door
Wipe with a damp cloth and dry thoroughly. Do not use
cleaning sprays, large amounts of soap and water, abrasive or
sharp objects on the panel-they can damage it. Some paper
towels may also scratch the control panel and door glass.
8

TROUBLESHOOTING
Occasionally, a problem may arise that is minor in nature, and a service call may not be necessary. Use this troubleshooting guide for a possible solution. If the unit continues to operate improperly, call an authorized service depot or Danby’s
Toll Free Number 1-800-263-2629 for assistance.
Problem Possible Cause What to do
No power A fuse in your home may be
blown or the circuit breaker
tipped.
Replace fuse or reset circuit
breaker.
Power surge.
Plug not fully inserted into wall
outlet.
Cabinet temperature too high Temperature setting.
Door not shut properly or opened
excessively.
Interior lights toggled on.
Recently added a large quantity of
warm bottles to the cabinet.
Condensation on the cabinet,
doors or fl oor
High humidity conditions in the
home.
Door not shut properly or opened
excessively.
Unplug the wine cooler, wait a few
seconds and then plug it back in
Make sure the 3-prong plug is fully
inserted into outlet.
Verify the temperature control
setting. Adjust if neccessary.
Ensure that the door is fully closed
and that the gasket is sealing.
against the cabinets. Open the
doors only as needed and for short
periods of time.
The interior lights are intended for
temporary lighting of cabinets for
display purposes only. They are not
intended to be left on for prolonged
time periods.
Limit the quantity of warm bottles
being introduced to the cabinet at
the same time. Attempt to stagger
the load introduction if possible.
The condensation will subside once
humidity conditions return to normal.
Ensure that the door is fully closed
and that the gasket is sealing.
against the cabinets. Open the
door only as needed and for short
periods of time
9

LIMITED IN-HOME APPLIANCE WARRANTY
This quality product is warranted to be free from manufacturer’s defects in material and workmanship, provided that the unit is used under the normal operating
conditions intended by the manufacturer.
This warranty is available only to the person to whom the unit was originally sold by Danby Products Limited (Canada) or Danby Products Inc. (U.S.A.) (hereafter
“Danby”) or by an authorized distributor of Danby, and is non-transferable.
TERMS OF WARRANTY
Plastic parts, are warranted for thirty (30) days only from purchase date, with no extensions provided.
First Year
During the first twelve (12) months, any functional parts of this product found to be defective, will be repaired or replaced, at warrantor’s
option, at no charge to the ORIGINAL purchaser.
To obtain
Service
Danby reserves the right to limit the boundaries of “In Home Service” to the proximity of an Authorized Service Depot. Any appliance
requiring service outside the limited boundaries of “In Home Service” ,it will be the consumer’s responsibility to transport the appliance (at
their own expense) to the original retailer (point of purchase) or a service depot for repair. See “Boundaries of In Home Service” below.
Contact your dealer from whom your unit was purchased, or contact your nearest authorized Danby service depot, where service
must be performed by a qualified service technician.
If service is performed on the units by anyone other than an authorized service depot, or the unit is used for commercial application, all
obligations of Danby under this warranty shall be void.
Boundaries of
In Home Service
If the appliance is installed in a location that is 100 kilometers (62 miles) or more from the nearest service center your unit must be
delivered to the nearest authorized Danby Service Depot, as service must only be performed by a technician qualified and certified for
warranty service by Danby. Transportation charges to and from the service location are not protected by this warranty and are the
responsibility of the purchaser.
Nothing within this warranty shall imply that Danby will be responsible or liable for any spoilage or damage to food or other contents of this appliance, whether due
to any defect of the appliance, or its use, whether proper or improper.
EXCLUSIONS
Save as herein provided, Danby, there are no other warranties, conditions, representations or guarantees, express or implied, made or intended by Danby or its
authorized distributors and all other warranties, conditions, representations or guarantees, including any warranties, conditions, representations or guarantees
under any Sale of Goods Act or like legislation or statue is hereby expressly excluded. Save as herein provided, Danby shall not be responsible for any damages
to persons or property, including the unit itself, howsoever caused or any consequential damages arising from the malfunction of the unit and by the purchase of
the unit, the purchaser does hereby agree to indemnify and hold harmless Danby from any claim for damages to persons or property caused by the unit.
GENERAL PROVISIONS
No warranty or insurance herein contained or set out shall apply when damage or repair is caused by any of the following:
1) Power failure.
2) Damage in transit or when moving the appliance.
3) Improper power supply such as low voltage, defective house wiring or inadequate fuses.
4) Accident, alteration, abuse or misuse of the appliance such as inadequate air circulation in the room or abnormal operating conditions
(extremely high or low room temperature).
5) Use for commercial or industrial purposes (ie. If the appliance is not installed in a domestic residence).
6) Fire, water damage, theft, war, riot, hostility, acts of God such as hurricanes, floods etc.
7) Service calls resulting in customer education.
8) Improper Installation (ie. Building-in of a free standing appliance or using an appliance outdoors that is not approved for outdoor application).
Proof of purchase date will be required for warranty claims; so, please retain bills of sale. In the event warranty service is required, present this document to our
AUTHORIZED SERVICE DEPOT.
Warranty Service
In-home
Danby Products Limited
PO Box 1778, Guelph, Ontario, Canada N1H 6Z9
Telephone: (519) 837-0920 FAX: (519) 837-0449
1-800-263-2629
04/09
PO Box 669, Findlay, Ohio, U.S.A. 45840
Telephone: (419) 425-8627 FAX: (419) 425-8629
Danby Products Inc.

BIENVENUE
Bienvenue dans la famille Danby. Nous sommes fi ers de la qualité de nos produits et nous croyons fermement au service
par une assistance fi able. Vous le découvrirez au travers de ce guide, facile d'utilisation et vous en aurez la confi rmation
par notre service d'assistance à la clientèle.
Mais, ce qui est encore mieux, vous pourrez bénéfi cier de ces valeurs à chaque utilisation de votre appareil. Ceci est
important parce que votre nouvel appareil fera partie de votre famille pour longtemps.
S’il vous plaît écrivez informations ci-dessous:
Numéro de modèle :
Numéro de série :
Date d'achat :
BESOIN D'ASSISTANCE ?
Veuillez trouver quelques conseils avant de faire appel à nos
services, cela nous aidera à mieux vous servir:
Lisez ce guide:
Il comprend des instructions pour l’utilisation et l’entretien
adapté de votre unité.
Si votre nouvel appareil est endommagé :
Contactez immédiatement le revendeur (ou le fabricant).
Gagnez du temps et de l'argent :
Avant de faire appel à nos services, consultez à nouveau
la section « “Dépannage ». Cette section vous aidera à
solutionner des problèmes courants. Si une réparation est
nécessaire, ne vous inquiétez pas, la solution est au bout de
l'appel téléphonique.
Tel: 1-800-26-
(1-800-263-2629)
11

CONSIGNES DE SÉCURITÉ IMPORTANTES
PRENDRE CONNAISSANCE DE TOUTES LES INFORMATIONS
RELATIVES À LA SÉCURITÉ AVANT D’UTILISER LE PRODUIT
Veuillez vous assurer que les pièces à être remplacées le soient par des pièces similaires, et que l’entretien
soit effectué par un technicien agréé par l’usine, afi n de réduire le risque d’incendie à cause de mauvaises
pièces ou d’entretien mal fait.
AVERTISSEMENT
DANGER, RISQUE DES ENFANTS DEVIENNENT
COINCER DANS L’APPAREIL
Un refroidisseur de vin vide est une attraction dangereuse aux enfants. Enlever les joints étanches,
les loquets, les couvercles ou les porte des appareils qui ne sont pas utiliser, ou faites de soit
que l’appareil ne présente aucun danger. Laissez
les clayette a ses places afi n que des enfants
ne puissent pas monter facilement dans l’appareil.
N’ATTENDEZ PAS! FAITES-LE IMMEDIATEMEN!
PRÉCAUTIONS
• Cet appareil doit être mis à latterre. Branchez le seulement dans
une prise correctement mise à la
terre. Référez-vous au chapitre intitulé “Instructions de mise à la terre”
à la page 13.
• Ne faites pas fonctionner cet
appareil s’il a un cordon ou fi che
électrique endommagé, s’il ne fonctionne pas correctement, ou si
l’appareil a été endommagé ou
échappé.
• N’utilisez pas de produits
chimiques ou vapeurs corrosives
dans/près de cet appareil.
• N’utilisez cet appareil que pour
les fi ns auxquelles il est conçu
comme indiqué dans ce guide.
• Ne placez pas les articles périssables de nourriture dans votre
refroidisseur de vine. (Pour examplem, les viandes et les produits
laitiers)
AVERTISSEMENT
Pour minimiser le risque d’incendie, de brûlures,
de chocs électriques ou de blessures,
suivez les chapitres suivants en plus d’appliquer
les précautions de base.
• Cet appareirl est conçu pour un
usage domestique à l’intérieur
seulement. N’entreposez ni
n’utilisez pas cet appareil à
l’extérieur.
• Cet appareil ne devrait être réparé
que par du personnel qualifi é. Pour
tout examen, réparation ou réglage,
contactez votre centre de service le
plus rapproché.
• N’épissez pas le cordon électrique
• Gardez le cordon électrique
éloigné des sources de chaleur
• N’immersez pas le cordon ou sa
fi che dans aucun liquide.
• N’utilisez pas cet appareil près de
bassins d’eau, par exemple dans un
sous-sol détrempé, près d’une
piscine ou d’un évier.
SAUVEGARDEZ CES INSTRUCTIONS
• Entreposez le vin dans des
bouteilles scellées seullement.
• Référez-vous aux instructions
de nettoyage du fi ni de la porte se
trouvant au(x) chapitre(s) de Soins
et nettoyage de ce guide.
• Ne recouvrez pas ou n’obstruez
aucune ouverture de l’appareil.
12

CONSIGNES DE SÉCURITÉ IMPORTANTES
PRENDRE CONNAISSANCE DE TOUTES LES INFORMATIONS
RELATIVES À LA SÉCURITÉ AVANT D’UTILISER LE PRODUIT
Veuillez vous assurer que les pièces à être remplacées le soient par des pièces similaires, et que l’entretien
soit effectué par un technicien agréé par l’usine, afi n de réduire le risque d’incendie à cause de mauvaises
pièces ou d’entretien mal fait.
INSTRUCTIONS
DE MISE À LA
TERRE
AVERTISSEMENT
Une mauvaise utilisation
de la mise à la terre de la
fi che constitue un danger
d’électrocution.
Cet appareil doit être mis à la
terre. Dans l’éventualité d’un
court-circuit, la mise à la terre
procure un chemin direct de
contournement du courant
pour prévenir l’électrocution
des manipulateurs de l’appareil.
Cet appareil est muni d’un cordon
comprenant une fi che et
fi l de mise à la terre.
La fi che doit être branchée
dans une prise correctement
installée et mise à la terre.
Si les directives de mise à la
terre ne sont pas tout à fait
comprises ou en cas de tout
doute relatif à la mise à la
terre appropriée de l’appareil,
faites appel à un électricien ou
à un technicien qualifi é.
Si la prise murale est une
prise à 2 branches, c’est votre
obligation, et la responsabilité
vous en incombe, de la faire
remplacer par une prise à trois
branches adéquatement mise
à la terre.
Pour un meilleur rendement et
pour éviter que les ampoules
d’éclairage de la résidence
soient affectées d’un affaissement
de tension, ou que le fusible ou
disjoncteur du circuit ne grille
ou ne se déclenche, dédiez un
circuit individuel d’alimentation à la
machine à glaçons (prise (double)
unique sur le circuit).
Sous aucun prétexte il est
permis de couper ou d’enlever
la troisième branche (mise à la
terre) de la fi che du cordon
électrique.
N’utilisez pas d’adaptateur de
fi che avec cet appareil.
N’utilisez pas de cordon de
rallonge avec cet appareil. Si
le cordon électrique de l’appareil
ne rejoint pas la prise murale,
faites installer une prise plus rapprochée par un électricien ou un
technicien qualifi é.
INSTRUCTIONS D’INSTALLATION
EMPLACEMENT
À FAIRE...
• Choisir un endroit avec un
plancher solide et au niveau.
• Laisser un espace de 13 cm
(5 po) entre l’arrière de l’appareil
et tout mur adjacent.
• Éviter l’exposition au soleil
direct et à la chaleur. Le soleil
direct peut affecter la couche
d’acrylique. Les sources de chaleur à proximité peuvent causer
une plus grande consommation
d’électricité.
13
À NE PAS FAIRE...
• Utiliser cet appareil à l’extérieur:
Cet appareil a été conçu pour usage domestique seulement. Ne
pas faire fonctionner ou entreposer
cet appareil à l’extérieur.
• Incorporer cet appareil dans une
armoire: Cet appareil est conçu
pour une utilisation autonome
seulement et n’est pas prévu pour
être encastré.

INSTRUCTIONS D’INSTALLATION
CARACTÉRISTIQUES DE
VOTRE REFROIDISSEUR
DE VIN
1. Verrou à l’épreuve des enfants
2. Joint Étanche Magnétique: Le joint
étanche permet de conserver le niveau de
température et d’humidité à l’intérieur du
cabinet.
3. Portes en Verre Trempé: Teinté pour
protéger contre les rayons UV tout en
permettant de voir facilement le contenu du
cabinet.
Largeur 493 mm (19,4 po) Écart de température
Hauteur 841 mm (33,1 po) Poids net 43 kg (94.82 lb)
Profondeur 626 mm (24,6 po) Réfrigérant R134a
4. Clayettes grillagées noires avec garniture en teck:
C’est possible d’avoir des variations minimales dans la
couleur du bois.
5. Commande électronique: Pour
ajuster la température des deux
compartiments du refroidisseur de vin
individuellement.
6. Pieds Adjustables
Spécifi cations
39~64°F / 4~18°C
(minimum ~ maximum)
14

INSTRUCTIONS D’INSTALLATION
COMMANDES DE VOTRE
REFROIDISSEUR DE VIN
Tournevis cruciforme nº 2 et une clé réglable.
AVERTISSEMENT
Pour réduire le risque d’incendie, de
brûlures, de choc électrique ou de blessures lors de l’utilisation de votre appareil,
respectez les précautions de base, y compris les sections ci-dessous;
Cache-vis en caoutchouc
1
2
Vis
3
Couvercle décoratif
OUTILS NÉCESSAIRES
Fig. 1
1
2
3
Fig. 2
Fig. 3
4
5
4
Vis
Charnière supérieure
5
Chapeau
6
7
Vis
8
Charnière inférieure
9
Pied du cabinet
10
Plaque d’extrusion de
l’interrupteur d’éclairage
11
Vis
Fig. 4
6
Fig. 6
Fig. 5
8
7
9
11
10
1. Fermez la porte et retirez les cache-vis en caoutchouc (1), dévissez deux vis (2) et retirez le couvercle décoratif (3). (Fig.1)
2. Dévissez les vis (4) et saisissez la charnière supérieure (5), puis retirez la porte. (Fig. 2)
3. Mettez la porte de côté dans un endroit sûr, prenez 2 vis (11) en bas, retirez le panneau à extrusion de l’interrupteur
de l’ampoule (10) et refi xez-le sur la partie supérieure de la porte. (Fig. 5)
4. Retirez les chapeaux (6) de la partie supérieure gauche du meuble. (Fig.4)
5. Dévissez 3 vis (7) dans la partie inférieure droite du meuble et déposez la charnière inférieure (8). (Fig.5)
6. Dévissez le pied du meuble (9) de la partie inférieure gauche du meuble et fi xez-le dans la partie inférieure droite
du meuble. (Fig.5)
7. Fixez la charnière inférieure (8) dans la partie inférieure gauche du meuble à l’aide des vis (7). (Fig. 5)
8. La porte tourne à 180 degrés. Alignez l’axe de la porte à la charnière inférieure (8) et posez la porte dans la charnière
inférieure (8), puis fermez la porte avec précaution. (Fig.3)
9. Fixez la charnière supérieure (5) dans la partie supérieure gauche du meuble à l’aide des vis (4), ajustez la porte et posez
le couvercle décoratif (3) et le couvercle en caoutchouc. (Fig.6)
10. Bouchez les 3 trous de vis dans la partie supérieure droite du meuble avec d’autres bouchons.
15

OPÉRATION
COMMANDES DE VOTRE
REFROIDISSEUR DE VIN
2
1
1
: Le voyant s’allume pour indiquer que le
cycle de refroidissement est presentment en marche.
2
Fenêtre: Pour vue la température de la zone
supérieure.
Fenêtre: Pour vue la température de la zone
3
inférieure.
4
°C / °F: Le voyant situés à côté, dénote quelle bal-
ance de la température est montrée.
3
4
5
6
5
Réglage Supérieure : Réglez la
température du chambre supérieure par
intervalle de un degré (référez-vous au
“Réglage du température” ci-dessous).
Réglage Inférieure : Réglez la
température du chambre inférieure par
intervalle de un degré (référez-vous au
“Réglage du température” ci-dessous).
Manuellement illuminer ou éteignez les
lumières intérieures.
6
RÉGLAGE DU
TEMPÉRATURE
IMPORTANT
En cas de panne de courant, attendez de 3 à 5 minutes avant de redémarrer.
“ I ” éclairage continu
“ O ” éclairage que lorsque la porte est
ouverte
• Pour changer l’affi chage entre la température en Celsius (°C) et la la
température en Fahrenheit (°F) appuyez sur les bouton de control et
en même temps pour environ 5 secondes.
• La température pour les deux compartiments peut être ajustée aussi
basse que 39°F (4°C) ou aussi haut que 64°F (18°C) pour satisfaire à
vos besoin spécifi ques pour votre entreposage de vin.
Chaque pression du bouton commande ou vous permettra
d’ajuster la température par intervalle de un degré dans la marge mentionnée ci-dessus.
16

OPÉRATION
ENTREPOSAGE
DES VINS
IMPORTANT
Entreposez le vin dans des
bouteilles scellées seullement.
Le cabinet à vin peut accepter
un maximum* de trente-huit
(38) bouteilles de vin de 750
ml.
*Lorsque chargées selon les
instructions
Pour atteindre la capacité maximale
de trente-huit (38) bouteilles, il
est nécessaire de positionner les
bouteilles de manière alternée sur
les quatre (4) tablettes supérieures,
tel qu’illustré dans la Fig. A. De
cette façon, vous pouvez ranger
sept (7) bouteilles de 750 ml par
tablette dans chacune des quatre
(4) tablettes supérieures et cinq (5)
bouteilles sur les deux (2) tablettes
inférieures (Fig. B). Pour voir une
unité pleine, veuillez vous reporter
à la Fig. C ci-dessous
Fig. B
Fig. A
Clayettes entières
Demi-clayettes
Fig. C (unité pleine)
7 bouteilles
7 bouteilles
7 bouteilles
7 bouteilles
5 bouteilles
5 bouteilles
38 bouteilles au total
17

OPÉRATION
INSTRUCTIONS
DES TABLETTE
IMPORTANT
Ne recouvrez PAS les
étagères de feuilles
d’aluminium ou de tout autre membrane qui préviendrait la circulation de l’air à
l’intérieur du cabinet.
SOINS ET ENTRETIEN
CONSEILS UTILES
En retirant la clayette ou en la remettant
dans l’unité, veillez à ce qu’elle soit alignée
avec le bloc de serrure.
Pour enlever une tablette de la position
verrouillée, incline l’étagère comme montré dans la fi gue C et tire à l’extérieur.
Fig. C
Après avoir fait de la glace,
effectué un autonettoyage ou
un nettoyage manuel, laissez
la porte de la machine ouverte
durant quelques minutes pour
aérer et assécher l’intérieur de
l’armoire.
Pour réinstaller, assurez l’étagère se
repose sur les supports et poussée la
tablette vers l’intérieur jusqu’à ce qu’elle
soit verrouillée en place.
REMARQUER: Assurez vous
que l’alimentation est coupée
avant de nettoyer n’importe
quelle partie de cet appareil.
COMMENT NETTOYER
L’INTÉRIEUR
Ne jamais utiliser de nettoyants industriels ou abrasifs ou des objets acérés
sur n’importe quelle partie
de votre cabinet à vin
COMMENT NETTOYER
L’EXTÉRIEUR
Ne pas utiliser de nettoyants contenant de
l’ammoniaque ou de
l’alcool sur le cabinet à
vin.
L’ammoniaque ou l’alcool
peut altérer le fi ni du
cabinet.
Murs, plancher, vitre
intérieure, et tablettes
Les dépôts d’eau et la poussière peuvent être enlevés
avec un linge humide.
Réservoirs D’Humidité
Lavez le délicatement à l’eau tiède et savonneuse.
IMPORTANT
Ne recouvrez PAS les étagères de feuilles d’aluminium ou
de tout autre membrane qui préviendrait la circulation de
l’air à l’intérieur du cabinet.
Extérieur de l’armoire
Il est important de garder la région de scellement de la
porte sur l’armoire propre. Nettoyez avec un tissu savonneux,
rincez le régionr et puis séchez.
Surface du Porte
N’utilisez que des détergents doux, non abrasifs, appliqués
avec une éponge propre ou un chiffon doux. Rincez
abondamment.
Panneau de commande et porte
Essuyez avec un chiffon humide. Asséchez bien avec
un chiffon sec. N’utilisez pas de nettoyants en aérosol, de
grandes quantités d’eau et de savon, d’abrasifs ou d’objets
acérés sur le panneau, ceci pourrait l’endommager. Certains
essuie-tout peuvent aussi égratigner le panneau de
commande et verre de la porte.
18

DÉPANNAGE
Parfois, il peut arriver qu’un problème mineur survienne et qu’il ne soit pas nécessaire de faire appel à un réparateur. Se
servir de ce guide de dépannage pour déterminer la cause possible du problème. Si l’appareil continue à fonctionner de
manière anormale, appelez un centre de service autorisé ou Danby au numéro sans frais 1-800-263-2629 pour obtenir
de l’aide.
Problème Cause possible Ce qu’il faut faire
L’appareil n’est pas alimenté Un fusible de votre panneau de
distribution peut être grillé ou le
disjoncteur déclenché.
Remplacez le fusible ou réarmez le
disjoncteur.
La température dans le cabinet
est trop haute
Surtension.
La fi che n’est pas complètement
insérée dans la prise murale.
Réglage du température.
Les portes ne sont pas fermées
correctement ou son ouverte trop
souvent.
Stocké une grande quantité de bouteilles chaudes dans le
cabinet.
Débranchez la refroidisseur de vin
et attendez quelques secondes, et
puis rebranchez la.
Assurez-vous que la fi che à 3
branch es de la refroidisseur de vin
est com plètement insérée dans la
prise.
Vérifi ez que la commande est ré-
glée. À la bonne arrangement.
Assurez-vous que les portes sont
fermées et que les joint étanches
sont contre le coffret. Ouvrez les
portes seulement quand nécessaire.
Limitez la quantité de bouteilles
chaudes qui sont stockées dans le
cabinet en même temps.. Essayez
d’introduire progressivement des
charge chaudes si possible (ex. ne
chargez pas plus de 6 bouteilles
chaudes à la fois- trois par cabinet)
L’eau de condensation sur le coffret, les portes ou plancher
Niveau de humidité élevé dans la
maison..
Les portes ne sont pas fermées
correctement ou son ouverte trop
souvent.
19
La formation de l’eau de condensation s’arrêtera quand le
niveau.d’humidité retours à normale.
Assurez-vous que les portes sont
fermées et que les joint étanches
sont contre le coffret. Ouvrez les
portes seulement quand néces-
saire.

GARANTIE LIMITÉE SUR
APPAREIL ÉLECTROMÉNAGER À DOMICILE
Cet appareil de qualité est garantie exempt de tout vice de matière première et de fabrication, s’il est utilisé dans les conditions normales recommandées par
le fabricant.
Cette garantie n’est offerte qu’à l’acheteur initial de l’appareil vendu par Danby Products Limited (Canada) ou Danby Products Inc. (E.- U. d’A) (ci-après “Danby”)
ou par l’un des ses distributeurs agréés et elle ne peut être transférée.
CONDITIONS
Les pièces en plastique sont garanties pour trente (30) jours seulement à partir de la date de l’achat, sans aucune prolongation prévue.
Première 12 mois
Pendant les douze (12) mois, toutes pièces fonctionnelles de ce produit s’avèrent défectueuses, seront réparées ou remplacées, selon le
choix du garant, sans frais à l’acheteur INITIAL.
Pour bénéficier du
Service
Le client sera responsable pour le transport et tous les frais d’expédition de tout appareil exigeant le service au dépot de service
autorisé le plus proche. S’adresser au détaillant qui a vendu l’appareil, ou à la station technique agréée de service la plus proche, où les
réparations doivent être effectuées par un technicien qualifié. Si les réparations sont effectuées par quiconque autre que la station de
service agréée où à des fins commerciales, toutes les obligations de Danby en vertu de cette garantie seront annulées.
Limites de l’entretien
à domicile
Si l'appareil est installé à plus de 100 kilomètres (62 milles) du centre de service le plus proche, il doit être livré à l'atelier de
réparation autorisé par Danby le plus proche, car l'entretien doit uniquement être réalisé par un technicien qualifié et certifié pour
effectuer un entretien couvert par la garantie de Danby. Les frais de transport entre votre domicile et le lieu de l'entretien ne sont pas
couverts par la présente garantie et doivent être acquittés par l'acheteur.
Cette garantie indique en aucun temps la responsabilité de Danby de l’avarie ou dommage de la vin ou autre contenu, soit par les vices de l’appareil, ou soit
parl’utilisation convenable ou inexacte.
EXCLUSIONS
En vertu de la présente, il n’existe aucune autre garantie, condition ou représentation, qu’elle soit exprimée ou tacite, de façon manifeste ou intentionnelle, par
Danby ou ses distributeurs agréés. De même, sont exclues toutes les autres garanties, conditions ou représentations, y compris les garanties, conditions ou
représentations en vertu de toute loi régissant la vente de produits ou de toute autre législation ou règlement semblables.
En vertu de la présente, Danby ne peut être tenue responsable en cas de blessures corporelles ou des dégâts matériels, y compris à l’appareil, quelle qu’en soit
les causes. Danby ne peut pas être tenue responsable des dommages indirects dus au fonctionnement défectueux de l’appareil. En achetant l’appareil,
l’acheteur accepte de mettre à couvert et de dégager Danby de toute responsabilité en cas de réclamation pour toute blessure corporelle ou tout dégât matériel
causé par cet appareil.
CONDITIONS GÉNÉRALES
La garantie ou assurance ci-dessus ne s’applique pas si les dégâts ou réparations sont dus aux cas suivants:
1) Panne de courant.
2) Dommage subis pendant le transport ou le déplacement de l’appareil.
3) Alimentation électrique incorrecte (tension faible, câblage défectueux, fusibles incorrects).
4) Accident, modification, emploi abusif ou incorrect de l’appareil tel qu'une circulation d'air inadéquate dans la pièce ou des conditions de fonctionnement
anormales (température extrêmement élevée ou basse).
5) Utilisation dans un but commercial ou industriel (à savoir, si l'appareil n'est pas installé dans un domicile résidentiel).
6) Incendie, dommage causés par l’eau, vol, guerre, émeute, hostilités, cas de force majeure (ouragan, inondation, etc.).
7) Visites d’un technicien pour expliquer le fonctionnement de l’appareil au propriétaire.
8) Installation inappropriée (par exemple, encastrement d'un appareil autoportant, ou utilisation extérieure d'un appareil non conçu à cet effet).
Une preuve d’achat doit être présentée pour toute demande de réparation sous garantie. Prière de garder le reçu. Pour faire honorer la garantie, présenter ce
document à la station technique agréée ou s’adresser à:
Danby Products Limited
PO Box 1778,Guelph, Ontario, Canada N1H 6Z9
Telephone: (519) 837-0920 FAX: (519) 837-0449
Service sous-garantie
Service au domicile
1-800-263-2629
04/09
PO Box 669, Findlay, Ohio, U.S.A. 45840
Danby Products Inc.
Telephone: (419) 425-8627 FAX: (419) 425-8629

BIENVENIDA
able. Usted lo podrá apreciar en este manual fácil de usar, y lo escuchará enlas voces amistosas de nuestro departamento de servicio al consumidor.
Sobre todo, usted apreciará estas ventajas cada vez que use su unidad. Eso es importante, ya que su nuevo
artefacto formará parte de su familia por mucho tiempo.
Por favor escriba la siguiente información:
Número de Modelo:
Número de Serie:
Fecha de la compra:
Necesita Ayuda
Antes de solicitar servicio, hayalgunas cosas que puede hacer
para ayudarnos a servirle mejor…
Lea este manual:
Contiene instrucciones que lo ayudarán a mantener correctamente su unidad.
Si usted recibe un artefacto dañado:
Llame inmediatamente al distribuidor (o constructor) que se lo
vendió.
Ahorre tiempo y dinero:
Lea la sección de Diagnóstico de Problemas antes de llamar.
Esta sección le ayudará a resolver problemas comunes que
pudieran ocurrir. Si necesita asistencia, no se preocupe y
llámenos.
Tel: 1-800-26-
(1-800-263-2629)
21

INSTRUCCIONES DE SEGURIDAD IMPORTANTES
LEA TODA LA INFORMACIÓN SOBRE SEGURIDAD ANTES DE UTILIZAR
EL EQUIPO
Asegúrese de que las piezas del componente se reemplacen con componentes similares y que la reparación
sea realizada por personal de servicio autorizado por la fábrica, para minimizar el riesgo de incendio debido a
piezas incorrectas o reparación inadecuada.
ADVERTENCIA IMPORTANTE
PELIGRO, RIESGO DE QUE LOS NIÑOS
QUEDEN A TRAPADOS
Un enfriador de vino vacío es una atracción
peligrosa para los niños. Retire ya sea los pestillos
de la junta, tapas, cerradura o puertas de los
artefactos sin utilizar o desechados, o tome alguna
otra medida para garantizar que no sean peligrosos.
Mantenga los estantes en su lugar para que los
niños no puedan subir al interior con facilidad.
NO ESPERE, ¡HÁGALO AHORA!
PRECAUCIONES
DE SEGURIDAD
• Este artefacto debe estar
conectado a tierra. Enchúfelo
solamente en un tomacorriente
debidamente conectado a tierra.
Consulte la sección "Instrucciones
de conexión a tierra" en la
página 23.
• No ponga en funcionamiento
este artefacto si tiene un cable de
alimentación o un enchufe que no
funcionan correctamente, o si el
artefacto se ha dañado o caído.
• No empalme el cable de
alimentación que se incluye con
este artefacto.
• Mantenga el cable alejado de las
superfi cies calientes.
• No sumerja el cable de
alimentación ni el enchufe ni el
artefacto mismo en agua.
• No utilice productos químicos
corrosivos ni vapores en
este artefacto.
• Utilice este artefacto únicamente
para su uso previsto, como se
describe en este manual.
• No guarde alimentos perecederos
tales como carnes y productos
lácteos (entre otros) en su
enfriador de vinos.
• Guarde el vino en recipientes
sellados únicamente.
• Consulte las instrucciones
de limpieza de la superfi cie
de la puerta en las secciones
de Cuidado y limpieza de
este manual.
• No cubra ni bloquee ningún
orifi cio en el artefacto.
ADVERTENCIA
Para reducir el peligro de incendio, quemaduras,
choque eléctrico, o lesiones a personas al usar el
artefacto, siga las precauciones básicas, incluidas
las secciones siguientes;
• Este artefacto solo debe utilizarse
para uso doméstico. No intente
hacer funcionar ni guardar este
artefacto al aire libre.
• Solo personal califi cado debe
realizar el mantenimiento de
este artefacto. Comuníquese
con el servicio de mantenimiento
autorizado más cercano para el
diagnóstico, reparación o ajuste
del artefacto.
• No utilice este producto cerca de
agua, por ejemplo, en un sótano
húmedo, cerca de una piscina
o de un lavabo.
GUARDE ESTAS INSTRUCCIONES
22

INSTRUCCIONES DE SEGURIDAD IMPORTANTES
LEA TODA LA INFORMACIÓN SOBRE SEGURIDAD ANTES DE UTILIZAR
EL EQUIPO
Asegúrese de que las piezas del componente se reemplacen con componentes similares y que la reparación
sea realizada por personal de servicio autorizado por la fábrica, para minimizar el riesgo de incendio debido a
piezas incorrectas o reparación inadecuada.
CONEXIÓN A TIERRA
INSTRUCCIONES
ADVERTENCIA
Para reducir el peligro de
incendio, quemaduras,
choque eléctrico o
lesiones a personas al
usar el artefacto, siga las
precauciones básicas,
incluidas las secciones
siguientes.
Este artefacto debe estar
conectado a tierra. Ante un caso
de cortocircuito eléctrico, la
puesta a tierra reduce el riesgo de
descarga eléctrica al proporcionar
un cable de escape para la
corriente eléctrica.
Este artefacto incluye un cable
de conexión a tierra con un enchufe
de conexión a tierra. El enchufe
debe conectarse a un tomacorriente
que esté correctamente instalado y
conectado a tierra.
Consulte a un electricista califi cado
o técnico de mantenimiento si no
comprende en su totalidad las
instrucciones de conexión a tierra
o si tiene dudas acerca de si el
artefacto está conectado a tierra
adecuadamente.
Si el tomacorriente es una toma de
pared estándar de dos entradas,
es su responsabilidad y obligación
reemplazarlo por una toma de
pared de tres entradas.
Par un mejor funcionamiento,
enchufe el artefacto en su propia
toma de corriente para evitar que
parpadeen las luces, queme el
fusible o se dispare el disyuntor.
No debe cortar ni eliminar
bajo ninguna circunstancia la
tercera pata (puesta a tierra)
del cable eléctrico.
No debe utilizar un enchufe
adaptador con este artefacto.
No debe utilizar una extensión
con este artefacto. Si el cable
eléctrico es demasiado corto,
haga que un electricista califi cado
o un técnico de mantenimiento
instale una toma eléctrica cerca
del artefacto.
INSTRUCCIONES DE INSTALACIÓN
UBICACIÓN
SÍ...
• Seleccione una ubicación en un
piso fuerte y nivelado.
• Deje 5 pulgadas de espacio entre
la parte posterior del artefacto
y cualquier pared adyacente.
• Evite la luz solar directa y
las fuentes de calor. La luz
solar directa puede afectar el
revestimiento acrílico, las fuentes
de calor cercanas causarán
mayor consumo de electricidad.
23
NO...
•
Utilice este artefacto al aire libre:
Este artefacto solo debe utilizarse
para uso doméstico. No intente
hacer funcionar ni guardar este
artefacto al aire libre.
• Incorpore este artefacto en
un recinto: Este artefacto está
diseñado solo para usarlo
de manera independiente
y no está destinado para
estar "empotrado".

INSTRUCCIONES DE INSTALACIÓN
CARACTERÍSTICAS DEL
ENFRIADOR DE VINOS
1. Manija
2. Juntas magnéticas de la puerta: Los sellos
herméticos conservan toda la potencia de refrigeración
y los niveles de humedad.
3. Puerta de vidrio templado: Teñido para protección
UV conservando una fácil visión interior.
Especifi caciones
Ancho 493 mm (19 7/16 in) Rango de temperatura
Altura 841 mm (33 2/16 in) Peso neto 43 kg / 94.82 lb
Fondo 626 mm (24 10/16 in) Refrigerante R134a
4. Estantes de alambre negro con tapiz de
madera barnizada: Puede haber variaciones naturales
en el color de la madera.
5. Pantalla y controles electrónicos: Para ver y
regular la temperatura de ambos compartimientos del
enfriador de vinos.
6. Patas de nivelación
39~64 °F / 4~18 °C
(Mínima~Máxima)
24

INSTRUCCIONES DE INSTALACIÓN
PUERTA BATIENTE
INVERTIDA
HERRAMIENTAS REQUERIDAS
Destornillador Phillips n.° 2 y llave inglesa ajustable.
ADVERTENCIA
Para reducir el riesgo de incendio, quemaduras,
choque eléctrico o lesiones a personas al usar
su artefacto, siga las precauciones básicas
incluidas las secciones siguientes.
Tapas de tornillos de goma
1
2
Tornillos
3
Cubierta decorativa
Fig.1
Fig.2
1
2
3
4
5
Fig.3
4
Tornillos
Bisagra superior
5
Enchufe
6
7
Tornillos
8
Bisagra inferior
9
Pata del gabinete
10
Extrusión para el
Fig.4
6
Fig.6
Fig.5
8
7
9
11
10
interruptor de luz
11
Tornillos
1.
Cierre la puerta y retire las tapas de tornillo de goma (1), desatornille dos tornillos (2) y reitre la cubierta decorativa (3). (Fig. 1)
2. Desatornille los tornillos (4) y saque la bisagra superior (5), luego retire la puerta. (Fig. 2)
3. Coloque la puerta de manera segura a un lado, retire la extrusión para el interruptor de luz (10) y júntelo a la parte
superior de la puerta. (Fig. 5)
4. Retire los tapones (6) de la parte superior izquierda del gabinete. (Fig. 4)
5. Desatornille 3 tornillos (7) de la parte inferior derecha del gabinete y reitre la bisagra inferior (8). (Fig. 5)
6. Desatornille la pata del gabinete (9) de la parte inferior izquierda del gabinete y fíjelo en el lado inferior derecho del
gabinete. (Fig. 5)
7. Fije la bisagra inferior (8) en la parte inferior izquierda del gabinete con los tornillos (7). (Fig. 5)
8. La puerta gira 180 grados, coloque el eje inferior de la puerta para alcanzar la bisagra inferior (8) e instale la puerta en la
bisagra inferior (8), luego cierre la puerta con cuidado. (Fig. 3)
9. Fije la bisagra superior (5) en la parte superior izquierda del gabinete con los tornillos (4), ajuste la puerta e instale la cubierta
decorativa (3) y la cubierta de goma (1). (Fig. 6)
10. Bloquee los 3 orifi cios de tornillos en el lado superior derecho del gabinete con los tapones.
25

OPERACIÓN
CONTROLES DEL
ENFRIADOR DE VINOS
2
1
1
: La luz indicadora se ilumina para indicar el
modo de enfriamiento con el que está funcionando
en ese momento.
Ventana: Para visualizar la temperatura de la
2
zona superior.
Ventana: Para visualizar la temperatura de la
3
zona inferior.
°C / °F: Indica con qué escala de temperatura se
4
visualizará.
3
4
5
5
Botón: Se utiliza para establecer la
temperatura en la zona superior (consulte más
adelante "Confi guración de la temperatura").
6
Botón: Se utiliza para establecer la
temperatura en la zona inferior (consulte más
adelante "Confi guración de la temperatura).
Encienda o apague (ON/OFF) para
6
controlar la luz interior.
Interruptor: Iluminación continua.
I
CONFIGURACIÓN DE
LA TEMPERATURA
IMPORTANTE
En caso de una corte
de luz, espere de 3 a 5
minutos antes de reiniciar.
Interruptor: Ilumina solo cuando la puerta
O
se abre.
• Para cambiar la visualización de escala entre Fahrenheit
(°F) y Celsius (°C), presione los botones de control y
simultáneamente por aproximadamente (5) segundos.
• El rango de temperatura se puede establecer desde 4 °C (39 °F)
como baja o 18 °C (64 °F) como alta, para adecuarla a sus
necesidades específi cas de almacenamiento. Cada pulsación en el
botón o le permitirá incrementar 1.° dentro del mencionado
rango de temperatura.
26

OPERACIÓN
ALMACÉN DE VINOS
IMPORTANTE
Solo guarde vino sellado
en botella.
La capacidad máxima* de
vino en el enfriador de vinos
es 38 botellas (750 ml).
*Al guardar siga las
instrucciones.
Para lograr la máxima
capacidad de treinta y ocho (38)
botellas, será necesario alternar
la posición de las botellas en
cuatro (4) botelleros en la parte
superior, como se muestra en
la Fig. A. Esto permitirá guardar
siete (7) botellas de 750 ml
en los cuatro (4) botelleros
superiores, y cinco (5) botellas
en los dos botelleros (2) de
abajo (Fig.B). Para llenar por
completo la unidad consulte la
Fig. C que se muestra abajo.
Fig. B
Fig. A
Estantes llenos
Estantes a la mitad de su capacidad
Fig. C (Unidad completamente llena)
7 botellas
7 botellas
7 botellas
7 botellas
5 botellas
5 botellas
Total 38 botellas
27

OPERACIÓN
ALMACÉN DE VINOS
IMPORTANTE
No cubra los botelleros
con papel aluminio ni con
cualquier otro material
que impida la circulación
adecuada dentro del
gabinete.
CUIDADO Y MANTENIMIENTO
DATOS ÚTILES
Asegúrese de que el estante esté
alineado con el bloqueo del seguro
al sacar el estante o al colocarlo en
la unidad.
Para retirar un botellero de su
posición bloqueada, incline el botellero
como se muestra en la Fig. C y tire
Fig. C
Deje la puerta del enfriador de
vinos abierta por unos minutos
después de la limpieza
manual para expulsar el aire
y secar el interior del gabinete
del enfriador de vinos.
hacia afuera.
Para reinstalar, asegúrese de que el
botellero se apoye de manera segura
en los soportes y empújelo hacia
adentro hasta que se acomode en
su lugar.
NOTA: Asegúrese de que la
alimentación esté apagada
antes de limpiar cualquier
parte de este artefacto.
CÓMO SE LIMPIA
EL INTERIOR
Nunca utilice ningún
limpiador comercial
o abrasivo ni objetos
afi lados en ninguna parte
del enfriador de vinos.
CÓMO SE LIMPIA
EL EXTERIOR
No utilice limpiadores
que contengan amoniaco
o alcohol en el enfriador
de vinos.
El amoniaco o alcohol
pueden dañar la apariencia
del artefacto.
Paredes, piso, ventana
interior y estantes
Algunos depósitos de agua y polvo se pueden retirar con un
papel toalla, otros pueden necesitar un paño húmedo.
Caja externa
Es importante mantener el área limpia donde la puerta se sella
con el gabinete. Limpie esta área con un paño jabonoso.
Enjuague y luego seque.
Superfi cie de la puerta
Use solamente detergentes suaves, no abrasivos, aplicados con
una esponja limpia o un paño suave. Enjuague bien.
Panel de control y puerta
Limpie con un paño húmedo y seque por completo. No utilice
aerosoles, grandes cantidades de jabón y agua, objetos abrasivos o
fi losos en el panel, ya que se puede dañar. Algunas toallas de papel
también pueden rayar el panel de control y el vidrio de la puerta.
28

DIAGNOSTICOS DE PROBLEMAS
Ocasionalmente, puede surgir algún problema de menor importancia y no será necesario llamar al servicio técnico. Utilice
esta guía de solución de problemas para obtener una posible solución. Si la unidad continúa funcionando incorrectamente,
llame al servicio técnico autorizado o al número gratuito de Danby1-800-263-2629 para obtener asistencia.
Posibles causas de problemas Qué hacer
No hay energía. Se puede haber quemado un
fusible o el disyuntor se disparó.
Reemplace el fusible o reinicie
el disyuntor.
La temperatura del gabinete
es muy alta.
Subida de tensión eléctrica.
El enchufe no se insertó
completamente en el tomacorriente
de la pared.
Confi guración de la temperatura.
La puerta no cierra correctamente
o está muy abierta.
Las luces interiores están
encendidas.
Desconecte el enfriador de vino,
espere unos segundos y luego
enchúfelo nuevamente.
Asegúrese de que el enchufe de
3 patas esté totalmente insertado
en el tomacorriente.
Verifi car la confi guración del control
de temperatura. Ajustar si fuera
necesario.
Asegúrese de que la puerta
esté completamente cerrada y
que la junta esté sellada con
los gabinetes. Abra las puertas
únicamente cuando sea necesario
y por períodos cortos de tiempo.
Las luces interiores están
destinadas para iluminar
temporalmente los gabinetes para
fi nes de visualización. No están
diseñadas para dejarlas encendidas
por largos períodos de tiempo.
Condensación en el gabinete,
puertas o piso
Últimamente se agregó una
gran cantidad de botellas tibias
al gabinete.
Condiciones altas de humedad en
la casa.
La puerta no cierra correctamente
o está muy abierta.
29
Limite la cantidad de botellas tibias
que se introducen en el gabinete
al mismo tiempo. Intente llenar la
carga de manera escalonada si
fuera posible.
La condensación deberá
desaparecer una vez que las
condiciones de humedad regresen
a la normalidad.
Asegúrese de que la puerta esté
totalmente cerrada y que la unión
esté sellada con los gabinetes.
Abra las puertas únicamente
cuando sea necesario y por
períodos cortos de tiempo.

GARANTÍA LIMITADA PARA
ELECTRODOMÉSTICO
Este producto de calidad está garantizado contra defectos de fabricación, incluyendo partes y mano de obra, siempre y cuando la unidad se utilice bajo las
condiciones normales de funcionamiento para las que fue diseñado.
Esta garantía está solamente disponible para la persona que haya comprado originalmente esta unidad directamente de Danby Products Limited (Canada) o
Danby Products Inc. (U.S.A.) (en adelante “Danby”) o uno de sus distribuidores autorizados, y no es transferible.
CONDICIONES DE LA GARANTÍA
Las piezas plásticas, se autorizan por treinta (30) días solamente a partir de la fecha de la compra, sin las extensiones proporcionadas.
Primeros 12 Meses
Durante los primer 12 meses, cualquier parte en buen estado de este producto que resulte defectuosa, incluyendo cualquier sistema
sellado, será reparado o reemplazado, a opción del fabricante, sin cargo para el comprador ORIGINAL.
Para obtener
Servicio
Danby se reserva el derecho de limitar la cobertura de "Servicio en Domicilio" sujeto a la proximidad de un Taller de Servicio Autorizado.
Para todo artefacto que requiera servicio fuera del área limitada de "Servicio en Domicilio", el cliente será responsable por transportar
dicho artefacto hasta el Taller de Servicio Autorizado mas cercano. Consulte "Límites del servicio técnico a domicilio", a continuación.
Comuníquese con el distribuidor donde haya comprado la unidad, o llame al Taller de Servicio Autorizado más cercano, donde debe ser
reparada por un técnico calificado. Si esta unidad es reparada en otro lugar que no sea un Taller de Servicio Autorizado, o si la unidad se
utiliza para aplicaciones comerciales, Danby no se hará responsable de ninguna forma y la garantía será anulada.
Límites del servicio
técnico a domicilio
Si el electrodoméstico está instalado en un lugar que se encuentra a 100 kilómetros (62 millas) o más del centro de servicios más
cercano, se debe llevar la unidad al Centro de servicios Danby autorizado más cercano, ya que dicho servicio sólo puede realizarlo un
técnico calificado y certificado por Danby para prestar servicios de garantía. Los cargos por transporte desde y hacia el lugar en que se
efectúe el servicio técnico no están cubiertos por esta garantía y son de responsabilidad del comprador.
Nada dentro de esta garantía implica que Danby será responsable por cualquier daño que hayan sufrido los alimentos u otros contenidos de este aparato, ya sea
debido a un defecto del aparato, o su uso, adecuado o inadecuado.
EXCLUSIONES
Salvo lo aquí indicado por Danby, no existen otras garantías, condiciones o representaciones, explícitas o implícitas, concretas o intencionales por parte de Danby
o sus distribuidores autorizados y todas las demás garantías, condiciones o representaciones, incluyendo cualquier garantía, condiciones o
representaciones bajo cualquier Acta de Venta de Productos o legislación o estatuto similar, quedan de esta forma expresamente excluidas. Salvo lo aquí
indicado, Danby no serán responsables por ningún daño a personas o bienes, incluyendo la propia unidad, sin importar su causa, o de ningún daño indirecto
causado por el desperfecto de la unidad, y al comprar esta unidad, el comprador acepta por la presente, indemnizar y proteger a Danby contra cualquier reclamo
por daños a personas o bienes causados por la unidad.
CONDICIONES GENERALES
No se considerará ninguna de estas garantías o seguros cuando el daño o la necesidad de reparación sea el producto de los siguientes casos:
1) Falla del suministro eléctrico.
2) Daños en tránsito o durante el transporte de la unidad.
3) Alimentación incorrecta, como bajo voltaje, instalación eléctrica defectuosa o fusibles inadecuados.
4) Accidente, modificación, abuso o uso incorrecto del artefacto, tal como insuficiente ventilación del ambiente o condiciones de operación anormales
(temperatura ambiente extremadamente alta o baja).
5) Utilización comercial o industrial (v.g., si el electrodoméstico no está instalado en una vivienda particular).
6) Incendio, daños por agua, robo, guerra, disturbios, hostilidades, actos de fuerza mayor como huracanes, inundaciones, etc.
7) Pedidos de servicio debido a desinformación del usuario.
8) Instalación inadecuada (v.g., instalación empotrada de un electrodoméstico diseñado como unidad independiente o uso de un electrodoméstico al aire
libre que no esté aprobado para dicho fin).
Para acceder a la garantía se solicitará un comprobante de compra; por lo tanto, guarde su recibo. En caso de necesitar servicio de garantía, presente ese
documento al TALLER DE SERVICIO AUTORIZADO.
Danby Products Limited
PO Box 1778, Guelph, Ontario, Canada N1H 6Z9
Telephone: (519) 837-0920 FAX: (519) 837-0449
Servicio de Garantía
Servicio en Domicilio
1-800-263-2629
04/09
PO Box 669, Findlay, Ohio, U.S.A. 45840
Danby Products Inc.
Telephone: (419) 425-8627 FAX: (419) 425-8629

WINE COOLER
All repair parts are available for purchase or special
order when you visit your nearest service depot. To
request service and/or the location of the service depot
nearest you, call the TOLL FREE number.
When requesting service or ordering parts, always provide the following information:
• Product Type
• Model Number
• Part Number
• Part Description
ENFRIADOR DE VINO
Todas las piezas de reparación disponibles para la compra o la orden especial cuando usted visita su depósito
más cercano del servicio. Para pedir servicio y/o la localización del depósito del servicio lo más cerca posible
usted, llama Danby gratis.
REFROIDISSEUR A VIN
Toutes les pièces de rechange ou commandes spéciales sont disponibles à votre centre de service régional
autorisé. Pour obtenir le service et/ou la localité de
votre centre de service régional, signalez le NUMÉRO
D’APPEL SANS FRAIS.
Ayez les renseignements suivants à la portée de la main
lors de la commande de pièce ou service:
• Type de produit
• Numéro de modèle
• Numéro de pièce
• Description de la pièce
Al pedir servicio o pidiendo piezas, proporcione siempre
la información siguiente:
• Tipo de Producto
• Número de Modelo
• Pieza número
• Descripción de la Parte
Model • Modèle • Modelo
Model • Modèle • Modelo
DWC040A2BDB
Tel: 1-800-26-
(1-800-263-2629)
Danby Products Limited, Ontario, Canada N1H 6Z9
Danby Products Inc., Findlay, Ohio, USA 45840
 Loading...