


 Loading...
GETTING STARTED
GUIDE
Cisco Small Business
NSS3000 Series Network Storage System

|
6bZg^XVh =ZVYfjVgiZgh |
6h^V EVX^[^X =ZVYfjVgiZgh |
:jgdeZ =ZVYfjVgiZgh |
|
8^hXd HnhiZbh! >cX# |
8^hXd HnhiZbh JH6 EiZ# AiY# |
8^hXd HnhiZbh >ciZgcVi^dcVa 7K |
|
|||
|
HVc ?dhZ! 86 |
H^c\VedgZ |
6bhiZgYVb! I]Z CZi]ZgaVcYh |
|
8^hXd ]Vh bdgZ i]Vc '%% d[[^XZh ldgaYl^YZ# 6YYgZhhZh! e]dcZ cjbWZgh! VcY [Vm cjbWZgh VgZ a^hiZY dc i]Z 8^hXd LZWh^iZ Vi lll#X^hXd#Xdb$\d$d[[^XZh#
 889:! 88:CI! 8^hXd :dh! 8^hXd Ajb^c! 8^hXd CZmjh! 8^hXd HiVY^jbK^h^dc! 8^hXd IZaZEgZhZcXZ! 8^hXd LZW:m! i]Z 8^hXd ad\d! 98:! VcY LZaXdbZ id i]Z =jbVc CZildg` VgZ igVYZbVg`h0 8]Vc\^c\ i]Z LVn LZ Ldg`!
 A^kZ! EaVn! VcY AZVgc VcY 8^hXd HidgZ VgZ hZgk^XZ bVg`h06bZg^VcY 6XVhXZhh=ZVYfjGZ\^higVg!iZgh6^gdcZi! 6hncXDH! 7g^c\^c\ i]Z BZZi^c\6h^V EVX^[^XId Ndj!=ZVYfjVgiZgh8ViVanhi! 8896! 889E! 88>:! 88>E! 88C6!:jgdeZ88CE! 88HE!=ZVYfjVgiZgh88KE! 8^hXd! i]Z 8^hXd 8Zgi^[^ZY
>ciZgcZildg` :meZgi ad\d! |
8^hXd HnhiZbh! >cX# |
8^hXd HnhiZbh JH6 EiZ# AiY# |
8^hXd HnhiZbh >ciZgcVi^dcVa 7K |
8^hXd >DH! 8^hXd EgZhh! 8^hXd HnhiZbh! 8^hXd HnhiZbh 8Ve^iVa! i]Z 8^hXd HnhiZbh ad\d! 8^hXd Jc^in! 8daaVWdgVi^dc L^i]dji A^b^iVi^dc! :i]Zg;Vhi! :i]ZgHl^iX]! :kZci 8ZciZg! ;Vhi HiZe! ;daadl BZ |
|||
|
HVc ?dhZ! 86 |
H^c\VedgZ |
6bhiZgYVb! I]Z CZi]ZgaVcYh |
7gdlh^c\! ;dgbH]VgZ! <^\V9g^kZ! =dbZA^c`! >ciZgcZi6bZg^XVhFjdi^Zci! >DH!=ZVYfjVgiZgh^E]dcZ! ^Fj^X` HijYn! >gdcEdgi! i]Z >gdcEdgi6h^Vad\d!EVX^[^XA^\]iHig=ZVb!YfjVgiZghA^c`hnh! BZY^VIdcZ! BZZi^c\EaVXZ! BZZi^c\EaVXZ:jgdeZ =ZVYfjVgiZgh8]^bZ HdjcY! B<M! CZildg`Zgh! CZildg`^c\ |
|||
|
8^hXd HnhiZbh! >cX# |
8^hXd HnhiZbh JH6 EiZ# AiY# |
8^hXd HnhiZbh >ciZgcVi^dcVa 7K |
6XVYZbn! CZildg` GZ\^higVg! E8Cdl! E>M! EdlZgEVcZah! Egd8dccZXi! HXg^eiH]VgZ! HZcYZg7VhZ! HB6GIcZi! HeZXigjb :meZgi! HiVX`L^hZ! I]Z ;VhiZhi LVn id >cXgZVhZ Ndjg >ciZgcZi Fjdi^Zci! IgVchEVi]! LZW:m! VcY i]Z LZW:m |
|||
|
HVc ?dhZ! 86 |
H^c\VedgZ |
6bhiZgYVb! I]Z CZi]ZgaVcYh |
ad\d VgZ gZ\^hiZgZY igVYZbVg`h d[ 8^hXd HnhiZbh! >cX# VcY$dg ^ih V[[^a^ViZh ^c i]Z Jc^iZY HiViZh VcY XZgiV^c di]Zg Xdjcig^Zh# |
|
||
8^hXd ]Vh bdgZ i]Vc '%% d[[^XZh ldgaYl^YZ# 6YYgZhhZh! e]dcZ cjbWZgh! VcY [Vm cjbWZgh VgZ a^hiZY dc i]Z 8^hXd LZWh^iZ Vi lll#X^hXd#Xdb$\d$d[[^XZh#
6aa di]Zg igVYZbVg`h bZci^dcZY ^c i]^h YdXjbZci dg lZWh^iZ VgZ i]Z egdeZgin d[ i]Z^g gZheZXi^kZ dlcZgh# I]Z jhZ d[ i]Z ldgY eVgicZg YdZh cdi ^bean V eVgicZgh]^e gZaVi^dch]^e WZilZZc 8^hXd VcY Vcn di]Zg XdbeVcn# %-%.G Xd ]889:!Vh bdgZ88:CI!i]Vc8^hXd'%%:dh!d[[^XZh8^hXd Ajb^c!ldgaYl^YZ#8^hXd CZmjh!6YYgZhhZh!8^hXd HiVY^jbK^h^dc!e]dcZ8^hXdcjbWZgh!IZaZEgZhZcXZ!VcY8^hXd[VmLZW:m!cjbWZghi]Z 8^hXdVgZad\d!a^hiZY98:! VcYdcLZaXdbZi]Z 8^hXdid i]Z =jbVcLZWh^iZCZildg`Vi VgZlll#X^hXd#XdbigVYZbVg`h0 8]Vc\^c\$\di]Z$d[[^XZh#LVn LZ Ldg`!
© 2008 Cisco Systems, Inc. All rights reserved. |
OL-18629-01 |

Contents
Chapter 1: Introduction |
1 |
Benefits |
1 |
About this Guide |
2 |
Approved Vendor List for Drives |
2 |
|
2 |
Chapter 2: Setting up the Hardware |
3 |
Installing the Disk Drives |
3 |
Connecting the NSS to the Network |
6 |
Connecting the Power |
7 |
Connecting the Chassis to a Standard Power Outlet |
7 |
Connecting the Chassis to an Uninterruptible Power Supply |
8 |
Supported UPS Product Families |
8 |
Starting the NSS |
9 |
Using the NSS3000 LCD Panel |
10 |
Chapter 3: Configuring the NSS |
12 |
Configuring the Computer Network Settings |
12 |
Logging into the Configuration Interface |
13 |
Running the Quick Setup Wizards to Configure the NSS |
16 |
Saving the NSS Configuration |
17 |
Chapter 4: Accessing the Network Storage |
20 |
Windows Users |
20 |
Accessing the Storage using CIFS/SMB |
20 |
Accessing the Storage through FTP |
21 |
UNIX and Linux Users |
22 |
Accessing the Storage through NFS |
22 |
Accessing the Storage through FTP |
23 |
NSS3000 Series Network Storage System Getting Started Guide |
i |

Contents
Mac Users |
23 |
Accessing Storage through CIFS/SMB |
23 |
Accessing Storage through FTP |
24 |
Chapter A: NSS LEDs |
25 |
Power Button LED |
25 |
System LED |
26 |
LAN LED |
27 |
Hard Disk Drive LEDs |
27 |
ACT LED |
27 |
ERR LED |
28 |
Reset Button |
28 |
Appendix B: Specifications |
29 |
Appendix C: Additional Information |
30 |
Regulatory Compliance and Safety Information |
30 |
Warranty |
30 |
End User License Agreement (EULA) |
30 |
Appendix D: Support Contacts |
31 |
NSS3000 Series Network Storage System Getting Started Guide |
ii |

1
Introduction
Thank you for choosing the Cisco Small Business Network Storage System (NSS).
Administering a network can be a difficult job. Finding low-cost ways to simplify your data-management tasks means that you have more resources to dedicate elsewhere. The NSS is a Network Attached Storage (NAS) unit that appears as a native file server for the various clients within your network, including Windows, Apple Macintosh, UNIX, and Linux platforms. The biggest benefit to your users is that they can now access data that might be stored across different physical platforms as simply as if it were on their own computers. The NSS provides a single repository that is completely dedicated to storage, ensuring the integrity, reliability, and accessibility of your data for a relatively low cost.
The NSS lets you install up to four physical disk drives. It uses the most common file-based protocols such as NFS, CIFS, and FTP for file sharing.
Benefits
The NSS offers these main advantages to your business:
•Cross-platform file sharing: Share files easily and inexpensively across multiple platforms over a cost-effective Ethernet and IP network.
•Easy installation and administration: With a basic understanding of networking, the NSS is easily configured, managed, and made available to all of the users on your network.
•Data consolidation: Centralize data to reduce management costs and maximize your investment in existing hardware. This also means better data security.
NSS3000 Series Network Storage System Getting Started Guide |
1 |

Introduction |
1 |
|
|
About this Guide |
|
|
|
|
|
About this Guide
This guide provides instructions on how to initially configure your NSS3000. It describes how to set up the hardware, configure the NSS, and how users can access the network storage.
Approved Vendor List for Drives
If you are purchasing disk drives to install in the NSS, see the Cisco Approved Vendor List at www.cisco.com/go/smallbiz for a list of recommended disk drives.
When you select a disk drive, consider the type of RAID levels required to service your business needs. For example, if you are creating a RAID (versus a JBOD), make sure that each of the disks used in the array have the same disk capacity. The RAID is built using the capacity of the smallest disk in the array.
NSS3000 Series Network Storage System Getting Started Guide |
2 |

2
Setting up the Hardware
This chapter provides instructions for installing the NSS hardware. It describes how to physically install the NSS and how to use the LCD panel of the front of the chassis to view the NSS status. It includes the following topics:
•
•
•
•
•
Installing the Disk Drives
Connecting the NSS to the Network
Connecting the Power
Starting the NSS
Using the NSS3000 LCD Panel
Installing the Disk Drives
Follow these steps to install disk drives in the NSS3000 NAS chassis.
If your NSS has the disk drives already installed, skip this step and go to Step 2.
STEP 1 Remove the contents of the NSS3000 NAS package from the box.
STEP 2 Place the chassis upright on a flat surface.
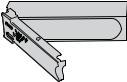
STEP 3 Unlock the front lock of the chassis.
273159
NSS3000 Series Network Storage System Getting Started Guide |
3 |

Setting up the Hardware |
2 |
|
|
Installing the Disk Drives |
|
|
|
|
|
STEP 4 Open the front door of the chassis.
STEP 5 From disk bay 1, remove the disk tray.
To remove the tray, push in the tab on the latch on the front of the tray, and then open the latch. Pull out the tray.
STEP 6 Position the disk drive into a disk tray. Then, attach the disk drive to the tray by inserting the disk drive screws into the four holes at the bottom of the tray and tightening them with a Phillips screwdriver.
Alternatively, you can attach the disk drive to the tray by inserting two screws into the holes on each side of the tray and tightening them.
 273160
STEP 7 Insert the tray back into the empty bay of the chassis.
STEP 8 Apply even pressure to both corners of the tray while you insert the tray fully into position in the chassis. Then, close the latch of the tray.
NSS3000 Series Network Storage System Getting Started Guide |
4 |

Setting up the Hardware |
2 |
|
|
Installing the Disk Drives |
|
|
|
|
|
Repeat steps 5 through 9 to install additional disk drives.
STEP 10 Close the front door of the chassis.
STEP 11 Continue to the next section, Connecting the NSS to the Network.
NSS3000 Series Network Storage System Getting Started Guide |
5 |
Setting up the Hardware |
2 |
|
|
Connecting the NSS to the Network |
|
|
|
|
|
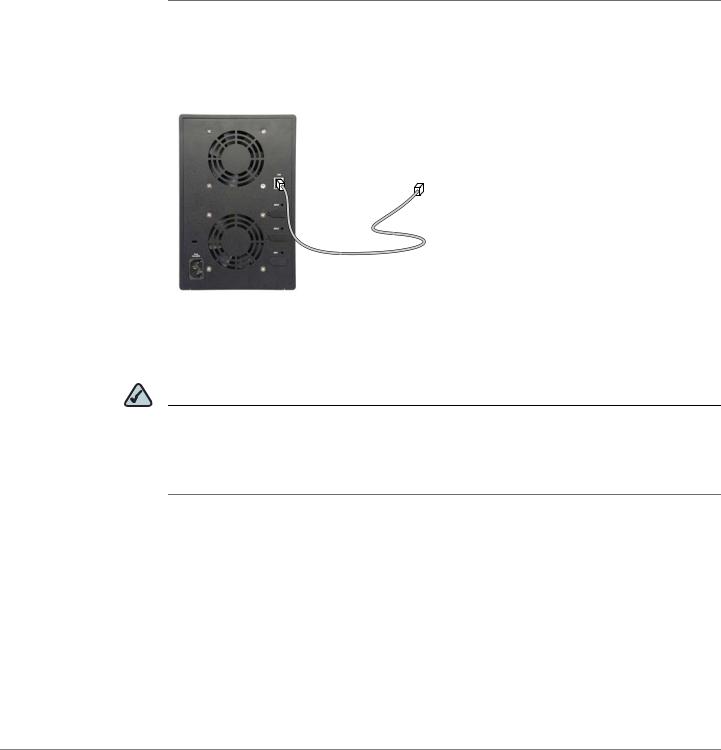
Connecting the NSS to the Network
Follow these steps to connect the NSS to the network.
STEP 1 Connect the supplied Ethernet cable to the Ethernet port on the back of the chassis.
STEP 2 Connect the other end of the Ethernet cable to a switch or router on your network.
to Network
188911
STEP 3 Make sure the Ethernet connections are secure.
STEP 4 Continue to the next section, Connecting the Power.
NOTE If you are hotplugging an Ethernet cable to the NSS after the initial installation, make sure that you wait 15 seconds between the time you unplug the cable and plug it back in. Within 10 seconds the newly connected link should appear with the correct IP and link rate in the configuration interface.
NSS3000 Series Network Storage System Getting Started Guide |
6 |
Setting up the Hardware |
2 |
|
|
Connecting the Power |
|
|
|
|
|
Connecting the Power
You can connect the NSS chassis to a standard power outlet or connect it to an
Uninterruptible Power Supply (UPS).
NOTE We recommend that you use an UPS since a sudden loss of power can cause RAID corruption and possible data loss.
Connecting the Chassis to a Standard Power Outlet
Follow these steps to connect the chassis to a standard power outlet.
STEP 1 Connect one end of the supplied power cable to the Power port on the chassis.
STEP 2 Connect the other end of the power cable to a standard power outlet.
188915
NSS3000 Series Network Storage System Getting Started Guide |
7 |
Loading...