


CDP-S350
Table of contents
 Loading...
EN
CDP-S350
CDPS350-E-2A
USER’S GUIDE
• When the Digital Piano is being operated on battery power only, notes may sound distorted when performing or playing back
a song at maximum volume. This is due to the difference between AC adaptor power and battery power, and does not
indicate Digital Piano malfunction. If you notice distortion, switch to AC adaptor power or lower the volume level.
Cove
r
Preparing a Power Supply Turning Power On or Off Using a Pedal Using Headphones
Playing on the Keyboard Splitting the Keyboard for
Duet Play
Changing the Pitch in Octave
Units (Octave Shift)
Using Reverb Linking with a Smart Device
Using Auto Accompaniment Selecting a Built-in Song for
(APP Function)
Changing the Pitch in
Semitone Steps (Transpose)
Playback
Fine Tuning a Pitch (Tuning)
Using Chorus
Included and Optional Accessories
• Any reproduction of the contents of this manual, either in part or its entirety, is prohibited. Except for your own, personal
use, any other use of the contents of this manual without the consent of CASIO is prohibited under copyright laws.
• IN NO EVENT SHALL CASIO BE LIABLE FOR ANY DAMAGES WHATSOEVER (INCLUDING, WITHOUT LIMITATION,
DAMAGES FOR LOSS OF PROFITS, BUSINESS INTERRUPTION, LOSS OF INFORMATION) ARISING OUT OF THE
USE OF OR INABILITY TO USE THIS MANUAL OR PRODUCT, EVEN IF CASIO HAS BEEN ADVISED OF THE
POSSIBILITY OF SUCH DAMAGES.
• The contents of this manual are subject to change without notice.
• The actual appearance of the product may be different from that shown in the illustrations in this User’s Guide.
• Company and product names used in this manual may be registered trademarks of others.
Use only accessories that are specified for use with this Digital Piano.
Use of unauthorized accessories creates the risk of fire, electric shock, and personal injury.
• You can get information about accessories that are sold separately for this product from the CASIO catalog available from
your retailer, and from the CASIO website at the URL or QR code below.
https://support.casio.com/global/en/emi/manual/CDP-S350/
About Music Score data
You can download music score data as a PDF file from the CASIO website, which you can access using the URL or QR code
below. You will then be able to view music scores on your smart device. You can jump from the PDF file table of contents directly
to the music score you want, and you can print out scores as needed.
https://support.casio.com/global/en/emi/manual/CDP-S350/
EN-1
Contents
Overview and Setup EN-4
General Guide. . . . . . . . . . . . . . . . . . . . . . . . . . . . . EN-4
Preparing a Power Supply . . . . . . . . . . . . . . . . . . . EN-7
Turning Power On or Off . . . . . . . . . . . . . . . . . . . . . EN-9
Returning the Digital Piano to Its Factory
Default Settings . . . . . . . . . . . . . . . . . . . . . . . . . . EN-9
Operation Lock . . . . . . . . . . . . . . . . . . . . . . . . . . . . EN-9
Using Headphones . . . . . . . . . . . . . . . . . . . . . . . . EN-10
Adjusting Display Contrast . . . . . . . . . . . . . . . . . . EN-10
Listening to Demo Play . . . . . . . . . . . . . . . . . . . . . EN-11
Operations Common to All Modes EN-11
Categories. . . . . . . . . . . . . . . . . . . . . . . . . . . . . . . EN-11
Dial Operations . . . . . . . . . . . . . . . . . . . . . . . . . . . EN-12
Text Character Input . . . . . . . . . . . . . . . . . . . . . . . EN-12
FUNCTION Indicator. . . . . . . . . . . . . . . . . . . . . . . EN-13
Playing on the Keyboard EN-14
Layering and Splitting Tones. . . . . . . . . . . . . . . . . EN-14
Changing Keyboard Response to Touch
Pressure (Touch Response) . . . . . . . . . . . . . . . EN-16
Using Reverb . . . . . . . . . . . . . . . . . . . . . . . . . . . . EN-17
Using Chorus . . . . . . . . . . . . . . . . . . . . . . . . . . . . EN-17
Using the Metronome . . . . . . . . . . . . . . . . . . . . . . EN-18
Changing the Tempo Setting . . . . . . . . . . . . . . . . EN-18
Using the Arpeggiator . . . . . . . . . . . . . . . . . . . . . . EN-19
Splitting the Keyboard for Duet Play . . . . . . . . . . . EN-20
Controlling Sounds EN-22
Using a Pedal . . . . . . . . . . . . . . . . . . . . . . . . . . . . EN-22
Using the Pitch Bend Wheel . . . . . . . . . . . . . . . . . EN-23
Changing the Pitch in Semitone Steps
(Transpose) . . . . . . . . . . . . . . . . . . . . . . . . . . . . EN-23
Fine Tuning a Pitch (Tuning). . . . . . . . . . . . . . . . . EN-23
Changing the Pitch in Octave Units
(Octave Shift) . . . . . . . . . . . . . . . . . . . . . . . . . . . EN-24
Changing the Scale Tuning (Temperament)
of the Keyboard . . . . . . . . . . . . . . . . . . . . . . . . . EN-24
Playing a Built-in Song or a Song on a
USB Flash Drive EN-26
Selecting a Built-in Song for Playback . . . . . . . . . .EN-26
Looping Playback of Specific Song Measures
(A-B Repeat) . . . . . . . . . . . . . . . . . . . . . . . . . . . .EN-27
Playing Back with One Hand’s Part Muted . . . . . . .EN-28
Increasing the Selection of Songs . . . . . . . . . . . . .EN-28
Playing Back a Song from a USB Flash Drive . . . .EN-29
Using Auto Accompaniment EN-29
Playing the Rhythm Part Only. . . . . . . . . . . . . . . . .EN-29
Playing Auto Accompaniment with Chords. . . . . . .EN-30
Auto Accompaniment Pattern Variations . . . . . . . .EN-33
Using Auto Harmonize . . . . . . . . . . . . . . . . . . . . . .EN-35
Using One-Touch Preset . . . . . . . . . . . . . . . . . . . .EN-36
Increasing the Number of Rhythms
(User Rhythms) . . . . . . . . . . . . . . . . . . . . . . . . . .EN-36
Using Music Preset EN-37
Registering and Restoring a Setup
(Registration) EN-38
Saving a Setup to Registration Memory . . . . . . . . .EN-38
Recalling a Setup from Registration Memory . . . . .EN-39
Recording Your Keyboard Play EN-40
Recording and Playing Back Keyboard Play . . . . .EN-40
Overdubbing a Recorded Track . . . . . . . . . . . . . . .EN-41
Recording Keyboard Play Along with a Song
(Part Practice Recording) . . . . . . . . . . . . . . . . . .EN-42
Configuring Precount and Metronome Settings . . .EN-43
Muting a Track . . . . . . . . . . . . . . . . . . . . . . . . . . . .EN-44
Deleting a Recorded Song or Track . . . . . . . . . . . .EN-44
Copying a Recorded Song . . . . . . . . . . . . . . . . . . .EN-44
Configuring Function Settings EN-45
To configure function settings. . . . . . . . . . . . . . . . .EN-45
Function Setting Item List . . . . . . . . . . . . . . . . . . . .EN-46
Using Operation Lock . . . . . . . . . . . . . . . . . . . . . . .EN-48
Deleting All Data in Digital Piano Memory . . . . . . .EN-48
EN-2

USB Flash Drive EN-49
USB Flash Drive and USB Flash Drive Port
Handling Precautions. . . . . . . . . . . . . . . . . . . . . EN-49
Connecting a USB Flash Drive to and
Detaching It from the Digital Piano . . . . . . . . . . EN-49
Formatting a USB Flash Drive . . . . . . . . . . . . . . . EN-50
USB Flash Drive Operations . . . . . . . . . . . . . . . . . EN-51
Using a Computer to Copy General Song
Data to a USB Flash Drive. . . . . . . . . . . . . . . . . EN-53
Connecting External Devices EN-54
Connecting to a Computer . . . . . . . . . . . . . . . . . . EN-54
Connecting to Audio Equipment . . . . . . . . . . . . . . EN-55
Linking with a Smart Device (APP Function) . . . . EN-56
Reference EN-57
Troubleshooting . . . . . . . . . . . . . . . . . . . . . . . . . . EN-57
Error Messages. . . . . . . . . . . . . . . . . . . . . . . . . . . EN-59
Specifications . . . . . . . . . . . . . . . . . . . . . . . . . . . . EN-60
Versatile Tone Map . . . . . . . . . . . . . . . . . . . . . . . . EN-62
Fingering Guide. . . . . . . . . . . . . . . . . . . . . . . . . . . EN-63
Chord Example List. . . . . . . . . . . . . . . . . . . . . . . . EN-64
MIDI Implementation Chart
Contents
EN-3
Overview and Setup
bo bp bq br bs
321 456
cp
7
bt ck cl cm cn
cq
co
8 9 bk bl bm bn
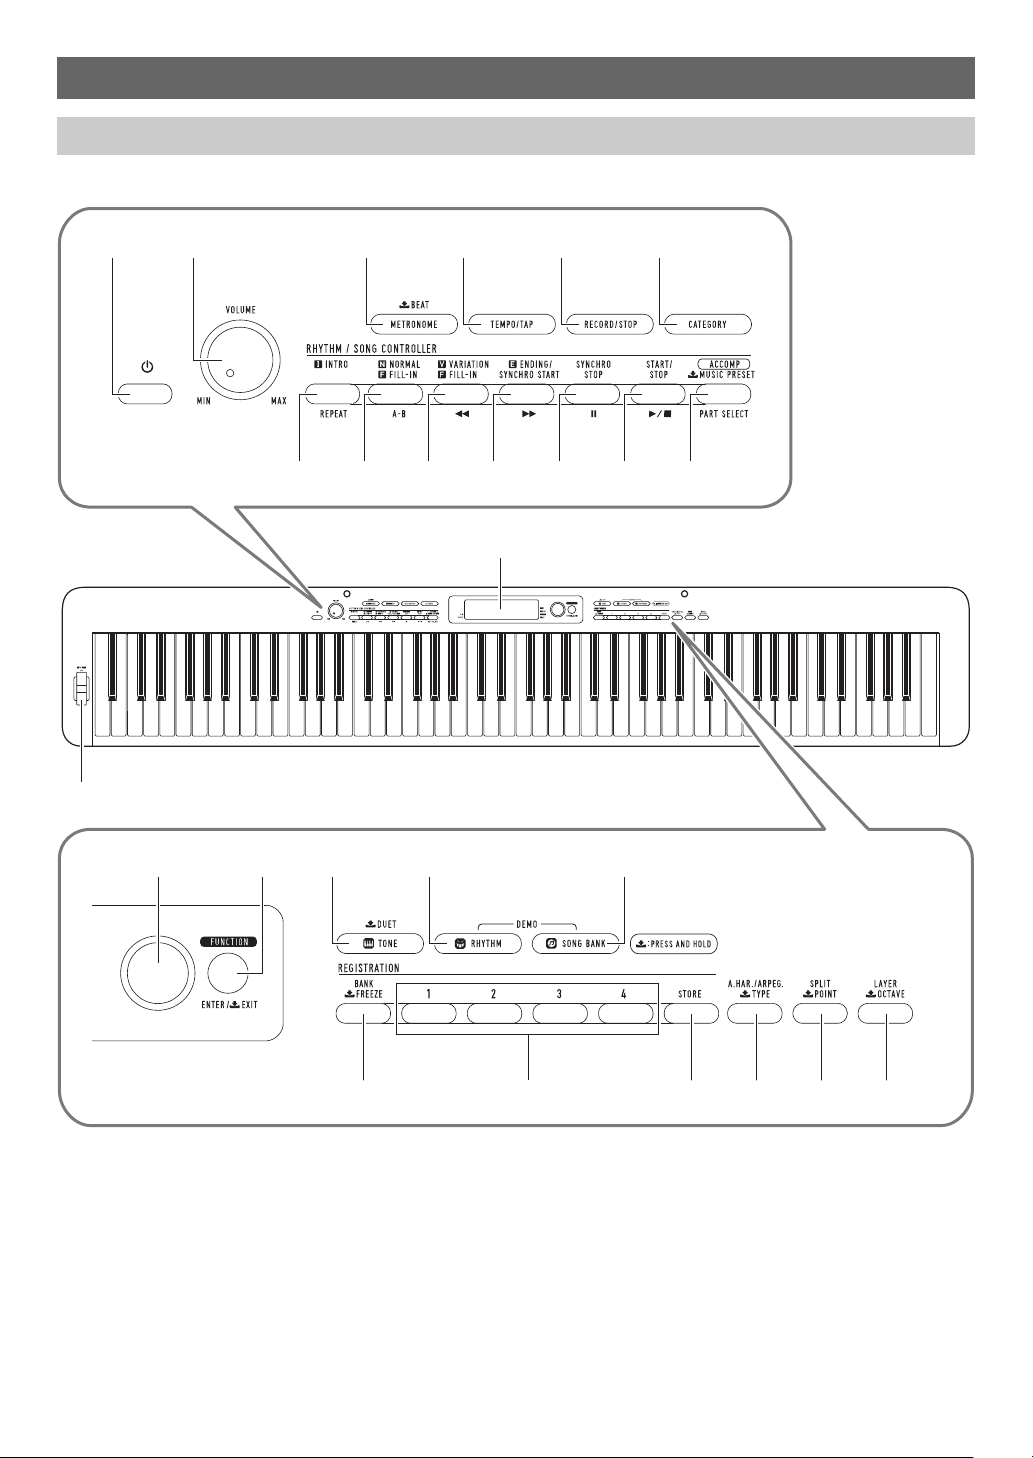
General Guide
■ Front Panel
• Some of the button names shown here include a $ mark. This indicates that you need to long-press the button to perform its
operation.
EN-4
Overview and Setup
cscr
ct dk dl dm dn
1 P (Power) button
2 VOLUME knob
3 METRONOME, $ BEAT button
4 TEMPO/TAP button
5 RECORD/STOP button
6 CATEGORY button
7 INTRO, REPEAT button
8 NORMAL FILL-IN, A-B button
9 VARIATION FILL-IN, s button
bk ENDING/SYNCHRO START, d button
bl SYNCHRO STOP, k button
bm START/STOP, a button
bn [ACCOMP], PART SELECT,
$ MUSIC PRESET button
bo dial
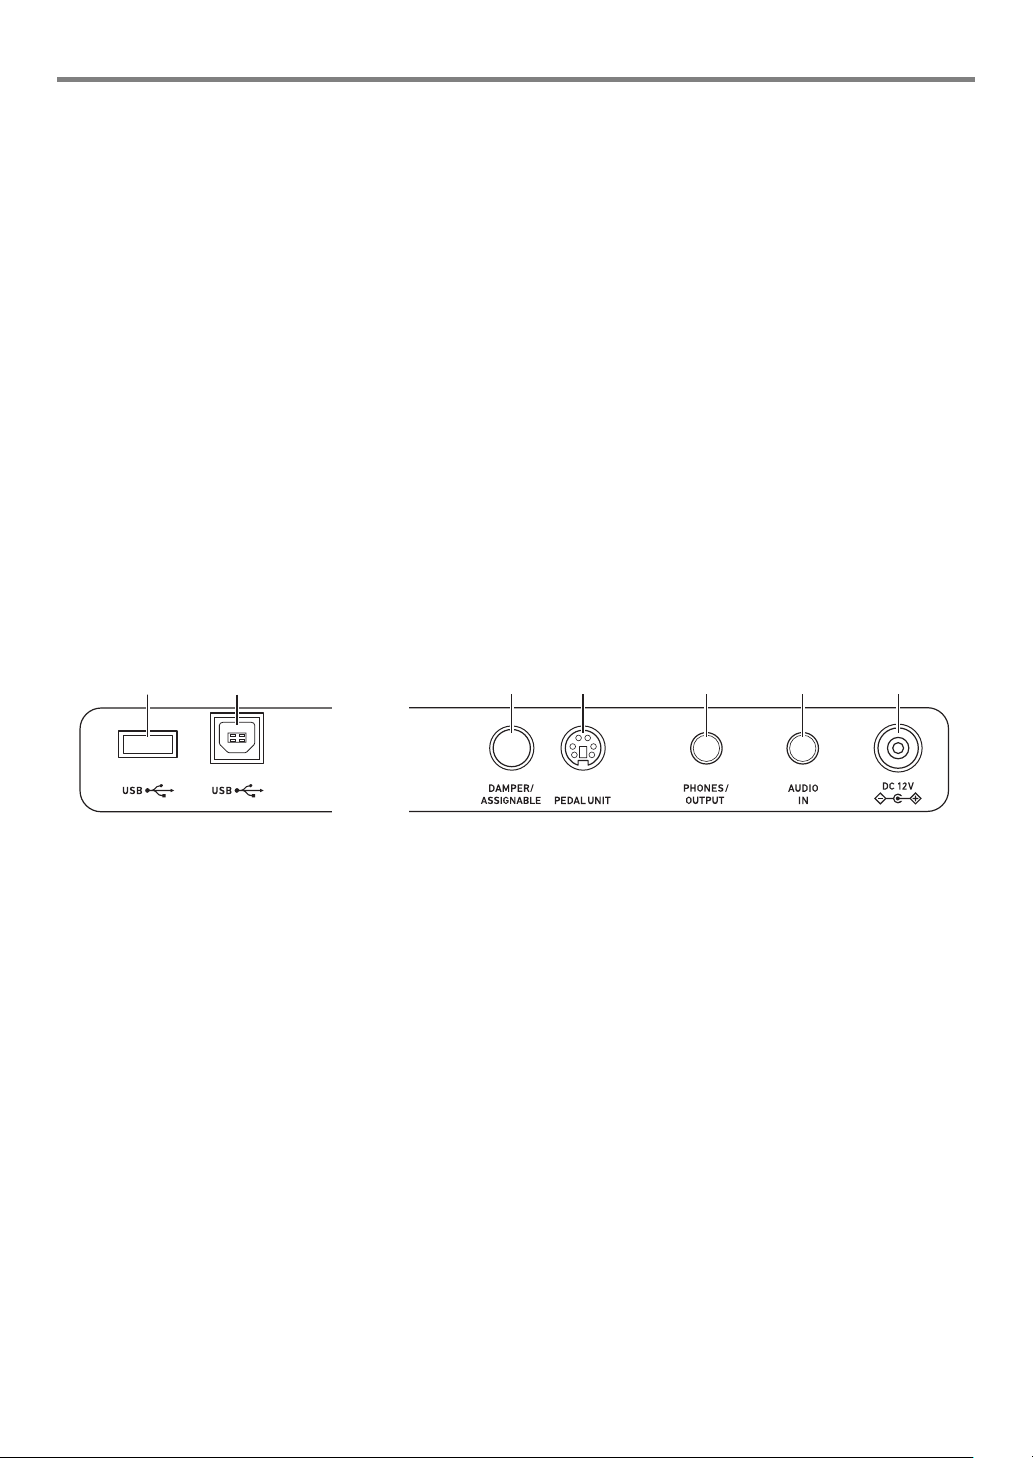
■ Back
bp FUNCTION, ENTER/$ EXIT button
bq TONE, $ DUET button
br RHYTHM button
bs SONG BANK button
bt BANK, $ FREEZE button
ck Area 1 - Area 4 button
cl STORE
cm A.HAR./ARPEG., $ TYPE button
cn SPLIT, $ POINT button
co LAYER, $ OCTAVE button
cp Display
cq PITCH BEND wheel
button
cr USB flash drive port
cs USB port
ct DAMPER/ASSIGNABLE jack
dk PEDAL UNIT jack
dl PHONES/OUTPUT jack
dm AUDIO IN jack
dn DC 12V terminal
EN-5

Overview and Setup
***
Music stand
Display
Tone indicator
Rhythm indicator
Song Bank indicator
Music Preset indicator
Keyboard part indicators
Number/setting value display (left), name display (right)
Preparing the Music Stand
Tempo, measure
Beat
Chord name
Auto Accompaniment indicators
Playback part indicators
Registration indicators, record indicators
* Other indicators
EN-6

Preparing a Power Supply
Household power outlet
AC adaptor
dn DC 12V
Power cord
Your Digital Piano uses an AC adaptor for power.
Though the Digital Piano supports battery operation, use of an
AC adaptor is generally recommended.
Using the AC Adaptor
Make sure that you use only the AC adaptor specified for this
Digital Piano. Use of a different type of AC adaptor can cause
malfunction.
Specified AC Adaptor: AD-A12150LW
(JEITA Standard plug)
Overview and Setup
• Never connect the AC adaptor (JEITA Standard, with
unified polarity plug) that comes with this Digital Piano
to any other device besides this Digital Piano. Doing so
creates the risk of malfunction.
• Be sure to turn off Digital Piano power before
connecting or disconnecting the AC adaptor.
• The AC adaptor will become warm to the touch after
very long use. This is normal and does not indicate
malfunction.
• Note the important precautions below to avoid damage
to the power cord.
During Use
• Never pull on the cord with excessive force.
• Never repeatedly pull on the cord.
• Never twist the cord at the base of the plug or connector.
During Movement
• Before moving the Digital Piano, be sure to unplug the
AC adaptor from the power outlet.
During Storage
• Loop and bundle the power cord, but never wind it
around the AC adaptor.
• Never insert metal, pencils, or any other objects into
the product’s DC12V terminal. Doing so creates the risk
of accident.
• Do not try to use the power cord that comes with the
product with another device.
• Plug the AC adaptor into a power outlet that is close to
the Digital Piano. This lets you immediately unplug
from the power outlet should any problem occur.
• The AC adaptor is intended for indoor use only. Do not
leave it in a location where it can become wet. Also, do
not place a vase or any other container of liquid on the
AC adaptor.
• Make sure that the AC adaptor does not become
covered with a newspaper, table cloth, curtain, or any
other type of fabric.
• If you do not plan to use the Digital Piano for a long
time, unplug the AC adaptor from the power outlet.
• The AC adaptor cannot be repaired. If your AC adaptor
malfunctions or becomes damaged, you need to
purchase a new one.
• AC Adaptor Usage Environment
Temperature: 0 to 40°C
Humidity: 10% to 90%RH
• Output Polarity: &
EN-7
Overview and Setup
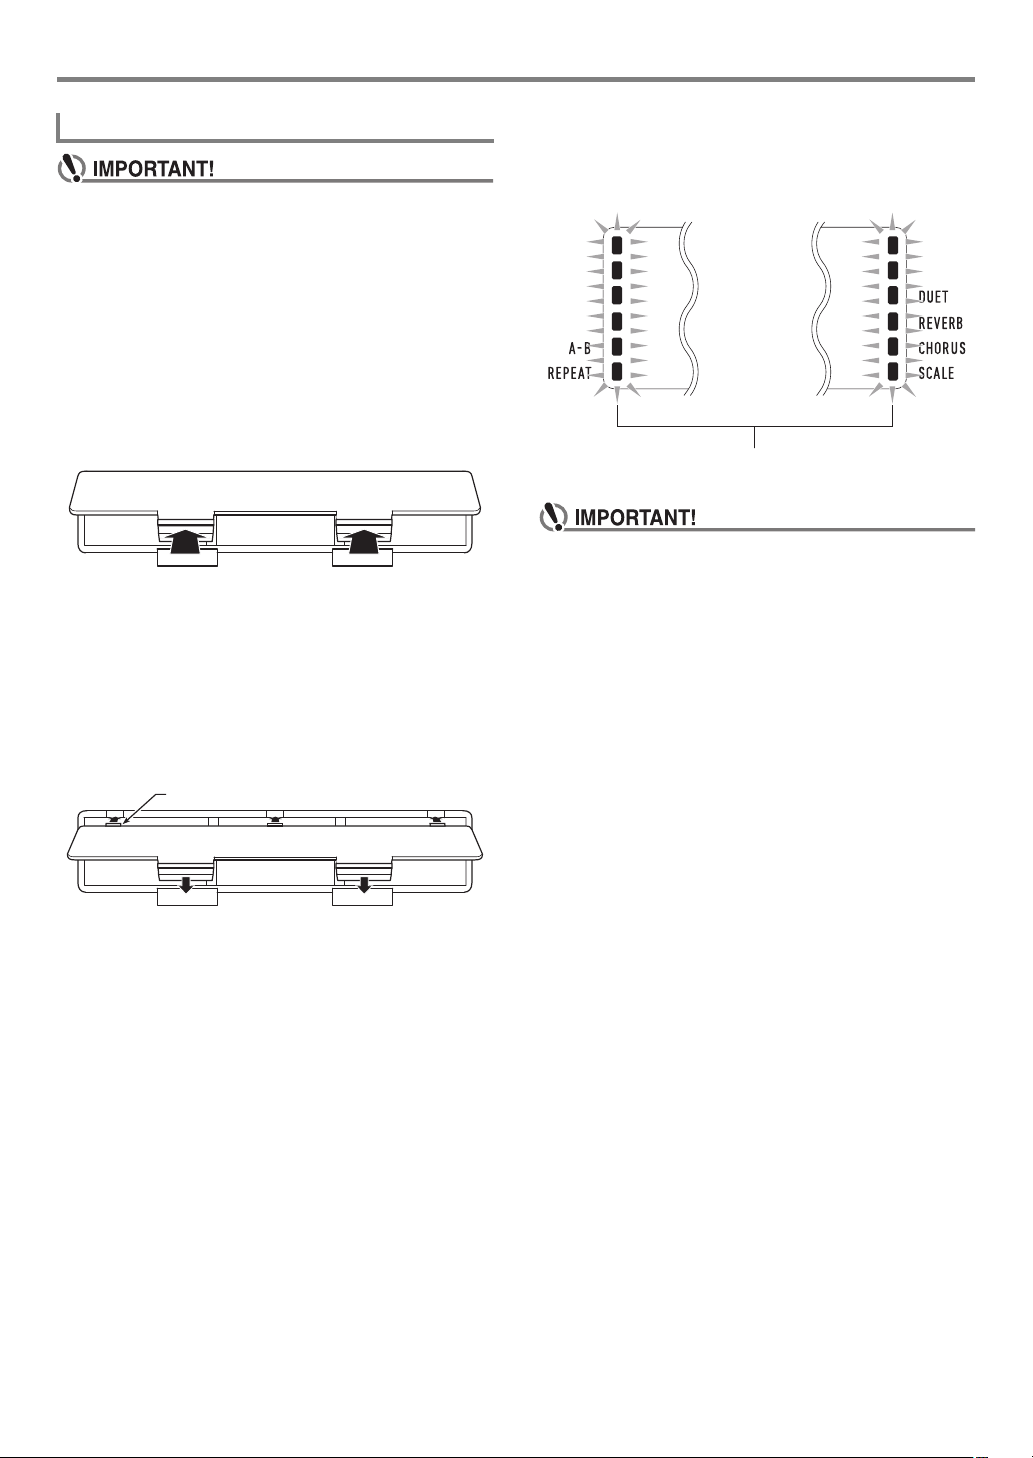
Tabs
Low battery indicators (flash)
Using Batteries
• Be sure to turn off power before loading batteries.
• It is up to you to prepare six commercially available
alkaline batteries.
• Note the precautions below while the Digital Piano is
turned upside down to load batteries.
− Take care to avoid injury due to pinching your
fingers under the Digital Piano.
− Do not allow the Digital Piano to tip over or otherwise
be subjected to strong impact. Impact can damage
the volume knob and keyboard keys.
1.
Open the battery cover on the bottom of the
Digital Piano.
2.
Load six AA-size batteries into the battery
compartment.
Make sure the positive + and negative - ends of the
batteries are facing as marked on the Digital Piano.
■ Low Battery Indication
The indicators shown below start to flash to let you know
when battery power is low. Replace the batteries with new
ones.
• Using the Digital Piano while batteries are very low can
cause it to turn off suddenly. This can cause data
stored in Digital Piano memory to be corrupted or lost.
3.
Insert the tabs of the battery cover into the
holes along the side of the battery
compartment, and close the cover.
EN-8
Overview and Setup
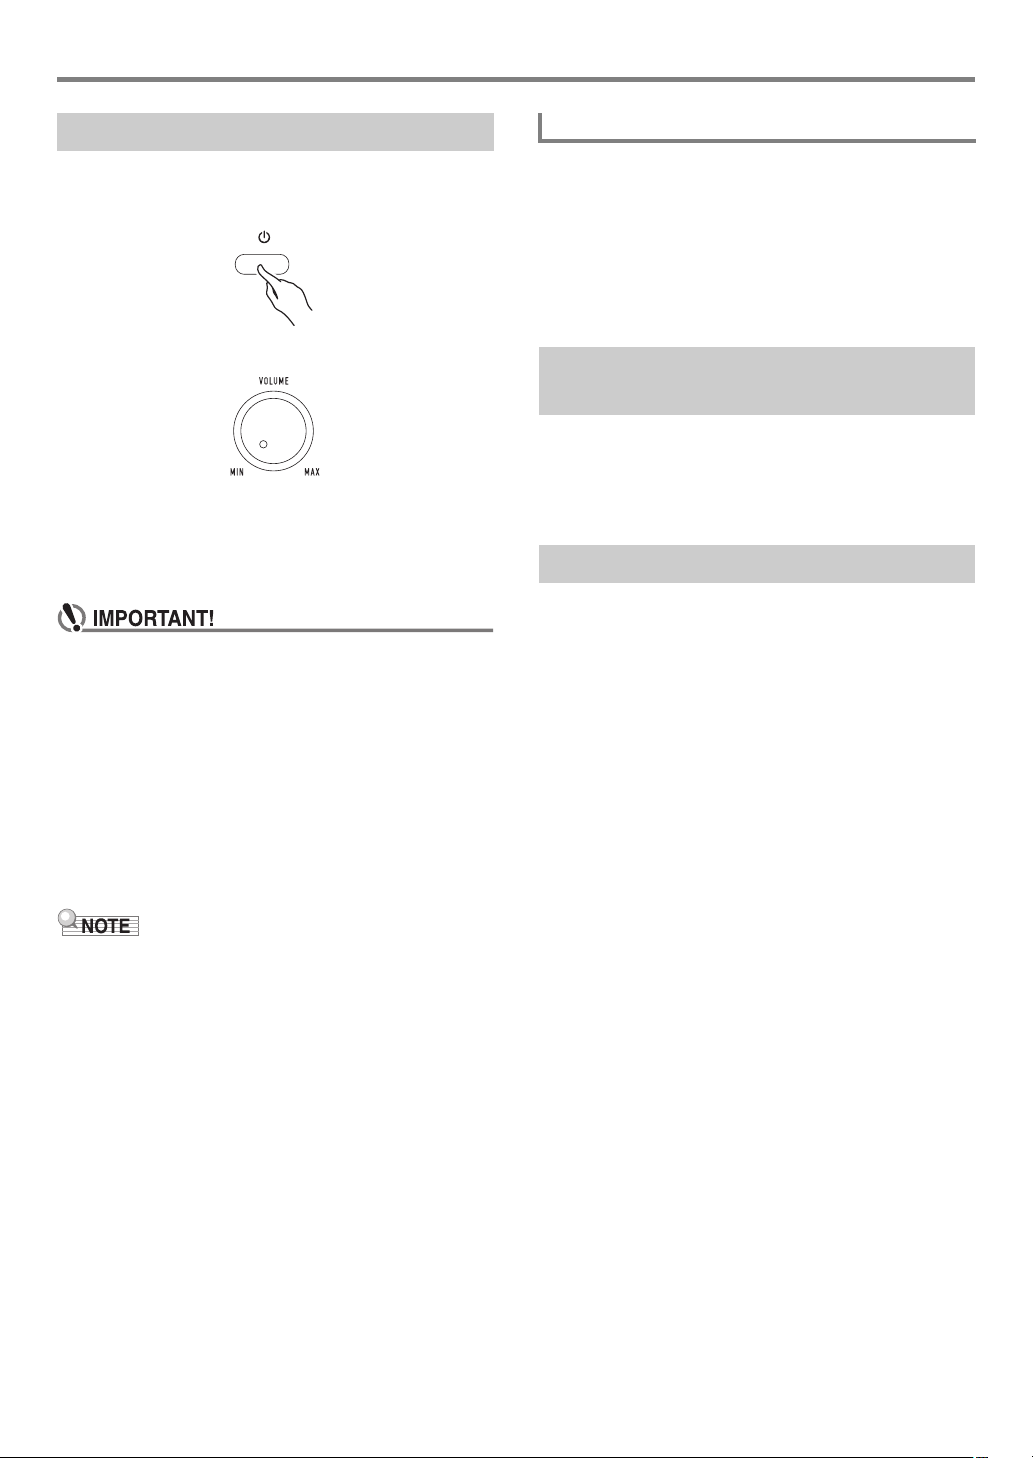
Turning Power On or Off
1.
Press the 1P (Power) button to turn on
Digital Piano power.
•Use 2 VOLUME to adjust volume.
2.
To turn off the Digital Piano, long-press the
1P (Power) button.
The message “Bye” will appear on the display and then
power will turn off.
• If you press 1P (Power) only lightly, the display will
light up momentarily but power will not turn on. This
does not indicate malfunction. Press 1P (Power)
firmly and completely to turn on power.
• Turning off the Digital Piano causes most current
settings to be cleared. The Digital Piano will revert to
initial settings the next time you turn it on.
• Never try to perform any operation while the “Wait...”
or “Bye” message is on the display. These messages
indicate that an internal data save operation is being
performed. Turning off the Digital Piano while either of
these messages is displayed can cause its data to be
deleted or become corrupted.
Auto Power Off
If you do not perform any operation on the Digital Piano for
about four hours under AC adaptor power or about six
minutes under battery power, power will turn off automatically.
■ Disabling Auto Power Off
You can disable Auto Power Off to ensure that power is not
turned off automatically during a concert, etc.
See function number 55 (AutoOff) in the “Function Setting
Item List” (page EN-46).
Returning the Digital Piano to Its Factory Default Settings
Perform the procedure below when you want to return the
Digital Piano’s stored data and settings to their initial factory
defaults.
See function number 58 (Factory) in the “Function Setting
Item List” (page EN-46).
Operation Lock
Operation lock can be used to prevent operational errors
during performances by disabling button operations. For
details, see “Using Operation Lock” (page EN-48).
• Pressing 1P (Power) to turn off power actually puts the
Digital Piano into a standby state. Minute amounts of
current continue to flow within the Digital Piano in the
standby state. If you do not plan to use the Digital Piano for
a long time or if there is a lightning storm in your area, be
sure to unplug the AC adaptor from the power outlet.
EN-9
Overview and Setup
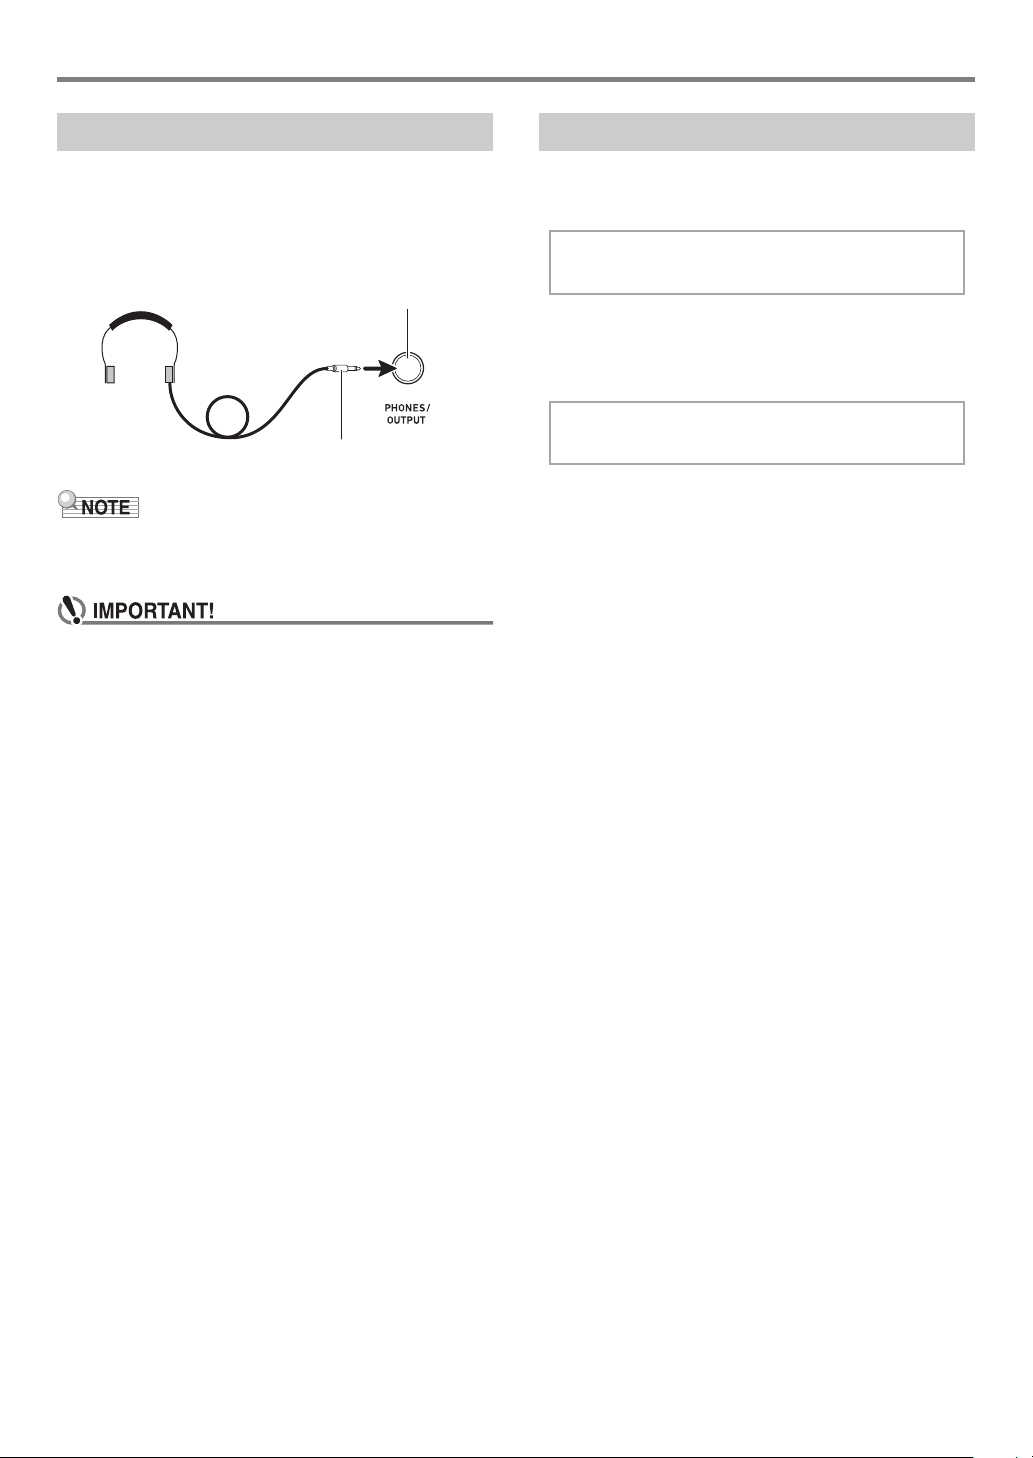
dl PHONES/OUTPUT jack
(Stereo mini jack (3.5mm))
Stereo mini plug
Other
Using Headphones
Using headphones cuts off output from the built-in speakers,
which means you can practice playing even late at night
without disturbing others.
• Be sure to turn down the volume level before connecting
headphones.
• Headphones do not come with the Digital Piano.
• Use commercially available headphones. See page EN-1
for information about options.
• Do not listen to very high volume output over
headphones for long period. Doing so creates the risk
of hearing damage.
• If you are using headphones that require an adaptor
plug, make sure you do not leave the adaptor plugged
in when you unplug the headphones. If you do, nothing
will sound from the speakers when you play.
Adjusting Display Contrast
1.
Press bp FUNCTION and then use the bo dial
to display “Other”.
2.
Press bp ENTER.
3.
Use the bo dial to display “Contrast”.
Con t r
4.
Press bp ENTER.
This displays the NUM indicator.
5.
Use the bo dial to adjust display contrast.
• The contrast setting range is 01 to 17.
6.
Press bp ENTER to apply your setting.
This causes the NUM indicator to disappear.
7.
To exit the setting screen, press bq TONE.
as t
EN-10
Listening to Demo Play
Category number Category name
Operations Common to All
1.
Press br RHYTHM and bs SONG BANK at the
same time.
This causes (song bank indicator) and (rhythm
indicator) to flash on the display and starts playing of the
demo song. After demo song playback is complete,
demo play will continue with Song Bank songs.
• During demo play, you can use the bo dial to jump to
the beginning of the previous or next song. See the
separate “Built-in Music Data Lists” for a list of Song
Bank titles.
• Demo play will repeat until you perform the operation
in step 2 below.
2.
To stop demo play, press bma or
br RHYTHM and bs SONG BANK at the same
time.
• If Auto Power Off (page EN-9) is enabled, power will turn off
automatically at the applicable trigger time after a period of
non-use, even if demo play is being performed. You can
disable Auto Power Off, if you want. Use the operation
under “Configuring Function Settings” (page EN-45) to
enable function number 55 (AutoOff) in the “Function
Setting Item List” (page EN-46).
Modes
• Unless otherwise specifically noted, all of the
procedures in this manual assume that the Digital
Piano is in its initial power on state (immediately after
you turn on power). If you run into problems with a
procedure, turn Digital Piano power off and back on,
and then try performing the procedure again.
• Note that turning off Digital Piano power during a
procedure causes any pending unsaved data to be
deleted.
Categories
The tones, rhythms, song bank songs, and music presets of
this Digital Piano are grouped into categories to make setting
option selection easier. When configuring settings, you can
first select a category and then select a setting option in that
category.
■ To navigate between categories
1.
Press 6 CATEGORY.
This causes one of the following mode indicators to flash
on the display: (tone), (rhythm), (song bank),
(music preset).
• Each press of 6 CATEGORY selects the next
sequential category.
Piano
• After pressing 6 CATEGORY, you can also scroll
forward and back between category names using the
bo dial.
• If you do not perform any operation for a while after
displaying a category, the display will automatically
exit the category screen.
2.
To exit the category screen, press
bp FUNCTION.
• For categories available in each mode, refer to the
Category column in the lists below.
– Tone list, rhythm list, song bank list, and music preset list
in the separate “Built-in Music Data Lists”
• To scroll forward or back from the current category to the
first item of previous or following categories (without
displaying the category names), hold down
6 CATEGORY as you rotate the bo dial.
EN-11
Operations Common to All Modes
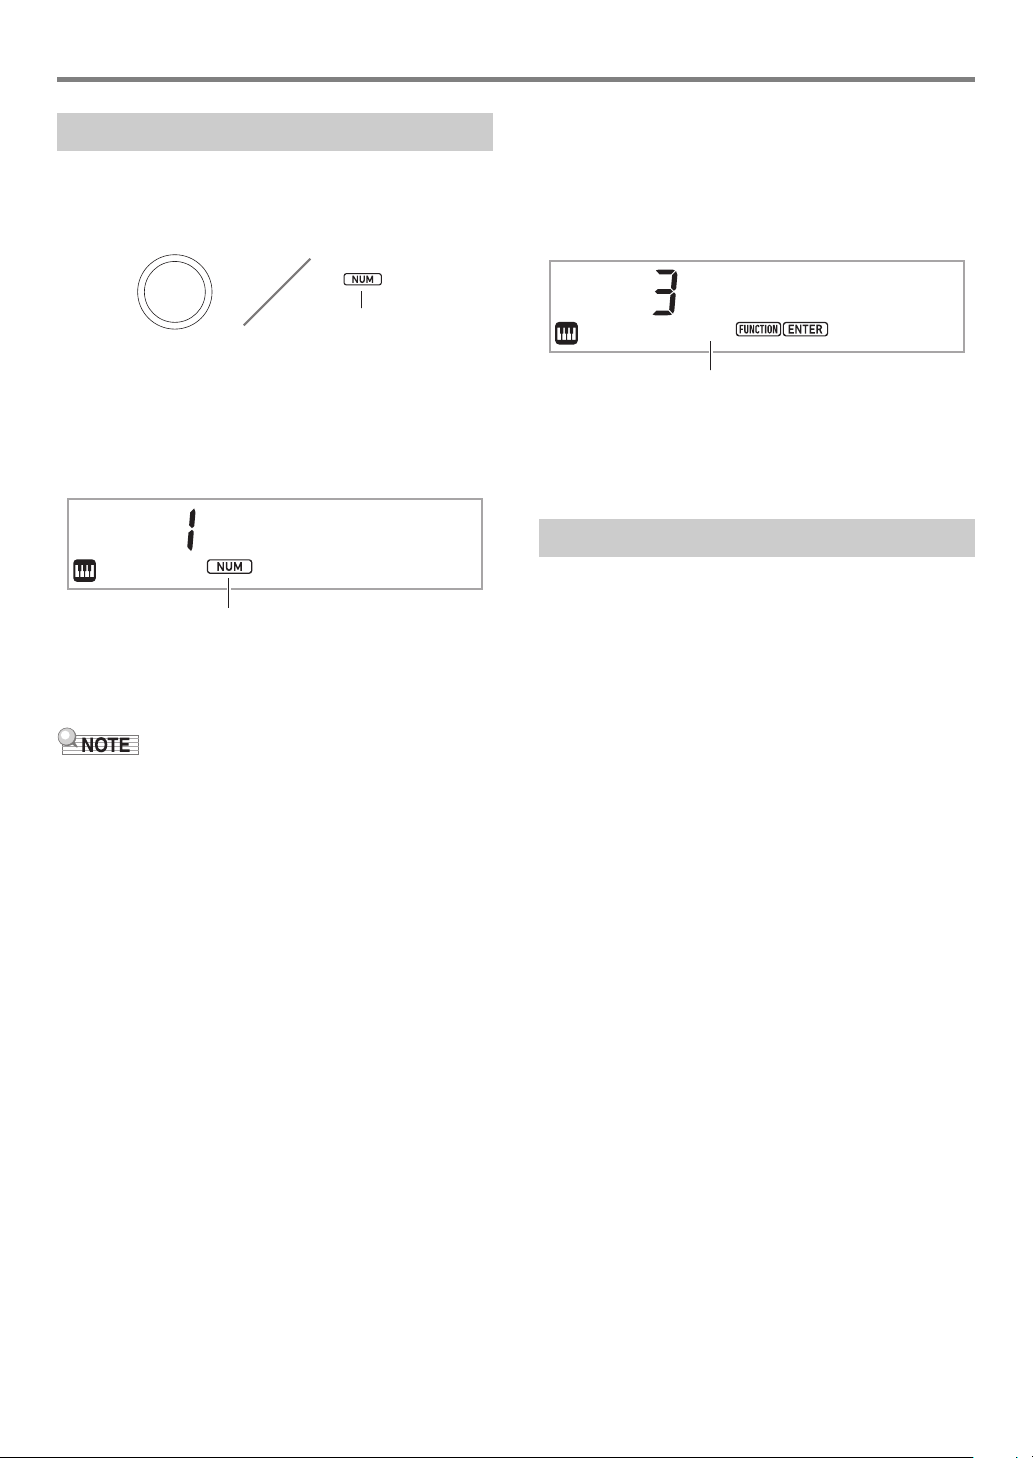
Displayed
NUM indicator displayed
Touch
NUM indicator not displayed
Dial Operations
Use the bo dial to change a number (tone number, etc.) or
value (tempo value, etc.), and to select menu items. You can
determine what operation you can perform with the bo dial by
checking the NUM indicator on the display.
■ To change a value or number (NUM indicator
displayed)
While the NUM indicator is displayed, the bo dial can be used
to change a number or value.
Example: Tone number selection screen
Stage
Example Operations
“To select an instrument for playing” (page EN-14)
“To adjust the tempo (beats per minute) value” (page EN-18)
• If a dial operation causes the value being changed to reach
its initial default (or recommended) value, the NUM
indicator will blink once to let you know.
Pno
■ To select a menu item (NUM indicator not
displayed)
If a menu appears while you are configuring a setting and the
NUM indicator is not displayed, you can use the bo dial to
select the menu item you want.
Example: Function setting screen
Example Operations
“To configure function settings” (page EN-45)
“To configure precount and metronome settings” (page
EN-43)
Text Character Input
Use the procedure below when you need to change the name
of data saved on a USB flash drive or to input other text.
■ To insert a character
1.
Use the bo dial to move the cursor to the
position where you want to insert a character.
2.
Press ck Area 2.
This inserts “A” at the cursor position and displays the
NUM indicator.
• At this time you can change the “A” to a different
character if you want. To do so, perform the procedure
under “To change a character” from step 2.
EN-12

Operations Common to All Modes
0
A
N
[
i
v
!
1
B
O
]
j
w
#
2
C
P
^
k
x
$
3
D
Q
_
l
y
%
4
E
R
`
m
z
&
5
F
S
a
n
{
'
6
G
T
b
o
}
(
7
H
U
c
p
~
)
8
I
V
d
q
+
9
J
W
e
r
,
;
K
X
f
s
=
L
Y
g
t
.
@
M
Z
h
u
~
Setting number Setting name
Not flashing
Flashing
Setting number Setting
■ To change a character
1.
Use the bo dial to move the cursor to the
position of the character you want to change,
and then press bp ENTER.
This displays the NUM indicator.
2.
Use the bo dial to change the currently
selected character.
3.
After the character is the way you want, press
(or long-press) bp ENTER to apply the change.
This causes the NUM indicator to disappear.
• Input of the characters shown in the table below is
supported when saving a file to a USB flash drive.
• If you input a similarity symbol ( ), it will be displayed
as a right arrow (3).
• If you use this procedure to edit the file name of a file
on a FAT32 formatted USB flash drive, you will not be
able to input some of the characters shown above.
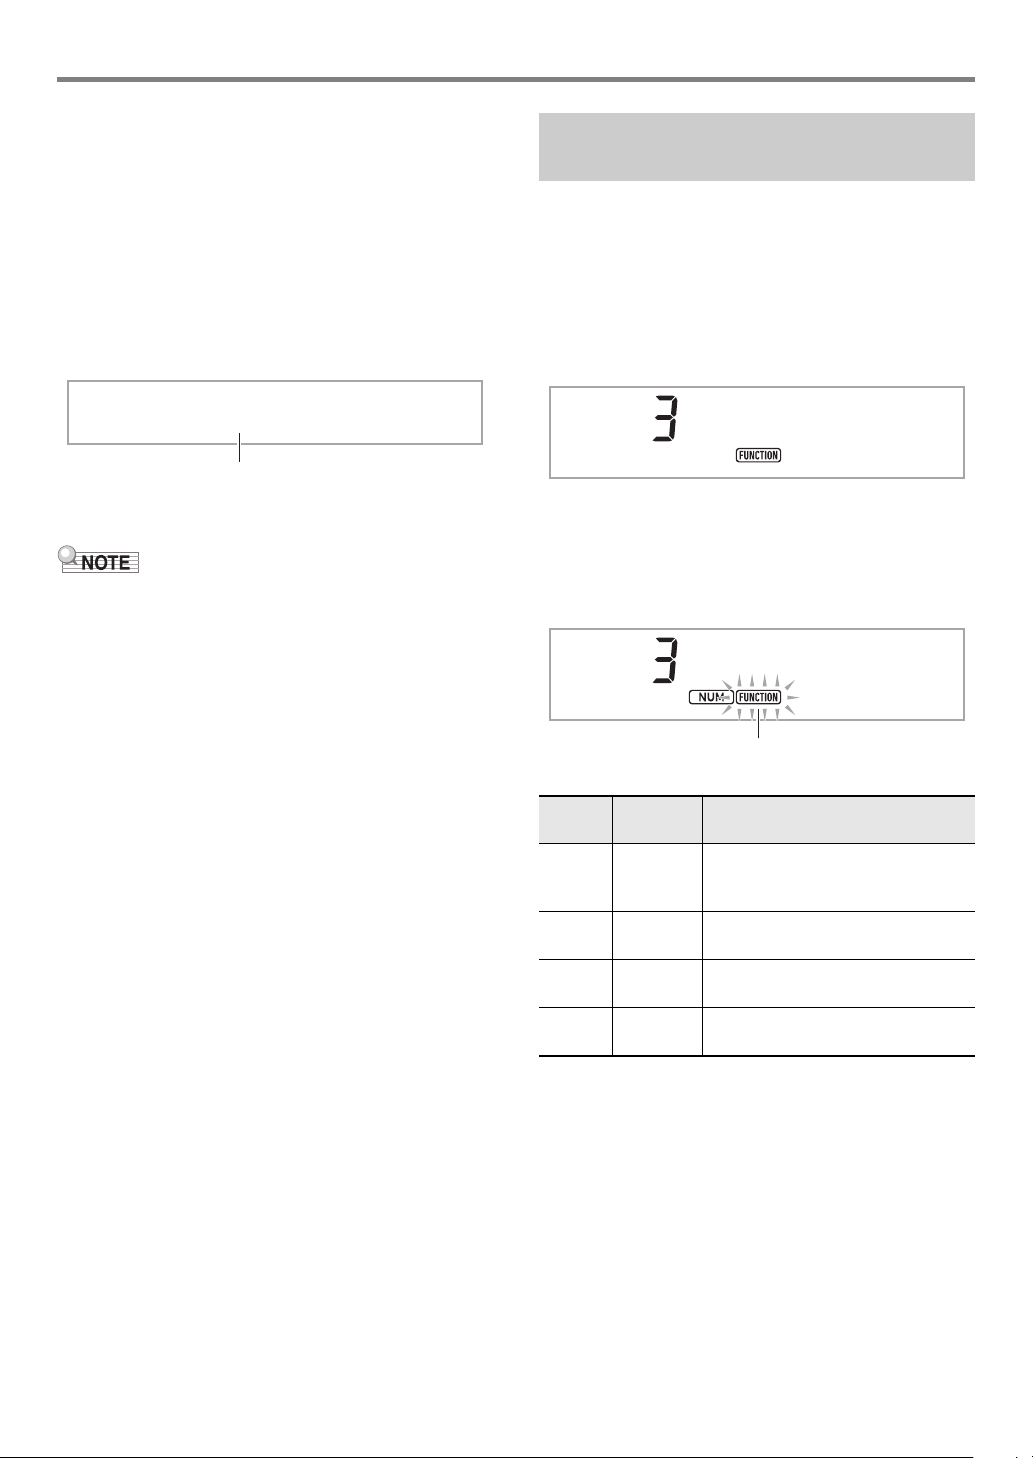
FUNCTION Indicator
The FUNCTION indicator is either flashing or not flashing
when you perform a Digital Piano function setting (page
EN-45) or other special setting operation. The meanings of
the text that appears along with a non-flashing or flashing
FUNCTION indicator are described below.
Indicator Indicates this:
Not flashing Item name*
Flashing Setting of the displayed setting item
* Only while a setting that is a function setting is displayed.
An example of what the FUNCTION indicator indicates is
shown below.
Example: To configure the Touch Response
setting
1.
Press bp FUNCTION.
This displays “Touch”.
• “Touch” is a setting name, so the FUNCTION indicator
is not flashing.
Touch
■ To delete a character
1.
Use the bo dial to move the cursor to the
position of the character you want to delete.
2.
Press ck Area 1.
■ To save edited text
1.
Press cl STORE.
2.
Press bp ENTER.
This causes “Touch” to change to “Normal” (the initial
default Touch Response setting). Since “Normal” is a
setting option, the FUNCTION indicator flashes.
No r
3.
To return to the setting name display, press
bp FUNCTION.
This causes the FUNCTION indicator to stop flashing.
4.
To exit the setting screen, press bq TONE.
This causes the FUNCTION indicator to disappear.
m
a
l
EN-13
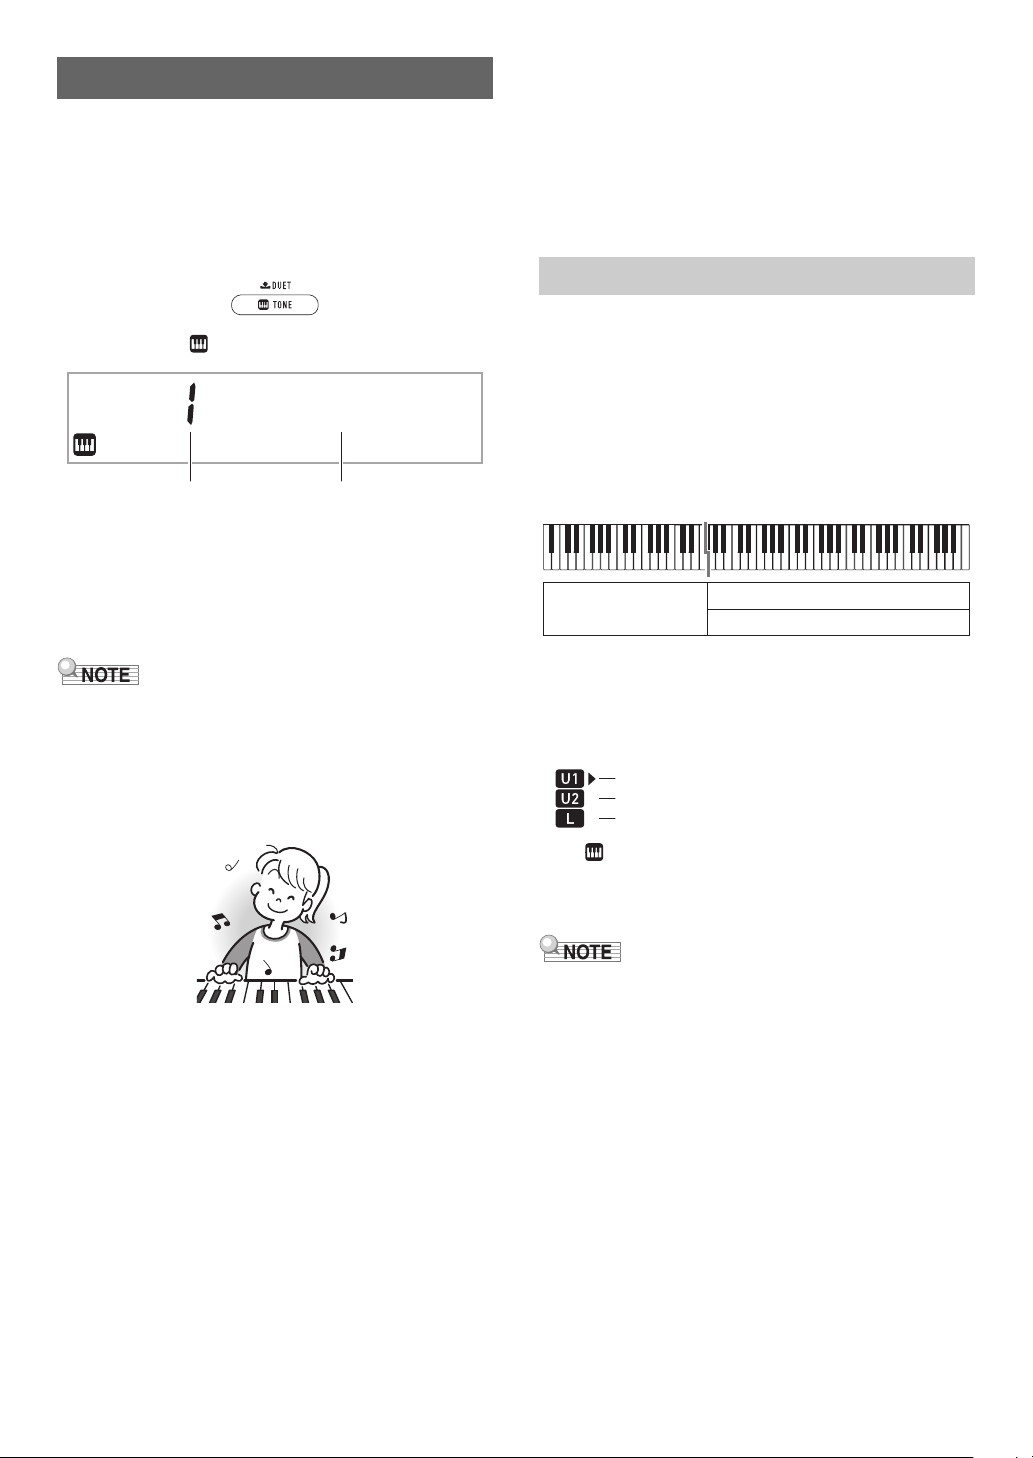
Playing on the Keyboard
Tone number Tone name
Lower
Upper1
Upper2
U1 (Upper1) indicator
U2 (Upper2) indicator
L (Lower) indicator
Your Digital Piano lets you select tones for a wide variety of
musical instrument sounds, including violin, flute, orchestra,
and more. Even the same song sound takes on a different feel
by changing the instrument type.
■ To select an instrument for playing
1.
Press bq TONE.
This displays (tone indicator).
Stage
2.
Use the bo dial to select the tone number you
want.
• For information about how to jump between tone
categories, see “To navigate between categories”
(page EN-11).
Pno
■ Versatile Tones
The Digital Piano’s built-in tones include “versatile tones”
(three guitar tones, two bass tones, and two brass tones) that
can be used for creating computer music. Versatile tones
assign performance sounds that are characteristic of a
particular musical instrument (such as a guitar glissando, fret
noise, etc.) to each keyboard key (note) and velocity. For
information about the sounds assigned for each versatile tone
and velocity, see “Versatile Tone Map” (page EN-62).
Layering and Splitting Tones
You can configure the keyboard to play two different tones at
the same time (Layer) or to play different tones in the left and
right ranges (Split). You can even use Layer and Split in
combination with each other and play three different tones at
the same time.
The Upper1 part is used alone when playing an individual
tone on the keyboard. When layering two tones, the Upper1
part and Upper2 part are used. When splitting the keyboard
between two tones, the low range of the keyboard plays the
Lower part.
• See the separate “Built-in Music Data Lists” for a complete
list of available tones.
• When one of the drum sets is selected, each keyboard key
is assigned a different percussion sound.
3.
Try playing something on the keyboard.
The tone of the instrument you selected will sound.
■ DSP Tones
The Digital Piano has a number of “DSP tones”, which are
tones with special effects. The DSP TONE indicator is
displayed while a DSP tone is selected.
■ Guitar Tones
The built-in guitar tones of this Digital Piano include strum
noise and other sound effects that are applied in accordance
with the pitch (note number) and/or intensity (velocity) of the
notes being played.
■ Keyboard part indicators
Keyboard part indicators show the current split and layer
status of the keyboard. The displayed indicator shows which
keyboard part will sound.
While (tone indicator) is displayed, an arrow mark () will
appear to the right of one of the part indicators. Performing a
tone change operation will change the tone of the part where
the arrow mark () is located.
• Changing the tone setting affects the Upper2 part when
Layer is turned on, and the Lower part when Split is turned
on.
• If you have split and/or layer enabled, assigning DSP tones
to multiple parts (page EN-14) can affect the sound quality
of the Upper2 part and/or Lower part. For example if layer is
enabled and you assign DSP tones to the Upper1 part and
the Upper2 part, the Upper2 part effect is eliminated, which
affects tone quality.
EN-14
Playing on the Keyboard
Displayed
St r in
g
s
Displayed
Vibes
1
Split point
■ To layer two tones
• Check to make sure that the U2 (Upper2) and
L (Lower) indicators are not shown on the display before
starting this procedure. If either indicator is displayed, press
co LAYER and/or cn SPLIT so they are not displayed.
1.
Press bq TONE.
• Confirm that the arrow mark () is to the right of the
U1 (Upper1) indicator.
2.
Use the bo dial to select a tone for the Upper1
part.
Example: 32 ELEC.PIANO 1
E.Pia
3.
Press co LAYER.
This displays the U2 (Upper2) indicator, with the arrow
mark () to the right.
no1
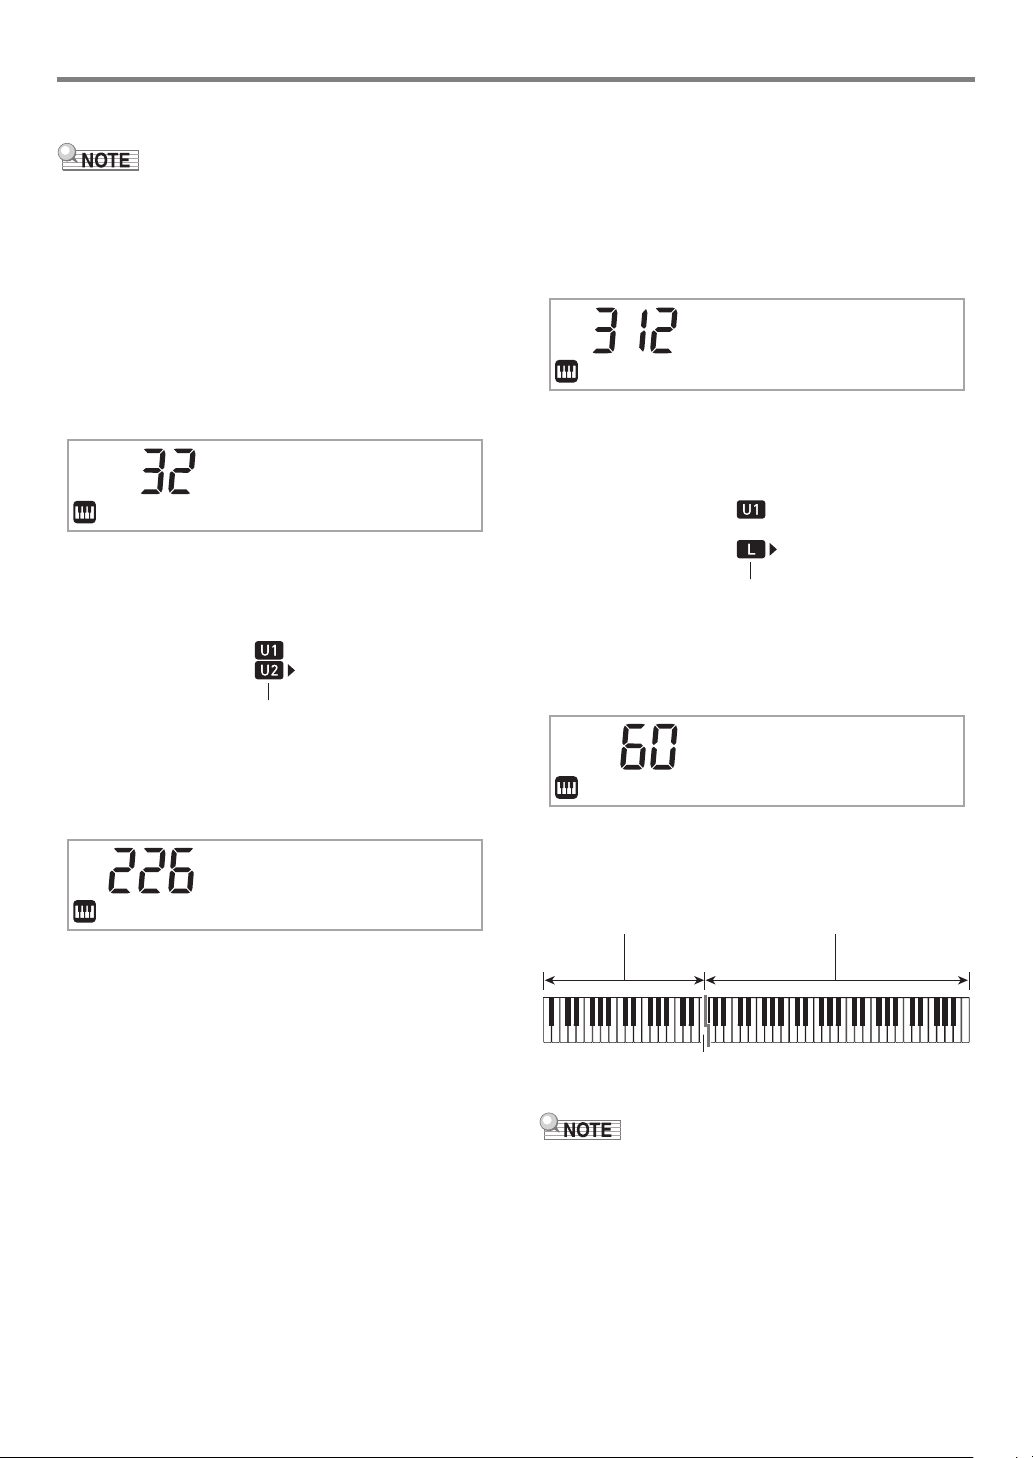
■ To split the keyboard between two different
tones
1.
Select the tone for the Upper1 part (page
EN-14).
•Press bq TONE and then use the bo dial to select the
tone you want.
Example: 312 FLUTE 1
Flute
2.
Press cn SPLIT.
This displays the L (Lower) indicator, with the arrow mark
() to the right.
3.
Use the bo dial to select the Lower part tone
you want.
Example: 60 VIBRAPHONE 1
1
4.
Use the bo dial to select a tone for the Upper2
part.
Example: 226 STRINGS
5.
Play something on the keyboard.
Both tones sound at the same time.
• Pressing co LAYER again will turn layer off.
4.
Play something on the keyboard.
This will sound the tones assigned to the left and right
side ranges of the keyboard.
VIBRAPHONE 1 FLUTE 1
F3
• Pressing cn SPLIT again will turn split off.
• If you turn on both layer and split, layering will be applied to
the right side range of the keyboard only.
EN-15
Playing on the Keyboard
Key name
Flashing
■ To change the split point
1.
Keep cn SPLIT depressed until you finish step
2 of this procedure.
This will cause the key name at the currently set split
point to appear on the display.
2.
Press the keyboard key where you want the
split point to be.
The key you press will become the lowest note of the
Upper1 part of the split keyboard.
Example: Setting middle C (C4) as the split point.
C4
3.
Release cn SPLIT.
• You can also use bp FUNCTION to specify the split point.
See function number 20 (Split Pt) in the “Function Setting
Item List” (page EN-46).
Changing Keyboard Response to Touch Pressure (Touch Response)
Touch Response alters tone volume in accordance with
keyboard pressure (speed). This provides you some of the
same expressivity you get on an acoustic piano.
■ To change touch response sensitivity
1.
Press bp FUNCTION.
This displays the “Touch” setting name along with the
FUNCTION indicator.
Touch
2.
Press bp ENTER.
This displays the current touch response setting (Off,
Light, Normal, or Heavy), and causes the FUNCTION
indicator to flash.
The NUM indicator is also displayed.
No r
m
a
l
Setting
Number
3.
4.
5.
Parameter
(Display)
1 Off (Off) Touch Response is turned off.
Sound volume is fixed, regardless of
key press speed.
2 Light
(Light)
3Normal
(Normal)
4 Heavy
(Heavy)
Use the bo dial to change the setting.
Press bp ENTER to apply the displayed
setting.
This causes the NUM indicator to disappear.
To exit the setting screen, press bq TONE.
Strong sound, even with light
pressure
Normal Touch Response
Normal sound, even with strong
pressure
Description
EN-16
Playing on the Keyboard
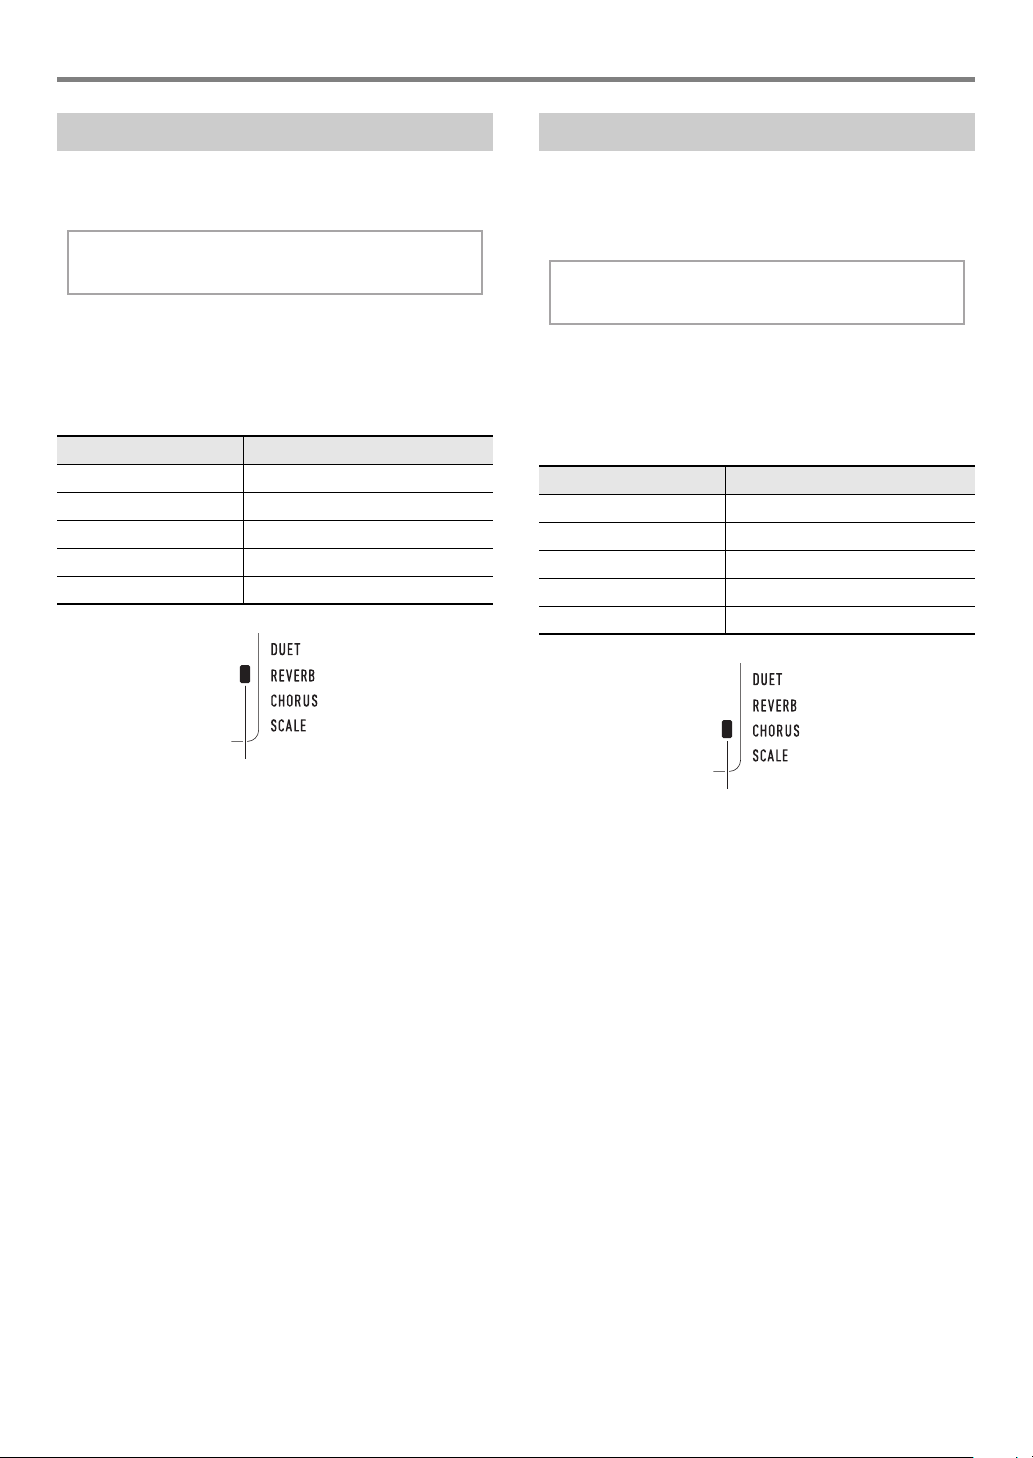
Reve r
b
Displayed when the reverb type setting is anything other than “Off”.
Cho r u
s
Displayed when the chorus type setting is anything other than “Tone”.
Using Reverb
1.
Press bp FUNCTION and then use the bo dial
to display “Reverb”.
2.
Press bp ENTER.
This displays the NUM indicator.
3.
Use the bo dial to select the reverb setting you
want.
Setting Number Parameter
1Off
2 - 4 Room 1 - 3
5 - 6 LargeRm1 - 2
7 - 9 Hall 1 - 3
10 - 11 Stadium1 - 2
Using Chorus
Chorus is a function that adds depth and breadth to notes.
1.
Press bp FUNCTION and then use the bo dial
to display “Chorus”.
2.
Press bp ENTER.
This displays the NUM indicator.
3.
Use the bo dial to select the chorus type you
want.
Setting Number Parameter
1 Tone
2 LightCho
3Chorus
4 Deep Cho
5 Flanger
4.
Press bp ENTER to apply your setting.
This causes the NUM indicator to disappear.
5.
To exit the setting screen, press bq TONE.
• If you select Setting Number 1 (Tone), appropriate chorus
settings are assigned to each tone.
• The actual effect produced by chorus depends on the tone
you are using.
4.
Press bp ENTER to apply your setting.
This causes the NUM indicator to disappear.
5.
To exit the setting screen, press bq TONE.
EN-17

Playing on the Keyboard
This indicator moves with each beat.
Tap two or more times.
Using the Metronome
The metronome lets you play and practice along with a steady
beat to help keep you on tempo.
■ To start or stop the metronome
1.
Press 3 METRONOME.
This starts the metronome.
2.
Press 3 METRONOME again to stop the
metronome.
■ To change the beats per measure
1.
Hold down 3 METRONOME until the
message “Beat” appears on the display.
2.
Use the bo dial to select a beat setting.
• You can configure the metronome to use a bell sound
for the first beat of each measure of the song you are
playing.
• You can specify a value from 0 to 9 as the number of
beats per measure.
• The bell will not sound if you specify 0 for this setting.
This setting lets you practice with a steady beat,
without worrying how many beats there are in each
measure.
3.
To exit the setting screen, press bp ENTER.
Changing the Tempo Setting
There are two ways to change the tempo (beats per minute)
setting: using buttons to change the tempo value and tapping
a beat on a button.
■ To adjust the tempo (beats per minute) value
1.
Press 4 TEMPO/TAP to make “Tempo”
appear on the display.
2.
Use the bo dial to change the tempo value.
• You can specify a tempo value in the range of 20 to
255.
• You can set the currently selected song, or rhythm and
music preset to the recommended tempo by long
pressing 4 TEMPO/TAP.
3.
To exit the setting screen, press bp ENTER.
• If you do not perform any operation for a while after
changing the tempo value, the display will
automatically exit the setting screen.
■ To adjust the tempo by tapping a beat (tap input)
1.
Tap the 4 TEMPO/TAP button a number of
times at the tempo you want to set.
• The tempo setting will change in accordance with your
tapping.
• After you use this method to specify the approximate
tempo, you can then use the procedure under “To
adjust the tempo (beats per minute) value” to adjust
the setting to a more exact value.
• You can also use the bp FUNCTION button to configure
settings. See function number 42 (Beat) in the “Function
Setting Item List” (page EN-46).
■ To change the metronome sound volume
See function number 43 (Volume) in the “Function Setting
Item List” (page EN-46).
EN-18
Playing on the Keyboard
Displayed
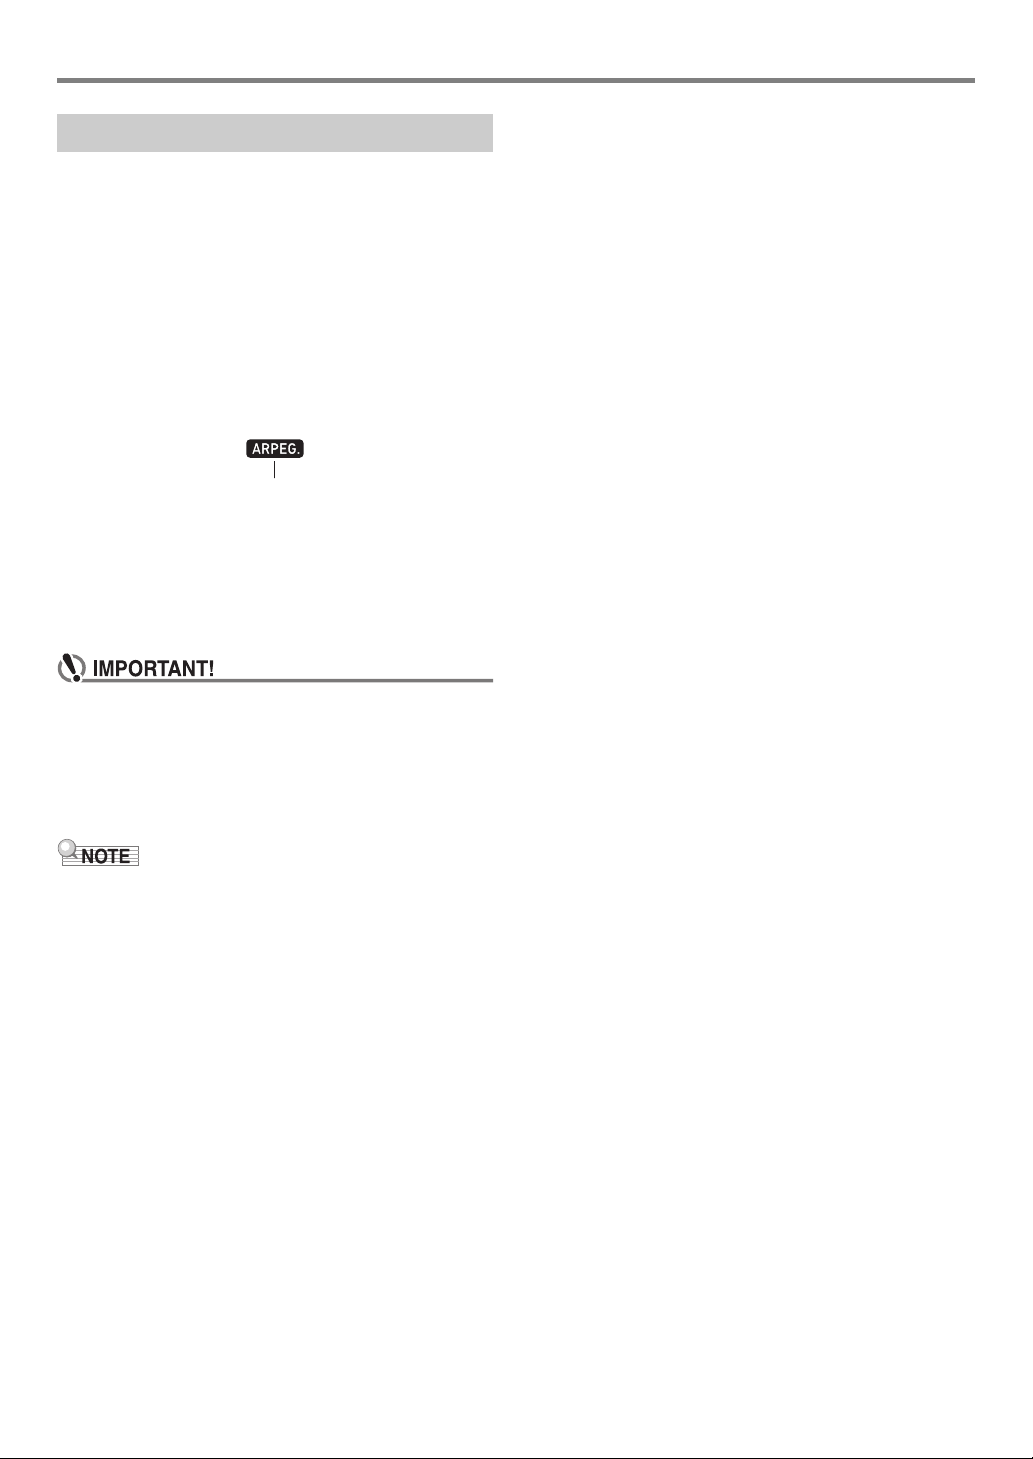
Using the Arpeggiator
With the arpeggiator, you can play various arpeggios and
other phrases automatically by simply pressing keys on the
keyboard. You can select from a number of different arpeggio
options, including playing arpeggios from a chord, playing
various phrases automatically, and more.
• A single button is used to control the arpeggiator and auto
harmonize (page EN-35). Because of this, auto harmonize
cannot be used while the arpeggiator is in use.
■ To turn on the arpeggiator
1.
Press cm A.HAR./ARPEG. and confirm that
the ARPEG. indicator is displayed.
• Playing a chord or single note on the keyboard will
play back the currently selected arpeggio.
2.
To turn the arpeggiator off, press cm A.HAR./
ARPEG..
This causes the ARPEG. indicator to disappear.
• If the A.HAR. indicator is displayed instead of ARPEG.
in step 1 of the above procedure, you will need to
change the function assigned to the button.
Use the operation under “Configuring Function
Settings” (page EN-45) to select “2 Arpeg.” for function
number 12 (BtnAsign) in the “Function Setting Item
List” (page EN-46).
■ To select an arpeggiator type
1.
Perform the procedure under “To turn on the
arpeggiator” and confirm that the ARPEG.
indicator is displayed.
2.
Long-press cm A.HAR./ARPEG. until the
FUNCTION indicator flashes on the display.
This displays the currently selected arpeggiator type
number and name. The NUM indicator is also displayed.
3.
Use the bo dial to display the arpeggiator type
you want to select.
• While the arpeggiator type is displayed, long-pressing
cm A.HAR./ARPEG. will select the tone that is
recommended for the displayed type.
• For details about arpeggiator types, refer to the
separate “Built-in Music Data Lists”.
4.
Press bp ENTER to apply your setting.
This causes the NUM indicator to disappear.
• Use the procedure below when you want an arpeggio
pattern to keep playing after you release the keyboard
keys.
Use the operation under “Configuring Function Settings”
(page EN-45) to enable function number 15 (ArpegHld) in
the “Function Setting Item List” (page EN-46).
EN-19
Playing on the Keyboard
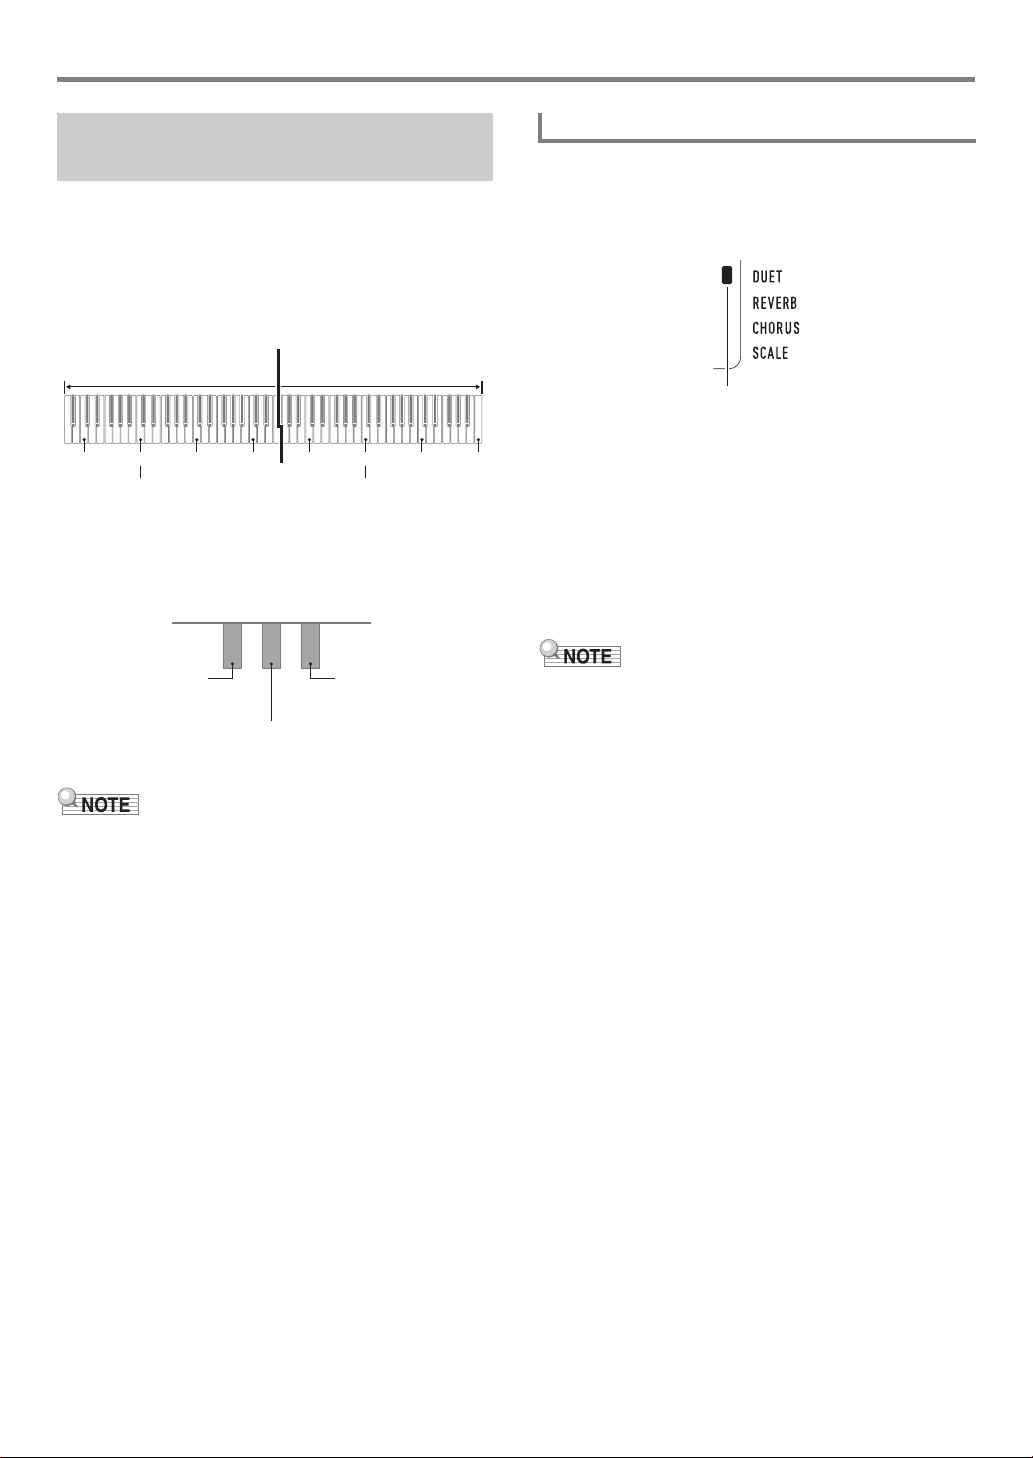
C3 C4 C5 C6 C3 C4 C5
C6
Split point
Left keyboard Right keyboard
(middle C) (middle C)
Left side damper pedal
Left and right side
damper pedal
Right side damper pedal
(Half-pedal operation
supported)
Duet Mode indicator
Splitting the Keyboard for Duet Play
You can split the keyboard in the center for duet play so the
left and right sides have the same ranges.
The Duet Mode is the perfect way to conduct lessons, with the
teacher playing on the left side as the student plays the same
song on the right side.
Keyboard
Pedal Operation when Playing a Duet
● Optional SP-34 Pedal Unit
The left pedal operates as the left side damper pedal, while
the right pedal is the right side damper pedal.
• Only the damper pedal for the right side keyboard supports
half-pedal operations.
To play a duet
1.
Long-press bq TONE until an indicator mark
(
K
) appears next to “DUET” on the right side of
the display.
• This indicates the Duet Mode.
2.
Select a tone and perform the song you want.
• The left-side and right-side keyboard ranges are
assigned the same tone (Upper1 part tone).
3.
To exit the Duet Mode, long-press bq TONE
until the indicator mark (
disappears.
• Each time you long-press bq TONE, the Digital Piano
will enter or exit the Duet Mode.
• Entering the Duet Mode automatically disables layer (page
EN-15) and split (page EN-15).
• You can configure the piano to output the left side keyboard
tone from the left speaker and the right side keyboard tone
from the right speaker while duet is turned on. Use the
operation under “Configuring Function Settings” (page
EN-45) to enable function number 6 (Duet Pan) in the
“Function Setting Item List” (page EN-46).
K
) next to “DUET”
● Supplied SP-3 Pedal Unit
To use the SP-3 Pedal Unit as the right keyboard damper
pedal, connect it to the ct DAMPER/ASSIGNABLE jack. In
the Duet Mode, this pedal functions as a damper pedal for the
right side keyboard, regardless of the effect type assigned to it
with the procedure under “To select the pedal effect” (page
EN-22).
• Half-pedal operation is not supported in this case.
EN-20
Loading...