


Contents
|
|
|
|
|
|
|
|
Getting Started with Your Phone |
7 |
|
|
Phone Overview |
7 |
|
|
Menus Overview |
15 |
|
|
The Battery |
18 |
|
|
Charging the Battery |
20 |
|
|
Battery Level |
22 |
|
|
Turning the Phone On and Off |
22 |
|
|
Making Calls |
23 |
|
|
Redialing Calls |
23 |
|
|
Receiving Calls |
23 |
|
|
Screen Icons |
24 |
|
|
Menu Access |
25 |
|
|
Using a Memory Card |
27 |
|
|
|
|
|
|
Quick Access to Convenient Features |
31 |
|
|
Using the Headset Adapter/2.5mm Splitter |
31 |
|
|
Vibrate Mode |
31 |
|
|
Lock Mode |
32 |
|
|
Mute Function |
32 |
|
|
Volume Quick Adjustment |
32 |
|
|
Call Waiting |
33 |
|
|
Caller ID |
33 |
|
|
Voice Commands |
34 |
|
|
Speed Dialing |
34 |
|
|
|
|
|
|
Entering and Editing Information |
35 |
|
|
Text Input |
35 |
|
|
Text Input Modes |
36 |
|
|
|
|
|
|
Contacts in Your Phone’s Memory |
39 |
|
|
The Basics of Storing Contacts Entries |
39 |
|
|
Options to Customize Your Contacts |
40 |
|
|
Editing Contacts Entries |
44 |
|
|
Deleting |
47 |
|
|
Phone Numbers with Pauses |
49 |
|
|
1

|
|
|
|
|
|
|
|
|
|
|
|
Searching Your Phone’s Memory |
51 |
|
|
|
Making a Call from Your Phone’s Memory |
52 |
|
|
|
|
|
|
|
MEDIA CENTER |
56 |
|
|
|
|
Music & Tones |
57 |
|
|
|
V CAST Music with Rhapsody® |
58 |
|
|
|
Get New Ringtones |
59 |
|
|
|
My Ringtones |
60 |
|
|
|
My Music |
61 |
|
|
|
My Sounds |
62 |
|
|
|
Sync your music from your PC to your V CAST |
||
|
|
Music with Rhapsody® wireless device |
64 |
|
|
|
Picture & Video |
65 |
|
|
|
V CAST Videos |
66 |
|
|
|
Get New Pictures |
69 |
|
|
|
My Pictures |
70 |
|
|
|
My Videos |
73 |
|
|
|
Take Picture |
75 |
|
|
|
Record Video |
77 |
|
|
|
Online Album |
78 |
|
|
|
Games |
78 |
|
|
|
Mobile Web |
79 |
|
|
|
Browse & Download |
82 |
|
|
|
Extras |
83 |
|
|
|
Info |
83 |
|
|
|
|
|
|
|
MESSAGING |
84 |
|
|
|
|
New Message |
85 |
|
|
|
Inbox |
92 |
|
|
|
Sent |
94 |
|
|
|
Drafts |
96 |
|
|
|
Voicemail |
97 |
|
|
|
Mobile IM |
98 |
|
|
|
98 |
|
|
2

Contents
Chat |
99 |
|
|
|
|
||
Message Settings |
99 |
|
|
Message Erase |
101 |
|
|
|
|
|
|
CONTACTS |
103 |
|
|
New Contact |
104 |
|
|
Contact List |
105 |
|
|
Groups |
105 |
|
|
New PTT Contact |
108 |
|
|
PTT Contact List |
108 |
|
|
PTT Groups |
109 |
|
|
Speed Dials |
110 |
|
|
In Case of Emergency (ICE) |
111 |
|
|
My Name Card |
113 |
|
|
|
|
|
|
RECENT CALLS |
114 |
|
|
Missed |
115 |
|
|
Received |
116 |
|
|
Dialed |
117 |
|
|
Blocked |
118 |
|
|
All |
119 |
|
|
View Timers |
120 |
|
|
|
|
|
|
Push to Talk |
121 |
|
|
PTT Settings |
121 |
|
|
PTT Contact List |
121 |
|
|
New PTT Contact |
122 |
|
|
Erasing a PTT Contact |
123 |
|
|
PTT Groups |
123 |
|
|
Temp PTT Group |
125 |
|
|
Making a PTT Call |
127 |
|
|
Incoming PTT Call |
131 |
|
|
PTT Screen Icons |
132 |
|
|
3

|
|
|
|
|
|
|
|
|
|
|
|
|
|
|
|
SETTINGS & TOOLS |
135 |
||
|
|
My Verizon |
135 |
|
|
|
Tools |
136 |
|
|
|
Voice Commands |
136 |
|
|
|
Calculator |
140 |
|
|
|
Calendar |
141 |
|
|
|
Alarm Clock |
142 |
|
|
|
Stop Watch |
143 |
|
|
|
Countdown Timer |
144 |
|
|
|
World Clock |
145 |
|
|
|
Notepad |
146 |
|
|
|
Electronic Compass |
146 |
|
|
|
Bluetooth Menu |
149 |
|
|
|
Power |
150 |
|
|
|
Add New Devices |
150 |
|
|
|
Options |
154 |
|
|
|
Sending and Receiving Name Cards |
156 |
|
|
|
Sending and Receiving Images |
158 |
|
|
|
Sounds Settings |
159 |
|
|
|
Call Sounds |
159 |
|
|
|
Alert Sounds |
160 |
|
|
|
Keypad Volume |
162 |
|
|
|
Service Alerts |
162 |
|
|
|
Power On/Off |
163 |
|
|
|
Folder On/Off |
163 |
|
|
|
Display Settings |
164 |
|
|
|
Banner |
164 |
|
|
|
Backlight |
165 |
|
|
|
Contrast |
166 |
|
|
|
Wallpaper |
166 |
|
|
|
Display Themes |
167 |
|
|
|
Main Menu Settings |
167 |
|
|
|
Dial Fonts |
168 |
|
4

Contents
Clock Format |
168 |
|
|
|
|
||
Power Saver |
169 |
|
|
Phone Settings |
169 |
|
|
Airplane Mode |
170 |
|
|
Set Shortcuts |
171 |
|
|
Voice Commands |
173 |
|
|
Language |
174 |
|
|
Location |
174 |
|
|
Security |
175 |
|
|
System Select |
180 |
|
|
NAM Selection |
181 |
|
|
Call Settings |
182 |
|
|
Answer Options |
182 |
|
|
Auto Retry |
183 |
|
|
TTY Mode |
183 |
|
|
One Touch Dial |
184 |
|
|
Voice Privacy |
185 |
|
|
PC Connections |
185 |
|
|
DTMF Tones |
186 |
|
|
Memory |
186 |
|
|
Save Options |
187 |
|
|
Phone Memory |
187 |
|
|
Card Memory |
189 |
|
|
Phone Info |
190 |
|
|
My Number |
191 |
|
|
SW/HW Version |
191 |
|
|
Icon Glossary |
192 |
|
|
Software Update |
193 |
|
|
|
|
|
|
Included Items |
195 |
|
|
|
|
|
|
Safety |
196 |
|
|
TIA Safety Information |
196 |
|
|
Safety Information for FCC RF Exposure |
200 |
|
|
5

|
|
|
|
|
|
|
|
|
|
|
|
FDA Information |
203 |
|
|
|
Emergency Calls |
212 |
|
|
|
Compliance with Other FCC Regulations |
215 |
|
|
|
General Safety |
215 |
|
|
|
Games |
222 |
|
|
|
Camera |
224 |
|
|
|
Accessibility |
224 |
|
|
|
RECYCLE YOUR CELL PHONE! |
229 |
|
|
|
|
|
|
|
12 MONTH LIMITED WARRANTY |
231 |
|
|
|
|
|
|
|
|
Index |
235 |
|
|
6
Getting Started with Your Phone
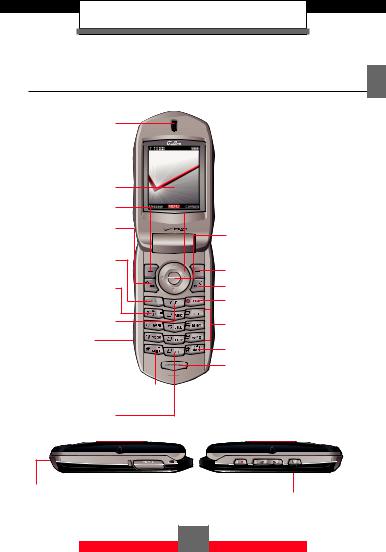
Phone Overview
1. Earpiece
2. LCD Screen
3. Left Soft Key
 11. Directional Key
4. Camera/ |
12. Center Select Key |
||
Video Key |
|||
5. Send Key |
13. |
Right Soft Key |
|
|
|||
6. Voicemail Key |
14. |
Speaker/Flashlight Key |
|
15. |
End/Power Key |
||
|
|||
7. Clear Key |
16. |
Alphanumeric Keypad |
|
||
8. Voice |
17. Vibrate Mode Key |
|
Command Key |
||
(when flip is open) |
21. |
Microphone |
|
||
9.International  Dialing Code Key
10. Next Key
18. Memory Card Slot |
|
|
|
19. PTT Key |
|
|
|
||
|
|
|
|
|
20. Volume Keys 
22. Accessory Connector
Port 8. Electronic Compass, Countdown Timer,
Stop Watch (when flip is closed)
7

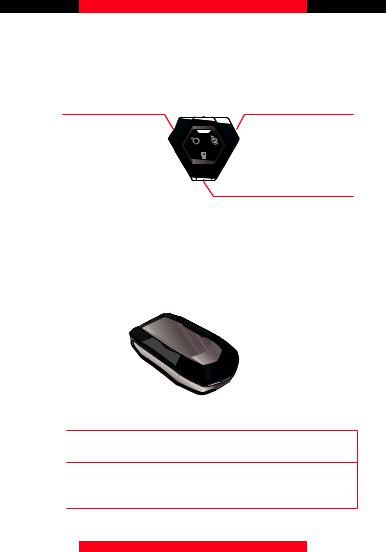
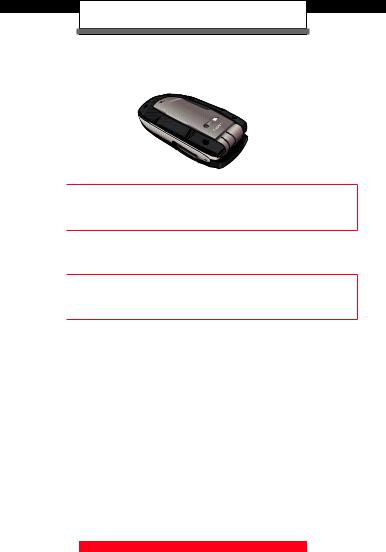
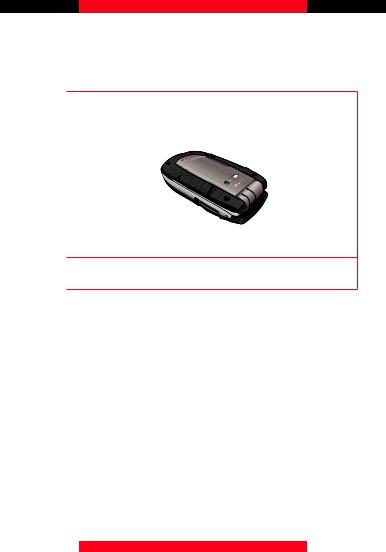
25. Internal Antenna
Area*
23.Camera Flash/ 
 26. Camera Lens Flashlight
24.Outside Display
27.Customizable
Ring
30. Speaker
28.Screw Type 
 Battery Lock
31. Battery
29. Charging 

Terminals
 22. Accessory
Connector Port
* For best performance, do not touch this area when using your phone.
8

Getting Started with Your Phone
1.Earpiece
2.LCD Screen
Displays messages and indicator icons.
3.LLeft Soft Key
Press to display the Message menu or access the function listed above the key.
4.VCamera/Video Key
Press for quick access to Camera/Video.
5.  Send Key
Press to place or answer calls. In standby mode, press to access your All Calls list.
6.1Voicemail Key
Press and hold to call Voicemail.
7. CClear Key
When entering a phone number or text, press to delete a single space or character. Press and hold to delete entire words. Press this key once in a menu to go back one level.
8. .Voice Command Key
When the phone is open, press to access the Voice Commands/Voice Recorder function. When the phone is closed, press and hold to change between the Watch, Electronic Compass, Countdown Timer, and the Stop Watch functions on the external display.
9

9.*International Dialing Code Key
Press and hold to enter a plus “+”. A “+” is reserved for international dialing code.
10. 0Next Key
In T9 mode, press to display other matching words.
11.aDirectional Key
Press the Directional Key aleft to access My Verizon, down to access the Calendar, up to access Mobile Web, and right to access My Shortcuts.
12.cCenter Select Key
Press to select a function.
13.RRight Soft Key
Press to display Contacts or to access the function listed above the key.
14.FSpeaker/Flashlight Key
Press to turn Speakerphone on/off. You can switch from the earpiece to the speaker by turning on Speakerphone before starting a call or while a call is in progress. Press and hold to toggle the flashlight on/off when the phone is in idle mode.
15. End/Power Key
Press to toggle power on/off and to end a call. Also, press to return to the standby screen.
10
Getting Started with Your Phone
16.Alphanumeric Keypad
Press to enter numbers and characters and to select menu items.
17.#Vibrate Mode Key
Press and hold to turn Vibrate Mode on/off. In Vibrate Mode, all phone sounds including ringtones and keypad tones are silenced.
18. Memory Card Slot
You can insert a microSD™ memory card here to increase memory capacity.
19. ,PTT Key
Press and hold to utilize Push to Talk (PTT) when the phone is in PTT mode.
20. <>Volume Keys
Press to set or reset Volume Up/Down/Electronic Compass/Stopwatch/Countdown Timer.
Press while the phone is ringing to stop it.
21. Microphone |
22. Accessory Connector |
|
Port |
23. Camera Flash/ |
24. Outside Display |
Flashlight |
|
25. Internal Antenna |
26. Camera Lens |
Area |
|
27. Customizable Ring |
28. Screw Type Battery |
|
Lock |
29. Charging Terminals |
30. Speaker |
31. Battery |
|
11
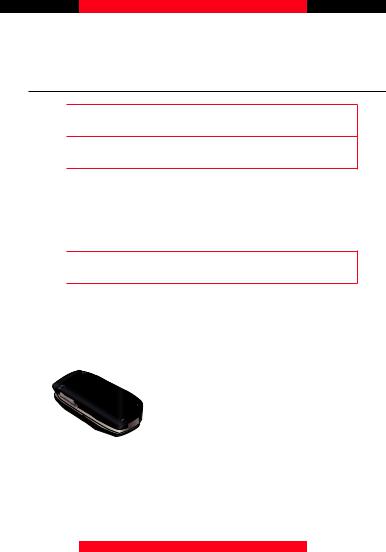
kDevice Lock Tool
For Customizable Ring removal |
For battery removal |
(see below) |
(see page 19) |
For memory card removal (see page 30)
kRemoving the Customizable Ring
Insert the corner of the Device Lock Tool marked with the ring icon  under the Customizable Ring as illustrated below and then pry up the Customizable Ring.
Be sure to use only the Device Lock Tool that comes Warning! with the phone when replacing the Customizable Ring.
When attaching a Customizable Ring, press it down Warning! with uniform pressure with your fingers. Check to
make sure it is attached securely.
12
Getting Started with Your Phone
kBluetooth® Wireless Technology
The G’zOne Boulder™ is compatible with devices that support the Bluetooth® Headset (HSP), Hands-Free (HFP), Dial-Up Networking (DUN), Stereo (A2DP, AVRCP), Phonebook Access (PBAP), and Object Push (OPP) Profiles.
Your phone is based on the Bluetooth® specification, but it is not guaranteed to work with all devices
NOTE
enabled with Bluetooth® wireless technology. This phone does not support all Bluetooth® OBEX Profiles.
*For vehicle/accessory (sold separately) compatibility go to www.verizonwireless.com/bluetoothchart.
NOTE For details, see page 149.
kWater Resistance
The G’zOne Boulder™ is water resistant. It provides reliable performance for outdoor life, in such conditions as driving rain or high humidity.
For additional information, see 12 MONTH LIMITED WARRANTY section (from page 231).
To maintain water resistance:
NOTE • Securely fasten the Accessory Connector Port cover.
• Install the battery and secure the battery lock.
13
kShock Resistance
The rugged construction of the G’zOne Boulder™ provides outstanding shock and vibration resistance.
kDust Resistance
For additional peace of mind, the G’zOne Boulder™ is also dust resistant. The device was tested using silica flour at a temperature of 95F and meets the MIL-STD- 810F (Dust) standard.
The phone can be rinsed with clean water when dirty. NOTE To ensure water resistance, make sure that all covers
are securely closed before rinsing.
Periodically, clean the Charging Terminals with a dry cloth or cotton swab. Dust may cause some electrical connection problems. Avoid wiping with excessive force, which can disfigure the terminals.
Battery
NOTE
|
|
|
|
|
Charging Terminals |
Charging Terminals |
Charging |
||
(external) |
(internal) |
Terminals |
||
14
Getting Started with Your Phone
Menus Overview
 MEDIA CENTER
1.Music & Tones
1.V CAST Music
2.Get New Ringtones
3.My Ringtones
4.My Music
5.My Sounds
6.Sync Music
2.Picture & Video
1.V CAST Videos
2.Get New Pictures
3.My Pictures
4.My Videos
5.Take Picture
6.Record Video
7.Online Album
3.Games
4.Mobile Web
5.Browse & Download
6.Extras


 MESSAGING
1.New Message
2.Inbox
3.Sent
4.Drafts
5.Voicemail
6.Mobile IM
7.Email
8.Chat


 CONTACTS
1.New Contact
2.Contact List
3.Groups
4.New PTT Contact*
5.PTT Contact List*
6.PTT Groups*
7.Speed Dials
8.In Case of Emergency
9.My Name Card

 RECENT CALLS
1.Missed
2.Received
3.Dialed
4.Blocked
5.All
6.View Timers
*These options are available only when the PTT feature is turned on.
15


 SETTINGS & TOOLS
1.My Verizon
2.Tools
1.Voice Commands
2.Calculator
3.Calendar
4.Alarm Clock
5.Stop Watch
6.Countdown Timer
7.World Clock
8.Notepad
9.Electronic Compass
3.Bluetooth Menu
1.Add New Devices
4.Sounds Settings
1.Call Sounds
1.1.Call Ringtone
1.2.Call Vibrate
2.Alert Sounds
2.1.TXT Message
2.2.Pic-Video Message
2.3.Voicemail
2.4.PTT Alert*
2.5.Emergency Tone
3.Keypad Volume
4.Service Alerts
4.1.ERI
4.2.Minute Beep
4.3.Call Connect
5.Power On/Off
5.1.Power On
5.2.Power Off
6.Folder On/Off
5.Display Settings
1.Banner
1.1.Personal Banner
1.2.ERI Banner
2.Backlight
2.1.Display
2.2.Keypad
3.Contrast
4.Wallpaper
4.1.My Picture List
4.2.My Video List
4.3.Fun Animations
5.Display Themes
6.Main Menu Settings
7.Dial Fonts
8.Clock Format
8.1.Main Clock
8.2.Front Clock
9.Power Saver
*This option is available only when the PTT feature is turned on.
16

Getting Started with Your Phone
6. Phone Settings |
8. Memory |
|
||
1. |
Airplane Mode |
1. |
Save Options |
|
2. |
Set Shortcuts |
2. |
Phone Memory |
|
|
2.1. Set My Shortcuts |
3. |
Card Memory |
|
|
2.2. Set Directional |
9. Phone Info |
|
|
|
Keys |
1. My Number |
|
|
3. |
Voice Commands |
2. |
SW/HW Version |
|
4. |
Language |
3. |
Icon Glossary |
|
5. |
Location |
4. |
Software Update |
|
6.Security
6.1.Edit Codes
6.2.Restrictions
6.3.Phone Lock Setting
6.4.Lock Phone Now
6.5.Emergency #s
6.6.Restore Phone
7.System Select
8.NAM Selection
7.Call Settings
1.Answer Options
2.Auto Retry
3.TTY Mode
4.One Touch Dial
5.Voice Privacy
6.PC Connections
7.DTMF Tones
8.PTT Mode
17
The Battery
Warning! Use only approved batteries for the G’zOne Boulder™.
NOTE
Fully charge the battery before using the phone for the first time.
The phone comes with a rechargeable battery. Keep the battery charged while not in use in order to maximize talk and standby time.
Failure to follow the below directions for installing/ Warning! removing the battery could result in product failure.
kInstalling the Battery
1. Insert the battery into the opening on the back of the handset using the guides. Push the battery into the cavity.


 Guides
18
Getting Started with Your Phone
|
2. Insert the tip of the corner of |
|
|
the Device Lock Tool marked |
|
|
with the battery lock icon |
into |
|
the groove of the screw type |
|
|
battery lock and rotate in the |
|
|
direction indicated by the arrow |
|
|
in the illustration to the left. |
|
|
Rotate the battery lock as far |
|
|
as it will go towards the LOCK |
|
|
position. |
|
kRemoving the Battery |
|
|
1. |
1. Insert the tip of the corner of |
|
|
the Device Lock Tool marked |
|
|
with the battery lock icon |
into |
|
the groove of the screw type |
|
|
battery lock and rotate in the |
|
|
direction indicated by the arrow |
|
|
in the illustration to the left. |
|
2. |
Rotate the battery lock as far |
|
|
as it will go towards the FREE |
|
|
position. |
|
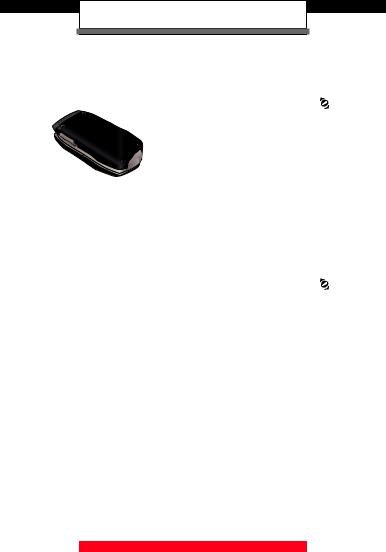
2. Remove the battery by pulling up on the tab.
WARNING! Do not twist the battery as shown in the illustration to the left. Doing so can damage the phone and the battery.
19
Charging the Battery
To use the charger provided with your phone:
Use only approved chargers with the G’zOne Boulder™. Warning! Using unapproved chargers with the G’zOne Boulder™
may damage your phone or battery.
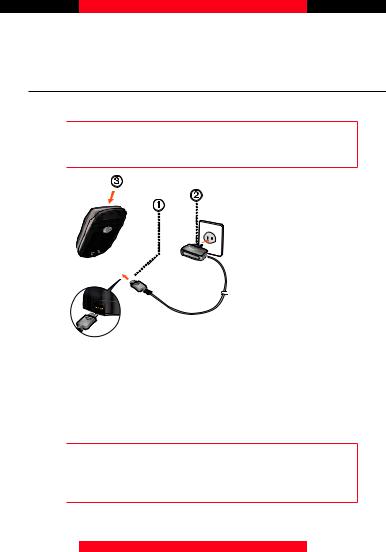
1.Connect the AC Charger to the Handset Charging Cradle.
2.Plug the AC Charger power plug into an electrical outlet.
3.Insert the handset into the Handset Charging Cradle.
Whenever placing the G’zOne Boulder™ into or
removing it from the Handset Charging Cradle, hold the Warning! cradle steady as shown in the illustration above. Slide
the phone along the guides on the cradle back support.
20
Getting Started with Your Phone
You can also charge the battery by directly connecting the AC Charger to the Accessory Connector Port located at the bottom of the handset.
kOpening and Closing the Accessory
Connector Port Cover
1.To open the Accessory Connector Port cover, pinch it between your thumb and index finger and pull it open.
2.To close the port cover, push the center of the port cover into the Accessory Connector Port.
3.Make sure the port cover is completely closed.
Failure to completely reseal the Accessory Connector Warning! Port after charging may result in damage if the phone
is exposed to water.
NOTE
The charge time varies depending upon the battery level.
21

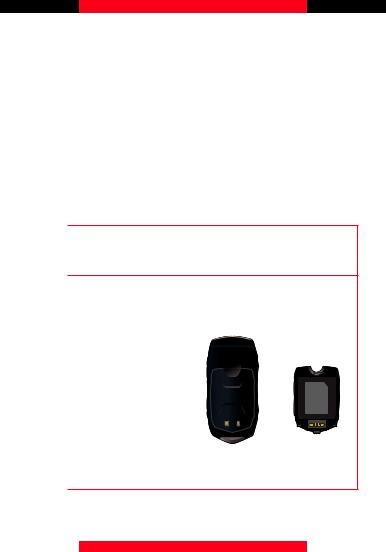
Battery Level
The battery level is shown at the top right of the LCD screen. When the battery level becomes low, the low battery sensor alerts you in three ways: an audible tone will sound, the battery icon will begin to blink, and BATTERY LOW will appear on the display.
If the battery level becomes too low, the phone automatically powers off and any function in progress will not be saved.
|
|
Fully Charged |
Fully Discharged |
Turning the Phone On and Off
kTurning the Phone On
1.Press and hold the End/Power Key  until the LCD screen lights up.
NOTE
Avoid any unnecessary contact with the antenna while your phone is on.
kTurning the Phone Off
1.Press and hold the End/Power Key  until the display turns off.
22
Getting Started with Your Phone
Making Calls
1.From standby mode enter the phone number (include the area code if needed).
2.Press the Send Key  to place the call.
3.Press the End/Power Key  to end the call.
kCorrecting Dialing Mistakes
If you make a mistake while dialing a number, press the Clear Key Conce to erase the last digit entered, or press and hold the Clear Key Cto delete all digits.
Redialing Calls
1.Press the Send Key  twice to redial the last number you dialed.
Receiving Calls
1.When the phone rings or vibrates, press the Send Key  to answer the call.
When the flip is closed, you can answer the incoming NOTE call by opening the flip as the default is set to Flip
Open. See page 182 for more detailes.
2. Press the End/Power Key  to end the call.
23

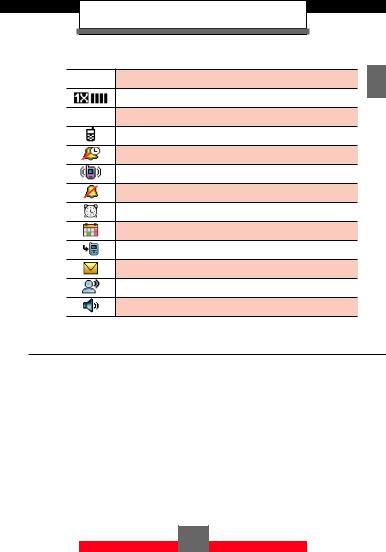
Screen Icons
When the phone is turned on, the top line of the LCD screen displays icons indicating the status of the phone.
Digital indicator. Digital service is available.
EVDO service indicator. EVDO service is available.
1x service indicator. 1x service is available.
EVDO and 1x services are available.
Airplane Mode
Battery indicator. Indicates battery level.
In Call State. A call is in progress.
* No icon indicates the phone is in standby mode.
Data Session
Location On Mode
E911 Only Mode
No service indicator.
The phone is not receiving a system signal.
Voice Privacy
Roaming indicator. The phone is outside of the home service area.
SSL (Secure Sockets Layer) is a protocol developed by Netscape Communications that uses encryption to secure data through the public Internet from client to server.
TTY mode On
Bluetooth® On
Bluetooth® Device Connected
24
Getting Started with Your Phone
BT Discovery Mode
PTT service is available.
PTT service is available.
PTT in use. A PTT call is in progress.
Alarm Only
Vibrate Only
Sound Off
Alarm On
Calendar
Missed Calls
New Message
New Voicemail
Speakerphone mode
Menu Access
To display the Main Menu in standby mode, press the Center Select Key c[MENU].
To use the menu:
•Press the Directional Key aup, down, left or right to select your desired menu item then press the Center Select Key c[OK].
•Or enter the number that corresponds to the menu or submenu item.
With the G’zOne Boulder™, there are three Main Menu types: Tab, List, and Grid.
25

All directions in this manual are based on the Tab Main NOTE Menu Setting, and Classic Display Theme, which are
the default settings.
NOTE
For information about how to switch between Main
Menu types, refer to page 167.
kExample 1: Tab Menu
The Tab Menu has five tabs.
1.From standby mode press the Center Select Key c[MENU].
2.Press the Directional Key sleft or right to move between tabs.
3.Press the Directional Key jup or down to select your desired menu option then press the Center Select Key c[OK].
kExample 2: List Menu
The List Menu has nine items.
1.From standby mode press the Center Select Key c[MENU].
2.Press the Directional Key jup or down to select your desired menu option then press the Center Select Key c[OK].
kExample 3: Grid Menu
The Grid Menu has nine items.
26
Getting Started with Your Phone
1.From standby mode press the Center Select Key c[MENU].
2.Press the Directional Key aup, down, left or right to select your desired menu option then press the Center Select Key c[OK].
When navigating within menus and submenus or when
NOTE
configuring your phone’s settings, you can return to the previous screen or step by pressing the Clear Key
C.
Using a Memory Card
The G’zOne Boulder™ supports the use of a microSD™ memory card as a source of external memory.
NOTE The microSD™ memory card is sold separately.
kInstalling a Memory Card
Whenever installing or removing a memory card, make Warning! sure the phone is turned off and that the AC charger is
not connected.
When installing or removing a memory card, avoid
touching the memory card contacts and avoid Warning! damaging the memory card. Either can cause
malfunction or loss of data.
27
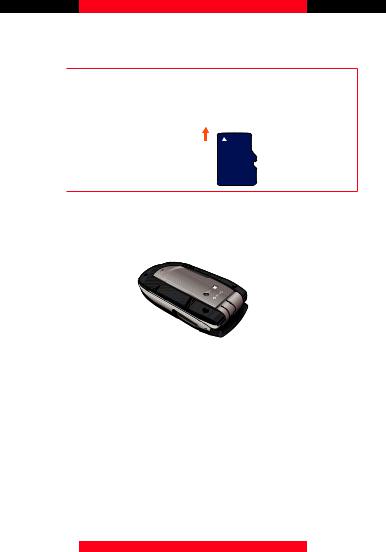
The front and back of the memory card look different. When inserting the memory card, make sure the correct side is facing up. If not, the card may become stuck or damaged.
Warning!
Insert like this.
1.Open the memory card slot cover. With the front of the memory card facing as shown in the illustration below, insert it into the slot.
2.Carefully press the memory card into the slot until it locks into place.
28
Getting Started with Your Phone
3. Close the memory card slot cover.
Failure to fully close the memory card slot cover after Warning! installing or removing a memory card can allow water
to leak inside and create the risk of malfunction.
kRemoving a Memory Card
Never remove a memory card from the phone while it Warning! is being accessed. Doing so can damage the memory
card or the data stored on it.
1.Open the memory card slot cover.
2.Gently press the memory card into the memory card slot. This will cause the memory card to eject slightly from the slot.
29
3. Pull it out the rest of the way.
If you have trouble pulling out the memory card, use the corner of the Device Lock Tool (comes with the phone) marked with the memory card icon  to grasp the card.
NOTE
NOTE
The memory card is very small. Make sure you do not drop it.
4. Close the memory card slot cover.
30
 Loading...