


 Loading...
PUB. DIE-0444-000
HD Camcorder
Instruction Manual
NTSC
 COPY
COPY

Important Usage Instructions
COPYRIGHT WARNING:
Unauthorized recording of copyrighted materials may infringe on the rights of copyright owners and be contrary to copyright laws.
FCC/IC NOTICE
HD Camcorder, VIXIA mini systems
This device complies with Part 15 of the FCC Rules. Operation is subject to the following two conditions: (1) This device may not cause harmful interference, and (2) this device must accept any interference received, including interference that may cause undesired operation.
Note: This equipment has been tested and found to comply with the limits for class B digital device, pursuant to Part 15 of the FCC Rules. These limits are designed to provide reasonable protection against harmful interference in a residential installation. This equipment generates, uses and can radiate radio frequency energy and, if not installed and use in accordance with the instructions, may
•Reorient or relocate the receivingCOPYantenna.
•Increase the separation between the equipment and receiver.
•Connect the equipment into an outlet on a circuit different from that to which the receiver is connected.
•Consult the dealer or an experienced radio/TV technician for help.cause harmful interference to radio communications. However, there is no guarantee that interfer-
Use of shielded cable is required to comply with class B limits in Subpart B of Part 15 of FCC Rules. Do not make any changes or modifications to the equipment unless otherwise specified in the manual. If such changes or modifications should be made, you could be required to stop operation of the equipment.
Model ID0032 (including WLAN Module Model RF401, FCC ID: AZD401)
This device complies with Industry Canada license-exempt RSS standard(s). Operation is subject to the following two conditions: (1) this device may not cause interference, and (2) this device must accept any interference, including interference that may cause undesired operation of the device.
2

This transmitter must not be co-located or operated in conjunction with any other antenna or transmitter.
The available scientific evidence does not show that any health problems are associated with using low-power wireless devices. There is no proof, however, that these low power wireless devices are absolutely safe. Low-power wireless devices emit low levels of radio frequency energy (RF) in the microwave range while being used. Whereas high levels of RF can produce health effects (by heating tissue), exposure to low-level RF that does not produce heating effects causes no known adverse health effects. Many studies of low-level RF exposures have not found any biological effects. Some studies have suggested that some biological effects might occur, but such findings have not been confirmed by additional research. This model has been tested and found to comply with FCC/IC radiation exposure limits set forth for an uncontrolled equipment and meets the FCC radio frequency (RF) Exposure Guidelines in Supplement C to OET65 and RSS-102 of the IC radio frequency (RF) Exposure rules.
Canon U.S.A., Inc.
One Canon Park, Melville, NY 11747, USA
Tel No. 1-800-OK-CANON (1-800-652-2666)
Battery Charger CB-2LV |
COPY |
|
This power unit is intended to be correctly orientated in a vertical or floor mount position.
IMPORTANT SAFETY INSTRUCTIONS - SAVE
THESE INSTRUCTIONS. DANGER - TO REDUCE THE RISK OF FIRE OR ELECTRIC SHOCK, CAREFULLY FOLLOW THESE INSTRUCTIONS.
For connection to a supply not in the U.S.A., use an attachment plug adapter of the proper configuration for the power outlet, if needed.
This battery charger is for exclusive use with Battery Pack NB-4L. There is a danger of explosion if other battery packs are used.
CAUTION
RISK OF EXPLOSION IF BATTERY IS REPLACED BY AN INCORRECT TYPE. DISPOSE OF USED BATTERIES ACCORDING TO LOCAL REGULATION.
3
REGIONS OF USE
The VIXIA mini is in compliance (as of June 2013) with the radio signal regulations of the regions listed below. For details on other regions where it can be used, make inquiries with the contacts listed at the end of this instruction manual (A253).
REGIONS
Canada, Hong Kong S.A.R., South Korea, USA
Model
ID0032: VIXIA mini
Trademark Acknowledgements
•microSD, microSDHC and microSDXC Logos are trademarks of SD-3C, LLC.
•Microsoft and Windows are trademarks or registered trademarks of Microsoft Corporation in the United States and/or other countries.
•App Store, iPad, iPhone, iTunes and Mac OS are trademarks of Apple Inc., registered in the U.S. and other countries. COPY
•HDMI, the HDMI logo and High-Definition Multimedia Interface are trademarks or registered trademarks of HDMI Licensing LLC in the United States and other countries.
•Google, Android, Google Play, YouTube are trademarks of Google Inc.
•Facebook is a registered trademark of Facebook, Inc.
•IOS is a trademark or registered trademark of Cisco in the U.S. and other countries and is used under license.
•The Twitter name and marks are trademarks of Twitter, Inc.
•Wi-Fi is a registered trademark of the Wi-Fi Alliance.
•Wi-Fi Certified, WPA, WPA2, and the Wi-Fi Certified logo are trademarks of the Wi-Fi Alliance.
•WPS as used on the camcorder’s settings, onscreen displays and in this manual signifies Wi-Fi Protected Setup.
•The Wi-Fi Protected Setup Identifier Mark is a mark of the Wi-Fi Alliance.
•Other names and products not mentioned above may be trademarks or registered trademarks of their respective companies.
•This device incorporates exFAT technology licensed from Microsoft.
•“Full HD 1080” refers to Canon camcorders compliant with high-definition video composed of 1,080 vertical pixels (scanning lines).
4

•This product is licensed under AT&T patents for the MPEG-4 standard and may be used for encoding MPEG-4 compliant video and/or decoding MPEG-4 compliant video that was encoded only (1) for a personal and non-commercial purpose or (2) by a video provider licensed under the AT&T patents to provide MPEG-4 compliant video. No license is granted or implied for any other use for MPEG-4 standard.
Copyright
•If you use copyrighted songs and music tracks in your video creations, remember that music under copyright may not be used without permission from the copyright holder, except for cases permitted under applicable laws, such as for personal use. Make sure to follow applicable laws when using music files.
COPY
5

About this Manual
Thank you for purchasing the Canon VIXIA mini. Please read this manual carefully before you use the camcorder and retain it for future reference. Should your camcorder fail to operate correctly, refer to Troubleshooting (A199).
Conventions Used in this Manual
Important precautions related to the camcorder’s operation.
Additional notes and topics that complement the basic operating procedures.
>This arrow is usedCOPYto abbreviate menu selections. For a
detailed explanation on how to use the menus, refer to
Using the Menus (A45). the
•“Scene” refers to one movie unit from the point you touch [Ü] to start recording until you touch [Ñ] to stop recording.
•Brackets [ ] are used to refer to onscreen controls you need to touch (menus, buttons, etc.) and to messages as they are displayed on the screen.
6
•The photos included in this manual are simulated pictures taken with a still camera.
•Illustrations of the camcorder’s screen or a computer’s screen included in this manual may show only relevant parts of the screen.
•Navigation buttons: The navigation bar at the bottom of the page offers up to four buttons to let you get quickly to the information you want to find.
Jump to the general table of contents.
Go to a list of select functions grouped by their uses in real-life situations. This alternative index can be very useful for beginnersCOPYwho encounter a particular challenge but are not sure of what function to use.
Jump to the alphabetical index.
The button with a number in it will take you to the beginning of the current chapter, where you will find an overview of the information and related functions covered in that chapter. Note that the icon itself will change depending on the chapter you are currently reading.
7

Table of Contents |
|
Important Usage Instructions...................................... |
2 |
About this Manual ...................................................... |
6 |
The Camcorder’s Functions in Real-Life |
|
Situations .................................................................. |
13 |
Unique functions for special cases ........................... |
13 |
COPY |
|
Getting the look you want......................................... |
14 |
Challenging subjects and shooting conditions .......... |
15 |
Audio, playback, editing and others.......................... |
15 |
Wireless functions .................................................... |
17 |
Getting to Know the Camcorder ............................... |
19 |
Supplied Accessories and CD-ROM......................... |
19 |
Names of Parts ........................................................ |
21 |
Preparations ........................................................ |
27 |
Charging and Inserting the Battery Pack .................. |
29 |
Using a Memory Card ............................................... |
34 |
Memory Cards Compatible for Use with the |
|
Camcorder............................................................... |
34 |
8

Inserting and Removing a Memory Card................... |
36 |
|
First Time Settings .................................................... |
38 |
|
Basic Setup ............................................................. |
|
38 |
Changing the Time Zone .......................................... |
41 |
|
Initializing a Memory Card......................................... |
42 |
|
Basic Operation of the Camcorder ........................... |
44 |
|
Using the Touch Screen........................................... |
44 |
|
Using the Menus ...................................................... |
45 |
|
Operating Modes ..................................................... |
51 |
|
Basic Recording and Playback .......................... |
53 |
|
Basic Recording |
........................................................ |
54 |
|
COPY |
|
Recording Video....................................................... |
54 |
|
Changing the Field of View ....................................... |
57 |
|
Taking Photos .......................................................... |
|
61 |
Basic Playback.......................................................... |
|
65 |
Playing Back Video .................................................. |
65 |
|
Viewing Photos |
........................................................ |
72 |
Deleting Scenes ....................................................... |
76 |
|
Trimming Scenes ..................................................... |
79 |
|
Deleting Photos |
........................................................ |
81 |
Slideshow ................................................................ |
|
84 |
9

Advanced Functions ........................................... |
85 |
Video Quality and Shooting Modes .......................... |
87 |
Selecting the Video Quality....................................... |
87 |
Selecting the Photo Size .......................................... |
89 |
Selecting the Shooting Mode ................................... |
90 |
Special Recording Modes......................................... |
94 |
Interval Recording .................................................... |
94 |
Slow and Fast Motion............................................... |
98 |
Video Snapshot...................................................... |
100 |
Convenient Functions ............................................. |
102 |
Self Timer............................................................... |
102 |
Decoration: Adding a Personal Touch .................... |
103 |
Image Rotation and Image Flipping ........................ |
108 |
Audio Scenes......................................................... |
110 |
When You Want More ontrol ................................ |
112 |
White Balance ........................................................COPY |
112 |
Exposure................................................................ |
114 |
Face Detection....................................................... |
117 |
Capturing Video Snapshot Scenes and Photos |
|
from a Movie .......................................................... |
120 |
10
External Connections........................................ |
123 |
|
Terminals on the Camcorder .................................. |
124 |
|
Connection Diagrams............................................. |
125 |
|
Playback on a TV Screen ....................................... |
127 |
|
Saving and Sharing Your Recordings ..................... |
128 |
|
Converting and Resizing Movies............................. |
128 |
|
Saving Recordings on a Computer......................... |
131 |
|
Uploading Recordings to the Web.......................... |
137 |
|
Wi-Fi Functions |
................................................. |
138 |
The Camcorder’s Wi-Fi Functions .......................... |
140 |
|
Wireless Connections .....Without an Access Point |
145 |
|
|
COPY |
|
Using an iOS or Android Device as a Remote |
|
|
Control................................................................... |
|
145 |
Remote Browse: Viewing Recordings Using a Web |
|
|
Browser on an ....................iOS or Android Device |
148 |
|
Saving Recordings and Uploading Movies to the |
|
|
Web Using an iOS ......................................Device |
151 |
|
Wireless Connections ........Using an Access Point |
154 |
|
Sharing Recordings with CANON iMAGE |
|
|
GATEWAY ............................................................. |
|
154 |
Wireless Playback ..........................on a Computer |
161 |
|
Wi-Fi Connection ................Using an Access Point |
163 |
|
Viewing and Changing .....................Wi-Fi Settings |
173 |
|
11

Additional Information ...................................... |
176 |
Appendix: Menu Options Lists................................ |
178 |
|
[1Other Settings] Menus ..................................... |
180 |
|
Appendix: Onscreen Icons and Displays ................ |
192 |
|
Trouble? .................................................................. |
|
199 |
Troubleshooting ..................................................... |
199 |
|
List of Messages .................................................... |
210 |
|
Do’s and Don’ts |
...................................................... |
226 |
Handling Precautions ............................................. |
226 |
|
Maintenance/Others................................................ |
232 |
|
Cleaning................................................................. |
|
232 |
|
COPY |
|
Condensation......................................................... |
|
233 |
Using the Camcorder Abroad................................. |
234 |
|
General Information ................................................ |
235 |
|
Optional Accessories.............................................. |
235 |
|
Specifications......................................................... |
|
239 |
Index ....................................................................... |
|
245 |
12

The Camcorder’s Functions in
Real-Life Situations
Unique functions for special cases
Record a mirror image of your dance training so you can practice along with the playback scene.
X Automatic Image RotationCOPYand Image Flipping (A108)
Shoot a cool time-lapse video or use slow motion to check your golf swing.
X Interval Recording (A94)
X Slow and Fast Motion Recording (A98)
Decorate movies with graphics and stamps.
X Decoration (A103)
13

Create a dynamic montage sequence with short cuts.
X Video Snapshot (A100)
Getting the look you want
Get gorgeous video and photos without bothering with settings.
X Nmode (A54)
Make the image brighter or darker |
|
|
||
than the exposure set by the |
|
|
||
camcorder. |
COPY |
|
|
|
|
|
|
||
X Exposure (A114) |
|
|
|
|
|
|
|
||
|
|
|
|
|
Change how smooth or natural |
|
|
|
|
movement looks in your videos. |
|
|
|
|
X Frame Rate (A182) |
|
|
|
|
|
|
|
|
|
Create a copy of your movies |
|
|
||
applying a unique cinematic filter. |
|
|
||
X Converting and Resizing Movies |
Cinema filter |
|||
(A128) |
|
|
||
|
|
[FILTER 2] (Vivid) |
||
|
|
|
|
|
Change the field of view you record from a fisheyelike ultra wide angle to a close-up center view.
X Field of View (A57)
14
Challenging subjects and shooting conditions
Shoot great video of special scene situations with minimal settings.
X Shooting Modes (A90)
Obtain natural-looking colors even under special lighting conditions.
X White Balance (A112)
Optimize the exposure for the desired subject just by touching the screen.
X Touch AE (A116)
Keep the exposure optimizedCOPYwhile shooting a moving subject.
X Face Detection and Tracking (A117)
Give yourself time to get in the picture.
X Self Timer (A102)
Audio, playback, editing and others
Record the best sound possible according to your shooting situation.
X Audio Scenes (A110)
15
Save parts of your video as photos or short video snapshot scenes.
X Capturing Photos/Video Snapshot Scenes (A120)
Convert your scenes into a smaller file size to upload to the Web.
X Converting and Resizing Movies (A128)
Play a slideshow of your photos.
X Slideshow (A84)
Enjoy your recordings on a TV.
X HDMI Connection (A125)
X Playback (A127)COPY
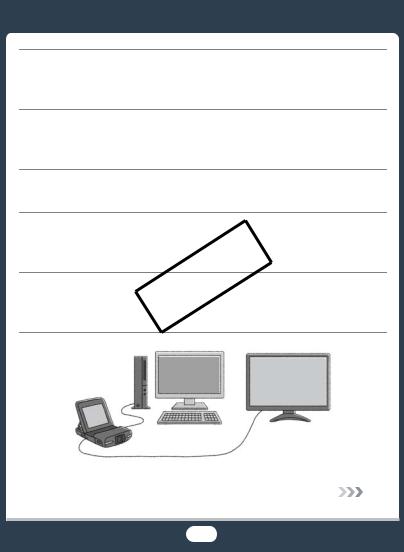
Save recordings on your computer and upload them to the Web.
X Saving Recordings (ImageBrowser EX) (A131)
16

Wireless functions
Use your smartphone or tablet as a remote control while recording.
X Wi-Fi Remote Control (CameraAccess) (A145)
Use a Web browser on your smartphone or tablet to access and play back the recordings in the camcorder.
X Remote Browse/Playback via Browser (A148)
Use an iOS app to wirelessly transfer recordings to your iPhone/iPad and upload them to the Web.
X Movie Uploader (A151) COPY
17

Share your recordings with Web albums using CANON iMAGE GATEWAY.
X CANON iMAGE GATEWAY (A154)
Connect the camcorder to your home network and wirelessly stream your recordings.
X Media Server (A161)
X Wi-Fi Connection to an Access Point (A163)
Review and change Wi-Fi settings (for advanced users).
X Wi-Fi Settings (A173)
COPY
18

Getting to Know the Camcorder
Supplied Accessories and CD-ROM
The following accessories are supplied with the camcorder:
XCB-2LV Battery Charger*
NB-4L Battery PackW
XIFC-400PCU USB Cable
WS-DC11 Wrist StrapW
XGettingCOPYStarted Leaflet
Canon VIXIA mini CD-ROMW
* CB-2LVE including power cord, in Asia.
19
The Canon VIXIA mini CD-ROM contains the following components:
-Instruction Manual - The full-version instruction manual of the camcorder (this PDF file).
-ImageBrowser EX - The CD-ROM contains an automatic installer for the software ImageBrowser EX, which allows you to save and manage movies and photos and upload them to CANON iMAGE GATEWAY*, YouTube and Facebook. An Internet connection is required for full installation of the software.
* CANON iMAGE GATEWAY is an online service that allows you to
share movies and photos, make photo albums, and more. This service may not be availableCOPYin all countries/regions.
20
Names of Parts
Left side view
1 2 3 4
|
5 |
|
|
6 |
COPY |
1 |
|
|
Photo button (A61) |
||
2 |
Memory card slot cover (A36) |
|
3 |
ACCESS indicator (A54, 61) |
|
4LCD panel (A25)
5Adjustable stand (A25)
6Memory card slot (A36)
7Strap mount (A25)
8USB terminal (A124, 126)
7
8
21

Right side view
910 11 12
|
13 |
|
|
|
14 |
|
15 |
9 |
(playback mode) button (A65, 70) |
|
|
10 |
Terminal cover |
|
|
11 |
Power indicator |
|
|
12 |
Power switch (ON/OFF) (A54, 61) |
|
|
13 |
|
COPY |
|
Strap mount (A25) |
|
||
14 |
HDMI terminal (A124, 125) |
|
|
15 |
DC IN terminal |
|
|
|
To use the optional CA-110 Compact Power Adapter. |
||
22
Front view |
Top view |
|
|
|||
16 |
18 |
19 |
||||
|
|
|
|
|
|
|
|
|
|
|
|
|
|
|
|
|
|
|
|
|
|
|
|
|
|
|
|
|
|
|
|
|
|
|
|
|
|
|
|
|
|
|
|
|
|
|
|
|
|
|
|
|
|
|
|
|
17 |
COPY |
|
16 |
Lens cover |
||
|
|||
17 |
Stereo microphone (A110) |
||
18 |
Speaker (A67) |
|
|
19 |
LCD touch screen (A26, 44) |
||
23

Bottom view |
Back view |
20 21 22 23
24 25
20Serial number


 COPY
COPY
21Tripod socket (A228)
22Battery compartment cover (A30)
23Wi-Fi antenna (A138)
24Battery release latch (A30)
25Battery compartment (A30)
24
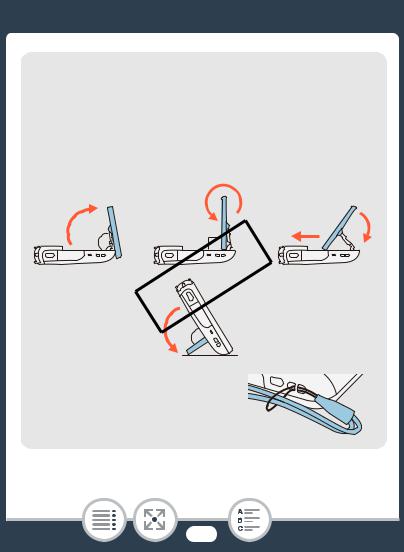
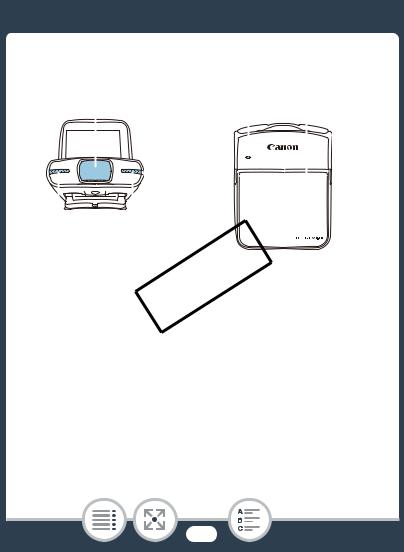
Adjusting the camcorder’s position
The camcorder has an adjustable stand (5) and an articulated LCD panel (4) that allow you to easily adjust its position to match your recording conditions.
Here are typical shooting positions (all degree measurements are approximate):
1 |
2 |
3 |
80° |
90° |
|
|
COPY95° |
|
13 Strap mount
You can attach the supplied wrist strap to one side of the camcorder.
25

19 LCD touch screen
•The screen is produced using extremely high-precision manufacturing techniques, with more than 99.99% of the pixels operating to specification. Less than 0.01% of the pixels may occasionally misfire or appear as black, red, blue or green dots. This has no effect on the recorded image and does not constitute a malfunction.
•For details about how to take care of the touch screen, refer to Handling Precautions (A226), Cleaning
(A232).
•You can adjust the screen’s brightness using the 1> t>[LCD Brightness]COPYand [LCD Backlight] settings.
26

Preparations
Charging and Inserting the Battery Pack
29
The first step for using your camcorder is to prepare the power supply. This section explains how to charge a battery pack and how to install it in the camcorder.
34movies and photosCOPYwill be recorded. This section explains the types of memory cards that can be used and how to insert one into the camcorder.Using a Memory Card
First Time Settings
Now that your camcorder is powered up and has a mem-
38ory card, you can turn it on and complete the basic setup. These include selecting the camcorder’s language and setting the date and time.
27

Basic Operation of the Camcorder
44
In this section you can learn more about basic operations, such as using the touch screen, changing operating modes and using the menus.
COPY
28

Charging and Inserting the Battery Pack
Charging and Inserting the Battery
Pack
Charge the supplied battery pack in advance, using the supplied battery charger.
1 |
2 |
3 |
2 |
3 |
1 |
COPY |
|
|
|
|
■ Charging the Battery Pack |
|
|
1 Attach the battery pack to the battery charger, aligning the triangle marks.
2Extract the fold-in plug and plug the battery charger into a power outlet.
•For Asia only: Connect the power cord to the battery charger and plug the other end into a power outlet.
29

Charging and Inserting the Battery Pack
•When the CHARGE indicator on the battery charger turns green, the battery pack is fully charged.
3When the battery pack is fully charged, remove the battery pack from the battery charger and unplug the battery charger.
1 |
2 |
2 |
|
1 |
|
3 |
|
COPY |
|
1 |
|
2 |
|
■ Inserting the Battery Pack
1Push the battery compartment cover in the direction of the arrow to open it.
2Insert the battery pack with the Canon label facing the bottom of the camcorder.
•Push the battery pack all the way in, until the battery release latch secures it in place.
30
Loading...