


 Loading...
PCL Driver Guide
Please read this guide before operating this equipment.
After you finish reading this guide, store it in a safe place for future reference.

NOTICE:
The information contained in this document is subject to change without notice. Canon, Inc. makes no warranty of any kind with regard to material, either expressed or implied, except as provided herein, including without limitation thereof, warranties as to marketability, for a particular purpose or use, or against infringement of any patent. Canon, Inc. shall not be liable for any direct, incidental, or consequential damages of any nature, or loss of expenses resulting from the use of this material.
This document contains proprietary information which is protected by copyright. All rights are reserved. No part of this document may be photocopied, reproduced, or translated into another language without prior written consent of Canon, Inc.
Copyright © 2000 Canon Inc. ALL RIGHTS RESERVED.

About Trademarks
PCL and HP-GL are trademarks of Hewlett-Packard Company.
Microsoft, Windows and Windows NT are registered trademarks of Microsoft Corporation in the United States and/or other countries.
NetWare® and Novell are registered trademarks of Novell Inc. (US), ©1996 Novell Inc., all rights reserved.
Other brands and product names are trademarks and/or registered trademarks of their respective companies.
About Trademarks |
1 |

How This Manual Is Organized
Chapter 1 Before You Begin
Provides an explanation of system environments required for using the PCL5e and PCL 6 printer drivers and Fax driver, and also explains how to find help and information regarding the installing and use of these drivers.
Chapter 2 Getting Started
Provides instructions for installing the PCL5e or PCL 6 printer drivers, setting the system configuration, and printing a document.
Chapter 3 Using the Print Options
Provides instructions for specifying the various settings for printing a document.
Chapter 4 Using the Fax Options
Provides instructions for installing the fax driver, faxing a document, and specifying the various settings for faxing a document.
Chapter 5 Appendix
Provides information about additional software used with the PCL5e or PCL 6 printer drivers.
2 How This Manual Is Organized

Symbols Used in This Manual
 IMPORTANT
 NOTE
NOTE
Indicates important items or prohibited actions that should always be observed when using the printer drivers and fax driver. Always read these to avoid improper operation.
Indicates items for reference or supplementary information that users should note.
Symbols Used in This Manual |
3 |

Table of Contents
About Trademarks . . . . . . . . . . . . . . . . . . . . . . . . . . . . . . . . . . . . . . . . . . . . . 1
How This Manual Is Organized . . . . . . . . . . . . . . . . . . . . . . . . . . . . . . . . . . . 2
Symbols Used in This Manual . . . . . . . . . . . . . . . . . . . . . . . . . . . . . . . . . . . 3
Table of Contents. . . . . . . . . . . . . . . . . . . . . . . . . . . . . . . . . . . . . . . . . . . . . . 4
Chapter 1 Before You Begin
Introduction . . . . . . . . . . . . . . . . . . . . . . . . . . . . . . . . . . . . . . . . . . . . . . . . .1-2 System Requirements . . . . . . . . . . . . . . . . . . . . . . . . . . . . . . . . . . . . . . . . .1-3 Where to Find Help . . . . . . . . . . . . . . . . . . . . . . . . . . . . . . . . . . . . . . . . . . .1-4
Chapter 2 Getting Started
Installing the Software . . . . . . . . . . . . . . . . . . . . . . . . . . . . . . . . . . . . . . . .2-2
Installing the Printer Driver. . . . . . . . . . . . . . . . . . . . . . . . . . . . . . . . . . . .2-2
Installing Canon NetSpot Suite Service . . . . . . . . . . . . . . . . . . . . . . . . . .2-6
Uninstalling the Printer Driver . . . . . . . . . . . . . . . . . . . . . . . . . . . . . . . . .2-8
Accessing the Properties Dialog Box . . . . . . . . . . . . . . . . . . . . . . . . . . . .2-9
For Windows 95/98 . . . . . . . . . . . . . . . . . . . . . . . . . . . . . . . . . . . . . . . . .2-9
For Windows NT4.0/2000. . . . . . . . . . . . . . . . . . . . . . . . . . . . . . . . . . . .2-10
Setting Up the Printer Configuration . . . . . . . . . . . . . . . . . . . . . . . . . . . .2-11
Printing a Document . . . . . . . . . . . . . . . . . . . . . . . . . . . . . . . . . . . . . . . . .2-13
Chapter 3 Using the Print Options
Using Profiles for Printing . . . . . . . . . . . . . . . . . . . . . . . . . . . . . . . . . . . . .3-2
What is a Profile?. . . . . . . . . . . . . . . . . . . . . . . . . . . . . . . . . . . . . . . . . . .3-2 Selecting a Profile for Printing . . . . . . . . . . . . . . . . . . . . . . . . . . . . . . . . .3-2 Adding or Editing Profiles. . . . . . . . . . . . . . . . . . . . . . . . . . . . . . . . . . . . .3-2 Adding or Editing Profiles in the Profile Sheet
(for Windows NT4.0/2000) . . . . . . . . . . . . . . . . . . . . . . . . . . . . . . . . . . . .3-3
Scaling a Document . . . . . . . . . . . . . . . . . . . . . . . . . . . . . . . . . . . . . . . . . .3-5
Scaling a Document Automatically. . . . . . . . . . . . . . . . . . . . . . . . . . . . . .3-5
Scaling a Document Manually . . . . . . . . . . . . . . . . . . . . . . . . . . . . . . . . .3-6
Printing Multiple-Pages on One Sheet. . . . . . . . . . . . . . . . . . . . . . . . . . . .3-7 Using 2-Sided Printing . . . . . . . . . . . . . . . . . . . . . . . . . . . . . . . . . . . . . . . .3-8
Specifying the Finishing Options. . . . . . . . . . . . . . . . . . . . . . . . . . . . . . . .3-9
Selecting a Finishing Option . . . . . . . . . . . . . . . . . . . . . . . . . . . . . . . . . .3-9 Using Booklet Printing . . . . . . . . . . . . . . . . . . . . . . . . . . . . . . . . . . . . . .3-12
4 Table of Contents

Specifying the Paper Source . . . . . . . . . . . . . . . . . . . . . . . . . . . . . . . . . . 3-14
Using Overlay Printing . . . . . . . . . . . . . . . . . . . . . . . . . . . . . . . . . . . . . . . 3-19
What is Overlay Printing? . . . . . . . . . . . . . . . . . . . . . . . . . . . . . . . . . . . 3-19 Creating a Form File . . . . . . . . . . . . . . . . . . . . . . . . . . . . . . . . . . . . . . . 3-19 Printing with an Overlay. . . . . . . . . . . . . . . . . . . . . . . . . . . . . . . . . . . . . 3-21
Specifying the Print Quality . . . . . . . . . . . . . . . . . . . . . . . . . . . . . . . . . . . 3-23
What is an Objective? . . . . . . . . . . . . . . . . . . . . . . . . . . . . . . . . . . . . . . 3-23
Selecting and Editing an Objective . . . . . . . . . . . . . . . . . . . . . . . . . . . . 3-23
Sending Document Data to the Image Server . . . . . . . . . . . . . . . . . . . . 3-25 Secured Printing . . . . . . . . . . . . . . . . . . . . . . . . . . . . . . . . . . . . . . . . . . . . 3-27 Editing Some Print Documents Together (for Windows 95/98) . . . . . . . 3-28
Using the Job Accounting Feature . . . . . . . . . . . . . . . . . . . . . . . . . . . . . 3-29
About Job Accounting . . . . . . . . . . . . . . . . . . . . . . . . . . . . . . . . . . . . . . 3-29 Specifying the ID and Password for Job Accounting . . . . . . . . . . . . . . . 3-29 Printing under Job Accounting (for Windows 95/98) . . . . . . . . . . . . . . . 3-30 Printing under Job Accounting (for Windows NT4.0/2000) . . . . . . . . . . 3-31
Specifying the Grayscale Settings . . . . . . . . . . . . . . . . . . . . . . . . . . . . . 3-32
About the Grayscale Settings . . . . . . . . . . . . . . . . . . . . . . . . . . . . . . . . 3-32
Using the Grayscale Settings . . . . . . . . . . . . . . . . . . . . . . . . . . . . . . . . 3-32
Chapter 4 Using the Fax Options
Installing the Fax Driver . . . . . . . . . . . . . . . . . . . . . . . . . . . . . . . . . . . . . . . 4-2
Specifying the Installed Fax Memory . . . . . . . . . . . . . . . . . . . . . . . . . . . . 4-6
Faxing a Document . . . . . . . . . . . . . . . . . . . . . . . . . . . . . . . . . . . . . . . . . . . 4-7
Specifying the Fax Recipients . . . . . . . . . . . . . . . . . . . . . . . . . . . . . . . . . 4-10
Defining the Address Book Entries . . . . . . . . . . . . . . . . . . . . . . . . . . . . . 4-12
Defining an Individual . . . . . . . . . . . . . . . . . . . . . . . . . . . . . . . . . . . . . . 4-12
Defining a Group . . . . . . . . . . . . . . . . . . . . . . . . . . . . . . . . . . . . . . . . . . 4-15
Attaching a Cover Sheet to a Fax . . . . . . . . . . . . . . . . . . . . . . . . . . . . . . 4-18
Chapter 5 |
Appendix |
Additional Software. . . . . . . . . . . . . . . . . . . . . . . . . . . . . . . . . . . . . . . . . . . 5-2
Canon Port Setting Tool . . . . . . . . . . . . . . . . . . . . . . . . . . . . . . . . . . . . . . 5-2
Device Status Extension . . . . . . . . . . . . . . . . . . . . . . . . . . . . . . . . . . . . . 5-2
Index
Table of Contents |
5 |

Before You Begin |
1 |
|
|
|
|
|
|
|
|
|
|
|
|
|
|
C |
H A P T E R |
||
|
|
|
|
|
|
|
|
|
|
This chapter provides an explanation of system environments required for using the PCL5e and PCL 6 printer drivers and Fax driver, and also explains how to find help and information regarding the installing and use of these drivers.
Introduction . . . . . . . . . . . . . . . . . . . . . . . . . . . . . . . . . . . . . . . . . . . . . . . . . . . . . . . . . . . 1-2 System Requirements . . . . . . . . . . . . . . . . . . . . . . . . . . . . . . . . . . . . . . . . . . . . . . . . . . . 1-3 Where to Find Help . . . . . . . . . . . . . . . . . . . . . . . . . . . . . . . . . . . . . . . . . . . . . . . . . . . . . 1-4
1 Before You Begin
1-1

1 Before You Begin
Introduction
The Canon PCL5e and PCL 6 Printer drivers and Fax driver give users of Microsoft Windows 95, Windows 98, Windows NT Version 4.0 or Windows 2000 (hereafter called Windows 95/98/ NT4.0/2000) operating systems the ability to make full use of the printer. The printer driver allows you to print documents from any Windows application to your printer using Hewlett-Packard’s PCL5e or PCL 6 data format. If your printer is equipped with the optional fax subsystem, the fax driver allows you to access the fax device.
In Windows 95/98/NT4.0/2000 environments, you can use both printer drivers. The PCL 6 printer driver is recommended for printing image data. The PCL5e printer driver is recommended for printing text data.
IMPORTANT
•The PCL5e printer driver is available for imageRUNNER 6000/5000, iR3250, imageRUNNER 600/550/60, imageRUNNER 400/330, imageRUNNER 210, GP225/GP200, GP215/GP200 and GP55/GP30. The PCL 6 printer driver is available only for imageRUNNER 6000/5000 and iR3250.
•Three versions are provided for each PCL5e and PCL 6 driver, one for Windows 95/98, one for Windows NT4.0 and one for Winsows 2000. Use the driver for the version of Windows you are using.
•The PCL5e printer driver for Windows NT4.0 and Windows 2000 are available for GP55/GP30.
1-2 Introduction

System Requirements
The printer drivers and fax driver for Windows 95/98/NT4.0/2000 can be used in the following system environments.
Software: Microsoft Windows 95, Microsoft Windows 98, Microsoft Windows NT4.0 or Microsoft Windows 2000
Computer: Any computer on which Microsoft Windows 95, Microsoft Windows 98, Microsoft Windows NT4.0 or Microsoft Windows 2000 runs properly.
1 Before You Begin
System Requirements |
1-3 |
|
|
|
Where to Find Help |
|
|
|
Here’s where to get immediate help if you are having problems installing or using the Printer and |
|
|
|
|
|
|
|
Fax Driver for Windows 95/98/NT4.0/2000. |
|
|
|
● Readme |
|
Begin |
|
Any hints, limitations, and restrictions you need to be aware of when installing and using your |
|
|
Windows 95/98/NT4.0/2000 printer and fax driver for the printer are included in the |
|
|
|
README.TXT file provided with the driver. |
|
|
You |
|
● Online Help |
|
Before |
|
|
|
|
Help file provided with the driver software. In the Properties dialog box, you can click the Help |
|
|
|
|
You can locate additional help for questions you may have regarding your printer in the online |
|
1 |
|
button to display additional information about every feature and option in the PCL5e or PCL 6 |
|
|
printer driver and fax driver. You can also click the ? button in the upper right corner of most dialog |
|
|
|
|
|
|
|
|
boxes and then click a specific item in the dialog box for help with that item. |
|
|
|
● Canon Authorized Dealers |
|
|
|
If the Help file does not provide the information you need, contact your Canon authorized dealer. |
1-4 Where to Find Help

Getting Started |
2 |
|
|
||
|
|
|
|
|
|
|
|
|
|
|
|
|
C |
H A P |
T E R |
||
|
|
|
|
|
|
|
|
|
|
|
|
This chapter provides instructions for installing the PCL5e or PCL 6 printer drivers, setting the system configuration, and printing a document.
Installing the Software . . . . . . . . . . . . . . . . . . . . . . . . . . . . . . . . . . . . . . . . . . . . . . . . . . . 2-2
Installing the Printer Driver . . . . . . . . . . . . . . . . . . . . . . . . . . . . . . . . . . . . . . . . . . . . . 2-2
Installing Canon NetSpot Suite Service. . . . . . . . . . . . . . . . . . . . . . . . . . . . . . . . . . . . 2-6
Uninstalling the Printer Driver . . . . . . . . . . . . . . . . . . . . . . . . . . . . . . . . . . . . . . . . . . . 2-8
Accessing the Properties Dialog Box. . . . . . . . . . . . . . . . . . . . . . . . . . . . . . . . . . . . . . . . 2-9
For Windows 95/98 . . . . . . . . . . . . . . . . . . . . . . . . . . . . . . . . . . . . . . . . . . . . . . . . . . . 2-9
For Windows NT4.0/2000 . . . . . . . . . . . . . . . . . . . . . . . . . . . . . . . . . . . . . . . . . . . . . 2-10
Setting Up the Printer Configuration . . . . . . . . . . . . . . . . . . . . . . . . . . . . . . . . . . . . . . . 2-11
Printing a Document . . . . . . . . . . . . . . . . . . . . . . . . . . . . . . . . . . . . . . . . . . . . . . . . . . . 2-13
2 Getting Started
2-1
2 Getting Started
Installing the Software
Installing the Printer Driver
Before using the printer, you must install the PCL5e or PCL 6 printer driver. The installation procedures for both printer drivers are the same.
IMPORTANT
•For Windows NT4.0/2000, log in as Administrator when you install the driver.
•imageRUNNER 400/330 System Version 2.0 (or later) is supported only by the PCL5e Printer Driver Version 4.2 (or later).
To install using the Installer
1 Insert the User Software CD into the CD-ROM disk drive.
2 Double-click the My Computer icon, and then double-click the CD-ROM disk drive icon.
3 Double-click the PCL, Drivers, USEng, and Setup folder icons, and then double-click the Setup icon to start the installation process.
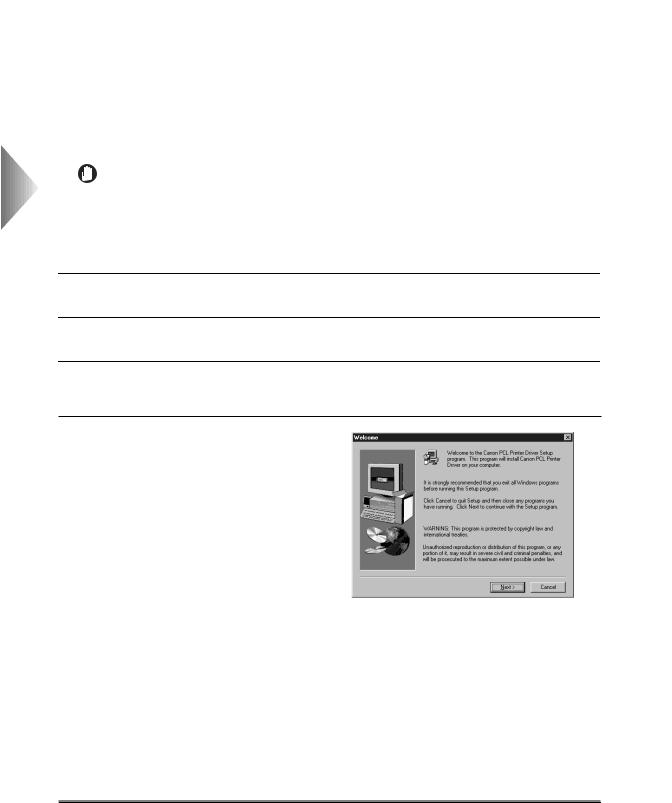
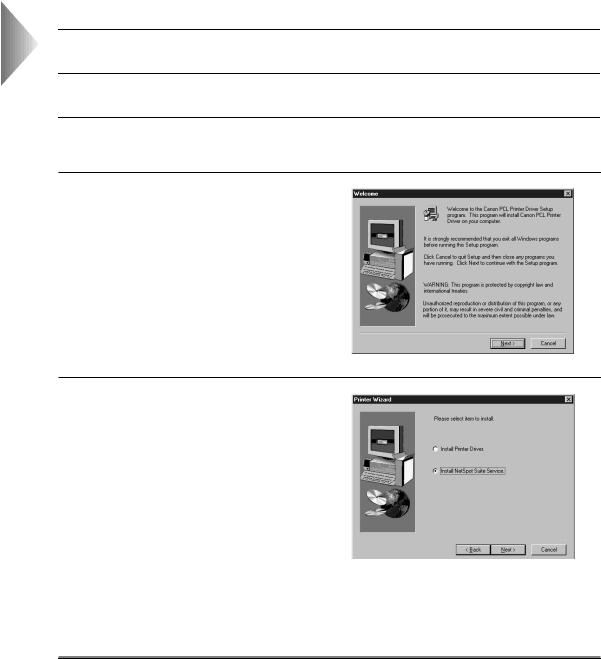
4 In the Welcome dialog box, click the Next button and follow the instruction on the screen.
2-2 Installing the Software

5 In the Printer Wizard dialog box, click the check box of the driver you want to install. Then click the Next button.
NOTE
•If the printer driver of the device which supports NetSpot Suite Service is already installed in your computer, a dialog box for selecting which item to install displays after the Welcome dialog box. Select Install Printer Driver, and then continue the installation.
6 Select the printer port name from the Port drop-down list box. If the printer is connected to the network, click the Browse for Printer button, and then specify the network printer in the Browse for Printer dialog box. Then click the Next button to continue the installation.
7 Click the Next button in the Confirmation of installation dialog box.
2 Getting Started
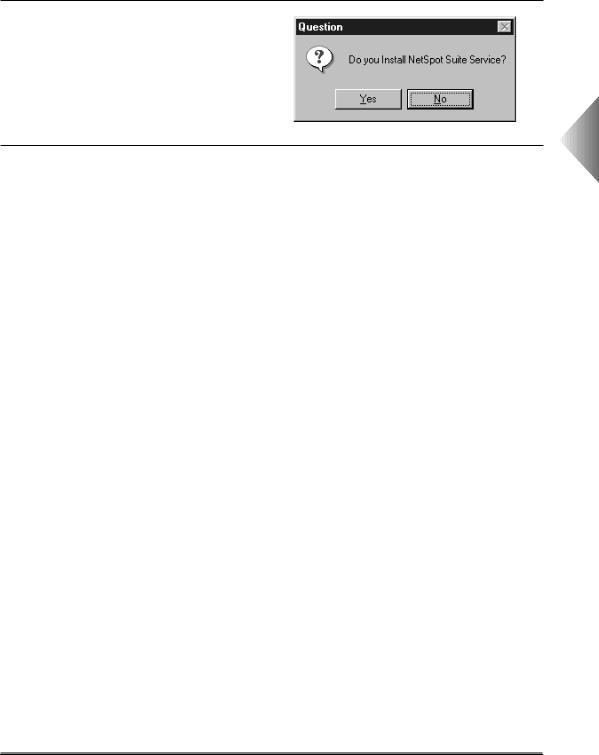
8 If you select the printer driver for imageRUNNER 6000/5000 or iR3250, a message asking if you want to install NetSpot Suite Service is displayed. Click the Yes button to install NetSpot Suite Service together with the printer driver.
NOTE
•Canon NetSpot Suite Service is necessary when setting up the printer configuration automatically or when using the Job Accounting feature.
•If you select Install Printer Driver in the Printer Wizard dialog box when selecting which item to install, this message will not display.
Installing the Software |
2-3 |
2 Getting Started
9 After the files are copied, click the Finish button to finish the installation program.
The printer icon is displayed in the Printers folder. The driver is now installed.
NOTE
•Use the Installer only for Client PCs.
-You cannot install an alternate Printer Driver for Windows 95/98 on the Windows NT4.0/2000 Server because the Installer detects the OS on which the driver is going to be installed.
To install using the Add Printer Wizard
1 Click the Start button, point to Settings, and then click Printers.
2 In the Printers folder, double-click the Add Printer icon to start the Add Printer Wizard.
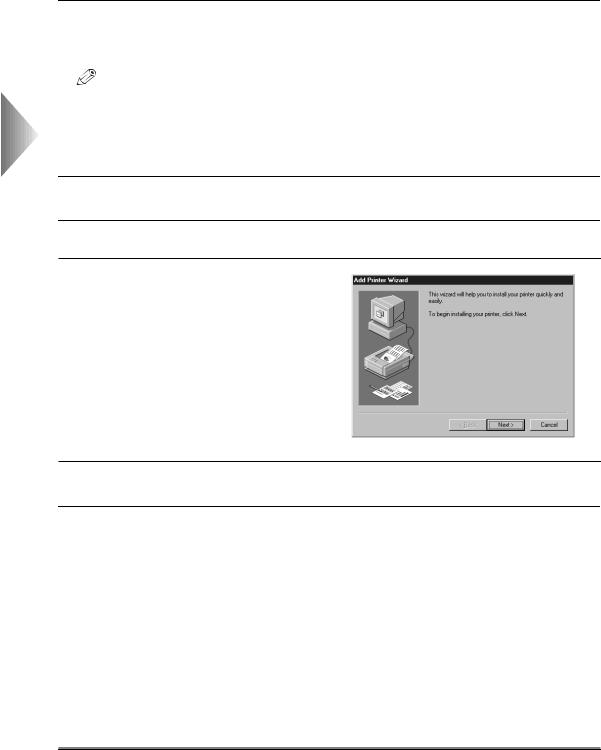
3 Confirm the Wizard is started, and then click the Next button.
4 Follow the instructions on the screen to continue the installation.
5 Insert the User Software CD into the CD-ROM disk drive, and then click the Have Disk button.
2-4 Installing the Software

6 Click the Browse button to select the folder of the driver you want to install, and then click the OK button.
●PCL5e
Windows 95/98: \PCL\Drivers\USEng\Printer\PCL5e\WIN9X
Windows NT4.0: \PCL\Drivers\USEng\Printer\PCL5e\WINNT40
Windows 2000: \PCL\Drivers\USEng\Printer\PCL5e\WIN2000
●PCL 6
Windows 95/98: \PCL\Drivers\USEng\Printer\PCL6\WIN9X
Windows NT4.0: \PCL\Drivers\USEng\Printer\PCL6\WINNT40
Windows 2000: \PCL\Drivers\USEng\Printer\PCL6\WIN2000
7 Select your printer model from the list, and then click the Next button.
8 Follow the instructions on the screen to continue, and then click the Finish button to start copying the files.
The printer icon is displayed in the Printers folder. The driver is now installed.
2 Getting Started
Installing the Software |
2-5 |
2 Getting Started
Installing Canon NetSpot Suite Service
For imageRUNNER 6000/5000 and iR3250, Canon NetSpot Suite Service is necessary when setting up the printer configuration automatically or when using the Job Accounting feature. When using the installer, Canon NetSpot Suite Service can be installed together with the printer driver. (See P 2-2) However, if you install the printer driver using the Add Printer Wizard or install only the printer driver when using the installer, install Canon NetSpot Suite Service with the following procedure.
1
2 Double-click the My Computer icon, and then double-click the CD-ROM disk drive icon.
3
4 In the Welcome dialog box, click the Next button and follow the instructions on the screen.
5 In the Printer Wizard dialog box, click Install NetSpot Suite Service and click the Next button.
2-6 Installing the Software
6 A message asking if you want to install NetSpot Suite Service is displayed. Click the Yes button to start copying the files.
7 After the files are copied, click the Finish button to finish the installation program.
2 Getting Started
Installing the Software |
2-7 |
2 Getting Started
Uninstalling the Printer Driver
It is recommended to use the uninstaller in the User Software CD when you delete an unnecessary driver.
1 Insert the User Software CD into the CD-ROM disk drive.
2 Double-click the My computer icon, and then double-click the CD-ROM disk drive icon.
3 Double-click the PCL, Drivers, USEng, and Setup folder icons.
4 In the Setup folder, double-click the P5uninst.exe icon to start the uninstallation process.
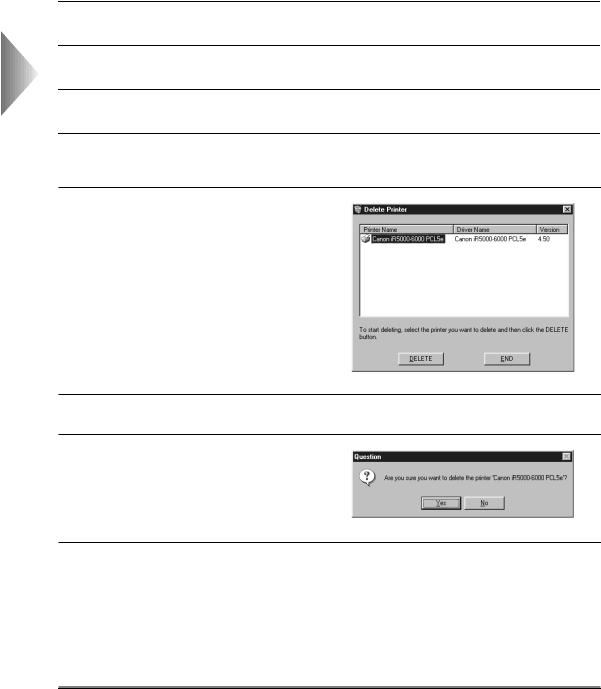
5 In the Delete Printer dialog box, select the printer name you want to delete from the list box.
6 Click the DELETE button.
7 Click the Yes button in the message box.
8 Click the END button in the Delete Printer dialog box.
2-8 Installing the Software

Accessing the Properties Dialog Box
The Properties dialog box contains several sheets that allow you to setup and control your printer. To access the Properties dialog box, follow the procedure below for your version of Windows.
For Windows 95/98
To access the Properties dialog box from the application
If you access the Properties dialog box from the application, the specified settings are available for the current print job.
1 Select the Print command to display the Print dialog box.
2 Select your printer name from the drop-down list box, and then click the Properties button.
2 Getting Started
To access the Properties dialog box from the Printers folder
If you access the Properties dialog box from the Printers folder, you can setup the printer configuration or specify the default printer driver settings for every print job.
1 Click the Start button, point to Settings, and then click the Printers.
2 In the Printers folder, right-click the printer icon for your printer, and then click Properties.
Accessing the Properties Dialog Box |
2-9 |
2 Getting Started
For Windows NT4.0/2000
You can access the Document Properties dialog box and the Printer Properties dialog box.
In the Document Properties dialog box, you can specify the printer driver settings. In the Printer Properties dialog box, you can setup the printer configuration.
To access the Document Properties dialog box from the application
If you access the Document Properties dialog box from the application, the specified settings are available for the current print job.
1 Select the Print command to display the Print dialog box.
2 Select your printer name from the drop-down list box, and then click the Properties button.
To access the Document Properties dialog box from the Printers folder
If you access the Document Properties dialog box from the Printers folder, you can specify the default printer driver settings for every print job.
1 Click the Start button, point to Settings, and then click Printers.
2 In the Printers folder, right-click the printer icon for your printer, and then click Document Defaults.
NOTE
•To access the Document Properties dialog box from the Printers folder, you need to be assigned Full Control Permission to the printer. If you cannot access the Document Properties dialog box from the Printers folder, access it from the application.
To access the Printer Properties dialog box from the Printers folder
You can setup the printer configuration in the Printer Properties dialog box.
1 Click the Start button, point to Settings, and then click the Printers.
2 In the Printers folder, right-click the printer icon for your printer, and then click Properties.
2-10 Accessing the Properties Dialog Box
Setting Up the Printer Configuration
If your printer is connected to the network, you can set up the printer configuration automatically.
To set up the printer configuration
1 Click the Start button, point to Settings, and then click Printers.
2 In the Printers folder, right-click the icon of your printer, and then click Properties.
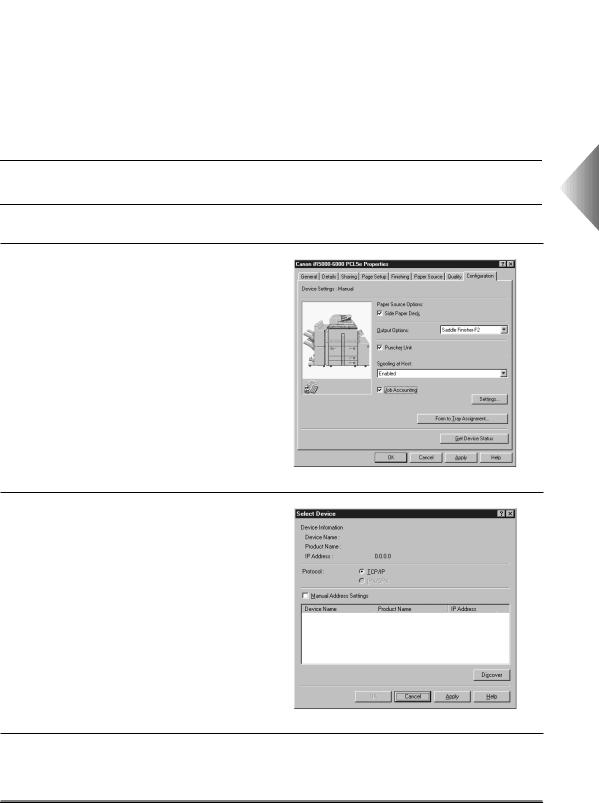
3 In the Properties dialog box, click the Configuration tab (Windows 95/98) or Device Settings tab (Windows NT4.0/ 2000) to display the Configuration sheet (Windows 95/98) or Device Settings sheet (Windows NT4.0/2000).
4 Click the Select Device button to open the Select Device dialog box.
For imageRUNNER 6000/5000, iR3250, GP215/GP200 and GP55/GP30, skip to step 8.
2 Getting Started
5 Select the protocol used for your network under Protocol.
Setting Up the Printer Configuration |
2-11 |

2 Getting Started
6 Do one of the following to establish communication with the printer:
●If you know the IP Address/Network Address of the printer, click the Manual Address Settings check box, and then enter the IP Address/Network Address of the printer.
●If you do not know the IP Address/Network Address of the printer, click the Discover button, and then select the printer from the list box displaying the detected device names.
7 Click the OK button in the Select Device dialog box.
8 In the Configuration sheet (Windows 95/98) or Device Settings sheet (Windows NT4.0/ 2000), click the Get Device Status button.
The detected information is displayed in the Device Settings sheet.
9 Click the OK button.
IMPORTANT
If you want to set up the printer configuration automatically, please note the following points.
•For imageRUNNER 6000/5000 and iR3250, it is necessary to install Canon NetSpot Suite Service. See P2-6 for installing Canon NetSpot Suite Service.
•For imageRUNNER 600/550/60, imageRUNNER 400/330, imageRUNNER 210 and GP225/GP200, one of the following environments is required:
-Novell NetWare IPX/SPX Client Software needs to be installed in your PC to use IPX/SPX as the protocol.
-TCP/IP Protocol provided by Window should be installed in your PC to use TCP/IP as the protocol.
•For GP215/GP200 and GP55/GP30, it is necessary to install the NetWare Client files. For details, refer to the readme file.
NOTE
•If you cannot set up the configuration automatically, specify the options manually in the Configuration sheet (Windows 95/98) or Device Settings sheet (Windows NT4.0/2000).
•For GP215/GP200 and GP55/GP30 using under Windows 2000, setting up the configuration automatically is not available.
2-12 Setting Up the Printer Configuration

Printing a Document
1 In your Windows application, with the document open, click the command to print your document.
2 In the Print dialog box, select your printer name from the Name drop-down list box, and then click the Properties button to display the Properties dialog box.
3 Specify the various print settings in the Properties dialog box, or select a Profile. To switch between sheets, click the tabs for the Page Setup, Finishing, Paper Source, and Quality sheet.
For more information on using the print options, see Chapter 3.
4 After all the print settings are specified, click the OK button in the Properties dialog box.
5 Click the OK button in the Print dialog box.
The document is printed under the settings you specified.
2 Getting Started
Printing a Document |
2-13 |

2 Getting Started
2-14 Printing a Document

Using the Print Options |
3 |
|
|
|
|
|
|
|
|
C H A P T E R |
|
|
|
|
This chapter provides instructions for specifying the various settings for printing a document.
IMPORTANT
• Some print options may be unavailable depending on your printer model.
Using Profiles for Printing. . . . . . . . . . . . . . . . . . . . . . . . . . . . . . . . . . . . . . . . . . . . . . . . . 3-2
What is a Profile? . . . . . . . . . . . . . . . . . . . . . . . . . . . . . . . . . . . . . . . . . . . . . . . . . . . . . 3-2 Selecting a Profile for Printing . . . . . . . . . . . . . . . . . . . . . . . . . . . . . . . . . . . . . . . . . . . 3-2 Adding or Editing Profiles . . . . . . . . . . . . . . . . . . . . . . . . . . . . . . . . . . . . . . . . . . . . . . 3-2 Adding or Editing Profiles in the Profile Sheet (for Windows NT4.0/2000) . . . . . . . . . 3-3
Scaling a Document. . . . . . . . . . . . . . . . . . . . . . . . . . . . . . . . . . . . . . . . . . . . . . . . . . . . . 3-5
Scaling a Document Automatically . . . . . . . . . . . . . . . . . . . . . . . . . . . . . . . . . . . . . . . 3-5
Scaling a Document Manually. . . . . . . . . . . . . . . . . . . . . . . . . . . . . . . . . . . . . . . . . . . 3-6
Printing Multiple-Pages on One Sheet . . . . . . . . . . . . . . . . . . . . . . . . . . . . . . . . . . . . . . . 3-7
Using 2-Sided Printing . . . . . . . . . . . . . . . . . . . . . . . . . . . . . . . . . . . . . . . . . . . . . . . . . . . 3-8
Specifying the Finishing Options . . . . . . . . . . . . . . . . . . . . . . . . . . . . . . . . . . . . . . . . . . . 3-9
Selecting a Finishing Option . . . . . . . . . . . . . . . . . . . . . . . . . . . . . . . . . . . . . . . . . . . . 3-9
Using Booklet Printing . . . . . . . . . . . . . . . . . . . . . . . . . . . . . . . . . . . . . . . . . . . . . . . . 3-12
Specifying the Paper Source . . . . . . . . . . . . . . . . . . . . . . . . . . . . . . . . . . . . . . . . . . . . . 3-15
Using Overlay Printing . . . . . . . . . . . . . . . . . . . . . . . . . . . . . . . . . . . . . . . . . . . . . . . . . . 3-20
What is Overlay Printing? . . . . . . . . . . . . . . . . . . . . . . . . . . . . . . . . . . . . . . . . . . . . . 3-20 Creating a Form File . . . . . . . . . . . . . . . . . . . . . . . . . . . . . . . . . . . . . . . . . . . . . . . . . 3-20 Printing with an Overlay. . . . . . . . . . . . . . . . . . . . . . . . . . . . . . . . . . . . . . . . . . . . . . . 3-22
Specifying the Print Quality . . . . . . . . . . . . . . . . . . . . . . . . . . . . . . . . . . . . . . . . . . . . . . 3-24
What is an Objective? . . . . . . . . . . . . . . . . . . . . . . . . . . . . . . . . . . . . . . . . . . . . . . . . 3-24
Selecting and Editing an Objective. . . . . . . . . . . . . . . . . . . . . . . . . . . . . . . . . . . . . . 3-24
Sending Document Data to the Image Server . . . . . . . . . . . . . . . . . . . . . . . . . . . . . . . . 3-26
Secured Printing . . . . . . . . . . . . . . . . . . . . . . . . . . . . . . . . . . . . . . . . . . . . . . . . . . . . . . 3-28
Editing Some Print Documents Together (for Windows 95/98) . . . . . . . . . . . . . . . . . . . 3-29
Using the Job Accounting Feature . . . . . . . . . . . . . . . . . . . . . . . . . . . . . . . . . . . . . . . . . 3-30
About Job Accounting. . . . . . . . . . . . . . . . . . . . . . . . . . . . . . . . . . . . . . . . . . . . . . . . 3-30 Specifying the ID and Password for Job Accounting . . . . . . . . . . . . . . . . . . . . . . . . 3-30 Printing under Job Accounting (for Windows 95/98) . . . . . . . . . . . . . . . . . . . . . . . . 3-31 Printing under Job Accounting (for Windows NT4.0/2000). . . . . . . . . . . . . . . . . . . . 3-32
Specifying the Grayscale Settings . . . . . . . . . . . . . . . . . . . . . . . . . . . . . . . . . . . . . . . . . 3-33
About the Grayscale Settings . . . . . . . . . . . . . . . . . . . . . . . . . . . . . . . . . . . . . . . . . . 3-33
Using the Grayscale Settings . . . . . . . . . . . . . . . . . . . . . . . . . . . . . . . . . . . . . . . . . . 3-33
3 Using the Print Options
3-1
Loading...