


English
Quick Start Guide
Be sure to install the software programs before connecting the scanner to the computer!
Setup and Scanning
Check the Package Contents  p.3
p.3
Install the Software
Windows  p.4
p.4
Macintosh  p.5
p.5
Unlock the Scanning Unit |
p.6 |
Connect the Scanner |
p.7 |
Try Scanning |
p.8 |
Try the Additional Features
Using the Scanner Buttons 
 p.11
p.11
Scanning Film


 p.12
p.12
Please read this guide before operating this scanner. After you finish reading this guide, store it in a safe place for future reference.
1
Guide to the Manuals
Guide to the Manuals
Open the Package
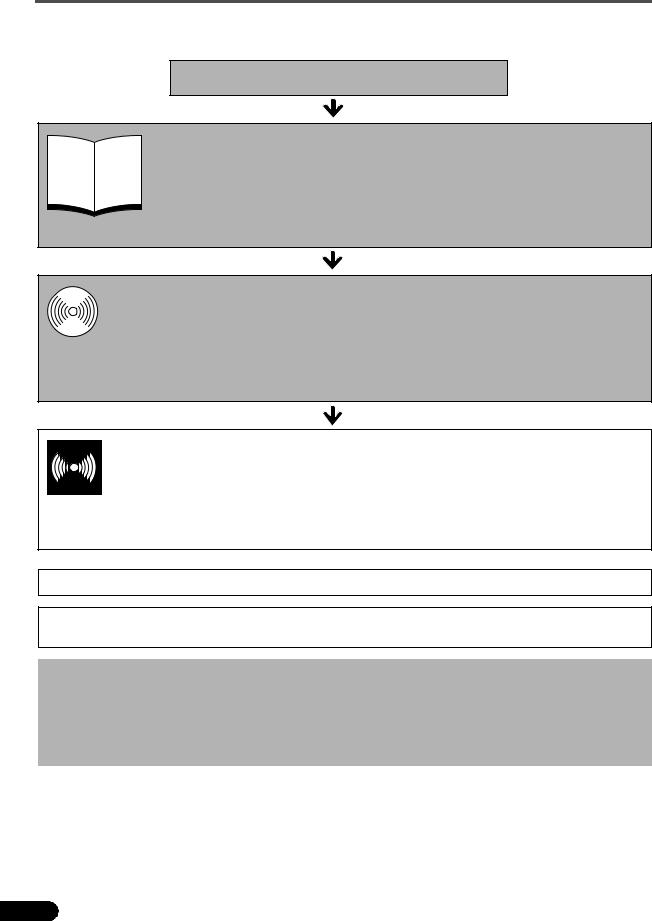
Quick Start Guide (this guide)
This guide describes a series of basic processes from opening the package to using the scanner.
READ THIS GUIDE FIRST!
Scanning Guide (HTML format manual)
Refer to this guide when you have finished setting up the scanner according to the procedures in the Quick Start Guide. It describes how to utilize the scanner with the bundled software,
HTML and how to solve problems when they occur. You can install this manual onto the hard disk together with the software programs. When you install it, the Scanning Guide icon will appear
on the desktop. Double-click the icon to view it with a browser program, such as Internet Explorer.
Users’ Guides for Application Programs (PDF format manuals)
• ArcSoft PhotoStudio
• ScanSoft OmniPage SE
PDF • Presto! PageManager (Windows only)
Select the “View the Electronic Manuals” menu on the CanoScan Setup Utility CD-ROM. To read these manuals, Adobe Acrobat Reader should be installed on your computer.
The socket-outlet shall be installed near the equipment and shall be easily accessible.
Use of a shielded cable with the ferrite core(s) provided with the scanner is necessary to comply with the technical requirements of the EMC Directive.
Warning
When you use this product, you should pay attention to the following legal issues:
•Scanning of certain documents, such as bank notes (bank bills), government bonds and public certificates, may be prohibited by law and may result in criminal and/or civil liability.
•You may be required under law to obtain authorization from a person possessing copyrights or other legal rights to
the item being scanned.
If you are uncertain of the legality of scanning any particular item, you should consult your legal adviser in advance.
•CanoScan and ScanGear are trademarks of Canon Inc.
•Adobe and Acrobat and Photoshop are trademarks of Adobe Systems Incorporated.
•Microsoft and Windows are registered trademarks of Microsoft Corporation in the U.S. and other countries.
•Macintosh, Power Macintosh and Mac OS are trademarks of Apple Computer, Inc., registered in the U.S. and other countries.
•ScanSoft and OmniPage are trademarks of ScanSoft, Inc.
•Other names and products not mentioned above may be trademarks or registered trademarks of their respective companies.
In this guide, Windows XP screen shots are used to illustrate explanations common to all operating systems.
2
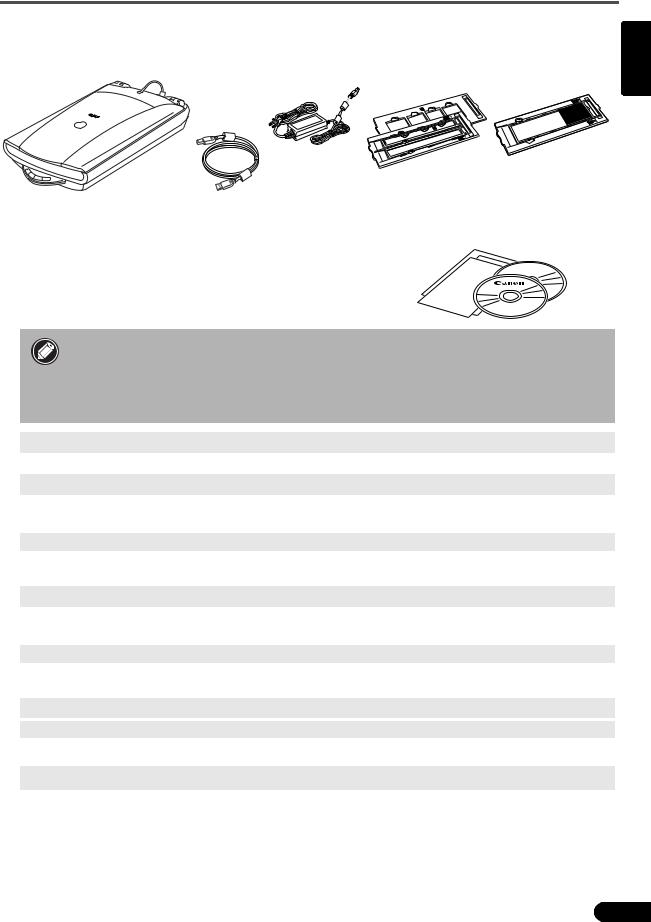
Check the Package Contents
Check the Package Contents
Scanner and Accessories
English
|
AC Adapter |
|
|
|
|
Film Guides |
Film Guides |
CanoScan 8400F |
|
(for 35 mm film strip |
(for 120 format film) |
USB Interface Cable |
and slides) |
|
|
|
|
Documents and Software Programs
• Quick Start Guide (this guide)
• Additional Documents
• CanoScan Setup Utility CD-ROM
• The two figures in the brackets below indicate the respective sizes of the Windows/ Macintosh versions of the software.
•Approximately 350 MB/ 160 MB (for Windows/Macintosh) of hard disk space on your computer is required to install all the programs. Additional free hard disk space is required to operate the programs.
ScanGear CS (25 MB / 10 MB) - Scanner Driver
It allows you to scan and load images from the scanner.
CanoScan Toolbox (15 MB / 10 MB) - Scanning Utility Program
It makes it easy to scan images and save or print them as well as create e-mail attachments or PDF files. It also works with the scanner buttons.
ArcSoft PhotoStudio (35 MB / 20 MB) - Image Editing Program
It allows you to load images from the scanner, edit and retouch them, and apply special effects and enhancements.
ScanSoft OmniPage SE (90 MB / 80 MB) - OCR (Optical Character Recognition) Program
It converts characters scanned from a book, magazine or newspaper into text data for editing or digital transmission.
Presto! PageManager (Windows only) (150 MB) - Digital Document Management Program
It makes it easy to scan, share and organize documents and photos. It automatically links to other popular programs and avoids file-sharing problems by creating self-executable files.
Adobe Acrobat Reader (25 MB / 30 MB) - PDF File Reader Program
Electronic manuals for the above software programs (HTML (10 MB) and PDF manuals)
• Adobe Photoshop Elements CD-ROM
Adobe Photoshop Elements (135 MB / 170 MB) - Image Editing Program
It loads images from the scanner and allows you to edit and retouch them or apply special effects and enhancements. Please read the instruction sheet or electronic (PDF) manual for Adobe Photoshop Elements.
3
Install the Software (Windows)
Install the Software Windows
• If you are running Windows XP or Windows 2000 Professional with multiple user accounts, you should log on with an administrator user name when installing or uninstalling software programs.
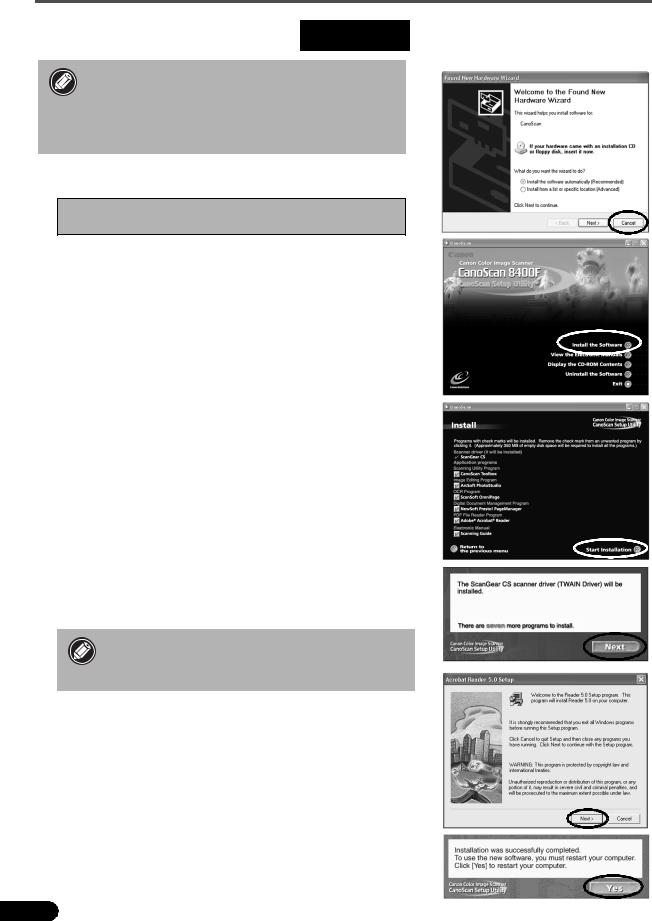
1 Turn the computer on.
If the "Found New Hardware Wizard" or
"Add New Hardware Wizard" appears, click [Cancel].
2 Place the CanoScan Setup Utility CD-ROM in the drive.
After you select your language, the CanoScan Setup Utility main menu will display.
3 Click [Install the Software].
Read the SOFTWARE USER LICENSE AGREEMENT. Click [Yes] if you accept the terms.
The [Install] window will display.
4
5
Click [Start Installation].
You will install six software programs and the Scanning Guide (HTML format manual).
The installation procedure will start.
Follow the on-screen message prompts and click [Next] or [Yes] to continue the installation.
• In a few cases, your operating system may require a restart. Follow the on-screen messages to restart and resume installation.
6
7
When the installation is complete, click [Yes].
The computer will restart.
After Windows restarts, remove the CD-ROM from the drive and store it in a safe place.
 Continue on P. 6.
4

Install the Software (Macintosh)
Install the Software Macintosh
1 Turn the computer on.
Make sure to log in with the first created administrator to install the software. You cannot install the software when logged in using added administrator accounts.
2 Place the CanoScan Setup Utility CD-ROM in the
drive.
3 Double-click the CD-ROM icon.
4 Double-click the [SetUp] icon.
After you select your language, the CanoScan Setup Utility main menu will display.
5 Click [Install the Software].
Read the SOFTWARE USER LICENSE AGREEMENT. Click [Yes] if you accept the terms.
The [Install] window will display.
6 Click [Start Installation].
You will install five software programs and the Scanning Guide (HTML format manual).
7 The installation procedure will start.
Follow the on-screen message prompts and click [Next], [Yes] or [Install] to continue the installation.
If a verification dialog appears, input the Administrator’s name and password.
8 When the installation is complete, click [Yes].
The computer will restart.
9 After restarting, remove the CD-ROM from the drive and store it in a safe place.
English
5
Unlock the Scanning Unit
Unlock the Scanning Unit
• Unlock the scanning unit before connecting the scanner to the computer. If it is left locked, a malfunction or other problem may occur.
•Do not tilt the scanner more than 90 degrees from horizontal when releasing the lock.
•When locking the scanner, do not lift up the back and tilt the front (scanner button location) downward. You may be unable to set the lock.
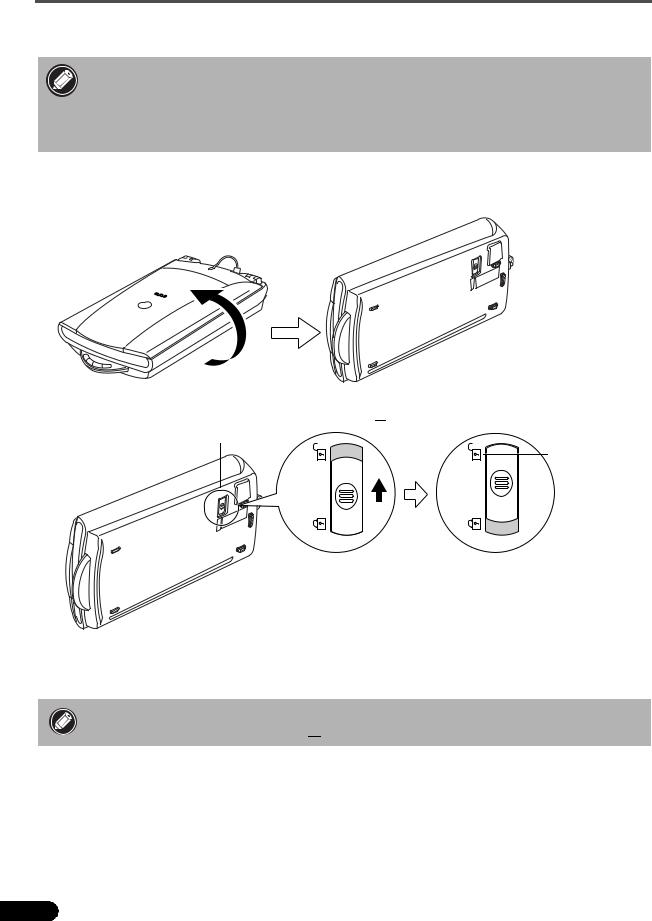
1 Peel the seals off the scanner.
2 Gently turn the scanner over.
3 Push the lock switch toward the unlock mark ( 

 ).
).
Lock Switch
Unlock Mark
4 Return the scanner to a horizontal position.
• When carrying or transporting the scanner, always lock the scanning unit by pushing the lock switch toward the lock mark (

 ).
).
6
 Loading...