


WMA 665 S
Beko WMA 665 S, WMA 665 W, WMA 645 W, WMA 645 S, WMA 655 W Owner's Manual
...
Automatic
washing machine
installation & operating
instructions and washing guidance
a
WMA 665 S
WMA 665 W
WMA 645 W
WMA 645 S
WMA 655 W
WMA 655 S


contents
Introduction
Welcome 2
Installation
Know your washing machine/specification 4
Location 5
Installation 5
Electrical connection 7
Operating
How to use 8
Programme descriptions 12
Function buttons 13
ITCL fabric care symbols 13
Machine care
Care & maintenance 14
Before calling service/trouble shooting 16
Guarantee 17
Service 17
3
know your washing machine
Capacity (dry fabric) 6kg
Dimensions width x depth x height
60cm x 54cm x 85cm
Net weight 72kg
Supply voltage 230V~ 50Hz
Nominal current 10A
Motor power 350 watts
Heater power 2100 watts
Washing speed 52 rpm
Spin speed 1600 rpm
(Model Dependent)
Because we continually strive to improve
our products, we may change our specifications
and designs without prior notice.
4
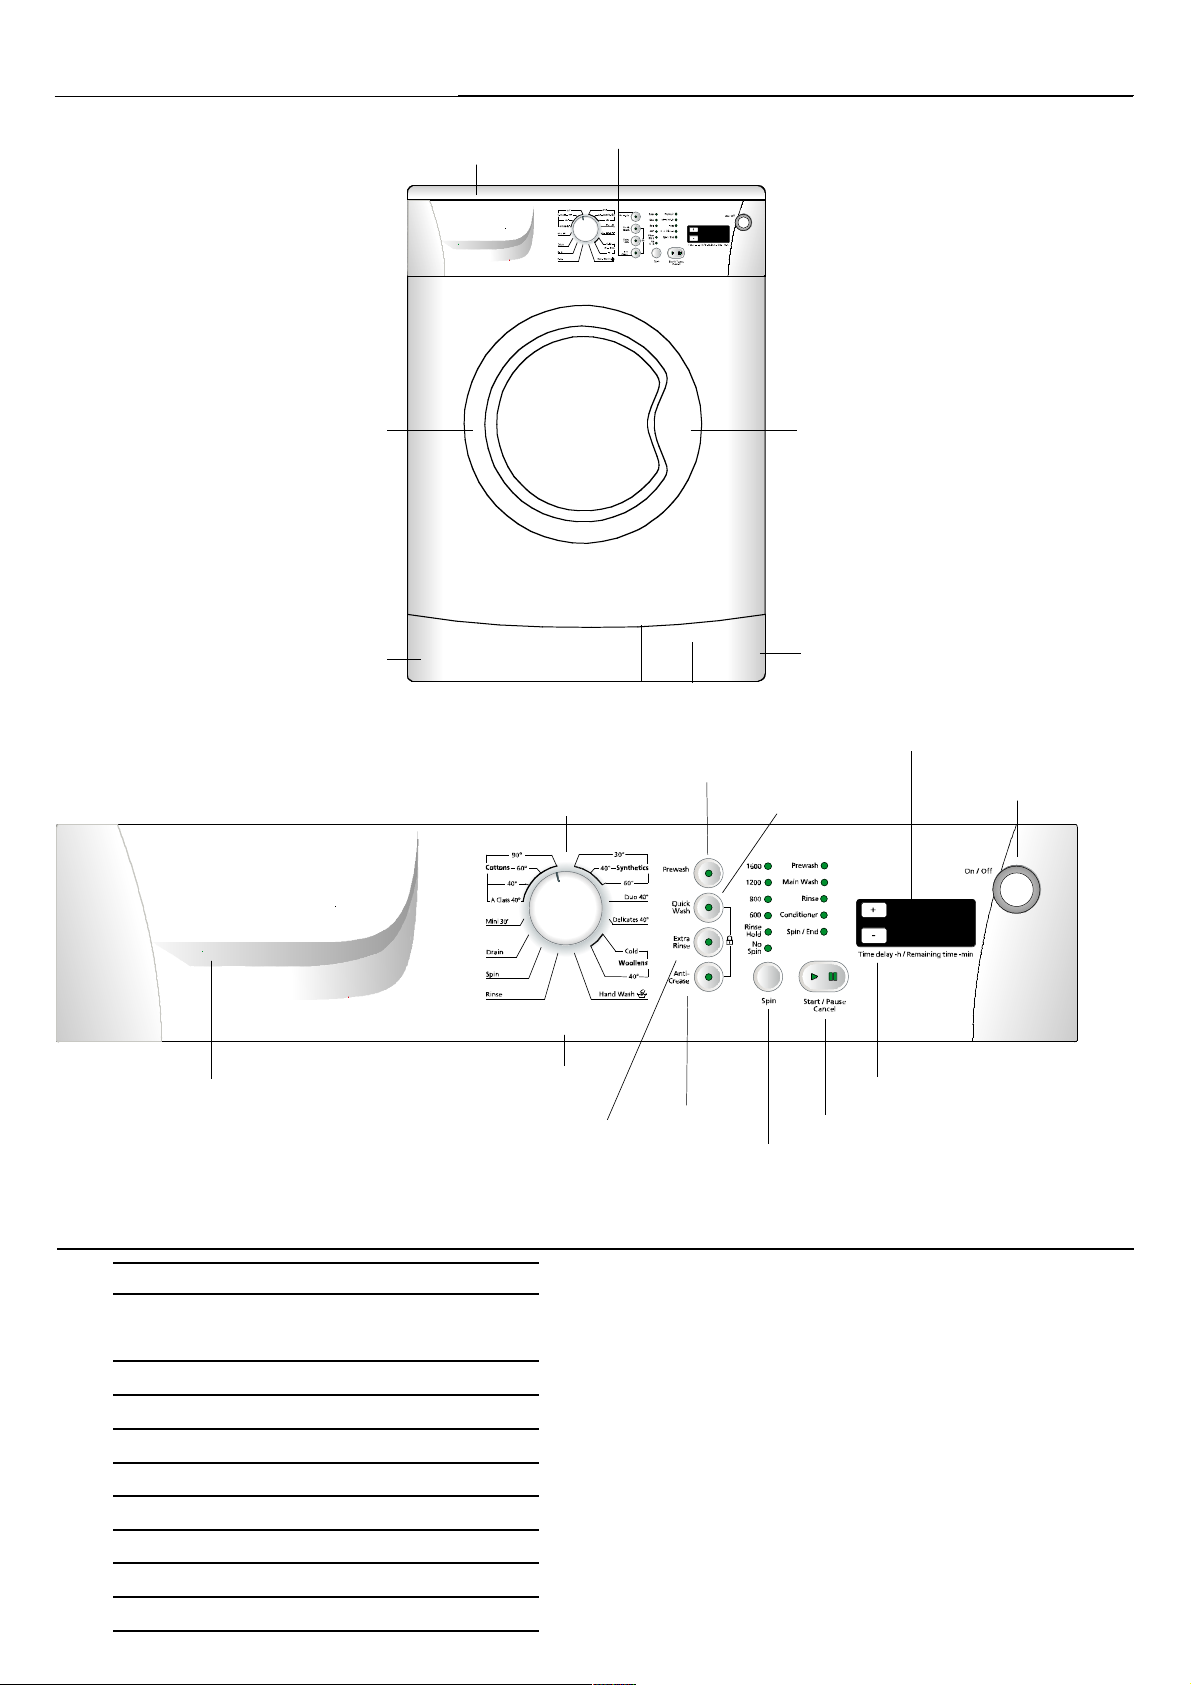
specification
Kick plate cover
Front door
Kick plate
Top lid
Function buttons
Spin speed selection
Time delay adjustment button
Start/Pause/Cancel button
Remain time
Prewash
button
Detergent and softener drawer
On/Off button
Door open button
Quick
wash
button
Extra
Rinse
button
Anti-
Crease
button
programme selection knob
Door Handle
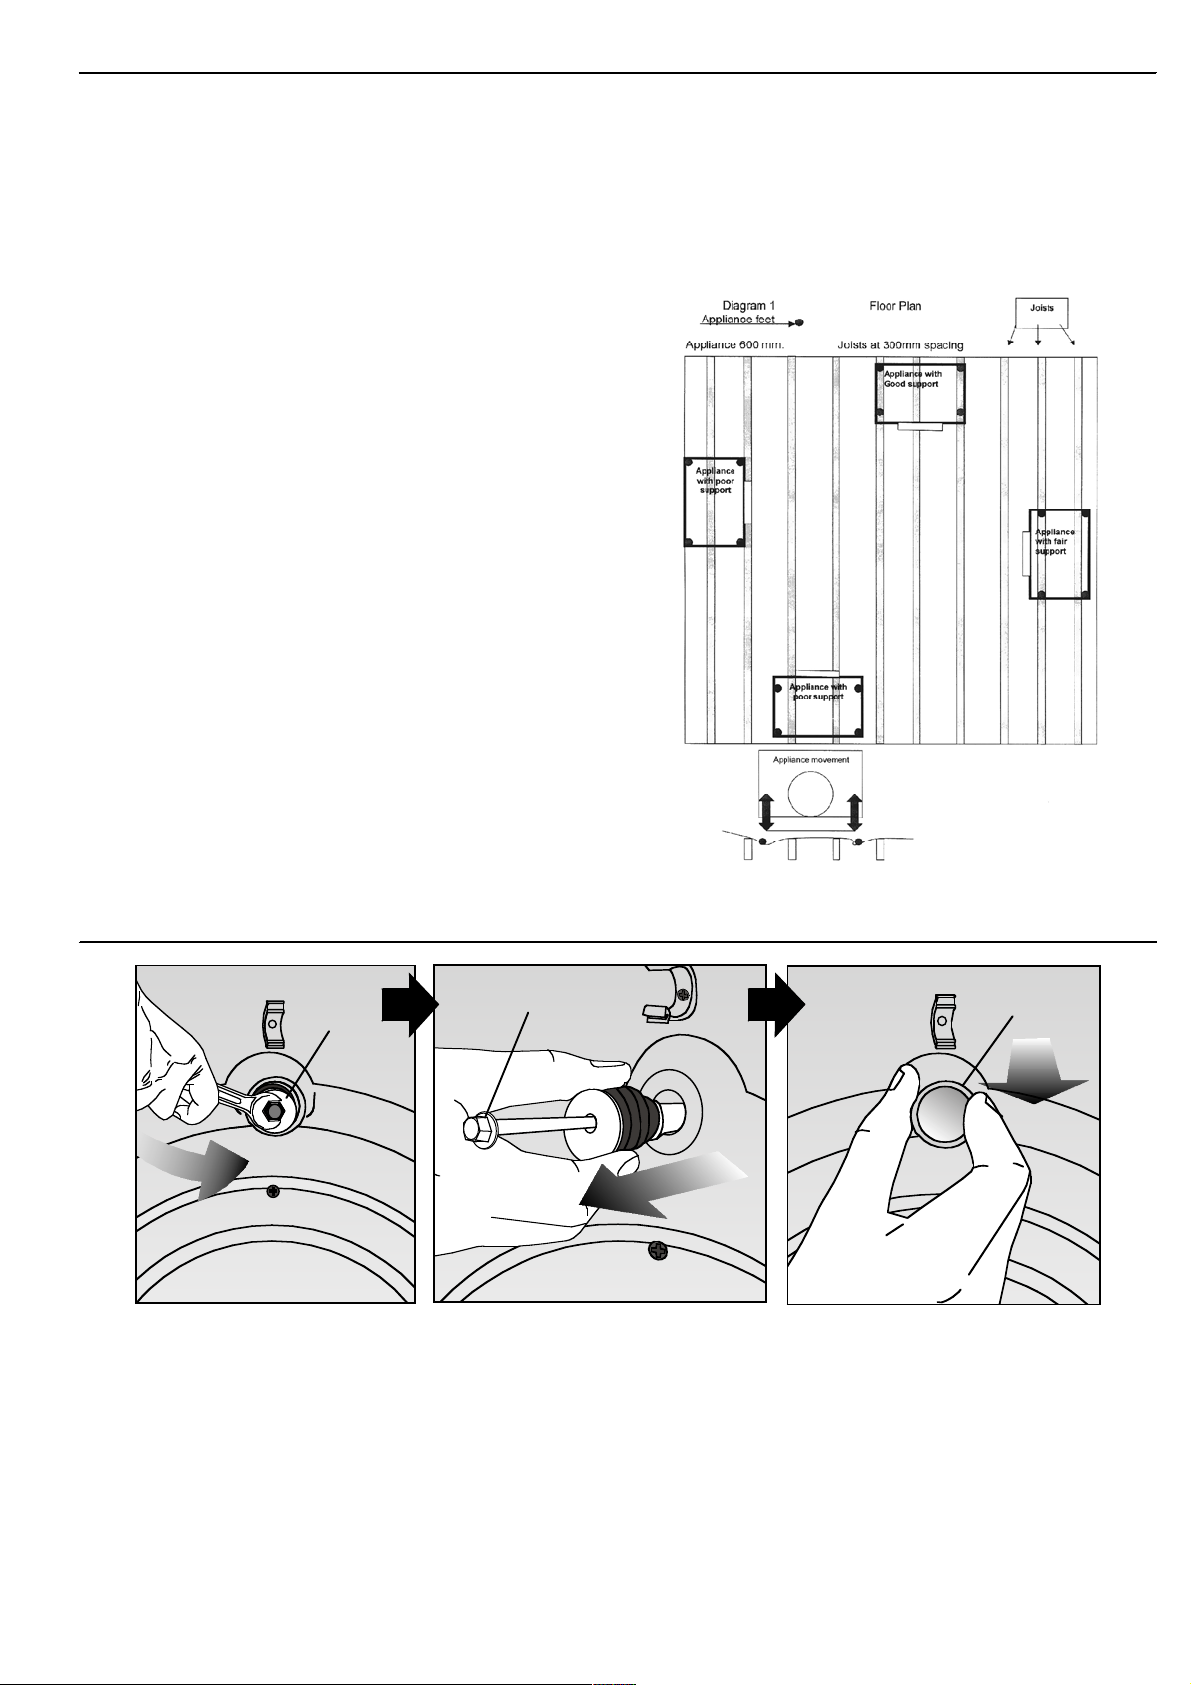
Removing transport safety bolts
The transport safety bolts must be removed
before any operation of the machine.
1 Turn the bolt heads C anti-clockwise until
the bolt can be partially withdrawn.
2 Remove them and the rubber bushes by
pulli
ng outwards. An up/down action and
a small squirt of washing up liquid will ease
removal.
3
Plastic plugs, supplied inside the protective
bag, designated P, should be placed in the
safety bolt holes as shown.
Attention!
Keep the safety bolts for future
transportation and reinstate them before
transporting your machine. Never transport
your machine without the transport bolts in
position. Any resultant damage is not covered
by the warranty.
location
C
P
C
5
You can locate the washing machine
anywhere (except bathrooms, showers and
away from rain, damp places and water) as
long as you have hot and cold water supply,
drainage and electrical connection alongside.
Ensure there is clearance each side of the
machine to allow slight side ways movement
during washing and spin drying.
Attention!
Never place your machine on a carpet. This
prevents air circulation. The electrical
components of the machine may overheat and
may cause damage.
Please ensure the power, water supplies
and waste are suitable, if in doubt, consult a
qualified plumber or electrician.
In the case of floating, or any form of
suspended floor, the flooring joists must be
constructed in a way to fully support machines
that, when loaded, can exceed a weight of
90kgs, and therefore the area directly beneath
the appliance must be additionally supported
directly from the sub-floor in a way to
adequately prevent excessive vibration and
movement on the machine’s spin cycle.(Please
see diagram 1)
In addition to this, washing mach
ines should
not be installed on carpet, foam backed
laminate, or parquet flooring where the nature
of these types of flooring can also contribute
to the inefficient operation of the washing
machine on the spin cycle.
installation
6
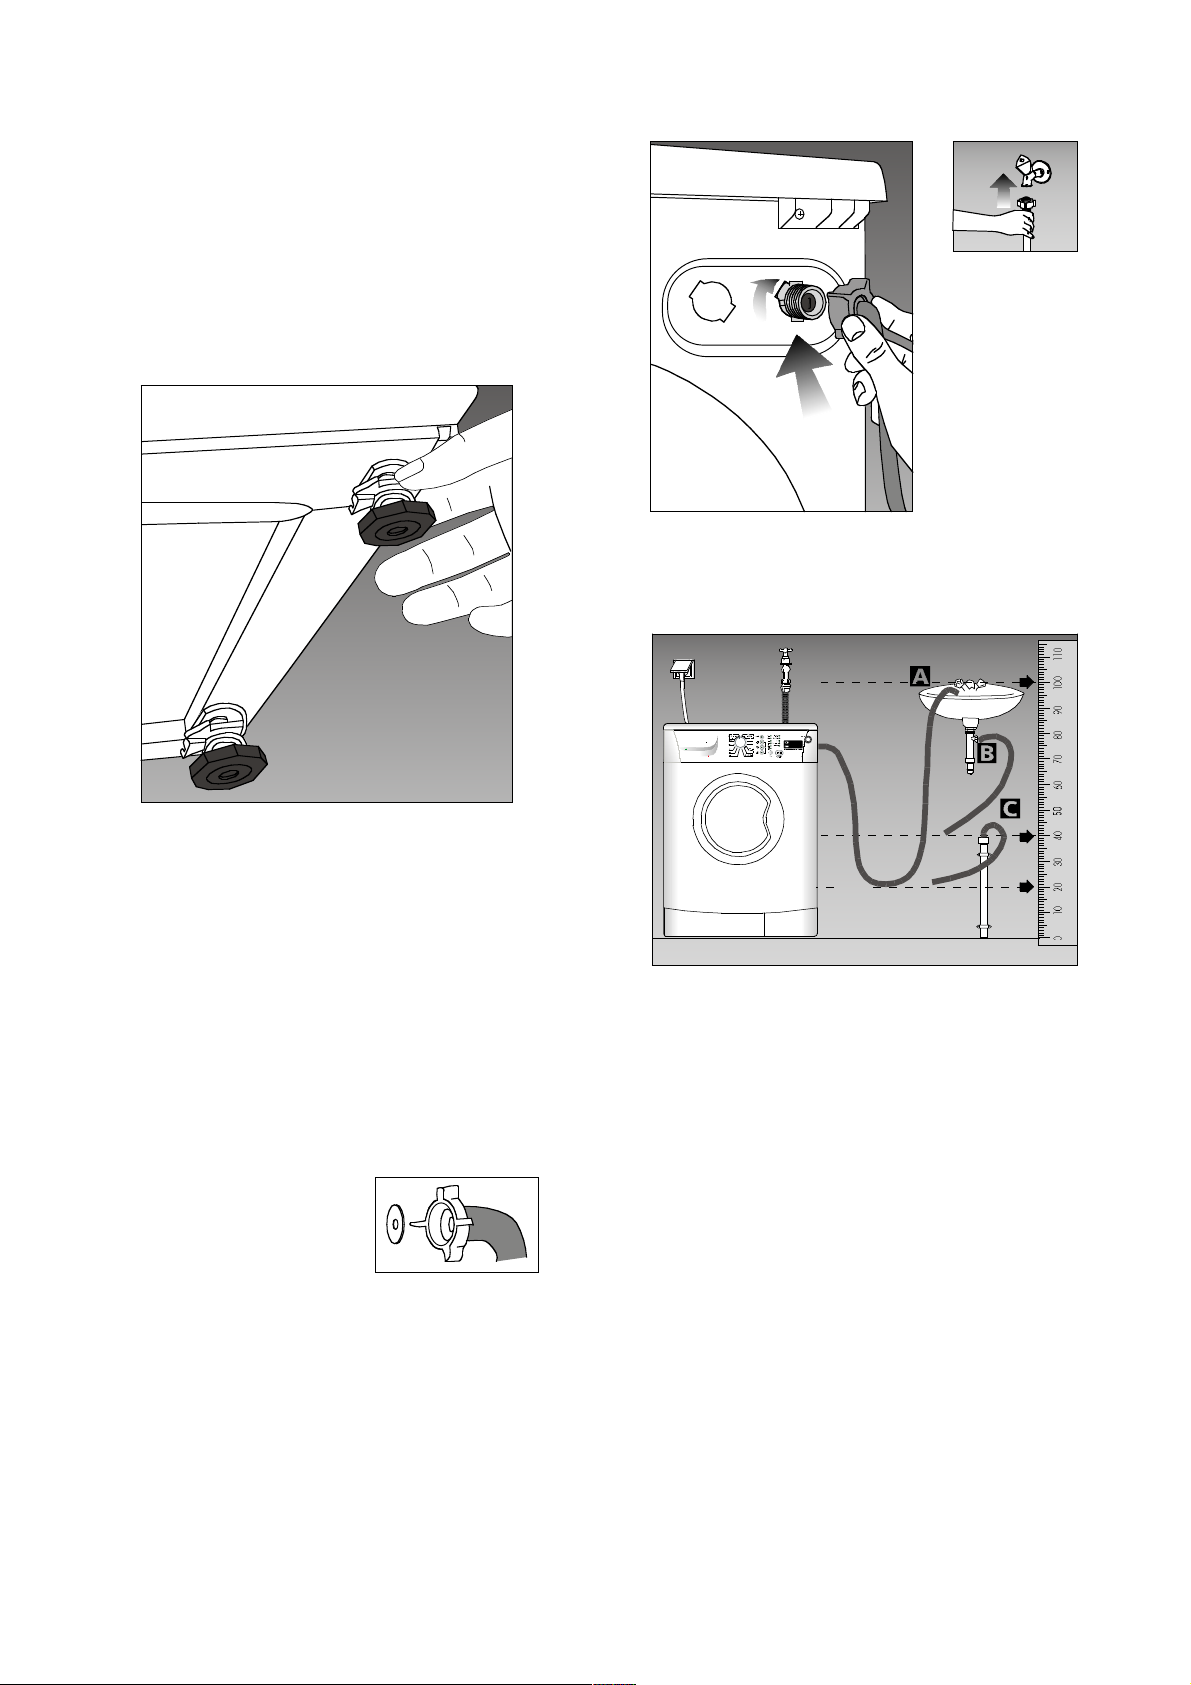
Drain hose
The drain hose should be placed and secured
either at the side of the sink A, directly to the
drain B or directly to the waste water
inlet C.
• The hose should not be bent.
• Using method A, the drain hose should be
secured with the elbow so that it can not
be dislodged.
• The waste pipe must only be connected
into the foul drains and not surface water
drainage system.
• The hose should be placed between 20 and
80cm from the floor level and must not be
extended otherwise the machine may not
empty the waste water.
• The m
inimum diameter of any external pipe
must be 32 mm.
Water inlet connection
Your machine comes with cold water
connection only.
Connect the cold water using the hose with
blue printing or colour.
Cold water supply
For proper operation, the pressure of cold
water should be between 1 and 10 bars. (1
bar corresponds to more
than 8 litres per minute
flow rate with a fully open
tap.)
To prevent water leaks,
sealing washers are
supplied with the water inlet hose inside the
machine. Place these on the hose end and
tighten both ends fully.
In order to prevent any water leakage and
damage, turn off the water tap when not in
use. Connect the cornered end of the hose to
the machine water inlet.
The washing machine should be connected
via new hose sets and the old hose sets should
not be reused.
min.
Feet adjustment
To ensure quiet and stable operation, the
machine should be positioned correctly and
on the level. If the machine is unstable, adjust
one of the front feet by loosening the plastic
lock nut and screwing or unscrewing the foot
until the machine is level. After positioning,
tighten the lock nut.
5
 Loading...