


 Loading...
2
Table of contents |
|
Chapter 1 Introduction........................................................................................... |
4 |
What is energyXT?.......................................................................................................... |
4 |
Main features at a glance..................................................................................................... |
4 |
About the manual........................................................................................................... |
5 |
Which aspects of the software are covered?................................................................ |
5 |
Conventions used in the manual...................................................................................... |
5 |
Comparison between energyXT2.5 and energyXT2.5 Compact........................... |
7 |
Entering Demo mode in energyXT2.5 Compact......................................................... |
8 |
Upgrading energyXT2.5 Compact to energyXT2.5.................................................... |
8 |
Chapter 2 Setup....................................................................................................... |
9 |
Portable (All OSes).......................................................................................................... |
9 |
Installation....................................................................................................................... |
9 |
Windows / Mac OS / Linux................................................................................................... |
9 |
Activating your copy of energyXT............................................................................... |
9 |
Software and hardware setup...................................................................................... |
9 |
Setting up your audio interface and hardware MIDI controllers........................... |
9 |
Setting folder paths............................................................................................................. |
11 |
Setting the look of the user interface............................................................................ |
11 |
Chapter 3 The Basics.............................................................................................. |
12 |
Structure of energyXT................................................................................................. |
12 |
Basic functions....................................................................................................................... |
13 |
Edit functions......................................................................................................................... |
14 |
Global settings....................................................................................................................... |
16 |
Chapter 4 Multitrack Audio Recorder.................................................................. |
17 |
The setup........................................................................................................................ |
17 |
2-channel setup.................................................................................................................... |
18 |
Multi-channel setup............................................................................................................ |
19 |
Audio recording step by step..................................................................................... |
20 |
Creating a Project................................................................................................................. |
20 |
Adding Audio Tracks............................................................................................................ |
20 |
Routing audio inputs and outputs................................................................................. |
21 |
Monitor settings.................................................................................................................... |
21 |
Setting the input signal level........................................................................................... |
22 |
Configuring the metronome............................................................................................ |
23 |
Recording takes..................................................................................................................... |
23 |
Exchanging a part of a recorded take with a new recording................................ |
24 |
Working with patterns........................................................................................................ |
25 |
Creating dynamic volume changes (energyXT2.5 only)......................................... |
26 |
Embedding loop samples.................................................................................................. |
28 |
Editing audio.......................................................................................................................... |
30 |
Crossfade................................................................................................................................. |
30 |
Beatslice................................................................................................................................... |
30 |

3
Creating a mix............................................................................................................... |
31 |
|
Adjusting channel volume and Pan............................................................................... |
31 |
|
Using send / insert effects................................................................................................. |
31 |
|
Shaping sound with the equalizer................................................................................. |
34 |
|
Creating submix groups..................................................................................................... |
34 |
|
Remote mixing...................................................................................................................... |
35 |
|
Multiple track recording.............................................................................................. |
38 |
|
Editing multiple Parts simultaneously.......................................................................... |
41 |
|
Chapter 5 |
MIDI Sequencer.................................................................................... |
42 |
MIDI setup with a master keyboard and virtual tone generators....................... |
42 |
|
MIDI setup with hardware tone generators................................................................ |
43 |
|
MIDI recording step by step....................................................................................... |
44 |
|
Creating a Project................................................................................................................. |
44 |
|
Adding Instrument Tracks................................................................................................. |
45 |
|
Using virtual instruments.................................................................................................. |
45 |
|
Routing MIDI inputs and outputs................................................................................... |
46 |
|
MIDI thru settings (MIDI monitoring)............................................................................ |
48 |
|
Configuring the metronome............................................................................................ |
49 |
|
Recording takes..................................................................................................................... |
49 |
|
Quantizing MIDI events...................................................................................................... |
50 |
|
Overdub recording............................................................................................................... |
53 |
|
Punch recording.................................................................................................................... |
53 |
|
Working with patterns........................................................................................................ |
54 |
|
Editing MIDI events.............................................................................................................. |
55 |
|
Remote controlling Instrument Tracks.......................................................................... |
60 |
|
Using the Drum Track.......................................................................................................... |
61 |
|
Freezing tracks (energyXT2.5 only)................................................................................ |
65 |
|
Chapter 6 Virtual FX Rack..................................................................................... |
66 |
|
Guitarist / Keyboardist live setup.................................................................................... |
66 |
|
Guitarist / Sound Designer studio setup...................................................................... |
67 |
|
Building a virtual FX rack step by step..................................................................... |
67 |
|
Creating a Project................................................................................................................. |
68 |
|
Using the Modular view to build effect chains.......................................................... |
68 |
|
Setting the input signal level........................................................................................... |
71 |
|
Effect racks (Guitar Amp)................................................................................................... |
71 |
|
Remote controlling effect parameters.......................................................................... |
72 |
|
Routing the input signal to an Audio Track................................................................. |
73 |
|
Chapter 7 |
Appendix.............................................................................................. |
74 |
Using energyXT on multiple systems....................................................................... |
74 |
|
Keeping Project data together........................................................................................ |
74 |
|
Transfering data and restoring paths............................................................................ |
74 |
|
Switching between OSes................................................................................................... |
74 |
|
Glossary.......................................................................................................................... |
75 |
|
Support........................................................................................................................... |
|
76 |

4
Chapter 1 Introduction
What is energyXT?
EnergyXT is an integrated powerful music production environment. A one-stop solution for making music so to speak. Whether you are a song writer who wants to record "hand-made" music, a producer who wants to tap the full potential of a software-based production environment, a sound designer who wants to shape sound, or a podcaster who is looking for a solution to simply cut his casts: energyXT is for you.
EnergyXT comes with all components of a professional recording studio such as a modular mixer, versatile EQs, a MIDI sequencer and the potential to use an unlimited number of commercially and freely available VST instruments and effects — all powered by a pristine and streamlined audio engine. It even brings along its own integrated sound sampler and synthesizer. Record audio, incorporate external sound modules, play top-notch software synthesizers and create mixes in a mixer environment, where nearly every parameter can be automated. There's much more to discover in energyXT. Find out for yourself by reading this manual.
Main features at a glance
EnergyXT has unique advantages over other music production suites making your work much easier and more efficient.
First of all it's organized in views rather than in window layers. MIDI and audio events can be edited right within their residing tracks. In fact every parameter and function can be controlled in one of the three main views without having to switch between different windows.
EnergyXT supports drag & drop transfers of VST instruments, effects and audio files and makes setting up a new production environment just a matter of a few minutes.
Each component of energyXT is part of a modular environment where instruments and mixer channels can be freely connected to each other. This opens up a variety of applications in which some sequencers simply fail.
Best of all, you can take energyXT with you anywhere you want to. Just copy the application files to a USB flash drive and you're ready to make music within a minute on every computer without having to undergo lengthy installation and configuration procedures.
The Sequencer
The Sequencer is the heart of energyXT.That's where the music is being composed.The Sequencer supports MIDI and audio tracks for recording plus additional folder tracks for grouping. Events are clearly organized in Parts which can be freely distributed in a classic timeline view. Every Part features a powerful integrated piano roll editor for editing notes and controller events such as Modwheel or Pitch Bend. To avoid a high CPU load, tracks can be frozen to temporarily free up resources. Modern hooks and lines can be simply created with the multi-mode Arpeggiator and the Swing / Shuffle control, whereas rhythms can be easily imported as REX2-slices or WAV / AIFF files for a fast production process. The playback options for audio include high-quality timestretching, pitched and reverse playback.
The Drum Track
The Drum Track of energyXT is a special audio track with a built-in drum sampler and a powerful drum machine-like editor for easy rhythm creation.Trigger notes are created by placing note events in a grid which also grants direct access to volume, pan and filter cutoff parameters. Samples are organized in sampler cells and can be saved as a drumset preset for later use.
Introduction

5
The Mixer
The Mixer is the control center of energyXT. It houses all audio signals as separate channels which can be added dynamically. Parameters can either be automated from the Sequencer or controlled remotely from an external MIDI controller. With an unlimited number of possible VST effects, both insert and send, 4-band channel EQs and additional submix groups, mixing is as comfortable as it gets.
The Modular environment
The Modular environment is the core of energyXT and all its components. It serves as a multi-functional patchbay where each synthesizer, audio input / output, audio channel and effect can be freely routed. This opens up some exceptional application scenarios which can be realized with energyXT.
The Synth / Sampler
The built-in Synth is a complex phase modulation synthesizer and sampler for creating complex sound layers. With 4 LFOs powered by a complex modulation matrix, a versatile multi-mode filter, 6 envelopes and phaser, chorus, flanger, delay and reverb effects it meets all requirements you'd expect from an all-in-one sound workstation.
The Browser
The built-in Browser grants quick access to all energyXT relevant sound samples, instruments, effects and presets and supports drag & drop functionality. With the quick search bar even large amounts of sound samples can be browsed within seconds.
About the manual
For easy understanding, all sections are supported by multiple screenshots. This concept helps you to get to know the software and its possibilities in a fast and easy way.
On the last pages you can find a glossary which contains a brief description of important terms used throughout the manual. Refer to these explanations for background information on selected terms.
Which aspects of the software are covered?
This manual covers all important aspects of music production with energyXT. From MIDI to audio recording and editing you will find all the information you require to get the most out of the software quickly. The chapters are specifically tailored to different user groups and tasks. It should be easy to find at least one of these topic-related chapters useful for your work.
However there is still a lot more to discover within energyXT. Find out for yourself once you know the basics. Don't miss the online tutorials and the community support at www.energy-xt.com.
Conventions used in the manual
Menu functions and energyXT terms
Functions that can be reached via menus are described as follows:
◊File > Open
The first entry identifies the menu name. It is followed by one or more sub entries which name the menu function. Entries are separated with the ">" symbol.
œœ For many functions you can also use the context menu (right-click).
EnergyXT related terms are printed as they appear in the application, which is most often in Sentence case.
Introduction

<![endif]>Introduction
<![endif]>6
Feature |
energyXT2.5 |
energyXT2.5 Compact |
|
|
|
General |
|
|
|
|
|
Portable |
Yes |
Yes |
|
|
|
VST version (for use with other hosts) |
Yes |
No |
|
|
|
Max. bit / sampling rate |
32-bit / 192 kHz |
32-bit / 192 kHz |
|
|
|
Number of tracks (Audio, Instrument, Drum, Folder) |
Not restricted |
8 |
|
|
|
Audio input / output channels |
32 / 32 |
8 / 8 |
|
|
|
MIDI In / Out ports (16 ch. each) |
Not restricted / 1 |
1 / 1 |
|
|
|
Mixer |
|
|
|
|
|
Available channels |
Not restricted |
Not restricted |
|
|
|
Send effects |
Not restricted |
2 |
|
|
|
Insert effects |
Not restricted |
2 per channel |
|
|
|
4-band EQ on all channels |
Yes |
Yes |
|
|
|
Modular environment / Sequencer |
|
|
|
|
|
Modular environment view / edit |
Yes |
Yes |
|
|
|
Number of Mixer / Sequencer Components |
Not restricted |
1 / 1 |
|
|
|
Simultaneously usable instruments |
Not restricted |
8 |
|
|
|
Sequencer |
|
|
|
|
|
Arpeggiator |
Yes |
No |
|
|
|
Shuffle quantize |
Yes |
Yes |
|
|
|
Track freeze / Bounce to track |
Yes |
No |
|
|
|
eXT Synthesizer / Sampler, Multi-effect, Drum sampler |
Yes |
Yes |
|
|
|
Remote controller support |
Yes |
Yes |
|
|
|
Offline mixdown |
Yes |
Yes |
|
|
|
|
REX2 (Windows / Mac), WAV / AIFF (all OSes) |
WAV / AIFF (all OSes) |
Supported audio formats |
MP3 import/export (if free 'lame.exe' installed (not |
MP3 import only (if free 'lame.exe' installed (not |
|
included)) |
included)) |
|
|
|
Resample |
Re-pitch, Stretch |
Re-pitch, Stretch |
|
|
|
Edit MIDI controller events |
Static, Envelope |
Static |
|
|
|
Full eq/fx strip per Drum sampler slot |
Yes |
No |
|
|
|

7
File and folder names
File and folder names are put in quotation marks:
◊"energyXT2.exe"
Shortcuts
Keyboard shortcuts can be used to trigger various functions of energyXT. They are displayed as follows:
◊Ctrl + S
A key combination is separated by a "+". Press the keys simultaneously to trigger the function.
œœ Shortcuts mentioned in this manual refer to the default keyboard shortcut scheme.
Screenshots
In the manual all screenshots has been taken from the Light skin of energyXT. For more information on how to change the skin of your application, see chapter Setting the look of the user interface.
User groups
Each application chapter begins with a list of target user groups. Use the list below to identify the user group profile that matches your interests. With this classification it should be easy to find the chapter(s) that are of interest to you.
The target groups covered in this manual are :
◊Podcaster: cuts and fades audio snippets and prepares multiple tracks for mixdown.
◊Sound Designer: cuts samples and creates new sounds by usingVST effects, time stretching algorithms and sound layering.
◊Mastering Engineer: cuts and creates mixdowns by using equalizers and shapes the dynamic level of signals by using VST effects.
◊MIDI-Producer: records MIDI data and makes use of VST instruments and internal drum pattern creation.
◊Songwriter: records instruments with simultaneous playback of previously recorded tracks and uses input signal processing with VST effects.
◊DJ: re-organizes audio snippets and uses VST effects with remote control for live application.
◊Guitarist / Keyboardist: uses VST effects for signal processing instead of outboard equipment.
Terminology
In the manual the term energyXT is used to describe both the full version energyXT2.5 and the light version energyXT2.5 Compact. Differences between these two versions are stated, if necessary. For details, refer to the table on the previous page.
Comparison between energyXT2.5 and energyXT2.5 Compact
EnergyXT2.5 is the full featured software suite. It is sold separately as a boxed version or can be downloaded from www.energy-xt.com.
EnergyXT2.5 Compact is the light version of energyXT2.5 with selected functionality (see table on page 6). It is sold with selected hardware (e.g. BEHRINGER). EnergyXT2.5 Compact users can explore all functions of
the full version at any time by entering a special Demo mode (see page Basic functions).
Introduction

8
Entering Demo mode in energyXT2.5 Compact
EnergyXT2.5 Compact users can explore all functions of the full version by entering a restricted Demo mode. In Demo mode, you can test the full potential of the software, but you can't save a Project.
As soon as you are about to use an exclusive energyXT2.5 feature you'll receive a notification. Click on
◊Try to enter Demo mode and test the function.
◊Cancel to abort and go back to energyXT2.5 Compact mode.
œœ Remember to always save your projects before entering Demo mode to prevent data loss.
Upgrading energyXT2.5 Compact to energyXT2.5
Registered energyXT2.5 Compact users may upgrade to the full version of energyXT2.5 at www.energy-xt. com or by using the menu XT > Upgrade now ....
Introduction

9
Chapter 2 Setup
EnergyXT has a unique feature that separates it from many other music production software — It can be used as a portable application which can be launched from removable devices like USB flash drives. This gives you the opportunity to take your whole setup with you and make music on different computers. Of course, you can also conventionally install the software on a single computer.
Portable (All OSes)
To launch energyXT without installation, you simply have to copy the complete energyXT folder to a target device (e.g. USB flash drives, hard disks) you wish the application to run from and execute the file "energyXT2". See chapter "Using energyXT on multiple systems" for details on how to use energyXT on different computers.
Installation
Windows / Mac OS / Linux
To install energyXT:
i.Visit the online tutorial at www.energy-xt.com or refer to the Quick Start Guide for details on how to install energyXT on your operating system.
Activating your copy of energyXT
As soon as you launch energyXT for the first time, you will be prompted to enter your name and the serial number that came with your software. Provide the requested information to activate the software.
œœ If you choose not to enter the requested data, energyXT will run in Demo mode. You can enter your serial number when launching the program at any time.
Right after activation you will be prompted to register your product. Registration enables you to always receive the latest updates and news.
œœ The registration process requires an active internet connection.
Software and hardware setup
Setting up your audio interface and hardware MIDI controllers
Before you can start to make music you first have to configure the software, to ensure that your hardware works properly with energyXT. The list below notes required hardware for different applications.
If you
◊are using external MIDI hardware, such as synthesizers, drum machines or samplers, you need at least a MIDI interface.
◊are using VST software instruments you need at least a MIDI input device, such as a remote control or a keyboard and an audio interface.
Setup

10
◊record and play back audio you need an audio interface.
EnergyXT supports audio interfaces with DirectSound (DS) / ASIO on Windows, Core Audio on Mac OS X and ALSA on Linux operating systems.
œœ If you want to work with VST instruments or record audio, it is strongly recommended that you use a professional audio interface to ensure low latency audio.
œœ Connect and install all hardware before you enter the Setup of energyXT.
Setting up your audio interface
To set up your audio interface:
i.Go to File > Setup > Audio.
ii.Under Device, choose the appropriate driver type for your audio interface.
EnergyXT automatically detects your audio interface and chooses the best driver type.
iii.Identify your hardware in the subsequent field.
iv.Under Buffer size, choose an adequate latency setting.
œœ As a rule of thumb a low latency setting implies better audio performance, but the best setting for your system depends on your hardware. If you experience audio dropouts, try higher values. A reasonable entry to start with would be 1024 samples.
v.Under Sample rate and Record, choose the recording and playback settings.
œœ If possible, choose 24-bits for high-quality recordings.
vi.Check the inputs and outputs of your audio interface you want to use under Audio inputs and Audio outputs.
œœ Make sure that at least one pair of inputs and outputs is active.
Setting up your MIDI hardware
To set up your MIDI hardware:
i.Go to File > Setup > MIDI.
ii.Check your MIDI hardware under MIDI inputs and MIDI outputs.
œœ Remember to connect and activate both inputs and outputs for devices which rely on a MIDI data loop to work properly (e.g. motorized fader remote control, keyboard with a tone generator).
Setup
11
Setting folder paths
EnergyXT offers a file browser which grants quick access to plug-ins, presets, projects and samples. To use the Browser effectively, you have to set the necessary folder paths first.
To set the folder paths for the Browser:
i.Go to File > Setup > Browser.
ii.Select the entry for which you want to set the folder path.
iii.Click on Add to add an entry to the list.
iv.In the browser window, navigate to the folder which contains the respective files and confirm by clicking on OK.
œœ You can add multiple folder paths to each category.
v.Repeat steps ii.-iv. to include all folders that contain relevant files.
Setting the look of the user interface
The user interface of energyXT can be set to either dark or light colors, according to your preference.
EnergyXT2.5 users can download additional skins from www.xt-user.com.
To set the look of the user interface:
i.Go to File > Setup > Looks.
ii.Click on the respective entry to set the user interface to either Light or Dark colors.
Alternatively, click on Open to apply a downloaded skin.
œœ You may also customize the look of your interface. Use the browser to change the look of all elements within the application manually
Setup

12
Chapter 3 The Basics
Target user: All users
Structure of energyXT
The main window
Before you can start making music you have to learn the basics of energyXT first. The basic structure of energyXT is simple but effective. The main window is divided into three areas.
1 The menu bar and global control area
The menu bar shows the options available for each of the three views (Modular, Sequencer, Mixer). Below you see from left to right the Recent Projects drop-down list, the MIDI input meter with the controller mapping options, the metronome icon, the tempo designation for the Project, the transport controls, the mixdown icon and the song position timer. The text to the bottom right (actually Arpeggiator Mode) changes according to the function where the mouse pointer actually hovers above. Always keep an eye on this needful information to identify the different functions, especially if you are not familiar with them.
The Basics
13
2 The Browser area
With the Browser you can easily explore all plug-ins, presets, projects and samples on your computer, as long as you have located all relevant folders in the Setup beforehand. Each global entry in the Browser grants direct access to the deposited folders without cumbersome navigation. Via the Disks entry you can also explore all drives of your computer. The Audio pool entry lists all samples that are currently in use by your Project. Next to the magnifying glass is the search field which helps to locate files quickly.
3 The main working area
The content of the main working area depends on the active view. It either shows the Modular, the Sequencer or the Mixer view. You can switch views by clicking on the respective entry in the global control area. The actual screenshot shows the Sequencer view. You can easily add additional views for VST instruments and effects, by selecting Add from the context menu, which proves especially useful for laptop users.
Basic functions
Before we go into detail with the application chapters it's necessary to understand the basics of energyXT. Some functions apply to all views, others only apply to one of the three views. The following paragraph headings include the view to which the described function applies to in brackets.
Many functions are assigned to keyboard shortcuts. Refer to the function list under File > Setup > Shortcuts to look up or change shortcuts.
Navigation
Navigating through energyXT works in the same way as in every other application. However there are a few things you need to know.
Using the mouse wheel to zoom and navigate (All views)
You can use the mouse wheel to navigate through each view horizontally. Turning the mouse wheel with the Ctrl key depressed affects the horizontal zoom in the Sequencer view.
Entering values (All views)
You can change value entries in energyXT by either double-clicking on an entry and making a numeric entry with the keyboard or by click-holding the entry and dragging the mouse up to increase and down to decrease the value. A few entries can also be changed via context menus with a right-click.
Scrolling editor windows (All views)
You can scroll any editor window by dragging the mouse, with the right mouse button depressed, in any direction.
The transport controls (All views)
EnergyXT has five transport buttons which are similar to those you can find on most hi-fi recording units (e.g. MD recorder and tape deck). From left to right, the buttons are as follows:
◊Play: to start the song playback
◊Stop: to stop the song playback
◊Rewind: to go back to the beginning of a song
◊Loop: loops the selected range for playback or recording
◊Record: to start a recording with the selected tracks
The Basics
14
The song position pointer and timer (Sequencer)
The song position pointer shows the actual playback position. It is represented by a vertical bar in the Sequencer view. By default, the position pointer causes the track view to scroll with the actual position during playback. You can place the song position pointer by clicking into the bar line above the displayed tracks.
The song position timer shows the actual position of the song position pointer. It is located next to the transport controls. You can change the format from bar count to time count by clicking on the display.
Edit functions
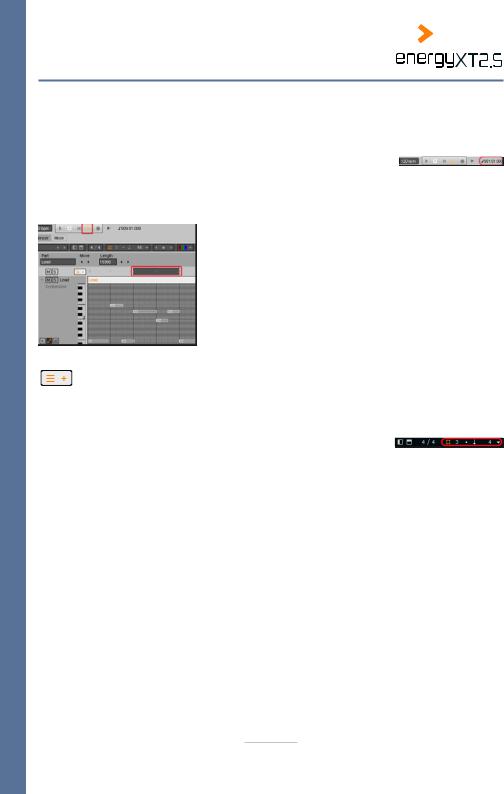
Setting a playback / recording range (Sequencer)
You can define a playback / recording range in the bar line. Click on the bar line and, with the mouse button depressed, draw the range from beginning to end. Once set, you can alter the range by moving the left and right edges with the mouse.
EnergyXT can loop the selected range for playback or recording. You can use this feature for overdub recordings. Click on the arrow next to the Record button in the transport controls to switch between loop and forward mode.
The Quick add button (Sequencer)
The Quick add button gives you quick access to all available tracks in energyXT. Click on the button and select a track template to easily add a new track to your project. Choose between Synthesizer, Drum sampler, Audio, Guitar Amp and VST tracks.
The grid snap function (Sequencer)
EnergyXT has a convenient grid function which causes the song position pointer to snap to predefined note values. This is especially useful to make exact selections and move Parts and notes on a musically time basis to rasterized positions.
You can activate / deactivate the grid function by clicking on the hash. Use the triangle to the right to set the grid value. To select triplet and dotted note values, set the 3 and the dot next to the hash active (orange). To switch between absolute and relative snap positions, use the arrow. The grid snap setting likewise defines the grid for the note quantization.
Editing Parts (Sequencer)
In energyXT, the content of each track is displayed as Parts on a timeline. Parts may have any size. A reasonable length would be a few bars, e.g. for chorus and verse. Smaller Parts may represent short musical phrases which can be easily reused throughout the whole Project.
EnergyXT creates a new Part ranging from the beginning of the recording to the end with every new recording. You can move Parts by grabbing the Part with the mouse and dragging it with the mouse button depressed to a new location on the same or another track. To make a copy of a Part, hold down the Ctrl key while dragging the Part. The length of each Part can be altered by moving the left and right edges with the mouse. You can select multiple Parts by clicking on the Parts' name with the Shift key depressed or by clicking into the track view and with the mouse button depressed drawing a selection rectangle.
œœ Make use of the grid snap function to place Parts at musical positions.
The Basics

15
Edit mode for tracks (Sequencer)
You can switch each track into edit mode by double clicking on its name. In edit mode, you see a more detailed view of the track content for editing. The view depends on the track type.
◊Instrument Tracks display note events in a piano roll editor.
◊Audio Tracks display a detailed view of the waveform.
◊Drum Tracks display note events with additonal drum specific controller data entries.
All track types support the display of additional MIDI controller data.
To change the vertical size of the edit view, grab the bottom of the track with the mouse and drag it upwards or downwards.
Naming tracks (Sequencer)
You can name tracks by right-clicking on the track and choosing Rename.
Rendering Project (All views)
Once you finished your song you'd probably want to export the Project to a sound file. EnergyXT offers a downmix function to finalize your music with all settings and effects. Choose File > Export Project (wav, aif, mp3) or use the quick button next
to the transport controls to render a WAV, AIFF or MP3 file (energyXT2.5 only).
Under Format, choose the quality and file type of your mixdown.You can either export the complete project or the selected playback / recording range. Click on Start and choose a destination and a proper name to complete the operation.
œœ Exporting your project to MP3 format requires an MP3 encoder/decoder to be installed. For more information, refer to the energyXT2.5 Quick Start Manual or visit www.energy-xt.com.
The Basics

16
Global settings
Song tempo / Signature (All views)
The song tempo and signature indicators show the current tempo in beats per minute (bpm) and the song's metric scheme. You can change both by clicking into the appropriate fields.
Info panels (Sequencer)
EnergyXT provides two info panels which show important options for the selected track or Part. The panels can be activated / deactivated by using the symbols next to the signature indicator.
◊ The horizontal panel grants access to important track and Part options
◊The vertical panel displays the mixer channel strip of the track and gives full access to all mixer functions.
œœ Make sure that both panels are visible as they provide valuable information and edit options.
Channel filters (Mixer)
In the Mixer view, you have access to all audio channels. By default all types of channels (Inputs, Outputs, Sends, Groups, Components) are displayed. You can choose which type of channel you want to see by clicking on + and checking the appropriate entries.
Mute and solo functions (Sequencer / Mixer)
You can switch tracks in the Sequencer view and channels in the Mixer view to Solo or Mute. You activate either entry by clicking on S (Solo) or M (Mute).
◊When you activate Solo only the selected track(s) / channel(s) are played back.
◊When you activate Mute the selected track(s) / channel(s) are not played back.
Accessing Components in energyXT (Modular)
EnergyXT features a powerful Modular view which can be regarded as a virtual patchbay. It allows for free signal distribution of MIDI and audio signals between physical inputs / outputs of hardware, virtual inputs / outputs of plug-ins and energyXT's Sequencer. Each element is called a Component and appears in the Modular view.
You can change the routing for each Component by right-clicking on its symbol. The context menu lists all possible input and output connections. Alternatively, you can connect the inputs / outputs of each Component by drawing a direct connection with the mouse. To do so, click on a connector square and, with the mouse button
depressed, drag the mouse pointer to the square of the Component to which you want to connect the selected Component. You can always break an established connection with a right-click on an occupied connector square.
The number of independent inputs and outputs for each Component is represented by a corresponding number of connector squares. Audio connections and connectors appear blue, MIDI connections appear green. Connections to physical inputs / outputs of your hardware are not displayed.
The Basics

17
Chapter 4 Multitrack Audio Recorder
Target user: Podcaster, Songwriter, Sound Designer, Mastering-Engineer
EnergyXT offers extensive capabilities for recording audio signals. Audio signals are generated by microphones when you record an acoustic instrument or a vocalist. Most commonly the signal of the microphone will pass a mixer and enter the computer through the audio interface. Some audio interfaces even allow for microphone signals to be plugged in directly. If so, you don't have to use an additional mixer unit. Another source of audio signals originate from guitars and keyboards. These instruments output an audio signal directly.
All audio signals that enter your computer can be recorded on Audio Tracks. Each Audio Track can be either mono (1-channel) or stereo (2-channel). The possible sample rate for audio signals complies with all professional standards across the world as long as your audio interface lives up to the specs of energyXT. Audio signals can be recorded either one instrument after the other or you may record a group of signals simultaneously (e.g. a live band).
The Mixer of energyXT lets you create mixes of your audio recordings with additional effects and equalizer settings.
The setup
Basically there are three different setups for recording audio signals in energyXT.
With a 2-channel (stereo) audio interface, you can either
◊record up to two mono signals on two dedicated Audio Tracks or one stereo signal on a single Audio Track. Each Audio Track then carries the dedicated input signal.
◊record several signals as a mix on a stereo track. The Audio Track then carries a mixed version of the input signals.
With a multi-channel audio interface, you can also
◊record several input signals on dedicated Audio Tracks. Each Audio Track then carries the dedicated input signal.
œœ The maximum number of independent record signals depends on the number of input channels of your audio interface and the energyXT version you are using (compare with table on page 6).
If you want to record instruments (either mono or stereo) one after the other, it's sufficient to use a 2-channel audio interface.
If you want to record a live rehearsal (e.g. band performance) and like to create a mix later on, you should record each input signal on a dedicated Audio Track with a multi-channel audio interface.
See the application examples on how to make the necessary connections for 2-channel and multi-channel recordings.
Multitrack Audio Recorder

18
2-channel setup
You need
◊a 2-channel audio interface with microphone inputs
or
◊a 2-channel audio interface with line inputs and a mixer.
œœ A suitable combination of an audio interface and a mixer is always desirable as it gives way more flexibility for different recording purposes. Actually it is a prerequisite if you want to record a signal mix with a 2-channel audio interface.
Microphone
(e.g. BEHRINGER B-2 PRO)
|
Electric Guitar |
CD Player |
|
|
ANALOG OUT |
|
DI |
INPUTS |
|
|
|
|
Box |
|
MIC IN 1 |
LINE IN 2 |
LINE IN 3/4 |
|
|
Active Monitor Speakers |
Analog Mixer |
|
(e.g. BEHRINGER MS40) |
|
CTRL ROOM |
|
(e.g. BEHRINGER |
|
|
|
OUT |
|
XENYX 802) |
|
|
|
|
|
CD/TAPE OUTPUT |
Laptop |
|
CD/TAPE INPUT |
||
UNBAL IN |
BAL/UNBAL OUT |
|
|
|
FIREWIRE 1 |
|
|
FIREWIRE |
Audio Interface (e.g. BEHRINGER FCA 202)
Multitrack Audio Recorder

19
Multi-channel setup
You need
◊ a multi-channel audio interface with microphone inputs
or
◊a multi-channel audio interface with line inputs and a mixer with direct outputs.
Microphone |
|
Electric Guitar |
|
|
|
|
(e.g. BEHRINGER B-2 PRO) |
|
|
|
|||
|
|
|
|
|||
|
|
Guitar Amp |
|
|
|
|
|
(e.g. BEHRINGER |
|
Keyboard |
|
||
|
|
LX210) |
|
|
|
|
|
|
|
|
|
|
Bass Guitar |
|
|
|
LINE IN 4-5 |
|
Bass Head |
|
MIC IN 1/2 |
|
LINE IN 3 |
|
|
(e.g. BEHRINGER |
|
|
|
|
BX4500H) |
|||
|
|
|
|
|
|
|
|
|
|
LINE IN 6 |
|
|
|
Analog Mixer |
|
|
LINE IN 7-8 |
|
|
|
(e.g. BEHRINGER |
|
|
|
E-Drums |
||
|
|
|
|
|
||
XENYX 2222FX) |
|
|
|
|
|
|
|
|
|
|
|
|
|
|
|
|
CHANNEL INSERTS 1-8 |
|
||
|
|
|
ANALOG IN 1-8 |
|
|
|
Multi-channel |
|
ANALOG OUT 1-2 |
FIREWIRE |
FIREWIRE |
||
|
|
|
|
|||
Audio |
|
|
INPUTS |
|
|
|
Interface |
|
|
|
|
|
|
|
|
|
|
|
|
Laptop |
|
Active Monitor Speakers (e.g. BEHRINGER MS40) |
|
||||
Multitrack Audio Recorder
20
Audio recording step by step
The following section will show you how to make use of the full audio potential of energyXT. On the basis of a typical recording application, all important aspects of audio recording are covered from adjusting input signal levels up to the final mix.
œœ Before you follow the instructions below, make sure you've already set up your computer and energyXT properly. See chapter "Setup" for details.
Each paragraph heading outlines the main steps you need to undergo to perform a typical audio recording. You may follow all of the paragraphs or simply pick the ones that are of interest to you. However, it might be useful to read all texts to get to know all the possibilities energyXT has to offer.
For better understanding, the guide reflects a real-life recording example by recording two acoustic instruments (guitar, vocals) one after the other and then adding a drum loop. You will learn how to record audio signals and mixdown all recorded tracks with effects. Later on, you may want to take this demo Project as a starting point and tailor it to your needs. Keep track of the demo Project's progress by reading the text after each diary icon.
Creating a Project
Before you can make a recording you have to create a Project. The Project is the foundation for your song and holds all musical data, settings and parameters.
To create a Project:
i.Go to File > New Project.
Alternatively choose the respective template from the Welcome screen.
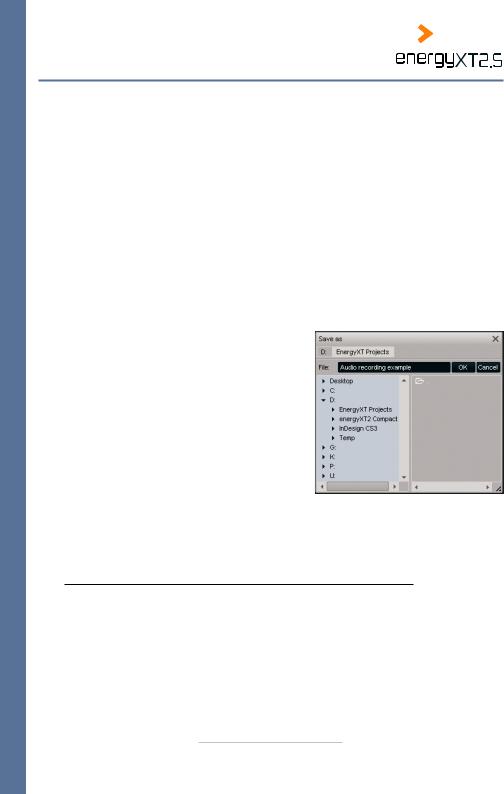
ii.Choose File > Save as... to call up the save dialog.
iii.Choose a folder for your Projects.
The save dialog of energyXT is similar to that of the Windows Explorer user interface. The left column shows the folder tree of your drives and the right column lists all subfolders and energyXT related files that are present in the selected folder. The selected folder path is displayed at the top of the window.
iv.Under File:, enter a reasonable name for your Project.
v.Click on OK to save the Project.
œœ You must save your Project before you start a recording.
In our example we created a new Project called Audio recording example and saved it to D:energyXT Projects.
Adding Audio Tracks
Audio Tracks in energyXT either carry a mono or a stereo signal. The quality of the recorded audio signal depends on the settings in the Setup. See chapter "Setting up your audio interface" for details. Common sample settings include 24-bits / 96000 Hz for DVD-A / SACD and 16-bits / 44100 Hz for CDDA.
Multitrack Audio Recorder
21
To add an Audio Track:
i.In the Sequencer view from the menu, choose Track > Add New > Audio Track.
Alternatively, use the context menu on the empty track column or select an already present Audio Track and doubleclick into the track column to add a new track.
ii.You may name each track to identify it easily. See chapter "Naming tracks (Sequencer)" for details.
iii.From the info panel, choose a recording format.
Select Stereo for signal sources such as CD players and keyboards.
Select Mono for signal sources such as a microphone and guitar signal.
œœ Alternatively, you can use the Quick add button next to the bar line to add a new track.
In our example we created two stereo tracks named Guitar and Drums and a mono track for the Vocals.
Routing audio inputs and outputs
By default each AudioTrack is connected to an available input / output Component of energyXT. See chapter "Accessing Components in energyXT (Modular)" for details on Components. The actual routing appears in the Input and Output fields of the info panel.
If you have a 2-channel audio interface:
or only activate two channels of a multi-channel interface in energyXT's Setup:
i.Choose Audio In as Input and Audio Out as Output, if not already preselected.
If you have a multi-channel audio interface:
i.Choose the Input and Output of your audio interface from the drop-down list.
The entries are named consecutively in pairs, e.g. [1+2]
Audio In, [2+3] Audio In. Choose the Input and Output according to the connections you made to your audio interface.
œœ It is possible to mix input signals by activating more than one Audio In Component of an Audio
Track. The same goes for the output.
In our example we set all Audio Tracks to the default Audio In and Audio Out routing.
Monitor settings
The monitoring determines whether the input signal can be heard or not. By default the input signal is always active. However, you may want to change the option depending on your hardware setup to prevent audio feedback loops.
Multitrack Audio Recorder

22
The monitoring options in energyXT are as follows:
◊Off: Disables monitoring.
◊Auto: Enables monitoring anytime (Default setting).
◊Record: Enables monitoring only during recording.
◊Manual: Enables monitoring only if the monitoring for each track is activated in the track column.
To adjust the monitoring settings:
i.From the menu, choose Options > Monitor and select the appropriate setting.
In our example we chose the default setting Auto.
Setting the input signal level
Setting a proper signal level for the input signal is very important in order to avoid annoying artifacts.
If the level of the input signal is
◊too high the signal will distort.
◊too low the signal probably will be covered with noise and results in a falsified sound.
You can adjust the level of the input signal in the Mixer view. The Mixer is organized in channel strips.
To set a proper input signal level, you need to be familiar with the following elements:
◊The Trim for boosting or lowering the input signal level at the top.
◊The level fader with the corresponding level meter at the bottom.
To adjust the level of the input signal properly:
i.In the Mixer view, identify the input channel strip to which your signal is connected (e.g. Audio In, [1+2] Audio In).
The channel name corresponds to the input Component you selected for the recording track in the Sequencer view (Audio In in Sequencer view = Audio In in Mixer view). See chapter "Routing audio inputs and outputs".
ii.Make sure that you set the Monitor setting correctly if you hear no input signal. See chapter "Monitor settings".
iii.Play your instrument or playback the signal you have connected to your audio interface and observe the level meter next to the level fader.
iv.Adjust the level of the input signal at your audio interface according to the user manual of the unit in case your audio interface includes a control for trimming the signal level.
v.Adjust the level of the input signal further with the Trim so that the peak amplitude of the signal barely causes the level meter to reach the top.
vi.Reduce the recording level with the level fader, if needed.
In our example we adjusted the input signal level with the Trim to +12 dB and left the level fader at its default 0.00 dB position.
Multitrack Audio Recorder
23
Configuring the metronome
If you want to record several instruments one after the other it is critical that you perform your music as exactly as possible to a given song tempo when recording. In energyXT, you can use a metronome which, like its real counterpart, produces an audible click, the beat.
To set the tempo:
i. Input the song tempo into the field next to the transport controls.
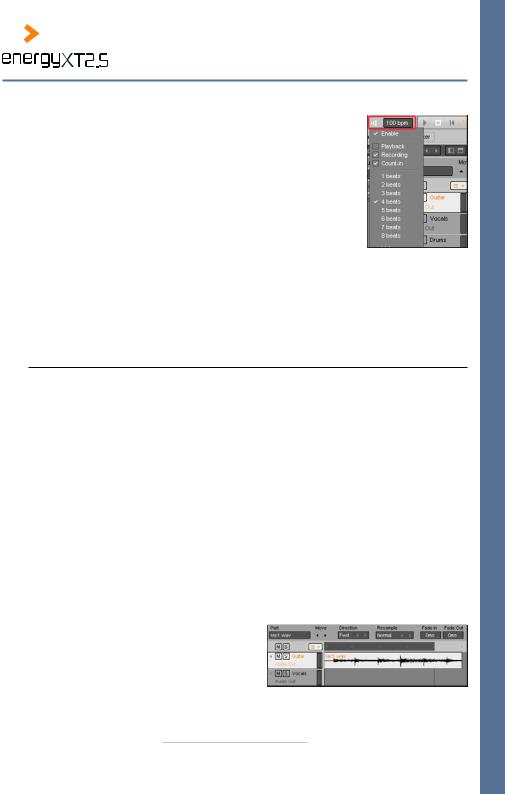
To configure the metronome:
i.Right-click on the metronome icon.
ii.Choose the number of beats per bar (1 to 8 beats).
E.g. 4 beats to count quarter notes for a 4/4 time signature.
iii.Check the Count-In entry if you want to have a one bar precount before the recording starts.
iv.Check the Playback and Recording entries if you want to hear the metronome's click during playback and recording.
v.Select a volume for the click under the Volume entry.
vi.Check the Enable entry to activate the metronome.
Alternatively, you can left-click the metronome symbol to enable / disable the metronome.
In our example we chose a song tempo of 100 bpm and enabled the metronome with a one bar precount to count quarter notes during a recording.
Recording takes
Among musicians a recording is most commonly known as a take. A take can be just a few bars of length or even cover the whole song. For each take energyXT creates a Part from the beginning of the recording to its end. Parts can be modified later on in various ways as described in chapters "Editing Parts (Sequencer)" and "Working with patterns".
To record a take:
i.In the Sequencer view, select an Audio Track for recording.
ii.Set a recording range in the bar line if you know the length of your musical performance.
Alternatively, turn off loop mode and set a zero range, if you can't predict the length of your recording.
iii.Place the song position pointer at the very beginning of the song or at the beginning of your recording range.
Remember to use the grid function to place the song position pointer exactly at musical units (see chapter "The grid snap function (Sequencer)").
iv.Click the Record button in the transport controls to start the recording.
If you have activated the metronome's Count-In, the recording starts with the secondly counted bar.
v.Perform your music.
EnergyXT creates a Part for your recording.
Multitrack Audio Recorder
24
vi.Click on the Stop button in the transport controls to stop the recording.
The Part ends as soon as you stop the recording.
In our example we recorded a 4 bar Guitar take from the beginning of the song.
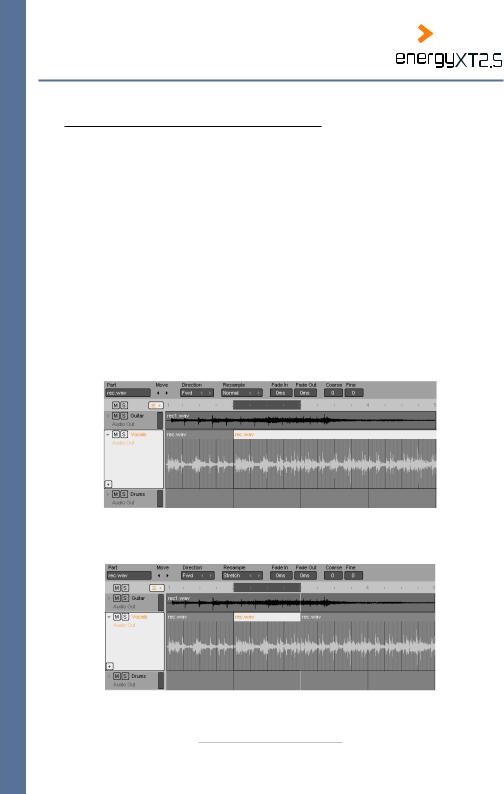
Exchanging a part of a recorded take with a new recording
Assuming that you have recorded a good take with just a small mistake you don't necessarily have to record the whole performance again. In fact you could pick a musically reasonable slice of your take (e.g. two bars) which includes the mistake and replace just this small slice with a new recording. Audio engineers call this a punch recording, as you jump in with your new recording for just a predefined range.
However, this course of action is only possible if the signal contains enough silence (signal pauses) at which you can cut the audio material properly without getting annoying artifacts such as a truncated sound. A signal pause in the waveform view appears flat.
To exchange a slice of a recording with a new recording:
i.In the Sequencer view, enter the track's edit view.
ii.Disable the grid snap function.
iii.In the recorded Part you wish to exchange a few bars, locate a signal pause at the beginning of the range you wish to re-record and place the song position pointer.
Use the zoom function for easy navigation.
iv.From the menu, choose Part > Split to split the Part into two pieces.
v.Locate a signal pause at the end of the range you wish to re-record and place the song position pointer.
vi.From the menu choose Part > Split to isolate the slice.
Multitrack Audio Recorder
Loading...